


Manual
SEARCH AND RESCUE HELICOPTER FLIGHT SIM
Win 98/Me
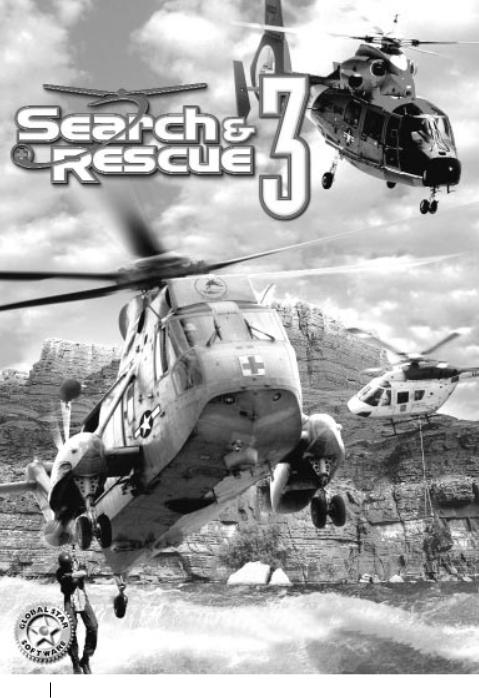
USER MANUAL
Copyright © 2001 by InterActive Vision A/S Written by Anton Norup Sørensen and Allan A. Kirkeby.
2

Copyright © 2001 by InterActive Vision A/S
Search and Rescue 3- SAR3 - is copyright © 2001 by InterActive Vision A/S. All rights reserved.
The purchaser is entitled to a license to install and use the CD-ROM on a single stand-alone computer for domestic and private purposes only. Altering, cropping, printing or other treatment of all or any part of this program and the documentation as well as the rental, lending, networking, resale, remote access and reverse engineering is prohibited without explicit permission from InterActive Vision A/S. Any violation or attempts at violation of these rules will be reported to the police and will be subject to compensation claims according to the Danish copyright act.
InterActive Vision A/S and other people involved in the production and publication of this program are not liable for any consequences of the use of the program, including — but not restricted to — damages to data or hardware or any economic loss arising from damages caused by the use of the program. The above conditions are accepted once the user starts using the program.
All trademarks mentioned in the program or in the documentation are protected by law and belong to the owners respectively.
▲
▲
▲
Contact Information:
Developer:
InterActive Vision A/S
Nørreskov Bakke 14
DK-8600 Silkeborg
Denmark
Tel: +45 8680 2700
Fax: +45 8680 0692
Web: www.iavision.com
Email: general@iavision.com
Publisher:
Global Star Software
6225 Kenway Drive
Mississauga
Ontario L5T 2L3 Canada
Web: www.globalstarsoftware.com
Customer Support:
Our Technical Support team is available:
Monday through Friday 9am to 5pm Eastern Time Zone Tel: 1.410.933.9191
E-mail: support@talonsoft.com Web: www.talonsoft.com
TalonSoft
P.O. Box 43730
White Marsh, MD 21236
3

Table of Contents |
|
SEARCH AND RESCUE 3 USER MANUAL .......................................................................... |
1 |
TABLE OF CONTENTS ............................................................................................................ |
4 |
INTRODUCTION ...................................................................................................................... |
5 |
GETTING STARTED................................................................................................................. |
6 |
System Requirements ..................................................................................................... |
6 |
Running the Search And Rescue 2 CD ........................................................................ |
6 |
Quick start Flight Manual ............................................................................................... |
8 |
THE MENUS........................................................................................................................... |
10 |
Search And Rescue 3 - Main Menu........................................................................... |
10 |
Single Mission Settings Menus .................................................................................. |
11 |
Mission Briefing............................................................................................................. |
14 |
Map .................................................................................................................................. |
14 |
Selecting a Helicopter .................................................................................................. |
15 |
Campaign ........................................................................................................................ |
16 |
Creating a New Pilot ..................................................................................................... |
17 |
Running Campaign......................................................................................................... |
18 |
Pilots Log......................................................................................................................... |
20 |
Debriefing........................................................................................................................ |
20 |
Options............................................................................................................................. |
21 |
Options / Sound.............................................................................................................. |
22 |
Options / Graphics ......................................................................................................... |
22 |
Options / Controls .......................................................................................................... |
23 |
DURING A MISSION ........................................................................................................... |
24 |
Camera Views ................................................................................................................ |
24 |
Transparent cockpit option .......................................................................................... |
25 |
Mission Flow................................................................................................................... |
25 |
Campaign Flow............................................................................................................... |
26 |
Flight Area....................................................................................................................... |
26 |
Point System................................................................................................................... |
27 |
RESCUE RULES AND PROCEDURES.................................................................................. |
28 |
Rescue Equipment......................................................................................................... |
28 |
Spotlight .......................................................................................................................... |
28 |
Flight Crew ...................................................................................................................... |
28 |
Rescue and Secure Checks......................................................................................... |
29 |
Rescue Procedures....................................................................................................... |
29 |
KEYBOARD REFERENCE SHEET.................................................................................. |
31 |
Survivor Condition ......................................................................................................... |
37 |
Errors During Flight........................................................................................................ |
38 |
THE HELICOPTERS OF SAR3............................................................................................... |
40 |
The BK-117 C-1............................................................................................................... |
40 |
The HH-65 Dolphin......................................................................................................... |
41 |
The SH-3 Sea King......................................................................................................... |
41 |
In the Cockpt................................................................................................................... |
42 |
Flight Controls................................................................................................................. |
42 |
Landing Gear Controls .................................................................................................. |
42 |
Engine Controls .............................................................................................................. |
43 |
4

Instruments ..................................................................................................................... |
43 |
The Flight Computer ...................................................................................................... |
47 |
BASIC HELICOPTER AERODYNAMICS ............................................................................. |
49 |
FLYING THE DOLPHIN.......................................................................................................... |
50 |
FORWARD FLIGHT ................................................................................................................ |
51 |
HOVERING.............................................................................................................................. |
53 |
TAKE-OFF AND LANDING ................................................................................................... |
55 |
EMERGENCIES ...................................................................................................................... |
56 |
NAVIGATION.......................................................................................................................... |
58 |
FLYING IN ARCADE OR EASY MODE ................................................................................ |
59 |
Flying without AFCs ....................................................................................................... |
59 |
TROUBLE SHOOTING ........................................................................................................... |
60 |
Basic Faults .................................................................................................................... |
60 |
Sound Problems............................................................................................................. |
60 |
Optimizing For Speed. ................................................................................................... |
61 |
Frequently Asked Questions ........................................................................................ |
61 |
GLOSSARY ............................................................................................................................. |
62 |
CREDITS ................................................................................................................................. |
63 |
Developer ........................................................................................................................ |
63 |
Publisher ......................................................................................................................... |
63 |
Introduction
▲
Thank you for purchasing Search And Rescue 3!
You are now the proud owner of the most realistic search and rescue helicopter simulation on the market.
Search And Rescue 3 (SAR3) is the sequel to InterActive Vision’s highly successful Search And Rescue 2 (SAR2). Where SAR2 had only a choice of 1 single helicopter to fly, SAR3 gives you 3 of the most renowned rescue helicopters used across the world.
Being a simulator, SAR3 intends to give you a real challenge as a pilot. The flight model, weather and object physics are very detailed, and will, combined with the stunning graphics, make you fully absorbed in handling and flying the helicopter. Many hours will be spent improving pilot skills and flight control, and this will in itself be a very entertaining part of the simulator.
Enjoy!
5

Getting Started
▲
System Requirements
To be able to play SAR2, your computer will have to meet the following minimum requirements:
Processor .................................................. |
Pentium 166 MHz |
Internal Memory....................................... |
32 MB |
Graphics Card........................................... |
3D Accelerated card |
Sound Card................................................ |
Any Sound card |
Hard disc space ....................................... |
315 MB |
Operating System .................................... |
Windows 9x, with Direct X 5.0 or later. |
Controllers ................................................. |
Keyboard |
For optimum game performance and playability we recommend that your computer specifications be as follows (or better):
Processor .................................................. |
Pentium 500 MHz |
Internal Memory....................................... |
128 MB |
Graphics Card........................................... |
32MB 3D Accelerated card |
Sound Card................................................ |
Any Sound card |
Hard disc space ....................................... |
315 MB |
Operating System .................................... |
Windows 9x, with Direct X 5.0 or later. |
Controllers ................................................. |
Joystick, Pedals and Throttle stick. |
Running the Search And Rescue 3 CD
Installing the Game
SAR3 supports the AutoRun function. If your computer has this activated the install start-up box should appear automatically after you have inserted the CD.
If AutoRun is not activated on your computer, you need to do the following:
1.Double-click on the icon on your desktop called “My computer”.
2.Find the icon for the CD-ROM drive (in the folder you just opened) and
double-click on it.
The SAR3 install start-up box will appear on your screen. In this box you will see several buttons and drop down boxes, but only 3 of them are available on the first run of the CD:
•Cancel
•Install DirectX 8
•Install game
If you do not have a version of DirectX installed you will need to install this, otherwise you should go directly to installing the game by pressing “Install game”.
Installing the game is easy. Once you have agreed to the terms of the License Agreement, you should just follow the instructions on the screen.
The game will then start the installation from CD to hard disc. SAR3 needs to copy quite a large amount of data, so this process could take some time. Just wait patiently for the progress indicator bar to reach 100%.
6
When you have clicked “Finish” you will be returned to the start-up box.
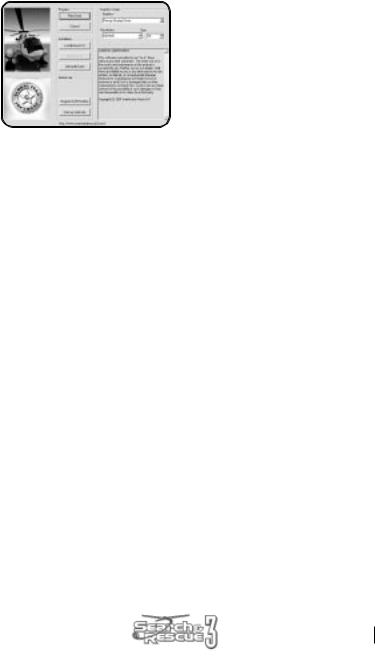
Search And Rescue 3 Start-up Box
When SAR3 has been installed and you run the game you will see the following functions in the start-up box:
Note: Avoid pressing the windows key while playing the game. Pressing this key will close the game.
Search And Rescue 3 Start-up Box
You can now start the game by pressing the “Play Game” button, but before you do this it might be a good idea to take a look at the Graphics setup section. Here you can set up the in-game screen resolution and colour depth. This is done as follows:
Graphics device:
You can choose which graphics device or card that you want to use in the game. Depending on what hardware your computer has this will list a number of choices. You should choose the graphics device that supports 3D acceleration, or alternatively you can try the default “Primary Display Driver”.
Resolution:
The minimum and default in-game screen resolution is 640*480 pixels. You can choose a higher resolution from the drop down list. The choice will be limited to the resolutions supported by your graphic card.
Note: Choosing a higher resolution will make the graphics inside the game look smoother, but it will also force your computer to work harder and could therefore slow the game down.
Bpp:
Bpp is short for “Bits per pixel” and represents the in game colour depth. Choosing a higher number will increase the colour palette of the game.
The choice will be limited to the bit depth supported by your graphic card.
7

Quick Start Flight Manual
This section has been included to help you get through the start-up procedures and into the air without having to read through the entire manual first. Of course we recommend you do this later on, but we also know that you will want to get started right away.
Navigating Through the Front-end Menus
Search And Rescue 3 has an easy-to-use and intuitive menu system. It will be described in more detail later, but in this section you will learn just enough to be able to set up a mission and get to the action.
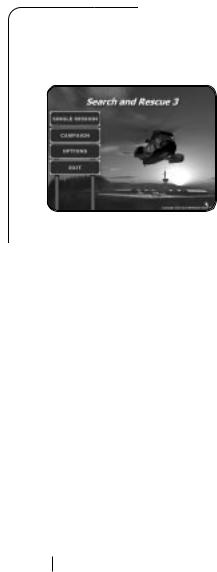
On the main screen you will see four buttons: Single mission, Campaign, Options and Exit.
The Exit button will let you exit back to your Windows desktop.
The Options button give you access to various control, sound and graphics settings. The most important thing for you to begin with will be the switch setting at the top of the screen called controls. This will let you choose whether you want to fly with keyboard, joystick or other game controllers.
The Single Mission button takes you to a menu where you can select which type of mission you want to play. This is the fastest way to get started.
The Campaign button opens the campaign system in the game. Here you can create a new pilot, and start a career as a RESCUE RULES AND officer.
We suggest you start by playing a few single missions. Later when you have familiarized yourself with the interface and controls, you can try a campaign session.
If this is your first flight with SAR3, you should not concern yourself too much with the choice of mission or helicopter. Just click through the menus and make any choice you like. The most important thing right now is that you get into the game itself.
Helicopter Simulation Physic Modes
There are three ways to fly the helicopter in SAR 3, Easy-, Arcadeor Realistic-mode. When you go through the steps of either the Single mission or the Campaign setup screen, you will be able to choose between these modes.
If you have no Joystick we suggest that you use the Easy or Arcade physics mode. The Realistic mode is best used with a Joystick, as it requires better and more precise control of the cyclic stick (flight stick).
On-screen Help
The first thing you will want to do when you enter the game, is to activate the on-screen help box. You do this by pressing “O” on the keyboard. This box will constantly keep you up to date on what you need to do in the game, and also give you hints to which buttons you need to press.
Flying the Helicopter
When you enter the game, you will either be stationary at the base, or hovering in the air (depending on the choices you made during the front-end menu selections).
Note: If you are stationary on the base, you will need to start the engines. Pressing “R” once, followed by “E” and “T” twice each. (In Easy mode all you need to do is press “R” once).
8

Before continuing you should take a look at the accompanying key-reference sheet. This shows all the function keys for SAR2, and how they are placed on the keyboard.
(Notice that the number keys on the numeric pad have different functions than the number keys on the main keyboard!)
Now you should take a look at the instrument panel in the cockpit. Enter the cockpit by pressing “1” on the main keyboard, then exit again by pressing “3”. To look around in the cockpit use the glance keys (NUM PAD).
To rise and fall in altitude use the collective control keys “A” and “Z”.
You can spin around your own axis using the tail rotor keys “X” and “C”.
To control the cyclic stick use the arrow keys (or joystick if this is selected as controller).
Note: Hover mode (F12) and Autopilot (F11) are not accessible when flying arcade mode!
Finding the Mission Site.
When you have familiarized yourself with the basic flight controls of the game, you should try playing through your selected mission.
As a start you should take a look at the cockpit instrument panel. (You gain access to a 2D instrument panel by pressing “Q”). Your main concern right now is the onboard computer screen (The big black screen, with the green digital display, also called HSVD).
The main purpose of the computer is to give the direction and distance to the mission target. Try changing the heading of the helicopter while looking at the computer screen (use the tail rotor keys “X” and “C” or pedals if equipped). Now you will see the navigation pointer turning. The helicopter nose is pointing in the right direction when the arrow is pointing upwards (12 o’clock position).
To find the mission target, fly in the indicated direction until the distance counter reaches 0. The distance to the target is shown in the upper right corner of the onboard computer screen.
At one point you will have to use the “time jump” function. You can activate it yourself by pressing the “L” key. The time jump function will take you to the area containing the next waypoint in the mission.
(Note: The time jump function will activate automatically if you fly out of the flight areas boundaries. If you are heading in the direction of the mission target, you will jump to the mission area, otherwise you will be repositioned back to the original area).
Rescue Procedures.
The actions to be performed at the mission site will vary depending on what kind of rescue type is required. You may need to have a look at the briefing again (press “F1” to read the briefing again). The briefing should explain what procedure you should use in that specific situation.
When you have picked up all mission targets, a message will notify you to head for the next waypoint. Some missions will require you to make a stop at a RESCUE RULES AND base or a
9
hospital before returning to your own base. In this case you should land on the roof of the building, after which a message will tell you that you can fly to the next waypoint.
Finishing the Mission.
A mission is considered successful when you have safely completed your mission goals. In some missions this may require you to deliver survivors at a hospital, where in other missions it may be to check the identity of a vessel using the radio.
When the missions is considered completed you may exit the mission by pressing “ESC”.
The Menus
▲
This section will explain all features of menus in SAR3. We will go through each screen one by one, and explain each button and text as we go along.
Search And Rescue 3 - Main Menu
Single Mission
Here you gain access to the single mission features and screens. There you can set-up and play a single mission chosen from the entire mission list.
Campaign
In the campaign you can start a new pilot, or load an existing one. You will then gain access to your pilots career data, and continue the service in the RESCUE RULES AND, flying more missions!
Options
Here are set-up screens for graphics, controls and sound.
Exit
Here you can exit the game, and return to your windows desktop.
10
Single Mission Settings menus
This section will explain all features of the single mission screens, and will allow you to set-up a custom rescue mission.
Choosing a Mission
This screen shows a list of all missions in SAR 3, and will also let you set up certain flight settings for that mission. You can scroll down the list of missions using the scroll bar (or arrows) on the right.
If you click with your left mouse button on a mission name, you will see that it is highlighted by a blue box. This means that you have selected that mission.
When you have chosen mission and modified the desired options, click “OK”.
If you want to go back to the previous menu, click “Back”.
Choosing the Single Mission Flight Settings
The right side of the screen holds a panel with a number of buttons. Each button will let you customize a particular flight setting.
Below is an explanation of each button and the setting it affects.
Physics Switch
Mouse click on the metal switch with the mouse to select between the three settings: Easy, Arcade or Realistic. The difference between these is described later in this document, but as a rule you should select “Realistic” for sensitive control, and “Arcade” for safer flight, and “Easy” if you are a beginner and have no joystick.
Weather
The weather setting you chose will influence wind, light, visibility and rainfall. You change between the settings by clicking on the dial button.
Each setting is shown as a small icon, graphically illustrating the weather type it represents. They are explained below (Note that the wind strengths below show the constant “background” wind, but that occasional wind gusts more forceful can be experienced):
Sunny: The visibility is very good and the wind is light.
This is by far the easiest setting!
Wind strength between: 2-10 knots
Overcast: The sky is grey and the mood is gloomy, but flight conditions are still good.
Wind strength between: 6-20 knots
11

Fog: A dense fog covers the landscape, and long-range visibility is poor. Helicopter control is still easy though!
Wind strength between: 2-6 knots
Rain: Rain and fog makes visibility poor.
The wind is also slightly increased.
Wind strength between: 6-30 knots
Storm: Wind is strong, making control of the helicopter challenging.
Additionally you will have to fight with both fog and rain.
Wind strength between: 10-30 knots
Hurricane: This is absolutely insane. Normally an aircraft would not go up in this weather, but if you are up to the challenge, here you get the chance. Wind strength between: 30-60 knots
Random: If you want to have the computer chose for you, this is the setting to select. The computer makes a random selection of the previous six weather types. The result will then be shown on the mission briefing screen.
Time of Day
The time of day setting you chose will mostly influence the light level in the game. You change between the settings by clicking on the dial button.
Each setting is shown as a small icon, graphically illustrating the time of day it represents. They are explained below:
Morning: The morning is misty and cold.
Mid day: This is the normal setting for a rescue flight.
The sun is high and the light is good.
Evening: The sun is setting and the sky is red with its last rays.
Night: It is pitch dark. This is not a setting for beginning player.
It will be nearly impossible to find any visual fix points, and you will have to rely heavily on instruments.
Random: If you want to have the computer choose for you, this is the setting to select. The computer makes a random selection of the previous four types. The result will then be shown on the mission briefing screen.
12
Start Position
Here you choose where to start the mission. The most realistic setting is of course to start from the base, but for training purposes we have included the other two possibilities.
Base: The helicopter stands stationary, with the engines off at the base. You will need to go through the start-up procedure and power up the engines before you can take-off.
Hover: The helicopter is hovering in the air just over the base. You are ready to turn your bearing towards the mission site. This setting can be used if you do not want to go through the entire start-up procedure.
Mission site: The helicopter is hovering near the mission site. This setting is good when you want to practice the rescue procedures used for each accident, without having to fly all the way to the site first.
Crashes Off
This button looks like a light. You alternate between the settings by clicking on the light switching it on or off.
Off: Choosing yes will make your helicopter indestructible. You will be able to collide with any obstacle without inflicting any damage on hull, wheels or rotor. Additionally you will never encounter damage on engines and gearboxes nor be able to over-speed rotors.
On: Your helicopter will take damage and possibly be destroyed if you collide with anything.
Time Limit Off
This refers to the optimal time limit within which the mission must be completed to avoid getting a deduction in points.
Off: Time limit is off, and you will not be penalized for completing the mission using more time then optimal. However you will still have to deal with the survivors and their worsening health condition.
On: The time limit is on. The player will be awarded for fast completion of the mission.
13
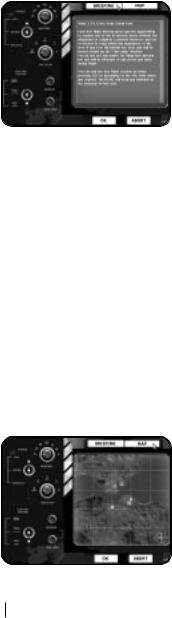
Mission Briefing
This is the mission briefing. Information details about the mission are given here.
When you have read the text and are ready to fly, click “Take off”.
If you want to go back to the previous menu, click “Reject Mission”.
Below is a description of each entry.
Mission Settings
The left side of the screen is now locked, but it stays to remind you of the current weather and other mission settings.
Mission Description
The mission description box holds several elements. First of all it shows the time of day (Hours: Minutes) and the Distance to the mission site (from the start position of the helicopter). You are not obliged to use this information, but they are helpful. It also shows the wind strength and the direction.
The central text gives a short description of the accident that has happened. Sometimes you will learn a lot from this briefing, such as number of victims, victim condition or hints on rescue procedures, but more often the information available is limited to hints or suggestions.
At the bottom of the text box is shown the estimated mission time. This is not the time you will need to spend in front of the computer, but it is the time that the missions would take in reality. (The SAR3 time-jump function cuts away much of that time).
Map
The mission-briefing map shows an overview of the area in which the mission/ accident site is located. (During flight you will also be able to access this map by pressing “F1”, and then it will show the area over which you are currently flying.)
14
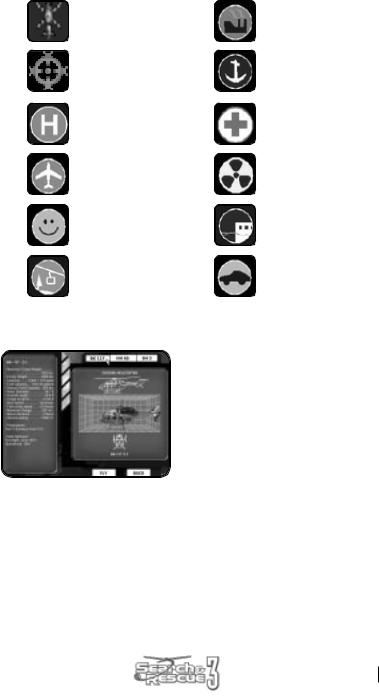
Important locations are marked on the map using small icons. The icons used are explained below:
The helicopter. |
Factory. |
Mission waypoint marker. |
Harbor. |
Helicopter landing pad. |
Hospital. |
Airport. |
Nuclear plant. |
Theme park. |
Pier. |
Cable rail. |
Racetrack. |
Selecting a Helicopter
The last choice you will need to make is which helicopter you would like to fly. You select helicopter by clicking the buttons at the top of the screen.
When you have made your choice of aircraft for the mission, click “FLY”.
If you want to go back to the previous menu, click “BACK”.
15

Campaign
The following section will describe the screens related to playing a campaign.
Setting up Pilot and Campaign
This screen shows a list of slots. Each slot has room for one pilot name. The text “- Empty slot” means that no pilot has yet been created there.
You select a pilot (or an empty slot) by clicking on the name. You have selected a pilot when the slot is lit with a dark blue background. When you have selected a slot you will be able to access/ modify it by using the buttons on the bottom left. They are explained below.
Click the “Back” button if you want to exit the campaign menu.
New Pilot
Clicking this button will create a new pilot in the selected slot. If you try to create a new pilot in a slot already used by another name, you will be given a choice to continue (and delete the old pilot) or to cancel.
If you go on to create a new pilot you will enter the “New Pilot” menu screen (described later in this manual).
Load Pilot
If you want to continue a campaign with a pilot already created you will have to load his information. Select the pilot name from the list, and press this button. You will then enter the “Running Campaign” screen (described later in this manual).
Dead Pilots
If you see this skull icon next to a pilot’s name it means that he is dead. You will still be able to load his data and review his log (as long as you do not overwrite him with a new pilot), but you will not be able to continue the campaign.
16

Creating a New Pilot
Here you can create your new campaign pilot. This data will be used throughout the campaign of that pilot and cannot be changed later on. It is therefore important that you think about what you want before selecting the options. (See descriptions below).
When your pilot has been created and you are ready to continue, press: “Add Pilot”.
If you change your mind and want to return to the campaign menu, press: “Back”.
Pilot Name
Click on the empty box to type in the name. The mouse cursor will disappear while you type the name. When you are finished and have typed in the name you want press return. This will give you back control of the mouse.
The pilots name has no influence on the game itself. It will only be used on the “Hiscore” (High score) list and for saving the pilots data after each mission. You can therefore choose any name you want.
Physics Switch
Mouse click on the metal switch with the mouse to select between the three settings: Easy, Arcade or Realistic. The difference between these is described later in this document, but as a rule you should select “Realistic” for sensitive control, and “Arcade” for safer flight, and “Easy” if you are a beginner and have no joystick.
Immortal Pilot
On: Your pilot can never die. Even if you suffer a total crash during a mission, and the helicopter explodes into a thousand pieces will he be able to go on.
Off: Your pilot is mortal and will die if you suffer a serious crash during a mission. If your pilot dies the campaign is terminated and you cannot continue with the pilot.
Crashes Off
On (Selected): Turning the light on will make your helicopter indestructible. You will be able to collide with any obstacle without inflicting any damage on hull or rotor. You will still be able to encounter engine failures or other flight problems though.
17
Off (Not Selected): Your helicopter will take damage and possibly be destroyed if you collide with anything. If this happens you will be penalized with points during the debriefing.
Time Limit Off
This refers to the optimal time limit within which the mission must be completed to avoid getting a deduction in points.
On (Selected): There is no limited amount of time within which the mission must be completed, and you will not be penalized for completing the mission using more time then optimal. However you will still have to deal with the survivors and their worsening health condition.
Off (Not Selected): There is a limited time to complete the missions.
The player will be awarded for fast completion of the mission.
Replay Option
On (Selected): You will be able to cancel the outcome of a mission, by choosing the replay option on the debriefing menu. This is good if you have made errors during a mission, but is of course not very realistic.
Off (Not Selected): There is no option to undo/ replay a mission. Once the mission is completed you are forced to accept the outcome, and take any consequences it might have on your pilots career.
Realism Level
This is not an option, but shows the sum of the realism percentages of the above chosen settings. This has no influence on the game itself, but it will influence the amount of points gained after each mission. In this way you will earn less points for flying easy, and more points for risking your neck (like a real RESCUE RULES AND pilot).
Full point (100% realism) is obtained by choosing no to all realism settings.
Running Campaign
This screen holds all information about the pilot and his career. It is the main screen of the campaign and from this screen you gain access to all other things related to your pilots career.
18

The two buttons at the top of the screen will switch the information in the display area between “Campaign” information and the pilots “Log” file.
(The content of each screen is described below).
The “Training Mission” button in the lower left corner will let you fly a mission that will not influence your pilot’s career, though it will be recorded in your Log.
To play the next mission in the campaign, press “NEXT MISSION”.
To go back to the pilot screen, press “BACK”.
To go back to the campaign screen, press “Exit Campaign”.
Campaign Information
Pilot Name
As mentioned before the pilots name has no influence on the game itself. Here it is used to inform you of what pilot you are playing now.
Pilot Rank
This is a little bit of spice included from the real RESCUE RULES AND service. Here you are given ranks according to the number of flight hours you have in the helicopter. We have adjusted the
ranking system a bit to fit SAR 3 but it should still resemble real life close enough.
You will gain rank in the following way: |
|
|
Rank |
Required |
|
Ensign, Level 1...................................... |
0 Flight hours and 0 successful missions. |
|
Ensign, Level 2...................................... |
20 Flight hours and 12 successful missions. |
|
Lieutenant junior grade ...................... |
40 Flight hours and 30 successful missions. |
|
Lieutenant.............................................. |
80 Flight hours and 60 successful missions. |
|
Lieutenant commander....................... |
120 |
Flight hours and 90 successful missions. |
Aircraft commander............................ |
200 |
Flight hours and 120 successful missions. |
Missions
Here you can see the number of missions flown opposed to the number of successful ones.
Mission Goals
Here you can see how many mission goals you have completed out of the number encountered. Mission goals include injured people needing to be saved, objects to deliver or vessels to inspect.
Flight Time
Flight time shows how much time you have spent in front of the computer with this pilot. It will gradually increase as you fly more missions.
Note that this is not the time we base the gain in rank on. (Later in this document you will see that we operate with two different times for a mission: Flight time and Mission time.)
Score
Shows how many points this pilot has scored throughout his career.
19

Pilots Log Information
The Pilots Log is a tool to help you remember what you did and what should
not be repeated. It is a mix between a real pilots log, with information about the mission and the helicopter, and a game log keeping track of points and progress. The Log is essentially a text file, which is updated every time you finish a campaign mission. Each mission has its entry with information of how things went.
Debriefing
After completing your flight session (even if you crashed) you will come to the “Debriefing” screen. Here you get information about the outcome of the mission, and how you handled yourself and the helicopter.
On the right side of the screen are the points given for each accomplishment. They are added together, and the total is given in the lower right corner. However the total will never be negative, even if the sum of points given to you is negative. You will never get lower then 0 points.
Additionally you should note that the Realism Level modifies your point total (slightly).
The left side of the screen show you the settings as they were for the mission. These are shown for reference purposes, and you will not be able to handle the buttons or switches in any way!
When you have read the “Debriefing” and are satisfied with the result, press “OK”. Depending on what kind of mission you had been flying you will then
return to either the “Single mission” menu or the “Running Campaign” menu.
If you are dissatisfied with the result, you will be able to fly the mission over again by pressing “Replay Mission”.
Note: This function will not be available if you are playing in Campaign mode and have clicked the replay option off for your pilot!
Mission Outcome
This is the primary parameter for success or failure. You can encounter the following outcome messages:
Message |
Explanation |
Successful.............................................. |
You have returned to the base and all mission goals |
|
have been completed. |
Failed ....................................................... |
No mission goals obtained, or helicopter crashed. |
Partly successful .................................. |
You have returned to the base but only some mission |
|
goals were completed. |
Not completed....................................... |
The mission was exited before final touchdown at the base. |
Mission failed, Pilot dead ................... |
You crashed and the pilot was killed. |
Free flight mission ................................ |
The mission is a free flight mission and no points are given. |
20
 Loading...