

www.fingertec.comwww.fingertec.com
Slave Fingerprint Access
R3c
Control Terminal
User Guide
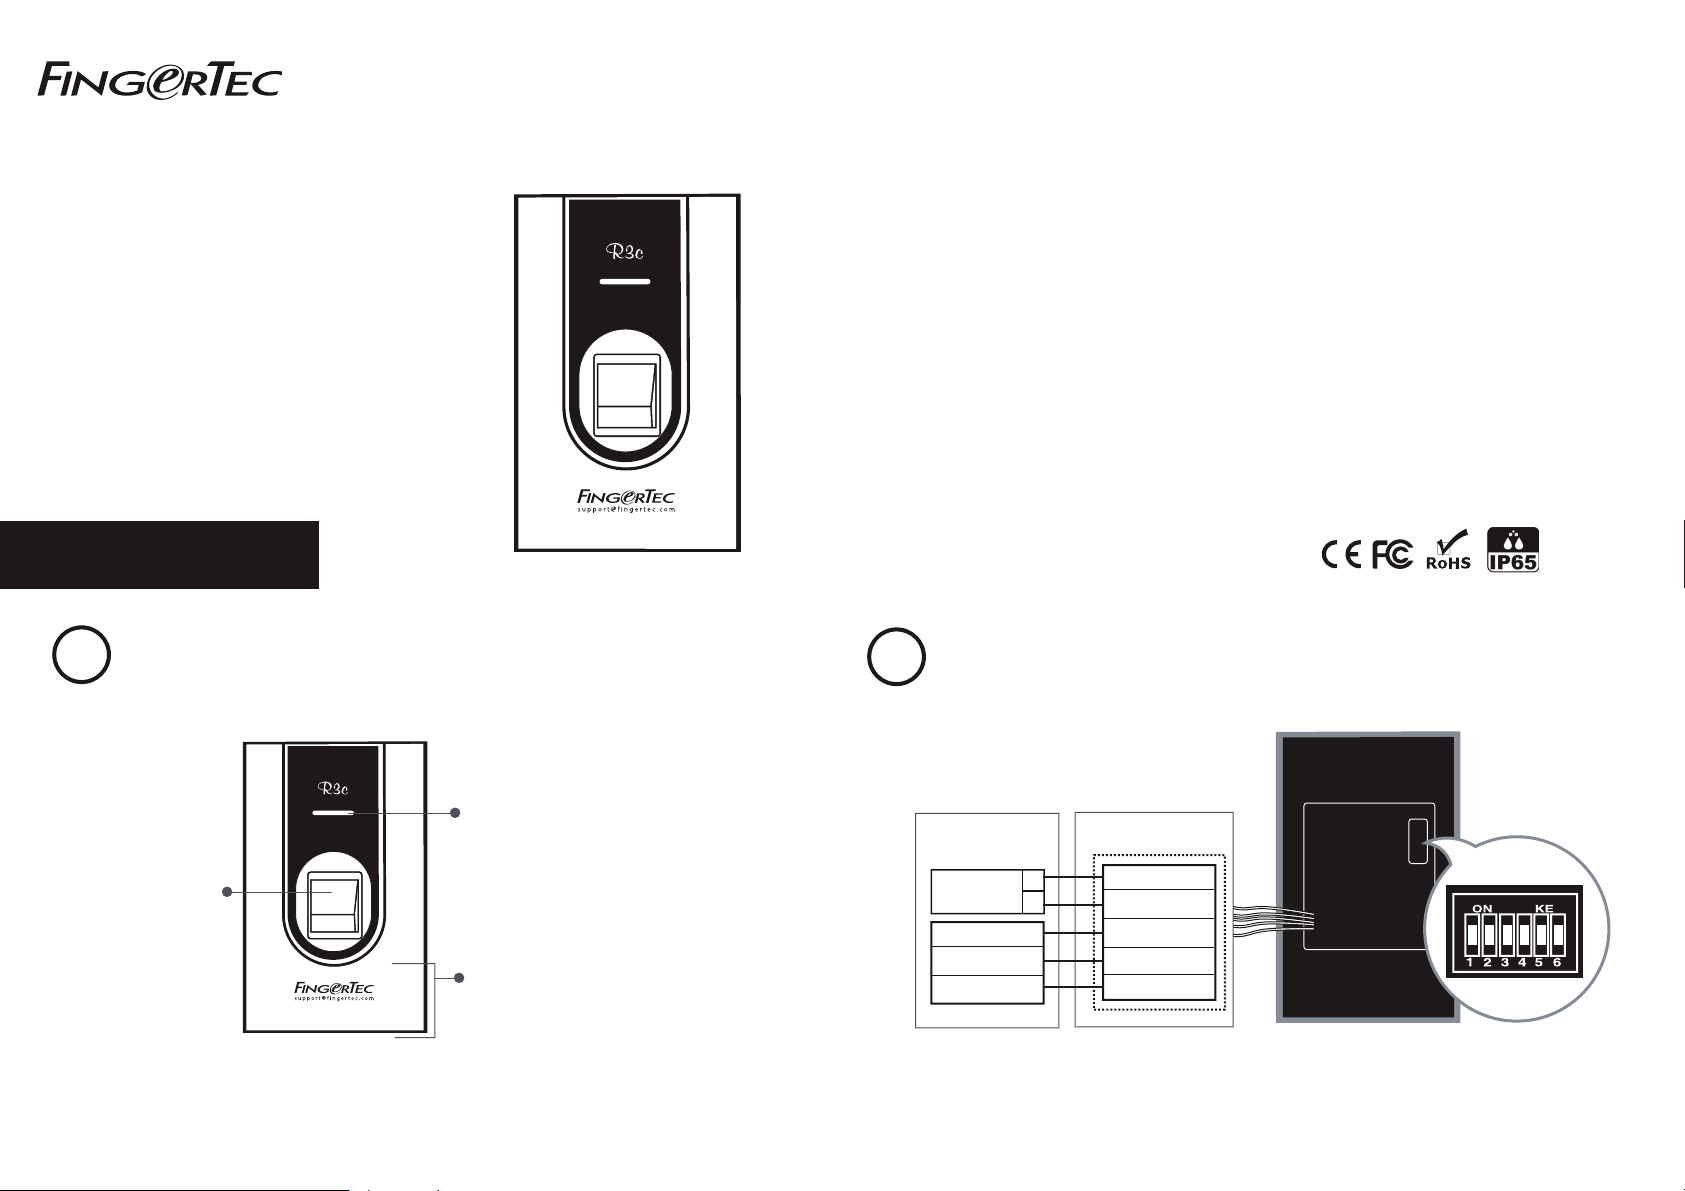
INTRODUCTION
1
Fingerprint Scanner
Scans and sends
fingerprint template to
the master terminal for
verification.
LED Light Indicator
The red light indicates that the verification
process has failed. The green light indicates
that the fingerprint or card information is
being read and sent to the master terminal
for verification.
Card Scanning Area
This area reads and captures details of
the cards and sends the information to
the master terminal for verification. The
default card technology is RFID, Mifare
card technology is available upon
request.
© 2019-2020 Timetec Computing Sdn Bhd. All rights reserved • 072019
CONNECTIONS & WIRING DIAGRAM
2
Rear of Master
Terminal
12VDC power
supply
Blue – RS 485+
Yellow – RS 485 -
Black - GND
Note:
1. The R3c will only work with R3 (new and old), R2 (new and old), AC900, Q2i and H2i master terminals.
2. The R3c can share the 12VDC power supply with the master terminal.
3. It is recommended to use RS485 connection cables with a shielded twisted pair to achieve an optimum speed of data transfer.
4. Do not adjust the dip switch unless you are connecting the R3c with the Ingressus controller. If your R3c is unable to send any fingerprint or card data to the master
terminal, please check the dip switch. Make sure it is set to the default settings as highlighted.
+
_
Rear of R3c Terminal
Red – +12V
Black – GND
*Yellow – RS 485+
*Purple – RS 485 -
Black - GND
Dip Switch Settings
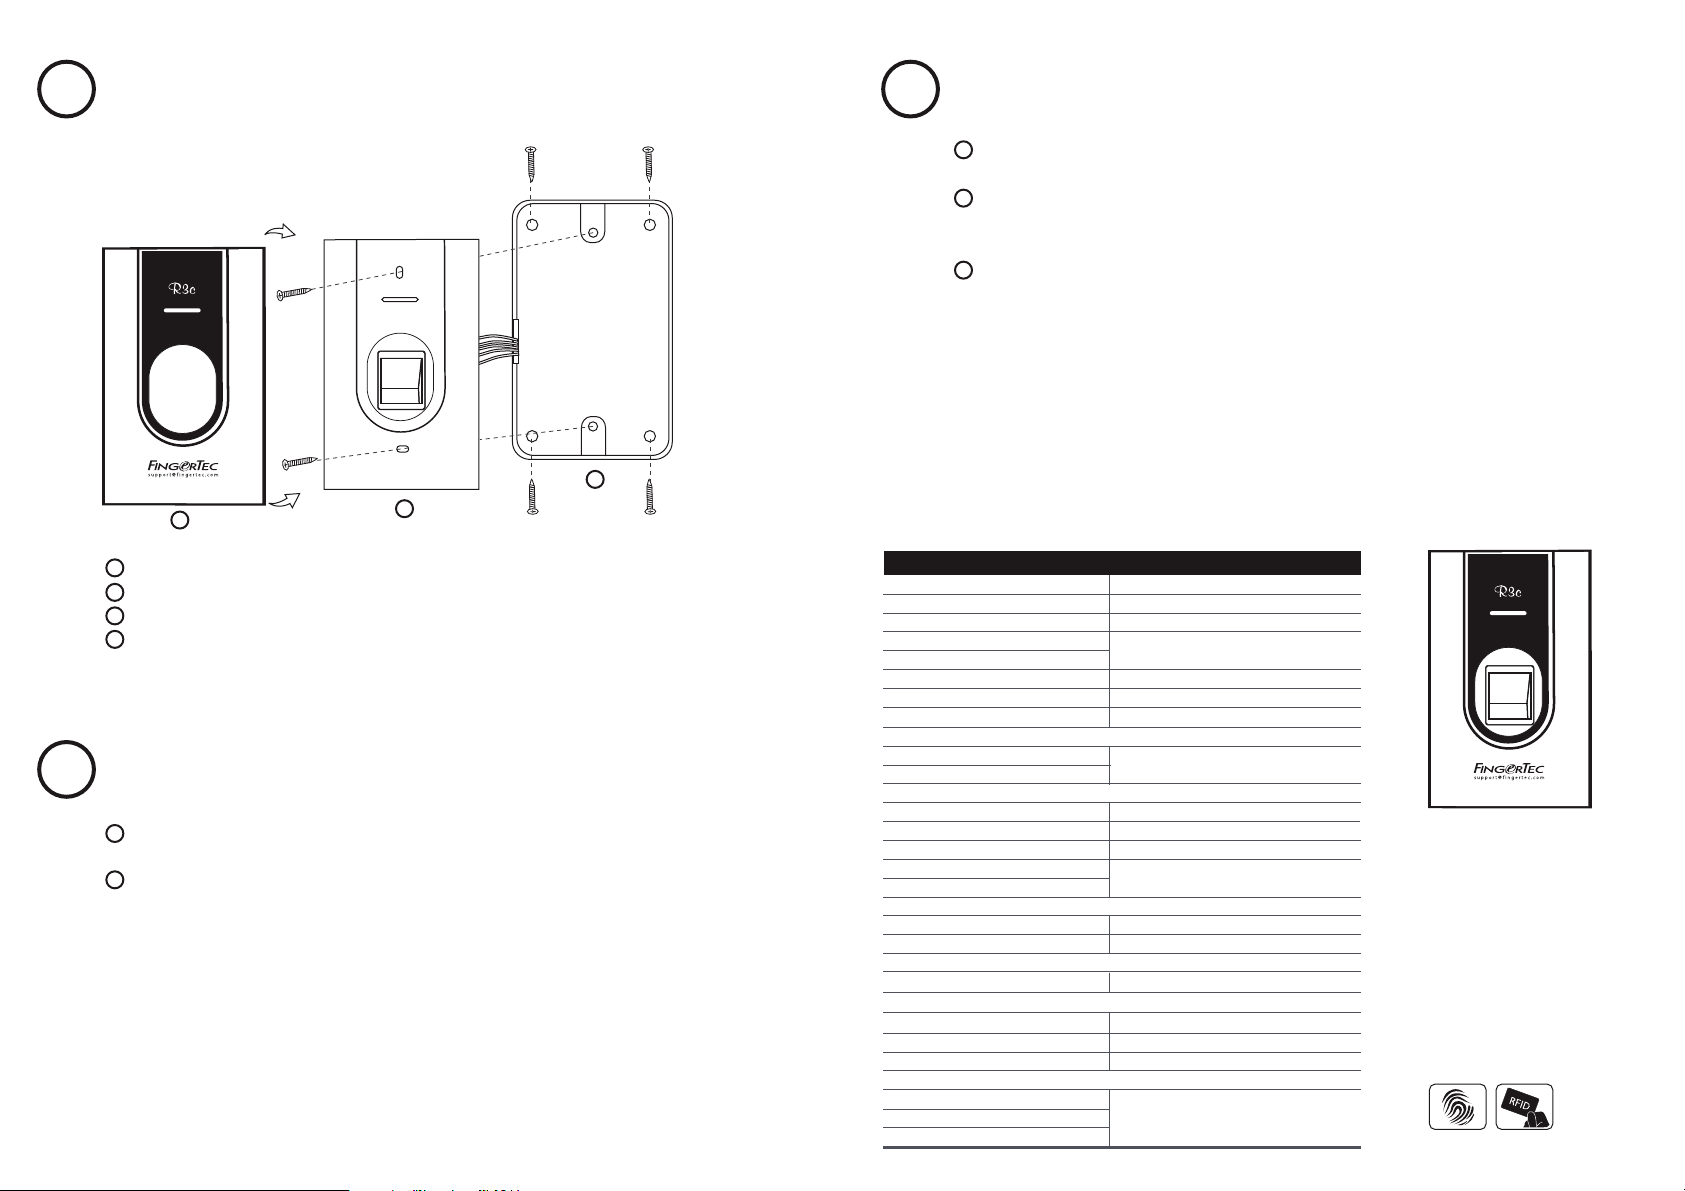
Installation
3
Note: Please read the instructions carefully before installing the R3c.
A
1
R3c consists of 2 parts, A and B. Detach the pieces apart.
2
Attach the back plate on a wall by securing the 4 screws properly.
3
Secure B onto the back plate by using the 2 screws provided
4
Attach A piece back into its position.
Verification • Fingerprints
4
Make sure the R3c is in its standby mode, where the blue LED light is blinking and the user’s
1
fingerprint has been enrolled into a master terminal before you proceed to verify.
2
Place a finger on the fingerprint scanner to scan a fingerprint. You will hear a beep, to
indicate the fingerprint has been captured and sent to master terminal to verify.
Verification result:
a. Successful Verification:
Green LED blinks accompanied by a beeping sound.
b. Failed Verification:
Red LED blinks accompanied by 2 beeping sounds.
5
Verification • Cards
1
Make sure the R3c is in standby mode, where the blue LED light is blinking and a card ID
has been enrolled into a master terminal before you proceed to verify.
2
Wave card on the inducation area to capture the card information. You will hear a beep,
indicating the card information has been captured and sent to the master terminal to
verify.
3
Verification result:
a. Successful Verification:
Green LED blinks accompanied by a beeping sound.
Back piece
b. Failed Verification:
Red LED blinks accompanied by 2 beeping sounds.
C
B
NOTE: Specifications are subject to change. Check http://product.ngertec.com for latest product information.
MODEL
SURFACE FINISHING
TYPE OF SCANNER
MICROPROCESSOR
MEMORY
ALGORITHM
PRODUCT DIMENSION (L x W x H), mm
PRODUCT WEIGHT, kg
STORAGE
Fingerprint templates
Transaction
ENROLLMENT & VERIFICATION
Methods
Recommended fingerprint per user ID
Fingerprint placement
Verification time (sec)
FAR (%), FRR (%)
CARD TECHNOLOGY
RFID: 64-bit, 125kHz
MIFARE: MF1S50/S70, 13.56MHz
COMMUNICATIONS
Method
OPERATING ENVIRONMENT
Temperature (°C)
Humidity (%)
Power input
ACCESS CONTROL
EM lock driving output
Alarm output
Antipassback
SPECIFICATIONS
R3c
Acrylonitrile butadiene styrene (ABS)
Non coated optical scanner
Managed by master
Supports BioBridge VX 10.0
80 x 40 x 125 (w/o housing)
0.14
Storage in master terminal
Fingerprint (1:N) & card
Managed by master
Any angle
Managed by master
Yes
Made to order
RS485
(Connects to Master Terminal)
0 ~ 45
20 ~ 80
Managed by master
Managed by master
R3c
Slave Fingerprint Access
Control Terminal
Fingerprint Card
 Loading...