

Page 1
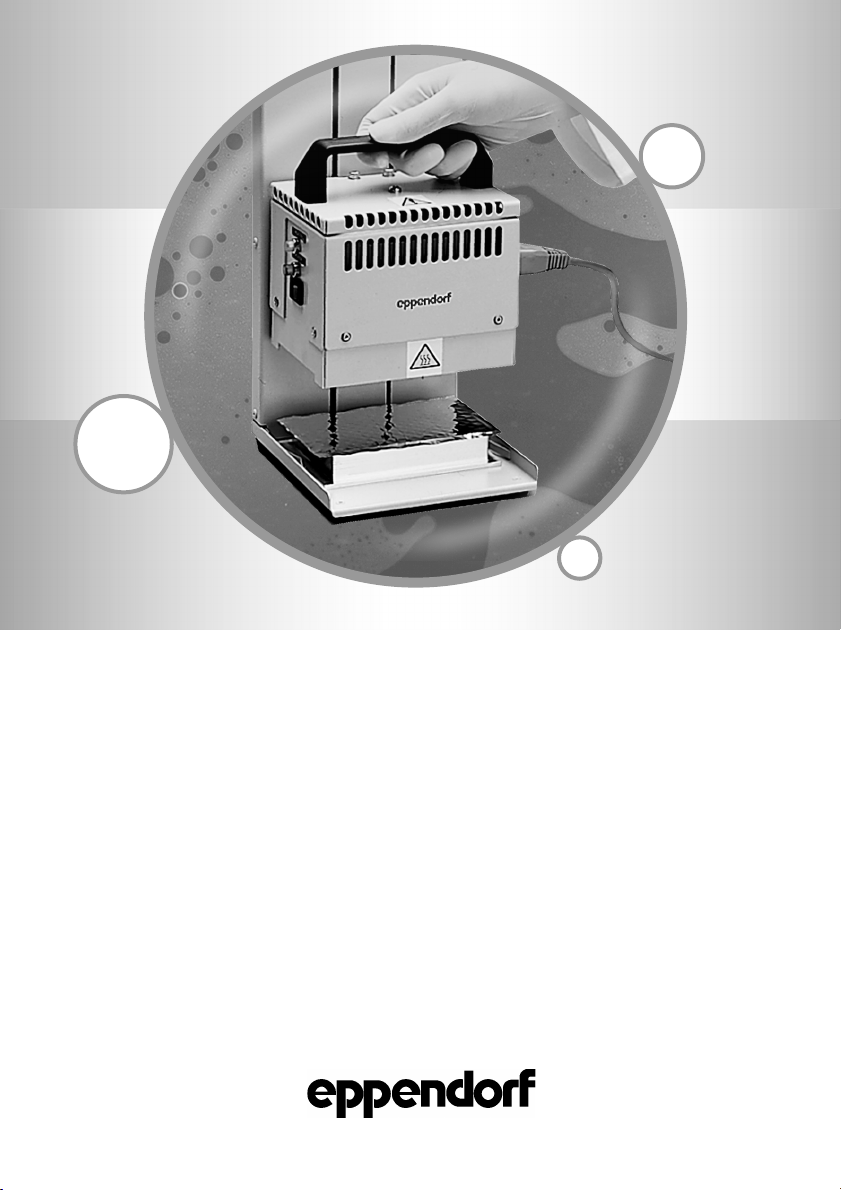
Heat Sealer
Instruction Manual
Page 2

No part of this publication may be reproduced without the prior permission of
the copyright owner.
Copyright© 2003 Eppendorf AG, Hamburg
Page 3

Table of contents
1 Introduction
2
Safety precautions
3
Installation
3.1 Delivery package ............................................................................................................ 6
3.2 Setting up the device ...................................................................................................... 6
3.3 Functional units .............................................................................................................. 7
3.4 Starting up the device ..................................................................................................... 7
4
Operation
4.1 Sealing ............................................................................................................................ 8
4.2 Removing seal ................................................................................................................ 9
5
Maintenance
6
Troubleshooting
7
Technical data
8
Ordering information
................................................................................................................... 4
........................................................................................................ 4
..................................................................................................................... 6
....................................................................................................................... 8
................................................................................................................ 10
..........................................................................................................11
............................................................................................................. 12
.................................................................................................. 13
Table of contents
3
Page 4
1 Introduction / 2 Safety precautions
1
The Heat Sealer offers a convenient method for heat sealing plates made from various types of
plastic. The device is designed for low to medium throughput applications.
Pre-set temperature settings enable optimal sealing.
Used in conjunction with Eppendorf heat sealing film and foils, the Heat Sealer provides a nearly
100 % seal, preventing sample loss during exposure to high temperatures or for long-term
storage.
2 Safety precautions
Please read the operating instructions carefully before using the Heat Sealer.
If the equipment is used in a manner not specified by the manufacturer, the
protection provided by the equipment may be impaired.
The Heat Sealer may only be used by qualified specialists in the research lab.
The following instructions must be unconditionally observed:
Introduction / Safety precautions
The safety regulations valid for the lab are to be constantly observed when working with the
device.
In order to avoid damage through condensation, the device may first be switched on 12 hours
after being set up. This is also the case when the location of the device is changed.
The mains voltage must coincide with the information on the identification plate.
The device must be connected to a grounded socket.
The device must be switched off and the plug pulled before maintenance work and
cleaning are carried out. Wait for the heater plate to cool.
The Heat Sealer must stand completely on a stable work surface.
Damage to the device can result from using sample plates other than those recommended.
Unsuitable plates can be damaged to such an extent that sample material may escape.
This is especially important to remember when working with infectious materials.
The heater plate is set to approximately 170 °C. Sealed plates can also reach
temperatures of over 50 °C very quickly. There is a risk of burns!
Coming into contact with heater plate and sample plates should be avoided until
temperatures of around 30 °C or less are reached.
Do not use materials (plates, foils, films) that are not sufficiently temperature
resistant.
Do not get your fingers caught between the heater plate and the plates to be sealed.
Explosive, flammable and volatile materials may not be sealed with the Heat Sealer.
The device may not be operated in rooms at risk of explosion.
The appropriate safety regulations should be observed when working with pathogenic material,
radioactive materials or other health-damaging materials.
In the event of spillage or other contamination of the unit, switch off and disconnect the unit
from the mains power supply. Do not attempt to clean the unit until it has thoroughly cooled.
4
Page 5

2 Safety precautions
It should be ascertained that no liquid penetrates into the device.
Repairs should be carried out by a specialist. Use only original Eppendorf replacement parts.
Transfer
If the device is passed on to someone else, please include the instruction manual.
Disposal
In case the product is to be disposed of, the relevant legal regulations are to be observed.
Information on the disposal of electrical and electronic devices in the European
Community
The disposal of electrical devices is regulated within the European Community by national
regulations based on EU Directive 2002/96/EC on waste electrical and electronic equipment
(WEEE).
According to these regulations, any devices supplied after 13.08.05 in the business-to-business
sphere, to which this product is assigned, may no longer be disposed of in municipal or
domestic waste. They are marked with the following symbol to indicate this.
As disposal regulations within the EU may vary from country to country, please contact
your supplier if necessary.
2
Safety precautions
5
Page 6

3 Installation
3
The delivery package contains the following items
1 Heat Sealer
1 Base Plate for 96 well PCR plates
1 Instruction Manual
Installation
1 Power lead
In order to avoid damage caused by condensation, the device may first be switched on
12 hours after setting up. This also applies to a change in location.
The Heat Sealer must stand completely stable on the work surface in a safe, dry location away
from the edge of the work surface.
Space requirement: Width: 14 cm
Mains connection: An earthed wall socket for the Heat Sealer.
The mains voltage must agree with the information on the name plate.
The device must be connected to a grounded socket.
The delivery carton should be kept in order to be able to ship the device in case repairs are
necessary.
3.1 Delivery package
3.2 Setting up the device
Depth: 15 cm
Height: 33 cm
6
Page 7

3 Installation
3.3 Functional units
1
2
3
1 Heater light
2 Power light
3 Mains switch 0 = off / I = on
4 Heater plate
5 Mains connection socket
3
Installation
5
4
3.4 Starting up the device
Connect the mains cable to the Heat Sealer and then to the power main.
Switch on the mains switch on the side of the unit. If electricity is being supplied to the unit, the
green power light will illuminate. If the heater within the unit is receiving power, the amber light
will also illuminate.
When starting from cold, it is preferable to leave the unit on for 20 to 25 minutes to settle down
before carrying out the first sealing operation. On initial power-up, both green and amber lights
will appear. After approximately 10 – 15 minutes the amber light will go out.
Do not use
amber lamp will flicker on and off constantly. This flickering on and off is the normal behaviour
exhibited by the amber lamp indicating correct working temperature has been reached. The unit
is now up to temperature and ready for sealing.
the Heat Sealer until 20 – 25 minutes have elapsed from power-up. By this time the
7
Page 8

4 Operation
4
Operation
4.1 Sealing
After installation, follow the procedures set out below:
– Check that the unit is connected to an appropriate power supply and leave for
20 – 25 minutes to settle down to correct operating temperature. The green power lamp
should be illuminated and the amber heater lamp flicker on and off.
– Slide the plate to be sealed on to the platform of the sealer, making sure that it is flat
between the two centralizing springs.
– Deep well plates can be sealed without a base plate. If the plate to be sealed does not have
its own support skirt to keep it perfectly flat, place it in an appropriate base plate (PCR
Plate 96 should be placed in the metal 96-well base plate supplied with this instrument.
PCR Plate 384 has an alternative base plate (see recommended accessories, ordering
information).
– Once the heater plate has reached operating temperature, the amber heater light on the
side of the sealer will go off.
– Place the sealing film over the plate, ensuring that the sealing surface is face down.
– Holding the handle on the top of the unit, push the heater down to the plate. Once the
heater is resting on top of the plate, continue to push down to compress the floating springs
which are located behind the plate. Once these are fully compressed (a distance of only
5 mm), this applies a force equivalent to a weight of 10 kg to the surface of the plate.
– Hold in this position for approximately 2 – 5 seconds (this time will vary significantly
depending on the plate material, the surface area and the sealing film being used. An initial
time/seal study is strongly recommended for each new type of plate) then turn the plate by
180° and hold for another 2 – 5 seconds (again, an initial time/seal study is strongly
recommended).
The heater plate is set to approximately 170 °C. Sealed plates can also reach
temperatures of over 50 °C very quickly. There is a risk of burns!
Coming into contact with heater plate and sample plates should be avoided
until temperatures of around 30 °C or less are reached.
– Return the heater to the top of the track.
– Remove the plate.
8
Note:
The instrument is fitted with an internal heater with a maximum temperature of approxi-
mately 170 °C when ON. Take care to avoid skin contact with the heater plate and to
prevent contact between the heater plate and any material which may be damaged or
ignited.
Foil-backed film may remain hot for a number of seconds after sealing; care should be
taken in handling these plates.
Page 9

4 Operation
4.2 Removing seal
Depending on the heat sealing sheet used, it can be removed in a number of ways:
Eppendorf Peel-it-Lite Heat Sealing Foil (0030 127.668) can be peeled off. Complete removal of
the foil can be achieved with the Eppendorf Foil Stripper (0030 127.641) or by hand.
If the foil has been removed fully, a new foil sheet can be used to reheat-seal the plate.
For removal of the sample, Eppendorf Pierce-it-Lite Heat Sealing Foil (0030 127.676) can be
easily pierced with an Eppendorf pipette tip. For long-term storage, a pierced foil seal can be
resealed with adhesive PCR Foil (0030 127.471) or PCR Film (0030 127.480) or reheat-sealed
with Pierce-it-Lite.
Using of Eppendorf Heat Sealing Film (0030 127.650) allows monitoring of the sample, but the
seal can only be pierced or peeled off with difficulty.
4
Operation
9
Page 10

5 Maintenance
5
The device may only be opened by a qualified specialist.
defunct with unauthorized work on the device!
Maintenance
Before using any cleaning or decontamination method other than that recommended by the
manufacturer, users should check with the manufacturer that the proposed method will not
damage the equipment.
You can clean the Heat Sealer cover with a cloth dipped in water, mild lab cleaner or ethanol
(methanol or formaldehyde can also be used).
Note:
The device guarantee becomes
The device must be switched off and the main plug pulled before maintenance or
cleaning is carried out.
The heater plate reaches temperatures of more than 50 °C very quickly. There is a
danger of burns. Wait until the temperature reaches 30 °C or less.
It should be ascertained that no liquid penetrates into the device.
Do not use acetone or abrasive cleaners for cleaning!
In case of radioactive spillages, Eppendorf recommends that you use a proprietary
cleaning agent and follow the manufacturer´s instructions!
10
Page 11

6 Troubleshooting
Should you have any recurring problems with this unit, please contact our service department
or your local Eppendorf dealer. Return of the device requires its original packing.
Error Cause Solution
Plates not correctly sealed.
Evaporation problems.
Heater plate impurity. – E.g. film / foil out of
Instrument ON, amber heater
light off (no flickering on and
off to top up the heat to the
unit).
– Sealing time not
sufficient.
– Sealing not consistent. – Turn the plate by 180° after
place.
– Excess-temperature
problem.
If the block temperature
exceeds 220 °C, thermal
cut-out removes power
to the heater.
– General sealing time 2 – 5
seconds; for appropriate
sealing conditions see
specifications of used heat
sealing film / foil.
first sealing and hold for
another 2 – 5 seconds.
– Springs behind the heated
plate not fully compressed;
push the heater head down
on to the seal and plate
more strongly.
– Cleaning of heater plate,
see chapter 5.
– Thermal cut-out is
non-resettable and the unit
should be returned to
Eppendorf for repair.
6
Troubleshooting
11
Page 12

7 Technical data
7
Power supply: 110 V AC (Nominal)
Input frequency: 47 – 63 Hz
Fuses: T 5 A (T) (110 V)
Power consumption: Approx. 500 W (110 V)
Technical data
230 V AC (Nominal)
T 3.15 A (T) (230 V)
Approx. 400 W (230 V)
Internal heater:
Heater plate:
Dimensions: Width: 14 cm
Weight: 3.4 kg
Instrument housing: Sheet metal
Operating conditions: 10 to 35 °C, 10 % to 80 %, non-condensing
Storage conditions: – 20 to 40 °C, 10 % to 80 %, non-condensing
Technical specifications subject to change!
Ambient to 220 °C max.
Approx. 170 °C max.
Depth: 15 cm
Height: 33 cm
12
Page 13

8 Ordering information
Please use only the original accessories recommended by Eppendorf. The function and safety
of the device may be negatively affected by the use of accessories or consumables other than
those recommended by Eppendorf. We do not honor any warranty or accept any responsibility
by damage resulting from such action.
Desription Order no.
Heat Sealer, 115 V, incl.
Base Plate for 96 well PCR plate 5390 000.016 951023078
Heat Sealer, 230 V, incl.
Base Plate for 96 well PCR plate 5390 000.024
Recommended Accessories:
Base Plate for 384 well PCR plate
Instruction manual
Also available from Eppendorf:
Heat Sealing Film 100 sheets
PCR Film (adhesive) 100 sheets
PCR Foil (adhesive) 100 sheets
Pierce-it-Lite 100 sheets
Peel-it-Lite 100 sheets
Foil Stripper
Eppendorf twin.tec PCR Plate 96, skirted
colorless 25 pieces
yellow 25 pieces
green 25 pieces
blue 25 pieces
red 25 pieces
Eppendorf twin.tec PCR Plate 96, semi-skirted
colorless 25 pieces
yellow 25 pieces
green 25 pieces
blue 25 pieces
red 25 pieces
Eppendorf twin.tec PCR Plate 384
colorless 25 pieces
yellow 25 pieces
green 25 pieces
blue 25 pieces
red 25 pieces
Eppendorf Plate Deepwell 96/500 µl
Eppendorf Plate Deepwell 96/1000 µl
Eppendorf Plate/Deepwell 96/2000 µl
(also available as sterile or LoBind qualities,
and various colors)
20 pieces
120 pieces
20 pieces
80 pieces
20 pieces
80 pieces
international
5390 100.029
5390 900.009
0030 127.650
0030 127.480
0030 127.471
0030 127.676
0030 127.668
0030 127.641
0030 128.648
0030 128.656
0030 128.664
0030 128.672
0030 128.680
0030 128.575
0030 128.583
0030 128.591
0030 128.605
0030 128.613
0030 128.508
0030 128.516
0030 128.524
0030 128.532
0030 128.540
0030 501.101
0030 505.107
0030 501.209
0030 505.204
0030 501.306
0030 505.301
Order no.
for North America
951023086
951023060
951023019
951023001
951023213
951023205
951023043
951020401
951020427
951020443
951020460
951020486
951020303
951020320
951020346
951020362
951020389
951020702
951020711
951020729
951020737
951020745
951031801
951032204
951032603
951033006
951033405
951033600
8
Ordering information
PCR (Polymerase Chain Reaction) is covered by U.S. patents owned by Hoffmann-La Roche.
13
Page 14

EG-Konformitätserklärung
EC Conformity Declaration
Das bezeichnete Produkt entspricht den einschlägigen grundlegenden Anforderungen der
aufgeführten EG-Richtlinien und Normen. Bei einer nicht mit uns abgestimmten Änderung des
Produktes oder einer nicht bestimmungsgemäßen Anwendung verliert diese Erklärung ihre Gültigkeit.
The product named below fulfills the relevant fundamental requirements of
the EC directives and standards listed. In the case of unauthorized modifications to the product
Produktbezeichnung, Product name:
Heat Sealer 5390
Produkttyp, Product type:
Gerät zum Verschließen von Mikrotiterplatten / thermal sealing device for micro plates
Einschlägige EG-Richtlinien/Normen, Relevant EC directives/standards:
73/23/EWG, EN 61010-1
or an unintended use this declaration becomes invalid.
89/336/EWG, EN 55014, EN 61000-6-1, EN 61000-3-2, EN 61000-3-3
Vorstand, Board of Management: Projektmanagement, Project Management:
05.08.2003
Hamburg, Date:
Eppendorf AG · Barkhausenweg 1 · 22339 Hamburg · Germany
0015 033.509-02
5390 900.998-01
Page 15

Eppendorf Offices
SPAIN
SWITZERLAND
UNITED KINGDOM
USA
OTHER COUNTRIES
ASEAN
Eppendorf AG
Regional Office in Malaysia
Tel. +60 3 8023 2769
Fax +60 3 8023 3720
E-Mail: eppendorf@eppendorf.com.my
Internet: www.eppendorf.com.my
AUSTRALIA / NEW ZEALAND
Eppendorf South Pacific Pty. Ltd.
Tel. +61 2 9889 5000
Fax +61 2 9889 5111
E-mail: Info@eppendorf.com.au
Internet: www.eppendorf.com.au
AUSTRIA
Eppendorf AG
c/o Schott Austria
Tel. +43 1 29017560
Fax +43 1 290175620
E-Mail: gilch.p@eppendorf.de
Internet: www.eppendorf.com
BRAZIL
Eppendorf do Brasil Ltda.
Tel. +55 11 30 95 93 44
Fax +55 11 30 95 93 40
E-Mail: eppendorf@eppendorf.com.br
Internet: www.eppendorf.com.br
CANADA
Eppendorf Canada Ltd.
Tel. +1 905 826 5525
Fax +1 905 826 5424
E-Mail: canada@eppendorf.com
Internet: www.eppendorf.com
CHINA
Eppendorf AG
Tel. +86 21 68760880
Fax +86 21 50815371
E-Mail: market.info@eppendorf.cn
Internet: www.eppendorf.cn
FRANCE
EPPENDORF FRANCE S.A.R.L.
Tel. +33 1 30 15 67 40
Fax +33 1 30 15 67 45
E-Mail: eppendorf@eppendorf.fr
Internet: www.eppendorf.fr
GERMANY
Eppendorf Vertrieb
Deutschland GmbH
Tel. +49 2232 418-0
Fax +49 2232 418-155
E-Mail: vertrieb@eppendorf.de
Internet: www.eppendorf.de
INDIA
Eppendorf India Limited
Tel. +91 44 52111314
Fax +91 44 52187405
E-Mail: info@eppendorf.co.in
Internet: www.eppendorf.co.in
ITALY
Eppendorf s.r.l.
Tel. +390 2 55 404 1
Fax +390 2 58 013 438
E-Mail: eppendorf@eppendorf.it
Internet: www.eppendorf.it
JAPAN
Eppendorf Japan Co. Ltd.
Tel. +81 3 5825 2363
Fax +81 3 5825 2365
E-Mail: info@eppendorf.jp
Internet: www.eppendorf.jp
NORDIC
Eppendorf Nordic Aps
Tel. +45 70 22 2970
Fax +45 45 76 7370
E-Mail: nordic@eppendorf.dk
Internet: www.eppendorf.dk
Eppendorf Ibérica S.L.
Tel. +34 91 651 76 94
Fax +34 91 651 81 44
E-Mail: iberica@eppendorf.de
Internet: www.eppendorf.es
Vaudaux-Eppendorf AG
Tel. +41 61 482 1414
Fax +41 61 482 1419
E-Mail: vaudaux@vaudaux.ch
Internet: www.eppendorf.com
Eppendorf UK Limited
Tel. +44 1223 200 440
Fax +44 1223 200 441
E-Mail: sales@eppendorf.co.uk
Internet: www.eppendorf.co.uk
Eppendorf North America
Tel. +1 516 334 7500
Fax +1 516 334 7506
E-Mail: info@eppendorf.com
Internet: www.eppendorfna.com
see:
www.eppendorf.com/worldwide
Page 16

In touch with life
Your local distributor: www.eppendorf.com/worldwide
Eppendorf AG · 22331 Hamburg · Germany · Tel. +49 40 538 01-0 · Fax +49 40 538 01-556
E-Mail: eppendorf@eppendorf.com
Eppendorf North America, Inc. · One Cantiague Road, P.O. Box 1019 · Westbury, N.Y. 11590-0207 USA
Tel. +1 516 334 7500 · Toll free phone 800 645 3050 · Fax +1 516 334 7506 · E-Mail: info@eppendorf.com
Application Support
Europe, International: Tel. +49 1803 666 789 · E-Mail: support@eppendorf.com
North America: Tel. 800 645 3050 ext. 2258 · E-Mail: support_NA@eppendorf.com
Asia, Pacific: Tel. +603 8023 2769 · E-Mail: support_Asia@eppendorf.com
is a registered trademark.
B 5390 900.009-07/0306 · Printed in Germany
eppendorf
 Loading...