

D-Link DNS-300 User Manual

1
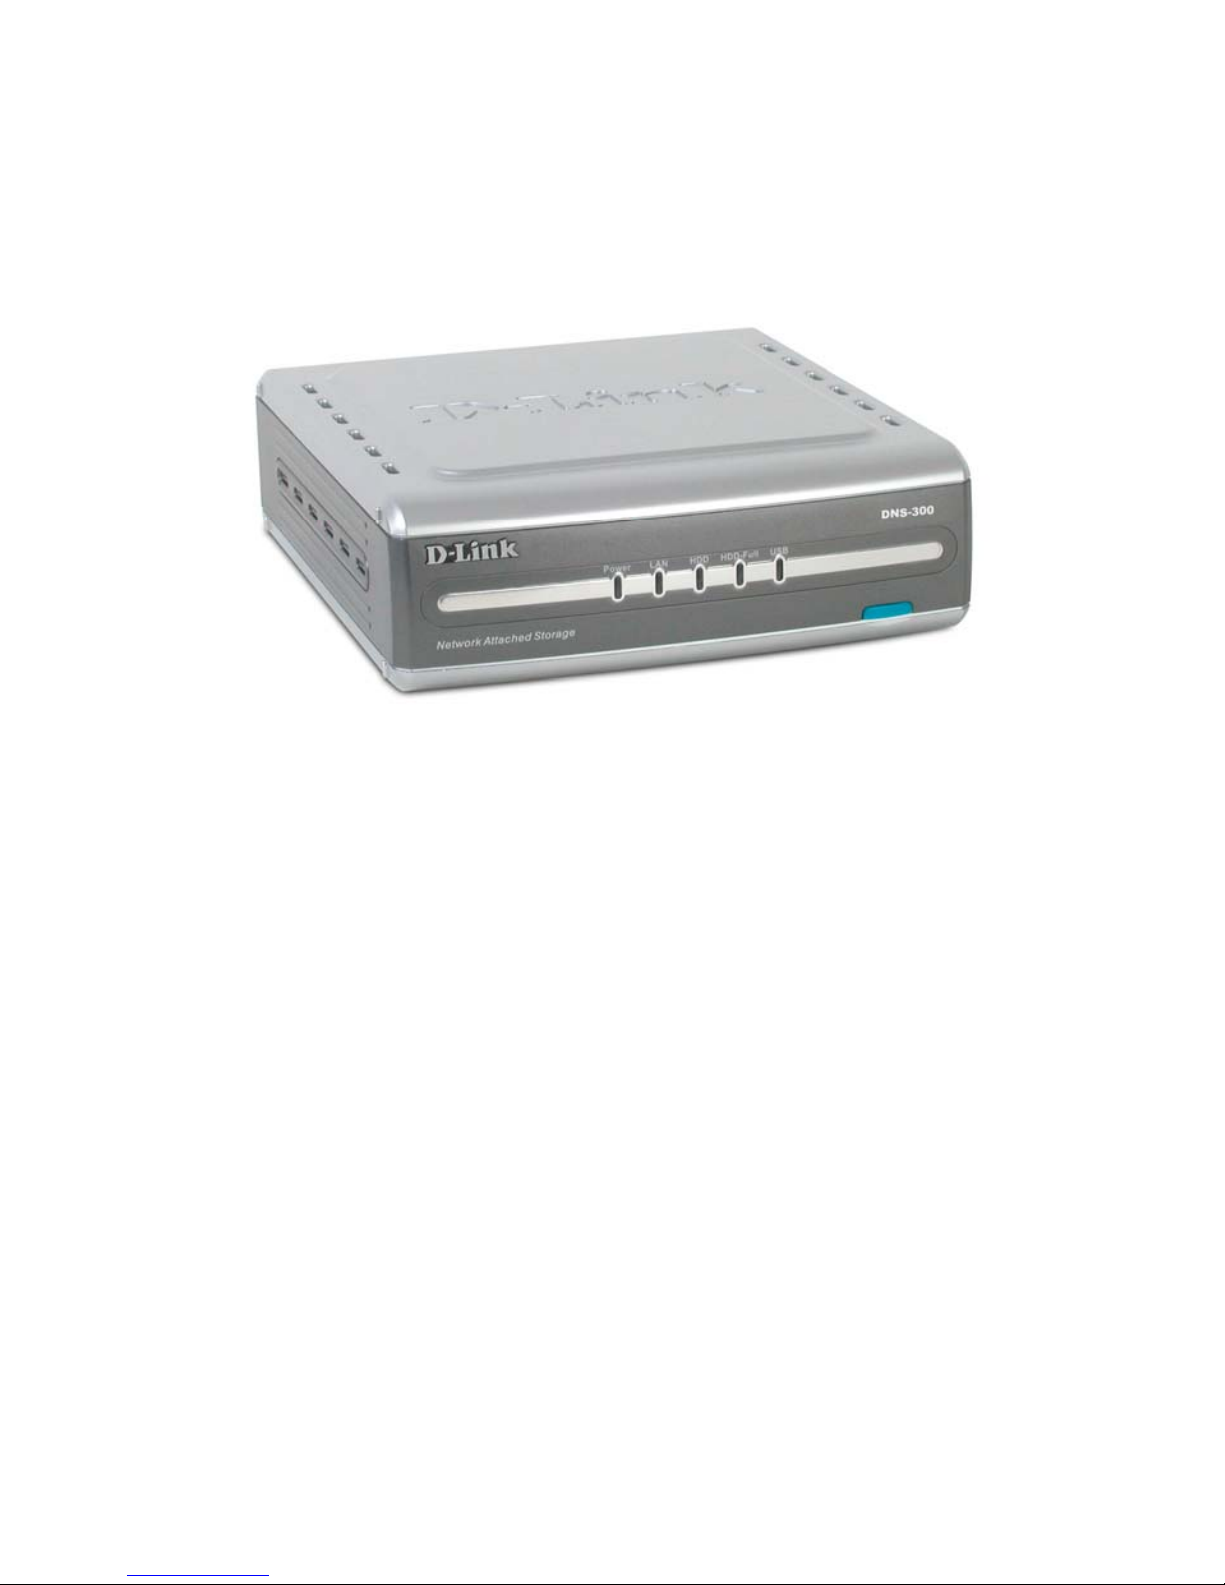
DNS-300
Network Attached Storage
Manual
Building Networks for People
Ver.1.00
(2/18/2005)

2
Contents
Introduction ......................................................................................5
Specifications....................................................................................... 5
Package Contents ............................................................................... 8
LEDs. 9
Physical Connections ........................................................................ 10
Getting Started ...............................................................................11
Setting Up the Hard Disk Drive.......................................................... 11
Formatting the Hard Disk Drive ......................................................... 15
D-Link Storage Utility ......................................................................... 17
Double-click the D-Link Storage Utility icon...................................... 17
Setup Wizard ..................................................................................... 20
Enter the default IP........................................................................... 20
Enter the default user name ............................................................. 21
Start the wizard................................................................................. 21
Enter system information.................................................................. 22
Enter networking information............................................................23
Setup time settings ...........................................................................25
Setup network file protocol ............................................................... 26
Finish the settings............................................................................. 27
LAN Setup ......................................................................................... 29
Changing server name ..................................................................... 30
Advanced Setup .............................................................................31
User Management ............................................................................. 31
Creating new user ............................................................................31
Editing user information.................................................................... 33
Deleting a user.................................................................................. 34

3
Group Management........................................................................... 34
Creating a new group ....................................................................... 34
Editing group information.................................................................. 36
Deleting a group ............................................................................... 37
Share Management ........................................................................... 37
Creating a new share .......................................................................38
Editing share information.................................................................. 40
Deleting a share ............................................................................... 41
Hard Drive Hibernation ...................................................................... 42
USB Disk ........................................................................................... 43
USB Printer........................................................................................ 44
Tools................................................................................................47
Time Setup ........................................................................................ 47
Set the time manually .......................................................................47
Connecting to an NTP server ........................................................... 48
Backup Configurations ...................................................................... 50
Backup system settings.................................................................... 50
Restore system settings ................................................................... 52
Restore factory default settings ........................................................ 52
Format Hard Drive ............................................................................. 53
Networking and Encoding.................................................................. 54
Firmware Update ............................................................................... 57
E-mail Notifications............................................................................ 59
Service............................................................................................... 60
Device Status..................................................................................62
Device Information............................................................................. 62
Logs.. 63
Clear the log ..................................................................................... 64

4
Save the log......................................................................................65
Online Help .....................................................................................66
Individual Help ................................................................................... 66
Overall Help....................................................................................... 67

5
With the emergence of increasingly large multimedia files, the need for bigger, more
dependable storage for personal computers grows rapidly as well. D-Link DNS-300
is designed to meet your need for multimedia file storage and immediate play back.
As it is attached to your home network environment, you don't have to take apart
your computer to expand the storage like was previously the case when adding an
additional hard drive to your PC. All you have to do is plug in the network cable of the
device running D-Link DNS-300 to your computer, or the hub or switch in the same
network environment, and then you are ready to start storing your home
entertainment files in the device.
Configuring the device and getting it running is amazingly simple. A browser-based
wizard only takes a few steps for the initialization settings to take effect.
Specifications
Networking
Network
Types
Network
File
Protocols
Protocols Client types
Microsoft
network
CIFS, SMB TCP/IP
Windows 98, ME, NT 4.0,
2000, XP
Apple
Macintosh
network
AFP
AppleTalk,
TCP/IP
Apple Macintosh 7.x, 8.x,
9.x, OS X
Introduction
6
LAN port setting
Manual configuration
Type
DHCP
Management
User/ Group/ Share
Maximum user
number
32
Maximum group
number
16
Maximum share
number
16
Logs / Notification
Available log type
System log
Connection log
Current connection
E-mail notification
Encoding
Available codepage
U.S. English (Code Page 437)
Greek (Code Page 737)
Western European (Code Page 850)
MS-DOS Latin 2 (Code Page 852)
Icelandic (Code Page 861)
Cyrillic (Code Page 866)
Japanese SJIS (Code Page 932)
Simplified Chinese (Code Page 936)
Korean Hangul (Code Page 949)

7
Traditional Chinese (Code Page 950)
USB Support
USB Disk
USB Printer
Miscellaneous
Online help
Hard drive usage overview
Firmware update
HDD format
System configuration backup and restore
Network Time Protocol (NTP) support
HDD Hibernation
Usability
Initialization wizard
Web-based management UI
8
Package Contents
Contents of package:
• One D-Link DNS-300 Media Storage Server device
• One Category 5 cable
• One power switch with power cord
• One CD-ROM
• One QIG
If any of the above items are missing, please contact your reseller.
Important Warning:
Tampering with any components inside the product other than those
specifically mentioned in this manual or the accompanying QIG will
automatically invalidate the product warranty.
9
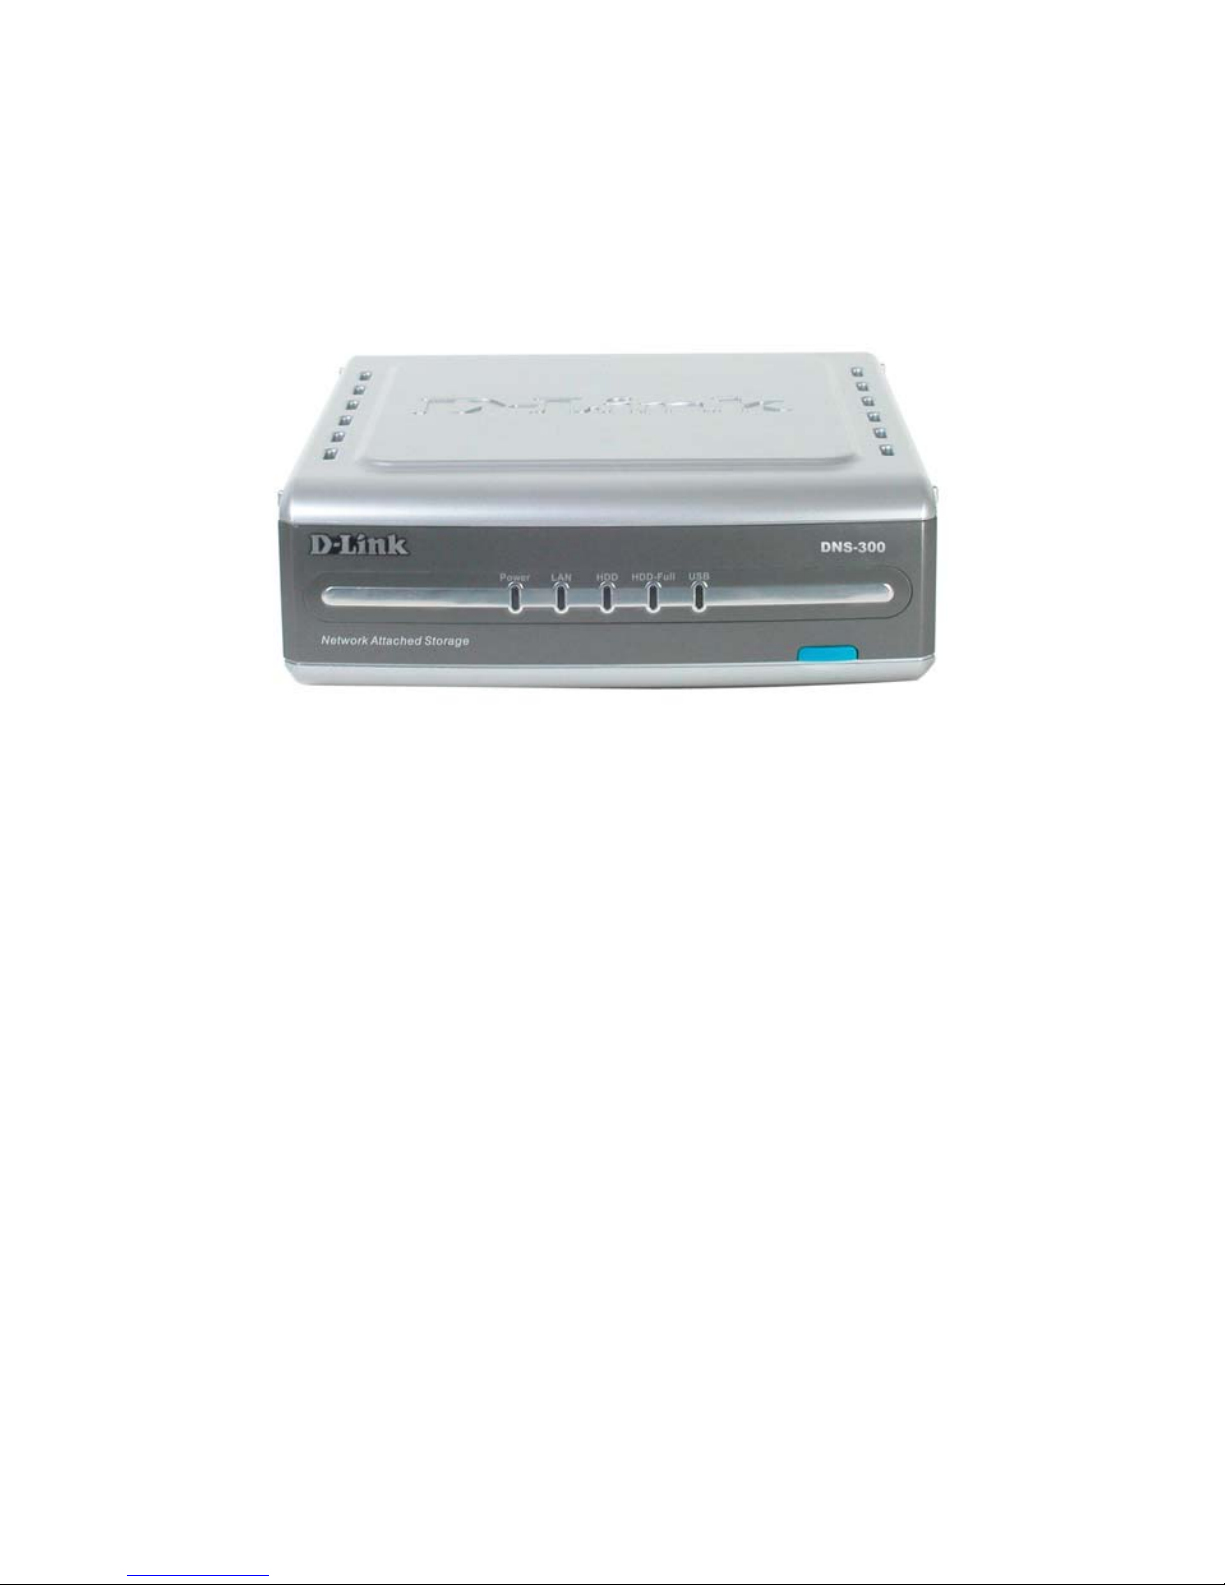
LEDs
Power: A solid light indicates a proper connection. No light indicates the power is off.
To power off the DNS-300, hold down the power button for about 6 seconds.
LAN: A solid light indicates a proper connection to LAN port. A blinking light indicates
that data is being transferred. No light indicates the port is disconnected.
HDD: A blinking light indicates the HD is in read/write mode. No light indicates the
read/write mode is not engaged.
HDD Full: A solid light indicates the HD is completely full (100%). A blinking light
indicates the HD is almost full (95%). No light is the normal condition.
USB: A solid light indicates that the USB flash/HDD is properly connected. A blinking
light indicates that data is being received. No light indicates that there is neither a
USB Flash nor a USB HDD connected.
10
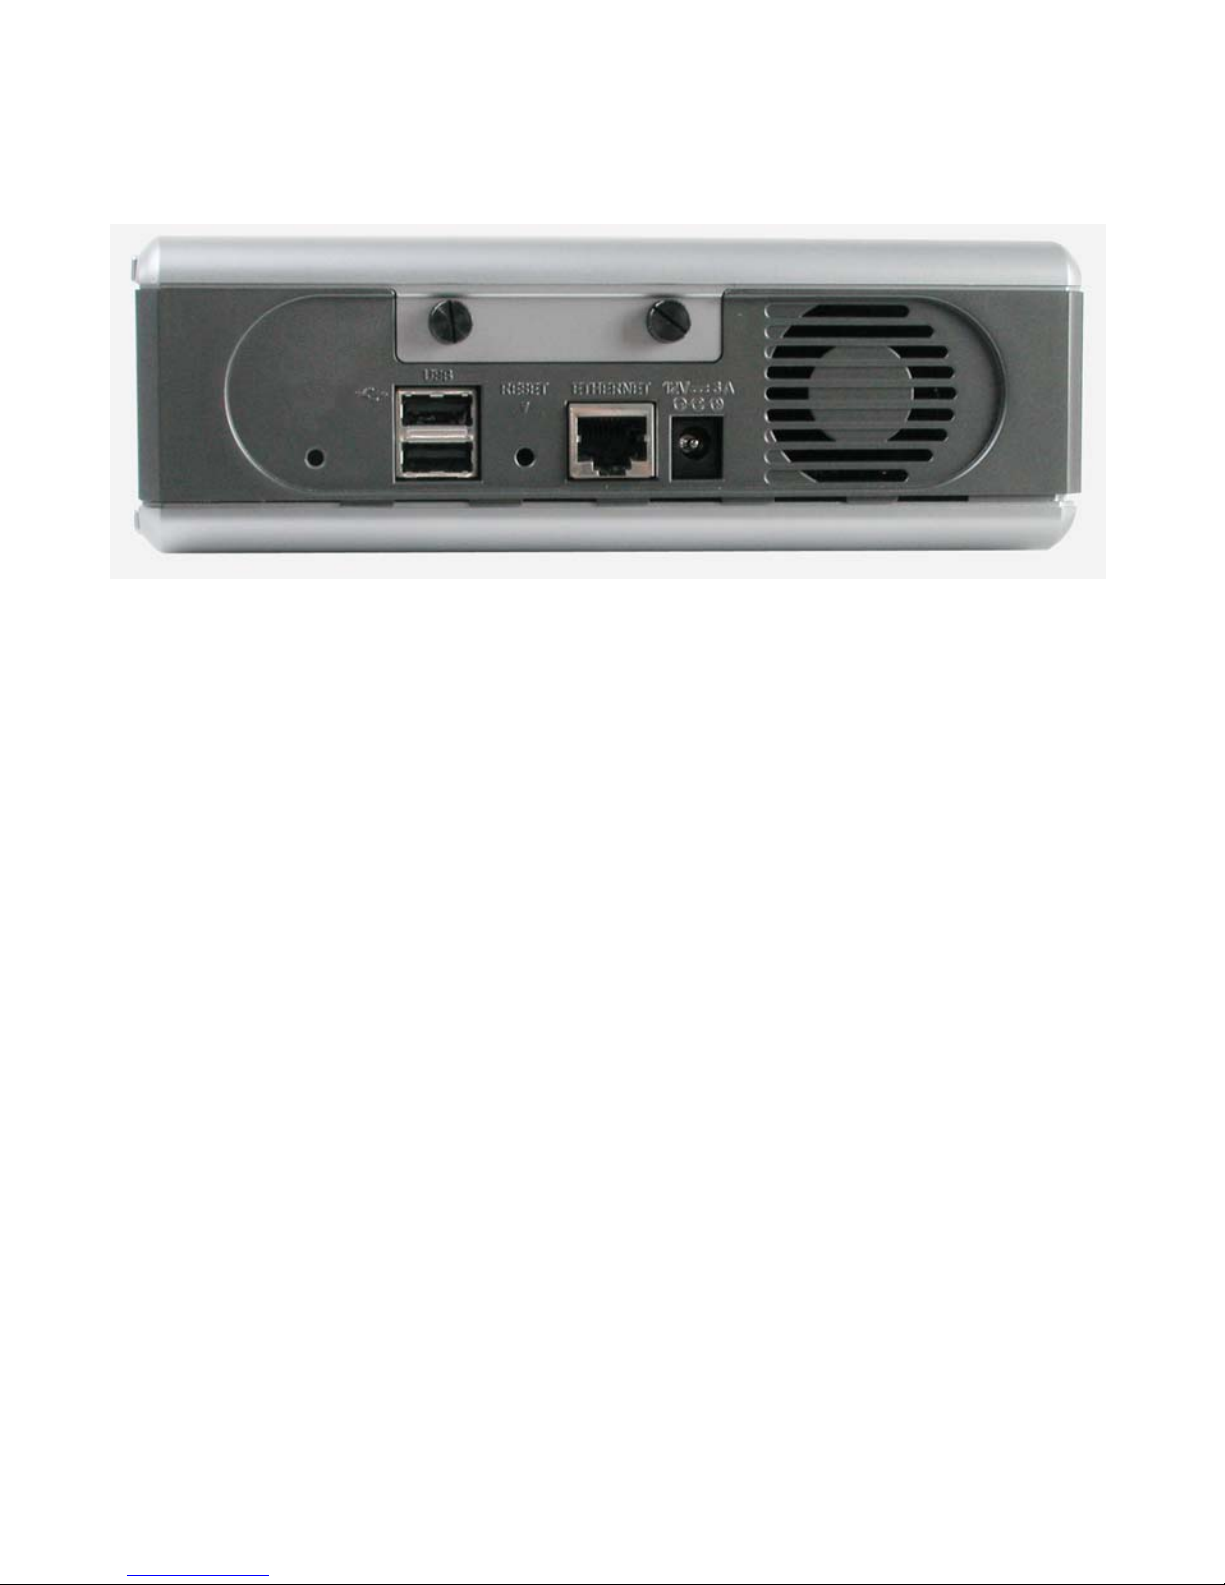
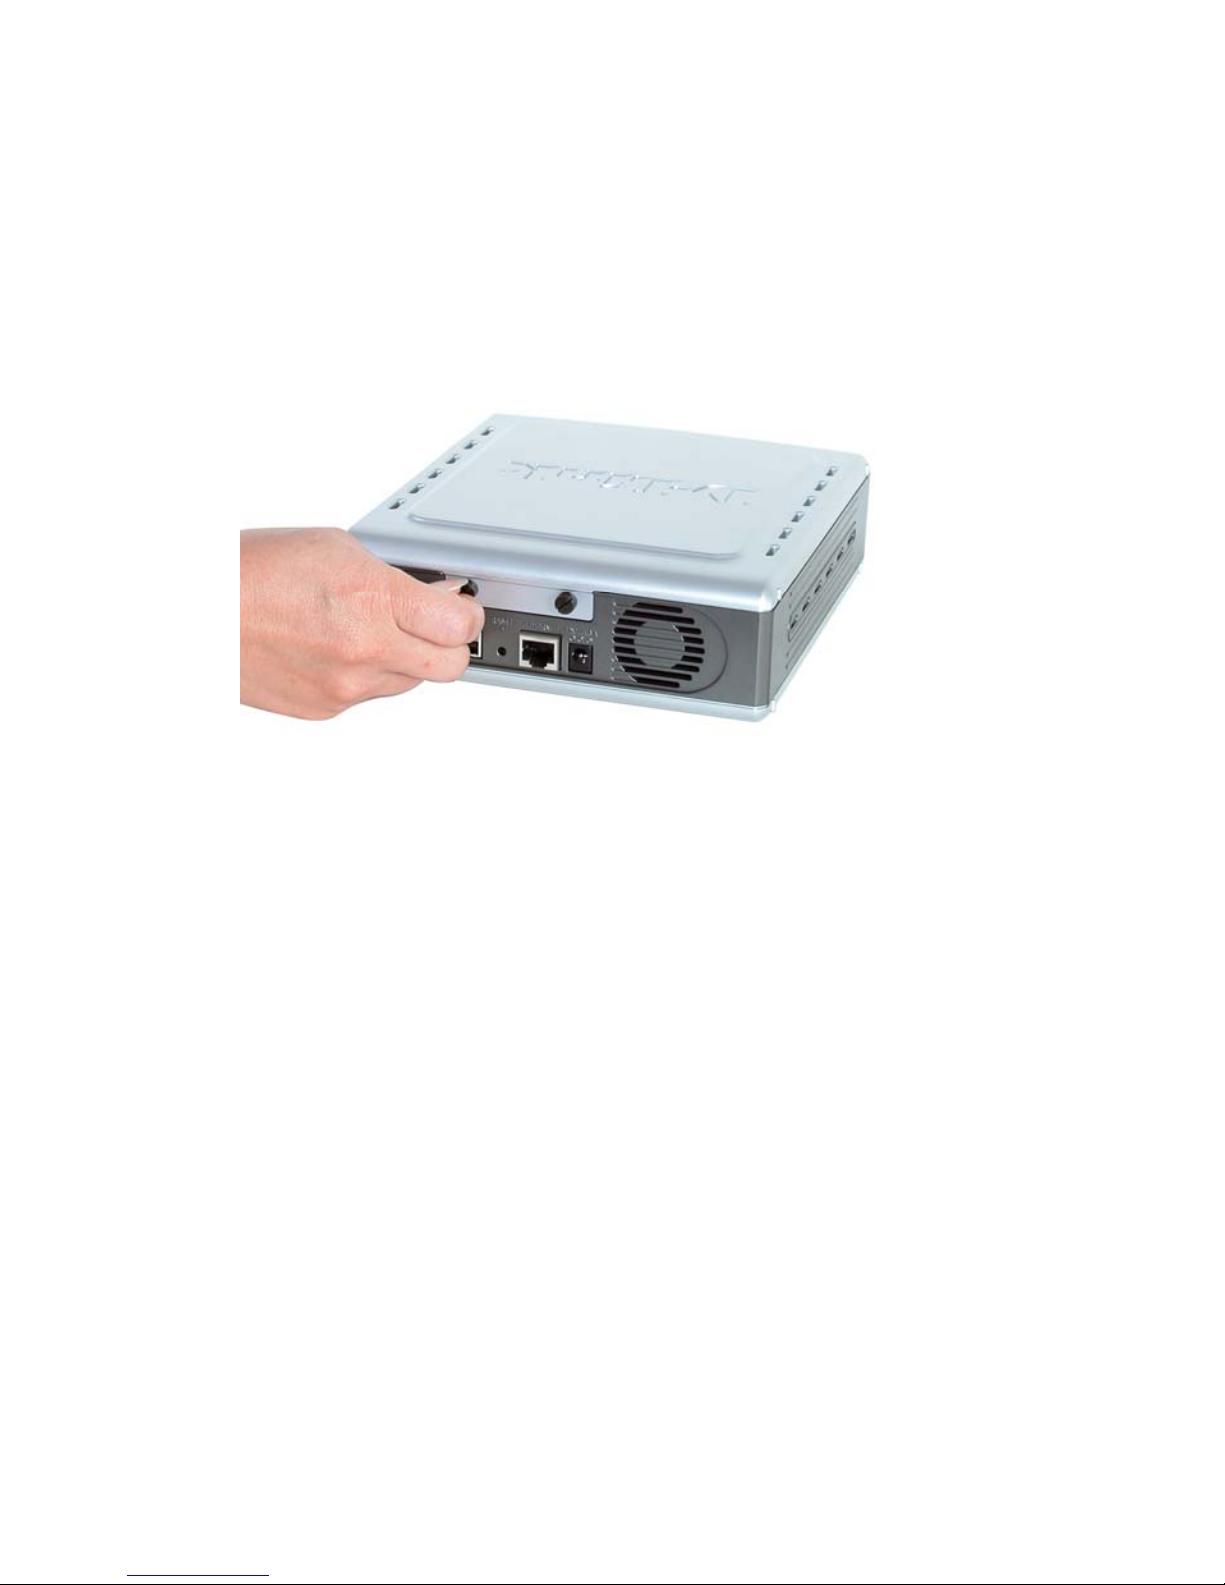
Physical Connections
USB Ports for Printer Server/USB HDD: Please use the USB printer cable to
connect the DNS-300 USB Port (for printer server) or USB HDD for additional
volume.
Reset: Pressing this button restores the DNS-300 to its original factory default
settings.
LAN Port: Please use the Ethernet cable to connect the DNS-300 and the
router/switch/hub in the network.
Power Adapter: Receptor for power adapter.
11
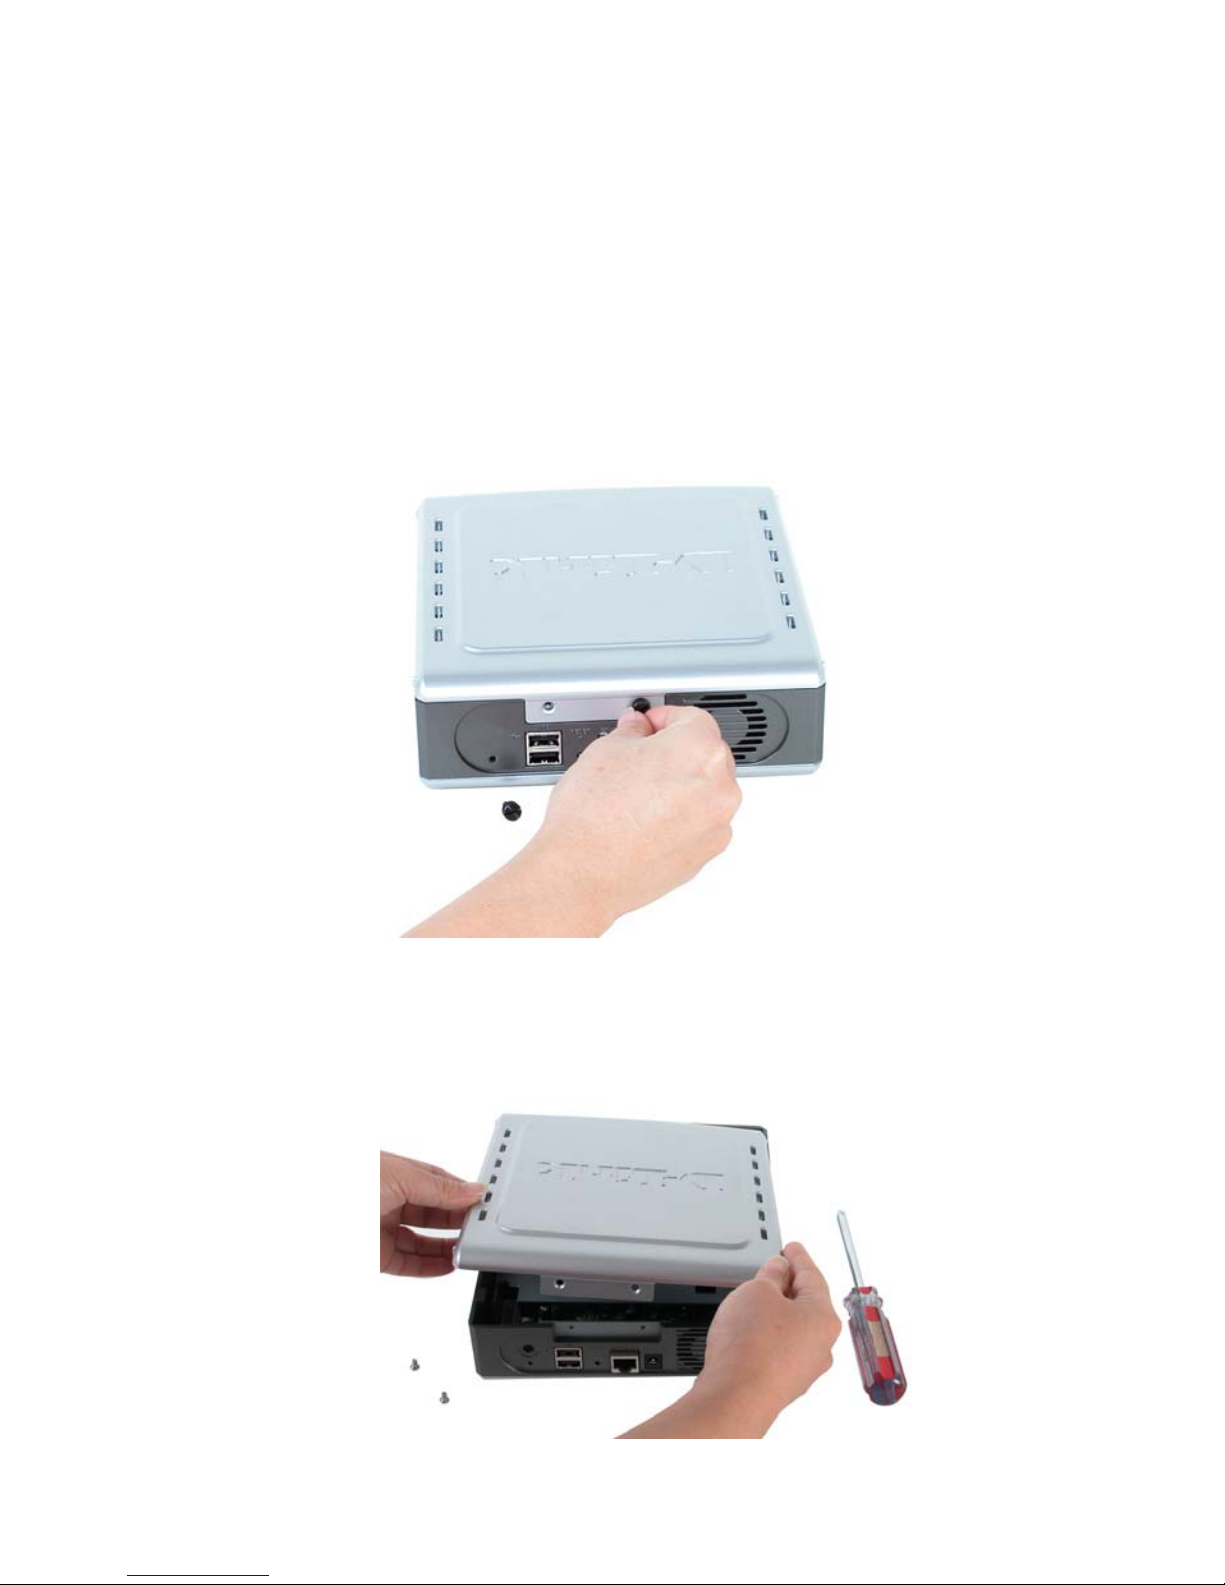
Setting Up the Hard Disk Drive
Step 1: Loosen the screws on the back of the DNS-300.
Step 2: Remove the cover.
Getting Started

12
Step 3: Plug the IDE/ATA cable into the HDD.
Step 4: Connect the power connector to the HDD.

13
Step 5: Tighten the HDD to the metal bracket with the screws provided.
The DNS-300 packing materials include four screws, which are used in Step 5.
14
Step 6: Replace the cover and tighten the screws.
The DNS-300 is now ready to be plugged in and powered on.
15
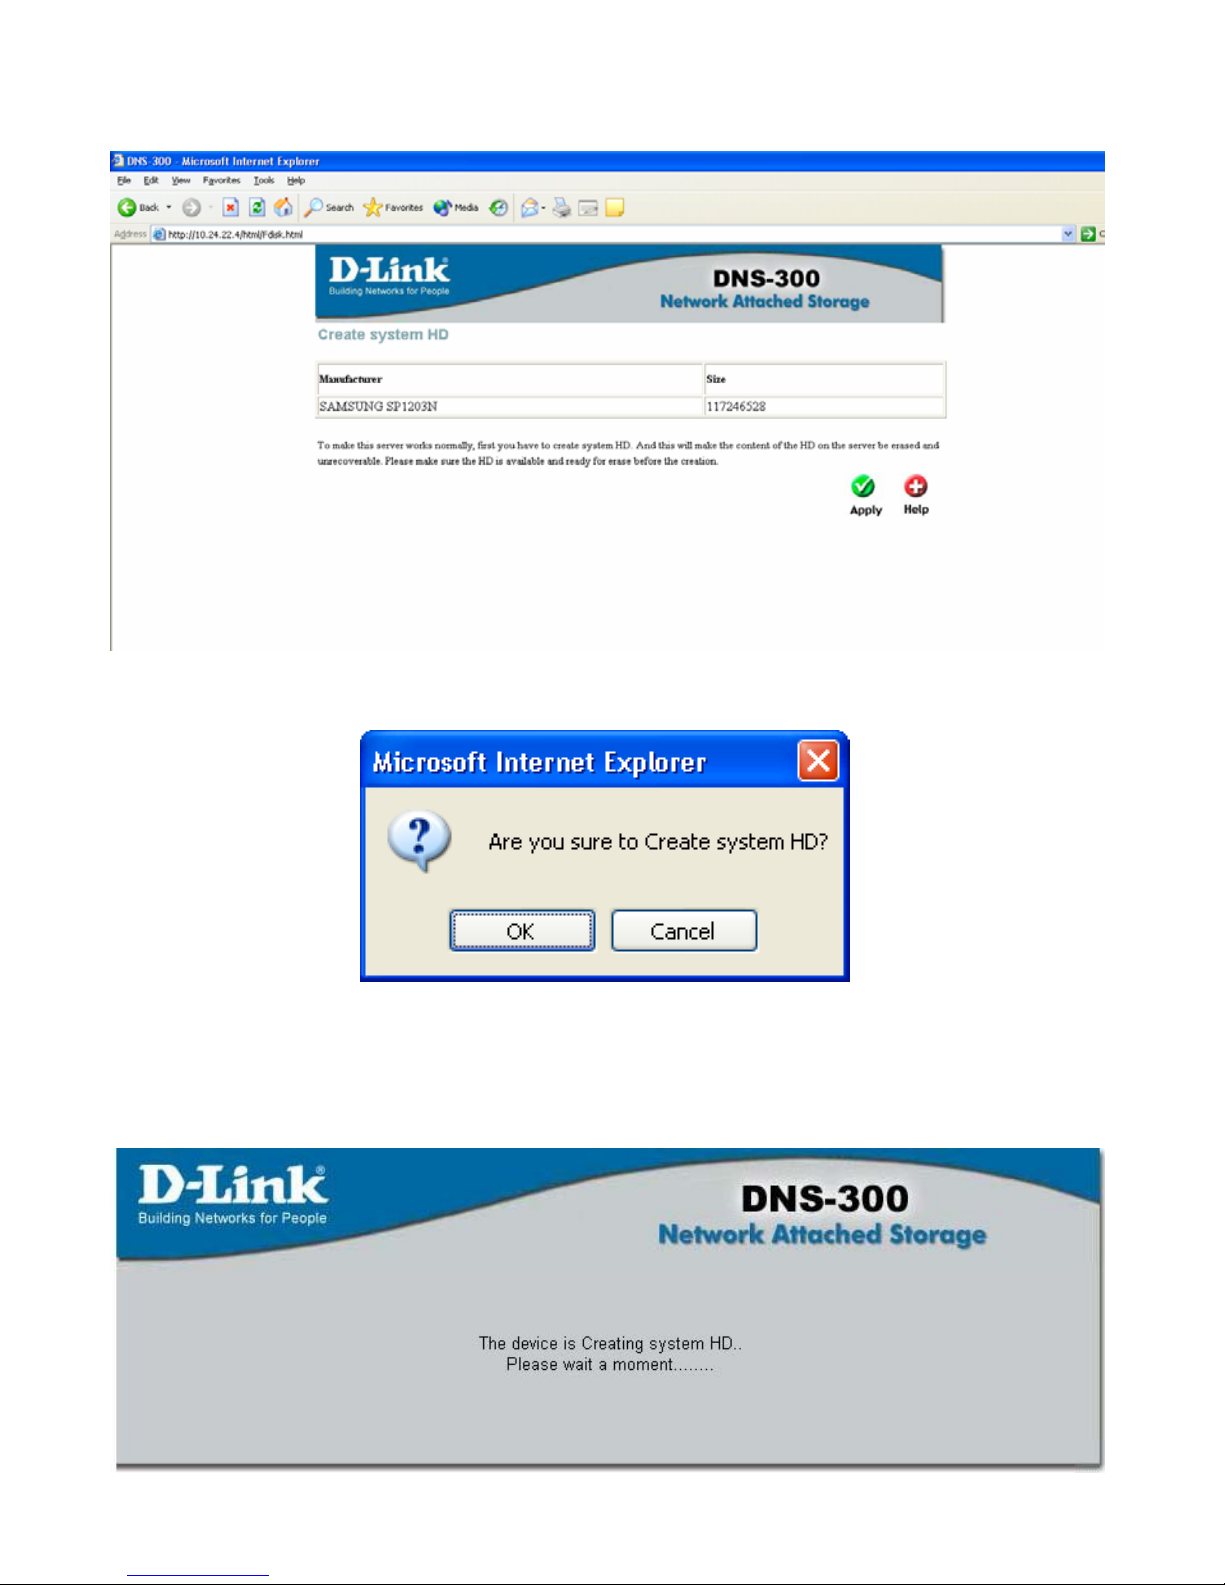
Formatting the Hard Disk Drive
If you are setting up the Hard Disk Drive for the first time, you need to format it with
the D-Link Storage Configuration Utility (see the next section in this manual for more
detailed information).
Follow these easy steps:
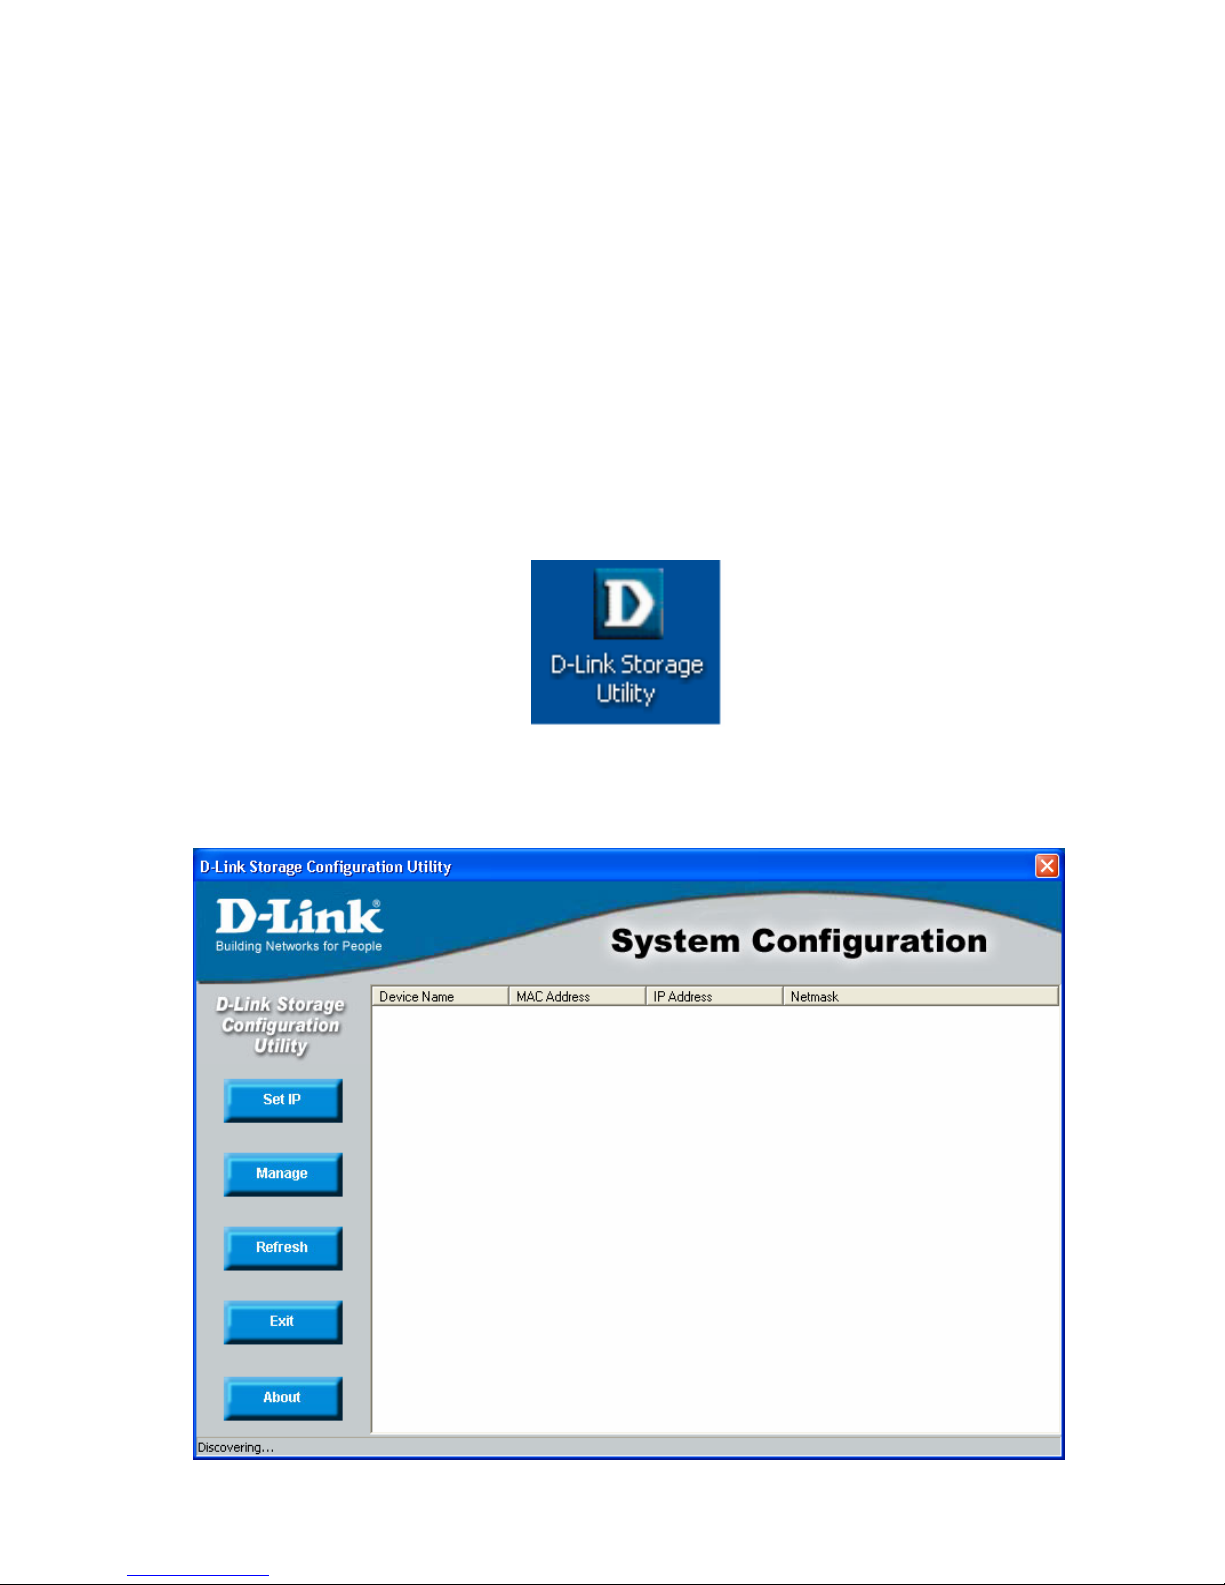
1. Open the D-Link Storage Configuration Utility by clicking on the icon that is
installed on your desktop (when you first place the CD that comes with the
DNS-300 in your CD-ROM drive).
2. Select “DNS-300” under the Device Name column (click Refresh if it doesn’t
appear automatically) and then click the Manage button.
16
This will cause your default Web browser to open the following window:
Click Apply.
Click OK to proceed with the creation of the system HD.
The following window will be displayed:
17
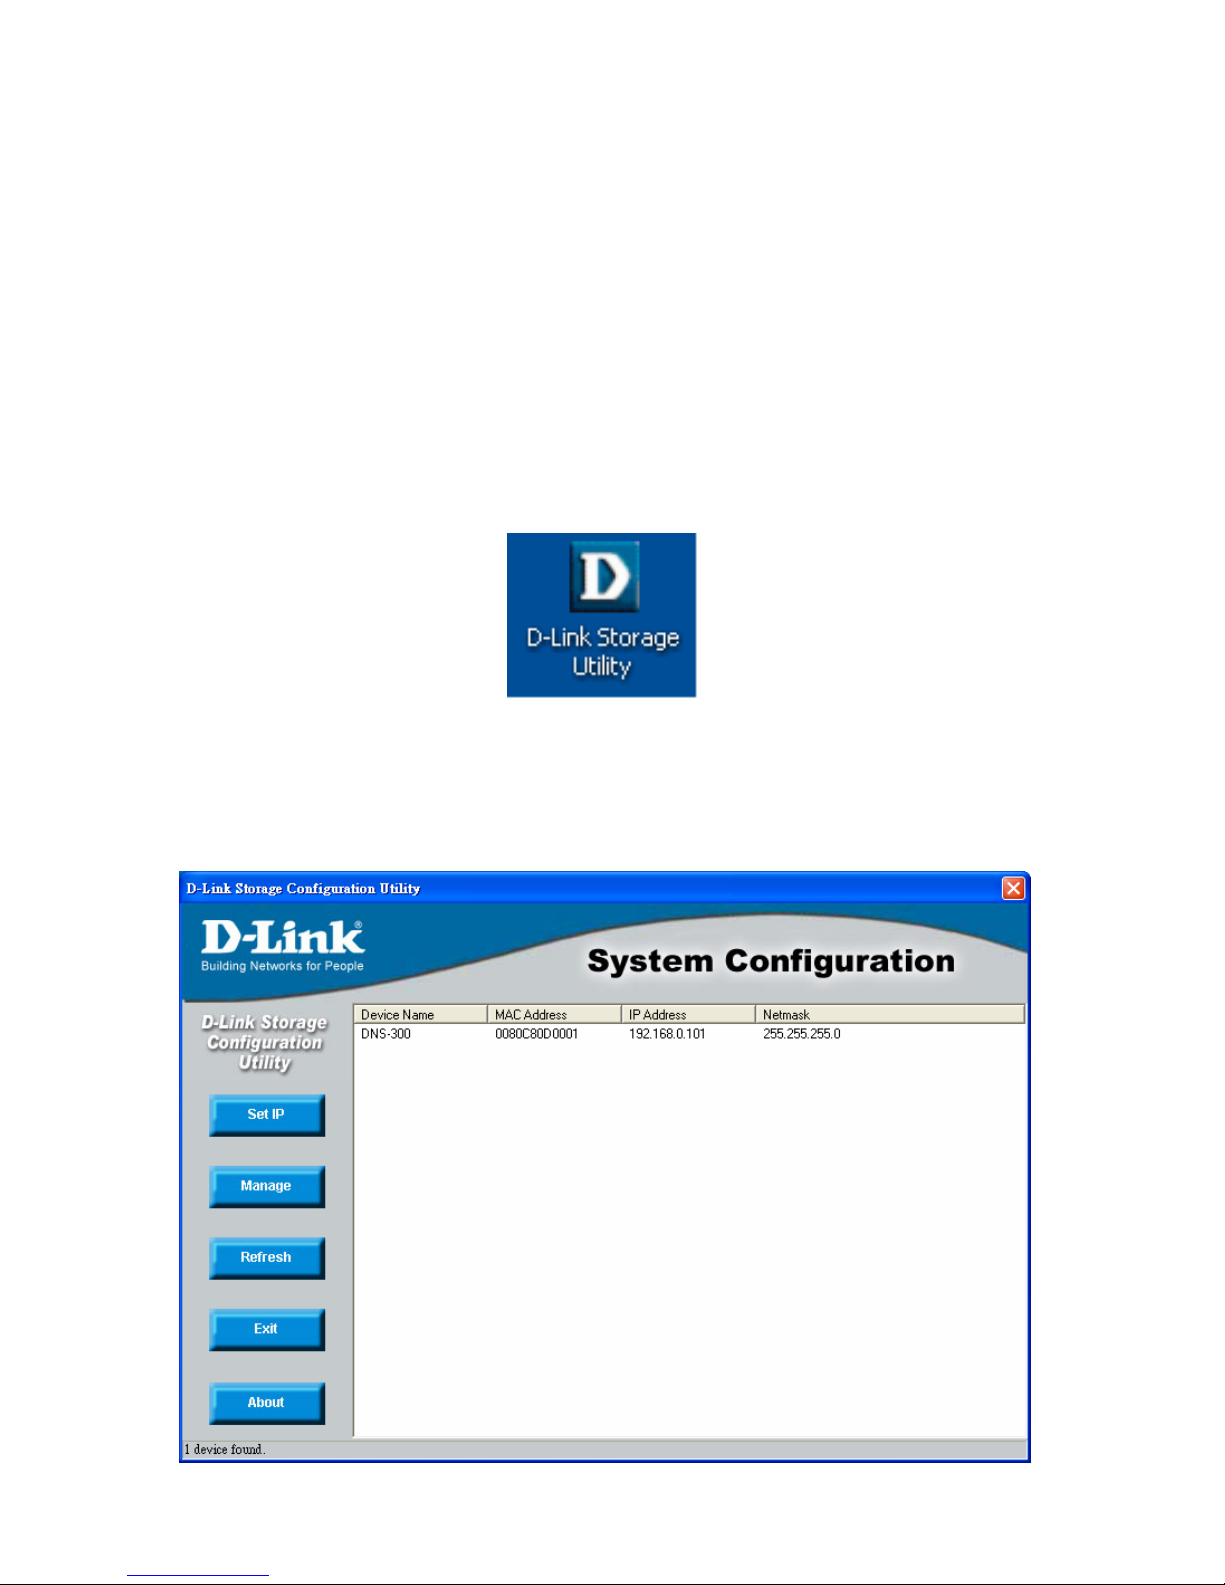
D-Link Storage Utility
D-Link Storage Utility is a tool to connect and use the DNS-300 Network Attached
Storage device.
Double-click the D-Link Storage Utility icon
Double-click the D-Link Storage Utility icon.
This will automatically detect all servers on the network at the moment by displaying
the following System Configuration window:
18
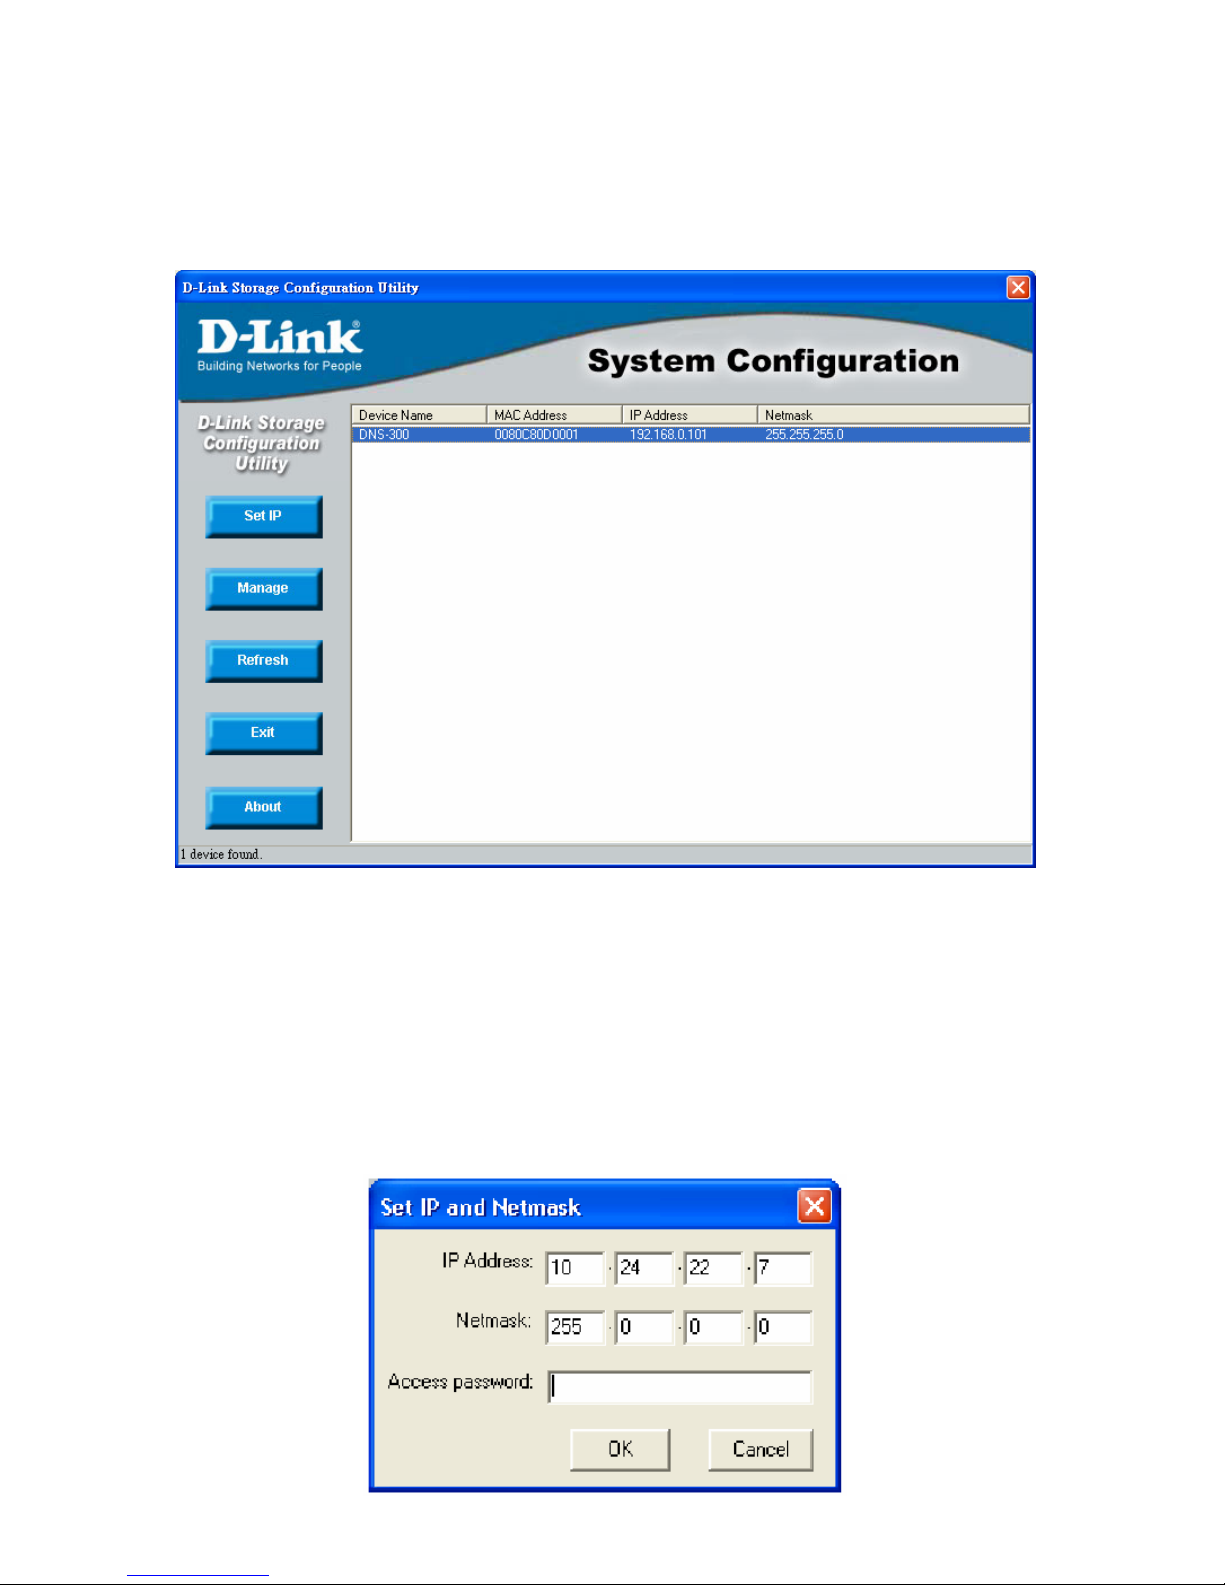
After it is finished searching, a detailed list will be shown, as above. This includes
Device Name, MAC Address, IP Address, and Netmask. Select the DNS-300 from
this list. Please note that you can rename the device later if desired.
Note:
The default IP address of the DNS-300 is 192.168.0.101.
You now are able to set the IP address of the DNS-300 by clicking the Set IP button
on the System Configuration window. Enter the appropriate information in the
following pop-up dialogue and input admin password then click OK.
19
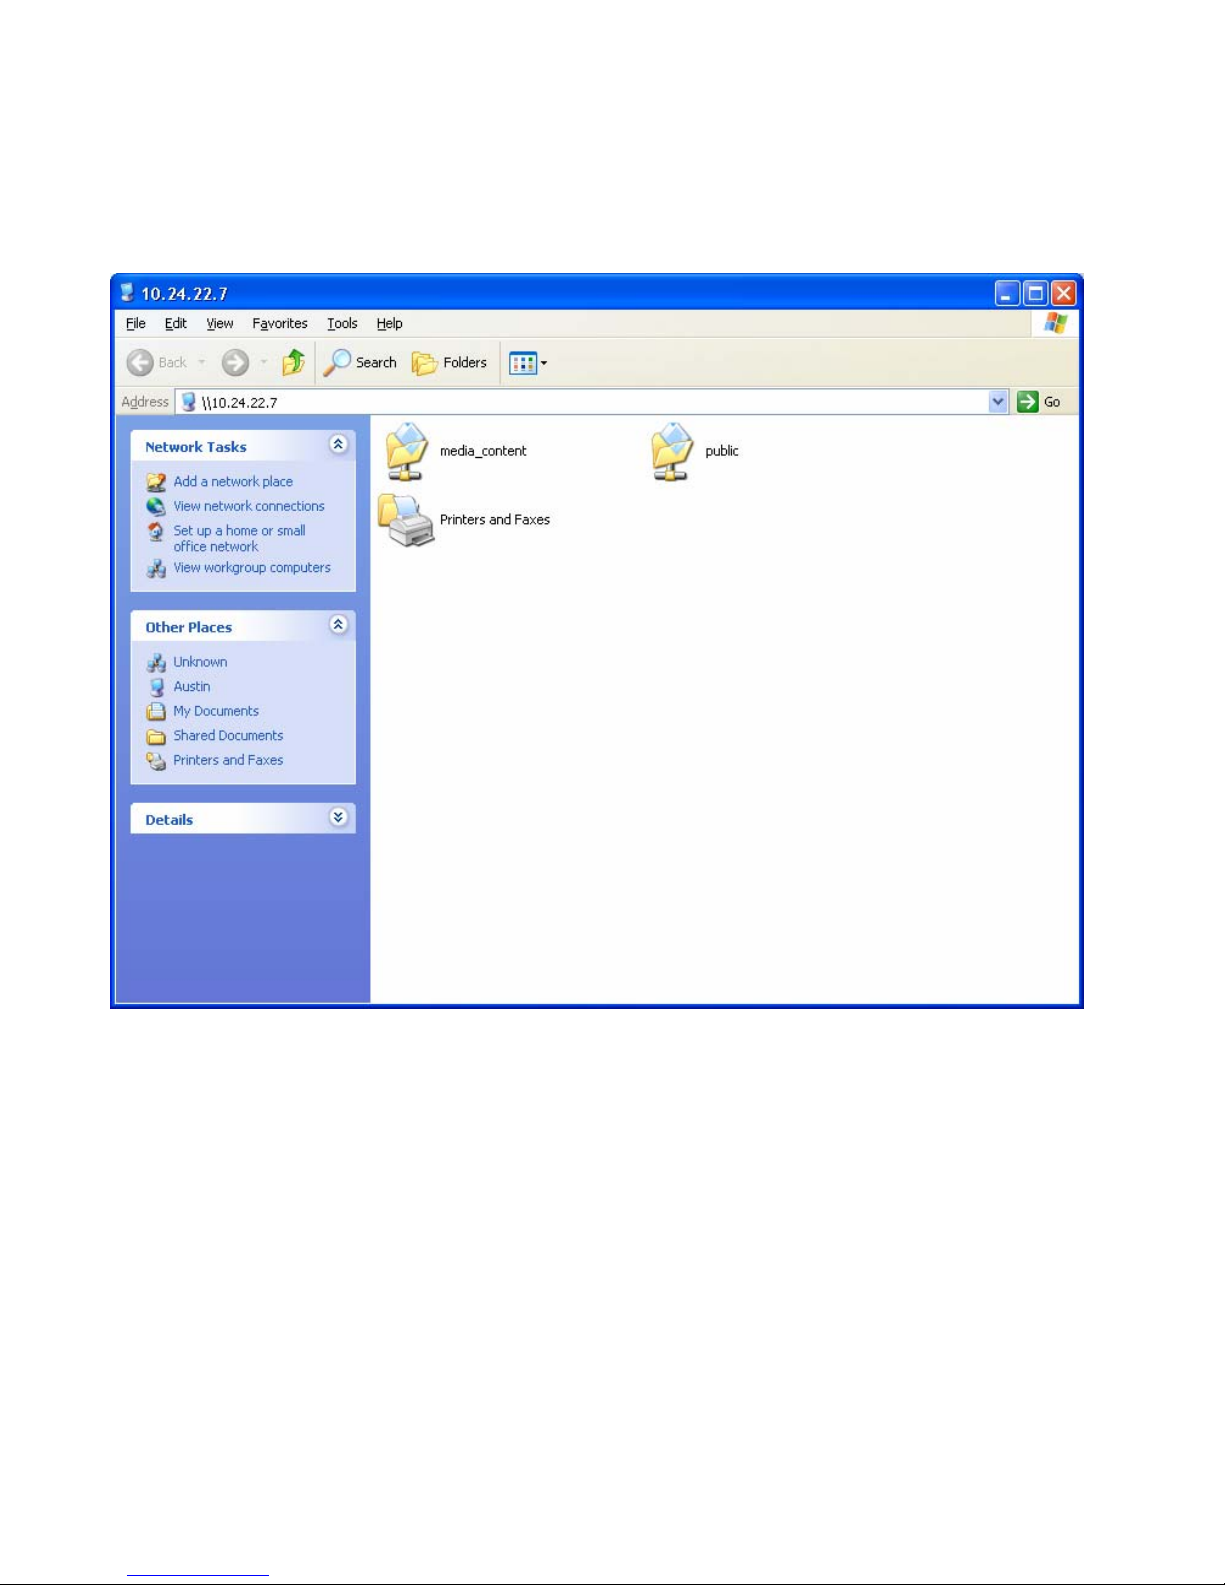
Clicking the correct server name from the list displayed in the System
Configuration window will open the default file folders provided for the user
account.
Please note that in order for media files to be displayed, they must be placed in the
“media_content” folder rather than the “public” folder.
Clicking the Manage button on the System Configuration window will cause your
browser to open. This is described in more detail later in the manual.
20
Setup Wizard
Please follow the steps below to run the initialization wizard:
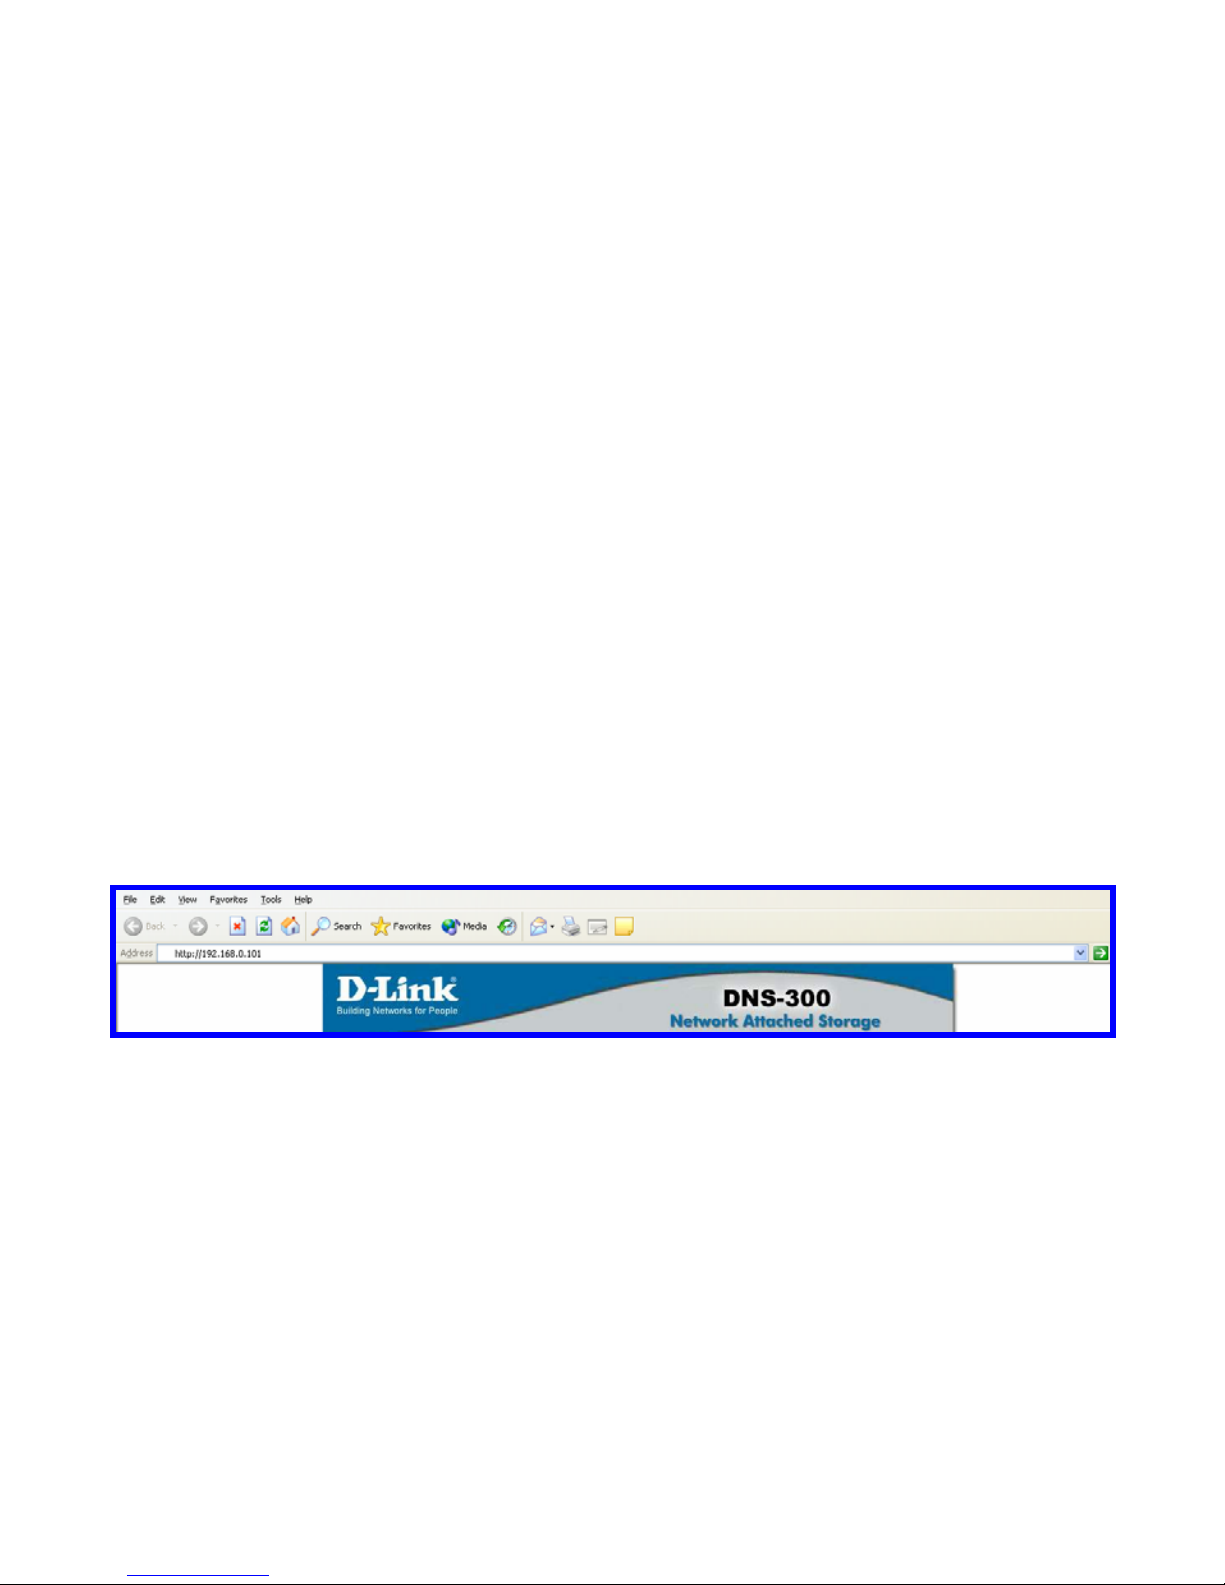
Enter the default IP
1. Connect the device running D-Link DNS-300 to the network.
2. Power the device on.
3. Open the browser, using Microsoft IE (version 6.0 or above is
recommended) or another suitable Web browser.
4. Enter the device default IP “192.168.0.101” (or the new address
you set using the D-Link Storage Configuration Utility) the
address bar.
5. Click Go to continue.
21
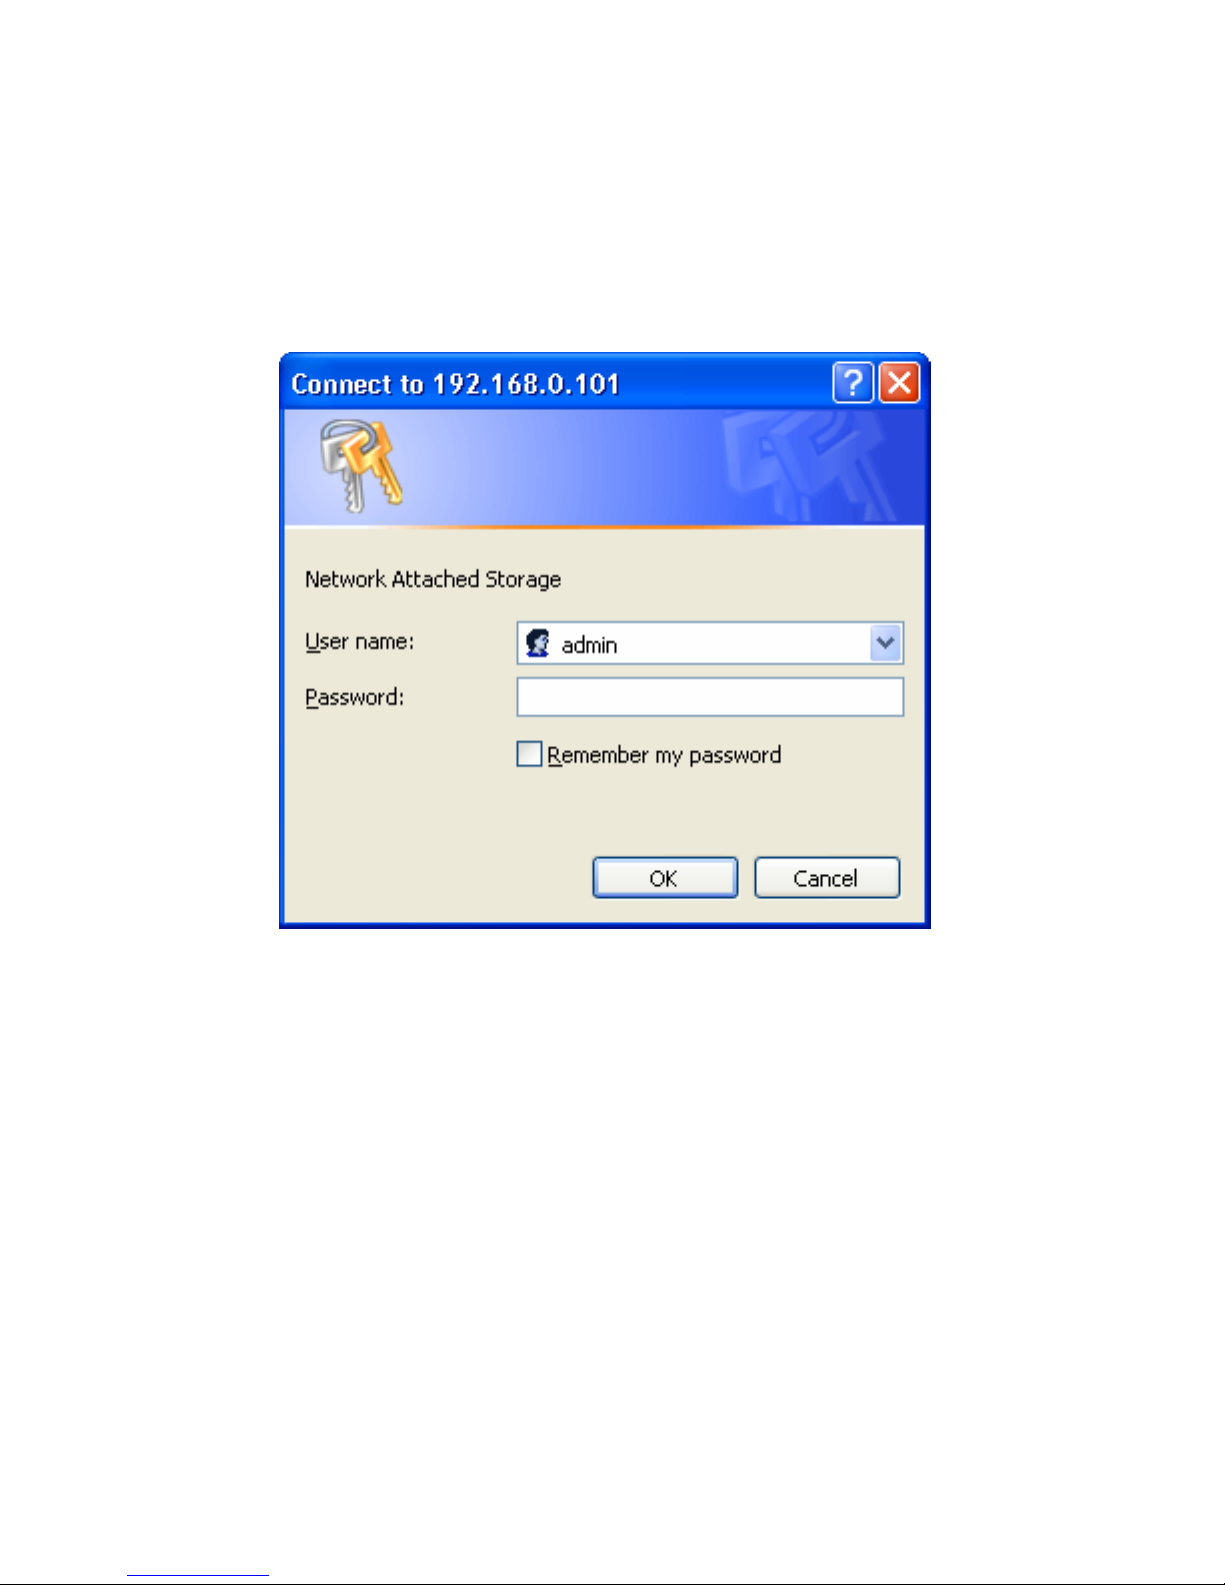
Enter the default user name
In the authentication dialog, please enter “admin” for the default user name and
leave the password blank, and then click OK.
Start the wizard
The Setup Wizard will help you configure the basic settings of the device in a few
steps. The settings will not take effect until you click the Finish button in the last
page.
Click the Run Wizard button to start.
 Loading...