


 Loading...
RCD-N8
NETWORK CD RECEIVER
Owner’s Manual
Preparations
Operations
Information
nSAFETY PRECAUTIONS
CAUTION
RISK OF ELECTRIC SHOCK
DO NOT OPEN
CAUTION:
TO REDUCE THE RISK OF ELECTRIC SHOCK, DO NOT REMOVE COVER (OR BACK). NO USER-SERVICEABLE PARTS INSIDE. REFER SERVICING TO QUALIFIED SERVICE PERSONNEL.
The lightning flash with arrowhead symbol, within an equilateral triangle, is intended to alert the user to the presence of uninsulated “dangerous voltage” within the product’s enclosure that may be of sufficient magnitude to constitute a risk of electric shock to persons.
The exclamation point within an equilateral triangle is intended to alert the user to the presence of important operating and maintenance (servicing) instructions in the literature
accompanying the appliance.
WARNING:
TO REDUCE THE RISK OF FIRE OR ELECTRIC SHOCK, DO NOT EXPOSE THIS APPLIANCE TO RAIN OR MOISTURE.
CAUTION:
HOT SURFACE. DO NOT TOUCH.
The top surface over the internal heat sink may become hot when operating this product continuously.
Hot Do not touch hot areas, especially around the “Hot surface surface mark” and the top panel.
mark
CAUTION:
To completely disconnect this product from the mains, disconnect the plug from the wall socket outlet.
The mains plug is used to completely interrupt the power supply to the unit and must be within easy access by the user.
R&TTE Directive 1999/5/EC
This product may be operated in the following countries; |
|
|||
AT |
BE |
CZ |
DK |
FI |
FR |
DE |
GR |
HU |
IE |
IT |
NL |
PL |
PT |
SK |
ES |
SE |
GB |
NO |
CH |
Indoor use only.
IMPORTANT SAFETY
INSTRUCTIONS
1.Read these instructions.
2.Keep these instructions.
3.Heed all warnings.
4.Follow all instructions.
5.Do not use this apparatus near water.
6.Clean only with dry cloth.
7.Do not block any ventilation openings.
Install in accordance with the manufacturer’s instructions.
8.Do not install near any heat sources such as radiators, heat registers, stoves, or other apparatus (including amplifiers) that produce heat.
9.Protect the power cord from being walked on or pinched particularly at plugs, convenience receptacles, and the point where they exit from the apparatus.
10.Only use attachments/accessories specified by the manufacturer.
11.Use only with the cart, stand, tripod, bracket, or table
specified by the manufacturer, or sold with the apparatus. When a cart is used, use caution when moving the cart/ apparatus combination to avoid injury from tip-over.
12. Unplug this apparatus during lightning storms or when unused for long periods of time.
13.Refer all servicing to qualified service personnel.
Servicing is required when the apparatus has been damaged in any way, such as power-supply cord or plug is damaged, liquid has been spilled or objects have fallen into the apparatus, the apparatus has been exposed to rain or moisture, does not operate normally, or has been dropped.
14.Batteries shall not be exposed to excessive heat such as sunshine, fire or the like.
•DECLARATION OF CONFORMITY
We declare under our sole responsibility that this product, to which this
declaration relates, is in conformity with the following standards: EN60065, EN55013, EN55020, EN61000-3-2, EN61000-3-3, EN300328, EN301489-01, EN301489-17 and EN50371.
Following the provisions of Low Voltage Directive 2006/95/EC and EMC Directive 2004/108/EC, the EC regulation 1275/2008 and its frame work Directive 2009/125/EC for Energy-related Products (ErP).
DENON EUROPE
Division of D&M Germany GmbH
An der Kleinbahn 18, Nettetal,
D-41334 Germany
CAUTION:
USE OF CONTROLS OR ADJUSTMENTS OR PERFORMANCE OF PROCEDURES OTHER THAN THOSE SPECIFIED HEREIN MAY RESULT IN HAZARDOUS RADIATION EXPOSURE.
THIS PRODUCT SHOULD NOT BE ADJUSTED OR REPAIRED BY ANYONE EXCEPT PROPERLY QUALIFIED SERVICE PERSONNEL.
CLASS 1 LASER PRODUCT
LUOKAN 1 LASERLAITE
KLASS 1 LASERAPPARAT
,,CLASS 1 ,, LASER PRODUCT
ADVARSEL: USYNLIG LASERSTRÅLING VED ÅBNING, NÅR SIKKERHEDSAFBRYDERE ER UDE AF FUNKTION. UNDGÅ UDSAETTELSE FOR STRÅLING.
VAROITUS! LAITTEEN KÄYTTÄMINEN MUULLA KUIN TÄSSÄ KÄYTTÖOHJEESSA MAINITULLA TAVALLA SAATTAA ALTISTAA KÄYTTÄJÄN TURVALLISUUSLUOKAN 1 YLITTÄVÄLLE NÄKYMÄMTTÖMÄLLE LASERSÄTEILYLLE.
VARNING: OM APPARATEN ANVÄNDS PÅ ANNAT SÄTT ÄN I DENNA BRUKSANVISNING SPECIFICERATS, KAN ANVÄNDAREN UTSÄTTAS FÖR OSYNLIG LASERSTRÅLNING SOM ÖVERSKRIDER GRÄNSEN FÖR LASERKLASS 1.
ATTENZIONE: QUESTO APPARECCHIO E’ DOTATO DI DISPOSITIVO OTTICO CON RAGGIO LASER.
L’USO IMPROPRIO DELL’APPARECCHIO PUO’ CAUSARE PERICOLOSE ESPOSIZIONI A RADIAZIONI!
A NOTE ABOUT RECYCLING:
This product’s packaging materials are recyclable and can be reused. Please dispose of any materials in accordance with the local recycling regulations.
When discarding the unit, comply with local rules or regulations.
Batteries should never be thrown away or incinerated but disposed of in accordance with the local regulations concerning battery disposal.
This product and the supplied accessories, excluding the batteries, constitute the applicable product according to the WEEE directive.
Preparations
Operations
Information
I
nNOTES ON USE
WARNINGS
•Avoid high temperatures.
Allow for sufficient heat dispersion when installed in a rack.
•Handle the power cord carefully.
Hold the plug when unplugging the cord.
•Keep the unit free from moisture, water, and dust.
•Unplug the power cord when not using the unit for long periods of time.
•Do not obstruct the ventilation holes.
•Do not let foreign objects into the unit.
•Do not let insecticides, benzene, and thinner come in contact with the unit.
•Never disassemble or modify the unit in any way.
•Ventilation should not be impeded by covering the ventilation openings with items, such as newspapers, tablecloths or curtains.
•Naked flame sources such as lighted candles should not be placed on the unit.
•Observe and follow local regulations regarding battery disposal.
•Do not expose the unit to dripping or splashing fluids.
•Do not place objects filled with liquids, such as vases, on the unit.
•Do not handle the mains cord with wet hands.
•When the switch is in the OFF (STANDBY) position, the equipment is not completely switched off from MAINS.
•The equipment shall be installed near the power supply so that the power supply is easily accessible.
•Do not keep the battery in a place exposed to direct sunlight or in places with extremely high temperatures, such as near a heater.
1.IMPORTANT NOTICE: DO NOT MODIFY THIS PRODUCT
This product, when installed as indicated in the instructions contained in this manual, meets R&TTE directive requirements. Modification of the product could result in hazardous Radio and EMC radiation.
2.CAUTION
•Separation distance of at least 20 cm must be maintained between the antenna of this product and all persons.
•This product and its antenna must not be co-located or operating in conjunction with any other antenna or transmitter.
n CAUTIONS ON INSTALLATION
z
z z
z
Wall
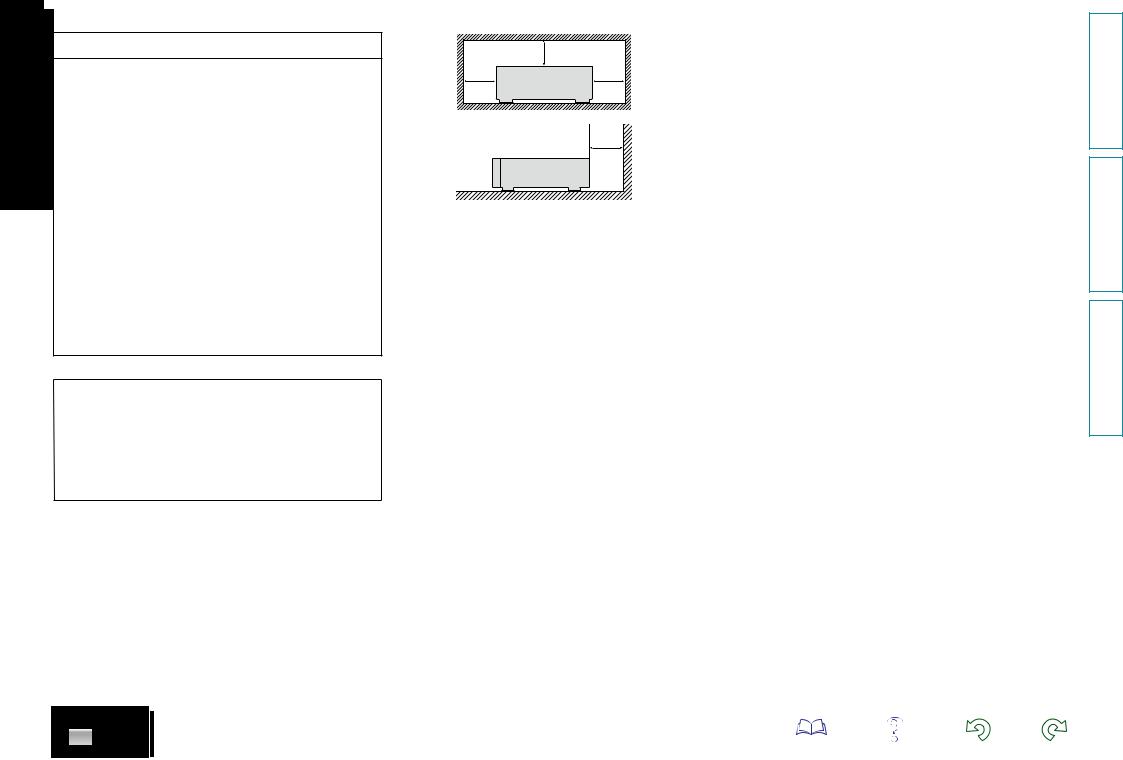
zz For proper heat dispersal, do not install this unit in a confined space, such as a bookcase or similar enclosure.
•More than 0.3 m is recommended.
•Do not place any other equipment on this unit.
II
Preparations
Operations
Information

Getting started
Thank you for purchasing this DENON product. To ensure proper operation, please read these owner’s manual carefully before using the product. After reading them, be sure to keep them for future reference.
Contents
Getting started···············································································1 Accessories···················································································2 Main features················································································2 Cautions on handling·····································································2 Discs······························································································3 Remote operation ·········································································4
Preparations·············································································5
Connections···················································································6 Connecting the speakers·······························································6 Connecting an analog device·························································7 Connecting a digital device····························································7 Connecting a portable player·························································7 Connecting an antenna··································································8 Connecting to a home network (LAN)···········································9 Connecting the power cord·························································10
Setup·····························································································11 Menu map···················································································11 Setting the first setup [Quick Setup]···········································12 Setting the general [General]·······················································12 Setting the network [Network]····················································17
Operations···············································································22
Operations····················································································23 Preparations················································································23 Operations possible during playback···········································23 CD playback·················································································25 MP3 and WMA files playback·····················································28 Network audio playback······························································29 Tuning in radio stations·······························································33 Favorite function ·········································································36 iPod playback···············································································37 USB memory device playback·····················································40 Portable audio player playback····················································41 Listening to ANALOG IN·····························································41 Listening to DIGITAL IN······························································42 AirPlay function···········································································43 Remote play function··································································45 Web control function···································································46 Other functions···········································································48
Information·············································································50
Information···················································································51 Part names and functions····························································51 iPod·····························································································56 MP3 and WMA············································································56 USB memory device···································································57 Network audio·············································································58
Explanation terms·······································································59 Troubleshooting··········································································61 Specifications···············································································65
1
Preparations
Operations
Information
Accessories
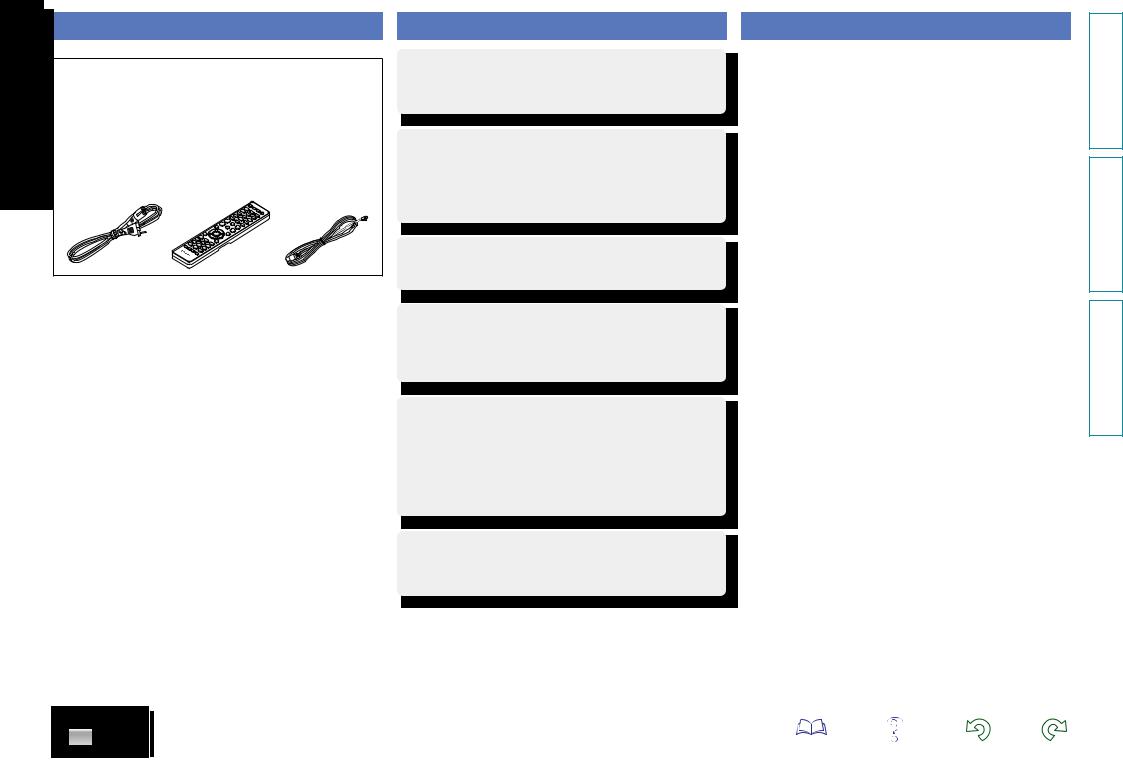
Check that the following parts are supplied with the product.
q Quick setup guide.................................................................... |
|
1 |
w CD-ROM (Owner’s manual)..................................................... |
|
1 |
e Safety Instructions................................................................... |
|
1 |
r Service network list................................................................. |
|
1 |
t Power cord............................................................................... |
|
1 |
y Remote control (RC-1174)....................................................... |
|
1 |
u R03/AAA batteries................................................................... |
|
2 |
i FM indoor antenna................................................................... |
|
1 |
t |
y |
i |
Main features
Big sound in Small body
•Full digital sound
•High power output (65 W x 2 channels, 4 Ω)
•High quality sound (LPCM/FLAC 192 kHz/24 bit)
Compatible with “Denon Remote App” for performing basic operations of the unit.
“Denon Remote App” is application software that allows you to perform basic operations with an iPod touch, iPhone or Android smartphone such as turning the unit ON/OFF, controlling the volume, and switching the sources.
Supports AirPlay®
This unit also supports AirPlay that lets you stream your music library from an iPhone®, iPad®, iPod touch® or iTunes.
Wi-Fi compatibility
This unit is equipped with a built-in diversity antenna, and is certified under WMM (Wi-Fi Multimedia) for efficient wireless connectivity. In addition, easy wireless connection is possible by pressing the WPS button.
iPod®/iPhone® charge function
You can charge your iPhone/iPod by connecting it to the dock connector or USB port. Even if the unit enters the power standby mode, the iPod/iPhone will continue to be charged, and when the iPhone/iPod is fully charged the unit automatically stops supplying power for charging. In addition, if you connect your iPhone/iPod to the dock connector while the unit is in power standby mode, the iPhone/iPod will automatically begin charging.
3 Line OELD
Incorporated 3-line display to show file information or menu items legibly. The display can enlarge letters of selected items and show icons clearly. The menu selection supports seven languages.
Cautions on handling
•Before turning the power switch on
Check once again that all connections are correct and that there are no problems with the connection cables.
•Power is supplied to some of the circuitry even when the unit is set to the standby mode. When going on vacation or leaving home for long periods of time, be sure to unplug the power cord from the power outlet.
•Proper ventilation
If the unit is left in a room full of smoke from cigarettes, etc., for long periods of time, the surface of the optical pickup may get dirty, preventing it from receiving signals properly.
•About condensation
If there is a major difference in temperature between the inside of the unit and its surroundings, condensation may form on parts inside the unit, causing it to fail to operate properly.
If this happens, let the unit sit for an hour or two with the power turned off and wait until there is little difference in temperature before using the unit.
•Cautions on using mobile phones
Using a mobile phone near this unit may result in noise. If that occurs, move the mobile phone away from the unit when it is in use.
•Moving the unit
Turn off the power and unplug the power cord from the power outlet. Next, disconnect the cables connected to other system units before moving the unit.
•About care
•Wipe the cabinet and control panel clean with a soft cloth.
•Follow the instructions when using a chemical cleaner.
•Benzene, paint thinner or other organic solvents as well as insecticide may cause material changes and discoloration if brought into contact with the unit, and should therefore not be used.
Preparations
Operations
Information
2
Discs
Discs playable on this unit Loading discs Cautions on handling
q Music CDs
Discs marked with the logo below can be played in this unit.
w CD-R/CD-RW
NOTE
•Discs in special shapes (heart-shaped discs, octagonal discs, etc.) cannot be played. Do not attempt to play them, as doing so can damage the unit.
•Some discs and some recording formats cannot be played.
•Non-finalized discs cannot be played.
•What is finalization?
Finalization is the process that makes recorded CD-R/CD-RW discs playable on compatible players.
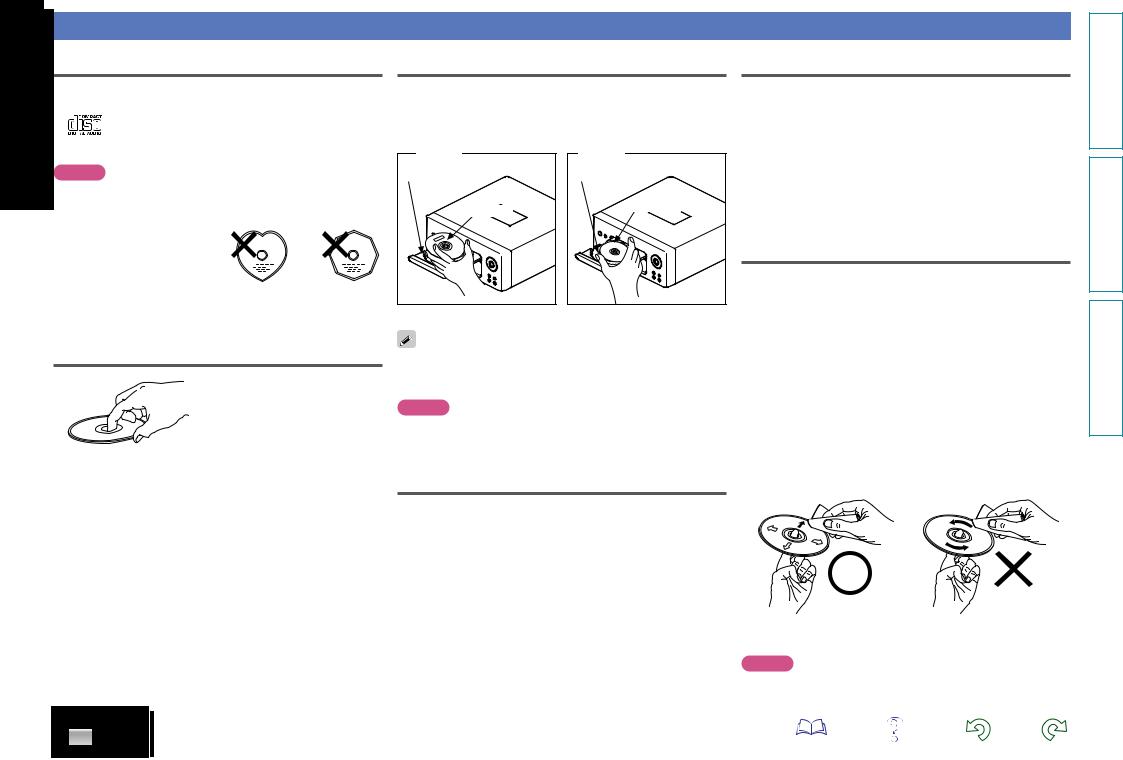
Holding discs
Do not touch the signal surface.
•Place the disc in the tray, label side up. |
•Do not get fingerprints, oil or dirt on discs. |
||
•Make sure the disc tray is fully open when inserting the disc. |
•Take special care not to scratch discs when removing them from |
||
•Place the discs flat, 12 cm discs in the outer tray guide (Figure 1), 8 |
their cases. |
||
cm discs in the inner tray guide (Figure 2). |
•Do not bend or heat discs. |
||
Figure 1 |
Figure 2 |
•Do not enlarge the hole in the center. |
|
•Do not write on the labeled (printed) surface with ball-point pens, |
|||
Outer tray guide |
Inner tray guide |
pencils, etc., or stick new labels on discs. |
|
•Water droplets may form on discs if they are moved suddenly from |
|||
|
|
||
|
8 cm disc |
a cold place (outdoors for example) to a warm place, but do not try to |
|
12 cm disc |
dry them off using a hairdryer, etc. |
||
|
|
||
|
|
Cautions on storing discs |
|
|
|
•Be sure to remove discs after using them. |
|
|
|
•Be sure to store discs in their cases to protect them from dust, |
|
•Place 8 cm discs in the inner tray guide without using an adapter. |
scratches, warping, etc. |
||
•Do not store discs in the following places: |
|||
|
|
1. Places exposed to direct sunlight for long periods of time |
|
|
|
2. Dusty or humid places |
|
•“Unsupported” is displayed if a disc that cannot be played is loaded. |
3. Places exposed to heat from heaters, etc. |
||
|
|||
•“No Disc” is displayed if the disc is loaded upside-down or if no disc
is loaded. |
Cleaning discs |
NOTE |
Do not push the disc tray in by hand when the power is turned off. Doing so could damage the set.
Cautions on loading discs
•Only load one disc at a time. Loading two or more discs can damage the unit or scratch the discs.
•Do not use cracked or warped discs or discs that have been repaired with adhesive, etc.
•Do not use discs on which the sticky part of cellophane tape or labels is exposed or on which there are traces of where labels have been removed. Such discs can get caught inside the player and damage it.
•If there are fingerprints or dirt on a disc, wipe them off before using the disc. Fingerprints and dirt can impair sound quality and cause interruptions in playback.
•Use a commercially available disc cleaning set or a soft cloth to clean discs.
Gently wipe the disc from the Do not wipe in a circular motion. inside towards the outside.
NOTE
Do not use record spray, antistatic agents, benzene, thinner or other solvents.
3
Preparations
Operations
Information

Remote operation
|
About the remote control |
nnOperating range of the remote control |
Denon Remote App |
|||||
|
|
|
|
Point the remote |
it. |
|
||
|
|
nnInserting the batteries |
|
|
|
|
Denon Remote App is a unique application developed for the iPhone, |
|
|
|
|
|
|
|
iPod touch and Android smartphone. This application enables you to |
||
|
|
q Remove the remote |
w Set two R03/AAA batteries in |
|
|
|
control DENON network devices that are connected to your home |
|
|
|
control’s rear cover. |
the battery compartment in the |
|
|
|
network. Install the App onto your iPhone, iPod touch or Android |
|
|
|
|
indicated direction. |
|
|
|
smartphone to control this device. |
|
|
|
|
|
|
|
|
|
|
|
|
|
|
|
|
|
|
|
|
|
|
|
|
|
|
iPod |
18:46 |
|
|
|
|
|
|
|
|
|
|
|
|
|
|
|
|
|
|
|
|
|
|
||
|
|
|
|
|
|
|
|
|
|
|
|
|
|
|
|
|
CEOL |
Player |
||
|
|
|
|
|
|
|
|
|
|
|
|
|
|
|
|
|
View |
|||
|
|
|
|
|
|
|
|
|
|
|
|
|
|
|
|
|
|
|
|
|
e Put the rear cover back on.
NOTE
•Insert the specified batteries in the remote control.
•Replace the batteries with new ones if the set does not operate even when the remote control is operated close to the unit. (The supplied batteries are only for verifying operation. Replace them with new batteries at an early date.)
•When inserting the batteries, be sure to do so in the proper direction, following the q and w marks in the battery compartment.
•To prevent damage or leakage of battery fluid:
•Do not use a new battery together with an old one.
•Do not use two different types of batteries.
•Do not attempt to charge dry batteries.
•Do not short-circuit, disassemble, heat or dispose of batteries in flames.
•Do not keep the battery in a place exposed to direct sunlight or in places with extremely high temperatures, such as near a heater.
•If the battery fluid should leak, carefully wipe the fluid off the inside of the battery compartment and insert new batteries.
•Remove the batteries from the remote control if it will not be in use for long periods.
•Used batteries should be disposed of in accordance with the local regulations regarding battery disposal.
•The remote control may function improperly if rechargeable batteries are used.
Approx. 7 m
30° 30°
Internet Radio
NOTE
•The set may function improperly or the remote control may not operate if the remote control sensor is exposed to direct sunlight, strong artificial light from an inverter type fluorescent lamp or infrared light.
•When using 3D video devices that transmit radio communication signals (such as infrared signals etc) between the various units (such as the monitor, 3D glasses, 3D transmitter unit etc), the remote control may not operate due to interference from those radio communication signals. If this occurs, adjust the direction and distance of the 3D communication for each unit, and check that the remote control operation is not affected by these signals.
Favorites |
Internet Radio Music Server |
USB |
|
Tuner |
Digital In |
CD |
iPod Player |
15
•Bidirectional communication is performed.
•The Denon Remote App can be downloaded for free from the Apple App Store or Google Play store.
Preparations
Operations
Information
4

Preparations
Preparations
Here, we explain the connections and basic operation methods for this unit.
FConnections vpage 6
FSetup vpage 11
5
Preparations
Operations
Information

Connections
NOTE
•Do not plug in the power cord until all connections have been completed.
•When making connections, also refer to the operating instructions of the other components.
•Be sure to connect the left and right channels properly (left with left, right with right).
•Do not bundle power cords together with connection cables. Doing so can result in humming or noise.
Cables used for connections
Audio cable (sold separately) |
|
Subwoofer cable |
|
Speaker cable |
|
Optical cable |
|
L |
L |
Audio cable |
|
R |
R |
Stereo mini-plug cable |
|
Connecting the speakers
Speakers
(L)(R)
Subwoofer with built-in amplifier
w |
q |
w |
q |
IN |
|
Connecting the speaker cables
Carefully check the left (L) and right (R) channels and + (red) and – (black) polarities on the speakers being connected to this unit, and be sure to interconnect the channels and polarities correctly.
1 Peel off about 10 mm of sheathing from the tip of the speaker cable, then either twist the core wire tightly or terminate it.
2 Turn the speaker terminal counterclockwise to loosen it.
3 Insert the speaker cable’s core wire to the hilt into the speaker terminal.
4
NOTE
•Disconnect this unit’s power plug from the power outlet before connecting the speakers. Also, turn off the subwoofer.
•Use speakers with an impedance of 4 to 16 Ω. The protection circuit may be activated if speakers with an impedance other than specified are used.
•Connect the speaker cables so they do not stick out of the speaker terminals. The protection circuit may be activated if the wires touch the rear panel or if the + and – sides touch each other (vpage 59 “Protection circuit”).
•Never touch the speaker terminals while the power supply is connected. Doing so could result in electric shock.
Preparations
Operations
Information
6
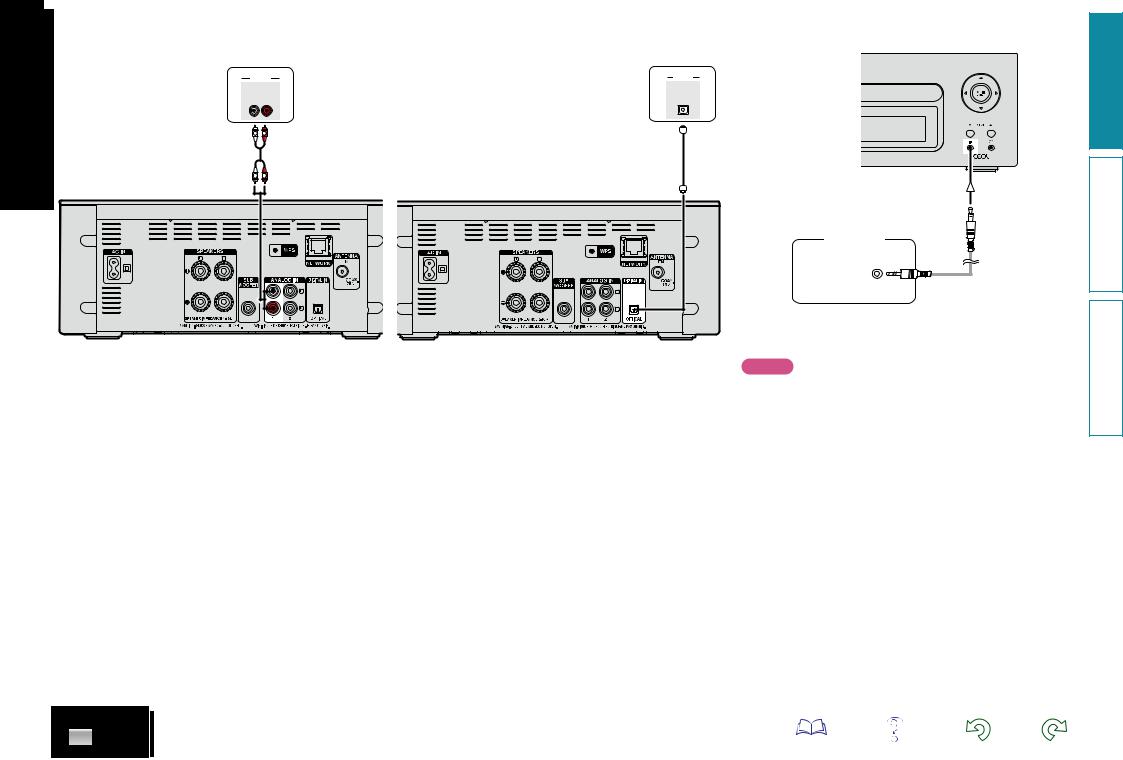
Connecting an analog device |
|
Connecting a digital device |
|
|
|
Connecting a portable player |
||
|
|
|
|
|
|
|
|
|
|
Analog |
|
|
Digital |
||||
|
device |
|
|
|
device |
|
|
|
AUDIO |
AUDIO |
|
AUDIO |
OPTICAL |
|
OUT |
OUT |
|
L |
R |
|
L |
R |
|
L |
R |
|
|
|
Portable |
|
|
Audio |
|
|
HEADPHONE |
Connect this unit and portable audio player using a separately sold mini-stereo audio cable.
NOTE
After you connect a portable audio player, the input source automatically switches to “Portable In”.
Preparations
Operations
Information
7
Connecting an antenna
•Connect the FM antenna supplied with the unit to enjoy listening to radio broadcasts.
•After connecting the antenna and receiving a broadcast signal (vpage 33 “Listening to FM broadcasts”), fix the antenna with tape in a position where the noise level becomes minimal.
Direction of broadcasting station

 FM outdoor
  antenna
 75 Ω coaxial
  cable
cable
FM indoor antenna (Supplied)
NOTE
•Do not connect two FM antennas simultaneously.
•If you are unable to receive a good broadcast signal, we recommend installing an outdoor antenna. For details, inquire at the retail store where you purchased the unit.
8
Preparations
Operations
Information
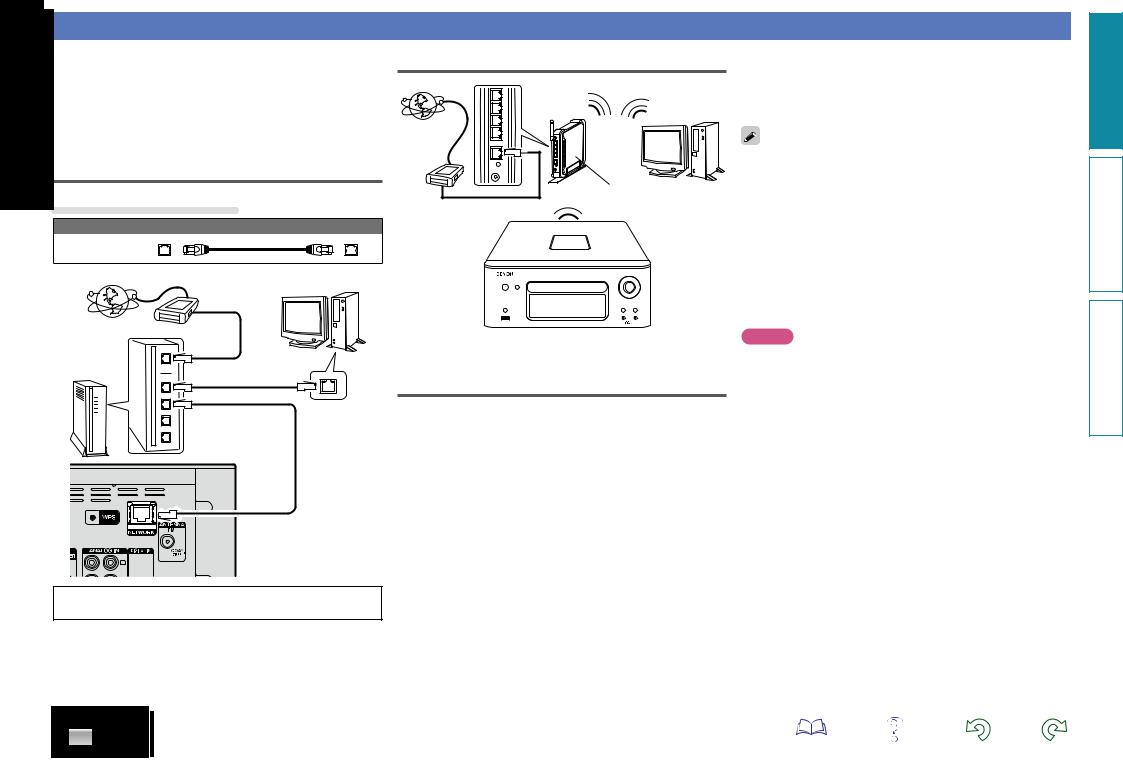
Connecting to a home network (LAN)
•This unit lets you play via your home network (LAN) music files stored on a computer and music content such as that from Internet radio.
•You can update by downloading the latest firmware from the DENON website.
For more information, see “Update” (vpage 14).
•See “Setting the network [Network]” (vpage 17) for more information on network setting.
Wired LAN
Cables used for connections
Cable (sold separately)
Ethernet cable
|
|
Computer |
|
Modem |
|
Internet |
|
|
Router |
To WAN side |
|
|
To LAN port |
|
|
To LAN port |
LAN port/ |
|
Ethernet |
|
|
|
|
|
|
connector |
For connections to the Internet, contact an ISP (Internet Service Provider) or a computer shop.
Wireless LAN
Internet |
Modem |
To WAN side
Computer
Router with
 access point
zz This unit comes with a built-in
Wi-Fi antenna.
Required system
nnBroadband internet connection
nnModem
Device that connects to the broadband circuit and conducts communications on the Internet.
A type that is integrated with a router is also available.
nnRouter
When using this unit, we recommend you use a router equipped with the following functions:
•Built-in DHCP server
This function automatically assigns IP addresses on the LAN.
•Built-in 100BASE-TX switch
When connecting multiple devices, we recommend a switching hub with a speed of 100 Mbps or greater.
•When using with a wireless LAN, prepare a broadband router with built-in access point.
•When using a WPS (Wi-Fi Protected Setup) compatible router, easy wireless connection is possible by pressing this unit’s WPS button (vpage 19).
nnEthernet cable (CAT-5 or greater recommended)
•Use only a shielded STP or ScTP LAN cable which is available at retailer.
Some flat type Ethernet cables are easily affected by noise. We recommend using a normal type cable.
•If you have an Internet provider contract for a line on which network settingsaremademanually,makethesettingsat“Networkconnecting (when “DHCP” settings is “Off”)” (vpage 17).
•With this unit, it is possible to use the DHCP and Auto IP functions to make the network settings automatically.
•When using this unit with the broadband router’s DHCP function enabled, this unit automatically performs the IP address setting and other settings.
When using this unit connected to a network with no DHCP function, make the settings for the IP address, etc., at “Network connecting (when “DHCP” settings is “Off”)” (vpage 17).
•When setting manually, check the setting contents with the network administrator.
NOTE
•A contract with an ISP is required to connect to the Internet.
•No additional contract is needed if you already have a broadband connection to the Internet.
•The types of routers that can be used depend on the ISP. Contact an ISP or a computer shop for details.
•DENON assumes no responsibility whatsoever for any communication errors or troubles resulting from customer’s network environment or connected devices.
•This unit is not compatible with PPPoE. A PPPoE-compatible router is required if you have a contract for a type of line set by PPPoE.
•Do not connect an Ethernet connector directly to the LAN port/ Ethernet connector on your computer.
•To listen to audio streaming, use a router that supports audio streaming.
9
Preparations
Operations
Information
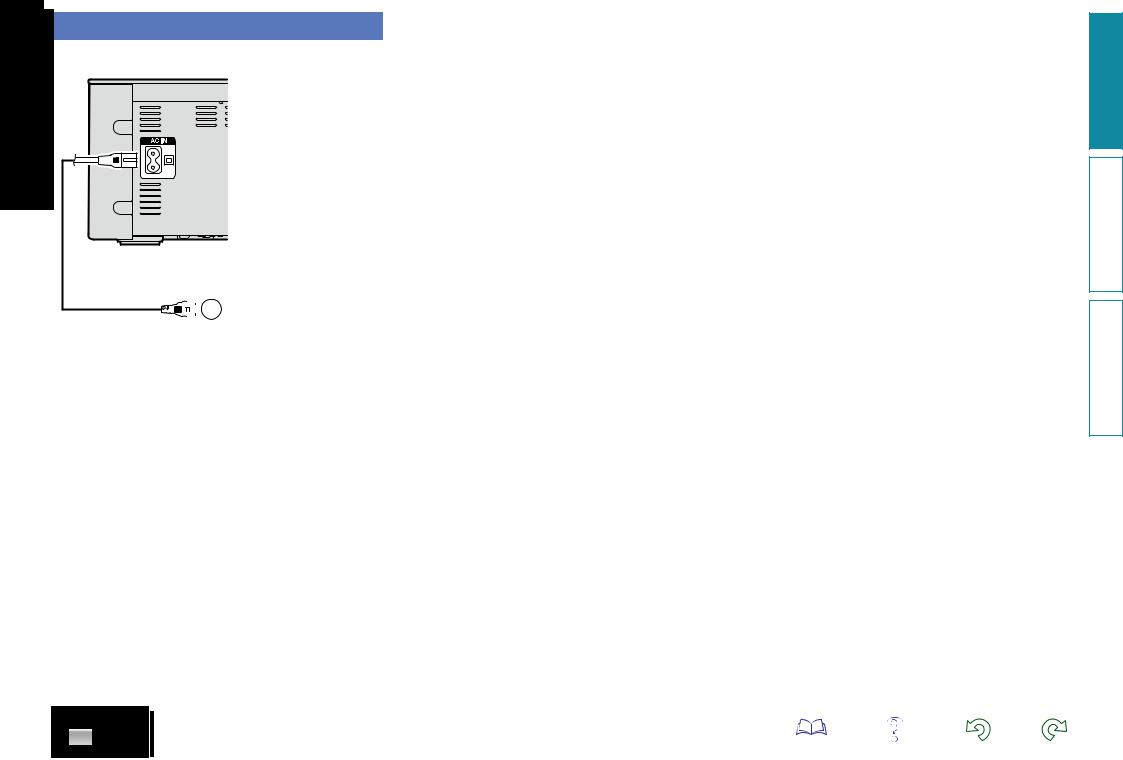
Connecting the power cord
When all of the connections are completed, insert the power plug into the power outlet.
Power cord
(supplied) 
 To household power outlet


 (AC 230 V, 50/60 Hz)
10
Preparations
Operations
Information
 Setup
Setup
Menu map
|
|
|
Setting items |
|
Detailed items |
Description |
Page |
|||
|
|
Quick Setup |
|
|
|
|
|
|
|
|
|
|
|
|
|
|
|
|
|
Performs the network settings using a Wizard style window. |
|
|
|
|
[Setup] |
|
|
Quick Setup |
|
|
– |
|
|
|
|
Quick Setup |
|
|
|
For details on the operations, see the separate “Quick setup guide”. |
|||
|
|
|
|
|
|
|
|
|||
|
|
|
:enter |
:back |
|
|
|
|
|
|
|
|
|
|
|
|
|
|
|
|
|
|
|
General |
|
|
Alarm |
|
|
Sets the timer playback. |
12 |
|
|
|
|
|
|
|
Clock |
|
|
Sets the current time |
13 |
|
|
|
[Setup] |
|
|
|
|
|||
|
|
|
|
|
Speaker Optimization |
|
|
Sets the optimum playback properties of the speakers SC-N8, sold separately. |
14 |
|
|
|
|
General |
|
|
|
|
|||
|
|
|
|
|
Language |
|
|
Sets the language. |
14 |
|
|
|
|
:enter |
:back |
|
Auto-Standby |
|
|
Sets the unit power to standby when the unit is not in use. |
14 |
|
|
|
|
|
|
|
Update |
|
Updates the firmware. |
14 |
|
|
|
|
|
|
Firmware |
Notification |
|
Set the Update and Upgrade notification on/off. |
15 |
|
|
|
|
|
|
|
Add New Feature |
Displays new functions that can be downloaded, and upgrades functions. |
16 |
|
|
|
Network |
|
|
Network Information |
|
|
Displays various information about the network. |
– |
|
|
|
|
|
|
|
Network Control |
|
|
Performs the ON/OFF settings for the network function when in standby mode. |
20 |
|
|
|
[Setup] |
|
|
|
|
|||
|
|
|
|
|
Friendly Name |
|
|
Edits a name displayed on the Internet. |
21 |
|
|
|
|
Network |
|
|
|
||||
|
|
|
|
Last.fm Display |
|
|
Disables the display of Last.fm on the menu. |
21 |
||
|
|
|
:enter |
:back |
|
|
|
|
Performs the settings for a wired or wireless LAN. |
17 |
|
|
|
|
|
|
|
|
|
Performs the settings for a wired LAN. |
17 |
|
|
|
|
|
|
|
When making |
DHCP (On) or DHCP (Off) |
Performs the DHCP setting. |
17 |
|
|
|
|
|
|
|
IP Addressz |
Performs the IP address setting. |
17 |
|
|
|
|
|
|
|
|
wired |
|||
|
|
|
|
|
|
|
Subnet Maskz |
Performs the subnet mask setting. |
17 |
|
|
|
|
|
|
|
|
connection |
|||
|
|
|
|
|
|
|
Gatewayz |
Performs the gateway setting. |
17 |
|
|
|
|
|
|
|
|
|
|||
|
|
|
|
|
|
Settings |
Wired Setup |
Primary DNSz |
Performs the primary DNS setting. |
17 |
|
|
|
|
|
|
Secondary DNSz |
Performs the secondary DNS setting. |
17 |
||
|
|
|
|
|
|
|
|
|||
|
|
|
|
|
|
|
|
Proxy |
Performs the proxy setting. |
18 |
|
|
|
|
|
|
|
|
Test Connection |
Performs the wired LAN connection. |
17 |
|
|
|
|
|
|
|
When |
|
Performs the wireless LAN connection setting. |
18 |
|
|
|
|
|
|
|
Auto-Scan |
Selects and sets the wireless connections from the access point list. |
18 |
|
|
|
|
|
|
|
|
making Wi-Fi |
|||
|
|
|
|
|
|
|
WPS (Wi-Fi Protected Setup) |
Sets the wireless connection using WPS (Wi-Fi Protected Setup). |
19 |
|
|
|
|
|
|
|
|
connection |
|
|
|
|
|
|
|
|
|
|
Manual |
Sets the wireless connection manually. |
20 |
|
zDisplayed when the “DHCP” setting is “Off” (vpage 17).
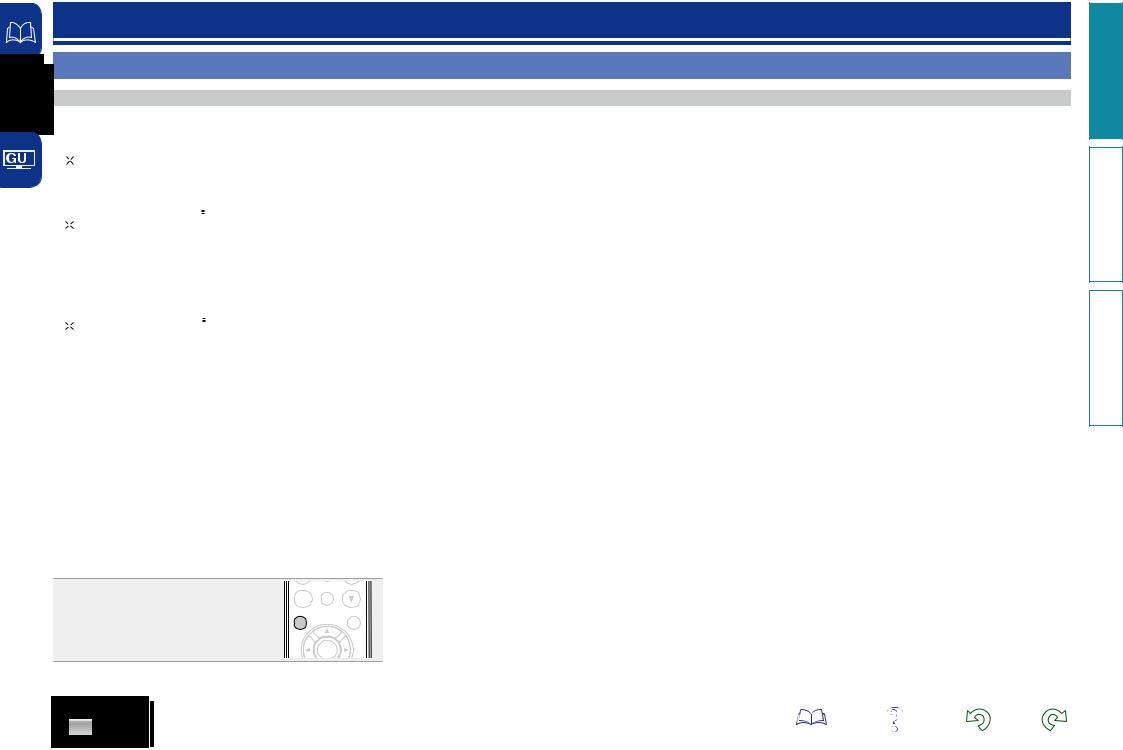
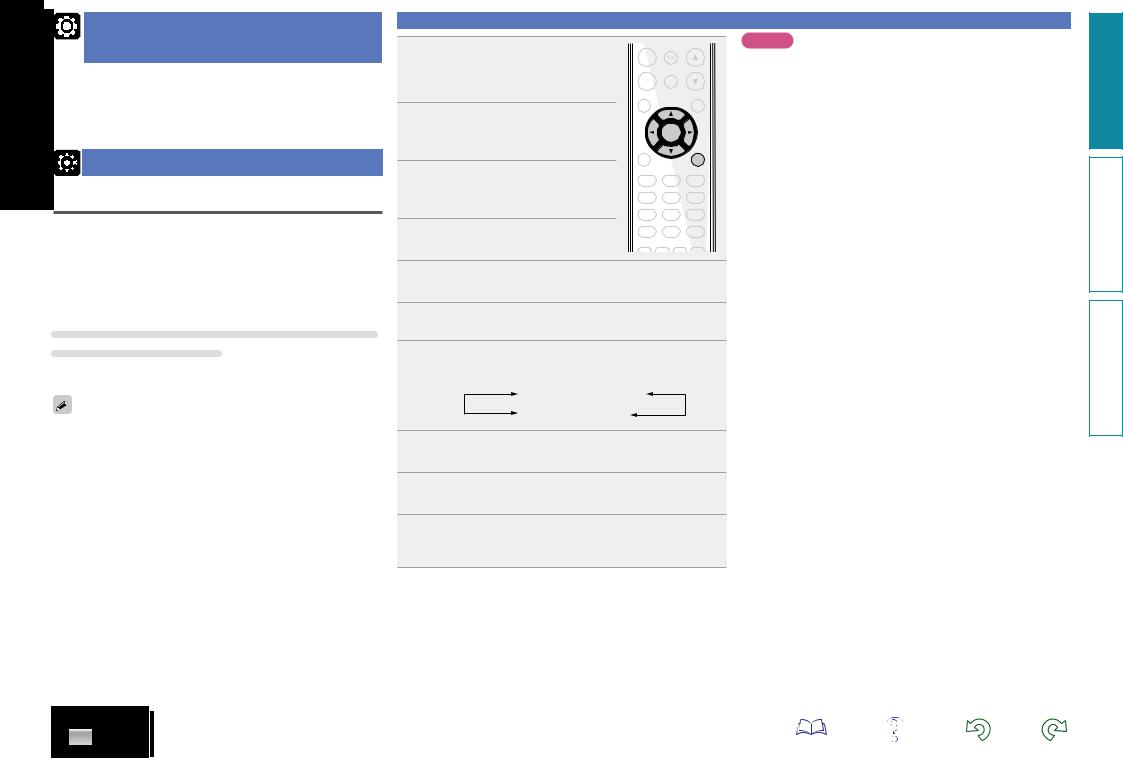
nnTo back to the top of the menu, during menu operation
Press TOP MENU. |
CALL |
SDB |
|
FAVORITE |
VOLUME |
|
|
TONE |
|
TOP MENU |
INFO |
|
|
ENTER |
11
Preparations
Operations
Information
Setting the first setup [Quick Setup]
•For details on “Quick Setup” operations, see the separate “Quick setup guide”.
•If you cancelled “Quick Setup” menu or changed the network environment, perform “Setup” – “Quick Setup”.
Setting the general [General]
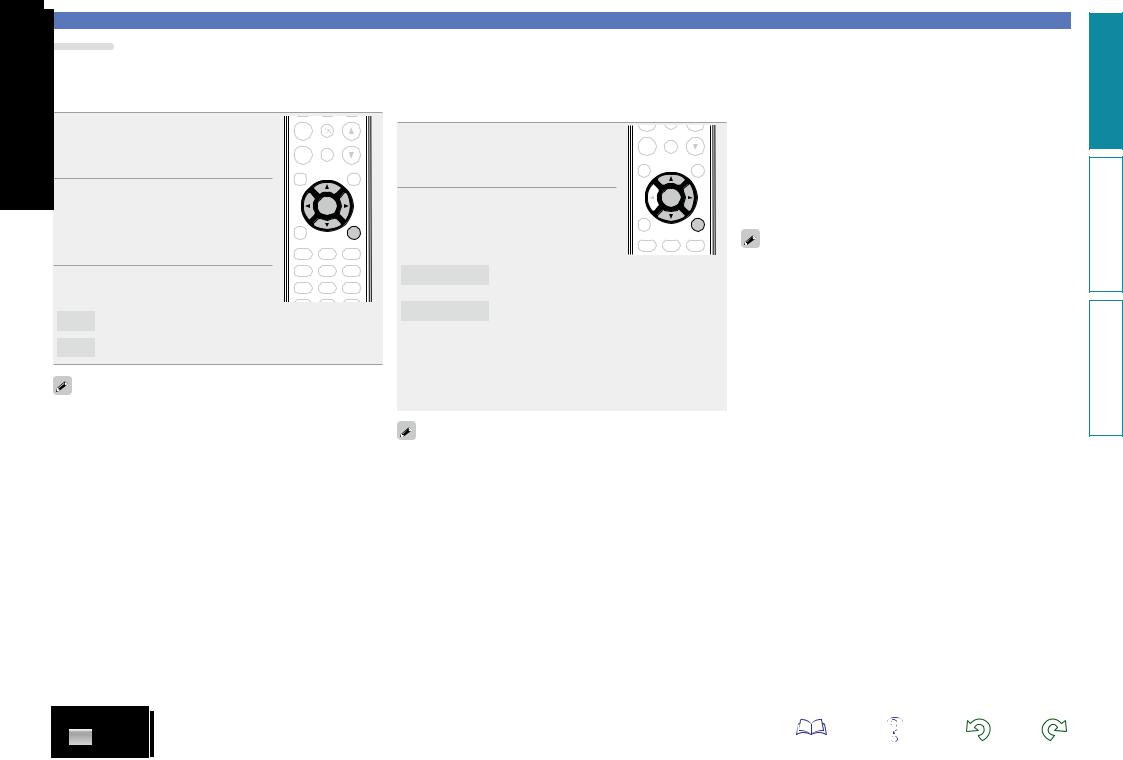
Alarm
This device can playback using the alarm playback (everyday alarm, once alarm).
•This unit’s alarm does not support exit time settings for alarm playback.
nnAlarm operation when the time settings for alarms overlap
When the once alarm and everyday alarm are both set (sleep timer is not set)
•Automatically starts playback at the earlier alarm start time set for either of the alarms.
If the current time is not set, enter alarm setting mode to get time setting mode.
nnSetting the everyday alarm and once alarm
•Everyday alarm (“Everyday”)
Playback starts at the set times each day.
•Once alarm (“Once”)
Playback starts once only at the set times.
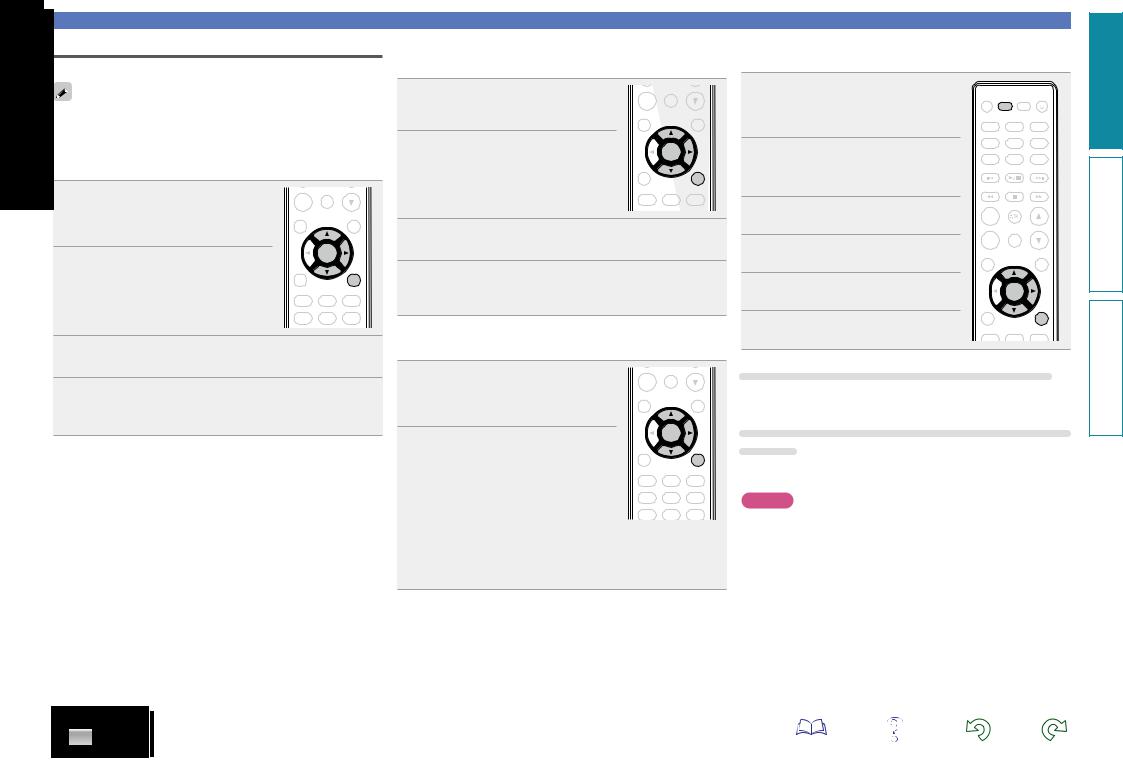
Press SETUP. |
|
|
1 Turns on the Menu settings mode |
|
MUTE |
ADD |
|
|
FAVORITE |
VOLUME |
|
and the Menu appears on the display |
CALL |
SDB |
(vpage 11 “Menu map”). |
|
TONE |
TOP MENU |
INFO |
2 Use ui and ENTER to select
“General” – “Alarm”, then press
ENTER or p.
3 Use ui to select the alarm mode, and use opto select “On” or “Off” then press ENTER.
4 Use ui to select “Set Time”, then press ENTER or p.
|
|
ENTER |
|
SEARC |
|
|
SETUP |
1 |
. / |
2 ABC |
3 DEF |
4 |
GHI |
5 JKL |
6 MNO |
7 PQRS |
8 TUV |
9WXYZ |
|
+10a/A |
0 * |
CLEAR |
|
RANDOM |
REPEAT PROGRAM |
MODE |
|
5 Use uito select “hours” – “minutes” for the alarm start time, then press ENTER or p.
6 Use uito select “Source”, then press ENTER or p.
7 Use uito select the input source, then press ENTER or p.
CD 
 Favorite
iPod 
 USB
USB
8 Usep. ui to select “Volume”, then press ENTER or
9 Use ui to select the volume “0 – 60”, then press
ENTER or p.
10 Press POWER Xto set the power to standby.
Alarm standby mode is set, and the power indicator lights orange.
12
Setting the general [General]
NOTE
•If the unit or remote control is not operated for 90 minutes or more when the alarm is set to on, the standby mode is activated.
•When using alarm playback on an iPod touch or iPhone, set the iPod touch or iPhone to “Sleep” mode. If the power is switched off using the power off operation, alarm playback cannot be used.
For details on the “Sleep” mode of the iPod touch or iPhone, see the instruction manuals of the products or related web pages.
nnSetting the alarm to on or off
Perform the operations at “Alarm” (vpage 12).
•When set to “OFF”, time operation is disabled, but the alarm settings remain unchanged.
nnTo check the alarm settings nnTo change the alarm settings
nnTo change the setting while setting the alarm
Press o.
The setting returns to the previous step. Display the setting you want to change, then make the desired setting.
Preparations
Operations
Information
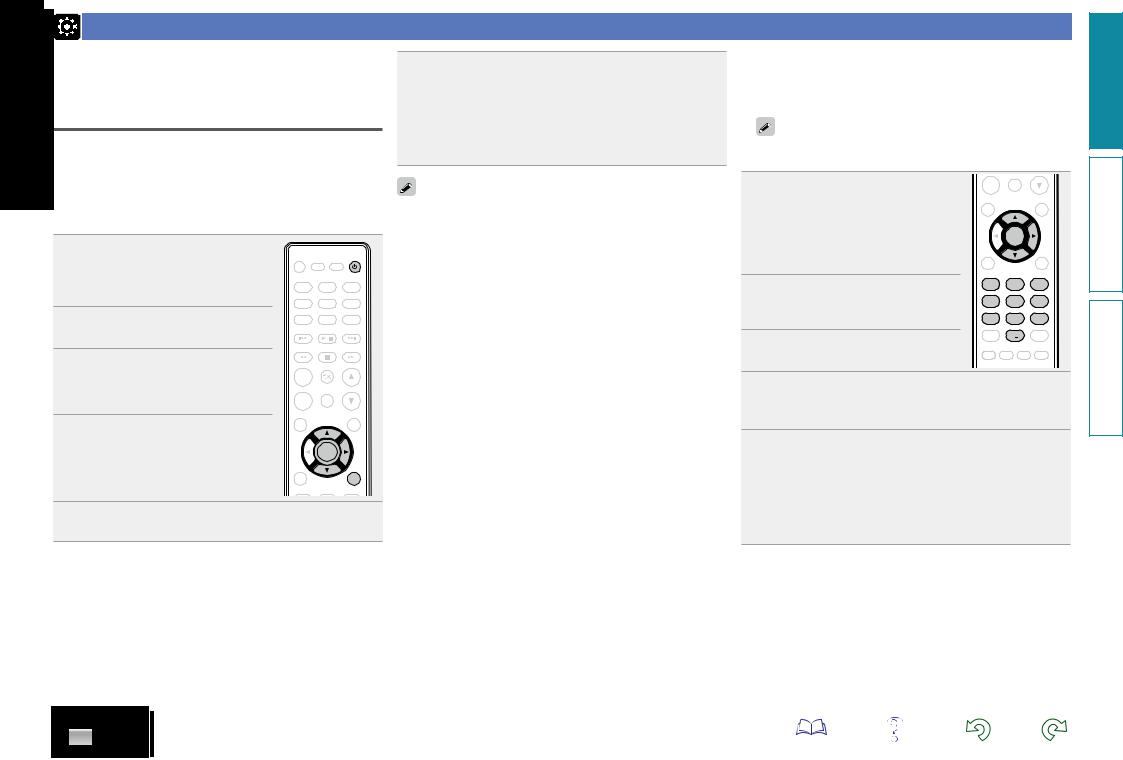
Clock
You can automatically adjust the clock of this unit using the Internet.
To use this function, the unit must be connected to the Internet.
nnSetting the Time Zone
When changing the time zone, use the following procedure to select your local standard time (time zone).
1 Press SETUP.
Turns on the Menu settings mode and the Menu appears on the display. (vpage 11 “Menu map”)
2 Use ui and ENTER to select
“General” – “Clock” – “AutoAdjust” – “Time Zone”, then press ENTER or p.
FAVORITE |
|
VOLUME |
CALL |
SDB |
|
TONE |
|
|
|
|
|
TOP MENU |
|
INFO |
|
ENTER |
|
SEARC |
|
SETUP |
1 . / |
2 ABC |
3 DEF |
“Time Zone” menu appears. |
4 GHI |
5 JKL |
6 MNO |
|
3 Use ui to select your time zone, then press ENTER or p.
4 Use ui and ENTER to select “Auto-Adjust” – “Adjust Now”, then press ENTER or p.
The setting is entered.
nnSetting the Summer Time
Use the following procedure to set Summer time if the Summer time system is used in your country.
1 Press SETUP.
Turns on the Menu settings mode and the Menu appears on the display.
2 Use ui and ENTER to select
“General” – “Clock” – “AutoAdjust” – “Summer Time”, then press ENTER or p.
“Select Summer Time” menu appears.
FAVORITE |
|
VOLUME |
CALL |
SDB |
|
TONE |
|
|
|
|
|
TOP MENU |
|
INFO |
|
ENTER |
|
SEARC |
|
SETUP |
1 . / |
2 ABC |
3 DEF |
3 Use ui to select “Off (0H)” or “On (+1H)”, then press ENTER or p.
4 Use ui and ENTER to select “Auto-Adjust” – “Adjust Now”, then press ENTER or p.
The setting is entered.
nnAuto Adjust
Use the following procedure to automatically adjust the clock.
1 Press SETUP.
Turns on the Menu settings mode and the Menu appears on the display (vpage 11 “Menu map”).
2 Use ui and ENTER to select
“General” – “Clock” – “AutoAdjust” – “Adjust Now”, then press ENTER or p.
The operation to receive the current time starts.
FAVORITE |
|
VOLUME |
CALL |
SDB |
|
TONE |
|
|
|
|
|
TOP MENU |
|
INFO |
|
ENTER |
|
SEARC |
|
SETUP |
1 . / |
2 ABC |
3 DEF |
4 GHI |
5 JKL |
6 MNO |
7 PQRS |
8 TUV |
9WXYZ |
•The current time is displayed for several seconds when it is received successfully.
•If the current time is not received successfully, “Connection Failed” appears.
13
Setting the general [General]
nnSetting the current time (Manual Adjust)
(24-Hour Display)
1 Press SETUP.
Turns on the Menu settings mode and the Menu appears on the display (vpage 11 “Menu map”).
2 Use ui and ENTER to select
“General” – “Clock” – “Manual Adjust”, then press ENTER or p.
3 Use uito set the “hours”.
4 Press ENTER or p.
5 Use uito set the “minutes”.
6 Press ENTER or p.
The current time is set.
SLEEP CLOCK DIMMER POWER
INTERNET |
ONLINE |
MUSIC |
RADIO |
MUSIC |
SERVER |
TUNER |
ANALOG IN |
DIGITALIN |
iPod |
USB |
CD |
CH - |
|
CH + |
TUNE - |
|
TUNE + |
|
MUTE |
|
ADD |
|
|
FAVORITE |
|
VOLUME |
CALL |
SDB |
|
TONE |
|
|
|
|
|
TOP MENU |
|
INFO |
|
ENTER |
|
SEARC |
|
SETUP |
1 . / |
2 ABC |
3 DEF |
Checking the current time when the power is on
Press CLOCK.
Press once more and the display returns to its original condition.
Checking the current time when the power is set to standby
Press CLOCK.
The current time is displayed for 30 seconds.
NOTE
•The time cannot be set when in the standby mode. Turn on the power first.
•The time setting is canceled if the power cord is disconnected. Set the time again.
Preparations
Operations
Information
Speaker Optimization
An optimizing filter suited for the properties of the speakers (SC-N8) can be used.
|
|
Press SETUP. |
|
|
|
1 Turns on the Menu settings mode |
|
|
|
and the Menu appears on the display |
|
|
|
||
|
|
(vpage 11 “Menu map”). |
|
|
|
|
|
|
|
Use ui and |
ENTER to |
|
|
2 select “General” – “Speaker |
|
|
|
Optimization”, |
then press |
|
|
ENTER or p. |
|
“Speaker Optimization” menu appears.
|
MUTE |
|
ADD |
|
|
FAVORITE |
|
VOLUME |
CALL |
SDB |
|
TONE |
|
|
|
|
|
TOP MENU |
|
INFO |
|
ENTER |
|
SEARC |
|
SETUP |
1 . / |
2 ABC |
3 DEF |
Use ui to select “On”, |
then |
4 GHI |
5 JKL |
6 MNO |
|
3 press ENTER or p. |
|
||||
|
7 PQRS |
8 TUV |
9WXYZ |
||
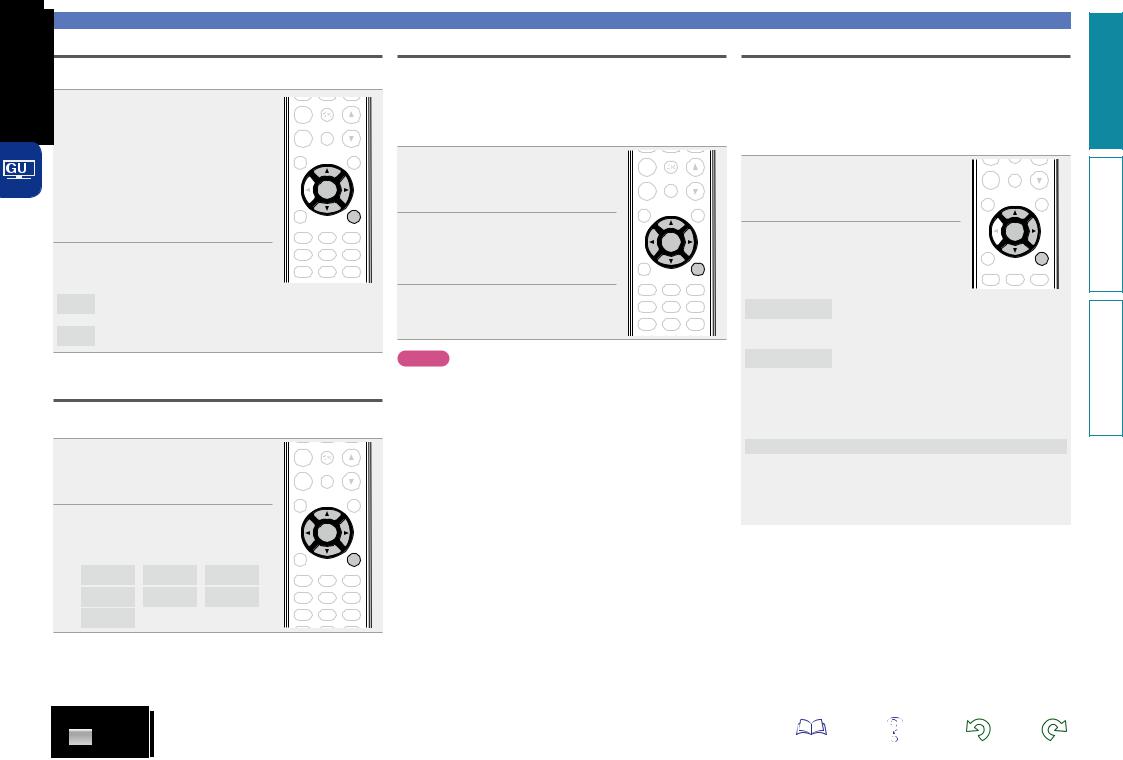
ON |
The response is optimized for the speakers (SC-N8, sold |
||||
|
separately). |
|
|
|
|
OFF |
The response is flat. |
|
|
|
|
Language
Sets the language for display the menu.
•The factory language setting is “English”.
|
Press SETUP. |
|
|
ADD |
|
|
||
1 Turns on the Menu settings mode |
|
MUTE |
|
|||||
FAVORITE |
|
VOLUME |
||||||
|
and the Menu appears on the display |
CALL |
TONE |
|
||||
|
|
|
|
|
|
|
SDB |
|
|
(vpage 11 “Menu map”). |
|
|
TOP MENU |
|
INFO |
||
2 |
Use ui and ENTER to select |
|
|
|
||||
“General” – “Language”, then |
|
ENTER |
|
|||||
|
press ENTER or p. |
|
|
SEARC |
|
SETUP |
||
|
English |
/ |
Deutsch / |
Français |
/ |
1 . / |
2 ABC |
3 DEF |
|
|
|
|
|
|
|||
|
Italiano |
/ |
Nederlands / |
Español |
/ |
4 GHI |
5 JKL |
6 MNO |
|
Svenska |
|
|
|
|
7 PQRS |
8 TUV |
9WXYZ |
|
|
|
|
|
|
|||
Auto-Standby
When this unit is in the stop state and there is no input signal and operation for 30 minutes, it automatically enters the standby mode. For the input source “Analog In 1”, “Analog In 2” and “Portable In” only, when no operation is performed for eight hours, this unit automatically enters the standby mode.
•The default setting is “On”.
Press SETUP. |
ADD |
|
1 Turns on the Menu settings mode |
|
MUTE |
FAVORITE |
VOLUME |
|
and the Menu appears on the display |
CALL |
TONE |
|
|
SDB |
(vpage 11 “Menu map”). |
TOP MENU |
INFO |
2 Use ui and ENTER to select
“General” – “Auto-Standby”, then press ENTER or p.
“Select Auto-Standby” menu appears.
3 Use ui to select “On”, then press ENTER or p.
|
|
ENTER |
|
SEARC |
|
|
SETUP |
1 |
. / |
2 ABC |
3 DEF |
4 |
GHI |
5 JKL |
6 MNO |
The setting is entered. |
7 PQRS |
8 TUV |
9WXYZ |
|
NOTE
In the following situations, the Auto-standby function does not operate.
•When the source is “Tuner”, “iPod” (Remote mode) or “AirPlay”.
•During CD playback or pause.
14
Setting the general [General]
Firmware
nnUpdate
•In order to update the firmware, the environment and settings required for connecting to broadband internet are needed (vpage 9).
•Perform the firmware update operation after at least 2 minutes has elapsed since turning this unit’s power ON.
Press SETUP. |
|
|
|
|
|
1 Turns on the Menu settings |
|
FAVORITE |
|
VOLUME |
|
mode |
CALL |
SDB |
|
||
|
|
|
TONE |
|
|
and the Menu appears on the display |
|
|
|||
TOP MENU |
|
INFO |
|||
(vpage 11 “Menu map”). |
|
|
|
|
|
Use ui and ENTER to |
select |
|
|
|
|
2 “General” |
– “Firmware” – |
|
ENTER |
|
|
SEARC |
|
SETUP |
|||
“Update”, then press ENTER or |
|
|
|
||
p. |
|
|
1 . / |
2 ABC |
3 DEF |
|
|
|
|||
Check For Update |
Check for firmware updates. You can also check |
||||
|
approximately how long it will take to complete |
||||
an update.
Update Start Execute the update process.
•If updating fails, the set automatically retries, but if updating is still not possible, one of the messages shown below is displayed. If the display reads as shown below, check the settings and network environment, then update again.
|
Display |
Description |
|
|
Updating fail |
Updating failed. |
|
|
Login failed |
Failure to login to server. |
|
|
Server is busy |
Server is busy. Wait a while then try again. |
|
|
Connection fail |
Failure in connecting to server. |
|
|
Download fail |
Downloading of the firmware has failed. |
|
|
|
|
|
Preparations
Operations
Information
nnUpdate on web screen
Firmware can be updated using the “Web control function” (vpage 46).
“Web control function” (vpage 46) settings must be completed in advance on a PC belonging to the same network. For information on obtaining update files, please contact our customer service center.
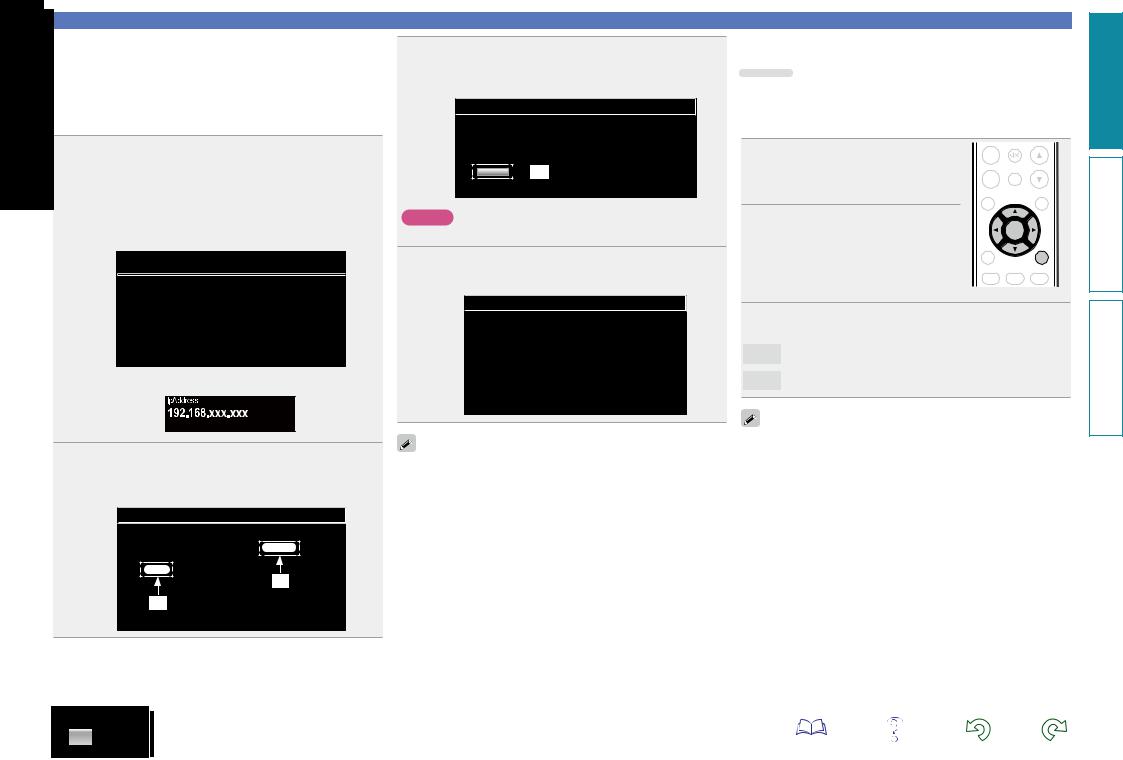
1 Click r from step 5 for the “Web control function” (vpage 46).
The PC will display the following screen. Wait for approximately 1 minute.
You can also gain access by entering the IP address shown by the unit into a web browser.
GThe web displayH
FIRMWARE
Please wait...
Now,go to the new IP displayed in the body.
If do not move the page within 1 minute,please refer to IP.
GThe unit’s screen displayH
3 When the following screen is displayed, click the “OK” (e) button.
Updating will begin.
 Firmware
Warning:
Once started,the upload process cannot be interrupted or adorted, in order to ensure the integrity of the Digital Media Player.
Are you sure you want to proceed? OK 
 e
e
NOTE
Do not operate the unit while updating is in progress.
4 When the following screen is displayed, updating is complete.
 Firmware
New Firmware: xxx.fw
Firmware upload status: 100% completed.
The upload process finished successfully.
Please close this.
Setting the general [General]
nnNotification
Update
Displays a notification message on this unit’s menu screen when the latest firmware is released with “Update”.
Connect to broadband Internet (vpage 9) when using this function.
1 Press SETUP.
Turns on the Menu settings mode and the Menu appears on the display (vpage 11 “Menu map”).
2 Use ui and ENTER to select
“General” – “Firmware” –
“Notification” – “Update”, then press ENTER or p.
“Update Notification” menu appears.
|
MUTE |
|
ADD |
|
|
FAVORITE |
|
VOLUME |
CALL |
SDB |
|
TONE |
|
|
|
|
|
TOP MENU |
|
INFO |
|
ENTER |
|
SEARC |
|
SETUP |
1 . / |
2 ABC |
3 DEF |
3 Use uito select “On”, then press ENTER or p.
On Display update message.
Off Do not display update message.
2 When the following screen is displayed by the PC, click the “Choose File” (q) button, select the update file, and click the “Upload” (w) button.
 Firmware
Choose File
Upload new firmware
Upload
q
w
Button names may vary depending on the OS language used on your computer.
•When you press ENTER during display of the notification message, the “Check for Update” is displayed. (Refer to page 14 for more information on “Update”.)
•Press o to erase the notification message.
Preparations
Operations
Information
15
Upgrade
Display a notification message on this unit’s menu screen when downloadable firmware is released with “Add New Feature”. Connect to broadband Internet (vpage 9) when using this function.
1 Press SETUP.
Turns on the Menu settings mode and the Menu appears on the display (vpage 11 “Menu map”).
2 Use uiand ENTER to select
“General” – “Firmware” –
“Notification” – “Upgrade”, then press ENTER or p.
|
MUTE |
|
ADD |
|
|
FAVORITE |
VOLUME |
|
CALL |
SDB |
|
TONE |
||
|
||
TOP MENU |
INFO |
|
|
ENTER |
|
SEARC |
SETUP |
“Upgrade Notification” menu appears.
3 Use ui to select “On”, then press ENTER or p.
On Display upgrade message.
Off Do not display upgrade message.
1 |
. / |
2 ABC |
3 DEF |
4 |
GHI |
5 JKL |
6 MNO |
7 PQRS |
8 TUV |
9WXYZ |
|
•When you press ENTER during display of the notification message, the “Add New Feature” is displayed. (Refer to page 16 for more information on “Add New Feature”.)
•Press o to erase the notification message.
nnAdd New Feature
•In order to add new functions, the environment and settings required for connecting to broadband internet are needed (vpage 9).
•Perform the add new feature operation after at least 2 minutes has elapsed since turning this unit’s power on.
Press SETUP. |
|
|
|
|
1 Turns on |
|
FAVORITE |
|
VOLUME |
the Menu settings mode |
CALL |
SDB |
|
|
and the Menu appears on the display |
|
TONE |
|
|
TOP MENU |
|
INFO |
||
(vpage 11 “Menu map”). |
|
|
|
|
Use uito select “General” |
|
|
|
|
2 – “Firmware” – “Add New |
|
ENTER |
|
|
SEARC |
|
SETUP |
||
Feature”, then press ENTER or |
|
|
|
|
p. |
|
1 . / 2 ABC |
3 DEF |
|
|
|
|||
Upgrade Status |
Display a list of the additional functions provided |
|||
|
by the upgrade. |
|
|
|
Upgrade Start |
Execute the upgrade process. |
|
|
|
•If the upgrade is not successful, an error message identical to those in “Update”(vpage 14) will appear on the display. Check the settings and network environment, then update again.
|
Upgrade ID |
The ID number shown on this screen is needed |
|
|
when carrying out the procedure. |
|
|
|
|
|
|
See the DENON website for details about updates.
When the procedure is complete, “Registered” is displayed and updates can be carried out. If the procedure has not been carried out, “Not Registered” is displayed.
16
Setting the general [General]
[Notes concerning use of “Update” and “Add New Feature”]
•Do not turn off the power until updating or upgrading is completed.
•Even with a broadband connection to the Internet, approximately
20 minutes is required for the updating/upgrading procedure to be completed.
•Once updating/upgrade starts, normal operations on this unit cannot be performed until updating/upgrading is completed.
•Furthermore, updating/upgrading the firmware may reset the backup data for the parameters, etc. set for this unit.
•If the update or upgrade fails, remove and re-insert the power cord. “Update Retry” appears on the display and update restarts from the point at which update failed. If the error continues despite this, check the network environment.
•Information regarding the “Update” function and “Add New Feature” will be announced on the DENON web site each time related plans are defined.
•When usable new firmware is released with “Update” or “Add New Feature”, a notification message is displayed on the menu screen. When you do not want to be notified, set “Update” (vpage 15) and “Upgrade” (vpage 16) to “Off”.
Preparations
Operations
Information
Setting the network [Network]
•For details on “Quick Setup” operations, see the separate “Quick setup guide”.
•If you cancelled “Quick Setup” menu or changed the network environment, perform “Setup” – “Network” – “Quick Setup”.
Connecting wired LAN
Use this procedure to configure the wired LAN settings.
nnNetwork connecting
(when “DHCP”settings are “On”)
When using this unit with the broadband router’s DHCP function enabled, this unit automatically performs the IP address setting and other settings.
1 Connect the ETHERNET cable (vpage 9 “Connecting to a home network (LAN)” – “Wired LAN”).
2 Press POWER Xto turn on power to the main unit.
3 Press SETUP.
Turns on the Menu settings mode and the Menu appears on the display (vpage 11 “Menu map”).
4 Use uiand ENTER to select
“Network” – “Settings” – “DHCP (On)”, then press
ENTER or p.
“Select DHCP” menu appears.
SLEEP CLOCK DIMMER POWER
INTERNET |
ONLINE |
MUSIC |
RADIO |
MUSIC |
SERVER |
TUNER |
ANALOGIN |
DIGITALIN |
iPod |
USB |
CD |
CH - |
|
CH + |
TUNE - |
|
TUNE + |
|
MUTE |
|
ADD |
|
|
FAVORITE |
|
VOLUME |
CALL |
SDB |
|
TONE |
|
|
|
|
|
TOP MENU |
|
INFO |
|
ENTER |
|
SEARC |
|
ETUP |
5 Use uito select “On”, then press ENTER or p.
“DHCP (On)” menu appears.
6 Use ui to select “Test Connection”, then press
ENTER or p.
“Wait for the network to connect...” is displayed, and the unit starts connecting to the LAN.
•When the connection is made successfully, “Connected!” appears.
•If the connection cannot be established, “Connection Failed” is displayed. Perform steps 1 – 6 again.
You may need to set the network connection manually, depending on the provider you use. To set the connection manually, use the setting procedure of “Network connecting (when “DHCP” settings are “Off”)”.
17
nnNetwork connecting
(when “DHCP” settings is “Off”)
This section explains the settings when connecting this unit to a network that does not have a DHCP function.
To configure the settings manually, check the setting details with your network administrator.
1 Perform steps 1 – 4 of the “Network connecting (when “DHCP” settings are “On”)” procedure and select “Off” in step 5.
“DHCP (Off)” menu appears.
CALL |
SDB |
|
TONE |
||
|
||
TOP MENU |
INFO |
|
|
ENTER |
|
SEARC |
ETUP |
|
Use ui to select “IP Address”, |
1 . / |
2 ABC |
3 DEF |
|
|
|
|
|
2 then press ENTER or p. |
4 GHI |
5 JKL |
6 MNO |
|
|
|
|
||
|
“Enter IP Address” menu appears. |
7 PQRS |
8 TUV |
9WXYZ |
|
Use uip or 0 – 9 to input the |
+10a/A |
0 * |
CLEAR |
|
RANDOM |
REPEAT PROGRAM MODE |
||
3 IP address and press ENTER. |
|
|
|
|
4 |
Use uipor 0 – 9 to input the address for |
|
||
“Subnet Mask”, “Gateway”, “Primary DNS”, and |
||||
“Secondary DNS”.
5 Use ui to select “Test Connection”, then press
ENTER or p.
“Wait for the network to connect...” is displayed, and the unit starts connecting to the LAN.
•When the connection is made successfully, “Connected!” appears.
•If the connection cannot be established, “Connection Failed” is displayed. Perform steps 1 – 4 again.
Preparations
Operations
Information
nnProxy settings
Configure these settings to connect to the internet via a proxy server.
Press SETUP. |
|
|
|
1 Turns on the Menu settings mode |
FAVORITE |
VOLUME |
|
CALL |
SDB |
||
TONE |
|||
and the Menu appears on the display |
|
||
TOP MENU |
INFO |
||
(vpage 11 “Menu map”). |
|
|
2 Use uiand ENTER to select
“Network” – “Settings” – “Proxy”, then press ENTER or p.
“Setup Proxy” menu appears.
3 If “Proxy(On)” appears, go to step 5.
If “Proxy(Off)” appears, press
ENTER or p.
“Select Proxy” menu appears.
|
|
ENTER |
|
SEARC |
|
|
SETUP |
1 |
. / |
2 ABC |
3 DEF |
4 |
GHI |
5 JKL |
6 MNO |
7 PQRS |
8 TUV |
9WXYZ |
|
+10a/A |
0 * |
CLEAR |
|
RANDOM |
REPEAT PROGRAM |
MODE |
|
4 Use uito select “On”, then press ENTER or p.
“Setup Proxy” menu appears.
5 Use ui to select “Proxy (Address)” or “Proxy (Name)”, then press ENTER or p.
“Select Type” menu appears.
6 Use ui to select “Address” or “Name”, then press
ENTER or p.
“Setup Proxy” menu appears.
7 Use ui to select “Address” or “Name”, then press
ENTER or p.
“Enter Proxy Address” or “Enter Proxy Name” menu appears.
8 Use uipor 0 – 9, +10 to input the address or name, then press ENTER.
“Setup Proxy” menu appears.
9 Use uito select “Port”, then press ENTER or p.
“Enter Proxy Port” menu appears.
10 Use uip or 0 – 9 to input the port, then press
ENTER.
The Proxy settings are completed.
Setting the network [Network]
Connecting wireless LAN
Use this procedure to configure the wireless LAN settings.
nnAuto-Scan (Wireless LAN)
If a LAN cable is connected, remove it.
Press POWER Xto turn on
1 power to the main unit. |
|
SLEEP |
CLOCK DIMMER POWER |
|
|
|
|
|
|
Press SETUP. |
|
|
|
|
2 Turns on the menu settings |
|
INTERNET |
ONLINE |
MUSIC |
|
RADIO |
MUSIC |
SERVER |
|
mode |
TUNER |
ANALOG IN |
DIGITALIN |
|
and the menu appears on the display |
iPod |
USB |
CD |
|
(vpage 11 “Menu map”). |
|
CH - |
|
CH + |
Use ui and ENTER to |
select |
|
|
|
3 “Network” – “Settings” – “Auto- |
TUNE - |
|
TUNE + |
|
ADD |
MUTE |
|
||
Scan”, then press ENTER or p. |
FAVORITE |
|
VOLUME |
|
The access point you have |
set is |
CALL |
SDB |
|
|
|
TONE |
|
|
displayed. |
|
|
|
|
|
TOP MENU |
|
INFO |
|
4 Use ui to select the access point, and then press ENTER or p.
•If the access point is not detected automatically, configure it manually (vpage 20 “Manual Settings”).
|
|
ENTER |
|
SEARC |
|
|
SETUP |
1 |
. / |
2 ABC |
3 DEF |
4 |
GHI |
5 JKL |
6 MNO |
7 PQRS |
8 TUV |
9WXYZ |
|
+10a/A |
0 * |
CLEAR |
|
vSee overleaf
18
Preparations
Operations
Information
5 If there is an encryption setting for the access point you selected in step 4, enter same encryption key as used for the access point. (If there is no encryption setting, proceed to step 6.)
Use uiopor 0 – 9, +10 to input the “Password” (encryption key) and press ENTER or p. Enter the same encryption key as
used for the access point.
•The types of characters that can be input are as shown below.
GLower case charactersH abcdefghijklmnopqrstuvwxyz GUpper case charactersH
ABCDEFGHIJKLMNOPQRSTUVWXYZ
GSymbolsH ! “ # $ % & ‘ ( ) z + , - . / : ; < = > ? @ [ \ ] ^ _ ` { | } ˜ GNumbersH 0123456789 (Space)
•When no security settings have been used in the Internet connection settings, this step is not necessary.
6 Use ito select “Test Connection”, then press ENTER or p.
“Wait for the network to connect...” is displayed, and the unit starts connecting to the network.
•This unit performs automatic network setup due to the DHCP function.
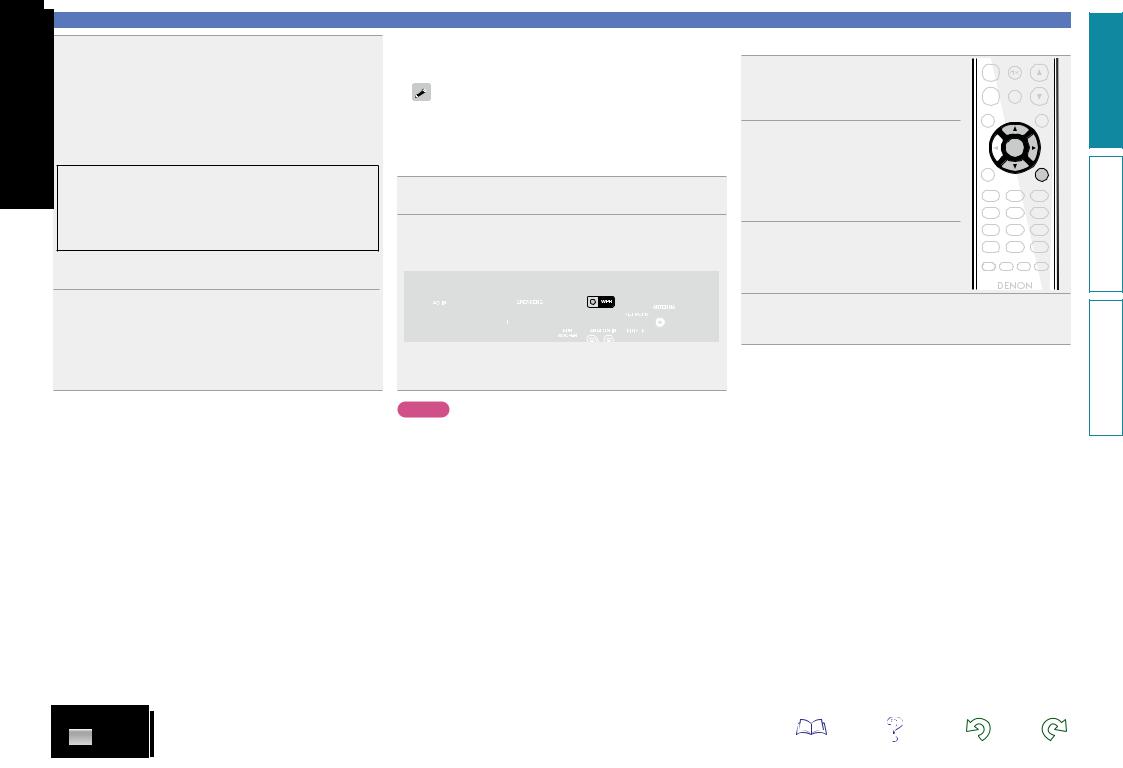
nnWPS Settings (Push-button method)
pressing the WPS button on your router and this unit, the LAN connection settings are made.
•Before turning this unit on, make sure that an Ethernet cable is not connected to this unit. If a cable is connected, have this unit enter the power standby mode and disconnect the cable.
•After the unit is turned on, it takes approximately 30 seconds for the WPS button on this unit to be available.
1 Press the WPS button of the router.
2 Press WPS on the rear panel.
“Wait for the network to connect...” is displayed, and the unit starts connecting to the LAN.
•When the connection is made successfully, “Connected!” appears.
•If the connection cannot be established, “Connection Failed” is displayed. Perform steps 1 – 2 again.
NOTE
If the router uses WEP, WPA-TKIP or WPA2-TKIP encryption, connection is not possible using the WPS button. In this case, connect using “Auto-scan” or “Manual”.
19
Setting the network [Network]
nnWPS Settings (PIN code method)
1 Press SETUP.
Turns on the Menu settings mode and the Menu appears on the display (vpage 11 “Menu map”).
2 Use ui and ENTER to select
“Network” – “Settings” – “WPS (Wi-Fi Protected Setup)” – “PIN code”, then press ENTER or p.
|
MUTE |
|
ADD |
|
|
FAVORITE |
VOLUME |
|
CALL |
SDB |
|
TONE |
||
|
||
TOP MENU |
INFO |
|
|
ENTER |
|
SEARC |
ETUP |
The access point that you have set is |
1 |
. / |
2 ABC |
3 DEF |
displayed. |
4 |
GHI |
5 JKL |
6 MNO |
Use uito select the access point |
7 PQRS |
8 TUV |
9WXYZ |
|
3 whose PIN code you want to |
||||
+10a/A |
0 * |
CLEAR |
||
|
||||
display, and press ENTER or p. |
RANDOM |
REPEAT PROGRAM MODE |
||
|
|
|
||
PIN code number is displayed.
4 Set this PIN code to the register.
When connection is established with access point, “Connected!” is displayed.
Preparations
Operations
Information
Loading...