


 Loading...
RCD-M39
CD RECEIVER
Owner’s Manual
Preparations
Operations
Informations
nSAFETY PRECAUTIONS
CAUTION
RISK OF ELECTRIC SHOCK
DO NOT OPEN
CAUTION:
TO REDUCE THE RISK OF ELECTRIC SHOCK, DO NOT REMOVE COVER (OR BACK). NO USER-SERVICEABLE PARTS INSIDE. REFER SERVICING TO QUALIFIED SERVICE PERSONNEL.
The lightning flash with arrowhead symbol, within an equilateral triangle, is intended to alert the user to the presence of uninsulated “dangerous voltage” within the product’s enclosure that may be of sufficient magnitude to constitute a risk of electric shock to persons.
The exclamation point within an equilateral triangle is intended to alert the user to the presence of important operating and maintenance (servicing) instructions in the literature
accompanying the appliance.
WARNING:
TO REDUCE THE RISK OF FIRE OR ELECTRIC SHOCK, DO NOT EXPOSE THIS APPLIANCE TO RAIN OR MOISTURE.
CLASS 1 LASER PRODUCT
,,CLASS 1 ,, LASER PRODUCT
IMPORTANT SAFETY
INSTRUCTIONS
1.Read these instructions.
2.Keep these instructions.
3.Heed all warnings.
4.Follow all instructions.
5.Do not use this apparatus near water.
6.Clean only with dry cloth.
7.Do not block any ventilation openings.
Install in accordance with the manufacturer’s instructions.
8.Do not install near any heat sources such as radiators, heat registers, stoves, or other apparatus (including amplifiers) that produce heat.
9.Do not defeat the safety purpose of the polarized or grounding-type plug. A polarized plug has two blades with one wider than the other. A grounding type plug has two blades and a third grounding prong. The wide blade or the third prong are provided for your safety. If the provided plug does not fit into your outlet, consult an electrician for replacement of the obsolete outlet.
10.Protect the power cord from being walked on or pinched particularly at plugs, convenience receptacles, and the point where they exit from the apparatus.
11.Only use attachments/accessories specified by the manufacturer.
12.Use only with the cart, stand, tripod, bracket, or table
specified by the manufacturer, or sold with the apparatus. When a cart is used, use caution when moving the cart/ apparatus combination to avoid injury from tip-over.
13. Unplug this apparatus during lightning storms or when unused for long periods of time.
14.Refer all servicing to qualified service personnel.
Servicing is required when the apparatus has been damaged in any way, such as power-supply cord or plug is damaged, liquid has been spilled or objects have fallen into the apparatus, the apparatus has been exposed to rain or moisture, does not operate normally, or has been dropped.
15.Batteries shall not be exposed to excessive heat such as sunshine, fire or the like.
FCC INFORMATION (For US customers)
1.PRODUCT
This product complies with Part 15 of the FCC Rules. Operation is subject to the following two conditions: (1) this product may not cause harmful interference, and (2) this product must accept any interference received, including interference that may cause undesired operation.
2.IMPORTANT NOTICE: DO NOT MODIFY THIS PRODUCT
This product, when installed as indicated in the instructions contained in this manual, meets FCC requirements. Modification not expressly approved by DENON may void your authority, granted by the FCC, to use the product.
3.NOTE
This product has been tested and found to comply with the limits for a Class B digital device, pursuant to Part 15 of the FCC Rules. These limits are designed to provide reasonable protection against harmful interference in a residential installation.
This product generates, uses and can radiate radio frequency energy and, if not installed and used in accordance with the instructions, may cause harmful interference to radio communications. However, there is no guarantee that interference will not occur in a particular installation. If this product does cause harmful interference to radio or television reception, which can be determined by turning the product OFF and ON, the user is encouraged to try to correct the interference by one or more of the following measures:
•Reorient or relocate the receiving antenna.
•Increase the separation between the equipment and receiver.
•Connect the product into an outlet on a circuit different from that to which the receiver is connected.
•Consult the local retailer authorized to distribute this type of product or an experienced radio/TV technician for help.
For Canadian customers:
This Class B digital apparatus complies with Canadian ICES-003.
CAUTION:
USE OF CONTROLS OR ADJUSTMENTS OR PERFORMANCE OF PROCEDURES OTHER THAN THOSE SPECIFIED HEREIN MAY RESULT IN HAZARDOUS RADIATION EXPOSURE.
THIS PRODUCT SHOULD NOT BE ADJUSTED OR REPAIRED BY ANYONE EXCEPT PROPERLY QUALIFIED SERVICE PERSONNEL.
CAUTION:
HOT SURFACE. DO NOTTOUCH.
The top surface over the internal heat sink may become hot when operating this product continuously.
Hot Do not touch hot areas, especially around the “Hot surface surface mark” and the top panel.
mark
CAUTION:
To completely disconnect this product from the mains, disconnect the plug from the wall socket outlet.
The mains plug is used to completely interrupt the power supply to the unit and must be within easy access by the user.
Preparations
Operations
Informations
I
nNOTES ON USE
WARNINGS
•Avoid high temperatures.
Allow for sufficient heat dispersion when installed in a rack.
•Handle the power cord carefully.
Hold the plug when unplugging the cord.
•Keep the unit free from moisture, water, and dust.
•Unplug the power cord when not using the unit for long periods of time.
•Do not obstruct the ventilation holes.
•Do not let foreign objects into the unit.
•Do not let insecticides, benzene, and thinner come in contact with the unit.
•Never disassemble or modify the unit in any way.
•Ventilation should not be impeded by covering the ventilation openings with items, such as newspapers, tablecloths or curtains.
•Naked flame sources such as lighted candles should not be placed on the unit.
•Observe and follow local regulations regarding battery disposal.
•Do not expose the unit to dripping or splashing fluids.
•Do not place objects filled with liquids, such as vases, on the unit.
•Do not handle the mains cord with wet hands.
•When the switch is in the OFF (STANDBY) position, the equipment is not completely switched off from MAINS.
•The equipment shall be installed near the power supply so that the power supply is easily accessible.
•Do not keep the battery in a place exposed to direct sunlight or in places with extremely high temperatures, such as near a heater.
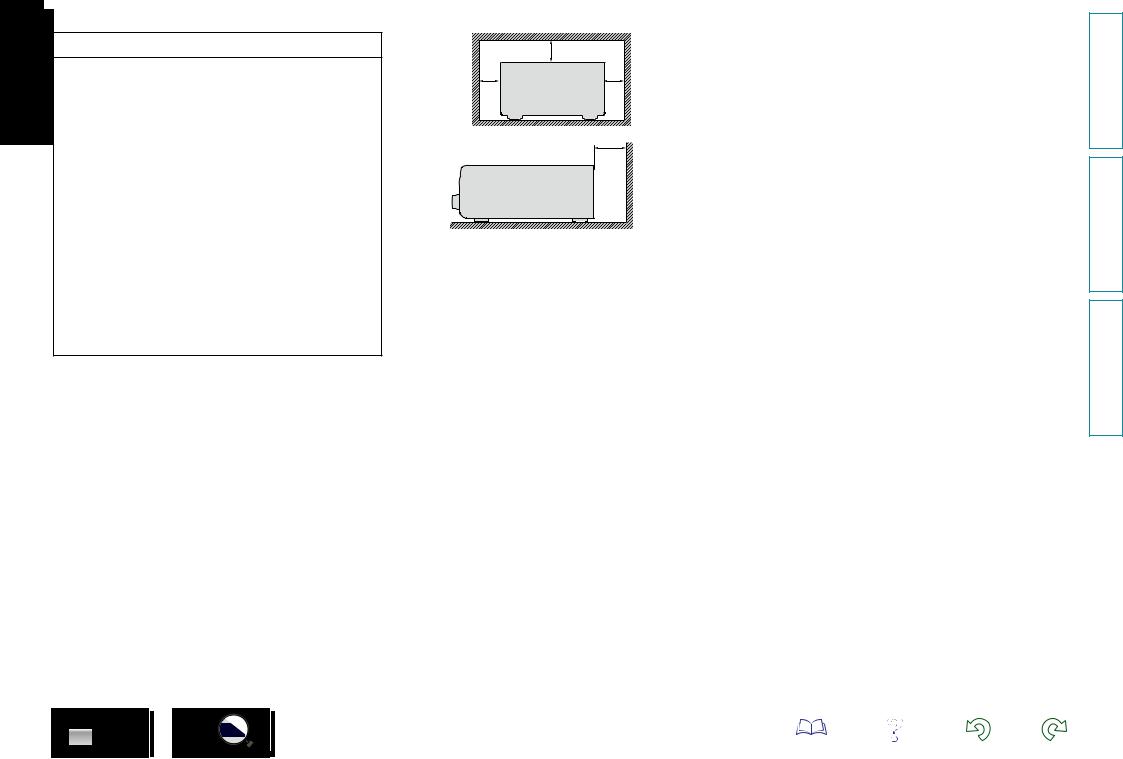
n CAUTIONS ON INSTALLATION
|
z |
z |
z |
z |
Wall |
zz For proper heat dispersal, do not install this unit in a confined space, such as a bookcase or similar enclosure.
•More than 12 in. (0.3 m) is recommended.
•Do not place any other equipment on this unit.
II
Preparations
Operations
Informations
Getting started
Thank you for purchasing this DENON product. To ensure proper operation, please read this owner’s manual carefully before using the product. After reading them, be sure to keep them for future reference.
Contents
Getting started···············································································1 Accessories···················································································1 Features························································································2 Cautions on handling·····································································2
Preparations·············································································3
Connections···················································································4 Connecting the speakers·······························································4 Connecting an iPod or USB memory device to the USB port·······5 Connecting a TV············································································6 Connecting an antenna··································································6 Connecting the power cord···························································6
Operations·················································································7
Basic operation··············································································8 Preparations··················································································8 Setting the current time (12-Hour Display)····································9 Operations possible during playback···········································10 Playing CDs·················································································11 Listening to FM broadcasts·························································13 Listening to AUX·········································································15
Advanced operation····································································16 Preparations················································································16 Playing of MP3 and WMA files···················································17 Playing an iPod············································································19 Playing a USB memory device····················································20 Setting the alarm·········································································21 Other functions···········································································23
Informations···········································································24
Part names and functions···························································25 Front panel··················································································25 Display·························································································26 Rear panel···················································································26 Remote control unit·····································································27
Other information········································································30 Discs····························································································30 Explanation terms········································································31 Troubleshooting··········································································31 Specifications···············································································33
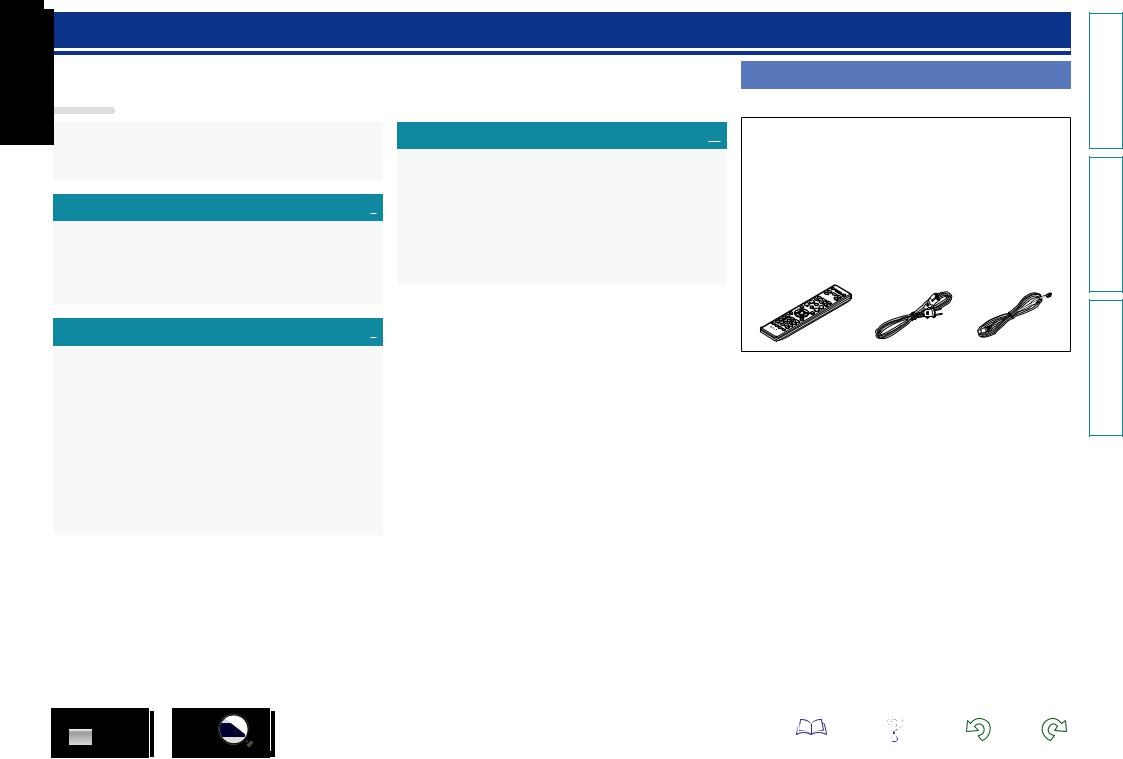
Accessories
Check that the following parts are supplied with the product.
q Getting Started......................................................................... |
|
1 |
w CD-ROM (Owner’s manual)..................................................... |
|
1 |
e Safety Instructions................................................................... |
|
1 |
r Warranty (for North America model only) |
................................ 1 |
|
t Service network list................................................................. |
|
1 |
y Remote control unit (RC-1162)................................................ |
1 |
|
u R03/AAA batteries................................................................... |
|
2 |
i Power cord............................................................................... |
|
1 |
o FM indoor antenna................................................................... |
|
1 |
y |
i |
o |
Preparations
Operations
Informations
1

Features
High quality amplifier stressing sound quality
Equipped with a 30 W + 30 W (6 Ω) high-quality amplifier circuits.
Direct Play for iPod® and iPhone® via USB
Music data from an iPod can be played back if you connect the USB cable supplied with the iPod via the USB port of this unit, and also an iPod can be controlled with the Remote control unit for this unit.
Weight and Dramatic sound
The board and circuit configuration has been redesigned to achieve lower impedance. Since stable current is supplied to the power amp and other sections, it is possible to realize as much as 30 watts of power.
“Simple & Straight” circuit design for sound purity and free of coloration
DENON’s popular M series gives you high sound quality based on the “simple & straight” concept. Circuitry is uncomplicated, signal paths are short, and all adverse influences on sound quality have been minimized.
This unit also provides the “Auto standby mode”, where it goes into the standby state when there is no operation for 30 minutes.
Playback of MP3 and WMA files
Supports playback of discs and USB memory devices on which MP3 or WMA files are recorded. The unit’s display can display the title of the track and the name of the artist of the current track.
Usable characters “Switching the display” (vpage 12, 20)
Low standby power consumption
Designed with the environment in mind, the unit consumes just 0.3 W while in standby mode.
Remote control unit
This unit is shipped with a remote control unit that has large buttons for frequently used functions, allowing you to quickly find the desired function.
Cautions on handling
•Before turning the power switch on
Check once again that all connections are correct and that there are no problems with the connection cables.
•Power is supplied to some of the circuitry even when the unit is set to the standby mode. When leaving home for long periods of time, be sure to unplug the power cord from the power outlet.
•Proper ventilation
If the unit is left in a room full of smoke from cigarettes, etc., for long periods of time, the surface of the optical pickup may get dirty, preventing it from receiving signals properly.
•About condensation
If there is a major difference in temperature between the inside of the unit and its surroundings, condensation may form on parts inside the unit, causing it to fail to operate properly.
If this happens, let the unit sit for an hour or two with the power turned off and wait until there is little difference in temperature before using the unit.
•Cautions on using mobile phones
Using a mobile phone near this unit may result in noise. If that occurs, move the mobile phone away from the unit when it is in use.
•Moving the unit
Be sure to remove a disc, turn off the power and unplug the power cord from the power outlet. Next, disconnect the cables connected to other system units before moving the unit.
•About care
•Wipe the cabinet and control panel clean with a soft cloth.
•Follow the instructions when using a chemical cleaner.
•Benzene, paint thinner or other organic solvents as well as insecticide may cause material changes and discoloration if brought into contact with the unit, and should therefore not be used.
Preparations
Operations
Informations
2

Preparations
Preparations
Here, we explain the connection methods for this unit.
FConnecting the speakers vpage 4
FConnecting an iPod or USB memory device to the USB port vpage 5 FConnecting a TV vpage 6
FConnecting an antenna vpage 6
FConnecting the power cord vpage 6
3
Preparations
Operations
Informations

Connections
NOTE
•Do not plug in the power cord until all connections have been completed.
•When making connections, also refer to the owner’s manual of the other components.
•Be sure to connect the left and right channels properly (left with left, right with right).
•Do not bundle power supply cords together with connection cables. Doing so can result in humming or noise.
Cables used for connections
Audio cable (sold separately) |
|
Subwoofer cable |
|
Optical cable |
|
L |
L |
Audio cable |
|
R |
R |
Audio cable (supplied) |
|
Speaker cable |
|
Connecting the speakers
Subwoofer with built-in amplifier
 IN
IN
Speaker SC-M39
(supplied)
|
(R) |
|
(L) |
w |
q |
w |
q |
Connecting the speaker cables
Carefully check the left (L) and right (R) channels and + (red) and – (black) polarities on the speakers being connected to the unit, and be sure to connect the channels and polarities correctly.
1 Peel off about 0.03 ft/10 mm of sheathing from the tip of the speaker cable, then either twist the core wire tightly or apply solder to it.
2 Turn the speaker terminal counterclockwise to loosen it.
3 Insert the speaker cable’s core wire to all the way into the speaker terminal.
4
NOTE
•Disconnect this unit’s power plug from the power outlet before connecting the speakers. Also, turn off the subwoofer.
•Use speakers with an impedance of 6 to 16 Ω. The protection circuit may be activated if speakers with an impedance other than specified are used.
•Connect the speaker cables so they do not stick out of the speaker terminals. The protection circuit may be activated if the wires touch the rear panel or if the + and – sides touch each other (vpage 31 “Protection circuit”).
•Never touch the speaker terminals while the power supply is connected. Doing so could result in electric shock.
Preparations
Operations
Informations
4
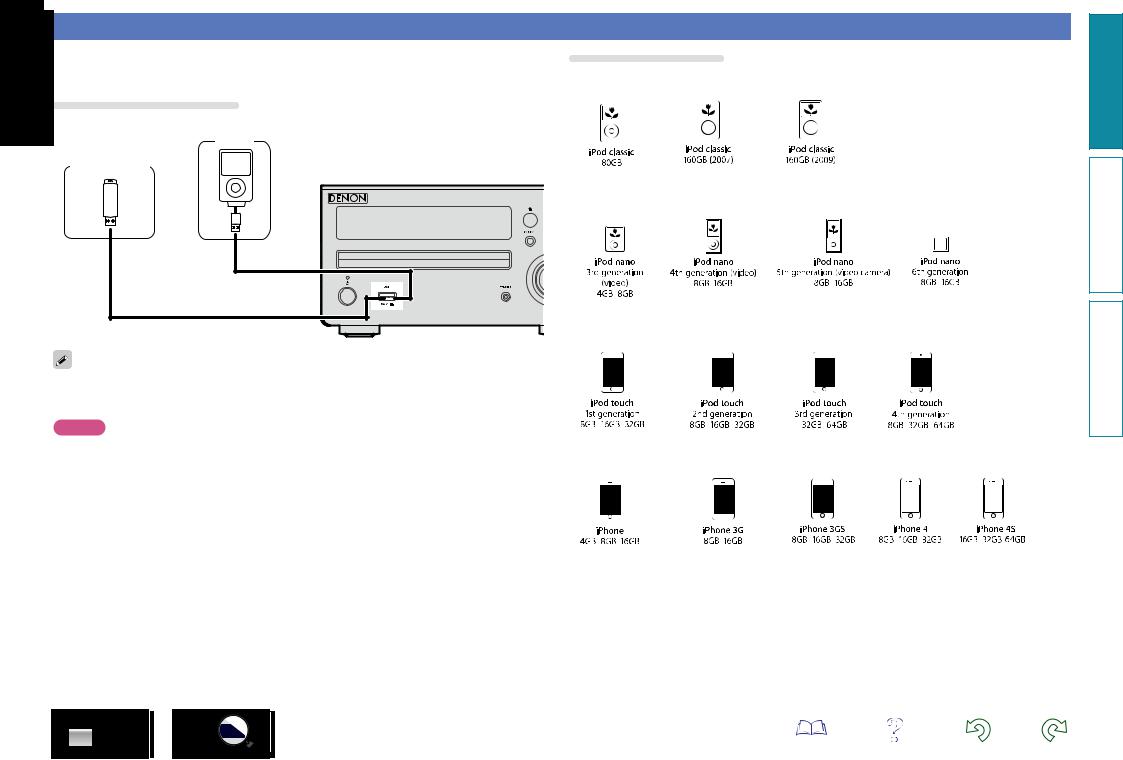
Connecting an iPod or USB memory device to the USB port
•You can enjoy music stored on an iPod or USB memory device.
•For operating instructions see “Playing an iPod” (vpage 19) or “Playing a USB memory device” (vpage 20).
Cables used for connections
To connect an iPod to this unit, use the USB cable supplied with the iPod.
Supported iPod models
• iPod classic
iPod
USB memory device
or
• iPod nano
• iPod touch
DENON does not guarantee that all USB memory devices will operate or receive power. When using a portable USB connection type HDD of the kind to which an AC adapter can be connected to supply power, use the AC adapter.
NOTE
• USB memory devices will not work via a USB hub. |
|
• It is not possible to use this unit by connecting the unit’s USB port to a PC via a USB cable. |
• iPhone |
•Do not use an extension cable when connecting a USB memory device. This may cause radio interference with other devices.
•When connecting an iPhone to this unit, keep the iPhone at least 0.7 ft (20 cm) away from this unit. If the iPhone is kept closer to this unit and a telephone call is received by the iPhone, noise may be output from this device.
•If the iPod is connected using an iPod cable (commercially available) that is longer than 6.6 ft (2 m), sound may not be played correctly. In this case, use a genuine iPod cable, or a cable that is shorter than 3.3 ft (1 m).
5
Preparations
Operations
Informations
(as of June 2012)
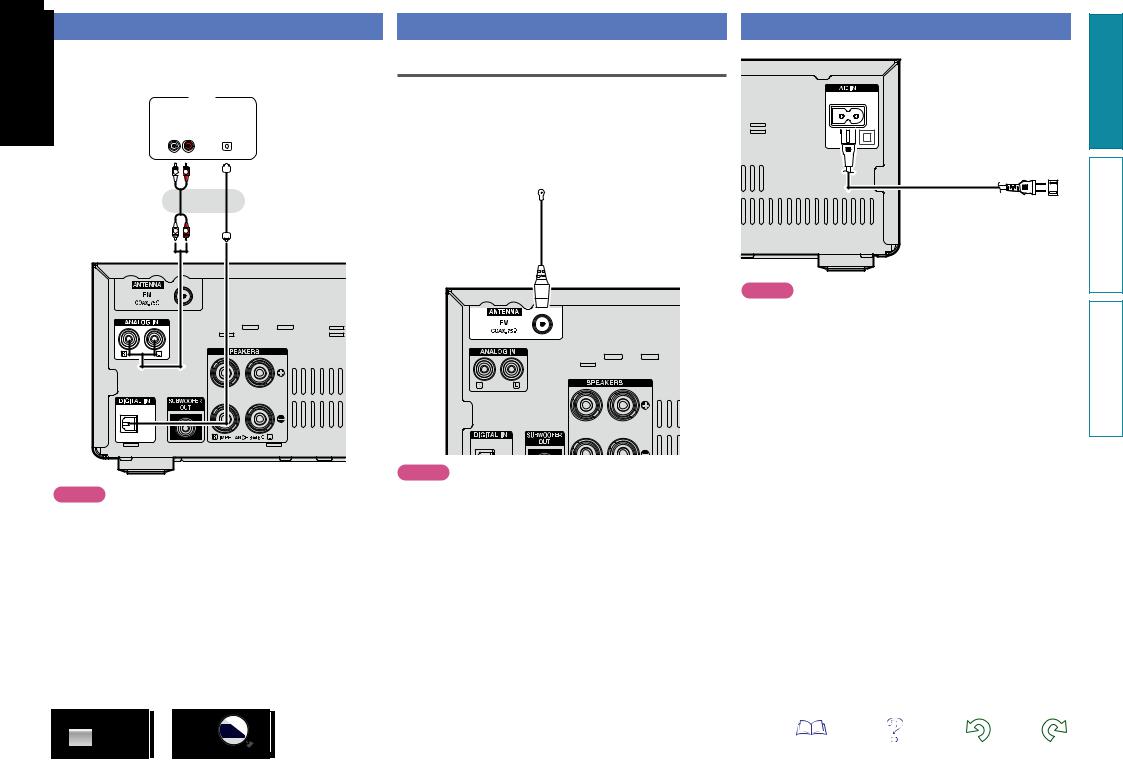
Connecting a TV
•Select the connector to use and connect the device.
•To listen to TV audio through this unit, use the optical digital connection.
|
|
TV |
|
|
|
|
||||
|
|
|
|
|
|
|
|
|
|
|
|
|
AUDIO |
|
|
|
|
|
|
||
|
|
|
|
|
|
|
|
|||
|
|
|
|
|
|
|
|
|
|
|
|
|
|
|
|
|
|
|
|
|
|
AUDIO |
|
|
|
OPTICAL |
|
|||||
OUT |
|
|
|
|
OUT |
|
||||
L R |
|
|
|
|
|
|
|
|
|
|
|
|
|
|
|
|
|
|
|
|
|
|
|
|
|
|
|
|
|
|
|
|
|
|
|
|
|
|
|
|
|
|
|
L 
 R
R
or
L |
R |
NOTE
•Other digital audio signals than 2 channel linear PCM cannot be input through DIGITAL IN (OPTICAL) connector of this unit.
•When you try to input digital audio signals other than 2 channel linear PCM to this unit, set the digital audio output setting of the TV to 2 channel PCM. For details, see the operating instructions of the TV.
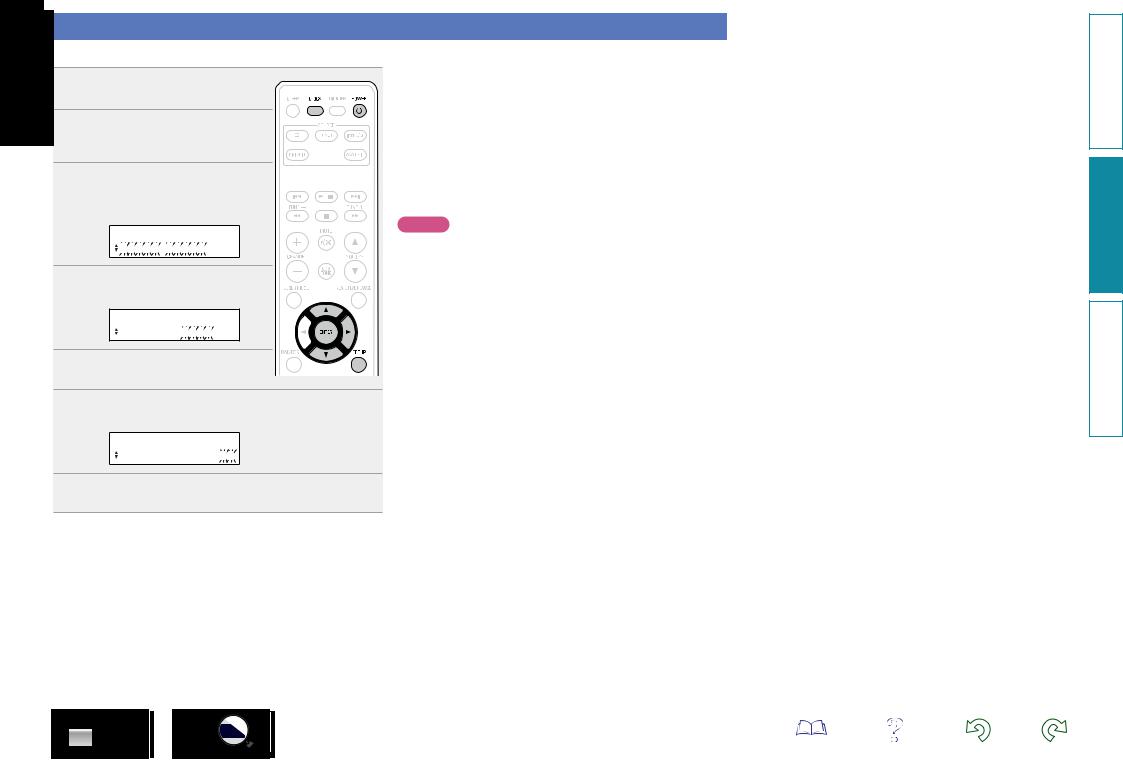
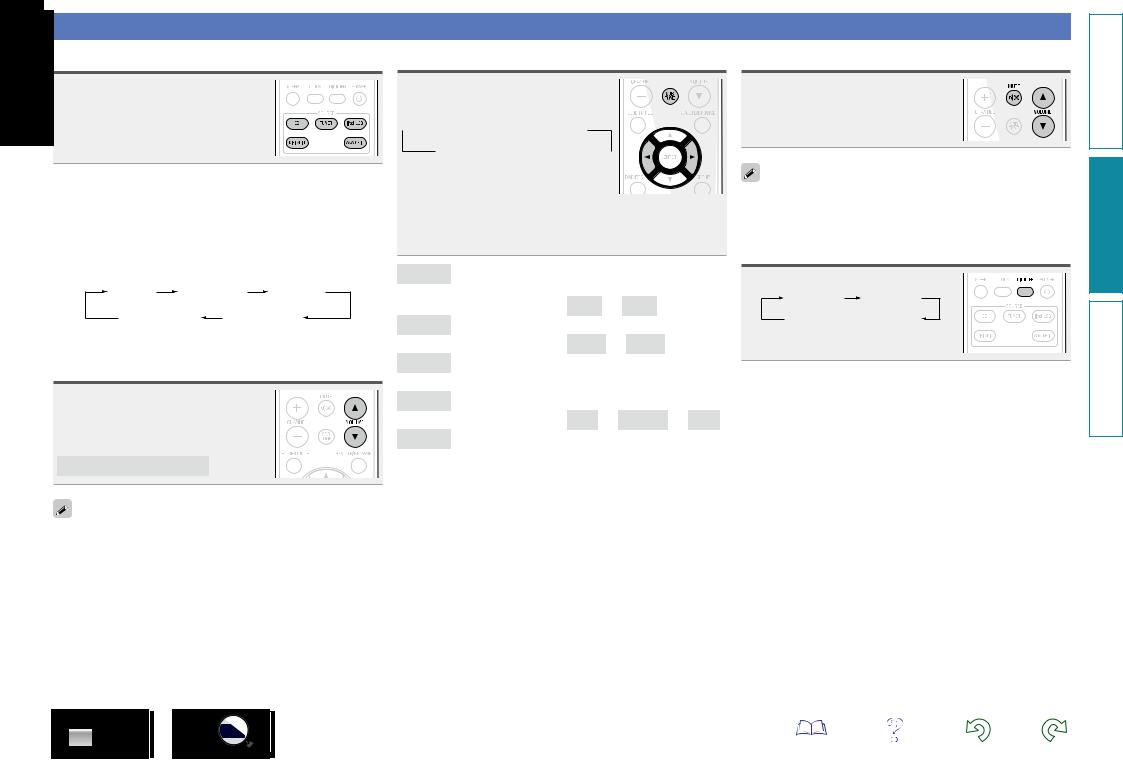
Connecting an antenna Connecting the power cord
FM |
|
• Connect the FM antenna included with the unit to enjoy listening to |
|
radio broadcasts. |
|
• After connecting the antenna and receiving a |
broadcast signal |
(vpage 13 “Listening to FM broadcasts”), use tape to fix the |
|
antenna in a position where noise is the lowest. |
|
FM indoor antenna |
Power cord (Supplied) |
(Supplied) |
|
|
To household power outlet |
|
(AC 120 V, 60 Hz) |
NOTE
•Do not connect two FM antennas simultaneously.
•If you are unable to receive a good broadcast signal, we recommend installing an outdoor antenna. Inquire at the retail store where you purchased the unit for details.
NOTE
•Only use the supplied power cord.
•Be sure the power cord is unplugged from the power outlet before connecting or disconnecting it to the AC IN.
Preparations
Operations
Informations
6

Operations
Operations
Here, we explain functions and operations that let you make better use of this unit.
FBasic operation vpage 8
FAdvanced operation vpage 16
7
Preparations
Operations
Informations
Basic operation
nn Turning the power on (vpage 8) nn Before playing a disc (vpage 8) nn Turning the power off (vpage 8)
nn Setting the current time (12-Hour Display)
(vpage 9)
nn Selecting the input source (vpage 10) nn Adjusting the master volume (vpage 10) nn Adjusting the tone (vpage 10)
nn Turning off the sound temporarily (vpage 10) nn Switching the display’s brightness (vpage 10)
nn Playing CDs (vpage 11)
nn Listening to FM broadcasts (vpage 13)
nn Advanced operation (vpage 16)
Preparations
Turning the power on
Press POWER X.
• The power turns on. Press again to set the
power to standby. |
|
• Power indicator |
|
Normal standby....................... |
Off |
Power on................................. |
Green |
Alarm standby.......................... |
Orange |
iPod charge standby................ |
Red |
When the power is in the standby mode, pressing one of the following buttons also turns this unit on.
•X, 5 or 1/3z on the main unit
•CD, TUNER, iPod/USB, DIGITAL IN, ANALOG IN or 1/3z on the remote control unit
zzIf a disc has already been inserted, playback starts.
NOTE
•Power continues to be supplied to some of the circuitry even when the power is in the standby mode. When leaving home for long periods of time, unplug the power cord from the power outlet.
•Be sure to stop playback before turning the power off.
nnCompletely turning off the power
Unplug the power cord from the wall outlet.
•Note that the time setting is cleared when the power cord is unplugged from the outlet.
•The settings made for the various functions may be cleared if the power cord is left unplugged from a power outlet for an extended period of time.
Before playing a disc
1 Press POWER X.
2 Press CD to set the input source to “DISC”.
If no disc is loaded “NO DISC” is displayed.
3 Insert a disc (vpage 30).
• Press 5 on the main unit to open/close the disc tray.
• The disc tray also closes when 1/3 is pressed.
NOTE
Do not place any foreign objects in the disc tray. Doing so could damage it.
Turning the power off
Press POWER X.
The power indicator turns off, and so does the power.
NOTE
•Be sure to stop playback before turning the power off.
•Make sure that the disc tray is completely shut before turning off the power.
•Do not push the disc tray in by hand when the power is turned off.
Doing so could damage the set.
8
Preparations
Operations
Informations
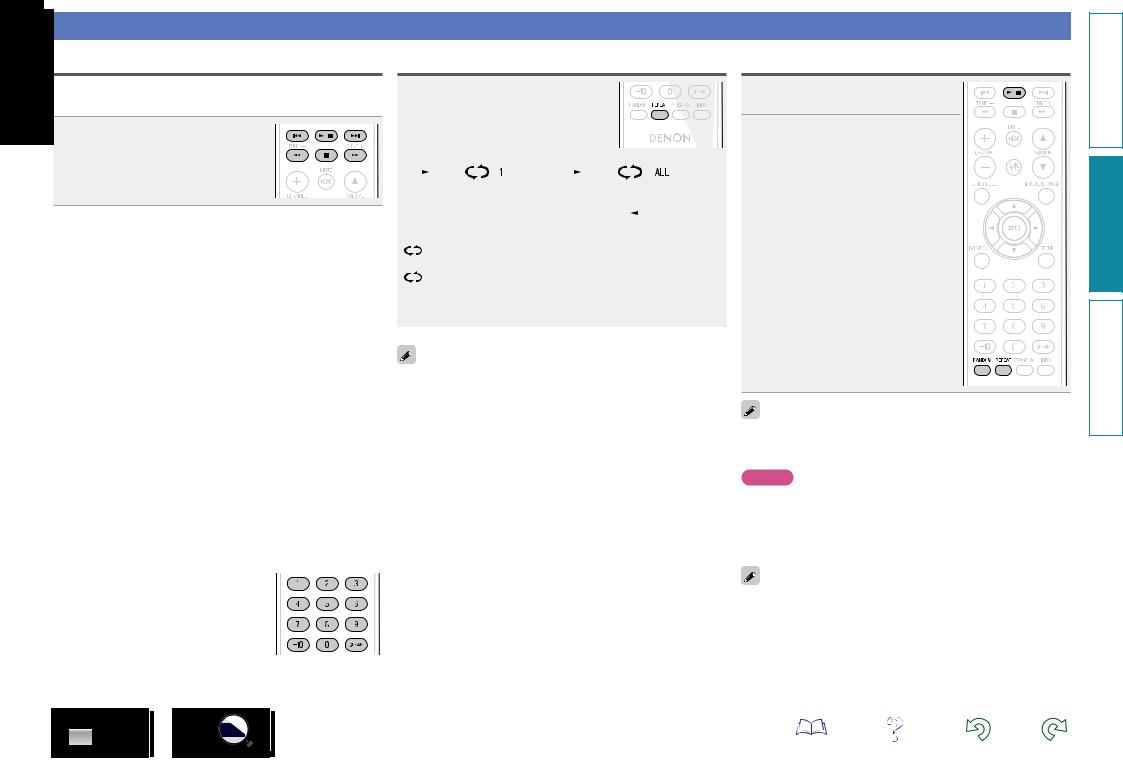
Setting the current time (12-Hour Display)
GExampleH Setting the current time to 10:15 am
1 Press POWER X to turn the
power on.
2 Press SETUP.
Various types of setting menus are displayed.
3 Use ui to select “CLOCK
SETUP”, then
nnChecking the current time when the power is on
Press CLOCK.
Press once more and the display returns to its original condition.
nnChecking the current time when the power is set to standby
Press CLOCK.
The current time is displayed for 10 seconds.
NOTE
The time cannot be set when in the standby mode. Turn on the power first.
7
9
Preparations
Operations
Informations
Operations possible during playback
Selecting the input source
Press CD, TUNER, iPod/USB, DIGITAL IN or ANALOG IN to select the input source.
The desired input source can be selected directly.
You can also use the following operation to select an input source.
nnUsing the button on the main unit
Press SOURCE.
•Every time you press SOURCE, the input source switches in the following order.
DISC |
iPod/USB |
TUNER |
DIGITAL IN |
ANALOG IN |
|
Adjusting the master volume
Use VOLUME df to adjust the volume.
The volume level is displayed.
GAdjustable rangeH
VOLUME 00 – 49, VOLUME MAX
You can also adjust the volume this by turning VULUME on the main unit.
Adjusting the tone
1 Press SDB TONE to select the tone parameter to be adjusted.
 SDB
SDB  BASS
BASS  TREBLE
S. DIRECT  BALANCE
2 Use op to adjust the SDB,
BASS, TREBLE or BALANCE.
•To make other tone adjustments at this time, press SDB TONE.
•If no operation is performed for 5 seconds, the adjustment is retained and the normal display reappears.
SDB Emphasizes the bass sound when the Super Dynamic Bass (SDB) function is set to ON.
GSelectable modesH |
ON – OFF |
BASS Adjusts the bass sound.
GVariable rangeH |
–10dB – +10dB |
TREBLE Adjusts the treble sound.
GVariable rangeH |
–10dB |
– |
+10dB |
BALANCE Adjusts the left/right volume balance.
GVariable rangeH L06 – CENTER – R06
S.DIRECT Plays back a disc using the SOURCE DIRECT mode. During the SOURCE DIRECT mode, the audio signals bypass the tone control circuits (SDB/BASS/TREBLE/ BALANCE), the music reproduction is more faithful to the original sound.
GDefault settingsH |
|
• SDB....................................... |
OFF |
• BASS..................................... |
0dB |
• TREBLE................................. |
0dB |
• BALANCE....................... |
CENTER |
• S.DIRECT............................... |
OFF |
Turning off the sound temporarily
Press MUTE :.
“MUTE ON” is displayed.
To cancel, press MUTE : again.
(The mute mode is also canceled when VOLUME df is pressed.)
Switching the display’s brightness
Press DIMMER.
100 % 70 %
Off  40 %
40 %
• The display’s brightness switches each time the button is pressed.
Preparations
Operations
Informations
10
Playing CDs
Playing CDs
Before you start this operation, perform the procedure in “Before playing a disc” (vpage 8).
Press 1/3.
The 1 indicator lights and playback begins.
nnPlaying of MP3 and WMA files (vpage 17)
nnStopping playback
Press 2.
•You can also perform this operation by pressing 2 on the main unit.
nnStopping playback temporarily
Press 1/3.
3 is displayed.
• To resume playback, press 1/3.
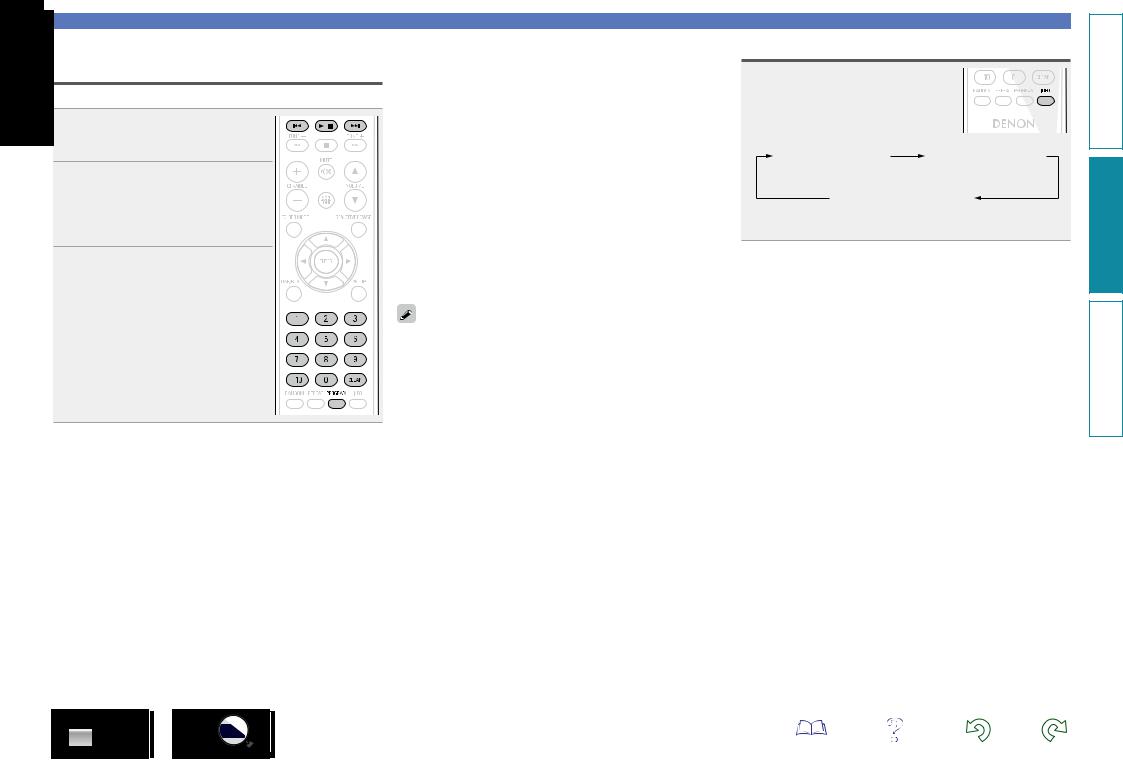
nnFast-forwarding and fast-reversing (searching)
During playback, press and hold in 6, 7.
nnMoving to the beginning of tracks (skipping)
During playback, press 8, 9.
•The disc skips as many tracks as times the button is pressed.
•When you press reverse once, playback returns to the beginning of the current track.
•You can also perform this operation by pressing 8/–, +/9 on the main unit.
nnTo play the desired track
Press 0 – 9, +10 to select the track.
GExampleH Track 4 : 4
GExampleH Track 12 : +10, 2 GExampleH Track 20 : +10, +10, 0
Playing repeatedly (Repeat playback)
Press REPEAT.
Playback in the respective repeat mode starts.
|
|
|
Single-track repeat |
|
|
All-track repeat |
|
|
||
|
|
|
|
Repeat off |
|
|||||
|
|
|
|
(indicator turns off) |
|
|
|
|||
|
|
|
|
|
Only 1 track plays repeatedly. |
|||||
|
|
|
1 (Single-track repeat) |
|||||||
|
|
|
|
|
All tracks play repeatedly. |
|||||
|
|
|
ALL (All-track repeat) |
|||||||
|
|
|
|
Normal playback resumes. |
||||||
|
Repeat off (indicator turns off) |
|||||||||
|
|
|
|
|
|
|
|
|
|
|
The repeat playback mode is canceled if you open the disc tray or turn off power.
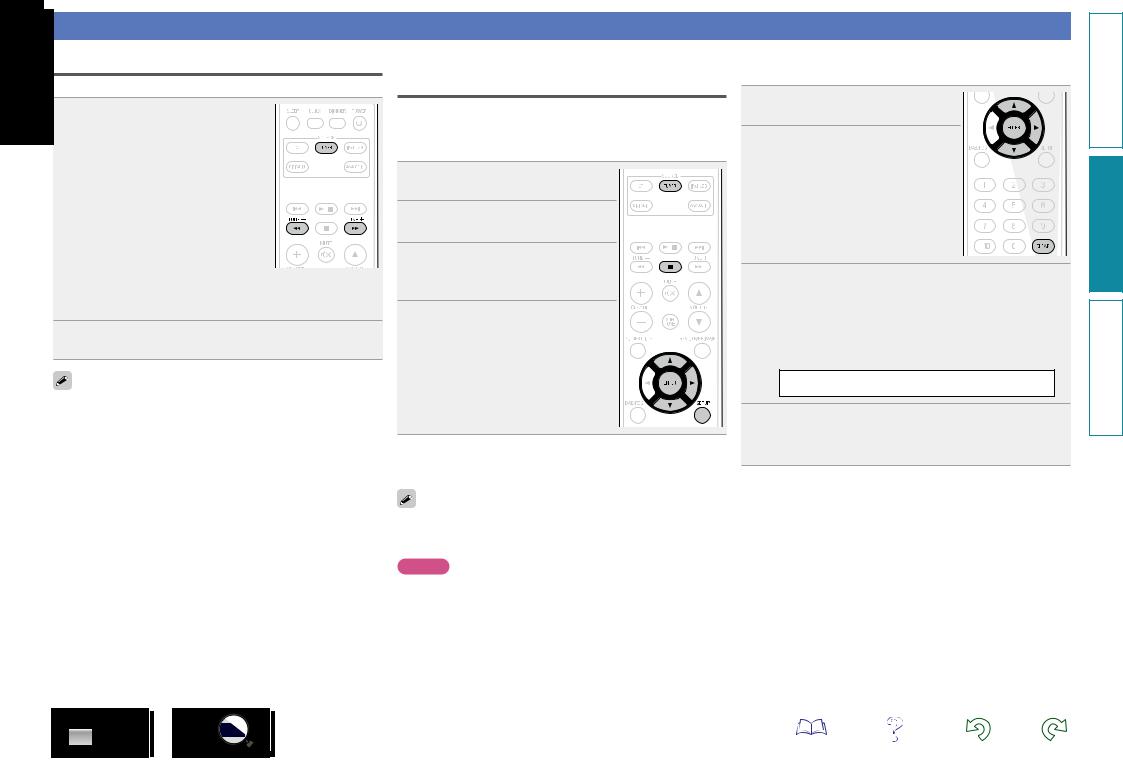
Playing random order (Random playback)
1 In the stop mode, press RANDOM.
The “RANDOM” indicator lights.
2 Press 1/3.
The tracks start playing in random order.
If REPEAT is pressed during random playback, after the current session of random playback is finished, another session in a different order of tracks starts.
NOTE
Random play cannot be set or canceled during playback.
nnCanceling random playback
While stopped, press RANDOM. The “RANDOM” indicator turns off.
The random playback mode is canceled if you open the disc tray or turn off power.
11
Preparations
Operations
Informations
Playing tracks in the desired order (Program playback)
Up to 25 tracks can be programmed.
1 In the stop mode, press
PROGRAM.
“PGM” is displayed.
2 Use 0 – 9, +10 to select the tracks.
GExampleH To program tracks 3, 12, 7 to
play in that order:
Press PROGRAM, 3, +10, 2, 7.
3 Press 1/3.
Playback starts in the programmed order.
nnChecking the order of the programmed tracks
In the stop mode, press 9.
The track numbers are displayed in the programmed order each time the button is pressed.
Playing CDs
Switching the display
Press INFO.
nnTo clear the last track programmed
In the stop mode, press CLEAR.
The last track programmed is cleared each time the button is pressed.
nnTo clear one programmed track at a time
In the stop mode, press 9to select the track to be cleared, then press CLEAR.
nnClearing the all programmed track
In the stop mode, press PROGRAM.
•If REPEAT is pressed during program playback, the tracks are played repeatedly in the programmed order.
•If RANDOM is pressed during program playback, the programmed tracks are played in random order.
•The program is cleared when the disc tray is opened or the power is turned off.
12
Elapsed time of |
Remaining time |
current track |
of current track |
Remaining time for all remaining tracks
• The display switches each time the button is pressed.
Preparations
Operations
Informations
Listening to FM broadcasts
Tuning in broadcast stations
Connect the antenna beforehand (vpage 6).
1 Press TUNER to select the reception band.
• When “FM AUTO” is selected: “AUTO” is displayed.
• When “FM MONO” is selected: “MONO” is displayed.
FM MONO 
 FM AUTO
•You can also perform this operation by pressing 2 on the main unit.
•When the reception band mode is set to “FM AUTO”, the “ST” indicator lights when a stereo broadcast is tuned in.
2 Use TUNE –, + to select the reception band.
When a station is received, the “TUNED” indication will light.
If the signal is weak and stable stereo reception is not possible, select “FM MONO” to receive in monaural.
Automatically presetting FM stations (Auto preset)
This unit can be preset with a total of 40 FM broadcast stations.
nnAuto presetting with the remote control unit
Perform this operation when tuned to an FM broadcast station.
1 Press SETUP.
2 Use ui to select “TUNER SETUP”, then press ENTER or p.
3 Use ui to select “FM AUTO
PRESET”, then press ENTER or p.
4 Press ENTER while “PRESET
ENTER ” is flashing.
Broadcast stations are preset automatically.
nnTo tune automatically
Press and hold in TUNE –, + to tune in stations automatically. |
nnCanceling auto presetting |
• Stations whose signal is weak cannot be tuned in. |
Press TUNER or 2. |
nnGiving station names to preset channels
Names of up to 8 characters can be input.
1 Tune in the preset channel you want to name.
2 Press ENTER twice.
The display switches to the station name input display.
Input the station name. |
|
3 Names of up to 8 characters can be input. |
|
• u, i button.......................... |
Selects the character. |
• p button................................ |
Moves the cursor to the right. |
• CLEAR button........................ |
Deletes the currently selected |
character.
• Characters that can be input.
A ~ Z, 0 ~ 9, ^ ’ ( ) z + , - . / = (space)
4 Press ENTER.
The characters you have input are entered.
• To give names to other stations, repeat steps 1 to 4.
nnTo stop auto tuning
Press TUNE –, +.
Broadcast stations whose antenna signal are weak cannot be preset automatically. If you wish to preset such stations, tune them in manually.
NOTE
When FM auto preset is performed, the channel currently registered as the FM preset is deleted, and the newly preset FM broadcast station is registered to the same number as the deleted channel.
Preparations
Operations
Informations
13
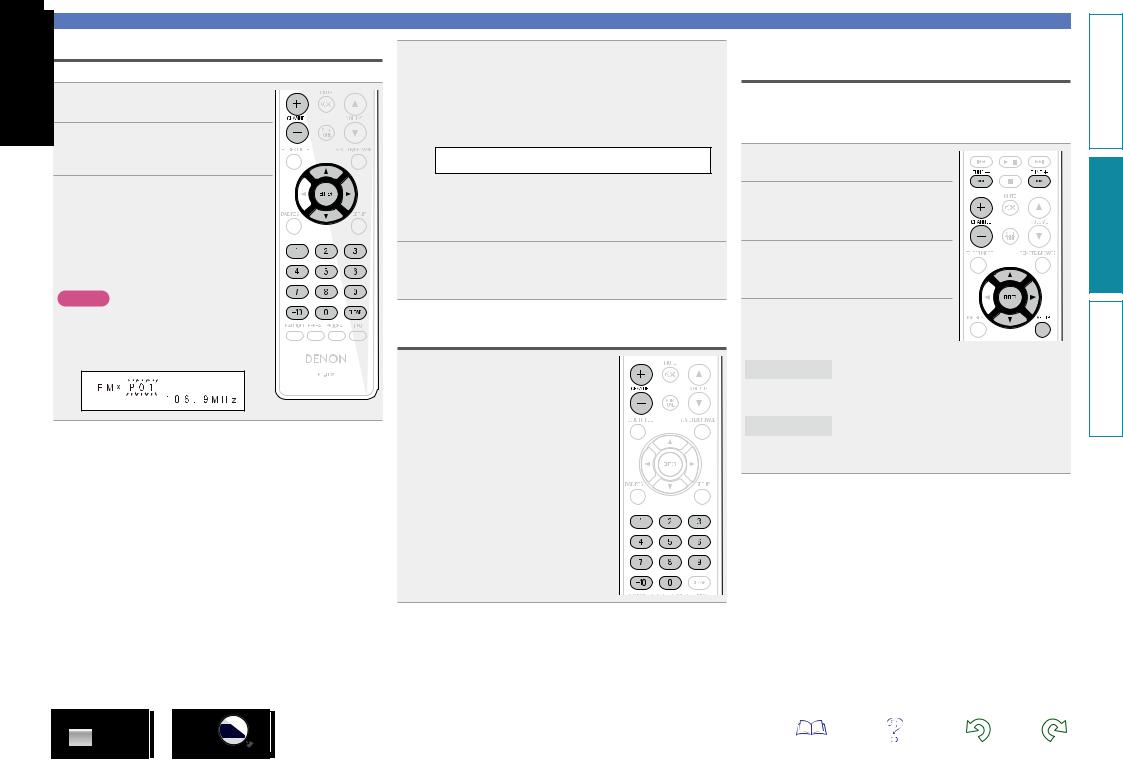
Presetting FM stations manually
This unit can be preset with a total of 40 FM broadcast stations.
1 Tune in the station you want to preset.
2 Press ENTER.
The minimum number display “P– –” for the unregistered preset flashes.
3 Use 0 – 9, +10 or CHANNEL –, + to select the number to be preset,
then press ENTER.
The reception frequency and reception mode are preset and the display switches to the station name input display.
NOTE
When the registered preset number is selected, “*” is displayed.
To overwrite this preset number, press
ENTER.
Input the station name. |
|
4 Names of up to 8 characters can be input. |
|
• u, i button..................... |
Selects the character. |
• p button........................... |
Moves the cursor to the right. |
• CLEAR button................... |
Deletes the currently selected |
character.
• Characters that can be input.
A ~ Z, 0 ~ 9, ^ ’ ( ) z + , - . / = (space)
•If you do not want to input a station name, press ENTER without inputting anything else.
•If you make a mistake when inputting, perform the procedure again. Whatever was previously input is overwritten.
5 Press ENTER.
The characters you have input are entered.
• To give names to other stations, repeat steps 1 to 5.
Listening to preset stations
Use 0 – 9, +10 or CHANNEL –, + to select the preset number.
14
Listening to FM broadcasts
Setting the preset channels and changing the received frequency on the main unit
8/–, +/9 on the main unit can be used both for switching the preset channel and for tuning.
Before operating them, switch the main unit to the “preset mode” or “tuning mode” using the procedure below.
1Press SETUP.
2Use ui to select “TUNER
SETUP”, then press ENTER or p.
3Use ui to select “MODE
SELECT”, then press ENTER or p.
4Use ui to select “PRESET
MODE” or “TUNING MODE”, then press ENTER.
PRESET MODE
TUNING MODE
Press 8/–, +/9on the main unit to switch preset channels.
•This is the same operation as CHANNEL –, + on the remote control unit.
Press 8/–, +/9 on the main unit to change the received frequency.
•This is the same operation as TUNE–, + on the remote control unit.
Preparations
Operations
Informations
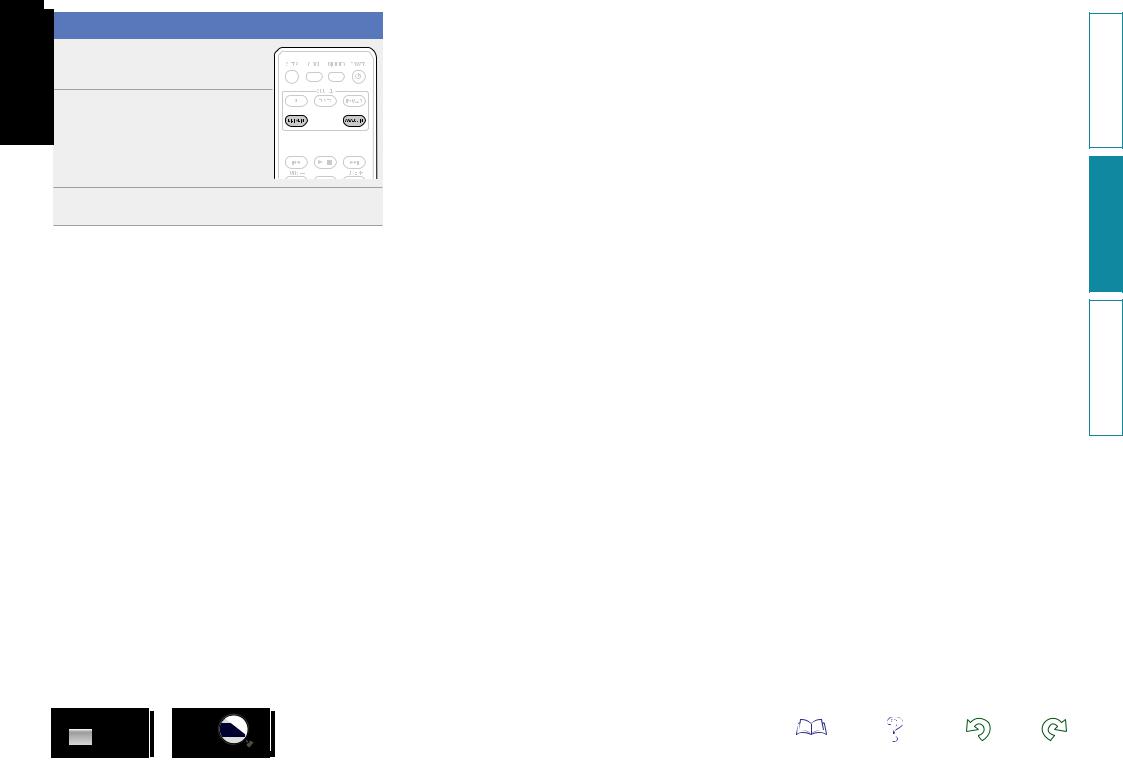
Listening to AUX
1 Prepare for playback.
Check the connection, then turn on this units.
2 Press DIGITAL IN or ANALOG IN.
•When there is no component connected to the DIGITAL IN connector, “SIGNAL
UNLOCK” is not displayed when you press
DIGITAL IN.
3 Play the component connected to this unit.
15
Preparations
Operations
Informations
Advanced operation
nn Before playing a USB or an iPod (vpage 16)
nn MP3 or WMA playback order of MP3 or WMA files
(vpage 16)
nn Playing of MP3 and WMA files (vpage 17) nn Playing an iPod (vpage 19)
nn Playing a USB memory device (vpage 20) nn Setting the alarm (vpage 21)
nn Other functions (vpage 23)
Preparations
Before playing a USB or an iPod
Press POWER X.
Connect USB memory device or iPod connection cable (vpage 5).
When the USB memory device or iPod is connected to the USB port on this unit, the source automatically switches to “USB” and file playback begins.
nnTurning the power off (to the standby mode)
Press POWER X again.
NOTE
Be sure to stop playback before turning the power off.
MP3 or WMA playback order of MP3 or WMA files
When there are multiple folders containing MP3 or WMA files, the playback order of folders is automatically set when this unit reads the media. The files in each folder are played back in the order in which the files were recorded on the media, from the oldest date and time.
nnPlayback order of folders
CD-R/CD-RW
For playback of files on CD-R or CD-RW , files in all folders on the first layer are played first, next on the second layer, then next on the third layer, and so on in this order.
USB memory device
For playback of files recorded on USB, files in the first folder on the first layer are played first, next folders on the second layer in the folder, next on the third layer, and so on in this order. Then accordingly
on another first layer are played.
•The playback order displayed on a PC may differ from the actual playback order.
•The playback order with a CD-R/CD-RW may differ, depending on the writing software.
NOTE
The playback order may differ from the order in which the folders or files were recorded if you delete or add a folder or file on USB. This occurs because of data recording specifications and is not a malfunction.
Preparations
Operations
Informations
16
Loading...