

Page 1

Preparations
Operations
Informations
DISC
RCD-M39
CD RECEIVER
Owner’s Manual
Page 2
SAFETY PRECAUTIONS
Preparations
Operations
Informations
DISC
n
IMPORTANT SAFETY
FCC INFORMATION (For US customers)
CAUTION
RISK OF ELECTRIC SHOCK
DO NOT OPEN
CAUTION:
TO REDUCE THE RISK OF ELECTRIC SHOCK, DO NOT REMOVE
COVER (OR BACK). NO USER-SERVICEABLE PARTS INSIDE.
REFER SERVICING TO QUALIFIED SERVICE PERSONNEL.
The lightning flash with arrowhead symbol, within an equilateral
triangle, is intended to alert the user to the presence of
uninsulated “dangerous voltage” within the product’s enclosure
that may be of sufficient magnitude to constitute a risk of
electric shock to persons.
The exclamation point within an equilateral triangle is intended
to alert the user to the presence of important operating
and maintenance (servicing) instructions in the literature
accompanying the appliance.
WARNING:
TO REDUCE THE RISK OF FIRE OR ELECTRIC SHOCK, DO NOT
EXPOSE THIS APPLIANCE TO RAIN OR MOISTURE.
CLASS 1 LASER PRODUCT
,,
CLASS 1
LASER
PRODUCT
,
,
INSTRUCTIONS
1. Read these instructions.
2. Keep these instructions.
3. Heed all warnings.
4. Follow all instructions.
5. Do not use this apparatus near water.
6. Clean only with dry cloth.
7. Do not block any ventilation openings.
Install in accordance with the manufacturer’s instructions.
8. Do not install near any heat sources such as radiators, heat registers,
stoves, or other apparatus (including amplifiers) that produce heat.
9. Do not defeat the safety purpose of the polarized or grounding-type plug. A
polarized plug has two blades with one wider than the other. A grounding
type plug has two blades and a third grounding prong. The wide blade or the
third prong are provided for your safety. If the provided plug does not fit into
your outlet, consult an electrician for replacement of the obsolete outlet.
10. Protect the power cord from being walked on or pinched particularly at
plugs, convenience receptacles, and the point where they exit from the
apparatus.
11. Only use attachments/accessories specified by the manufacturer.
12. Use only with the cart, stand, tripod, bracket, or table
specified by the manufacturer, or sold with the apparatus.
When a cart is used, use caution when moving the cart/
apparatus combination to avoid injury from tip-over.
13. Unplug this apparatus during lightning storms or when
unused for long periods of time.
14. Refer all servicing to qualified service personnel.
Servicing is required when the apparatus has been damaged in any way,
such as power-supply cord or plug is damaged, liquid has been spilled or
objects have fallen into the apparatus, the apparatus has been exposed to
rain or moisture, does not operate normally, or has been dropped.
15. Batteries shall not be exposed to excessive heat such as sunshine, fire or
the like.
1. PRODUCT
This product complies with Part 15 of the FCC Rules. Operation is subject
to the following two conditions: (1) this product may not cause harmful
interference, and (2) this product must accept any interference received,
including interference that may cause undesired operation.
2. IMPORTANT NOTICE: DO NOT MODIFY THIS PRODUCT
This product, when installed as indicated in the instructions contained
in this manual, meets FCC requirements. Modification not expressly
approved by DENON may void your authority, granted by the FCC, to use
the product.
3. NOTE
This product has been tested and found to comply with the limits for
a Class B digital device, pursuant to Part 15 of the FCC Rules. These
limits are designed to provide reasonable protection against harmful
interference in a residential installation.
This product generates, uses and can radiate radio frequency energy and,
if not installed and used in accordance with the instructions, may cause
harmful interference to radio communications. However, there is no
guarantee that interference will not occur in a particular installation. If this
product does cause harmful interference to radio or television reception,
which can be determined by turning the product OFF and ON, the user
is encouraged to try to correct the interference by one or more of the
following measures:
•Reorientorrelocatethereceivingantenna.
•Increasetheseparationbetweentheequipmentandreceiver.
•Connect the productintoan outlet on acircuitdifferent from that to
which the receiver is connected.
•Consultthelocalretailerauthorizedtodistributethistypeofproductor
an experienced radio/TV technician for help.
For Canadian customers:
This Class B digital apparatus complies with Canadian ICES-003.
CAUTION:
USE OF CONTROLS OR ADJUSTMENTS OR PERFORMANCE OF
PROCEDURES OTHER THAN THOSE SPECIFIED HEREIN MAY RESULT IN
HAZARDOUS RADIATION EXPOSURE.
THIS PRODUCT SHOULD NOT BE ADJUSTED OR REPAIRED BY ANYONE
EXCEPT PROPERLY QUALIFIED SERVICE PERSONNEL.
CAUTION:
HOT SURFACE. DO NOT TOUCH.
The top surface over the internal heat sink may become hot
Hot
surface
when operating this product continuously.
Do not touch hot areas, especially around the “Hot surface
mark” and the top panel.
mark
CAUTION:
To completely disconnect this product from the mains, disconnect the plug
from the wall socket outlet.
The mains plug is used to completely interrupt the power supply to the unit
and must be within easy access by the user.
I
Page 3
NOTES ON USE
Preparations
Operations
Informations
DISC
n
n CAUTIONS ON INSTALLATION
WARNINGS
•Avoid high temperatures.
Allow for sufficient heat dispersion when installed in a rack.
•Handle the power cord carefully.
Hold the plug when unplugging the cord.
•Keep the unit free from moisture, water, and dust.
•Unplug the power cord when not using the unit for long periods of time.
•Do not obstruct the ventilation holes.
•Do not let foreign objects into the unit.
•Do not let insecticides, benzene, and thinner come in contact with the unit.
•Never disassemble or modify the unit in any way.
•Ventilation should not be impeded by covering the ventilation openings
with items, such as newspapers, tablecloths or curtains.
•Naked flame sources such as lighted candles should not be placed on
the unit.
•Observe and follow local regulations regarding battery disposal.
•Do not expose the unit to dripping or splashing fluids.
•Do not place objects filled with liquids, such as vases, on the unit.
•Do not handle the mains cord with wet hands.
•When the switch is in the OFF (STANDBY) position, the equipment is not
completely switched off from MAINS.
•The equipment shall be installed near the power supply so that the power
supply is easily accessible.
•Do not keep the battery in a place exposed to direct sunlight or in places
with extremely high temperatures, such as near a heater.
z
z z
z
Wall
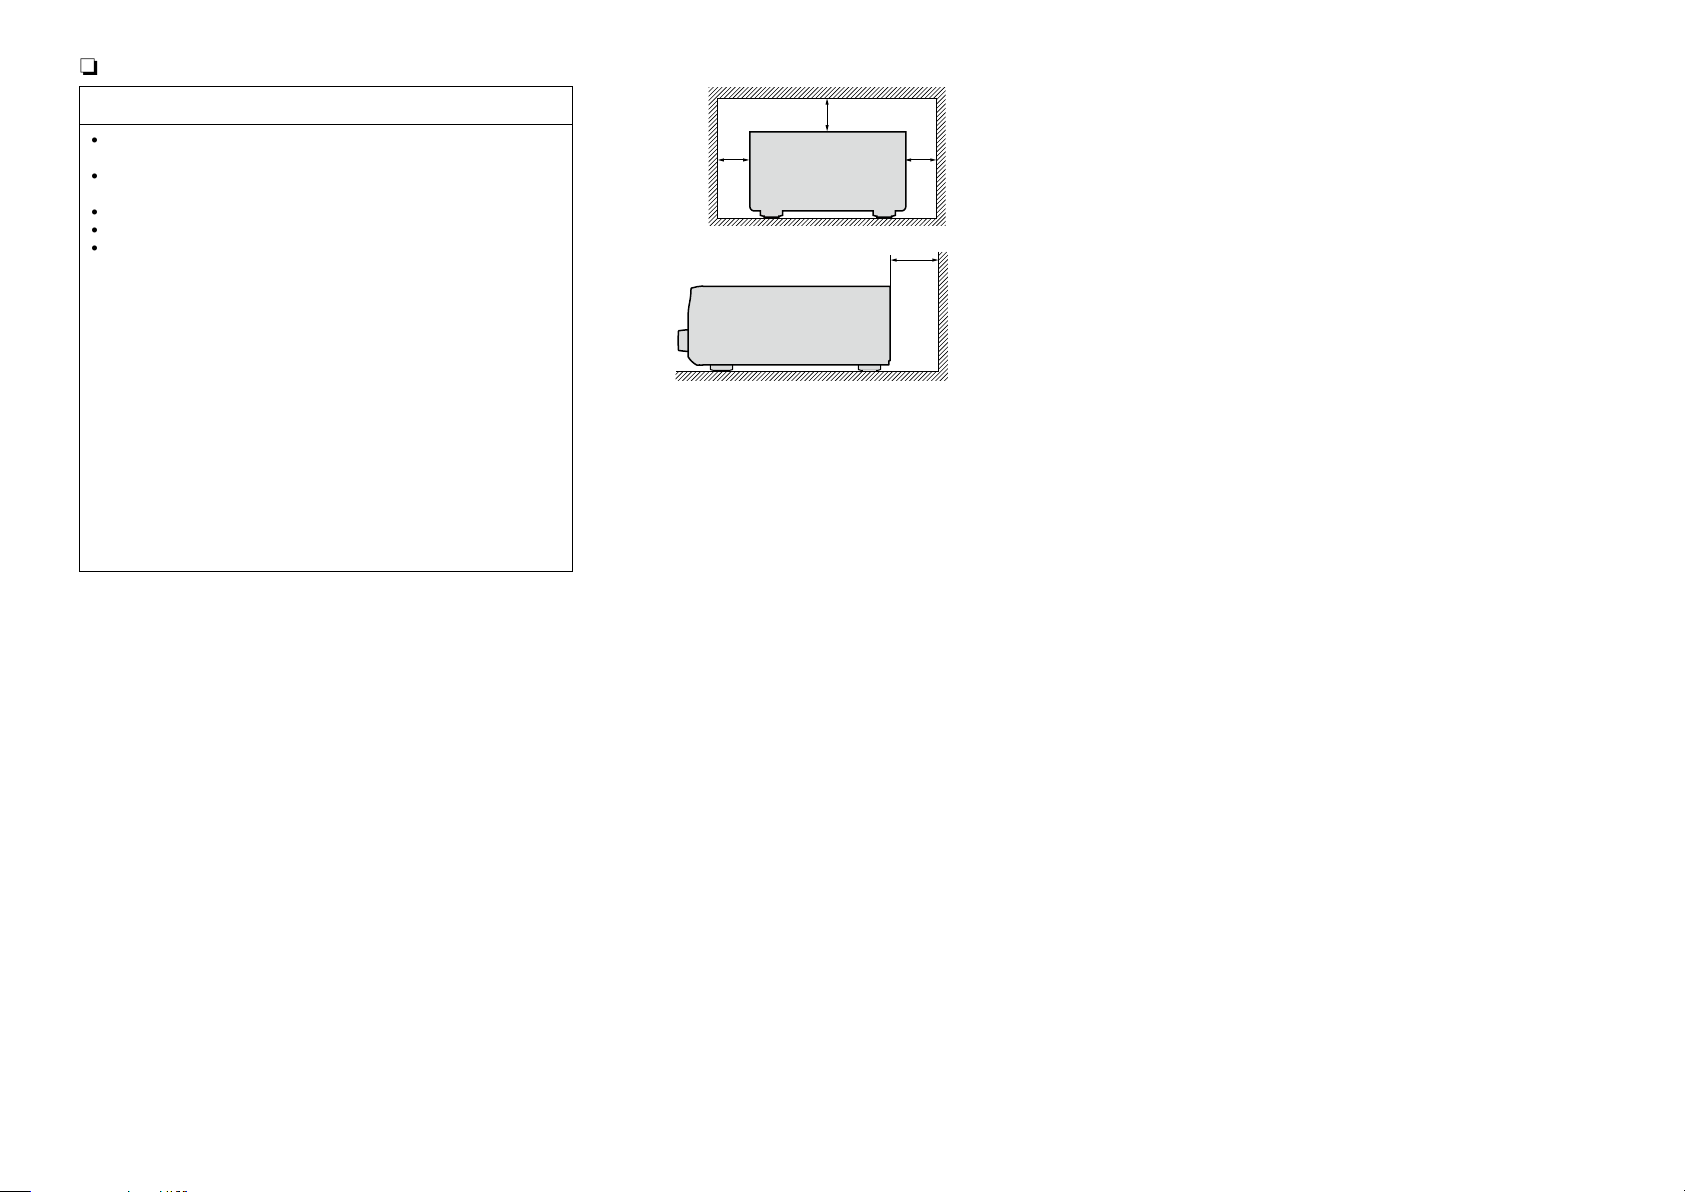
z For proper heat dispersal, do not install this unit in a confined
space, such as a bookcase or similar enclosure.
•More than 12 in. (0.3 m) is recommended.
•Do not place any other equipment on this unit.
II
Page 4
Getting started
Preparations
Operations
Informations
DISC
Thank you for purchasing this DENON product. To ensure proper operation, please read this owner’s manual carefully before using the product.
After reading them, be sure to keep them for future reference.
Contents
Getting started ·············································································· 1
Accessories ··················································································1
Features ························································································ 2
Cautions on handling ····································································2
Preparations ·············································································3
Connections ··················································································· 4
Connecting the speakers ······························································ 4
Connecting an iPod or USB memory device to the USB port ·······5
Connecting a TV············································································6
Connecting an antenna ································································· 6
Connecting the power cord ·························································· 6
Operations ················································································7
Basic operation ·············································································· 8
Preparations ·················································································· 8
Setting the current time (12-Hour Display) ··································· 9
Operations possible during playback ·········································· 10
Playing CDs·················································································11
Listening to FM broadcasts ························································ 13
Listening to AUX ········································································· 15
Advanced operation ···································································· 16
Preparations ················································································ 16
Playing of MP3 and WMA files ··················································· 17
Playing an iPod············································································19
Playing a USB memory device ····················································20
Setting the alarm ········································································21
Other functions ··········································································· 23
Informations···········································································24
Part names and functions···························································25
Front panel ·················································································· 25
Display ························································································ 26
Rear panel ··················································································· 26
Remote control unit ···································································· 27
Other information ·······································································30
Discs ··························································································· 30
Explanation terms ······································································· 31
Troubleshooting ·········································································· 31
Specifications ··············································································33
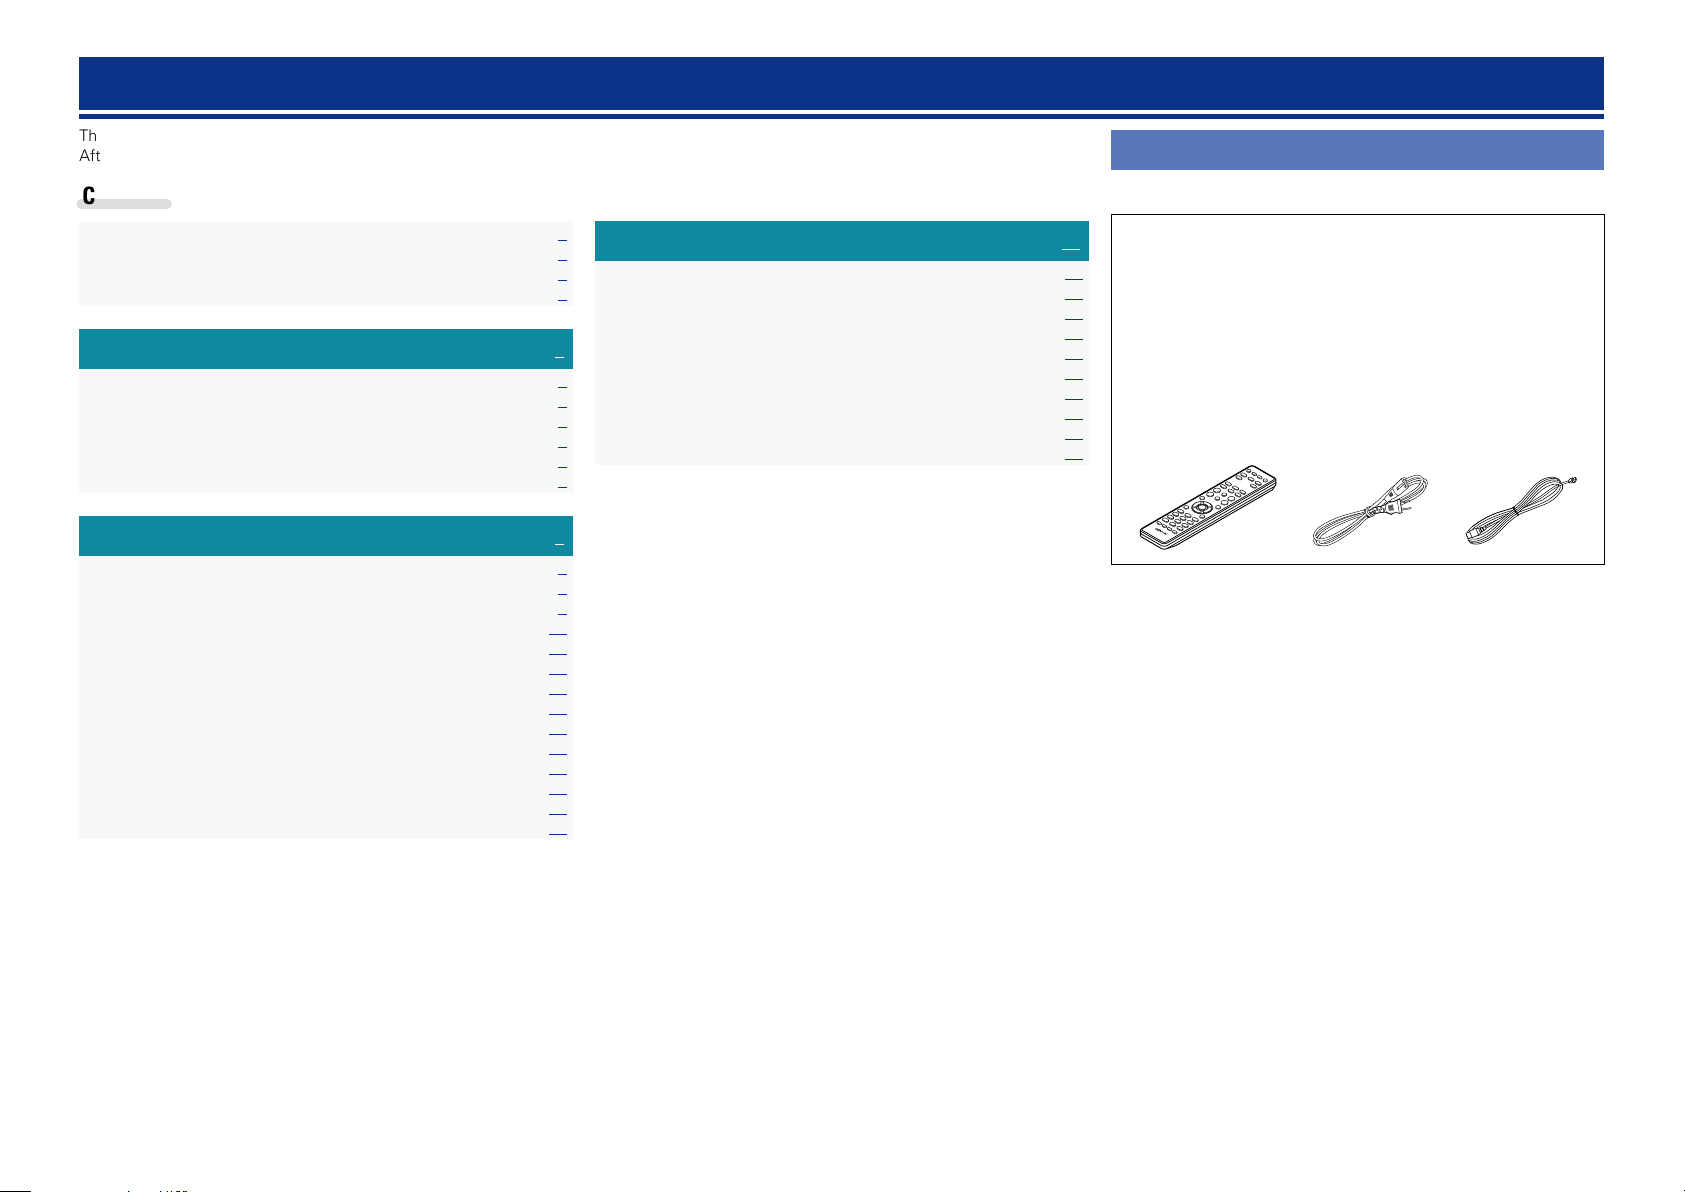
Accessories
Check that the following parts are supplied with the product.
q Getting Started ........................................................................ 1
w CD-ROM (Owner’s manual) .................................................... 1
e Safety Instructions .................................................................. 1
r Warranty (for North America model only) ................................ 1
t Service network list ................................................................. 1
y Remote control unit (RC-1162) ................................................ 1
u R03/AAA batteries ................................................................... 2
i Power cord .............................................................................. 1
o FM indoor antenna .................................................................. 1
y i o
1
Page 5

Features
Preparations
Operations
Informations
DISC
Cautions on handling
High quality amplifier stressing sound quality
Equipped with a 30 W + 30 W (6 Ω) high-quality amplifier circuits.
Direct Play for iPod® and iPhone® via USB
Music data from an iPod can be played back if you connect the USB
cable supplied with the iPod via the USB port of this unit, and also
an iPod can be controlled with the Remote control unit for this unit.
Weight and Dramatic sound
The board and circuit configuration has been redesigned to achieve
lower impedance. Since stable current is supplied to the power
amp and other sections, it is possible to realize as much as 30
watts of power.
“Simple & Straight” circuit design for sound
purity and free of coloration
DENON’s popular M series gives you high sound quality based on
the “simple & straight” concept. Circuitry is uncomplicated, signal
paths are short, and all adverse influences on sound quality have
been minimized.
This unit also provides the “Auto standby mode”, where it goes
into the standby state when there is no operation for 30 minutes.
Playback of MP3 and WMA files
Supports playback of discs and USB memory devices on which
MP3 or WMA files are recorded. The unit’s display can display the
title of the track and the name of the artist of the current track.
Usable characters “Switching the display” (vpage12, 20)
Low standby power consumption
Designed with the environment in mind, the unit consumes just
0.3 W while in standby mode.
Remote control unit
This unit is shipped with a remote control unit that has large
buttons for frequently used functions, allowing you to quickly find
the desired function.
•Before turning the power switch on
Check once again that all connections are correct and that there are
no problems with the connection cables.
•Power is supplied to some of the circuitry even when the unit is set
to the standby mode. When leaving home for long periods of time,
be sure to unplug the power cord from the power outlet.
•Proper ventilation
If the unit is left in a room full of smoke from cigarettes, etc., for
long periods of time, the surface of the optical pickup may get dirty,
preventing it from receiving signals properly.
•About condensation
If there is a major difference in temperature between the inside of
the unit and its surroundings, condensation may form on parts inside
the unit, causing it to fail to operate properly.
If this happens, let the unit sit for an hour or two with the power
turned off and wait until there is little difference in temperature
before using the unit.
•Cautions on using mobile phones
Using a mobile phone near this unit may result in noise. If that
occurs, move the mobile phone away from the unit when it is in use.
•Moving the unit
Be sure to remove a disc, turn off the power and unplug the power
cord from the power outlet. Next, disconnect the cables connected
to other system units before moving the unit.
•About care
•Wipe the cabinet and control panel clean with a soft cloth.
•Follow the instructions when using a chemical cleaner.
•Benzene, paint thinner or other organic solvents as well as
insecticide may cause material changes and discoloration if brought
into contact with the unit, and should therefore not be used.
2
Page 6

Preparations
Operations
Informations
Preparations
DISC
Preparations
Here, we explain the connection methods for this unit.
F Connecting the speakers vpage4
F Connecting an iPod or USB memory device to the USB port vpage5
F Connecting a TV vpage6
F Connecting an antenna vpage6
F Connecting the power cord vpage6
3
Page 7
Connections
Operations
Informations
Preparations
DISC
NOTE
•Do not plug in the power cord until all connections have been
completed.
•When making connections, also refer to the owner’s manual of the
other components.
•Be sure to connect the left and right channels properly (left with left,
right with right).
•Do not bundle power supply cords together with connection cables.
Doing so can result in humming or noise.
Cables used for connections
Audio cable (sold separately)
Subwoofer cable
Optical cable
Audio cable
Speaker cable
L
R
Audio cable (supplied)
L
R
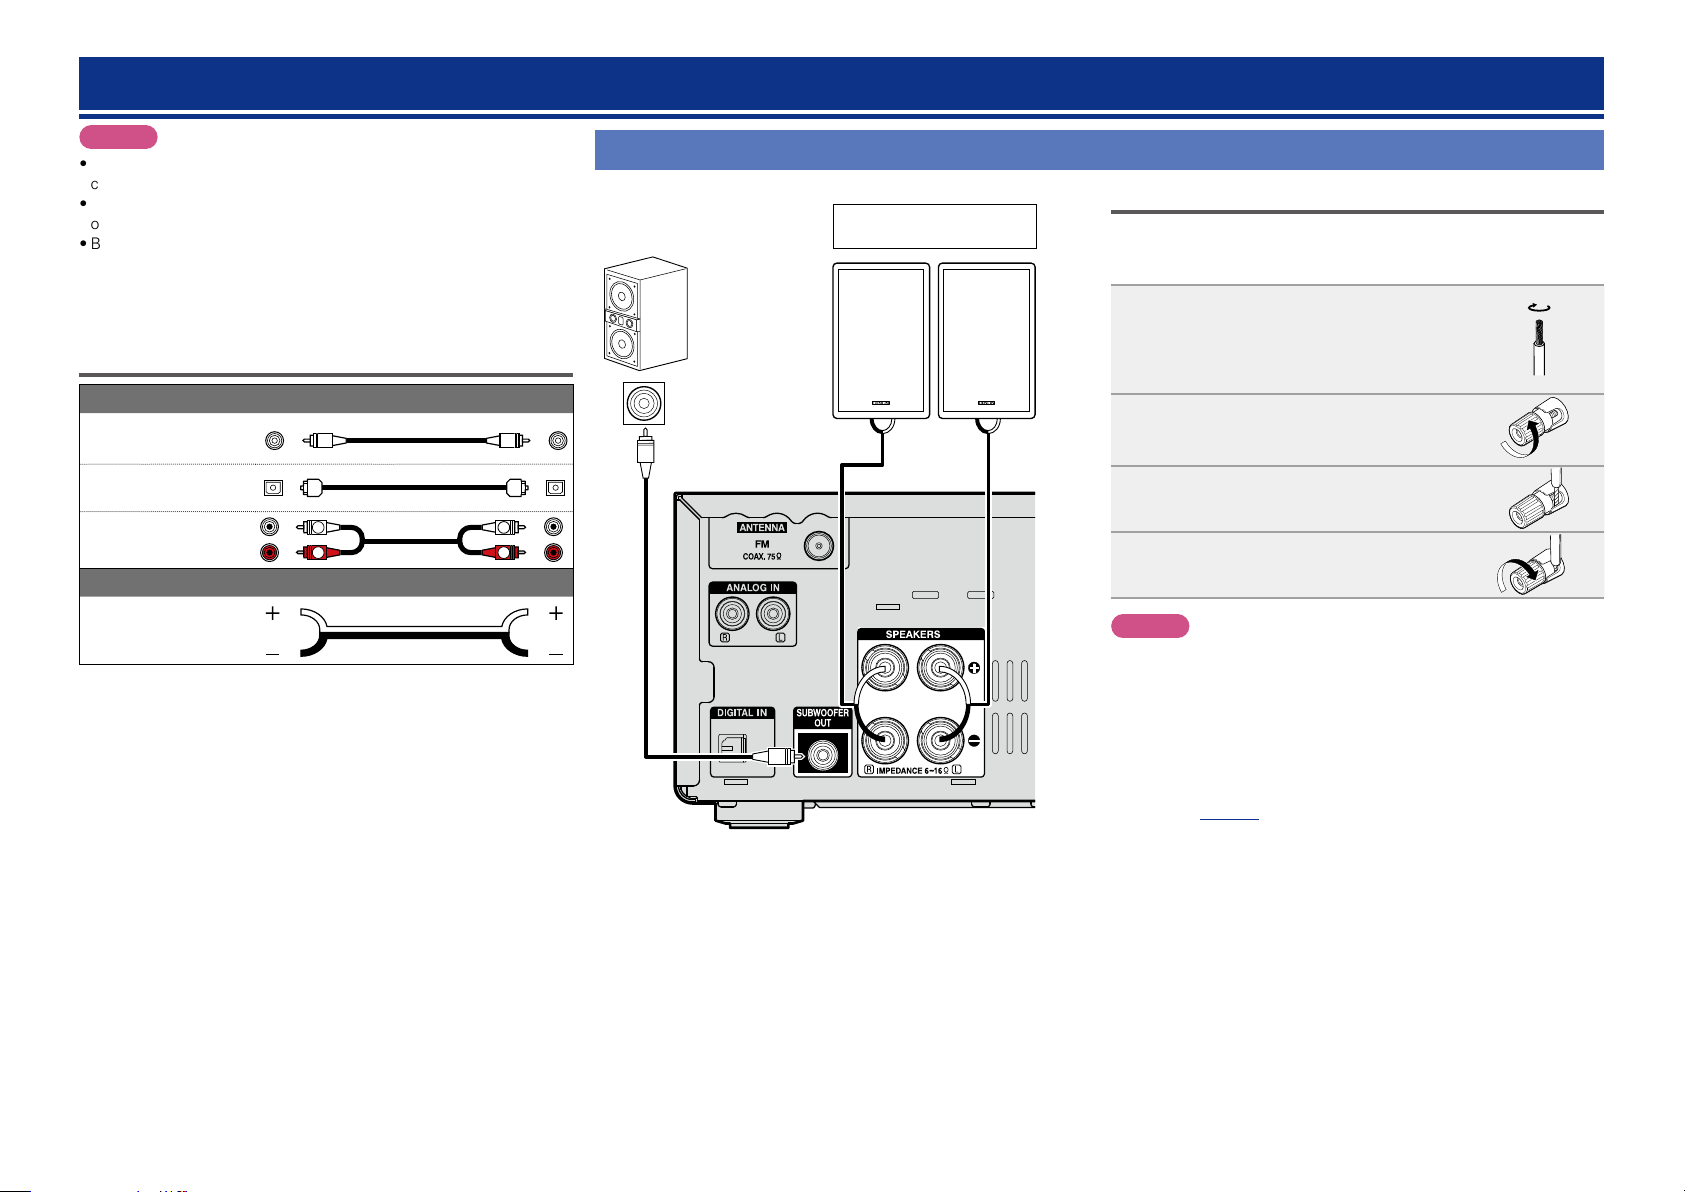
Connecting the speakers
Subwoofer
with built-in
amplifier
IN
Speaker SC-M39
(supplied)
(R) (L)
w q w q
Connecting the speaker cables
Carefully check the left (L) and right (R) channels and + (red) and –
(black) polarities on the speakers being connected to the unit, and be
sure to connect the channels and polarities correctly.
Peel off about 0.03 ft/10 mm of
1
sheathing from the tip of the speaker
cable, then either twist the core wire
tightly or apply solder to it.
Turn the speaker terminal
2
counterclockwise to loosen it.
Insert the speaker cable’s core wire to
3
all the way into the speaker terminal.
Turn the speaker terminal clockwise
4
to tighten it.
NOTE
•Disconnect this unit’s power plug from the power outlet before
connecting the speakers. Also, turn off the subwoofer.
•Use speakers with an impedance of 6 to 16 Ω. The protection
circuit may be activated if speakers with an impedance other
than specified are used.
•Connect the speaker cables so they do not stick out of the
speaker terminals. The protection circuit may be activated if the
wires touch the rear panel or if the + and – sides touch each
other (vpage31 “Protection circuit”).
•Never touch the speaker terminals while the power supply is
connected. Doing so could result in electric shock.
4
Page 8

Connecting an iPod or USB memory device to the USB port
Operations
Informations
Preparations
DISC
•You can enjoy music stored on an iPod or USB memory device.
•For operating instructions see “Playing an iPod” (vpage 19) or “Playing a USB memory device”
(vpage20).
Cables used for connections
To connect an iPod to this unit, use the USB cable supplied with the iPod.
iPod
USB memory
device
Supported iPod models
•iPod classic
or
DENON does not guarantee that all USB memory devices will operate or receive power. When using a
portable USB connection type HDD of the kind to which an AC adapter can be connected to supply power,
use the AC adapter.
NOTE
•USB memory devices will not work via a USB hub.
•It is not possible to use this unit by connecting the unit’s USB port to a PC via a USB cable.
•Do not use an extension cable when connecting a USB memory device. This may cause radio interference
with other devices.
•When connecting an iPhone to this unit, keep the iPhone at least 0.7 ft (20 cm) away from this unit. If
the iPhone is kept closer to this unit and a telephone call is received by the iPhone, noise may be output
from this device.
•If the iPod is connected using an iPod cable (commercially available) that is longer than 6.6 ft (2 m), sound
may not be played correctly. In this case, use a genuine iPod cable, or a cable that is shorter than 3.3 ft
(1 m).
•iPod nano
•iPod touch
•iPhone
(as of June 2012)
5
Page 9
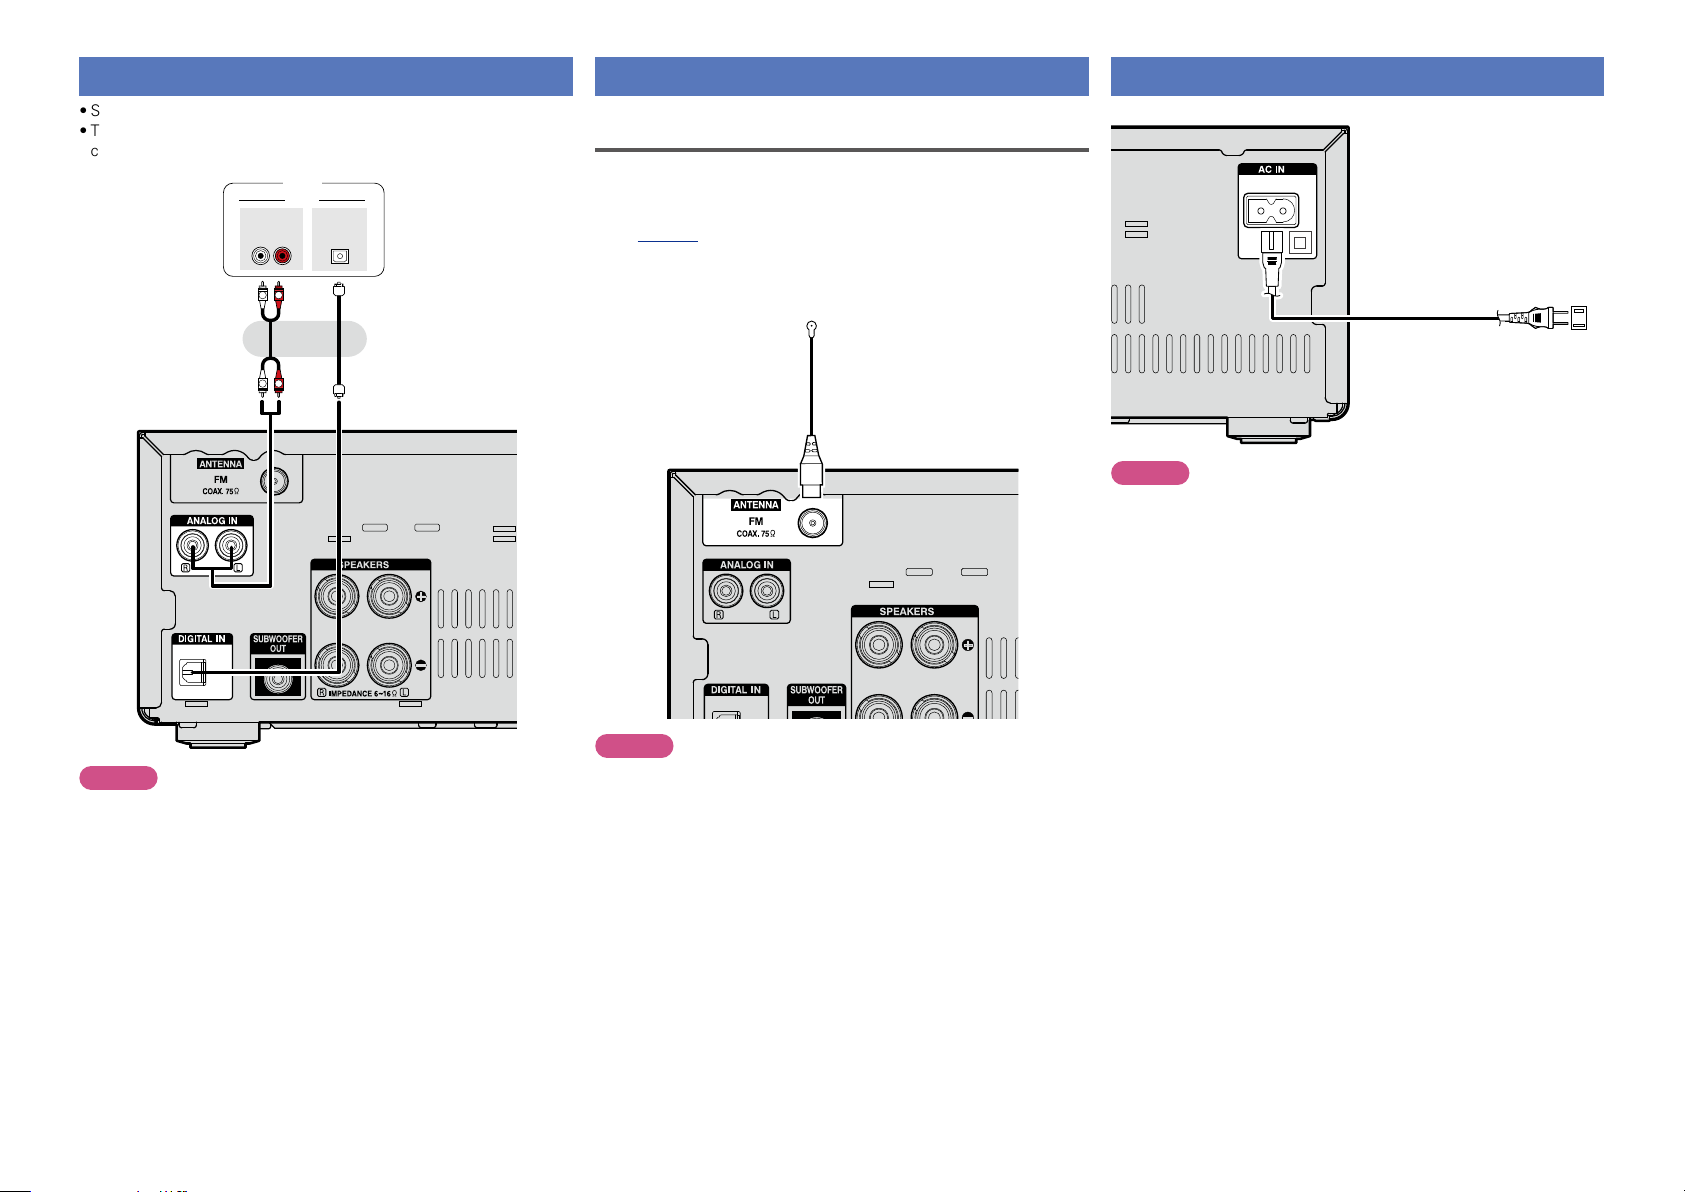
Connecting a TV
Operations
Informations
Preparations
DISC
•Select the connector to use and connect the device.
•To listen to TV audio through this unit, use the optical digital
connection.
TV
AUDIO
AUDIO
L
L
OUT
OPTICAL
OUT
RL
R
or
R
Connecting an antenna
FM
•Connect the FM antenna included with the unit to enjoy listening to
radio broadcasts.
•After connecting the antenna and receiving a broadcast signal
(vpage 13 “Listening to FM broadcasts”), use tape to fix the
antenna in a position where noise is the lowest.
FM indoor antenna
(Supplied)
Connecting the power cord
Power cord (Supplied)
To household power outlet
(AC 120 V, 60 Hz)
NOTE
•Only use the supplied power cord.
•Be sure the power cord is unplugged from the power outlet before
connecting or disconnecting it to the AC IN.
NOTE
•Other digital audio signals than 2 channel linear PCM cannot be input
through DIGITAL IN (OPTICAL) connector of this unit.
•When you try to input digital audio signals other than 2 channel linear
PCM to this unit, set the digital audio output setting of the TV to 2
channel PCM. For details, see the operating instructions of the TV.
NOTE
•Do not connect two FM antennas simultaneously.
•If you are unable to receive a good broadcast signal, we recommend
installing an outdoor antenna. Inquire at the retail store where you
purchased the unit for details.
6
Page 10

Operations
Preparations
Informations
Operations
DISC
Operations
Here, we explain functions and operations that let you make better use of this unit.
F Basic operation vpage8
F Advanced operation vpage16
7
Page 11
Basic operation
Preparations
Informations
Operations
DISC
n Turning the power on (vpage8)
n Before playing a disc (vpage8)
n Turning the power off (vpage8)
n Setting the current time (12-Hour Display)
(vpage9)
n Selecting the input source (vpage10)
n Adjusting the master volume (vpage10)
n Adjusting the tone (vpage10)
n Turning off the sound temporarily (vpage10)
n Switching the display’s brightness (vpage10)
n Playing CDs (vpage11)
n Listening to FM broadcasts (vpage13)
n Advanced operation (vpage16)
Preparations
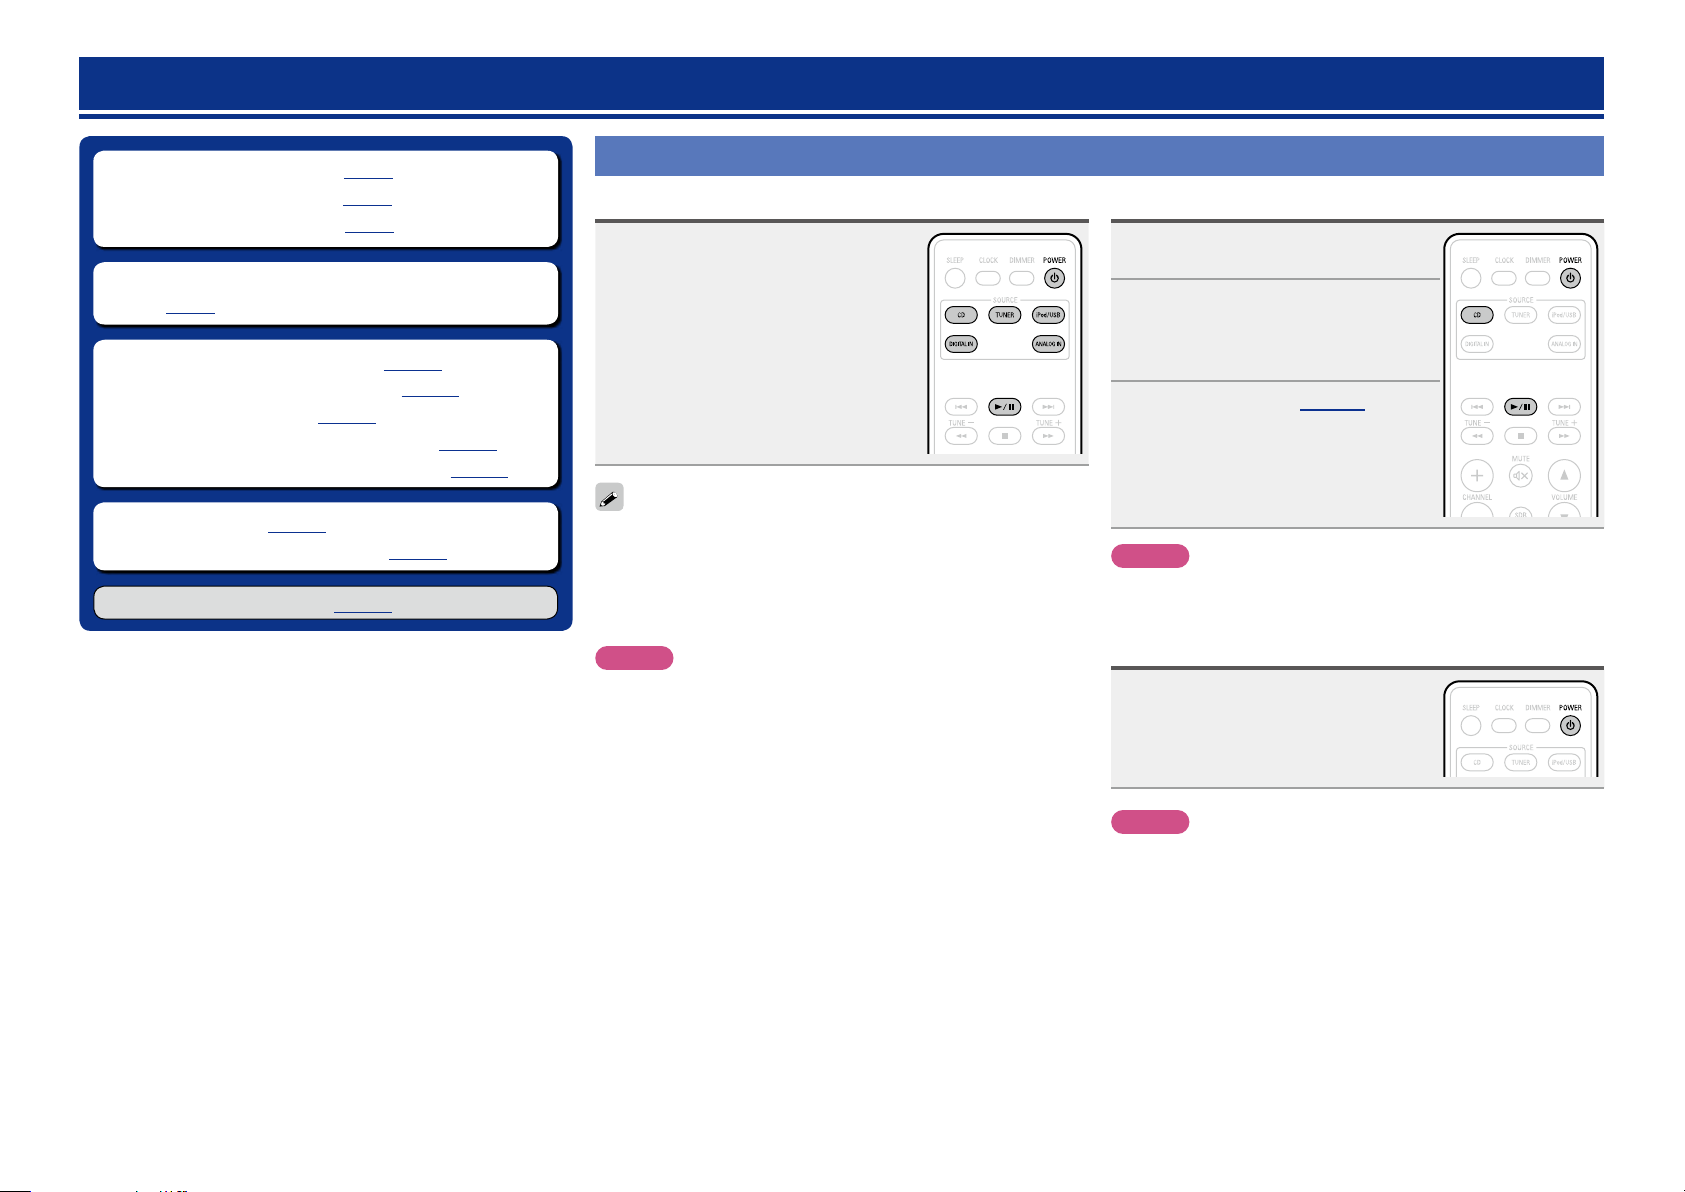
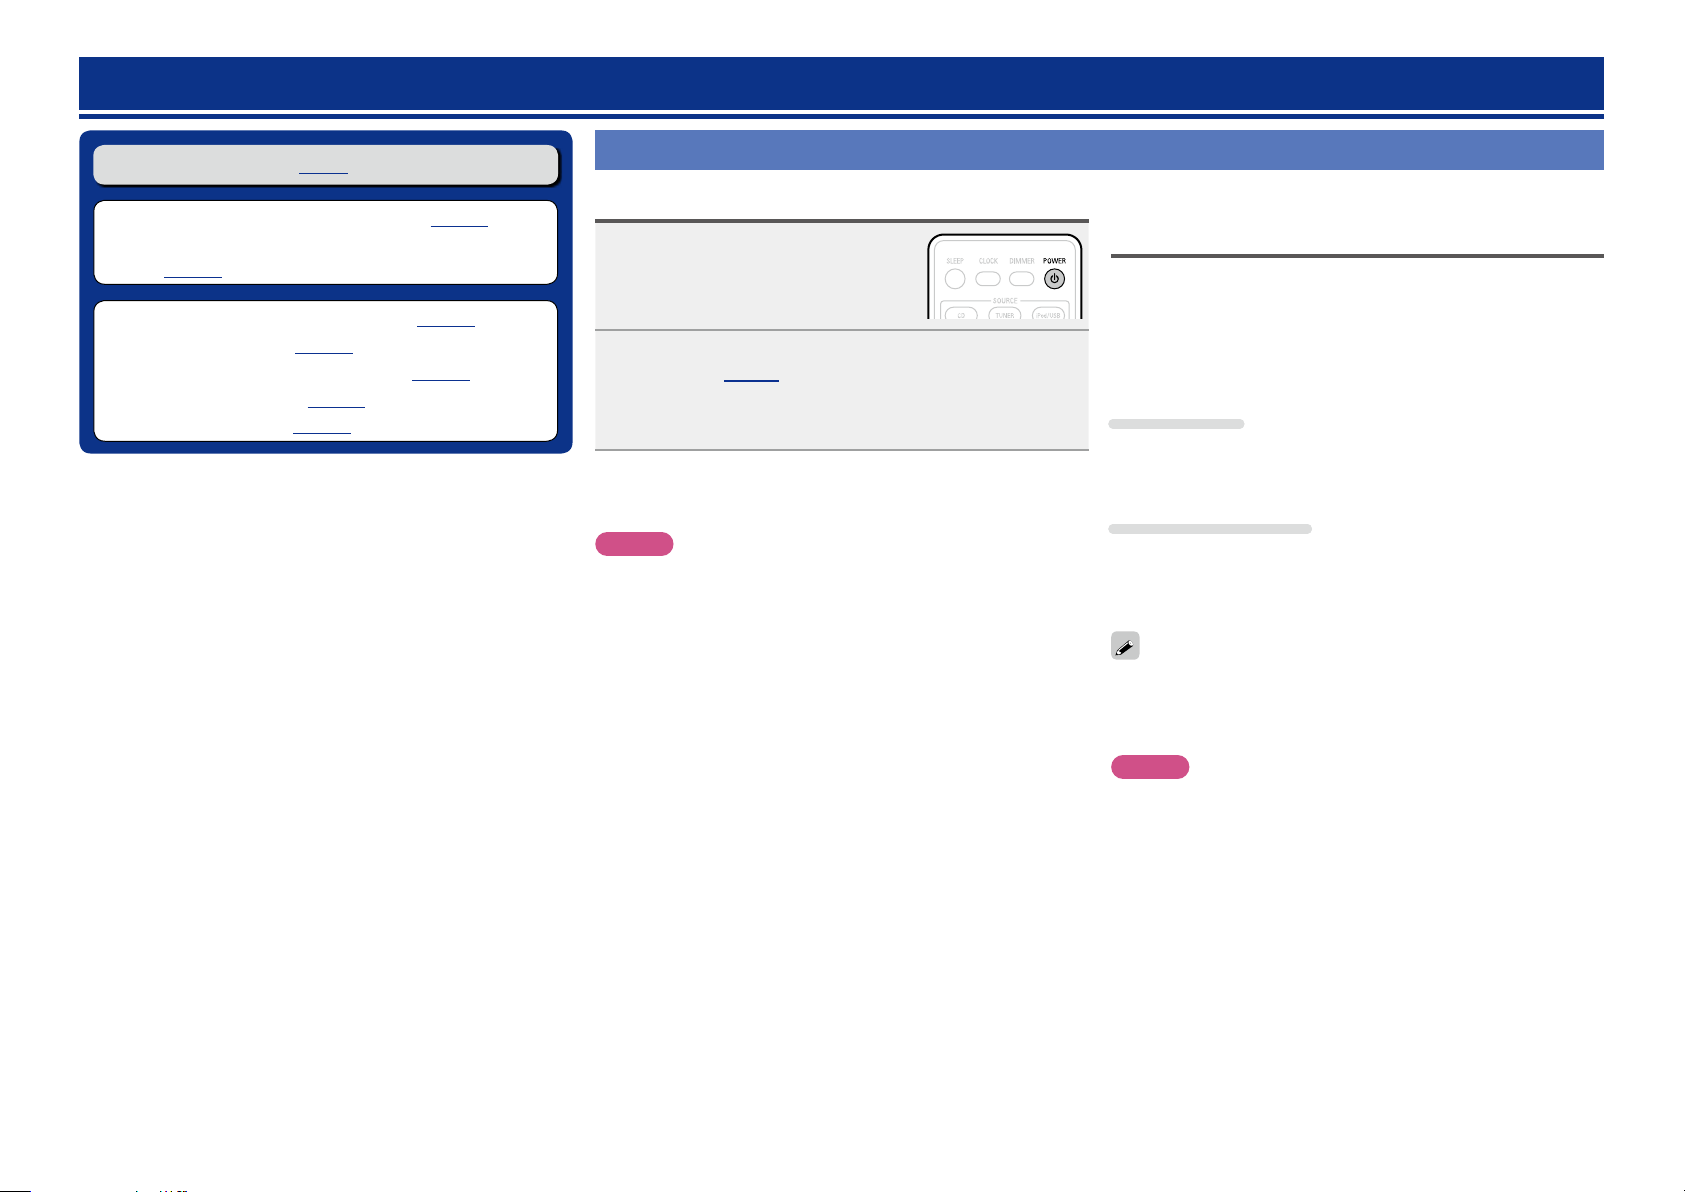
Turning the power on
Press POWER X.
•The power turns on. Press again to set the
power to standby.
•Power indicator
Normal standby .......................Off
Power on .................................Green
Alarm standby .........................Orange
iPod charge standby ................Red
When the power is in the standby mode, pressing one of the following
buttons also turns this unit on.
•X, 5 or 1/3z on the main unit
•CD, TUNER, iPod/USB, DIGITAL IN, ANALOG IN or 1/3z on the
remote control unit
z If a disc has already been inserted, playback starts.
NOTE
•Power continues to be supplied to some of the circuitry even when
the power is in the standby mode. When leaving home for long
periods of time, unplug the power cord from the power outlet.
•Be sure to stop playback before turning the power off.
Before playing a disc
Press POWER X.
1
Press CD to set the input source
2
to “DISC”.
If no disc is loaded “NO DISC” is
displayed.
Insert a disc (vpage 30).
3
•Press 5 on the main unit to open/close the
disc tray.
•The disc tray also closes when 1/3 is
pressed.
NOTE
Do not place any foreign objects in the disc tray. Doing so could
damage it.
Turning the power off
Press POWER X.
The power indicator turns off, and so does
the power.
n Completely turning off the power
Unplug the power cord from the wall outlet.
•Note that the time setting is cleared when the power cord is
unplugged from the outlet.
•The settings made for the various functions may be cleared if the
power cord is left unplugged from a power outlet for an extended
period of time.
8
NOTE
•Be sure to stop playback before turning the power off.
•Make sure that the disc tray is completely shut before turning off
the power.
•Do not push the disc tray in by hand when the power is turned off.
Doing so could damage the set.
Page 12
Setting the current time (12-Hour Display)
Preparations
Informations
Operations
DISC
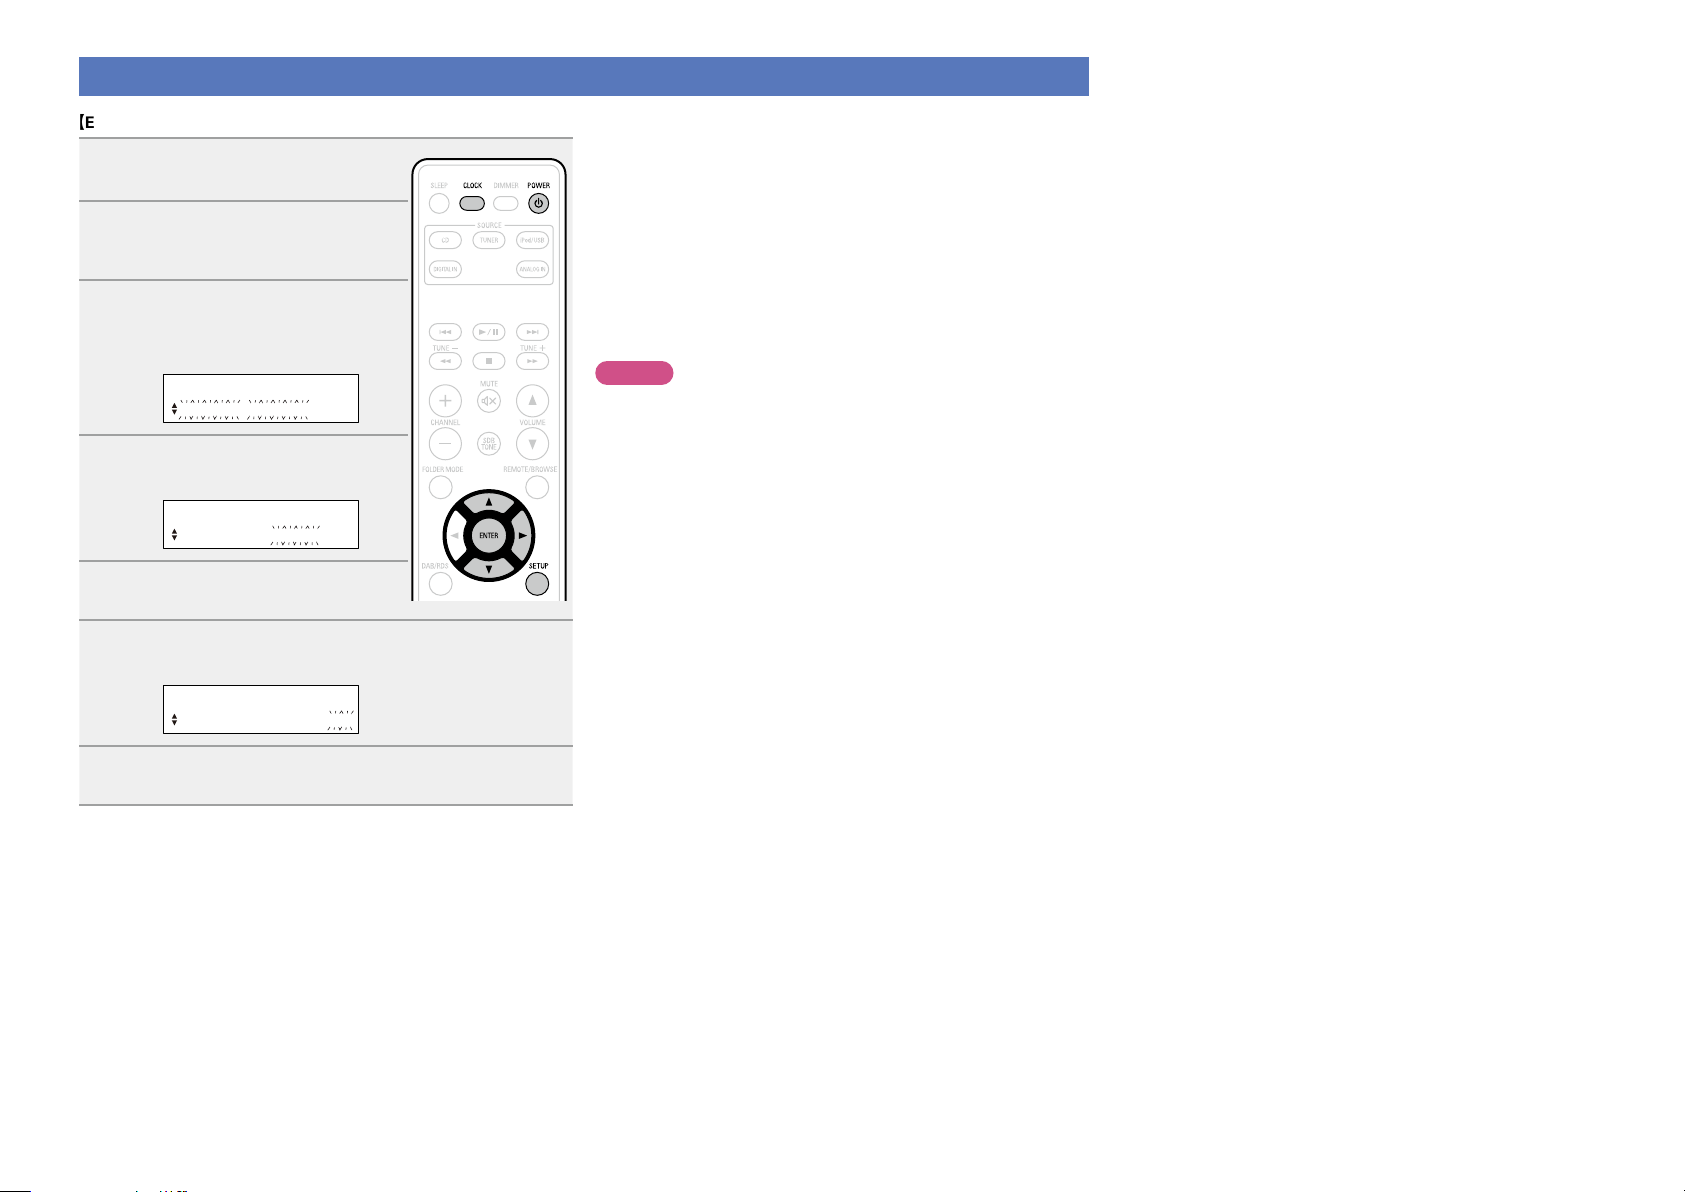
GExampleH Setting the current time to 10:15 am
Press POWER X to turn the
1
power on.
Press SETUP.
2
Various types of setting menus are
displayed.
Use ui to select “CLOCK
3
SETUP”, then
press ENTER or p.
SETUP
CLOCK SETUP
Use ui to set the “hours”.
4
CLOCK SETUP
AM10:00
Press ENTER or p.
5
The “minutes” display flashes.
Use ui to set the “minutes”.
6
n Checking the current time when the power is on
Press CLOCK.
Press once more and the display returns to its original condition.
n Checking the current time when the power is
set to standby
Press CLOCK.
The current time is displayed for 10 seconds.
NOTE
The time cannot be set when in the standby mode. Turn on the power
first.
CLOCK SETUP
AM10:15
Press ENTER or p.
7
The current time is set, and the normal display reappears.
9
Page 13
Operations possible during playback
Preparations
Informations
Operations
DISC
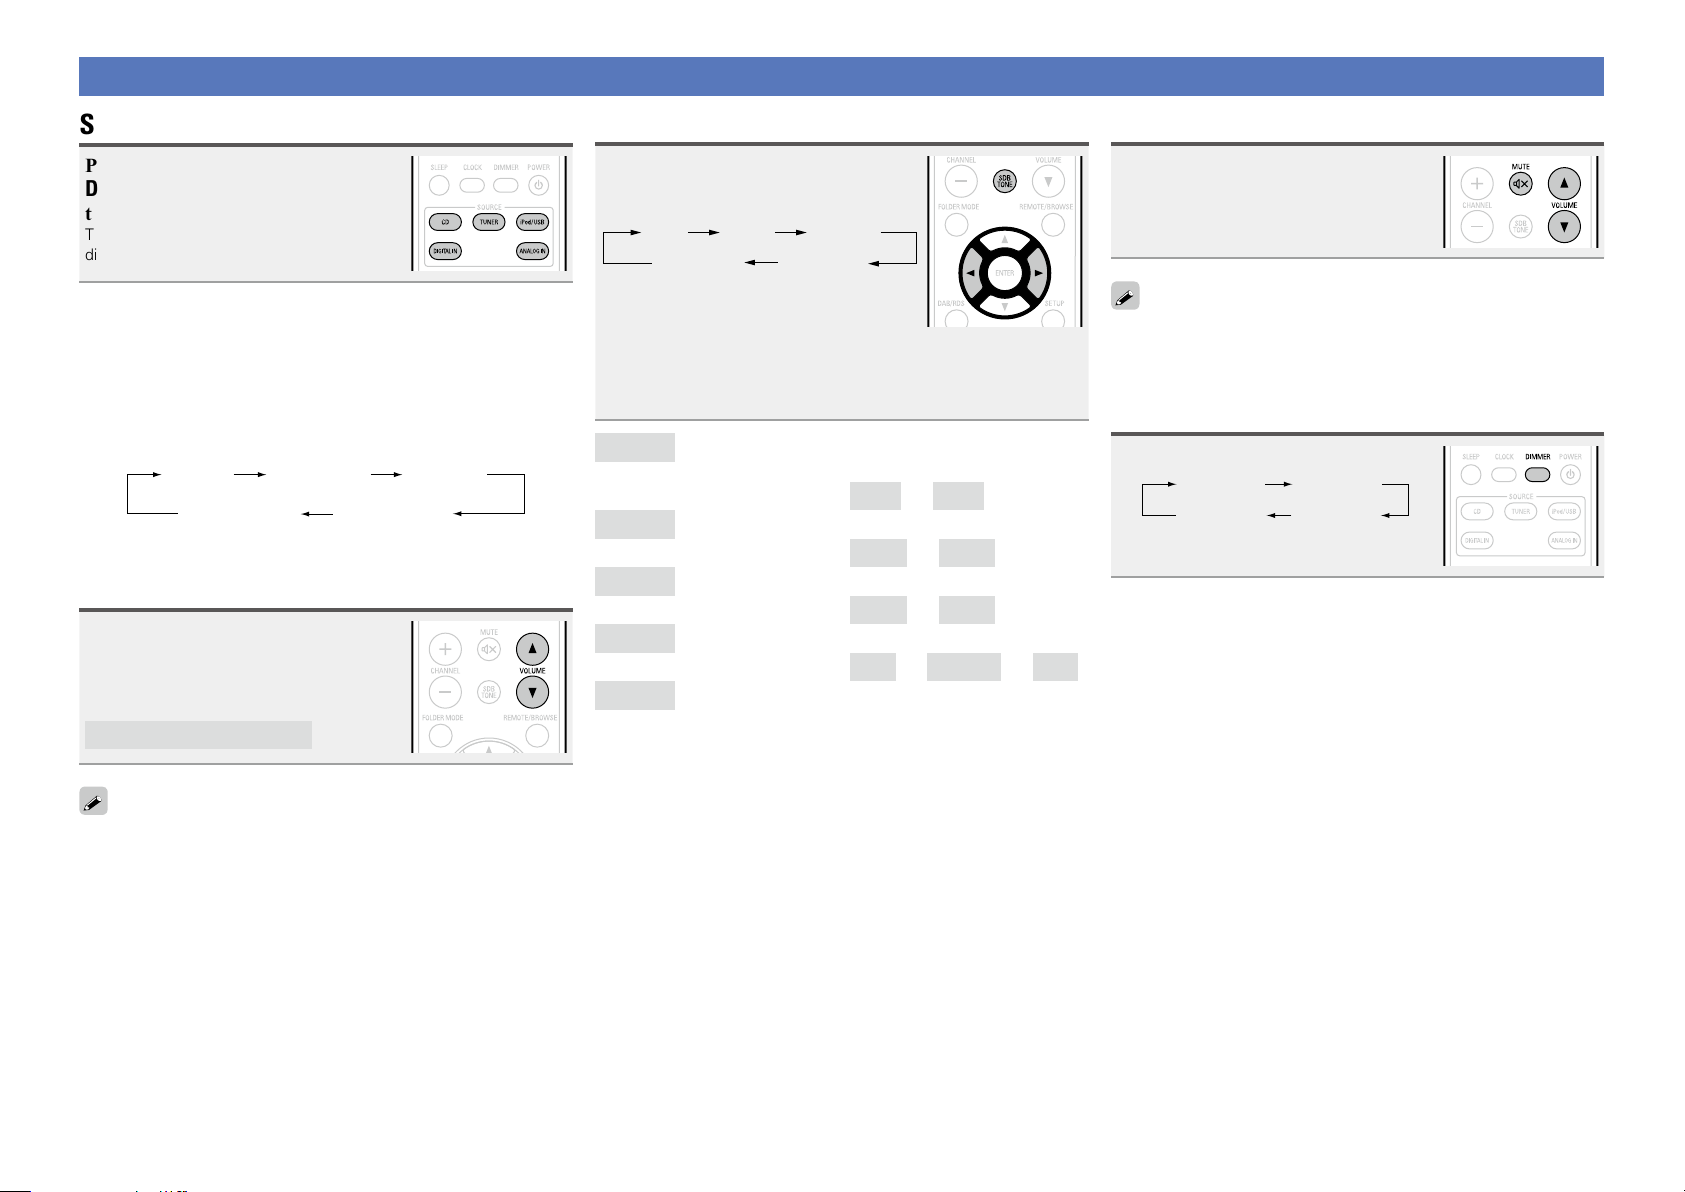
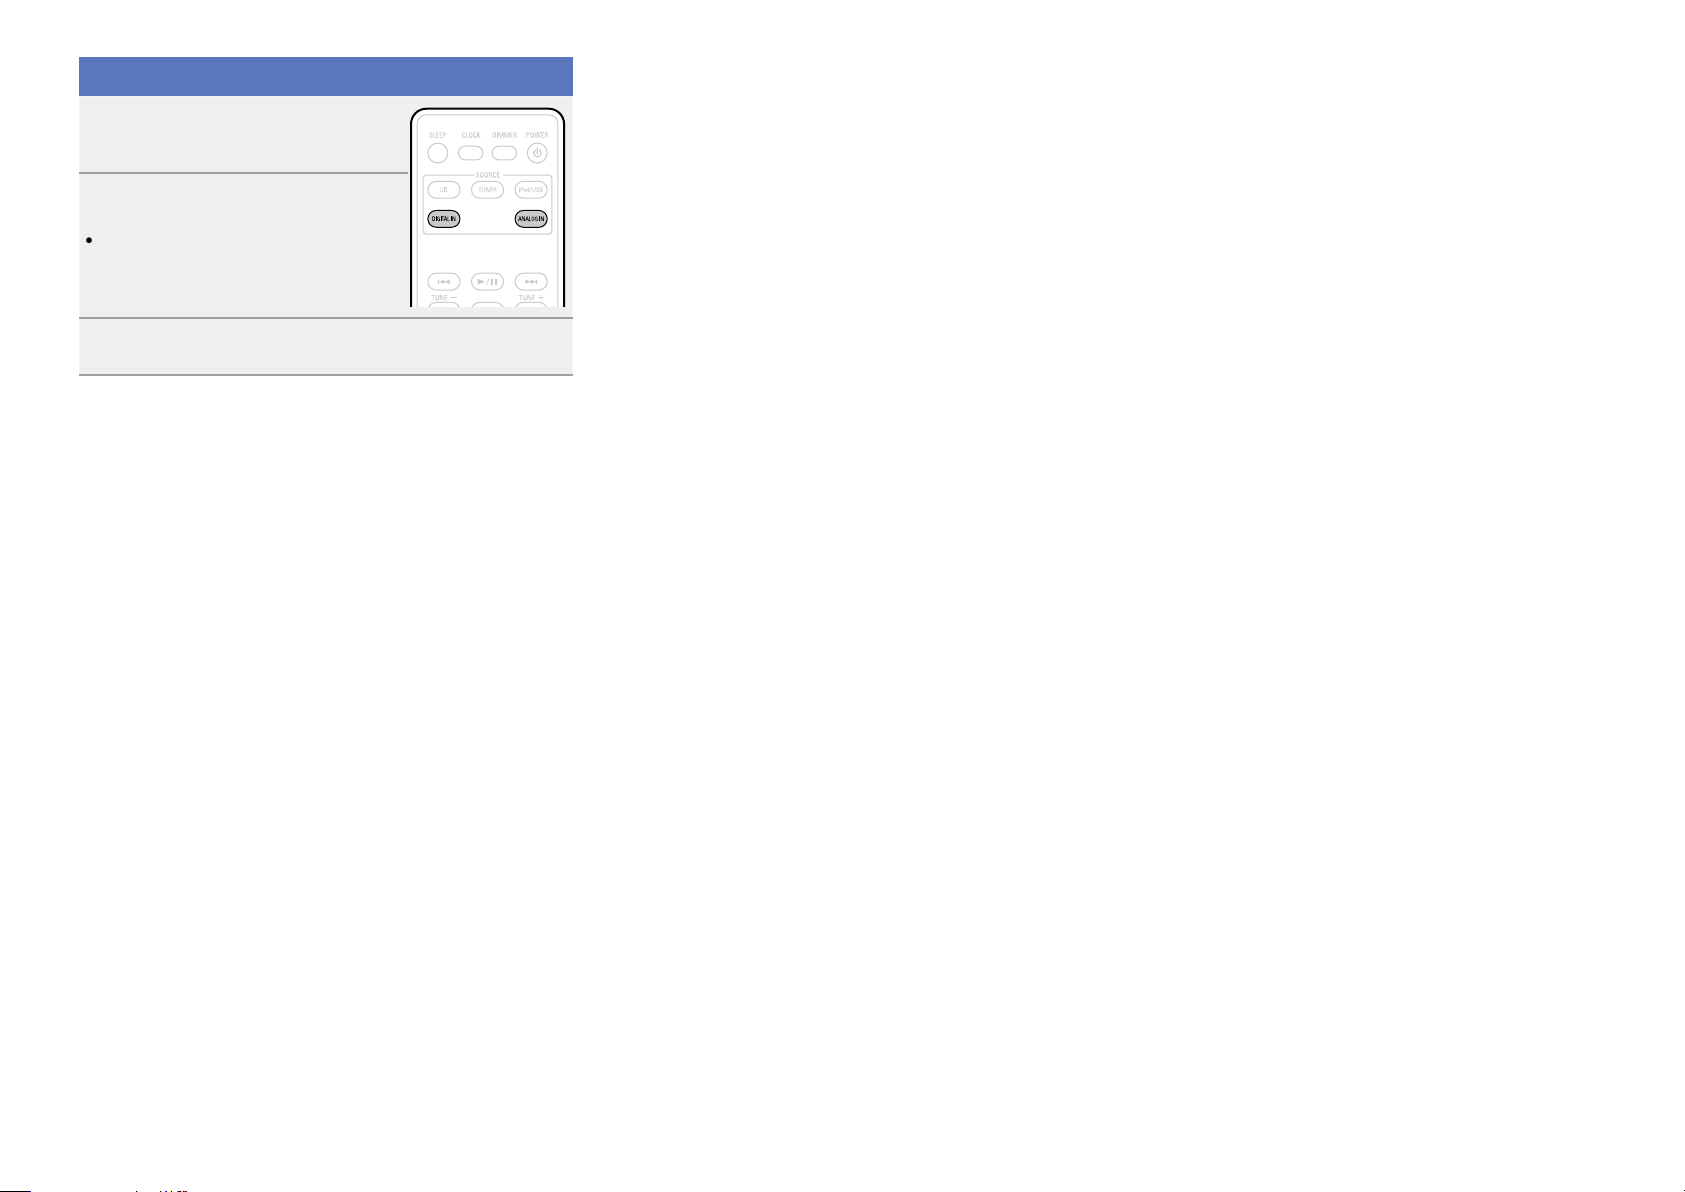
Selecting the input source
Press CD, TUNER, iPod/USB,
DIGITAL IN
or ANALOG IN to select
the input source.
The desired input source can be selected
directly.
You can also use the following operation to select an input
source.
n Using the button on the main unit
Press SOURCE.
•Every time you press SOURCE, the input source switches in the
following order.
TUNERiPod/USBDISC
DIGITAL IN ANALOG IN
Adjusting the master volume
Use VOLUME df to adjust the volume.
The volume level is displayed.
GAdjustable rangeH
VOLUME 00 – 49, VOLUME MAX
You can also adjust the volume this by turning VULUME on the main
unit.
Adjusting the tone
Press SDB TONE to select the
1
tone parameter to be adjusted.
SDB BASS
Use o p to adjust the SDB,
2
BASS, TREBLE or BALANCE.
•To make other tone adjustments at this time, press SDB TONE.
•If no operation is performed for 5 seconds, the adjustment is
retained and the normal display reappears.
Emphasizes the bass sound when the Super Dynamic
SDB
GSelectable modesH
BASS
GVariable rangeH
TREBLE
GVariable rangeH
BALANCE
GVariable rangeH
S.DIRECT
During the SOURCE DIRECT mode, the audio signals
GDefault settingsH
•SDB .......................................OFF
•BASS ..................................... 0dB
•TREBLE ................................. 0dB
•BALANCE .......................CENTER
•S.DIRECT ..............................OFF
Bass (SDB) function is set to ON.
Adjusts the bass sound.
Adjusts the treble sound.
Adjusts the left/right volume balance.
Plays back a disc using the SOURCE DIRECT mode.
bypass the tone control circuits (SDB/BASS/TREBLE/
BALANCE), the music reproduction is more faithful to
the original sound.
BALANCES. DIRECT
TREBLE
ON
–10dB
–10dB
L06
–
OFF
–
+10dB
–
+10dB
–
CENTER
–
R06
Turning off the sound temporarily
Press MUTE :.
“MUTE ON” is displayed.
To cancel, press MUTE : again.
(The mute mode is also canceled when VOLUME df is pressed.)
Switching the display’s brightness
Press DIMMER.
100 % 70 %
40 %Off
•The display’s brightness switches each
time the button is pressed.
10
Page 14
Playing CDs
Preparations
Informations
Operations
DISC
Playing CDs
Before you start this operation, perform the procedure in “Before
playing a disc” (vpage8).
Press 1/3.
The 1 indicator lights and playback begins.
n Playing of MP3 and WMA files (vpage17)
n Stopping playback
Press 2.
•You can also perform this operation by pressing 2 on the main
unit.
n Stopping playback temporarily
Press 1/3.
3 is displayed.
•To resume playback, press 1/3.
n Fast-forwarding and fast-reversing (searching)
During playback, press and hold in 6, 7.
n Moving to the beginning of tracks (skipping)
During playback, press 8, 9.
•The disc skips as many tracks as times the button is pressed.
•When you press reverse once, playback returns to the beginning
of the current track.
•You can also perform this operation by pressing 8/–, +/9
on the main unit.
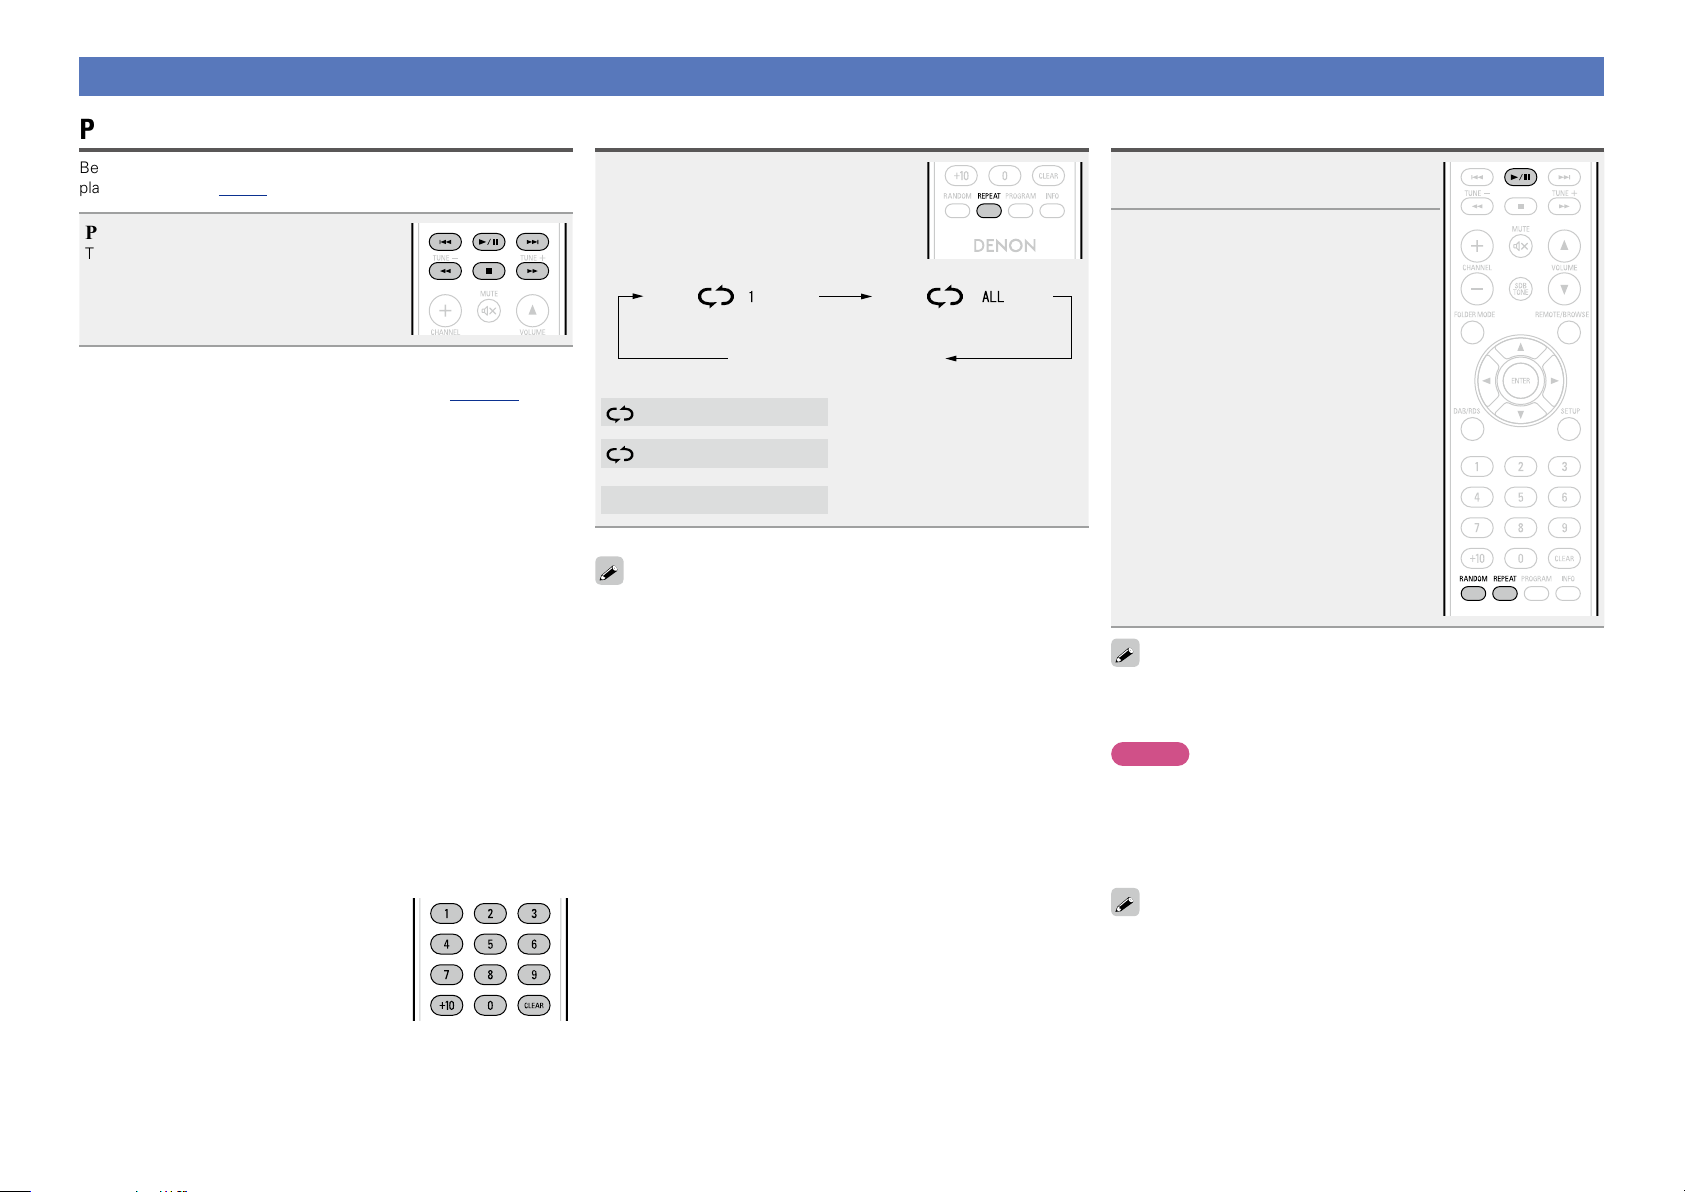
n To play the desired track
Press 0 – 9, +10 to select the track.
GExampleH Track 4 : 4
GExampleH Track 12 : +10, 2
GExampleH Track 20 : +10, +10, 0
Playing repeatedly (Repeat playback)
Press REPEAT.
Playback in the respective repeat mode starts.
Single-track repeat All-track repeat
Repeat off
(indicator turns off)
1 (Single-track repeat)
ALL (All-track repeat)
Repeat off (indicator turns off)
The repeat playback mode is canceled if you open the disc tray or turn
off power.
Only 1 track plays repeatedly.
All tracks play repeatedly.
Normal playback resumes.
Playing random order (Random playback)
In the stop mode, press RANDOM.
1
The “RANDOM” indicator lights.
Press 1/3.
2
The tracks start playing in random order.
If REPEAT is pressed during random playback, after the current
session of random playback is finished, another session in a different
order of tracks starts.
NOTE
Random play cannot be set or canceled during playback.
n Canceling random playback
While stopped, press RANDOM.
The “RANDOM” indicator turns off.
The random playback mode is canceled if you open the disc tray or
turn off power.
11
Page 15
Playing CDs
Preparations
Informations
Operations
DISC
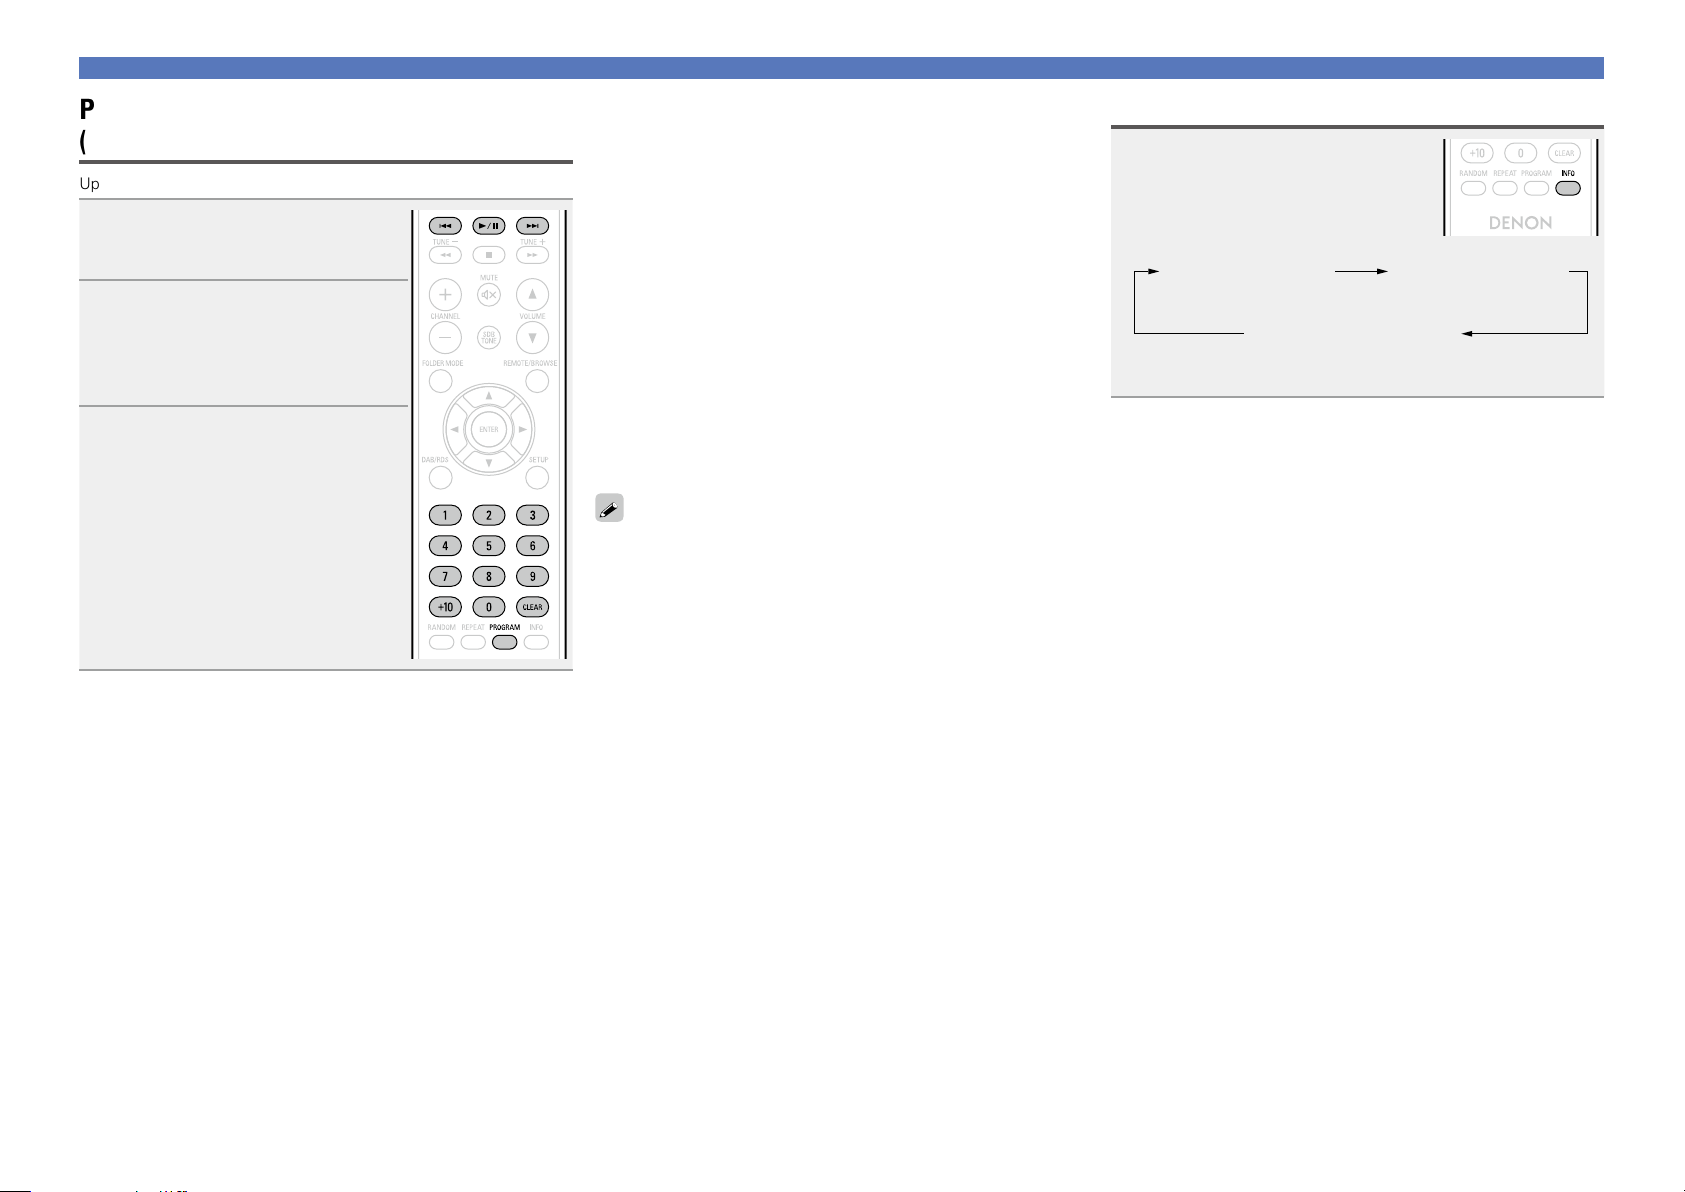
Playing tracks in the desired order
(Program playback)
Up to 25 tracks can be programmed.
In the stop mode, press
1
PROGRAM.
“PGM” is displayed.
Use 0 – 9, +10 to select the tracks.
2
GExampleH To program tracks 3, 12, 7 to
play in that order:
Press PROGRAM, 3, +10, 2, 7.
Press 1/3.
3
Playback starts in the programmed
order.
n Checking the order of the programmed tracks
In the stop mode, press 9.
The track numbers are displayed in the programmed order each
time the button is pressed.
n To clear the last track programmed
In the stop mode, press CLEAR.
The last track programmed is cleared each time the button is pressed.
n To clear one programmed track at a time
In the stop mode, press 9 to select the track to be cleared, then
press CLEAR.
n Clearing the all programmed track
In the stop mode, press PROGRAM.
•If REPEAT is pressed during program playback, the tracks are played
repeatedly in the programmed order.
•If RANDOM is pressed during program playback, the programmed
tracks are played in random order.
•The program is cleared when the disc tray is opened or the power
is turned off.
Switching the display
Press INFO.
Elapsed time of
current track
Remaining time for
all remaining tracks
•The display switches each time the button is pressed.
Remaining time
of current track
12
Page 16
Listening to FM broadcasts
Preparations
Informations
Operations
DISC
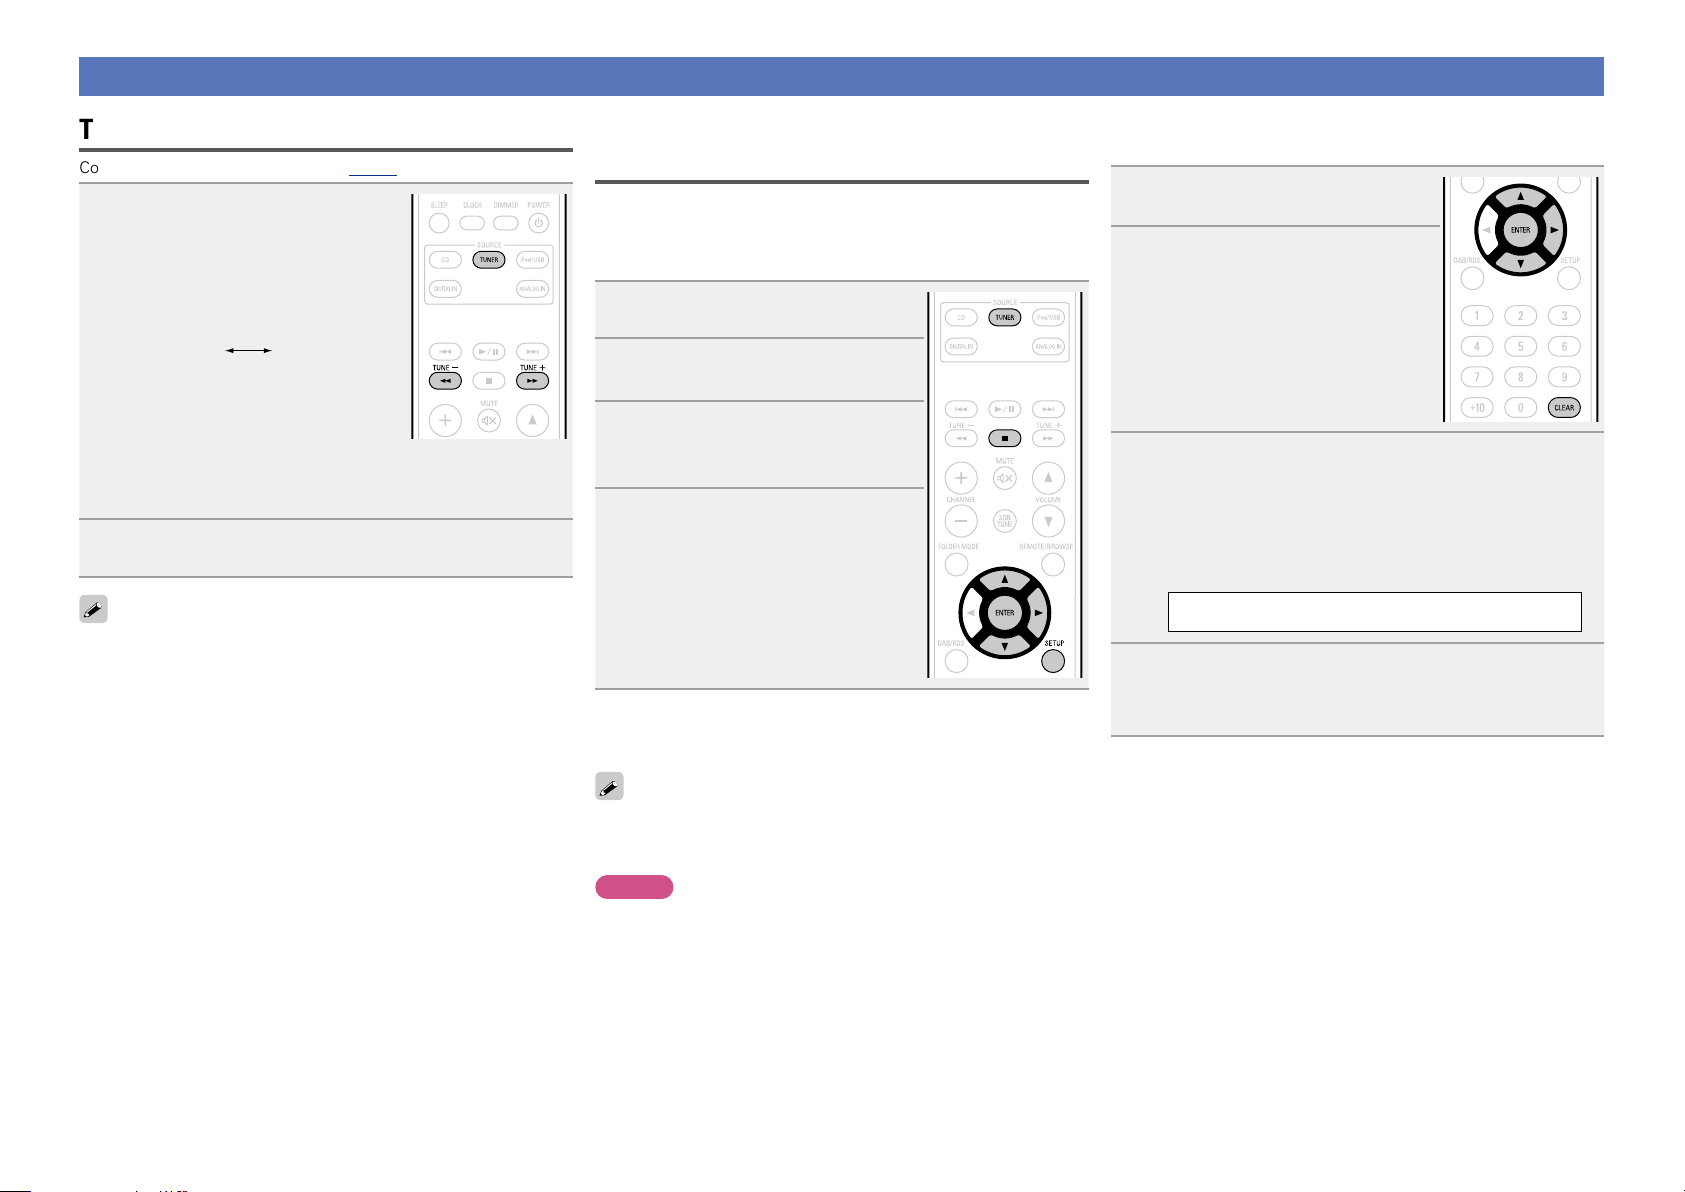
Tuning in broadcast stations
Connect the antenna beforehand (vpage6).
Press TUNER to select the
1
reception band.
•When “FM AUTO” is selected:
“AUTO” is displayed.
•When “FM MONO” is selected:
“MONO” is displayed.
FM AUTOFM MONO
•You can also perform this operation by pressing 2 on the main unit.
•When the reception band mode is set to “FM AUTO”, the “ST”
indicator lights when a stereo broadcast is tuned in.
Use TUNE –, + to select the reception band.
2
When a station is received, the “TUNED” indication will light.
If the signal is weak and stable stereo reception is not possible, select
“FM MONO” to receive in monaural.
n To tune automatically
Press and hold in TUNE –, + to tune in stations automatically.
•Stations whose signal is weak cannot be tuned in.
Automatically presetting FM stations
(Auto preset)
This unit can be preset with a total of 40 FM broadcast stations.
n Auto presetting with the remote control unit
Perform this operation when tuned to an FM broadcast station.
Press SETUP.
1
Use ui to select “TUNER
2
SETUP”, then press ENTER or p.
Use ui to select “FM AUTO
3
PRESET”, then press ENTER or
p.
Press ENTER while “PRESET
4
ENTER ” is ashing.
Broadcast stations are preset
automatically.
n Canceling auto presetting
Press TUNER or 2.
n Giving station names to preset channels
Names of up to 8 characters can be input.
Tune in the preset channel you
1
want to name.
Press ENTER twice.
2
The display switches to the station
name input display.
Input the station name.
Names of up to 8 characters can be input.
3
•u, i button .......................... Selects the character.
•p button ............................... Moves the cursor to the right.
•CLEAR button ........................ Deletes the currently selected
character.
•Characters that can be input.
A ~ Z, 0 ~ 9, ^ ’ ( ) z + , - . / = (space)
Press ENTER.
4
The characters you have input are entered.
•To give names to other stations, repeat steps 1 to 4.
n To stop auto tuning
Press TUNE –, +.
Broadcast stations whose antenna signal are weak cannot be preset
automatically. If you wish to preset such stations, tune them in
manually.
NOTE
When FM auto preset is performed, the channel currently registered
as the FM preset is deleted, and the newly preset FM broadcast
station is registered to the same number as the deleted channel.
13
Page 17
Listening to FM broadcasts
Preparations
Informations
Operations
DISC
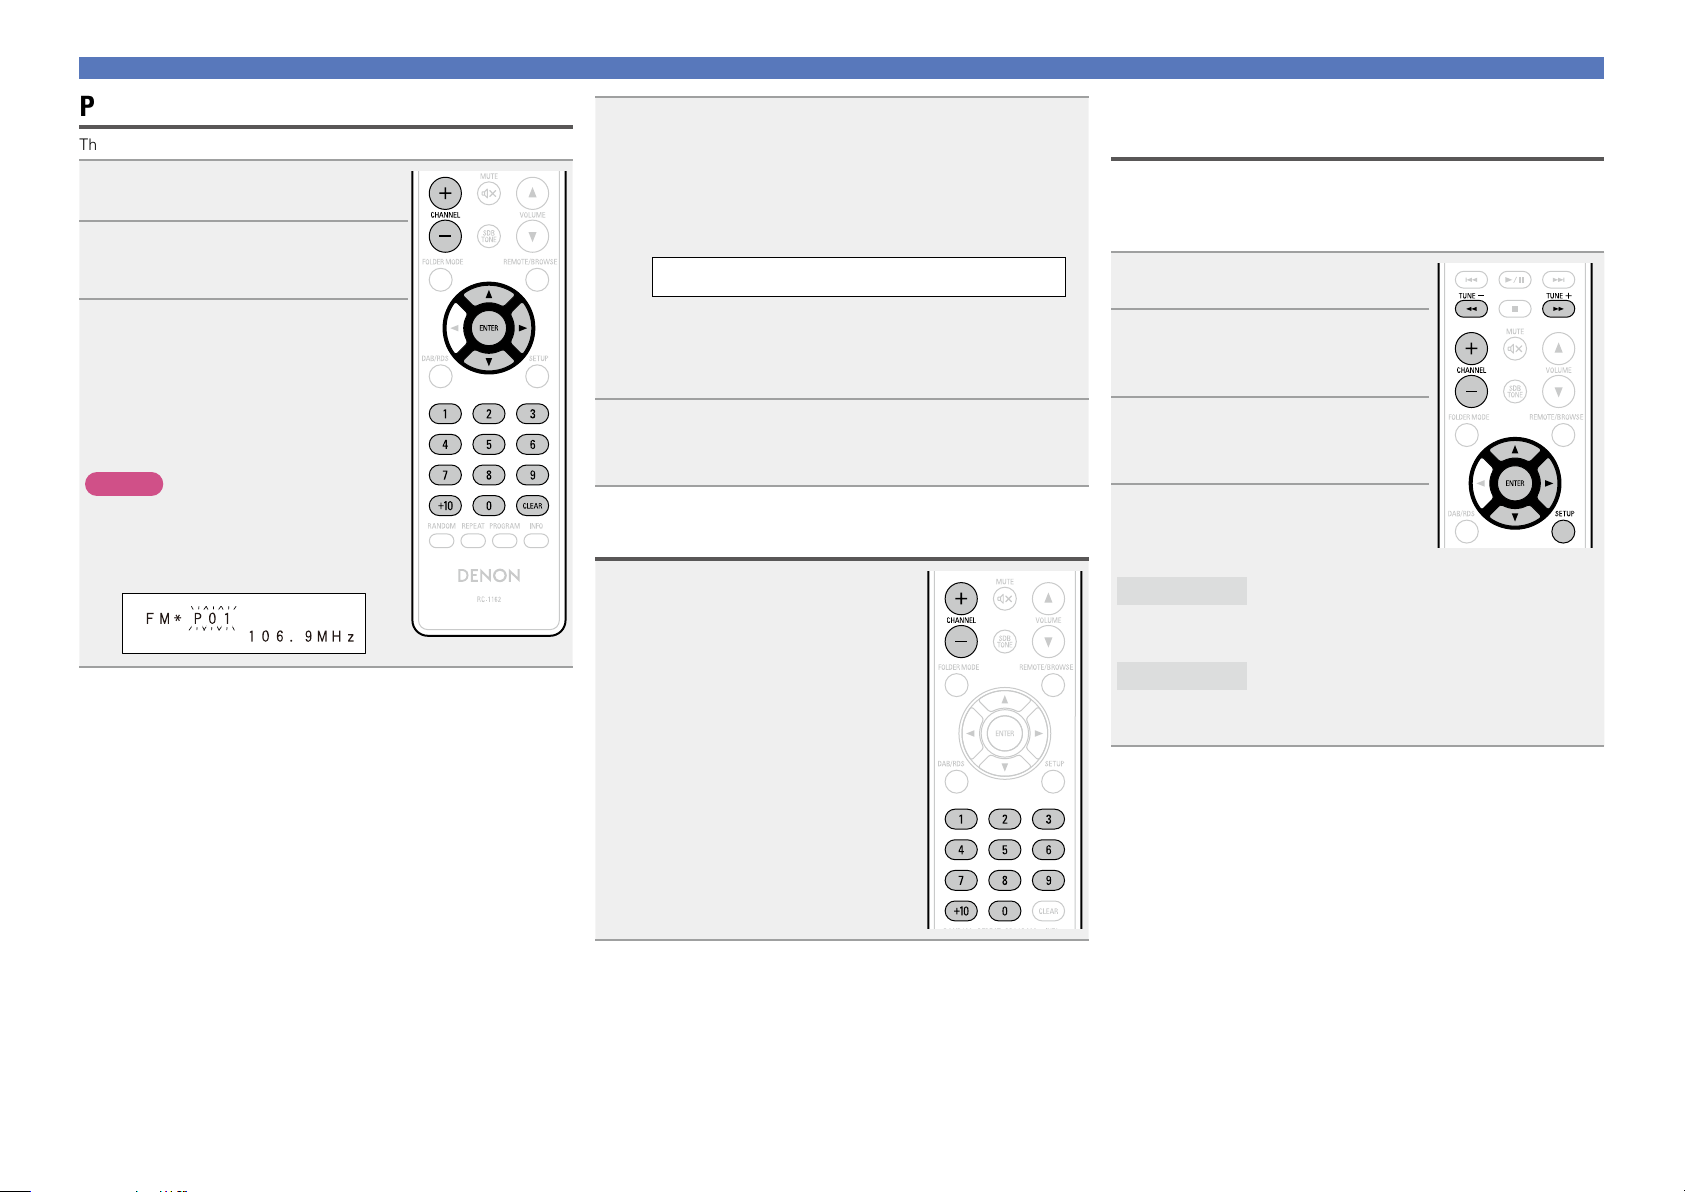
Presetting FM stations manually
This unit can be preset with a total of 40 FM broadcast stations.
Tune in the station you want to
1
preset.
Press ENTER.
2
The minimum number display “P– –” for
the unregistered preset flashes.
Use 0 – 9, +10 or CHANNEL –, +
3
to select the number to be preset,
then press ENTER.
The reception frequency and reception
mode are preset and the display
switches to the station name input
display.
NOTE
When the registered preset number is
selected, “*” is displayed.
To overwrite this preset number, press
ENTER.
Input the station name.
Names of up to 8 characters can be input.
4
•u, i button ..................... Selects the character.
•p button ..........................Moves the cursor to the right.
•CLEAR button ................... Deletes the currently selected
character.
•Characters that can be input.
A ~ Z, 0 ~ 9, ^ ’ ( ) z + , - . / = (space)
•If you do not want to input a station name, press ENTER without
inputting anything else.
•If you make a mistake when inputting, perform the procedure
again. Whatever was previously input is overwritten.
Press ENTER.
5
The characters you have input are entered.
•To give names to other stations, repeat steps 1 to 5.
Listening to preset stations
Use 0 – 9, +10 or CHANNEL –, + to
select the preset number.
Setting the preset channels and changing
the received frequency on the main unit
8/–, +/9 on the main unit can be used both for switching the
preset channel and for tuning.
Before operating them, switch the main unit to the “preset mode” or
“tuning mode” using the procedure below.
Press SETUP.
1
Use ui to select “TUNER
2
SETUP”, then press ENTER or
p.
Use ui to select “MODE
3
SELECT”, then press ENTER or
p.
Use ui to select “PRESET
4
MODE” or “TUNING MODE”,
then press ENTER.
8/–, +/9 on the main unit to switch
PRESET MODE
TUNING MODE
Press
preset channels.
•This is the same operation as CHANNEL –, +
on the remote control unit.
8/–, +/9 on the main unit to
Press
change the received frequency.
•This is the same operation as TUNE–, + on the
remote control unit.
14
Page 18
Listening to AUX
Preparations
Informations
Operations
DISC
Prepare for playback.
Check the connection, then turn on this
1
units.
Press DIGITAL IN or ANALOG IN.
2
•When there is no component connected
to the DIGITAL IN connector, “SIGNAL
UNLOCK” is not displayed when you press
DIGITAL IN.
Play the component connected to this unit.
3
15
Page 19
Advanced operation
Preparations
Informations
Operations
DISC
n Basic operation (vpage8)
n Before playing a USB or an iPod (vpage16)
n MP3 or WMA playback order of MP3 or WMA files
(vpage16)
n Playing of MP3 and WMA files (vpage17)
n Playing an iPod (vpage19)
n Playing a USB memory device (vpage20)
n Setting the alarm (vpage21)
n Other functions (vpage23)
Preparations
Before playing a USB or an iPod
Press POWER X.
1
Connect USB memory device or iPod connection
2
cable (vpage 5).
When the USB memory device or iPod is connected to the USB
port on this unit, the source automatically switches to “USB”
and file playback begins.
n Turning the power off (to the standby mode)
Press POWER X again.
NOTE
Be sure to stop playback before turning the power off.
MP3 or WMA playback order of MP3 or
WMA files
When there are multiple folders containing MP3 or WMA files, the
playback order of folders is automatically set when this unit reads the
media. The files in each folder are played back in the order in which
the files were recorded on the media, from the oldest date and time.
n Playback order of folders
CD-R/CD-RW
For playback of files on CD-R or CD-RW , files in all folders on the first
layer are played first, next on the second layer, then next on the third
layer, and so on in this order.
USB memory device
For playback of files recorded on USB, files in the first folder on the
first layer are played first, next folders on the second layer in the folder,
then next on the third layer, and so on in this order. Then accordingly
files on another first layer are played.
•The playback order displayed on a PC may differ from the actual
playback order.
•The playback order with a CD-R/CD-RW may differ, depending on
the writing software.
NOTE
The playback order may differ from the order in which the folders
or files were recorded if you delete or add a folder or file on USB.
This occurs because of data recording specifications and is not a
malfunction.
16
Page 20

Playing of MP3 and WMA files
Preparations
Informations
Operations
DISC
There are many music distribution sites on the Internet allowing you
to download music files in MP3 or WMA (Windows Media® Audio)
format. The music (files) downloaded from such sites can be stored
on CD-R or CD-RW discs and played on this unit.
“Windows Media” and “Windows” are registered trademarks or
trademarks in the United States and other countries of Microsoft
Corporation of the United States.
MP3 and WMA formats
CD-R and CD-RW discs created in the format described below can
be played.
n Writing software format
ISO9660 Level 1
When written in other formats, it may not be possible to play the
disc properly.
n Maximum number of playable files and folders
Number of files : 255
Number of folders : 255
n File format
MPEG-1 Audio Layer-3
WMA (Windows Media Audio)
n Tag data
ID3-Tag (Ver. 1.x and 2.x )
META-Tag
(Compatible with title, artist and album names)
Playable MP3/WMA file
File format
MP3 32, 44.1, 48 kHz 32 ~ 320 kbps .mp3
WMA 32, 44.1, 48 kHz 64 ~ 192 kbps .wma
Sampling
frequency
Bit rate Extension
MP3 and WMA files playback
Load a CD-R or CD-RW disc
1
containing music les in the MP3
or WMA format into the disc
tray (vpage 30).
Press FOLDER MODE and select
2
“Folder Mode” or “Disc Mode”.
Folder Mode Disc Mode
GAbout the displayH
•When “Folder Mode” is selected:
“FLD” indicator lights.
•When “Disc Mode” is selected:
“FLD” indicator turns off.
Folder Mode
Disc Mode
Use ui to select the folder to be played.
All the files in the selected folder are played.
After the selected folder and files are played, all
the files in all the folders are played.
3
Use 8, 9 or o p to select the le to be played.
4
•Be sure to give files the extension “.MP3” or “.WMA”. Files with
any other extensions or with no extensions cannot be played.
•In accordance with copyright laws, recordings you have made should
only be used for your personal enjoyment and may not be used in
other ways without permission of the copyright holder.
17
Press 1/3.
5
Page 21

Playing of MP3 and WMA files
Preparations
Informations
Operations
DISC
n To switch the folder or file during playback
Folder
Use ui to select the folder, then press
ENTER.
File
Use o p to select the file, then press
ENTER.
Also use 8, 9 to select the file, or
use 0 – 9, +10 to select the file number.
•The folder and file numbers are set
automatically when the disc is loaded.
•Copyright-protected files cannot be
played.
•Depending on the application software
used for writing, it may not be possible
to write the data properly.
•Depending on the disc’s recording
conditions, it may not be possible to play
some discs properly.
n Switching the display
During playback, press INFO.
File name Title name /
Artist name
Title name /
Album name
•The characters that can be displayed are as follows:
A – Z a – z 0 – 9
! ” # $ % & : ; < > ? @ l [ ] _ ` | { } ˜ ^ ’ ( ) z + , - . / = (space)
n To play repeatedly
Press REPEAT.
Playback starts in the respective repeat mode.
•The selectable repeat modes differ in the “Folder Mode” and the
“Disc Mode”.
When “Folder Mode” is selected:
Single-track repeat
Repeat off
When “Disc Mode” is selected:
Single-track repeat All-track repeat
Repeat off
(indicator turns off)
Repeat of all the tracks
in the folder
GSelectable itemsH
When “Folder Mode” is selected:
Only the selected track is played repeatedly.
1 FLD
All the files in the selected folder are played repeatedly.
FLD
Folder mode playback resumes.
FLD
When “Disc Mode” is selected:
“Playing repeatedly (Repeat playback)” (vpage11)
n Setting random playback
“Playing random order (Random playback)” (vpage11)
Programmed playback is not possible with MP3/WMA discs.
18
Page 22

Playing an iPod
Preparations
Informations
Operations
DISC
With this unit, you can listen to music on an iPod. It is also possible to
operate the iPod from the main unit or remote control unit.
“Made for iPod” and “Made for iPhone” mean that an electronic
accessory has been designed to connect specifically to iPod, or
iPhone, respectively, and has been certified by the developer to meet
Apple performance standards.
Apple is not responsible for the operation of this device or its
compliance with safety and regulatory standards.
iPhone, iPod, iPod classic, iPod nano, iPod shuffle, and iPod touch are
trademarks of Apple Inc., registered in the U.S. and other countries.
iPhone is a trademark of Apple Inc.
•Individual users are permitted to use iPhone, iPod, iPod classic, iPod
nano, iPod shuffle, and iPod touch for private copy and playback of
non-copyrighted contents and contents whose copy and playback is
permitted by law. Copyright infringement is prohibited by law.
NOTE
•Depending on the type of iPod and the software version, some
functions may not operate.
•Note that DENON will accept no responsibility whatsoever for any
problems arising with the data on an iPod when using this unit in
conjunction with the iPod.
Playback preparation
1
(vpage 16 “Before playing a
USB or an iPod”).
Press REMOTE/BROWSE to
2
select the display mode.
The mode switches each time the
button is pressed.
GSelectable modeH
Display location Main unit display iPod display
Playable
files
Active
buttons
Audio file
Video file
Remote control
unit and main
unit
iPod
Browse mode Remote mode
P P
P
P P
P
Use ui to select the item, then press ENTER to select
3
the music le to be played.
n Remote control unit and iPod button relations
Remote control
buttons
1/3 13
8, 9 8, 9
6, 7
Press and hold
u, i
ENTER
p
or
REMOTE/
BROWSE
REPEAT – Switch the repeat function
RANDOM – Switch the shuffle function
o
2
iPod buttons Operation on this unit
Play the track / Pause the track.
Play the track from the beginning/
Play the next track.
8, 9
Press and hold
Click Wheel Select an item.
Select
–
MENU
– Stop
Fast-reverse the track/Fastforward the track.
Enter the selection or plays the
track.
Switch between the browse
mode and the remote mode.
Display the menu or return to the
previous menu.
n To switch the display
During playback, press INFO.
The display switches each time the button is pressed.
Title name /
Artist name
Title name /
Album name
Press 1/3.
4
Playback starts.
19
Disconnecting the iPod
Press POWER X to set the
1
standby mode.
Disconnect the iPod cable from the USB port.
2
By pressing POWER X while the power of this unit is on with iPod
being connected, this unit enters the iPod charge standby mode,
continuing to charge iPod. In this case, the power indicator lights in
red. When iPod is fully charged, the power indicator lights off.
Page 23

Playing a USB memory device
Preparations
Informations
Operations
DISC
Playable USB memory formats
Files stored on USB memory devices created in the formats below
can be played.
n USB-compatible file systems
“FAT16” or “FAT32”
•If the USB memory device is divided into multiple partitions, only
the top drive can be selected.
n Maximum number of playable files and folders
Maximum number of files in a folder: 255
Maximum number of folders: 255
n File format
MPEG-1 Audio Layer-3
WMA (Windows Media Audio)
n Tag data
ID3-Tag (Ver.1.x and 2.x)
META-Tag
(Compatible with title, artist and album names)
Playable MP3/WMA file
File format
MP3 32, 44.1, 48 kHz 32 ~ 320 kbps .mp3
WMA 32, 44.1, 48 kHz 64 ~ 192 kbps .wma
Sampling
frequency
Bit rate Extension
Playing a USB memory device
Playback preparation
1
(vpage 16 “Before playing
a USB or an iPod”).
Press FOLDER MODE and select
2
“Folder Mode” or “Memory
Mode”.
•When “Folder Mode” is selected:
“FLD” indicator lights.
•When “Memory Mode” is selected:
“FLD” indicator turns off.
Folder Mode
All the files in the selected folder are
played.
Memory Mode
After the selected folder and files are
played, all the files in all the folders are
played.
Use ui to select the folder to be
3
played.
Use 8, 9 or o p to select the le to be played.
4
n To switch the folder or file during playback
Folder
Use ui to select the folder, then press ENTER.
File
Use o p to select the file, then press ENTER.
Use 8, 9 to select the file, or use 0 – 9, +10 to select the
file number.
•The folder and file numbers are set automatically when the USB
memory device is loaded.
n Stopping playback
Press BAND 2.
n Stopping playback temporarily
Press 1/3.
The 3 is displayed.
•To resume playback, press 1/3.
n Fast-forwarding and fast-reversing (searching)
During playback, press and hold in 6, 7.
n Playing repeatedly
Press REPEAT.
n Playing random order
In the stop mode, press RANDOM.
Only music files that are not copyright-protected can be played on
this set.
•Contents downloaded from pay sites on the Internet are copyright
protected. Also, files encoded in WMA format when ripped from a
CD, etc., on a computer may be copyright protected, depending on
the computer’s settings.
Press 1/3.
5
For details on the order of playback for files stored on a USB memory
device, see “MP3 or WMA playback order of MP3 or WMA files”
(vpage16).
20
Page 24

Playing a USB memory device
Preparations
Informations
Operations
v See overleaf
DISC
n Switching the display
During playback, press INFO.
File name
Title name /
Album name
•The characters that can be displayed are as follows:
A – Z a – z 0 – 9
! ” # $ % & : ; < > ? @ l [ ] _ ` | { } ˜ ^ ’ ( ) z + , - . / = (space)
NOTE
•DENON will take no responsibility whatsoever for any loss or
damage to data on USB memory devices when using the USB
memory device connected to this unit.
•USB memory devices will not work via a USB hub.
•DENON does not guarantee that all USB memory devices will
operate or be suppled power. When using a USB connection type
portable hard disk of the type for which power can be supplied by
connecting an AC adapter, we recommend using the AC adapter.
Title name /
Artist name
Setting the alarm
This device can playback using the alarm playback (everyday alarm,
once alarm) and sleep timer.
n Alarm operation when the time settings for
alarms overlap
When the sleep timer is set
•Automatically stops playback after the time set for the sleep timer
has elapsed.
When the once alarm and everyday alarm are both
set (sleep timer is not set)
•Automatically starts playback at the earlier alarm start time set for
either of the alarms.
•Automatically stops playback at the earlier alarm stop time set for
either of the alarms.
If the current time is not set, enter alarm setting mode to get time
setting mode.
Setting the alarm
•Everyday alarm (“EVERYDAY ALARM”)
Playback starts and stops (the power turns off) at the set times each
day.
•Once alarm (“ONCE ALARM”)
Playback starts and stops (the power turns off) once only at the set
times.
Press SETUP.
1
Use ui to select “ALARM
2
SETUP”, then press ENTER or
p.
Use ui to select the alarm
3
mode, then press ENTER or p.
MODE SELECT
ONCE ALARM
21
ONCE ALARM
EVERYDAY ALARM
Use ui to select the source,
4
then press ENTER or p.
SOURCE SELECT
DISC
TUNERiPod/USBDISC
DIGITAL IN ANALOG IN
5
Only when the “TUNER” function is selected
Use
ui to select the preset number, then press
ENTER or p.
•When no name has been registered for the selected preset
number, the frequency appears after the preset number is
displayed.
Page 25

1
Setting the alarm
Preparations
Informations
Operations
DISC
Use ui to select “hours” for the alarm start time,
6
then press ENTER or p.
ON TIME
AM10:00>AM12:00
Use ui to select “minutes” for the alarm start time,
7
then press ENTER or p.
ON TIME
AM10:30>AM12:00
Use ui to select “hours” for the alarm stop time,
8
then press ENTER or p.
OFF TIME
AM10:30>AM11:00
Use ui to select “minutes” for the alarm stop time,
9
then press ENTER or p.
OFF TIME
AM10:30>AM11:30
Use o p to select “ON” or “OFF” for the alarm,
10
then press ENTER.
n Setting the alarm to on or off
q Press SETUP.
w Use ui to select “ALARM ON/OFF”,
then press ENTER.
e Use ui to select “ONCE” or
“EVERYDAY”.
r Use o p to select “ON” or “OFF”
for the alarm, then press ENTER. The
alarm settings are displayed after this.
•When set to “OFF”, time operation is disabled, but the alarm
settings remain unchanged.
n To check the alarm settings
q Press SETUP.
w Use ui to select “ALARM ON/OFF” , then press ENTER.
e When “ON” is displayed for the alarm setting, press ENTER.
The alarm settings are displayed for 3 seconds.
n To change the alarm settings
Perform the operations at “Setting the alarm” (vpage21).
n To change the setting while setting the alarm
Press o.
The setting returns to the previous step. Display the setting you
want to change, then make the desired setting.
Setting the sleep timer
Use this function to automatically switch the power to the standby
mode after a specific amount of time (minutes).
The sleep timer can be set to up to 90 minutes, in steps of 10 minutes.
Press SLEEP during playback and select the setting time.
SLEEP 90 min SLEEP 80 min SLEEP 70 min
SLEEP 60 min SLEEP 50 min SLEEP 40 min
SLEEP 30 min SLEEP 20 min SLEEP 10 min SLEEP OFF
•After about 5 seconds, the setting is entered and the display
returns to as it was before.
n Canceling the sleep timer
Either press SLEEP to select “SLEEP
OFF” or press POWER X.
n To check the time remaining until the sleep
timer is activated
Press SLEEP.
•The indicator lights and
the alarm setting is entered.
•The alarm settings are
displayed for 3 seconds.
Press POWER X to set the power to standby.
11
Alarm standby mode is set, and the power indicator lights
orange.
ONCE ALARM0 ON 1
EVERYDAY 0 OFF1
ONCE ALARM0 ON
EVERYDAY 0 OFF1
22
Page 26

Other functions
Preparations
Informations
Operations
DISC
Using an optimizing filter
An optimizing filter suited for the properties of the speakers (SC-M39)
can be used.
Press SETUP.
1
Use ui to select “SPK
2
OPTIMISE”, then press the
ENTER or p.
Use ui to select “ON”, then press the ENTER or p.
3
The setting is entered.
The response is optimized for the speakers (SC-M39,
ON
supplied).
The response is flat.
OFF
Auto power on
When the power is in standby, the power
turns on when any of the buttons below
other than POWER X is operated, and the
respective operation is performed.
Auto standby
With the Auto standby ON, this unit will automatically enter the
standby mode after about 30 continuous minutes of stop mode with
no operation.
For the input source “ANALOG IN” only, when no operation is
performed for eight hours, this unit automatically enters the standby
mode.
Press SETUP.
1
Use ui to select “AUTO
2
STANDBY”, then press ENTER
or p.
Use ui to select “ON”, then press ENTER or p.
3
The setting is entered.
NOTE
In the following situations, the Auto standby function does not operate.
•When an iPod (Remote mode) is connected to the USB port on the
unit.
•When the source is “TUNER”.
•The default setting for the Auto Standby mode is “OFF”.
Last function memory
This stores the settings as they were immediately before going into
the standby mode.
When the power is turned back on, the settings are restored to as
they were immediately before going into the standby mode.
Resetting the microprocessor
Perform this procedure if the display is abnormal or if operations
cannot be performed.
When the microprocessor is reset, all the settings are reset to their
default values.
8/–SOURCE
•5 (on the main unit) ......... The disc tray opens.
•1/3 ................................. Playback of the “CD”, “iPod” or “USB”
starts.
•CD .................................... The source switches to “DISC”.
•TUNER.............................. The source switches to “TUNER” and the
band last set is tuned in.
•iPod/USB ......................... The source switches to “iPod/USB”.
•DIGITAL IN ....................... The source switches to “DIGITAL IN”.
•ANALOG IN ...................... The source switches to “ANALOG IN”.
23
Unplug the power cord.
1
Plug the power cord into a power outlet while
2
simultaneously pressing 8/– and SOURCE on the
main unit.
“INITIALIZE” is displayed.
If “INITIALIZE” does not display in step 2, start over from step 1.
Page 27

Informations
Preparations
Operations
Informations
DISC
Informations
Here, we list various information related to this unit.
Please refer to this information as needed.
F Part names and functions vpage25
F Other information vpage30
F Troubleshooting vpage31
F Specifications vpage33
F Index vpage33
24
Page 28

Part names and functions
Preparations
Operations
Informations
DISC
Front panel
For buttons not explained here, see the page indicated in parentheses ( ).
Q3
Q2
Q1
Q0
o
Image when viewed
from the top of the front
panel
q Power operation button (X) ··············································· (8, 16)
w Power indicator ········································································· (8)
e USB port ····················································································· (5)
r Disc tray ··················································································· (30)
t Headphones jack (PHONES)
When the headphones are plugged into this jack, audio will no
longer be output from the connected speakers.
NOTE
To prevent hearing loss, do not raise the volume level excessively
when using headphones.
y SOURCE button ································································· (10, 23)
u VOLUME control knob ···························································· (10)
i Reverse-skip/Forward-skip buttons
Preset/Tuning buttons
(8/–, +/9) ················································ (11, 14, 17, 20, 23)
o Stop button (2) ··························································· (11, 13, 20)
Q0 Play/Pause button (1/3) ································· (8, 11, 17, 19, 20)
Q1 Disc tray open/close button (5) ··············································· (8)
Q2 Remote control sensor ··························································· (29)
Q3 Display
q w e r t y u
i
25
Page 29

Display
Preparations
Operations
Informations
DISC
i y rt e
u
Rear panel
For buttons not explained here, see the page indicated in parentheses ( ).
y
q
q Information display
Various information is displayed here.
w Remote control signal reception indicator
e Timer operation indicator
r Play mode indicator ······················· (11, 18, 20)
t TOTAL indicator
Lights when the total number of tracks and total
time of the CD are displayed.
w
y Tuner reception mode indicators ············· (13)
u Tone indicators ··········································· (10)
SDB: Lights when the super dynamic bass
function is set to “ON”.
TONE: Lights when the tone (bass/treble) is
being adjusted.
i Playback mode indicators
1 : During Playback
3 : During pause
q
e
q Analog audio connectors
(ANALOG IN) ················································· (6)
w Digital audio connector
(DIGITAL IN) ·················································· (6)
e Subwoofer connector
(SUBWOOFER OUT) ····································· (4)
rw
t
r Speaker terminals (SPEAKERS) ·················· (4)
t AC inlet (AC IN) ············································· (6)
y FM antenna terminal (ANTENNA) ·············· (6)
26
Page 30

Remote control unit
Preparations
Operations
Informations
DISC
This section explains the buttons used to playback each source.
Buttons that work with all sources (CD, TUNER, iPod and USB)
q w e r
q SLEEP button ·············································· (22)
w CLOCK button ··············································· (9)
e DIMMER button ·········································· (10)
r POWER button (X) ································· (8, 16)
t
y
u
i
o
t SOURCE buttons ·································· (10, 23)
y MUTE button (:) ····································· (10)
u VOLUME buttons (d f) ····························· (10)
i SDB TONE button ······································ (10)
o SETUP button
··············································· (9, 13, 14, 21, 23)
Buttons that work with CDs
The buttons listed at “Buttons that work with all sources” can also be used.
q Play/Pause button (1/3) ······················ (8, 11)
w Reverse-skip/Forward-skip buttons
(8, 9) ············································ (11, 17)
e Fast-reverse/Fast-forward buttons
Q4
w
e
Q3
Q2
q
w
e
r
t
(6, 7) ··················································· (11)
r Cursor buttons (uio p) ··························· (17)
t ENTER button ············································· (18)
y Number buttons (0 – 9, +10 ) ··············· (11, 18)
u CLEAR button ·············································(12)
i Information button (INFO) ··················· (12, 18)
o PROGRAM button ······································(12)
Q0 REPEAT button ····································· (11, 18)
Q1 RANDOM button ········································(11)
Q2 FOLDER MODE button ······························· (17)
Q3 Stop button (2) ·········································· (11)
Q4 SOURCE button (CD) ··································· (8)
27
Q1
Q0
y
u
i
o
Page 31

Remote control unit
Preparations
Operations
Informations
v See overleaf
DISC
n Buttons that work with the tuner
The buttons listed at “Buttons that work with all sources” can also be used.
q SOURCE button (TUNER) ·························· (13)
w Tuning buttons (TUNE +, –) ······················· (13)
e Cursor buttons (uio p) ··························· (13)
r ENTER button ············································· (13)
t SETUP button ············································· (13)
y Number buttons (0 – 9, +10 ) ····················· (14)
u CLEAR button ·············································(13)
i CHANNEL buttons (+, –) ···························· (14)
o Stop button (2) ·········································· (13)
w
o
i
q
w
e
r
t
n Buttons that work with iPods or USBs
The buttons listed at “Buttons that work with all sources” can also be used.
q SOURCE button (iPod/USB) ······················ (10)
w Play/Pause button (1/3) ···················· (19, 20)
e Reverse-skip/Forward-skip buttons
(8, 9) ············································ (19, 20)
r Fast-reverse/Fast-forward buttons
(6, 7) ·············································· (19, 20)
t REMOTE/BROWSE button ························(19)
y Cursor buttons (uio p) ····················· (19, 20)
u ENTER button ······································· (19, 20)
i Number buttons (0 – 9, +10 ) ····················· (18)
o Information button (INFO) ························· (19)
Q0 REPEAT button ····································· (19, 20)
Q1 RANDOM button ··································(19, 20)
Q2 FOLDER MODE button ······························· (20)
Q3 Stop button (2) ·········································· (20)
e
r
Q3
Q2
q
w
e
r
t
y
u
y
u
28
Q1
Q0
i
o
Page 32

Remote control unit
Preparations
Operations
Informations
DISC
Inserting the batteries
q Remove the rear lid in the
direction of the arrow and
remove it.
e Put the rear cover back on.
NOTE
•Insert the specified batteries in the remote control unit.
•Replace the batteries with new ones if the set does not operate
even when the remote control unit is operated close to the unit. (The
supplied batteries are only for verifying operation. Replace them
with new batteries at an early date.)
•When inserting the batteries, be sure to do so in the proper direction,
following the q and w marks in the battery compartment.
•To prevent damage or leakage of battery fluid:
•Do not use a new battery together with an old one.
•Do not use two different types of batteries.
•Do not attempt to charge dry batteries.
•Do not short-circuit, disassemble, heat or dispose of batteries in
flames.
•Do not keep the battery in a place exposed to direct sunlight or in
places with extremely high temperatures, such as near a heater.
•If the battery fluid should leak, carefully wipe the fluid off the inside
of the battery compartment and insert new batteries.
•Remove the batteries from the remote control unit if it will not be in
use for long periods.
•Used batteries should be disposed of in accordance with the local
regulations regarding battery disposal.
•The remote control unit may function improperly if rechargeable
batteries are used.
w Load the two batteries properly
as indicated by the marks in the
battery compartment.
Operating range of the remote control unit
Approx. 23 ft/7 m
30°30°
NOTE
•The set may function improperly or the remote control unit may not
operate if the remote control sensor is exposed to direct sunlight,
strong artificial light from an inverter type fluorescent lamp or
infrared light.
•When using 3D video devices that transmit radio communication
signals (such as infrared signals etc) between the various units (such
as the monitor, 3D glasses, 3D transmitter unit etc), the remote
control unit may not operate due to interference from those radio
communication signals. If this occurs, adjust the direction and
distance of the 3D communication for each unit, and check that the
remote control unit operation is not affected by these signals.
29
Page 33

Figure 1
Figure 2
Other information
Preparations
Operations
Informations
DISC
Discs
Discs playable on this unit
q Music CDs
Discs marked with the logo below can be played in this unit.
w CD-R/CD-RW
NOTE
•Discs in special shapes (heart-shaped discs, octagonal discs, etc.)
cannot be played. Do not attempt to play them, as doing so can
damage the unit.
•Some discs and some recording
formats cannot be played.
•Non-finalized discs cannot be
played.
•What is finalization?
Finalization is the process that makes recorded CD-R/CD-RW discs
playable on compatible players.
Holding discs
Do not touch the signal surface.
Loading discs
•Place the disc in the tray, label side up.
•Make sure the disc tray is fully open when inserting the disc.
•Place the discs flat, 12 cm discs in the outer tray guide (Figure 1), 8
cm discs in the inner tray guide (Figure 2).
Outer tray guide
12 cm disc
•Place 8 cm discs in the inner tray guide without using an adapter.
•“00 Tr 00 : 00” is displayed if a disc that cannot be played is loaded.
•“NO DISC” is displayed if the disc is loaded upside-down or if no
disc is loaded.
NOTE
Do not push the disc tray in by hand when the power is turned off.
Doing so could damage the set.
Inner tray guide
8 cm disc
Cautions on storing discs
•Be sure to remove discs after using them.
•Be sure to store discs in their cases to protect them from dust,
scratches, warping, etc.
•Do not store discs in the following places:
1. Places exposed to direct sunlight for long periods of time
2. Dusty or humid places
3. Places exposed to heat from heaters, etc.
Cleaning discs
•If there are fingerprints or dirt on a disc, wipe them off before using
the disc. Fingerprints and dirt can impair sound quality and cause
interruptions in playback.
•Use a commercially available disc cleaning set or a soft cloth to clean
discs.
Gently wipe the disc from the
inside towards the outside.
Do not wipe in a circular motion.
Cautions on loading discs
•Only load one disc at a time. Loading two or more discs can damage
the unit or scratch the discs.
•Do not use cracked or warped discs or discs that have been repaired
with adhesive, etc.
•Do not use discs on which the sticky part of cellophane tape or labels
is exposed or on which there are traces of where labels have been
removed. Such discs can get caught inside the player and damage it.
Cautions on handling
•Do not get fingerprints, oil or dirt on discs.
•Take special care not to scratch discs when removing them from
their cases.
•Do not bend or heat discs.
•Do not enlarge the hole in the center .
•Do not write on the labeled (printed) surface with ball-point pens,
pencils, etc., or stick new labels on discs.
•Water droplets may form on discs if they are moved suddenly from
a cold place (outdoors for example) to a warm place, but do not try to
dry them off using a hairdryer, etc.
30
NOTE
Do not use record spray, antistatic agents, benzene, thinner or other
solvents.
Page 34

Explanation terms
Preparations
Operations
Informations
v See overleaf
DISC
A
AAC (Advanced Audio Coding)
This is an internationally standardized audio data
compression scheme. It has a compression ratio 1.4
times higher than the “MP3” audio compression
scheme adopted for “MPEG-1”.
B
Bit rate
This expresses the read amount per 1 second of
video/audio data recorded in a disc.
D
Dynamic range
The difference between the maximum undistorted
sound level and the minimum sound level that is
discernible above the noise emitted by the device.
F
Finalize
This is processing that enables playing back of disc
of CD, which was recorded using a recorder, by
other players.
M
MP3 (MPEG Audio Layer-3)
This is an internationally standardized audio data
compression scheme, using the “MPEG-1” video
compression standard. It compresses the data
volume to about one eleventh its original size while
maintaining sound quality equivalent to a music CD.
MPEG (Moving Picture Experts Group), MPEG-2,
MPEG-4
These are the names for digital compression format
standards used for the encoding of video and audio.
Video standards include “MPEG-1 Video”, “MPEG2 Video”, “MPEG-4 Visual”, “MPEG-4 AVC”. Audio
standards include “MPEG-1 Audio”, “MPEG-2
Audio”, “MPEG-4 AAC”.
P
Protection circuit
This is a function to prevent damage to components
within the power supply when an abnormality
such as an overload, excess voltage occurs or
temperature for any reason.
In this unit, the power indicator blinks and the unit
enters standby mode when an abnormality occurs.
S
Sampling frequency
Sampling involves taking a reading of a sound wave
(analog signal) at regular intervals and expressing
the height of the wave at each reading in digitized
format (producing a digital signal).
The number of readings taken in one second is
called the “sampling frequency”. The larger the
value, the closer the reproduced sound is to the
original.
Speaker impedance
This is an AC resistance value, indicated in Ω
(ohms). Greater power can be obtained with this
value smaller.
W
WMA (Windows Media Audio)
This is audio compression technology developed by
Microsoft Corporation.
WMA data can be encoded using Windows Media®
Player Ver.7, 7.1, Windows Media®Player
for Windows® XP and Windows Media® Player 9
Series.
To encode WMA files, only use applications
authorized by Microsoft Corporation. If you use
an unauthorized application, the file may not work
properly.
Troubleshooting
If a problem occurs first check the following:
1. Are the connections correct?
2. Is the set being operated as described in the owner’s manual?
3. Are the other components operating properly?
If this unit does not operate properly, check the items listed in the table below. If the problem persists,
there may be a malfunction.
In this case, disconnect the power immediately and contact your retail outlet.
GGeneralH
Symptom Cause Countermeasure Page
Set does not
operate properly.
Display not lit
and sound not
produced when
power switched
to on.
Display lit but
sound not
produced.
Display is off. •The Dimmer setting is set to
Power turns off
suddenly and
power indicator
flashes red.
(Flashes at 0.5
second intervals)
Power turns off
suddenly and
power indicator
flashes red.
(Flashes at 0.25
second intervals)
•External noise or interference is
causing the set to malfunction.
•Power cord not plugged in
securely.
•Wrong input source selected.
•Volume control set to minimum.
•MUTING is on.
“OFF”.
•Protection circuit activated due
to a rise in internal temperature.
•Core wires of two speakers
are touching each other or a
core wire is sticking out of
the terminal and touching the
set’s rear panel, activating the
protection circuit.
•Set is damaged. •Turn off the power and contact
•Reset the microprocessor.
•Check the connections on
the set's rear panel and the
connection of the power plug to
the power outlet.
•Select the appropriate input
source.
•Turn volume up to suitable level.
•Switch off MUTING.
•Set to something other than
“OFF”.
•Turn off the power, wait for the
set to fully cool down, then turn
the power back on.
•Place the set in a well-ventilated
location.
•First unplug the power cord,
then twist the core wires tightly
or terminate the speaker cables,
then reconnect.
a DENON service center .
23
6
10
10
10
10
31
II
4
–
31
Page 35

GRemote control unitH
Preparations
Operations
Informations
DISC
Symptom Cause Countermeasure Page
Set does not
work properly
when Remote
control unit
operated.
•Batteries are worn.
•You are operating outside of the
specified range.
•Obstacle between main unit and
Remote control unit.
•The batteries are not inserted
in the proper direction, as
indicated by the polarity marks
in the battery compartment.
•The set’s Remote control sensor
is exposed to strong light (direct
sunlight, fluorescent light, etc.).
•Replace with new batteries.
•Operate within the specified
range.
•Remove the obstacle.
•Insert the batteries in the
proper direction, following the
polarity marks in the battery
compartment.
•Move the set to a place in which
the remote control sensor will
not be exposed to strong light.
GCDH
Symptom Cause Countermeasure Page
“00 Tr 00 : 00”
is shown on the
display even
though a CD is
loaded.
Disc does not
play when
button is pressed.
A specific part
of a disc is not
played.
A CD-R or CD-RW
disc cannot be
played.
MP3 and WMA
files cannot be
played.
1/3
•The disc is not properly loaded. •Reload the disc.
•The disc is dirty or scratched. •Wipe the disc clean or replace
the disc.
•The disc is dirty or scratched. •Wipe the disc clean or replace
the disc.
•The disc has not been finalized.
•The recording conditions are bad
or the quality of the disc itself
it poor.
•The file formats, extensions or
settings made when the disc
was created are not compatible
with this unit.
•Finalize the disc then play it.
•Use a properly recorded disc.
•Create discs with file formats,
extensions or settings
compatible with this unit.
GTunerH
Symptom Cause Countermeasure Page
Continuous noise
is heard when
receiving FM
programs.
•Antenna cable is not properly
connected.
•Connect the antenna cable
properly.
•Connect an outdoor antenna.
29
29
29
29
30
30
30
30
17
GUSBH
Symptom Cause Countermeasure Page
When a USB
memory device
–
–
6
–
is connected,
“USB” is not
displayed.
iPod cannot be
played.
Files on a USB
memory device
cannot be played.
•The set cannot recognize a USB
memory device.
•A USB memory device not
conforming to mass storage class
or MTP standards is connected.
•A USB memory device that
the set cannot recognize is
connected.
•USB memory device is
connected via USB hub.
•Input source other than “USB” is
selected.
•Cable is not properly connected.
•USB memory device is in a
format other than FAT16 or
FAT32.
•USB memory device is divided
into multiple partitions.
•Files are stored in a noncompatible format.
•You are attempting to play a file
that is copyright protected.
•Check the connection.
•Connect a USB memory device
conforming to mass storage
class or MTP standards.
•This is not a malfunction.
DENON does not guarantee that
all USB memory devices will
operate or receive power.
•Connect the USB memory
device directly to the USB port.
•Switch the SOURCE to “USB”.
•Reconnect.
•Set the format to FAT16 or
FAT32. For details, refer to the
USB memory device’s operating
instructions.
•When divided into multiple
partitions, only files stored in the
top partition can be played.
•Record the files in a compatible
format.
•Files that are copyright
protected cannot be played on
this set.
5
–
–
–
19
5
–
–
20
20
32
Page 36

Specifications
Preparations
Operations
Informations
DISC
n Audio section
• Power amplifier
Rated output: 30 W + 30 W (6 Ω, 1 kHz T.H.D 10 %)
n Tuner section
Receiving range: FM: 87.50 MHz – 107.90 MHz
Usable sensitivity: FM: 1.2 μV/75 Ω
FM stereo separation: 35 dB (1 kHz)
n CD section
Playback frequency response: 2 Hz – 20 kHz
Wow & flutter: Below measurable limits (± 0.001%)
Sampling frequency: 44.1 kHz
n Clock/Timer section
Clock method: Crystal oscillator (Within 1 – 2 minutes per month)
Timer: Everyday/Once alarm: One each
Sleep timer: 90 minutes, maximum
n General
Power supply: AC 120 V, 60 Hz
Power consumption: 70 W
Approx. 0.3 W (standby)
•For purposes of improvement, specifications and design are subject to change without notice.
Index
v A
Accessories ·························································· 1
Alarm ·································································· 21
v B
BASS ·································································· 10
Bit rate ···················································· 17, 20, 31
Browse mode ····················································· 19
v C
Cable
Audio cable ························································ 4
Optical cable ······················································ 4
Speaker cable ···················································· 4
Subwoofer cable ················································ 4
Characters ········································ 13, 14, 18, 21
Condensation ······················································· 2
Connection
Antenna ····························································· 6
iPod ···································································· 5
Power cord ························································ 6
Speaker ······························································ 4
TV······································································· 6
USB memory device ·········································· 5
Current time ························································· 9
v D
Display ································································ 26
Display’s brightness ··········································· 10
Dynamic range ··················································· 31
v F
Finalize ······························································· 31
FM indoor antenna ··············································· 6
Front panel ························································· 25
v M
MP3 ························································ 16, 17, 31
Mute ··································································· 10
v P
Playback
AUX·································································· 15
CD ···································································· 11
FM ··································································· 13
iPod ·································································· 19
MP3 ································································· 17
USB memory device ········································ 20
WMA ······························································· 17
Protection circuit ············································ 4, 31
v R
Rear panel ·························································· 26
Remote control unit ··········································· 27
Inserting the batteries······································ 29
Remote mode ···················································· 19
Resetting the microprocessor ···························· 23
v S
Sampling frequency ······························· 17, 20, 31
SDB ···································································· 10
Speaker impedance ············································ 31
Subwoofer ···························································· 4
v T
Tone ··································································· 10
TREBLE ······························································ 10
Turning the power on ··········································· 8
v V
Volume ······························································· 10
v H
Headphones ······················································· 25
v I
Input source ······················································· 10
33
v W
WMA ······················································ 16, 17, 31
Page 37

Dimensions
Preparations
Operations
Informations
DISC
Unit : in. (mm)
5 5/64
(129.1)
63/64
(25.0)
12 1/8 (308.0)
10 45/64 (272.0)
7/16
(11.0)
(28.0)
1 7/64
(199.0)
7 53/64
(45.0)
1 49/64
5 1/8 (130.0)
8 17/64 (210.0)
3/16
(30.0)
9/64
(29.0)
5 63/64
(152.0)
Weight : 9 lbs 14 oz (4.0 kg)
9/64
(29.0)
4 3/16 (106.5)
4 17/32 (115.0)
21/64 (8.5)
34
Page 38

V00
www.denon.com
D&M Holdings Inc.
3520 10159 00AD
Page 39

RCD-M39
CD RECEIVER
Getting Started
ESPAÑOL
FRANÇAIS ENGLISH
Mise en route / Antes de empezar
Page 40

ENGLISH DEUTSCH FRANÇAIS ITALIANO ESPAÑOL NEDERLANDS SVENSKA
Welcome
Thank you for choosing a DENON CD receiver. This guide
provides step-by-step instructions for setting up your CD
receiver.
If you have setup problems:
If you need additional help in solving problems, contact DENON
customer service in your area.
See the address sheet included in the box.
1-855-MY.DENON
1-855-693-3666
Call for Assistance: 9:00AM to 8:00PM M-F E.S.T.
For frequency asked questions please visit
www.usa.denon.com/FAQ
For US and Canada only
1
Page 41

Before You Begin
ENGLISHDEUTSCHFRANÇAISITALIANOESPAÑOLNEDERLANDSSVENSKA
Remote
control unit
CD Receiver Getting Started Service
What’s In the Box
R03/AAA
batteries
Power cord FM indoor
antenna
network list
What’s In the Box (SC-M39)
Speaker SC-M39 Speaker cables
Note that the illustrations in this manual is for explanation purposes and
may differ from the actual unit.
Safety
Instructions
Warranty
(for North America model only)
Owner’s
Manual
2
Page 42

ENGLISH DEUTSCH FRANÇAIS ITALIANO ESPAÑOL NEDERLANDS SVENSKA
Setup Steps
There are five steps to the setup process.
1
2
3
Install batteries in the remote control unit
Connect the speakers
Connect the power cable
Install batteries in the
1
remote control unit
4
5
3
Turn the power on
R03/AAA
batteries
Begin CD playback
Page 43

ENGLISHDEUTSCHFRANÇAISITALIANOESPAÑOLNEDERLANDSSVENSKA
2
Connect the speakers
Speaker SC-M39
(supplied)
(L) (R)
Connecting the speaker
cables
q Peel off about 10 mm
of sheathing from
the tip, then twist the
wire core.
10 mm
Speaker cables
(supplied)
w Loosen the speaker
terminal.
e Insert the speaker
cable into the speaker
terminal.
r Tighten the speaker
terminal.
4
Page 44

ENGLISH DEUTSCH FRANÇAIS ITALIANO ESPAÑOL NEDERLANDS SVENSKA
Connect the power
3
4
Turn the power on
cable
To household power outlet
(AC 120 V, 60 Hz)
5
Page 45

ENGLISHDEUTSCHFRANÇAISITALIANOESPAÑOLNEDERLANDSSVENSKA
5
Begin CD playback
1 2
Set the input source to
1
3
1
3
4
“CD”.
Insert a disc.
2
3
Press 1/3.
Adjust the volume.
4
4
6
Page 46

ENGLISH DEUTSCH FRANÇAIS ITALIANO ESPAÑOL NEDERLANDS SVENSKA
Owner’s Manual
The included CD-ROM contains an Adobe PDF version of the full owner’s manual for the CD receiver.
Please reference this manual for more details about the setup and operation of the CD receiver and it’s features.
NOTE
The contents of the included CD-ROM cannot be viewed using this player.
Insert the disc into your PC. )ROORZWKHVFUHHQRUGRXEOHFOLFNRQWKH3')¿OH
1 2
7
Page 47

V00
www.denon.com
Printed in China 5411 10873 00AD
D&M Holdings Inc.
Page 48

SAFETY
INSTRUCTION
MANUAL
DENON
Q SAFETY PRECAUTIONS
CAUTION:
TO
REDUCE
COVER
REFER
A
A
WARNING:
TO
REDUCE
EXPOSE
(Only amplifier)
CAUTION:
HOT
The
top surface over the internal
product continuously.
Do
not touch hot
panel.
PRECAUTION:
SURFACE
La
surface superieure du dissipateur de chaleur peut devenir chaude
utilisez
Ne
touchez
"Hot surface mark" et le panneau superieur.
PRECAUCION:
SUPERFICIE
La
superficie superior sobre
calentarse
No
toque· las areas calientes. especialmente las situadas alrededor de
"Hot surface mark" y del panel superior.
THE
RISK
OF
(OR
ELECTRIC
BACK).
NO
SERVICING
The lightning flash with arrowhead symbol. within
triangle,
uninsulated "dangerous voltage" within the product's enclosure
that may
electric shock to persons.
The exclamation p. oint within
to alert the user to the presence of important operating
and maintenance (servicing) instructions
accompanying the appliance.
THE
THIS
APPLIANCE
USER-SERVICEABLE
TO
QUALIFIED
is
intended
be
of sufficient magnitude to constitute a risk of
RISK
OF
FIRE
TO
SHOCK,
DO
NOT
PARTS
SERVICE
to
alert the user to the presence of
an
OR
ELECTRIC
RAIN
PERSONNEL.
equilateral triangle
in
SHOCK,
OR
MOISTURE.
Hot surface mark
SURFACE.
ce
DO
NOT
TOUCH
.
heat
sink
may
become hot when operating this
areas.
especially around the "Hot surface mark"
CHAUDE. NE
produit
pas
les zones chaudes. tout particulierement vers !'inscription
CALIENTE. NO
al
operar este producto de forma continua.
en
continu.
PAS
TOUCHER.
TOCAR.
el
disipador de calor interno podria llegar a
REMOVE
INSIDE.
an
equilateral
is
intended
the literature
DO
NOT
and
the top
si
vous
IMPORTANT SAFETY
INSTRUCTIONS
1.
Read
2.
3. Heed
4. Follow
5.
6.
7.
8. Do not install near any heat sources such
9. Do not defeat the safety purpose of the polarized or grounding-type plug. A
10.
11.
12.
13.
14.
15.
Ia
these instructions.
Keep these instructions.
all
warnings.
all
Do not use this apparatus near water.
Clean
Do not block any ventilation openings.
Install
stoves, or other apparatus (including amplifiers) that produce heat.
polarized plug
type plug has
third prong
your outlet. consult
Protect the power cord from being walked
plugs, convenience receptacles,
apparatus.
Only use attachments/accessories specified by the manufacturer .
Use only with the cart, stand, tripod, bracket, or
specified by the manufacturer, or sold
When a cart
apparatus combination to avoid injury from tip-over.
Unplug this apparatus during lightning storms or when
unused for long periods of time. · :..
Refer
Servicing
such
objects have fallen into the apparatus, the apparatus has been exposed to
rain
Batteries shall not
the like.
instructions.
only with dry cloth.
in
accordance
all
is
as
power-supply cord or plug
or moisture, does not operate normally, or
with
the manufacturer's instructions.
has
two
two
are
is
servicing to qualified service personnel.
required when the apparatus has been damaged
blades with one wider than the other. A grounding
blades and a third grounding prong. The wide blade or the
provided for your safety. If the provided plug does not fit into
an
electrician for replacement of the obsolete outlet.
and
the point where they exit from the
with
used, use caution when moving the cart/
be
exposed to excessive heat such
the apparatus.
is
damaged, liquid has been spilled or
as
radiators, heat registers,
on
or pinched particularly at
table®
has
been dropped.
as
sunshine, fire or
CAUTION:
To
completely disconnect this product from the mains. disconnect tlie plug
from the wall socket out l
The mains plug
and must
be
within easy access by the user.
et
is
.
used to completely interrupt the power supply to the unit
PRECAUTION:
Pour deconnecter completement
Ia
prise
de
Ia
La
prise secteur est utilisee pour couper completement !'alimentation de
l'appareil et l'utilisateur doit pouvoir y acceder facilement.
prise murale.
ce
produit
du
courant secteur. debranchez
PRECAUCI6N:
Para
desconectar completamente este producto de
el
desconecte
El
enchufe de
el
suministro de alimentaci6n electrica a
un Iugar
enchufe del enchufe de
Ia
alimentaci6n elect
al
que
el
usuario tenga facil acceso. ·
rica
Ia
se
pared.
utiliza
Ia
Ia
alimentaci6n electrica,
para
interrumpir por completo
unidad y debe de encontrarse
1.PRODUCT
2.
3.NOTE
tm
~
..,
_
~
in
any way,
For Canadian customers:
This
Cet appareil numerique
Canada.
en
FCC
INFORMATION (For
This product complies with Part 15 of the
to the following
interference. and
including interference that may cause undesired operation.
1MPORTANT
This product, when installed
in
this manual, meets
approved by DENON may void your authority, granted by the
the product.
This product
a Class 8
are
limits
interference
This product generates, uses
if not installed and used
harmful interference to radio communications. However, there
guarantee that interference will not occur
product does cause harmful interference to radio or television reception.
can
which
is
encouraged to try to correct the interference by one or more of the
following measures:
• Reorient or relocate the receiving antenna.
• I ncr ease the separation between the equipment
• Connect the product into
which the receiver
• Consult the local retailer authorized to distribute this type of product or
an
experienced radio/TV technician for help.
Class
B digital apparatus complies with Canadian ICES-003.
two
conditions:
(2)
this product must accept any interference received,
NOTICE: DO
has
been tested and found to comply with the iimits for
~igital
device. pursuant
designed to provide reasonable protection against harmful
in
a residential installation.
be
determined by turning the product
is
de
NOT MODIFY THIS
as
FCC
requirements. Modification not expressly
and
in
accordance with the instructions, may cause
an
outlet
connected.
Ia
classe B est conforrne a
US
customers)
FCC
(1)
Rules. Operation
this product may not cause harmful
is
PRODUCT
indicated
can
in
the instructions contained
FCC,
to
Part
15 of the
radiate radio frequency energy and,
in
a particular installation. If this
on
a circuit different from that to
FCC
Rules. These
OFF
and
ON,
and
receiver.
Ia
norme NMB-003
subject
to use
is
no
the user
du
Page 49

0 NOTES
• Avoid high temperatures.
Allow for sufficient heat dispersion when installed
rack.
a
• Handle the power cord carefully.
Hold the plug
• Keep the unit free from moisture, water, and dust. • Proteger l'appareil contre l'humidite. l'eau
Unplug the power cord
•
long periods
• Do not obstruct the ventilation holes. l'appareil n'est pas utilise pendant de longues • Desconecte
• Do not let foreign objects into the unit. p8riodes.
• Do not let insecticides, benzene,
in
contact with the unit.
• Never disassemble
• Ventilation should not be impeded by covering benzene
the ventilation openings
newspapers,
• Naked flame sources such
should
• Observe and follow local regulations regarding
battery
• Do not expose the unit
fluids.
• Do not place objects filled with liquids. such
vases,
Do not handle the mains cord with
•
When the
•
position, the equipment is not
off
from MAINS.
• The equipment shall be installed near the
power
accessible.
• Do
direct sunlight or in places
temperatures, such
ON
USE I OBSERVATIONS RELATIVES A L'UTILISATION I
WARNINGS
• Eviter des temperatures elevees . • Evite altas temperaturas.
in
Tenir compte d'une dispersion de chaleur suffisante Permite
lors de
when
unplugging the cord.
when
of
time.
or modify the unit in any way.
tablecloths or curtains. maniere
not
be placed on the unit. objets tels que des journaux. nappes
disposal.
on
the unit.
sw
itch
is
supply so that the power supply
not
keep the battery
not using the unit for poussiere. • Mantenga el equipo libre de humedad, agua y
and
thinner come
with
items, such
as
lighted candles
to
dripping or splashing
in
the
OFF
(STANDBY)
completely switched
in
a place exposed
with
as
near a heater.
as
wet
hands. l'humidite.
is
easily
extremely high
• Manipuler le cordon d'alimentation avec precaution. • Maneje el cord6n de energla con cuidado.
Tenir
• Debrancher le cordon d'alimentation lorsque polvo.
• Ne
• Ne
• Ne
• Ne jamais demonter ou modifier l'appareil d'une
• Ne
Cela
• Ne jamais placer de !Iamme nue sur l'appareil, • No deber
notamment des bougies allumees.
• Veillez
as
to
jetez les piles usagees.
• L' appareil ne doit pas et
•
Ne pas poser d' objet con tenant du liqui
exemple
•
Ne pas manipuler
mains
• Lorsque l'interrupteur est sur
(STANDBY), l'appareil
deconnecte du
• L'appareil sera installs pres de Ia source
d'alimentation, de sorte que cette derniere soit alimentaci6n de manera que resulte facil acceder
facilement accessible.
•
Ne placez pas
Ia
presentant des temperatures ex
elevees, par exemple pres d'un radiateur. calefacci6n.
AVERTISSEMENTS
I'
installation sur une etagere.
Ia
prise lors du debranchement du cordon. Sostenga
pas
obstruer les trous d'aeration. • No obstruya los orificios de ventilaci6n.
pas
laisser des objets strangers dans l'appareil. • No deje objetos extrai\os dentro del equipo.
pas
mettre
en
contact des insecticides, du • No permita el contacto de insecticidas, gasolina y
et
un
diluant avec l'appareil. diluyentes con
ou
d'une autre.
pas
recouvrir les orifices de ventilation avec des •
entraverait
Ia
ventilation . peri6dicos, manteles o cortinas.
a respecter les lois en vigueur lorsque vous • A
un
vase. sur l'appareil. liquido, como jarros.
mouillees. mojadas.
lumiere directe du soleil ou dans des endroi
le
SECTEUR
Ia
pile dans un endroit expose a
NOT
esta instalado
et
Ia
ou
rideaux.
re
expose a
I'
eau
ou a • No exponer
de,
par
cordon d'alimentation avec les
Ia
position
n'est pas completement
(MAINS). desconectado de
OFF
tremement
de energla.
el
equipo por mucho tiempo.
• Nunca desarme o modifique
manera
La
ventilaci6n no debe quedar obstruida por
haberse cubierto
inflamables sin protecci6n, como velas encendidas.
Ia
normativa
cuando se utilice.
• No colocar sabre
• No maneje
• Cuando el interrupter esta
(STANDBY).
El
equipo se instalara ce
•
a ella.
• No coloque
ts
Ia
luz
sea extremadamente alta,
AS SOBRE
.
hora de deshacerse de
directa del sol o donde
EL
USO
ADVERTENCIAS
Ia
suficiente dispersi6n del calor cuando
en
Ia
consola.
el
enchufe cuando desconecte
el
cord6n de energia cuando no utilice
el
equipo.
las
an
colocarse sobre
para
el
cuidado del media ambiente.
el
aparato
el
el
cable de alimentaci
el
equipo no esta completamente
Ia
las
pilas
el
aperturas con objetos como
el
aparato fuentes
las
al
goteo o salpicaduras
aparato objetos llenos de
en
Ia
alimentaci6n MAINS.
rca
de
Ia
en
un Iugar expuesto a
Ia
como
el
equipo de ninguna
pilas, respete
6n
con
las
posici6n
OFF
fuente de
temperatura
cerca de una
cord6n
Ia
manos
0 CAUTIONS
ON
INSTALLATION
PRECAUTIONS D'INSTALLATION
EMPLAZAMIENTO DE
LA
INSTALACI6N
*
Wall
Paroi
Pared
* For proper heat dispersal, do not install this unit in a confined
such
space,
•
More
•
Do
* Pour permettre Ia dissipation de chaleur requise, n'installez
pas cette unite dans un espace confine tel qu'une bibliotheque
ou
un endroit similaire.
•
Une
•
Ne
* Para
equipo
similar.
•
Se
•
No
as a bookcase or similar enclosure.
than
12
in. (0.3
m)
is
de
mas
otro
recommended
equipment
12 po (0,3
sur
cet
de
.12 pulg. (0.3
equipo
sobre
not
place
any
other
distance
placez
Ia
recomienda
coloque
de
plus
aucun
materiel
dispersi6n del calor adecuadamente, no instale este
en
un Iugar confinado tal como una libreria o unidad
dejar
ningun
on
this
ml
est
appareil.
Ia
.
unit.
recommandee.
ml
alrededor.
unidad.
(Only disc player)
CLASS 1 LASER PRODUCT
LUOKAN 1 LASERLAITE
KLASS 1 LASERAPPARAT
ADVARSEL:
VAROITUS! LAITTEEN
VARNING:
USYNUG
SIKKERHEDSAFBRYDERE
UDSAETTELSE FOR STRAUNG.
KAYTTOOHJEESSA MAINITULLA
ALTISTAA
YUTT
OM
BRUKSANVISNING SPECIACERATS, KAN ANVANDAREN
UTSATTAS
OVERSKRIDER GRANSEN FOR LASERKLASS 1.
LASERSTRAUNG VED ABNING, NAR
KAYTTAMINEN
KAYTTAJAN TURVALLISUUSLUOKAN 1
Av
ALLE NAKYMAMTTOMALLE LASERSATEIL
APPARATEN
ANVANDS
FOR
OSYNLIG LASERSTRALNING
"CLASS 1
LASER PRODUCT"
ER
UDE
AF
FUNKTION.
MUULLA
KUIN TASSA
TAVALLA SAATTAA
PA
ANNAT
SATT AN I DENNA
SOM
UNDGA
YLLE
ATIENZIONE: OUESTO APPARECCHIO E' DOTATO
DISPOSITIVO
L'USO IMPROPRIO DELL'APPARECCHIO PU
PERICOLOSE ESPOSIZIONI
CAUTION:
USE OF CONTROLS OR ADJUSTMENTS OR PERFORMANCE OF
PROCEDURES OTHER
HAZARDOUS RADIATION EXPOSURE.
THIS PRODUCT SHOULD
EXCEPT PROPERLY QUALIFIED SERVICE PERSONNEL.
.
OTIICO
CON RAGGIO LASER.
THAN
THOSE SPECIFIED HEREIN
NOT
BE
ADJUSTED OR REPAIRED BY ANYONE
A RADIAZIONI!
O'
MAY
Dl
CAUSARE
RESULT IN
DE
www
NON
.denon.com
Printed
in
China
D&M
5411
Holdings Inc.
10965
OOAD
COE1A566Z
Page 50

Argentina
Australia
Austria
Bahrain
Belarus
Belgium
Bosnia
Herzegowina
Brasil
Bulgaria
Canada
Chile
China
Croatia
Cyprus
Czech
republic
Denmark
Egypt
Estonia
Finland
France
Germany
Georgia
Greece
Hong Kong
Hungary
Iceland
India
Indonesia
Israel
Italy
Jordan
Kazachstan
Korea
Kuwait
Latvia
Lebanon
Lithuania
Macedonia
Malaysia
Malta
DENON SERVICE NETWORK I
ICAP S.A. Av. Di
Products Group Pty Ltd. 67 O'Riordan Street Alexandria NSW 2015.
Audio
1460Australia
Digital-Professional-Audio Vertriebsges.m.b.H., Seebockgasse 59, A-1160 Wien
Tel: 01-480-1006
Yusif Bin Yusif Fakhro
Tel : +973
Neotechnos
Transtei-Sabima
d.o.o. Mala Pruga b.b
STAV
Syncrotape Sistemas
Audio Centre 8 Angel Kanchev St., 1000 Sofia Tel: +359 2 9806213 Fax: +359 2 9806212
Sofia
D&M
CANADA
Music
J:iHJ
EI!
if
El!
m : os6-21-624B5151 f
Audiolab centar d.o.
MODESTOU SOUND&VISION
EUROSTAR
Tel: 261-112-901 Fax: 261-112-904
AUDIONORD DISTRIBUTION DALI ALLE
Sigma
Square, Mohandeseen, Cairo, Egypt. Tel: +20 2 3305 0806
Sperco lmpex Ltd. Ehitajate tee 122, 13517 Tallinn Tel: +372 6509810 Fax: +372 6509811
Soundata
DENON
Tel:+33(0)1-41-383230
DENON
Tel : +49(0)2157-1208-0 Fax: +49(0)2157-1208-15
Pegasi.
KINOTECHNIKI
D&M
Sales and Marketing (H.K.)
Mong
Road, Tai Kok Tsui, Kowloon. Hong Kong. Te
~
i'!!itL~:*:f<JP.ll.
HORN DISTRIBUTION (HU)
Tel: +36 1 347 0020 Fax :
Fa
Einar
PROFX
Bazaar,
PT
Autoaccindo Jaya. Cideng Barat
Newpan Ltd. 14 Rosansky st. Rishon Lezion 75706.
Audiodelta S.r.l. 19
Tel: 39-02-5411-6008
DIGITAL AUDIO VIDEO SYSTEMS
Tel: +962 6 568 2880 Fax: +962 6 568 2881
Samat Electronics Ltd
D&M
Sales and Marketing Korea Ltd. 2F,Yeon bldg., 88-5, Banpo-dong. Seocho-gu, Seoul Korea
Tel: 02-715-9041 Fax: 02-715-9040
OCEAN
Tel: +965 573 1975
Sperco lmpex Ltd . Ehitajate
AMAC
Tel:
+961 1 651
UAB Hi-Fi
D.T.
KODI ul. Cedomir
Wo
Kee
Petaling
Doublesin
az
Velez 3531 Buenos Aires (C1200AAC). ARGENTINA Tel: +5411-4865-3755
Tel:
1300134400
Fax
: 01-485-7679
17
ty
Wor
ld Pedro de Valdi v
ll,~±.W!~:ff~!l-0~
OSTRAVA
Import
Oy
FRANCE
DEUTSCHLAND
6.
Sanapiro Street. 108, Tbilisi Tel: +995 32952802
restveit & co hf .. Borgartun 28, P.Box 5440, 125 Reykjavik. Tel: +354 5207900 Fax: +354 5207910
SERVICE
Bangalore- 560 027, India Tel: 080 3297 0853
W.W.L.
408 111
Fax
le MOSKOVSKAJA
P.V.B.A. Duboisstraat
Rua
INC. 5-505
o.
Mlinska 5. 10143 Strmec Samoborski Tel: +385
s.r.o. areal Vodni stav
(RADWAN
Hameentie
157
A division of D&M
Fax
A division of D&M Germany
LTD. 14.
PYRGOU
i?I(
IIIi:l[31lJ!t
CENTRE
Via
Pietro Calvi 20129 Milano Italy
I 39-02-5412-8253
88,
STAR
TRADING
Fax
: +965 575 1175
S.A.R.L. Mazraa
pasaulis Kalvariju 168, LT-08206, Vilnius, Lithuania Tel & Fax: +370 5 2762659
Hong Trading Sdn Bhd. 2nd Floor , (Left Wing), Bangunan Infinite Centre, Lot
Jaya, Selangor Darul Ehsan, Malaysia Tel: 03
& Zammit Ltd.
Street-
774 Fax:
Kantargiev 21a,
Fax: +
61295780159
P 0 Box 214 Manama. Kingdom
: +973
17
406 080
STR
.20, ROOM
..
Hermann Hering 1193, 89010-600 Blumenau,
Apple
t1l:
EL
OGAIL STORES). 52, Gameat
5th
: +33(0)1-41-380110
~ii::*:Jli
KFT.
+36 1 347
Advanced Audio Solutions (Bangalore)Pvt.
Karasai
EST.
tee
+961 1 651
53
Nicolo lsouard Street. SLM04
48
11080 Belgrade. Serbia Tel:
Creek Blvd., Markham, Ontario.
ia
Norte 0691, Providencia. Santiago, CHILE Tel: +562-334-2300
J:iHJll
fiVIJiCiffi
os6-21-62494434
PLC
LTD
floor
00560
France
STR. 166 75,
ltd
- Denon Group. Unit
~t
1'[
Ady Endre ut 28.,
0021
No.7
CORP.
Batyr St. 050012 Almaty
(Easa Husain
122, 13517 Tallinn Tel: +372 6509810
Arab Bank Bldg. P.
754
1000 Skopje Tel
1.
, B-2060
Ant
/ll}
1600~
7'::Jt:&NR1l-
2.
Salaminos Avenue, 1045 Nicos
by
Praha.
1,
9610 NOERAGER
Helsinki
Finland
SAS
Tour
Ventose. 2
GmbH. Ander
GLYFADA
9jf902
Fax
l:
~
1!Iilli
1191
Jakarta, Indonesia Tel: +62-21-633-2730
: 39-02-5412-0258
P O.BOX 926478. Amman 11190, Jordan.
AI
Yousifi & Sons Co.) P.O. Box. 126. Safat 13002. Kuwait.
O.
ij~fttM*l
PO
Box 150,
of
Bahrain.
220007
Minsk
werpen. Belgium Tel: 03-237-3607
l!iX
miDiJ
budova
Tel
ATHENS
(+852) 2516 5864 Fax: (+852) 2516 5940
Tel: +375
+381
11
371-33-00
L3R
5B1
ii~BOB
;1:!\
~:
A2
Dobronicka 635.148 00
Tel
: +45 8743 2157 Fax: +45 8743 2140
El
Dowal
Fax
: +20 2 338 9574
: +
358-(0)9-4769
rue
des
Bourets, 92156
Kleinbahn
Fax
: +995 32964821
Tel: +30
2.
9/F., North Block, Skyway House. 3 Sham
: 852-2516-5864 llJ
Budapest. Hungary
Fa
x: 080 2211 2043
Israel. Tel : +972-3-953-5900
Tel
: +7 3272 718304
Box 155230. Beirut. Lebanon.
:+
389 2 3133 104
-7
954-8088
Sliema
Fax
Tel: +356
17
228 69 86
Fax
: +
SC,
Tel
: 905-475-4085 Fax:
~
os6-21-62494424
91
33 0 958
ia
El
Arabia Street, Mostafa Mahmoud
210
960
ltd
Fax
: 03-7954-7088
(213)
381
BRASIL Tel: +5547-2111-4700
Fax
: +385
Tel : +357 996 23 014
Praha 4 Czech
3300
Fax
: +
358-{0)9-4769
Suresnes
18.
D-41334 Nettetal, Germany
1071
Fax: +30
Jj;:
852-2516-5940
. No 53. K.H.Road. Opp .Big
Fax
: +62-21-632-2886
Fax
: +972-3-961-6193
Fax:
+7 3272 581945718438
: +372 6509811
1,
Jalan 13/
40562
Fax
: +
Mascot
NSW
11
371-33-33
905-475-4159
91
33
0 990
Rep
3310
Cedex, France
210
960
1072
6,
46200
356 (213) 45522
Mauritius
Mexico
Mexico
Mexico
Moldova
Montenegro
Morocco
Netherlands
New
Norway
Oman
Pakistan
Philippines
Poland
.
Portugal
Qatar
Romania
Russia
Saudi Arabia
Serbia
Singapore
Slovakia
Slovenia
South
Spain
Sweden
Switzerland
Taiwan R.O.C.
Thailand
Turkey
U.A.E.
Ukraine
United
U.S
Vietnam
Zealand
Africa
Kingdom & Eire
.A.
TECHNICAL DYNAMICS Ltd. George Guilbert
Productos
lnteligos Boulevard Rogelio Cantu 370, Colonia Santa Maria, Monterrey, Nuevo Le6n, C.P. 64650, MEXICO
Tel: +5281-8335-2000
Best Buy
Edomex Mexico
Mandoli
STAV
lnes Marokko
Penhold B.V. Poppenbouwing 58, NLTel:
Audio Products Group Pty
Tel: +64-4-2320-030
AUDIONORD DISTRIBUTION DALI ALLE
HITEC
Tel :
Hina
Tel :
Lottewor
Barangay Bahay Taro,
HORN DISTRIBUTION S.A. Ulica Kurantow 34, 02-873 Warszawa Poland
Tel :
Videoacustica Qta.
Tel :
TECHNO Q P.O.Box. 18860, Doha. Qatar. Tel: +974 468 9494
LOTUS TELECOM
DENON
Tel: +7 (495) 647-02-75
MOHAMED AL-RASHID
Tel: +966 2 284 4044
Audiolab centar d.o.o. Mlinska
DAV
Tel:
BIS
Digital-Professional
The
Tel: +
Gaplasa S.A.AV. lng. Conde
Hi-Fi
DKB
D&M
Tel:
Mahajak Development Co.,
Bangkok
Ertekin
Tel: +90 212 293 95 15 Fax: +90 212
V.V. & SONS L.
Tel : +971-4-266-2435. 268-4575 Fa
Mirs Ltd.
DE
BT1
DENON
Tel:
A
Tel: +84 8 898 3424
Exitosos Durango
Mundo
E Blvd. Manuel Avila Camacho. #1007.1ocai4B y 1 D
C.P
na
SRL
Techomarket Bul.
d.o.o. Mala Pruga b.b., 11080 Belgrade, Serbia Tel: +
KM
31-345-588 080
CENTER
+968 24 497 384
Import & Export Suite #721-725 Regal Trade Square. Preedy Street. Saddar Karachi-74400. Pakistan
+92
+48 22
+351
ENGINEERING & SERVICES
6481 0071
AUDIO s.r.o. Dobronivska cesta 1642/6 960
Soundlab (Ply)
27
Klubben Goteborg Skanegatan
Household Switzerland
Sales and Market ing Taiwan Ltd. 6F-2 N
02-2522-1308
NON
5HD. United Kingdom Tel: +44 (0)28 9027 9830
201-762-6665
nh
Duy
PO
21
273 5757
ld Audio Video Systems Incorporated
331
55
214241770 Fax: +
Russia
a division of
Fax
11
466 4700 ·
Thailand. 10110 Tel: 66-2-256-0020
Elektronik Tic. ve
L.C.
Osipova str.
UK
A division
ELECTRONICS
Manufacturing- Trading Co., Ltd.
269.
Piso
. 54055 Tel: +5255-52929211
11,5 BD Chefchaouni, 20250 Casablanca
Fax
Fax
Box.3558. Ruwi Postal Code:112. Sultanate Of Oman .
Fax
Fax
Project
33
Do
SRL
Fax
: 6476 7757
Audio Seebbckgasse 59, 1160 Wien Te
ltd
Fax
Street No-11 /
37/0ffice
Fax
Fax
Mir
: 31-345-588 085
ltd
. 13 Wall Place. Tawa, Wellington
: +64-4-2325-984
: +968
24
: +92
21
222 7427
8,
Quezon City, Philippines. Tel: +632-929-5334
Fax
: +48
22
Paizinho-Armazem 5-Estrada De Circunvalagao-Apart. 3127 1303 Lisboa Codex
351
214188093
39 Mehadia St..
LLC
D&M
Fax
: +7 (495) 258-90-45
EST
.(MRE) Architectural Audio-Vision, P.O.Box 6004 . Jeddah 21442, Saudi Arabi
: +966 2 284 4144
5,
10143 Strmec Samoborski Tel: +385
PTE
17
Indianapolis Street, Kyalami
de Torroja. 25. 28022 Madrid Tel : 91-746-00-45
AG
Eggbuhlstrasse 28. 8052 Zurich Tel: +41
: 02-2100-1175
ltd.
46 Mahajak Building, Sukhumvit Soi 3 (Nana-Nua) Klongtoey, Wattana,
San.
A.~
Galipdede
B.
1, 65012 Odessa, Ukraine Tel: +380 (482) 305530
of
D&M
Audiovisual. First floor Imperial House. 4-10 Donegal I Square East. Belfast
(USA
).
LLC
: 201-762-6686
(a
: +84 8 898 3425
DE
w
St
2-14.
cea
698 389
331
RS
LTD
25.41252
Road N0-128, Shed No-39
x: +97
D&M Holdings Company)
reet, MU Curepipe, Tel: +230 6983927
Colonia
Roma
, 06700 Mexico D. F ..
eel
Batrin
6.
2022
Chisinau
Tel
381
11
Tel
4191
NZ
Geldermalsen, Netherland
1.
9610 NOERAGER Tel: +47 815 000 90
CET
Building Mezzannine Floor No. 4 Mindanao Avenue.
55 00
6.
060541 Bucharest Tel: +40-21-2202440
Novoalekseevskaya
222
TAGORE
01
Zvolen Tel: 045-5400 703
Goteborg Tel:
0148,
Songjiang Rd., Taipei City 10458, Taiwan R.O.C.
Fax
: 66-2-253-1696
Cd.
249 35
No.: 83 Kuledibi- Karakby, istanbul, Turkey
12
1-4-266-2052
170
Ung
Van
: +212 22 66 6768
New
Fa
street
19
LANE
#03-17,
l:
+43 1 480
Park,
1685,
031
AI
Fax
: +44 (0) 28 9031 2643
100 Corporate
Khe
im S
t..
Ward 25, Blinh
NON
ww.denon.com
Fax
MEXICO
San
Lucas Tepetlatalco. Tlalnepantla,
: +373
22
241033
371-33-00
x: +974 468 9565
bid 2. office 55,
Kya
33 51010 Fax:
Khabisi, Deira. Dubai, U.A.E
Fax
Zealand
Fax
91
33
0 958
TG
BUILDING,
Fax
10
06
lami, South Africa
Fa
1 3061615
Dri
ve, Mahw
Thanh
: +230 6980322
Tel:
+5255-5514-0401
Fax
: +373
: +
381
11
Fax
: +212
Fax
: +47 228 063 05
: +632-929-1343
Fax:
+40-744-501516
129626
Moscow.
Fax
: +385
SINGAPORE
: 045-5400 704
Fax
: +43 1 485 76 79
x:
91-329-44-57
031
33 51019
Fax
: +41-044-3061690
Fax
: +380 (482) 305555
ah,
NJ 07430-2041
Dist.,
HCMC, Vietnam
D&M
5431
22
226009
371-33-33
22
35 42 77
Russia,
91
33
0 990
787603
Holdings Inc.
10032 302D
CQE1A226P
a.
Page 51

Page 52

To
start
your
Extended
Protection
Plan
coverage:
1 .
2.
(855)
Call us
toll-free
Have your model
at
number, serial
and purchase receipt
Log on
http:/
to
/servicecontracts.denon.com
720-0823
(US
number,
available when
Copyright
©
2011
D&M
Residents
Only)
calling.
Holdings Inc. All
Rights Reserved.
CQE1A559Z
Page 53

The
Today's highly technical products are mechanically and electronically
complex, and even the best equipment may need periodic attention that
can result in costly repair bills. With the Denon Extended Protection Plan,
Denon
Extended
Protection
Plan
there are no deductibles
product is unrepairable,
has similar features and functionality.
Don't delay!
warranty expires.
http:/
/servicecontracts.denon.com,
You
must extend your coverage before your factory
To
extend
or
we
hidden charges. Best
will replace it, absolutely free with a unit that
your
warranty, simply log on
or
of
all,
call us toll-free at
if
to
our
(855)
your
720-0823.
(US
Denon
website:
Residents
Only)
Page 54

Features
&
Benefits
• 1
• If unrepairable, we'll replace it!
• No deductibles
• Power surge protection
• Unlimited service calls
• Nationwide authorized service
00°/o
center network
coverage on parts & labor
or
hidden charges
• Service representatives
to
available
24 hours a
assist you
day
• No Lemon guarantee
• Fully insured
• Fully transferable
Page 55

DE
NON
SPEAKER
SC-M39
Owner's
Manual
Manuel
de
Manuale delle
llllllilltiiJI.
Bedienungsanleitung
Manual del
Gebruiksaanwijzing
Bruksanvisning
Py
lnst
A
c
I'Utilisateur
istruzioni
usuario
KOBOACTBO
rukcja
nOnb3088TenR
obslugi
"-"side
terminal: Black
Borne"
- ":
Nair
T erminale Ia
- ii!H
"- "-Anschluss: Schwarz
T
"- "-aansluiting
"
60KOBOI71
..
to
iil
i'l'
lOi
erm
i
na
l del lado "- " :
-"
anslutning : Svart
pa3b€M
_
..
zacisk
boczny· Czarny
"-
":Nero
:Zwart
"-"·
N
egro
LlepHb
'IS"'Wi'
Thank you
for
reading
purchasing this
please
read this
them,
operation,
the product.
After
Accessories
<DOwner's Manual
® Service
@Speaker cable
®Foam
®Anti-slip
station
plug
pads
..
list
..
.
...
(8
pes. / 1 sheet)
Before using
Note
on
use
0
Ca
ut
ions
on
i
nst
a
The
quali
by the si
installation. Consider
speaker.
• If
the bass sound is overemphasized
installed di
ot
h
er
•
Note that
record player
• Also
magnetic force nearby, interaction
speakers can cause
•Wf.ld~"Nit
•
Be sure
people
accidentally,
•
Be su re
Afterwards, perform
sure there is no danger that the speakers
be liable
of
the
O
Cieaning
•
Use a
cabinet and operation
•
When usi
provided for th
•
Do
not
insecticides on the speakers since they may cause a change
@
~
~
B
p
Foam
plug
Prise
mousse
Tappe di spugna
q&
jp
,
;j(y,:J
Schaums
toffstopfen
Tap6n
de
espuma
Schuimpl
ug
Skumgummiplugg
n
opOI10HOB8A
n
oay
w
e4
Ka
Zatyczka
piankowa
"+
"side
terminal:
+": Rouge
l
ata
"+": Rosso
-:
;;F
luss: Rot
utning:
paJbeM
Red
"+"·
ROd
"+"·
Czerwony
Rojo
KpaCHbllil
Borne"
Terminate
H !H
IH
"+"-Ansch
Termi
nal del lado
"+"
-aansluiting: Rood
"+"
l
~
ansl
6oKoeo~
"+"
zacisk boczny:
b
D
~
"'-.
Anti-slip pads
Ronde
Tappa di spugna
~"(Vll:
Antirutschunter
Almohadil
Antislipkussentjes
Halkskydd
HecK011
Podktadki
Cl
Sheath
Gaine
Guai
na
l&ll
lsolierung
Funda
Bekleding
Mantel
06on04Ka
Ostona
przewodu
ll
es
ll:l
las
b
3Autltle
an
anti
de
rapantes
lagen
an
tidesli
npoK.naAKlll
t
yposlizgowe
0
zantes
X
quafity or
0
Other
•
Raising
distorted sound
the sound at a reasonable vol
•
Whe
surface
speaker.
Removing
•
The
net
•
To remove. grasp both sides
•
To mount,
speaker
press in .
Acoustic
When
may emphasized.
the back
You
can adjust
pl
ug
you i
tmD
•
Do
not
and
get
•If
the foam
the unit immediately and
nearest repair and inquiry center.
How
to
Attach four of the
(125'8 )
llation
ty
of
the
sound produced from the speaker is affected
ze
and type
rectly
hard stands.
note that
caution
n moving
on the
placing
may
if
to
fasten the speaker cables
from trippi
causing the speakers
to
check for safety
for
damages
place
of
installation or improper installation
dry
wiping
ng
chemi
em
.
use benzene, thinners, or other organic solvents or
color.
s
the
amp
lifier's
could
the
of
the
speaker thro ugh the saran
the
Speaker
on
the
front
line up
net
wi
th
the
Sponge
installing
on a
Insert
of
the
SC-M39.
the
nsert.
insert the foam
stuck inside.
plug
cannot be removed
Install
incl
DENON product. To ensure proper
owner's
manual carefully
be sure
to
keep
them
for future reference.
..
__
of
the room,
the points
the
speaker on the same stand
result in howling_
there is a
the
ng ove r
sa
or
cloth
panel.
ca
ll
y
damage the
unit, note
as
listed
floor.
set
them
magnet
colors
f
ety
accidents caused by inapprop riate choice
and wipe
between
on the
the
m or
to
after
inspections at regular intervals
l
ightly
treated cloths.
volume
excessively and playing
amp
ume
leve
that
applying
. .............
.
-
..
......
well
as by the
below
before
when
the speakers are
on concrete
or
any device generating
this device and the
TV
to
become
to
a
wa
l
l.
etc
ot
h
erw
ise
pulling
fa
iL
insta
ll
ing
the speakers.
wi
ll
fall. DENON w i
procedures.
to
r
emove
follow
the precautions
l
if
ier and speakers_ Enjoy
l.
strong force
net
could
Net
of
the speakers can be removed.
of
the
net
and
pull
the
projecting pieces in the
holes in the
desktop
bass sound
uded
or in the corner
sound foam
((F
A)
with
plug
too deep. The fo
consult
anti-sl
ip pads
four
your store
plug
forward.
four
corners of the cabinet and
of
your room.
i
n
the
bass·reflex duct at
the
amount
of
am
plug could
or
falls
inside, stop using
of
purchase or your
to
the
botto
before using
...
..
..
.
...
.
...
..
....
..
-·
....
....
..........
..
..........
...
..
......
....
..
..
method
install
ing
the
blocks
or
sh
elf
as
blotchy.
..
to
prevent
on
them
to
ll
not
dirt
from
the
wi
to
the
damage
the
corners of the
the
bass
sound foam
fa
ll in
m of the
un
..
be
1
1
2
2
.
1
of
or
a
in
th
it.
Connect
Connectez
~o
An die
Conecte
Aansluiten
Anslut ti
noAK11104
CepAe4HliiK
Podtz,cz
Connect
to
amplifier's
..
_
..
side:
Connectez
au
_::ffi];~ffl~
An die
Conecte allado "Aansluiten op
Anslut ti
noAK1110
Podtz,cz
cOte"- "
l
~;;~
"
de"
ll
fOrstarkarens
4
lii
Te
K
YC&.111l11
po stronie
d:
"del
- "
van deversterker: Etten draad
,-"
"- "·Seite des Versta rkers
Plain
de l'amplificateur
:
~~~i~c~~;ttn
ansch
amplificador: Nuc leo simple
"-"
.sida:
T
Ka
e.nl0
CO
CTOpOHbl
wzmacniacza: Rdzen
to amplifie
r'
s
"+
"side:
au
~
cOte "+"
'ij~ffi~~~;~·
"+"·Seite
core
: Arne
l
ie~en
bel
utan rand
"-":
:
~~~~~m-f~E'b~~;;eV
des Verst8rkers anschlief1en:
allado
"+" del
op
de "+"
ll
fbrsta rkarens
L
iiT€
K
yClll.m1Te
c
no
.no
cKaM&.-~
po
s
tr
onie
"+"
lisse
i
ma
liscia
:
Einfarbige
f
.naAK1<1H
gtadki
Striped
de
l
'amp
li
ficateur.
amp
lificador: NUcleo rayado
van
de
versterker: Gestreepte draad
"+"·sida: Kabel
11
10
CO
CTOpOHbl
wz
macniacza :
Ader
cepAe4HliiK
core
Arne
Anima
med rand
"+":
Rdzen
cannel8e
fi
l
ett
ata
Gestreifte
w paski
Ader
~r
Page 56

Connections
read the
amplifier, be sure
an
connecting the speakers
When
amplifier's
• Connect
the speaker
speaker
• Connect
the amplifier,
on the amplifier, making sure to check the polarities
"-"}.((FC}
Amplifiers have various speaker
•
Check
details.
GD
sure to turn the amplifier's power
Be
•
speakers
the polarities are inverted,
• If
have no bass component.
may
connect the polarities properly.
to
Twist firmly the wires by hand
1
manual carefully
owner's
the input terminals on
output
cables.
the speaker for the
speaker
the
the owner's manual of the amplifier you are using for
the ampl ifier.
to
to
and connect properly.
panel
rear
for
the
channel
left
right channel
the
output
phase
the
making
to
terminals.
off
may
seem
it
terminals on the amplifier, using the included
not stick out and cause short-circuits.
Loosen the terminal by turning to the left and
2
to
the speaker
of
terminal
"L"
the
before connecting the
be
the
to
and the sound
off
unnatural.
that
so
terminal
"R"
+"
("
Be sure
they do
((FD)
insert the speaker cable through the bole in the
speaker terminal.
3
Tighten
check
and
terminal
the
that the core wire
by
not protruding
is
the
to
turning
from the bole.
gently on the speaker cables
connections are completed,
Once
check that
to
GD
Do
•
Doing so
amplifier.
not
are securely connected.
they
let the core
short-circuit the amplifier circuitry and damage
will
wires
pull
speaker cables touch each other.
two
of
Specifications
2-speakers
Type:
Frequency range:
impedance:
Input
input
Max.
Sensitivity:
frequency:
Crossover
Speakers·
external
Maximum
dimensions:
Weight:
For improvement purposes, specifications and design are
subject to change
·
2-way
box
Reflex
45Hz-40kHz
0/ohms
6
60
83 dB (1 W . 1 m}
3kHz
12
2.5 em
145 (W}
(5-45/64"
3.5 kg
without
120
(IEC}.
W
(4-3/4") cone bass-mid x 1
em
soft
")
(1
238
X
9-3/8"
X
11.5
lbs
(7
notice.
W
dome
(H)
oz}
(PEAK}
high range x 1
234 (0}
X
9-7/32"}
X
mm
with
on
and
right
the
appareil DENON. Afin
d'ut
iliser
cet
veuillez
l'appareil.
attentivement
lire
Nous vous remercions d'avoir acquis
d'assurer son bon fonctionnement.
manuel de
l'avoir lu, conservez-le afin de pouvoir vous y reporter
Apres
ultSrieurement.
l'utilisa
teur
avant
Accessoires
I'Utilisateur..
de
CDManuel
® Liste
®Cable
®Prise
®Rondelles
Observations
0
La
Ia
attentifs aux remarques inscrites ci-dessous avant
enceintes.
•
• Veuillez
•
•
• Veillez
0 Nattoyago
•
• Lorsque vous utilisez des chiffons traites chimiquemen
0
Demontage
Element
Si
les
dans
Le son des basses
mousse
services apr9s-vente
des
d' enceinte ............................................................................
mousse... . .............. 2
antiderapantes
utilisation
I'
Avant
relatives
d'installation
Precautions
qua lite du son produit par le enceintes
forme de
Si
instaiiBes
bBton
support ou
g8nant
Notez egalement que si un aimant au un autre appareil
une force magn8tique
entre
Ia
Fixez les
prendre les mains au les pieds
des enceintes. Par
reguliBrement
pas de
des
d'installation au par des procedures d'installation incorrectes.
Uti!isez un chiffon
desboitiers
les mesures
• Ne pas
organiques, ou
ils risquent d'en alterer
Autres
• Vous
vous augmentez
son distordu.
• Lorsque vous
vous risquez de
pression
• Le
• Pour
Pour remonter, alignez les parties saillantes dans
•
angles du filet de
du caisson
I'
piece,
Ia
le son des basses
directement
au sur un autre support dur.
que quand le enceintes
noter
Ia
se produire.
peut
appareil et les enceintes
cet
television.
c§bles
effectuer
a
pour vous assurer que
.
tomber
au accidents causes par un choix inapproprie du l
d8g§ts
du panneau de
et
de
utiliser
Precautions
d'endommager
risquez
Appr8ciez
niveau du filet de protection .
au
filet
du
sur le davant des enceintes peut
filet
l'enlever, attrapez les deux
appuyez.
et
mousse
en
installee
est
enceinte
basses peuvent augmenter. lnser
enceinte
I'
inseree.
bass-reflex
(8
!'utilisation
a
ainsi que par
est
sur le sol, placez-les sur des
Stagers
m8me
se trouve
nte
i
d'ence
contrOls
un
suite,
Ia
n'acceptera aucune responsabili
DENON
essuyez
et
precaution jointes
de benzene, de dissolvant ou d'autres solvants
insecticides pour nettoyer
d'
qualite
Ia
volume
le
trop
le son
les enceintes,
d9placez
endommager
les
enceinte
d.
!'enceinte
sur un meuble au dans
a
ajuste en fonction de
Stre
peut
................................ ....
..
..
......
..
............... 1
......
..
......
/lfeuille)
paves
par
affectee
est
d'installation.
methode
Ia
excessif lorsque les enceintes sont
est
qu'une
proximite, una interaction
a
peut
au mur, etc
de faire
et
s9curit9 apres !'installation
de
des
effectuez
les
IGgerement afin
commands.
ces produits.
a
couleur.
au Ia
l'amplificateur
l'amplificateur
de
un niveau de
a
si vous exercez une forte
du filet
cOtes
avec les orifices des quatre angles
ez
du SC-M39.
l'arriere
installation
I'
dispose sur le
platina disque, un bruit
les couleurs
brouiller
d'Bviter de vous y
afin
.,
les enceintes.
tomber
de
contr61es
enceintes ne risquent
Ia
d'6ter
t,
principals, car
l'unite
les enceintes si
et
produisez un
et
raisonnable.
volume
remarquer que
veuillez
8tre enleve.
tirez vers
et
les
de
coin
le
bouchon en Mousse
le
((FA}
quanti
Ia
ce
....
..
..
....
..
taille
Ia
Soyez
du
de
blocs
mllme
generant
·de
securite
pour
te
ieu
poussiere
respectez
avant.
I'
quatre
piece,
Ia
de
te
Connexions
d'effectuer
Afin
d'emploi
mode
1
1
2
et
le
•
• Connectez
•
•dit§f.!;t.lil:t
•
•
1
les
Connectez
enceintes aux barnes
d'enceinte (Fourni).
cables
l'amplificateur, !'enceinte de
l'amplificateur,
Les amplificateurs sont
sortie d' enceintes.
V9rifiez le
L'amplificateur
enceintes.
Si
horsphase
correctement. Assurezvous
correctement.
!'enceinte de
mode
les polarites
et
Torsadez
ne depassent
qu'ils
court-circuit.
Desserrez
2
et inserez
de Ia borne du baut-parleur.
Serrez Ia
3
verifiez que
Lorsque
les
connectes.
d'enceinte pour vous assurer qu'ils
cflbles
Ne pas laisser les fils de deux
•
causerait un court-circuit
Ceci
connexions sont
les
Specifications
Type: 2-enceintes
frequence: 45
de
Gamme
d'entree
Impedance
max:
Puissance
ite:
Sensibil
croisement:
de
Fr9quence
Enceintes: 1
Dimensions externes
maximales:
Poids: 3,5
d'amBiioration,
Par souci
susceptibles de modifications sans
les connexions correctement. lisez
lificateur.
l'amp
de
barnes
en verifiant les polarites
emploi de votre amplificateur.
d'
etre
doit
sont
les basses ne seront alors pas reproduites
fermement
Ia
le
borne
Ie
:
situees sur
d'entree
sortie de l'amplif
de
voie gauche
Ia
voie droite
Ia
differents
de
dotes
mis hors tension avant
inversees, les enceintes risquent
connecter les
de
les fils
et
pas
((FO)
borne en
tournant
cilble du baut-parleur dans
tournant
en
ne sort pas du trou.
fit
termin9es,
d'enceinte
cables
endommagerait l'amplificateur.
et
2-voies
.
a
resonance
de
Caisson
-40kHz
Hz
0/ohms
6
(IEC}, 120 W
W
60
83 dB
3
1 x
(1"}
145
(5-45/64"
1 m}
W.
(1
kHz
cones bass-mid
pavilion
(L}
kg
les caractBristiques
de
souple haute frequence 2.5 em
x 234
(H)
x 238
X
9-3/8"
X
oz}
.5
11
lbs
(7
pr8avis.
attentivement
panneau
le
teur
ica
borne
Ia
a
borne
Ia
a
"-"}
et
+"
("
types de barnes de
d'y
Ia
a
causent
ne
vers Ia gauche
vers Ia
doucement
tirez
sont
entrer
(PEAK}
(4-3/4"}
em
12
mm
(P}
9-7/32"}
le
et
arri9re
l'aide
a
,
"L"
"R"
((FC}
.
connecter les
d'Stre
polarit9s
afin
main
pas
trou
le
droite
fermement
en contact.
sont
design
des
des
de
de
de
et
sur
Ne pas inserer le bouchon en mousse trap profondement. Le
•
bouchon en mousse risque de
l'interieur.
le bouchon en mousse ne peut pas
Si
•
l'interieur, cessez
a
contactez votre vendeur au le centre de reparation et
et
d'information le plus proche.
imm8diatement
tomber
et
Stre
d'utiliser
de rester
retire au s'il
les
coince
tombs
enceintes
Installation
(1:2J"'B
unite.
xez quatre des patins antiderapants en dessous de
Fi
I'
a
)
Holdings Inc.
NON
DE
www.denon
com
.
Printed
in
China
O&M
5411
10875
OOAD
Page 57

DE
NON
CD
RECEIVER
RCD-M39
Adobe Reader® is included.
Reader® is registered trademarks or trademarks
in
Incorporated
, ,
the United States and/or other countries.
C
Op
1/ · d.
'"ght
©2012
D&M
Ho\
nS
\f'':'
.-.c.
\
''
__
- -
of
Adobe Systems
Page 58

Argentina
Australia
atria
Au
Bahrain
Belarus
Belgium
Herzegowlna
Bosnie
Brasil
Bulgaria
Canada
Chile
China
Croatia
Cyprus
Czech republic
Denmark
Egypt
Estonia
Finland
France
Garmany
Georgia
Greece
Hong Kong
Hungary
Iceland
India
lndonnla
Israel
Italy
Jordan
Kazachaten
Korea
Kuwait
Latvia
Lebanon
Lithuania
Macedonia
Malaysia
Malta
DIUIJlll!
DENON SERVICE
3531 Buenos Aires
Velez
Av. Diaz
S.A.
\CAP
Products Group Pty Ltd .
Audio
Australia Tel:
1460
Digital-Professional-Audio Vertriebsges.m.b.H ..
01-480-1006
Tel:
Yusif Bin Yusif Fakhro W .W.L. P
Tel: +973 17
Neotechnostyle
Transtei-Sabima P.V.B.A. Duboisstraat
STAV
Syncrotape Sistemas
Sofia
D&M
Music
_t~ftl.if
ltl.i6 :
Audiolab centar d.o.o. Mlinska
MODESTOU SOUND&VISION PLC LTD 2, Salaminos
EUROSTAR
Tel: 261-112-901 Fax: 261-112AUDIONORD DISTRIBUTION DALI ALLE
Sigma
Square. Mohandeseen. Cairo. Egypt. Tel:
Sperco
Soundata Oy Hameentie
DENON
Te\:+33(0)1-41-383230
NON
DE
Tel: +49(0)2157-1208-0
Pegasi.
KINOTECHNIKI
D&M
Mong
1!f~:hlll::*:fllo.!l~I!Ill!3
HORN DISTRIBUTION (HU)
Tel: +36 1 347
Einar Farestveit & co
PROFX SERVICE
Bazaar,
PT
Newpan
Audiodelta
Tel:
DIGITAL AUDIO VIDEO SYSTEMS CORP. P.O.BOX
Tel: +962 6
Samat
D&M
Tel:
OCEAN STAR
Tel: +965 573 1975 Fax: +965
Sperco
AMAC
Tel:
UAB Hi-Fi pasaulis Kalvariju
D.T.
Wo
Petaling Jaya. Selangor
Doublesin & Zammit Ltd .
408
d.o.o. Mala Pruga
Audio Centre 8 Angel Kanchev
INC.
CANADA
Pedro de
World
!!J~±
086-2Hl2465151
OSTRAVA
(RADWAN
Import
Ltd. Ehitajate
lmpex
FRANCE
DEUTSCHLAND
Sanapiro Street, 108,
6.
LTD.
and Marketing
Sales
Road. Tai Kok Tsui, Kowloon. Hong Kong. Tel: (+852) 2516 5864 Fax : (+852) 2516
0020
Bangalore-
Autoaccindo Jaya. Cideng Barat No. 7 Jakarta. Indonesia Tel: +62-21-633-2730 Fax: +62-21-632-2886
Ltd. 14 Rosansky st. Rishon Lezion
S.r.l.
39-02-5411-6008/39-02-5412-8253
568
Electronics Ltd 88,
and Marketing Korea Ltd. 2F.Yeon
Sales
02-715-9041
TRADING
Ltd. Ehitajate tee 122. 13517 Tallinn
lmpex
S.A.R.L.
651
1
+961
Cedomir
KOD\ ul.
Trading
Hong
Kee
134400
1300
Fax: 01-485-7679
Fax: +973 17 406 080
111
MOSKOVSKAJA STR.20. ROOM
b ..
b.
Hermann Hering 1193,
Rua
Apple Creek
5-505
Valdivia
Rl
0
M£1il!ll
Wit:
areal
s.r.o.
OGAIL STORES). 52,
EL
5th floor 00560
157
D&M
of
A division
CENTRE Advanced
19
2880
Fax:
Mazraa
774
+33(0)1-41-380110
Fax:
A division of D&M Germany GmbH.
Fax: +49(0)2157- 1208-15
PYRGOU
,
14
(H
Jr;
1}1f
KFT
Fax: +36 1 347
Borgartun
..
hi
560 027.
Pietro Calvi
Via
Fax: +962 6 568 2881
Karasai
02-715-9040
EST.
Street-
+961
Fax:
Kantargiev 21a.
Bhd. 2nd Floor.
Sdn
Darul Ehsan, Malaysia Tel:
Nicolo lsouard
53
NETWORK
(C1200AAC).
O'Riordan
67
Fax:
Box 214 Manama. Kingdom
0
Belgrade.
11080
Blvd.
Norte
~r!Jill:Jli:W/il!-1600~
_t
086-21-62494434
10143 Strmec Samoborski Tel:
5,
Vodni
904
122, 13517
tee
France
Tbilisi Tel: +995 32952802
166
.
STR
Ltd - Denon Group. Unit
K.)
.
!l~tm9!1902j[
::*:
il
Ady
.
0021
28,
India Tel:
20129
Satyr
(Easa Husain
5751175
Arab Bank Bldg.
651
1
168, LT-08206, Vilnius. Lithuania Tel &
Street
9578
2
+61
Seeb6ckgasse
, B-2060
48
Serbia Tel:
St.. 1000 Sofia
0691 .
Endre
754
89010-600
Markham, Ontario,
,
Providencia.
Praha
stavby
9610
1,
3305 0806 Fax:
2
+20
Tallinn
Helsinki Finland Tel:
Tour
SAS
GLYFADAATHENS
,
75
28.,
ilt
5440,
x
Bo
P.
Solutions
Audio
080 3297 0853
75706. Israel. Tel :
Milano
39-02-5412-0258
Fax:
050012
St.
bldg.,
Yousifi &
AI
1000 Skopje
Wing), Bangunan
(Left
Street. SLM04 Sliema
I
ARGENTINA Tel : +5411-4865-3755
Alexandria
0159
220007
1,
Antwerpen
Tel: +359 2
llitr!JNi:M~808j[
:£;~f'llR*i\1!\~:
7(
Avenue.
, budova
NOERAGER Tel: +45 8743 2157
Gameat
Tel: +372
Ventose,
•~
1191 Budapest. Hungary
125 Reykjavfk. Tel: +354
Italy
926478,
Almaty
88-5, Banpo-dong, SeochOiJu, Seoul
Tel: +372
Box
P.O.
Tel:+
03-7954-8088
NSW
59,
Bahrain.
of
Minsk
, Belgium Tel:
11
+381
Blumenau.
9806213
581
L3R
Santiago. CHILE Tel:
+3
1045
Dobronicka 635,148
A2
Dowal
El
+20
6509810 Fax: +372
+358-{0
des Bourets, 92156
rue
2
der Kleinbahn
An
x: +995 32964821
Fa
+30
:
Tel
..
2, 9/F
: 852-2516-5864
(Bangalore)Pvt. Ltd. No
080 2211
x:
Fa
+972-3-953-5900
Amman
: +7 3272
Tel
P.O.
Co.)
Sons
6509810 Fax: +372
155230.
2 3133
389
Infinite
Fax:
+3
:
Tel
PO
2015,
A-1160 Wien
Tel: +375
371-33-00
85
)9-4769 3300
North Block.
17228
03-237-3607
Fax: +
BRASIL
SC,
Fax: +359 2
: 905-475-4085
Tel
+562-334-2300
086-21-62494424
958
0
33
91
Nicosia Tel: +357
Street,
Arabia
El
2 338 9574
D-41334 Nettetal. Germany
18,
1071
960
210
iWJt
5207900
2043
Jordan.
11190.
Fax
718304
126, Safat 13002
Box.
Beirut. Lebanon.
5 2762659
+370
x:
Fa
104
Centre. Lot
03-7954-7088
40562
(213)
56
Mascot
150,
Box
86
69
371-33-33
11
381
Tel: +5547-2111-4700
9806212
905-475-4159
Fax:
91
+385
x:
Fa
00
Fa
6509811
x:
Fa
Suresnes
Fa
Skyway
852-2516-5940
:
53,
Fax: +972-3-961-6193
+7
:
6509811
014
23
996
4 Czech Rep.
Praha
x: +45 8743
Mahmoud
Mostafa
+358-{0)9-4769
Cedex,
210
+30
x:
House. 3
5940
x: +354 5207910
Fa
K.H.Road.
3272 581945718438
Korea
Kuwait.
.
1, Jalan 13/6,
: +356 (213) 45522
Fax
33
France
960
Opp
NSW
0 990
2140
3310
1072
Sham
.Big
46200
Mauritius
Mexico
Mexico
Mexico
Moldova
Montenegro
Morocco
Netherlands
Zealand
New
Norway
Oman
Pakistan
Philippines
Poland
Portugal
Qatar
Romania
Russia
Saudi Arabia
Serbia
Singapore
Slovakia
Slovenia
South Africa
Spain
Sweden
Switzerland
R.O.C.
Taiwan
Thailand
Turkey
U.A.E.
Ukraine
Kingdom
United
.A.
U.S
Vietnam
TECHNICAL DYNAMICS
Productos Exitosos Durango 269. Piso 2-14. Colonia
lnteligos Boulevard Rogelio Cantu
+5281-8335-2000
Tel:
Mundo
Best Buy
Mexico
Edomex
Mandolins SAL
d.o.o. Mala Pruga b.b.,
STAV
lnes Marokko KM 11,5 BD Chefchaouni,
Penhold B.V.
Tel: 31-345-588
Audio Products Group Pty Ltd. 13
+64-4-2320-030
Tel:
AUD\ONORD DISTRIBUTION DALI
CENTER
HITEC
Tel:
Hina
Tel: +92
Lotteworld
Barangay Bahay Toro, Project
HORN DISTRIBUTION S.A. Ulica
Tel: +
Videoacustica
Tel:
TECHNO
LOTUS TELECOM SAL
DENON
Tel:
MOHAMED
Tel: +966 2 284
Audiolab centar d.o.o. Mlinska 5, 10143 Strmec Samoborski
DAV ENGINEERING &
Tel: 6481
BIS AUDIO
Digital-Professional Audio
The
Tel: +27
Gaplasa
Hi-Fi Klubben G6teborg
DKB
D&M
Tel:
Mahajak
Bangkok Thailand.
Ertekin Elektronik Tic.
Tel: +90
V.V.
Tel: +971-4-266-2435. 268-4575 Fax:
Mirs Ltd.
DE
Eirs
l
BT1
DENON
Tel: 201-762-6665 Fax:
Anh Duy Manufacturing
Tel: +84 8 898
497
24
968
+
& Export
Import
273 5757 Fax: +92
21
Audio
331
22
48
214241770 Fax:
351
+
Q P.O.Box. 18860,
Russia
647-02-75
(495)
+7
AL-RASH\D
0071
s.r.o. Dobronivska casta 1642/6
lab (Pty) Ltd
Sound
466
11
S.A.AV.
Household Switzerland
and Marketing Taiwan Ltd. 6F-2
Sales
02-2522-1308
Development
212 293
SONS L.L.C.
&
Osipova
A division
NON UK
United Kingdom Tel: +44
5HD,
ELECTRONICS
Ltd. George Guilbert
370.
E Blvd. Manuel Avila Camacho.
C.P.
Techomarket
Poppenbouwing
080
PO
384
Video
55
Ota.
a division of
4044
Fax: 6476 7757
4700
lng
9515
3424
Tel: +5255-52929211
54055
Fax: 31-345-588
Fax: +64-4-2325-984
Box.3558. Ruwi Postal Code:112.
Fax: +968
Suite
33
Do
SERVICES
. Conde
Fax:
10110
Street No-11/B, Road
str. 37/
Fax: +84 8 898 3425
Mircea
Bul.
11080
NL-4191 NZ Ge\dermalsen,
,
58
Wall
24
#721-725 Regal Trade
222 7427
21
Incorporated
Systems
Quezon
8,
Kurantow
Fax: +48 22
Paizinho-Armazem 5-Estrada
39 Mehadia
Fax: +7 (495)
EST
Fax: +966 2
17\ndianapo\is
Skanegatan
02-2100-1175
Co.,
ve
Fax:
of
(USA)
201
-Trading
331
214188093
+351
Doha. Qatar.
D&M
LLC
.(MRE) Architectural Audio-Vision,
2844144
PTE
Seeb6ckgasse
Torroja, 25.
de
Eggbiihlstrasse
AG
Ltd. 46 Mahajak Building ,
66-2-256-0020
Tel:
Galipdede
A.$
San.
212 249
+90
65012 Odessa.
1.
0ffice
Audiovisual, First
D&M
(a
LLC
,
-762-6686
..
Co
DE
www
Street,
Colonia Santa
Batrin
eel
Belgrade,
20250
085
Place, Tawa,
1, 9610
ALLE
389
698
City,
34, 02-873
00
55
Tel:
St., 6, 060541
Novoa\ekseevskaya street
RS
258-90-45
LTD 222 TAGORE
960
59, 1160
Street. Kyalami Park. 1685, Kyalami,
28022
25, 41252 G6teborg Tel:
N0148,
3512
N0
+971-4-266-2052
(0)28 9027 9830
D&M Holdings Company)
170
Ltd.
NON
.denon.
6983927 Fax:
Curepipe, Tel :
MU
06700
.
Roma
Maria, Monterrey, Nuevo Le6n, C.
#1007,\oca\4B
Chisinau Tel: +373
2022
6,
Serbia Tel:
Casablanca Tel: +212
CET
Philippines. Tel: +632-929-5334 Fax: +632-929-1343
+974 468 9494 Fax: +974
28, 8052
Fax: 66-2-253-1696
Cd.
-128, Shed
Ung
com
+381
Wellington
NOERAGER Tel: +47 815
Sultanate
Preedy Street. Saddar Karachi-74400.
Square,
Building Mezzannine Floor No. 4
Warszawa Poland
Circunvala9ao-Apart. 3127
De
Bucharest Tel :
Tel: +385
LANE
Zvolen Tel:
01
Tel: +43 1
Wien
Tel:
Madrid
ZOrich
Songjiang
Sukhumvit
Kuledibi - Karak6y, istanbul, Turkey
83
No.:
No-39
Ukraine Tel:
Imperial
floor
Fax: +44
St.,
Kheim
Van
+230
MEXICO
Mexico D.
Netherland
P.O.Box 6004,
#03-17.
+380
100
F.,
Lucas Tepetlatalco. Tlalnepantla,
San
y 1 D
241033
22
371-33-00
11
New
Oman
Of
+40-21-2202440 Fax:
bid
19
045-5400 703
480
91-746-00-45 Fax: 91-329-44-57
33
031
Tel: +411 3061615
Taipei City
Rd.,
Soi
Khabisi , Deira, Dubai.
AI
(482)
House,
28
(0)
Corporate Drive. Mahwah,
Ward 25. Blinh Thanh Dist.,
Fax: +381
6768 Fax: +212 22 35 42
66
22
Zealand
000 90
.
9565
468
,
55
2, office
Jeddah 21442,
958 Fax: +385
0
33
91
BUILDING. SINGAPORE 787603
TG
Fax:
Fax:
06
10
South
Fax:
51010
10458,
3 (Nana-Nua) Klongtoey, Wattana,
305530
Donegal\
4-10
2643
9031
+230 6980322
+5255-5514-0401
:
Tel
64650, MEXICO
P.
: +373 22
Fax
371
11
Fax: +47 228 063
Mindanao
Lisboa Codex
1303
+40-744-501516
129626 Moscow.
Saudi
91
045-5400
Africa
031
Fax:
Fax
704
485
+431
51019
33
+41-044-3061690
Taiwan
U.A.E
(482)
+380
:
East, Belfast
Square
07430.2041
NJ
HCMC,
Holdings
D&M
10032
5431
-33-33
Pakistan
76 79
R.O.
226009
77
05
Avenue,
Russia
Arabia.
990
0
33
C.
305555
Vietnam
I
302D
,
.
nc
Page 59

MIIMUiiM
Safety Instructions (Read
0
SAFETY
PRECAUTIONS
A.IRISKC:::oNOTOP~~HOCKI
CAUTION:
TO REDUCE THE RISK OF ELECTRIC SHOCK, DO
REMOVE COVER (OR BACK).
PARTS INSIDE.
SERVICE PERSONNEL.
A
A
WARNING:
TO
REDUCE THE RISK OF
DO
NOT
MOISTURE.
REFER
The lightning flash
equilateral
trian~le,
presence
of
t'
s enclosure that may
produc
constitute a risk
The exclamation point
intended to alert
operating and mamtenance (servicm
literature accompanying the appliance.
EXPOSE THIS APPLIANCE
IMPORTANT SAFETY
INSTRUCTIONS
1.
Read
these instructions.
2.
Keep
these instructio
3. Heed all
warn
ings.
llow
all instructions.
Fo
4.
5.
Do
not
use
this apparatus near water.
Clean only
6.
7. Do
8. Do
9.
10
11
with
dry
110t
block
any ve.ntilation openings.
Install in accordance
not
install near
registers. stoves,
produce heat.
On
ly
. Use
table spec;t;ed
the apparatus. When a cart is used. use caution
when moving the cart/apparatus
avoid injury from tip-over.
.
~=~;~~~9
been damaged· in any
supply cord or plug is damaged. liquid has been
have fallen into
ra
in o r moisture,
or other apparatus (includi
use
attachments/accessories specified
only with the cart. stand . tripod, bracket.
by
the manufacturer.
5
~~~~~~;;~dq~
th
e apparatus,
does
NO
USER-SERVICEABLE
SERVICING TO
wit
h arrowhead symbol,
is intended to
unmsulated H dangerous voltage"
of
electric shock
_the
alell
be
of sufficient magn1tude to
to
persons.
within
an eq uilateral triangle is
user
to
the presence
g)
FIRE
OR ELECTRIC SHOCK,
TO
instructions
ns.
cloth.
with the
manufacturer's instructions.
any
heat sources such as radiators, heat
~~~t~:"'~~~~:,~~n~=~
way, suc
the
not
operate normally, or has been dropped . binnendringen. •
ng
by
the
or
or sold
w;th
combinat
ion
to
h as
power
- afgevoerd. fukt. va
apparatus has been exposed
these
A
NOT
QUALIAED
within
an
the user
t_o
the
wit.h1n
the
of
imp~man
t
1n
the
RAIN
OR
amp
lifiers) that
manufacturer.
®
~~
sp
illed
or
objects •
to
safety
instructions
0
NOTES
ON
NOT
3AME'IAHI/IR
USE I HINWEISE
AS
SOBRE
EL
no
WARNINGS
• Avoid high
tempe
Allow
dispersion w hen
a rack.
• Keep the
mois
• Do
ventilation holes.
• Do
into
•
Do
benzene. and thinner come
in contact
• Never disassemble
modify
• Ventilation should
impeded by covering the
ventilation openings
items
tablecloths
Naked flame sources such
•
as
lighted candles should
be placed on the unit.
Do
•
dripping or splashing fluids.
•
Do
wi
th liquids. such as vases.
on the unit.
~~~~===~===~~~~~~===~~~~~~~~~~~:;:~=~~~~~:;:~~------
WAARSCHUWINGEN
• Vermijd
Zorg er bij insta
ratures.
for sufficient heat
installed in
unit
free from
ture, water. and dust.
not
obstruct t
he
not
let foreign objects
the unit.
not let
insecticides,
with
the unit.
or
the
unit
in any way.
not
, such as newspapers,
or
curtains.
not
expose the unit to
not
place objects filled
hoge
temperaturen. • Undvik
lla
tie in een
be
wi
th
~~~~1-$~~~=.;&~
Laa
t geen vod"ltigheid. • Tapp inte till • He
water of
stof
in h
et
apparaat ventilationsOppningarna.
la
tieopeningen inte tr.3nger in i apparaten. • He
• De venti
worden
mogen niet
beblokkeerd.
• Laat geen vreemde thinner k
voorwerpen
in
dit
vallen.
• Voork
benzeen
met
komen.
• Dit toeste l
gedemonteerd
worden. gardiner.
• De ventilatie mag niet • Placera inte Oppen eld, t.ex.
worden
de
ventilatieopeningen af • Apparat en
te dekken
kranten.
gordijnen.
• Plaats geen open vlammen. apparaten. • He
bijvoorbeeld
kaars,
Stel het apparaat niet
•
aan druppels
• Plaats geen
gevuld
bijvoorbeeld een
apparaat. B
apparaat med apparat
om
dat insecticiden, f0rs6k inte bygga
of
verfverdunner • Ventilation
dit toestel in contact
mag
niet
of
aangepast tidningar, bordsdukar eller •
belemmerd
door
met
bijvoorbeeld
een
tafelkleed
of • Pla
ee
n branden
op
het
apparaat.
bloot
of
spatten. •
voorwerpen
met
water
,
op
vaas,
before
operating
ZUM
USO I ALVORENS
GEBRAUCH I OBSERVATIONS
TE
3KCnnYATAUIIIIII I WSKAZ6WKI
WARNHINWEISE
• Vermeiden Sie hohe
Temperaturen.
Beachten
Sie,
dass eine
BeiUftung
ausreichende
wird.
geWcihrleistet
Gerat auf ein Regal geste
wird.
• Halten
Feuchtigkeit, Wasser und
Staub fern.
• Decken
LOftungsberei
• Lassen
Gegenstande in das Gerat
kommen.
• Lassen
lnselctiziden, Benzin
mit
oder
BerOhrung kommen.
• Versuchen
Ge
rat auseinander
not
oder
Die BeiUftung sollte auf keinen
•
Fa
ll
durch das Abdecken
Be
der
durch Gegenstande
beispielsweise Zeitungen,
nschtOcher. Vorh§nge
behi
dem
• Auf
keinerlei direkte Feuerquellen
wie beispielsweise
angezUndete
aufgestellt werden.
• Das
tropfenden oder
FIOssigkeit
we
rden.
dem
• Auf
FIO
mit
Beh§lter
Vasen
wenn
Sie das Gerat von
Sie den
ch
nicht ab.
Sie
keine fremden
Sie
das Geri:it nicht
VerdUnnungsmitteln
Sie niemals das
zu
zu
veliindern.
lUftungsOffnungen
ndell
warden.
Gerat sollt
en
Kerzen
Geri:i
t sollte keiner
spritzenden
ausgesetzt
Gerat sollten kein
ssigkeit gefOilten
wie beispielsweise
aufgestellt werd
nehmen
wie
o.
en.
VARNINGAR
hOga
temperaturer. • lll36erm7ne
Se
till att
det
finns mOjlighet r eMneparyp. JeSii urz&dzenie jest
•
2~~:~i~~~EC:o:;d
nen
och damm.
Se till
an
fr.3mmande fOremAI
•
Se till
att inte insektsmedel
pA
spraybruk. bensen och
om
mer
i kontakt •
ens
Ta inte
•
fOrhi
fOr
me
t.3nda
fOr
med
de
hat
h61je.
isar apparaten och
om
den.
en
bOr inte •
ndras genom
an
ventilationsOppningarna
d f
OremAI
ljus,
vatska.
cera i
vatska, t.ex. vaser,
tacka ycrpoHcreo
s~som
p~
apparaten. • He 3aKpbleaiilre obrusem, zastonami itp.
f~
r
i
nte
utsattas
nte
fOrerntll fyllda ra3e
the
unit.)
GEBRUIKEN I OBSERVERA
RELATIVES
DOTV~CE
OBst.UGI
AVERTISSEMENTS
• Eviter
des
temperatures
1e
vees.
9
rcompte
d'une
Teni
dispersion de chale
das
suffisante tors
ll
t
!'installation sur une 9tagere.
• Protliger
l'hum
poussiere.
• Ne pas obstruer les trous
d'aeration.
• Ne pas laisser
9trangers dans l'appareil.
• Ne pas
des
insecticides, du benzene
et
un diluant avec l'appareil.
• Ne jamais
in
modifier
maniere
• Ne pas recouvrir l
de
ces
objets tels que des journaux,
nappes ou rideaux.
entraverait
• Ne jamais placer de
flam
me
notamment
A.
allumees.
•
l'appare
~tre
expose a l'eau ou a
um
l'h
Ne pas poser
•
contenant
exemple un vase,
l'appareil.
e
de
l'appare
idit9, l'eau
et
des
mettre
en
d9m
onter
l'appareil
ou
d'une
ventilation avec
Ia
ventilation.
nue sur l'appareil,
des
bougies
il
ne
doit
idit9.
d'objet
du
liquide, par
it
centre
Ia
objets
conta
d'une
autre.
es
pas
sur
ur
orifi
Cela
ct
ou
des
nPEAOCTEPE>KEHIIIE
BbiCOK
~ X
~~~;~::::~~;;~~~~:~~~
nonKY
. • Chror'l urz!jdzenie przed
no.aeepra~re
eo3.Qe~creHIO
1-1
nbln~.
eeH
oreepcr~A.
Cne.QHTe,
nocropoHH~e
He
ycrpo~crea.
npe.aoxpaHA~Te
A.QOX~M~Karoe
pacreop~re.neiil
HVIKOr.Qa
VI
He
ycrpoHcreo
eeHTHnAL.lHOHHble
raK~MVI
p~
VI .ap.
noeepxHOCTH
VICTO'-IH~KVI
Hanp~Mep
Cne.QLIITe,
ycrpo~creo
eo.aa
• He
I<OTOpbiX
eo,o.a, Ha
ycrpm1creo wilgoci!j. wod& i pyfem.
enar~.
BO.Qbl
3aK
pblea~re
T~nf
ii.
.I~
OHHble
'iT0
6bl
npe.aMeTbl
nonBAanH
BHYT
Pb
or
eoJ.aeiilcra~A
.
6eH3VI
Ha
VI
.
He
pa36~pa~ne
MOA
~-'~¢~u~p
yiilre
.
oreepcr~A
n
pe.QMe
TaMH.
Tbl
,
cKarepr~.
pa3MetUB~Te
. wazon6w.
pacnonara~re eMKocr~.
KaK
wr
opbl
Ha
anna
para
OT
KPbiTOro
orHA,
cee'i~
.
'iT06bl
Ha
He
npon~o~aanacb
CO.QepJKHTCA
ycrpo~cree.
A L'
ANGAENDE
UTIUSATION I NOTE
ANVANDNINGEN
AWERTENZE
• Evitate di esporre !'unitS a
temperature elevate.
Assicuratevi che vi sia
un'adeguata dispersione
de
l calore quando installate
in un mobile per
l'unitS
componenti audio.
• Tenete
l'unita lantana
dalt'umidita, dall'acqua e
da
ll
a polvere.
• Non coprite i
• Non inserite corpi estranei
• Assicuratevi che l'unita
• Non smont
•
• N
• l 'apparecchiatura non deve
• Non posizionate sull'unita
fori di
ventilazione.
all'interno
dell'unita.
non entri in contatto con
insetticidl, benzoic o
solventi.
ate
l'unita
le
non devono essere ostruite
coprendole con oggetti, quali
giornali, tovaglie, tende e
cosl via.
fi
esempio candele accese.
essere esposta a gocciolii o
spruzzi.
alcun oggetto contenente
liquidi, come ad esempio
i vasi.
ne modificate
in
alcun modo.
aperture di ventilazione
on
posizionate sull'unita
amme
Iibera,
come
• Evite altas temperaturas.
Permite
dispersi6n
esta instalado en Ia consola.
• Mantenga
humedad, agua y
• No
ventilaci6n.
• No deje objetos extraiios
dentro
• No perm ita el contacto de
insecticidas, gasolina y
diluyentes con
• Nunca desarme o modifique
el equipo de ninguna
La
•
quedar obstruida por haberse
cubierto
objetos
manteles o
•
No
sabre
infl amables sin protecci6n,
como
•
No
ad
goteo
se utilice.
•
No
objetos
como
OSTRZEiENIE
• Unikaj
wysok
ich temperatur.
~~~:;,~~:oJ:~~~Fieiy
• Nie zakrywaj
otwor6w
wentylacyjnych.
• Zwr6C
U"ffaQ4i!. aby
do
nie dostaty
nie przed
ograniczaC
ognia. np.
em
lub kapaniem
przedmio
nim
otwor6w
iadnych
t6w
np
Srodka
si~
urz!jdzen~a
iadne
ot:ice przedmioty.
• Chror'l
uriqdze
kontakteln z Srodkami
owadob6jczymi, benzynq
oraz rozpuszczalnikiem.
• Nie rozbieraj urzqdzenia oraz
nie dokoh uj w
modyfikacji.
• Nie
nalety
wentylacji urz!jdzenia. np.
poprzez zakrycie
wenty
lacyjnych gaze tami,
• Na urz!jdzeniu nie wolno
sta
wia
C i:adnych i:r6del
otwartego
zapalonych Swiec.
• Chror'l urz!jdzenie przez
zachlapani
wsze
lkich cieczy.
• Nie stawia j na urz!jdzeniu
iadnych
napetnionych wodq,
SULL'USO
I
ADVERTENCIAS
Ia
suf
iciente
del calor cuan
el equipo libra de
po
obst
ventilaci6n no debe
deberan colocarse
exponer el aparato al
colocar sabre
lvo.
ruya los orificios
del equipo.
el
equipo.
las apelluras
con
como
peri6dicos,
collinas.
el
aparato fuentes
velas encendidas.
o salpicaduras cuando
el
aparato
de
lfquido,
!Ienos
jarro
s.
---
I
concerning battery disposal.
do
de
Ort
Ort
WEEE-Direktive.
reutilises. Veuillez
recyclage
r9glementations en vigueur.
conformement aux
Ce
produits conformes
NOTA
Smalti
Pe
Non gettare
normativa locale sui rifiuti chimici.
Questa prodotto e
alia direttiva
ACERCA DEL RECICLAJE:
Los
volver a utilizar. Disponga
de
Cuando
las
elias siguiendo los reglamentos de su localidad relacionados
desperdicios qufmicos.
Este producto junto con
aplicable a
EEN
Het inpakmateriaal
worden.
de plaatselijke voorschriften.
Volg voor het wegdoen
wit·
Batterijen mogen nooit worden weggegooid of verbrand, maar moe
de plaatselijke voorschriften betreffende chemisch afval worden verwijde
Op dit product
voor
OBSERVERA ANGAENDE ATERVINNING:
Produktens emballage
det
Nar
regler och bestammelser.
Batterier f
lokala bestammelser
Denna apparat och
WEEE-direktiv,
YnaKOBO'iHb
YJ
He
npaeH.na
DaHHbl~
WEEE,
INFORMACJE DOTYCV,CE RECYKLINGU:
Opakowanie
stan
A NOTE
ABOU
This product's packaging materials are recyclable and can
be
reused. Ple
with the
When discarding the unit, comply with
regulations.
Batteries should never
but disposed of
This product and the supplied accessories. excluding the
batteries, constitute the applicab
the
HINWEIS
Das Verpackungsmateri
Recyceln geeignet und
tte
Bi
lichen Recycling-Vorschriften.
Beachten
lichen Vorschriften und Bestimrnungen.
Die Batterien
oder verbrannt
gem.311
Dieses Prod
ZubehOr (mit Ausnahme
UNE
les
Lorsque vous mettez cet appareil
les
I materiali
r lo smaltimento dell'unita, osservare le normative o le leggi locali in vigore.
reciclaje
nPIIIME~AHIIIE
~
noer opHo
COOTBeTCTB~~ C M8CTHbiM~
np~o~
LII.nVI3
wt6rnego przetworzenia.
zgod
Urzqdzenie nalei:y zutylizowaC zgodnie z lokalnymi przepisami.
Baterii nie
zgodnie z obowiqzujqcymi zasadami dotycz<}cym i utylizacji bateri
Niniejszy produkt oraz dostarczone wraz z nim ak cesoria (opr6cz baterii)
T RECYCUNG:
ase
dispose
of
any
materials
in
local
recycling regulations.
be
thrown away or incinerated
in
accordance with the loc
WEEE
directive.
ZUM
RECYCUNG:
al
dieses Produktes
ka
nn
entso
rgen Sie aile Materialien entsprechend der
Sie bei
der Ortlichen Vorschriften.
ukt
REMARQUE CONCERNANT
materiaux d'emballage de ce prod uit sont recydables
en
vigueur.
piles ne doivent jamais etre jetees ou incinerees, mais mises
produit
et
RELA TIVA
di
imballaggio di questa prodotto sono riutilizzabili e riciclabili.
re i materia
le batter
RAEE
mate
riales
de
se
deshaga de Ia unidad,
pil
as
nunca deberiin tirar
Ia
directiva
AANTEKENING
Er
wordt verzocht
en
bruingoed op.
en
afgedankte elektrische
enligt lokala
du
kasserar enheten ska du
Ar
absolut inte
l~
vr~n~JaU.HH
al.l~~.
Bb16pacblea~re
yr~.nVI3a
npo.ayKT ~ aKceccyapbl e
~CKiliO'iaA
urzqdzenia
ni
e z obowiqzuj<jcymi lo
wolno
owi!j
wta.Sciwy produkt. zgodnie z dyrektywq W
wieder
der
Entsorgung des Gerates die
dOrfen nicht in
warden;
bitte entsorgen Sie die Batterien
und das im lieferumfang enthaltene
der
Batteri
disposer des mat9riaux conform9ment aux lois sur le
lois en vigueur
les accessoires indus, a !'exception des piles. sent des
Ia
directive DEEE.
8
AL
RICICLAGGIO:
li conformemente
ie,
ne
incenerir l
gli accesso
. ad eccezione delle batterie.
de
embalaje
de
de
estes materiales siguiendo los reglamentos
su localida d.
los accesorios empaquetados es el producto
RAEE
excepto pilas.
MET
van
dit product
om
zich
van
de
spe
de
meegeleverdeaccessoi
en
elektronische apparaten
ar
atervinningsbart och kan ateranv.3ndas. Kassera
~tervinningsbestamme
kas
tas i soporna eller brannas. Kassera
fOr
kemiskt avfall.
de tillbehOr som levereras
med undantag av batterierna.
0 nEPEPA60TKE:
MaTepHan
.QaHHOfO
VICnonb30BaH.
n
Tpe60BaH~AMH
onpe.aeneHHblx
~
He
C>K~raiilre
U~~
XLIIM
~'i
8CI<~X
6arape~K~.
zostafo wykonane z materiaf6w
Utylizacj~
kaln
ymi przepisami dotycz<jcymi recyklingu.
wyrzucaC
do
accordance
local ru
les
or
al
reg
ulatio
ns
le
product according to
ist
verwende
den
HausmQ
en!) entsprechen
sur Ia
aJie
e,
ri
inclusi nell'imballaggio sono applicabili
este producto son reciclables y se pueden
cumpla con
se
ni incinerarse. Debera disponer de
BETREKKING TOT
is
recycleerbaar
van
ler
de
voorschriften voor
gOra
det i Overensstammelse
npO
oJKany~cra.
6.noKOB
6arape~KVI,
O
TXO.QOB
ynaKOBKe
wszelkich materiat6w naleiy przeprowadziC
Smieci lub
zum
t werden.
II
geworfen
der
LE
RECYCLAGE:
et
au
rebut. respectez les lois
mise
au rebut
des piles.
normative locali sui riciclaggio.
ma
smaltirle conformemente
las
regl
as o re
glamentos locales.
DE
RECYCLING:
en
kan
m.u.v.
de
batteri
(WEE
med
den uppfyller gallande
Ta
MO>KeT
6b1Tb
copr~py~re Mar
nepepa60TKH.
co6n10.aa~re
.
cooreercrey10r
paliC.
Naleiy
EEE
opnieuw gebruikt
de
verwijdering
jen
E)
van
nepepa60TaH
MeCTHble
nadaj<}cyc
je zutylizowaC
.
elk afvalmateriaal te ontdoen volgens
res,
l
ser.
.QYK
co6no.o.a~re
-
Pb
peuvent etre
au
rebut
con los
ten
volgens
rd
is
de ric
htli
toepassing.
med
lokala
dem
enligt
ep~anbl
np
aeV~na
MeCTHble
.QVIpet<TLIIBe
h
si~
i.
• DECLARATION OF CONFORMITY
We declare under our sole responsibility
this product. to whi
is
in conformity with the following standards:
EN55013
Following
2004/1
• 0BEREINSTIMMUNGSERKLARUNG
Wir erkl!iren unter unserer Verantwortung,
dieses
bezieht.
EN55013
Entsp
Richtlinie
• DECLARATION
Nous
que
declaration, est conforme
suivants:
EN55013
Selon Ia
• DICHIARAZIONE
Dichiariamo
questa prodotto, al quale
si
riferisce, e conforme
EN55
Fa
cendo seguito aile disposizioni della dirett
ou
EMC
OUESTO
AL
O.M.
• DECLARACI6N
Oeclaramos
res
ponsabilidad que este producto al que
referenda esta declaraci6n.
l
os
siguientes estandares:
EN55013 y EN55020.
De
acuerdo
alia
sabre
• EENVORMIGHEIDSVERKLARING
Wij verklaren uitsluitend op
verantwoordelijkheid dat dit produkt,
waarop
overeenstemmi
EN55013
Volgens
200.4/1
• OVERENSSTAMMELSESINTYG
Harmed intygas helt
produ
fOijande
EN55013
Uppf
'jdler reg l
• CEPTIIIIDIIIKAT COOTBETCTBIIIR
van
Mbl rapaHTHpyeM,
KOTOPOMY
COOTBeTCTByeT
.
CTaH,llaplO
jn
EN55013
B
cooreercre
EMC
• DEKLARACJA ZGODNOSCI
Dekla
produ
jest zgodny z
EN55013
Zgodnie z postanowieniami
2004/108/EC.
s
do
ch
this declaration rela
and
EN55020.
he
provisions
t
08/EC.
Produkt,
auf
das
den
folgenden Standards entspricht:
und
EN55020
rechend den Bestimmungen der
dCclarons
l"
013 e EN55020.
2004/108/EC.
EMC
08/EC
kt.
Directive
rujemy z
kt.
An
.
2004/1
08/EC.
DE
sous
notre seule responsabilite
appareil, auquel
et
EN55020.
directive
EMC
2004/1
Dl
con
piena responsabiliU
aile
PRODOTTO
E"
CON
28108195
N.
548
DE
bajo
con las
disposiciones
2004/1
08/EC
.
deze
verklaring
ng
is
met de volgende normen:
en
EN55020
.
de
voo
rzieningen
.
pA
eget
vilken
detta intyg
standarder:
och
EN55020.
ema i EMC
-direktivet
YTO
.QaHHbliil
nplilnaraeTCA
D,aHHbliil
Tpe60BaHHAM
B:
1-1
EN55020.
~~
c
no.nmKeHHRMH
2004/1
08/EC
pe/nq
odpowiedzialnoSciq,
kt6rego dotyczy niniej
nast~pujqcymi
oraz
EN5502
0.
Division
of
D&M
der
Kleinbahn 1
CONFORMITE
Ia
CONFORMIDAD
of
EMC
Directive
sich diese
Erk
l!irung
EMC..
se
refere cette
au
x standards
08/EC.
CONFORMITA
nostra dichiarazione
seguenti
normative:
FORME
nuestra
exc
lusiva
hace
esta
conforme
de
Ia
directi
betrekking heeft. in
van
EMC
-richtlijn
ansvar
att
denna
avser,
uppfyller
2004/108/EC
npo.o.yi<T,
K
cepTHQ:lHKaT,
COe.QyiOW.HX
.QHpeKTHBbl
.
sza
deklaracja.
no
rmami:
Dyrek.tywy
EMC
DENON
EUROPE
Germany GmbH
8,
Nettetal,
D-41
Germany
tha
tes.
daB
che
con
t
iva
va
.
ie
334
Page 60

DE
NON
Congratulations on purchasing this Denon product!
We invite you
Be
the
first
previews
our
of
online
to
new
store and
to
join
Thank
about
be
the
you
upcoming
first
know
technologies. You
the
Denon Owner's Club.
for
choosing Denon.
Den on products and
will
also receive
in
line
for
Join
today!
members
all
promotions
get
exclusive
only
offers
and contests.
from
Please register
US
customer : www.usa.denon.com/prodreg
Canada
customer : www.ca.denon.com/prodreg
Denon Factory Service Information
To
locate
or
DENON
REGIONAL SUPER SERVICE CENTERS (Repair only-No parts orders please)
PYRAMID AUDIO
305 E. Braker Lane
Austin,
TX
(512) 458-8292
(512) 453-4542
78753-2746
Fax
you
DENON
an
authorized
"
http://www.usa.denon.com/ServiceCenterlocator.asp
can send
your
FACTORY SERVICE by PANURGY
701
Ford Road (South Dock)
Rockaway, NJ 07866-2053
(973) 625-4056
(973) 625-9489
warranty
product
service center
to
one
of
UNITED RADIO SERVICE
5717 Enterprise Parkway
E. Syracuse, NY 13057-2905
(800) 634-8606
(315) 446-8505
your
product
at,
USA
OEM
Fax
within
your
area please
our
Regional Super Service Centers listed
Fax
visit
AUDIO SERVICES
544 Central Dr., Suite
Virginia Beach, VA 23454-5245
(757) 498-8277
(757) 498-9554
our
web
"
site at
below
Fax
.
101
INNER
1416 S.E.
Portland,
(503) 238-1955
(503) 238-1787
SOUND
Morrison
OR
97214-2646
Fax
Street
ELECTRONIC EXPRESS,
1809 E. Fabyan Parkway
West Chicago, IL 60185
(630) 208-4600
(630) 208-4601
Fax
To
locate an authorized
NORMAN'S ELECTRONICS
3653
Clairmont
Atlanta, GA 30341-4907
(770) 451-5057
(770) 455-8337
Road
Fax
GOLD CROWN ELECTRONICS
Victoria Business Park
129 E. Savarona Way
Carson, CA 90746-1406
(310) 538-8282
(310) 538-8281
Inc.
CANADA
D&M
CANADA
5-505
Apple
Creek Boulevard
Ontario,
warranty
Markham
(905) 475-4085
(905) 475-4159
service center
"http://www.ca.denon.com/ServiceCenterlocator.asp
L3R
Fax
within
INC.
5B1
your
area please
visit
our
".
Fax
web
site at
WARRANTY
COE1A2240 5431 10003
DE
COMMON
OOAD
1
Page 61

·•tllh
..
·
lll•
·•t
..
·
~·•tUI•
w~o<y
Thi•
l
ll.
·•tl
...
I•·
II
•J
·
...
·
i•
i
ti
·•
...
l•·
tll
·•
...
·
•tlll•
·
....
•tlll•·
·
....
·
•JIII•
·
....
tUI•·
·•
...
lll•·
•t
·
...
·
lll•
·•t
...
·•tlll•·
...
l•·
tll
·•
..
·
lll•
l
·•
..
•dll•·
·
...
·
l•
ll
•t
·
..
·•lllh·
..
·•tlll•·
...
l•·
·•tll
...
•·
lll
•t
·
..
·•tlll•·
..
·
ll•
·•ll
..
·•tlll•·
..
·•tlll•·
..
l•·
l
·•tl
..
l•·
li
t
·•
..
•tlll•·
·
..
·
tilll
·•
..
·
·•tlll•
...
·otlil•·
....
® :
wm
hooo,ooo,ly
00
ilieUM
'"
D E
N
N
0
t
t
This warranty
the date
your DEN
on
the original consumer purchase from an
of
Non-Transferable
of
Length
What is Covered
ed below, this Warranty covers
Except as spec
not covered by the Warranty:
U.S.A.
the
ifi
from an authorized DEN
all products listed above except in the case
can be identified by DENON AUTHORIZED
please contact
resulting fro
DENON
a) Accident, act
m:
the product. b) Repair
wear from normal usage (tape heads, cartridges, stylu
(8) Damaged magnetic tape or CD/DVD discs. (9)
product failure.
We Will Pay
What
during the applicable warranty period from the date
If
or
repair,
How to
your unit ever needs service, it may
If
er
wheth
below.)
a. You
If
b.
You
WHEN
c.
You
d.
In the case
tion, r
op
at its
Warranty
Obtain
a service station is
cases, the following procedures apply whenever
er
h
ot
all
In
are responsible for transporting your unit
shipment of your unit is re
must pay the initial
RETURNING YOUR UNIT
should include the following: your name, address, daytime telephone numb
of
THIS WARRANTY IS
your product does not require serv i
If
THIS WARRANTY IS EXPRESSLY
WARRANTIES
LIAB ILI
OUR
INCLUDE
OF
IS
TY
ENTAL
ID
C
IN
PRODUCTS LOST, STOLEN AND/OR DAMAGED
t
SOME
INCIDENTAL
t
This warranty gives
writing signed by an offi
t
STATES
DO
CONSEQUENTI
OR
Warranty
product which is distributed and warranted by
ON
Product Category
Receiver,
Controller, A
IV
A
AVR-xx11Cl
Receiver,
DVD
Pre-Amplifier, Digital Pre-Amplifier
Power-
er. Integrated
Tun
ion
Opt
CD Player,
Recorder
CD
Receiver,
CD
System Audio
Turntable
Speaker
woofe
SubMicrophone
Control Dock for
Headphone
Front Surround H
deo
Vi
Cartridge
Remote
Cables
Speaker stands ASF
IV
series,
DVD
lifier, Head
Amp
Amplif
Board
Playe
DVD
Network
r
iPod""
ome
Processor
Controller
Any product which
(I)
ON
AVR-xx12CI
Home
Amp
ier
Blu·ray
r,
CD
Theater
dealer, unless the product is purchased through the
of
sted below). (3) Any product on which the serial number has been defaced, modified
li
as
attempted repair by anyone not authorized by DEN
or
nature, abuse, misuse, neglect, unauthorized product repair, opening
of
For
lace with new, used
ep
Performance
authorized, please visit
DENON
ed;
quir
ar
ipping ch
sh
Player, plea
DVD
or
CD
a
U.S.A. O
VALID IN
THE
, but you have qu es
ce
MADE
CHANTABILITY
MER
THE
LIMITED
NOT ALLOW LIMITATIONS
TO
CO
OR
u specific legal
yo
Denon El
of
r
ce
SEQUENTIAL
N
DAMAGES,
AL
ri
tronics
ec
ARRAN
DEN
ON
W
ON
DEN
ELECTRONICS
AVC,AVR,DRA
Special
S
PRA,AVP,DAP
PMA
U.
T
ACD
CDRW
RCD
D-M
D-F,
DP-L, DP-M
DP-USB
DP-F,
sc
DSW
-S,
DM
ASD
AH
DHT-FS
DVP
DL
RC
AK
by DEN
U.S.A.
ELECTRONICS (USA), LLC remains in effect for the following periods from
Cl
,
DM
iPod is a
ON ELECTRONICS (USA), LLC. (2) Any
LIMITED
AUTHORIZED
FM Receiver
I
AM
later
series and
Theater System ADV,
lifier
Player DCD, DCM,
Disc
Receiver
1
I
2
Sys
a
Manual
I
lift
to
Au
I
Automatic
Full
tem
-
defects in material and workman ship in this product occurring during the above warranty periods. The
ll
not distributed in the
is
U.S.A.
Cartridges, Accessories and Remote Controller which
you are
DEALER sticker displayed in the stores.
battery, etc.). (6)
s,
in industrial,
Use
of
t model, suc h defective product without charge for parts
en
equival
or
shipped to any authorized
or
taken
be
arrang
or
pay the return shipping charges if the repairs are covered by the Warranty.
will
s, but we
ge
WARRANTY SERVICE.
FOR
ONE
ose
encl
se
Y.
NL
ti
ALL
OF
LIEU
IN
FITNESS FOR
AND
REPLACEMENT,
OR
REPAIR
COM
original consumer purchase your
in
Periodic
mercial, and/or professional app
com
r website at
ou
ur unit must be transported for warranty service ;
yo
g for its transportation.
(1) disc that the unit has failed with for t
ons regarding its operation, pl
OTHER
PARTICU
A
IAL
ERC
M
If
c) Any shipment
.
ON
check-ups which do not disclose any defect.
DENON
http://www.u
"
THE
OF
A COPY
, model and serial number
er
WARRANTIES,
PURPOSE
LAR
OPTION,
OUR
AT
ERTY
PROP
OR
TV
DEALER.
LLC
(USA),
, POA, HA
DVD, DVM,
S
-A
servi
ea
EXPRESSED
DAMAGES
DBP
registered in the U.S. and
Apple Inc.,
ademark of
tr
Military Exchange Service where the Warranty
days. (Note:
90
remain at
will
certain as to whether a dealer is a DEN
un
of
the product (claim must be presented to carrier). (5) Items subject to
of
cations.
li
DENON
station
ce
.denon.com/ServiceCenterLocator.asp
sa
ORIGINAL
est
se contact
removed. (4) Damaged deterioration or malfunction
or
modification or failure to follow
or
Any installation
(10)
uct is found to be
od
pr
SALES
reasons.
our
labor.
or
ON
DEN
or
SLIP
the product and a description
of
will be returned with the unit.
It
Technical Services Department as listed below.
IMPLIED, INCLU
OR
AUTHORIZED
Use
)
(7
fective by
de
ELECTRONICS
ATTAC
BE
MUST
DING
.
PRODUCT AND
CTIVE
E
DEF
ANY
OF
OF
ANY
KIND
.
WE
ARE
DURING SHIPPING.
NOT ALLOW
AN IMPLIED
LONG
HOW
ON
ABOVE LIMITATIONS
THE
SO
ghts , but you may also have other
LLC.
USA,
WARRANTY LASTS AND/OR
EXCLUSI
AND
ghts which vary from state to state. This Warranty may not be altered other than in a
ri
MAY NOT APPLY
ONS
DO
TO
2
3
1
3
3
3
1
1
1
YEAR lSI
1
4
2
5
1
2
1
1
1
3
90
90
DAYS
90
90
other countries
owing are
ll
fo
product which is not purchased in
will
ON AUTHORIZED
DEN
DEALERS
ON
DEALER,
year for
One ( I)
be
instructions supplied with
the product outside the
of
removal char
or
ge
DENON, DENON
you are
(if
contact DENON
or
"
.
HED
of
WITHOUT
SHALL
RESPONSIBLE
NOT
EXCLUSION
THE
YOU.
U.S.A.
s resulting from
will
certain as to
un
as listed
the problem.
LIMITATION,
EVENT
NO
IN
FOR
OF
•
•
•
•
•
-_
!_
t
.
ri
·•
2
DENON
ELECTRONICS (USA),
D&M
(a
100
Mahwah,
Holdings
Corporate
Company)
NJ 07430-2041
Drive
(201) 762-6665
www.usa.denon.com
lll
·•
..
•·
•tlll
·
...
•·
•tlll
·
..
·
•tlll•
·
..
·
•tllh
·
..
·
l•
ll
·•t
..
·
lll•
·•t
..
ll•·
ll
·•
..
·
•tlll•
·
..
•·
•JIII
·
..
•·
•tiii
·
...
•·
•llll
·
....
·
lll•
·•l
...
·
lll•
·•t
...
•·
ll
l
·•t
...
·
II•
·•II
...
·
II•
JI
·•
...
• ·
•~II
·
...
•·
ii
LLC
t
-
--
~-
'
•
~
·
·
tll~
· t
..
ll•·
•tl
·
..
•·
ll
l
•t
·
....
tlll•·
·•
....
•·
•tnt
·
..
·
ll•
tl
·•
....
l•·
tJl
·•
...
"'·
tl
·•
....
l•·
•tll
·
..
•·
llt
•t
·
....
•·
tlll
·•
....
ll•·
ll
·•
...
•·
•tlll
·
..
·
ll
Page 62

~·•tlll
•·
4
This
..
·•~ll•·
warranty
....
·•tlll•·
.... ·•tllh·
.... ·!lltl•· ....
•
~lll•·
.. ·•llll•·
will
be
honored
... ••llll•• .. ••llll•·
only
in
Canada.
.... ·•tlll•·
.... ·•lllh•
.. •tlllh·
...
•
tdl~
·
.. ·•tllh·
.. ·•tlll•·
.. ·•tlll•·
.. ·otlll•·
... ·•tlll•• .. •tllth•
.. •tlllh·
...
·••lll•·
... ·•lllh· ... ·•llll•·
.. ·tllll•· .... ·tlllh·
..
·•tllh·
.. ·•tllh·
.. ·otllh· ... ·•tlllt•
..
·otl
ll•·
... ·otlll•· .. ·•tlll.
w
of
FOR
1
the
in
in
OF
;
i '
Length
of
Non-
This warranty on your DENON product which is distributed and warranted by D&M CANADA INC. remains in effect for the following periods from the date
original consumer purchase from an AUTHORIZED D&M CANADA
What
Except as specified below, this Warranty covers all defects
following are not covered by the Warranty:
Canada from an authorized DEN ON dealer. (Note: AUTHORIZED DEN
the stores.
on which the serial number has been defaced, modified
misuse, neglect, unauthorized product repair, opening
anyone not authorized by DENON. c) Any shipment
cartridges, stylus, battery, etc.). (6) Periodic check-ups which
DVD discs. (9) Use in industrial, commercial , and/or professional applications. (I
What
If
during the applicable warranty period from the date
repair,
How
to
If
your unit ever needs service,
station near you, please check our website
cases, the following procedures apply whenever your unit must be transported for warranty service;
a.
b.
c.
d.
THIS WARRANTY
If your product does not require service, but you have questions regarding its operation, please contact our Technical
THIS WARRANTY
WARRANTIES
OUR
INCLUDE
PRODUCTS LOST, STOLEN AND/OR DAMAGED DURING SHIPPING.
t
SOME
INCIDENTAL OR CONSEQUENTIAL DAMAGES,
'
This warranty gives you specific legal rights, but you may also have other rights which vary from province to province. This Warranty may not be altered other than
f
in
a writing signed by an officer
:;
Transferable
is
Covered
If
you are uncertain as to whether a dealer is a DEN ON AUTHORIZED DEALER, please contact D&M CANADA INC. as listed below). (3) Any product
We Will
Pay
or
at its option, replace with new, used or equivalent model, such
Obtain
Warranty
You
are responsible for transporting your unit
If
shipment
You
WHEN RETURNING YOUR UNIT FOR WARRANTY SERVICE, A COPY
You
In
LIABILITY
PROVINCES DO NOT ALLOW LIMITATIONS
of
must pay the initial shipping charges, but we will pay the return shipping charges
should include the following: your name, address, daytime telephone number, model and serial number
the case
of
OF
IS
INCIDENTAL
Warranty
Product Category
A/V
Controller.
A/V
DVD Rece iver, DVD
Pre-Amplifier, Digital Pre-Amplifier
Powe Amplifi
Tuner, Integrated
Option
Board ACD
CD Player, DVD Player, Blu-ray Disc Player DCD,
CD Recorder CDRW 1
CD Receiver, Ne
System Audio D-
Tu
rntable
Speaker sc
Sub-woofer
Microphone
Control Dock for
Headpho ne AH
Front Surround
Video
Processor DVP
Cartridoe
Remote Controller
Cables
Speaker stands ASF
For
Performance
your unit
a CD
or
DVD Player, please enclose
IS
VALID
IS
EXPRESSLY
MERCHANTABILITY AND FITNESS FOR A PARTICULAR PURPOSE.
LIMITED TO
OR
Receiver,
Home
er,
Head Amplifier
Amplifier
twork
CD Receiver
iPod'B>
Home
Theater System DHT-
(I)
it
may be taken
" http://www.ca.denon.com/ServiceCenterLocator.asp " or contact D&M CANADA INC. as listed below.)
is
required;
IN
CANADA ONLY.
MADE
THE
REPAIR OR REPLACEMENT,
CONSEQUENTIAL
of
D&M Canada Inc.
DENON®
LIMITED
AM
I FM Receiver
Theater System
1 I Autolift I Manual
I
I
Full
Automatic
2
I
Any product which is not distributed in Canada by D&M CANADA INC. (2) Any product which
of
of
or
shipped to any authorized DEN ON service station
or
IN LIEU
SO
in
or
removed. (4) Damaged deterioration
or
modification
the product (claim must be presented to carrier). (5) Items subject to wear from normal usage (tape heads ,
do
of
original consumer purchase your DEN ON product is found to be defective by DENON, DEN ON will
arranging for its transportation.
ONE
(I)
OF
ALL OTHER WARRANTIES, EXPRESSED OR IMPLIED, INCLUDING WITHOUT LIMITATION,
COMMERCIAL
ON
HOW LONG AN IMPLIED WARRANTY LASTS AND/OR DO NOT ALLOW
THE
ABOVE LIMITATIONS AND EXCLUSIONS MAY NOT APPLY
WARRANTY
INC. DEALER.
AVC,
AVA, ORA
ADV, S
PRA,AVP,DAP,POA,HA
TU,
PMA
DCM,
DVD, DVM, DBP
RCD
F,
D·M, S 1 YEARIS)
DP-L, DP-M
DP-F. DP-USB 2
DSW
DM-S, DM-A
ASD
FS
DL
RC
AK
1Pod
1s
a trademark
of
Apple Inc
material and workmanship
ON
DEALERS can be identified by DEN ON AUTHORIZED DEALER sticker displayed
or
failure to follow instructions supplied with the product. b) Repair or attempted repair by
not disclose any defect. (7) Use
def
disc that the unit has failed with for test reason
0) Any installation
ective product without charge for parts
OF
AT
OUR
OR
OPTION,
PROPERTY
in
this product occurring during the above warranty periods. The
or
malfunction resulting from: a) Accident, act
of
the product outside Canada. (8) Damaged magnetic tape or CD/
or
removal charges resulting from product failure.
or
D&M CANADA INC. (For an authorized DEN ON service
if
the repairs are covered by the Warranty.
THE ORIGINAL SALES SLIP
OF
ANY DEFECTIVE PRODUCT AND
DAMAGES
OF
2
1
3
3
3
1
1
4
5
1
2
1
1
1
3
90
90
90
..
reg1stered
or
labor.
MUST
of
the product and a description
s.
It will be returned with the unit.
Services Department as
ANY
KIND. WE
90
1n
the US. and other countnes.
BE
ATTACHED.
ARE
TO
YOU.
NOT
DAYS
is
not purchased
of
of
the problem.
li
sted below.
SHALL
IN NO EVENT
RESPONSIBLE
THE
EXCLUSION
nature, abuse,
In
all other
'
D&M
CANADA
5-505
Apple
Creek Boulevard ;
Markham, Ontario
t (905) 475-4085
t
www.denon.ca
INC.
L3R
581
;
~-
-
-·
t
~-•il"·-
..
,,,
.. _
.. ,,._
..
,,
...
_ .
,,,,
.. -
..
,,,
..
__
,,,
..
_.,,,,
..
_ __
,,,
..
__
,,,
..
__
,,,
..
_.,,"'"-
·
·•il'"-
·
·•"''-
·
·•ll'"-
·
····"-·•oll•
··-·•ll•·
·-·
·ol''"-
·
·•ll'"-
·
•oll'"-·•oll'
'·-·
·•il''
·-··
•ll''-···ll"
·-·
·oll'•-
·
··ll'''-···"'"-·•11'
•·-·
··ll'"-
·
··ll'"-
·
··ll'"~
3
Page 63

~·•llll•·
....
·•llll•·
...
·•llll•·
...
·•lllll·
.....
·••ll''·~·••tl••·
....
·••lll•·_.,.·•llll•·
....
·••lll•·
...
·•
lll
l•·
...
·•llll•·
...
·•llll
•·
...
·••llio·
...
·••ll''·
...
·•
•l
ll
•·
...
·••lll•·
...
·••lll•·
...
·••lll•·
...
·llllll·
...
·•
•l
ll•·
...
·••lll•·
...
·••lll•·
...
·••lll•·.,._·,,l
lio
·
...
·•
•lll
•:.,._
.,,ll''·
...
·••lll•·.,._·
••ll••·
...
·•
•lll
•·
...
·•
lll
•
•·
...
·••lll•·
...
·
4
Cette
garantie
ne
sera
honoree
qu'
au
Canada.
•lll''
~
• . !
!
t
Duree
t
t
t
~
t
t
t
t
t
t
t
t
'
t
t
t
t
t
t
t
t
~
f
t
t
t
t
t
t
t
t
t
t
t
'
i
t
t
t
du garantie non-transferable
La
garantie de votre produit
revendeur official D&M CANADA
Couverture
Cette gara
nti
de
Ia
Canada
dans leur magasin.
de
serie
impropre, negligence, reparation au moyen d'
tentative de reparation par quelqu'un non reconnu par DENON. c) tout envoi du produit
par !'usage (tetes de magnetophone, cellules phono, pointes de lecture phono, piles, etc.). (6) verification
hors du Canada. (8) Bandes
ou de deplacement resultant d'un defaut
e couvre
garantie. Ne sont pas couverts par
aupres d' un revendeur officiel DEN
a
Si
ete efface, modi
DENON,
distribue
lNC.
Categorie de produit
Controleur
Recepteur DVD,
Preamplificateu
Amplificateur
Syntoniseur. amplificateur
Carte optionnelle ACD
Lecteur
CD,
Enregi
st
reur
Ampri-tuner avec Lecteur
RScepteur
Systems
Audio
Table
tournante
Haut-parleurs
Sub-
woofer
Micro
Dock
de
contr61e
Casque d'Scout e
Avant Surround
Processeur video
Cellule phonolectrice
Te
l
ecommande
Cable
Support
pour enceinte acoustiq
tousle
s
vous doutez qu'un revendeur soil officiellement reconnu, contactez
fie
ou
ma
gnetiques, disques CD
pendant les periodes suivantes.
A
IV.
Recepteu A
Systeme DVD
r,
preamplificate
de
puissance.
integ
Lecteur
DVD.
CO
audio
defa
enleve.
Lecteur Disque
de
I
CO
avec reseau
I
I
pour
iPod<Bl
Systeme
Home
ut
s
de
materiel
Ia
garantie:
ON
(4) Dommages dus
un
du produit.
Notre paiement
Si
votre produit
reparera ou,
Application de
Si
votre appareil necessitc une verification
CANADA
ou bien contactez D&M Canada Inc aux coordonnes indiguees ci bas).
Dans
tousles
a.
Vous
b.
Si
votre article doit
c.
LORSOUE VOUS RENVOYEZ
D'
ACHAT D' ORIGINE.
d.
Vous dev
Dans le
CETTE
GARANTIE
Si
votre produit ne requiert
CETTE
GAR
COMPRJS, SANS
NOTRE RESPONSABILITE
JNCLUT
RESPONSABLES POUR
CERTAINES PROVINCES NE PERMETTE
PAS
L
'E
XCLUSION
A
VOTRECAS.
Cette garantie vous donne des droits legaux specifiques, mais il
etre
modifiee que par un document
DENON
a
son choix, remplacera avec un modele neuf,
Ia
garantie
INC. (Pou
au
tr
es
etes
responsable
ez
inclure egalement
cas
d'un lecteur
ANTIE
SE
EN
AUCUN CAS DES DOMMAGES FORTUIT$, COMMERCIAUX IN DIRECTS
est reconnu
r
trouver
I'
cas, les procedures suivant
du
etre
envoye, vous dev
CD
EST
VALABLE
au
c
un
EST EXPRESSEMENT
LIMIT
ER
SE
LA
PERTE
DE
DOMMAGES FORTUITS. LES LIMITATIONS
defectueux
atelier autorise le plus
transport de votre article ou vous devez vous arranger vous-meme pour s
VOTRE ARTICLE
VOS
nom, adresse, numero de telephone de
ou DVD, joindre un disquc que l'apparcil n'a pu lire pour t
SEULMENT
service
mai
s
A
CELLES-CI,
LIMITE
A
DE
LES PRODUITS ETIOU LES MARCHANDISES ENDOMMAGEES PENDANT
NT
signe
par un gestionnaire autori
DENON®
GARANTIE
et
garanti par D&M CANADA INC.
IV.
Recepteur
AM
I
Home
Theater ADV,
ur
numerique
Preamplificateur
re
CO,
int8gre
1
I
Levee
I
Auto
2
Theater
ue
ou de fabrication du produit,
(I)
Tout produit qui
(Note:
On
produit non autorise, debale, modification, emploi contraire aux instructions fournies avec
ou
DVD endommages. (9) Utilisa
par
ou
une reparation,
pres,
es
s'
appliquent
ez
payer l
AU
qu
e
vous
avez
FAITE
EN
LES GARANTIES MARCHANDES
LA
REPARATION
PAS
DE
FM
phono
Blu-ray
auto
complet
Apple
et
•
Pod
sont des marques
n'e
peut identifier
a
Ia
deterioration ou
DENON
usage
priere de verifier sur le site Internet de DEN
si
es
frais d'envoi initiaux, mais nous payerons les frais de retour si
POUR UN SERVICE SOUS
CANADA.
des questions quanta son fonctionnement, co
LIEU
LIMTTES QUANT
5-505
st pas distribue au Canada par D&M
le
s reve
durant
ou equivalent ce produit
votre appare
Ia
il
peut
etre apporte ou envoye
il
ET
PLACE DE
OU
AU
REMPLACEMENT,
ET EXCLUSIONS MENTIONNEES PLUS HAUT PEUVENT
se
pourrait que vous ayez d'au
se
de D&M
D&M
CANADA
Apple
Markham,
LIMITEE
prend effet
AVC,
AVR,
S
PRA,AVP,DAP,POA
TU,
PMA
DCD.
DCM,
CDRW
RCD
D-
F,
0-M,
DP-L,
DP-M
DP-F,
DP-USB
sc
DSW
DM
-
S,
OM
ASD
------
AH
DHT-FS
DVP
DL
RC
AK
ASF
comme
a
!
'e
xception de ce
nd
eurs officiels
D&M
a
un fonctionnement Mfectueux
(I
a
reclamation doit
ti
on commerciale, industrie
periode d'application de
A
Ontario
defectueux
do it
et
re
envoye pour une verification ou une reparation sous garantie.
GARANTI
jour
, numeros de m
TOUTES LES AUTRES GARANTIES EXPRIMEES OU SOUS-ENTENDUES' Y
ET
SPECIFIQUES POUR UN USAGE PART!
LA
DUREE D'
Ca
nada.
Creek
Boulevard
a
partir de
Ia
date
DRA
,
HA
DVD. DVM, DBP
S
-A
---
-·
rc•ales d:t\pple Inc.,
ux
DENON
CANADA INC.
a
tout atelier de service autorise
ode
es
t.
II
A
Nl MATERIELS
UNE
tr
depose
es
indigoes
ci
-apres qui
CANADA INC. (2) Tout produit qui n
par leur auto-collant
a
l'adresse ci-dessous.)
a
Ia
suite de: a) accident, acte de
etre presentee
periodique qui
ll
e ou professio
Ia
garantie
sans frais de pieces
ON
on
E.
VOUS DEVEZ
le
et
vous
se
nt
actez notre departement technique dont l'adresse
NOTRE CHOIX,
GARANTIE
es droits qui varient d'une province
a
au "http:llwww.ca.denon.com/ServiceCenterLocator.asp"
transport.
de
serie
du
ra
retourne avec
D'
AUCUNE SORTE. NOUS NOUS SOMMES PAS
SOUS
INC.
L3R
581
d'
ac
hat du consommateur original aupres
2
1
3
3
3
1
1
1
ANNEES
1
4
2
5
1
2
1
1
1
3
90
90
JOU
RS
90
aux Etats
co
"REVENDEUR OFFICIEL DENON"
au transporteur
ne
revele
pr
es
Ia
ni
de main
Ia
JOINDRE UNE COPIE
produit et une description du probleme .
DE
TOUT
-ENTENDUE ETIOU
90
·U
ms
et
dans d'autres pays.
nforrment
se
lon les termes durant
(3)
),
(5) Articles sujets
aucun
defaut. (7)
nn
elle. (
10)
date d
'ac
hat du
d'oeuvre.
DENON
garantie couvre les reparations.
I'
article.
CU
PRODUIT DEFECTUEUX
LE
TRNASPORT DES BIENS .
a
'a
pas
Tout produit dont le numero
Ia
nature, abus, utilisation
le
produit, b) reparation ou
Utilisation
Toutes charges d
co
nsommateur,
ou directeme
DE LA
figure
LlER.
NE PERMETTENT
NE
PAS
S'APPLIQUER
I'
autre. La garantie ne peut
Ia
periode
ete achete au
affiche
a
deterioration
du produit
'i
nstallation
DENON
nt
ch
e7.
D&M
FACTURE
ci-
des
so
ET
d'un
us
.
N'
;
4
•
i
•
4
:
·•
I
II
I•
·
.....
·•
•II"
·
.....
·
•III"
·
_.,.
.
,,II~
·
.....
•IIII•
·
.....
·
••II"
·
.....
·
••U••
·
..-
·•
•II"
·
.....
·
••II"
·
...
·••II"·
...
·
•IIIII
·
...
·
••II•
•·
.....
~~~-:~~:~~~
·
•IIIII
·
...
·
••III•
·
..
·
•IIIh
·
...
·
••ll"
·
...
·•
lllh
·
...
·•
•ll
••
·
.....
·••ll"·
...
·•l
llh
·
.....
·•
llll•
·
...
·
••ll"
·
...
·•lllh·
...
·•
lllh
·
...
·•ll
li
•·
...
·••
H"
·
...
·
•FIIh
·
...
·••lll•·
...
·•
lll
h·
...
·
••ll••
·
...
t
·•
llll•·
...
·•lll
ll
·
_.:
 Loading...