

Delonghi MW 675 FI Instructions Manual

1
35
ENGLISH
1 GENERAL
page 36
1.1 Safety warnings page 37
1.2 Technical specifications page 37
1.3 Installation and electrical connections page 37
1.4 Accessories page 38
1.5 Cookware page 39
1.6 General rules and tips for using the oven page 39
2 USING FOR THE FIRST TIME AND OPERATION
page 41
2.1 Selecting the language page 41
2.2 Adjusting the clock page 41
2.3 Operation page 42
3 AUTOMATIC MODE page 44
3.1 How to set automatic mode page 44
3.2 List of recipes/foods page 46
AA
- Reheat chilled (5 to 8 °C) or frozen (-18 to -20 °C)
home cooked foods or ready meals page 46
CC
- Pasta, rice, pizza (chilled or frozen) page 47
EE
- Meat (defrost or cook) page 48
FF
- Poultry (defrost or cook) page 49
HH
- Fish (defrost, cook from fresh or cook from frozen) page 51
LL
- Vegetables (cook from fresh or cook from frozen) page 52
PP
- Cakes/desserts (cook) page 53
UU
- Heat liquids and baby food, defrost bread page 54
4 MANUAL MODE page 54
4.1 How to programme manual functions page 54
4.2 Pre-heating page 56
4.3 Quick reheat page 57
4.4 Memotime function (timer) page 57
4.5 Child safety device page 57
4.6 Defrost: advice, tips and table page 57
4.7 Reheat: advice, tips and table page 59
4.8 Cooking hors d’oeuvres, pasta and rice dishes: advice, tips and table page 60
4.9 Cooking meat: advice, tips and table page 61
4.10 Cooking fish: advice, tips and table page 61
4.11 Cooking vegetables: advice, tips and table page 61
4.12 Cooking cakes and desserts: advice, tips and table page 62
5 CLEANING AND MAINTENANCE page 63
5.1 Cleaning page 63
5.2 Maintenance page 64
INDEX
GB 28-01-2002 11:43 Pagina 35

1
36
ENGLISH
CHAPTER 1: GENERAL
1.1 IMPORTANT SAFETY WARNINGS
Read carefully these instructions and keep for future reference
1) WARNING: If the door or door seals are damaged, the oven must not be operated until it has been
repaired by a competent person (trained by the manufacturer or by its Customer Service).
2) WARNING: It is hazardous for anyone other than a competent person to carry out any service or repair
operation which involves the removal of a cover which gives protection against exposure to microwave
energy.
3) WARNING: Liquids and other foods must not be heated in sealed containers since they are liable to
explode. Eggs in their shell and whole hard-boiled eggs should not be heated in microwave ovens since
they may explode even after microwave heating has ended.
4) WARNING: Only allow children to use the oven without supervision when adequate instructions have been given so that the child is able to use the oven in
a safe way and understands the hazards of improper use. Do not allow children
near the oven when it is in operation, as this may result in severe burns.
5) Do not attempt to operate the oven with the door open by tampering with the
safety devices.
6) Do not operate the oven if objects for any kind get stuck between the front panel
of the oven and the door. Always keep the inside of the door (E) clean, using a
damp cloth and non-abrasive detergents. Do not allow dirt or remains of food
to accumulate between the front panel of the oven on the door.
7) Do not operate the oven if the supply cable or the plug is damaged, as this may
result in electric shocks.
8) If smoke is observed, switch off or unplug the appliance and KEEP THE DOOR CLOSED in order to
stifle any flames.
9) Only use utensils that are suitable for use in microwave ovens. In order to avoid overheating and the
consequent risk of fire, it is advisable to supervise the oven when cooking food in disposable containers
made of plastic, cardboard or other inflammable materials, and when heating small quantities of food.
10) Never place the turntable in water after it has ben heated for a long time. The high thermal shock resulting would break the turntable.
11) When cooking "Only MICROWAVE" and "COMBINED WITH MICROWAVE" , you absolutely must
not pre-heat the oven (without foodstuffs in it) and you must not operate it when it is empty, because you
might cause sparking.
12) Before using this oven, check to be certain that the utensil and containers chosen are suitable for
microwave oven use (see the section on "Glassware and Similar Items").
13) During the use the appliance becomes hot. Do not touch the heating elements inside the oven.
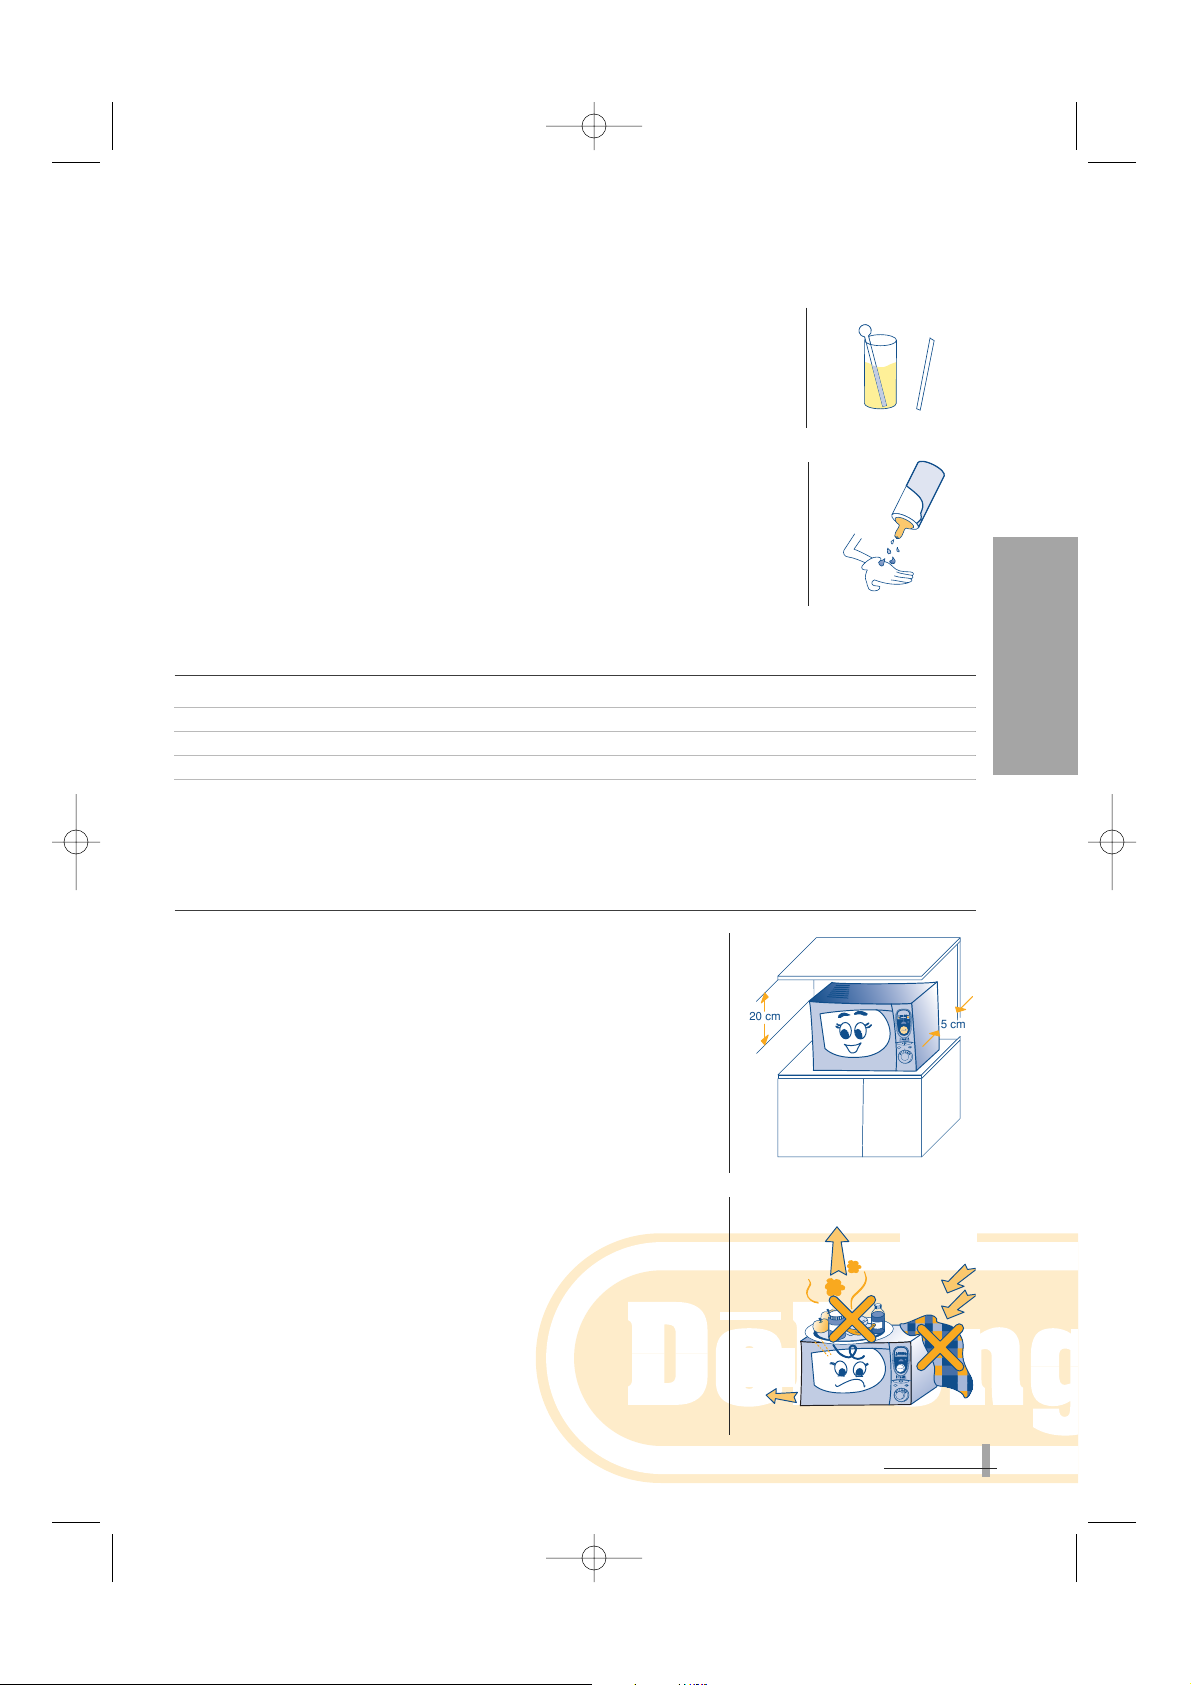
14) When heating liquids (water, coffee, milk, etc.) it is possible that the contents may suddenly start to boil
and spill violently as a result of delayed boiling, causing scalding. To avoid this happening, you should
place a heat-resistant plastic spoon or a glass rod in the container before starting to heat liquids.
Anyway, care shall be taken when handling the container.
Temperature
Select
°C inside °C set
Power W
Clock
Stop
°C
Start
Clear
Power Level
Quick Reheat
T
i
m
e
a
d
j
u
s
t
.
T
i
m
e
a
d
j
u
s
t
.
R
e
c
i
p
e
s
/
M
o
d
e
R
e
c
i
p
e
s
/
M
o
d
e
GB 28-01-2002 11:43 Pagina 36
1
37
ENGLISH
15) Do not heat spirit with a high alcohol content, nor large quantities of oil, as these
could catch fire !
16) The contents of feeding bottles and baby food jars shall be stirred or shaken and
the temperature shall be checked before consumption in order to avoid burns.
It is also advisable to stir or shake the food in order to ensure that it has an even
temperature.
When using commercially available bottle sterilisers, before turning the oven on,
ALWAYS make sure the container is filled with the quantity of water indicated
by the manufacturer.
IMPORTANT: When turning on the appliance for the first time,
there may be a “new” smell and slight smoking for the first ten
minutes or so. This is caused by the protective substances
applied to the elements.
1.2 TECHNICAL SPECIFICATIONS
ENERGY CONSUMPTION (CENELEC HD 376)
To reach 200 °C 0.3 kWh
To maintain 200 °C for one hour 1.1 kWh
To tal consumption 1.4 kWh
For further information, consult the characteristic rating plate on the rear of the appliance.
This oven complies with EEC Directives 89/336 and 92/31 on Electromagnetic Compatibility
and EEC Directive 89/109 on materials for contact with foodstuffs.
1.3 INSTALLATION AND ELECTRICAL CONNECTIONS
1) Unpack the oven, remove the turntable (H), turntable support (I) and
all accessories from the protective packaging. Check that the turntable spindle (D) is inserted correctly into the housing at the centre of
the turntable.
2) Clean the inside of the oven with a soft damp cloth.
3) Check the oven has not been damaged during transport and that the
door opens and closes perfectly.
4) Stand the oven on a stable surface at least 85 cm from the floor out
of reach of children as during cooking the door may get extremely
hot.
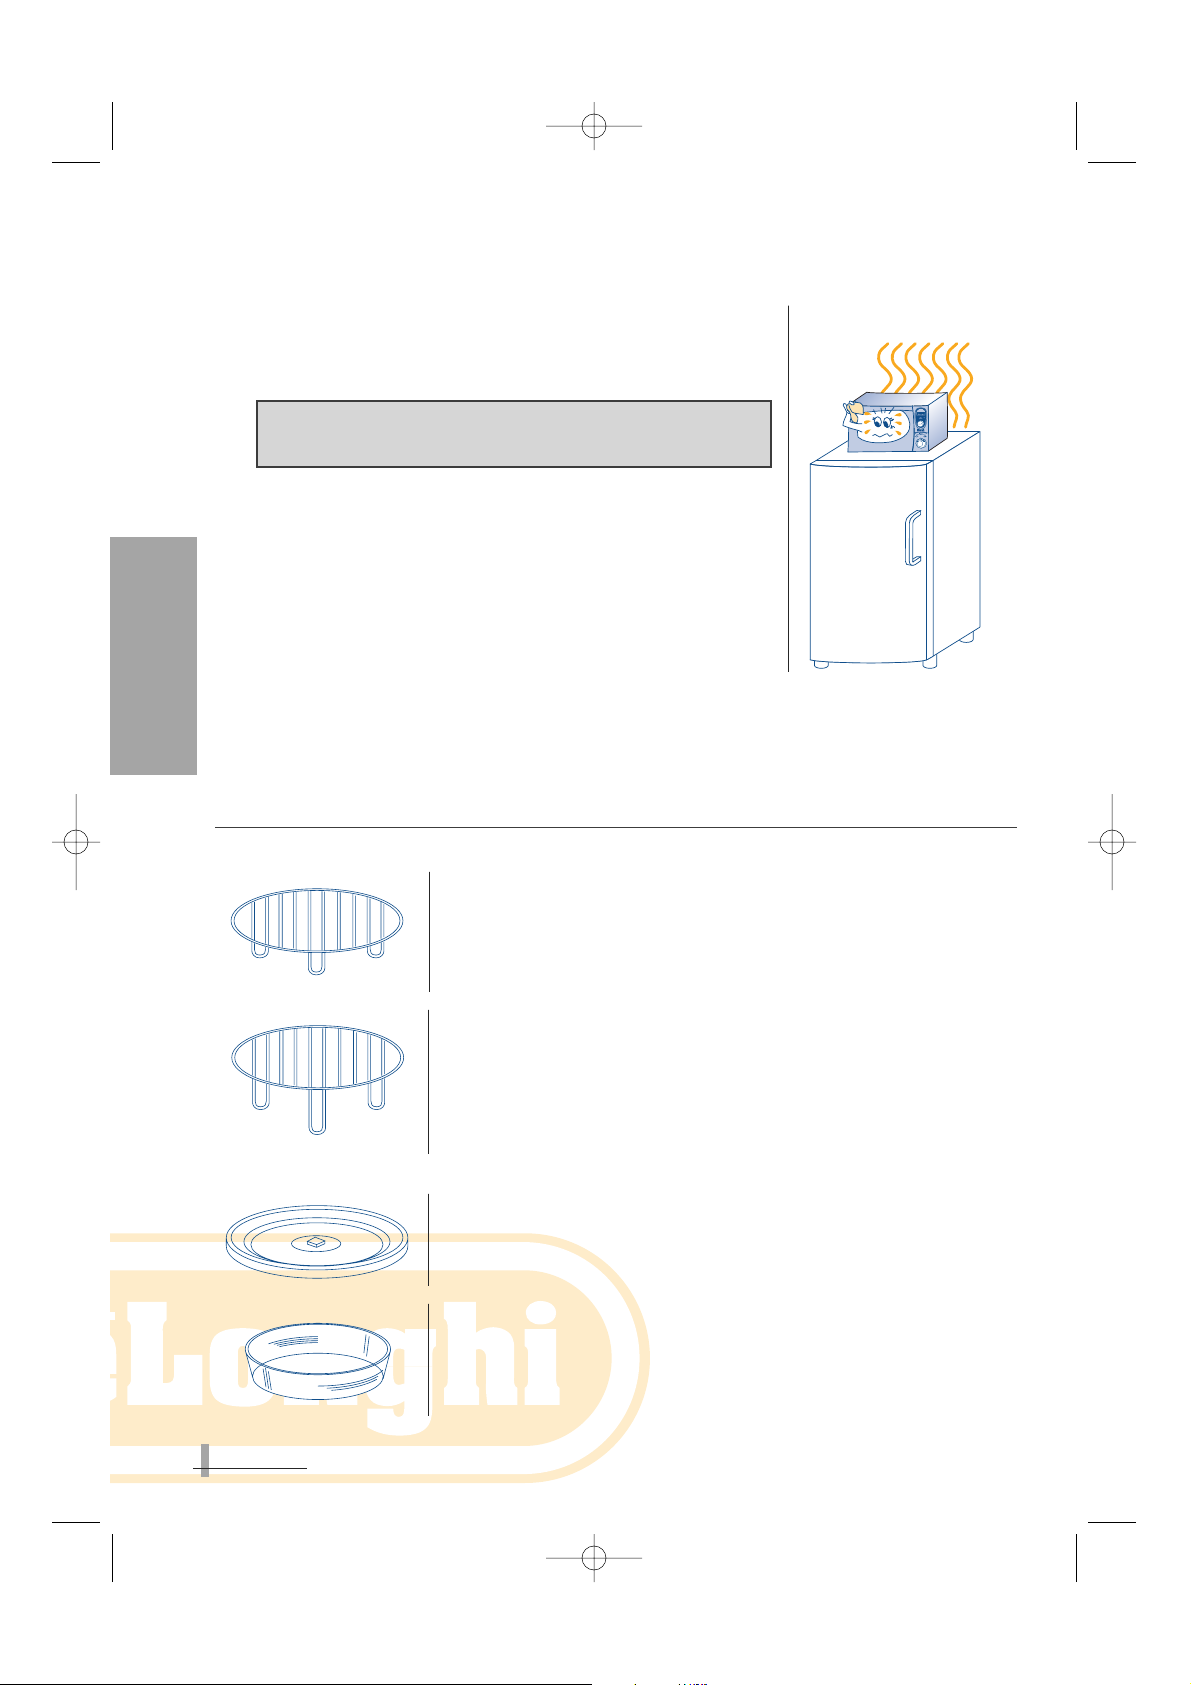
5) After standing the oven on the work surface, make sure there
is at least 5 cm of space around the sides and back of the
appliance and 20 cm at the top.
6) Do not obstruct air intake vents. In particular, never rest anything on
top of the oven and make sure that air and vapour outlet slots (above,
below and/or behind the appliance) are ALWAYS KEPT FREE.
CHAPTER 1: GENERAL
Temperature
Select
°C inside °C set
Power W
Clock
Stop
°C
Start
Clear
Power Level
Quick Reheat
T
i
m
e
a
d
j
u
s
t
.
T
i
m
e
a
d
j
u
s
t
.
R
e
c
i
p
e
s
/
M
o
d
e
R
e
c
i
p
e
s
/
M
o
d
e
USCITA
ARIA
ENTRATA
ARIA
USCITA
ARIA
20 cm
5 cm
T
e
m
p
e
r
a
t
u
r
e
S
e
l
e
c
t
°
C
i
n
s
i
d
e
°
C
s
e
t
P
o
w
e
r
W
C
l
o
c
k
S
t
o
p
°
C
S
t
a
r
t
C
l
e
a
r
P
o
w
e
r
L
e
v
e
l
Q
u
i
c
k
R
e
h
e
a
t
T
i
m
e
a
d
j
u
s
t
.
T
i
m
e
a
d
j
u
s
t
.
R
e
c
i
p
e
s
/
M
o
d
e
R
e
c
i
p
e
s
/
M
o
d
e
AIR
OUTLET
AIR
OUTLET
AIR
INLET
GB 28-01-2002 11:43 Pagina 37
1
CHAPTER 1: GENERAL
7) Place the turntable support (I) in the centre of the circular housing.
Rest the turntable on the support, making sure that the spindle (D)
fits into the housing in the centre of the turntable.
8) The appliance should always be plugged into sockets with a rating of
at least 16 A. Also check that the circuit breaker in your home has a
minimum capacity of 16A to avoid it being triggered during operation
of the oven.
9) Position the appliance so that the plug and the outlet can be
easily reached even after installation.
10) Before use, check that the mains voltage is as indicated on the
appliance rating plate and that the socket is efficiently earthed. Failure to do so absolves the
Manufacturer from all liability.
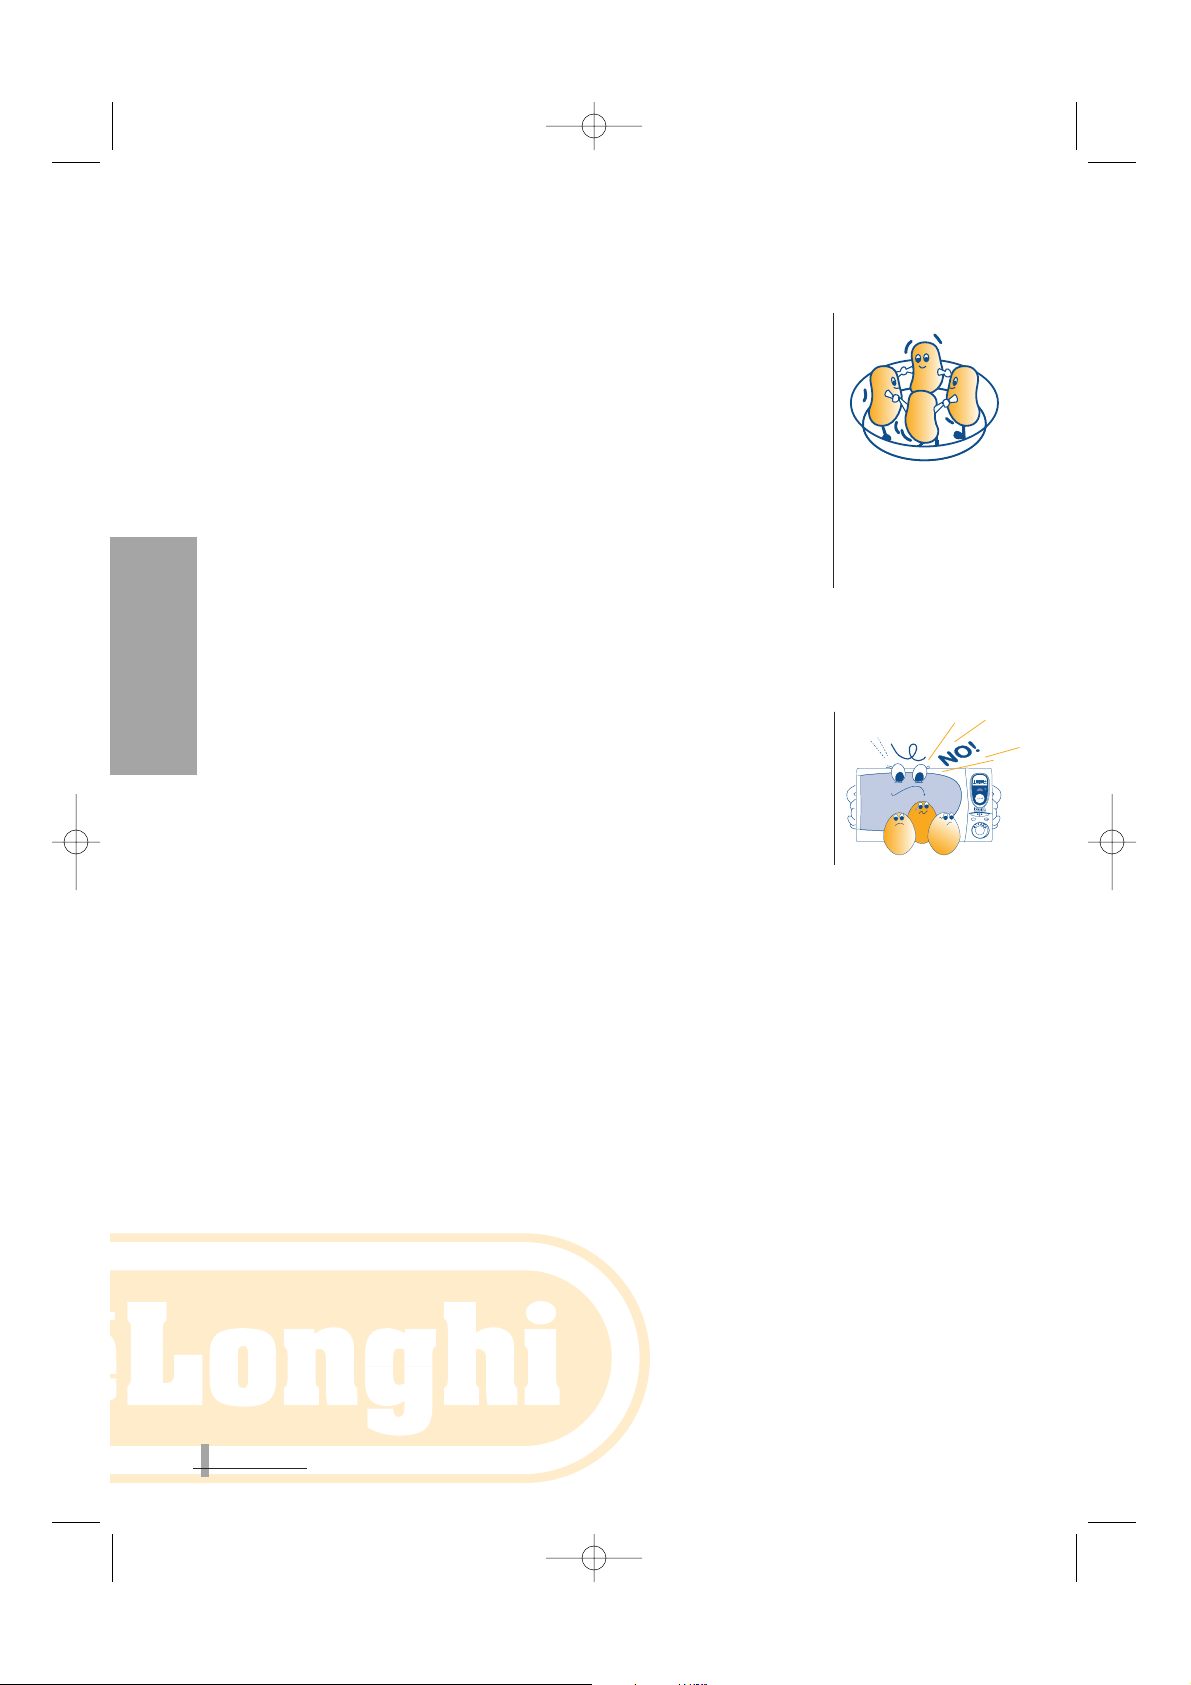
1.4 ACCESSORIES
LOW WIRE RACK
Use for certain types of cooking as indicated in the recipes and tables given
in this manual.
HIGH WIRE RACK
Use for all types of grilling in MANUAL “GRILL” function
TURNTABLE
Use for all functions.
OVENPROOF DISH
Use for certain types of cooking as indicated in the recipes and tables given
in this manual.
38
ENGLISH
Temperature
Select
°C inside °C set
Power W
Clock
Stop
°C
Start
Clear
Power Level
Quick Reheat
R
e
c
i
p
e
s
/
M
o
d
e
R
e
c
i
p
e
s
/
M
o
d
e
T
i
m
e
a
d
j
u
s
t
.
T
i
m
e
a
d
j
u
s
t
.
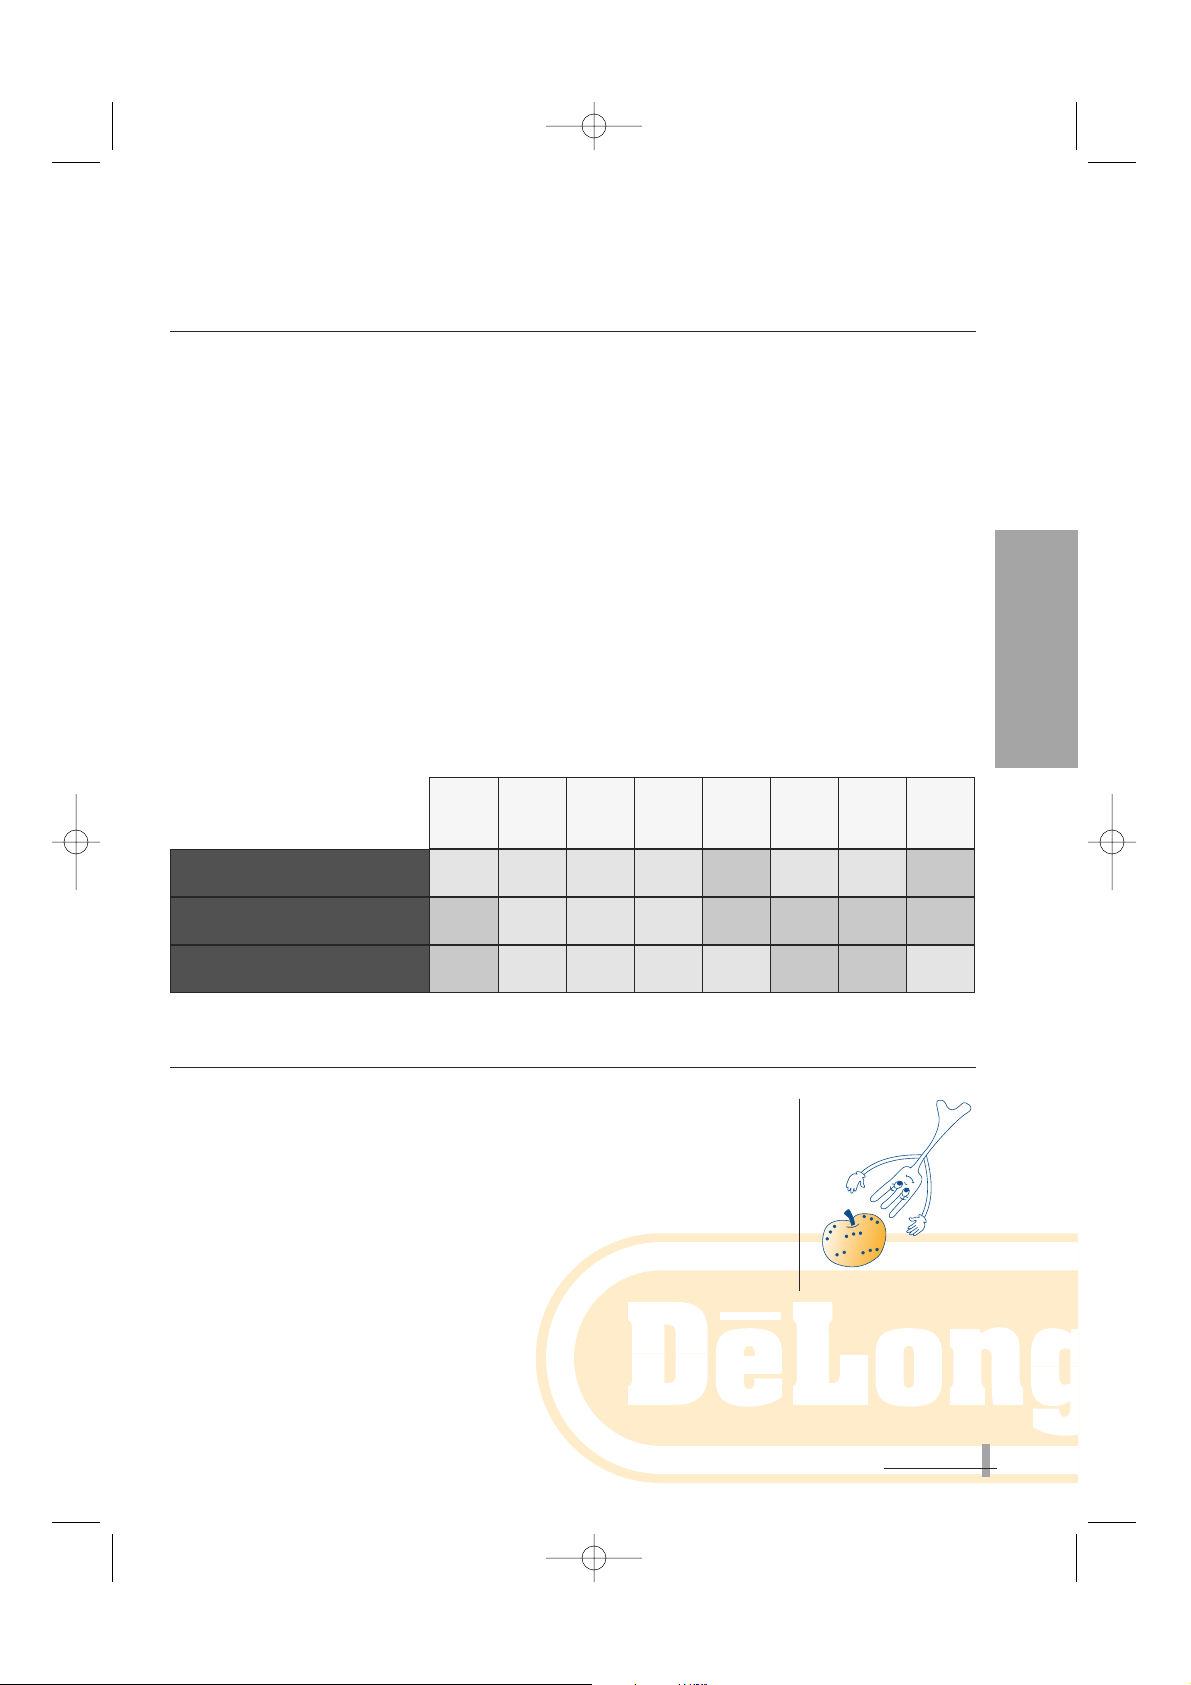
IMPORTANT: Do not locate the oven on or near heat
sources (for example, on top of a refrigerator).
GB 28-01-2002 11:43 Pagina 38
1
CHAPTER 1: GENERAL
1.5 COOKWARE
• AUTOMATIC MODE
When cooking in AUTOMATIC mode, always use the containers and cookware specified in the
recipes in paragraph 3.2 - LIST OF RECIPES/FOODS
• MANUAL MODE
In "MICRO", "MICROGRILL" and "MICROFAN" manual functions, all glass (ideally Pyrex),
ceramic, porcelain or earthenware containers can be used as long as they have no decorations
or metal parts (gilded borders, handles, feet). Heat resistant plastic containers can also be used,
but only for “Microwave Only” cooking. If you are still doubtful about using a particular container,
you can perform a simple test. Place the empty container in the oven for 30 seconds at maximum
power (“Microwave Only” function). If the container is still cold or only slightly warm, it is suitable
for microwave cooking. If it is very hot or gives out sparks, it is not suitable. Metal, wood,
wickerwork or plate glass containers are not suitable for microwave cooking. Microwaves heat the
food and not the container. The food can therefore be cooked directly on the serving plate, so
avoiding having to wash saucepans afterwards.
Always follow the table below:
1.6 GENERAL RULES AND TIPS FOR USING THE OVEN
1) It is extremely important to stir the food several times during cooking.
This improves temperature distribution and reduces cooking time.
2) You are also recommended to turn the food over halfway through
cooking.
3) Food with a skin, shell or peel (for example: apples, potatoes, tomatoes,
frankfurters, fish) should be pierced in several points with a fork to
let the steam escape and prevent the skin or peel from exploding.
39
ENGLISH
Metal
container
Paper or
card-
board
Plastic
Aluminium foil
Earth-
enware
Pyro-
ceram
PyrexGlass
NOYESYESNOYESYESYESYES
NONONONOYESYESYESNO
YESNONOYESYESYESYESNO
“MICRO” function
“MICROFAN”
“MICROGRILL”
function
“FAN”
“GRILL”
function
GB 28-01-2002 11:43 Pagina 39
1
40
ENGLISH
CHAPTER 1: GENERAL
4) If a number of portions of the same food are being cooked, for example, boi-
led potatoes, arrange in a ring in an ovenproof dish to ensure even cooking.
5) During cooking in MANUAL “MICRO” mode, the formation of condensa-
tion inside the oven and on the surface where the oven is standing is perfectly normal. To reduce it, cover the food with transparent film, waxed
paper, a glass cover or an upturned plate.
Food with a high water content (for example, green vegetables) cook better
covered. Covering food also helps keep the inside of the oven clean. Use transparent film suitable for microwave use.
6) In AUTOMATIC mode and with “MICRO”, “MICROFAN” and “MICRO-
GRILL” functions, never pre-heat the oven or operate it empty
(without food). This may cause sparks and damage the appliance.
7) Do not cook eggs in their shells. The pressure forming inside the shell will
cause the eggs to explode, even after fully cooked. Do not heat up pre-cooked
eggs unless scrambled.
8) Before heating or cooking food in airtight or sealed containers, remember to
open them. The pressure rise inside the container would cause them to explode, even after the food is fully cooked.
Temperature
Select
°C inside °C set
Power W
Clock
Stop
°C
Start
Clear
Power Level
Quick Reheat
T
i
m
e
a
d
j
u
s
t
.
T
i
m
e
a
d
j
u
s
t
.
R
e
c
i
p
e
s
/
M
o
d
e
R
e
c
i
p
e
s
/
M
o
d
e
GB 28-01-2002 11:43 Pagina 40

2
41
ENGLISH
CHAPTER 2: USING FOR THE FIRST
TIME AND OPERATION
2.1 SELECTING THE LANGUAGE
1) Plug in the appliance. You will hear a short “beep” and the following words will appear:
ENGLISH, ITALIANO, DEUTSCH, FRANCAIS, ESPANOL.
2) When using for the first time, select the language for future messages displayed on the screen.
Bear in mind that the oven cannot be programmed until the language has been
selected.
3) Wait until the required language is displayed then press the SELECT button
(you will hear three beeps). Hold it down for at least five seconds.
After five seconds you will hear a further “beep” confirming that the language
has been memorised. The display will flash --|--. All appliance functions can
now be used or the clock set (see next paragraph).
4) The selected language is permanently memorised, even if the oven is
temporarily without power.
5) If you want to change the language, press the STOP/CLEAR button (5) then hold the SELECT button
(3) down for five seconds. After a short beep the choice of five languages will be displayed again. Repeat
from point three to select the new langage.
2.2 ADJUSTING THE CLOCK
After selecting the required language, proceed as follows to adjust the clock:
1) Press the CLOCK button (2): the hours flash.
2) Rotate the TIME ADJUST knob (9) clockwise and anticlockwise until the required hour is displayed.
3) Press the CLOCK button (2) again: the hour will be recorded and the minutes will begin flashing.
4) Rotate the TIME ADJUST knob (9) clockwise and anticlockwise until the required minutes are
displayed.
5) Press the CLOCK button (2) again: the required time will be displayed and the clock will begin working.
If you want to change the time set, press the CLOCK (2) button then reset as described above.
6) The hour set will not remain in memory if the oven is temporarily without power.
Select
°C inside °C set
Power W
Clock
R
e
c
i
p
e
s
/
M
o
d
e
R
e
c
i
p
e
s
/
M
o
d
e
5 SECONDI
5 seconds
english
GB 28-01-2002 11:43 Pagina 41
2
42
ENGLISH
CHAPTER 2: USING FOR THE FIRST TIME AND OPERATION
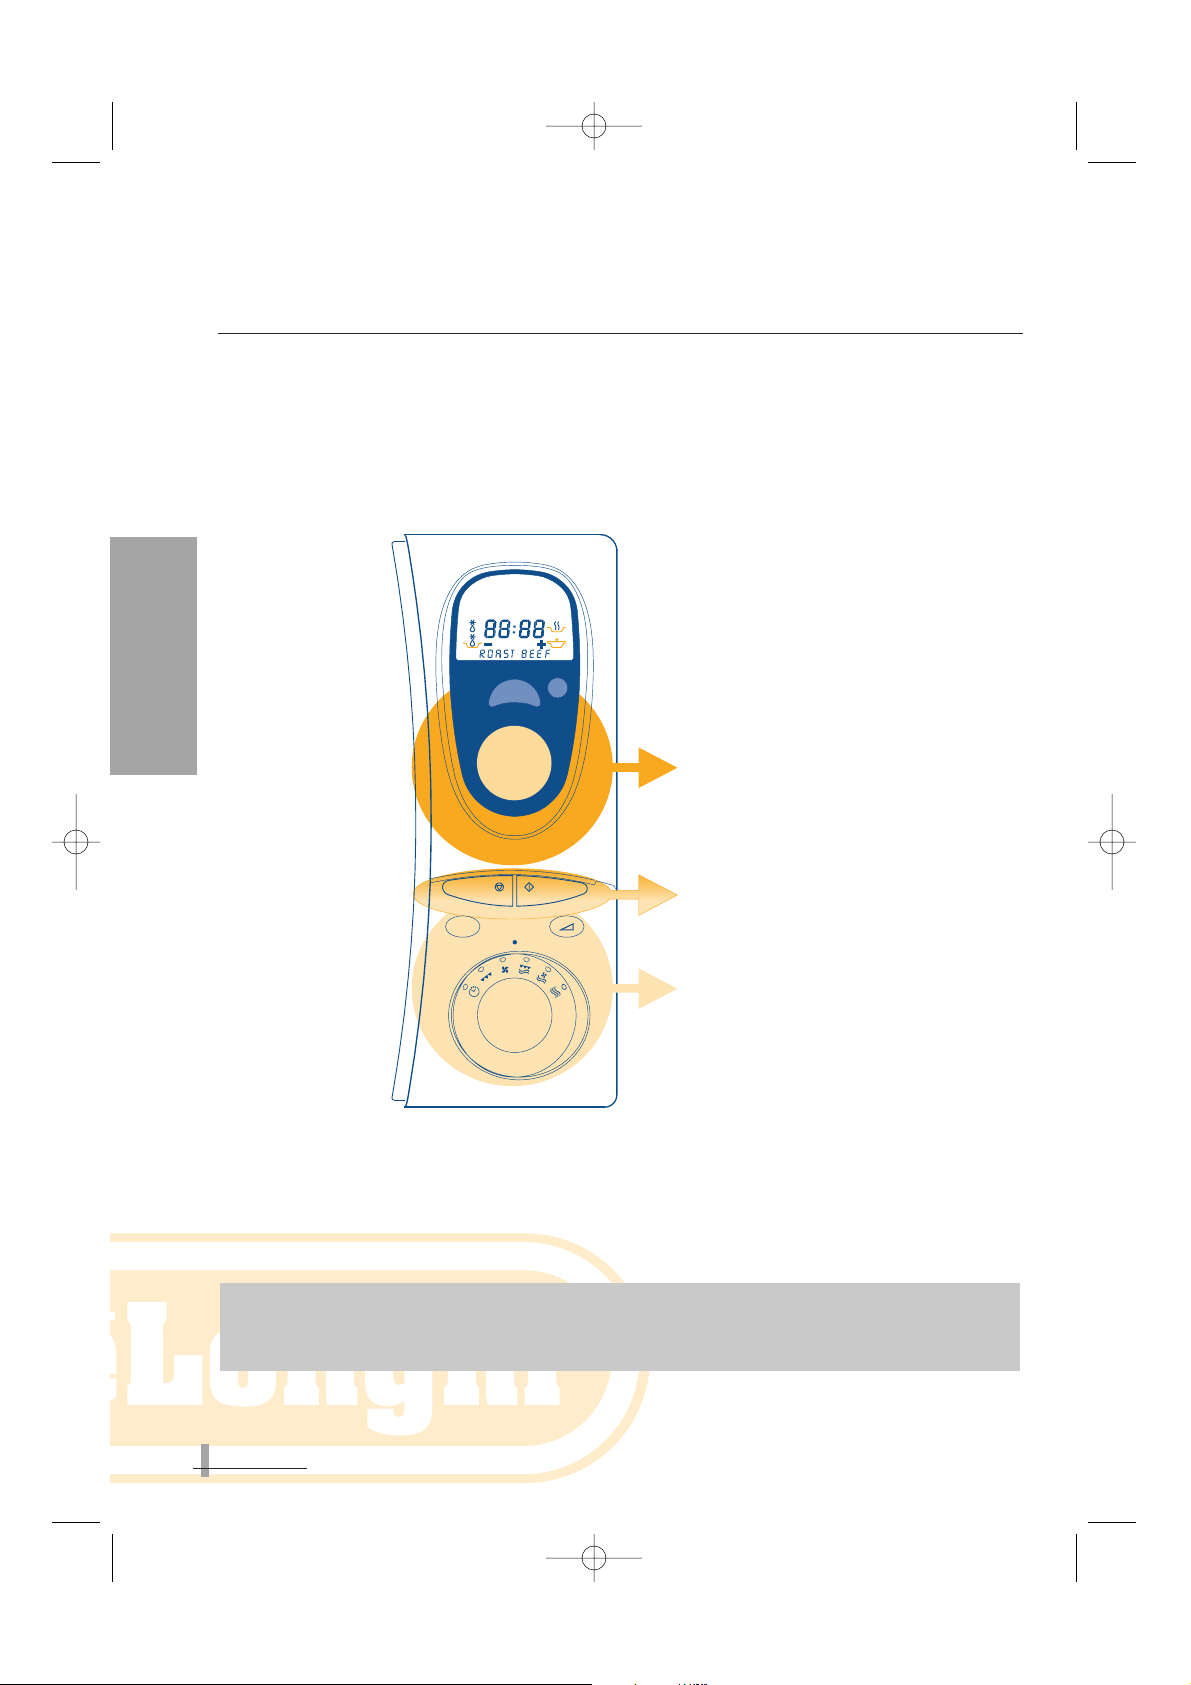
2.3 OPERATION
This oven has two independent operating modes:
AUTOMATIC MODE (see chapter 3, page 34)
Select the required recipe and the oven microcomputer will automatically select the most suitable
temperature, time and type of cooking. All the recipes available are listed in paragraph 3.2 LIST
OF RECIPES/FOODS and the QUICK REFERENCE GUIDE provided.
AUTOMATIC MODE
STOP AND START BUTTONS
FOR USE IN BOTH AUTOMATIC
AND MANUAL MODE
MANUAL MODE
MANUAL (see chapter 4, page 44)
The commands on the lower part of the panel can be used to manually select the most suitable
function (MICRO, MICROFAN, GRILL, etc), cooking time, temperature and power level.
NOTE: in the event of doubt or errors while selecting recipes or functions, push the
STOP/CLEAR button (5) and begin the setting process again.
Temperature
Select
°C inside °C set
Power W
Clock
Stop
°C
Start
Clear
Power Level
Quick Reheat
T
i
m
e
a
d
j
u
s
t
.
T
i
m
e
a
d
j
u
s
t
.
R
e
c
i
p
e
s
/
M
o
d
e
R
e
c
i
p
e
s
/
M
o
d
e
GB 28-01-2002 11:43 Pagina 42
°C inside
2
43
CHAPTER 2: USING FOR THE FIRST TIME AND OPERATION
ENGLISH
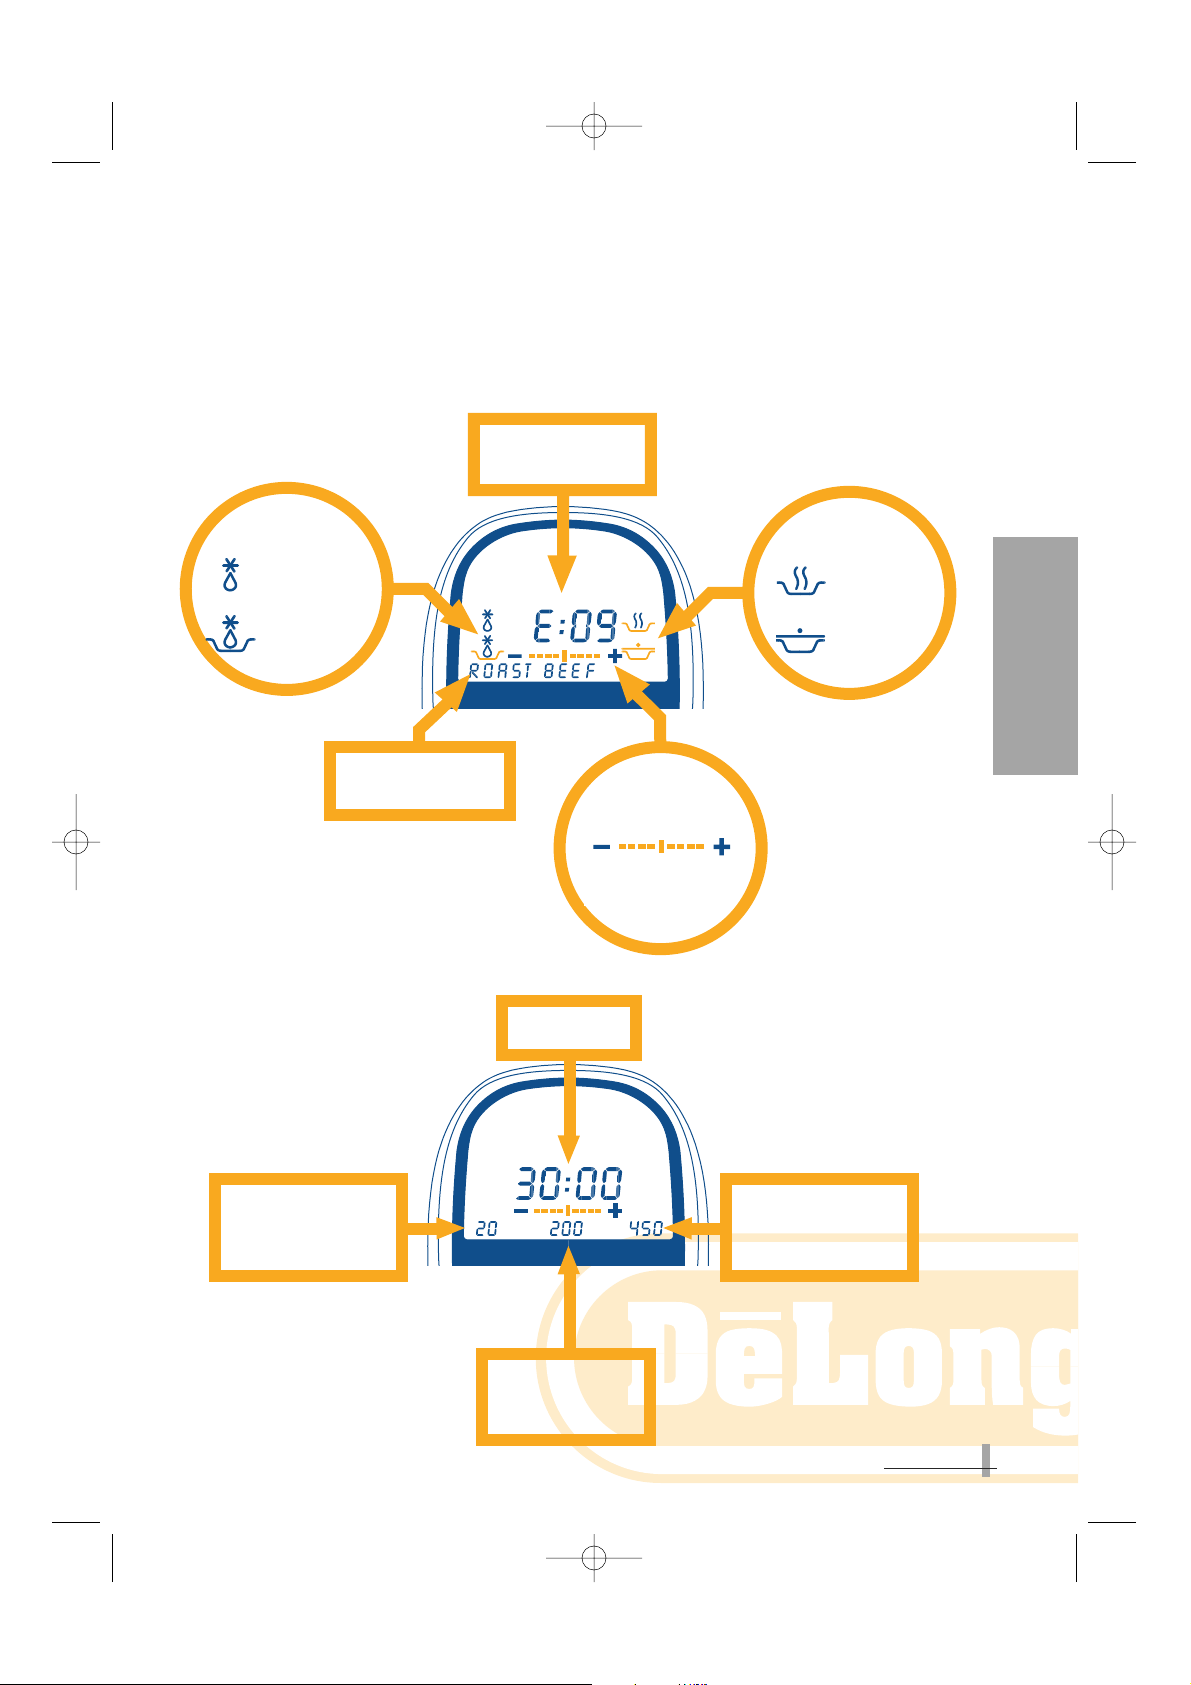
Description of display:
The display gives all information on the operating mode selected:
AUTOMATIC MODE: (see chapter 3, page 44)
MANUAL MODE: (see chapter 4, page 54)
Reference code for the
selected
RECIPE/FOOD
Cooking time
POSSIBLE
TYPES OF
COOKING
defrost
cook or
reheat from
frozen
POSSIBLE
TYPES OF
COOKING
reheat
cook
Name of
RECIPE/FOOD
selected
COOKING
DONENESS
LIGHTLY
COOKED
WELL
COOKED
Actual temperature inside the
oven for MICROFAN
and FAN functions
(when the oven heats up, this
value increases).
Microwave power level for:
MICRO, MICROFAN and
MICROGRILL functions
Oven temperature selec-
ted for: MICROFAN
and FAN functions
GB 28-01-2002 11:43 Pagina 43
°C inside °C set
Power W
°C inside °C set
Power W
 Loading...