


CW-9060024-WW
corsair.com
TM
FACEBOOK: facebook.com/corsairmemory
© 2015 Corsair Components, Inc. All rights reserved. Corsair and the sails logo are registered trademarks, and Corsair is a trademark
in the United States and/or other countries. All other trademarks are the property of their respective owners. Product may vary slightly from those pictured.
EMAIL: support@corsair.com
BLOG: corsair.com/blog/
USA and CANADA: (510) 657-8747 | INTERNATIONAL: (888) 222-4346 | FAX: (510) 657-8748
47100 Bayside Parkway • Fremont • California • 94538 • USA
Document Number: 49-001431 rev AA
FORUM: forum.corsair.com
TWITTER: twitter.com/corsairmemory
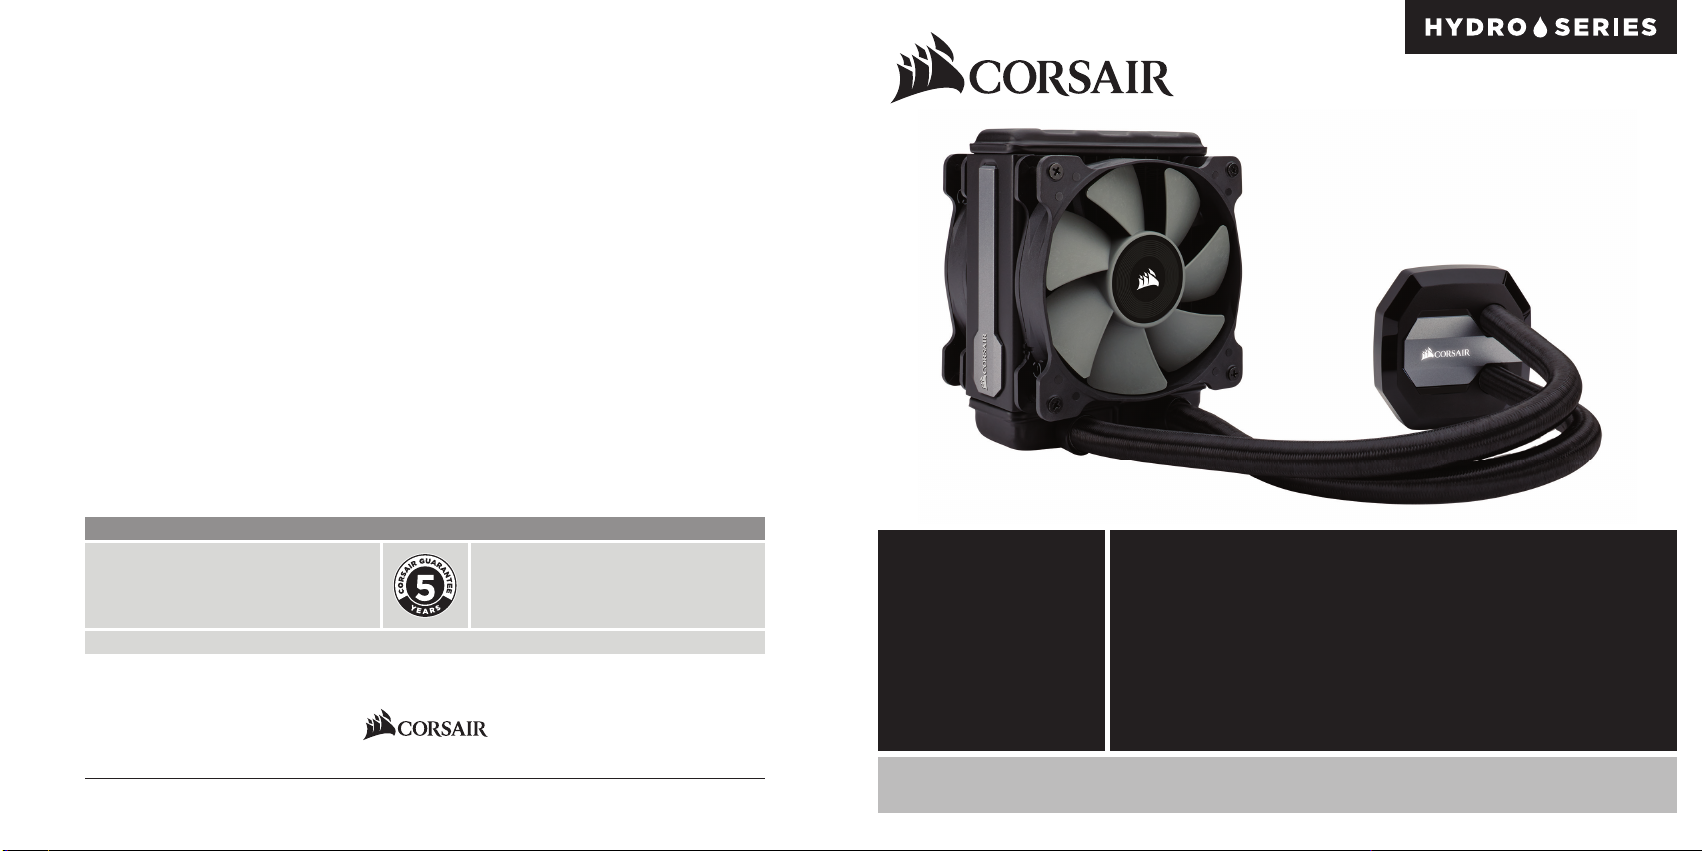
H80i GT PAGE: corsair.com/H80iGT
QUICK START GUIDE
GUIDE DE DÉMARRAGE RAPIDE
SCHNELLSTARTANLEITUNG
GUÍA BREVE DE INICIO
КРАТКОЕ РУКОВОДСТВО
快速入门指南
H80i v2
HIGH-PERFORMANCE LIQUID CPU COOLER
Note: Most newer PC cases include a CPU cutout to allow access to the bottom of
the motherboard. If your case does not include a cutout, you will need to remove
your motherboard from the case before installation.
Remarque : la plupart des nouveaux boîtiers de PC comportent un accès facilité au
processeur qui permet d'accéder à la base de la carte mère. Si aucun accès n'est
prévu sur votre boîtier, vous devrez retirer votre carte mère du boîtier avant de
procéder à l'installation.
Hinweis: Bei neueren PC-Gehäusen gibt in der Regel eine CPU-Önung Zugang zur
Unterseite der Hauptplatine. Falls Ihr Gehäuse keine derartige Önung aufweist,
müssen Sie vor der Installation die Hauptplatine ausbauen.
Nota: La mayoría de las carcasas de las nuevas PC incluyen una puerta trasera para el
CPU a fin de permitir el acceso a la parte inferior del motherboard. Si su carcasa no
tiene esta entrada, deberá retirar el motherboard de la carcasa antes de la instalación.
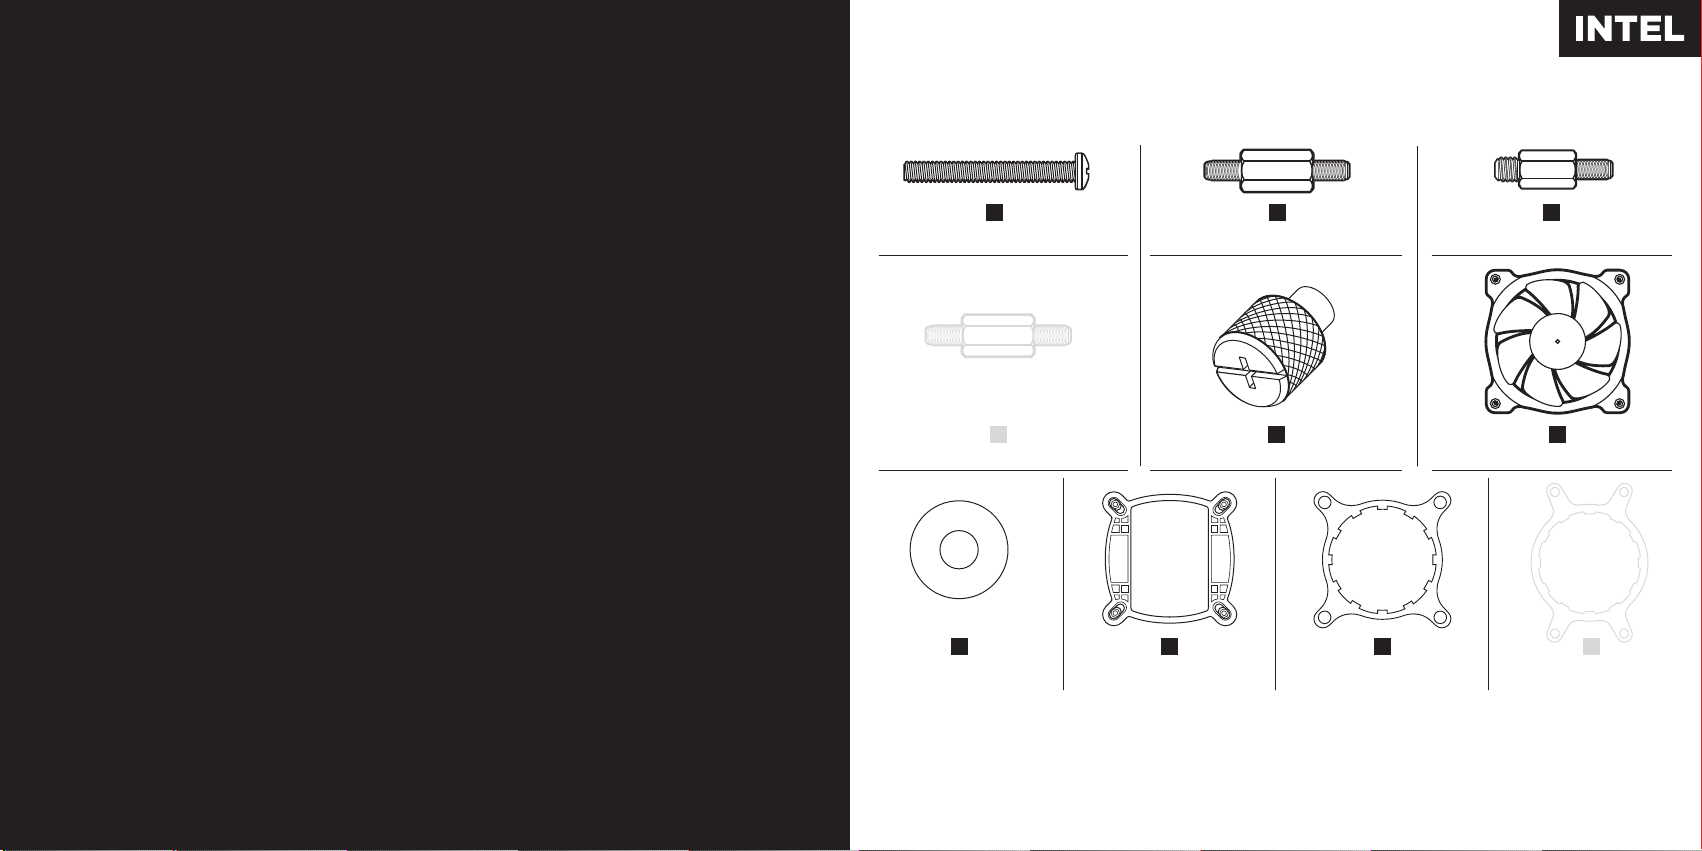
Included Hardware
Highlighted parts for Intel installation only • Les sections en surbrillance concernent
uniquement l'installation Intel • Die markierten Passagen beziehen sich nur auf die Intel
Componentes de instalación solamente para Intel • Части, выделенные цветом, только для установки Intel
突出显示的部分仅限Intel安装
x8 LONG FAN SCREWS
A
x4 LGA 115X / 1366 STANDOFF
B
x4 LGA 2011 STANDOFF
C
Примечание. На большинстве современных корпусов ПК имеется прорезь для предоставления
доступа к нижней части материнской платы. Если на вашем корпусе нет такой прорези, то перед
установкой необходимо удалить материнскую плату из корпуса.
注:大部分型号较新的PC机箱都配有CPU散热器更换口,可以在不移动主板的情况直接更换CPU散热
器,如果您的机箱未预留此空间,需要在水冷安装前取下主板。
x4 AMD BLACK STANDOFF
x8 WASHER
Note: The H80i v2 comes with Intel mounting bracket pre-installed on the pump for quick installation.
Remarque : pour une installation plus rapide, le support de fixation Intel est déjà monté sur la pompe du dissipateur H80i v2.
Hinweis: Beim Hochleistungsprozessorkühler H80i v2 ist die Intel-Montagehalterung bereits auf der Pumpe vorinstalliert und
ermöglicht so eine besonders schnelle Montage.
Nota: El H80i v2 viene con un soporte de montaje Intel preinstalado en la bomba para una instalación rápida.
Примечание. H80i v2 поставляется с установленным на насос монтажным кронштейном Intel для быстрой установки.
注:H80i v2的泵机上预装了Intel安装支架,可进行快速安装。
D
G
x1 INTEL BACKPLATE
H
E
x4 THUMBSCREWS
x1 INTEL MOUNTING BRACKET
I
(PRE-INSTALLED)
F
x2 SP120L FANS
J
x1 AMD MOUNTING
BRACKET
1
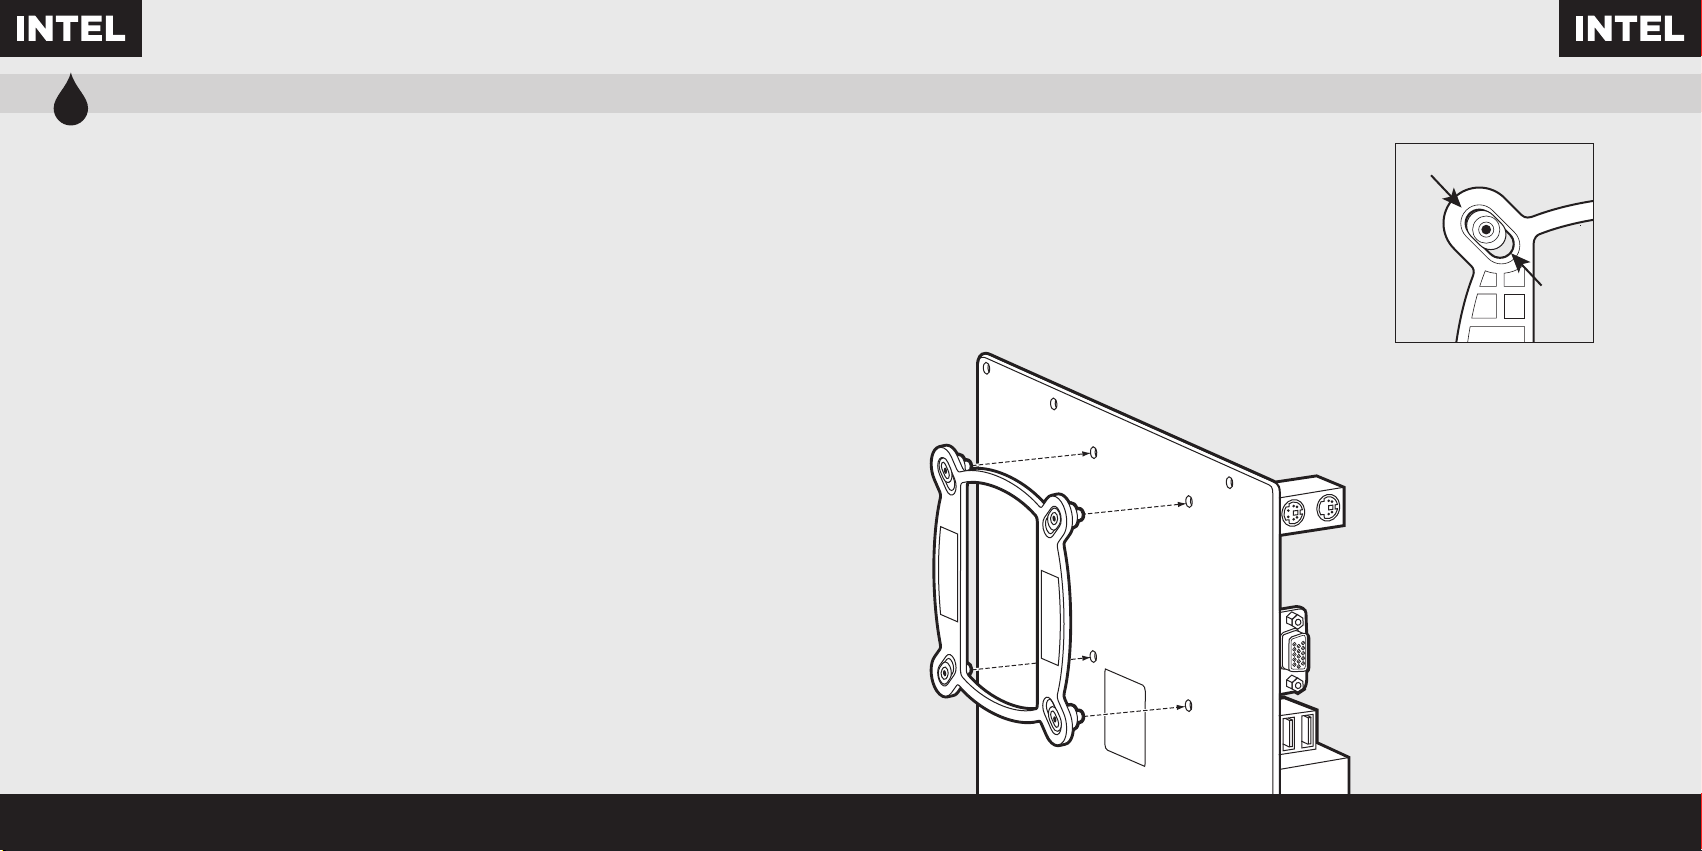
Installing the Intel Backplate
Installation de la plaque arrière Intel • Installation der Intel-Rückwand
Instalación de la placa de soporte para Intel • Установка опорной пластины Intel
安装Intel背板
LGA 1366
• For LGA 115X installation, slide the backplate
pins inside (figure 1).
• For LGA 1366 installation, slide the backplate
pins outside (figure 1).
• Install the assembled backplate (figure 2).
Note: Intel LGA 2011 does not require backplate
installation. Proceed to step 2.
• Pour l'installation sur un socket LGA 115x, faites glisser
les broches de la plaque arrière vers l'intérieur (figure 1).
• Pour l'installation sur un socket LGA 1366, faites glisser
les broches de la plaque arrière vers l'extérieur (figure 1).
• Installez la plaque arrière assemblée (figure 2).
Remarque: Le socket Intel LGA 2011 ne requiert pas
l'installation d'une plaque arrière. Passez à l'étape 2.
• Schieben Sie die Stifte der Rückwand nach innen,
um LGA 115X zu montieren (Abbildung 1).
• Schieben Sie die Stifte der Rückwand nach innen,
um LGA 1366 zu montieren (Abbildung 1).
• Montieren Sie die zusammengebaute Rückwand
(Abbildung 2).
Hinweis: Für den Intel LGA 2011 ist keine Rückwand
erforderlich. Fahren Sie mit Schritt 2 fort.
• Para instalación en LGA 115X, deslice la placa de soporte
con las patillas hacia dentro (figura 1).
• Para instalación en LGA 1366, deslice la placa de soporte
con las patillas hacia fuera (figura 1).
• Instale la placa de soporte ensamblada (figura 2).
Nota: Intel LGA 2011 no requiere que se instale
una placa de soporte. Siga con el paso 2.
• При установке LGA 115X задвиньте штырьки
внутрь (Рис. 1).
• При установке LGA 1366 задвиньте штырьки
наружу (Рис. 1).
• Установите собранную опорную пластину. (Рис. 2)
Примечание. Для Intel LGA 2011 установка опорной
пластины не требуется. Перейдите к шагу 2.
• 要安装LGA 115X,请将背板针脚插入(图1)。
• 要安装LGA 1366,请将背板针脚拔出(图1)。
• 安装组装好的背板(图2)。
注:Intel LGA 2011不需要安装背板。继续执行步骤2。
LGA
115X
figure 1
figure 2

2 3
Installing the Intel Stando Screws
Installation des vis d'entretoise Intel • Installation der Intel-Abstandhalter
Instalación de los tornillos del separador para Intel • Установка опорных винтов Intel
安装Intel隔架螺丝
LGA 115X/1366
LGA2011
B
C
• Attach the provided Intel stando.
• Use (B) for LGA 115X / 1366, or (C)
for LGA 2011.
• Tighten all four screws until firmly secure.
• Fixez les entretoises Intel fournies.
• Utilisez-en (B) pour un socket LGA 115X / 1366
ou (C) pour un socket LGA 2011.
• Serrez les quatre vis jusqu'à ce qu'elles ne
puissent plus bouger.
• Befestigen Sie den im Lieferumfang
enthaltenen Intel-Abstandhalter.
• Verwenden Sie (B) für LGA 115X / 1366
oder (C) für LGA 2011.
• Ziehen Sie alle vier Schrauben fest.
• Conecte el separador para Intel suministrado.
• Utilice (B) para LGA 115X / 1366 o (C) para
LGA 2011.
• Apriete los cuatro tornillos hasta que estén
bien fijados.
• Прикрепите входящую в комплект опору
Intel.
• Для LGA 115X / 1366 используйте (B), а для
LGA 2011— (C).
• Хорошо затяните все четыре винта.
• 连接随附的Intel隔架。
• 为LGA 115X / 1366使用(B),或者为LGA 2011
使用(C)。
• 拧紧全部四个螺丝,直至牢牢地固定。
A
Installing the Fan and Radiator
Installation du ventilateur et du radiateur • Installation des Lüfters und Kühlers
Instalación de los ventiladores y el radiador • Установка вентилятора и радиатора
安装风扇和散热器
• Mount the radiator and fans to your case’s rear 120mm
fan opening as shown below.
Note: For best cooling performance, we recommend
mounting the fan as an air intake to your PC case.
• Fixez le radiateur et les ventilateurs à l'arrière de votre
tour, dans l'ouverture de 120mm prévue à cet eet,
comme indiqué ci-dessous.
Remarque : Pour des performances de refroidissement
optimales, nous vous recommandons d'installer le
ventilateur comme une entrée d'air sur la tour de
votre ordinateur.
G
G
• Montieren Sie den Kühler und die Lüfter an den
Önungen für die hinteren 120-mm-Lüfter, wie in der
Abbildung unten dargestellt.
Hinweis: Für die bestmögliche Kühlleistung empfehlen
wir, den Lüfter als Lufteinlass des PC-Gehäuses
zu montieren.
• Monte el radiador y los ventiladores en la abertura trasera
de 120mm para ventiladores de la carcasa como se
muestra a continuación.
Nota: Para una refrigeración óptima, recomendamos
montar los ventiladores como entrada de aire en la
carcasa del PC.
• Установите радиатор и вентиляторы к заднему
отверстию для 120mm вентиляторов вашего корпуса,
как указано ниже.
Примечание. Для более эффективного охлаждения
рекомендуется установить вентилятор таким
A
образом, чтобы он нагнетал воздух внутрь корпуса.
• 按下图所示,在机箱后侧120mm风扇开口处安装散热器
和风扇。
注:为了达到最佳散热性能,建议您将风扇作为进气口安
装到PC机箱上。
 Loading...