


H XP R OPFOE SWS IEO NRA LSSUE RPI PE SL™ Y
AX1200i
D I G I T A L A T X P O W E R S U P P LY
MANUAL • MANUEL • MANUALE
MANUELLE • MANUAL DE • РУКОВОДСТВО

English 4
Français 11
Deutsch 19
Italiano 27
Español 34
Россию 41

PROFESSIONAL SERIES™
Congratulations on the purchase of your new Corsair Professional Series AX1200i digital ATX power supply.
The Corsair AX1200i is a groundbreaking new design. It is a departure from traditional PSU designs and is packed with features that will make building your ultimate dream PC even more enjoyable. The AX1200i introduces some new and exciting technologies, so please read below for more information.
Product Features
Digitally Controlled Power
Unlike traditional power supply designs, the Corsair AX1200i uses a Digital Signal Processor (DSP) for optimized efficiency and tighter voltage regulation, which improves overall system stability and component reliability.
Quiet, Efficient Operation
Upgrading to digital provides increased efficiency. The AX1200i is certified 80 PLUS® Platinum, which results in lower heat generation and a quieter fan profile. The AX1200i is so efficient that the 140mm fan doesn’t even spin at low loads for completely noiseless power delivery.
Corsair Link™
The built-in Corsair Link™ functionality shows you how your AX1200i is performing at any given
4moment and lets you quickly tweak its performance. Server-inspired diagnostic tools monitor real-time efficiency, power usage, configurable over-current protection points and fan profiles.
Brilliant Design
The fully modular cables make it easy to install and the self-test switch lets you quickly determine if the AX1200i is functioning normally before you even attach cables to your motherboard.
Technology and Benefits
•Digital Control
The AX1200i Digital ATX Power Supply features an advanced control architecture to produce outstanding dynamic response. It features a true digital engine that provides superior on-the-fly performance optimization across the full operating range while maintaining stable operation.
•80 PLUS® Platinum Efficiency
The sophisticated electrical design, incorporating advanced hybrid digital control and state of the art magnetics delivers extremely high energy efficiency (92% and above).
•User-Selectable Over-Current Protection
The AX1200i has a massive 100.4 Amp (1204.8 Watt) single +12V rail, which makes it the ideal power supply for ultra-high end multi-GPU systems based around powerhungry CPUs. If you prefer multi-rail architecture, the PCI-E Over-Current Protection trip points can be configured individually via the Corsair Link™ Dashboard software.
•Outstanding DC Voltage Regulation
Due to its digital design, the AX1200i delivers exceptionally stable power over the whole load range and automatically compensates for DC output cable voltage drop,
PROFESSIONAL SERIES™
ensuring tight DC output voltage regulation without the ripple/noise, transient response, and converter stability drawbacks associated with conventional power supply designs.
•Low DC Output Voltage Ripple and Noise
The AX1200i features individual DC-DC regulation for 3.3V, 5V and 12V rails, and secondary side synchronous rectification, utilizing MOSFETs that have lower losses than the conventional output rectification schemes. An advanced 4-layer modular connector board PCB ensures a better ground return plane, lower resistance and low voltage drops. This, combined with circuit trace optimization and advanced filtering techniques, helps to minimize ripple and noise.
•Reduced Component Count and Increased Reliability
The digital control of the AX1200i eliminates many external components required by more conventional PSU solutions to offer an extremely small, high density, high reliability solution that allows incremental space to add extra features - like real time parameter monitoring and power supply control.
User Friendly Features
•Fully Modular Cable System
The fully-modular, low-profile cable system provides maximum flexibility when building or upgrading your PC, and maximum airflow through your chassis. This allows you to
utilize only the cables that you need, reducing cable clutter and maximizing the cooling |
5 |
performance of your PC. |
|
•Ultra Low Noise Design
The AX1200i utilizes a low-noise, thermally-controlled 140mm fan, and employs sophisticated techniques to enhance cooling performance and reduce noise. This includes a specially designed PCB that channels airflow to reduce back-pressure and maximize the cooling effect of the airflow. The fan remains off under light load conditions and can be controlled via a graphical user interface.
•Self Test Switch
The power supply can be validated prior to system installation via a self test switch, which confirms all DC output voltage rails are present and the fan is functional.
Safety and Protection
•Over-Voltage Protection (OVP)
Over-voltage protection for the 12V, 5V and 3.3V DC outputs is required to comply with the ATX specification. OVP shuts down the PSU in the event that the DC outputs exceed a set level, determined by the PSU manufacturer. The minimum voltage levels required for compliance are 13.4V for the +12V rail(s), 5.74V for the +5V rail and 3.76V for the 3.3V rail.
•Over-Current Protection (OCP)
The AX1200i features OCP on the 3.3V, 5V and 12V rails. OCP ensures that the output of the DC voltage rails remains within safe operating limits. The AX1200i can be configured as a single rail or multi-rail OCP solution.
PROFESSIONAL SERIES™
•Over-Temperature Protection (OTP)
OTP ensures that the PSU will shut down when the internal temperature reaches a set point. This is usually as a result of internal current overloading or a fan failure.
•Short-Circuit Protection (SCP)
A short-circuit is defined as any output impedance of less than 0.1 ohms. Amongst other things, SCP ensures that the PSU shuts down should the 3.3V, 5V and 12V rails short to any other rail, or to ground. It also ensures that no damage should occur to the unit, or your PC’s components, in the event of a short.
Power Supply Specifications
•Dimensions: 150mm(W) x 86mm(H) x 200mm(L)
•MTBF: 100,000 Hours
Package Contents
•Corsair Professional Series power supply unit
•Modular cable set
•User Manual
•AC power cord
•Cable ties
•Mounting screws
•Corsair case badge
•Carrying bag
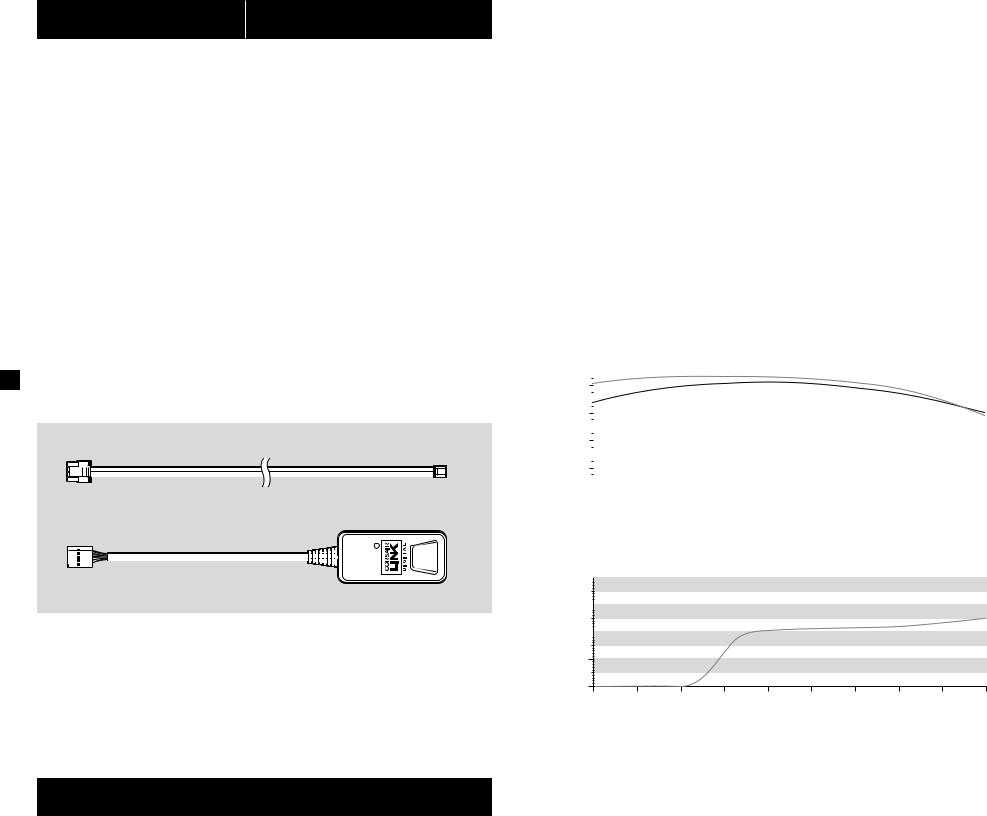
6• Corsair Link™ Digital interface cable
• Corsair Link™ USB Dongle
Corsair Link™ Digital interface cable
Corsair Link™ USB Dongle
|
|
|
|
|
|
|
PROFESSIONAL SERIES™ |
|
|
||||||
Corsair Cable Configuration |
|
|
|
|
|
|
|
|
|
||||||
|
|
|
|
|
|
|
|
|
|
|
|
|
|
|
|
|
|
|
|
|
|
AX1200i |
|
|
|
|
|
|
|
|
|
|
|
|
|
|
|
|
|
|
|
|
|
|
|
|
|
Qty |
Length |
|
Connector/Cable |
|
|
|
|
|
|
|
|
|
|||
|
|
|
|
|
|
|
|
|
|
|
|
|
|
|
|
1 |
|
|
|
610mm ± 10mm |
1 |
|
ATX Cable 24-PIN (20+4) |
|
|
||||||
|
|
|
|
|
|
|
|
|
|
|
|
|
|
|
|
2 |
|
|
650mm ± 10mm |
1 |
|
EPS/ATX12V Cable 8-PIN (4+4) |
|
|
|||||||
|
|
|
|
|
|
|
|
|
|
|
|
|
|
|
|
6 |
|
|
600mm ± 10mm |
1 |
|
PCI-E Cable 8PIN (6+2) |
|
|
|
|
|||||
|
|
|
|
|
|
|
|
|
|
|
|
|
|
|
|
3 |
|
|
700mm ± 10mm |
4 |
|
SATA Cable (4 SATA) |
|
|
|
|
|||||
|
|
|
|
|
|
|
|
|
|
|
|
|
|
|
|
1 |
|
|
|
850mm ± 10mm |
4 |
|
SATA Cable (4 SATA) |
|
|
|
|
||||
|
|
|
|
|
|
|
|
|
|
|
|
|
|
|
|
3 |
|
|
750mm ± 10mm |
4 |
|
Peripheral Cable (4 PIN) |
|
|
|
|
|||||
|
|
|
|
|
|
|
|
|
|
|
|
|
|
|
|
2 |
|
|
101mm ± 5mm |
1 |
|
Floppy Drive Cable (4 PIN) |
|
|
|||||||
|
|
|
|
|
|
|
|
|
|
|
|
|
|
|
|
1 |
|
|
|
800mm ± 10mm |
1 |
|
PMBUS Cable (4PIN) |
|
|
|
|
||||
|
|
|
|
|
|
|
|
|
|
|
|
|
|
|
|
Power Supply Efficiency |
|
|
|
|
|
|
|
|
|
|
|
||||
94 |
|
|
|
% EFFICIENCY |
|
|
|
|
|
|
INPUT Vac |
|
|||
|
|
|
|
|
|
|
|
|
|
||||||
|
|
|
|
|
|
|
|
|
|
|
|
|
|
7 |
|
|
|
|
|
|
|
|
|
|
|
INPUT Vac |
|
|
|||
90 |
|
|
|
|
|
|
|
|
|
|
|
|
|||
|
|
|
|
|
|
|
|
|
|
|
|
|
|
|
|
|
|
|
|
|
|
|
|
|
|
|
|
|
|
|
|
86 |
|
|
|
|
|
|
|
|
|
|
|
|
|
|
|
|
|
|
|
|
|
|
|
|
|
|
|
|
|
|
|
|
|
|
|
|
|
|
|
|
|
|
|
|
|
|
|
82 |
|
|
|
|
|
|
|
|
|
|
|
|
|
|
|
|
|
|
|
|
|
|
|
|
|
|
|
|
|
|
|
|
|
|
|
|
|
|
|
|
|
|
|
|
|
|
|
78 |
|
|
|
|
|
|
|
|
|
|
|
|
|
|
|
|
|
|
|
|
|
|
|
|
|
|
|
|
|
|
|
|
|
|
|
|
|
|
|
|
|
|
|
|
|
|
|
100% |
50% |
20% |
|
|
10% |
|
|
||||||||
|
|
|
|
|
|
SYSTEM LOAD |
|
|
|
|
|
|
|
|
|
Power Supply Fan Noise Curve
FAN NOISE (Decibels)
40 
30 
20 
0
10% |
20% |
40% |
60% |
80% |
100% |
|
|
SYSTEM LOAD (Watts) |
|
|
|
|
|
|
|
|
|
|
|
|
|
|
|

PROFESSIONAL SERIES™
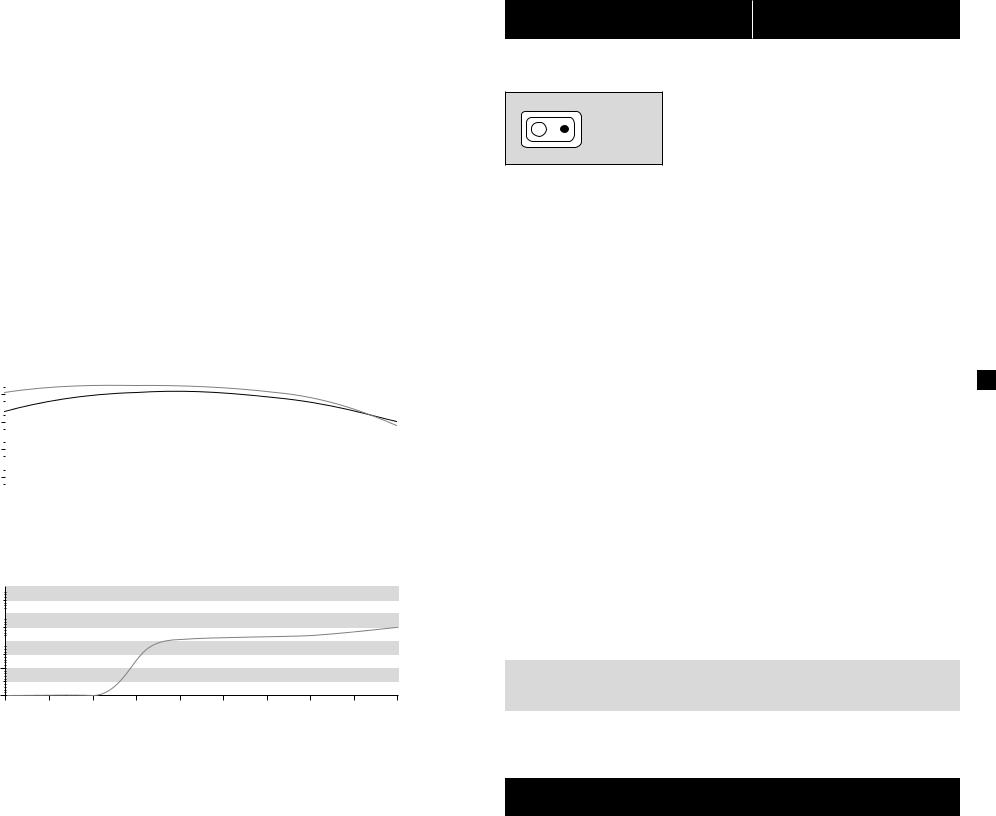
Using the Self Test Feature
SELF TEST
In order to use the self-test feature, please follow the steps below.
1.Connect the PSU to an AC power source, and flip the power indicator on the back of the PSU to the On position (I).
2.Press the self-test button on the modular connector side of the PSU.
3.If the button lights up green and the fan spins for a moment, you’re good to go!
4.If the button lights up red or does not light up at all, please contact Corsair customer service for further technical support.
Installing your New AX1200i
Step A: Removing your existing power supply
If you are building a new system, skip to Step B.
1.Disconnect the AC power cord from your wall outlet or UPS and from the existing power supply.
2.Disconnect all the power cables from your video card, motherboard and all other
8peripherals.
3.Follow the directions in your chassis manual and uninstall your existing power supply.
4.Proceed to Step B.
Step B: Installing the Corsair Gaming Series power supply
1.Make sure the power supply’s AC power cable is not connected.
2.Follow the directions in your chassis manual and install the power supply with the screws provided.
3.The main 24-pin power cable has a detachable 4-pin mechanism in order to support either a 24-pin or a 20-pin socket on the motherboard.
a.If your motherboard has a 24-pin socket, you may connect the 24-pin main power cable from the power supply directly to your motherboard.
b.If your motherboard has a 20-pin socket, you must detach the four-pin cable from the 24-pin connector, and then plug the 20-pin cable onto your motherboard without connecting the four-pin connector.
4.Connect the eight-pin +12V (EPS12V) cable to the motherboard..
a.If your motherboard has an eight-pin +12V socket, connect the eight-pin cable directly to your motherboard.
b.If your motherboard has a four-pin socket, detach the four-pin from the eight-pin cable, and then plug this four-pin cable directly to your motherboard.
WARNING: The detachable four-pin from the 24-pin main connector is not a “P4” or “+12V” connector. Serious damage can be caused if you use it in place of a “P4” or “+12V” connector.
5.Connect the peripheral cables, PCI-Express cables, and SATA cables.
a.Connect the peripherals cables to your hard drive and CD-ROM/DVD-ROM power sockets.
PROFESSIONAL SERIES™
b.Connect the SATA cables to your SATA SSD or hard drive’s power sockets.
c.Connect the PCI-Express cables to the power sockets of your PCI-Express video cards if required.
d.Connect the peripheral cables to any peripherals requiring a small 4-pin connector.
e.Make sure all the cables are tightly connected.
6.Connect the AC power cord to the power supply and turn it on by pushing the switch to the ON position (marked with “I”).
Using Corsair Link™ with your New AX1200i
Before you are able to monitor your new PSU with Corsair Link™ you must connect the power supply to an internal USB header using the Digital Interface Cable and USB Dongle.
1.Plug one end of the Digital Interface Cable into the COMM PORT of the AX1200i, seen here:
COMM PORT
2.Plug the other end of this cable into the USB Dongle, as shown below.
3. Plug the other end of the USB Dongle into a standard USB header on your |
9 |
|||||||||||||||||||||||||||||||||||||||||||||||||||||||||
motherboard. (Check your motherboard manual for locations and compatibility). |
|
|||||||||||||||||||||||||||||||||||||||||||||||||||||||||
|
|
|
|
|
|
|
|
|
|
|
|
|
|
|
|
|
|
|
|
|
|
|
|
|
|
|
|
|
|
|
|
|
|
|
|
|
|
|
|
|
|
|
|
|
|
|
|
|
|
|
|
|
|
|
|
|
|
|
|
|
|
|
|
|
|
|
|
|
|
|
|
|
|
|
|
|
|
|
|
|
|
|
|
|
|
|
|
|
|
|
|
|
|
|
|
|
|
|
|
|
|
|
|
|
|
|
|
|
|
|
|
|
|
|
|
|
|
|
|
|
|
|
|
|
|
|
|
|
|
|
|
|
|
|
|
|
|
|
|
|
|
|
|
|
|
|
|
|
|
|
|
|
|
|
|
|
|
|
|
|
|
|
|
|
|
|
|
|
|
|
|
|
|
|
|
|
|
|
|
|
|
|
|
|
|
|
|
|
|
|
|
|
|
|
|
|
|
|
|
|
|
|
|
|
|
|
|
|
|
|
|
|
|
|
|
|
|
|
|
|
|
|
|
|
|
|
|
|
|
|
|
|
|
|
|
|
|
|
|
|
|
|
|
|
|
|
|
|
|
|
|
|
|
|
|
|
|
|
|
|
|
|
|
|
|
|
|
|
|
|
|
|
|
|
|
|
|
|
|
|
|
|
|
|
|
|
|
|
|
|
|
|
|
|
3
Corsair Link™
USB Dongle
1 |
2 |
Corsair Link™ Digital interface cable
4.Download the Corsair Link Dashboard software from www.corsair.com and follow the instructions.

PROFESSIONAL SERIES™
Important Safety Information
CAUTION ELECTRIC SHOCK HAZARD!
1.Install in accordance with all manufacturer instructions and safety warnings.
Failure to do so may result in damage to your power supply or system, and may cause serious injury or death.
2.High voltages are present in the power supply. Do not open the power supply case or attempt to repair the power supply; there are no user-serviceable components.
3.This product is designed for indoor use only.
4.Do not use the power supply near water, or in high temperature or high humidity environments.
5.Do not install near any heat sources such as radiators, heat registers, stoves, or other apparatus that produce heat.
6.Do not insert any objects into the open ventilation or fan grill area of the power supply.
7.Do not modify the cables and/or connectors included with this power supply.
8.If this power supply uses modular cables, use only manufacturer supplied cables.
Other cables might not be compatible and could cause serious damage to your system and power supply.
9.The 24-pin main power connector has a detachable 4-pin connector. This 4-pin connector is not a P4 or ATX 12V connector. Do not force this cable in the P4 or ATX +12V socket on the motherboard.
10.Failure to comply with any manufacturer instructions and/or any of these safety
10 instructions will immediately void all warranties and guarantees.
Safety and Agency Approvals
FCC |
FCC Rules Part 15, Class B |
ICES |
ICES-003 |
CE |
EN 55022:2006 + A1:2007, Class B |
|
EN61000-3-2:2006+A1:2009+A2:2009 Class A |
|
EN61000-3-3: 2008 |
|
EN55024:1998 + A1:2001 + A2:2003 |
|
IEC61000-4-2 |
|
IEC61000-4-3 |
|
IEC61000-4-4 |
|
IEC61000-4-5 |
|
IEC61000-4-6 |
UL / CUL |
IEC61000-4-11 |
UL 60950-1 |
|
CSA |
C22.2 NO. 60950-1 |
C-Tick/RCM AS/NZS CISPR 22:2009 |
|
TUV |
AS/NZS 4417 |
EN 60950-1 |
|
CB |
IEC 60950-1 |
CCCGB4943
GB9254
GB17625.1
BSMI |
CNS14336 |
GOST |
CNS13438 |
R IEC 60950-1-2005 |
|
|
R 51318.22-99 |
|
R 51318.24-99 |
|
R 51317.3.2-2006 |
IRAM |
R 51317.3.3-99 |
IEC 60950-1 |
|
KC Mark |
K 60950-1(2006-12), K00022(2009-12), K00024(2009-12) |
ROHS |
2002/95/EC, Restriction of Hazardous Substances Directive |
WEEE |
2002/96/EC, Waste Electrical and Electronic Equipment Directive |
ROHS |
China Order No.39, Administration on the Control of Pollution Caused By |
(China) |
Electronic Information Products |
|
|
|
|
PROFESSIONAL SERIES™ |
|
Félicitations pour l'achat de votre nouveau bloc d'alimentation AX1200i Digital ATX de la |
|
gamme Corsair Professional ! |
|
L'AX1200i de Corsair bénéficie d'une conception révolutionnaire. Différent des blocs |
|
d'alimentation traditionnels, ce modèle présente de nombreuses fonctionnalités grâce |
|
auxquelles vous prendrez encore plus de plaisir à construire le PC de vos rêves. L'AX1200i |
|
intègre de nouvelles technologies passionnantes : pour en savoir plus, lisez ce qui suit. |
|
Caractéristiques du produit |
|
Alimentation à commande numérique |
|
Contrairement aux blocs d'alimentation classiques, le modèle AX1200i de Corsair est doté d'un |
|
processeur de traitement du signal numérique (DSP) qui régule la tension plus efficacement. La |
|
stabilité générale du système et la fiabilité des composants s'en trouvent ainsi améliorées. |
|
Silencieux et performant |
|
La mise à niveau numérique est synonyme de performances accrues. Bénéficiant de la |
|
certification 80 PLUS® Platinum, l'AX1200i se caractérise par une émission thermique réduite et |
|
un ventilateur discret. L'AX1200i est si efficace que son ventilateur de 140 mm ne tourne pas en |
|
cas de faibles charges, garantissant ainsi une alimentation totalement silencieuse. |
|
Corsair Link™ |
11 |
Grâce à la fonctionnalité Corsair Link™ intégrée, vous pouvez vérifier les performances de votre |
AX1200i à tout moment et effectuer rapidement les ajustements nécessaires, le cas échéant. Les outils diagnostiques de type serveur permettent de surveiller en temps réel le rendement, la consommation, les points de protection configurables contre les surintensités et les profils de ventilation.
Conception exceptionnelle
Les câbles entièrement modulaires permettent une installation en toute facilité. Grâce au commutateur d'autotest, vous pouvez savoir rapidement si le AX1200i fonctionne normalement, avant même de le brancher sur votre carte mère.
Technologie et avantages
•Contrôle numérique
Le bloc d'alimentation AX1200i Digital ATX présente une architecture de contrôle avancée garantissant une réponse dynamique remarquable. Il est doté d'un véritable moteur numérique permettant, le cas échéant, une optimisation supérieure des performances sur toute la plage de fonctionnement, tout en assurant une grande stabilité d'utilisation.
•Efficacité 80 PLUS® Platinum
The sophisticated electrical design, incorporating advanced hybrid digital control and state of the art magnetics delivers extremely high energy efficiency (92% and above).
•Protection contre les surintensités sélectionnable par l'utilisateur
L'AX1200i dispose d'un impressionnant rail unique de 12 volts/100,4 ampères (1204,8 watts) qui en fait le bloc d'alimentation idéal pour les installations multi-GPU
PROFESSIONAL SERIES™
ultra-haut de gamme intégrant des processeurs nécessitant énormément d'énergie. Si vous préférez une architecture multirails, les points de déclenchement du dispositif de protection contre les surintensités PCI-E peuvent être configurées individuellement par le biais du logiciel Corsair Link™ Dashboard.
•Régulation de tension CC exceptionnelle
De par de sa conception numérique, l'AX1200i garantit une stabilité d'alimentation remarquable sur l'ensemble de la capacité de charge, ainsi qu'une compensation automatique des baisses de tension sur les câbles de sortie en CC. De fait, il permet de réguler efficacement la tension continue de sortie, tout en s'affranchissant des problèmes de bruit, d'ondulations électriques, de réponse transitoire et de stabilité de convertisseurs qui affectent les blocs d'alimentation traditionnels.
•Ondulations électriques et bruit minimes en tension continue de sortie
L'AX1200i est doté d'un système de régulation CC/CC individuel pour rails de 3,3, 5 et 12 V, et d'une correction synchrone secondaire. En outre, il utilise des transistors MOSFET plus efficaces que les correcteurs de sortie traditionnels. Sophistiqué, le circuit imprimé modulaire à quatre couches optimise le retour par la terre, réduit la résistance et limite les baisses de tension. Associée à un tracé de circuit optimisé et à des techniques de filtrage avancées, cette technologie favorise la limitation du bruit et des ondulations électriques.
•Moins de composants, plus de fiabilité
12Le contrôle numérique de l'AX1200i l'affranchit des nombreux composants externes nécessaires aux blocs d'alimentation plus classiques. Vous bénéficiez ainsi d'un modèle fiable et compact à haute densité qui peut accueillir des fonctionnalités supplémentaires, notamment un suivi des paramètres et un contrôle de l'alimentation en temps réel.
Fonctionnalités conviviales
•Système de câblage entièrement modulaire
Entièrement modulaire, le système de câblage extra-plat vous offre un maximum de flexibilité lorsque vous construisez ou mettez votre PC à niveau, ainsi qu'une ventilation optimale du boîtier. Vous pouvez donc utiliser uniquement les câbles dont vous avez besoin, ce qui limite l'encombrement et maximise les capacités de refroidissement de votre PC.
•Niveau de bruit ultra-faible
L'AX1200i est doté d'un ventilateur silencieux de 140 mm à contrôle thermique et bénéficie de technologies sophistiquées vouées à améliorer ses capacités de
refroidissement et à réduire le niveau sonore. Ces technologies incluent notamment un circuit imprimé conçu sur mesure qui canalise l'écoulement d'air afin de réduire la contre-pression et d'optimiser son refroidissement. Le ventilateur reste désactivé en cas de charge limitée et peut être contrôlé par le biais d'une interface utilisateur graphique.
•Commutateur d'autotest
Avant d'installer le système, il est possible de valider l'alimentation via un commutateur d'autotest, qui permet de confirmer la présence de tous les rails en tension continue de sortie, ainsi que le bon fonctionnement du ventilateur.
PROFESSIONAL SERIES™
Sécurité et protection
•Protection contre les surtensions (OVP)
Un OVP pour les sorties en CC (3,3, 5 et 12 V) est requis pour assurer la conformité à la norme ATX. Si les sorties en CC dépassent un certain seuil, déterminé par le fabricant du bloc d'alimentation, l'OVP éteint ce dernier automatiquement. Le niveau de tension minimum requis pour assurer la conformité est de 13,4 V pour le(s) rail(s) 12 V, 5,74 V pour le rail 5 V et 3,76 V pour le rail 3,3 V.
•Protection contre les surintensités (OCP)
L'AX1200i intègre un OCP sur les rails 3,3, 5 et 12 V. L'OCP permet de prévenir toute surintensité des rails en tension continue. L'AX1200i est configurable avec un OCP à rail unique ou un OCP multirails.
•Protection contre les surchauffes
L'OTP permet de mettre le bloc d'alimentation hors tension si sa température interne atteint un certain seuil. Une telle situation est généralement la conséquence d'une surcharge de courant interne ou d'une panne du ventilateur.
•Protection contre les courts-circuits (SCP)
Un court-circuit correspond à une impédance de sortie inférieure à 0,1 ohm. Le SCP permet notamment la mise hors tension du bloc d'alimentation en cas de court-circuit
des rails 3,3, 5 4 et 12 V à la terre ou sur un autre rail. Il protège également l'unité (ou |
13 |
les composants de votre PC) de tout dégât en cas de court-circuit. |
Caractéristiques techniques du bloc d'alimentation
•Dimensions : 150 mm (l) x 86 mm (H) x 200 mm (L)
•MTBF : 100 000 heures.
Contenu de l'emballage
•Bloc d'alimentation Corsair Professional
•Ensemble de câbles modulaires
•Guide de l'utilisateur
•Cordon d'alimentation CA
•Attaches pour câbles
•Vis de fixation
•Badge du boîtier Corsair
•Sac de transport
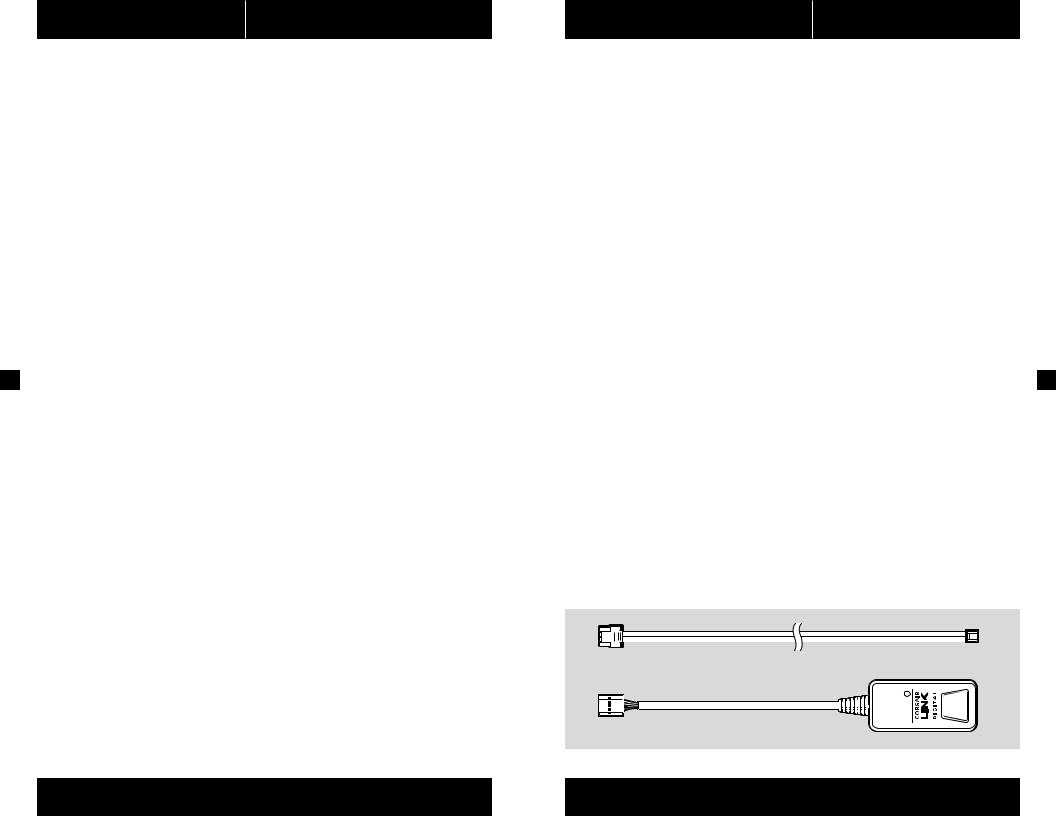
•Câble d'interface numérique Corsair Link™ Digital.
•Clé USB Corsair Link™
Câble d'interface numérique Corsair Link™ Digital.
Clé USB Corsair Link™
|
|
PROFESSIONAL SERIES™ |
|
|
|
|
|
|
|
||||||
|
Configuration des câbles Corsair |
|
|
|
|
|
|
|
|||||||
|
|
|
|
|
|
|
|
|
|
|
|
|
|
|
|
|
|
|
|
|
|
|
|
|
AX1200i |
|
|
|
|
|
|
|
|
|
|
|
|
|
|
|
|
|
|
|
|
|
|
|
|
Qté |
Longueur |
|
Nombre de |
|
|
|
|
|
|
||||
|
|
connecteurs par câble |
|
|
|
|
|
|
|||||||
|
|
|
|
|
|
|
|
|
|
|
|
|
|||
|
|
1 |
|
|
|
610mm ± 10mm |
|
|
1 |
Câble ATX 24 BROCHES (20+4) |
|||||
|
|
|
|
|
|
|
|
|
|
|
|
|
|
|
|
|
|
2 |
|
|
650mm ± 10mm |
|
|
1 |
Câble 12 V EPS/ATX 8 BROCHES |
||||||
|
|
|
|
|
|
(4+4) |
|
|
|
|
|||||
|
|
|
|
|
|
|
|
|
|
|
|
|
|
||
|
|
|
|
|
|
|
|
|
|
|
|
|
|
|
|
|
|
6 |
|
|
600mm ± 10mm |
|
|
1 |
Câble PCI-E 8 broches (6 + 2) |
||||||
|
|
|
|
|
|
|
|
|
|
|
|
|
|
|
|
|
|
3 |
|
|
700mm ± 10mm |
|
|
4 |
CÂBLE SATA (4 SATA) |
|
|
||||
|
|
|
|
|
|
|
|
|
|
|
|
|
|
|
|
|
|
1 |
|
|
|
850mm ± 10mm |
|
|
4 |
CÂBLE SATA (4 SATA) |
|
|
|||
|
|
|
|
|
|
|
|
|
|
|
|
|
|
|
|
|
|
3 |
|
|
750mm ± 10mm |
|
|
4 |
Câble périphérique (4 BROCHES) |
||||||
|
|
|
|
|
|
|
|
|
|
|
|
|
|
|
|
|
|
2 |
|
|
101mm ± 5mm |
|
|
1 |
Câble pour lecteur de disquette |
||||||
|
|
|
|
|
|
(4 BROCHES) |
|
|
|||||||
|
|
|
|
|
|
|
|
|
|
|
|
||||
|
|
|
|
|
|
|
|
|
|
|
|
|
|
|
|
|
|
1 |
|
|
|
800mm ± 10mm |
|
|
1 |
Câble PMBUS (4 BROCHES) |
|
|
|||
|
|
|
|
|
|
|
|
|
|
|
|
|
|
|
|
|
Efficacité du bloc d'alimentation |
|
|
|
|
|
|
|
|||||||
|
|
|
|
|
|
% EFFICACITÉ |
|
|
|
|
|
|
ENTRÉE Vac |
||
14 |
94 |
|
|
|
|
|
|
||||||||
|
|
|
|
|
|
|
|
|
|||||||
|
|
|
|
|
|
|
|
|
|
ENTRÉE Vac |
|
||||
|
90 |
|
|
|
|
|
|
|
|
|
|
|
|||
|
|
|
|
|
|
|
|
|
|
|
|
|
|
||
|
|
|
|
|
|
|
|
|
|
|
|
|
|
||
|
86 |
|
|
|
|
|
|
|
|
|
|
|
|
|
|
|
|
|
|
|
|
|
|
|
|
|
|
|
|
||
|
|
|
|
|
|
|
|
|
|
|
|
|
|
||
|
82 |
|
|
|
|
|
|
|
|
|
|
|
|
|
|
|
|
|
|
|
|
|
|
|
|
|
|
|
|
||
|
|
|
|
|
|
|
|
|
|
|
|
|
|
||
|
78 |
|
|
|
|
|
|
|
|
|
|
|
|
|
|
|
|
|
|
|
|
|
|
|
|
|
|
|
|
||
|
|
|
|
|
|
|
|
|
|
|
|
|
|
||
|
100% |
50% |
|
20% |
|
|
10% |
||||||||
CHARGE DU SYSTÈME
Courbe sonore du ventilateur du bloc d'alimentation
BRUIT DU VENTILATEUR (dB)
40 
30 
20 
0
10% |
20% |
40% |
60% |
80% |
100% |
|
|
CHARGE DU SYSTÈME (Watts) |
|
|
|
|
|
|
|
|
|
|
|
|
|
|
|
PROFESSIONAL SERIES™
Utilisation de la fonctionnalité d'autotest
SELF TEST
Pour utiliser la fonctionnalité d'autotest, veuillez suivre les étapes ci-dessous.
1.Branchez le bloc d'alimentation à une prise secteur et faites passer le bouton d'alimentation au dos du bloc d'alimentation en position « On » (I).
2.Appuyez sur le bouton d'autotest, côté connecteur modulaire du bloc d'alimentation.
3.Si le bouton s'allume en vert et que le ventilateur tourne un instant, tout va bien !
4.Si le bouton s'allume en rouge ou ne s'allume pas du tout, veuillez contacter l'assistance technique de Corsair pour obtenir de l'aide supplémentaire.
Installation de votre nouveau AX1200i
Étape A - Retrait de votre bloc d'alimentation actuel
Si vous montez un tout nouveau système, passez à l'Étape B.
1.Débranchez le cordon d'alimentation CA de votre prise murale ou de l'onduleur ainsi que du bloc d'alimentation actuel.
2.Débranchez tous les câbles d'alimentation de votre carte vidéo, de votre carte
mère et des autres périphériques. |
15 |
3.Suivez les instructions fournies dans le manuel de votre boîtier et désinstallez votre bloc d'alimentation actuel.
4.Passez à l'Étape B.
Étape B : Installation du bloc d'alimentation Corsair Professional
1.Assurez-vous que le câble d'alimentation CA du bloc d'alimentation n'est pas branché.
2.Suivez les instructions fournies dans le manuel de votre boîtier et installez le bloc d'alimentation à l'aide des vis fournies.
3.Le connecteur ATX à 24 broches étant modulaire, il est compatible avec les fiches 20 ou 24 broches.
a.Si votre carte mère possède une fiche à 24 broches, vous pouvez brancher le connecteur directement.
b.Si votre carte mère est équipée d'une fiche à 20 broches, il suffit de détacher le bloc de 4 broches amovible, puis de brancher les 20 broches fixes sur la carte mère, sans le bloc amovible.
4.Branchez le câble +12 V (EPS12V) à 8 broches sur la carte mère.
a.Si votre carte mère possède une fiche +12 V à 8 broches, branchez le connecteur directement.
b.Si votre carte mère est équipée d'une fiche à 4 broches, détachez le bloc amovible de 4 broches, puis branchez les 4 broches restantes directement.
AVERTISSEMENT : le bloc de 4 broches amovible du connecteur ATX à 24 broches n'est pas un connecteur « P4 » ou « +12 V ». Si vous le branchez à la fiche « P4 » ou « +12 V », vous risquez d'endommager gravement le système.
5.Branchez les câbles périphériques, PCI-Express et SATA.
a. Raccordez les câbles périphériques aux fiches d'alimentation de votre disque dur
 Loading...