


 Loading...
MA1908-EC © 2019 CASIO COMPUTER CO., LTD.
Operation Guide 5594
Contents
Before Getting Started...
Watch Face and Display Indicators
Navigating Between Modes
Mode Overview
Shifting the Hands
Viewing the Face in the Dark
Useful Features
Time Adjustment
Using Watch Operations to Adjust the Time Setting
Using the Watch in a Medical Facility or Aircraft
Using Mobile Link with a Mobile Phone
Getting Ready
Auto Time Adjustment
Mode Customization
Customizing the Timekeeping Mode Screen
Viewing Step Count Data
Recording Your Current Location (Location
Memory)
Checking the Distance and Bearing to a Location Memory Point (Location Indicator)
Auto Altitude Calibration
Recording Waypoints and Their Altitudes
(Mission Log)
Configuring World Time Settings
Adjusting Hand Alignment
Phone Finder
Configuring Watch Settings
Changing the Home City Summer Time Setting
Connection
Connecting with a Phone
Canceling a Connection with a Phone
Using the Watch in a Medical Facility or Aircraft
Unpairing
If you purchase another phone
Digital Compass
Taking a Compass Reading
Calibrating the Compass Calibrating Compass Readings
Setting Up for True North Readings (Magnetic Declination Calibration)
Magnetic North and True North
Digital Compass Reading Precautions
Altitude Measurement
Checking the Current Altitude
Calibrating Altitude Readings (Offset)
Checking the Altitude Differential from a Reference Point
Setting the Auto Measurement Interval
Recording Altitude Readings
Specifying the Altitude Measurement Unit
Altitude Reading Precautions
Barometric Pressure
Measurement
Checking the Current Barometric Pressure
Checking Changes in Barometric Pressure
Over Time
Checking the Change in Barometric Pressure between Two Readings
Barometric Pressure Change Indications
Calibrating Barometric Pressure Readings (Offset)
Specifying the Barometric Pressure Unit
Barometric Pressure Reading Precautions
Temperature Measurement
Checking the Current Temperature
Calibrating Temperature Readings (Offset)
Specifying the Temperature Unit
Temperature Reading Precautions
Viewing Altitude Records
Viewing Saved Data
Deleting a Particular Record
Deleting All Records
Sunrise and Sunset Times
Looking Up Today’s Sunrise and Sunset
Times
Looking Up Sunrise and Sunset Times by Specifying a Day
Stopwatch
Measuring Elapsed Time
Measuring a Split Time
Timer
Setting the Timer Start Time
Using the Timer
Alarms and Hourly Time Signal
Configuring Alarm Settings
Configuring the Hourly Time Signal Setting
Turning Off an Alarm or the Hourly Time Signal
World Time
Checking World Time
World Time City Setting
Swapping Your Home City Time and World
Time
Selecting UTC (Universal Coordinated Time)
as Your World Time City
1

Operation Guide 5594
Pedometer
Counting Steps
Causes of Incorrect Step Count
Hand Alignment Adjustment
Adjusting Hand Alignment
Other Settings
Enabling the Button Operation Tone
Reflecting Altitude Differential in Activity
Measurements
Returning the Watch to Its Factory Default
Settings
International Travel
Other Information
City Table
Summer Time Table
Supported Phones
Specifications
Mobile Link Precautions
Copyrights and Registered Copyrights
Troubleshooting
2

Operation Guide 5594
Before Getting
Started...
This section provides an overview of the watch and introduces convenient ways it can be used.
Important!
●This watch is not a special-purpose measuring instrument. Measurement function readings are intended for general reference only.
●Whenever using the Digital Compass of this watch for serious trekking, mountain climbing, or other activities, be sure to always take along another compass to confirm readings. If the readings produced by the Digital Compass of this watch are different from those of the other compass, perform figure 8 calibration or 2-point calibration of the watch compass to ensure better accuracy.
Compass readings and calibration will not be possible if the watch is in the vicinity of a permanent magnet (magnetic accessory, etc.), metal objects, high-voltage wires, aerial wires, or electrical household appliances (TV, computer, cellphone, etc.)
lDigital Compass
●The watch’s Altimeter Mode calculates and displays relative altitude based on barometric pressure readings produced by its pressure sensor. Because of this, altitude values displayed by the watch may be different from your actual elevation and/or sea level elevation indicated for the area where you are located. Regular calibration in accordance with the local altitude (elevation) indications is recommended.
lAltitude Measurement
Note
●The illustrations included in this operation guide have been created to facilitate explanation. An illustration may differ somewhat from the item it represents.
Watch Face and Display
Indicators


AThe second hand points to [R] when the watch is standing by for connection with a phone.
BThe second hand points to [C] when the watch is connected with a phone.
CWith 12 o’clock as the reference point, the second hand indicates either north (compass reading) or the approximate angle differential from your current location to a destination (Location Indicator).
DThe second hand indicates altitude/ barometric pressure differential.
EFlashes while the watch’s hands are shifted for easier reading.
FDisplayed when the indicated time is summer time.
G Displayed when an alarm is turned on.
HDisplayed during p.m. times while 12-hour timekeeping is being used.
I Displayed while Auto Light is enabled.
J Displayed while Mission Log is enabled.
KDisplayed while barometric pressure trend information is enabled.
LShows the barometric pressure measurement unit.
MShows the altitude and distance measurement unit.
N Appears when the hourly time signal is on.
● Battery Replacement
When battery power goes low, will start to flash and some functions will become disabled. If continues to flash, replace the battery.
Request battery replacement from a CASIO service center or your original retailer.
Navigating Between Modes
Your watch has the modes shown below.
●To return to the Timekeeping Mode from any other mode, hold down (E) for at least two seconds.
Altimeter Mode |
C Digital Compass Mode |
A |
|
|
Timekeeping Mode |
|
A |
E |
C |
E |
E |
E |
World Time Mode |
Barometer Mode |
E |
E |
Alarm Mode |
Thermometer Mode |
E |
E |
Timer Mode |
Altitude Record Recall |
Mode |
|
E |
E |
Stopwatch Mode |
Sunrise/Sunset Mode |
E |
Use the buttons in the illustration above to navigate between modes.
3

Operation Guide 5594
|
|
Note |
|
Note |
||||
|
|
|
|
|
|
|
|
|
|
|
● You can use G-SHOCK Connected to |
|
|
● You can use G-SHOCK Connected to |
|||
|
|
change the arrangement of modes, or |
|
|
add the items below to the display. |
|||
|
|
to delete or add modes. |
|
|
You can also remove items from the |
|||
|
|
lMode Customization |
|
|
display and rearrange their display |
|||
|
|
● To perform operations with G-SHOCK |
|
|
locations. |
|||
|
|
Connected, you first need to pair the |
|
|
Year, month, day |
|||
|
|
watch with the phone where the app is |
|
|
Barometric pressure graph |
|||
|
|
installed. |
|
|
World Time hour and minute |
|||
|
|
lC Pair the watch with a phone. |
|
|
Home City sunrise and sunset times |
|||
|
|
|
|
|
|
lCustomizing the Timekeeping |
||
|
|
|
|
|
|
Mode Screen |
||
|
|
|
|
|
|
● To perform operations with G-SHOCK |
||
|
Mode Overview |
|
Connected, you first need to pair the |
|||||
● Timekeeping Mode |
|
watch with the phone where the app is |
||||||
|
installed. |
|||||||
This mode shows the current time and date. |
|
lC Pair the watch with a phone. |
||||||
You can also configure settings to show a |
|
|
|
|||||
|
|
|
||||||
barometric pressure graph, World Time, step |
Connecting with a Paired Phone to Adjust |
|||||||
count, and/or sunrise and sunset times. |
||||||||
You can navigate between display screens by |
the Watch’s Time |
|||||||
Press (B). |
||||||||
pressing (D). |
||||||||
|
|
Day of the week, month, day |
lTriggering Immediate Time Adjustment |
|||||
|
|
Searching for a Paired Phone |
||||||
|
|
|
|
|
||||
|
|
|
|
|
Hold down (B) for about 5 seconds. |
|||
|
|
|
|
|
lPhone Finder |
|||
|
|
|
|
|
● Digital Compass Mode |
|||
|
|
|
|
|
Use this mode to take direction and bearing |
|||
|
|
|
|
|
angle readings. |
|||
|
|
|
|
|
lDigital Compass |
|||
DD
|
|
Barometric pressure |
|
Objective |
Step count |
graph, month, day |
Display screen |
|
|
|
|
|
navigation |
Remeasure |
One |
Daily step |
Barometric |
|
|
second |
|
|
||
later |
count |
pressure graph |
|
|
D |
D |
D |
Hour, minute, second |
|
|
|
|
|
A North indication
B Bearing at 12 o’clock
C Bearing angle at 12 o’clock
● Altimeter Mode
Use this mode to take an altitude reading for your current location.
lAltitude Measurement
Display screen |
|
navigation |
|
Remeasure
A Altitude differential/current time seconds
B Altitude graph
C Altitude
● Barometer Mode
Use this mode to take barometric pressure readings at your current location.
lBarometric Pressure Measurement
Display screen |
|
navigation |
|
Remeasure
ABarometric pressure differential/current time seconds
B Barometric pressure graph
C Barometric pressure
● Thermometer Mode
Use this mode to take temperature readings at your current location.
lTemperature Measurement
Remeasure
A Temperature
4
Operation Guide 5594
● Altitude Record Recall Mode
Use this mode to view altitude records. lViewing Altitude Records
|
Data search |
Data search
ANumber of the record displayed last time the Altitude Record Recall Mode was used
● Sunrise/Sunset Mode
Use this mode to check the sunrise and sunset times for your Home City.
lSunrise and Sunset Times
Date search
Date search
A Year, month, day
B Sunrise time
C Sunrise indicator
D Sunset time
E Sunset indicator
● Stopwatch Mode
Use this mode to measure elapsed time. lStopwatch
|
Split/reset |
Start/Stop
A Stopwatch minutes
B Stopwatch seconds
C Stopwatch: 1/100 second
● Timer Mode
Use this mode to countdown from a desired start time.
lTimer
|
Reset |
Start/Stop
A Timer hours
B Timer minutes
C Timer seconds
● Alarm Mode
The watch will beep when an alarm time is reached.
lAlarms and Hourly Time Signal
When the last screen was an alarm screen
|
|
On/off |
Select alarm/ |
hourly time signal |
Select alarm/ hourly time signal
When the last screen was the hourly time signal screen
|
|
On/off |
Select alarm/ |
hourly time signal |
Select alarm/ hourly time signal
A Alarm number
B Alarm enabled/disabled
C Alarm hour/minute
D Hourly time signal enable/disable
● World Time Mode
This mode shows the current time in 38 cities and UTC (Coordinated Universal Time) time. lWorld Time
Show current city |
Select city |
Select city
A Home City time
B World Time City
C World Time City current time
Shifting the Hands
Hand shift moves the hands out of the way for easy viewing of display information.
1.While holding down (L), press (E).
This will shift the analog hands to allow easy viewing of display information.
2.To return the hands to their normal timekeeping positions, hold down (L) as you press (E) again, or press (E) to change to another mode.
Note
●The hands will resume normal timekeeping automatically if you change modes or if you leave the watch with its hands shifted and do not perform any operation for about one hour.
5

Operation Guide 5594
Viewing the Face in the Dark
The face of the watch can be illuminated for viewing in the dark.
● To illuminate the face manually
Pressing (L) turns on illumination.
●Illumination will turn off automatically if an alarm starts to sound.
●To illuminate the face when Auto Light is enabled
If Auto Light is enabled, the face illumination will turn on automatically whenever the watch is positioned at an angle of 40 degrees or more.
40 degrees or more
Important!
●Auto Light may not operate properly when the watch is at a horizontal angle of 15 degrees or greater from horizontal as shown in the illustration below.
●Electro-static charge or magnetism can interfere with proper auto light operation. If this happens, try lowering your arm and then angle it towards your face again.
●When moving the watch you may note a slight rattling sound. This is due to operation of the auto light switch, which determines the current orientation of the watch. It does not indicate malfunction.
Note
●Auto Light is disabled when any one of the conditions below exists.
Alarm, timer alert, or other beeper sounding
Hand movement operation is in progress
Watch in the Compass Mode
●Configuring the Auto Light Setting
Holding down (L) for at least three seconds in the Timekeeping Mode toggles Auto Light between enabled and disabled.
●[LT] is displayed while Auto Light is enabled.
●If you do not disable it manually, Auto Light remains enabled for approximately six hours. After that, it becomes disabled automatically.
On
● Specifying the Illumination Duration
You can select either 1.5 seconds or three seconds as the illumination duration.
1.Enter the Timekeeping Mode. lNavigating Between Modes
2.Hold down (D) for at least two seconds. Release the button when the name of the currently selected Home City appears on the display.
Home City
3.Press (E) three times so [LT] is displayed.
4.Press (A) to toggle between the two illumination duration settings.
[1]: 1.5-second illumination [3]: 3-second illumination
5.Press (D) twice to exit the setting screen.
Useful Features
Pairing the watch with your phone makes a number of the watch’s features easier to use.
Auto time adjustment lAuto Time Adjustment
12:30
Selection of More Than 300 World Time cities
lConfiguring World Time Settings
Data transfer to a phone lViewing Step Count Data
6
Operation Guide 5594
Use your phone to check the distance and bearing to a point in Location Memory lChecking the Distance and Bearing to a
Location Memory Point (Location Indicator)
Use your phone to record route waypoints and their altitudes
lRecording Waypoints and Their Altitudes (Mission Log)
In addition, a number of other watch settings can be configured using your phone.
To transfer data to a watch and to configure settings, you first need to pair the watch with your phone.
lGetting Ready
●Your phone needs to have the CASIO “G- SHOCK Connected” app installed to pair with the watch.
Time Adjustment
Your watch can connect with a phone to obtain information that it uses to adjust its date and time setting.
Important!
●Disable Auto Time Adjustment when you are on an aircraft or in any other location where radio signals may cause problems.
lUsing G-SHOCK Connected to Configure Settings
lUsing Watch Operations to Configure Settings
Referring to the information below, configure the time setting in accordance with the method that suits your own lifestyle.
Do you use a phone?
Time adjustment by connecting with your phone is recommended.
lAuto Time Adjustment
12:30
If your phone cannot connect with the watch
You can adjust time settings by performing operations on the watch.
lUsing Watch Operations to Adjust the Time Setting
Using Watch Operations to Adjust the Time Setting
If your watch cannot connect with a phone for some reason, you can use watch operations to adjust date and time settings.
● Setting a Home Time City
Use the procedure in this section to select a city to use as your Home City. If you are in an area that observes summer time, you can also enable or disable summer time.
Note
●The initial factory default summer time setting for all cities is [AUTO]. In many cases, the [AUTO] setting lets you use the watch without switching between summer time and standard time.
1.Enter the Timekeeping Mode. lNavigating Between Modes
2.Hold down (D) for at least two seconds. Release the button when the name of the currently selected Home City appears on the display.
Home City
3. Use (A) and (C) to change the Home City.
●For details refer to the information below.
lCity Table
4.Press (E).
5.Use (A) to select a summer time setting.
Each press of (A) cycles through available settings in the sequence shown below.
●[AUTO]
The watch switches between standard time and summer time automatically.
●[OFF]
The watch always indicates standard time.
●[ON]
The watch always indicates summer time.
6. Press (D) twice to exit the setting screen.
7
Operation Guide 5594
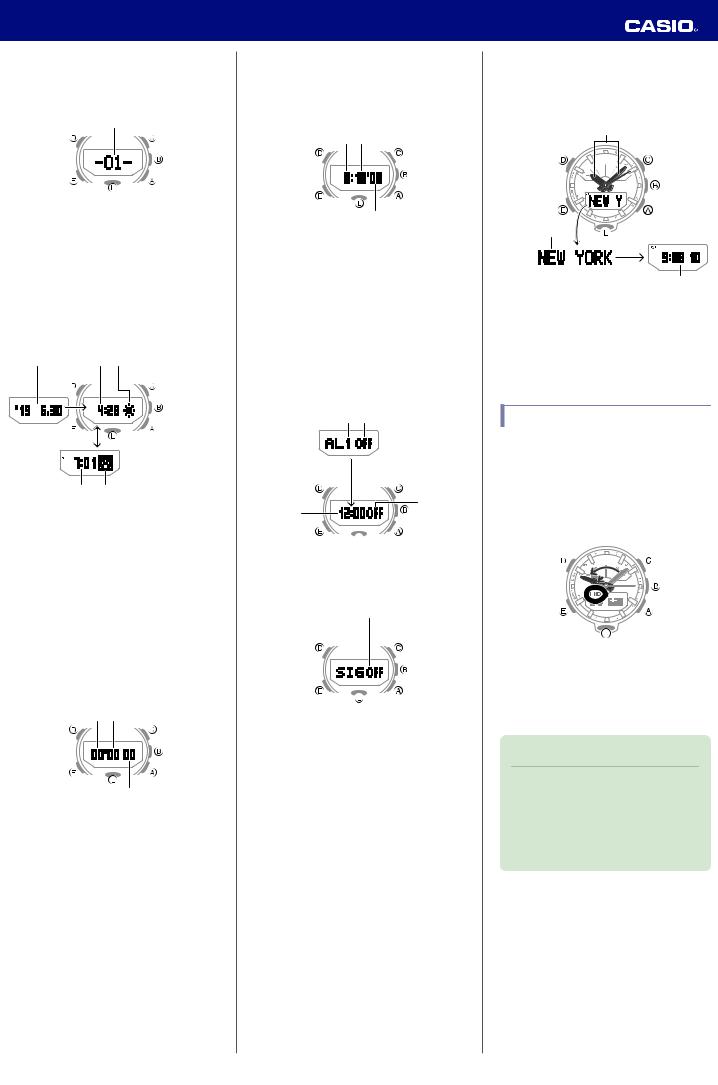
● Setting the Time/Date
1.Enter the Timekeeping Mode. lNavigating Between Modes
2.Hold down (D) for at least two seconds. Release the button when the name of the currently selected Home City appears on the display.
Home City
3.Press (D).
This causes the seconds to flash.
4.Keep pressing (E) until the setting item you want to change is selected.
●Each press of (E) moves to the next setting item in the sequence shown below.
Seconds
Hours
Minutes
Year
Month
Day
5.Configure the date and time settings.
●To reset the seconds to 00: Press (A). 1 is added to the minutes when the current count is between 30 and 59 seconds.
●Use (C) and (A) to change the other settings.
6.Repeat steps 4 and 5 to configure time and date settings.
7.Press (D) to exit the setting screen.
●Switching between 12-hour and 24hour Timekeeping
You can specify either 12-hour format or 24hour format for the time display.
1.Enter the Timekeeping Mode. lNavigating Between Modes
2.Hold down (D) for at least two seconds. Release the button when the name of the currently selected Home City appears on the display.
Home City
3.Press (E) four times.
This causes [12H] or [24H] to flash on the display.
4.Press (A) to toggle the setting between [12H] (12-hour timekeeping) or [24H] (24hour timekeeping).
12-hour timekeeping |
|
24-hour timekeeping |
|
|
|
5. Press (D) twice to exit the setting screen.
Using the Watch in a Medical Facility or Aircraft
Whenever you are in a hospital, on an aircraft, or in any other location where connection with a phone may cause problems, you can perform the procedure below to disable auto time adjustment. To re-enable auto time adjustment, perform the same operation again.
1.Enter the Timekeeping Mode. lNavigating Between Modes
2.Hold down (D) for at least two seconds. Release the button when the name of the currently selected Home City appears on the display.
Home City
3.Press (E) five times. This displays [RCV].
4.Press (A) to select the auto time adjustment setting you want.
[OFF]: Auto time adjustment disabled. [ON]: Auto time adjustment enabled.
5.Press (D) twice to exit the setting screen.
Note
●If the watch is paired with a phone, G- SHOCK Connected can be used to disable auto time adjustment.
lUsing G-SHOCK Connected to Disable Auto Time Adjustment
8

Operation Guide 5594
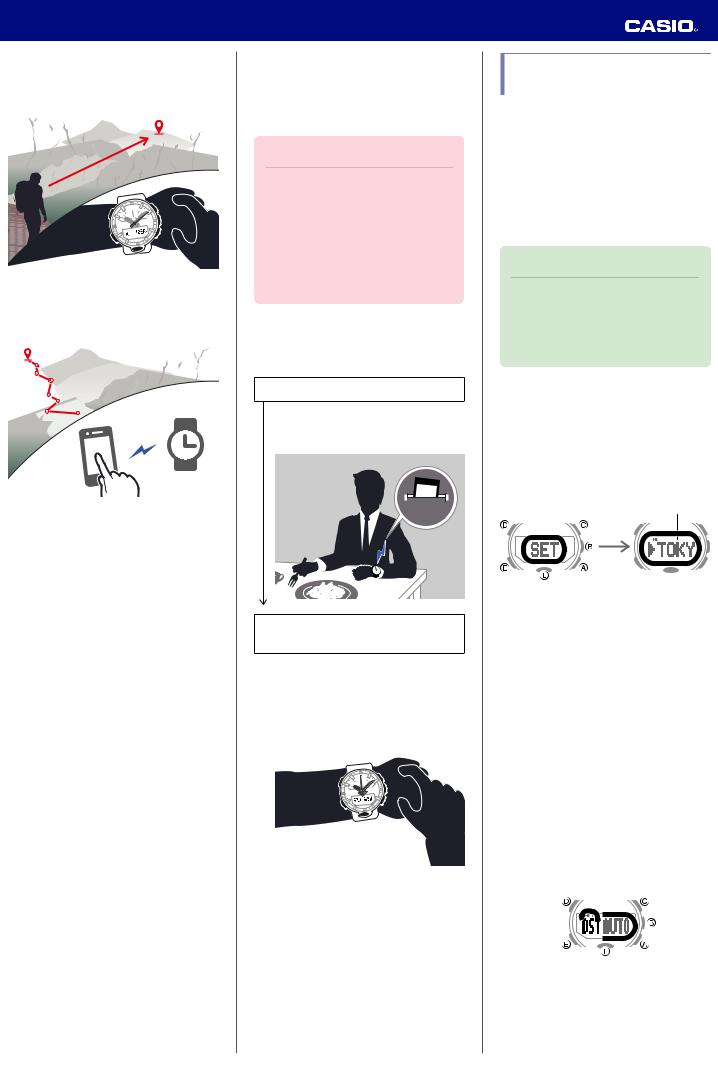
Using Mobile Link with a Mobile Phone
While there is a Bluetooth connection between the watch and phone, the watch time setting is adjusted automatically. You can also change the watch’s other settings.
Note
●This function is available only while G- SHOCK Connected is running on the phone.
●This section describes watch and phone operations.
X : Watch operation Y : Phone operation
Getting Ready
To use your watch in combination with a phone, you first need to pair them. Perform the steps below to pair the watch with a phone.
●A Install the required app on your phone.
In Google Play or the App Store, search for the CASIO “G-SHOCK Connected” app and install it on your phone.
● B Configure Bluetooth settings.
Enable the phone’s Bluetooth.
Note
●For details about setting procedures, see your phone documentation.
● C Pair the watch with a phone.
Before you can use the watch in combination with a phone, you first need to pair them.
1.Move the phone to be paired with close to (within one meter of) the watch.
2.Y Tap the “G-SHOCK Connected” icon.
3.Y Perform the operation shown on the screen of the phone to be paired with.
●If a pairing prompt message appears, perform the operation shown on the phone screen.
●After pairing starts, the second hand will move to [R]. When pairing is complete, the second hand will move to [C].
Auto Time Adjustment
The watch will connect with a phone at preset times each day and adjust its time settings.
● Using Auto Adjust
Your watch adjusts its time setting four times a day according to a preset schedule. If you leave your watch in the Timekeeping Mode, it will perform the adjustment operation automatically as you go about your daily life, without any operation required by you.
12:30
●If pairing fails for some reason, the watch will return to the state in step 1 of this procedure. Perform the pairing procedure again from the beginning.
Note
●The first time you start up G-SHOCK Connected, a message will appear on your phone asking if you want to enable location information acquisition. Configure settings to allow background use of location information.
Important!
●The watch may not be able to perform auto time adjustment under the conditions described below.
While the watch is too far away from its paired phone
While communication is not possible due to radio interference, etc.
While the phone is updating its system
While G-SHOCK Connected is not running on the phone
Note
●If the watch does not indicate the correct time even if it is able to connect with a phone, adjust the hand and day indicator alignment.
lAdjusting Hand Alignment
●If there is a World Time City specified with G-SHOCK Connected, its time will also be adjusted automatically.
●The watch will connect with the phone and perform auto time adjustment at around 12:30 a.m., 6:30 a.m., 12:30 p.m. and 6:30 p.m. The connection is automatically terminated after auto time adjustment is complete.
9
Operation Guide 5594
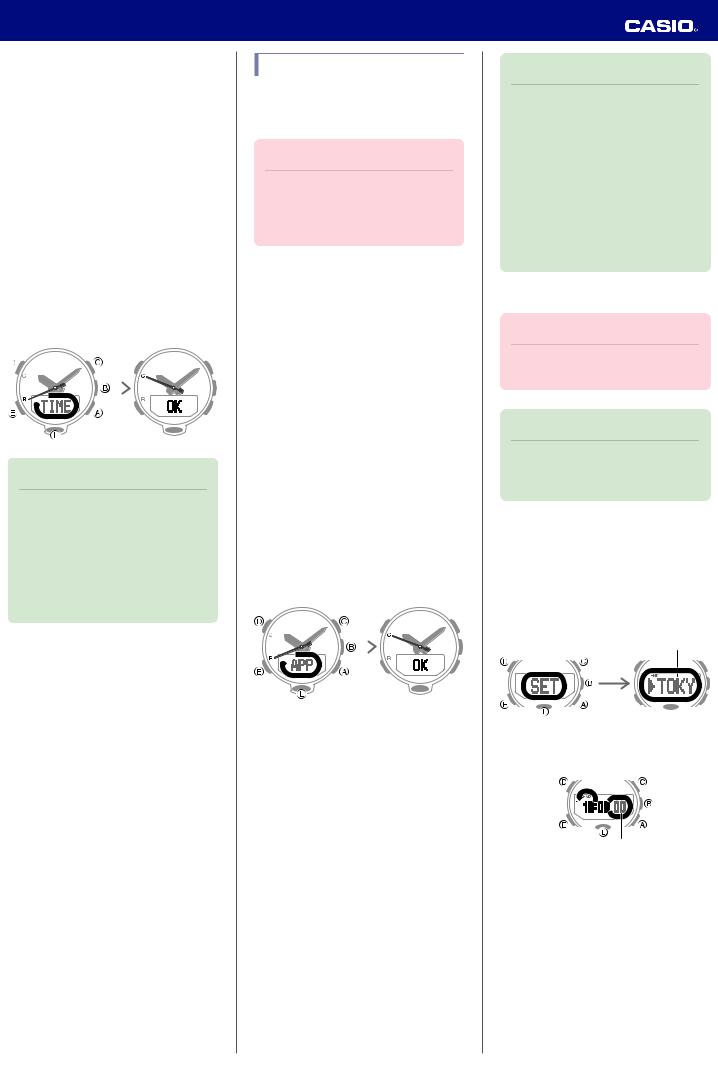
● Triggering Immediate Time Adjustment
The watch’s time setting will be adjusted automatically whenever you establish a connection between the watch and a phone. Whenever you want to adjust the watch’s time setting based on your phone's time, perform the procedure below to connect with a phone.
1.Move the phone close to (within one meter of) the watch.
2.X Press (B).
[TIME] flashes to indicate that the watch has started the connection operation. When a connection is established between the watch and phone, [OK] will appear, time information will be acquired, and then the watch’s time setting will be adjusted.
Trying to connect |
|
Following time |
|
|
adjustment |
|
|
|
Note
●You can perform the above operation for time adjustment from any watch mode.
●The connection is terminated automatically after time adjustment is complete.
●If time adjustment fails for some reason, [ERR] will appear.
Mode Customization
You can use G-SHOCK Connected to customize modes by rearranging them on the screen, and by deleting or adding modes.
Important!
●You cannot perform mode customization operations on the watch. Use G-SHOCK Connected to configure settings.
The modes below can be rearranged or deleted.
●Barometer Mode
●Thermometer Mode
●Altitude Record Recall Mode
●Sunrise/Sunset Mode
●Stopwatch Mode
●Timer Mode
●Alarm Mode
●World Time Mode
1.Y Tap the “G-SHOCK Connected” icon.
2.X Hold down (B) for at least two seconds until the second hand points to [R] twice.
When a connection is established between the watch and phone, [APP] will change to [OK], and the second hand will move from [R] to [C].
Trying to connect |
|
Connection |
|
|
successful |
|
|
|
3.Y Perform the operations shown on the phone screen to configure mode settings.
Note
●Increasing or decreasing the number of modes may change mode functions and/or settings.
●Even if you remove the Barometer Mode, you can still display the barometric pressure graph on the Timekeeping Mode screen.
●Even if you remove the Sunrise/Sunset Mode, you can still display sunrise and sunset times on the Timekeeping Mode screen.
●To initialize Mode Customization
Important!
●Initializing Mode Customization also initializes watch settings.
Note
●Mode Customization cannot be initialized while Mission Log is enabled.
1.X Enter the Timekeeping Mode. lNavigating Between Modes
2.XHold down (D) for at least two seconds. Release the button when the name of the currently selected Home City appears on the display.
Home City
3.X Press (D).
This causes the seconds to flash.
Seconds
4.XHold down (C) for at least five seconds. Release it when [RESET] stops flashing. This initializes Mode Customization.
5.X Press (D) to exit the setting screen.
10
Operation Guide 5594
Customizing the
Timekeeping Mode Screen
You can use G-SHOCK Connected to rearrange display items on the Timekeeping Mode, and to add or remove items.
Important!
●Note that you cannot use watch operations to configure display item settings. Use G-SHOCK Connected to configure settings.
The items below can be displayed.
●Day of the week, month, day
●Year, month, day *
●Barometric pressure graph, month, day
●Barometric Pressure Graph *
●Hour, minute, second
●World Time hour, minute *
●Step count
●Home Time City sunrise/sunset times *
* Item that can be added using G-SHOCK Connected. These items are not displayed under initial default settings.
1.Y Tap the “G-SHOCK Connected” icon.
2.X Hold down (B) for at least two seconds until the second hand points to [R] twice.
When a connection is established between the watch and phone, [APP] will change to [OK], and the second hand will move from [R] to [C].
Trying to connect |
|
Connection |
|
|
successful |
|
|
|
3.Y Perform the operations shown on the phone screen to configure mode settings.
Viewing Step Count Data
G-SHOCK Connected can be used to view the information below, which is measured by the watch.
●Your step count and physical exertion over the past 24 hours
●Weekly number of steps, calories burned
1.Y Tap the “G-SHOCK Connected” icon.
2.X Hold down (B) for at least two seconds until the second hand points to [R] twice.
When a connection is established between the watch and phone, [APP] will change to [OK], and the second hand will move from [R] to [C].
Trying to connect |
|
Connection |
|
|
successful |
|
|
|
3.Y Follow the instructions on the screen to display pedometer data.
Note
●You can also use G-SHOCK Connected to specify a daily step target.
●Though the step count is displayed on the watch in real time, G-SHOCK Connected displays step counts at the time when a connection is established between the watch and phone. Because of this, the step counts displayed by G-SHOCK Connected may be different from those displayed by the watch.
Recording Your Current
Location (Location Memory)
You can use G-SHOCK Connected to record current location information.
1.Y Tap the “G-SHOCK Connected” icon.
2.X Enter the Timekeeping Mode or Compass Mode.
lNavigating Between Modes
3.X Hold down (C) for at least five seconds until [MEMORY] starts to flash. Release the button when the second hand points to [R] twice.
If location information is successfully acquired after a connection is established between the watch and phone, [MEMORY] will change to [OK], and the second hand will move from [R] to [C].
●[ERR] will appear on the display if connection fails for some reason.
●[FAILED]n[POSITION] will appear in sequence if location information acquisition fails for some reason.
Trying to connect |
|
Connection |
|
|
successful |
|
|
|
4.Y Perform the operation shown on the phone screen to view the Location Memory information record.
●You can have only one location record in memory. Saving location information while there is already a location record in memory will overwrite the existing record with the new information.
Note
●If there is location information stored in Location Memory, you can use Location Indicator to check the distance and bearing to the stored location.
lChecking the Distance and Bearing
to a Location Memory Point
(Location Indicator)
11

Operation Guide 5594
Checking the Distance and Bearing to a Location Memory Point (Location Indicator)
The watch acquires current location information from the phone, and then displays the bearing and distance from your current location to the location recorded in Location Memory.
lRecording Your Current Location (Location Memory)
Memory point 
Bearing to memory point
Distance to memory point
Important!
●Note that G-SHOCK Connected operation is disabled while Location Indicator is in use.
1.Y Tap the “G-SHOCK Connected” icon.
2.X Enter the Timekeeping Mode or Compass Mode.
lNavigating Between Modes
3.X Hold down (C) for at least two seconds until [INDICATE] starts to flash. Release the button when the second hand moves to [R].
When a connection is established between the watch and phone and location information acquisition is successful, [INDICATE] will change to [OK], and the second hand will move from [R] to [C].
After two seconds the distance from your current location to the recorded location will appear on the display, and the second hand will indicate the bearing to the destination.
Second hand 

After two seconds
Bearing to destination
*1
Distance from your current |
*2 |
location |
|
*1
When the second hand is within the range between 55 seconds to 05 seconds (indicating that you are within 30 degrees of the bearing to the destination), [ ] will be displayed as a light figure on a dark background.
*2
[G] is shown on the display when you are within 80 meters of the destination. [G] will disappear from the display if you move to a distance of 161 meters or more from the destination.
4.X Check the display distance and the bearing to your destination on the display.
Note
●Location Indicator remains enabled for three minutes.
●The watch connects with the phone and acquires location information every 10 seconds or each time (B) is pressed, and uses the information to refresh the distance and the bearing to the point stored in Location Memory.
●Location Indicator will become disabled automatically about three minutes after it is enabled. You can also disable it manually by pressing any button besides (B) or (L).
●Pressing (B) or (L) while Location Indicator is enabled will cause it to remain enabled for three minutes after the button is pressed.
●Pressing (B) to update data causes [ TRY] to appear on the display and remain displayed until data updating is complete.
●[ FAIL] will appear on the display in the cases below.
When it has been 30 seconds or more since the last update and location information acquisition fails
When it has been 60 seconds or more since the last update
When data acquisition fails after you press (B)
●The display range for the distance to a destination is 0 to 99,999 meters (0 to
327,995 feet). [ -----] will be shown for the distance to the destination when it is outside the display range.
●[ERR] will appear on the display if connection fails for some reason.
●The message [NO-DATA] will appear when there is no data in Location Memory.
●[FAILED]n[POSITION] will appear in sequence if the first location information acquisition fails.
●[ ] or [G] will flash on the display if the watch detects abnormal magnetism while Location Indicator is in use.
●[ ERR] will appear on the display if a direction sensor error occurs while Location Indicator is in use.
12
Loading...