

Canon MVX10, MVX10i Instruction Manual
Digital Video Camcorder
Mini
Digital
Video
Cassette
Instruction Manual
PUB.DIE-196
English
Introduction
Mastering
the Basics
Using the
Full Range
of Features
Editing
Using a
Memory Card
Direct
Printing
PUB.DIE-196
Additional
Information
PAL
Important Usage Instructions
E
Introduction
WARNING:
TO REDUCE THE RISK OF ELECTRIC SHOCK, DO NOT REMOVE COVER (OR
BACK). NO USER SERVICEABLE PARTS INSIDE. REFER SERVICING TO
QUALIFIED SERVICE PERSONNEL.
WARNING:
TO REDUCE THE RISK OF FIRE OR ELECTRIC SHOCK, DO NOT EXPOSE THIS
PRODUCT TO RAIN OR MOISTURE.
CAUTION:
TO REDUCE THE RISK OF ELECTRIC SHOCK AND TO REDUCE ANNOYING
INTERFERENCE, USE THE RECOMMENDED ACCESSORIES ONLY.
CAUTION:
DISCONNECT THE MAINS PLUG FROM THE SUPPLY SOCKET WHEN NOT IN USE.
CA-570 identification plate is located on the bottom.
• Use of CV-150F/CV-250F DV cable is necessary to comply with the technical requirement
of EMC Directive.
2

Reference Guide
The following manuals are supplied with the camcorder:
❍ Digital Video Camcorder MVX10i Instruction Manual
This manual explains the camcorder operations from basic video recording to the
use of the full range of features.
❍ Digital Video Software Instruction Manual
This manual explains how to download images from the memory card to a
E
computer using the supplied USB cable. You can add sample images for Card Mix
and My Camera settings from the supplied DIGITAL VIDEO SOLUTION DISK.
❍ Windows XP Users Only
DV Network Software Instruction Manual
This manual explains how to connect the camcorder to a computer and use the
following software:
• DV Messenger Version 2 (USB or IEEE1394): This software operates with Windows
Messenger and allows you to perform videoconference and file transfer over the
Internet, or to remotely access the camcorder at home.
•AV/C Camera Storage Subunit-WIA Driver (IEEE1394): Allows you to
download/upload images to/from the computer and use the camcorder as a card
reader/writer.
Trademark Acknowledgements
• Canon and Bubble Jet are registered trademarks of Canon Inc.
• D is a trademark.
Introduction
• logo is a trademark.
•Windows®is either a registered trademark or trademark of Microsoft Corporation in
the United States and/or other countries.
• Macintosh and Mac OS are trademarks of Apple Computer, Inc., registered in the
United States and other countries.
• Other names and products not mentioned above may be registered trademarks or
trademarks of their respective companies.
MPEG-4 Visual Consumer Recorded Video Decoders and/or Encoders
USE OF THIS PRODUCT IN ANY MANNER THAT COMPLIES WITH THE MPEG-4
VISUAL STANDARD IS PROHIBITED, EXCEPT FOR USE BY A CONSUMER ENGAGING
IN PERSONAL AND NON-COMMERCIAL ACTIVITIES.
3

Table of Contents
Introduction
E
Introduction
Reference Guide ..............................................................................................................3
Thank You for Choosing a Canon ................................................................................7
Introducing the MVX10i ................................................................................................8
Components Guide ........................................................................................................9
Mastering the Basics
Preparations
Using a Household Power Source ..............................................................................13
Attaching and Charging the Battery Pack ................................................................14
Installing the Backup Battery ......................................................................................17
Preparing the Camcorder ............................................................................................18
Loading a Cassette ........................................................................................................19
Using the Wireless Controller......................................................................................21
Setting the Time Zone, Date and Time......................................................................22
Basic Recording
Recording Movies on a Tape ......................................................................................25
Zooming ........................................................................................................................27
Using the LCD Screen....................................................................................................29
Searching and Reviewing when Recording ..............................................................32
Tips for Making Better Videos ....................................................................................33
Basic Playback
Playing Back a Tape ......................................................................................................34
Playing Back on a TV Screen........................................................................................37
Using the Full Range of Features
General
Menus and Settings ......................................................................................................41
Changing the Remote Sensor Mode ..........................................................................47
Customizing the Camcorder ........................................................................................48
Other Camcorder Settings ..........................................................................................49
Recording
Changing the Recording Mode (SP/LP) ......................................................................51
Recording Still Images on the Tape ............................................................................52
Using the Built-in Flash ................................................................................................54
Using the Recording Programs....................................................................................57
Using Digital Effects......................................................................................................61
Using the Multi-Image Screen ....................................................................................67
Turning Off the Image Stabilizer ................................................................................69
Recording With the Self-Timer....................................................................................70
Audio Recording ..........................................................................................................71
Manual Adjustments
Adjusting the Focus Manually ....................................................................................74
Adjusting Exposure Manually......................................................................................76
4

Setting the Shutter Speed............................................................................................77
Setting the White Balance ..........................................................................................79
Playback
Magnifying the Image..................................................................................................81
Displaying the Data Code ............................................................................................82
Photo Search/Date Search............................................................................................84
Returning to a Pre-marked Position ..........................................................................85
Editing
Recording to a VCR or Digital Video Device ............................................................86
Recording from Analog Video Devices (VCR, TV or Camcorder) ..........................88
Recording from Digital Video Devices (DV Dubbing)..............................................89
Converting Analog Signals into Digital Signals (Analog-Digital Converter) ........91
Replacing Existing Scenes (AV Insert) ........................................................................93
Audio Dubbing..............................................................................................................95
Connecting to a Computer Using a DV (IEEE1394) Cable ......................................98
Using a Memory Card
Inserting and Removing the Memory Card ..............................................................99
Selecting the Image Quality/Size ..............................................................................100
Recording Still Images on a Memory Card..............................................................103
Selecting the Focusing Point ....................................................................................107
Selecting the Drive Mode ..........................................................................................109
Recording Panoramic Images (Stitch Assist Mode) ................................................111
Recording MPEG-4 Movies on a Memory Card ......................................................113
Playing Back a Memory Card ....................................................................................115
Protecting Images ......................................................................................................118
Erasing Images ............................................................................................................119
Selecting Still Images for Printing (Print Order) ....................................................120
Combining Images (Card Mix) ..................................................................................122
Copying Still Images....................................................................................................126
Formatting a Memory Card ......................................................................................128
Connecting to a Computer Using a USB Cable ......................................................129
Memory Card Information ........................................................................................131
E
Introduction
Direct Printing
Printing Still Images (Direct Printing) ......................................................................134
Selecting the Print Settings (Style/Paper Settings)..................................................137
Printing with Print Order Settings ............................................................................141
Additional Information
About the NETWORK Mode ....................................................................................142
Screen Displays ............................................................................................................143
List of Messages ..........................................................................................................147
Maintenance................................................................................................................150
Troubleshooting ..........................................................................................................153
System Diagram ..........................................................................................................156
Optional Accessories ..................................................................................................157
Specifications ..............................................................................................................159
Index ............................................................................................................................161
5
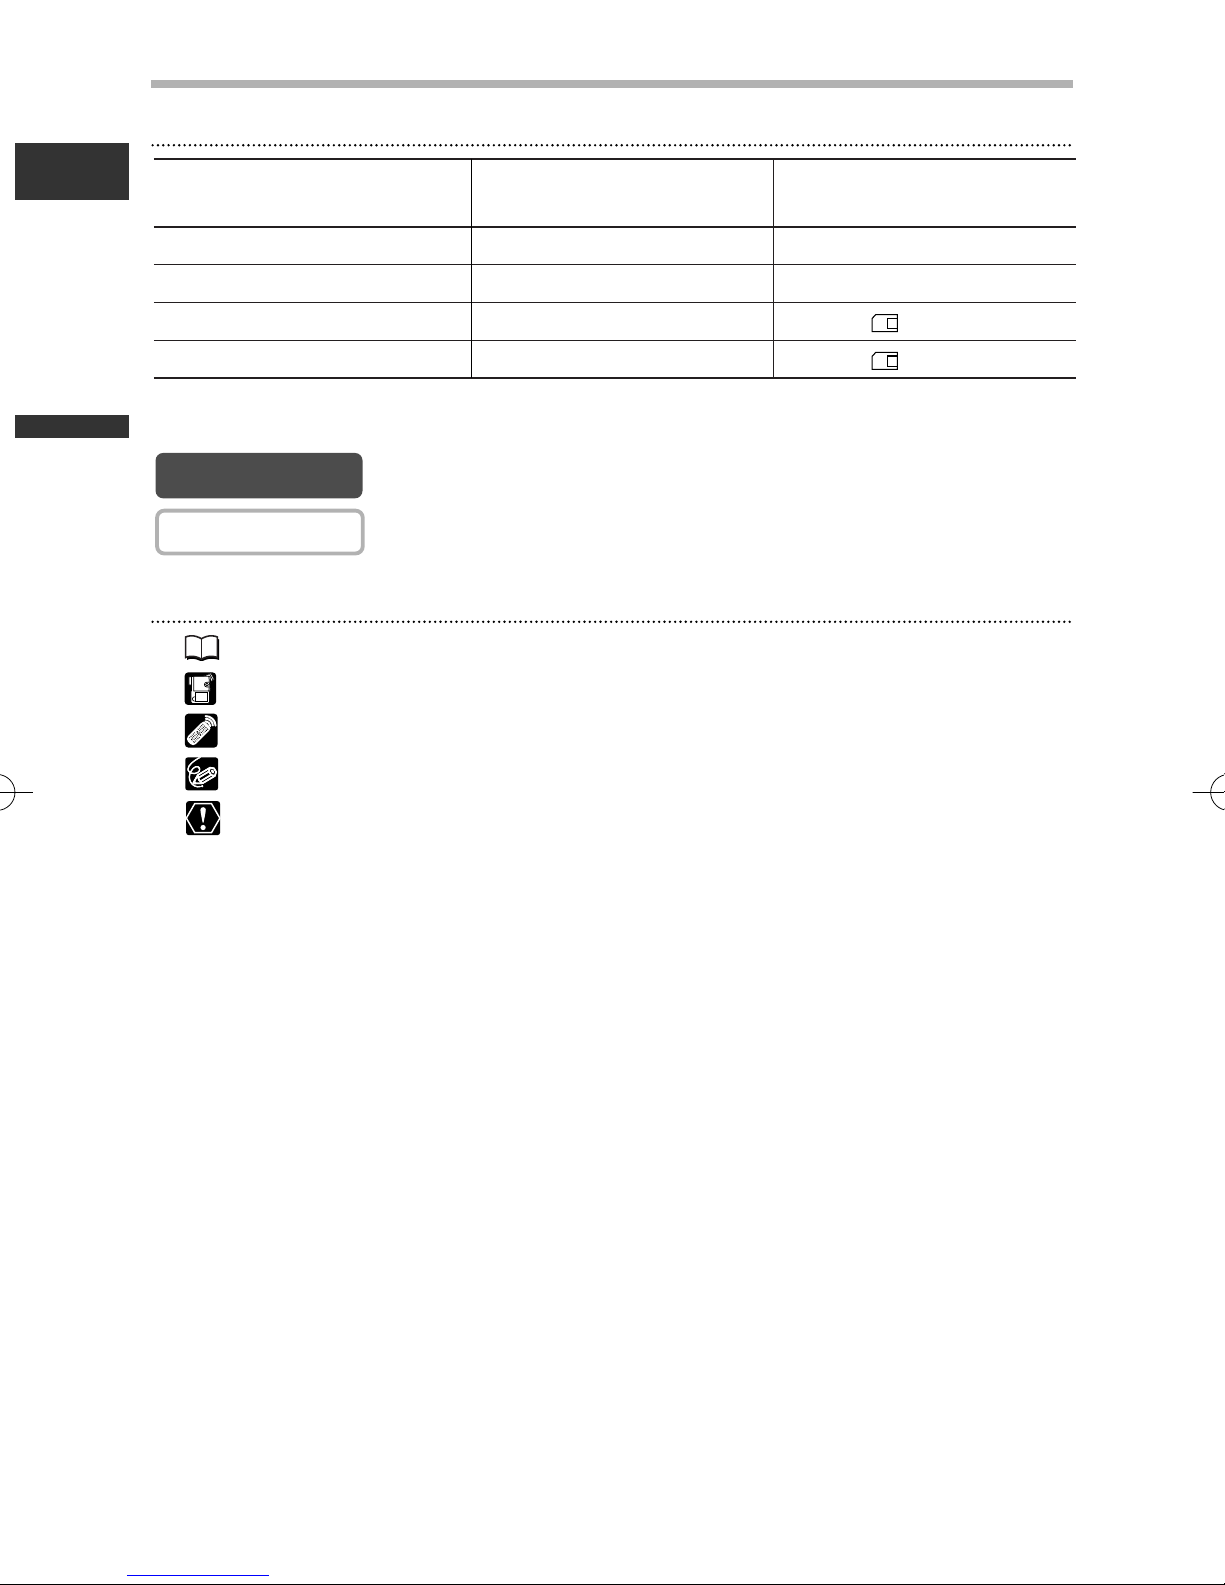
Conventions Used in This Manual
CAMERA
CAMERA
Operating Mode
Position of the
POWER Switch
Position of the
TAPE/CARD Switch
CAMERA CAMERA b (TAPE)
PLAY (VCR) PLAY (VCR) b (TAPE)
CARD CAMERA CAMERA (CARD)
CARD PLAY (VCR) PLAY (VCR) (CARD)
Operating Modes
E
Available functions depend upon the operating mode. It is indicated as follows:
: Function can be used in this mode.
: Function cannot be used in this mode.
Introduction
Other Symbols and References
❍ : Reference page number.
❍ : Functions to be operated on the body of the camcorder.
❍ : Functions to be operated on the wireless controller.
❍ : Additional topics that complement the basic operating procedures.
❍ :Precautions related to the camcorder operation.
❍ Capital letters are used to refer to buttons on the camcorder or the wireless
controller.
❍ [ ] are used to refer to menu items displayed on the screen.
❍ “Screen” refers to the LCD and the viewfinder screen.
6

Thank You for Choosing a Canon
The Canon MVX10i provides a full range of options and functions. We recommend
reading this manual thoroughly before you use the camcorder. It will help you to
become more familiar with your camcorder, and learn how to operate it properly.
We suggest that you master the basic operations of the camcorder first, before
moving on to its full range of features.
Checking Supplied Accessories
E
WL-D81 Wireless
Controller
BP-407 Battery Pack CA-570 Compact
PC-A10 SCART
Adapter
(Europe and Asia)
Two AA Batteries Lens Cap and Lens
Power Adapter
(incl. power cord)
IFC-300PCU USB Cable SDC-8M SD Memory
Cap Cord
STV-250N Stereo
Video Cable
Card (containing
sample images)
Lithium Button
Battery CR2025
S-150 S-video Cable
Case for SD Memory
Card
Introduction
DIGITAL VIDEO
SOLUTION DISK
For Windows
For Macintosh
7

Introducing the MVX10i
2 Megapixel CCD
E
The MVX10i incorporates a 2 megapixel
CCD, allowing recording of highresolution still images on a memory card.
(Tape: 1.77 megapixels)
10× Optical and
200× Digital Zoom
(Card: 40× Digital Zoom)
Image Stabilizer
Stabilizes your recordings even in long
Introduction
telephoto shots.
Night and Super Night Mode
You can keep on shooting in dark places
with the Night and Super Night mode. In
the Super Night mode, the assist lamp
(white LED) lights up to illuminate the
subject.
Still Images
Just press the photo button to capture
still images like photographs.
16:9 Widescreen Mode*
You can record high-resolution videos in
the 16:9 format for widescreen TVs.
* In CAMERA mode only.
Memory Card
You can record still images and MPEG-4
movies on a SD Memory Card or
MultiMediaCard. Images recorded in
Stitch Assist mode can be merged into
one panoramic scene with the supplied
software.
Direct Print
You can print still images by connecting
to a Canon printer with Direct Print
function or to a PictBridge-compliant
printer.
USB Terminal
Allows transfer of memory card data to
a computer with built-in USB port. You
can organise and edit images on your
computer using the supplied software.
IEEE1394 DV Terminal
Built-in Flash
The MVX10i has a built-in flash for
recording still images.
My Camera Settings
You can personalise your camcorder by
customizing the start-up image and
camcorder sounds.
Manual Audio Recording Level
Adjustment
Analog Line-in Recording/
Audio Dubbing/AV Insert Editing
8
The DV terminal allows high-quality
transfer with virtually no deterioration in
quality of images. You can edit images
by connecting the camcorder to a PC
with IEEE1394 terminal.
DV Messenger (Windows XP only)
Windows XP users can use the supplied
software to perform videoconference
and file transfer over the Internet by
connecting the camcorder to a computer
using a USB or DV (IEEE1394) cable.
*
Windows Messenger 4.5, 4.6 or 4.7 required.

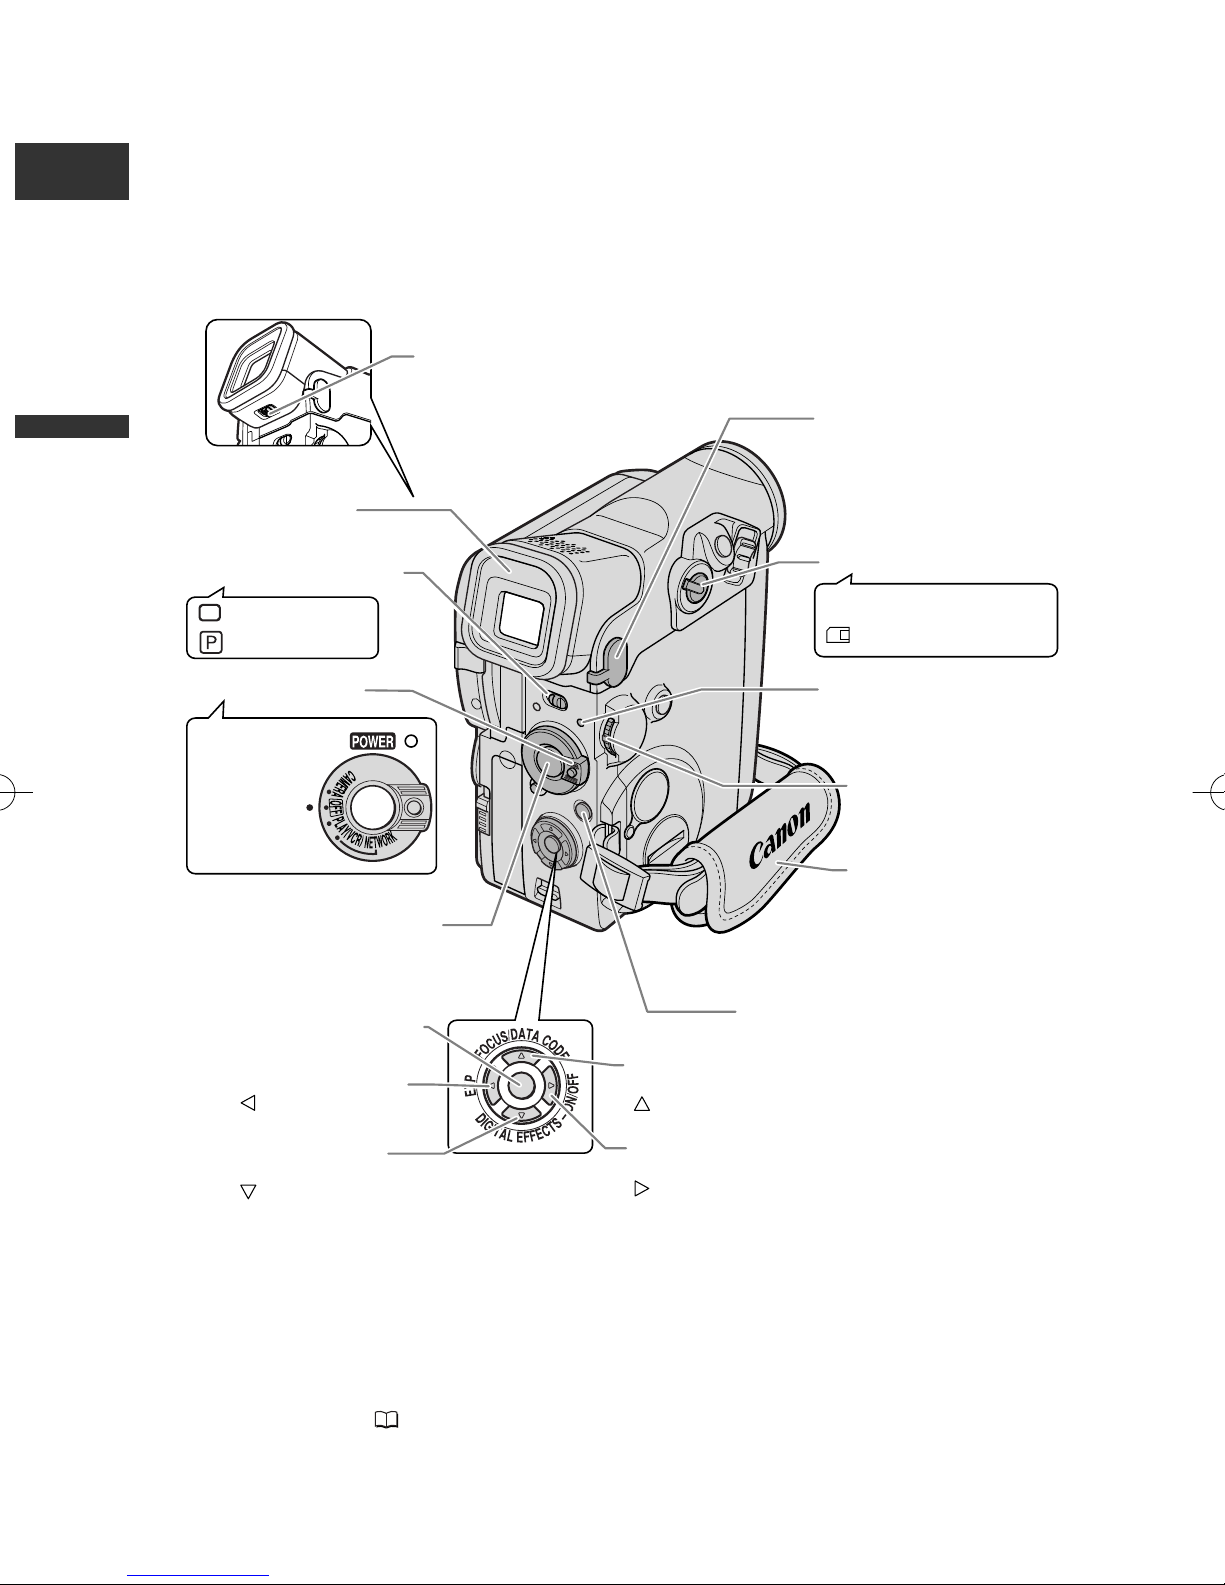
Components Guide
PUSH
(
L
I
N
E
-
I
N
)
R
E
C
P
A
U
S
E
CARD
STILL/
MOVIE
REC SEARCH
CARD MIX/
SLIDE SHOW
CARD
Card access indicator
CARD MIX button (p. 124) /
SLIDE SHOW button (p. 117) /
(stitch assist) button
(p. 111)
Memory card slot
(p. 99)
OPEN/EJECT switch
(p. 19)
Battery attachment unit
(p. 14) / Serial number
BATT. RELEASE button
(p. 14)
Terminal cover
Cassette compartment
(p. 19)
Cassette compartment
cover (p. 19)
(self-timer) button (p. 70) /
REC PAUSE (LINE-IN) button
(p. 88, 89)
LCD screen (p. 29)
LCD panel OPEN
button (p. 29)
Built-in Speaker(p. 36)
CARD STILL/MOVIE
button (p.116)
DC IN terminal
(p. 13)
CHARGE indicator
(p. 14)
REC SEARCH + button (p. 32) /
(fast forward) button (p. 34) /
CARD
+ button (p. 115)
REC SEARCH – button (p. 32) /
(record review) button (p. 32) /
(rewind) button (p. 34) /
CARD
– button (p. 115)
(flash) button (p. 54) /
(play/pause) button (p. 34)
(stop) button (p. 34)
AV IN/OUT terminal
(p. 37) / (phones)
terminal (p. 36, 72)
DV IN/OUT terminal
(p. 87)
USB terminal
(p. 129, 134)
MVX10i
E
Introduction
9
E
Program AE
Easy recording
CAMERA
OFF
PLAY(VCR)
NETWORK*
b
Using a memory card
Using a tape
Diopter adjustment
lever (p. 18)
Grip belt (p. 18)
MIC terminal (p. 72)
Selector dial (p. 41)
POWER indicator (p. 25)
Start/Stop button (p. 25, 113)
MENU button (p. 41)
FOCUS button (p. 74) /
DATA CODE button (p. 82) /
button (p. 81, 135)
P.SET button (p. 134)
EXP button (p. 76) /
button (p. 81, 135)
DIGITAL EFFECTS
button (p. 64) /
button (p. 81, 135)
Digital effects ON/OFF
button (p. 64) /
button (p. 81, 135)
TAPE/CARD switch (p. 6)
Viewfinder (p. 18)
Program selector (p. 57)
Power switch (p. 6)
Introduction
* The NETWORK mode is for use with DV
Messenger (Windows XP users only). Press the
small button below the POWER switch when
switching to NETWORK ( 142).
10

Terminal cover
Remote sensor (p. 21)
Tally lamp (p. 49)
Assist lamp (White LED)
(p. 55, 59)
S-video IN/OUT
terminal (p. 38)
Tripod socket (p. 34)
AUDIO LEVEL button (p. 71)
PHOTO button (p. 52, 103)
Stereo microphone (p. 71)
Zoom lever (p. 27)
Built-in flash (p. 54)
Backup battery
compartment
(p. 17)
Bottom view
E
Introduction
11
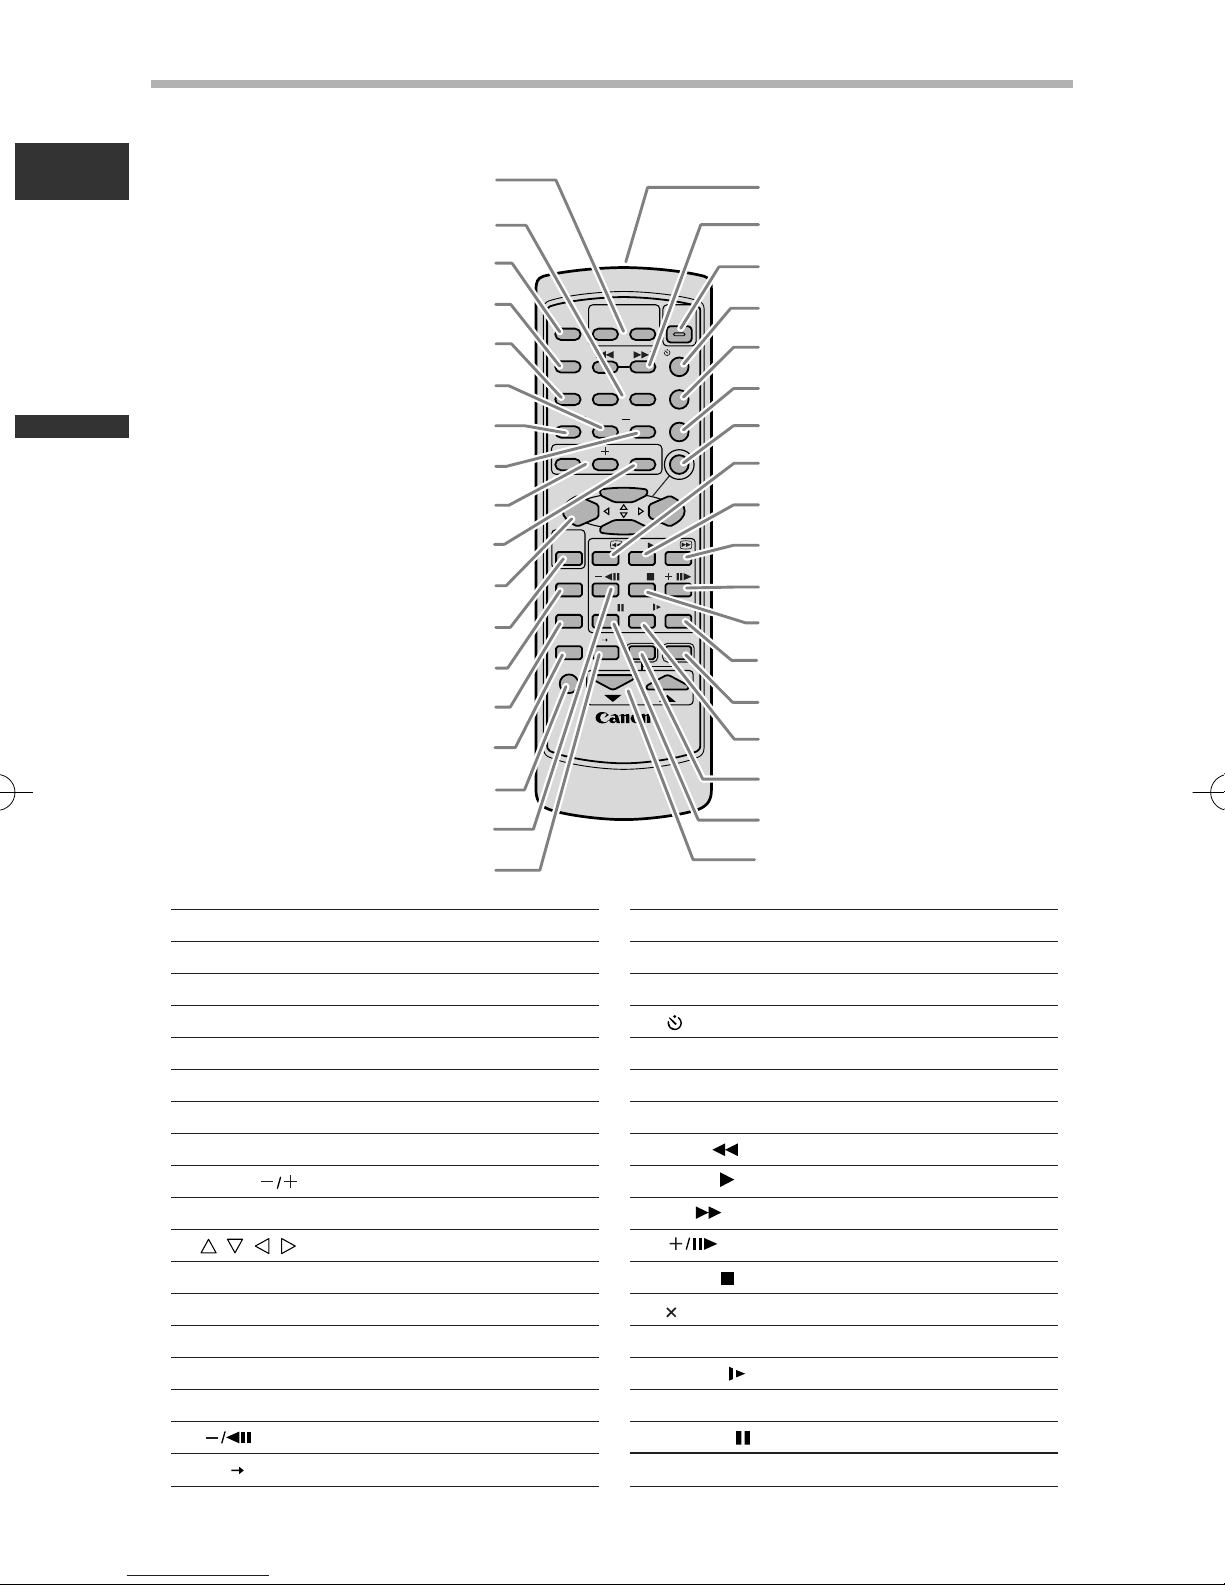
Zoom buttons (p. 27)
MIX BALANCE button (p. 97)
PHOTO button (p. 52, 103)
SEARCH SELECT button (p. 84)
12bit AUDIO OUT button (p. 97)
D. EFFECTS (Digital effects) button (p. 64)
CARD STILL/MOVIE button (p. 116)
Digital effects ON/OFF button (p. 64)
CARD buttons (p. 115)
SLIDE SHOW button (p. 117)
, , , buttons (p. 81, 135)
REC PAUSE button (p. 88, 89)
ZERO SET MEMORY button (p. 85)
AUDIO DUB. button (p. 96)
AV INSERT button (p. 94)
REMOTE SET button (p. 47)
button (p. 35)
AV DV button (p. 92)
Transmitter
Search buttons (p. 84)
START/STOP button (p. 25, 113)
SELF T. button (p. 70)
TV SCREEN button (p. 143)
DATA CODE button (p. 82)
P.SET button (p. 135)
REW button (p. 34)
PLAY button (p. 34)
FF button (p. 34)
button (p. 35)
STOP button (p. 34)
2 button (p. 35)
SET button (p. 41)
SLOW button (p. 35)
MENU button (p. 41)
PAUSE button (p. 35)
Select buttons (p. 41)
q
w
e
r
t
y
u
i
o
!0
!1
!2
!3
!4
!5
!6
!7
!8
!9
@0
@1
@2
@3
@4
@5
@6
@7
@8
@9
#0
#1
#2
#3
#4
#5
#6
WIRELESS CONTROLLER WL-D81
W
T
REW
PLAY
FF
START
/STOP
PHOTO
SELF T.
MENU
TV SCREEN
DATA CODE
P.SET
CARD
12bit
AUDIO OUT
CARD
STILL/MOVIE
REC
PAUSE
SEARCH SELECT
SLIDE SHOW
ZERO SET
MEMORY
AUDIO DUB.
STOP
MIX
BALANCE
ST-1 ST-2
ON/OFF
D.EFFECTS
SET
ZOOM
AV INSERT
PAUSE
SLOW
REMOTE SET
//
×
2
AV DV
!8
#3
#5
#6
@6
!7
!9
@2
@0
@3
@9
@4
@7
@8
@5
#0
@1
#2
#4
#1
!4
!5
!6
q
r
t
y
!1
i
!0
o
!3
e
!2
w
u
WL-D81 Wireless Controller
E
Introduction
12
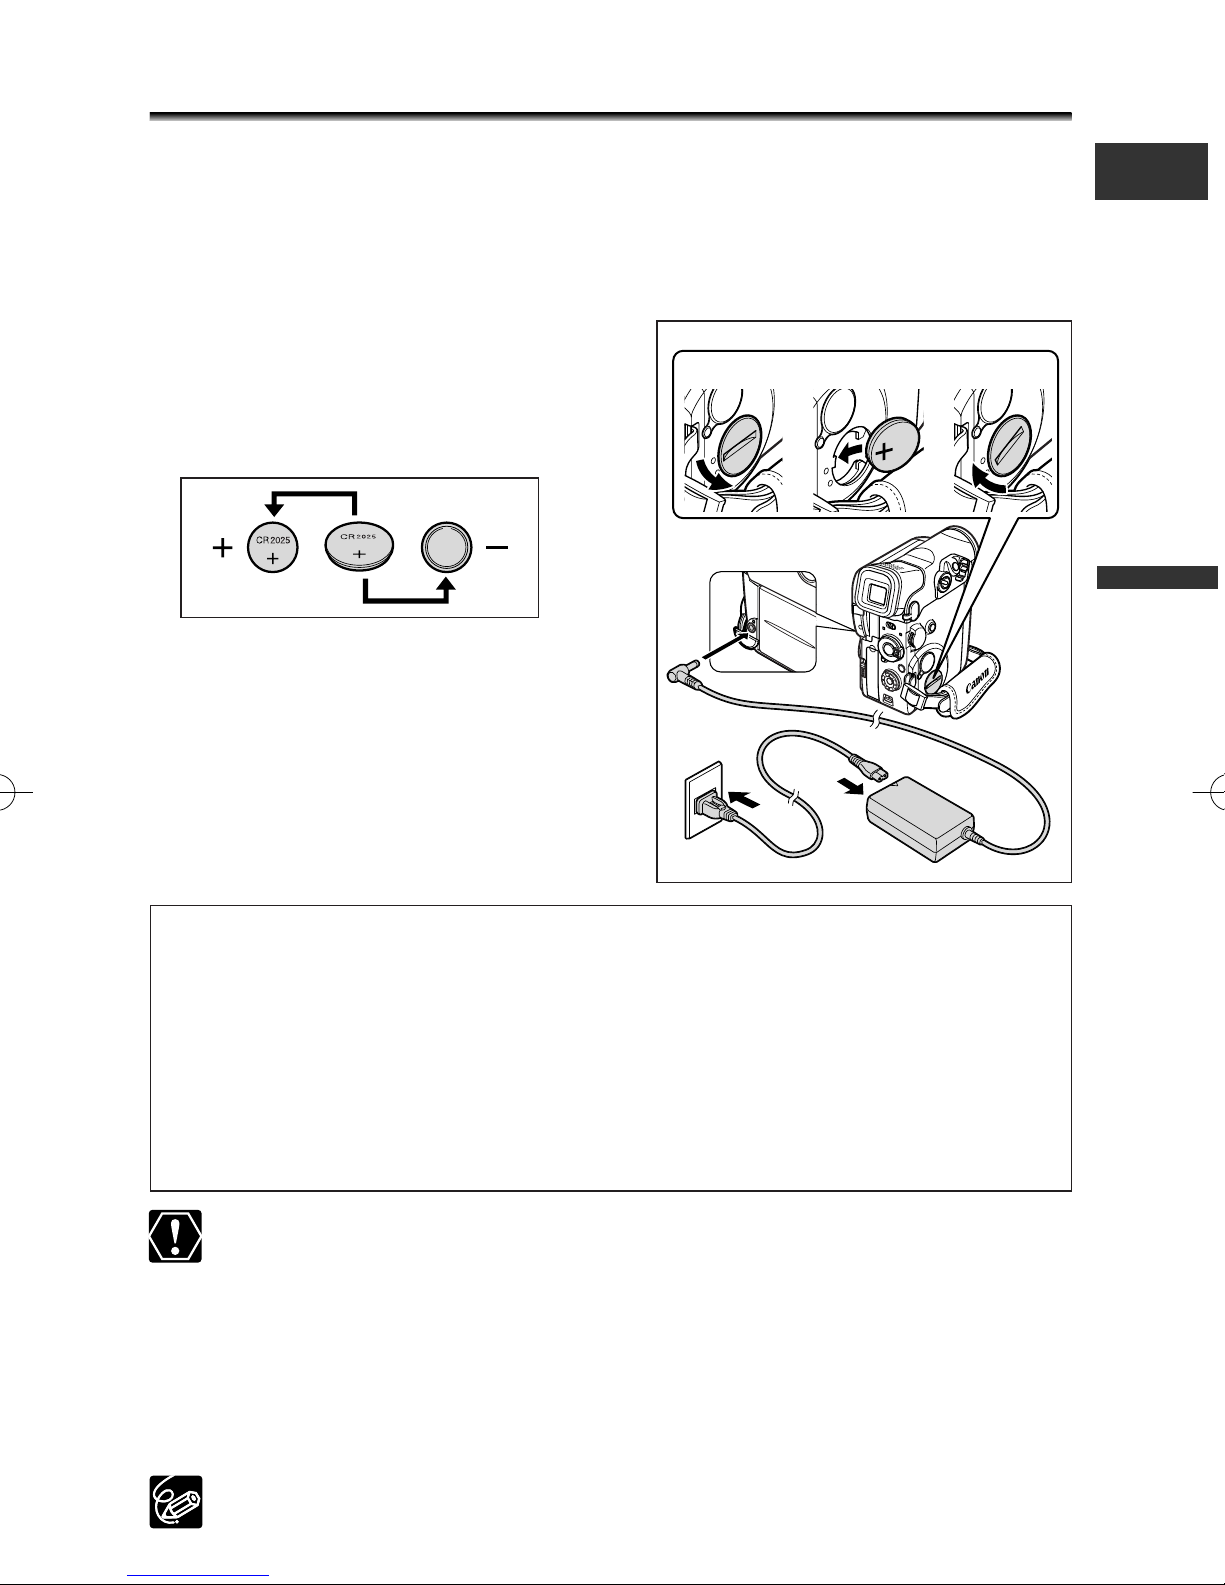
Using a Household Power Source
q
w
e
r
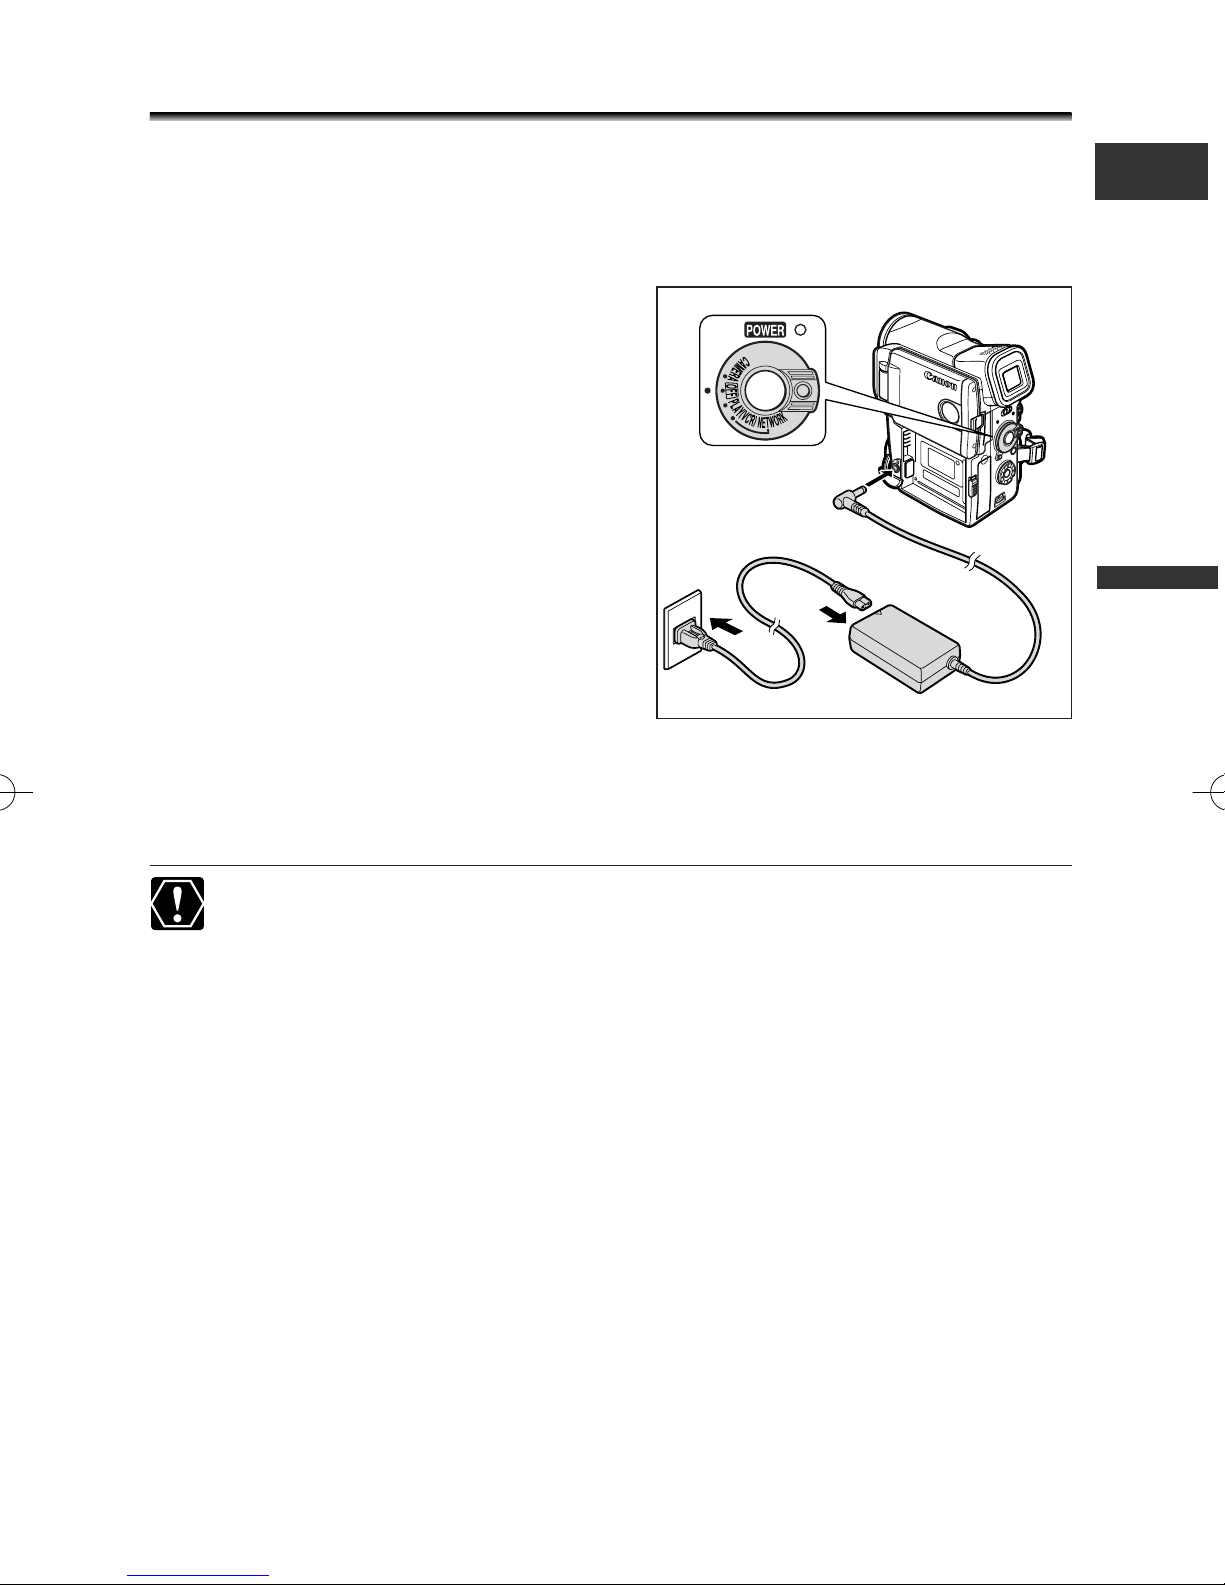
You can operate the camcorder from a household power source using the supplied
power adapter. The power adapter converts current from a power outlet (100-240 V
AC, 50/60 Hz) to the DC current used by the camcorder.
1. Turn the POWER switch to OFF.
2. Connect the power cord to the
power adapter.
3. Plug the power cord into a power
outlet.
4. Connect the power adapter to the
camcorder’s DC IN terminal.
E
Mastering
the Basics
5. After use, turn off the camcorder and disconnect the power adapter
from the camcorder. Unplug the power cord from the power outlet and
disconnect it from the adapter.
❍ Turn off the camcorder before connecting or disconnecting the power adapter.
❍ If the adapter is used close to a TV, it may cause picture interference. Move the
adapter away from the TV or the arerial cable.
❍ Do not connect any products that are not expressly recommended to the
camcorder’s DC IN terminal or to the power adapter.
❍ You may hear some noise from the power adapter during use. This is not a
malfunction.
13
Attaching and Charging the Battery Pack
q
w
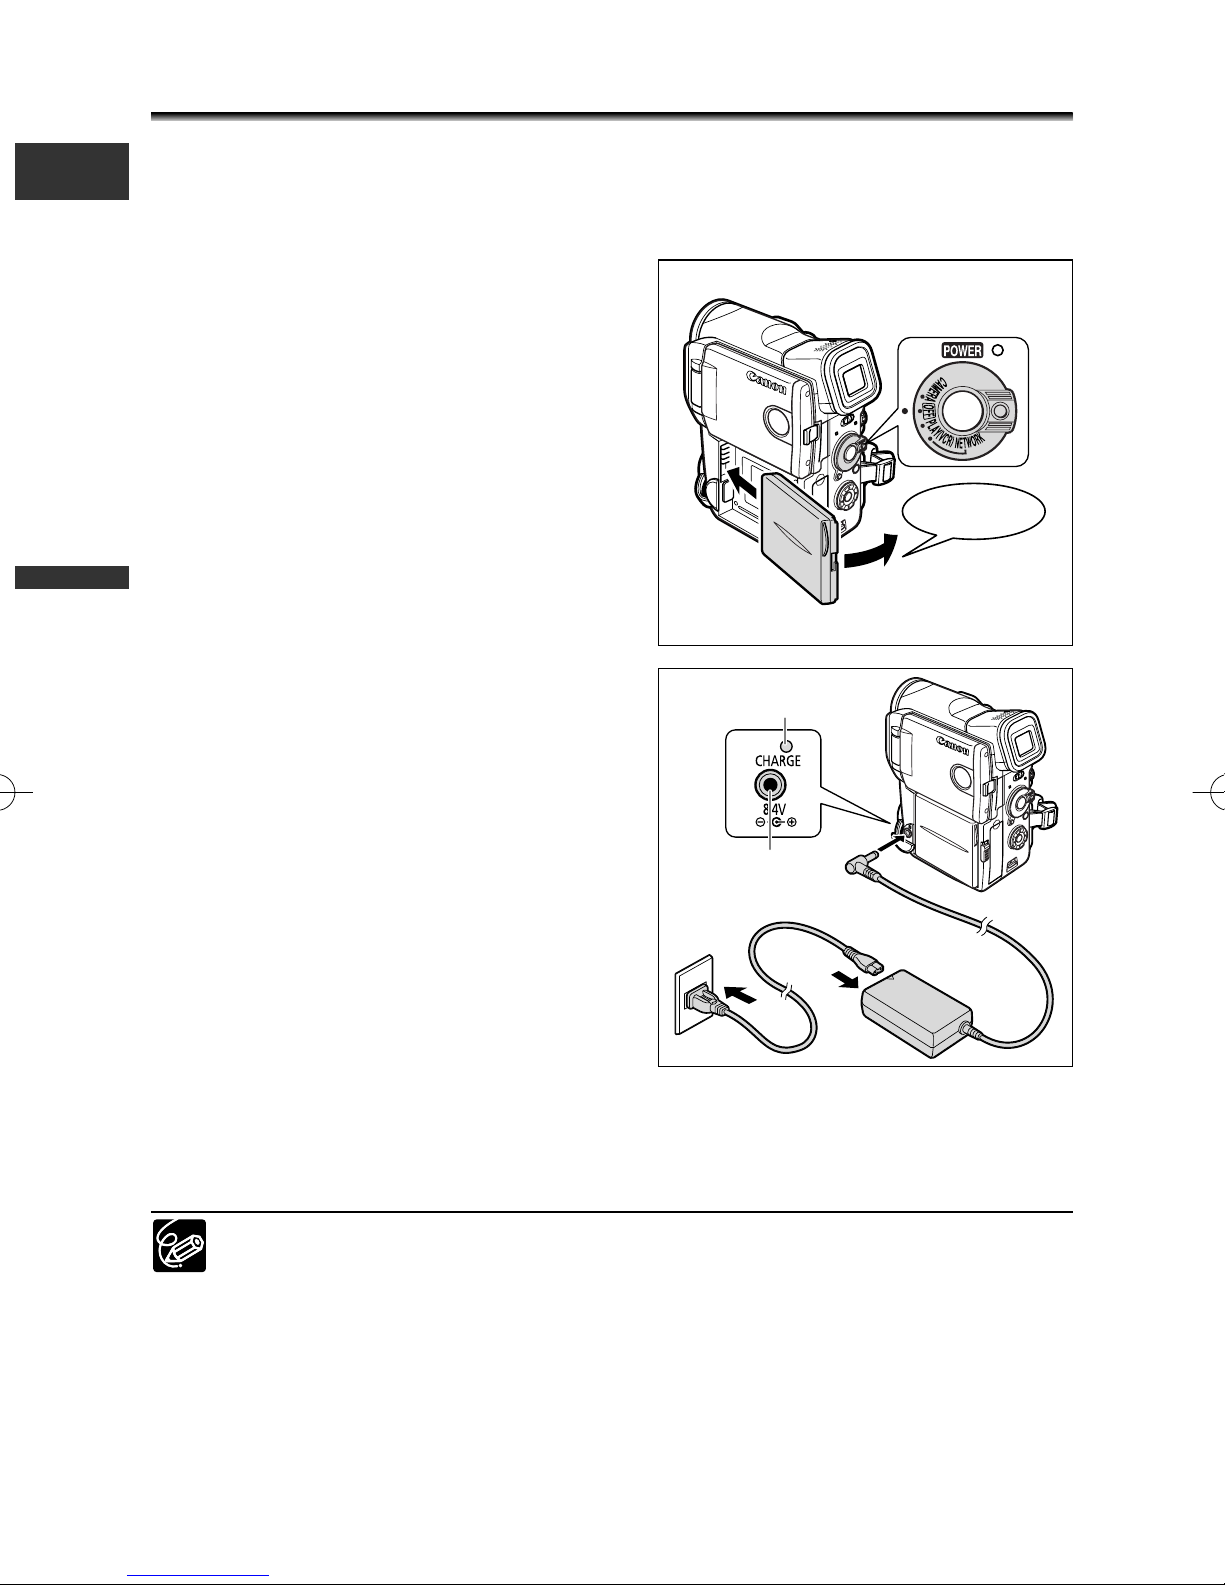
Charge the battery pack with the supplied power adapter before you use the
E
camcorder for the first time and subsequently when the message “CHANGE THE
BATTERY PACK” appears.
1. Turn the POWER switch to OFF.
2. Attach the battery pack to the
camcorder.
• Remove the terminal cover of the battery
pack.
• Insert the battery pack in the direction of
the arrow, press lightly and slide it in until it
clicks.
3. Connect the power cord to the
the Basics
Mastering
adapter.
4. Plug the power cord into a power
outlet.
5. Connect the power adapter to the
camcorder’s DC IN terminal.
6. When charging is complete,
disconnect the power adapter from
the camcorder. Unplug the power
cord from the power outlet and
disconnect it from the adapter.
CHARGE indicator
DC IN terminal
r
click
t
e
7. Remove the battery pack after use.
Press the BATT. RELEASE button to remove the battery. Be careful not to drop the
battery pack when removing.
❍ The battery pack may be defective when the CHARGE indicator flashes rapidly.
❍ The CHARGE indicator informs you about the charge status.
0-50%: Flashes once every second
More than 50%: Flashes twice every second
100%: Glows steadily
❍ Do not disconnect and reconnect the power cord while charging a battery
pack. The battery pack may not be charged correctly even if the CHARGE
indicator glows steady. The battery pack may also not be charged correctly
when a power outage occurs during charging. Remove the battery pack and
14
attach it back to the camcorder.

Charging, Recording and Playback Time
Battery Pack Charging Time
BP-407 (Supplied) 85 min.
BP-406 (Optional) 70 min.
BP-412 (Optional) 130 min.
BP-422 (Optional) 220 min.
Battery Pack Playback Time
(Using the LCD)
BP-407 (Supplied) 85 min.
BP-406 (Optional) 80 min.
BP-412 (Optional) 140 min.
BP-422 (Optional) 260 min.
Battery Pack Maximum Recording Time Typical Recording Time*
Using the Viewfinder
Using the LCD
Using the Viewfinder
Using the LCD
BP-407 (Supplied) 75 min. 60 min. 40 min. 35 min.
BP-406 (Optional) 70 min. 55 min. 40 min. 30 min.
BP-412 (Optional) 120 min. 100 min. 70 min. 60 min.
BP-422 (Optional) 230 min. 190 min. 130 min. 110 min.
Below times are approximate and vary according to the charging, recording or
playback conditions.
Charging Time
• Charge the battery pack in temperatures between 5º C and 40º C.
•A lithium ion battery pack can be charged at any charge state. Unlike conventional
battery packs, you do not need to completely use or discharge it before charging.
Recording Time
E
Mastering
the Basics
* Approximate times for recording with repeated operations such as start/stop, zooming, power
on/off. Actual time may be shorter.
•We recommend that you prepare battery packs 2 to 3 times longer than you think you
might need.
•To conserve battery charge, turn off the camcorder instead of leaving it in record pause
mode.
Playback Time
15
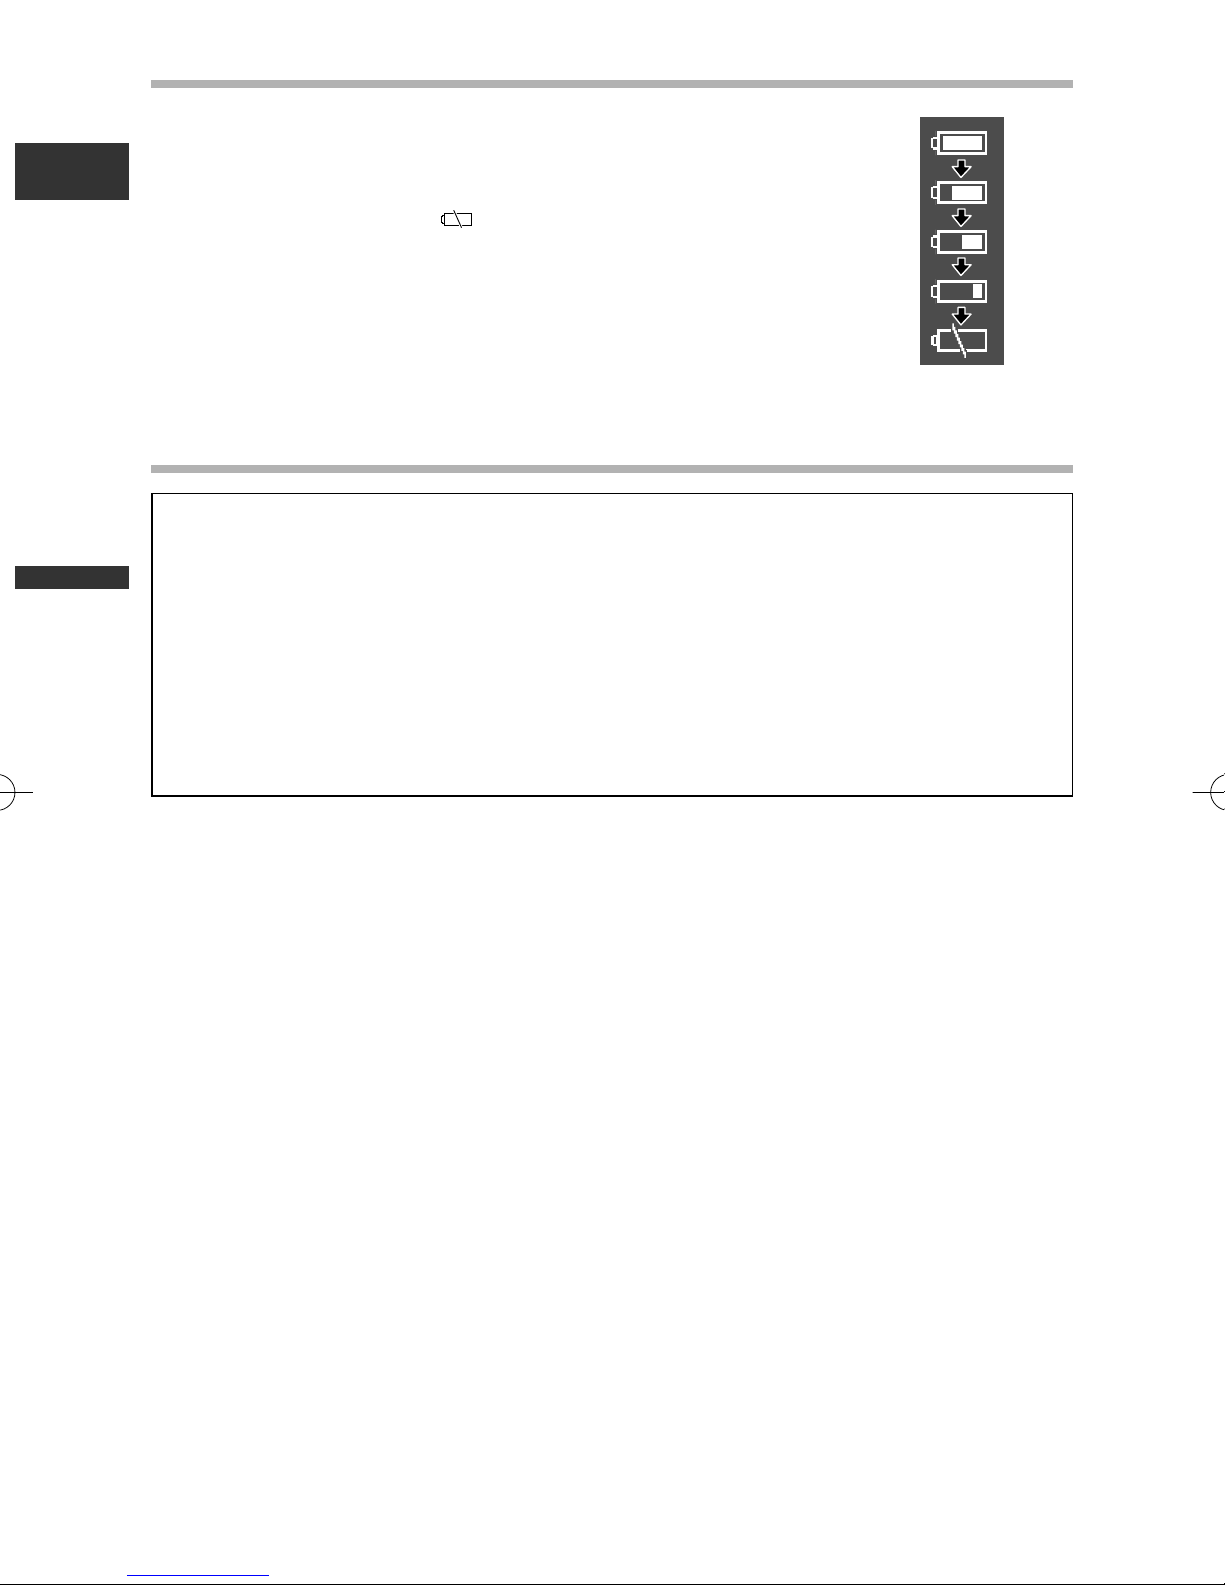
How much power is left?
The battery symbols indicate the charge status of the battery
pack.
E
When the battery pack is empty, "CHANGE THE BATTERY PACK"
appears for 4 seconds and starts flashing in red.
The battery charge indicators are not constant – they vary
according to the condition under which battery pack and
camcorder are used.
Battery Pack Handling Precautions
DANGER!
Treat the battery pack with care.
• Keep it away from fire (or it might explode).
• Do not expose the battery pack to temperature higher than 60º C. Do not leave
it near a heater or inside a car in hot weather.
the Basics
Mastering
• Do not try to disassemble or modify it.
• Do not drop or knock it.
• Do not get it wet.
❍ Charged battery packs continue to discharge naturally. Therefore, charge them on
the day of use, or the day before, to ensure a full charge.
❍ Attach the terminal cover whenever a battery pack is not in use. Contact to metallic
objects may cause a short circuit and damage the battery pack.
❍ Dirty terminals may cause a poor contact between the battery pack and the
camcorder. Wipe the terminals with a soft cloth.
❍ Since storing a charged battery pack for a long time (about 1 year) can shorten its
lifecycle or affect performance, we recommend to discharge the battery pack fully
and to store it in a dry place at temperatures no higher than 30˚ C. If you do not
use the battery pack for long periods, charge and discharge it fully at least once a
year. If you have more than 1 battery pack, perform these precautions at the same
time for all battery packs.
❍ Although the battery pack’s operating temperature range is from 0˚ C to 40˚ C, the
optimal range is from 10˚ C to 30˚ C. At cold temperatures, performance will
temporarily decline. Warm it in your pocket before use.
❍ Replace the battery pack if the usable time after full charge diminishes substantially
at normal temperatures.
16
Installing the Backup Battery
qew
The backup battery allows the camcorder to retain date, time and other camcorder
settings while the power source is disconnected. Power the camcorder from a
household power source or with a battery pack when replacing the backup battery to
retain the setting.
1. Open the backup battery cover.
Use a coin and screw the cover to the left.
2. Insert the lithium battery with the
+ side facing outward.
E
Mastering
the Basics
3. Close the cover.
Align the slot with the marks on the
camcorder and screw the cover to the right.
WARNING!
• The battery used in this device may present a fire or chemical burn hazard if
mistreated. Do not recharge, disassemble, heat above 212° F (100° C) or
incinerate the battery.
• Replace the battery with a CR2025 made by Panasonic, Hitachi Maxell, Sony,
Sanyo, or with Duracell2025. Use of other batteries may present a risk of fire or
explosion.
• The used battery should be returned to the supplier for safe disposal.
❍ Do not pick up the battery using tweezers or other metal tools as this will
cause a short circuit.
❍ Wipe the battery with a clean dry cloth to ensure proper contact.
❍ Keep the battery out of reach of children. If it is swallowed, seek medical
assistance immediately. The battery case may break and the battery fluids may
damage stomach and intestines.
❍ Do not disassemble, heat or immerse the battery in water to avoid the risk of
explosion.
The backup battery has a life span of about a year. j flashes in red to inform
you that it needs to be replaced.
17
Preparing the Camcorder
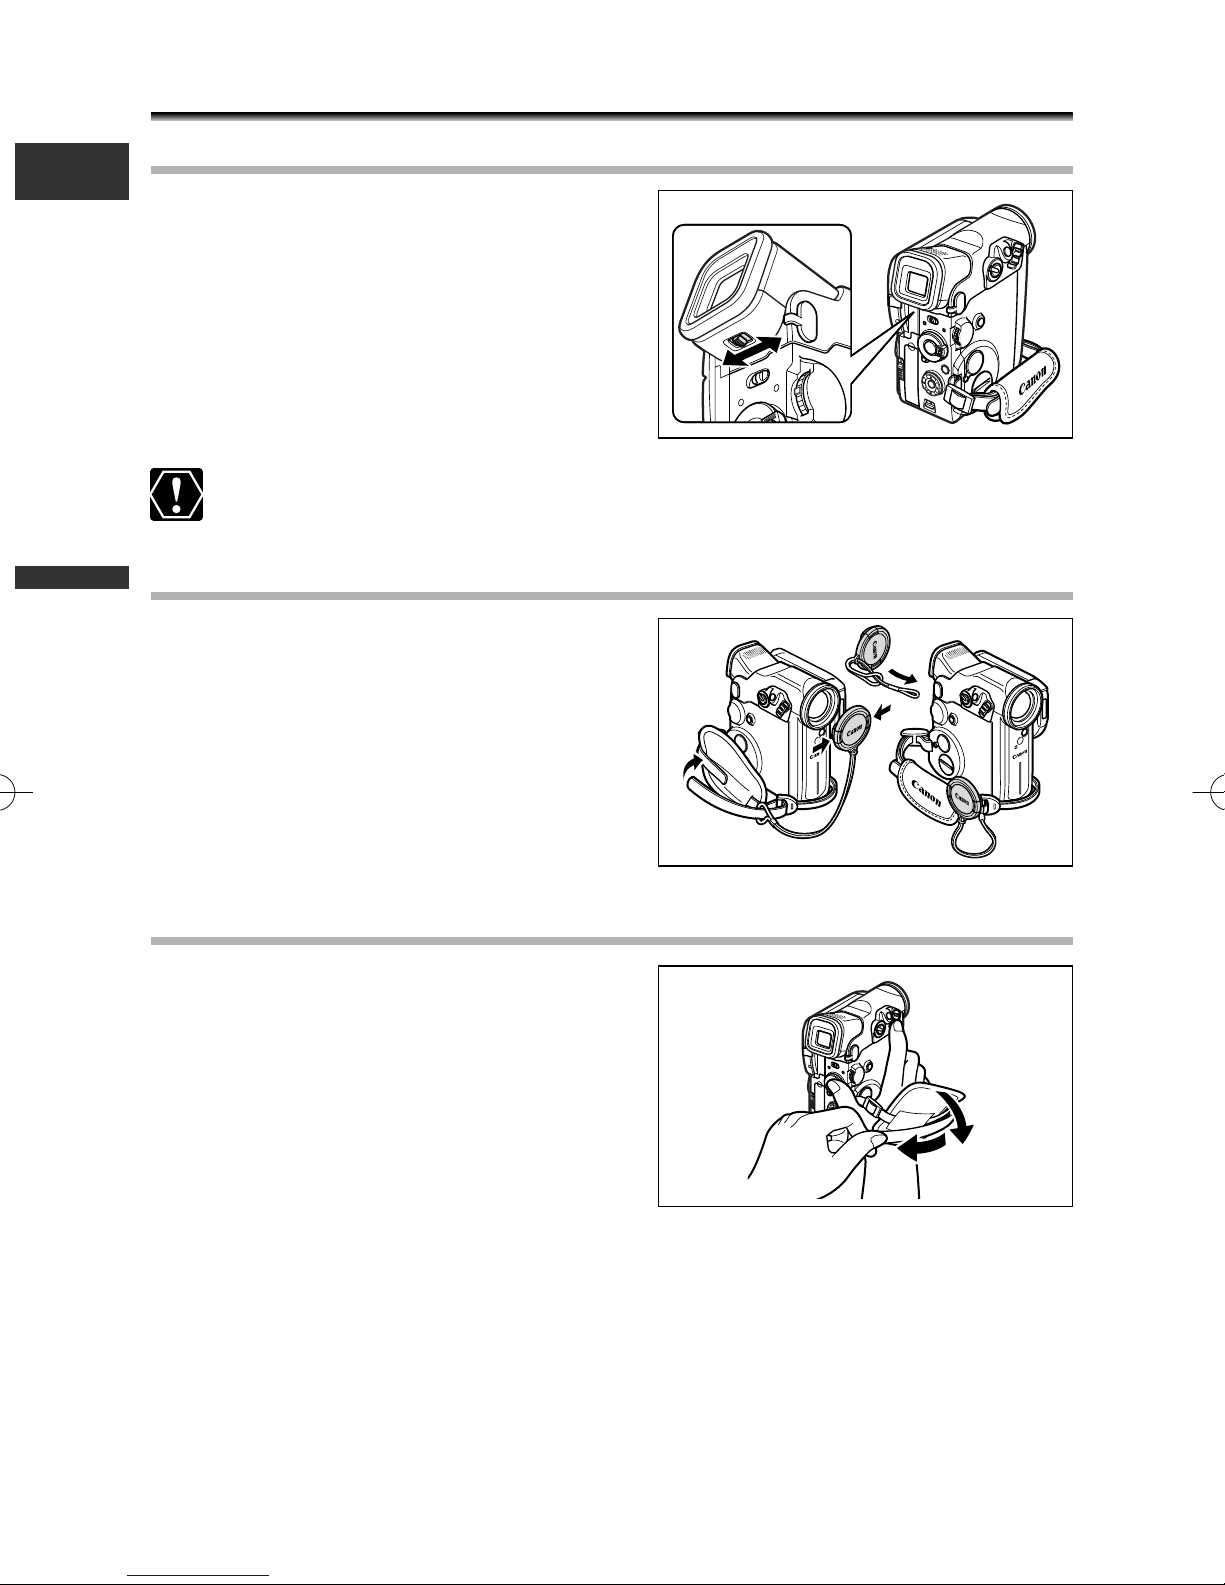
Adjusting the Viewfinder (Diopter Adjustment)
E
1. Turn on the camcorder and keep the
LCD panel closed.
2. Adjust the diopter adjustment lever.
Do not leave the viewfinder exposed to direct sunlight as it may melt (due to
concentration of light by the lens).
Attaching the Lens Cap
1. Attach the cord to the lens cap.
2. Pass the grip belt through the loop
the Basics
Mastering
on the cord.
Press the buttons on the lens cap when
attaching/removing it. Hook the lens cap on
the grip belt while you are recording, and
place it over the lens when you have finished.
Fastening the Grip Belt
Hold the camcorder with your right
hand and adjust the belt with your left.
Adjust the grip belt so that you can reach the
zoom lever and photo button with your index
finger, and the start/stop button with your
thumb.
18
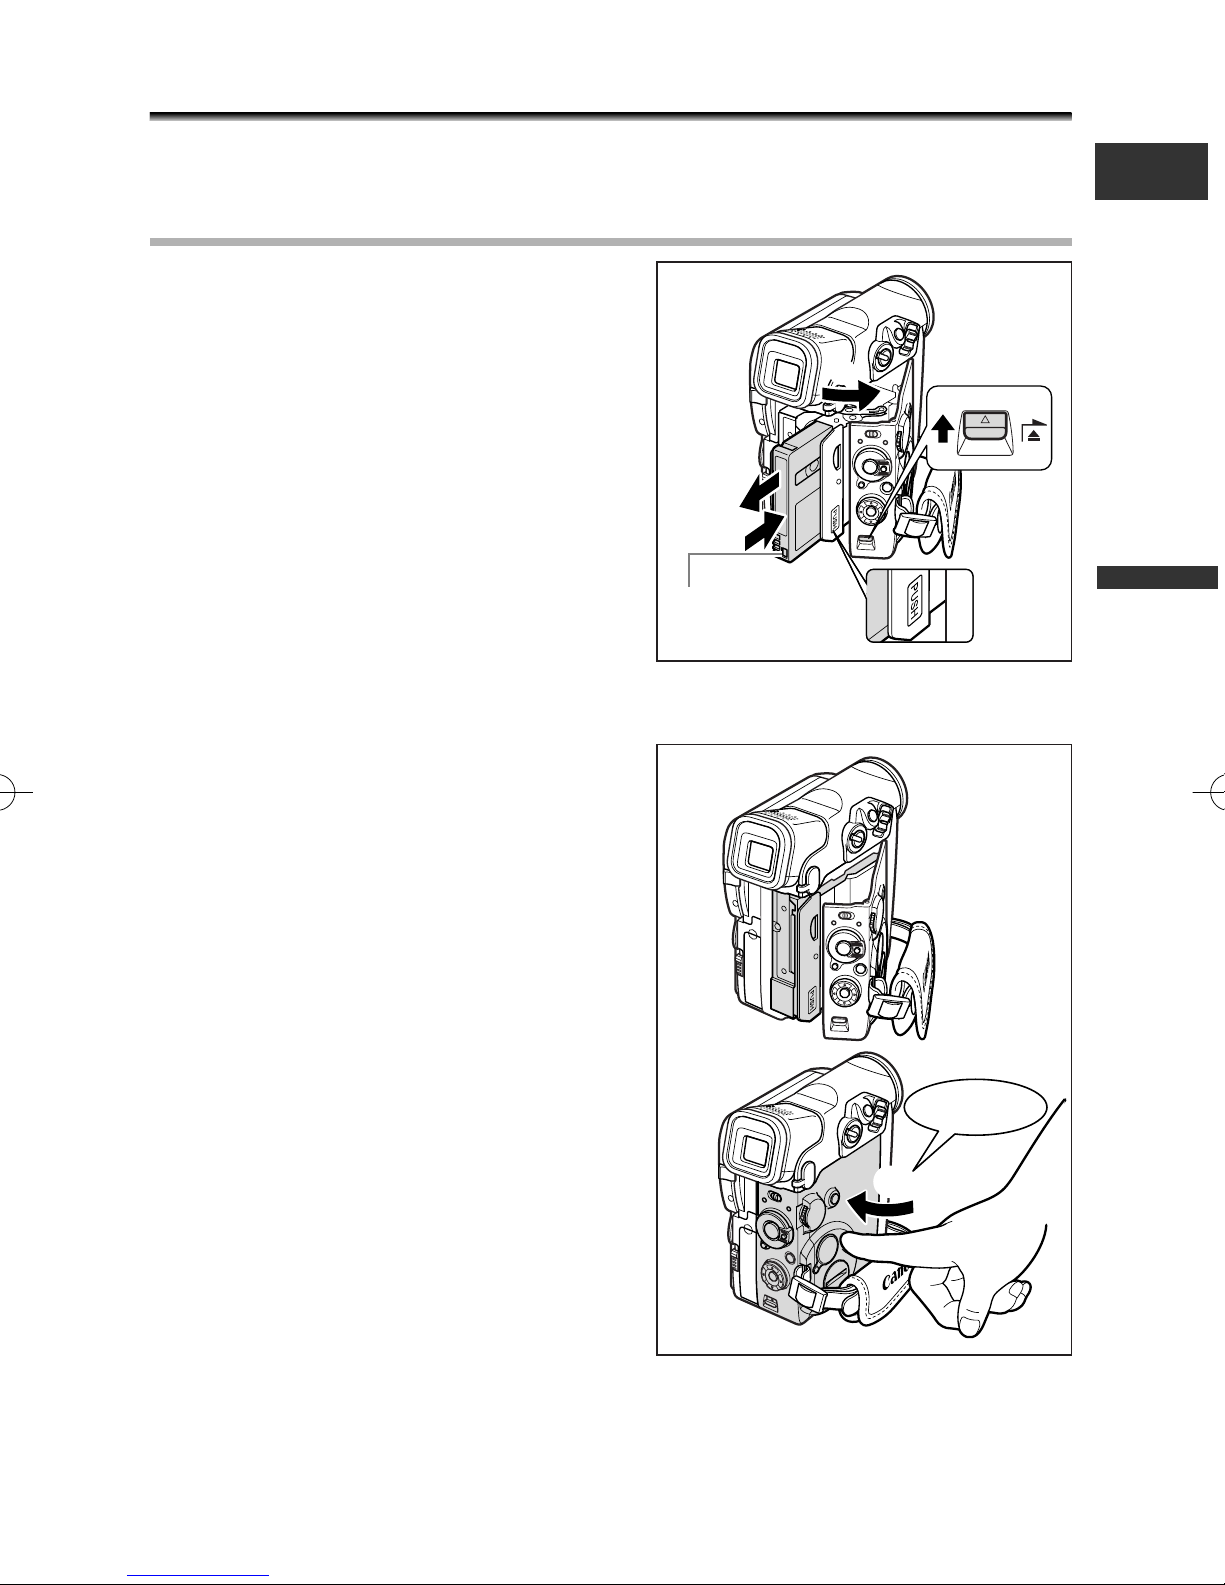
Loading a Cassette
w
e
q
OPEN/EJECT
Use only video cassettes marked with the D logo.
Loading and Unloading
1. Slide and hold the OPEN/EJECT
switch and open the cassette
compartment cover.
The cassette compartment opens
automatically.
2. Load/unload the cassette.
• Load the cassette with the window facing
the grip belt and the REC/SAVE tab facing
downward.
• Unload the cassette by pulling it straight
out.
Tape protection tab
E
Mastering
the Basics
3. Press the P mark on the cassette
compartment until it clicks.
4. Wait for the cassette compartment to
retract automatically.
5. Close the cassette compartment
cover.
r
click
t
19
SAVE
REC
SAVE
REC
❍ Do not interfere with the cassette compartment while it is opening or closing
automatically or attempt to close the cover until the cassette compartment has
fully retracted.
E
❍ Be careful not to get your fingers caught in the cassette compartment cover.
❍ If the camcorder is connected to a power source, cassettes can be
loaded/unloaded even if the POWER switch is set to OFF.
❍ v flashes in red if no cassette is inserted when turning on the power (in
CAMERA and PLAY (VCR) mode).
❍ With some types of tapes, the remaining tape display may not be accurate.
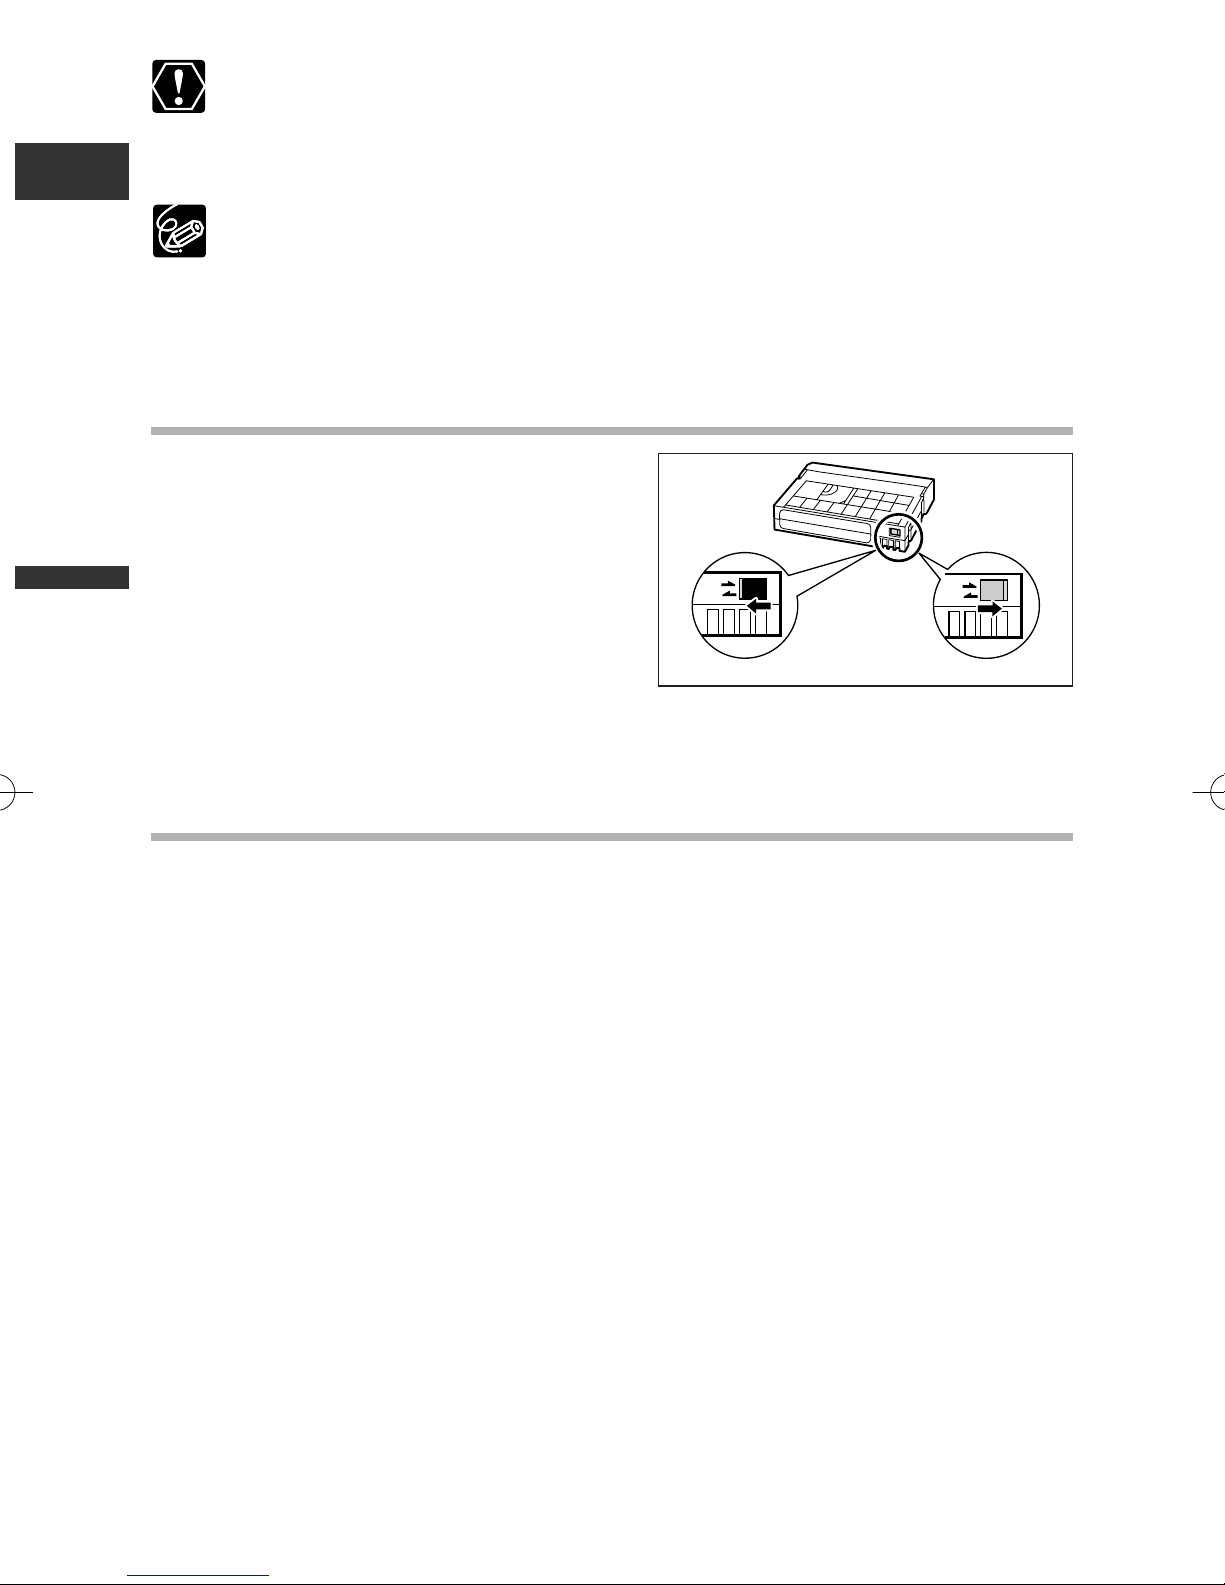
Protecting Tapes from Accidental Erasure
To protect your recordings from accidental
erasure, slide the tab on the cassette to the
left. (This switch position is usually labelled
SAVE or ERASE OFF.)
If you load a protected cassette in CAMERA
mode, the message “THE TAPE IS SET FOR
ERASURE PREVENTION” appears for approx.
the Basics
Mastering
4 seconds and v starts flashing. If you wish to record on that cassette, slide the tab
back to the right.
Cassette Handling Precautions
❍ Rewind tapes after use. If the tape becomes slack and damaged, it may cause picture
and sound distortion.
❍ Return cassettes in the case and store them upright.
❍ Do not leave the cassette in the camcorder after use.
❍ Do not use spliced tapes or nonstandard cassettes as they may damage the camcorder.
❍ Do not use tapes that have been jammed as video heads may become dirty.
❍ Do not insert anything into the small holes of the cassette, or cover them with
cellophane tape.
❍ Handle cassettes with care. Do not drop or subject them to severe impact as this may
damage the cassettes.
❍ Rewind tapes from time to time if they are stored for a long time.
❍ With cassettes equipped with a memory function, metal plated terminals may become
dirty with use. Clean the terminals with a cotton swab after about 10 times of
loading/unloading. The memory function is not supported by the camcorder.
20
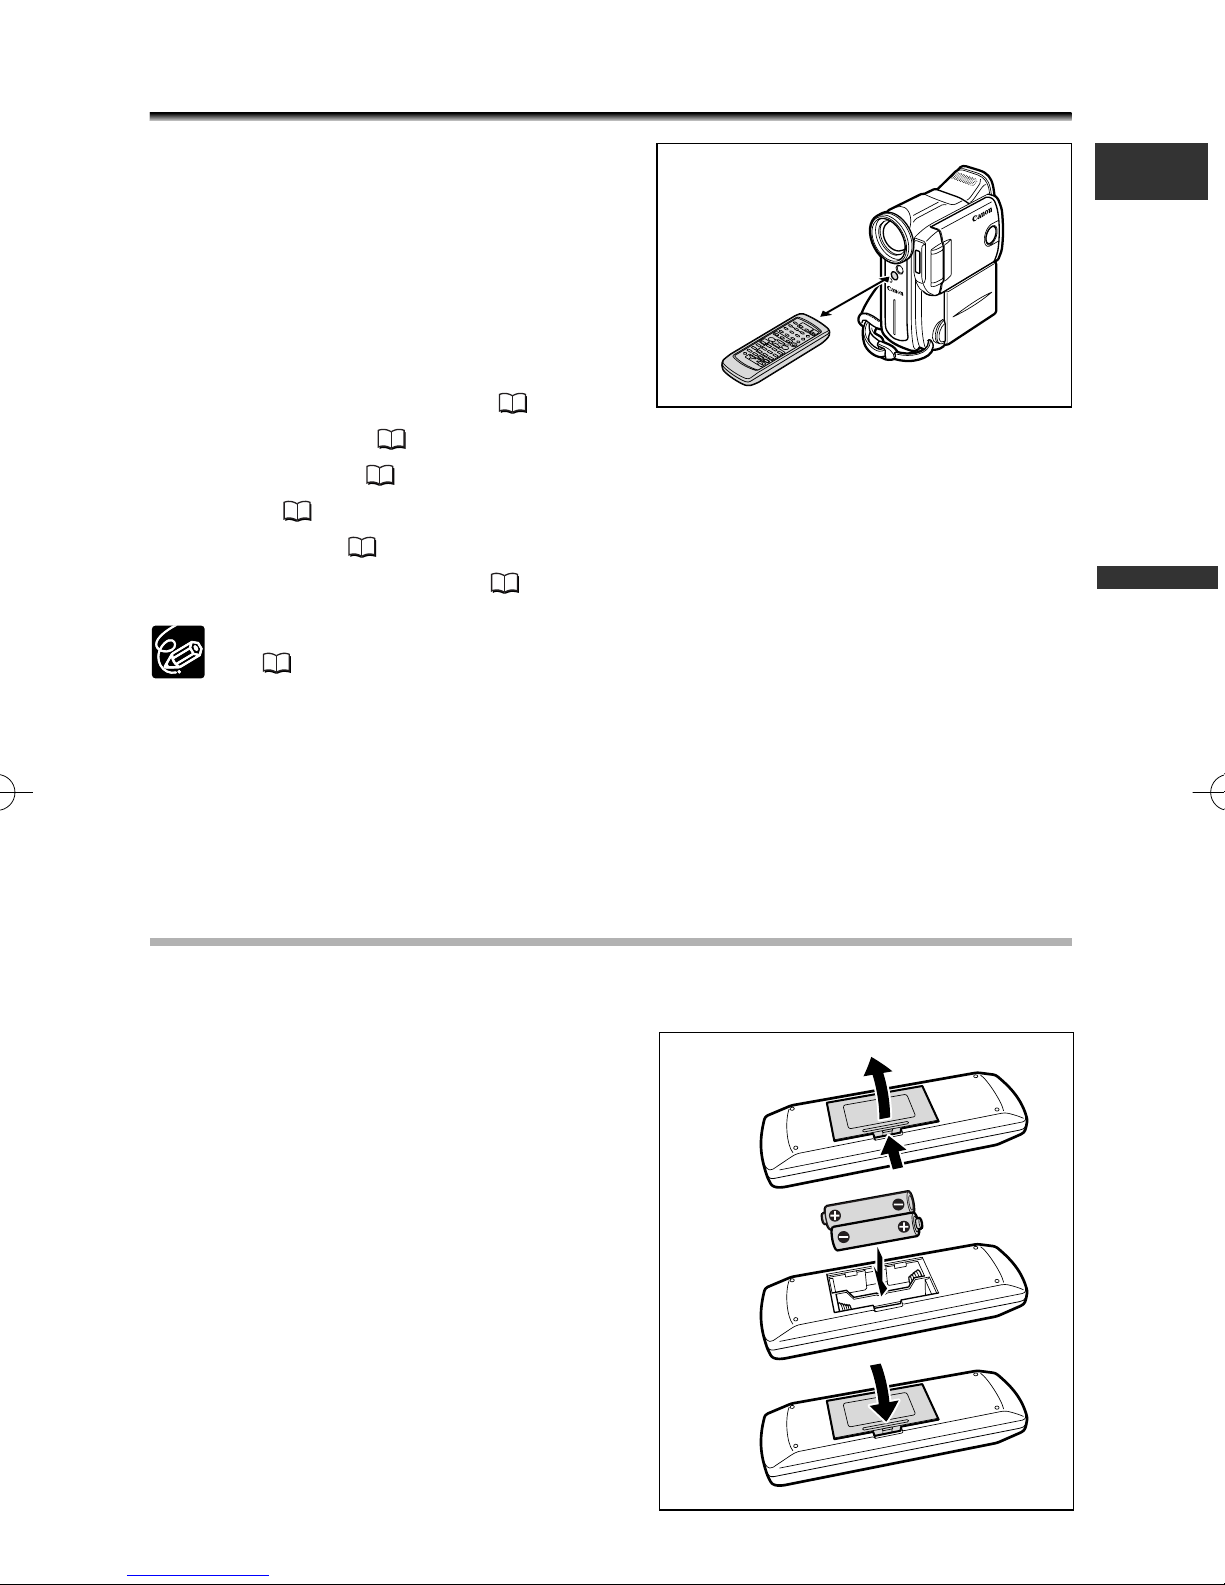
Using the Wireless Controller
You can operate the camcorder with the
supplied wireless controller from a distance of
up to 5 m. Point it at the camcorder’s remote
sensor when you press the buttons.
Following functions cannot be operated
without the wireless controller:
• Some special playback modes ( 35)
• Photo/date search ( 84)
• Zero set memory ( 85)
•AV Insert ( 94)
• Audio dubbing ( 96)
E
5 m
• 12 bit audio out/mix balance ( 97)
❍ Camcorder and wireless controller are equipped with 2 remote sensor modes
( 47). If the wireless controller does not work, check if camcorder and
wireless controller are set to the same mode.
❍ The wireless controller may not work properly in bright places, such as
outdoors under direct sunlight, or when used too close to the camcorder.
❍ The operable range of the wireless controller may shorten when the
camcorder’s remote sensor is exposed to strong light.
❍ When the batteries run out, replace both at the same time.
Inserting Batteries
The wireless controller operates with two AA batteries.
1. Open the battery cover.
2. Insert the batteries following the +
and – markings.
3. Close the battery cover.
q
Mastering
the Basics
w
e
21
Setting the Time Zone, Date and Time
CARD PLAY (VCR)
CARD CAMERA
T.ZONE/DST•••PARIS SYSTEM
Set the time zone, date and time when you first start using your camcorder. Install the
E
backup battery before you begin ( 17).
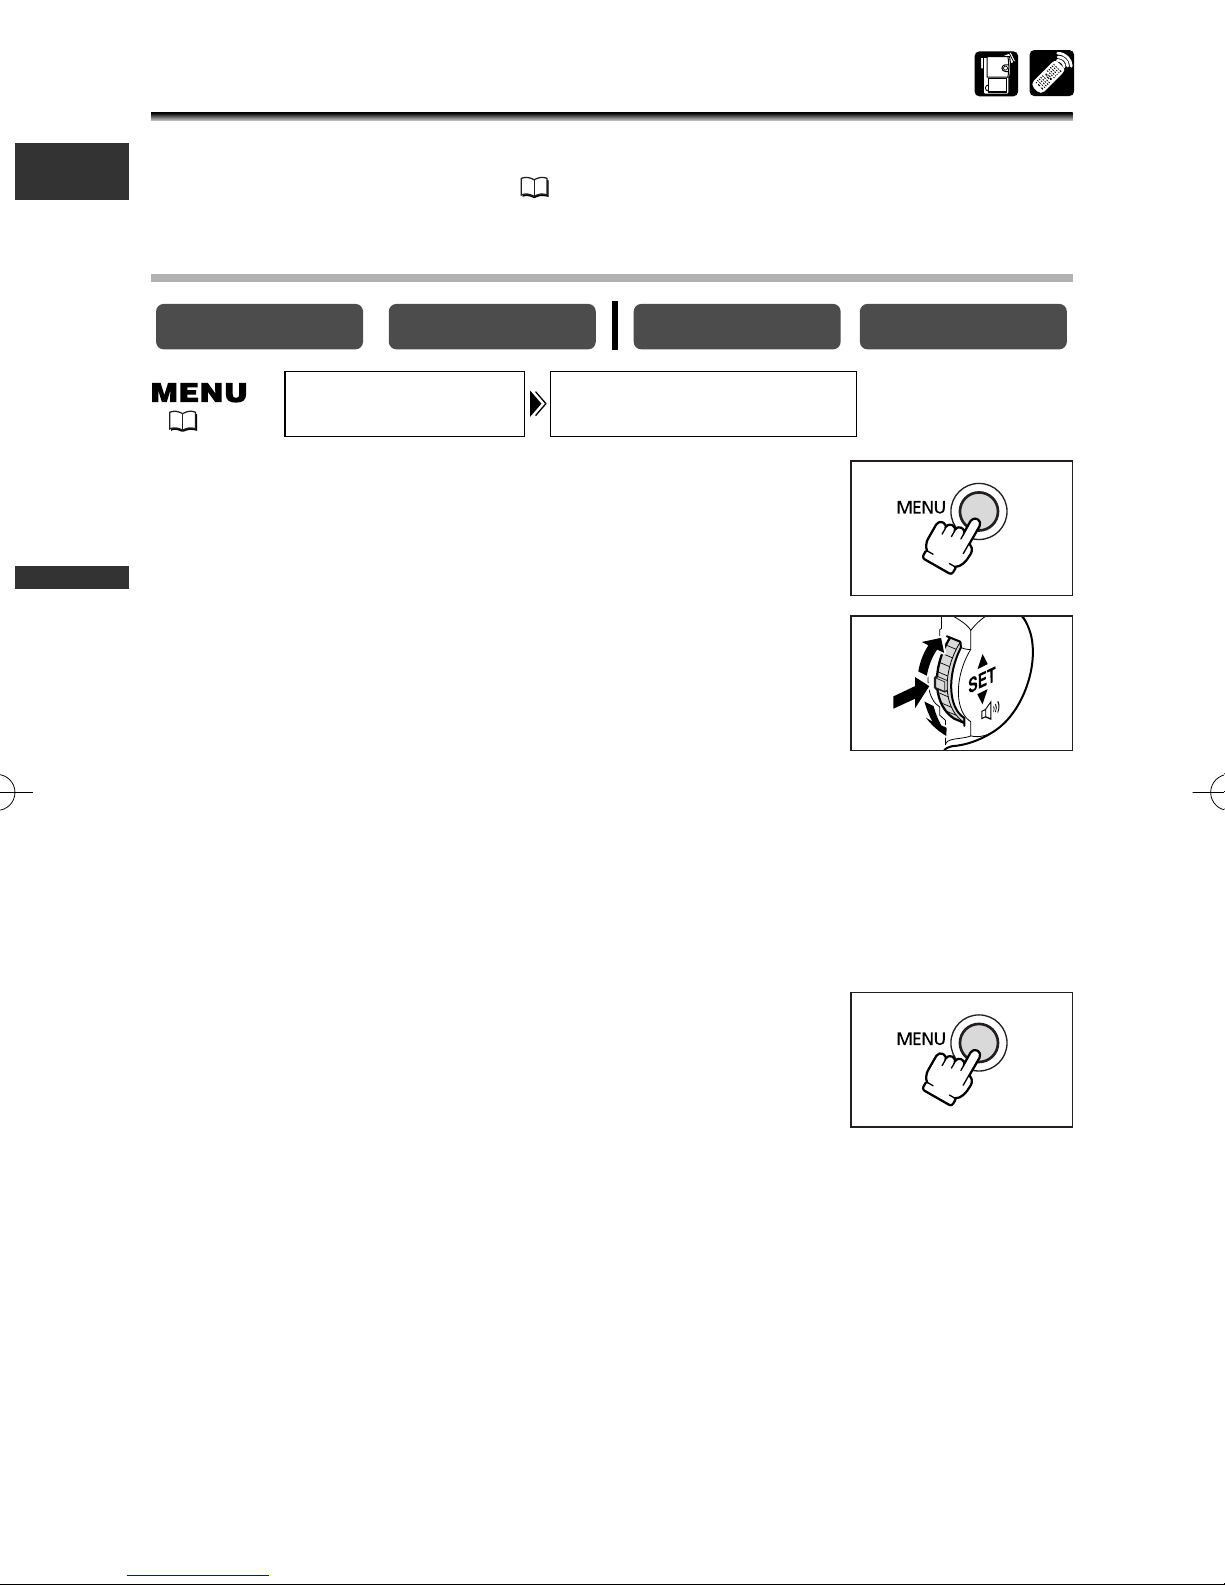
Setting the Time Zone/Daylight Saving Time
PLAY (VCR)CAMERA
( 41)
1. Press the MENU button to open the menu.
2. Turn the selector dial to select [SYSTEM] and press
the selector dial.
the Basics
Mastering
3. Turn the selector dial to select [T.ZONE/DST] and
press the selector dial.
• The time zone setting appears.
• The default setting is Paris. Select your time zone and daylight saving time (DST)
setting if necessary.
4. Turn the selector dial to select the setting option that represents your
time zone.
To adjust for daylight saving time, select the time zone with the U next to the area.
5. Press the MENU button to close the menu.
22
CARD PLAY (VCR)
CARD CAMERA
16
20
19
18
15
14
17
21
22
1
2
24
23
4
3
6
7
9
5
8
10
12
11
13
E
24 1 2 3 4 5 6 7 8 9 10 11 12 1314 15 16 17 18 19 20 21 22 23
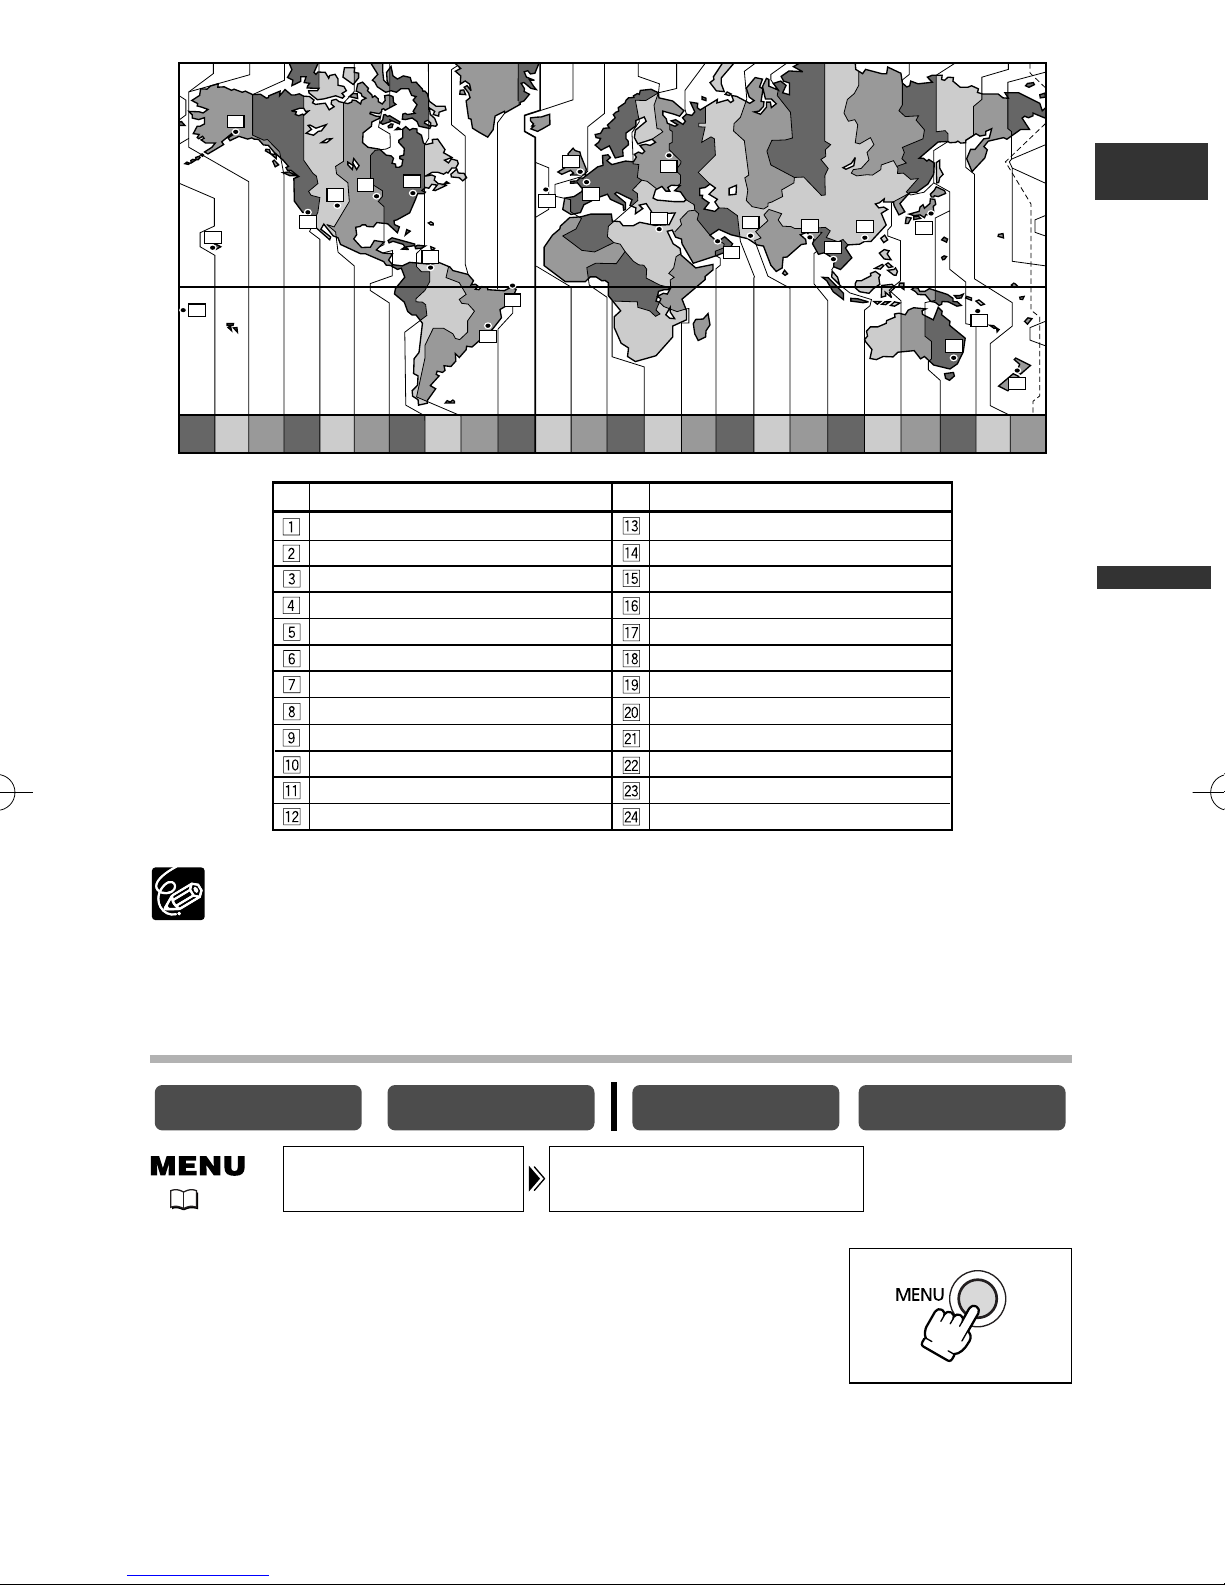
No.
Time zone
LONDON
PARIS
CAIRO
MOSCOW
DUBAI
KARACHI
DACCA
BANGKOK
H. KONG (Hong Kong)
TOKYO
SYDNEY
SOLOMON
No.
Time zone
WELLGTN (Wellington)
SAMOA
HONOLU. (Honolulu)
ANCHOR. (Anchorage)
L.A. (Los Angeles)
DENVER
CHICAGO
N.Y. (New York)
CARACAS
RIO (Rio de Janeiro)
FERNAN. (Fernando de Noronha)
AZORES
Mastering
the Basics
❍ Once you have set time zone, date and time, you do not need to reset the
clock each time you travel to another time zone. Just set the time zone to the
one of your destination, and the camcorder automatically adjusts the clock.
❍ Days per month and leap years will be automatically adjusted.
Setting the Date and Time
PLAY (VCR)CAMERA
SYSTEM
( 41)
1. Press the MENU button to open the menu.
D/TIME SET••• 1.JAN.2003
12:00 PM
23
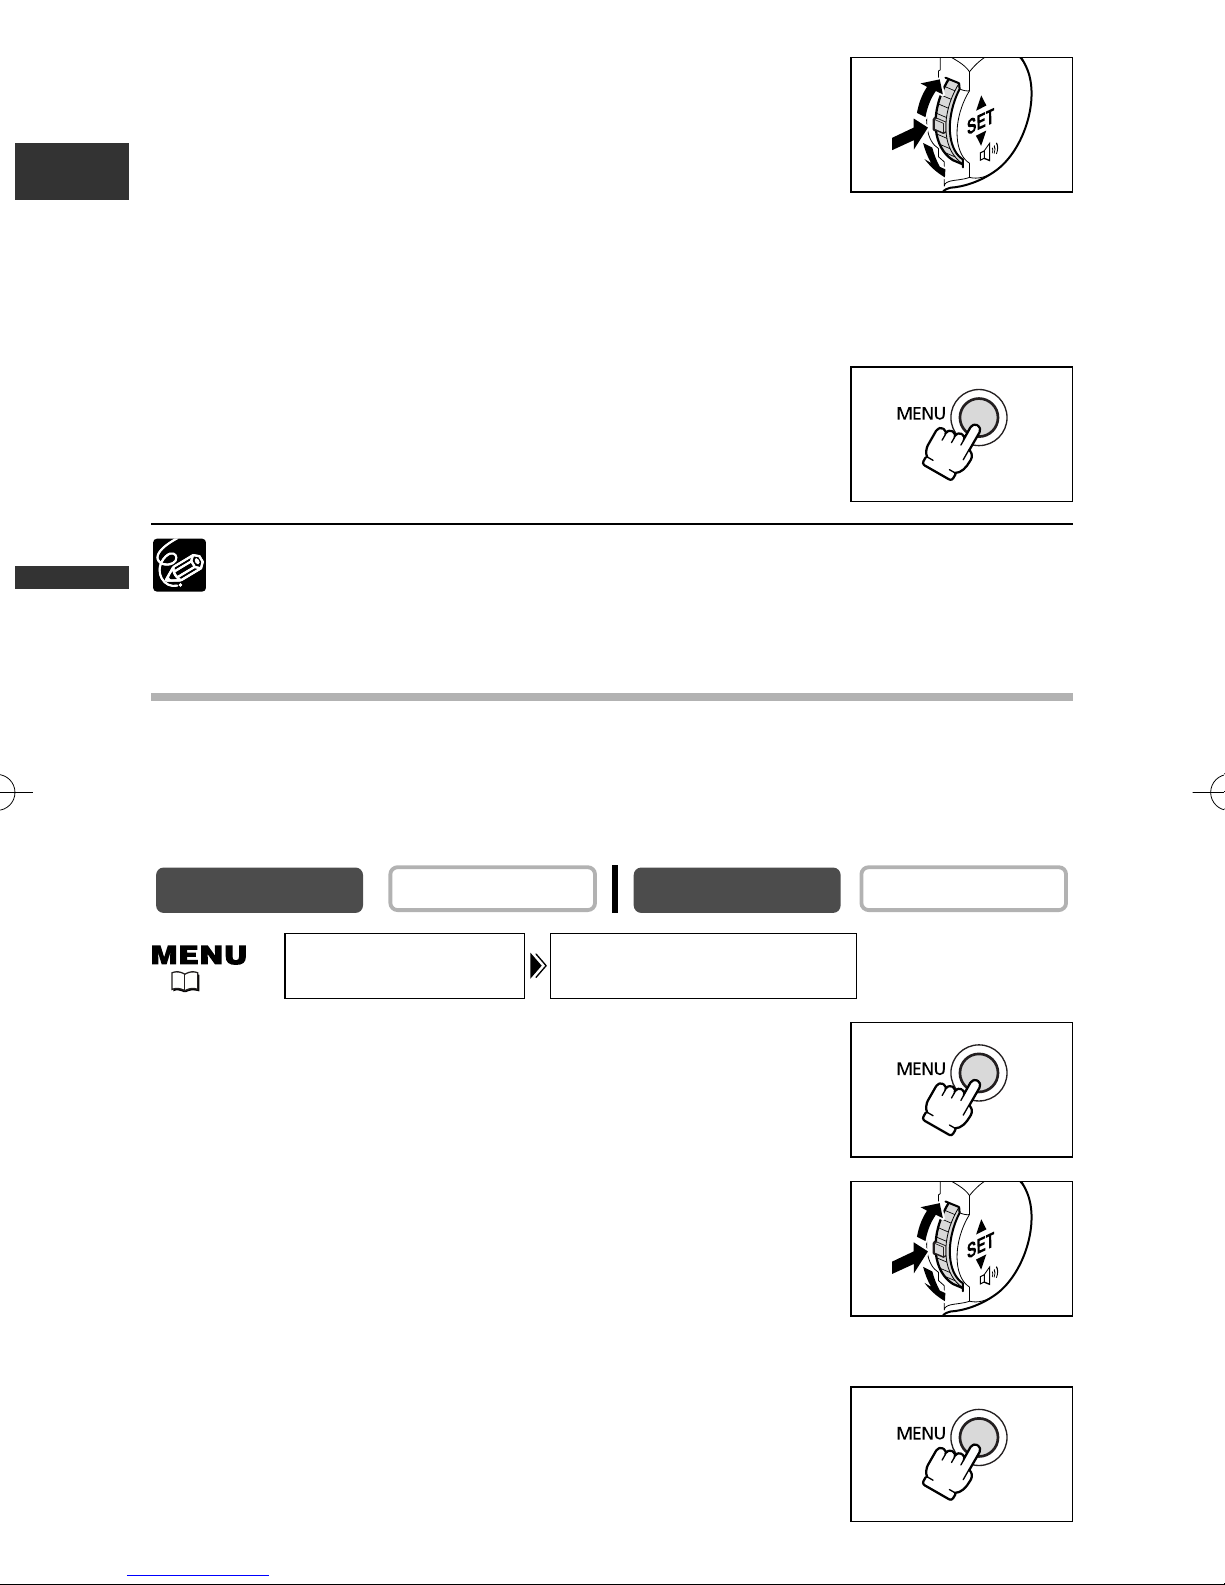
2. Turn the selector dial to select [SYSTEM] and press
CARD PLAY (VCR)
CARD CAMERA
the selector dial.
3. Turn the selector dial to select [D/TIME SET] and
E
press the selector dial.
The year display starts to flash.
4. Turn the selector dial to select the year, and press the selector dial.
• The next part of the display starts flashing.
• Set the month, day, hours and minutes in the same way.
5. Press the MENU button to close the menu and to
start the clock.
Time zone, date and time appear for 4 seconds each time you
turn the power on.
❍ To change a part of the date or time, press the selector dial at step 4, and
move to the part you wish to change.
❍ The date can be set to any year between 2003 and 2030.
Displaying Date and Time during Recording
the Basics
Mastering
You can display time zone, date and time in the lower left corner of the screen (the
time zone disappears after 4 seconds). The 4-second display will no longer appear
when you turn the power on. The date and time display will not be superimposed on
your recordings.
CAMERA
( 41)
PLAY (VCR)
D/T DISPLAY••OFFDISPLAY SET UP
1. Press the MENU button to open the menu.
2. Turn the selector dial to select [DISPLAY SET UP] and
press the selector dial.
3. Turn the selector dial to select [D/T DISPLAY] and
press the selector dial.
4. Turn the selector dial to select [ON].
5. Press the MENU button to close the menu.
24

Recording Movies on a Tape
You can use the LCD screen or the viewfinder when recording.
Before You Begin Recording
Make a test recording first to check if the camcorder operates correctly. Before you
make important recordings, clean the video heads ( 151).
Preparations
Connect a power source. Load a cassette.
Recording
1. Remove the lens cap.
2. Set the camcorder to CAMERA mode.
If you have not set the time zone, date and
time, “SET THE TIME ZONE, DATE AND TIME”
w
q
E
Mastering
the Basics
appears. See Setting the Time Zone, Date and
Time ( 22).
3. Open the LCD panel ( 29).
To use the viewfinder, keep the LCD panel
closed or rotate it so that the screen faces in
the same direction of the lens ( 30).
4. Press the start/stop button to begin
recording.
Wait until the tape counter comes to a
complete stop before you begin recording.
5. Press the start/stop button again to
w
rt
e
pause recording.
Restart recording by pressing the start/stop button.
25

When You Have Finished Recording
1. Turn the POWER switch to OFF.
2. Close the LCD panel.
E
3. Replace the lens cap.
4. Unload the cassette.
5. Disconnect the power source.
When recording outdoors or through a window, do not leave LCD screen,
viewfinder or lens exposed to direct sunlight as it may cause damage.
❍ Turn the power off if you do not intend to use the camcorder for a longer
time.
❍ When you start recording, the camcorder counts from 1 second to 10 seconds
(recording reminder). Recordings shorter than 10 seconds may be difficult to
edit later. On the other hand, a recording not containing a particular action
should generally last no longer than 10 seconds.
❍ The camcorder will shut off after 5 minutes when left in record pause mode to
protect tape and video heads. “ AUTO POWER OFF” appears 20 seconds
the Basics
Mastering
before shutoff. To continue recording, turn the POWER switch to OFF and then
back to CAMERA.
❍ For when to use the [ (Easy Recording) or
the Recording Programs ( 57).
❍ When you do not remove the cassette, you can record the next scene without
producing any noise or blank sections between the recordings even if you turn
the camcorder off.
❍ For extra recording time, see Changing the Recording Mode ( 51).
❍ About the LCD and viewfinder screen: The screens are produced with
extremely high-precision manufacturing techniques, with more than
99.99% of the pixels operating to specification. Less than 0.01% of the
pixels may occasionally misfire or appear as black or green dots. This
has no effect on the recorded image and does not constitute a
malfunction.
Q (program AE) mode, see Using
26
Zooming
CARD PLAY (VCR)
CARD CAMERA
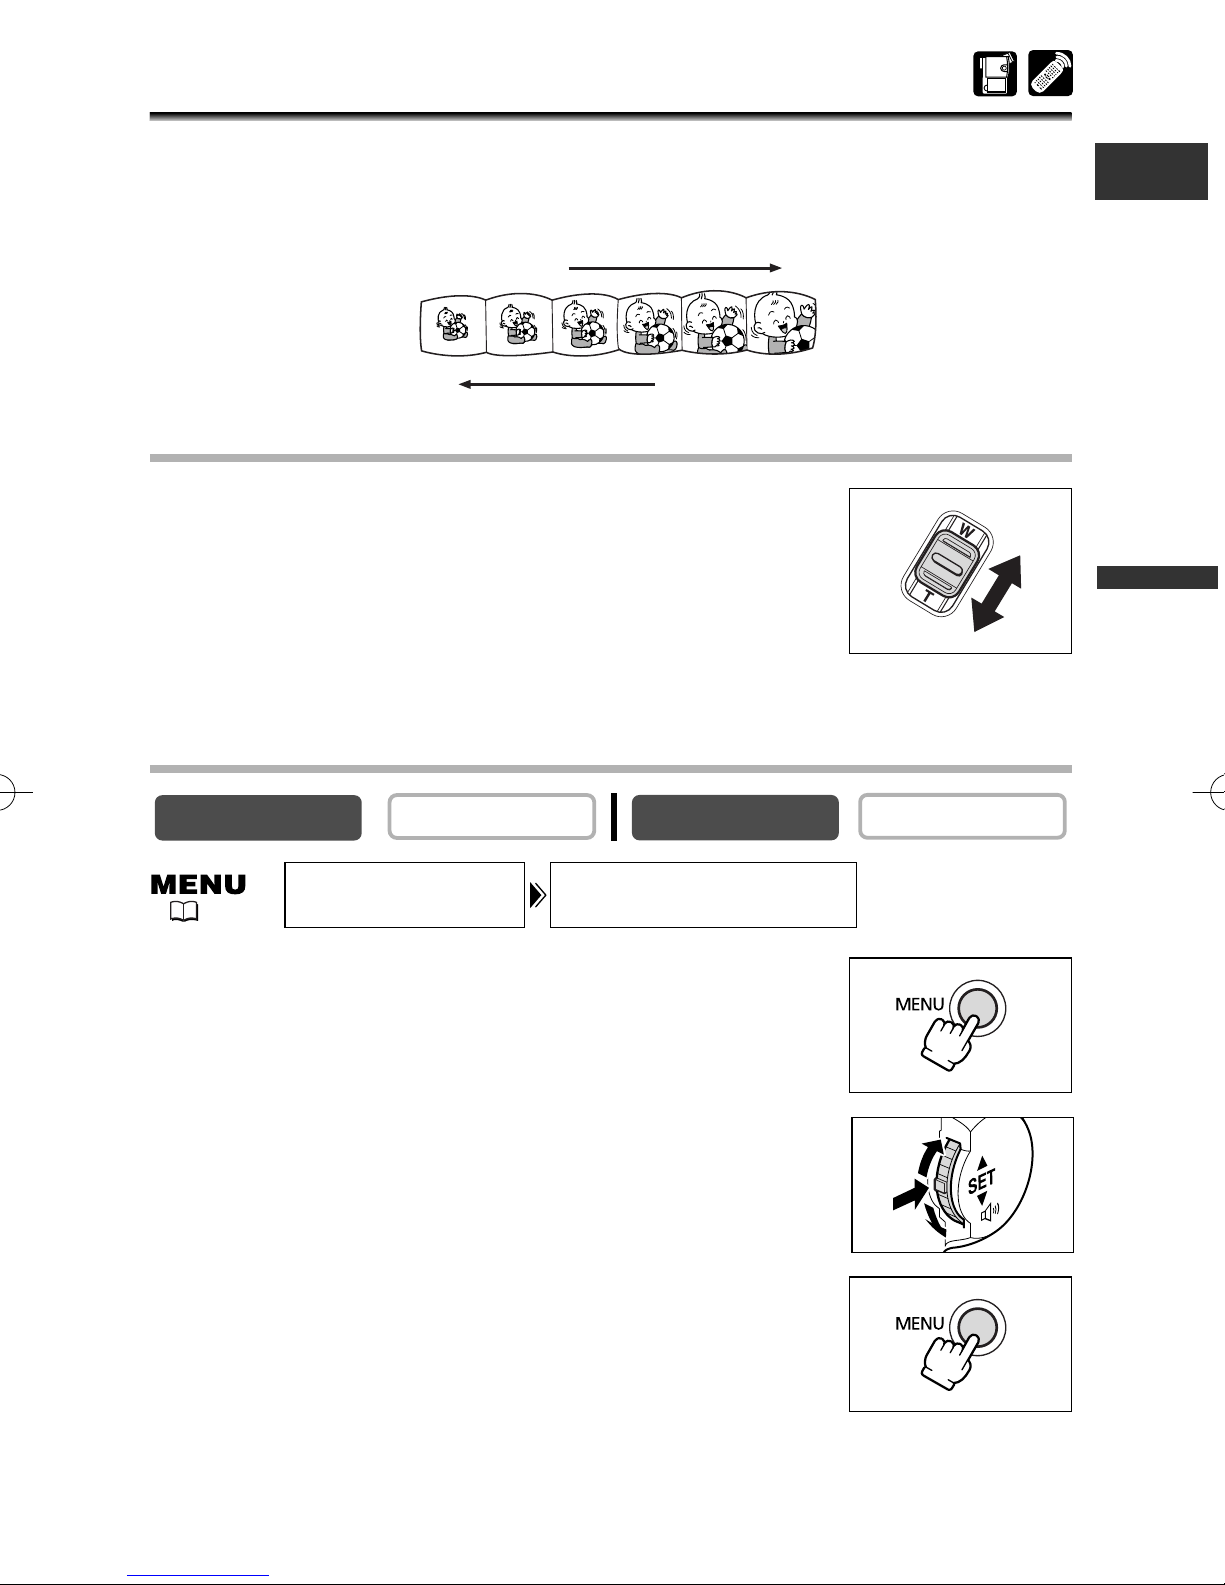
The camcorder’s zoom lens allows you to choose the best picture angle for your
recordings. The camcorder automatically switches between optical zooming and
digital zooming. Image resolution is slightly lower with the digital zoom.
E
W
Zoom in
Zoom out
T
10× Optical Zoom
Move the zoom lever toward W to zoom out (wideangle). Move it toward T to zoom in (telephoto).
•Press the zoom lever slightly for a slow zoom. Press harder for a
faster zoom.
•You can also use the T and W buttons on the wireless controller.
However, you cannot control the zoom speed.
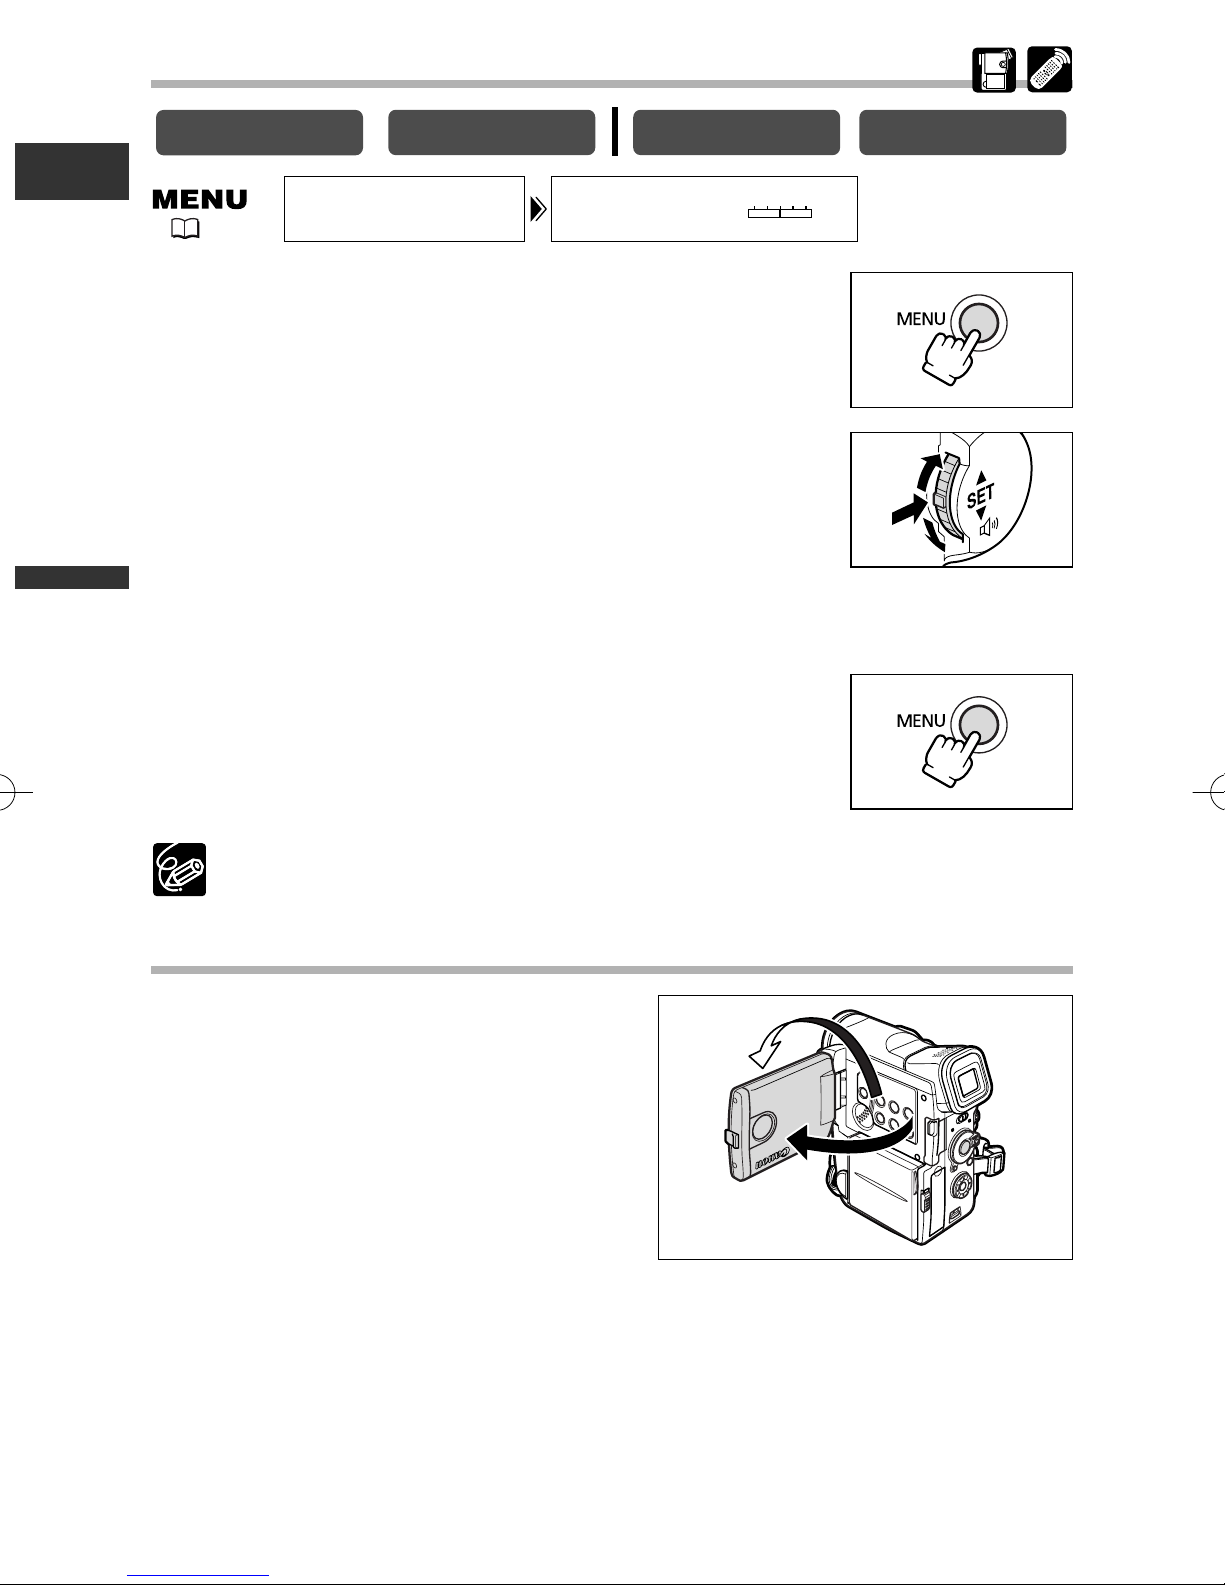
40×/200× Digital Zoom (Card: 40×)
CAMERA
PLAY (VCR)
Mastering
the Basics
( 41)
CAMERA SET UP
D.ZOOM•••••••40
×
1. Press the MENU button to open the menu.
2. Turn the selector dial to select [CAMERA SET UP] and
press the selector dial.
3. Select [D.ZOOM] and press the selector dial.
4. Select a setting option.
5. Press the MENU button to close the menu.
27

E
❍ Keep at least 1 m to the subject. At wide-angle, you can focus on a subject as
close as 1 cm.
❍ A zoom indicator appears for 4 seconds. It extends in light blue when the
digital zoom is set to 40×, and extends further in dark blue when set to 200×.
❍ Digital zoom cannot be used in the Night mode and Super Night mode.
❍ Digital zoom cannot be used when the multi-image screen is selected.
❍ Because the image stabilizer cannot be used in CARD CAMERA mode, we
recommend mounting the camcorder on a tripod at large magnifications.
the Basics
Mastering
28

Using the LCD Screen
1. Push the OPEN button at the LCD
panel and open the LCD panel.
The LCD screen switches on and the
viewfinder switches off.
2. Rotate the LCD panel and choose the
angle of the screen.
You can rotate the LCD panel so that the
screen faces in the same direction as the lens
( 30), or push it flat against the camcorder with the screen facing outward.
3. Close the LCD panel after use.
• Close the LCD panel firmly until it clicks.
• The LCD screen switches off and the
viewfinder switches on.
E
Mastering
the Basics
❍ Make sure to open the LCD panel at 90 degrees before rotating it.
❍ Rotate the LCD panel in the vertical position before closing the LCD panel.
❍ When recording outdoors or through a window, do not leave the LCD screen,
viewfinder or lens exposed to direct sunlight as it may cause damage.
❍ Do not hold the camcorder by the LCD panel or the viewfinder.
❍ Bright light or reflected light may cause a vertical light bar to appear on the
screen. This is not a malfunction.
❍ Bright light may make it difficult to use the LCD screen. In such case, use the
viewfinder instead.
29
Adjusting the Brightness of the LCD Screen
CARD PLAY (VCR)
CARD CAMERA
CAMERA
PLAY (VCR)
E
BRIGHTNESS•••DISPLAY SET UP
( 41)
1. Press the MENU button to open the menu.
2. Turn the selector dial to select [DISPLAY SET UP] and
press the selector dial.
3. Turn the selector dial to select [BRIGHTNESS] and
press the selector dial.
4. Turn the selector dial and adjust the level.
Turn the selector dial up to make the screen brighter and down to make it darker.
5. Press the MENU button to close the menu.
the Basics
Mastering
–+
Changing the brightness of the LCD screen does not affect that of the viewfinder
or the recordings.
Allowing the Subject to Monitor the LCD Screen
You can rotate the LCD panel so that the
screen faces in the same direction as the lens.
The viewfinder switches on allowing you to
use the viewfinder while the subject can
monitor the screen.
When you rotate the screen so that the screen faces in the same direction as the lens,
the image appears mirror reversed (LCD MIRROR ON). However, you can choose to
display the image as it is being recorded (LCD MIRROR OFF).
30
 Loading...