


 Loading...
Office All-In-One
series
Quick Start Guide
Q T 5 1 3 4 6 V 0 1

Getting Help from Canon
Help Us Help You Better
Before you contact Canon, please record the following information.
Serial Number (located on the inside of the product): ____________________________________
Model Number (located on the top of the product): ______________________________________
Setup CD-ROM number (located on the CD-ROM): _____________________________________
Purchase Date:__________________________________________________________________
Customer Technical Support Sequence*
1.Internet — www.canontechsupport.com
For quick and comprehensive self-help in an intuitively guided interactive troubleshooting environment, the place to start is our helpful tech support web site. In addition, the latest driver downloads, answers to frequently asked questions, product information, and “where to buy” instructions are found here.
2.Email Tech Support — www.canontechsupport.com
For individual attention to a special issue, try emailing our friendly technical support representatives, specially trained to communicate quick, easy, and logical solutions to your inquiries within 24 hours.
3.Toll-Free Live Tech Support — (1-800-828-4040)
This option provides live telephone technical support, free of service charges, MondaySaturday (excluding holidays), during your product’s 1 year limited warranty period. Telephone Device for the Deaf (TDD) support is available at (1-866-251-3752).
4.Extended Service and Support — www.canonesp.com
Canon CarePAK Extended Service Plan is a cost-attractive and easy-to-use extended service program that provides up to three full years of service and support coverage at a very attractive price. CarePAK offers toll-free Canon technical support and includes Canon’s superb InstantExchange product replacement program. For further information about extending your Canon service and support, call (1-800-385-2155), or visit our Web site at www.canonesp.com. CarePAK must be purchased during your product’s warranty period.
For more information and updated program specifics, please visit our web site at www.canontechsupport.com.
* Support program specifics are subject to change without notice.
series
Office All-In-One
Quick Start Guide

Canon PIXMA MX300 series Office All-In-One Quick Start Guide.
Copyright
This manual is copyrighted by Canon U.S.A., Inc. with all rights reserved. Under the copyright laws, this manual may not be reproduced in any form, in whole or in part, without the prior written consent of Canon U.S.A., Inc.
© 2007 Canon U.S.A., Inc.
Disclaimer
Canon U.S.A., Inc. has reviewed this manual thoroughly in order that it will be an easy-to-use guide to your Canon PIXMA MX300 series Office All-In-One. All statements, technical information and recommendations in this manual and in any guides or related documents are believed reliable, but the accuracy and completeness thereof are not guaranteed or warranted, and they are not intended to be, nor should they be understood to be, representation or warranties concerning the products described.
Specifications are subject to change without notice.
As an ENERGY STAR® Partner, Canon Inc. has determined that this product meets the ENERGY STAR® guidelines for energy efficiency.
All information regarding non-Canon products was compiled from publicly available information. No representation is made regarding the accuracy thereof.
About Consumables
Consumables (ink tanks / FINE Cartridges) are available for 5 years after production has stopped.
Trademarks
z“Microsoft” is a registered trademark of Microsoft Corporation.
z“Windows” is a trademark of Microsoft Corporation, registered in the U.S. and other countries.
z“Windows Vista” is a trademark of Microsoft Corporation.
z“Macintosh” and “Mac” are trademarks of Apple Inc., registered in the U.S. and other countries.
Canon U.S.A., Inc.
One Canon Plaza
Lake Success, NY 11042

Table of Contents |
|
Before Using the Machine ............................. |
2 |
Operation Panel.............................................. |
2 |
Menu Items..................................................... |
4 |
Turning the Machine On and Off .................... |
6 |
Handling the Original Document..................... |
8 |
Loading Printing Paper ................................... |
9 |
Copying ......................................................... |
17 |
Making Copies.............................................. |
17 |
Changing the Copy Settings......................... |
17 |
Using Useful Copy Functions ....................... |
19 |
Printing from Your Computer...................... |
20 |
Printing with Windows................................... |
20 |
Printing with Macintosh................................. |
21 |
Scanning Images.......................................... |
22 |
Scanning Methods........................................ |
22 |
Printing Photographs Directly |
|
from a Compliant Device ....................... |
23 |
Printing Photographs Directly |
|
from a Compliant Device .............................. |
23 |
About PictBridge Print Settings..................... |
25 |
Faxing............................................................ |
28 |
Preparing the Machine for Fax ..................... |
28 |
Registering Sender Information.................... |
32 |
Registering the Destination........................... |
37 |
Sending Faxes.............................................. |
40 |
Using Other Useful Sending Functions......... |
44 |
Receiving Faxes ........................................... |
45 |
Using Other Useful Receiving Functions ...... |
51 |
Document Stored in Memory........................ |
52 |
Summary of Reports and Lists ..................... |
55 |
Routine Maintenance ................................... |
57 |
When Printing Becomes Faint or Colors |
|
Are Incorrect ................................................. |
57 |
Printing the Nozzle Check Pattern................ |
58 |
Examining the Nozzle Check Pattern ........... |
59 |
Print Head Cleaning...................................... |
60 |
Print Head Deep Cleaning............................ |
61 |
Aligning the Print Head................................. |
62 |
Replacing a FINE Cartridge.......................... |
64 |
Keeping the Best Printing Results ................ |
70 |
Cleaning Your Machine ................................ |
71 |
Troubleshooting ........................................... |
75 |
An Error Message Is Displayed |
|
on the LCD.................................................... |
76 |
LCD Cannot Be Seen At All.......................... |
78 |
An Unintended Language Is Displayed |
|
on the LCD.................................................... |
79 |
Cannot Install the MP Drivers....................... |
80 |
Cannot Connect to Computer Properly......... |
81 |
Print Results Not Satisfactory....................... |
82 |
The Print Result Not Satisfactory |
|
When Copying .............................................. |
86 |
Printing Does Not Start................................. |
86 |
Paper Does Not Feed Properly .................... |
87 |
Paper Jams .................................................. |
88 |
Error Message Appears on the Computer |
|
Screen .......................................................... |
89 |
Error Message Appears on a PictBridge |
|
Compliant Device ......................................... |
91 |
Scanning Problems ...................................... |
92 |
Problems Receiving Faxes........................... |
92 |
Problems Sending Faxes ............................. |
94 |
Telephone Problems .................................... |
95 |
Appendix....................................................... |
96 |
How to Use the Documentation Provided..... |
96 |
Reading the On-screen Manuals.................. |
97 |
Specifications ............................................... |
98 |
Safety Precautions..................................... |
102 |
Legal Limitations on Use of Your Product |
|
and Use of Images ..................................... |
105 |
Users in the U.S.A...................................... |
106 |
Users in Canada......................................... |
111 |
Users in New Zealand ................................ |
112 |
Index............................................................ |
113 |
1
Before Using the Machine
Operation Panel
(1) |
(2)(3)(4)(5)(6) |
(7) |
(8) |
(9) |
(10) |
(11) |
(12) |
|||||||||||||
|
|
|
|
|
|
|
|
|
|
|
|
|
|
|
|
|
|
|
|
|
|
|
|
|
|
|
|
|
|
|
|
|
|
|
|
|
|
|
|
|
|
|
|
|
|
|
|
|
|
|
|
|
|
|
|
|
|
|
|
|
|
|
|
|
|
|
|
|
|
|
|
|
|
|
|
|
|
|
|
|
|
|
|
|
|
|
|
|
|
|
|
|
|
|
|
|
|
|
|
|
|
|
|
|
|
|
|
|
|
|
|
|
|
|
|
|
|
|
|
|
|
|
|
|
|
(20) (19) (18) |
(17) |
(16) |
(15) |
(14) |
(13) |
(1)ON/OFF button / Power lamp
Turns the machine on and off. Lights or flashes green to indicate the power status. Before turning on the machine, make sure the Document Cover is closed.
(2)COPY button
Switches the machine to copy mode.
(3)In Use/Memory lamp
Flashes when the telephone line is in use. Lights when there are documents stored in the machine’s memory.
(4)FAX button
Switches the machine to fax mode.
(5)Alarm lamp
Lights or flashes orange when an error, such as paper-out or ink-out, occurs.
(6)SCAN button
Switches the machine to scan mode. In scan mode, the machine scans a document to your computer according to the settings selected. To use this button, the machine must be connected to a computer. For details, refer to the Scanning Guide on-screen manual.
(7)Menu button
Accesses the menus and settings to customize operation of your machine.
(8)LCD (Liquid Crystal Display)
Displays messages, menu selections, and the operational status.
(9)Numeric buttons
Enter numerical values such as the number of copies, as well as fax/telephone numbers and characters.
(10)Redial/Pause button
Redials the last number called using the Numeric buttons. Also enters pauses between or after numbers when dialing or registering numbers.
(11)Black button
Starts black & white copying, scanning, or faxing.
(12)Stop/Reset button
Cancels operations such as copying, scanning, or faxing, or a print job in progress.
(13)Color button
Starts color copying, scanning, or faxing.
2 |
Before Using the Machine |

(14)Coded Dial button
Press this button and a two-digit code to dial a pre-registered fax/telephone number.
(15)Tone button
Switches temporarily to tone dialing. Also changes the mode when entering characters.
(16)OK button
Finalizes your selection for the menu or setting item.
Dismisses the error message and resumes the machine’s normal operation after resolving a printing error or removing jammed paper.
(17)[ (-) and ] (+) buttons
Scroll through menu selections, and increase or decrease the number of copies.
For the fax settings, [ cancels the entered character, and ] enters a space between characters.
(18)Back button
Returns the LCD to the previous screen.
(19)Settings button
Configures the page size, media type, and image correction settings.
(20)FAX Quality button
Sets the scan contrast and resolution of the fax you are sending.
Before Using the Machine |
3 |
Menu Items
Press the Menu button to display the menu items.
You can specify the special copy settings, various fax settings, or perform the machine maintenance by using these menu items.
Press the Settings button to display the setting items in copy mode or fax mode.
You can specify the various print settings in copy mode, or page size and media type settings in fax mode by using these setting items.
Press the FAX Quality button to display the fax quality setting items in fax mode. You can specify the scan contrast and fax resolution.
For details, refer to the User’s Guide on-screen manual.
Note
zYou can select DEVICE SETTINGS and MAINTENANCE in any mode.
zDirect Printing mode is displayed only when a PictBridge compliant device is connected to the machine.
z COPY mode
Menu button
SPECIAL COPY*1
FRAME ERASE
STICKER COPY BORDERLESS COPY IMAGE REPEAT 2-ON-1
4-ON-1
FAX SETTINGS
See “FAX SETTINGS” in FAX mode.
DEVICE SETTINGS
MAINTENANCE
Settings button
ENLARGE/REDUCE (page 17)
PAGE SIZE (page 18)
MEDIA TYPE (page 18)
INTENSITY (page 18)
IMAGE QUALITY (page 18)
DEVICE SETTINGS and
MAINTENANCE under each mode contains the following menu items.
z DEVICE SETTINGS
PRINT SETTINGS*1
EXTENDED AMOUNT
PICTBRIDGE SET (page 27)
PAGE SIZE
MEDIA TYPE
PRINT QLTY
BORDERLESS PRINT
IMAGE ENHANCEMENT
OTHERS*1
AUDIBLE TONES
COUNTRY SELECT*2
LANGUAGE SETTING
QUIET MODE
RESTORE DEFAULT*1
z MAINTENANCE
NOZZLE CHECK (page 58)
CLEANING (page 60)
DEEP CLEANING (page 61)
ALIGN PRINT HEAD (page 62)
HEAD ALIGN PRINT (page 62)
ROLLER CLEANING (page 72)
BOTTOM CLEANING (page 73)
4 |
Before Using the Machine |

z FAX mode
Menu button
FAX SETTINGS
RECEIVE MODE SET (page 45)
FAX PRIORITY MODE
FAX ONLY MODE
DRPD*3
NETWORK SWITCH*2
TEL PRIORITY MODE
MEMORY REFERENCE (page 52) PRINT MEMORY LIST
PRINT DOCUMENT
DELETE DOCUMENT
PRNT REPORT/LIST (page 55)
ACTIVITY REPORT
SPEED DIAL LIST
USER’S DATA LIST
MEMORY LIST
CODED DIAL REGIST (page 37)
USER SETTINGS (page 32)
DATE/TIME SETTING
DATE DISPLAY*1
SUMMER TIME SET*2
UNIT TEL NUMBER
UNIT NAME
TX TERMINAL ID*1
OFFHOOK ALARM*1
VOLUME CONTROL*1
RX RING LEVEL*1
TEL LINE TYPE (page 30)
ACTIVITY REPORT*1
TX SETTINGS*1
ECM TX
PAUSE TIME
AUTO REDIAL
TX START SPEED
TX REPORT
DIAL TONE DETECT
RX SETTINGS*1
AUTO PRINT RX
ECM RX
FAX PRIORITY MODE
DRPD:FAX RNG PAT*3
RING COUNT
MAN/AUTO SWITCH
REMOTE RX
RX IMG REDUCTION
RX START SPEED
RX REPORT
DEVICE SETTINGS
MAINTENANCE
Settings button
PAGE SIZE (page 50)
MEDIA TYPE (page 50)
FAX Quality button
SCAN CONTRAST (page 41)
FAX RESOLUTION (page 41)
z SCAN mode
Menu button
DEVICE SETTINGS
MAINTENANCE
z Direct Printing mode
Menu button
DEVICE SETTINGS
MAINTENANCE
*1 For details, refer to the User’s Guide on-screen manual.
*2 This setting may not be available depending on the country or region of purchase.
*3 US and Canada only.
Before Using the Machine |
5 |
Turning the Machine On and Off
Turn on the machine before printing.
Turning on the Machine
Before turning on the machine, confirm the following. z The FINE Cartridges are installed properly.
If you are using the machine connected to a computer, confirm also the following.
zThe machine is connected to your computer (or a compatible device).
zThe MP Drivers are installed.
Note
If preparatory operations above are not complete, follow your setup sheet to complete them.
1 Press the ON/OFF button to turn on the machine.
The Power lamp flashes and then remains lit green.
Important
If the Alarm lamp lights up or flashes orange and an error message is displayed on the LCD, see “An Error Message Is Displayed on the LCD” on page 76.
2 If you are using the machine connected to a computer, turn on your computer.
Turning off the Machine
1 To turn off the machine, press the ON/OFF button.
When the Power lamp stops flashing, the machine is turned off.
Important
About the Power Plug
When removing the power plug after turing off the machine, be sure to confirm that the Power lamp is not lit. If the power plug is removed from the wall outlet with the Power lamp still lit or flashing green, the machine may become unable to print.
See “Keeping the Best Printing Results” on page 70.
Note
The power cannot be turned off while the machine is sending or receiving a fax, or when there are unsent faxes stored in the machine’s memory.
6 |
Before Using the Machine |
z Screen-saver Mode
The LCD goes out if the machine is not operated for about five minutes*. Perform a print operation to restore the display.
* You cannot change the wait time before the LCD goes out.
Note
When you want to restore the display, perform any operation such as copying, faxing, or scanning, or press any button except for the ON/OFF button. When you press the ON/OFF button while the machine is in Screen-saver mode, the machine turns off.
Before Using the Machine |
7 |
Handling the Original Document
This section describes how to load the original document on the Platen Glass.
Original Document Requirements
The original documents you load on the Platen Glass for copying, scanning, or faxing must meet these requirements:
Document type |
z Paper documents |
|
z Photographs |
|
z Books |
Size (W x L) |
Max. 8.5 x 11.7 inches / 216 x 297 mm |
Thickness |
Max. 0.39 inches / 10 mm |
Loading Original Documents
Load originals to copy, scan, or fax on the Platen Glass.
Note
Make sure any glue, ink, correction fluid, or the like on the original document is completely dry before loading it on the Platen Glass.
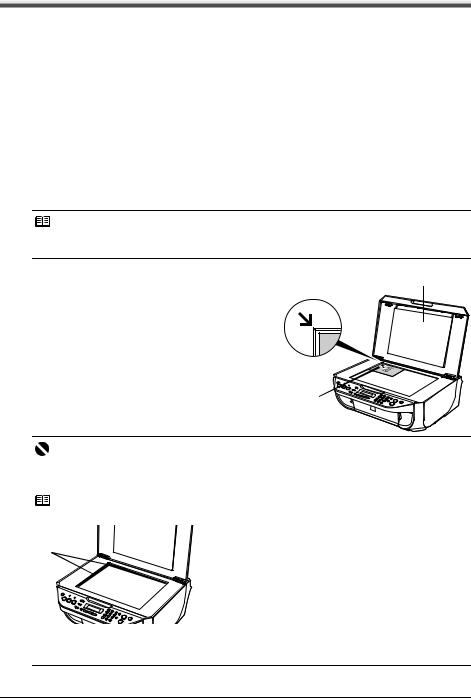
1 Load the original document on the Platen |
(1) |
Glass. |
|
(1) Lift the Document Cover. |
|
(2) Load the original with the side to be copied, |
|
scanned, or faxed facing down on the Platen |
|
Glass. |
|
Place the original in landscape orientation and |
|
align the upper corner of it with the alignment |
|
mark as shown in the figure on the right. |
(2) |
|
Important
zDo not place any objects weighing more than 4.4 lb / 2.2 kg on the Platen Glass.
zDo not press or put weight on the original with pressure exceeding 4.4 lb / 2.2 kg. Doing so may cause the scanner to malfunction or the Platen Glass to break.
Note
z The machine cannot scan the shaded area in the figure below.
(A)
(A) 0.04 inches / 1 mm
zWhen copying, the area you can scan depends on the printable area of the media. See “Printing Area” in the User’s Guide on-screen manual.
2 Gently close the Document Cover.
8 |
Before Using the Machine |
Loading Printing Paper
This section describes how to load printing paper in the Rear Tray.
z Using Specialty Media
Canon recommends that you use Canon genuine media to ensure optimal print quality.
z Photo Quality Media |
z Media Suited for Business |
z Glossy Photo Paper |
Documents |
z Matte Photo Paper |
z High Resolution Paper |
zPhoto Paper Plus Double Sided
zPhoto Paper Plus Glossy
zPhoto Paper Plus Semi-gloss
zPhoto Paper Pro
zPhoto Stickers
Before Using the Machine |
9 |

Paper Handling
z Recommended Paper and Requirements
Media Type |
Model*1 |
Paper |
Paper |
Paper |
Media Type |
|
|
|
Support |
Output |
Thickness |
Machine |
Printer |
|
|
Load Limit |
Tray Load |
Lever*2 |
Setting |
Driver |
|
|
|
Limit |
|
|
Setting |
Plain Paper*3 |
— |
100 sheets |
50 sheets |
Left |
PLAIN |
Plain Paper |
|
|
|
|
|
PAPER |
|
Envelopes*4 |
— |
10 envelopes |
1 envelope |
Right |
— |
Envelope |
High |
HR- |
80 sheets |
50 sheets |
Left |
— |
High |
Resolution |
101N |
|
|
|
|
Resolution |
Paper*4 |
|
|
|
|
|
Paper |
Super White |
SW-201 |
80 sheets |
50 sheets |
Left |
PLAIN |
Plain Paper |
Paper |
|
|
|
|
PAPER |
|
Glossy Photo |
GP-401 |
A4, Letter, 5" |
*6 |
Left |
GLOSSY |
Glossy Photo |
Paper*5 |
|
x 7" / 127.0 x |
|
|
|
Paper |
|
|
177.8 mm |
|
|
|
|
Glossy Photo |
GP-501 |
|
Left |
GLOSSY |
Glossy Photo |
|
Paper |
|
and 8" x 10" / |
|
|
|
Paper |
“Everyday |
|
203.2 x |
|
|
|
|
Use”*5 |
|
254.0 mm: |
|
|
|
|
|
|
10 sheets |
|
|
|
|
Matte Photo |
MP-101 |
|
Left |
MATTE |
Matte Photo |
|
Paper |
|
4" x 6" / |
|
|
PHOTO PAPR |
Paper |
|
101.6 x |
|
|
|||
Photo Paper |
GP-502 |
|
Left |
GLOSSY |
Glossy Photo |
|
152.4 mm, |
|
|||||
Glossy |
|
Wide, and |
|
|
|
Paper |
Photo Paper |
SG-101, |
Credit card: |
|
Left |
PHOTO |
Photo Paper |
Plus Semi- |
SG-201 |
20 sheets |
|
|
PAPER PLUS |
Plus Glossy |
gloss*5 |
|
|
|
|
|
|
Photo Paper |
PR-101 |
|
|
Left |
PHOTO |
Photo Paper |
Pro*5 |
|
|
|
|
PAPER PRO |
Pro |
Photo Paper |
PP-101 |
|
|
Left |
PHOTO |
Photo Paper |
Plus Glossy*5 |
|
|
|
|
PAPER PLUS |
Plus Glossy |
Photo Paper |
PP- |
1 sheet |
|
Left |
— |
Photo Paper |
Plus Double |
101D |
|
|
|
|
Plus Double |
Sided*4*7 |
|
|
|
|
|
Sided |
Photo |
PS-101 |
1 sheet |
|
Left |
PHOTO |
Photo Paper |
Stickers*8 |
|
|
|
|
PAPER PLUS |
Plus Glossy |
T-Shirt |
TR-301 |
1 sheet |
|
Right |
— |
T-Shirt |
Transfers*4 |
|
|
|
|
|
Transfers |
*1 Paper with a Model Number is Canon specialty media. Refer to the instruction manual supplied with the paper for detailed information on the printable side and notes on handling paper. For information on the paper sizes available for each Canon genuine paper, visit our website. You may not be able to purchase some Canon genuine papers depending on the country or region of purchase. Paper is not sold in the US by Model Number. Purchase paper by name.
*2 If the corners or edges of the paper are smudged, try to print with the Paper Thickness Lever set to the right. It may improve print quality.
Reset the Paper Thickness Lever to the left when you finish printing.
For details on the Paper Thickness Lever, refer to “Inside” in “Main Components” of the User’s Guide on-screen manual.
10 |
Before Using the Machine |

*3 Proper feeding of paper may not be possible at the maximum capacity depending on the type of paper or environmental conditions (either very high or low temperature and humidity). In such cases, reduce the sheets of paper you load at a time to around half (around 0.2 inches / 5 mm in paper stack height).
*4 Available only when printing from your computer.
*5 When loading paper in stacks, the print side may be marked as it is fed in or sheets may be stuck to one another causing them not to be fed properly. In this case, load one sheet at a time.
*6 We recommend that you remove the previously printed sheet from the Paper Output Tray before continuously printing to avoid blurs and discoloration.
*7 This paper cannot be used in Macintosh®.
*8 When copying onto sticker paper, be sure to select STICKER COPY in SPECIAL COPY. Refer to “Copying on Stickers (STICKER COPY)” in “Using Useful Copy Functions” of the User’s Guide on-screen manual.
Important
zPut unused paper back into the package, and store them avoiding heat, humidity, and direct sunlight.
zDo not touch the printed surface nor stack the printed sheets until the ink is fixed.
Note
For a detailed description of printing media types, refer to “Printing Media” in the User’s Guide onscreen manual.
z Media Types You Cannot Use
Do not use the following types of paper. Using such paper will not only produce unsatisfactory results, but can also cause the machine to jam or malfunction. Additionally, when printing on A5 or smaller sized paper, do not use paper thinner than a post card, including plain paper or notepad paper cut to a small size.
zFolded, curled, or wrinkled paper
zDamp paper
zPaper that is too thin (weighing less than 17 lb / 64 gsm)
zPaper that is too thick (plain paper, except for Canon genuine paper, weighing more than 28 lb / 105 gsm)
zPicture postcards
zPostcards affixed with photos or stickers
zAny type of paper with holes
zPaper that is not rectangular
zPaper bound with staples or glue
zPaper with adhesives
zPaper decorated with glitter, etc.
Before Using the Machine |
11 |
Loading Paper
Important
zLoad A4, Letter, or Legal-sized plain paper when receiving faxes.
zIf you cut plain paper to 4" x 6" / 101.6 x 152.4 mm, 5" x 7" / 127.0 x 177.8 mm, or 2.13" x 3.39" / 54.0 x 86.0 mm (credit card-size) for a trial print, it can cause paper jams.
zYou cannot print on postcards affixed with photos or stickers.
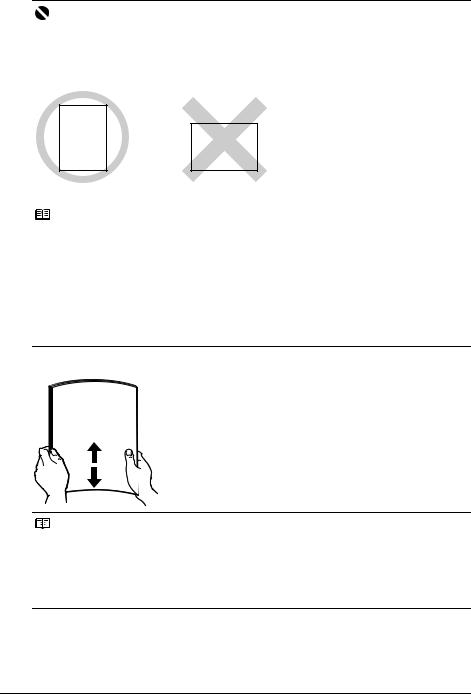
zAlways load paper in portrait orientation (A). Loading paper in landscape orientation (B) can cause the paper to be jammed.
(A) |
(B) |
Note
zWe recommend using genuine Canon photo media when printing photographs. For details on the specialty media Canon provides for use with its various printers, see “Using Specialty Media” on page 9.
When Printing on Plain Paper
zYou can use general copy paper or Canon’s Super White Paper. When printing on both sides, we recommend Canon’s Super White Paper Double-Sided.
Paper size:
–Standard sizes: A4, B5, A5, Letter, and Legal
–Non-standard sizes: 2.13 x 3.39 inches to 8.5 x 23 inches / 54.0 x 86.0 mm to 215.9 x 584.2 mm
Paper weight: 17 to 28 lb / 64 to 105 gsm (non-Canon genuine plain paper)
1 Flatten the four corners of the paper before loading it.
Note
zAlign the edges of paper neatly before loading. Loading paper without aligning the edges may cause paper jams.
zIf paper is curled, hold the opposing curled corners and gently bend them in the opposite direction until the paper becomes completely flat. See “Paper is curled.” on page 85.
zTo avoid curling, handle paper as follows.
–Put unused paper back into the package and keep them on a level surface.
–Take out only the necessary number of sheets from the package, just before printing.
12 |
Before Using the Machine |
2
3
4
Prepare to load paper. |
(2) |
||
(1) |
Open the Rear Tray. |
||
(1) |
|||
(2) |
Pull out the Paper Support. |
||
(3) |
|||
|
Put your finger in the rounded indent of the |
||
|
Paper Support and pull it out until it stops. |
(5) |
|
|
|
||
(3) |
Open the Paper Output Tray. |
|
|
|
Put your finger in the rounded indent beside |
|
|
|
the Paper Output Tray and open it gently. |
|
|
(4) |
Open the Output Tray Extension. |
(4) |
|
|
Open up and set the Output Tray Extension |
|
|
completely by pressing down the hollow on its front side.
(5)Adjust the position of the Paper Thickness Lever.
Set it to the right when printing on envelopes or T-shirt transfers, and left when printing on any other type of paper. See “Paper Handling” on page 10.
Note
If the corners or edges of the paper are smudged, try to print with the Paper Thickness Lever set to the right. It may improve print quality.
Reset the Paper Thickness Lever to the left when you finish printing.
For details on the Paper Thickness Lever, refer to “Inside” in “Main Components” of the User’s Guide on-screen manual.
Load the paper.
(1) Load the paper in the Rear Tray with the print side facing UP.
(2) Align the paper stack against the right side of the Rear Tray.
(3) Pinch the Paper Guide and slide it against the |
(3) |
|
|
left side of the paper stack. |
|
(A)* (1)

 (2)
(2)
* Do not load higher than the Load Limit Mark (A).
Specify the page size and media type settings according to the loaded paper.
Note
zWhen performing copy direct printing without using a computer, select the size and type of the loaded paper using the Operation Panel.
For details on settings, see “Changing the Copy Settings” on page 17 or “Changing the Print Settings” on page 50.
zWhen using the machine connected to a computer, select the size and type of the loaded paper in Page Size (or Paper Size) and Media Type in the printer driver.
For details on printer driver settings, see “Printing with Windows” on page 20 or “Printing with Macintosh” on page 21.
Before Using the Machine |
13 |
Loading Envelopes
Use either European DL or US Comm. Env. #10-sized envelope.
Important
zYou need to print from the computer to print on envelopes.
zDo not use the following envelopes:
–Envelopes with a double flap (or sticker flaps)
–Envelopes with an embossed or treated surface
–Envelopes with pressure seals
–Envelopes whose gummed flaps are already moistened and adhesive
1Prepare the envelopes.
z Press down on all four corners and edges of the envelopes to flatten them.
z If the envelopes are curled, hold the opposite corners and gently twist them in the opposite direction.
z If the flap of an envelope is curled, flatten it.
z If the leading edge of an envelope is puffed up or curled, use a pen to press the envelope flat and sharpen the crease.
Press the envelope flat, working from the middle to the edge.
* The above illustrations show a side view of the leading edge of the envelope.
Important
The envelopes may jam in the machine if they are not flat or the edges are not aligned. Make sure that no curl or puff exceeds 0.1 inches / 3 mm.
14 |
Before Using the Machine |
2 Load the envelopes.
(1)Load the envelope against the right side of the Rear Tray.
Load with the address side facing UP and the rear flaps DOWN on the left.
Up to 10 envelopes can be loaded at once.
(2)Pinch the Paper Guide and slide it against the left side of the envelope.
(3)Set the Paper Thickness Lever to the right.
(B)
(2) |
(1) |
 (3)
(3) 

(A)
(A)Printing orientation
(B)Make sure the flaps are folded.
Note
Reset the Paper Thickness Lever to the left when you finish printing. For details on the Paper Thickness Lever, refer to “Inside” in “Main Components” of the User’s Guide on-screen manual.
3 Specify the settings in the printer driver.
(1)Select Envelope in Media Type.
(2)Select the size for envelopes.
In Windows®, select DL Env. or Comm. Env. #10 in Page Size.
In Macintosh, select DL Envelope or #10 Envelope in Paper Size.
(3)Select Landscape in Orientation.
Important
Be sure to set the printer driver setting properly. If you do not, the address will be printed in the wrong direction.
Note
For details on printer driver settings, see “Printing with Windows” on page 20 or “Printing with Macintosh” on page 21.
Before Using the Machine |
15 |
Loading Small-Sized Paper
You can use 4" x 6" / 101.6 x 152.4 mm, 5" x 7" / 127.0 x 177.8 mm, and Credit card-sized papers.
1 Load the paper.
(1) |
Load the paper against the right side of the |
|
|
|
Rear Tray with the print side facing UP. |
(1) |
|
(2) |
Pinch the Paper Guide and slide it against the |
||
(2) |
|||
|
left side of the paper stack. |
||
|
|
2 Specify the page size and media type settings according to the loaded paper.
Note
zWhen performing copy direct printing without using a computer, select the size and type of the loaded paper using the Operation Panel.
For details on settings, see “Changing the Copy Settings” on page 17.
zWhen using the machine connected to a computer, select the size and type of the loaded paper in Page Size (or Paper Size) and Media Type in the printer driver.
For details on printer driver settings, see “Printing with Windows” on page 20 or “Printing with Macintosh” on page 21.
16 |
Before Using the Machine |
Copying
Making Copies
This section describes the basic procedure to make copies.
1 Turn on the machine.
See “Turning the Machine On and Off” on page 6.
2
3
Press the COPY button.
Load paper.
See “Loading Printing Paper” on page 9.
4 Load the original on the Platen Glass.
See “Loading Original Documents” on page 8.
5 Specify the copy settings.
(1)Press the [ or ] button, or the Numeric buttons to specify the number of copies (max. 99 copies).
(2)Press the Settings button to adjust the settings as necessary. For details, see “Changing the Copy Settings” on page 17.
6 Press the Color button for color copying, or the Black button for black & white copying.
Changing the Copy Settings
You can change the copy settings such as the page size, media type, or image quality. Press the Settings button repeatedly to switch the item to set.
Note
z The |
(asterisk) on the LCD indicates the current setting. |
zThe settings of the page size, media type, and image quality are retained even if the machine is turned off.
ENLARGE/REDUCE
Select the reduction/enlargement method.
For details, refer to “Reducing or Enlarging a Copy” in “Making Copies” of the User’s Guide onscreen manual.
Ex: 1.ENLARGE/REDUCE
PRESET RATIO
PRESET RATIO / ZOOM / FIT-TO-PAGE
Copying 17
PAGE SIZE
Select the page size of the loaded paper.
Ex: 2.PAGE SIZE
 A4
A4
8.5"x11" / A4 / B5 / A5 / 4"x6" / 5"x7" / CREDIT CARD SIZE
Note
Some of these are not available depending on the country or region of purchase.
MEDIA TYPE
Select the media type of the loaded paper.
Ex: 3.MEDIA TYPE
 PLAIN PAPER
PLAIN PAPER / PHOTO PAPER PRO / PHOTO PAPER PLUS / MATTE PHOTO PAPR / GLOSSY
INTENSITY
Change the intensity.
Ex: 4.INTENSITY
 MANUAL ADJUST
MANUAL ADJUST / AUTO ADJUST (A)
Note
If you select MANUAL ADJUST, use the [ button to decrease the intensity or the ] button to increase it.
If you select AUTO ADJUST (A), A appears on the LCD.
IMAGE QUALITY
Adjust print quality according to the original.
Ex: 5.IMAGE QUALITY
 STANDARD
STANDARD / HIGH / FAST
Note
zFAST can be selected only when this setting is set to PLAIN PAPER.
zWhen using FAST, if the quality is not as good as expected, select STANDARD or HIGH and try copying again.
zSelect HIGH to copy in grayscale. Grayscale renders tones in a range of grays instead of black or white.
18 Copying
Using Useful Copy Functions
For details, refer to “Using Useful Copy Functions” in the User’s Guide on-screen manual.
|
Reducing or Enlarging a Copy |
|
Copying Thick Originals Such as Books |
||||||||||
|
|
|
(ENLARGE/REDUCE) |
|
|
(FRAME ERASE) |
|||||||
|
|
|
|
|
|
|
|
|
|
|
|
|
|
|
|
|
|
|
|
|
|
|
|
|
|
|
|
|
|
|
|
|
|
|
|
|
|
|
|
|
|
|
|
|
|
|
|
|
|
|
|
|
|
|
|
|
|
|
|
|
|
|
|
|
|
|
|
|
|
|
|
|
|
|
|
|
|
|
|
|
|
|
|
|
|
|
|
|
|
|
|
|
|
|
|
|
|
|
|
|
|
|
|
|
|
|
|
|
|
|
|
|
|
|
|
|
|
|
|
|
|
|
|
|
|
|
|
|
|
|
|
|
|
|
|
|
|
|
|
|
|
|
|
|
|
|
|
|
|
|
|
|
|
|
|
|
|
|
|
|
|
|
|
|
|
|
|
|
Copying on Stickers |
Copying without Borders |
|||||||||||
|
|
(STICKER COPY) |
(BORDERLESS COPY) |
||||||||||
|
|
|
|
|
|
|
|
|
|
|
|
|
|
|
|
|
|
|
|
|
|
|
|
|
|
|
|
|
|
|
|
|
|
|
|
|
|
|
|
|
|
|
|
|
|
|
|
|
|
|
|
|
|
|
|
|
|
|
|
|
|
|
|
|
|
|
|
|
|
|
|
|
|
|
|
|
|
|
|
|
|
|
|
|
|
|
|
|
|
|
|
|
|
|
|
|
|
|
|
|
|
|
|
|
|
|
|
|
|
|
|
|
|
|
|
|
|
|
|
|
|
|
|
|
|
Platen Glass |
16 stickers |
|
Repeating an Image on a Page |
Copying Two Pages to Fit |
|
(IMAGE REPEAT) |
onto a Single Page |
|
|
|
(2-ON-1) |
Copying Four Pages to Fit onto a Single Page (4-ON-1)
Copying 19
Printing from Your Computer
This section describes procedure for basic printing.
Printing with Windows
Note
Depending on your application program, operations may differ. For details, refer to the instruction manual of your application.
The steps described in this section are for printing in Windows Vista™ operating system (hereafter referred to as “Windows Vista”).
1 Turn on the machine and load the paper in the machine.
See “Turning the Machine On and Off” on page 6 and “Loading Printing Paper” on page 9.
2
3
4
5
6
Create a document or open a file to print using an appropriate application software.
Select Print on the application software’s File menu.
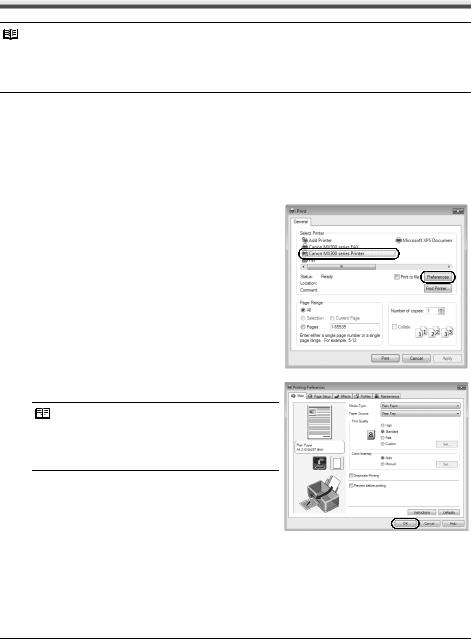
Make sure that Canon XXX Printer (where “XXX” is your machine’s name) is selected in
Select Printer, and click Preferences (or Properties).
Specify the required settings and click OK.
Note
For details on the printer driver functions, click Help or Instructions to view the online help or the PC Printing Guide on-screen manual. Instructions is only displayed when the on-screen manuals are installed.
Click Print (or OK).
20 |
Printing from Your Computer |
Printing with Macintosh
Note
Depending on your application program, operations may differ. For details, refer to the instruction manual of your application.
The steps described in this section are for printing in Mac® OS X v.10.4.x.
1 Turn on the machine and load the paper in the machine.
See “Turning the Machine On and Off” on page 6 and “Loading Printing Paper” on page 9.
2
3
Create a document or open a file to print using an appropriate application software.
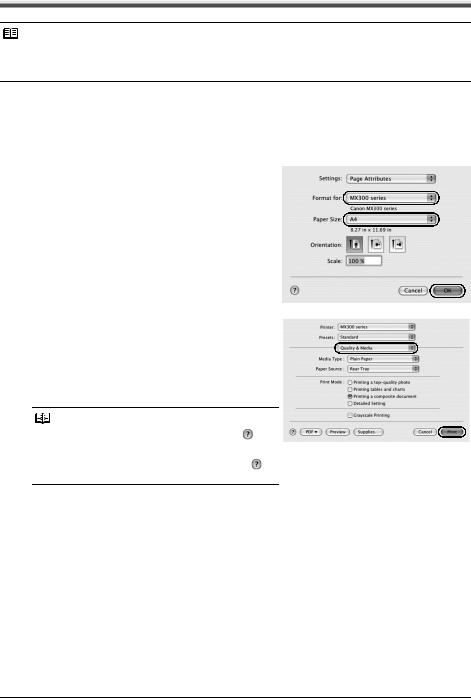
Select Page Setup on the application software’s File menu.
4 Make sure that your machine’s name is selected in Format for.
5 Select the page size of the loaded paper in
Paper Size.
6 Click OK.
7 Select Print on the application software’s File menu.
8
9
Select Quality & Media in the pop-up menu.
Specify the required settings.
Note
For details on the printer driver functions, click to view the PC Printing Guide on-screen manual. If the on-screen manuals are not installed, the PC Printing
Guide on-screen manual is not displayed even if |
is |
clicked. |
|
10 Click Print.
Printing from Your Computer |
21 |

Scanning Images
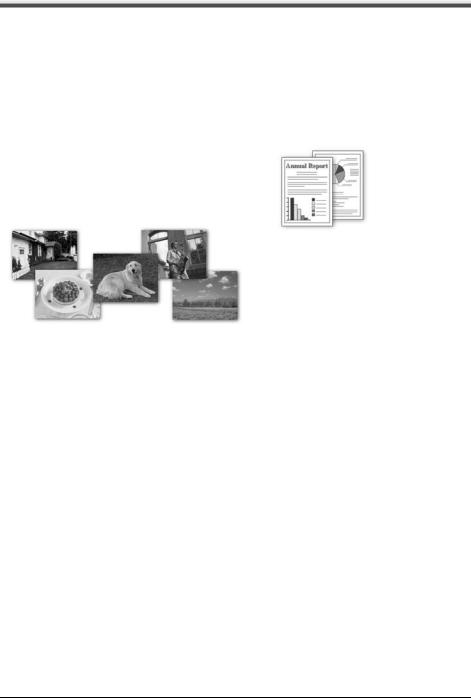
You can scan images from the machine to a computer without printing them and save them in popular image types such as JPEG, TIFF, bitmaps, or PDF. If you are scanning printed text, you can use the OCR (Optical Character Recognition) software to convert it to text data.
Scanning Methods
You can select from the various scanning methods.
z If You Want to Edit or Print the Scanned Images
MP Navigator EX enables you to edit the scanned images, such as optimizing or trimming.
You can also start application software from MP Navigator EX to edit or print the scanned images.
For detailed operations of MP Navigator EX, refer to the Scanning Guide on-screen manual.
You can also use the Operation Panel to open MP Navigator EX as well as open it using the computer.
See “Opening MP Navigator EX using the Operation Panel” on page 22.
z If You Want to Scan Originals with Advanced Settings
ScanGear enables you to scan originals with advanced settings such as the resolution. For detailed operations of ScanGear, refer to the Scanning Guide on-screen manual.
Besides the above-mentioned methods, you can use a TWAINor WIA- (Windows Vista and Windows XP only) compliant application software and the Control Panel (Windows Vista and Windows XP only) to scan originals with this machine. For detailed operations, refer to the Scanning Guide on-screen manual.
Opening MP Navigator EX using the Operation Panel
1(Macintosh only) Prepare your computer before scanning.
This operation is not necessary for Mac OS X v.10.4.x.
For details, refer to “Scanning Methods” in the User’s Guide on-screen manual.
2Turn on the machine.
See “Turning the Machine On and Off” on page 6.
3Load the original document on the Platen Glass.
See “Handling the Original Document” on page 8.
4Press the SCAN button, then press the Color or Black button.
22 |
Scanning Images |
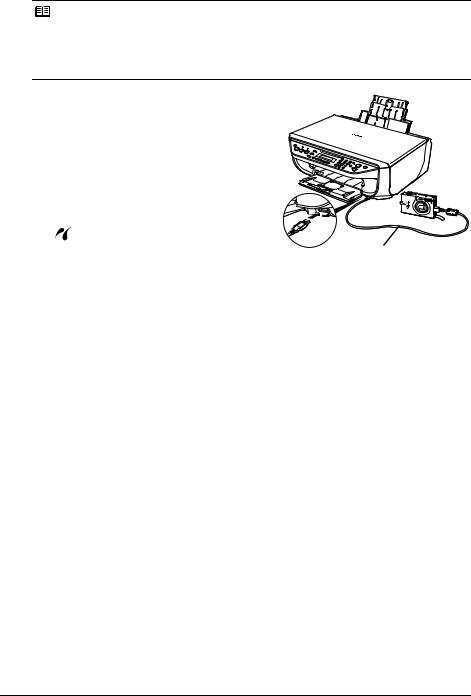
Printing Photographs Directly from a Compliant Device
You can connect a PictBridge compliant device such as a digital camera, camcorder, or mobile phone using a USB cable recommended by the device’s manufacturer, and print recorded images directly without using a computer.
z Connectable Devices
PictBridge is an industry standard enabling a range of digital photo solutions, including the direct printing of photos from a digital still camera, camcorder or mobile phone* without the need to use a computer. A device can be connected to this machine for direct printing regardless of the manufacturer or the model as long as it complies with the PictBridge standard.
*PictBridge compliant digital still cameras, digital camcorders, and camera-equipped mobile phones are hereafter collectively referred to as “PictBridge compliant device”.
 A device with this mark is PictBridge compliant.
z Printable Image Data Format
This machine prints images taken with a DCF (Design rule for Camera File system) ver. 1.0/2.0- compatible digital camera (Exif ver. 2.2/2.21 compliant), as well as PNG files.
Printing Photographs Directly from a Compliant Device
To connect a PictBridge compliant device to this machine, use a USB cable recommended by the device’s manufacturer.
Caution
Do not connect any equipment other than PictBridge compliant devices to the Direct Print Port of the machine. If you do so, electric shock, fire, or damage to the machine could result.
Important
Never disconnect the USB cable during printing unless when explicitly allowed to by the PictBridge compliant device. When disconnecting the USB cable between the PictBridge compliant device and machine, follow the instructions given in the device’s instruction manual.
Note
When printing photos with the PictBridge compliant device connected to the machine, we recommend the use of the AC adapter supplied with the device. If you are using the device battery, be sure to charge it fully.
1 Prepare for printing.
(1)Turn on the machine.
See “Turning the Machine On and Off” on page 6.
(2)Load paper.
See “Loading Printing Paper” on page 9.
Printing Photographs Directly from a Compliant Device |
23 |
2
3
Connect the PictBridge compliant device to the machine.
Note
Depending on the model or brand of your device, you may have to select a print mode compliant with PictBridge before connecting the device. You may also have to turn on the device or select Play mode manually after connecting the device to the machine.
Perform necessary operations on the PictBridge compliant device before connecting it to this machine according to instructions given in the device’s instruction manual.
(1) Make sure that the PictBridge compliant device is turned off.
(2) Connect the PictBridge compliant device to the machine using a USB cable recommended by the manufacturer of the device.
The device turns on automatically.
If your device does not turn on automatically, turn it on manually.
(3) Set up the PictBridge compliant device for |
|
direct printing. |
|
will appear on the LCD of the device when |
|
the machine is correctly connected. |
(2) |
|
Specify the print settings such as paper type and layout.
See “About PictBridge Print Settings” on page 25.
You can make settings using the menu on the LCD of your PictBridge compliant device. Select the size and type of paper that you loaded in the machine.
If your PictBridge compliant device does not have setting menu, change the setting from the machine. For details, see “Setting on the Machine” on page 27.
4 Start printing from your PictBridge compliant device.
24 |
Printing Photographs Directly from a Compliant Device |

About PictBridge Print Settings
Settings on a PictBridge Compliant Device
This section describes the print settings on a PictBridge compliant device. When operating the device, be sure to follow the instructions given in the instruction manual of your PictBridge compliant device.
Note
zIn the following description, names of setting items are given according to those used in Canonbrand PictBridge compliant devices. Setting item names may be different depending on the brand or model of your device.
zSome setting items explained below may not be available on some devices. In this case, the settings made on the machine are applied. Also, when some items are set to Default on a PictBridge compliant device, the machine settings for these items are applied. For details, see “Setting on the Machine” on page 27.
z Paper Size and Paper Type Settings
The following sizes and types of printing paper can be used when printing from a PictBridge compliant device.
z Paper size
4" x 6" / 101.6 x 152.4 mm, 5" x 7" / 127.0 x 177.8 mm*1, Credit card, 8" x 10" / 203.2 x 254.0 mm, A4, Letter, Wide*1
z Paper type
Paper Type Setting |
Loadable Paper*3 |
Plain Paper*2 |
Super White Paper or other plain paper |
Photo |
Photo Paper Plus Glossy |
|
Glossy Photo Paper |
|
Glossy Photo Paper “Everyday Use” |
|
Photo Paper Glossy |
|
Photo Paper Plus Semi-gloss*4 |
|
Photo Stickers*5 |
Fast Photo |
Photo Paper Pro |
The available page sizes vary depending on the media type. For details, visit our website.
*1
*2
*3
*4
*5
Can be selected only on certain Canon-brand PictBridge compliant devices.
Plain Paper can be selected for Paper type only when Paper size is set to A4 or 8.5" x 11" (Letter). When Paper type is set to Plain Paper, borderless printing will be disabled even when Layout is set to Borderless.
You may not be able to purchase some Canon genuine papers depending on the country or region of purchase.
When printing on Photo Paper Plus Semi-gloss 8" x 10" / 203.2 x 254.0 mm (SG-201), select 20 x 25 cm/8" x 10" for Paper size and Default for Paper type.
*Select PHOTO PAPER PLUS for MEDIA TYPE in the PICTBRIDGE SET setting on the machine.
See “Setting on the Machine” on page 27.
Exclusively used to print photo stickers. When printing on sticker paper, select 10 x 15 cm/ 4" x 6" in Paper size and Photo for Paper type. Do not set Layout to Borderless.
Printing Photographs Directly from a Compliant Device |
25 |

z Layout Setting
Various layout options are available.
zBordered/Borderless: You can select whether or not to print an image with a border.
zN-up: You can use this option when printing on sticker paper, or A4or Letter-sized paper.
Sticker paper: When you select 10 x 15 cm/4" x 6" for Paper size, you can print 16 images on a single sheet of paper.
A4or Letter-sized paper: When you select A4 or 8.5" x 11" (Letter) for Paper size, you can print 4 images on a single sheet of paper.
zShooting Info (Exif Data): You can print shooting info (Exif Data) along with the image. The following two options are available.
1-up*1: Prints the shooting info (Exif Data) in the margin of selected individual images.
20-up*2: Prints 20 images specified with DPOF*3 and their shooting info (Exif Data) in list format on a single sheet of paper.
z35 mm Film Style Layout (Contact Printing Layout)*2: You can print the multiple images specified with DPOF*3 in a list format that looks like a negative film.
Besides the above options, you can also specify to print an index of images in the DPOF*3 print settings menu.
*1 You can use this option only when 10 x 15 cm/4" x 6", 13 x 18 cm/5" x 7", 20 x 25 cm/8" x 10", A4 or 8.5" x 11" (Letter) is selected for Paper size.
*2 You can use this option only when A4 or 8.5" x 11" (Letter) is selected for Paper size.
*3 DPOF (Digital Print Order Format) is a standard format to record the specified information regarding images, such as which image or number of copies to print.
z Date/File No. Print Setting
You can specify whether the date and/or file number will be printed.
Note
zIf the images already have dates superimposed when shot, set this PictBridge setting item to Off. If you select Date, File No., or Both, the date and/or file number will be printed over the date printed by the device’s function.
zDepending on the paper size and layout, the date will only be printed even when Both is selected.
z Image Optimize Setting
You can select the optimization method to obtain high print quality. When you select On, the shooting information is used to print the optimized image.
If you are using a Canon-brand PictBridge compliant device, the following additional options may be available, depending on the model.
–VIVID makes green and blue more lively.
–NR (Noise Reduction) reduces the noise on blue areas like the sky as well as on black areas.
–Face brightens a darkened face on the photo taken against the light.
–Red-Eye corrects red eyes in portraits caused by flash photography.
z Trimming Setting
You can select an area to print.
26 |
Printing Photographs Directly from a Compliant Device |
Loading...