


Bosch GLI18V-1200C Owner's Manual
1-877-BOSCH99 (1-877-267-2499) www.boschtools.com
Operating/Safety Instructions
Consignes d’utilisation/de sécurité
Instrucciones de funcionamiento y seguridad
IMPORTANT
Read Before Using
●
IMPORTANT
Lire avant usage
●
IMPORTANTE
Leer antes de usar
For English Version
See page 2
●
Version française
Voir page 13
●
Versión en español
Ver la página 25
Call Toll Free for Consumer Information & Service Locations
Pour obtenir des informations et les adresses de nos centres de service après-vente, appelez ce numéro gratuit
Llame gratis para obtener información para el consumidor y ubicaciones de servicio
GLI18V-1200C
2610051843_GLI18V-1200C 10/1/18 10:24 AM Page 1
2
IMPORTANT SAFETY INSTRUCTIONS
Read all safety warnings and all instructions in this manual and in the
battery charger manual. Failure to follow the warnings and instructions
may result in electric shock, fire and/or serious injury.
SAVE ALL WARNINGS AND INSTRUCTIONS FOR FUTURE REFERENCE
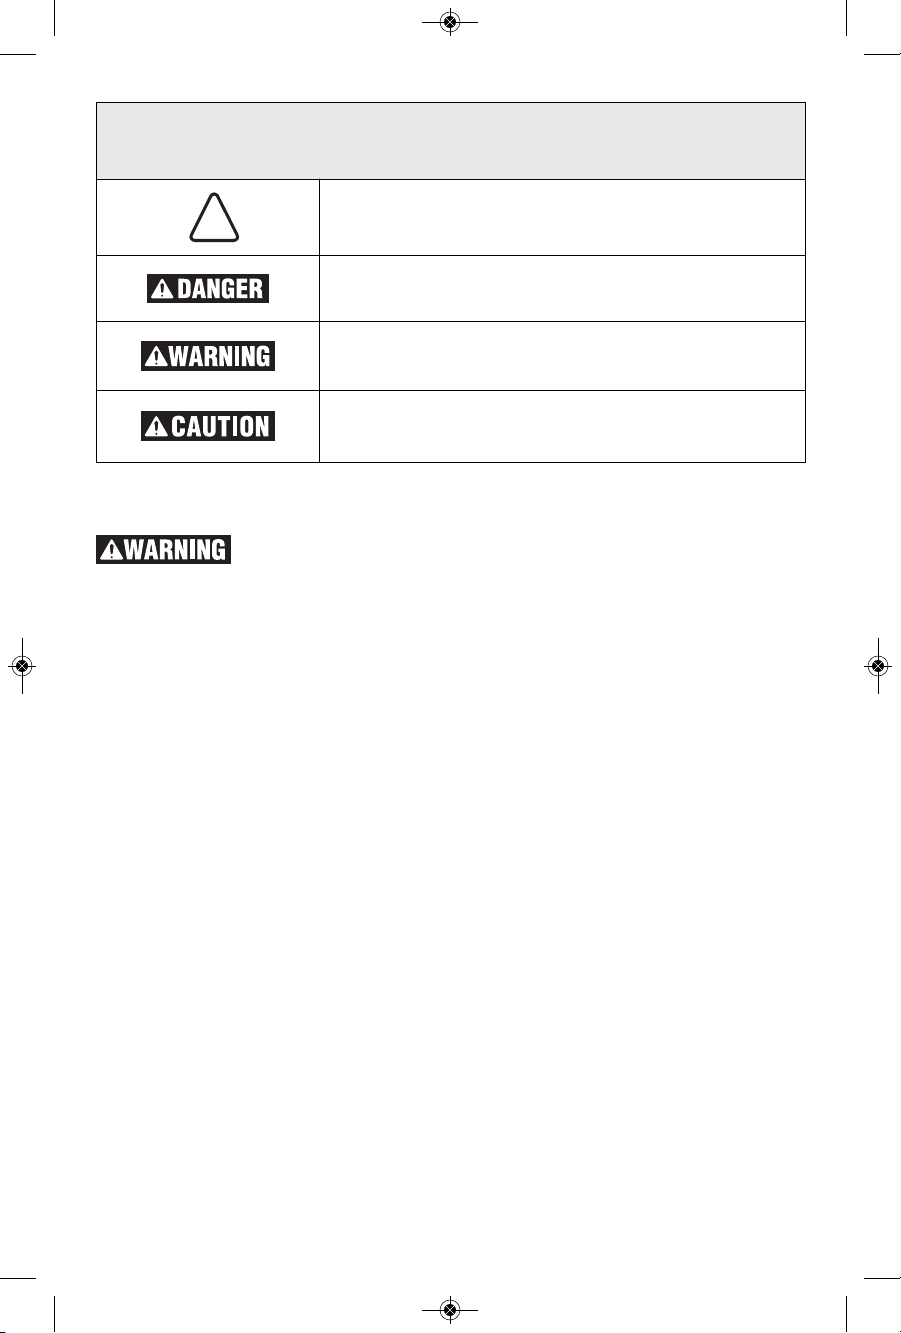
Safety Symbols
The definitions below describe the level of severity for each signal word. Please read the
manual and pay attention to these symbols.
!
This is the safety alert symbol. It is used to alert you to
potential personal injury hazards. Obey all safety messages
that follow this symbol to avoid possible injury or death.
DANGER indicates a hazardous situation which, if not
avoided, will result in death or serious injury.
WARNING indicates a hazardous situation which, if not
avoided, could result in death or serious injury.
CAUTION indicates a hazardous situation which, if not
avoided, could result in minor or moderate injury.
Ke ep work area clean and well lit.
Cluttered or dark areas invite accidents.
Do not allow children to use the cordless
area light. It is intended for professional
use. Children can unintentionally blind
themselves or other persons.
Do not operate area lights in explosive
atmospheres, such as in the presence of
flammable liquids, gases or dust. Area
lights create heat and sparks, which may
ignite the dust or fumes.
Do not expose area lights to rain or wet
conditions. Water entering an area light
will increase the risk of electric shock or
fire.
After the automatic shut-off of the
cordless area light, do not continue to
press the On/Off button. The battery
could become damaged.
Do not direct the light beam at persons or
animals and do not stare into the light
beam yourself (not even from a distance).
Do not turn on/off the light without line of
sight to the light. Operator working near
the light may be startled by the sudden
bright light (turn light on) or left out in the
dark (turn light off). Turning light on/off
when there is operator near the light can
cause personal injury or property damage.
Do not cover the lamp head while
operating the cordless area light. The
lamp head heats up during operation and
can cause burns or fire when the heat
accumulates.
Do not use the cordless area light in road
traffic. The cordless area light is not
approved for illumination in road traffic.
Remove the battery from the cordless
area light before any work on the
cordless area light itself (e.g. assembling,
maintenance, cleaning, etc.), as well as
when transporting and storing.
Do not position the lighted area light
head on or near flammable or
combustible materials. The lens gets hot
during use.
Do not touch the lens while the area light
is in operation. Touchi ng h ot l ens
increases the risk of personal injury.
Do not splash the lens of lighted area
light with liquids. Hot lens may shatter
when cooler liquids are contacted.
The area light is ruggedly constructed. It
should, however, be handled with care.
Use only original Bosch accessories.
Keep handles and grasping surfaces dry,
2610051843_GLI18V-1200C 10/1/18 10:24 AM Page 2
3
SAVE ALL WARNINGS AND INSTRUCTIONS FOR FUTURE REFERENCE
cl ean and free from oil and gre ase.
Slippery handles and grasping surfaces do
not allow for safe handling and control of
the tool in unexpected situations.
Recharge only with Bosch chargers listed
in the battery/charger list. A charger that
is suitable for one type of battery pack may
create a risk of fire when used with
another battery pack.
Use the battery only in conjunction with
your Bosch product. This measure alone
protects the battery against dangerous
overload.
Use only Bosch BAT612 or the batteries
listed in the battery/charger list. When
using other batteries, e. g. imitations,
reconditioned batteries or other brands,
there is danger of injury as well as property
damage through exploding batteries.
When battery pack is not in use, keep it
away from other metal objects like paper
clips, coins, keys, nails, screws, or other
small metal objects, that can make a
connection from one terminal to another.
Shorting the battery terminals together
may cause burns or a fire.
The battery can be damaged by pointed
objects such as nails or screwdrivers or
by force applied externally. An internal
short circuit can occur and the battery can
burn, smoke, explode or overheat.
Under abusive conditions, liquid may be
ejected from the battery; avoid contact. If
contact accidentally occurs, flush with
water. If liquid contacts eyes, additionally
seek medical help. Liquid ejected from the
battery may cause irritation or burns.
Do not use a battery pack or tool that is
dam a g e d or modified. Dam a g e d or
mod i fi e d bat t e r ies ma y exhib i t
unpredictable behaviour resulting in fire,
explosion or risk of injury.
Do not expose a battery pack or tool to
fire or excessive temperature. Exposure
to fire or temperature above 265 °F may
cause explosion.
Follow all charging instructions and do
not charge the battery pack or tool
outside the temperature range specified
in the instructions. Charging improperly
or at temperatures outside the specified
range may damage the ba ttery and
increase the risk of fire.
Check the charge level at least once a
month, especially if used for emergency
purposes. If the light seems dimmer,
recharge the battery pack.
User-Maintenance Instruction
All repairs, electrical or
me chanic al, shoul d b e
att e m p ted o n l y by t rained r e pairmen.
Contact the nearest Bosch Factory Service
Center, Authorized Service Station or other
competent repair service.
Never service damaged battery packs.
Service of battery packs should only be
pe rformed by the manu factur er or
authorized service providers.
2610051843_GLI18V-1200C 10/1/18 10:24 AM Page 3
4
The manufacturer is not responsible for
radio interference caused by unauthorized
mo dificatio ns to this equ ipment. Such
mod i f i cations coul d v o i d t he user’s
authority to operate the equipment.
This device complies with Part 15 of the
FCC Rul es. Operation is subject to the
following two conditions:
1) This devic e ma y not cause harmfu l
interference, and
2) This device must accept any interference
received, including interference that may
cause undesired operation.
NOTE! This equipment has been tested and
found to comply with the limits for a Class B
digital devices, pursuant to Part 15 of the
FCC rules. These limits are designed to
pr o vide reas onable prot ection aga inst
har m f u l i nterferen c e i n a resident i a l
installation. This equipment generates, uses
and can radiate radio frequency energy and,
if not installed and used in accordance with
the inst r u c tions, m a y ca u s e ha r m ful
in terferenc e to rad io commu nica tions .
How e v e r, there is no guarant e e t hat
interference will not occur in a particular
installation. If this equipment does cause
harmful interference to radio or television
reception, which can be determined by
turning the equipment off and on, the user
is encour a g e d to try to correct t h e
interference by one or more of the following
measures:
• Reorient or relocate the receiving antenna.
• Incr e ase t he s e parati o n be t ween the
equipment and receiver.
• Connect the equipment into an outlet on a
circuit different from that to which the
receiver is connected.
• Consult th e d ealer or an experienced
radio/TV technician for help.
“Exposure to Radio Frequency (RF) Signals:
The wireless device is a radio transmitter
and receive r . It is desi g n ed and
manufactured not to exceed the emission
limit for exposure to radio frequency (RF)
ene r g y set by the Min i s t ry of He a lth
(Canada), Safety Code 6. These limits are
par t of compreh e n sive g uidelin e s and
established permitted levels of RF energy
for the general population.
These guidelines are based on the safety
standards previously set by international
standard bodies. These standards include a
sub s tantial safet y margi n desi g ned t o
assure the safety of all persons, regardless
of age and health.
This device and its antenna must not be colocated or operating in conjunction with any
other antenna or transmitter.
FCC Caution
This device complies with Industry Canada
licence-exempt RSS standard(s). Operation
is subject to the following two conditions:
(1) this device may not cause interference,
and
(2) this dev i c e must ac c e pt any
interference, including interference that
may cause undesired operation of the
device.
Industry Canada
2610051843_GLI18V-1200C 10/1/18 10:24 AM Page 4

5
Symbols
Important: Some of the following symbols may be used on your tool. Please study them
and learn their meaning. Proper interpretation of these symbols will allow you to operate
the tool better and safer.
Symbol Designation ⁄ Explanation
V Volts (voltage)
A Amperes (current)
Ah Amp hour (measurement of battery capacity)
Hz Hertz (frequency, cycles per second)
W Watt (power)
kg Kilograms (weight)
min Minutes (time)
s Seconds (time)
Diameter (size of drill bits, grinding wheels, etc.)
n
No load speed (rotational speed at no load)
n Rated speed (maximum attainable speed)
...⁄min
Revolutions or reciprocation per minute (revolutions, strokes, surface
speed, orbits etc. per minute)
Off position (zero speed, zero torque...)
, , , ...
I, II, III,
Selector settings (speed, torque or position settings. Higher number
means greater speed)
0
Infinitely variable selector with off (speed is increasing from setting)
Arrow (action in the direction of arrow)
Alternating current (type or a characteristic of current)
Direct current (type or a characteristic of current)
Alternating or direct current (type or a characteristic of current)
Class II construction (designates double insulated construction tools)
Earthing terminal (grounding terminal)
2610051843_GLI18V-1200C 10/1/18 10:24 AM Page 5
6
Symbols (continued)
I
MPORTANT: Some of the following symbols may be used on your tool. Please study them
and learn their meaning. Proper interpretation of these symbols will allow you to operate the
tool better and safer.
Symbol Designation / Explanation
Designates Li-ion battery recycling program
Designates Ni-Cad battery recycling program
Alerts user to read manual
Alerts user to wear eye protection
This symbol designates that this tool is listed by Underwriters Laboratories.
This symbol designates that this component is recognized by Underwriters
Laboratories.
This symbol designates that this tool is listed by Underwriters Laboratories,
to United States and Canadian Standards.
This symbol designates that this tool is listed by the Canadian Standards
Association.
This symbol designates that this tool is listed by the Canadian Standards
Association, to United States and Canadian Standards.
This symbol designates that this tool is listed by the Intertek Testing
Services, to United States and Canadian Standards.
This symbol designates that this tool complies to NOM Mexican Standards.
2610051843_GLI18V-1200C 10/1/18 10:24 AM Page 6
7
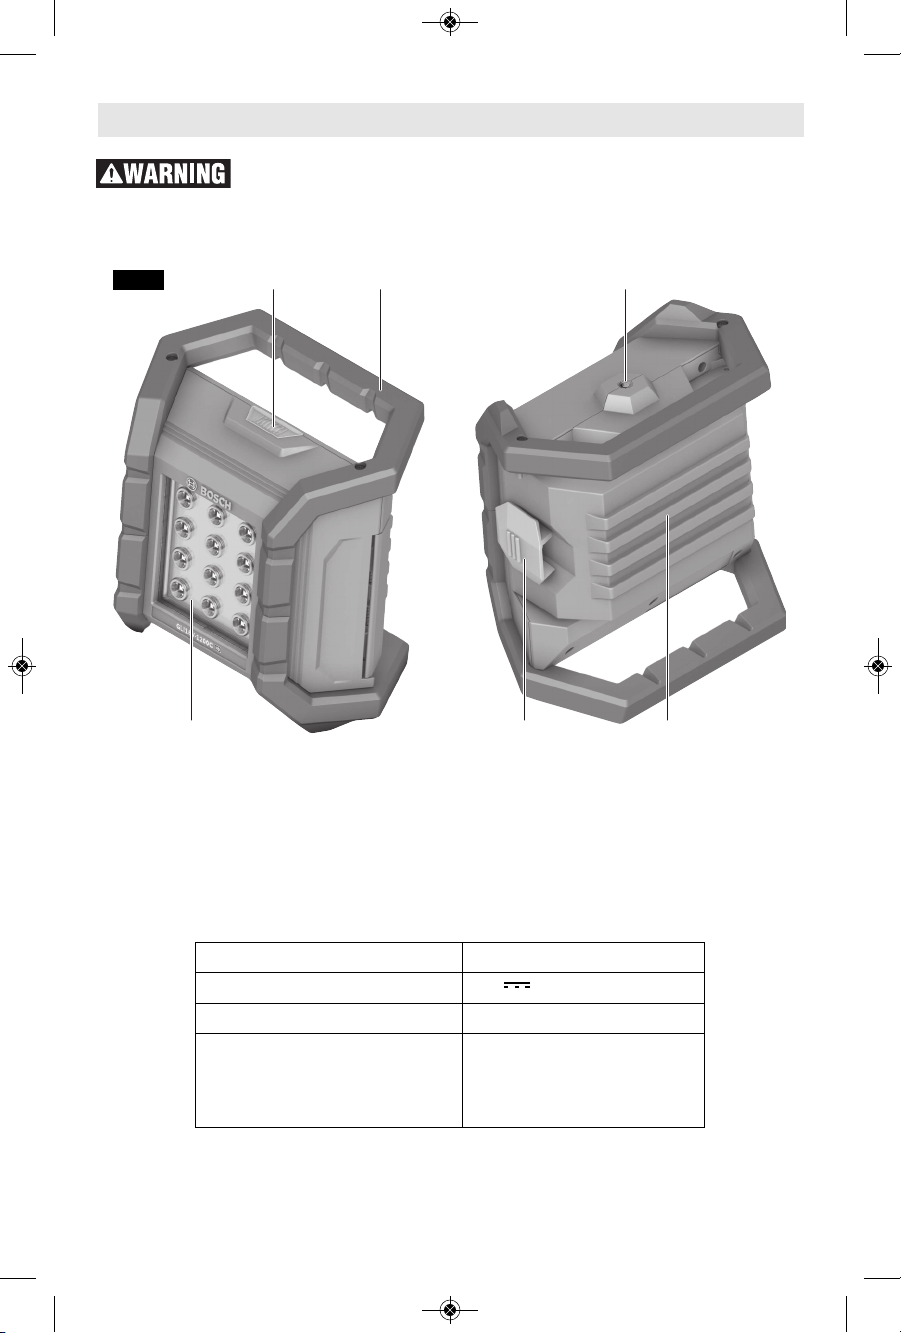
Functional Description and Specifications
Bluetooth
®
Connected Cordless Area Light
NOTE: For tool specifications refer to the nameplate on your tool.
Battery Packs/Chargers
Please refer to the battery/charger list, included with your tool.
Disconnect battery pack from tool before making any assembly,
ad j ustm e nts or cha n ging acc e ssor ies. Suc h pr e vent ive safe ty
measures reduce the risk of starting the tool accidentally.
1
324
56
1 Lamp head
2 On/off button
3 Carrying handle with
notches for hanging up
4 1/4"-11 tripod mount
5 Battery cover
6 Battery cover latch
7 Battery release button*
8 Battery* **
9 Battery compartment*
10 Button cell*
11 Button cell lid*
12 Screw*
13 Gasket*
* Not Shown. See further
in these operating
instructions.
** Available separately
FIG. 1
Model number GLI18V-1200C
Voltage rating
18V
Bluetooth® range 100 feet max.
Allowed ambient temperature:
– during charging
– during operation
– during storage
32…113 °F (0…+45 °C)
-4…122 °F (-20…+50 °C)
32…122 °F (0…+50 °C)
2610051843_GLI18V-1200C 10/1/18 10:24 AM Page 7
8
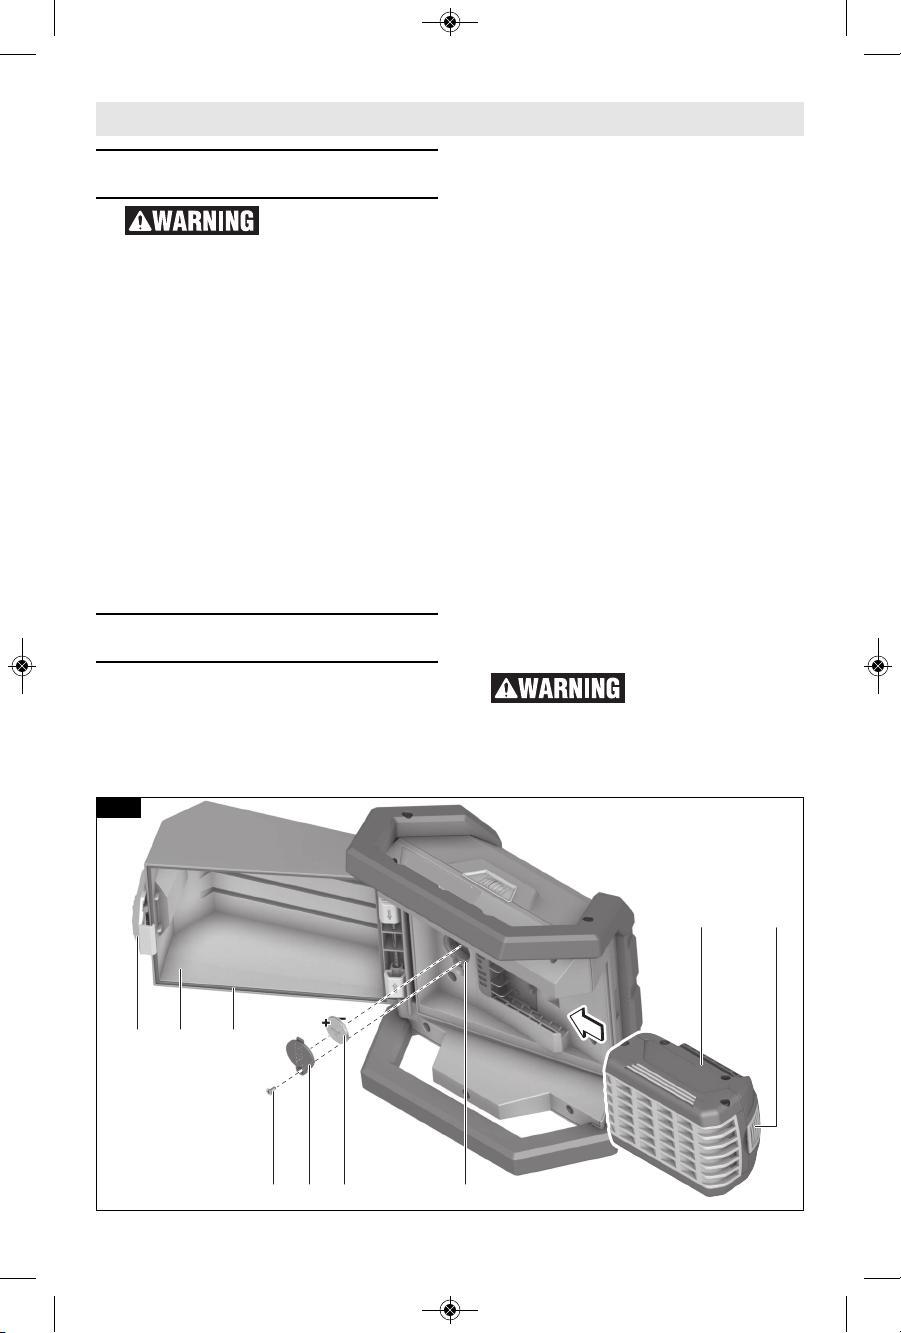
Inserting and Releasing
Battery Pack
Use o nly Bo s c h
BAT612 or batteries
listed in the battery/charger list. Using
other types of batteries m ay r esult in
personal injury or property damage.
Rel e a s e the locki n g latch 6 of the
battery cover 5 and flip the cover 5 open
(Fig. 2).
To remove the battery pack 8, press the
battery pack release button 7 and slide
the battery pack completely out of area
light housing.
To insert battery pack 8, align battery
pack and slide it into area light housing
until it locks into position (an audible
click sound is an indication that the
battery pack is locked). Do not force.
Ensure that the rubber gasket 13 is in
correct position when closing cover.
Otherwise, protection against dust and
splash water cannot be guaranteed.
Button Cell Activation /
Replacement
To enable the communication of this
cordless area light in the off state to a
mobile terminal/device, the button cell
battery 10 needs to be activated.
To activate the included button cell 10:
A. Release the locking latch 6 of the
battery cover and flip the cover 5
open (Fig. 2).
B. If the battery pack 8 is inserted,
remove it.
C. Using a #1 Phillips screwdriver,
loosen the screw 12 of the battery
lid and remove the button cell lid
11.
D. Remove the protective film.
E. Insert the button cell 10. Make sure
that the positive pole + is pointing
outside. Use only Lit hium 3V
CR2032 button cell battery.
F. Re-attach the button cell lid 11.
G. Close battery cover. Make sure that
the rubber gasket 13 is in correct
position when closi ng cover .
Otherwise, protection against dust
and splash water cann ot be
guaranteed.
When replacing a button cell, follow
steps A–C and E–G
The ‘Bosch ToolBox’ app d isplays a
warning before the button cell runs out
of energy.
Che m i c al Bur n
Haz a r d . Kee p
ba tter ies awa y f rom chi ldre n. This
product contains a lithium button/coin
cell battery. If a new or used lithium
Assembly
8
910
11
7
12
6 5 13
FIG. 2
2610051843_GLI18V-1200C 10/1/18 10:24 AM Page 8
9
Assembly
button/coin cell battery is swallowed or
enters the body, it can cause severe
internal burns and can lead to death in
as little as 2 hours. Always completely
secure the battery compartment. If the
battery compartment does not close
sec u r e ly, stop using the product ,
remove the batteries, and keep it away
from children. If you think batteries
might have been swallowed or placed
ins i d e any part of the body, se e k
immediate medical attention.
Operating Instructions
Protection Against Deep
Discharging
The lithium ion battery is protected
aga i n s t d e e p di s c harging by the
“E lectronic Cell P rote ction (ECP)”.
When the battery is empty, the cordless
area light is switched off by means of a
protective circuit.
Turning the Area Light On
To turn the area light ON, press the
On/ O f f button 2. T o increase t h e
brightness, press the On/Off button a
second time. To turn area light OFF,
press the On/Off switch a third time
(Fig. 1).
Temperature Dependent
Overload Protection
In order to protect both the user as well
as the area light, the area light switches
off if the heat sink temperature reaches
140°F (60°C). Allow the cordless area
light to cool down, then switch the
cordless area light on again.
Do not continue to
pre s s t he On/Off
switch after the cordless area light has
been automatically switched off. The
battery can be damaged.
Low Battery Warning
Shortly before the cordless area light
switches off because of a low battery, it
wil l f lash 3 ti m e s and shin e w ith
reduced brightness.
Adjusting the Brightness
Pressing the On/Off button 2 will turn
on the area light to the low brightness
setting. Pressing the button again will
turn the area light to the high brightness
setting.
Run Time
The run time will depend on the Bosch
bat t e r y pac k capac i t y and the
brightness setting of the area light. The
run time on the high brightness setting
will be 80 minutes per Ah of the battery
pack.
Fastening to the tripod
You can use the tripod mount to screw
the cordless area light onto a tripod.
Tighten the 1/4" screw. Ensure that the
tripod has a firm footing.
2610051843_GLI18V-1200C 10/1/18 10:24 AM Page 9

Connectivity
The cordless area light is equipped with
a Bluetooth® module, which enables
data transmission via radio technology
to certain mobile terminals/devices with
a B l u etooth® i n t erface (e.g.,
smartphones, tablets).
To operate the cordless area light via
Blu e t o oth® you need the Bosch
application (app ) “ Bosch Toolbox” .
Download the app from the respective
app stores (Apple App Store, Google
Play Store).
Do not tur n on/off the
light without line of sight
to the light. Operator working near the light
may be startled by the sudden bright light
(turn light on) or left out in the dark (turn light
of f ) . Tur n ing l i ght o n /off when t h ere i s
operator near the light can cause personal
injury or property damage.
Note: Once the timer or interval setting has
been reached, the light will flash 5 times and
then turn off in approximately 60 seconds.
Using ‘Bosch Toolbox’ app
From the app menu, choose “My tools”.
Your mobile terminal/device displays all
necessary steps to connect the cordless
area light.
After pairing your light with a mobile
device you can adjust certain functions
or check the status of the light using
Bosch Toolbox app.
‘GLI groups’ allows multiple units to be
inc l u d ed in a group th at ca n be
controlled in unison. They can each be
nam e d so that th e y can be ea s i l y
dis t i n guished from e a c h other . I n
unison, they can use the same features
as a single light; on/off, brightness,
timer mode, and interval mode.
A. Help button – tapping this button
will bring up help screen.
B. Tool photo – tapping on the photo
will let you customize the
photograph of the tool.
C. Power tool battery charge
status – the n umber of green
‘batteries’ indicates the estimated
charge level for the battery pack.
Note: Number of indicator
"batteries" may not be equal to the
number of LEDs on the battery fuel
gauge.
D. Power tool nickname – tapping on
the ‘pencil’ icon will let you
customize the tool nickname. You
can also do it when changing the
tool photo.
E. Connection status bar – Here you
can see the connection (signal)
strength indicated by vertical bars.
You can use toggle swi tch to
disconnect the tool from your
mobile device.
F. LED – Turn light on and off
G. Brightness – Toggle between off,
the low setting, and the high
brightness setting.
GLI18V-1200C
Connected
Brightness
LED
GLI18V-1200C
?
Timer & Interval
A
B
C
D
E
F
G
H
JI
10
The Bluetooth®word mark and logos are registered trademarks owned by the Bluetooth®, SIG,
Inc. and any use of such marks by BOSCH is under license.
2610051843_GLI18V-1200C 10/1/18 10:24 AM Page 10
H. Timer – Allows the light or group of
lights to be automatically switched
on or off after a specified amount
of time.
Interval – Allows the light or group
of lights to be automatically
switched on or off at a specified
time of day.
I. Tool alerts – tapping the ‘alerts
triangle’ will display any alerts
received from the tool.
J. Info button – displays tool
information and specifications.
11
Connectivity
Maintenance
Service
NO USER SERVICE-
ABLE PARTS INSIDE.
Preventive maintenance performed by
un au thorized personnel may result in
mis p l a cing of internal wires and
components which could cause serious
hazard. We recom mend that all tool
ser v i c e be performe d b y a B osch
Factory Service Center or Authorized
Bosch Service Station. SERVICE MEN:
Disconnect tool and/or charger from
power source before servicing.
Batteries
Be alert for battery packs that are
nearing their end of life. If you notice
dec r e a sed t o o l perf o r mance o r
sig n i f icantly shor t e r r u nning time
be t ween char ges then it is t i me t o
replace the battery pack. Failure to do
so c a n cause the t o o l to opera t e
improperly or damage the charger.
Cleaning
Certain cleaning
agents and sol vents
damage plastic parts. Some of these
are: gasoline, carbon tetrachlo ride,
chlo rinated cleaning solvents, ammonia
and house hold detergents that contain
ammonia.
To avoid damage, clean the plastic lens
of the cordless area light only with a
dry, so ft cloth. Do not use cleaning
agents or solvents.
To avoid accidents always dis connect the tool from the power
supply before cleaning or performing any main tenance.
2610051843_GLI18V-1200C 10/1/18 10:24 AM Page 11