


Table of Contents
Congratulations on Your Baby Lock Tiara II Purchase 2
Baby Lock Tiara II Important Information 3 Regulations 3 Important Safety Instructions 4 How to Pack/Unpack Machine 5 Instructions Before Using Machine 5 Grounding 6
Safety Section 7 Quick Facts 7 Package Contents/Included Accessories 8 Optional Accessories 9
Baby Lock Tiara II Components 10 Front Side View 10 Back Side View 11 Rear and Front Views 12
Setting Up the Table (and Taking Down for Storage) 13 Placing Machine in Table 13 Installing Power Cord 13 Installing Foot Pedal 13
Installing Thread Antennae 14 Installing Color Touch-Screen 14 Inserting (or Changing) Needle 15 Needle/Thread Selection Guide 15 Changing Hopping Foot 16 Threading the Machine 17 Bobbin Case and Bobbin Thread Tension Adjustments 19 Top Thread Tension Adjustment 20 Maintenance 21 Using the Touch-Screen Displays 22 Preparing to Quilt 29 Troubleshooting 30
Babylock.com |
Page 1 |
Congratulations on your purchase of the Baby Lock Tiara II
You haven’t just purchased a quilting machine, you’ve joined the Baby Lock family and we welcome you.
Baby Lock is committed to innovation, reliability, customer service and education. Our quilting machines are designed for quilters and we are committed to your quilting success.
With that in mind, we invite you to bookmark our website: www.babylock.com and invite you to visit to learn more about the art of quilting.
Remember, if you ever have questions, your authorized Baby Lock retailer can help you. If your retailer is not available, contact Baby Lock directly by visiting our website, www.babylock. com or contacting our Baby Lock Consumer Helpline at 1-800-313-4110, Monday-Friday, 8-6 CST.
Page 2 |
Baby Lock Tiara II Instruction Manual |

IMPORTANT INFORMATION: REGULATIONS
Federal Communications Commissions (FCC) Declaration of Conformity (For USA Only)
Responsible Party: Tacony Corporation
1760 Gilsinn Lane
Fenton, MO 63026
declares that the product
Product Name: |
Baby Lock Tiara II Model BLTR16-2 |
complies with Part 15 of the FCC Rules. Operation is subject to the following two conditions: (1) this device may not cause harmful interference, and (2) this device must accept any interference received, including interference that may cause undesired operation.
This equipment has been tested and found to comply with the limits for Class B digital device, pursuant to Part 15 of the FCC Rules. These limits are designed to provide reasonable protection against harmful interference in a residential installation. This equipment generates, uses, and can radiate radio frequency energy and, if not installed and used in accordance with the instructions, may cause harmful interference to radio communications. However, there is no guarantee that interference will not occur in a particular installation. If this equipment does cause harmful interference to radio or television reception, which can be determined by turning the equipment off and on, the user is encouraged to try to correct the interference by one or more of the following measures:
–Reorient or relocate the receiving antenna.
–Increase the separation between the equipment and receiver.
–Consult the retailer or an experienced radio/TV technician for help.
–Changes or modifications not expressly approved by the manufacturer or local sales distributor could void the user’s authority to operate the equipment.
Canadian Department of Communications Compliance Statement (For Canada Only)
This digital apparatus does not exceed the Class B limits for radio noise emission from digital apparatus as set out in the interference-causing equipment standard entitled “Digital Apparatus”, ICES-003 of the Department of Communications.
Radio Interference (Other than USA and Canada)
This machine complies with EN55022 (CISPR Publication 22) /Class B and AUS/NZ 55022/Class B.
Babylock.com |
Page 3 |
IMPORTANT SAFETY INSTRUCTIONS
Read all instructions before using.
When using this machine, basic safety precautions should always be taken, including the following: Read all instructions before using.
DANGER - To reduce the risk of electric shock:
•A quilting machine should never be left unattended when plugged in. Always unplug the machine from the electrical outlet immediately after using and before cleaning.
WARNING - To reduce the risk of burns, fire, electric shock, or injury to persons:
•Do not allow to be used as a toy. Close supervision is necessary when this quilting machine is used by or near children.
•Use this quilting machine only for its intended use as described in this manual. Use only attachments recommended by the manufacturer as contained in this manual.
•Never operate this quilting machine if it has a damaged cord or plug, if it is not working properly, if it has been dropped or damaged, or dropped into water. Return the quilting machine to the nearest authorized Baby Lock retailer for examination, repair, electrical or mechanical adjustment.
•Never operate the machine with any air openings blocked. Keep ventilation openings of the machine free from the accumulation of lint, dust, and loose cloth.
•Never drop or insert any object into any opening.
•Do not use outdoors.
•Do not operate where aerosol (spray) products are being used or where oxygen is being administered.
•To disconnect, turn the machine switch to the symbol “O” position which represents off, then remove plug from outlet.
•Do not unplug by pulling on cord. To unplug, grasp the plug, not the cord.
•Keep fingers away from all moving parts. Special care is required around the machine needle area.
•Always use the proper needle plate. The wrong plate can cause the needle to break.
•Do not use bent needles.
•Switch the machine to the symbol “O” position to turn it off when making any adjustments in the needle area, such as threading needle, changing needle, threading bobbin, or changing presser foot, and the like.
•Always unplug the machine from the electrical outlet when removing covers, lubricating, or when making any other user servicing adjustments mentioned in the instruction manual.
•This sewing machine is not intended for use by young children or infirm persons without supervision.
•Young children should be supervised to ensure that they do not play with this machine.
SAVE THESE INSTRUCTIONS
This machine is intended for household use.
Disclaimer
Baby Lock and its authorized retailers are in no way legally responsible or liable for damage to the Baby Lock Tiara II when used improperly or not in accordance with the guidelines stated in this manual or when used on machine quilting tables not recommended by Baby Lock.
Page 4 |
Baby Lock Tiara II Instruction Manual |

HOW TO UNPACK/REPACK THE MACHINE
Keep the carton and packing materials. You will need them in the event that you need to return the machine to your authorized Baby Lock retailer or send it for repair. If you do not pack the machine properly or if you do not use the correct packaging materials, the machine could be damaged. Baby Lock is not liable for damage that occurs during return shipping. Follow the diagram below to unpack and repack the machine.
IMPORTANT
These packaging materials are designed to prevent the machine from being damaged. Keep them in case you need to bring this machine to your authorized Baby Lock retailer or send it for repair.
PLEASE READ THESE INSTRUCTIONS BEFORE USING THE MACHINE.
To use the machine safely
1.Carefully watch the needle while sewing. Do not touch the handwheel, take up lever, needle or other moving parts.
2.Turn the machine off and unplug the cord in the following cases
•when you have stopped using the machine;
•when you replace or remove the needle or any other part;
•in case of failure when you use the machine;
•when you check or clean the machine;
•when you leave the machine unattended.
3.Connect the machine directly to the wall outlet. Do not use extension cords.
To increase the life of your machine
1.Do not store this machine in areas exposed to direct sunlight or high humidity. Never use or store the machine near a heater, an iron, a halogen lamp or other hot objects.
2.Use only neutral soaps or detergents to clean the machine. Benzene, solvents and scouring powders can damage the case and the machine and therefore should never be used.
3.Do not drop or bump the machine.
4.Always consult the manual to replace or fix the presser foot, needle or any other part of the machine.
To repair or adjust the machine
If the machine malfunctions or requires adjustment, first check the troubleshooting chart in the appendix to inspect and adjust the machine yourself.
For more product information and updates, visit our website at www.babylock.com.
The contents of this manual and product specifications are subject to change without prior notice.
Babylock.com |
Page 5 |

GROUNDING
|
GROUNDED OUTLET BOXES |
|
|
TAB FOR |
METAL |
|
GROUNDING |
SCREW |
|
SCREW |
|
GROUNDING PIN |
ADAPTER |
|
|
|
|
(A) |
(B) |
(C) |
Figure 1
This product is for use on a nominal 120 V or nominal 220 V circuit, and has a grounding plug that looks like the plug illustrated in sketch A in Figure 1. A temporary adapter, which looks like the adapter illustrated in sketches B and C, may be used to connect this plug to a 2-pole receptacle as shown in sketch C if a properly grounded outlet is not available. The temporary adapter should be used only until a properly grounded outlet can be installed by a qualified electrician. The green colored rigid ear, lug, and the like, extending from the adapter must be connected to a permanent ground such as a properly grounded outlet box cover. Whenever the adapter is used, it must be held in place by the metal screw.
Note: In Canada, the use of a temporary adapter is not permitted by the Canadian Electric Code.
Page 6 |
Baby Lock Tiara II Instruction Manual |
Safety Section
This device complies with Part 15 of the FCC Rules. Operation is subject to the following two conditions: (1) This device may not cause harmful interference, and (2) this device must accept any interference received, including interference that may cause undesired operation.
Please note: Do not operate your Baby Lock Tiara II quilting machine until you have completely read the information contained in this manual. Please keep all packaging and order information for warranty purposes.
1.The Baby Lock Tiara II is very heavy. Never attempt to lift it alone – always use two people when lifting.
2.Always unplug the Baby Lock Tiara II from the electrical outlet when performing any maintenance, changing the needle, removing thread locks, or when left unattended.
3.Keep fingers away from all moving parts. Use caution around the needle or sharp external components.
4.Change the needle often. Do not use bent or dull needles. “Every quilt deserves a new needle”.
5.Switch the power off when making any adjustments in the needle or bobbin area, such as threading the needle, installing the bobbin case, or when oiling or cleaning.
6.Never drop or insert foreign objects into any opening.
7.The Baby Lock Tiara II should only be used indoors; away from moisture.
8.The Baby Lock Tiara II should not be stored or used in extreme temperatures.
9.Use the Baby Lock Tiara II only for its intended use as described in this manual.
10.Use only attachments recommended by the manufacturer.
11.To disconnect from the wall outlet, push the switch to the off position, then remove the plug from outlet pulling from the plug, not the cord. Never operate the Baby Lock Tiara II if the cord is damaged or not working correctly. If a mechanical or electrical problem is encountered, return the Baby Lock Tiara II to your authorized Baby Lock retailer for examination, repair, electrical or mechanical adjustment.
Quick Facts
The Baby Lock Tiara II utilizes high-tech electronics and an innovative touch screen to offer greater functionality and ease of operation to home quilters than ever before conceived in the quilting industry. The Baby Lock Tiara II quilting machine is a high quality machine that incorporates very robust design features and is very easy to service.
Throat Dimensions: 8.25” X 16” (245mm X 610mm)
Quilting Speed: Maximum: 1500 SPM
Needle System: 134 (135 X 7) Needle Sizes: 12/80 - 20/125
Hook System: Rotary, Vertical, M-class bobbin
Bobbin Type: Aluminum, Class M
Bobbin Case: Type MF
Motor Type: Brushless DC
Needle Positioning: Up and down, tie-off stitch
Electrical Power: 90 – 264 VAC, 47-63Hz, 300W peak
LED Power Consumption: 2.25W Hopping Foot Stroke/Lift: 5mm
Needle Bar Stroke: 35.3mm
Take-Up Stroke: 73mm
Lubrication,
main components: Kluber Lube, permanent Lubrication of hook: Velocite 10, Texaco 22
Disclaimer
Baby Lock and its authorized retailers are in no way legally responsible or liable for damage to the Baby Lock Tiara II when used improperly or not in accordance with the guidelines stated in this manual or when used on home machine quilting tables not recommended by Baby Lock.
Babylock.com |
Page 7 |
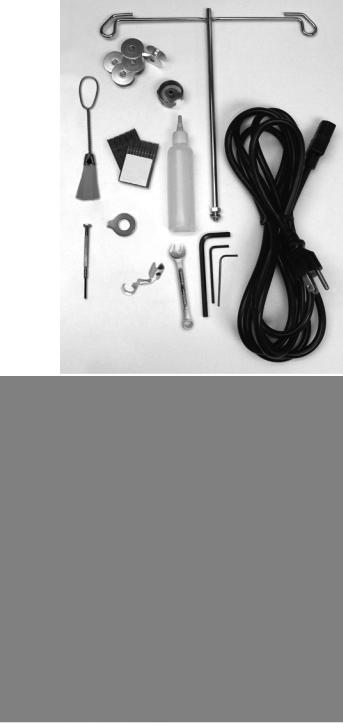
Package Contents/Included Accessories
Machine Box |
|
Part Name |
Part Code |
Baby Lock Tiara II |
BLTR16A2 |
Quilting Machine |
|
Instruction Manual |
IBBLTR16-2 |
Class M Bobbins (5 pieces) |
BLJ-BOB (3 pkg.) |
Needle size 16 (1 pkg. of 10) |
134FG-100 |
Needle size 18 (1 pkg. of 10) |
134FG-110 |
Bobbin Case |
JW000586 |
Thread Antenna |
JW010214 |
Oiler |
JW010272 |
Power Cord |
JW020277 |
Brush |
JW010270 |
Disc-shaped Screwdriver |
XC1074051 |
Screwdriver (bobbin case) |
JW010269 |
2.5mm Allen Wrench |
QM10286 |
3.0mm Allen Wrench |
JW010287 |
5.0mm Allen Wrench |
JW010289 |
8mm Open Wrench |
QM40235 |
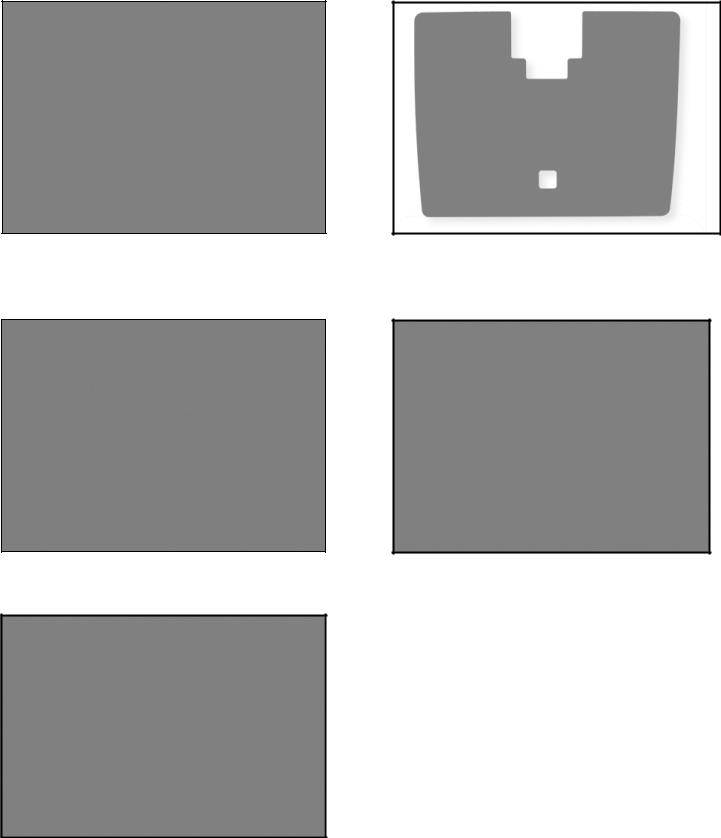
Open-Toe Hopping Foot |
QM10510 |
Bobbin Winder Box |
|
Variable-Speed Bobbin Winder |
BLQBW |
Table Box |
|
Tiara II Quilting Table |
BLTRT16 |
Page 8 |
Baby Lock Tiara II Instruction Manual |
Optional Accessories (available from your authorized Baby Lock retailer)
Tiara II 18” Quilting Table Extension
(BLTRT16-E)
Tiara II Quilting Table Overlay
(BLTRT16-O)
Horizontal Spool Pin
(BLJ18-HS)
TruStitch Stitch Regulator for Tiara II (BLTRTS)
Couching Feet Set
(BLQ-CCF)
Babylock.com |
Page 9 |

Baby Lock Tiara II Components
Front Side View
1
2
7 |
3 |
10
6
8
4
5
9
Figure 1
1.Thread Antennae
2.Thread Guide A
3.Three-Hole Thread Guide B
4.Thread Guide C
5.Top Thread Tension Assembly
6.Stirrup Thread Guide E
7.Take-Up Lever
8.Thread Guide F
9.Front Casing/Frame
10.Handwheel
Page 10 |
Baby Lock Tiara II Instruction Manual |
 Loading...