


 ®
®
IC6 Top and Bottom Freezer Refrigerator Ice Maker Kit Operating and Installation Instructions
Keep these instructions for future reference. Be sure this manual stays with refrigerator
Part No. 10527053 |
© 2000 Amana Appliances |
Printed in U.S.A. 11/00 |
Amana, Iowa 52204 |
IMPORTANT SAFETY INSTRUCTIONS
Introduction
! RECOGNIZE THIS SYMBOL AS A SAFETY PRECAUTION
Read entire manual before installing kit. All necessary tools and materials must be available prior to installation. Verify all listed parts are included in kit. If parts are missing, contact source from whom kit was purchased.
•If unable to solve a problem during installation, contact an authorized Amana technician. Locate a factory Service Center or independent authorized technician by calling 1-800-628-5782 inside U.S.A. and 1-319-622-5511 outside U.S.A. Service is at owner’s expense.
Safety Instructions
!WARNING
To avoid electrical shock which can cause severe personal injury or death, unplug power cord or open household circuit breaker to refrigerator before installing kit. After installing kit, reconnect power.
!CAUTION
To avoid risk of personal injury or property damage, do not place fingers or hands on or around the automatic icemaking mechanism while the refrigerator is plugged in.
SAVE THESE
INSTRUCTIONS
!CAUTION
To avoid property damage, observe the following:
REPLACE ORIGINAL ICE STORAGE BUCKET WITH ONE FROM KIT to avoid spilling ice cubes.
•Confirm water pressure to water valve is at least 20 pounds per square inch.
•Start nuts by hand to avoid cross threading. Finish tightening nuts using a wrench. Do not overtighten.
•Check carefully for water leaks prior to returning refrigerator to normal location and 24 hours after connection.
2
HOW THE ICEMAKER WORKS
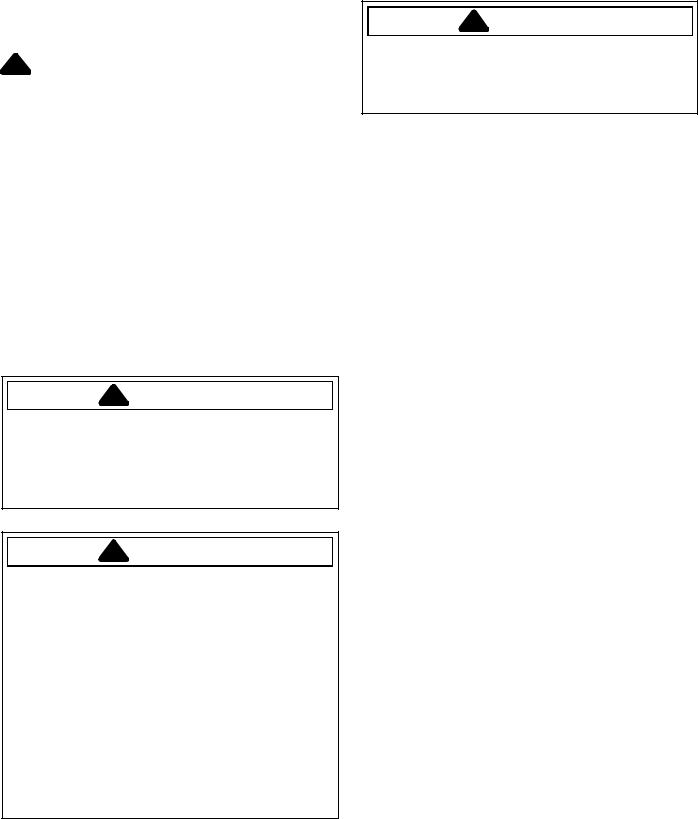
1.Water fills the empty cube mold when the freezer has cooled to freezing temperature. Cold air is forced directly over the mold.
2.When frozen, the cubes are moved up and out of the mold. The sweeper arm ejects them into the ice storage bin below.
Ice
Sweeper arm 
Ice storage bin
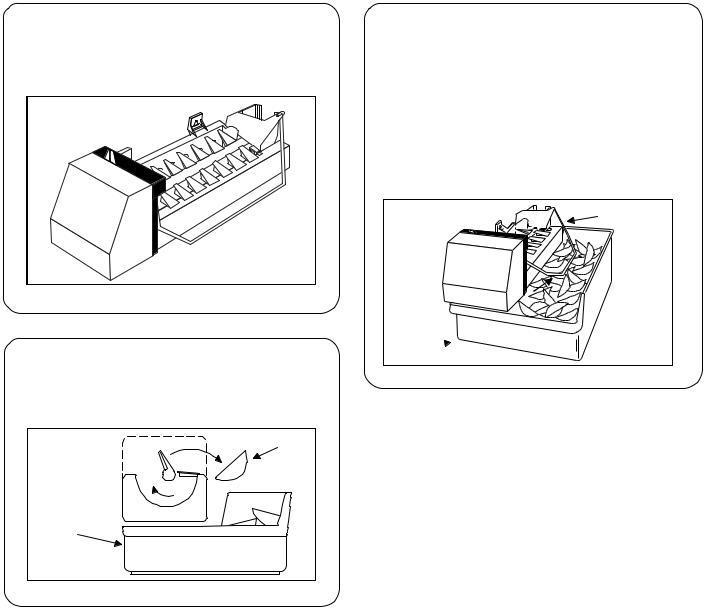
3.The feeler arm senses when the bin is full and signals the icemaker to stop ejecting more cubes. However, the mold has been refilled and cubes frozen so the new supply is ready when needed. As soon as ice is removed from the bin, the feeler arm signals that more is needed. Icemaker resumes operation by ejecting ready-and-waiting frozen cubes.
Feeler arm
Ice storage bin 
3
HOW TO USE YOUR ICEMAKER
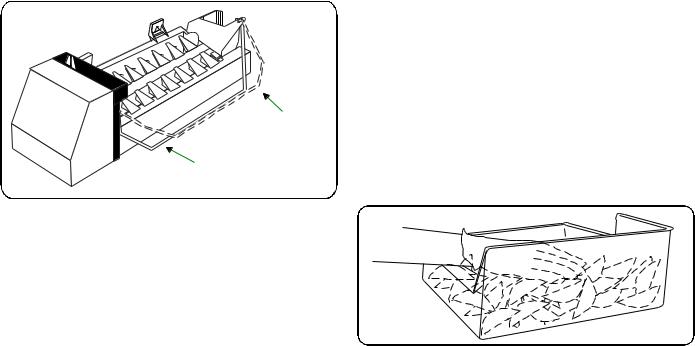
1.To start the Icemaker, lower the feeler arm to the ON (down) position. Make sure the ice storage bin is below the icemaker and pushed back as far as possible.
Arm up — stops operation
Arm down — icemaker will operate
2.When the Icemaker is first connected or after any extended period of non-use, you should discard the first few batches of cubes. Use ice regularly to maintain the best quality.
3.The feeler arm must be free to operate upward and outward over the top of the ice storage bin during each ice-delivery cycle. Make sure packages in the freezer compartment do not block its movement.
4.Raise the feeler arm to the STOP (up) position when:
a.Ice storage bin is to be removed for extended period of time.
b.Refrigerator is not to be used for an extended time, such as vacations. Also, turn off the water supply to the Icemaker in this instance.
c.Water supply is to be shut off for several hours.
5.During operation, you may hear certain sounds, such as the hum of the motor, movement of the cube ejector, humming or clicking of the water valve, and rattling of ice as it falls into the bin. These sounds are normal.
6.The Icemaker ejects cubes in groups and it is normal for several cubes to be joined together.
7.Ice cubes that have been in the ice storage bin for a considerable length of time may pick up off-flavor tastes, stick together, and gradually become smaller. We suggest that these cubes be thrown away.
8.The ice storage bin should be cleaned occasionally in warm water. Rinse and wipe dry. Be sure to put the icemaker feeler arm in the STOP (up) position when cleaning the bin.
9.Keep the cubes distributed levelly and the bin can reach its maximum cube capacity. If the cubes should build up in one area of the ice storage bin after being ejected from the mold, just level them out with your hand.
4

IC-6 ICE MAKER KIT INSTALLATION
INSTRUCTIONS
•Read these instructions all the way through before starting.
•IMPORTANT: OBSERVE ALL GOVERNING CODES AND ORDINANCES.
•Installer—Be sure to leave these instructions with the Consumer.
!CAUTION
For your safety, unplug the refrigerator from its electrical outlet to eliminate danger of electric shock during installation.
TOOLS REQUIRED
•6” Blade-type screwdriver
•¼" hex socket and driver
•Adjustable wrench/or
•½" open-end wrench
•3/8" open-end wrench
•Needle nose pliers
•Masking tape
•Protective gloves
•Utility knife
•Bucket
•Towel
•Tape measure
IMPORTANT
•Before connecting ice maker, contact a plumber to connect copper tubing to household plumbing. A ¼" (6mm) O.D. copper tubing must be used.
•Length of copper tubing must reach from water supply connection; in addition, 8 ft. should be added to create a service loop behind the refrigerator. The tubing should be soft and ends should be free of burrs.
•Do not use a self piercing saddle valve!
These valves will get clogged with sediment over time restricting the flow of water to the refrigerator.
•Water pressure to water valve must be at least 20 pounds per square inch to assure proper performance.
CONTENTS OF IC-6
|
“P” clamp |
Compression nut |
Ice maker wire harness |
|
|
||
|
|
|
|
Button plugs |
Water tube |
|
|
Sleeve |
|
|
|
|
|
|
|
5/8" Ice maker |
|
|
|
mounting screws |
Flexible plastic tubing |
|
|
|
|
|
|
|
|
Plastic clip |
|
Stainless steel clip |
|
|
|
Ice storage bucket
Water valve assembly
Wire harness assembly
Ice maker
5
 Loading...