


REFRIGERATOR USER INSTRUCTIONS
THANK YOU for purchasing this high-quality product. If you should experience a problem not covered in TROUBLESHOOTING, please visit our website at www.amana.com for additional information. If you still need assistance, call us at 1-800-843-0304. In Canada, visit our website at www.amanacanada.ca or call us at 1-800-807-6777.
You will need your model and serial number, located on the inside wall of the refrigerator compartment.
Para obtener acceso a “Instrucciones para el usuario del refrigerador” en español, o para obtener información adicional acerca de su producto, visite: www.amana.com.
Necesitará su número de modelo y de serie, ubicado en el interior del compartimiento del refrigerador.
TableofContents/Tabledesmatières
REFRIGERATOR SAFETY..................................................................... |
1 |
INSTALLATION INSTRUCTIONS ......................................................... |
2 |
REFRIGERATOR USE ........................................................................... |
7 |
REFRIGERATOR CARE......................................................................... |
8 |
TROUBLESHOOTING............................................................................ |
9 |
ACCESSORIES .................................................................................... |
10 |
WARRANTY.......................................................................................... |
11 |
SÉCURITÉ DU RÉFRIGÉRATEUR ..................................................... |
12 |
INSTRUCTIONS D'INSTALLATION ................................................... |
13 |
UTILISATION DU RÉFRIGÉRATEUR................................................. |
18 |
ENTRETIEN DU RÉFRIGÉRATEUR ................................................... |
19 |
DÉPANNAGE........................................................................................ |
20 |
ACCESSOIRES .................................................................................... |
22 |
GARANTIE............................................................................................ |
22 |
REFRIGERATOR SAFETY
Your safety and the safety of others are very important.
We have provided many important safety messages in this manual and on your appliance. Always read and obey all safety messages.
This is the safety alert symbol.
This symbol alerts you to potential hazards that can kill or hurt you and others.
All safety messages will follow the safety alert symbol and either the word “DANGER” or “WARNING.” These words mean:
 DANGER
 WARNING
You can be killed or seriously injured if you don't immediately follow instructions.
You can be killed or seriously injured if you don't follow instructions.
All safety messages will tell you what the potential hazard is, tell you how to reduce the chance of injury, and tell you what can happen if the instructions are not followed.
W10208848A

IMPORTANT SAFETY INSTRUCTIONS
WARNING:To reduce the risk of fire, electric shock, or injury to persons when using the refrigerator, follow basic precautions, including the following:
■Plug into a grounded 3 prong outlet.
■Do not remove ground prong.
■Do not use an adapter.
■Do not use an extension cord.
■Disconnect power before servicing.
■Replace all parts and panels before operating.
■Remove doors from your old refrigerator.
■Use nonflammable cleaner.
■Keep flammable materials and vapors, such as gasoline, away from refrigerator.
■Use two or more people to move and install refrigerator.
■Disconnect power before installing ice maker (on ice maker kit ready models only).
SAVE THESE INSTRUCTIONS
Proper Disposal of Your Old Refrigerator
Before You Throw Away Your Old Refrigerator or Freezer:
■Take off the doors.
 WARNING
Suffocation Hazard
Remove doors from your old refrigerator.
Failure to do so can result in death or brain damage.
IMPORTANT: Child entrapment and suffocation are not problems of the past. Junked or abandoned refrigerators are still dangerous
– even if they will sit for “just a few days.” If you are getting rid of your old refrigerator, please follow these instructions to help prevent accidents.
■Leave the shelves in place so that children may not easily climb inside.
INSTALLATION INSTRUCTIONS
UnpacktheRefrigerator
 WARNING
Excessive Weight Hazard
Use two or more people to move and install refrigerator.
Failure to do so can result in back or other injury.
When Moving Your Refrigerator:
Your refrigerator is heavy. When moving the refrigerator for cleaning or service, be sure to protect the floor. Always pull the refrigerator straight out when moving it.
Do not wiggle or “walk” the refrigerator when trying to move it, as floor damage could occur.
Remove the Packaging
Clean Before Using
Do not use sharp instruments, rubbing alcohol, flammable fluids, or abrasive cleaners to remove tape or glue. These products can damage the surface of your refrigerator. For more information, see “Refrigerator Safety.”
IMPORTANT: Do not remove the white foam air return insert from behind the control panel on the ceiling of the refrigerator. If the insert is removed, ice may migrate down from the freezer and cause icicles to form.
After you remove all of the package materials, clean the inside of your refrigerator before using it. See the cleaning instructions in “Refrigerator Care.”
Important information to know about glass shelves and covers:
Do not clean glass shelves or covers with warm water when they are cold. Shelves and covers may break if exposed to sudden temperature changes or impact, such as bumping. Tempered glass is designed to shatter into many small, pebble-size pieces. This is normal. Glass shelves and covers are heavy. Use special care when removing them to avoid impact from dropping.
2

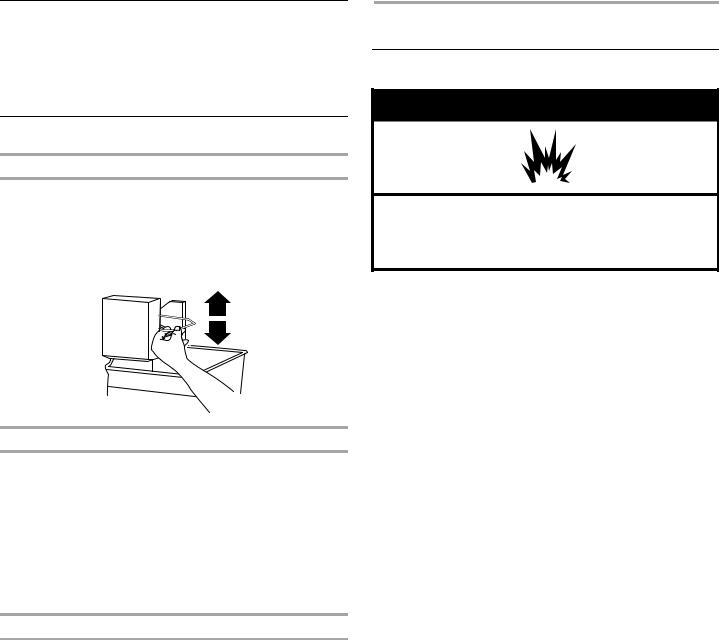
LocationRequirements
 WARNING
Explosion Hazard
Keep flammable materials and vapors, such as gasoline, away from refrigerator.
Failure to do so can result in death, explosion, or fire.
To ensure proper ventilation for your refrigerator, allow for a ½" (1.25 cm) space on each side and at the top. When installing your refrigerator next to a fixed wall, leave 2" (5.08 cm) minimum on the hinge side (some models require more) to allow for the door to swing open. If your refrigerator has an ice maker, allow extra space at the back for the water line connections.
NOTE: It is recommended that you do not install the refrigerator near an oven, radiator, or other heat source. Do not install the refrigerator in a location where the temperature will fall below 55°F (13°C).
1/2" (1.25 cm)
2" (5.08 cm)
ElectricalRequirements
 WARNING
Electrical Shock Hazard
Plug into a grounded 3 prong outlet.
Do not remove ground prong.
Do not use an adapter.
Do not use an extension cord.
Failure to follow these instructions can result in death, fire, or electrical shock.
Before you move your refrigerator into its final location, it is important to make sure you have the proper electrical connection.
Recommended Grounding Method
A 115 Volt, 60 Hz., AC only, 15or 20-amp fused, grounded electrical supply is required. It is recommended that a separate circuit serving only your refrigerator be provided. Use an outlet that cannot be turned off by a switch. Do not use an extension cord.
NOTE: Before performing any type of installation, cleaning, or removing a light bulb, turn the control (Thermostat, Refrigerator or Freezer Control depending on the model) to OFF and then disconnect the refrigerator from the electrical source. When you are finished, reconnect the refrigerator to the electrical source and reset the control (Thermostat, Refrigerator or Freezer Control depending on the model) to the desired setting. See “Using the Controls.”
3

Water Supply Requirements
Gather the required tools and parts before starting installation. Read and follow the instructions provided with any tools listed here.
TOOLS NEEDED:
■ |
Flat-blade screwdriver |
■ |
¹⁄ " Nut driver |
■ |
⁄ " and ¹⁄ " Open-end or two |
■ |
¹⁄ " Drill bit |
|
adjustable wrenches |
■ |
Cordless drill |
|
|
NOTE: Your refrigerator dealer has a kit available with a ¹⁄ " (6.35 mm) saddle-type shutoff valve, a union, and copper tubing. Before purchasing, make sure a saddle-type valve complies with your local plumbing codes. Do not use a piercing-type or ³⁄ "
(4.76 mm) saddle valve which reduces water flow and clogs more easily.
IMPORTANT:
■All installations must meet local plumbing code requirements.
■Use copper tubing and check for leaks. Install copper tubing only in areas where the household temperatures will remain above freezing.
Water Pressure
A cold water supply with water pressure of between 30 and 120 psi (207 and 827 kPa) is required to operate the water
dispenser and ice maker. If you have questions about your water pressure, call a licensed, qualified plumber.
Reverse Osmosis Water Supply
IMPORTANT: The pressure of the water supply coming out of a reverse osmosis system going to the water inlet valve of the refrigerator needs to be between 30 and 120 psi (207 and
827 kPa).
If a reverse osmosis water filtration system is connected to your cold water supply, the water pressure to the reverse osmosis system needs to be a minimum of 40 to 60 psi (276 to 414 kPa).
If the water pressure to the reverse osmosis system is less than 40 to 60 psi (276 to 414 kPa):
■Check to see whether the sediment filter in the reverse osmosis system is blocked. Replace the filter if necessary.
■Allow the storage tank on the reverse osmosis system to refill after heavy usage.
If you have questions about your water pressure, call a licensed, qualified plumber.
ConnecttheWater Supply
Read all directions before you begin.
IMPORTANT: If you turn the refrigerator on before the water line is connected, turn the ice maker OFF.
Connect to Water Line
1.Unplug refrigerator or disconnect power.
2.Turn OFF main water supply. Turn ON nearest faucet long enough to clear line of water.
3.Locate a ½" to 1¹⁄ " (1.25 cm to 3.18 cm) vertical cold water pipe near the refrigerator.
IMPORTANT:
■Make sure it is a cold water pipe.
■Horizontal pipe will work, but drill on the top side of the pipe, not the bottom. This will help keep water away from the drill and normal sediment from collecting in the valve.
4.Determine the length of copper tubing you need. Measure from the connection on the lower left rear of refrigerator to the water pipe. Add 7 ft (2.1 m) to allow for cleaning. Use ¹⁄ " (6.35 mm) O.D. (outside diameter) copper tubing. Be sure both ends of copper tubing are cut square.
5.Using a cordless drill, drill a ¹⁄ " hole in the cold water pipe you have selected.
|
A |
G |
B |
|
|
|
C |
F E |
D |
A. Cold water pipe |
E. Compression sleeve |
B. Pipe clamp |
F. Shutoff valve |
C. Copper tubing |
G. Packing nut |
D.Compression nut
6.Fasten the shutoff valve to the cold water pipe with the pipe clamp. Be sure the outlet end is solidly in the ¹⁄ " drilled hole in the water pipe and that the washer is under the pipe clamp. Tighten the packing nut. Tighten the pipe clamp screws slowly and evenly so washer makes a watertight seal. Do not overtighten or you may crush the copper tubing.
7.Slip the compression sleeve and compression nut on the copper tubing as shown. Insert the end of the tubing into the outlet end squarely as far as it will go. Screw compression nut onto outlet end with adjustable wrench. Do not overtighten.
8.Place the free end of the tubing in a container or sink, and turn ON the main water supply. Flush the tubing until water is clear. Turn OFF the shutoff valve on the water pipe. Coil the copper tubing.
Connect to Refrigerator
1.Unplug refrigerator or disconnect power.
2.Attach the copper tube to the valve inlet using a compression nut and sleeve as shown. Tighten the compression nut. Do not overtighten.
3.Use the tube clamp on the back of the refrigerator to secure the tubing to the refrigerator as shown. This will help avoid damage to the tubing when the refrigerator is pushed back against the wall.
4.Turn shutoff valve ON.
5.Check for leaks. Tighten any connections (including connections at the valve) or nuts that leak.
A
B
C
D
E
A. Tube clamp |
D. Compression nut |
B. Tube clamp screw |
E. Valve inlet |
C.Copper tubing
6.The ice maker is equipped with a built-in water strainer. If your water conditions require a second water strainer, install it in the ¹⁄ " (6.35 mm) water line at either tube connection. Obtain a water strainer from your nearest appliance dealer.
4

Complete the Installation
 WARNING
Electrical Shock Hazard
Plug into a grounded 3 prong outlet.
Do not remove ground prong.
Do not use an adapter.
Do not use an extension cord.
Failure to follow these instructions can result in death, fire, or electrical shock.
1. Plug into a grounded 3 prong outlet.
NOTE: Allow 24 hours to produce the first batch of ice. Discard the first three batches of ice produced. Allow 3 days to completely fill ice container.
RefrigeratorDoors
TOOLS NEEDED: ⁄" hex-head socket wrench, #2 Phillips screwdriver, flat-blade screwdriver, ⁄" open-end wrench, flat 2" putty knife.
IMPORTANT:
■Unplug refrigerator or disconnect power.
■Remove food and any adjustable door or utility bins from doors.
■If you only want to remove and replace the doors, see “Remove Doors and Hinges” and “Replace Doors and Hinges.”
■Depending on your model, you have either standard doors or contour doors. If you are going to reverse the door swing, follow the instructions for the appropriate door style.
■All graphics referenced in the following instructions are included later in this section after “Final Steps.”
Remove Doors and Hinges
⁄" Hex-head hinge screw
1.Unplug refrigerator or disconnect power.
2.Open refrigerator door and remove base grille from the bottom front of the refrigerator. See Base Grille graphic.
3.Close the refrigerator door and keep both doors closed until you are ready to lift them free from the cabinet.
NOTE: Provide additional support for the doors while the hinges are being moved. Do not depend on the door magnets to hold the doors in place while you are working.
4.Remove the parts for the top hinge as shown in Top Hinge graphic. Lift the freezer door free from the cabinet.
5.Remove the parts for the center hinge as shown in the Center Hinge graphic. Lift the refrigerator door free from the cabinet.
6.Remove the parts for the bottom hinge as shown in the Bottom Hinge graphic.
Reverse Doors (optional)
IMPORTANT: If you want to reverse your doors so that they open in the opposite direction, follow these steps. If you are not reversing the doors, see “Replace Doors and Hinges.”
|
|
|
|
Round-Head |
Door Handle |
||
Handle Screw |
Screw Hole Plug |
||
Cabinet
1.Remove ⁄" hex-head hinge screws from handle side and move them to opposite side. See Graphic 1.
2.Remove cabinet hinge hole plugs from the cabinet top and move them to opposite side hinge holes as shown in Graphic 2.
Doors
1.Remove door stop from both the freezer and refrigerator doors and move to the other side. See Graphics 3 and 4.
Replace Doors and Hinges
NOTE: Graphic may be reversed if door swing is reversed.
1.Replace the parts for the bottom hinge as shown. Tighten screws. See Bottom Hinge graphic. Replace the refrigerator door.
NOTE: Provide additional support for the doors while the hinges are being moved. Do not depend on the door magnets to hold the doors in place while you are working.
2.Assemble the parts for the center hinge as shown and tighten all screws. See Center Hinge graphic. Replace the freezer door.
3.Assemble the parts for the top hinge as shown in Top Hinge graphic. Do not tighten screws completely.
4.Line up the doors so that the bottom of the freezer door aligns evenly with the top of the refrigerator door. Tighten all screws.
Final Steps
1.Check all holes to make sure that hole plugs and screws are in place. Reinstall top hinge cover. See Top Hinge graphic.
2.Replace the base grille. See Base Grille graphic.
 WARNING
Electrical Shock Hazard
Plug into a grounded 3 prong outlet.
Do not remove ground prong.
Do not use an adapter.
Do not use an extension cord.
Failure to follow these instructions can result in death, fire, or electrical shock.
3.Plug into a grounded 3 prong outlet.
4.Return all removable door parts to doors and food to refrigerator.
5

Door Removal & |
Door Swing Reversal (optional) |
Replacement |
|
Base Grille |
1 |
|
|
|
A |
|
A. 5/16" Hex-Head Hinge Screws |
|
2 |
|
A |
Top Hinge
A. Cabinet Hinge Hole Plugs
A
3
B
A
C
A. Top Hinge Cover |
|
A. Door Hinge Hole Plug |
|
|
|
B. 5/16" Hex-Head Hinge Screws |
|
|
C. Top Hinge |
4 |
|
|
Removal of Door Stops |
|
|
|
Center Hinge |
|
|
A |
|
|
|
|
|
A |
|
B |
|
|
A. Door Stop |
|
|
B |
B. Door Stop Screw |
|
|
|
|
|
A. Center Hinge |
|
|
|
B. 5/16" Hex-Head Hinge Screws |
|
|
|
Bottom Hinge |
5 |
Reinstallation of Door Stops |
|
|
|||
|
|
A |
B |
|
A |
|
|
|
B |
A. Door Stop |
|
|
|
|
|
|
|
B. Door Stop Screw |
|
A. Bottom Hinge |
|
|
|
B. 5/16" Hex-Head Hinge Screws |
|
|
|
6

AdjusttheDoors
Door Closing
Your refrigerator has two front adjustable rollers – one on the right and one on the left. If your refrigerator seems unsteady or you want the doors to close easier, adjust the refrigerator's tilt using the instructions below.
1.Remove the base grille. See the Base Grille graphic in “Refrigerator Doors.” The two leveling screws are part of the front roller assemblies which are at the base of the refrigerator on either side.
2.Use a screwdriver to adjust the leveling screws. Turn the leveling screw to the right to raise that side of the refrigerator or turn the leveling screw to the left to lower that side. It may take several turns of the leveling screws to adjust the tilt of the refrigerator.
NOTE: Having someone push against the top of the refrigerator takes some weight off the leveling screws and rollers. This makes it easier to adjust the screws.
3.Open both doors again to make sure that they close as easily as you like. If not, tilt the refrigerator slightly more to the rear by turning both leveling screws to the right. It may take several more turns, and you should turn both leveling screws the same amount.
4.Replace the base grille.
Align Doors
If the space between your doors looks uneven, you can adjust it using the instructions below:
1.Pry off the top hinge cover.
2.Loosen the top hinge screws using a ⁄" socket or wrench.
3.Have someone hold the door in place or put a spacer between the doors while you tighten the top hinge screws.
4.Replace the top hinge cover.
REFRIGERATOR USE
UsingtheControls
For your convenience, your refrigerator controls are preset at the factory. When you first install your refrigerator, make sure that the controls are still preset to the mid-settings as shown.
NOTE: To turn your refrigerator off, turn the refrigerator control to the word OFF or until the word OFF appears. Your product will not cool when the refrigerator control is set to OFF.
Mid-setting “3”
Mid-setting “3”
IMPORTANT:
■Give your refrigerator time to cool down completely before adding food. It is best to wait 24 hours before you put food into the refrigerator.
■If you add food before the refrigerator has cooled completely, your food may spoil. Adjusting the Refrigerator and Freezer Controls to a higher (colder) than recommended setting will not cool the compartments any faster.
Adjusting Controls
The mid-settings indicated in the previous section should be correct for normal household usage. The controls are set correctly when milk or juice is as cold as you like and when ice cream is firm.
If the temperature is too warm or too cold in the refrigerator or freezer, first check the air vents to be sure they are not blocked.
If you need to adjust temperatures, use the settings listed in the chart below as a guide. On models with two controls, adjust the refrigerator temperature first. Wait at least 24 hours between adjustments and then recheck the temperatures.
CONDITION/REASON: |
ADJUSTMENT: |
|
|
REFRIGERATOR too warm |
REFRIGERATOR or |
|
TEMPERATURE Control one |
|
setting higher |
|
|
FREEZER too warm/too |
FREEZER or TEMPERATURE |
little ice |
Control one setting higher |
|
MAX ice production switch |
|
|
REFRIGERATOR too cold |
REFRIGERATOR or |
|
TEMPERATURE Control one |
|
setting lower |
|
|
FREEZER too cold |
FREEZER or TEMPERATURE |
|
Control one setting lower |
|
|
7
CrisperHumidityControl
(onsomemodels)
You can control the amount of humidity in the moisture-sealed crisper. Adjust the control to any setting between LOW and HIGH.
LOW (open) for best storage of fruits and vegetables with skins. HIGH (closed) for best storage of fresh, leafy vegetables.
IceMaker
Turning the Ice Maker On/Off
To turn the ice maker ON, simply lower the wire shutoff arm.
To manually turn the ice maker OFF, lift the wire shutoff arm to the OFF (arm up) position and listen for the click.
NOTE: Your ice maker has an automatic shutoff. As ice is made, the ice cubes will fill the ice storage bin and the ice cubes will raise the wire shutoff arm to the OFF (arm up) position. Do not force the wire shutoff arm up or down.
Ice Production Rate
■Allow 24 hours to produce the first batch of ice. Discard the first three batches of ice produced.
■The ice maker should produce approximately 8 to 12 batches of ice in a 24-hour period.
■To increase ice production, lower the freezer and refrigerator temperature. See “Using the Controls.” Wait 24 hours between adjustments.
■For maximum ice production (on some models), push the switch to ICE PLUS. The ice maker should produce 16 to 20 batches of ice in a 24-hour period in the Ice Plus mode.
Remember
■The quality of your ice will be only as good as the quality of the water supplied to your ice maker. Avoid connecting the ice maker to a softened water supply. Water softener chemicals (such as salt) can damage parts of the ice maker and lead to poor quality ice. If a softened water supply cannot be avoided, make sure the water softener is operating properly and is well maintained.
■Do not use anything sharp to break up the ice in the bin. This can cause damage to the ice container and the dispenser mechanism.
■Do not store anything on top of or in the ice maker or ice bin.
REFRIGERATOR CARE
Cleaning
 WARNING
Explosion Hazard
Use nonflammable cleaner.
Failure to do so can result in death, explosion, or fire.
Both the refrigerator and freezer sections defrost automatically. However, clean both sections about once a month to avoid buildup of odors. Wipe up spills immediately.
IMPORTANT:
■Because air circulates between both sections, any odors formed in one section will transfer to the other. You must thoroughly clean both sections to eliminate odors. To avoid odor transfer and drying out of food, wrap or cover foods tightly.
■For stainless steel models, stainless steel is corrosionresistant and not corrosion-proof. To help avoid corrosion of your stainless steel, keep your surfaces clean by using the following cleaning instructions.
To Clean Your Refrigerator:
NOTE: Do not use abrasive or harsh cleaners such as window sprays, scouring cleansers, flammable fluids, muriatic acid, cleaning waxes, concentrated detergents, bleaches or cleansers containing petroleum products on exterior surfaces (doors and cabinet), plastic parts, interior and door liners or gaskets. Do not use paper towels, scouring pads, or other harsh cleaning tools.
1.Unplug refrigerator or disconnect power.
2.Hand wash, rinse, and dry removable parts and interior surfaces thoroughly. Use a clean sponge or soft cloth and a mild detergent in warm water.
3.Clean the exterior surfaces.
Painted metal: Wash painted metal exteriors with a clean, soft cloth or sponge and a mild detergent in warm water. Rinse surfaces with clean, warm water and dry immediately to avoid water spots.
Stainless steel: Wash stainless steel surfaces with a clean, soft cloth or sponge and a mild detergent in warm water. Rinse surfaces with clean, warm water and dry immediately to avoid water spots.
NOTE: When cleaning stainless steel, always wipe with the grain to avoid cross-grain scratching.
4.There is no need for routine condenser cleaning in normal home operating environments. If the environment is particularly greasy or dusty, or there is significant pet traffic in the home, the condenser should be cleaned every 2 to
3 months to ensure maximum efficiency. If you need to clean the condenser:
■Remove the base grille.
■Use a vacuum cleaner with a soft brush to clean the grille, the open areas behind the grille and the front surface area of the condenser.
■Replace the base grille when finished.
5.Plug in refrigerator or reconnect power.
8
 Loading...