

Page 1

Adobe® Photoshop® CC
Help
Page 2

Legal notices
Legal notices
For legal notices, see http://help.adobe.com/en_US/legalnotices/index.html.
Last updated 2/2/2018
Page 3

Contents
Chapter 1: Introduction to Photoshop
New features summary . . . . . . . . . . . . . . . . . . . . . . . . . . . . . . . . . . . . . . . . . . . . . . . . . . . . . . . . . . . . . . . . . . . . . . . . . . . . . . . . . . . . . . . . . . . . . . . . .1
Create documents . . . . . . . . . . . . . . . . . . . . . . . . . . . . . . . . . . . . . . . . . . . . . . . . . . . . . . . . . . . . . . . . . . . . . . . . . . . . . . . . . . . . . . . . . . . . . . . . . . . . 18
System requirements | Photoshop . . . . . . . . . . . . . . . . . . . . . . . . . . . . . . . . . . . . . . . . . . . . . . . . . . . . . . . . . . . . . . . . . . . . . . . . . . . . . . . . . . . . 26
Migrate presets, actions, and settings . . . . . . . . . . . . . . . . . . . . . . . . . . . . . . . . . . . . . . . . . . . . . . . . . . . . . . . . . . . . . . . . . . . . . . . . . . . . . . . . . 32
System requirements | Older versions of Photoshop . . . . . . . . . . . . . . . . . . . . . . . . . . . . . . . . . . . . . . . . . . . . . . . . . . . . . . . . . . . . . . . . . . . 36
Chapter 2: Photoshop and Adobe services
Photoshop and Adobe Stock . . . . . . . . . . . . . . . . . . . . . . . . . . . . . . . . . . . . . . . . . . . . . . . . . . . . . . . . . . . . . . . . . . . . . . . . . . . . . . . . . . . . . . . . . . 51
Creative Cloud Libraries in Photoshop . . . . . . . . . . . . . . . . . . . . . . . . . . . . . . . . . . . . . . . . . . . . . . . . . . . . . . . . . . . . . . . . . . . . . . . . . . . . . . . . . 53
Use the Adobe Color Themes extension . . . . . . . . . . . . . . . . . . . . . . . . . . . . . . . . . . . . . . . . . . . . . . . . . . . . . . . . . . . . . . . . . . . . . . . . . . . . . . . 61
Touch capabilities and customizable workspaces . . . . . . . . . . . . . . . . . . . . . . . . . . . . . . . . . . . . . . . . . . . . . . . . . . . . . . . . . . . . . . . . . . . . . . 73
Chapter 3: Photoshop and mobile apps
Photoshop family of mobile apps . . . . . . . . . . . . . . . . . . . . . . . . . . . . . . . . . . . . . . . . . . . . . . . . . . . . . . . . . . . . . . . . . . . . . . . . . . . . . . . . . . . . . 77
iii
Chapter 4: Workspace
Workspace basics . . . . . . . . . . . . . . . . . . . . . . . . . . . . . . . . . . . . . . . . . . . . . . . . . . . . . . . . . . . . . . . . . . . . . . . . . . . . . . . . . . . . . . . . . . . . . . . . . . . . . 79
Photoshop search . . . . . . . . . . . . . . . . . . . . . . . . . . . . . . . . . . . . . . . . . . . . . . . . . . . . . . . . . . . . . . . . . . . . . . . . . . . . . . . . . . . . . . . . . . . . . . . . . . . . 89
Use the Touch Bar with Photoshop . . . . . . . . . . . . . . . . . . . . . . . . . . . . . . . . . . . . . . . . . . . . . . . . . . . . . . . . . . . . . . . . . . . . . . . . . . . . . . . . . . . . 95
Microsoft Dial support in Photoshop . . . . . . . . . . . . . . . . . . . . . . . . . . . . . . . . . . . . . . . . . . . . . . . . . . . . . . . . . . . . . . . . . . . . . . . . . . . . . . . . . . 99
Tool galleries . . . . . . . . . . . . . . . . . . . . . . . . . . . . . . . . . . . . . . . . . . . . . . . . . . . . . . . . . . . . . . . . . . . . . . . . . . . . . . . . . . . . . . . . . . . . . . . . . . . . . . . . 100
Performance preferences . . . . . . . . . . . . . . . . . . . . . . . . . . . . . . . . . . . . . . . . . . . . . . . . . . . . . . . . . . . . . . . . . . . . . . . . . . . . . . . . . . . . . . . . . . . . 107
Use tools . . . . . . . . . . . . . . . . . . . . . . . . . . . . . . . . . . . . . . . . . . . . . . . . . . . . . . . . . . . . . . . . . . . . . . . . . . . . . . . . . . . . . . . . . . . . . . . . . . . . . . . . . . . . 114
Touch gestures . . . . . . . . . . . . . . . . . . . . . . . . . . . . . . . . . . . . . . . . . . . . . . . . . . . . . . . . . . . . . . . . . . . . . . . . . . . . . . . . . . . . . . . . . . . . . . . . . . . . . . 118
Tec hnol ogy p rev iew s . . . . . . . . . . . . . . . . . . . . . . . . . . . . . . . . . . . . . . . . . . . . . . . . . . . . . . . . . . . . . . . . . . . . . . . . . . . . . . . . . . . . . . . . . . . . . . . . 118
Metadata and notes . . . . . . . . . . . . . . . . . . . . . . . . . . . . . . . . . . . . . . . . . . . . . . . . . . . . . . . . . . . . . . . . . . . . . . . . . . . . . . . . . . . . . . . . . . . . . . . . . 121
Quickly share your creations . . . . . . . . . . . . . . . . . . . . . . . . . . . . . . . . . . . . . . . . . . . . . . . . . . . . . . . . . . . . . . . . . . . . . . . . . . . . . . . . . . . . . . . . . 123
Place Photoshop images in other applications . . . . . . . . . . . . . . . . . . . . . . . . . . . . . . . . . . . . . . . . . . . . . . . . . . . . . . . . . . . . . . . . . . . . . . . . 124
Preferences . . . . . . . . . . . . . . . . . . . . . . . . . . . . . . . . . . . . . . . . . . . . . . . . . . . . . . . . . . . . . . . . . . . . . . . . . . . . . . . . . . . . . . . . . . . . . . . . . . . . . . . . . 128
Default keyboard shortcuts . . . . . . . . . . . . . . . . . . . . . . . . . . . . . . . . . . . . . . . . . . . . . . . . . . . . . . . . . . . . . . . . . . . . . . . . . . . . . . . . . . . . . . . . . . 129
Rulers . . . . . . . . . . . . . . . . . . . . . . . . . . . . . . . . . . . . . . . . . . . . . . . . . . . . . . . . . . . . . . . . . . . . . . . . . . . . . . . . . . . . . . . . . . . . . . . . . . . . . . . . . . . . . . . 151
Show or hide non-printing Extras . . . . . . . . . . . . . . . . . . . . . . . . . . . . . . . . . . . . . . . . . . . . . . . . . . . . . . . . . . . . . . . . . . . . . . . . . . . . . . . . . . . . 152
Specify columns for an image . . . . . . . . . . . . . . . . . . . . . . . . . . . . . . . . . . . . . . . . . . . . . . . . . . . . . . . . . . . . . . . . . . . . . . . . . . . . . . . . . . . . . . . . 153
Undo and history . . . . . . . . . . . . . . . . . . . . . . . . . . . . . . . . . . . . . . . . . . . . . . . . . . . . . . . . . . . . . . . . . . . . . . . . . . . . . . . . . . . . . . . . . . . . . . . . . . . . 153
Panels and menus . . . . . . . . . . . . . . . . . . . . . . . . . . . . . . . . . . . . . . . . . . . . . . . . . . . . . . . . . . . . . . . . . . . . . . . . . . . . . . . . . . . . . . . . . . . . . . . . . . . 158
Place files . . . . . . . . . . . . . . . . . . . . . . . . . . . . . . . . . . . . . . . . . . . . . . . . . . . . . . . . . . . . . . . . . . . . . . . . . . . . . . . . . . . . . . . . . . . . . . . . . . . . . . . . . . . 162
Position elements with snapping . . . . . . . . . . . . . . . . . . . . . . . . . . . . . . . . . . . . . . . . . . . . . . . . . . . . . . . . . . . . . . . . . . . . . . . . . . . . . . . . . . . . 165
Position with the Ruler tool . . . . . . . . . . . . . . . . . . . . . . . . . . . . . . . . . . . . . . . . . . . . . . . . . . . . . . . . . . . . . . . . . . . . . . . . . . . . . . . . . . . . . . . . . . 165
Presets . . . . . . . . . . . . . . . . . . . . . . . . . . . . . . . . . . . . . . . . . . . . . . . . . . . . . . . . . . . . . . . . . . . . . . . . . . . . . . . . . . . . . . . . . . . . . . . . . . . . . . . . . . . . . . 166
Customize keyboard shortcuts . . . . . . . . . . . . . . . . . . . . . . . . . . . . . . . . . . . . . . . . . . . . . . . . . . . . . . . . . . . . . . . . . . . . . . . . . . . . . . . . . . . . . . . 169
Grid and guides . . . . . . . . . . . . . . . . . . . . . . . . . . . . . . . . . . . . . . . . . . . . . . . . . . . . . . . . . . . . . . . . . . . . . . . . . . . . . . . . . . . . . . . . . . . . . . . . . . . . . 170
Last updated 2/2/2018
Page 4

ADOBE PHOTOSHOP
Content s
Chapter 5: Web, screen, and app design
Photoshop for design . . . . . . . . . . . . . . . . . . . . . . . . . . . . . . . . . . . . . . . . . . . . . . . . . . . . . . . . . . . . . . . . . . . . . . . . . . . . . . . . . . . . . . . . . . . . . . . . 176
Artboards . . . . . . . . . . . . . . . . . . . . . . . . . . . . . . . . . . . . . . . . . . . . . . . . . . . . . . . . . . . . . . . . . . . . . . . . . . . . . . . . . . . . . . . . . . . . . . . . . . . . . . . . . . 182
Export artboards, layers, and more . . . . . . . . . . . . . . . . . . . . . . . . . . . . . . . . . . . . . . . . . . . . . . . . . . . . . . . . . . . . . . . . . . . . . . . . . . . . . . . . . . . 191
Device Preview . . . . . . . . . . . . . . . . . . . . . . . . . . . . . . . . . . . . . . . . . . . . . . . . . . . . . . . . . . . . . . . . . . . . . . . . . . . . . . . . . . . . . . . . . . . . . . . . . . . . . . 195
Slice web pages . . . . . . . . . . . . . . . . . . . . . . . . . . . . . . . . . . . . . . . . . . . . . . . . . . . . . . . . . . . . . . . . . . . . . . . . . . . . . . . . . . . . . . . . . . . . . . . . . . . . . 198
HTML options for slices . . . . . . . . . . . . . . . . . . . . . . . . . . . . . . . . . . . . . . . . . . . . . . . . . . . . . . . . . . . . . . . . . . . . . . . . . . . . . . . . . . . . . . . . . . . . . . 201
Modify slice layout . . . . . . . . . . . . . . . . . . . . . . . . . . . . . . . . . . . . . . . . . . . . . . . . . . . . . . . . . . . . . . . . . . . . . . . . . . . . . . . . . . . . . . . . . . . . . . . . . . 204
Work with web graphics . . . . . . . . . . . . . . . . . . . . . . . . . . . . . . . . . . . . . . . . . . . . . . . . . . . . . . . . . . . . . . . . . . . . . . . . . . . . . . . . . . . . . . . . . . . . . 207
Create web photo galleries . . . . . . . . . . . . . . . . . . . . . . . . . . . . . . . . . . . . . . . . . . . . . . . . . . . . . . . . . . . . . . . . . . . . . . . . . . . . . . . . . . . . . . . . . . 209
Chapter 6: Image and color basics
Resize images . . . . . . . . . . . . . . . . . . . . . . . . . . . . . . . . . . . . . . . . . . . . . . . . . . . . . . . . . . . . . . . . . . . . . . . . . . . . . . . . . . . . . . . . . . . . . . . . . . . . . . . 217
Video | Resizing images in Photoshop . . . . . . . . . . . . . . . . . . . . . . . . . . . . . . . . . . . . . . . . . . . . . . . . . . . . . . . . . . . . . . . . . . . . . . . . . . . . . . . . 217
Image essentials . . . . . . . . . . . . . . . . . . . . . . . . . . . . . . . . . . . . . . . . . . . . . . . . . . . . . . . . . . . . . . . . . . . . . . . . . . . . . . . . . . . . . . . . . . . . . . . . . . . . . 219
Image size and resolution . . . . . . . . . . . . . . . . . . . . . . . . . . . . . . . . . . . . . . . . . . . . . . . . . . . . . . . . . . . . . . . . . . . . . . . . . . . . . . . . . . . . . . . . . . . . 221
Acquire images from cameras and scanners . . . . . . . . . . . . . . . . . . . . . . . . . . . . . . . . . . . . . . . . . . . . . . . . . . . . . . . . . . . . . . . . . . . . . . . . . . 228
Create, open, and import images . . . . . . . . . . . . . . . . . . . . . . . . . . . . . . . . . . . . . . . . . . . . . . . . . . . . . . . . . . . . . . . . . . . . . . . . . . . . . . . . . . . . 230
View images . . . . . . . . . . . . . . . . . . . . . . . . . . . . . . . . . . . . . . . . . . . . . . . . . . . . . . . . . . . . . . . . . . . . . . . . . . . . . . . . . . . . . . . . . . . . . . . . . . . . . . . . 234
Viewing multiple images . . . . . . . . . . . . . . . . . . . . . . . . . . . . . . . . . . . . . . . . . . . . . . . . . . . . . . . . . . . . . . . . . . . . . . . . . . . . . . . . . . . . . . . . . . . . 238
Customize color pickers and swatches . . . . . . . . . . . . . . . . . . . . . . . . . . . . . . . . . . . . . . . . . . . . . . . . . . . . . . . . . . . . . . . . . . . . . . . . . . . . . . . 240
High dynamic range images . . . . . . . . . . . . . . . . . . . . . . . . . . . . . . . . . . . . . . . . . . . . . . . . . . . . . . . . . . . . . . . . . . . . . . . . . . . . . . . . . . . . . . . . . 242
Convert between color modes . . . . . . . . . . . . . . . . . . . . . . . . . . . . . . . . . . . . . . . . . . . . . . . . . . . . . . . . . . . . . . . . . . . . . . . . . . . . . . . . . . . . . . . 249
Color modes . . . . . . . . . . . . . . . . . . . . . . . . . . . . . . . . . . . . . . . . . . . . . . . . . . . . . . . . . . . . . . . . . . . . . . . . . . . . . . . . . . . . . . . . . . . . . . . . . . . . . . . . 254
Erase parts of an image . . . . . . . . . . . . . . . . . . . . . . . . . . . . . . . . . . . . . . . . . . . . . . . . . . . . . . . . . . . . . . . . . . . . . . . . . . . . . . . . . . . . . . . . . . . . . . 257
Blending modes . . . . . . . . . . . . . . . . . . . . . . . . . . . . . . . . . . . . . . . . . . . . . . . . . . . . . . . . . . . . . . . . . . . . . . . . . . . . . . . . . . . . . . . . . . . . . . . . . . . . . 260
Choose colors . . . . . . . . . . . . . . . . . . . . . . . . . . . . . . . . . . . . . . . . . . . . . . . . . . . . . . . . . . . . . . . . . . . . . . . . . . . . . . . . . . . . . . . . . . . . . . . . . . . . . . . 264
Customize indexed color tables . . . . . . . . . . . . . . . . . . . . . . . . . . . . . . . . . . . . . . . . . . . . . . . . . . . . . . . . . . . . . . . . . . . . . . . . . . . . . . . . . . . . . . 270
Image information . . . . . . . . . . . . . . . . . . . . . . . . . . . . . . . . . . . . . . . . . . . . . . . . . . . . . . . . . . . . . . . . . . . . . . . . . . . . . . . . . . . . . . . . . . . . . . . . . . 272
About color . . . . . . . . . . . . . . . . . . . . . . . . . . . . . . . . . . . . . . . . . . . . . . . . . . . . . . . . . . . . . . . . . . . . . . . . . . . . . . . . . . . . . . . . . . . . . . . . . . . . . . . . . 275
Color and monochrome adjustments using channels . . . . . . . . . . . . . . . . . . . . . . . . . . . . . . . . . . . . . . . . . . . . . . . . . . . . . . . . . . . . . . . . . 277
Choose colors in the Color and Swatches panels . . . . . . . . . . . . . . . . . . . . . . . . . . . . . . . . . . . . . . . . . . . . . . . . . . . . . . . . . . . . . . . . . . . . . . 279
Sample . . . . . . . . . . . . . . . . . . . . . . . . . . . . . . . . . . . . . . . . . . . . . . . . . . . . . . . . . . . . . . . . . . . . . . . . . . . . . . . . . . . . . . . . . . . . . . . . . . . . . . . . . . . . . . 281
Color mode or Image mode . . . . . . . . . . . . . . . . . . . . . . . . . . . . . . . . . . . . . . . . . . . . . . . . . . . . . . . . . . . . . . . . . . . . . . . . . . . . . . . . . . . . . . . . . . 281
Color cast . . . . . . . . . . . . . . . . . . . . . . . . . . . . . . . . . . . . . . . . . . . . . . . . . . . . . . . . . . . . . . . . . . . . . . . . . . . . . . . . . . . . . . . . . . . . . . . . . . . . . . . . . . . 282
Add swatches from HTML CSS and SVG . . . . . . . . . . . . . . . . . . . . . . . . . . . . . . . . . . . . . . . . . . . . . . . . . . . . . . . . . . . . . . . . . . . . . . . . . . . . . . 283
iv
Chapter 7: Layers
Layer basics . . . . . . . . . . . . . . . . . . . . . . . . . . . . . . . . . . . . . . . . . . . . . . . . . . . . . . . . . . . . . . . . . . . . . . . . . . . . . . . . . . . . . . . . . . . . . . . . . . . . . . . . . 284
Nondestructive editing . . . . . . . . . . . . . . . . . . . . . . . . . . . . . . . . . . . . . . . . . . . . . . . . . . . . . . . . . . . . . . . . . . . . . . . . . . . . . . . . . . . . . . . . . . . . . . 288
Create and manage layers and groups . . . . . . . . . . . . . . . . . . . . . . . . . . . . . . . . . . . . . . . . . . . . . . . . . . . . . . . . . . . . . . . . . . . . . . . . . . . . . . . 288
Select, group, and link layers . . . . . . . . . . . . . . . . . . . . . . . . . . . . . . . . . . . . . . . . . . . . . . . . . . . . . . . . . . . . . . . . . . . . . . . . . . . . . . . . . . . . . . . . . 291
Mask layers . . . . . . . . . . . . . . . . . . . . . . . . . . . . . . . . . . . . . . . . . . . . . . . . . . . . . . . . . . . . . . . . . . . . . . . . . . . . . . . . . . . . . . . . . . . . . . . . . . . . . . . . . . 294
Video tutorial: Mask out part of an image . . . . . . . . . . . . . . . . . . . . . . . . . . . . . . . . . . . . . . . . . . . . . . . . . . . . . . . . . . . . . . . . . . . . . . . . . . . . . 294
Video tutorial: Remove a person from the background with masking . . . . . . . . . . . . . . . . . . . . . . . . . . . . . . . . . . . . . . . . . . . . . . . . . . 294
Layer opacity and blending . . . . . . . . . . . . . . . . . . . . . . . . . . . . . . . . . . . . . . . . . . . . . . . . . . . . . . . . . . . . . . . . . . . . . . . . . . . . . . . . . . . . . . . . . . 299
Apply Smart Filters . . . . . . . . . . . . . . . . . . . . . . . . . . . . . . . . . . . . . . . . . . . . . . . . . . . . . . . . . . . . . . . . . . . . . . . . . . . . . . . . . . . . . . . . . . . . . . . . . . 302
Last updated 2/2/2018
Page 5

ADOBE PHOTOSHOP
Content s
Video tutorial: Learn Photoshop Smart filters . . . . . . . . . . . . . . . . . . . . . . . . . . . . . . . . . . . . . . . . . . . . . . . . . . . . . . . . . . . . . . . . . . . . . . . . . 302
Layer comps . . . . . . . . . . . . . . . . . . . . . . . . . . . . . . . . . . . . . . . . . . . . . . . . . . . . . . . . . . . . . . . . . . . . . . . . . . . . . . . . . . . . . . . . . . . . . . . . . . . . . . . . 305
Video tutorial: Improved layer comps . . . . . . . . . . . . . . . . . . . . . . . . . . . . . . . . . . . . . . . . . . . . . . . . . . . . . . . . . . . . . . . . . . . . . . . . . . . . . . . . 305
Move, stack, and lock layers . . . . . . . . . . . . . . . . . . . . . . . . . . . . . . . . . . . . . . . . . . . . . . . . . . . . . . . . . . . . . . . . . . . . . . . . . . . . . . . . . . . . . . . . . . 308
Mask layers with vector masks . . . . . . . . . . . . . . . . . . . . . . . . . . . . . . . . . . . . . . . . . . . . . . . . . . . . . . . . . . . . . . . . . . . . . . . . . . . . . . . . . . . . . . . 309
Manage layers and groups . . . . . . . . . . . . . . . . . . . . . . . . . . . . . . . . . . . . . . . . . . . . . . . . . . . . . . . . . . . . . . . . . . . . . . . . . . . . . . . . . . . . . . . . . . . 310
Layer effects and styles . . . . . . . . . . . . . . . . . . . . . . . . . . . . . . . . . . . . . . . . . . . . . . . . . . . . . . . . . . . . . . . . . . . . . . . . . . . . . . . . . . . . . . . . . . . . . . 313
Edit layer masks . . . . . . . . . . . . . . . . . . . . . . . . . . . . . . . . . . . . . . . . . . . . . . . . . . . . . . . . . . . . . . . . . . . . . . . . . . . . . . . . . . . . . . . . . . . . . . . . . . . . . 322
Extract assets . . . . . . . . . . . . . . . . . . . . . . . . . . . . . . . . . . . . . . . . . . . . . . . . . . . . . . . . . . . . . . . . . . . . . . . . . . . . . . . . . . . . . . . . . . . . . . . . . . . . . . . . 323
Reveal layers with clipping masks . . . . . . . . . . . . . . . . . . . . . . . . . . . . . . . . . . . . . . . . . . . . . . . . . . . . . . . . . . . . . . . . . . . . . . . . . . . . . . . . . . . . 325
Generate image assets from layers . . . . . . . . . . . . . . . . . . . . . . . . . . . . . . . . . . . . . . . . . . . . . . . . . . . . . . . . . . . . . . . . . . . . . . . . . . . . . . . . . . . 326
Video: Generate web assets in Photoshop CC . . . . . . . . . . . . . . . . . . . . . . . . . . . . . . . . . . . . . . . . . . . . . . . . . . . . . . . . . . . . . . . . . . . . . . . . . 326
Work with Smart Objects . . . . . . . . . . . . . . . . . . . . . . . . . . . . . . . . . . . . . . . . . . . . . . . . . . . . . . . . . . . . . . . . . . . . . . . . . . . . . . . . . . . . . . . . . . . . 332
Video tutorial: Linked Smart Objects . . . . . . . . . . . . . . . . . . . . . . . . . . . . . . . . . . . . . . . . . . . . . . . . . . . . . . . . . . . . . . . . . . . . . . . . . . . . . . . . . 332
Combine multiple images into a group portrait . . . . . . . . . . . . . . . . . . . . . . . . . . . . . . . . . . . . . . . . . . . . . . . . . . . . . . . . . . . . . . . . . . . . . . . 338
Combine images with Auto-Blend Layers . . . . . . . . . . . . . . . . . . . . . . . . . . . . . . . . . . . . . . . . . . . . . . . . . . . . . . . . . . . . . . . . . . . . . . . . . . . . . 338
Align and distribute layers . . . . . . . . . . . . . . . . . . . . . . . . . . . . . . . . . . . . . . . . . . . . . . . . . . . . . . . . . . . . . . . . . . . . . . . . . . . . . . . . . . . . . . . . . . . 339
Copy CSS from layers . . . . . . . . . . . . . . . . . . . . . . . . . . . . . . . . . . . . . . . . . . . . . . . . . . . . . . . . . . . . . . . . . . . . . . . . . . . . . . . . . . . . . . . . . . . . . . . . 342
Load selections from a layer or layer mask's boundaries . . . . . . . . . . . . . . . . . . . . . . . . . . . . . . . . . . . . . . . . . . . . . . . . . . . . . . . . . . . . . . . 343
Knockout to reveal content from other layers . . . . . . . . . . . . . . . . . . . . . . . . . . . . . . . . . . . . . . . . . . . . . . . . . . . . . . . . . . . . . . . . . . . . . . . . . 343
Layer . . . . . . . . . . . . . . . . . . . . . . . . . . . . . . . . . . . . . . . . . . . . . . . . . . . . . . . . . . . . . . . . . . . . . . . . . . . . . . . . . . . . . . . . . . . . . . . . . . . . . . . . . . . . . . . . 344
Flattening . . . . . . . . . . . . . . . . . . . . . . . . . . . . . . . . . . . . . . . . . . . . . . . . . . . . . . . . . . . . . . . . . . . . . . . . . . . . . . . . . . . . . . . . . . . . . . . . . . . . . . . . . . . 345
Composite . . . . . . . . . . . . . . . . . . . . . . . . . . . . . . . . . . . . . . . . . . . . . . . . . . . . . . . . . . . . . . . . . . . . . . . . . . . . . . . . . . . . . . . . . . . . . . . . . . . . . . . . . . 346
Background . . . . . . . . . . . . . . . . . . . . . . . . . . . . . . . . . . . . . . . . . . . . . . . . . . . . . . . . . . . . . . . . . . . . . . . . . . . . . . . . . . . . . . . . . . . . . . . . . . . . . . . . . 346
v
Chapter 8: Selections
Select And Mask workspace . . . . . . . . . . . . . . . . . . . . . . . . . . . . . . . . . . . . . . . . . . . . . . . . . . . . . . . . . . . . . . . . . . . . . . . . . . . . . . . . . . . . . . . . . 348
Make quick selections . . . . . . . . . . . . . . . . . . . . . . . . . . . . . . . . . . . . . . . . . . . . . . . . . . . . . . . . . . . . . . . . . . . . . . . . . . . . . . . . . . . . . . . . . . . . . . . 353
Make selections . . . . . . . . . . . . . . . . . . . . . . . . . . . . . . . . . . . . . . . . . . . . . . . . . . . . . . . . . . . . . . . . . . . . . . . . . . . . . . . . . . . . . . . . . . . . . . . . . . . . . 356
Select with the marquee tools . . . . . . . . . . . . . . . . . . . . . . . . . . . . . . . . . . . . . . . . . . . . . . . . . . . . . . . . . . . . . . . . . . . . . . . . . . . . . . . . . . . . . . . 357
Video tutorial: Select part of an image . . . . . . . . . . . . . . . . . . . . . . . . . . . . . . . . . . . . . . . . . . . . . . . . . . . . . . . . . . . . . . . . . . . . . . . . . . . . . . . . 357
Select with the lasso tools . . . . . . . . . . . . . . . . . . . . . . . . . . . . . . . . . . . . . . . . . . . . . . . . . . . . . . . . . . . . . . . . . . . . . . . . . . . . . . . . . . . . . . . . . . . 359
Select a color range in an image . . . . . . . . . . . . . . . . . . . . . . . . . . . . . . . . . . . . . . . . . . . . . . . . . . . . . . . . . . . . . . . . . . . . . . . . . . . . . . . . . . . . . 361
Adjust pixel selections . . . . . . . . . . . . . . . . . . . . . . . . . . . . . . . . . . . . . . . . . . . . . . . . . . . . . . . . . . . . . . . . . . . . . . . . . . . . . . . . . . . . . . . . . . . . . . . 364
Extract an object from its background . . . . . . . . . . . . . . . . . . . . . . . . . . . . . . . . . . . . . . . . . . . . . . . . . . . . . . . . . . . . . . . . . . . . . . . . . . . . . . . . 370
Convert between paths and selection borders . . . . . . . . . . . . . . . . . . . . . . . . . . . . . . . . . . . . . . . . . . . . . . . . . . . . . . . . . . . . . . . . . . . . . . . . 370
Channel basics . . . . . . . . . . . . . . . . . . . . . . . . . . . . . . . . . . . . . . . . . . . . . . . . . . . . . . . . . . . . . . . . . . . . . . . . . . . . . . . . . . . . . . . . . . . . . . . . . . . . . . 371
Move, copy, and delete selected pixels . . . . . . . . . . . . . . . . . . . . . . . . . . . . . . . . . . . . . . . . . . . . . . . . . . . . . . . . . . . . . . . . . . . . . . . . . . . . . . . 374
Create a temporary quick mask . . . . . . . . . . . . . . . . . . . . . . . . . . . . . . . . . . . . . . . . . . . . . . . . . . . . . . . . . . . . . . . . . . . . . . . . . . . . . . . . . . . . . . 379
Save selections and alpha channel masks . . . . . . . . . . . . . . . . . . . . . . . . . . . . . . . . . . . . . . . . . . . . . . . . . . . . . . . . . . . . . . . . . . . . . . . . . . . . 381
Video tutorial: Mask out part of an image . . . . . . . . . . . . . . . . . . . . . . . . . . . . . . . . . . . . . . . . . . . . . . . . . . . . . . . . . . . . . . . . . . . . . . . . . . . . . 381
Select the image areas in focus . . . . . . . . . . . . . . . . . . . . . . . . . . . . . . . . . . . . . . . . . . . . . . . . . . . . . . . . . . . . . . . . . . . . . . . . . . . . . . . . . . . . . . 384
Duplicate, split, and merge channels . . . . . . . . . . . . . . . . . . . . . . . . . . . . . . . . . . . . . . . . . . . . . . . . . . . . . . . . . . . . . . . . . . . . . . . . . . . . . . . . . 387
Channel calculations . . . . . . . . . . . . . . . . . . . . . . . . . . . . . . . . . . . . . . . . . . . . . . . . . . . . . . . . . . . . . . . . . . . . . . . . . . . . . . . . . . . . . . . . . . . . . . . . 389
Selection . . . . . . . . . . . . . . . . . . . . . . . . . . . . . . . . . . . . . . . . . . . . . . . . . . . . . . . . . . . . . . . . . . . . . . . . . . . . . . . . . . . . . . . . . . . . . . . . . . . . . . . . . . . . 391
Bounding box . . . . . . . . . . . . . . . . . . . . . . . . . . . . . . . . . . . . . . . . . . . . . . . . . . . . . . . . . . . . . . . . . . . . . . . . . . . . . . . . . . . . . . . . . . . . . . . . . . . . . . . 392
Last updated 2/2/2018
Page 6

ADOBE PHOTOSHOP
Content s
Chapter 9: Image adjustments
Perspective warp . . . . . . . . . . . . . . . . . . . . . . . . . . . . . . . . . . . . . . . . . . . . . . . . . . . . . . . . . . . . . . . . . . . . . . . . . . . . . . . . . . . . . . . . . . . . . . . . . . . . 394
Reduce camera shake blurring . . . . . . . . . . . . . . . . . . . . . . . . . . . . . . . . . . . . . . . . . . . . . . . . . . . . . . . . . . . . . . . . . . . . . . . . . . . . . . . . . . . . . . . 402
Video | Using the camera shake reduction filter . . . . . . . . . . . . . . . . . . . . . . . . . . . . . . . . . . . . . . . . . . . . . . . . . . . . . . . . . . . . . . . . . . . . . . . 402
Healing brush examples . . . . . . . . . . . . . . . . . . . . . . . . . . . . . . . . . . . . . . . . . . . . . . . . . . . . . . . . . . . . . . . . . . . . . . . . . . . . . . . . . . . . . . . . . . . . . 408
Export color lookup tables . . . . . . . . . . . . . . . . . . . . . . . . . . . . . . . . . . . . . . . . . . . . . . . . . . . . . . . . . . . . . . . . . . . . . . . . . . . . . . . . . . . . . . . . . . . 435
Adjust image sharpness and blur . . . . . . . . . . . . . . . . . . . . . . . . . . . . . . . . . . . . . . . . . . . . . . . . . . . . . . . . . . . . . . . . . . . . . . . . . . . . . . . . . . . . 436
Video | Sharpening in Photoshop CC . . . . . . . . . . . . . . . . . . . . . . . . . . . . . . . . . . . . . . . . . . . . . . . . . . . . . . . . . . . . . . . . . . . . . . . . . . . . . . . . . 436
Video | Selective focus in Photoshop . . . . . . . . . . . . . . . . . . . . . . . . . . . . . . . . . . . . . . . . . . . . . . . . . . . . . . . . . . . . . . . . . . . . . . . . . . . . . . . . . 436
Understand color adjustments . . . . . . . . . . . . . . . . . . . . . . . . . . . . . . . . . . . . . . . . . . . . . . . . . . . . . . . . . . . . . . . . . . . . . . . . . . . . . . . . . . . . . . . 442
Apply a Brightness/Contrast adjustment . . . . . . . . . . . . . . . . . . . . . . . . . . . . . . . . . . . . . . . . . . . . . . . . . . . . . . . . . . . . . . . . . . . . . . . . . . . . . 448
Adjust shadow and highlight detail . . . . . . . . . . . . . . . . . . . . . . . . . . . . . . . . . . . . . . . . . . . . . . . . . . . . . . . . . . . . . . . . . . . . . . . . . . . . . . . . . . 449
From an expert: Shadows/Highlights . . . . . . . . . . . . . . . . . . . . . . . . . . . . . . . . . . . . . . . . . . . . . . . . . . . . . . . . . . . . . . . . . . . . . . . . . . . . . . . . . 449
Levels adjustment . . . . . . . . . . . . . . . . . . . . . . . . . . . . . . . . . . . . . . . . . . . . . . . . . . . . . . . . . . . . . . . . . . . . . . . . . . . . . . . . . . . . . . . . . . . . . . . . . . . 450
Adjust hue and saturation . . . . . . . . . . . . . . . . . . . . . . . . . . . . . . . . . . . . . . . . . . . . . . . . . . . . . . . . . . . . . . . . . . . . . . . . . . . . . . . . . . . . . . . . . . . 453
Make quick tonal adjustments . . . . . . . . . . . . . . . . . . . . . . . . . . . . . . . . . . . . . . . . . . . . . . . . . . . . . . . . . . . . . . . . . . . . . . . . . . . . . . . . . . . . . . . 456
Apply special color effects to images . . . . . . . . . . . . . . . . . . . . . . . . . . . . . . . . . . . . . . . . . . . . . . . . . . . . . . . . . . . . . . . . . . . . . . . . . . . . . . . . . 460
Apply the Color Balance adjustment . . . . . . . . . . . . . . . . . . . . . . . . . . . . . . . . . . . . . . . . . . . . . . . . . . . . . . . . . . . . . . . . . . . . . . . . . . . . . . . . . 462
View histograms and pixel values . . . . . . . . . . . . . . . . . . . . . . . . . . . . . . . . . . . . . . . . . . . . . . . . . . . . . . . . . . . . . . . . . . . . . . . . . . . . . . . . . . . . 463
Match, replace, and mix colors . . . . . . . . . . . . . . . . . . . . . . . . . . . . . . . . . . . . . . . . . . . . . . . . . . . . . . . . . . . . . . . . . . . . . . . . . . . . . . . . . . . . . . . 469
Convert a color image to black and white . . . . . . . . . . . . . . . . . . . . . . . . . . . . . . . . . . . . . . . . . . . . . . . . . . . . . . . . . . . . . . . . . . . . . . . . . . . . 474
Video tutorial: Creative black and white . . . . . . . . . . . . . . . . . . . . . . . . . . . . . . . . . . . . . . . . . . . . . . . . . . . . . . . . . . . . . . . . . . . . . . . . . . . . . . 474
Video | Black and White adjustment layer . . . . . . . . . . . . . . . . . . . . . . . . . . . . . . . . . . . . . . . . . . . . . . . . . . . . . . . . . . . . . . . . . . . . . . . . . . . . . 474
Adjustment and fill layers . . . . . . . . . . . . . . . . . . . . . . . . . . . . . . . . . . . . . . . . . . . . . . . . . . . . . . . . . . . . . . . . . . . . . . . . . . . . . . . . . . . . . . . . . . . . 475
Curves adjustment . . . . . . . . . . . . . . . . . . . . . . . . . . . . . . . . . . . . . . . . . . . . . . . . . . . . . . . . . . . . . . . . . . . . . . . . . . . . . . . . . . . . . . . . . . . . . . . . . . 478
Target images for press . . . . . . . . . . . . . . . . . . . . . . . . . . . . . . . . . . . . . . . . . . . . . . . . . . . . . . . . . . . . . . . . . . . . . . . . . . . . . . . . . . . . . . . . . . . . . . 482
Adjust color and tone with Levels and Curves eyedroppers . . . . . . . . . . . . . . . . . . . . . . . . . . . . . . . . . . . . . . . . . . . . . . . . . . . . . . . . . . . 485
Adjust HDR exposure and toning . . . . . . . . . . . . . . . . . . . . . . . . . . . . . . . . . . . . . . . . . . . . . . . . . . . . . . . . . . . . . . . . . . . . . . . . . . . . . . . . . . . . 486
Filter . . . . . . . . . . . . . . . . . . . . . . . . . . . . . . . . . . . . . . . . . . . . . . . . . . . . . . . . . . . . . . . . . . . . . . . . . . . . . . . . . . . . . . . . . . . . . . . . . . . . . . . . . . . . . . . . 487
Blur . . . . . . . . . . . . . . . . . . . . . . . . . . . . . . . . . . . . . . . . . . . . . . . . . . . . . . . . . . . . . . . . . . . . . . . . . . . . . . . . . . . . . . . . . . . . . . . . . . . . . . . . . . . . . . . . . 487
Dodge or burn image areas . . . . . . . . . . . . . . . . . . . . . . . . . . . . . . . . . . . . . . . . . . . . . . . . . . . . . . . . . . . . . . . . . . . . . . . . . . . . . . . . . . . . . . . . . . 488
vi
Chapter 10: Adobe Camera Raw
New features summary . . . . . . . . . . . . . . . . . . . . . . . . . . . . . . . . . . . . . . . . . . . . . . . . . . . . . . . . . . . . . . . . . . . . . . . . . . . . . . . . . . . . . . . . . . . . . . 489
Introduction to Camera Raw . . . . . . . . . . . . . . . . . . . . . . . . . . . . . . . . . . . . . . . . . . . . . . . . . . . . . . . . . . . . . . . . . . . . . . . . . . . . . . . . . . . . . . . . . 490
Create panoramas . . . . . . . . . . . . . . . . . . . . . . . . . . . . . . . . . . . . . . . . . . . . . . . . . . . . . . . . . . . . . . . . . . . . . . . . . . . . . . . . . . . . . . . . . . . . . . . . . . . 497
Default keyboard shortcuts . . . . . . . . . . . . . . . . . . . . . . . . . . . . . . . . . . . . . . . . . . . . . . . . . . . . . . . . . . . . . . . . . . . . . . . . . . . . . . . . . . . . . . . . . . 499
Vignette, grain, and dehaze effects in Camera Raw . . . . . . . . . . . . . . . . . . . . . . . . . . . . . . . . . . . . . . . . . . . . . . . . . . . . . . . . . . . . . . . . . . . . 504
Automatic perspective correction in Camera Raw . . . . . . . . . . . . . . . . . . . . . . . . . . . . . . . . . . . . . . . . . . . . . . . . . . . . . . . . . . . . . . . . . . . . . 506
Radial Filter in Camera Raw . . . . . . . . . . . . . . . . . . . . . . . . . . . . . . . . . . . . . . . . . . . . . . . . . . . . . . . . . . . . . . . . . . . . . . . . . . . . . . . . . . . . . . . . . . 509
Manage Camera Raw settings . . . . . . . . . . . . . . . . . . . . . . . . . . . . . . . . . . . . . . . . . . . . . . . . . . . . . . . . . . . . . . . . . . . . . . . . . . . . . . . . . . . . . . . . 512
Open, process, and save images in Camera Raw . . . . . . . . . . . . . . . . . . . . . . . . . . . . . . . . . . . . . . . . . . . . . . . . . . . . . . . . . . . . . . . . . . . . . . 517
Repair images with the Enhanced Spot Removal tool in Camera Raw . . . . . . . . . . . . . . . . . . . . . . . . . . . . . . . . . . . . . . . . . . . . . . . . . . 520
Rotate, crop, and adjust images . . . . . . . . . . . . . . . . . . . . . . . . . . . . . . . . . . . . . . . . . . . . . . . . . . . . . . . . . . . . . . . . . . . . . . . . . . . . . . . . . . . . . . 523
Adjust color rendering for your camera in Camera Raw . . . . . . . . . . . . . . . . . . . . . . . . . . . . . . . . . . . . . . . . . . . . . . . . . . . . . . . . . . . . . . . 525
New features summary . . . . . . . . . . . . . . . . . . . . . . . . . . . . . . . . . . . . . . . . . . . . . . . . . . . . . . . . . . . . . . . . . . . . . . . . . . . . . . . . . . . . . . . . . . . . . . 527
Last updated 2/2/2018
Page 7

ADOBE PHOTOSHOP
Content s
Chapter 11: Image repair and restoration
Content-Aware Patch and Move . . . . . . . . . . . . . . . . . . . . . . . . . . . . . . . . . . . . . . . . . . . . . . . . . . . . . . . . . . . . . . . . . . . . . . . . . . . . . . . . . . . . . . 537
Retouch and repair photos . . . . . . . . . . . . . . . . . . . . . . . . . . . . . . . . . . . . . . . . . . . . . . . . . . . . . . . . . . . . . . . . . . . . . . . . . . . . . . . . . . . . . . . . . . 539
Correct image distortion and noise . . . . . . . . . . . . . . . . . . . . . . . . . . . . . . . . . . . . . . . . . . . . . . . . . . . . . . . . . . . . . . . . . . . . . . . . . . . . . . . . . . 546
Chapter 12: Image transformations
Transform objects . . . . . . . . . . . . . . . . . . . . . . . . . . . . . . . . . . . . . . . . . . . . . . . . . . . . . . . . . . . . . . . . . . . . . . . . . . . . . . . . . . . . . . . . . . . . . . . . . . . 550
Video tutorial: Free Transform command . . . . . . . . . . . . . . . . . . . . . . . . . . . . . . . . . . . . . . . . . . . . . . . . . . . . . . . . . . . . . . . . . . . . . . . . . . . . . 550
Adjust crop, rotation, and canvas size . . . . . . . . . . . . . . . . . . . . . . . . . . . . . . . . . . . . . . . . . . . . . . . . . . . . . . . . . . . . . . . . . . . . . . . . . . . . . . . . 554
Video | Cropping and straightening photos . . . . . . . . . . . . . . . . . . . . . . . . . . . . . . . . . . . . . . . . . . . . . . . . . . . . . . . . . . . . . . . . . . . . . . . . . . . 554
Crop and straighten photos . . . . . . . . . . . . . . . . . . . . . . . . . . . . . . . . . . . . . . . . . . . . . . . . . . . . . . . . . . . . . . . . . . . . . . . . . . . . . . . . . . . . . . . . . . 557
Create and edit panoramic images . . . . . . . . . . . . . . . . . . . . . . . . . . . . . . . . . . . . . . . . . . . . . . . . . . . . . . . . . . . . . . . . . . . . . . . . . . . . . . . . . . . 560
Warp images, shapes, and paths . . . . . . . . . . . . . . . . . . . . . . . . . . . . . . . . . . . . . . . . . . . . . . . . . . . . . . . . . . . . . . . . . . . . . . . . . . . . . . . . . . . . . 564
Vanishing Point . . . . . . . . . . . . . . . . . . . . . . . . . . . . . . . . . . . . . . . . . . . . . . . . . . . . . . . . . . . . . . . . . . . . . . . . . . . . . . . . . . . . . . . . . . . . . . . . . . . . . 568
Use the Liquify filter . . . . . . . . . . . . . . . . . . . . . . . . . . . . . . . . . . . . . . . . . . . . . . . . . . . . . . . . . . . . . . . . . . . . . . . . . . . . . . . . . . . . . . . . . . . . . . . . . 582
Content-aware scaling . . . . . . . . . . . . . . . . . . . . . . . . . . . . . . . . . . . . . . . . . . . . . . . . . . . . . . . . . . . . . . . . . . . . . . . . . . . . . . . . . . . . . . . . . . . . . . . 590
Free transformations of images, shapes, and paths . . . . . . . . . . . . . . . . . . . . . . . . . . . . . . . . . . . . . . . . . . . . . . . . . . . . . . . . . . . . . . . . . . . 591
Warp . . . . . . . . . . . . . . . . . . . . . . . . . . . . . . . . . . . . . . . . . . . . . . . . . . . . . . . . . . . . . . . . . . . . . . . . . . . . . . . . . . . . . . . . . . . . . . . . . . . . . . . . . . . . . . . . 593
Transfor m . . . . . . . . . . . . . . . . . . . . . . . . . . . . . . . . . . . . . . . . . . . . . . . . . . . . . . . . . . . . . . . . . . . . . . . . . . . . . . . . . . . . . . . . . . . . . . . . . . . . . . . . . . . 593
Panorama . . . . . . . . . . . . . . . . . . . . . . . . . . . . . . . . . . . . . . . . . . . . . . . . . . . . . . . . . . . . . . . . . . . . . . . . . . . . . . . . . . . . . . . . . . . . . . . . . . . . . . . . . . . 594
vii
Chapter 13: Drawing and painting
Modify shapes . . . . . . . . . . . . . . . . . . . . . . . . . . . . . . . . . . . . . . . . . . . . . . . . . . . . . . . . . . . . . . . . . . . . . . . . . . . . . . . . . . . . . . . . . . . . . . . . . . . . . . . 595
About drawing . . . . . . . . . . . . . . . . . . . . . . . . . . . . . . . . . . . . . . . . . . . . . . . . . . . . . . . . . . . . . . . . . . . . . . . . . . . . . . . . . . . . . . . . . . . . . . . . . . . . . . 596
Draw shapes . . . . . . . . . . . . . . . . . . . . . . . . . . . . . . . . . . . . . . . . . . . . . . . . . . . . . . . . . . . . . . . . . . . . . . . . . . . . . . . . . . . . . . . . . . . . . . . . . . . . . . . . 598
Draw shapes in Photoshop . . . . . . . . . . . . . . . . . . . . . . . . . . . . . . . . . . . . . . . . . . . . . . . . . . . . . . . . . . . . . . . . . . . . . . . . . . . . . . . . . . . . . . . . . . 598
Painting tools . . . . . . . . . . . . . . . . . . . . . . . . . . . . . . . . . . . . . . . . . . . . . . . . . . . . . . . . . . . . . . . . . . . . . . . . . . . . . . . . . . . . . . . . . . . . . . . . . . . . . . . 602
Create and modify brushes . . . . . . . . . . . . . . . . . . . . . . . . . . . . . . . . . . . . . . . . . . . . . . . . . . . . . . . . . . . . . . . . . . . . . . . . . . . . . . . . . . . . . . . . . . 605
Add color to paths . . . . . . . . . . . . . . . . . . . . . . . . . . . . . . . . . . . . . . . . . . . . . . . . . . . . . . . . . . . . . . . . . . . . . . . . . . . . . . . . . . . . . . . . . . . . . . . . . . 614
Edit paths . . . . . . . . . . . . . . . . . . . . . . . . . . . . . . . . . . . . . . . . . . . . . . . . . . . . . . . . . . . . . . . . . . . . . . . . . . . . . . . . . . . . . . . . . . . . . . . . . . . . . . . . . . . 616
Paint with the Mixer Brush . . . . . . . . . . . . . . . . . . . . . . . . . . . . . . . . . . . . . . . . . . . . . . . . . . . . . . . . . . . . . . . . . . . . . . . . . . . . . . . . . . . . . . . . . . . 625
Brush presets . . . . . . . . . . . . . . . . . . . . . . . . . . . . . . . . . . . . . . . . . . . . . . . . . . . . . . . . . . . . . . . . . . . . . . . . . . . . . . . . . . . . . . . . . . . . . . . . . . . . . . . . 627
Gradients . . . . . . . . . . . . . . . . . . . . . . . . . . . . . . . . . . . . . . . . . . . . . . . . . . . . . . . . . . . . . . . . . . . . . . . . . . . . . . . . . . . . . . . . . . . . . . . . . . . . . . . . . . . 630
Fill and stroke selections, layers, and paths . . . . . . . . . . . . . . . . . . . . . . . . . . . . . . . . . . . . . . . . . . . . . . . . . . . . . . . . . . . . . . . . . . . . . . . . . . . 635
Draw with the Pen tools . . . . . . . . . . . . . . . . . . . . . . . . . . . . . . . . . . . . . . . . . . . . . . . . . . . . . . . . . . . . . . . . . . . . . . . . . . . . . . . . . . . . . . . . . . . . . 639
Create patterns . . . . . . . . . . . . . . . . . . . . . . . . . . . . . . . . . . . . . . . . . . . . . . . . . . . . . . . . . . . . . . . . . . . . . . . . . . . . . . . . . . . . . . . . . . . . . . . . . . . . . . 651
Generate a pattern using the Pattern Maker . . . . . . . . . . . . . . . . . . . . . . . . . . . . . . . . . . . . . . . . . . . . . . . . . . . . . . . . . . . . . . . . . . . . . . . . . . 651
Manage paths . . . . . . . . . . . . . . . . . . . . . . . . . . . . . . . . . . . . . . . . . . . . . . . . . . . . . . . . . . . . . . . . . . . . . . . . . . . . . . . . . . . . . . . . . . . . . . . . . . . . . . 653
Manage pattern libraries and presets . . . . . . . . . . . . . . . . . . . . . . . . . . . . . . . . . . . . . . . . . . . . . . . . . . . . . . . . . . . . . . . . . . . . . . . . . . . . . . . . . 655
Draw or paint with a graphics tablet . . . . . . . . . . . . . . . . . . . . . . . . . . . . . . . . . . . . . . . . . . . . . . . . . . . . . . . . . . . . . . . . . . . . . . . . . . . . . . . . . 656
Create textured brushes . . . . . . . . . . . . . . . . . . . . . . . . . . . . . . . . . . . . . . . . . . . . . . . . . . . . . . . . . . . . . . . . . . . . . . . . . . . . . . . . . . . . . . . . . . . . . 656
Add dynamic elements to brushes . . . . . . . . . . . . . . . . . . . . . . . . . . . . . . . . . . . . . . . . . . . . . . . . . . . . . . . . . . . . . . . . . . . . . . . . . . . . . . . . . . . 658
Gradient . . . . . . . . . . . . . . . . . . . . . . . . . . . . . . . . . . . . . . . . . . . . . . . . . . . . . . . . . . . . . . . . . . . . . . . . . . . . . . . . . . . . . . . . . . . . . . . . . . . . . . . . . . . . 661
Paint stylized strokes with the Art History Brush . . . . . . . . . . . . . . . . . . . . . . . . . . . . . . . . . . . . . . . . . . . . . . . . . . . . . . . . . . . . . . . . . . . . . . 662
Paint with a pattern . . . . . . . . . . . . . . . . . . . . . . . . . . . . . . . . . . . . . . . . . . . . . . . . . . . . . . . . . . . . . . . . . . . . . . . . . . . . . . . . . . . . . . . . . . . . . . . . . 663
Last updated 2/2/2018
Page 8

ADOBE PHOTOSHOP
Content s
Chapter 14: Text
Work with OpenType SVG fonts . . . . . . . . . . . . . . . . . . . . . . . . . . . . . . . . . . . . . . . . . . . . . . . . . . . . . . . . . . . . . . . . . . . . . . . . . . . . . . . . . . . . . . 664
Format characters . . . . . . . . . . . . . . . . . . . . . . . . . . . . . . . . . . . . . . . . . . . . . . . . . . . . . . . . . . . . . . . . . . . . . . . . . . . . . . . . . . . . . . . . . . . . . . . . . . . 666
Format paragraphs . . . . . . . . . . . . . . . . . . . . . . . . . . . . . . . . . . . . . . . . . . . . . . . . . . . . . . . . . . . . . . . . . . . . . . . . . . . . . . . . . . . . . . . . . . . . . . . . . . 671
Create type effects . . . . . . . . . . . . . . . . . . . . . . . . . . . . . . . . . . . . . . . . . . . . . . . . . . . . . . . . . . . . . . . . . . . . . . . . . . . . . . . . . . . . . . . . . . . . . . . . . . 677
Edit text . . . . . . . . . . . . . . . . . . . . . . . . . . . . . . . . . . . . . . . . . . . . . . . . . . . . . . . . . . . . . . . . . . . . . . . . . . . . . . . . . . . . . . . . . . . . . . . . . . . . . . . . . . . . . 682
Line and character spacing . . . . . . . . . . . . . . . . . . . . . . . . . . . . . . . . . . . . . . . . . . . . . . . . . . . . . . . . . . . . . . . . . . . . . . . . . . . . . . . . . . . . . . . . . . 686
Arabic and Hebrew type . . . . . . . . . . . . . . . . . . . . . . . . . . . . . . . . . . . . . . . . . . . . . . . . . . . . . . . . . . . . . . . . . . . . . . . . . . . . . . . . . . . . . . . . . . . . . 689
How to access Arabic and Hebrew features in Photoshop . . . . . . . . . . . . . . . . . . . . . . . . . . . . . . . . . . . . . . . . . . . . . . . . . . . . . . . . . . . . . 689
Fonts . . . . . . . . . . . . . . . . . . . . . . . . . . . . . . . . . . . . . . . . . . . . . . . . . . . . . . . . . . . . . . . . . . . . . . . . . . . . . . . . . . . . . . . . . . . . . . . . . . . . . . . . . . . . . . . 691
Work with Typekit fonts . . . . . . . . . . . . . . . . . . . . . . . . . . . . . . . . . . . . . . . . . . . . . . . . . . . . . . . . . . . . . . . . . . . . . . . . . . . . . . . . . . . . . . . . . . . . . . 701
Asian type . . . . . . . . . . . . . . . . . . . . . . . . . . . . . . . . . . . . . . . . . . . . . . . . . . . . . . . . . . . . . . . . . . . . . . . . . . . . . . . . . . . . . . . . . . . . . . . . . . . . . . . . . . . 703
Create type . . . . . . . . . . . . . . . . . . . . . . . . . . . . . . . . . . . . . . . . . . . . . . . . . . . . . . . . . . . . . . . . . . . . . . . . . . . . . . . . . . . . . . . . . . . . . . . . . . . . . . . . . . 709
Chapter 15: Video and animation
Video editing | CC, CS6 . . . . . . . . . . . . . . . . . . . . . . . . . . . . . . . . . . . . . . . . . . . . . . . . . . . . . . . . . . . . . . . . . . . . . . . . . . . . . . . . . . . . . . . . . . . . . . . 714
Video | Walk through a video project . . . . . . . . . . . . . . . . . . . . . . . . . . . . . . . . . . . . . . . . . . . . . . . . . . . . . . . . . . . . . . . . . . . . . . . . . . . . . . . . . 714
Edit video and animation layers . . . . . . . . . . . . . . . . . . . . . . . . . . . . . . . . . . . . . . . . . . . . . . . . . . . . . . . . . . . . . . . . . . . . . . . . . . . . . . . . . . . . . . 716
Video and animation overview . . . . . . . . . . . . . . . . . . . . . . . . . . . . . . . . . . . . . . . . . . . . . . . . . . . . . . . . . . . . . . . . . . . . . . . . . . . . . . . . . . . . . . . 720
Preview video and animations . . . . . . . . . . . . . . . . . . . . . . . . . . . . . . . . . . . . . . . . . . . . . . . . . . . . . . . . . . . . . . . . . . . . . . . . . . . . . . . . . . . . . . . 725
Paint frames in video layers . . . . . . . . . . . . . . . . . . . . . . . . . . . . . . . . . . . . . . . . . . . . . . . . . . . . . . . . . . . . . . . . . . . . . . . . . . . . . . . . . . . . . . . . . . 728
Import video files and image sequences . . . . . . . . . . . . . . . . . . . . . . . . . . . . . . . . . . . . . . . . . . . . . . . . . . . . . . . . . . . . . . . . . . . . . . . . . . . . . 730
Create frame animations . . . . . . . . . . . . . . . . . . . . . . . . . . . . . . . . . . . . . . . . . . . . . . . . . . . . . . . . . . . . . . . . . . . . . . . . . . . . . . . . . . . . . . . . . . . . . 733
Create timeline animations . . . . . . . . . . . . . . . . . . . . . . . . . . . . . . . . . . . . . . . . . . . . . . . . . . . . . . . . . . . . . . . . . . . . . . . . . . . . . . . . . . . . . . . . . . 740
Create images for video . . . . . . . . . . . . . . . . . . . . . . . . . . . . . . . . . . . . . . . . . . . . . . . . . . . . . . . . . . . . . . . . . . . . . . . . . . . . . . . . . . . . . . . . . . . . . 746
viii
Chapter 16: Filters and effects
Use the Blur Gallery . . . . . . . . . . . . . . . . . . . . . . . . . . . . . . . . . . . . . . . . . . . . . . . . . . . . . . . . . . . . . . . . . . . . . . . . . . . . . . . . . . . . . . . . . . . . . . . . . 752
Filter basics . . . . . . . . . . . . . . . . . . . . . . . . . . . . . . . . . . . . . . . . . . . . . . . . . . . . . . . . . . . . . . . . . . . . . . . . . . . . . . . . . . . . . . . . . . . . . . . . . . . . . . . . . 760
Filter effects reference . . . . . . . . . . . . . . . . . . . . . . . . . . . . . . . . . . . . . . . . . . . . . . . . . . . . . . . . . . . . . . . . . . . . . . . . . . . . . . . . . . . . . . . . . . . . . . . 764
Add Lighting Effects . . . . . . . . . . . . . . . . . . . . . . . . . . . . . . . . . . . . . . . . . . . . . . . . . . . . . . . . . . . . . . . . . . . . . . . . . . . . . . . . . . . . . . . . . . . . . . . . . 774
Use the Adaptive Wide Angle filter . . . . . . . . . . . . . . . . . . . . . . . . . . . . . . . . . . . . . . . . . . . . . . . . . . . . . . . . . . . . . . . . . . . . . . . . . . . . . . . . . . . 777
From an expert: Adaptive wide angle filter . . . . . . . . . . . . . . . . . . . . . . . . . . . . . . . . . . . . . . . . . . . . . . . . . . . . . . . . . . . . . . . . . . . . . . . . . . . 777
Use the Oil Paint filter . . . . . . . . . . . . . . . . . . . . . . . . . . . . . . . . . . . . . . . . . . . . . . . . . . . . . . . . . . . . . . . . . . . . . . . . . . . . . . . . . . . . . . . . . . . . . . . . 779
Apply specific filters . . . . . . . . . . . . . . . . . . . . . . . . . . . . . . . . . . . . . . . . . . . . . . . . . . . . . . . . . . . . . . . . . . . . . . . . . . . . . . . . . . . . . . . . . . . . . . . . . 781
Smudge image areas . . . . . . . . . . . . . . . . . . . . . . . . . . . . . . . . . . . . . . . . . . . . . . . . . . . . . . . . . . . . . . . . . . . . . . . . . . . . . . . . . . . . . . . . . . . . . . . . 784
Chapter 17: Saving and exporting
Supported file formats . . . . . . . . . . . . . . . . . . . . . . . . . . . . . . . . . . . . . . . . . . . . . . . . . . . . . . . . . . . . . . . . . . . . . . . . . . . . . . . . . . . . . . . . . . . . . . . 785
Save files in graphics formats . . . . . . . . . . . . . . . . . . . . . . . . . . . . . . . . . . . . . . . . . . . . . . . . . . . . . . . . . . . . . . . . . . . . . . . . . . . . . . . . . . . . . . . . 785
Save images . . . . . . . . . . . . . . . . . . . . . . . . . . . . . . . . . . . . . . . . . . . . . . . . . . . . . . . . . . . . . . . . . . . . . . . . . . . . . . . . . . . . . . . . . . . . . . . . . . . . . . . . . 789
File formats . . . . . . . . . . . . . . . . . . . . . . . . . . . . . . . . . . . . . . . . . . . . . . . . . . . . . . . . . . . . . . . . . . . . . . . . . . . . . . . . . . . . . . . . . . . . . . . . . . . . . . . . . 792
Save and export video and animations . . . . . . . . . . . . . . . . . . . . . . . . . . . . . . . . . . . . . . . . . . . . . . . . . . . . . . . . . . . . . . . . . . . . . . . . . . . . . . . 798
Save PDF files . . . . . . . . . . . . . . . . . . . . . . . . . . . . . . . . . . . . . . . . . . . . . . . . . . . . . . . . . . . . . . . . . . . . . . . . . . . . . . . . . . . . . . . . . . . . . . . . . . . . . . . 805
Digimarc copyright protection . . . . . . . . . . . . . . . . . . . . . . . . . . . . . . . . . . . . . . . . . . . . . . . . . . . . . . . . . . . . . . . . . . . . . . . . . . . . . . . . . . . . . . . 813
Supported file formats . . . . . . . . . . . . . . . . . . . . . . . . . . . . . . . . . . . . . . . . . . . . . . . . . . . . . . . . . . . . . . . . . . . . . . . . . . . . . . . . . . . . . . . . . . . . . . . 815
Last updated 2/2/2018
Page 9

ADOBE PHOTOSHOP
Content s
Chapter 18: Printing
Print 3D objects . . . . . . . . . . . . . . . . . . . . . . . . . . . . . . . . . . . . . . . . . . . . . . . . . . . . . . . . . . . . . . . . . . . . . . . . . . . . . . . . . . . . . . . . . . . . . . . . . . . . . 817
Print from Photoshop . . . . . . . . . . . . . . . . . . . . . . . . . . . . . . . . . . . . . . . . . . . . . . . . . . . . . . . . . . . . . . . . . . . . . . . . . . . . . . . . . . . . . . . . . . . . . . . . 826
Print with color management . . . . . . . . . . . . . . . . . . . . . . . . . . . . . . . . . . . . . . . . . . . . . . . . . . . . . . . . . . . . . . . . . . . . . . . . . . . . . . . . . . . . . . . . 828
Contact Sheets and PDF Presentations . . . . . . . . . . . . . . . . . . . . . . . . . . . . . . . . . . . . . . . . . . . . . . . . . . . . . . . . . . . . . . . . . . . . . . . . . . . . . . . 831
Print photos in a picture package layout . . . . . . . . . . . . . . . . . . . . . . . . . . . . . . . . . . . . . . . . . . . . . . . . . . . . . . . . . . . . . . . . . . . . . . . . . . . . . 832
Print spot colors . . . . . . . . . . . . . . . . . . . . . . . . . . . . . . . . . . . . . . . . . . . . . . . . . . . . . . . . . . . . . . . . . . . . . . . . . . . . . . . . . . . . . . . . . . . . . . . . . . . . . 835
Duotones . . . . . . . . . . . . . . . . . . . . . . . . . . . . . . . . . . . . . . . . . . . . . . . . . . . . . . . . . . . . . . . . . . . . . . . . . . . . . . . . . . . . . . . . . . . . . . . . . . . . . . . . . . . 838
Print images to a commercial printing press . . . . . . . . . . . . . . . . . . . . . . . . . . . . . . . . . . . . . . . . . . . . . . . . . . . . . . . . . . . . . . . . . . . . . . . . . . 840
Chapter 19: Automation
Creating actions . . . . . . . . . . . . . . . . . . . . . . . . . . . . . . . . . . . . . . . . . . . . . . . . . . . . . . . . . . . . . . . . . . . . . . . . . . . . . . . . . . . . . . . . . . . . . . . . . . . . . 846
Video tutorial: Record actions . . . . . . . . . . . . . . . . . . . . . . . . . . . . . . . . . . . . . . . . . . . . . . . . . . . . . . . . . . . . . . . . . . . . . . . . . . . . . . . . . . . . . . . . 846
Create data-driven graphics . . . . . . . . . . . . . . . . . . . . . . . . . . . . . . . . . . . . . . . . . . . . . . . . . . . . . . . . . . . . . . . . . . . . . . . . . . . . . . . . . . . . . . . . . 850
Scripting . . . . . . . . . . . . . . . . . . . . . . . . . . . . . . . . . . . . . . . . . . . . . . . . . . . . . . . . . . . . . . . . . . . . . . . . . . . . . . . . . . . . . . . . . . . . . . . . . . . . . . . . . . . . 855
Process a batch of files . . . . . . . . . . . . . . . . . . . . . . . . . . . . . . . . . . . . . . . . . . . . . . . . . . . . . . . . . . . . . . . . . . . . . . . . . . . . . . . . . . . . . . . . . . . . . . . 856
Video | Using the Image Processor to batch process multiple files . . . . . . . . . . . . . . . . . . . . . . . . . . . . . . . . . . . . . . . . . . . . . . . . . . . . . 856
Play and manage actions . . . . . . . . . . . . . . . . . . . . . . . . . . . . . . . . . . . . . . . . . . . . . . . . . . . . . . . . . . . . . . . . . . . . . . . . . . . . . . . . . . . . . . . . . . . . 860
Add conditional actions . . . . . . . . . . . . . . . . . . . . . . . . . . . . . . . . . . . . . . . . . . . . . . . . . . . . . . . . . . . . . . . . . . . . . . . . . . . . . . . . . . . . . . . . . . . . . 863
About actions and the Actions panel . . . . . . . . . . . . . . . . . . . . . . . . . . . . . . . . . . . . . . . . . . . . . . . . . . . . . . . . . . . . . . . . . . . . . . . . . . . . . . . . . 864
Record tools in actions . . . . . . . . . . . . . . . . . . . . . . . . . . . . . . . . . . . . . . . . . . . . . . . . . . . . . . . . . . . . . . . . . . . . . . . . . . . . . . . . . . . . . . . . . . . . . . . 865
From an expert: Tool recording . . . . . . . . . . . . . . . . . . . . . . . . . . . . . . . . . . . . . . . . . . . . . . . . . . . . . . . . . . . . . . . . . . . . . . . . . . . . . . . . . . . . . . 865
Add a conditional mode change to an action . . . . . . . . . . . . . . . . . . . . . . . . . . . . . . . . . . . . . . . . . . . . . . . . . . . . . . . . . . . . . . . . . . . . . . . . . 865
Photoshop UI toolkit for plug-ins and scripts . . . . . . . . . . . . . . . . . . . . . . . . . . . . . . . . . . . . . . . . . . . . . . . . . . . . . . . . . . . . . . . . . . . . . . . . . 866
ix
Chapter 20: 3D and technical imaging
Creative Cloud 3D Animation (Preview) . . . . . . . . . . . . . . . . . . . . . . . . . . . . . . . . . . . . . . . . . . . . . . . . . . . . . . . . . . . . . . . . . . . . . . . . . . . . . . 869
3D painting . . . . . . . . . . . . . . . . . . . . . . . . . . . . . . . . . . . . . . . . . . . . . . . . . . . . . . . . . . . . . . . . . . . . . . . . . . . . . . . . . . . . . . . . . . . . . . . . . . . . . . . . . 875
Video | 3D painting - The next level . . . . . . . . . . . . . . . . . . . . . . . . . . . . . . . . . . . . . . . . . . . . . . . . . . . . . . . . . . . . . . . . . . . . . . . . . . . . . . . . . . 875
3D panel enhancements | Photoshop CC . . . . . . . . . . . . . . . . . . . . . . . . . . . . . . . . . . . . . . . . . . . . . . . . . . . . . . . . . . . . . . . . . . . . . . . . . . . . . 880
Essential 3D concepts and tools . . . . . . . . . . . . . . . . . . . . . . . . . . . . . . . . . . . . . . . . . . . . . . . . . . . . . . . . . . . . . . . . . . . . . . . . . . . . . . . . . . . . . . 882
3D rendering and saving . . . . . . . . . . . . . . . . . . . . . . . . . . . . . . . . . . . . . . . . . . . . . . . . . . . . . . . . . . . . . . . . . . . . . . . . . . . . . . . . . . . . . . . . . . . . . 886
Create 3D objects and animations . . . . . . . . . . . . . . . . . . . . . . . . . . . . . . . . . . . . . . . . . . . . . . . . . . . . . . . . . . . . . . . . . . . . . . . . . . . . . . . . . . . 890
Image stacks . . . . . . . . . . . . . . . . . . . . . . . . . . . . . . . . . . . . . . . . . . . . . . . . . . . . . . . . . . . . . . . . . . . . . . . . . . . . . . . . . . . . . . . . . . . . . . . . . . . . . . . . 892
3D workflow . . . . . . . . . . . . . . . . . . . . . . . . . . . . . . . . . . . . . . . . . . . . . . . . . . . . . . . . . . . . . . . . . . . . . . . . . . . . . . . . . . . . . . . . . . . . . . . . . . . . . . . . 895
Measurement . . . . . . . . . . . . . . . . . . . . . . . . . . . . . . . . . . . . . . . . . . . . . . . . . . . . . . . . . . . . . . . . . . . . . . . . . . . . . . . . . . . . . . . . . . . . . . . . . . . . . . . 898
DICOM files . . . . . . . . . . . . . . . . . . . . . . . . . . . . . . . . . . . . . . . . . . . . . . . . . . . . . . . . . . . . . . . . . . . . . . . . . . . . . . . . . . . . . . . . . . . . . . . . . . . . . . . . . 904
Photoshop and MATLAB . . . . . . . . . . . . . . . . . . . . . . . . . . . . . . . . . . . . . . . . . . . . . . . . . . . . . . . . . . . . . . . . . . . . . . . . . . . . . . . . . . . . . . . . . . . . . 907
Count objects in an image . . . . . . . . . . . . . . . . . . . . . . . . . . . . . . . . . . . . . . . . . . . . . . . . . . . . . . . . . . . . . . . . . . . . . . . . . . . . . . . . . . . . . . . . . . . 909
Combine and convert 3D objects . . . . . . . . . . . . . . . . . . . . . . . . . . . . . . . . . . . . . . . . . . . . . . . . . . . . . . . . . . . . . . . . . . . . . . . . . . . . . . . . . . . . 911
3D texture editing . . . . . . . . . . . . . . . . . . . . . . . . . . . . . . . . . . . . . . . . . . . . . . . . . . . . . . . . . . . . . . . . . . . . . . . . . . . . . . . . . . . . . . . . . . . . . . . . . . . 912
3D panel settings . . . . . . . . . . . . . . . . . . . . . . . . . . . . . . . . . . . . . . . . . . . . . . . . . . . . . . . . . . . . . . . . . . . . . . . . . . . . . . . . . . . . . . . . . . . . . . . . . . . . 915
Chapter 21: Color Management
Understanding color management . . . . . . . . . . . . . . . . . . . . . . . . . . . . . . . . . . . . . . . . . . . . . . . . . . . . . . . . . . . . . . . . . . . . . . . . . . . . . . . . . . . 926
Keeping colors consistent . . . . . . . . . . . . . . . . . . . . . . . . . . . . . . . . . . . . . . . . . . . . . . . . . . . . . . . . . . . . . . . . . . . . . . . . . . . . . . . . . . . . . . . . . . . 928
Color settings . . . . . . . . . . . . . . . . . . . . . . . . . . . . . . . . . . . . . . . . . . . . . . . . . . . . . . . . . . . . . . . . . . . . . . . . . . . . . . . . . . . . . . . . . . . . . . . . . . . . . . . 932
Last updated 2/2/2018
Page 10

ADOBE PHOTOSHOP
Content s
Work with color profiles . . . . . . . . . . . . . . . . . . . . . . . . . . . . . . . . . . . . . . . . . . . . . . . . . . . . . . . . . . . . . . . . . . . . . . . . . . . . . . . . . . . . . . . . . . . . . 935
Color-managing documents for online viewing . . . . . . . . . . . . . . . . . . . . . . . . . . . . . . . . . . . . . . . . . . . . . . . . . . . . . . . . . . . . . . . . . . . . . . . 940
Color-managing documents when printing . . . . . . . . . . . . . . . . . . . . . . . . . . . . . . . . . . . . . . . . . . . . . . . . . . . . . . . . . . . . . . . . . . . . . . . . . . 941
Color-managing imported images . . . . . . . . . . . . . . . . . . . . . . . . . . . . . . . . . . . . . . . . . . . . . . . . . . . . . . . . . . . . . . . . . . . . . . . . . . . . . . . . . . . 946
Proofing colors . . . . . . . . . . . . . . . . . . . . . . . . . . . . . . . . . . . . . . . . . . . . . . . . . . . . . . . . . . . . . . . . . . . . . . . . . . . . . . . . . . . . . . . . . . . . . . . . . . . . . . 947
x
Last updated 2/2/2018
Page 11
Chapter 1: Introduction to Photoshop
New features summary
The January 2018 and October 2017 releases of Photoshop CC (versions 19.x) roll out exciting new features for
designers, digital photographers, and illustrators. Read on for a quick introduction to these features and links to
resources offering more information.
For a summary of features introduced in earlier releases of Photoshop CC, see Feature summary | earlier releases .
Note: If you're upgrading from an earlier version of Photoshop CC, see these considerations and tips .
1
Select Subject
New in the January 2018 release
Select the most prominent subjects in an image in a single click
Select Subject lets you select the most prominent subject in an image in a single click. Powered by advanced machine
learning technology, Select Subject is trained to identify a variety of objects in an image—p eople, animals, vehicles, toys,
and more.
Access Select Subject in one of the following ways in Photoshop:
• While editing an image, choose Select > Subject.
• While using the Quick Selection or Magic Wand tools, click Select Subject in the options bar.
• While using the Quick Selection tool in the Select & Mask workspace, click Select Subject in the options bar.
For more information, see Select Subject.
Last updated 2/2/2018
Page 12

Introduction to Photoshop
Support for Microsoft Surface Dial
Updated in the January 2018 release
Using the Surface Dial with Photoshop, you can adjust tool settings without ever looking away from the canvas. Use the
Dial to adjust size, opacity, hardness, flow, and smoothing for all brush-like tools. Using the Control option, you can
also rotate the dial to make dynamic adjustments to settings while a brush stroke is in progress.
Photoshop supports the Surface Dial on bluetooth-enabled computers running Windows 10 Fall Creators Update
(version 1709) and later versions.
For more information, see Microsoft Dial support in Photoshop.
High-density monitor support and per-monitor scaling
New in the January 2018 release
On Windows 10 Creators Update and later versions, Photoshop now offers a full range of choices for UI scaling—from
100% through 400% in 25% increments. This enhancement makes the Photoshop user interface looks crisp and sharp
regardless of the pixel density of your monitor. Photoshop automatically adjusts its resolution based on your Windows
settings.
In addition, Adobe and Microsoft have worked closely to provide per-monitor scaling across monitors with different
scaling factors. This enhancement ensures that a high resolution (HiDPI) laptop works seamlessly alongside a lowerresolution desktop monitor, or vice versa. For example, one of your monitors can have a scale factor of 175%, while
another monitor can have a scale factor of 400%. So, you can choose either the highest-end 13-inch laptops with 4k
screens, the more affordable 1080p models, or tap into the new 8k desktop monitors, and still have an uncompromised
experience within Photoshop.
2
In Windows, select Start > Settings > System > Display. Now, under Scale And Layout, choose a scaling factor for each
of your displays.
Note: On Windows 10 Creators Update and later versions, the UI Scaling setting in Photoshop (Preferences > Interface >
UI Scaling) still applies to some components, such as the File Info and Camera Raw dialogs. On earlier versions of
Windows, this preference applies to all Photoshop components. When the UI Scaling option is set to Auto, scaling defaults
to the value closest to the primary monitor's OS scaling factor—100 or 200.
Brush-related features
Stroke smoothing
New in the October 2017 release
Photoshop can now perform intelligent smoothing on your brush strokes. Simply enter a value (0-100) for
Smoothing
Eraser. A value of 0 is the same as legacy smoothing in earlier versions of Photoshop. Higher values apply increasing
amounts of intelligent smoothing to your strokes.
Stroke smoothing works in several modes. Clicking the gear icon ( ) to enable one or more of the following modes:
Pulled String Mode Paints only when the string is taut. Cursor movements within the smoothing radius leave no mark.
Stroke Catch Up Allows the paint to continue catching up with your cursor while you've paused the stroke. Disabling
this mode stops paint application as soon as the cursor movement stops.
in the Options bar when you're working with one of the following tools: Brush, Pencil, Mixer Brush, or
Last updated 2/2/2018
Page 13
Introduction to Photoshop
Catch-Up On Stroke End Completes the stroke from the last paint position to the point where you released the
mouse/stylus control.
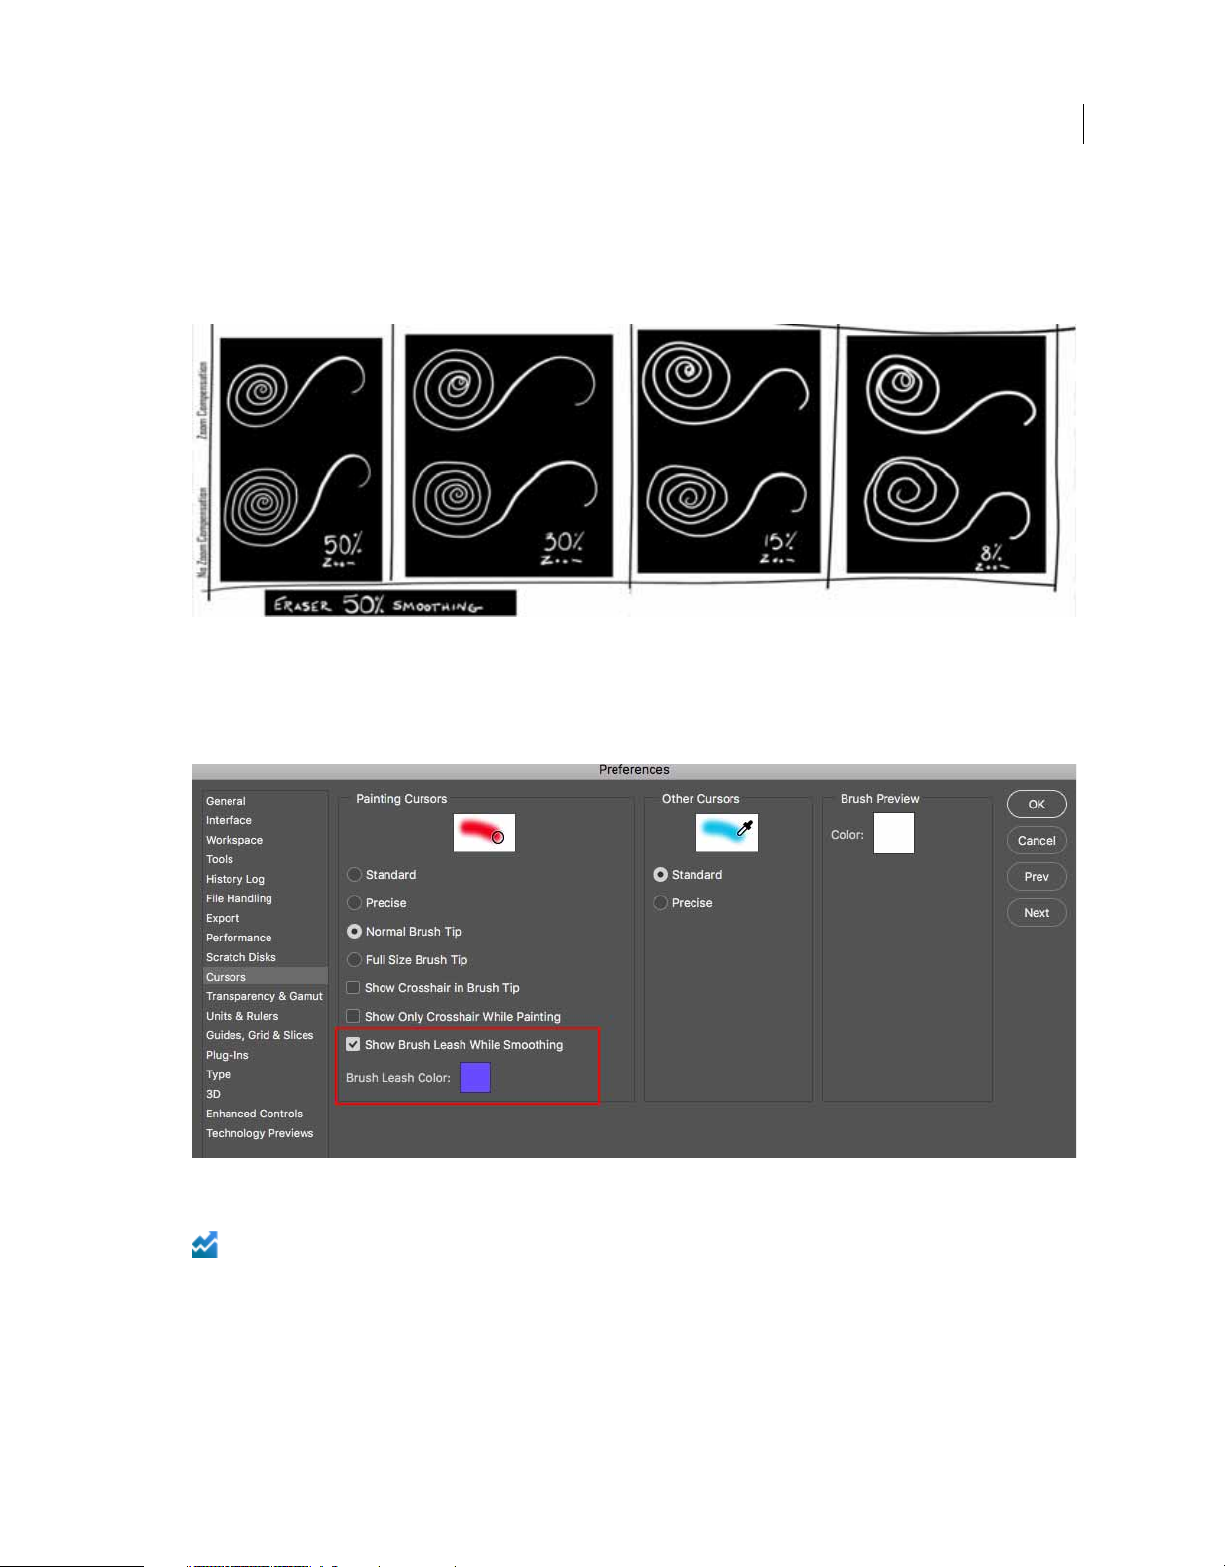
Adjust For Zoom Prevents jittery strokes by adjusting smoothing. Decreases smoothing when you zoom in the
document; increases smoothing when you zoom out.
Smoothing: Eraser tool
While using stroke smoothing, you may choose to view the brush leash, which connects the current paint location with
the present cursor position. Select Preferences > Cursors > Show Brush Leash While Smoothing. You can also specify
a color for the brush leash.
3
Brush Leash preferences
Streamlined brush management
Enhanced in the October 2017 release
Working with brush presets is much easier in this release of Photoshop. You can now organize brush presets into
folders—including nested folders—in the greatly-streamlined
releases).
Last updated 2/2/2018
Brushes panel (renamed from Brush Presets in earlier
Page 14
Introduction to Photoshop
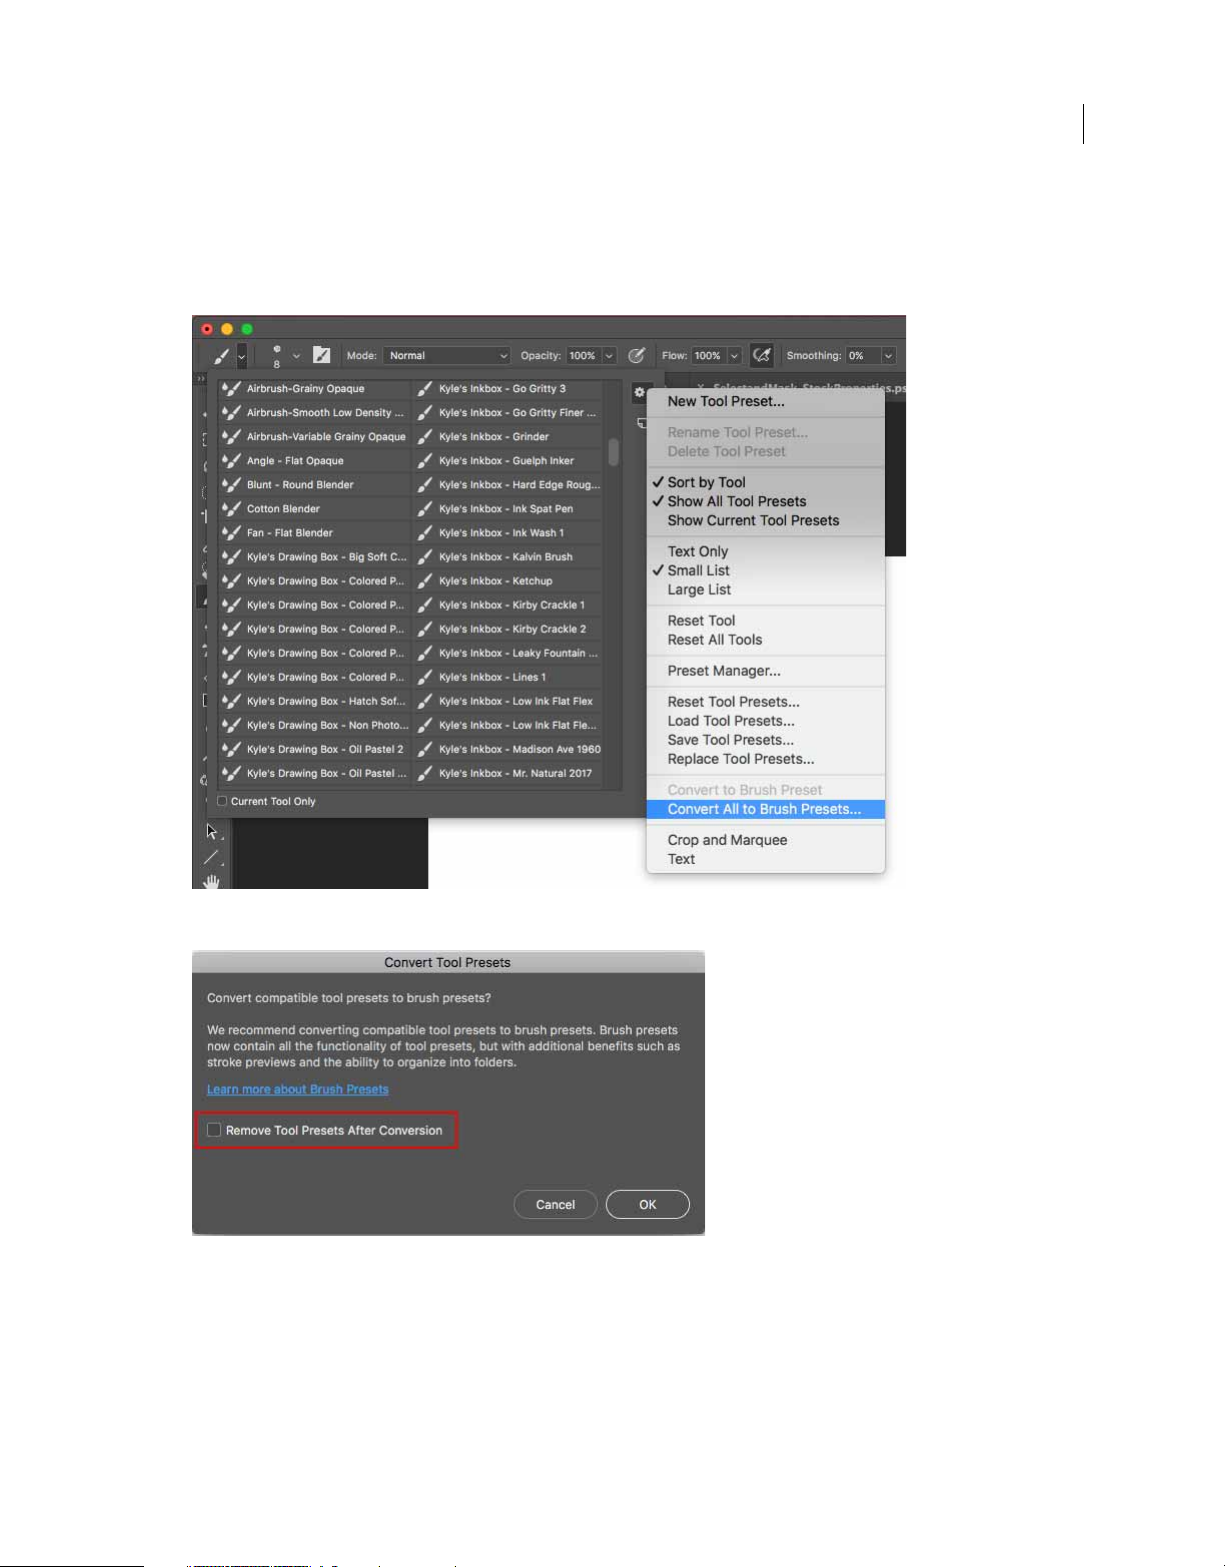
You can now choose to work with and manage brush-enabled tool presets and their attributes, accessible only from the
Options bar in earlier releases of Photoshop, in the Brushes panel. Any brush-enabled tool preset can be converted into
a brush preset; all of its attributes—such as opacity, flow, and blending mode—are preserved. Once you've converted
brush-enabled tool presets into brush presets, you can choose to remove them from the tool presets list.
4
Convert brush-enabled tool presets to brush presets
Choose to remove or retain brush-enabled tool presets after you've converted them to brush presets.
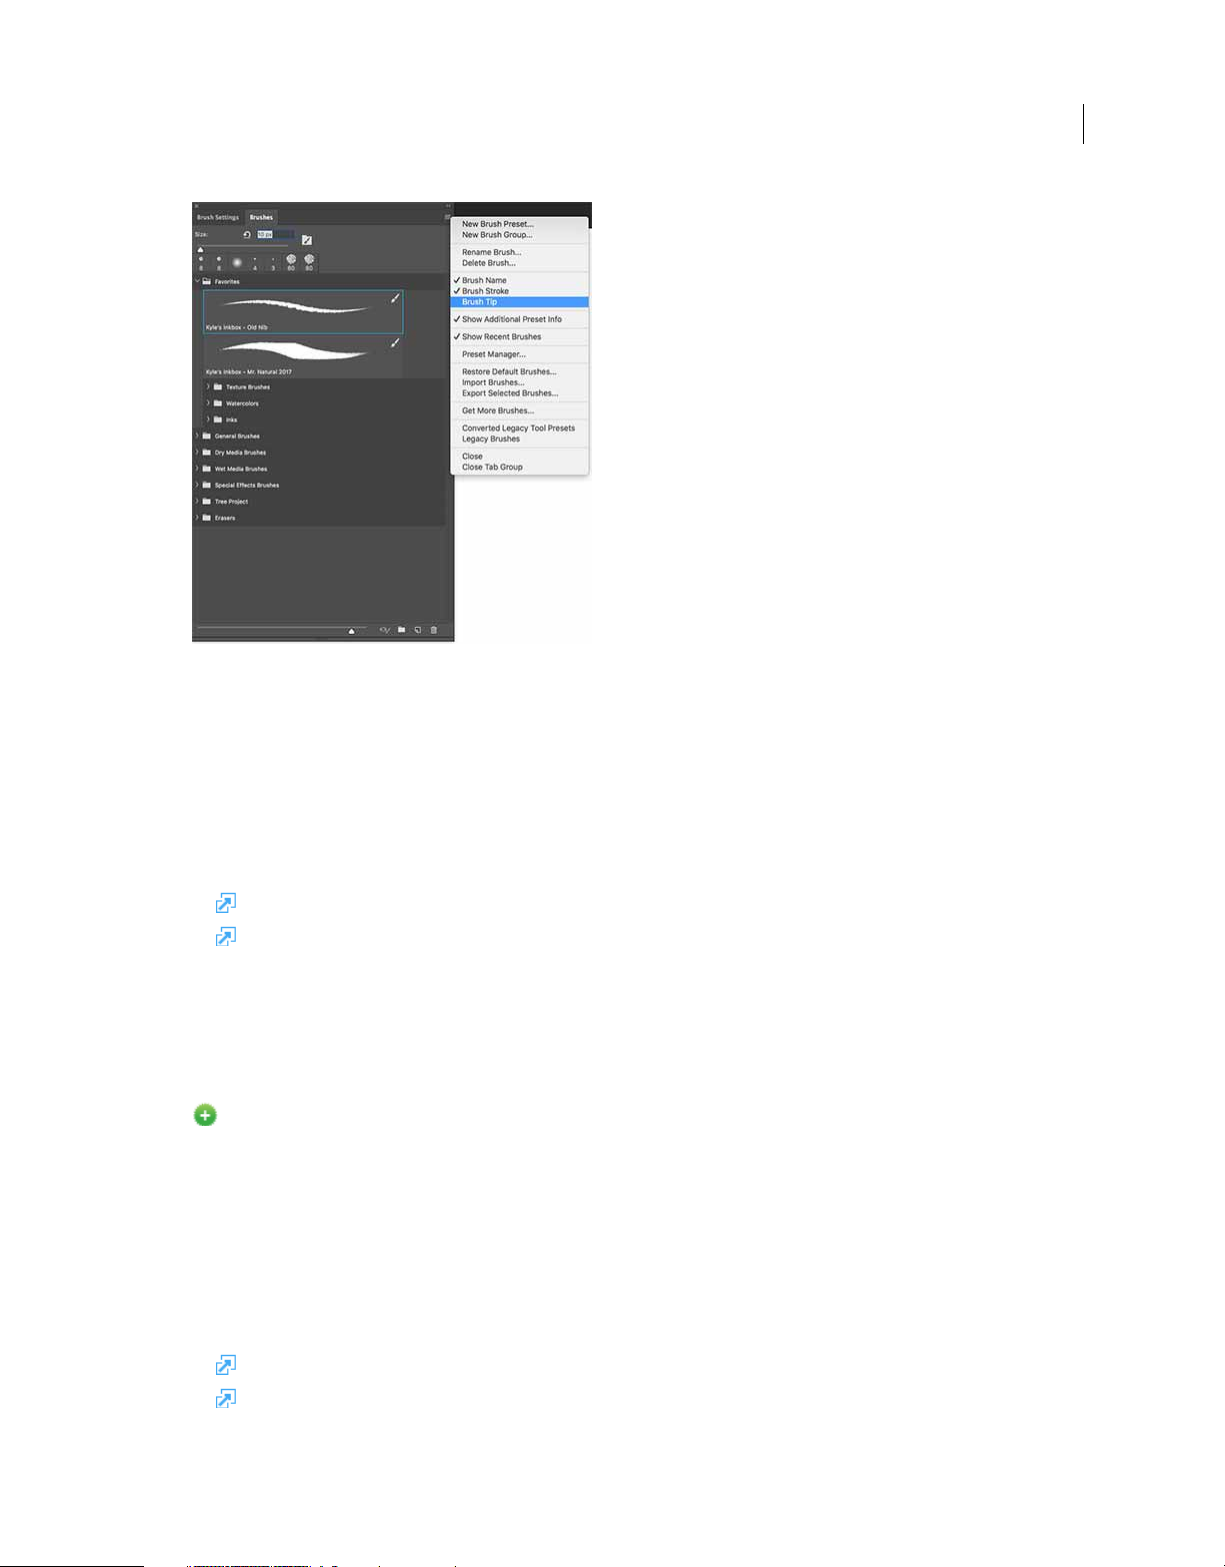
The Brushes panel itself incorporates a host of experience improvements in this release, such as the following:
• In the Brushes panel flyout menu, easily toggle between the different views to see any combination of the brush
name, brush stroke preview, and brush tip.
Last updated 2/2/2018
Page 15
Introduction to Photoshop
Brushes panel: View just the information you need
5
• View more brushes in the same screen space using the zoom slider.
• Drag and drop brush presets to reorder them conveniently.
• Collapse or expand folders to see only the brushes you need.
• Use the Show Additional Preset Info option in the flyout menu to see the associated preset tool (for example, Eraser)
and any included colors.
For related information, see:
• Create and modify brushes .
• Import brushes and brush packs
Getting started with advanced custom brushes
Getting started with advanced custom brushes
Access your Lightroom photos in Photoshop
New in the October 2017 release
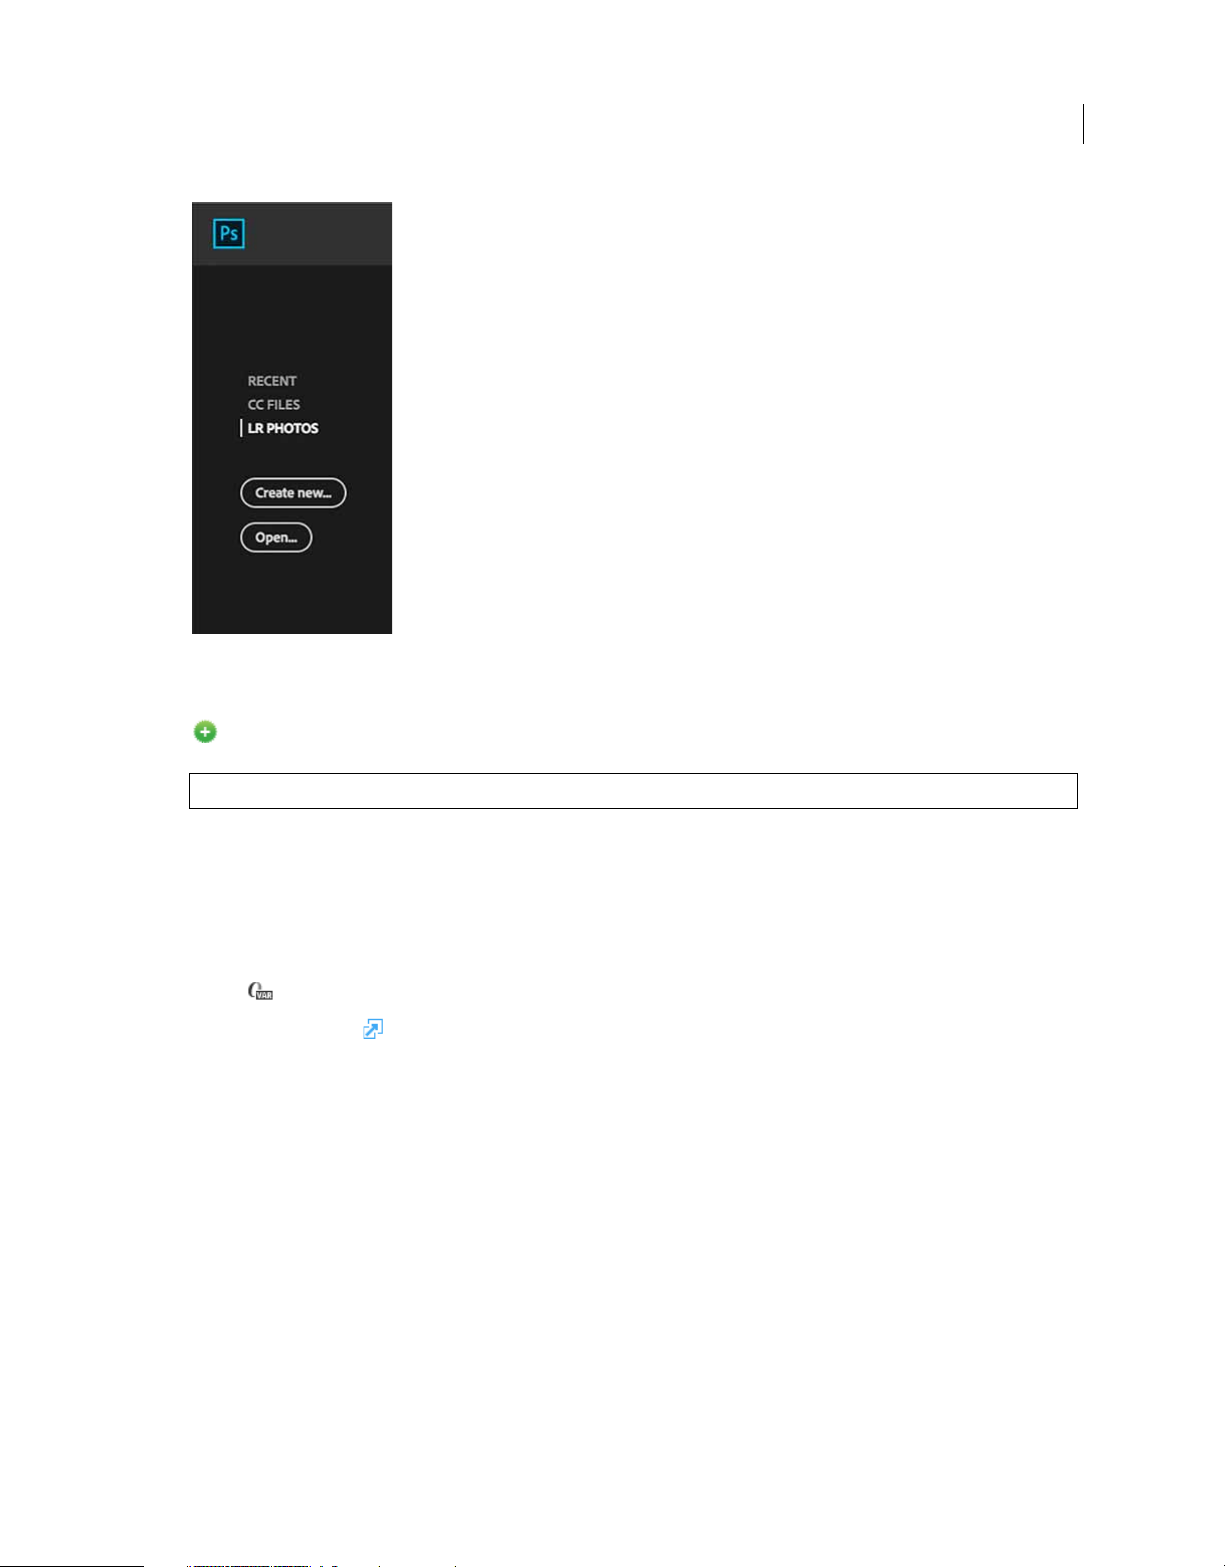
You can now access all of your synced Lightroom photos directly from the Start workspace within Photoshop. In the
Start workspace, click the Lr Photos tab. Now, select the images you want to open and click Import Selected. If you've
made changes to your photos or albums in any of the Lightroom apps while Photoshop is running, click the Refresh
button to see the changes you’ve
Aside from the Start workspace, you can also find, filter, sort, and import Lightroom photos into Photoshop using the
Photoshop search.
made. Click See More to view a grid of all of your photos organized by date.
For more information, see:
• Photoshop search
• Start and Recent Files workspaces
Last updated 2/2/2018
Page 16
Introduction to Photoshop
Lightroom photos in the Photoshop Start workspace
6
Variable fonts
New in the October 2017 release
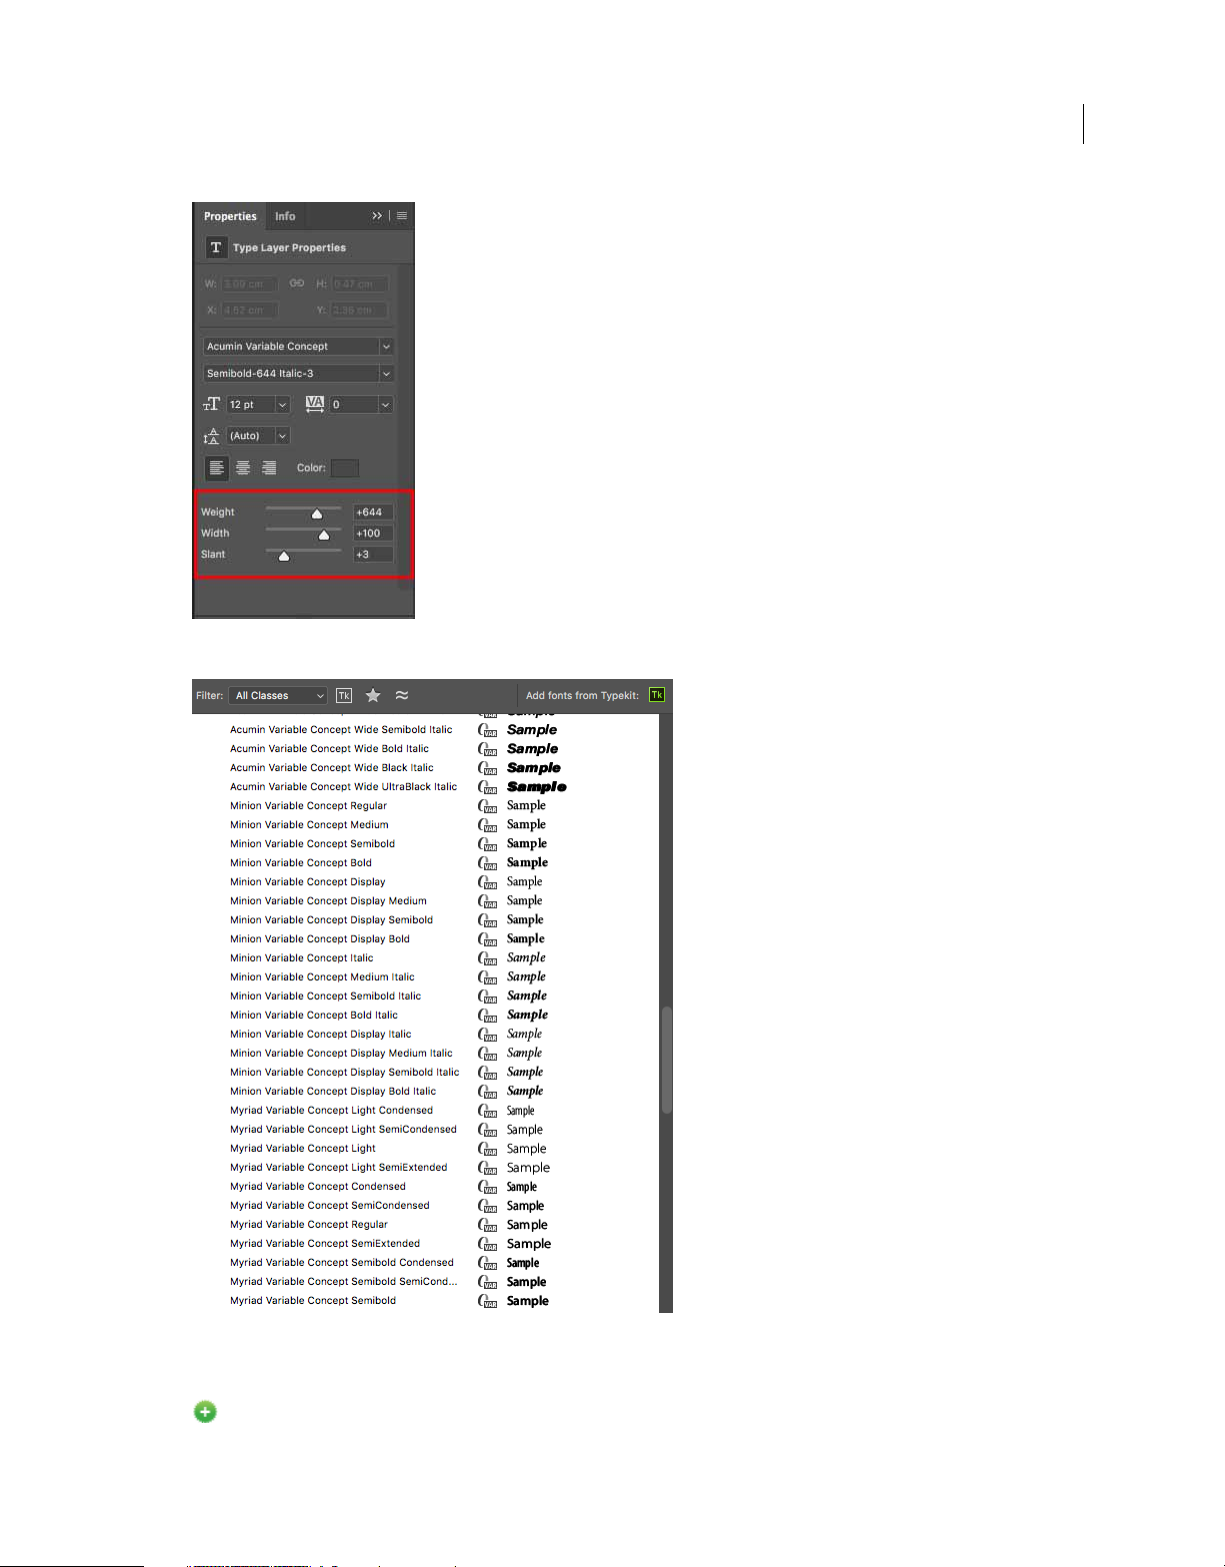
Photoshop now supports Va ri a bl e Font, a new OpenType font format supporting custom attributes like weight, width,
slant, optical size, etc. This release of Photoshop ships with several variable fonts for which you can adjust weight, width,
and slant using convenient slider controls in the Properties panel. As you adjust these sliders, Photoshop automatically
chooses the type style closest to the current settings. For example, when you increase the slant for a Regular type style,
Photoshop automatically changes it to a variant of Italic.
In the Character panel or Options bar, search for variable in the font list to look for variable fonts. Alternatively, look
icon next to the font name.
for the
For related details, see Fonts .
Last updated 2/2/2018
Page 17
Introduction to Photoshop
Slider controls to adjust font attributes
7
Font list: Some variable fonts
Quickly share your creations
New in the October 2017 release
Last updated 2/2/2018
Page 18
Introduction to Photoshop
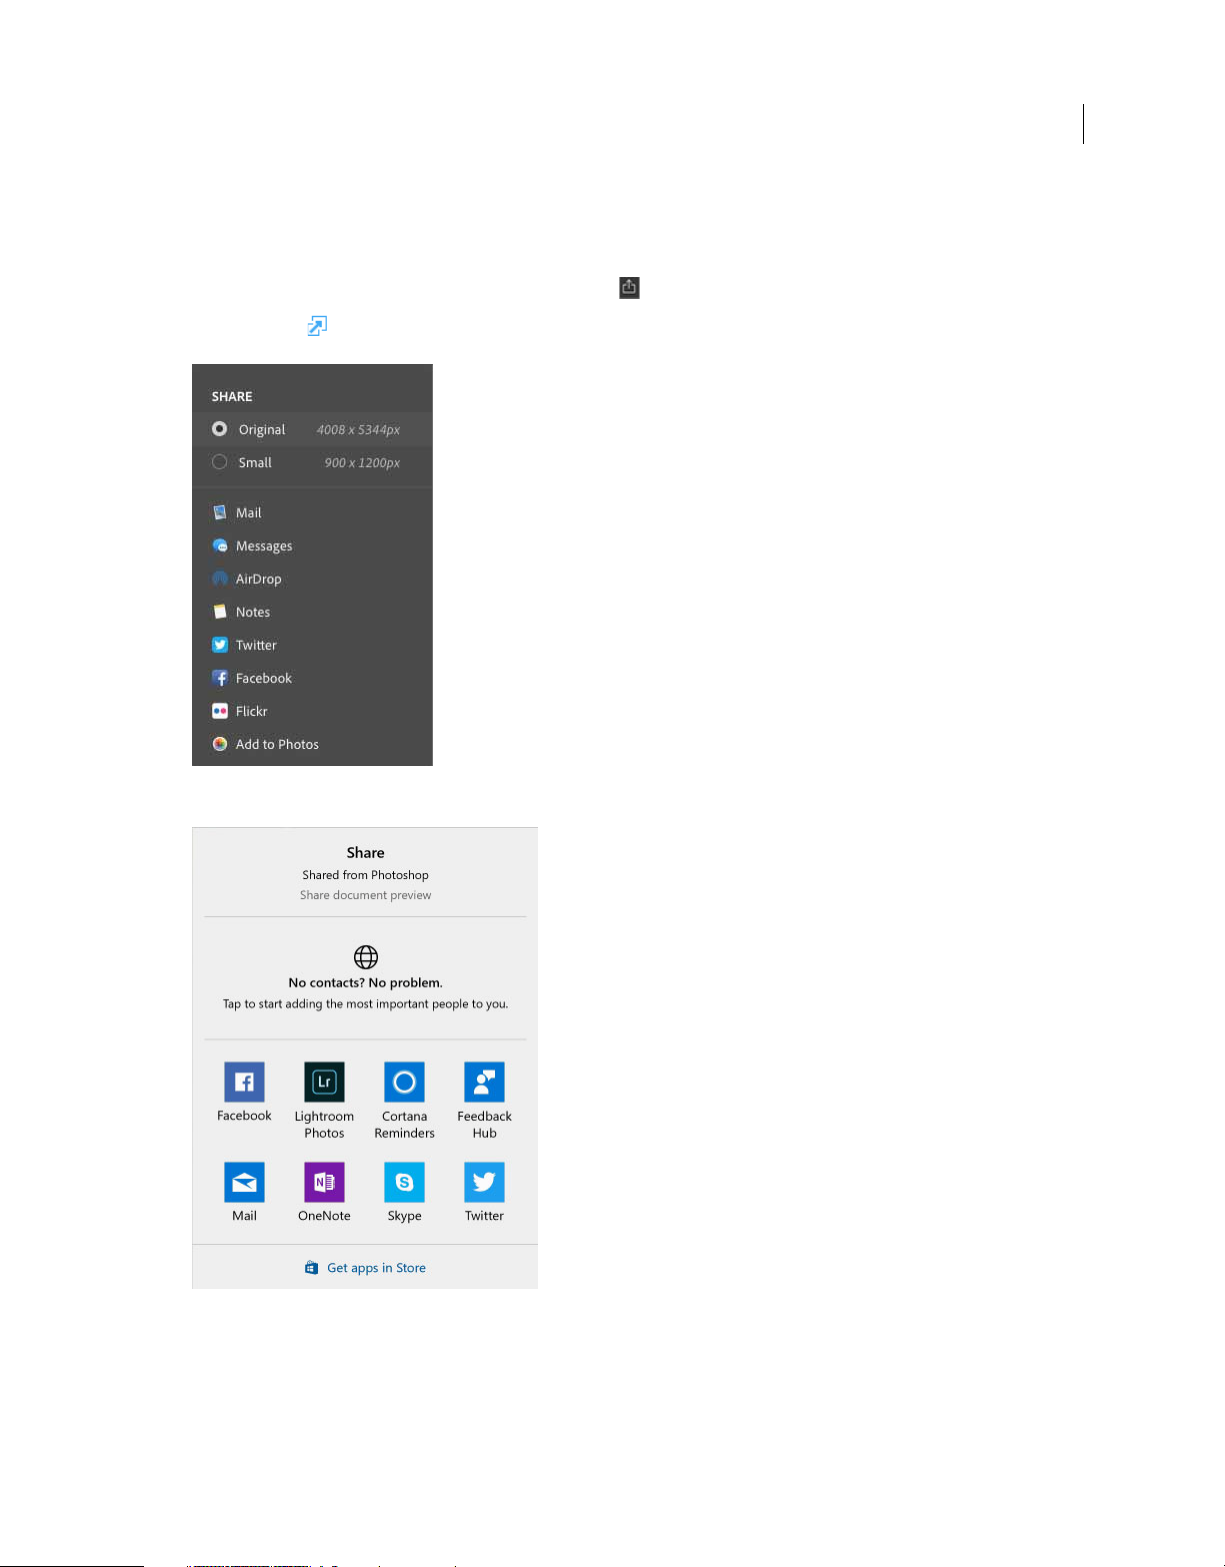
You can now email or share your creations to several services directly from within Photoshop. When you share a
document by email, Photoshop sends out the original document (.psd file). For certain services and social media
channels, Photoshop automatically converts the document to the JPEG format before sharing.
In Photoshop, select File > Share. Alternatively, click the icon in the options bar.
For details, see Quickly share your creations .
8
Sharing options on macOS
Sharing options on Windows
Note: Your operating system preferences determine the actual list of services appearing in the Share panel. You can tweak
these preferences. For example, on macOS, add/remove services to the Share panel by tweaking System Preferences >
Extensions > Share Menu. See
this Apple documentation page for more information.
Last updated 2/2/2018
Page 19
Introduction to Photoshop
Curvature Pen tool
New in the October 2017 release
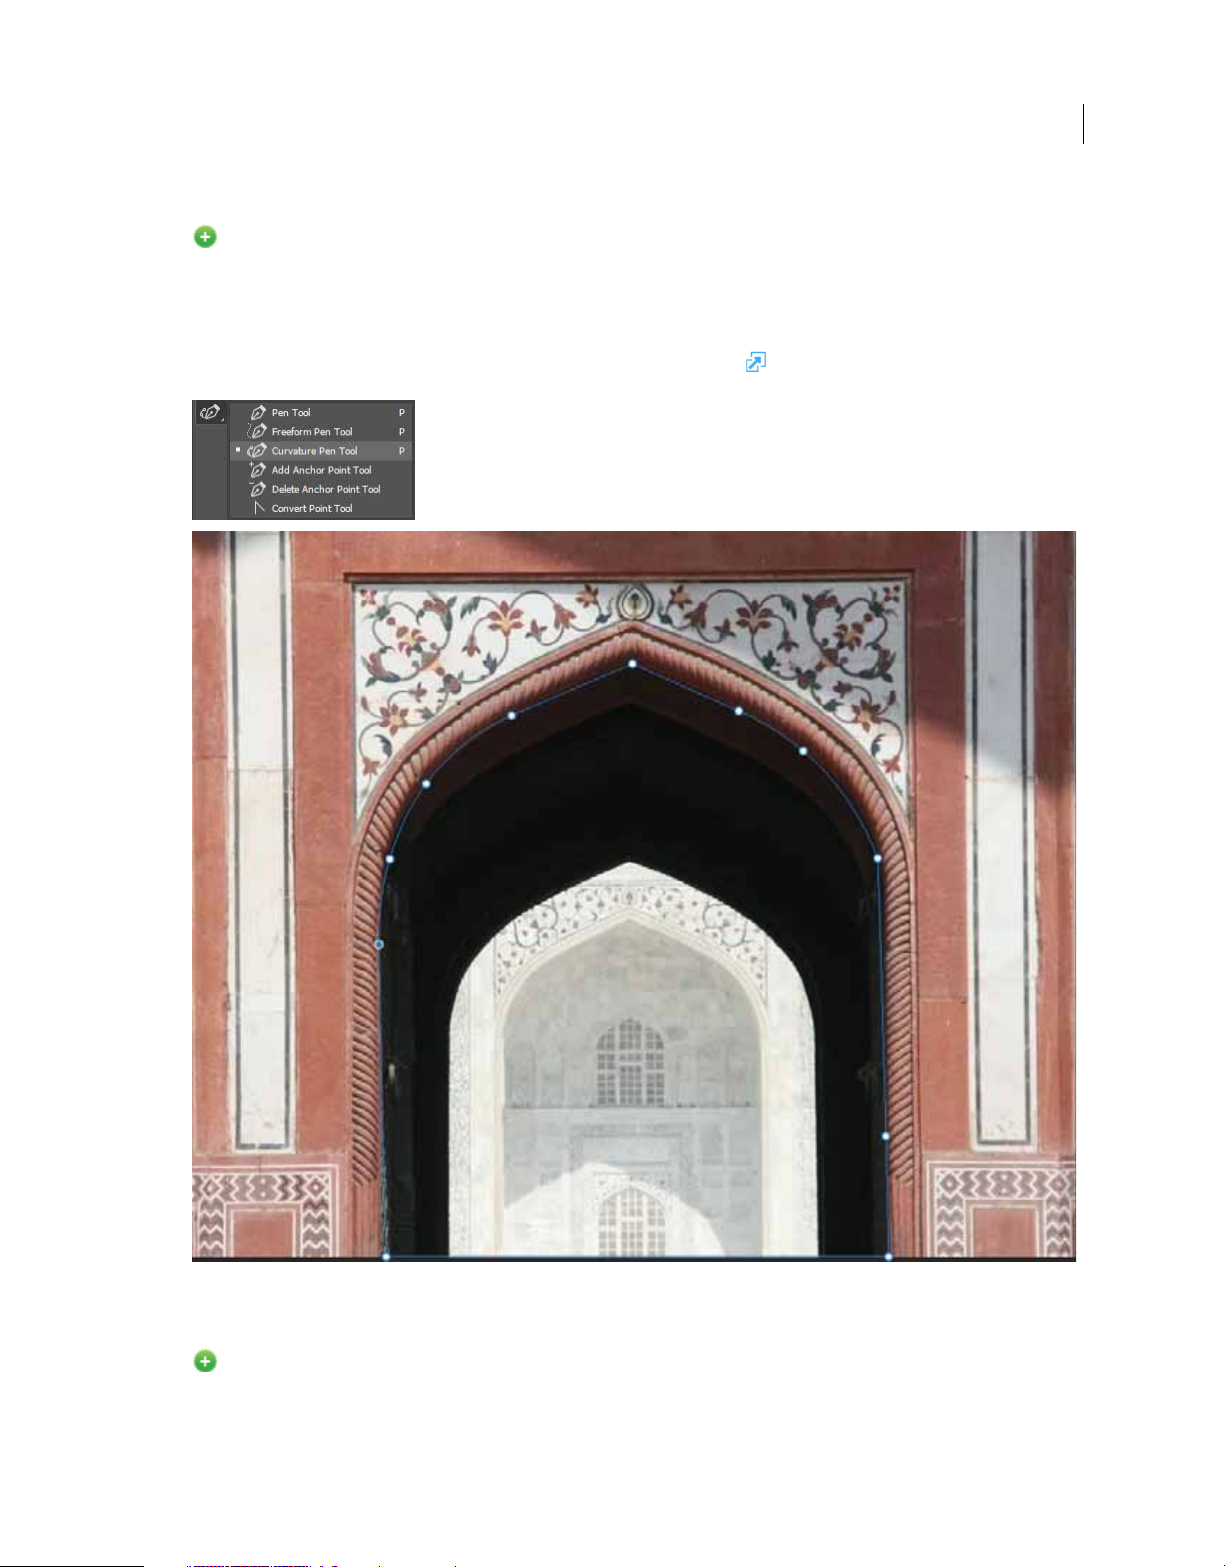
The Curvature Pen tool lets you draw smooth curves and straight line segments with equal ease. Create custom shapes
in your designs or define precise paths to effortlessly fine-tune your images using this intuitive tool. While doing so,
create, toggle, edit, add, or remove smooth or corner points without ever having to switch tools.
Access this new tool from the Pen tools group. To learn how to use it, see Use the Curvature Pen tool .
9
Draw curved and straight path segments with equal ease
Path options
New in the October 2017 release
Path lines and curves are no longer just in black and white! You can now define the color and thickness of path lines to
suit your taste and for easier visibility.
Last updated 2/2/2018
Page 20
Introduction to Photoshop
While creating a path—using the Pen tool, for example—click the gear icon ( ) in the Options bar. Now specify the
color and thickness of path lines. Also, specify whether you want to preview path segments as you move the pointer
between clicks (Rubber Band effect).
For related helpful information, see Manage paths .
Path options: Thickness and Color
Copy-paste layers
New in the October 2017 release
You can now copy and paste layers in Photoshop—within a document and between documents—using the Copy, Paste,
and Paste Into Place commands.
When you paste a layer between documents with different resolutions, the pasted layer retains its pixel
dimensions.
specify how to handle color information in the imported data.
Depending on your color management settings and the associated color profile, you may be prompted to
10
For more information, see Copy/paste layers .
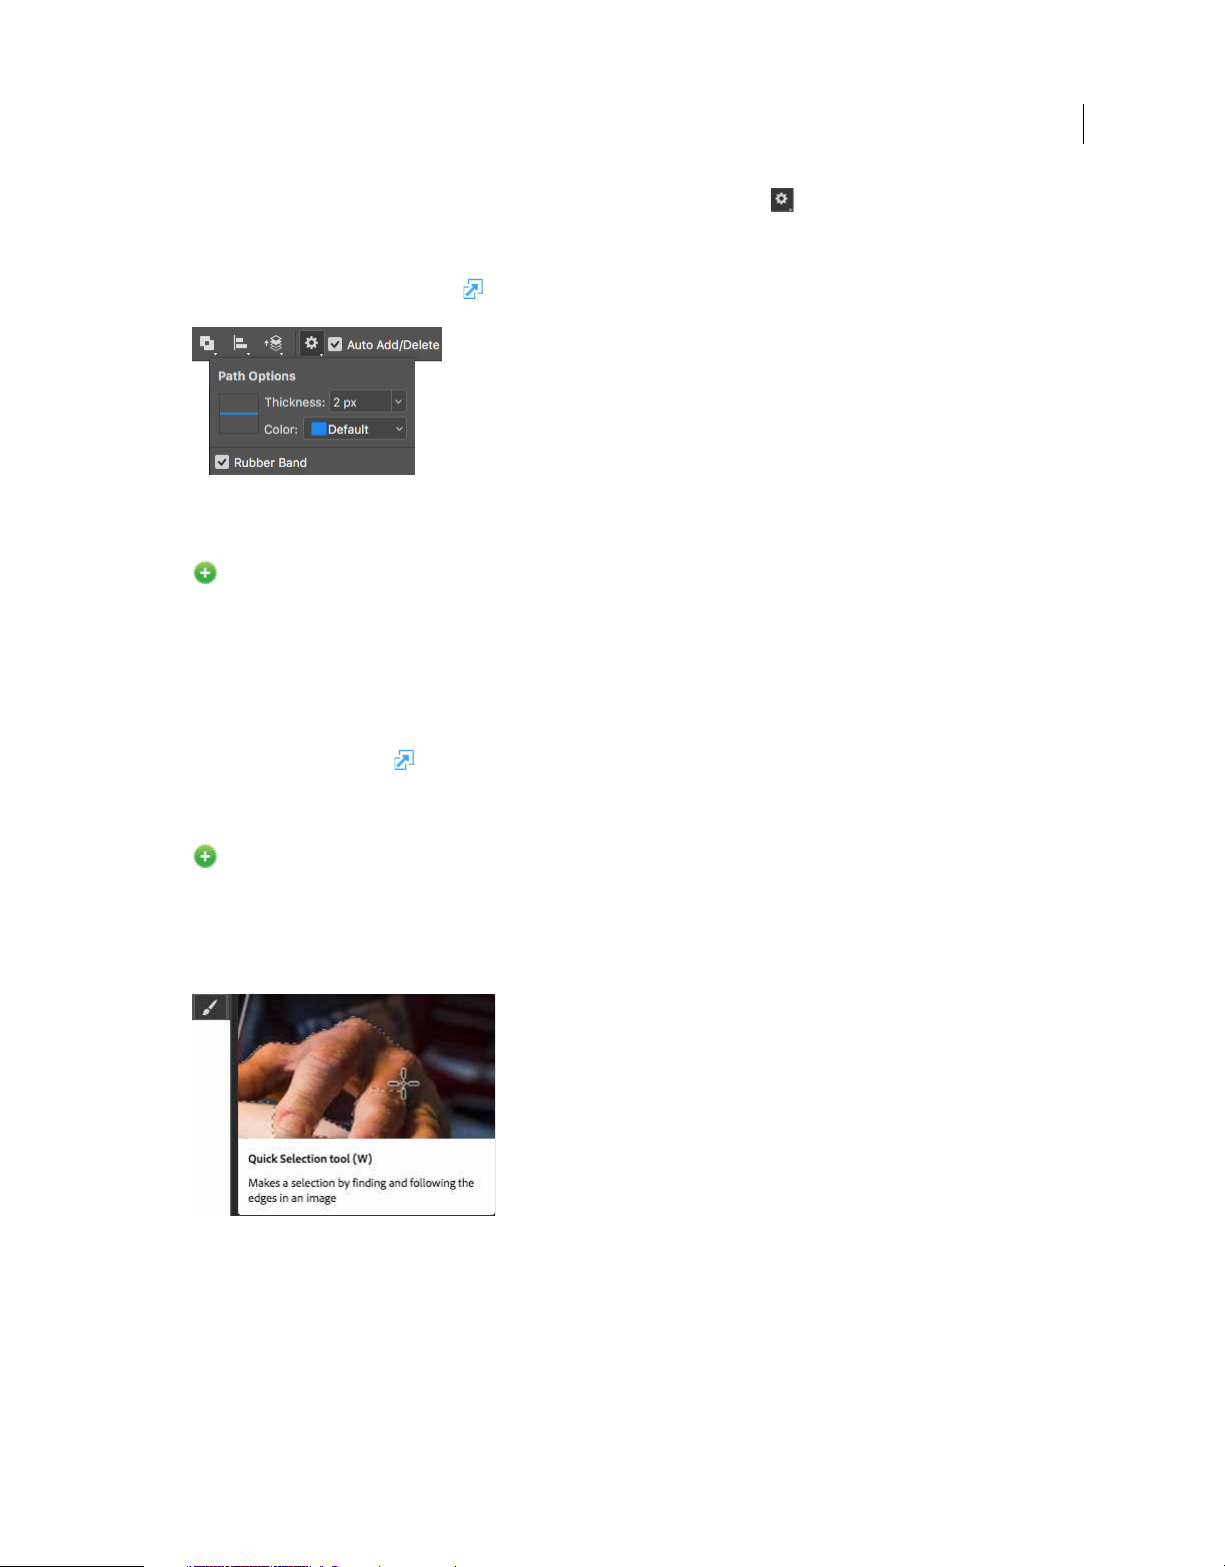
Rich tooltips
New in the October 2017 release
Figuring out what Photoshop tools do is now easier than ever before! When you hover the pointer over certain tools in
the Tools panel, Photoshop displays a description and a short video of the tool in action.
You can choose not to view rich tooltips. To do so, deselect the Preferences > Tools > Use Rich Tooltips preference.
Rich tooltip: Quick Selection tool
Last updated 2/2/2018
Page 21
Introduction to Photoshop
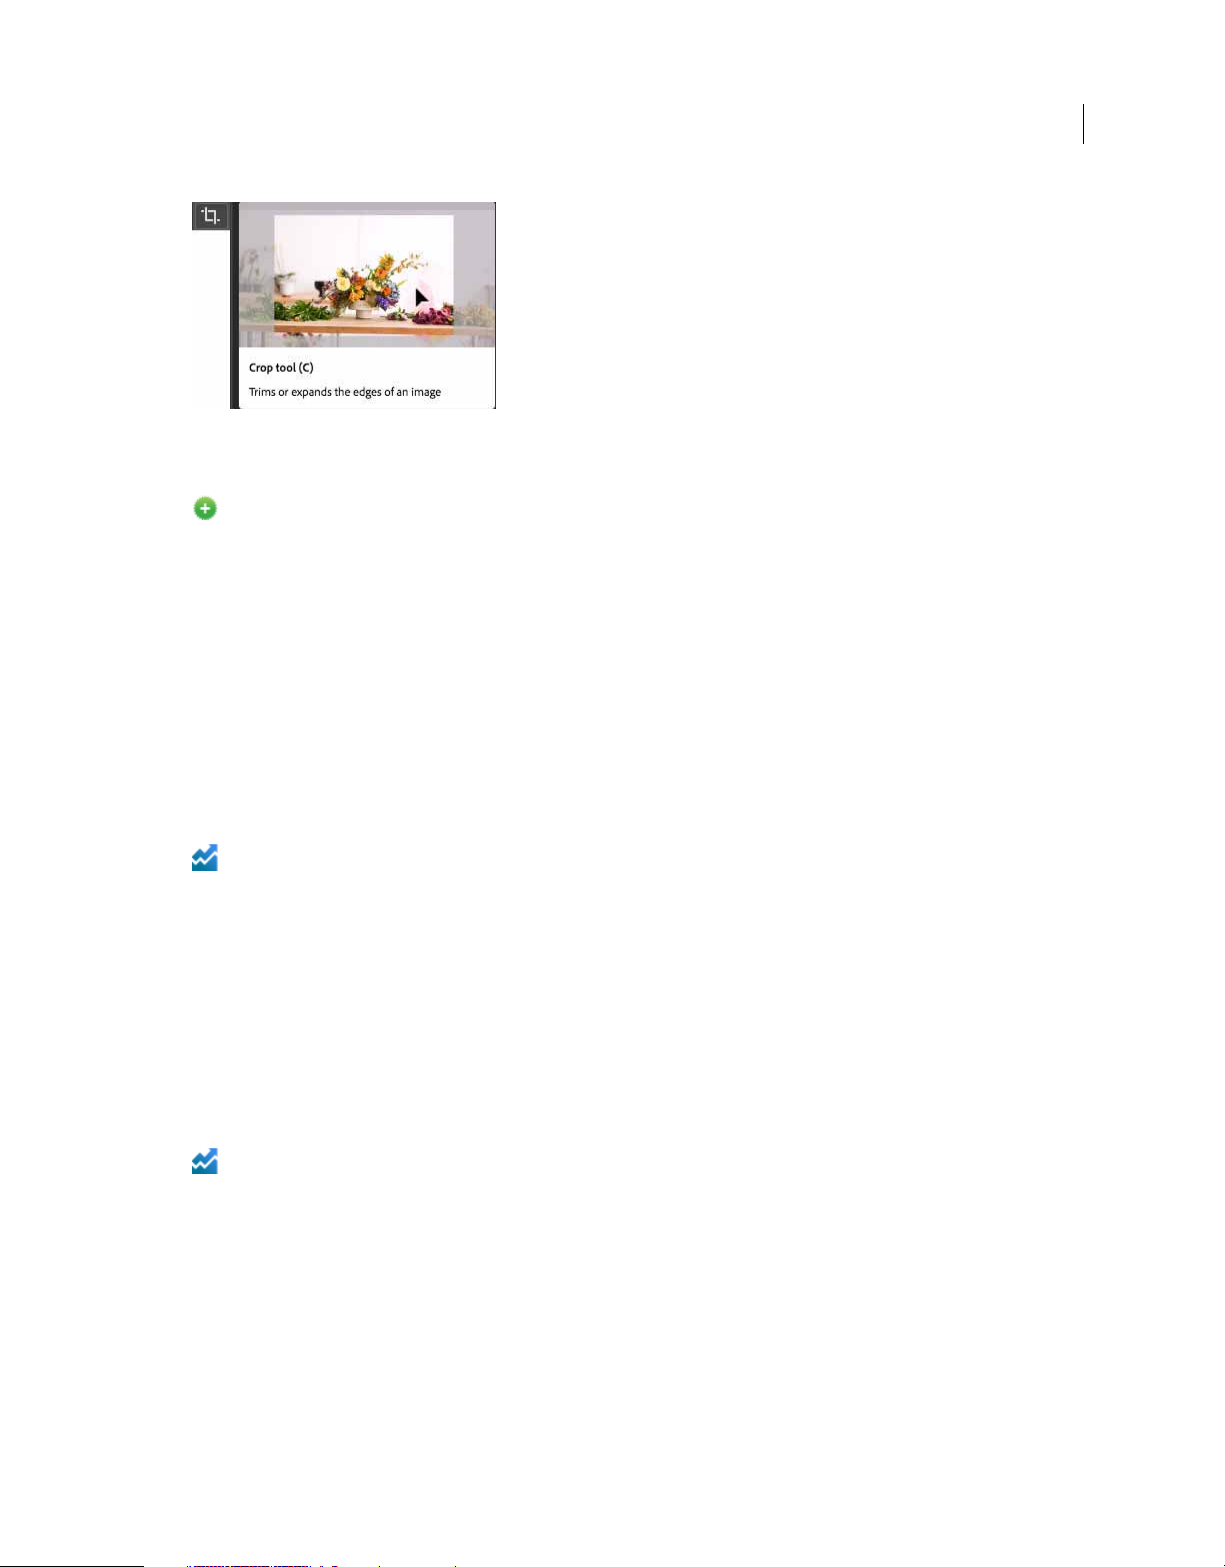
Rich tooltip: Crop tool
Edit spherical panoramas in Photoshop
New in the October 2017 release
You can now edit equirectangular spherical panoramas, shot using different cameras, in Photoshop. With the panorama
asset imported and its layer selected, invoke the panoramic viewer by choosing 3D > Spherical Panorama > New
Panorama Layer From Selected Layer. Alternatively, directly load a spherical panorama into the viewer by selecting 3D
> Spherical Panorama > Import Panorama.
Once you've opened a panorama in the viewer, you can perform a variety of operations on it:
11
• Rotate the camera view around
• Adjust the field of view
• Paint on the panorama using all relevant Photoshop tools and filters
Properties panel improvements
Enhanced in the October 2017 release
• You can now adjust leading and tracking for type layers in the Properties panel.
• You can now adjust settings, such as color, font, and size, for multiple type layers using the Properties panel.
• Work with Adobe Stock assets in the Properties panel:
• Vie w the asset on stock.adobe.com by clicking the asset ID.
• License a preview image directly from the Properties panel.
• Find stock assets similar to an image on stock.adobe.com.
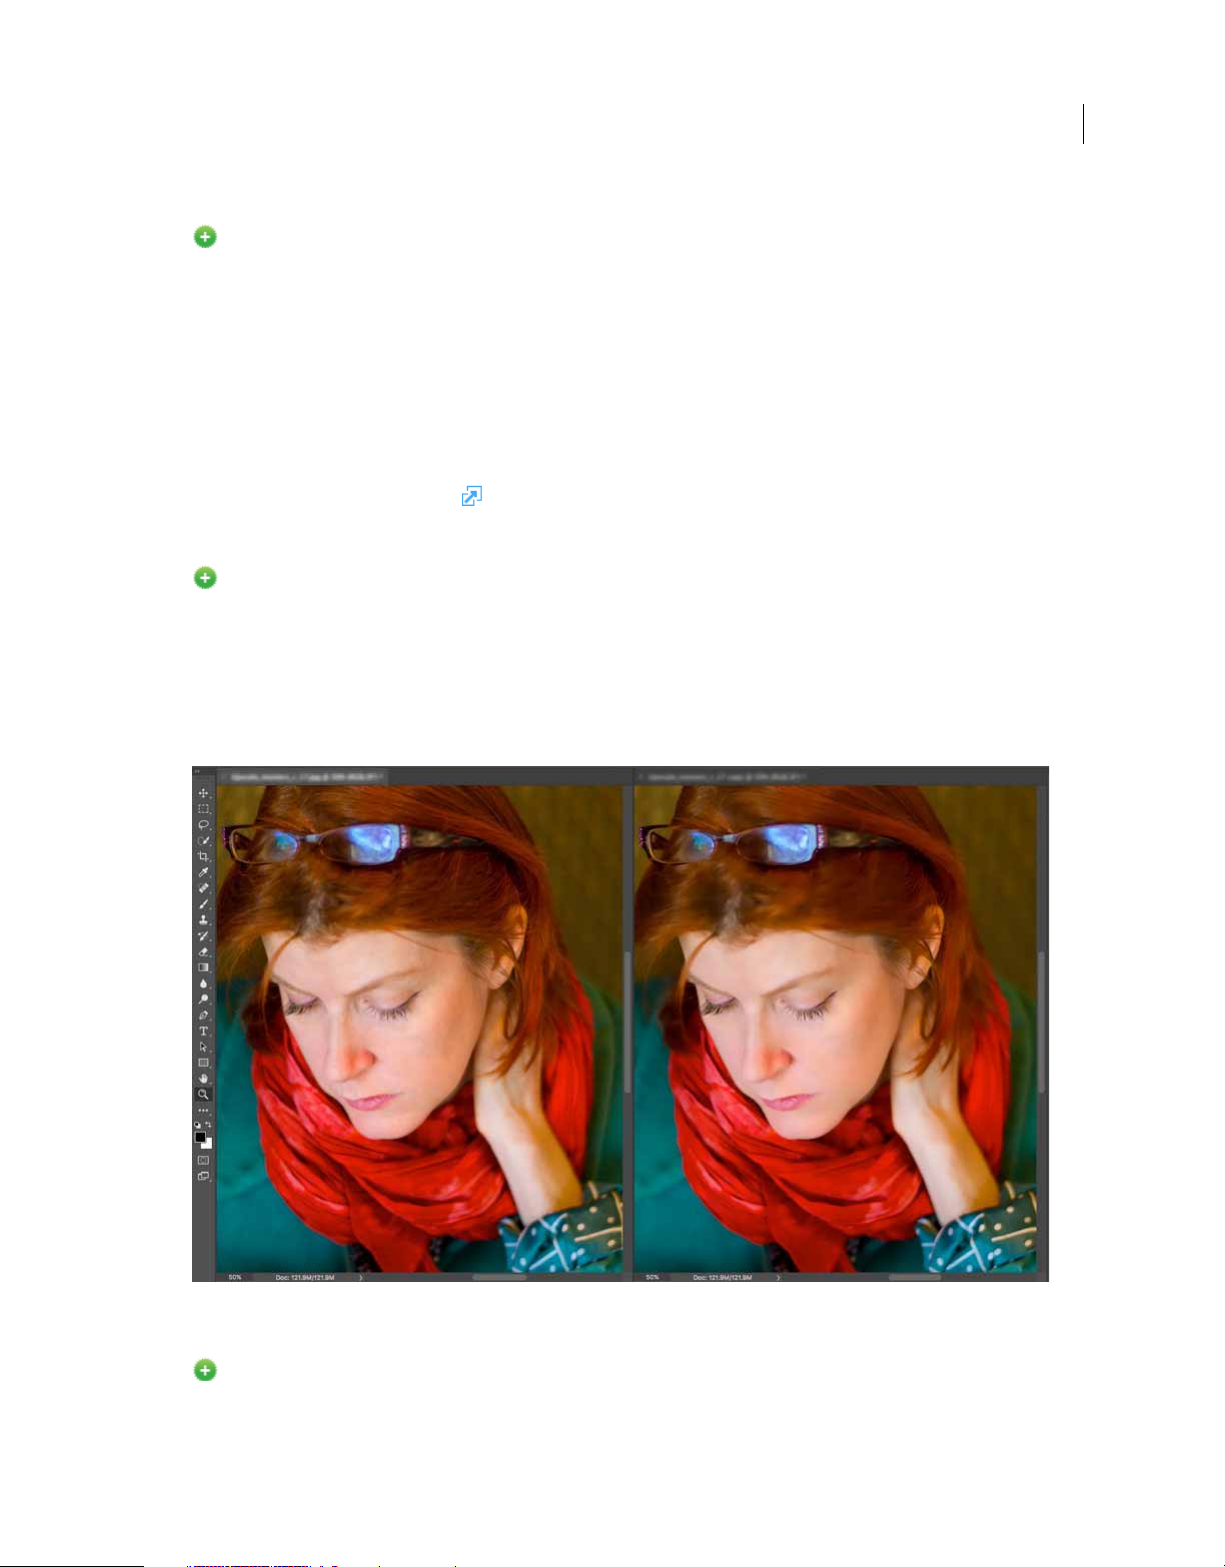
Select & Mask improvements
Enhanced in the October 2017 release
• Improved algorithm providing more accurate and realistic results when subtracting the foreground in cases where
foreground and background colors are visually similar.
the
• Improved blending of original selection and matting results
• Transparency view mode settings are now decoupled from the Quick Mask view modes. Transparency settings are
no longer
• Overlay view mode transparency settings are now decoupled from On White and On Black transparency settings.
shared between Select & Mask and Quick Mask.
Last updated 2/2/2018
Page 22
Introduction to Photoshop
Learn panel
New in the October 2017 release
You can now access step-by-step tutorials on basic concepts and tasks directly within Photoshop. These tutorials cover
basic photography concepts, retouching and combining images, and graphic design fundamentals.
In Photoshop, select Window > Learn.
Technology Preview features
Before using some Technology Preview features, you may need to enable them from Preferences > Technology
Previews.
For details about these features, see Te c h no lo gy pr e vie w s .
Preserve Details 2.0 Upscale
New in the October 2017 release
Default state: On
Photoshop now features artificial intelligence-assisted upscaling to preserve important details and textures while
resizing images without introducing distortions.
harder-edged details like text and logos. Try it on soups, salads, pizza, and any other subjects that need that extra dash
of texture preservation.
In addition to skin tones and hair textures, this feature preserves
12
Artificial intelligence-assisted upscale (left) vs legacy resizing (right)
Paint Symmetry
New in the October 2017 release
Default state: Off
Last updated 2/2/2018
Page 23

Introduction to Photoshop
Photoshop now lets you paint symmetrically while using the Brush, Pencil, and Eraser tools. While using these tools,
click the butterfly icon (
) in the Options bar. Choose from the several available types of symmetry. Paint strokes are
reflected live across the line of symmetry, allowing for easier sketching of faces, cars, animals, and more.
To enable this feature, select Preferences > Technology Previews > Enable Paint Symmetry.
13
Easily create intricate patterns with Paint Symmetry
Last updated 2/2/2018
Page 24
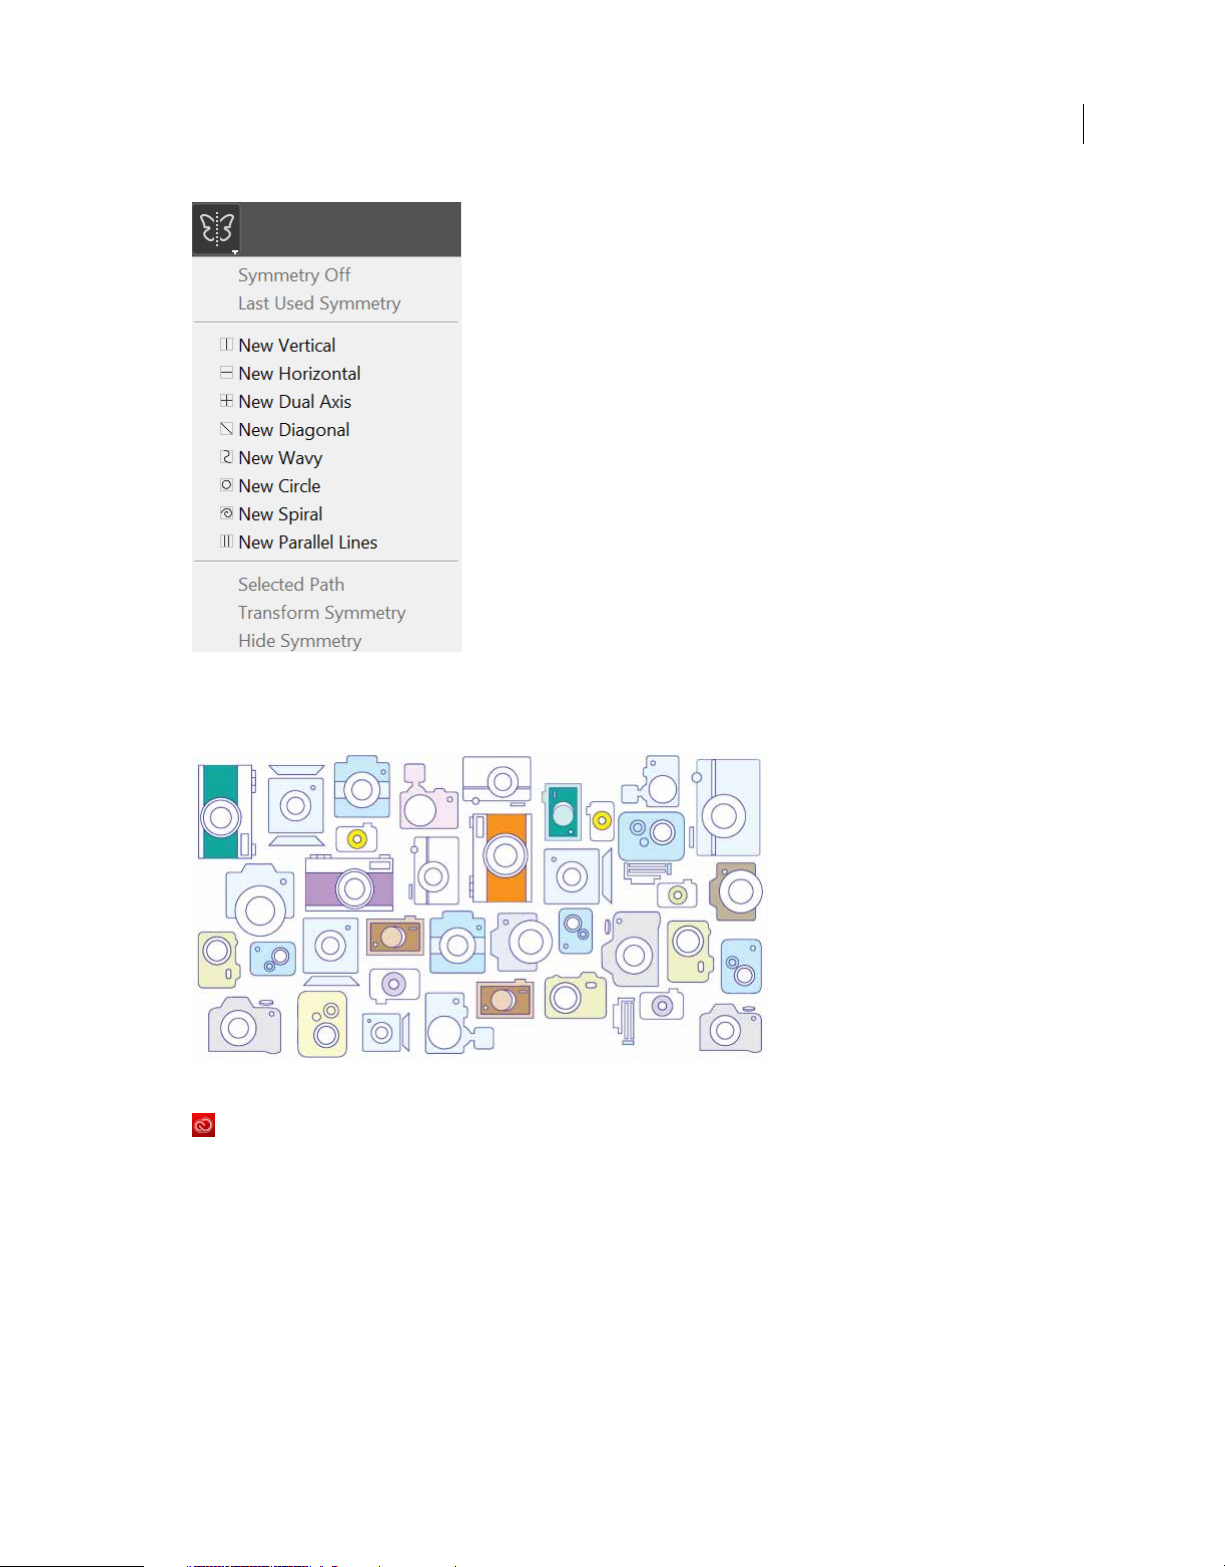
Introduction to Photoshop
Different symmetry types
14
Camera Raw | New features
Quick selections with Color and Luminance Range Masking
Available only for Creative Cloud members
Using the new Color and Luminance Range Masking controls, you can quickly create a precise masking area on your
photo for applying local adjustments. These new precision masking tools can detect changes in lighting and contrasting
edges based off color and tone. You can make quick initial masking selections with Adjustment Brushes or Radial
Filter/Graduated Filter. Then refine your selection with the range masks, located under Auto-Mask in the Adjustment
Brush tool options.
Color Range Mask
After making an initial selection mask on your photo with Adjustment Brushes or Radial Filter/Graduated Filters, use
Color Range Masking to refine the selection mask based on the colors sampled within the mask area.
Last updated 2/2/2018
Page 25
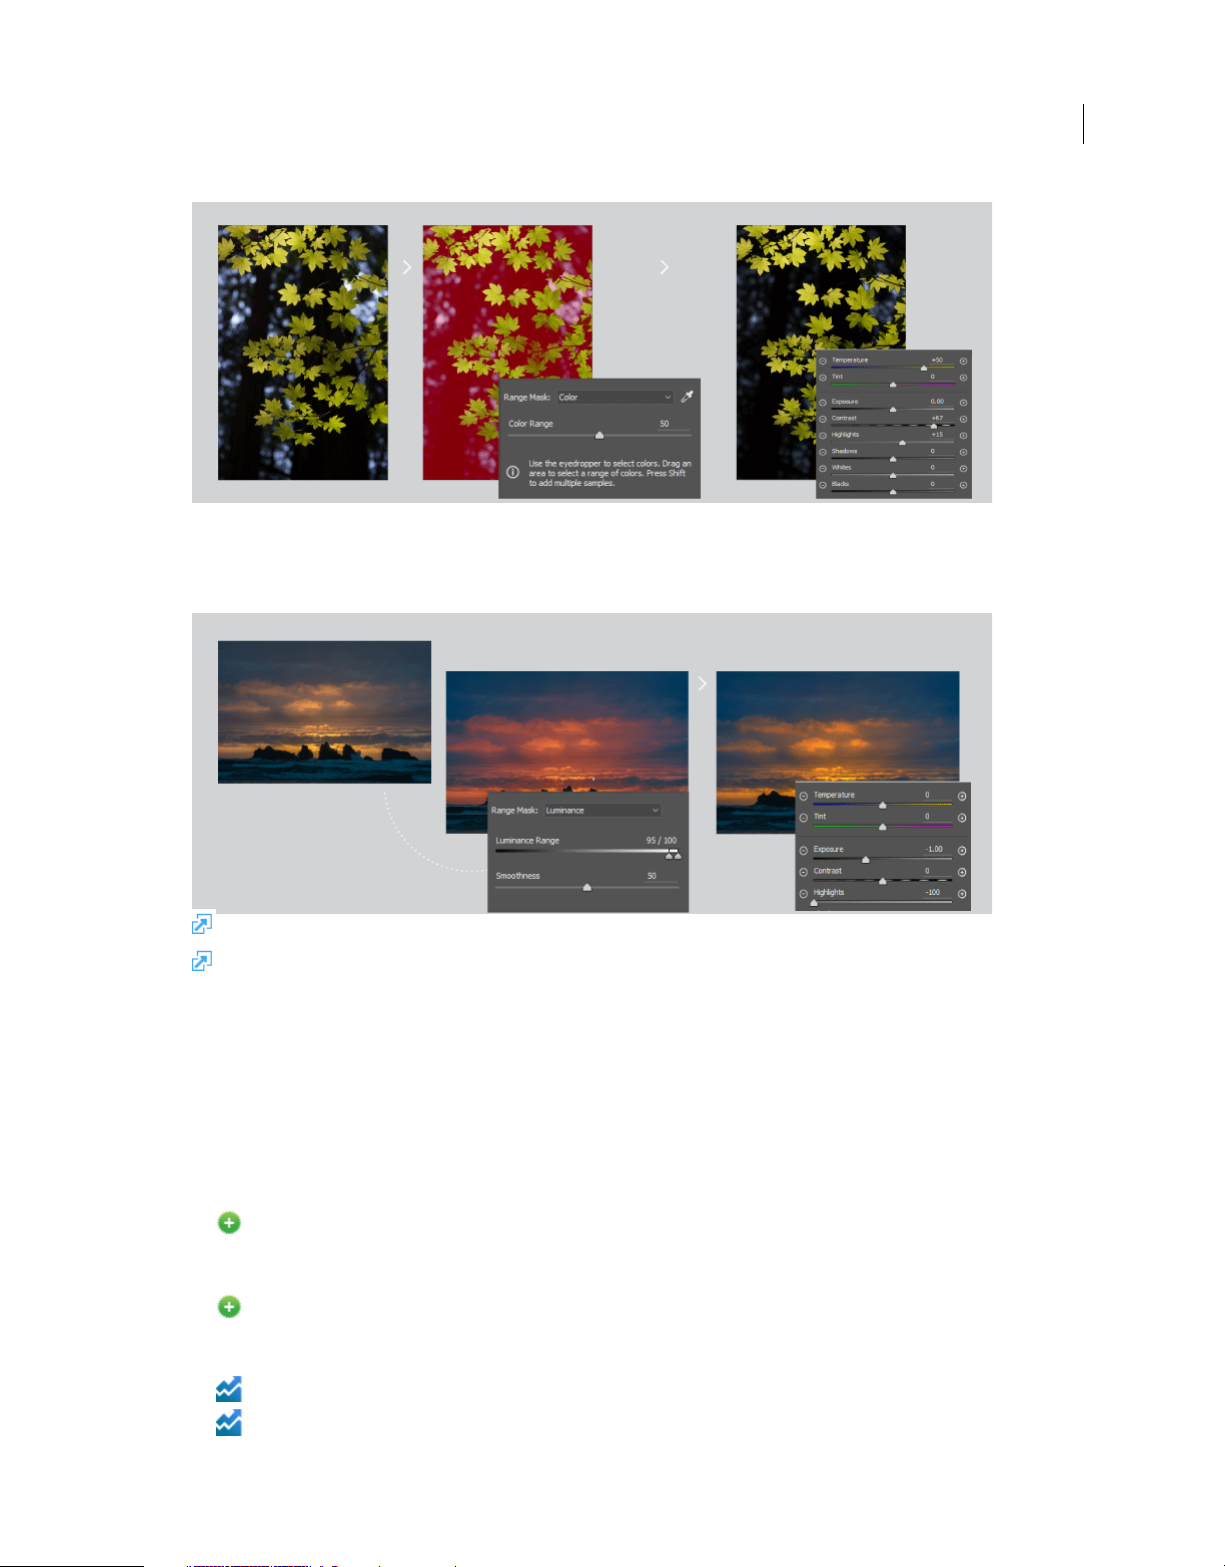
Introduction to Photoshop
Luminance Range Mask
After making an initial selection mask on your photo with Adjustment Brushes or Radial Filter/Graduated Filters, use
Luminance Range Masking to refine the mask area based on the luminance range of the selection.
15
For Help documentation, see Apply local adjustments with color or luminance range mask .
For details of new features in Adobe Camera Raw, see New features summary .
Other enhancements and fixes
January 2018 release
• New adjustment slider for Decontaminate Colors in the Select And Mask workspace. See Output Settings.
October 2017 release
• Composer Switching: You can now change the text composer on a per-document basis from the Paragraph
panel. This feature makes it easy to reuse assets even across languages that use different composers—for example,
Middle Eastern and East Asian languages.
• Photoshop now supports Apple's High Efficiency Image Format (HEIF). Photoshop can read depth maps in
HEIF image files created by iPhone 7 Plus and later devices into a channel. You can then create a depth-of-field effect
in the image using Filter > Blur > Lens Blur.
• Improved document creation (Cmd/Ctrl+N) launch performance
• Usability improvements to the Properties panel
Last updated 2/2/2018
Page 26

Introduction to Photoshop
• Improved startup time on Windows
• Improved performance of common blending and compositing operations
• Improved performance of the Surface Blur filter and the Noise > Median filter
• Improved Refine Edge tool accuracy in the Select & Mask workspace
• New preference on Windows 10: Preferences > Workspace > Align UI According To OS Settings. Use this
preference to prevent contextual UI elements, such as pop-up menus, from displaying beneath your hand when
you're drawing directly on the display. This operating system setting is controlled from Ink & Stylus system
preferences on Windows. It is available only on devices paired with a stylus.
• While pasting text into type layers, you can now use the new Edit > Paste > Paste Without Formatting
command. This command strips out style attributes from the source text and adapts it to the style of the destination
type layer.
• Photoshop search now also lets you find, filter, sort, and import Lightroom photos into Photoshop.
• Improved protection of face details for Content-Aware Move, Auto Levels, Curves, Tone, Brightness, Contrast,
and skin tone color range
• Save As PNG now offers much better compression
• Improved quality of Content-Aware Crop and Content-Aware Fill on edges
16
• Collapsed font menus: The font lists in the Options bar and various panels now show all the font faces in a given
family collapsed into a pop-up submenu accessible via either the mouse or the keyboard.
• Intelligent deep-learning-led face detection for Face-Aware Liquify
• Fixed: Select & Mask issue where brushing with soft radius using the Refine Edge brush still produces a hard
edge.
What's changed
• The Brush panel in earlier releases of Photoshop is now called Brush Settings.
• The Brush Presets panel in earlier versions of Photoshop has been streamlined and renamed as Brushes panel. For
more information, see
• Device Preview is no longer available in this release. Additionally, the Preview CC iOS app is no longer available for
download or actively maintained as of October 2017. If you have a previously-downloaded version of Preview CC
on your iOS device, you can continue to use it on an as-is basis with earlier versions of Photoshop.
• Pho tosho p no long er prompts you to imp ort as set s in to Cre ative Clo ud L ibrar ies whi le o pen ing doc ume nts. You ca n
still automatically import all assets from an open document using the Create New Library From Document
command in the Libraries panel.
• The Preferences > General > Show Recent Files Workspace When Opening A File setting is no longer available.
• On macOS 10.13 (High Sierra) and newer, Photoshop uses a dark title bar for floating document windows when UI
brightness is set to one of the two dark settings.
• (MacBook Pro) Use Photoshop with the Touch Bar on MacBook Pro -related changes:
Streamlined brush management.
• The Enable History Scrubbing In The Touch Bar preference is no longer available. To suppress history scrubbing,
simply remove the corresponding button from the Touch Bar layout.
• You can now control brush smoothing using the Touch Bar. Add this control to the Touch Bar using the
Customize Touch Bar user interface.
Last updated 2/2/2018
Page 27

Introduction to Photoshop
• PNG files created using the Save As option are now compressed better. Also, the options for saving images as PNG
assets have changed for better user experience:
New options for saving images as PNG
Known issues
• Photoshop sometimes stops responding when you're using the Refine Edge brush in the Select & Mask workspace.
As a workaround to this issue, disable Preferences > Performance > Advance Settings > Use OpenCL.
• (Only on MacBooks with a single GPU and running OS X 10.11) While using the Refine Edge brush, you may notice
heavy degradation along the edges of the image areas you're retouching. As a workaround to this issue, either
upgrade to the latest version of macOS or turn off OpenCL (deselect Preferences > Performance > Advanced
Settings > Use OpenCL).
17
• Photoshop sometimes stops responding when you choose 3D > Spherical Panorama > Import Panorama to import
a panoramic image. As a workaround for this issue, either install the application in the default location in your
system or remove any localized character from the installation path.
• Rarely, when Photoshop launches automatically after installation, the Start workspace and the New dialog might not
display any cards or templates. To resolve this issue, follow these steps:
• Quit Photoshop.
• Launch the Creative Cloud desktop app .
• Launch Photoshop.
• Press Cmd+N to invoke the New Document dialog.
• Press Esc to close the New Document dialog.
• Quit Photoshop and then launch it again.
• Occasional challenges while using the Curvature Pen tool:
• Path operations might behave unexpectedly. As a workaround, use the regular Pen tool.
• Selecting multiple points using the Ctrl+Shift-click keyboard combination may not work at times. As a
workaround, Shift-click with the Direct Selection tool to select multiple points or use the regular Pen tool.
• (Only on Windows) The first segment of a path remains a straight line and doesn't curve as expected, until you
close the path. As a workaround,
click and drag the second anchor point to achieve the expected curvature.
• Usability: The path transform bounding box may be hard to see at times against dark document backgrounds. As a
workaround, for shapes, select only the shape layer without the path. The transform bounding box should now be
clearly visible.
Fixed customer issues
To view the list of fixed issues in this release of Photoshop CC, see Fixed issues .
Last updated 2/2/2018
Page 28
Introduction to Photoshop
Create documents
Introduced in Adobe Photoshop CC 2017 release
When you create a document in Photoshop, instead of beginning with a blank canvas, you can choose from a wide
variety of
your project. When you open a template in Photoshop, you can work with it just as you would work with
Photoshop document (.psd).
templates from Adobe Stock. Templates include assets and illustrations that you can build on to complete
any other
18
In addition to templates, you can also create a document by selecting one of the numerous presets available in
Photoshop or create your custom sizes. You can also save your own presets for reuse.
Templates and presets
Te mp l at es provide inspiration and reusable elements for your documents. You can download templates from Adobe
Stock that include quality graphics and illustrations right within Photoshop. You can then build on these templates to
easily create documents that share common settings and design elements. Templates open as
and generally include multiple artboards.
Blank Document Presets are blank documents with predefined dimensions and settings. Presets make designing for
specific device form factors or use cases easier. For example, you can use a preset to quickly start designing for the iPad
Pro. Blank document presets have predefined size, color mode, unit, orientation, positioning, and resolution settings.
You c an
Templates and presets are categorized into these sets:
modify these settings before creating a document using the preset.
• Photo
• Print
• Art & Illustration
• We b
• Mobile
• Film & Video
.psd files in Photoshop
Last updated 2/2/2018
Page 29
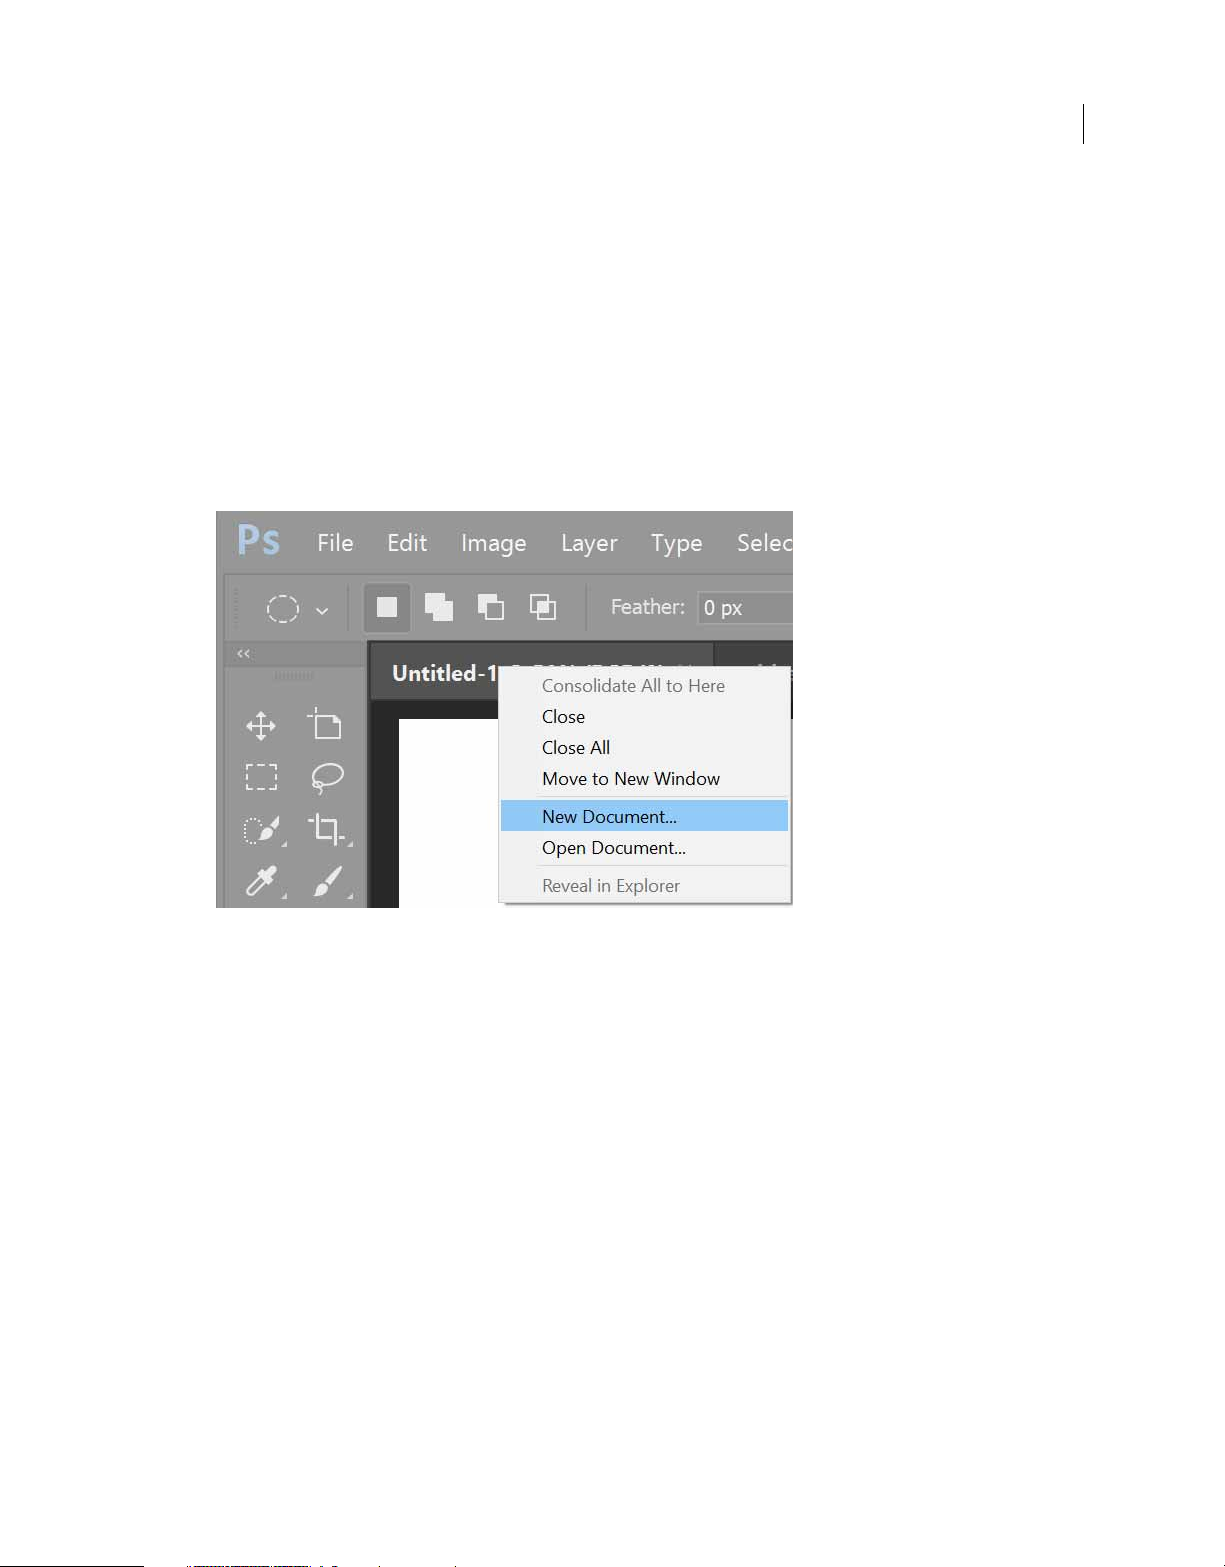
Introduction to Photoshop
Access the New Document dialog
1 Launch Photoshop.
2 Do one of the following:
• Use the following keyboard shortcut:
• (Mac) Cmd+N
• (Windows) Ctrl+N
• Select File > New.
• Click New or Start New in the Start workspace.
• Right-click the tab for an open document and choose New Document from the in-context menu.
19
Overview: New Document dialog
The New Document window lets you:
• Create documents using selected templates from Adobe Stock across several categories: Photo, Print, Art &
Illustration, Web, Mobile, and Film & Video.
• Find more templates and create documents using them. See Search for more templates from Adobe Stock.
• Quickly access files, templates, and items that you've have recently accessed (Recents tab).
• Save your own custom presets for reuse and quickly access them later (Saved tab).
• Create documents using Blank Document Presets for multiple categories and device form factors. Before opening
the presets, you can modify their settings.
Last updated 2/2/2018
Page 30
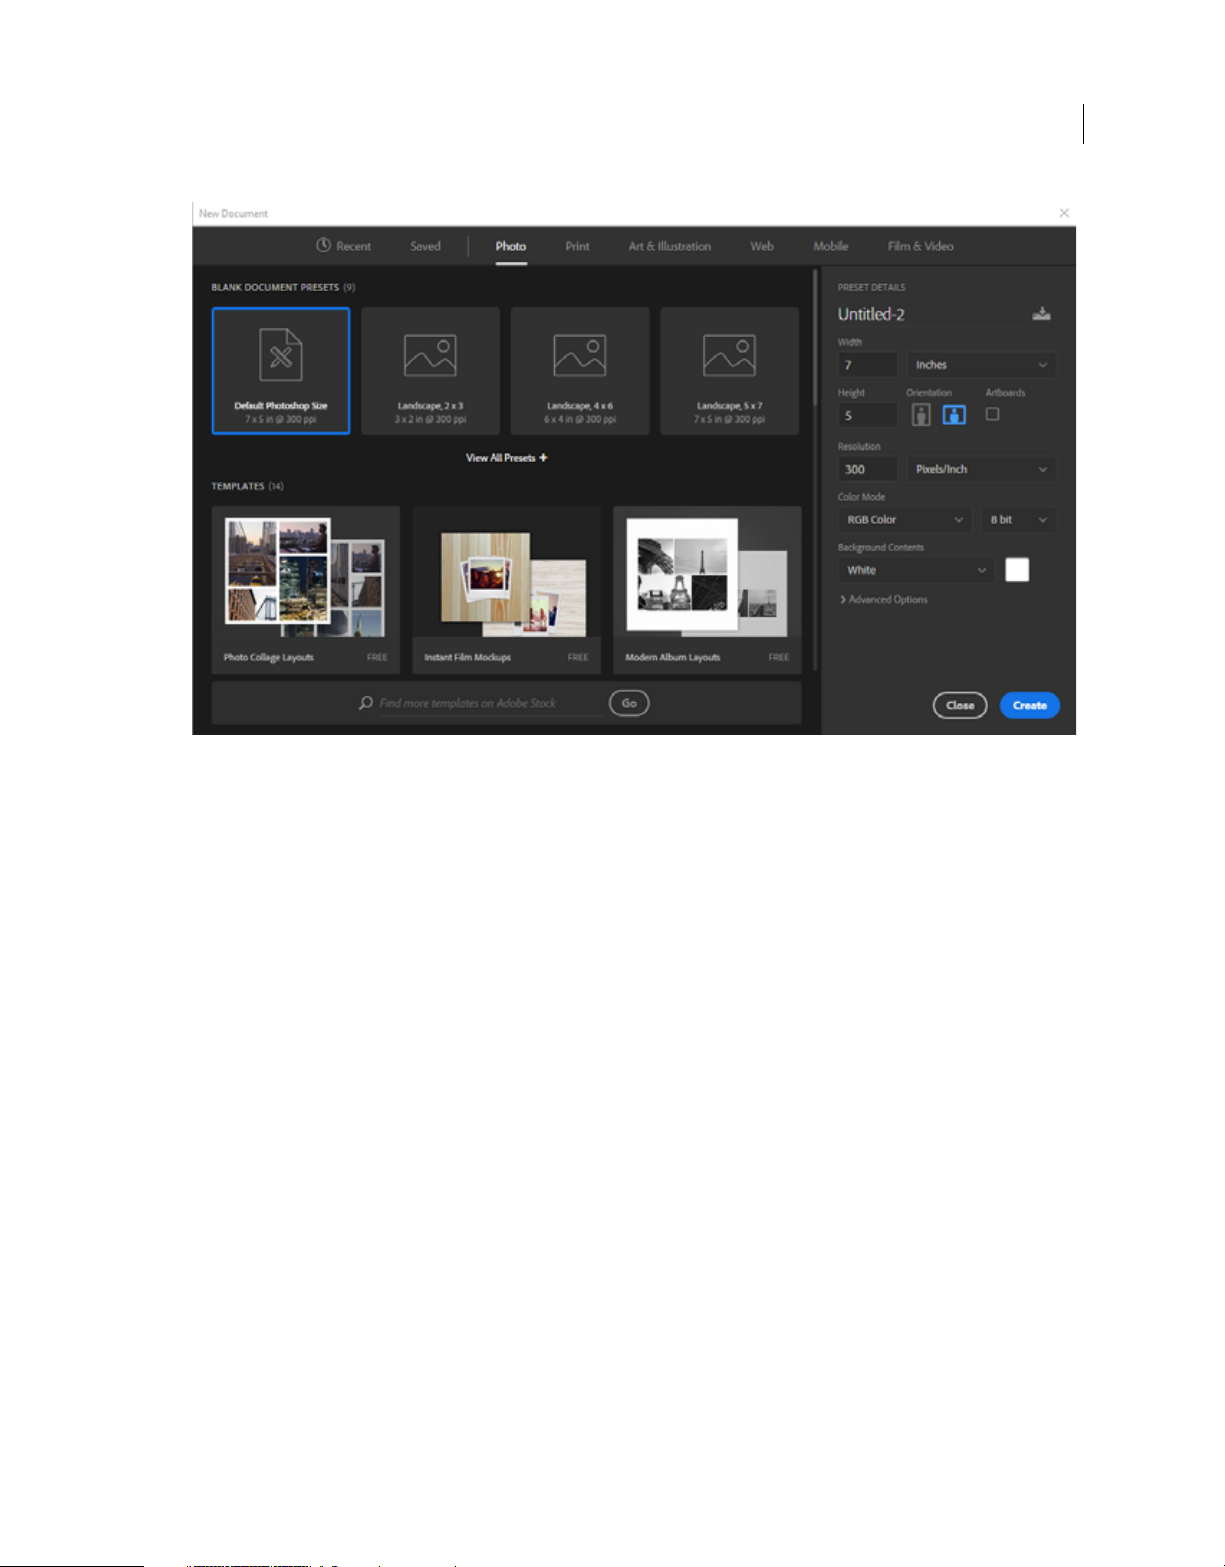
Introduction to Photoshop
20
Photo tab | New Document dialog box
Create documents using presets
1 In the New Document dialog box, click a category tab: Photo, Print, Art & Illustration, Web, Mobile, and Film &
Vi de o.
2 Select a preset.
3 Optionally, change the settings for the selected preset in the Preset Details pane on the right. See Modify presets to
understand how.
4 Click Create. Photoshop opens a new document based on the preset.
Modify presets
Before opening a document using the preset, you can modify its settings in the right pane.
1 Specify a file name for the new document.
Last updated 2/2/2018
Page 31

Introduction to Photoshop
21
The Preset Details pane
2 Specify the following options for the selected preset:
Width and Height: Specify the size of the document. Select the unit from the pop-up menu.
Orientation: Specify a page orientation for the document: Landscape or Portrait.
Artboards: Select this option if you want your document to have artboards. Photoshop adds an artboard while
creating the document.
Color Mode: Specify a color mode for the document. Changing the color mode converts the default contents of
selected new document profile to a new color.
the
Resolution: Specify the fineness of detail in a bitmap image measured in pixels/inch or pixels/centimetre.
Background contents: Specify a background color for the document.
3 To specify the following extra options, click Advanced Options.
Last updated 2/2/2018
Page 32

Introduction to Photoshop
Color Profile: Specify the color profile for your document from a wide range of options.
Pixel Aspect Ratio: Specify the ratio of width to height of a single pixel in a frame.
4 Click Create to open a document with the preset settings.
22
Save your own presets
The Preset Details pane lets you modify an existing preset or specify fresh settings for a new one. To save your custom
settings as a new preset, follow these steps:
1 After you're done specifying the settings, click the icon in the Preset Details pane.
2 Specify a name for the new preset.
3 Click Save Preset.
You can later access the new preset from the Saved tab of the New Document dialog.
Create documents using templates from Stock
Photoshop comes with various templates from Adobe Stock. Templates with font layers use basic fonts or fonts that can
be synced from Adobe Typekit. To create a document using a template, do one of the following:
1 In the New Document dialog, click a category tab: Photo, Print, Art & Illustration, Web, Mobile, and Film & Video.
2 Select a template.
3 Click See Preview to view a preview of the template. A preview is an image representation of a template that you can
review and decide if you want to license that template.
Last updated 2/2/2018
Page 33

Introduction to Photoshop
23
Preview the template before licensing it
4 Click Download.
Last updated 2/2/2018
Page 34

Introduction to Photoshop
Photoshop prompts you to license the template from Adobe Stock. See Adobe Stock Help for more information
about licensing and related considerations. After the template has been licensed using asset entitlements or credits
in your account, you can open it as a Photoshop document
Template licensing in progress
5 After the template has downloaded, click Open. While opening the template, if you're prompted to sync some fonts
from Typekit, click
OK.
for you to work on.
You can now work with the open document in Photoshop just as you would work with any other .psd document.
Notes:
• Downloaded templates are added to a Creative Cloud library called Stock Templates. You can access this library
in the Libraries panel.
• Photoshop templates carry the .psdt filename extension. However, when you open a template, an instance of it is
opened as a .psd document. Changes made to that .psd document don't affect the original .psdt template.
24
Search for more templates from Adobe Stock
Aside from the preselected templates from Adobe Stock, you can search for and download numerous other such
templates directly from within the New Document dialog.
• While working in the New Document dialog, enter a search string in the Find More Template s On Adobe Sto ck box.
Alternatively, simply click Go to browse the full selection of available templates.
Photoshop opens the Adobe Stock website in a new browser window for you to explore. Search for more templates and
download the one that best meets your project's requirements.
Last updated 2/2/2018
Page 35

Introduction to Photoshop
Explore and license templates on the Adobe Stock website
25
Use the legacy File New experience
Although not recommended, you can disable the latest New Document experience and revert to the File New
experience that Photoshop provided by default (in versions CC 2015.5 and earlier).
1 Select Edit > Preferences > General.
2 Select Use Legacy File New Interface. Click OK.
Enable the legacy File New experience (not recommended)
Last updated 2/2/2018
Page 36

Introduction to Photoshop
Note: Yo u can use the keyboard shortcuts for opening files (Ctrl/Cmd+O) or starting new documents (Ctrl/Cmd+N) to
open this dialog box.
FAQ
• What are the available formats for a template?
Templates in Photoshop exist in the .psdt format. When you open a template, Photoshop creates an instance of it as
a document. You can work on and save that
• Can I customize a preset after I have saved it?
You can further customize a saved preset in the Preset Details pane. The new preset, however, must be saved with a
different name.
• Can I customize a template?
No. Any changes you make to the template instance after downloading it aren't applied to the original template.
• I have downloaded templates in Photoshop and Illustrator. Can I use them interchangeably?
The templates that you download in Photoshop and Illustrator are found in Libraries. You can open only.psdt
templates in Photoshop and only.ait templates in Illustrator.
document just as you would work with any other Photoshop document.
26
System requirements | Photoshop
System requirements | October 2017 (19.0) release of Photoshop CC
Windows
• Intel® Core 2 or AMD Athlon® 64 processor; 2 GHz or faster processor
• Microsoft Windows 7 with Service Pack 1, Windows 8.1, or Windows 10
• 2 GB or more of RAM (8 GB recommended)
• 2.6 GB or more of available hard-disk space for 32-bit installation; 3.1 GB or more of available hard-disk space for
64-bit installation; additional free space required during installation (cannot install on a volume that uses a casesensitive file system)
• 1024 x 768 display (1280x800 recommended) with 16-bit color and 512 MB or more of dedicated VRAM; 2 GB is
recommended*
• OpenGL 2.0-capable system
• Internet connection and registration are necessary for required software activation, validation of subscriptions, and
access to online services.**
Note: The Quick Share feature, introduced in the October 2017 release of Photoshop CC, requires Windows 10 Spring
Creators edition version 1703 or later.
macOS
• Multicore Intel processor with 64-bit support
Last updated 2/2/2018
Page 37

Introduction to Photoshop
• macOS version 10.13 (High Sierra), macOS version 10.12 (Sierra), or Mac OS X version 10.11 (El Capitan)
• 2 GB or more of RAM (8 GB recommended)
• 4 GB or more of available hard-disk space for installation; additional free space required during installation (cannot
install on a volume that uses a case-sensitive file system)
• 1024 x 768 display (1280x800 recommended) with 16-bit color and 512 MB or more of dedicated VRAM; 2 GB is
recommended*
• OpenGL 2.0-capable system
• Internet connection and registration are necessary for required software activation, membership validation, and
access to online services.**
* 3D features are disabled on 32-bit platforms and on computers having less than 512MB of VRAM. Oil Paint filter and
video features are not supported on 32-bit Windows systems.
**NOTICE TO USERS. Internet connection, Adobe ID, and acceptance of license agreement required to activate and
use this product. This product may integrate with or allow access to certain Adobe or third-party hosted online
services. Adobe services are available only to users 13 and older and require agreement to additional terms of use and
Adobe’s online privacy policy (see
be available in all countries or languages and may be subject to change or discontinuation without notice. Additional
fees or membership charges may apply.
http://www.adobe.com/aboutadobe/legal.html). Applications and Services may not
27
Language versions
Photoshop CC 2017 is available in the following languages:
Dansk
Deutsch
English
Español
Français
Français*
Hebrew*
Hungarian
Italiano
Nederlands
Norwegian
Polish
Português (Brasil)
Suomi
Svenska
Tu rk i s h
Ukrainian
čeština
Last updated 2/2/2018
Page 38

Introduction to Photoshop
Русский
????*
???
????
????
???
* Arabic and Hebrew supported in a Middle Eastern version with full right-to-left language support, Arabic/Hebrew
features, and an English interface; also in a North African French (Français*) version with full right-to-left language
support, Arabic/Hebrew features, and a French interface.
System requirements | 2017 release of Photoshop CC
Windows
• Intel® Core 2 or AMD Athlon® 64 processor; 2 GHz or faster processor
• Microsoft Windows 7 with Service Pack 1, Windows 8.1, or Windows 10
28
• 2 GB or more of RAM (8 GB recommended)
• 2.6 GB or more of available hard-disk space for 32-bit installation; 3.1 GB or more of available hard-disk space for
64-bit installation; additional free space required during installation (cannot install on a volume that uses a casesensitive file system)
• 1024 x 768 display (1280x800 recommended) with 16-bit color and 512 MB or more of dedicated VRAM; 2 GB is
recommended*
• OpenGL 2.0-capable system
• Internet connection and registration are necessary for required software activation, validation of subscriptions, and
access to online services.**
macOS
• Multicore Intel processor with 64-bit support
• macOS version 10.12 (Sierra), Mac OS X version 10.11 (El Capitan), or Mac OS X version 10.10 (Yosemite)
• 2 GB or more of RAM (8 GB recommended)
• 4 GB or more of available hard-disk space for installation; additional free space required during installation (cannot
install on a volume that uses a case-sensitive file system)
• 1024 x 768 display (1280x800 recommended) with 16-bit color and 512 MB or more of dedicated VRAM; 2 GB is
recommended*
• OpenGL 2.0-capable system
• Internet connection and registration are necessary for required software activation, membership validation, and
access to online services.**
* 3D features are disabled on 32-bit platforms and on computers having less than 512MB of VRAM. Video features are
not supported on 32-bit Windows systems.
Last updated 2/2/2018
Page 39

Introduction to Photoshop
**NOTICE TO USERS. Internet connection, Adobe ID, and acceptance of license agreement required to activate and
use this product. This product may integrate with or allow access to certain Adobe or third-party hosted online
services. Adobe services are available only to users 13 and older and require agreement to additional terms of use and
Adobe’s online privacy policy (see
http://www.adobe.com/aboutadobe/legal.html). Applications and Services may not
be available in all countries or languages and may be subject to change or discontinuation without notice. Additional
fees or membership charges may apply.
Language versions
Photoshop CC 2017 is available in the following languages:
Dansk
Deutsch
English
Español
Français
Français*
Hebrew*
29
Hungarian
Italiano
Nederlands
Norwegian
Polish
Português (Brasil)
Suomi
Svenska
Tu rk i s h
Ukrainian
čeština
Русский
????*
???
????
????
???
* Arabic and Hebrew supported in a Middle Eastern version with full right-to-left language support, Arabic/Hebrew
features, and an English interface; also in a North African French (Français*) version with full right-to-left language
support, Arabic/Hebrew features, and a French interface.
Last updated 2/2/2018
Page 40

Introduction to Photoshop
Graphics processor requirements
Features requiring the graphics processor
A compatible graphics processor (also called a graphics card, video card, or GPU) lets you experience better
performance with Photoshop and use more of its features. Also, display problems, performance issues, errors, or
crashes can occur if your computer’s graphics processor or its driver is incompatible with Photoshop.
Features that won't work without a GPU
If your graphics processor is unsupported or its driver is defective, the following Photoshop features won't work:
• 3D
• Oil Paint
• Render – Flame, Picture Frame, and Tree
• Scrubby Zoom
• Birds Eye View
• Flick Panning
30
• Smooth Brush Resizing
Features that require a GPU for acceleration
• Artboards
• Camera Raw (more information )
• Image Size – Preserve Details
• Select Focus
• Blur Gallery - Field Blur, Iris Blur, Tilt-Shift, Path Blur, Spin Blur (OpenCL accelerated)
• Smart Sharpen (Noise Reduction – OpenCL accelerated)
• Perspective Warp
• Select and Mask (OpenCL accelerated)
Tested graphics card
Adobe has tested the laptop and desktop versions of the following graphics processor card series:
• nVidia GeForce: 400, 500, 600, 700 series
• nVidia GeForce GTX 965M & 980M
• nVidia Quadro: 2000, 4000 (Windows® and Mac OS), CX, 5000, 6000, K600, K2000, K4000, K5000 (Windows® and
Mac OS),
• nVidia GRID K1, K2
• AMD/ATI Radeon: 5000, 6000, 7000, R7, R9 series, 7950 Mac OS
M4000, M5000, P2000, P4000, P5000
• AMD/ATI FirePro: 3800, 4800, 5800, 7800, 8800, 9800, 3900, 4900, 5900, 7900, W8100, W9100, D300, D500, D700
• AMD/ATI FireGL: W5000, W7000, W8000
• AMD RX 480
• nVidia GeForce 1080 GTX
Last updated 2/2/2018
Page 41

Introduction to Photoshop
• Intel® HD Graphics: P530, P630, 5000, 515, 520
• Intel® Iris Pro Graphics: P5200, P6300, P580
• Intel HD Graphics 515 and 520
Note: Tested cards may not meet the minimum bar for use with all GPU features. In addition to basic functionality, some
Photoshop features, especially those which use APIs like OpenCL, require greater bandwidth, memory, or compute
resources than other Photoshop features. These requirements can pose significant challenges when cards are placed in older
machines, such as ones with low-powered motherboards or machines that make use of a single DIMM for their system
memory, effectively halving the bandwidth between the system memory and the GPU memory.Additionally, the relevant
tests are performed when Photoshop starts up. On computers barely meeting the requirements, other running software may
tip the balance from a card passing to failing. At times, OS updates, patches, and driver updates may cause issues with cards
that were previously working fine. We recommend you use the latest system and GPU hardware to make the most of GPU
features in Photoshop.
Note: Ensure that you have the latest driver for your specific graphic processor installed. Laptop and desktop versions of the
graphics processor have slightly different names.
Don't see your card in the list?
The list of graphics processor cards above is updated as newly released cards are tested. However, Adobe cannot test all
cards in a timely manner. If your cards is not listed above, but meets the following requirements, you can assume that
it works with the latest version of Photoshop CC:
31
• The card was released in the year 2014 or afterwards
• It has the minimum amount of graphics processor VRAM required for Photoshop (512 MB). The recommended
amount of VRAM is 2 GB or more, though.
Unsupported card series
The following card series are no longer being tested and are not officially supported in Photoshop:
• AMD/ATI 100, 200, 3000, and 4000 series
• nVidia GeForce 7000, 8000, 9000, 100, 200, 300 series
• Older Intel® HD Graphics (for example 2000, 3000, 4000 series) cards
Some GL functionality may be available for these cards, but newer features won't work.
System Requirements | Adobe Camera Raw
The Adobe Camera Raw plug-in gives you ability to import and work with camera raw files in Photoshop. You can also
use Camera Raw to work with JPEG and TIFF files.
Your computer may need to meet additional system requirements to work efficiently with Adobe Camera Raw. See
Adobe Camera Raw | System requirements for details.
Unsupported video adapters on macOS
Adobe Camera Raw does not support the following video adapters on macOS:
• AMD Radeon HD 6000M series
• Intel HD 3000/4000Windows
• NVIDIA GeForce 9400/9400M
• NVIDIA GeForce 320M
Last updated 2/2/2018
Page 42

Introduction to Photoshop
• NVIDIA GeForce GT 330M
• NVIDIA GeForce GT 120/GT 130
• NVIDIA GeForce 210
• NVIDIA GeForce GTX 260
• NVIDIA GeForce 8600M GT
• NVIDIA GeForce 8800 GT/GS
• NVIDIA GeForce 9600M GT
• NVIDIA GeForce 9800 GT
• NVIDIA Quadro FX 4800N
• NVIDIA GeForce NVS 3100M
System requirements | Older versions of Photoshop
See Older versions of Photoshop | System requirements and supported languages .
32
Migrate presets, actions, and settings
Presets, settings, and actions
Presets are collections of items and values that are applied to artwork in Photoshop. You can save and load presets, or
replace them with custom values at any time. Actions, brushes, and keyboard shortcuts are examples of presets.
Photoshop comes with presets, but you can also create your own.
Settings are actual values that are currently loaded in Photoshop. They control various elements and tools in the
application, such as your current brush and all its values.
Actions are series of tasks that you play back on a single file or a batch of files—menu commands, panel options, tool
actions, and so on. For example, an action can change the size of an image, apply an effect to that image, and then saves
the file in the desired format.
Migrate presets
You can migrate your custom preset collections, as well as some Photoshop presets, from one version of Photoshop to
another on the same computer. The presets you can migrate include:
• Actions
• Brushes
• Black and White (Adjustment)
• Channel Mixer (Adjustment)
• Color Range
• Color Swatches
• Contours
Last updated 2/2/2018
Page 43

Introduction to Photoshop
• Curves (Adjustment)
• Custom Shapes
• Doutone (Mono, Duo, Tri, Quad)
• Exposure (Adjustment)
• Gradients
• HDR Toning (Adjustment)
• Hue and Saturation (Adjustment)
• Keyboard Shortcuts
• Levels (Adjustment)
• Lighting Effects
• Lights (3D)
• Materials (3D)
• Menu Customization
• Patterns
• Render Settings (3D)
• Repousse (3D)
33
• Selective Color (Adjustment)
• Styles
• To o l s
• Vo l u m e s (3D )
Migrate presets while updating Photoshop
By default, when you update to the latest version of Photoshop CC using the Creative Cloud desktop app, your presets,
settings, and preferences are migrated from the earlier version of Photoshop. Also, when you launch Photoshop for the
first time, you're prompted to migrate all available presets from the most recent version of Photoshop installed on your
computer.
Presets can be migrated from the latest version installed before Photoshop CC, going back to Photoshop CS3. To
migrate from multiple versions of Photoshop, migrate presets
Note: You can, however, choose not to migrate them by deselecting Advanced Options > Import Previous Version Settings
And Preferences on the confirmation screen that appears after you click Update in the Creative Cloud desktop app.
sequentially from one version of Photoshop at a time.
Last updated 2/2/2018
Page 44

Introduction to Photoshop
The Creative Cloud desktop app
34
Advanced options available after you click Update in the Creative Cloud desktop app
Migrate presets after installing/updating Photoshop
If you chose not to migrate your presets when you updated Photoshop CC, or if you faced issues while migrating
presets, you can select Edit > Presets > Migrate Presets to migrate presets, settings, and preferences later in Photoshop.
Photoshop looks for an older version of Photoshop on the same system and prompts you to migrate presets.
Export and import presets
You can bring your presets from one computer to another, or to an offline computer, by manually exporting them and
then importing. The Export/Import Presets is not restricted to computers running Photoshop as part of Creative
Cloud.
SOURCE COMPUTER: On the computer that has the presets you want to migrate, do the following:
1 Open Photoshop.
2 Choose Edit > Presets > Export/Import Presets.
3 Choose Export Presets.
4 Select the desired presets and move them to the Presets To Export column.
5 Click Export Presets.
6 Select the folder to export your presets to. Choose a folder you can use to transfer the files using a USB drive,
network, or an online sharing service.
7 Click OK.
TARG ET COMPUTER: On the computer receiving the imported settings, do the following:
1 Choose Edit > Presets > Export/Import Presets.
Last updated 2/2/2018
Page 45

Introduction to Photoshop
2 Select Import Presets.
3 Select the presets you want to import, or click Add All.
4 If you saved your presets to a folder that is not the default, choose Select Import Folder, and select the appropriate
folder.
5 Click Import Presets.
Save and load presets
You can move actions and presets across different versions of Photoshop on same or different desktops by saving them
and loading them into the target application.
SOURCE COMPUTER: On the computer that has the presets you want to migrate, do the following:
1 Open Photoshop.
2 Choose Edit > Presets > Presets Manager.
3 Choose the desired option from the Preset Type drop-down menu. For example, choose Brushes.
4 Select the desired presets. For example, select the brushes that you want to migrate.
5 Click Save Set and then, click Save. For a set of Brushes, then Photoshop creates a .ABR file at the following location
by default:
• (Windows) C:\Users\<username>\AppData\Roaming\Adobe\Adobe Photoshop CC*<version>\Presets\Brushes
35
• (macOS) Applications/Adobe Photoshop <version>/Presets/Brushes
TARG ET COMPUTER: On the computer receiving the imported settings, do the following:
1 Choose Edit > Presets > Presets Manager.
2 Click Load in the Presets Manager dialog box.
3 Select the saved set you want to load.
4 Click Load.
Migrate actions
See Migrate actions .
Manually copy settings
Photoshop has a number of setting files that you can manually copy from one installation to another. These files
include:
• Actions Palette.psp
• Brushes.psp
• Contours.psp
• CustomShapes.psp
• Default Type Styles.psp
• Gradients.psp
• Patterns.psp
• Styles.psp
Last updated 2/2/2018
Page 46

Introduction to Photoshop
• Swatches.psp
• To o l Pr e s et s . ps p
To move these settings to a new installation, copy these files from the following path on the source installation to the
same path on the target installation:
• Mac:<Username>/Library/Preferences/Adobe Photoshop CC*<version> Settings
• Wi n d ow s : C:\Users\<username>\AppData\Roaming\Adobe\Adobe Photoshop CC*<version>\Adobe Photoshop
CC*version Settings
System requirements | Older versions of Photoshop
Note: For system requirements and list of languages supported in the latest version of Photoshop CC, see System
requirements | Photoshop.
Photoshop CC 2015.x system requirements
36
Windows
• Intel® Core 2 or AMD Athlon® 64 processor; 2 GHz or faster processor
• Microsoft Windows 7 with Service Pack 1, Windows 8.1, or Windows 10
• 2 GB of RAM (8 GB recommended)
• 2.6 GB of available hard-disk space for 32-bit installation; 3.1 GB of available hard-disk space for 64-bit installation;
additional free space required during installation (cannot install on a volume that uses a case-sensitive file system)
• 1024 x 768 display (1280x800 recommended) with 16-bit color and 512 MB of dedicated VRAM; 2 GB is
recommended*
• OpenGL 2.0–capable system
• Internet connection and registration are necessary for required software activation, validation of subscriptions, and
access to online services.**
Mac OS
• Multicore Intel processor
• Mac OS X v10.9 (64-bit), v10.10 (64-bit), or v10.11 (64-bit)
• 2 GB of RAM (8 GB recommended)
• 4 GB of available hard-disk space for installation; additional free space required during installation (cannot install
on a volume that uses a case-sensitive file system)
• 1024 x 768 display (1280x800 recommended) with 16-bit color and 512 MB of dedicated VRAM; 2 GB is
recommended*
• OpenGL 2.0–capable system
• Internet connection and registration are necessary for required software activation, membership validation, and
access to online services.**
Last updated 2/2/2018
Page 47

Introduction to Photoshop
* 3D features are disabled on 32-bit platforms and on computers having less than 512MB of VRAM. Video features are
not supported on 32-bit Windows systems.
**NOTICE TO USERS. Internet connection, Adobe ID, and acceptance of license agreement required to activate and
use this product. This product may integrate with or allow access to certain Adobe or third-party hosted online
services. Adobe services are available only to users 13 and older and require agreement to additional terms of use and
Adobe’s online privacy policy (see
http://www.adobe.com/aboutadobe/legal.html). Applications and Services may not
be available in all countries or languages and may be subject to change or discontinuation without notice. Additional
fees or membership charges may apply.
*** Design Space (Preview) may have system requirements in addition to the ones listed above. See Design Space
(Preview) Help for more information.
Language versions
Photoshop CC 2015.x is available in the following languages:
Dansk
Deutsch
English
Español
37
Français
Français*
Hebrew*
Hungarian
Italiano
Nederlands
Norwegian
Polish
Português (Brasil)
Suomi
Svenska
Tu rk i s h
Ukrainian
čeština
Русский
????*
???
????
????
???
Last updated 2/2/2018
Page 48

Introduction to Photoshop
* Arabic and Hebrew supported in a Middle Eastern version with full right-to-left language support, Arabic/Hebrew
features, and an English interface; also in a North African French (Français*) version with full right-to-left language
support, Arabic/Hebrew features, and a French interface.
Photoshop CC 2014 system requirements
Windows
• Intel® Pentium® 4 or AMD Athlon® 64 processor (2 GHz or faster)
• Microsoft® Windows® 7 with Service Pack 1, Windows 8, or Windows 8.1
• 2 GB of RAM (8 GB recommended)
• 2 GB of available hard-disk space for installation; additional free space required during installation (cannot install
on removable flash storage devices)
• 1024 x 768 display (1280x800 recommended) with 16-bit color and 512 MB of VRAM (1 GB recommended)**
• OpenGL 2.0–capable system
• Internet connection and registration are necessary for required software activation, validation of subscriptions, and
access to online services.*
38
Mac OS
• Multicore Intel processor with 64-bit support
• Mac OS X v10.7, v10.8, v10.9, or v10.10
• 2 GB of RAM (8 GB recommended)
• 3.2 GB of available hard-disk space for installation; additional free space required during installation (cannot install
on a volume that uses a case-sensitive file system or on removable flash storage devices)
• 1024 x 768 display (1280x800 recommended) with 16-bit color and 512 MB of VRAM (1 GB recommended)**
• OpenGL 2.0–capable system
• Internet connection and registration are necessary for required software activation, membership validation, and
access to online services.*
* Video features are not supported on 32-bit Windows systems.
* NOTE: Internet connection, Adobe ID, and acceptance of license agreement required to activate and use this product.
This product may integrate with or allow access to certain Adobe or third-party hosted online services. Adobe services
are available only to users 13 and older and require agreement to additional
Applications and services may not be available in all countries or languages and may be subject to change or
discontinuation without notice. Additional fees or membership charges may apply.
** 3D features are disabled and some Mercury Graphics Engine enhanced features may not work with less than 512MB VRAM. Read the
Help article.
terms of use and the Adobe privacy policy.
Language versions
Photoshop CC 2014 is available in the following languages:
Dansk
Deutsch
Last updated 2/2/2018
Page 49

Introduction to Photoshop
English
Español
Français
Français*
Hebrew*
Hungarian
Italiano
Nederlands
Norwegian
Polish
Português (Brasil)
Suomi
Svenska
Tu rk i s h
39
Ukrainian
čeština
Русский
????*
???
????
????
???
* Arabic and Hebrew supported in a Middle Eastern version with full right-to-left language support, Arabic/Hebrew
features, and an English interface; also in a North African French (Français*) version with full right-to-left language
support, Arabic/Hebrew features, and a French interface.
Photoshop CC system requirements
Windows
• Intel® Pentium® 4 or AMD Athlon® 64 processor (2 GHz or faster)
• Microsoft® Windows® 7 with Service Pack 1, Windows 8, or Windows 8.1 *
• 1 GB of RAM
• 2.5 GB of available hard-disk space for installation; additional free space required during installation (cannot install
on removable flash storage devices)
Last updated 2/2/2018
Page 50

Introduction to Photoshop
• 1024 x 768 display (1280 x 800 recommended) with OpenGL® 2.0, 16-bit color, and 512 MB of VRAM (1 GB
recommended)**
• Internet connection and registration are necessary for required software activation, membership validation, and
access to online services.†
Mac OS
• Multicore Intel processor with 64-bit support
• Mac OS X v10.7, v10.8, or v10.9
• 1 GB of RAM
• 3.2 GB of available hard-disk space for installation; additional free space required during installation (cannot install
on a volume that uses a case-sensitive file system or on removable flash storage devices)
• 1024 x 768 display (1280 x 800 recommended) with OpenGL 2.0, 16-bit color, and 512 MB of VRAM (1 GB
recommended)**
• Internet connection and registration are necessary for required software activation, membership validation, and
access to online services.†
* Video features are not supported on 32-bit Windows systems.
** 3D features are disabled with less than 512 MB of VRAM. Read the Help article.
40
† is product may integrate with or allow access to certain Adobe or third-party hosted online services. Adobe online
services, including the Adobe® Creative Cloud™ service, are available only to users 13 and older and require agreement
to additional
countries or languages, may require user registration, and may be subject to change or discontinuation without notice.
Additional fees or membership charges may apply.
terms and Adobe's online privacy policy. The applications and online services are not available in all
Legacy versions
Photoshop CS6
Windows
• Intel® Pentium® 4 or AMD Athlon® 64 processor
• Microsoft® Windows® XP with Service Pack 3 orMicrosoft Windows 7 with Service Pack 1. Adobe® Creative Suite®
5.5 and CS6 applications also support Windows 8 and Windows 8.1. See the CS6 FAQ for more information about
Window s 8 s u pport.*
• 1 GB of RAM
• 1 GB of available hard-disk space for installation; additional free space required during installation (cannot install
on removable flash storage devices)
• 1024 x 768 display (1280 x 800 recommended) with 16-bit color and 512 MB (1 GB recommended) of VRAM
• OpenGL 2.0–capable system
• DVD-ROM drive
• This software doesn't operate without activation. Broadband Internet connection and registration are required for
software activation, validation of subscriptions, and access to online services.
Last updated 2/2/2018
Page 51

Introduction to Photoshop
† Phone activation is not available.
Mac OS
• Multicore Intel processor with 64-bit support
• Mac OS X v10.6.8 or v10.7. Adobe Creative Suite 3, 4, 5, CS5.5, and CS6 applications support Mac OS X v10.8 or
v10.9 when installed on Intel-based systems.**
• 1 GB of RAM
• 2 GB of available hard-disk space for installation; additional free space required during installation (cannot install
on a volume that uses a case-sensitive file system or on removable flash storage devices)
• 1024 x 768 display (1280 x 800 recommended) with 16-bit color and 512 MB (1 GB recommended) of VRAM
• OpenGL 2.0–capable system
• DVD-ROM drive
• This software doesn't operate without activation. Broadband Internet connection and registration are required for
software activation, validation of subscriptions, and access to online services.
† Phone activation is not available.
41
Photoshop CS5
Windows
• Intel® Pentium® 4 or AMD Athlon® 64 processor
• Microsoft® Windows® XP with Service Pack 3; Windows Vista® Home Premium, Business, Ultimate, or Enterprise
with Service Pack 1 (Service Pack 2 recommended); or Windows 7
• 1 GB of RAM
• 1 GB of available hard-disk space for installation; additional free space required during installation (cannot install
on removable flash-based storage devices)
• 1024 x 768 display (1280 x 800 recommended) with qualified hardware-accelerated OpenGL graphics adapter, 16-
bit color, and 256 MB of VRAM
• Some GPU-accelerated features require graphics support for Shader Model 3.0 and OpenGL 2.0
• DVD-ROM drive
• QuickTime 7.6.2 software required for multimedia features
• Broadband Internet connection required for online services*
Mac OS
• Multicore Intel processor
• Mac OS X v10.5.7 or v10.6
• 1 GB of RAM
• 2 GB of available hard-disk space for installation; additional free space required during installation (cannot install
on a volume that uses a case-sensitive file system or on removable flash-based storage devices)
• 1024 x 768 display (1280 x 800 recommended) with qualified hardware-accelerated OpenGL graphics adapter, 16-
bit color, and 256 MB of VRAM
Last updated 2/2/2018
Page 52

Introduction to Photoshop
• Some GPU-accelerated features require graphics support for Shader Model 3.0 and OpenGL 2.0
• DVD-ROM drive
• QuickTime 7.6.2 software required for multimedia features
• Broadband Internet connection required for online services*
*This product may allow you to extend its functionality by accessing certain features that are hosted online, including
CS Live online services ("Online Services"), provided you have a high-speed Internet connection. The Online Services,
and some features thereof, may not be available in all countries, languages, or currencies and may be discontinued in
whole or in part without notice. Use of the Online Services is governed by separate terms of use and by the Online
Privacy Policy, and access to some services may require user registration. Some Online Services, including services that
are initially offered at no charge, may be subject to additional fees and require a separate subscription. For more details
and to review the applicable
terms of use and online privacy policy.
Photoshop CS4
Windows
• 1.8 GHz or faster processor
• Microsoft® Windows® XP with Service Pack 2 (Service Pack 3 recommended) or Windows Vista® Home Premium,
Business, Ultimate, or Enterprise with Service Pack 1 (certified for 32-bit Windows XP and 32-bit and 64-bit
Window s Vi sta)
• 512 MB of RAM (1 GB recommended)
42
• 1 GB of available hard-disk space for installation; additional free space required during installation (cannot install
on flash-based storage devices)
• 1,024 x 768 display (1,280 x 800 recommended) with 16-bit graphics adapter
• Some GPU-accelerated features require graphics support for Shader Model 3.0 and OpenGL 2.0
• DVD-ROM drive
• QuickTime 7.2 software required for multimedia features
• Broadband Internet connection required for online services*
Windows 7 compatibility
Mac OS
• PowerPC® G5 or multicore Intel® processor
• Mac OS X v10.4.11–10.5.4
• 512 MB of RAM (1 GB recommended)
• 2 GB of available hard-disk space for installation; additional free space required during installation (cannot install
on a volume that uses a case-sensitive file system or on flash-based storage devices)
• 1,024 x 768 display (1,280 x 800 recommended) with 16-bit graphics adapter
• Some GPU-accelerated features require graphics support for Shader Model 3.0 and OpenGL 2.0
• DVD-ROM drive
• QuickTime 7.2 software required for multimedia features
• Broadband Internet connection required for online services*
Last updated 2/2/2018
Page 53

Introduction to Photoshop
Snow Leopard compatibility
*This product may allow you to access certain features that are hosted online ("online services"), provided you have a
high-speed Internet connection. The online services, and some features thereof, aren't available in all countries,
languages, or currencies and can be discontinued in whole or in part without notice. Use of the online services is
governed by separate terms of use and by the Adobe Online Privacy Policy. Access to these services sometimes requires
user registration. Some online services, including services that are initially offered at no charge, may be subject to
additional fees. For more details, review the
terms of use and online privacy policy.
Photoshop CS3
Windows
• Pentium 4, Intel Centrino, Intel Xeon, or Intel Core Duo (or compatible) processor
• Microsoft Windows XP with Service Pack 2 or Windows Vista Home Premium, Business, Ultimate, or Enterprise
(certified for 32-bit editions)
• 512 MB of RAM
• 64 MB of video RAM
• 1 GB of available hard-disk space (additional free space required during installation)
43
• 1,024 x 768 monitor resolution with 16-bit graphics adapter
• DVD-ROM drive
• QuickTime 7 software required for multimedia features
• Internet or phone connection required for product activation
• Broadband Internet connection required for Adobe Stock Photos* and other services
Mac OS
• PowerPC G4 or G5 or multicore Intel processor
• Mac OS X v10.4.8-10.5 (Leopard)
• 512 MB of RAM
• 64 MB of video RAM
• 2 GB of available hard-disk space (additional free space required during installation)
• 1,024 x 768 monitor resolution with 16-bit graphics adapter
• DVD-ROM drive
• QuickTime 7 software required for multimedia features
• Internet or phone connection required for product activation
• Broadband Internet connection required for Adobe Stock Photos* and other services
*Online services, including, but not limited to, Adobe Stock Photos and Adobe Connect, may not be available in all
countries, languages, and currencies. Availability of services is subject to change. Use of online services is governed by
terms and conditions of a separate agreement and may be subject to additional fees.
Photoshop CS2
Last updated 2/2/2018
Page 54

Introduction to Photoshop
Windows
• Intel® Xeon™, Xeon Dual, Intel Centrino™, or Pentium® III or 4 processor
• Microsoft® Windows® 2000 with Service Pack 4, or Windows XP with Service Pack 1 or 2
• 320 MB of RAM (384 MB recommended)
• 650 MB of available hard-disk space
• 1,024 x 768 monitor resolution with 16-bit graphics adapter
• CD-ROM drive
• Internet or phone connection required for product activation
Mac OS
• PowerPC® G3, G4, or G5 processor
• Mac OS X v.10.2.8 through v.10.3.8 (10.3.4 through 10.3.8 recommended)
• 320 MB of RAM (384 MB recommended)
• 750 MB of available hard-disk space
• 1,024 x 768 monitor resolution with 16-bit graphics adapter
44
• CD-ROM drive
• Internet or phone connection required for product activation
Photoshop CS
Windows
• Intel Pentium III or 4 processor
• Microsoft Windows 2000 with Service Pack 3 or Windows XP
• 192 MB of RAM (256 MB recommended)
• 280 MB of available hard-disk space
• Color monitor with 16-bit color or greater graphics adapter
• 1,024 x 768 or greater monitor resolution
• CD-ROM drive
• Internet or phone connection required for product activation
Mac OS
• PowerPC G3, G4, or G5 processor
• Mac OS X v.10.2.4, 10.2.5, 10.2.6, or 10.2.7
• 192 MB of RAM (256 MB recommended)
• 320 MB of available hard-disk space
• Color monitor with 16-bit color or greater graphics adapter
• 1,024 x 768 or greater monitor resolution
• CD-ROM drive
Last updated 2/2/2018
Page 55

Introduction to Photoshop
• Internet or phone connection required for product activation
Photoshop 7
Windows
• Pentium III or 4 processor
• Microsoft Windows 98, Windows 98 Second Edition, Windows Millennium Edition, Windows NT with Service
Pack 6a, Windows 2000 with Service Pack 2, or Windows XP
• 128 MB of RAM (192 MB of RAM recommended)
• 280 MB of available hard-disk space
• Color monitor with 16-bit color or greater graphics adapter
• 800 x 600 or greater monitor resolution
• CD-ROM drive
Mac OS
• PowerPC G3, G4, or G4 dual processor
• Mac OS 9.1, 9.2, or Mac OS X v.10.1.3
• 128 MB of RAM (192 MB of RAM recommended)
45
• 320 MB of hard-disk space
• Color monitor with 16-bit color or greater graphics adapter
• 800 x 600 or greater monitor resolution
• CD-ROM drive
Photoshop 6
Windows
• Windows 98, Windows 2000, Windows NT 4.0 with Service Pack 4, 5, or 6a, or Windows Millennium
• Microsoft Windows 98/Millennium/2000/NT 4.0 (Service Pack 4, 5, or 6a required)
• 64 MB of RAM (128 MB of RAM required for running Photoshop and ImageReady concurrently)
• 125 of MB hard-disk space
• Color monitor with 256-color (8-bit) or greater graphics adapter
• 800 x 600 or greater monitor resolution
• CD-ROM drive
Mac OS
• PowerPC based Macintosh computer
• Mac OS software version 8.5, 8.6, or 9.0
• 64 of MB of RAM (with virtual memory on) (128 MB of RAM required for running Photoshop and ImageReady
concurrently)
Last updated 2/2/2018
Page 56

Introduction to Photoshop
• 125 of MB of available hard-disk space
• Color monitor with 256-color (8-bit) or greater graphics adapter
• 800 x 600 or greater monitor resolution
• CD-ROM drive
Photoshop 5.5
Windows
• Pentium or faster Intel processor
• Windows 95, Windows 98, or Windows NT 4.0 or later
• 64 of MB of RAM (96 MB recommended for running Photoshop and ImageReady concurrently)
• 125 of MB of available hard-disk space
• 256-color (8-bit) display adapter (24 bit recommended)
• CD-ROM drive
• Sound card recommended for viewing interactive tutorial files
46
Mac OS
• PowerPC based Macintosh computer
• Apple System Software 7.6 or later
• 64 MB of RAM (96 MB recommended for running Photoshop and ImageReady concurrently)
• 125 MB of available hard-disk space
• Color monitor with 256-color (8-bit) or greater graphics adapter (24-bit color recommended)
• CD-ROM drive
Photoshop 5
Windows
• Pentium or faster Intel processor
• Windows 95 or Windows NT 4.0 or later
• 32 MB of RAM (64 MB recommended)
• 80 MB of available hard-disk space
• 256-color (8-bit) display adapter (24-bit color recommended)
• CD-ROM drive
• Sound card recommended for viewing interactive tutorial files
Mac OS
• PowerPC based Macintosh computer
• Apple System Software 7.5 or later
Last updated 2/2/2018
Page 57

Introduction to Photoshop
• 32 MB of RAM (64 MB recommended)
• 80 MB of available hard-disk space
• Color monitor with 256-color (8-bit) or greater video card (24-bit color recommended)
• CD-ROM drive
Photoshop 4
Windows
• i486 or faster Intel processor
• Windows 3.1 with DOS 5.0, or Windows 95, or Windows NT 3.5.1 or later
• 16 MB of RAM
• 25 of MB available hard-disk space
• 256-color display adapter
• CD-ROM drive
47
Mac OS
• 68030 or greater processor, including Power Macintosh
• Apple System Software 7.1 or later (7.1.2 or later for Power Macintosh)
• 16 MB of RAM
• 25 MB of available hard-disk space
• Color monitor with 8-bit or greater graphics adapter
• CD-ROM drive
Recommendations
• Power Macintosh
• Apple System Software 7.5 or later
• 32 MB of RAM
• 25 MB of available hard-disk space
• Color monitor with 24-bit graphics adapter
• Acceleration products bearing the Adobe Charged logo
Photoshop 3
Windows
• i386, i486, or Pentium processor
• DOS 5.0 or greater
• Microsoft Windows 3.1 or Windows NT 3.5
• 10 MB of RAM (16 MB for Windows NT)
Last updated 2/2/2018
Page 58

Introduction to Photoshop
• Hard disk with at least 20 MB of free space
• 256-color display adapter
Recommendations
• Pentium processor
• DOS 6.0 or greater
• At least 16 MB of RAM (32 MB for Windows NT)
• 24-bit color display adapter
• Sound card and CD-ROM drive
• Acceleration products bearing the Adobe Charged logo
Mac OS
• Macintosh with 68020 or greater processor, including Power Macintosh
• Apple System Software version 7.0 or greater
• 6 MB of application RAM for Macintosh 68020-68040
• 11 MB of application RAM for Power Macintosh
• Hard disk with at least 20 MB of free space for virtual memory
• Recommendations
48
• Macintosh with 68040 or greater processor or Power Macintosh
• Apple System Software version 7.1.2 or greater
• 16 MB of application RAM for Macintosh 68020-68040
• 24 MB of application RAM for Power Macintosh
• Color monitor with 24-bit video card
• CD-ROM drive (for Deluxe CD-ROM)
• Acceleration products bearing the Adobe Charged logoMac OS
Unix
• Sun SPARCstation 2, IPX, or faster workstation
• Solaris 2.3 or 2.4 operating system
• OPEN LOOK or Motif window manager
• CD-ROM drive
• 32 MB of RAM
• 80 MB of swap space
• Hard disk space:
• 32 MB for Adobe Photoshop files and executables (required); 160 MB for Adobe Photoshop sample files and stock
photography files (optional)
• Additional hard disk space is required to accommodate runtime requirements
Last updated 2/2/2018
Page 59

Introduction to Photoshop
Photoshop 2.5
Mac OS
• Macintosh computer with a 68020 or faster processor
• Apple System Software version 6.0.7 or greater
• 32-bit QuickDraw extension (included)
• 3 MB of application RAM
• Hard disk
• Recommendations
• 68030 or faster processor
• Apple System Software version 7 or greater
• 4 to 8 MB or more of application RAM
• Color monitor with 24-bit video card
• Acceleration products bearing the Adobe Charged logo
49
• Supports ColorSync, Apple's color management software
• TWAIN compatible
Unix
• Sun SPARCstation 2, IPX, or faster workstation
• Solaris 2.3 operating system
• Open Windows or Motif window manager
• 32 MB of RAM
• Hard disk
• CD-ROM drive
• Recommendations
• Sun SPARCstation 10 or 10SX
• 48 MB of RAM or more
• 24-bit color capability
• Acceleration products bearing the Adobe Charged logo
Photoshop 2
Mac OS
• Macintosh II product line or SE product line with at least 2 MB of RAM, system 6.0.4 (or later) and a hard disk.
• Recommendations
Last updated 2/2/2018
Page 60

Introduction to Photoshop
• 68020 processor or greater, a color monitor and 4 MB of RAM.
Photoshop 1
Mac OS
• Macintosh II product line or SE product line with at least 2 MB of RAM, system 6.0.3 (or later) and a hard disk.
• Recommendations
• 68020 processor or greater and color monitor.
50
Last updated 2/2/2018
Page 61

Chapter 2: Photoshop and Adobe services
Photoshop and Adobe Stock
51
Adobe Stock provides designers and businesses with access to millions of high-quality, curated, royalty-free photos,
videos, illustrations, and vector graphics for all their creative projects. You can purchase Adobe Stock on an as-needed
basis as a single asset or you can purchase a multi-asset subscription. A number of subscription packages are available.
Use templates from Adobe Stock
Templates from Adobe Stock are available from right within the New Document dialog box in Photoshop. While
creating a document, instead of beginning with a blank canvas, you can choose from a wide variety of these templates
that include stock images, illustrations, and graphics.
Once you license and open a template, you can work with it just as you would work with any other Photoshop
document.
For details, see Create documents.
Last updated 2/2/2018
Page 62

Photoshop and Adobe services
52
New Document dialog | Templates from Adobe Stock
Search for stock images from within Photoshop
• In Photoshop, select File > Search Adobe Stock.
Use stock images in your Photoshop documents
Adobe Stock is deeply integrated with Creative Cloud Libraries. You can add a watermarked stock asset to any of your
libraries directly using the Adobe Stock website. You can then use the watermarked asset in your Photoshop documents
as a library-linked asset.
Last updated 2/2/2018
Page 63

Photoshop and Adobe services
When you choose to license the asset—which you can do directly from within Photoshop—all instances of the
watermarked asset in your open documents are updated to the high-resolution licensed asset.
For more information, see Use Adobe Stock in apps supporting Creative Cloud Libraries .
See also
• Create documents
• Photoshop and design
• Creative Cloud Libraries
Creative Cloud Libraries in Photoshop
Creative Cloud Libraries is a web service that allows you to access your assets across various Adobe desktop and mobile
applications. You can add graphics, colors, text styles, brushes, and layer styles to libraries in Photoshop and then easily
access those elements in several Creative Cloud apps.
A first look at Creative Cloud Libraries
53
A Libraries list | B Search C Assets | D Library from Document E Add graphics | F Add character style | G Add layer style | H Add foreground
color | I
Libraries sync status | J Delete | K Show items in a list | L Libraries options | M Show items as icons
Create a library
1 In Photoshop, select Window > Libraries.
2 In the Libraries panel, select Create New Library from the pop-up menu.
Last updated 2/2/2018
Page 64

Photoshop and Adobe services
Create a library
?
In the dialog box that appears, enter a name for the new library and click Create.
The new library is now available in the Libraries panel.
Create new library from a document
When you open a document containing assets that can be automatically added to a library, Photoshop prompts you to
create a new library. There are four types of assets that can be automatically added to a library from a document:
• Character styles
• Colors
• Layer styles
• Smart objects
Based on the contents of the document, Photoshop shows you the count for each type of asset.
54
Last updated 2/2/2018
Page 65

Photoshop and Adobe services
55
Create new library from a document
You can also create a new library from a document in one of the following ways:
• From the Libraries panel options, select Create New Library From Document
• Click the Library from Document ( ) icon at the bottom of the Libraries panel.
• Click Library from Document in the Libraries panel. This option is available only if your current library is empty.
Last updated 2/2/2018
Page 66

Photoshop and Adobe services
Linked and unlinked assets
You can use assets in libraries as linked assets or unlinked assets in your Photoshop documents. Library-linked assets
are instances that stay associated with the original asset in the library. When the original asset in the library is updated,
its instances in your Photoshop documents are automatically updated. Any effects that you applied to the instances are
retained as well. Library-linked assets are similar in their behavior to Linked Smart Objects.
56
Unlinked assets, on the other hand, are embedded in your Photoshop documents and are decoupled from the original
asset in the library. Unlinked assets are not updated automatically when the original asset changes.
Use library-linked assets in your Photoshop document
• In the Libraries panel, right-click an asset in a library and select Place Linked from the context menu.
Photoshop places the asset in your Photoshop document as a new layer. The layer thumbnail displays a cloud icon ( )
indicating that the layer is linked to a library asset.
A layer containing a library-linked asset
Last updated 2/2/2018
Page 67

Photoshop and Adobe services
File sync
Creative sync makes your libraries accessible across multiple applications, devices, and the web automatically. For
cross-device syncing to work, file sync must be enabled in the Creative Cloud desktop app. You can check the status of
library syncing by the Creative Cloud icon in the Libraries panel.
Library sync status
A Sync enabled B Sync disabled
On your local desktop machine all apps share a single local cache for your libraries data. This enables optimal use of
disk space and network bandwidth as well as near-instant propagation of libraries changes between local apps, even
when you are not connected to the network.
Turn on file sync
• In the Creative Cloud Desktop app, select > Preferences.
• Select Creative Cloud > Files.
• For the Sync ON/OFF setting, select On.
When you turn on file sync, libraries start syncing. Your libraries are kept up to date across devices. File syncing may
take some time, depending on the volume of content in your libraries.
57
Syncing libraries
Add assets to the library
Open the file containing your assets. You can add graphics, colors, text styles, and layer styles to the library. You can
also add assets to the library from
Add graphics
1 Select the appropriate layers or layer groups containing the graphic asset in the Layers panel.
2 Select the Move tool. .
3 Drag and drop the layers or layer groups into the Libraries panel.
The graphic asset is now available in the library.
Creative Cloud Market.
Last updated 2/2/2018
Page 68

Photoshop and Adobe services
Graphic assets added to a library.
Add layer styles, character styles, and colors
1 In the Layers panel, select the appropriate layer containing the asset.
2 Click an icon in the Libraries panel.
58
Add layer styles, character styles, or colors
A Add Character Style | B Add Layer Style | C Add Color
The assets are now available in the library.
Note: Layer Styles apply only to Photoshop layers. Although you can add these styles to a library, you cannot use them in
other Creative Cloud desktop applications that support Creative Cloud Libraries.
You can also drag brush presets from Brush Presets panel, layers from Layers panel, colors from Swatches panel, and
layers styles from Styles panel and drop them in the Libraries panel.
Add assets from Adobe Stock
Last updated 2/2/2018
Page 69

Photoshop and Adobe services
Adobe Stock is deeply integrated with Creative Cloud Libraries. You can add a watermarked stock image to any of your
libraries directly using the Adobe Stock website. You can then use the watermarked image in your Photoshop
documents as a library-linked asset.
When you choose to license the image—which you can do directly from within the Libraries panel in Photoshop—all
instances of the watermarked asset in your open documents are updated to the high-resolution licensed image.
For more information, see these resources:
• Use Adobe Stock in apps supporting Creative Cloud Libraries
Add assets from Creative Cloud Market
You can use the Creative Cloud for desktop app to browse and add assets from Creative Cloud Market.
1 Launch the Creative Cloud for desktop app.
2 Go to the Assets tab and select Market.
59
Creative Cloud for desktop
1 Browse and select the asset you want to add to the library.
2 Select the library you created in Adobe Photoshop from the pop-up menu.
Add asset from Creative Cloud Market
The asset is now available in the library.
Last updated 2/2/2018
Page 70

Photoshop and Adobe services
Add assets from other Adobe applications
You can add assets from other Adobe applications, such as Adobe Illustrator, and mobile applications, such as Adobe
Brush. Creative Cloud keeps all the assets in sync and you can use these assets in Photoshop.
For more information, see Apps supporting Creative Cloud Libraries .
Library search
60
Adobe Stock search from Libraries panel
The search box in the Libraries panel enables you to search for the right asset, quickly and efficiently. You can modify
your search based on the following available options:
Adobe Stock Search for the assets in Adobe Stock from directly within the Libraries panel.
Current Library Perform a search for your asset within your current library.
All Libraries Perform a search for your asset across all your libraries.
Find stock images visually similar to a library element
The visual search functionality in the Libraries panel lets you quickly find stock images similar to a library element.
Follow these steps:
• In the Libraries panel, right-click an element and then select Find Similar from the context menu.
Photoshop displays the search results right within the Libraries panel.
Last updated 2/2/2018
Page 71

Photoshop and Adobe services
Use the Adobe Color Themes extension
61
The Adobe Color service helps you choose harmonious and appealing color combinations for your design projects.
Adobe Color is integrated right within Photoshop in the form of an extension that lets you create, save, and access your
color themes. You can also explore the many public color themes available on Adobe Color and filter them in several
ways: Most Popular, Most Used, Random, themes you've published, or themes you've appreciated in the past. Once
you've found a theme that you like; you can edit it and and save it to your themes, or add it to your swatches in
Photoshop.
Aside from Photoshop, the Adobe Color Themes extension is currently available in three other Creative Cloud desktop
applications: Adobe Illustrator, Adobe InDesign and Adobe After Effects. Themes saved to Creative Cloud libraries
from within these desktop apps, mobile apps such as Capture CC, or using the
seamlessly in Photoshop.
Additionally, Adobe Color Themes panel is your portal to groups of colors, or themes, created by an online community
of designers. Using the Adobe Color Themes panel, you can create or edit thousands of themes, and then use them in
your projects.
You can also use the this panel to share your themes with the community by uploading them.
Adobe Color website are accessible
Access the Adobe Color Themes panel
• In Photoshop, select Window > Extensions > Adobe Color Themes.
Last updated 2/2/2018
Page 72

Photoshop and Adobe services
Explore color themes
Explore themes
1 Click the Explore tab in the Adobe Color Themes panel. By default, the Explore tab displays all public color themes.
2 If necessary, filter the color themes by a category and a timeframe. Use the search bar if you're looking for a specific
theme.
62
Work with the color theme
Once you've found a theme that you like; click icon to choose the desired option from the flyout menu of a color
theme using the Adobe Color Themes panel:
Options available for color themes under the Explore tab
Edit This Theme Opens the selected color theme in the Create tab of the Adobe Colors Theme panel. You can modify
and work with the colors present in the theme as desired and save it in your Creative Cloud Libraries.
Note: Alternatively, you can click the name of a color theme to edit it.
Add To Swatches Saves the selected color theme in the Swatches panel.
View Online View the color theme and related information, such as who created this color theme, the date of sharing
this color theme, ratings and reviews, and so on in your browser. You can also appreciate, save, share, and edit this
theme from your browser.
Last updated 2/2/2018
Page 73

Photoshop and Adobe services
63
View a color theme online
Create and save a color theme
1 Click the Create tab in the Adobe Color Themes panel.
2 Select the color rule on which you want to base the theme: Analogous, Monochromatic, Triad, Complementary,
Compound, Shades, or Custom. For details, see
?
Now, choose a base color by clicking the little triangle corresponding to a color in the theme you're editing. Based
upon the color rule selected, a color theme is automatically built around the base color.
Choose a base color
While a color is selected, you can adjust it either using the color wheel or by changing its value in one of the following
color systems: CMYK, RGB, LAB, HSB, or HEX.
1 (Optional) You can choose one of the following options while creating a color theme:
• Click the Set Selected Color From Active Color icon ( ) to add the active color from Illustrator workspace to
your color theme.
• Click the Click To Set Active Color icon ( ) to set the active color in the Illustrator workspace from your color
theme.
• Click the Add To Swatches icon ( ) to add your color theme to the Swatches panel.
Color rules.
2 Enter a name for the new color theme. Click Save.
Last updated 2/2/2018
Page 74

Photoshop and Adobe services
3 Choose the Creative Cloud library to which you want to save the theme.
Save the new theme to a library
?
Click Save.
Note: Depending on whether you're logged in using your Adobe ID or your enterprise credentials, different sets of libraries
may be available for saving themes. Select Help > Manage My Account to check the credentials with which you're logged
in. If you land at the authentication screen for your organization when you select this option, you're logged in using your
enterprise credentials.The same email ID may be associated with an Adobe ID as well as an enterprise ID.
64
Color rules
Analogous Uses colors that are adjacent on the color wheel. Analogous colors usually blend well with one another and
are harmonious and pleasing to the eye.
Last updated 2/2/2018
Page 75

Photoshop and Adobe services
65
Example: Analogous color rule
Monochromatic Uses variations in saturation and brightness of a single color. When you use this color rule, you're
presented with five colors sharing the same hue (example: H:182) but different saturation and brightness values.
Monochromatic colors go well together and produce a soothing effect.
Last updated 2/2/2018
Page 76

Photoshop and Adobe services
66
Example: Monochromatic color rule
Tri ad Uses colors evenly spaced around three equidistant points on the color wheel. When you use this color rule,
you're presented with two colors with the same hue but different saturation and brightness values from the first point
on the color wheel (example: HSB: 182, 90, 45 & HSB: 182, 100, 75), two from the second point on the color wheel (HSB:
51, 90, 55 & HSB: 51, 95, 45), and one color from the third point (HSB: 321, 90, 79). Triadic colors tend to be
contrasting—albeit not as contrasting as complementary colors—while still retaining harmony when used together.
Last updated 2/2/2018
Page 77

Photoshop and Adobe services
67
Example: Triad color rule
Last updated 2/2/2018
Page 78

Photoshop and Adobe services
68
Example: Monochromatic color rule
Complementary Uses colors opposite to each other on the color wheel. When you use this color rule, you are presented
with two colors with the same hue as the base color (example: HSB: 182, 100, 45 & HSB: 182, 90, 100), the base color
itself (HSB: 182, 100, 75), and two colors with the same hue from the opposite point on the color wheel (HSB: 23, 100,
45 & HSB: 23, 100, 75). Complementary colors provide high contrast and tend to stand out when used together.
Last updated 2/2/2018
Page 79

Photoshop and Adobe services
69
Example: Complementary color rule
Compound Uses a mix of complementary and analogous colors. When you use this color rule, you are presented with
two colors with the same hue that are adjacent (analogous) to the base color (example: HSB: 214, 90, 95 & HSB: 214,
60, 35), the base color itself (HSB: 182, 100, 75), and two colors opposite to the base color (complementary) but adjacent
to each other (HSB: 15, 75, 78 & HSB: 6, 90, 95). Compound color themes have the same strong visual contrast as
complementary color themes, but they have less pressure.
Last updated 2/2/2018
Page 80

Photoshop and Adobe services
70
Example: Compound color rule
Shades Uses five colors—all sharing the same hue (example: H: 182) and saturation (S: 100) but different brightness
values.
Last updated 2/2/2018
Page 81

Photoshop and Adobe services
71
Shades color rule
Custom Lets you manually select the colors on the color wheel in your palette without any rules controlling them.
Last updated 2/2/2018
Page 82

Photoshop and Adobe services
72
Custom color rule
Access themes saved to your libraries
Access your themes
1 In the Adobe Color Themes panel, click the My Themes tab.
2 Select the Creative Cloud library from which you want to access the color theme.
3 If necessary, select a sorting parameter/order for the listed themes: By Date, By Name, or By Quantity; ascending or
descending.
Last updated 2/2/2018
Page 83

Photoshop and Adobe services
Touch capabilities and customizable workspaces
Photoshop now features a modern user experience that provides robust touch capabilities, an updated UI, and
customizable toolbar and workspaces.
Touch workspace and gestures
If you own a Photoshop-supported Windows-powered device, such as the Surface Pro, you can use these touch gestures
while using Photoshop on it.
Two -Finger Pan
73
Move two fingers in any direction on the canvas without changing the distance between them or the angle of the line
connecting them. You may, this way, pan the canvas view.
Two-Finger Pan and Zoom
Move two fingers toward or away from each other. You may, this way, pan or zoom the canvas view (scaled).
Two-Finger Pan and Rotate
Rotate two fingers around the center of the line connecting them. You may, this way, pan and rotate the canvas.
Last updated 2/2/2018
Page 84

Photoshop and Adobe services
Five-Finger Cycle Screen Mode
Tap once with five fingers to cycle through the three application display screen modes, including full screen.
74
Two-Finger Reset or Restore View
Double-tap two fingers on the tablet surface to reset the view to an unrotated transform that nearly fills the document
canvas. Double-tap with two fingers again to restore the view to its previous state.
Three-Finger Step Back in History (Undo)
Move three fingers rapidly from right to left. The document view moves back one step in the change history.
Three-Finger Step Forward in History (Redo)
Last updated 2/2/2018
Page 85

Photoshop and Adobe services
Move three fingers rapidly from left to right. The document view moves forward one step in the change history.
Three-Finger History Scrub
Move three fingers from right to left or from left to right. The document view moves continuously through the entire
change history.
75
Two-Finger Free Transform (Pan, Zoom, and Rotate)
• Place two fingers on the tablet surface and rest motionless for a moment.
• Rotate the two fingers around the center of the line connecting them while simultaneously moving them nearer to
or farther from each other.
You may, this way, freely pan, zoom, and rotate the canvas view.
Customizable toolbar and workspaces
Photoshop now features an updated UI. In addition to look-and-feel improvements, it now lets you customize your
toolbar and save multiple toolbar configurations as parts of different workspaces. Also, included Photoshop workspaces
have been streamlined to give you quick access to only the tools you need.
Customize the toolbar .
Last updated 2/2/2018
Page 86

Photoshop and Adobe services
Customize your toolbar
76
Last updated 2/2/2018
Page 87

Chapter 3: Photoshop and mobile apps
Photoshop family of mobile apps
Adobe Photoshop Fix
Use Adobe Photoshop Fix to combine the power of Adobe Photoshop desktop software with the convenience of
mobile for a creative, easy-to-use photo retouching experience on your iPhone or iPad. Heal, smooth, liquify, lighten,
and make other edits and adjustments to your photos to get the precise look you want. What’s more, the Adobe
Creative Cloud connected workflows in Fix open up limitless creative possibilities.
Download: iTunes
Adobe Photoshop Fix FAQ
Get started with Photoshop Fix
Adobe Photoshop Mix
77
Use Adobe Photoshop Mix to combine the power of Adobe Photoshop software with the convenience of mobile for
a creative, easy-to-use photo editing experience on your iPhone, iPad, or Android phone. The ability to cut out
images, mix them, and edit images non-destructively means your original photo stays untouched. Additionally, the
Creative Cloud-connected workflows in Mix open up limitless creative possibilities.
Download: iTunes | Google Play
Adobe Photoshop Mix FAQ
Get started with Photoshop Mix
Adobe Preview CC
Adobe Preview CC is a Photoshop companion iOS app that lets you preview designs in real-time as you edit them in
Photoshop. Using Preview CC, you can make sure designs appear on actual devices exactly how you want them to
appear. Preview CC speeds up the design process and reduces the time required to test on multiple screen sizes. If
you have a document with artboards, Device Preview attempts to show you the correct artboard by matching the
size and position of the artboard with the size of the connected device.
Download: iTunes
Adobe Preview CC FAQ
Photoshop Help | Device Preview
Adobe Lightroom for mobile
Bring beautiful images to light with Adobe Lightroom. Powered by the magic of Adobe Photoshop technology,
Lightroom for mobile enables you to craft and share professional-quality images from your smartphone or tablet.
And when you’re ready to take your photography further, our trial of the Adobe Creative Cloud Photography plan
enables you to view, organize, edit, and share your photography across mobile devices, desktop, and the web. It’s all
your photography—all in one place.
Download: iTunes | Google Play
Adobe Lightroom for mobile FAQ
Get started with Lightroom for mobile
Adobe Photoshop Sketch
Last updated 2/2/2018
Page 88

Photoshop and mobile apps
Adobe Photoshop Sketch brings inspiration, expressive drawing, and your creative community together in one
place on your iPhone or iPad. Turn your ideas into sketches and share them on Behance for instant feedback. Sketch
gives you the freedom to find inspiration, explore ideas, and get feedback from trusted peers—wherever you are.
Download: iTunes
Adobe Photoshop Sketch FAQ
Get started with Photoshop Sketch
See also:
Photoshop and design Download URLs for all Adobe mobile apps
78
Last updated 2/2/2018
Page 89

Chapter 4: Workspace
Workspace basics
Note: If you're wondering whether Photoshop or Lightroom is the right application for your requirements, this article will
help you decide:
You create and manipulate your documents and files using various elements, such as panels, bars, and windows. Any
arrangement of these elements is called a workspace. (The workspaces of different Adobe creative applications share
similar appearances so that you can move between the applications easily.) You can adapt Photoshop to the way you
work by selecting from several preset workspaces or by creating one of your own.
Start workspace
The Start workspace in Photoshop gives you quick access to your recent files, libraries, and presets. Depending on your
subscription status, the Start workspace may also display content tailored for your requirements. You can also look for
the right Adobe Stock asset for your project directly from within the Start workspace.
Choosing the right photo app .
79
Photoshop displays the Start workspace at launch or whenever no documents are open.
Note: If necessary, customize the number of recent files displayed. Select Preferences > File Handling and then specify the
desired value (0-100) in the Recent File List Contains... field.
The Start workspace
To quit this workspace, simply press the Esc key.
Last updated 2/2/2018
Page 90

Workspace
Work with the Start workspace
Toggle between tile and list views Click the Tile icon ( ) or the List icon ( ).
Find a stock asset Enter a keyword in the Search Stock field. Photoshop displays the search results from Adobe Stock
in a new browser window.
Access your assets Open a recently-opened file or a library. Else, create a new document using a preset.
Disable the Start workspace
1 Select Preferences > General.
2 Deselect Show Start Workspace When No Documents Are Open.
A first look at the Photoshop working area
A: Tools panel | B: History panel | C: Color panel | D: Creative Cloud Libraries panel | E: Layers panel
Interactive image | Click the highlighted areas in the image to view more information about them
Workspace overview
• The Application bar across the top contains a workspace switcher, menus (Windows only), and other application
controls. On the Mac for certain products, you can show or hide it using the Window menu.
80
• The Tools panel contains tools for creating and editing images, artwork, page elements, and so on. Related tools are
grouped.
• The Options bar Control panel displays options for the currently selected tool.
• The Document window displays the file you’re working on. Document windows can be tabbed and, in certain cases,
grouped and docked.
• Panels help you monitor and modify your work. Panels can be grouped, stacked, or docked.
• The Application frame groups all the workspace elements in a single, integrated window that lets you treat the
application as a single unit. When you move or resize the Application frame or any of its elements, all the elements
within it respond to each other so none overlap. Panels don’t disappear when you switch applications or when you
accidentally click out of the application. If you work with two or more applications, you can position each
application side by side on the screen or on multiple monitors.
If you are using a Mac and prefer the traditional, free-form user interface, you can turn off the Application frame.
Usability features
The Photoshop workspace is easy to use and includes a number of usability features:
• Different brightness levels: Choose Edit > Preference (Windows) or Photoshop > Preferences (Mac OS) and select
a Color Theme swatch in the Interface section.
To quickly decrease brightness, press Shift + 1; to increase brightness, press Shift + 2. (On Mac OS, it’s necessary to also
press the FN key.)
• On-image displays: Stay informed as you use your favorite tools. On-image displays show selection dimensions,
transformation angles, and more. To change the placement of the displays, choose an option from the Show
Transformation Values in the Interface preferences.
• Maximized screen space: Click the button at the bottom of the toolbar to switch between Standard and Fullscreen
display modes.
Last updated 2/2/2018
Page 91

Workspace
• Set UX color: You can customize the interface to sport one of the following color themes: Black, Dark Gray, Medium
Gray and
1 Choose Edit > Preferences > Interface.
2 Choose the desired color theme.
Available Color Theme options
Light Gray.To do this, follow these steps:
Hide or show all panels
• To hide or show all panels, including the Tools panel and Control panel, press Tab .
• To hide or show all panels except the Tools panel and Control panel, press Shift+Tab.
You can temporarily display hidden panels if Auto-Show Hidden Panels is selected in Interface preferences. Move the
pointer to the edge of the application window (Windows) or to the edge of the monitor (Mac OS) and hover over the
strip that appears.
Display panel options
• Click the panel menu icon in the upper-right corner of the panel.
81
Note: You can open a panel menu even when the panel is minimized.
Note: In Photoshop, you can change the font size of the text in panels and tooltips. In the Interface preferences, choose a size
from the UI Font Size menu.
Reconfigure the Tools panel
You can display the tools in the Tools panel in a single column, or side by side in two columns.
• Click the double arrow at the top of the Tools panel.
Manage windows and panels
You can create a custom workspace by moving and manipulating Document windows and panels. You can also save
workspaces and switch among them.
Rearrange, dock, or float document windows
When you open more than one file, the Document windows are tabbed.
• To rearrange the order of tabbed Document windows, drag a window’s tab to a new location in the group.
• To undock (float or untab) a Document window from a group of windows, drag the window’s tab out of the group.
Note: You can also choose Window > Arrange > Float in Window to float a single Document window, or Window >
Arrange > Float All In Windows to float all of the Document windows at once.
• To dock a Document window to a separate group of Document windows, drag the window into the group.
• To create groups of stacked or tiled documents, drag the window to one of the drop zones along the top, bottom, or
sides of another window. You can also select a layout for the group by using the Layout button on the Application bar.
• To switch to another document in a tabbed group when dragging a selection, drag the select ion over the document’s
tab for a moment.
Last updated 2/2/2018
Page 92

Workspace
Dock and undock panels
A dock is a collection of panels or panel groups displayed together, generally in a vertical orientation. You dock and
undock panels by moving them into and out of a dock.
• To dock a panel, drag it by its tab into the dock, at the top, bottom, or in between other panels.
• To dock a panel group, drag it by its title bar (the solid empty bar above the tabs) into the dock.
• To remove a panel or panel group, drag it out of the dock by its tab or title bar. You can drag it into another dock or
make it free-floating.
82
Navigator panel being dragged out to new dock, indicated by blue vertical highlight
Navigator panel in its own dock
You can prevent panels from filling all the space in a dock. Drag the bottom edge of the dock up so it no longer meets
the edge of the workspace.
Move panels
As you move panels, you see blue highlighted drop zones, areas where you can move the panel. For example, you can
move a panel up or down in a dock by dragging it to the narrow blue drop zone above or below another panel. If you
drag to an area that is not a drop zone, the panel floats freely in the workspace.
Note: The position of the mouse (rather than the position of the panel) activates the drop zone, so if you can’t see the drop
zone, try dragging the mouse to the place where the drop zone should be.
• To move a panel, drag it by its tab.
• To move a panel group, drag the title bar.
Last updated 2/2/2018
Page 93

Workspace
Narrow blue drop zone indicates Color panel will be docked on its own above the Layers panel group.
A Title bar B Tab C Drop zone
Press Ctrl (Windows) or Command (Mac OS) while moving a panel to prevent it from docking. Press Esc while moving
the panel to cancel the operation.
Add and remove panels
If you remove all panels from a dock, the dock disappears. You can create a dock by moving panels to the right edge of
the workspace until a drop zone appears.
• To remove a panel, right-click (Windows) or Control-click (Mac) its tab and then select Close, or deselect it from
the Window menu.
• To add a panel, select it from the Window menu and dock it wherever you want.
83
Manipulate panel groups
• To move a panel into a group, drag the panel’s tab to the highlighted drop zone in the group.
Adding a panel to a panel group
• To rearrange panels in a group, drag a panel’s tab to a new location in the group.
• To remove a panel from a group so that it floats freely, drag the panel by its tab outside the group.
• To move a group, drag the title bar (the area above the tabs).
Stack floating panels
When you drag a panel out of its dock but not into a drop zone, the panel floats freely. The floating panel allows you to
position it anywhere in the workspace. You can stack floating panels or panel groups so that they move as a unit when
you drag the topmost title bar.
Last updated 2/2/2018
Page 94

Workspace
Free-floating stacked panels
• To stack floating panels, drag a panel by its tab to the drop zone at the bottom of another panel.
• To change the stacking order, drag a panel up or down by its tab.
Note: Be sure to release the tab over the narrow drop zone between panels, rather than the broad drop zone in a title bar.
• To remove a panel or panel group from the stack, so that it floats by itself, drag it out by its tab or title bar.
Resize panels
• To minimize or maximize a panel, panel group, or stack of panels, double-click a tab. You can also double-click the
tab area (the empty space next to the tabs).
• To resize a panel, drag any side of the panel. Some panels, such as the Color panel cannot be resized by dragging.
Collapse and expand panel icons
You can collapse panels to icons to reduce clutter on the workspace. In some cases, panels are collapsed to icons in the
default workspace.
84
Panels collapsed to icons
Panels expanded from icons
• To collapse or expand all panel icons in a column, click the double arrow at the top of the dock.
• To expand a single panel icon, click it.
Last updated 2/2/2018
Page 95

Workspace
• To resize panel icons so that you see only the icons (and not the labels), adjust the width of the dock until the text
disappears. To display the icon text again, make the dock wider.
• To collapse an expanded panel back to its icon, click its tab, its icon, or the double arrow in the panel’s title bar.
• To add a floating panel or panel group to an icon dock, drag it in by its tab or title bar. (Panels are automatically
collapsed to icons when added to an icon dock.)
• To move a panel icon (or panel icon group), drag the icon. You can drag panel icons up and down in the dock, into
other docks (where they appear in the panel style of that dock), or outside the dock (where they appear as floating
icons).
Comprehensive search
85
Photoshop features powerful search functionality that lets you search across UI elements, documents, Help & learning
content, inspiring Stock assets, and much more—all from within a unified dialog. You can search for items right after
launching Photoshop or when one or more documents are open.
For details, see Photoshop search.
Create documents
When you create a document in Photoshop, instead of beginning with a blank canvas, you can choose from a wide
variety of templates, including templates from Adobe Stock. Templates include stock assets and illustrations that you
can build on to complete your project. When you open a template in Photoshop, you can work with it just as you would
work with any other Photoshop document (.psd).
In addition to templates, you can also create a document by selecting one of the numerous blank presets available in
Photoshop.
For more information, see Create documents.
Last updated 2/2/2018
Page 96

Workspace
86
New Document dialog | Templates from Adobe Stock and blank presets
Save and switch workspaces
By saving the current size and position of panels as a named workspace, you can restore that workspace even if you
move or close a panel. The names of saved workspaces appear in the workspace switcher in the Application bar.
Save a custom workspace
1 With the workspace in the configuration you want to save, choose Window > Workspace > New Workspace.
2 Type a name for the workspace.
3 Under Capture, select one or more options:
Keyboard shortcuts Saves the current set of keyboard shortcuts (Photoshop only).
Menus or Menu Customization Saves the current set of menus.
Display or switch workspaces
Select a workspace from the workspace switcher in the Application bar.
In Photoshop, you can assign keyboard shortcuts to each workspace to navigate among them quickly.
Delete a custom workspace
• Select Manage Workspaces from the workspace switcher in the Application bar, select the workspace, and then click
Delete.
• Select Delete Workspace from the workspace switcher.
• Choose Window > Workspace > Delete Workspace, select the workspace, and then click Delete.
Last updated 2/2/2018
Page 97

Workspace
Restore the default workspace
1 Select the Default or Essentials workspace from the workspace switcher in the application bar.
2 Select Window > Workspace > Reset [Workspace Name].
Restore a saved workspace arrangement
In Photoshop, workspaces automatically appear as you last arranged them, but you can restore the original, saved
arrangement of panels.
• To restore an individual workspace, choose Window > Workspace > Reset [Workspace Name].
• To restore all the workspaces installed with Photoshop, click Restore Default Workspaces in the Interface
preferences.
87
To rearrange the order of workspaces in the application bar, drag them.
Rich tooltips
Figuring out what Photoshop tools do is now easier than ever before! When you hover the pointer over certain tools in
the Tools panel, Photoshop displays a description and a short video of the tool in action.
You can choose not to view rich tooltips. To do so, deselect the Preferences > Tools > Use Rich Tooltips preference.
Rich tooltip: Quick Selection tool
Rich tooltip: Crop tool
Hide tooltips
When you position the pointer over most tools and options, descriptions appear in tooltips by default. If you find
tooltips visually distracting, you can hide them.
In the Interface preferences, deselect Show Tooltips.
Note: Tooltips are not available in some dialog boxes.
Last updated 2/2/2018
Page 98

Workspace
Windows | High-density monitor support and per-monitor scaling
On Windows 10 Creators Update and later versions, Photoshop offers a full range of choices for UI scaling—from 100%
through 400% in 25% increments. This enhancement makes the Photoshop user interface looks crisp and sharp
regardless of the pixel density of your monitor. Photoshop automatically adjusts its resolution based on your Windows
settings.
In addition, you can adjust per-monitor scaling across monitors with different scaling factors. This flexibility ensures
that a high resolution (HiDPI) laptop works seamlessly alongside a lower-resolution desktop monitor, or vice versa. For
example, one of your monitors can have a scale factor of 175%, while another monitor can have a scale factor of 400%.
So, you can choose either the highest-end 13-inch laptops with 4k screens, the more affordable 1080p models, or tap
into 8k desktop monitors, and still have an uncompromised experience within Photoshop.
In Windows, select Start > Settings > System > Display. Now, under Scale And Layout, choose a scaling factor for each
of your displays.
Note: On Windows 10 Creators Update and later versions, the UI Scaling setting in Photoshop (Preferences > Interface >
UI Scaling) still applies to some components, such as the File Info and Camera Raw dialogs. On earlier versions of
Windows, this preference applies to all Photoshop components. When the UI Scaling option is set to Auto, scaling defaults
to the value closest to the primary monitor's OS scaling factor—100 or 200.
88
Use Photoshop with the Touch Bar on MacBook Pro
See Use Photoshop with the Touch Bar on MacBook Pro.
Windows | Modifier Keys palette
The new Modifier Keys palette lets you access frequently-used keyboard modifiers—Shift, Ctrl, and Alt—on
Windows-powered touch devices, such as the Surface Pro.
• Select Window > Modifier Keys.
Last updated 2/2/2018
Page 99

Workspace
Photoshop search
Photoshop features powerful search functionality that lets you search across UI elements, documents, Help & learning
content, inspiring Stock assets, and much more—all from within a unified dialog. You can search for items right after
launching Photoshop or when one or more documents are open.
sort, and import your Lightroom photos into Photoshop.
The in-app search experience also lets you find, filter,
89
Begin searching
In Photoshop, do any of the following:
• Select Edit > Search.
• Use the Cmd/Ctrl+F keyboard shortcut.
• At initial launch, click the Search icon ( ) in the right extremity of the Options bar, to the left of the Workspace
Switcher icon.
Search icon in the Options bar
A Search icon B Wor kspac e swit cher
Note: In earlier releases of Photoshop, Cmd/Ctrl+F used to be the keyboard shortcut for reapplying the last-used filter.
Beginning the
shortcut for reapplying the last-used filter, see
2017 release of Photoshop CC, it invokes the Photoshop search experience.To set a different keyboard
Customize keyboard shortcuts.
Last updated 2/2/2018
Page 100

Workspace
Scope of search
Using the Photoshop search functionality, you can find items across the following:
• UI elements
• To o l s
• Panels, including the Styles panel
• Menu items
• New document presets
• Open documents
• Recent files
• Layers
• Smart objects
• Help & learning content; documentation and instructional tutorials
• Stock assets
• Yo u r Li g htr o om phot o s
• The search scope does not currently include library elements and individual styles.
• The search scope shows menu items that are disabled too.
Note:
90
Search interface
Search tabs
Photoshop organizes search results into the following tabs:
All: Displays, in order, Photoshop UI elements, Help & Learn content, and Adobe Stock assets
Last updated 2/2/2018
 Loading...