

Page 1

Using
ADOBE® PHOTOSHOP® CS5
Page 2

Legal notices
Legal notices
For legal notices, see http://help.adobe.com/en_US/legalnotices/index.html
Last updated 12/5/2011
Page 3

Contents
Chapter 1: What’s new
Chapter 2: Photoshop companion apps
Connecting Photoshop companion apps to Photoshop
Using Adobe Nav
Using Adobe Color Lava
Using Adobe Eazel
Chapter 3: Workspace
Workspace basics
Panels and menus
Tools
. . . . . . . . . . . . . . . . . . . . . . . . . . . . . . . . . . . . . . . . . . . . . . . . . . . . . . . . . . . . . . . . . . . . . . . . . . . . . . . . . . . . . . . . . . . . . . . . . . . . . . . . . . . . . . . . . 24
Viewing images
Image information
Rulers, the grid, and guides
Presets, Preferences, and Plug-ins
Undo and history
Memory and performance
Adobe online services
. . . . . . . . . . . . . . . . . . . . . . . . . . . . . . . . . . . . . . . . . . . . . . . . . . . . . . . . . . . . . . . . . . . . . . . . . . . . . . . . . . . . . . . . . . . . . . . . . . . . . . 4
. . . . . . . . . . . . . . . . . . . . . . . . . . . . . . . . . . . . . . . . . . . . . . . . . . . . . . . . . . . . . . . . . . . . . . . . . . . . . . . . . . . . . . . . . . . . . . . 7
. . . . . . . . . . . . . . . . . . . . . . . . . . . . . . . . . . . . . . . . . . . . . . . . . . . . . . . . . . . . . . . . . . . . . . . . . . . . . . . . . . . . . . . . . . . . . . . . . . . . 9
. . . . . . . . . . . . . . . . . . . . . . . . . . . . . . . . . . . . . . . . . . . . . . . . . . . . . . . . . . . . . . . . . . . . . . . . . . . . . . . . . . . . . . . . . . . . . . . . . . . . 12
. . . . . . . . . . . . . . . . . . . . . . . . . . . . . . . . . . . . . . . . . . . . . . . . . . . . . . . . . . . . . . . . . . . . . . . . . . . . . . . . . . . . . . . . . . . . . . . . . . . . 20
. . . . . . . . . . . . . . . . . . . . . . . . . . . . . . . . . . . . . . . . . . . . . . . . . . . . . . . . . . . . . . . . . . . . . . . . . . . . . . . . . . . . . . . . . . . . . . . . . . . . . . 33
. . . . . . . . . . . . . . . . . . . . . . . . . . . . . . . . . . . . . . . . . . . . . . . . . . . . . . . . . . . . . . . . . . . . . . . . . . . . . . . . . . . . . . . . . . . . . . . . . . . 39
. . . . . . . . . . . . . . . . . . . . . . . . . . . . . . . . . . . . . . . . . . . . . . . . . . . . . . . . . . . . . . . . . . . . . . . . . . . . . . . . . . . . . . . . . . . 42
. . . . . . . . . . . . . . . . . . . . . . . . . . . . . . . . . . . . . . . . . . . . . . . . . . . . . . . . . . . . . . . . . . . . . . . . . . . . . . . . . . . . . 47
. . . . . . . . . . . . . . . . . . . . . . . . . . . . . . . . . . . . . . . . . . . . . . . . . . . . . . . . . . . . . . . . . . . . . . . . . . . . . . . . . . . . . . . . . . . . . . . . . . . . . 52
. . . . . . . . . . . . . . . . . . . . . . . . . . . . . . . . . . . . . . . . . . . . . . . . . . . . . . . . . . . . . . . . . . . . . . . . . . . . . . . . . . . . . . . . . . . . 57
. . . . . . . . . . . . . . . . . . . . . . . . . . . . . . . . . . . . . . . . . . . . . . . . . . . . . . . . . . . . . . . . . . . . . . . . . . . . . . . . . . . . . . . . . . . . . . . . 59
. . . . . . . . . . . . . . . . . . . . . . . . . . . . . . . . . . . . . . . . . . . . . . . . . . . . . . . . . . . . . . . . . 3
iii
Chapter 4: Understanding and opening images
Image essentials
Image size and resolution
Acquiring images from cameras and scanners
Creating, opening, and importing images
Placing files
High dynamic range images
Chapter 5: Color fundamentals
About color
Color modes
Converting between color modes
Choosing colors
Customizing color pickers and swatches
Chapter 6: Color and tonal adjustments
Viewing histograms and pixel values
Understanding color adjustments
Adjusting image color and tone
Targeting images for press
Matching, replacing, and mixing colors
Making quick tonal adjustments
Applying special color effects to images
. . . . . . . . . . . . . . . . . . . . . . . . . . . . . . . . . . . . . . . . . . . . . . . . . . . . . . . . . . . . . . . . . . . . . . . . . . . . . . . . . . . . . . . . . . . . . . . . . . . . . . 60
. . . . . . . . . . . . . . . . . . . . . . . . . . . . . . . . . . . . . . . . . . . . . . . . . . . . . . . . . . . . . . . . . . . . . . . . . . . . . . . . . . . . . . . . . . . . . 63
. . . . . . . . . . . . . . . . . . . . . . . . . . . . . . . . . . . . . . . . . . . . . . . . . . . . . . . . . . . . . . . . . . . . . . . . . . . . . 71
. . . . . . . . . . . . . . . . . . . . . . . . . . . . . . . . . . . . . . . . . . . . . . . . . . . . . . . . . . . . . . . . . . . . . . . . . . . . . . . . . . . . . . . . . . . . . . . . . . . . . . . . . . 76
. . . . . . . . . . . . . . . . . . . . . . . . . . . . . . . . . . . . . . . . . . . . . . . . . . . . . . . . . . . . . . . . . . . . . . . . . . . . . . . . . . . . . . . . . . 78
. . . . . . . . . . . . . . . . . . . . . . . . . . . . . . . . . . . . . . . . . . . . . . . . . . . . . . . . . . . . . . . . . . . . . . . . . . . . . . . . . . . . . . . . . . . . . . . . . . . . . . . . . . 87
. . . . . . . . . . . . . . . . . . . . . . . . . . . . . . . . . . . . . . . . . . . . . . . . . . . . . . . . . . . . . . . . . . . . . . . . . . . . . . . . . . . . . . . . . . . . . . . . . . . . . . . . . 89
. . . . . . . . . . . . . . . . . . . . . . . . . . . . . . . . . . . . . . . . . . . . . . . . . . . . . . . . . . . . . . . . . . . . . . . . . . . . . . . . . . . . . 92
. . . . . . . . . . . . . . . . . . . . . . . . . . . . . . . . . . . . . . . . . . . . . . . . . . . . . . . . . . . . . . . . . . . . . . . . . . . . . . . . . . . . . . . . . . . . . . . . . . . . . . 98
. . . . . . . . . . . . . . . . . . . . . . . . . . . . . . . . . . . . . . . . . . . . . . . . . . . . . . . . . . . . . . . . . . . . . . . . . . . . . 106
. . . . . . . . . . . . . . . . . . . . . . . . . . . . . . . . . . . . . . . . . . . . . . . . . . . . . . . . . . . . . . . . . . . . . . . . . . . . . . . . . 109
. . . . . . . . . . . . . . . . . . . . . . . . . . . . . . . . . . . . . . . . . . . . . . . . . . . . . . . . . . . . . . . . . . . . . . . . . . . . . . . . . . . . 115
. . . . . . . . . . . . . . . . . . . . . . . . . . . . . . . . . . . . . . . . . . . . . . . . . . . . . . . . . . . . . . . . . . . . . . . . . . . . . . . . . . . . . . 121
. . . . . . . . . . . . . . . . . . . . . . . . . . . . . . . . . . . . . . . . . . . . . . . . . . . . . . . . . . . . . . . . . . . . . . . . . . . . . . . . . . . . . . . . . . . 136
. . . . . . . . . . . . . . . . . . . . . . . . . . . . . . . . . . . . . . . . . . . . . . . . . . . . . . . . . . . . . . . . . . . . . . . . . . . . . . 139
. . . . . . . . . . . . . . . . . . . . . . . . . . . . . . . . . . . . . . . . . . . . . . . . . . . . . . . . . . . . . . . . . . . . . . . . . . . . . . . . . . . . . 146
. . . . . . . . . . . . . . . . . . . . . . . . . . . . . . . . . . . . . . . . . . . . . . . . . . . . . . . . . . . . . . . . . . . . . . . . . . . . . . 152
. . . . . . . . . . . . . . . . . . . . . . . . . . . . . . . . . . . . . . . . . . . . . . . . . . . . . . . . . . . . . . . . . . . . . . . . . 69
Last updated 12/5/2011
Page 4

USING PHOTOSHOP
Contents
Chapter 7: Retouching and transforming
Adjusting crop, rotation, and canvas . . . . . . . . . . . . . . . . . . . . . . . . . . . . . . . . . . . . . . . . . . . . . . . . . . . . . . . . . . . . . . . . . . . . . . . . . . . . . . . . . 155
Retouching and repairing images
Correcting image distortion and noise
Adjusting image sharpness and blur
Transforming objects
Content-aware scaling
Liquify filter
. . . . . . . . . . . . . . . . . . . . . . . . . . . . . . . . . . . . . . . . . . . . . . . . . . . . . . . . . . . . . . . . . . . . . . . . . . . . . . . . . . . . . . . . . . . . . . . . . . . . . . . . . 187
Vanishing Point
. . . . . . . . . . . . . . . . . . . . . . . . . . . . . . . . . . . . . . . . . . . . . . . . . . . . . . . . . . . . . . . . . . . . . . . . . . . . . . . . . . . . . . . . . . . . . . . 178
. . . . . . . . . . . . . . . . . . . . . . . . . . . . . . . . . . . . . . . . . . . . . . . . . . . . . . . . . . . . . . . . . . . . . . . . . . . . . . . . . . . . . . . . . . . . . . . 186
. . . . . . . . . . . . . . . . . . . . . . . . . . . . . . . . . . . . . . . . . . . . . . . . . . . . . . . . . . . . . . . . . . . . . . . . . . . . . . . . . . . . . . . . . . . . . . . . . . . . . 193
Create panoramic images with Photomerge
. . . . . . . . . . . . . . . . . . . . . . . . . . . . . . . . . . . . . . . . . . . . . . . . . . . . . . . . . . . . . . . . . . . . . . . . . . . . . . . . . . . . 160
. . . . . . . . . . . . . . . . . . . . . . . . . . . . . . . . . . . . . . . . . . . . . . . . . . . . . . . . . . . . . . . . . . . . . . . . . . . . . . . 170
. . . . . . . . . . . . . . . . . . . . . . . . . . . . . . . . . . . . . . . . . . . . . . . . . . . . . . . . . . . . . . . . . . . . . . . . . . . . . . . . . 173
. . . . . . . . . . . . . . . . . . . . . . . . . . . . . . . . . . . . . . . . . . . . . . . . . . . . . . . . . . . . . . . . . . . . . . . . . . 208
Chapter 8: Selecting and masking
Making selections
Adjusting pixel selections
Moving, copying, and deleting selected pixels
Channel basics
Channel calculations
Saving selections and alpha channel masks
. . . . . . . . . . . . . . . . . . . . . . . . . . . . . . . . . . . . . . . . . . . . . . . . . . . . . . . . . . . . . . . . . . . . . . . . . . . . . . . . . . . . . . . . . . . . . . . . . . . 212
. . . . . . . . . . . . . . . . . . . . . . . . . . . . . . . . . . . . . . . . . . . . . . . . . . . . . . . . . . . . . . . . . . . . . . . . . . . . . . . . . . . . . . . . . . . . 220
. . . . . . . . . . . . . . . . . . . . . . . . . . . . . . . . . . . . . . . . . . . . . . . . . . . . . . . . . . . . . . . . . . . . . . . . 226
. . . . . . . . . . . . . . . . . . . . . . . . . . . . . . . . . . . . . . . . . . . . . . . . . . . . . . . . . . . . . . . . . . . . . . . . . . . . . . . . . . . . . . . . . . . . . . . . . . . . . . 230
. . . . . . . . . . . . . . . . . . . . . . . . . . . . . . . . . . . . . . . . . . . . . . . . . . . . . . . . . . . . . . . . . . . . . . . . . . . . . . . . . . . . . . . . . . . . . . . . 234
. . . . . . . . . . . . . . . . . . . . . . . . . . . . . . . . . . . . . . . . . . . . . . . . . . . . . . . . . . . . . . . . . . . . . . . . . . 236
iv
Chapter 9: Layers
Layer basics
Selecting, grouping, and linking layers
Moving, stacking, and locking layers
Managing layers
Layer opacity and blending
Layer effects and styles
Adjustment and fill layers
Nondestructive editing
Layer comps
Masking layers
. . . . . . . . . . . . . . . . . . . . . . . . . . . . . . . . . . . . . . . . . . . . . . . . . . . . . . . . . . . . . . . . . . . . . . . . . . . . . . . . . . . . . . . . . . . . . . . . . . . . . . . . . 243
. . . . . . . . . . . . . . . . . . . . . . . . . . . . . . . . . . . . . . . . . . . . . . . . . . . . . . . . . . . . . . . . . . . . . . . . . . . . . . . 248
. . . . . . . . . . . . . . . . . . . . . . . . . . . . . . . . . . . . . . . . . . . . . . . . . . . . . . . . . . . . . . . . . . . . . . . . . . . . . . . . . 250
. . . . . . . . . . . . . . . . . . . . . . . . . . . . . . . . . . . . . . . . . . . . . . . . . . . . . . . . . . . . . . . . . . . . . . . . . . . . . . . . . . . . . . . . . . . . . . . . . . . . . 255
. . . . . . . . . . . . . . . . . . . . . . . . . . . . . . . . . . . . . . . . . . . . . . . . . . . . . . . . . . . . . . . . . . . . . . . . . . . . . . . . . . . . . . . . . . 258
. . . . . . . . . . . . . . . . . . . . . . . . . . . . . . . . . . . . . . . . . . . . . . . . . . . . . . . . . . . . . . . . . . . . . . . . . . . . . . . . . . . . . . . . . . . . . . 262
. . . . . . . . . . . . . . . . . . . . . . . . . . . . . . . . . . . . . . . . . . . . . . . . . . . . . . . . . . . . . . . . . . . . . . . . . . . . . . . . . . . . . . . . . . . . 271
. . . . . . . . . . . . . . . . . . . . . . . . . . . . . . . . . . . . . . . . . . . . . . . . . . . . . . . . . . . . . . . . . . . . . . . . . . . . . . . . . . . . . . . . . . . . . . 274
. . . . . . . . . . . . . . . . . . . . . . . . . . . . . . . . . . . . . . . . . . . . . . . . . . . . . . . . . . . . . . . . . . . . . . . . . . . . . . . . . . . . . . . . . . . . . . . . . . . . . . . . 281
. . . . . . . . . . . . . . . . . . . . . . . . . . . . . . . . . . . . . . . . . . . . . . . . . . . . . . . . . . . . . . . . . . . . . . . . . . . . . . . . . . . . . . . . . . . . . . . . . . . . . . 283
Chapter 10: Painting
Painting tools
Brush presets
Creating and modifying brushes
Blending modes
Gradients
. . . . . . . . . . . . . . . . . . . . . . . . . . . . . . . . . . . . . . . . . . . . . . . . . . . . . . . . . . . . . . . . . . . . . . . . . . . . . . . . . . . . . . . . . . . . . . . . . . . . . . . 292
. . . . . . . . . . . . . . . . . . . . . . . . . . . . . . . . . . . . . . . . . . . . . . . . . . . . . . . . . . . . . . . . . . . . . . . . . . . . . . . . . . . . . . . . . . . . . . . . . . . . . . . . 299
. . . . . . . . . . . . . . . . . . . . . . . . . . . . . . . . . . . . . . . . . . . . . . . . . . . . . . . . . . . . . . . . . . . . . . . . . . . . . . . . . . . . . 301
. . . . . . . . . . . . . . . . . . . . . . . . . . . . . . . . . . . . . . . . . . . . . . . . . . . . . . . . . . . . . . . . . . . . . . . . . . . . . . . . . . . . . . . . . . . . . . . . . . . . . 312
. . . . . . . . . . . . . . . . . . . . . . . . . . . . . . . . . . . . . . . . . . . . . . . . . . . . . . . . . . . . . . . . . . . . . . . . . . . . . . . . . . . . . . . . . . . . . . . . . . . . . . . . . . . 315
Filling and stroking selections, layers, and paths
Creating and managing patterns
. . . . . . . . . . . . . . . . . . . . . . . . . . . . . . . . . . . . . . . . . . . . . . . . . . . . . . . . . . . . . . . . . . . . . . . . . . . . . . . . . . . . . 323
Chapter 11: Drawing
About drawing
Drawing shapes
Drawing with the Pen tools
Managing paths
Editing paths
. . . . . . . . . . . . . . . . . . . . . . . . . . . . . . . . . . . . . . . . . . . . . . . . . . . . . . . . . . . . . . . . . . . . . . . . . . . . . . . . . . . . . . . . . . . . . . . . . . . . . . 326
. . . . . . . . . . . . . . . . . . . . . . . . . . . . . . . . . . . . . . . . . . . . . . . . . . . . . . . . . . . . . . . . . . . . . . . . . . . . . . . . . . . . . . . . . . . . . . . . . . . . . 327
. . . . . . . . . . . . . . . . . . . . . . . . . . . . . . . . . . . . . . . . . . . . . . . . . . . . . . . . . . . . . . . . . . . . . . . . . . . . . . . . . . . . . . . . . 331
. . . . . . . . . . . . . . . . . . . . . . . . . . . . . . . . . . . . . . . . . . . . . . . . . . . . . . . . . . . . . . . . . . . . . . . . . . . . . . . . . . . . . . . . . . . . . . . . . . . . 337
. . . . . . . . . . . . . . . . . . . . . . . . . . . . . . . . . . . . . . . . . . . . . . . . . . . . . . . . . . . . . . . . . . . . . . . . . . . . . . . . . . . . . . . . . . . . . . . . . . . . . . . . 339
Converting between paths and selection borders
Adding color to paths
. . . . . . . . . . . . . . . . . . . . . . . . . . . . . . . . . . . . . . . . . . . . . . . . . . . . . . . . . . . . . . . . . . . . . . . . . . . . . . . . . . . . . . . . . . . . . . . 348
. . . . . . . . . . . . . . . . . . . . . . . . . . . . . . . . . . . . . . . . . . . . . . . . . . . . . . . . . . . . . . . . . . . . . . 320
. . . . . . . . . . . . . . . . . . . . . . . . . . . . . . . . . . . . . . . . . . . . . . . . . . . . . . . . . . . . . . . . . . . . 347
Last updated 12/5/2011
Page 5

USING PHOTOSHOP
Contents
Chapter 12: Filters
Filter basics . . . . . . . . . . . . . . . . . . . . . . . . . . . . . . . . . . . . . . . . . . . . . . . . . . . . . . . . . . . . . . . . . . . . . . . . . . . . . . . . . . . . . . . . . . . . . . . . . . . . . . . . . 351
Filter effects reference
Applying specific filters
Add Lighting Effects
. . . . . . . . . . . . . . . . . . . . . . . . . . . . . . . . . . . . . . . . . . . . . . . . . . . . . . . . . . . . . . . . . . . . . . . . . . . . . . . . . . . . . . . . . . . . . . . 356
. . . . . . . . . . . . . . . . . . . . . . . . . . . . . . . . . . . . . . . . . . . . . . . . . . . . . . . . . . . . . . . . . . . . . . . . . . . . . . . . . . . . . . . . . . . . . . 364
. . . . . . . . . . . . . . . . . . . . . . . . . . . . . . . . . . . . . . . . . . . . . . . . . . . . . . . . . . . . . . . . . . . . . . . . . . . . . . . . . . . . . . . . . . . . . . . . . 367
Chapter 13: Type
Creating type
Editing text
Formatting characters
Fonts
Line and character spacing
Formatting paragraphs
Creating type effects
Asian type
. . . . . . . . . . . . . . . . . . . . . . . . . . . . . . . . . . . . . . . . . . . . . . . . . . . . . . . . . . . . . . . . . . . . . . . . . . . . . . . . . . . . . . . . . . . . . . . . . . . . . . . 371
. . . . . . . . . . . . . . . . . . . . . . . . . . . . . . . . . . . . . . . . . . . . . . . . . . . . . . . . . . . . . . . . . . . . . . . . . . . . . . . . . . . . . . . . . . . . . . . . . . . . . . . . . 374
. . . . . . . . . . . . . . . . . . . . . . . . . . . . . . . . . . . . . . . . . . . . . . . . . . . . . . . . . . . . . . . . . . . . . . . . . . . . . . . . . . . . . . . . . . . . . . . 379
. . . . . . . . . . . . . . . . . . . . . . . . . . . . . . . . . . . . . . . . . . . . . . . . . . . . . . . . . . . . . . . . . . . . . . . . . . . . . . . . . . . . . . . . . . . . . . . . . . . . . . . . . . . . . . . 383
. . . . . . . . . . . . . . . . . . . . . . . . . . . . . . . . . . . . . . . . . . . . . . . . . . . . . . . . . . . . . . . . . . . . . . . . . . . . . . . . . . . . . . . . . . 387
. . . . . . . . . . . . . . . . . . . . . . . . . . . . . . . . . . . . . . . . . . . . . . . . . . . . . . . . . . . . . . . . . . . . . . . . . . . . . . . . . . . . . . . . . . . . . . 390
. . . . . . . . . . . . . . . . . . . . . . . . . . . . . . . . . . . . . . . . . . . . . . . . . . . . . . . . . . . . . . . . . . . . . . . . . . . . . . . . . . . . . . . . . . . . . . . . 395
. . . . . . . . . . . . . . . . . . . . . . . . . . . . . . . . . . . . . . . . . . . . . . . . . . . . . . . . . . . . . . . . . . . . . . . . . . . . . . . . . . . . . . . . . . . . . . . . . . . . . . . . . . . 400
Chapter 14: Saving and exporting images
Saving images
Saving PDF files
Saving files in graphics formats
File formats
Metadata and notes
Digimarc copyright protection
Placing Photoshop images in other applications
. . . . . . . . . . . . . . . . . . . . . . . . . . . . . . . . . . . . . . . . . . . . . . . . . . . . . . . . . . . . . . . . . . . . . . . . . . . . . . . . . . . . . . . . . . . . . . . . . . . . . . . 407
. . . . . . . . . . . . . . . . . . . . . . . . . . . . . . . . . . . . . . . . . . . . . . . . . . . . . . . . . . . . . . . . . . . . . . . . . . . . . . . . . . . . . . . . . . . . . . . . . . . . . 411
. . . . . . . . . . . . . . . . . . . . . . . . . . . . . . . . . . . . . . . . . . . . . . . . . . . . . . . . . . . . . . . . . . . . . . . . . . . . . . . . . . . . . . 420
. . . . . . . . . . . . . . . . . . . . . . . . . . . . . . . . . . . . . . . . . . . . . . . . . . . . . . . . . . . . . . . . . . . . . . . . . . . . . . . . . . . . . . . . . . . . . . . . . . . . . . . . . 425
. . . . . . . . . . . . . . . . . . . . . . . . . . . . . . . . . . . . . . . . . . . . . . . . . . . . . . . . . . . . . . . . . . . . . . . . . . . . . . . . . . . . . . . . . . . . . . . . . 433
. . . . . . . . . . . . . . . . . . . . . . . . . . . . . . . . . . . . . . . . . . . . . . . . . . . . . . . . . . . . . . . . . . . . . . . . . . . . . . . . . . . . . . . 435
. . . . . . . . . . . . . . . . . . . . . . . . . . . . . . . . . . . . . . . . . . . . . . . . . . . . . . . . . . . . . . . . . . . . . . 437
v
Chapter 15: Printing
Printing from Photoshop
Printing with color management in Photoshop
Printing images to a commercial printing press
Duotones
. . . . . . . . . . . . . . . . . . . . . . . . . . . . . . . . . . . . . . . . . . . . . . . . . . . . . . . . . . . . . . . . . . . . . . . . . . . . . . . . . . . . . . . . . . . . . . . . . . . . . . . . . . . 455
Printing spot colors
. . . . . . . . . . . . . . . . . . . . . . . . . . . . . . . . . . . . . . . . . . . . . . . . . . . . . . . . . . . . . . . . . . . . . . . . . . . . . . . . . . . . . . . . . . . . 442
. . . . . . . . . . . . . . . . . . . . . . . . . . . . . . . . . . . . . . . . . . . . . . . . . . . . . . . . . . . . . . . . . . . . . . . 446
. . . . . . . . . . . . . . . . . . . . . . . . . . . . . . . . . . . . . . . . . . . . . . . . . . . . . . . . . . . . . . . . . . . . . . . 450
. . . . . . . . . . . . . . . . . . . . . . . . . . . . . . . . . . . . . . . . . . . . . . . . . . . . . . . . . . . . . . . . . . . . . . . . . . . . . . . . . . . . . . . . . . . . . . . . . . 458
Chapter 16: Web graphics
Working with web graphics
Slicing web pages
Modifying slice layout
HTML options for slices
. . . . . . . . . . . . . . . . . . . . . . . . . . . . . . . . . . . . . . . . . . . . . . . . . . . . . . . . . . . . . . . . . . . . . . . . . . . . . . . . . . . . . . . . . . . . . . . . . . . 464
. . . . . . . . . . . . . . . . . . . . . . . . . . . . . . . . . . . . . . . . . . . . . . . . . . . . . . . . . . . . . . . . . . . . . . . . . . . . . . . . . . . . . . . . . . 462
. . . . . . . . . . . . . . . . . . . . . . . . . . . . . . . . . . . . . . . . . . . . . . . . . . . . . . . . . . . . . . . . . . . . . . . . . . . . . . . . . . . . . . . . . . . . . . . 467
. . . . . . . . . . . . . . . . . . . . . . . . . . . . . . . . . . . . . . . . . . . . . . . . . . . . . . . . . . . . . . . . . . . . . . . . . . . . . . . . . . . . . . . . . . . . . . 471
Chapter 17: Video and animation
Video and animation overview
Creating images for video
. . . . . . . . . . . . . . . . . . . . . . . . . . . . . . . . . . . . . . . . . . . . . . . . . . . . . . . . . . . . . . . . . . . . . . . . . . . . . . . . . . . . . . . 475
. . . . . . . . . . . . . . . . . . . . . . . . . . . . . . . . . . . . . . . . . . . . . . . . . . . . . . . . . . . . . . . . . . . . . . . . . . . . . . . . . . . . . . . . . . . 480
Importing video files and image sequences (Photoshop Extended)
Painting frames in video layers (Photoshop Extended)
. . . . . . . . . . . . . . . . . . . . . . . . . . . . . . . . . . . . . . . . . . . . . . . . . . . . . . . . . . . . . . . . 488
Editing video and animation layers (Photoshop Extended)
Creating frame animations
Creating timeline animations (Photoshop Extended)
Previewing video and animations
Saving and exporting video and animations
. . . . . . . . . . . . . . . . . . . . . . . . . . . . . . . . . . . . . . . . . . . . . . . . . . . . . . . . . . . . . . . . . . . . . . . . . . . . . . . . . . . . . . . . . . 496
. . . . . . . . . . . . . . . . . . . . . . . . . . . . . . . . . . . . . . . . . . . . . . . . . . . . . . . . . . . . . . . . . 503
. . . . . . . . . . . . . . . . . . . . . . . . . . . . . . . . . . . . . . . . . . . . . . . . . . . . . . . . . . . . . . . . . . . . . . . . . . . . . . . . . . . . 510
. . . . . . . . . . . . . . . . . . . . . . . . . . . . . . . . . . . . . . . . . . . . . . . . . . . . . . . . . . . . . . . . . . . . . . . . . . 513
. . . . . . . . . . . . . . . . . . . . . . . . . . . . . . . . . . . . . . . . . . . . . . . . . . . . 485
. . . . . . . . . . . . . . . . . . . . . . . . . . . . . . . . . . . . . . . . . . . . . . . . . . . . . . . . . . . . 491
Last updated 12/5/2011
Page 6

USING PHOTOSHOP
Contents
Chapter 18: 3D
Essential 3D concepts and tools (Photoshop Extended) . . . . . . . . . . . . . . . . . . . . . . . . . . . . . . . . . . . . . . . . . . . . . . . . . . . . . . . . . . . . . . . 521
3D panel settings (Photoshop Extended)
3D painting (Photoshop Extended)
3D texture editing (Photoshop Extended)
Creating 3D objects and animations (Photoshop Extended)
Combining and converting 3D objects (Photoshop Extended)
3D rendering and saving (Photoshop Extended)
. . . . . . . . . . . . . . . . . . . . . . . . . . . . . . . . . . . . . . . . . . . . . . . . . . . . . . . . . . . . . . . . . . . . . . . . . . . . . 525
. . . . . . . . . . . . . . . . . . . . . . . . . . . . . . . . . . . . . . . . . . . . . . . . . . . . . . . . . . . . . . . . . . . . . . . . . . . . . . . . . . 535
. . . . . . . . . . . . . . . . . . . . . . . . . . . . . . . . . . . . . . . . . . . . . . . . . . . . . . . . . . . . . . . . . . . . . . . . . . . . 538
. . . . . . . . . . . . . . . . . . . . . . . . . . . . . . . . . . . . . . . . . . . . . . . . . . . . . . . . . . . 541
. . . . . . . . . . . . . . . . . . . . . . . . . . . . . . . . . . . . . . . . . . . . . . . . . . . . . . . . 546
. . . . . . . . . . . . . . . . . . . . . . . . . . . . . . . . . . . . . . . . . . . . . . . . . . . . . . . . . . . . . . . . . . . . . . 548
Chapter 19: Technical imaging
DICOM files (Photoshop Extended)
Measurement (Photoshop Extended)
Counting objects in an image (Photoshop Extended)
Photoshop and MATLAB (Photoshop Extended)
Image Stacks (Photoshop Extended)
. . . . . . . . . . . . . . . . . . . . . . . . . . . . . . . . . . . . . . . . . . . . . . . . . . . . . . . . . . . . . . . . . . . . . . . . . . . . . . . . . . . 552
. . . . . . . . . . . . . . . . . . . . . . . . . . . . . . . . . . . . . . . . . . . . . . . . . . . . . . . . . . . . . . . . . . . . . . . . . . . . . . . . 556
. . . . . . . . . . . . . . . . . . . . . . . . . . . . . . . . . . . . . . . . . . . . . . . . . . . . . . . . . . . . . . . . . 562
. . . . . . . . . . . . . . . . . . . . . . . . . . . . . . . . . . . . . . . . . . . . . . . . . . . . . . . . . . . . . . . . . . . . . 563
. . . . . . . . . . . . . . . . . . . . . . . . . . . . . . . . . . . . . . . . . . . . . . . . . . . . . . . . . . . . . . . . . . . . . . . . . . . . . . . . . 566
Chapter 20: Automating tasks
Playing and managing actions
Creating actions
. . . . . . . . . . . . . . . . . . . . . . . . . . . . . . . . . . . . . . . . . . . . . . . . . . . . . . . . . . . . . . . . . . . . . . . . . . . . . . . . . . . . . . . . . . . . . . . . . . . . . 573
Processing a batch of files
Scripting
. . . . . . . . . . . . . . . . . . . . . . . . . . . . . . . . . . . . . . . . . . . . . . . . . . . . . . . . . . . . . . . . . . . . . . . . . . . . . . . . . . . . . . . . . . . . . . . . . . . . . . . . . . . . 583
Creating data-driven graphics
. . . . . . . . . . . . . . . . . . . . . . . . . . . . . . . . . . . . . . . . . . . . . . . . . . . . . . . . . . . . . . . . . . . . . . . . . . . . . . . . . . . . . . . 569
. . . . . . . . . . . . . . . . . . . . . . . . . . . . . . . . . . . . . . . . . . . . . . . . . . . . . . . . . . . . . . . . . . . . . . . . . . . . . . . . . . . . . . . . . . . 577
. . . . . . . . . . . . . . . . . . . . . . . . . . . . . . . . . . . . . . . . . . . . . . . . . . . . . . . . . . . . . . . . . . . . . . . . . . . . . . . . . . . . . . . 584
vi
Chapter 21: Optional plug-ins
Picture packages and contact sheets
Creating web photo galleries
. . . . . . . . . . . . . . . . . . . . . . . . . . . . . . . . . . . . . . . . . . . . . . . . . . . . . . . . . . . . . . . . . . . . . . . . . . . . . . . . . . . . . . . . 594
Extract an object from its background
Generate a pattern using the Pattern Maker
Run Photoshop in 32-bit mode (64-bit Mac OS only)
Chapter 22: Keyboard shortcuts
Customizing keyboard shortcuts
Default keyboard shortcuts
. . . . . . . . . . . . . . . . . . . . . . . . . . . . . . . . . . . . . . . . . . . . . . . . . . . . . . . . . . . . . . . . . . . . . . . . . . . . . . . . . . . . . 606
. . . . . . . . . . . . . . . . . . . . . . . . . . . . . . . . . . . . . . . . . . . . . . . . . . . . . . . . . . . . . . . . . . . . . . . . . . . . . . . . . . . . . . . . . . 607
. . . . . . . . . . . . . . . . . . . . . . . . . . . . . . . . . . . . . . . . . . . . . . . . . . . . . . . . . . . . . . . . . . . . . . . . . . . . . . . . . 590
. . . . . . . . . . . . . . . . . . . . . . . . . . . . . . . . . . . . . . . . . . . . . . . . . . . . . . . . . . . . . . . . . . . . . . . . . . . . . . . . 601
. . . . . . . . . . . . . . . . . . . . . . . . . . . . . . . . . . . . . . . . . . . . . . . . . . . . . . . . . . . . . . . . . . . . . . . . . . 603
. . . . . . . . . . . . . . . . . . . . . . . . . . . . . . . . . . . . . . . . . . . . . . . . . . . . . . . . . . . . . . . . . . 605
Last updated 12/5/2011
Page 7

Chapter 1: What’s new
Companion apps for Photoshop 12.0.4 or later
Mix color swatches, select and manage Photoshop tools, and paint watercolor images using three iPad apps. See “Using
Adobe Color Lava” on page 7, “Using Adobe Nav” on page 4, and “Using Adobe Eazel” on page 9.
Easier interface management with live workspaces
Automatically store task-specific workspaces that reflect your workflow, and quickly switch between them. See “Save
and switch workspaces” on page 18.
Intelligent selection technology
Extract subjects from backgrounds more quickly and accurately, creating realistic composites. See “Refine selection
edges” on page 223.
Content-aware filling and healing
Easily remove image elements and replace them with content that seamlessly integrates into its surroundings. See
“Content-aware, pattern, or history fills” on page 321 and “Retouch with the Spot Healing Brush tool” on page 165.
1
HDR Pro
Apply greater tone-mapping power, creating high dynamic range images that range from photorealistic to surreal. Or
apply an HDR look to standard images with the HDR Toning adjustment. See “Merge images to HDR” on page 80 and
“Adjust HDR toning” on page 136.
Extraordinary painting effects
Take advantage of realistic painting effects, mixing colors on the canvas and simulating bristles to produce results that
rival traditional painting media. See “Paint with the Mixer Brush” on page 293 and “Bristle tip shape options” on
page 305.
Puppet Warp
Radically transform specific image areas, while anchoring others in place. See “Puppet Warp” on page 184.
Automated lens correction
Quickly fix distortion using installed profiles of popular lenses, or custom profiles of additional models. See “Correct
lens distortion and adjust perspective” on page 170.
Easy extrusions with 3D repoussé
Convert 2D text and artwork into 3D objects, and then extrude and inflate their surfaces. See “Create 3D repoussé
(Photoshop Extended)” on page 541.
Enhanced 3D performance, workflow, and materials
Quickly optimize performance with dedicated 3D preferences. Get faster previews and rendering with the improved
Adobe Ray Tracer engine. Apply materials interactively with Material Load and Drop tools. See “3D panel overview
(Photoshop Extended)” on page 525 and “3D Materials settings (Photoshop Extended)” on page 529.
Last updated 12/5/2011
Page 8

USING PHOTOSHOP
What’s new
Streamlined creative reviews
Collaborate with colleagues and quickly get client feedback with
CS Review
, an online service that accelerates the review process. See CS Review.
Integrated media management
Take advantage of improved watermarking, web galleries, and batch processing in
Adobe Bridge CS5
. Access assets directly in Photoshop using the
Mini Bridge
panel. See Adobe Bridge and Mini Bridge.
State of the art Camera Raw processing
Remove noise in high ISO images while preserving color and detail. Add creative effects like film grain and post-crop
vignettes. Or precisely sharpen images with minimal artifacts. See Correcting lens distortions in Camera Raw,
Sharpening and noise reduction in Camera Raw, and Vignette and grain effects in Camera Raw.
2
Dozens of customer-inspired productivity enhancements
Boost your efficiency with countless workflow improvements. Selected highlights let you:
• Create layers by dragging files from Windows or Mac OS. See “Create layers and groups” on page 245.
• Straighten images with the Ruler tool. See “Straighten an image” on page 158.
• Protect detail with the Sharpen tool. See “Sharpen image areas” on page 168.
• Apply a graduated neutral density filter. See “Apply a gradient fill” on page 315.
• Reverse the direction of a clone source. See “Retouch with the Clone Stamp tool” on page 161.
• Customize defaults for layer styles. See “Change style defaults to custom values” on page 264.
• Paste in the same relative location, or into or outside selections. See “Understanding the copy and paste commands”
on page 226.
• Store image-specific print settings. See “Print images” on page 443.
New GPU-accelerated features
Harness increased hardware power with features like brush previews, a color sampler ring for the Eyedropper tool, and
a Rule Of Thirds grid for the Crop tool. See “Choose a color while painting” on page 102 and “Crop an image using
the Crop tool” on page 155.
Faster performance with cross-platform 64-bit support
Complete day-to-day imaging tasks at least 10% faster on 64-bit versions of Mac OS and Windows. See “Memory and
performance” on page 57.
Last updated 12/5/2011
Page 9

Chapter 2: Photoshop companion apps
Important: To troubleshoot issues with companion apps, please visit the Adobe companion apps user forum. Phone
support is not provided. Ask questions, request features, and report problems at feedback.photoshop.com.
Connecting Photoshop companion apps to Photoshop
Adobe® Photoshop® communicates with Adobe Nav for Photoshop, Adobe Color Lava for Photoshop, and
Adobe Eazel for Photoshop using a wireless network. Photoshop and the apps must be on the same wireless network
to connect. To check your wireless network, do the following:
• On Mac OS, click the Wi-Fi icon in the OS menu bar to choose a wireless network.
• In Windows XP, choose Start > Control Panel > Network And Internet Connections > Network Connections >
Wireless Network Connection.
• In Windows Vista/Windows 7, choose Start > Control Panel > Network And Internet Connections > Network And
Sharing Center.
• On the iPad, tap Settings and then tap Wi-Fi.
Note: For more information about connecting Photoshop and its companion apps, see the support document
Troubleshoot companion app connectivity problems | Photoshop or watch Getting started with Photoshop companion
apps for Photoshop CS5 on
3
Note: Adobe TV
Note: . For general information on setting up and troubleshooting wireless networks, visit Apple Support or Microsoft
Windows Help & How-To.
Photoshop connection settings
Important: Using Photoshop
Important: with Adobe Nav, Adobe Color Lava, and Adobe Eazel requires Photoshop 12.0.4 or later. If necessary,
choose Help > Updates to install the latest version of Photoshop.
Establish Photoshop as a remote connection to the apps.
1 In Photoshop, choose Edit > Remote Connections.
Last updated 12/5/2011
Page 10

USING PHOTOSHOP
Photoshop companion apps
Create a remote connection in Photoshop.
2 In the Service Name field of the Remote Connections dialog box, enter a descriptive name.
3 In the Password field, enter a six-digit password.
4 Select Enable Remote Connections and then click OK.
Companion app wireless connection settings
1 In Adobe Nav, Adobe Color Lava, or Adobe Eazel, tap the PS icon in the lower-right corner of the app.
2 In the Connections window, tap your Photoshop service.
3 Enter the six-digit password and tap Connect.
When the connection is established, the PS icon turns blue .
4
Companion app IP connections
If a wireless network is unavailable, you can create a direct IP connection between Adobe Nav, Adobe Color Lava, or
Adobe Eazel and Photoshop.
1 In Adobe Nav, Adobe Color Lava, or Adobe Eazel, tap the PS icon in the lower-right corner of the app.
2 In the Connections window, tap New.
3 Enter the IP address and password from the Photoshop Remote Connections dialog box.
4 Click Connect.
When the connection is established, the PS icon turns blue .
Note: For help troubleshooting IP connections, see the support document Troubleshoot companion app connectivity
problems | Photoshop.
Using Adobe Nav
Adobe Nav for Photoshop allows you to select and manage Photoshop tools on the iPad. Adobe Nav also allows you
to browse open Photoshop documents using the iPad while you are working in Photoshop on your computer. Using
Adobe Nav to access tools and documents gives you more space and flexibility for working on your images in
Photoshop.
Last updated 12/5/2011
Page 11

USING PHOTOSHOP
Photoshop companion apps
Important: Adobe Nav is available in English, French, German, and Japanese. Other language versions of Photoshop
can connect to Adobe Nav, but only in those languages. Adobe Nav requires Photoshop 12.0.4 or later. To download the
latest version of Photoshop, choose Help > Updates.
For a video tutorial on using Adobe Nav, visit the Adobe CS5.5 update page of the NAPP website. Or see Russell
Brown’s Photoshop apps update video for information about new Adobe Nav features for the iPad 2.
Connect to Photoshop
Adobe Nav must be connected to Photoshop. For instructions on how to connect Adobe Nav to Photoshop, see
“Connecting Photoshop companion apps to Photoshop” on page 3.
Adobe Nav Tools mode
Adobe Nav Tools mode allows you to select and work with Photoshop tools. Adobe Nav displays up to 16 tools at a
time. You can customize Tools mode to include the tools you most commonly use, or the tools you use for a particular
task, such as painting.
5
F
A
B
CD E
Adobe Nav Tools mode.
A. Tool buttons B. Edit options C. Switch to Tools mode D. Switch to Document mode E. Connect to Photoshop F. Toolbox
• To enter Tools mode, tap at the bottom of the app.
• To select a tool to use in Photoshop, tap it. The selected tool has a white background.
Note: To specify tool options, use the Options bar in Photoshop.
• To display a 100% view of the active image, tap the Actual Pixels button.
• To cycle through screen modes, tap the Screen Mode button. See “Change the screen mode” on page 33 for more
information.
• To reverse the foreground and background colors, tap the Switch Colors icon . To restore the defaults, tap the
Default Colors icon .
Note: The toolbox in Adobe Nav shows the selected foreground and background colors. To actually select foreground
or background colors, use the toolbox in Photoshop. See “Choose colors in the toolbox” on page 99.
Last updated 12/5/2011
Page 12

USING PHOTOSHOP
Photoshop companion apps
• To add, delete, or move tools, tap Edit. Then, do one of the following:
• To move a tool, drag it.
• To delete a tool, tap the X in the upper-left corner of the tool button.
• To add a tool, drag it from the menu at right onto the grid.
Tools that are in the grid are blue in the menu.
• To return to Tools mode, tap Done.
Adobe Nav Document mode
Document mode allows you to select, view, and open new Photoshop documents from Adobe Nav.
6
Adobe Nav Document mode displays image files that are currently open in Photoshop.
• To enter Document mode, tap at the bottom of the app.
The blue dot to the left of the filename indicates the active document.
• To make a different document active in Photoshop, tap its thumbnail.
• To view information about a document, including size and resolution, tap its thumbnail twice. Tap twice again to
return to thumbnail view.
• To create a new, untitled document in Photoshop, tap New or tap the new document placeholder thumbnail.
New documents are 1024 x 768 pixels, 72 dpi, and sRGB.
• To duplicate a document, drag its thumbnail to the new document placeholder thumbnail.
• To zoom in on a thumbnail, pinch it open up to four times. To return to thumbnail view, pinch closed.
• To rearrange documents, drag a thumbnail to a new location.
Last updated 12/5/2011
Page 13

USING PHOTOSHOP
Photoshop companion apps
Using Adobe Color Lava
Adobe Color Lava for Photoshop lets you create themed color swatches on the iPad. When Adobe Color Lava is
connected to Photoshop, you can set Adobe Color Lava swatches as the foreground color. You can also add
Adobe Color Lava colors to the Photoshop Swatches panel as you work. Or, you can e-mail Adobe Color Lava themes
as swatch libraries to share them with other people on other computers.
Important: Adobe Color Lava is available in English, French, German, and Japanese. Other language versions of
Photoshop can connect to Adobe Color Lava, but only in those languages. Adobe Color Lava requires Photoshop 12.0.4
or later. To download the latest version of Photoshop, choose Help > Updates.
For a video tutorial on using Adobe Color Lava, visit the Adobe CS5.5 update page of the NAPP website. Or see Russell
Brown’s Photoshop apps update video for information about new Adobe Color Lava features for the iPad 2.
AB
7
D
C
E
FG
Adobe Color Lava Mixer mode.
A. Clean finger well B. Canvas C. Color wells D. Swatches E. Connect to Photoshop F. Switch to Theme Library mode G. Load a photo
Mix colors in Adobe Color Lava
To mix colors in Adobe Color Lava, select colors from the sample wells and then “paint” with your finger on the
canvas.
• To load a color, tap its color well. The selected color has a thicker white border.
• To switch between RGB and grayscale, tap the inner ring of the color wells.
• To edit hue, saturation, and brightness values, double-tap a color well. To accept the HSB settings, tap .
• To remove color from your fingertip, tap the clean finger well once or twice.
• To reset the color wells to their defaults, tap .
• To erase the canvas, tap .
• To create a new theme, tap the New button.
• To load a photo into the canvas, tap the camera icon . Then, choose an image from an iPad photo album.
Last updated 12/5/2011
Page 14

USING PHOTOSHOP
Photoshop companion apps
Work with swatches in Adobe Color Lava
Swatch sets appear on the right side of the Adobe Color Lava app. The active, or selected, swatch is larger than the other
four swatches.
• To select a swatch, tap it. When you mix colors, Adobe Color Lava replaces the color in the selected swatch with
the color you are painting.
• To set a swatch as the foreground color in Photoshop, tap it.
• To edit swatch sets, tap the Theme Library mode button .
Manage themes in Adobe Color Lava
Theme Library mode allows you to work with up to 300 swatch sets, or themes.
A
8
BC D
Adobe Color Lava Theme Library mode.
A. Color themes B. Edit themes C. Switch to Color Mixer mode D. Connect to Photoshop
• To select a theme, tap it.
• To edit the selected theme, tap the Color Mixer mode button .
• To set a swatch in a theme as the foreground color in Photoshop, tap it.
• To see the RGB, HSL, and hexadecimal values for each swatch in a theme, double-tap the theme.
Adobe Color Lava theme details.
Last updated 12/5/2011
Page 15
USING PHOTOSHOP
Photoshop companion apps
• To rename or delete a theme, tap the Edit button or touch and hold a theme. Then, do one of the following:
• Tap the X in the upper-left corner of a theme to delete it.
• Tap a theme name to rename it.
Share Adobe Color Lava themes
For instructions on how to connect Photoshop and Adobe Color Lava, see “Connecting Photoshop companion apps
to Photoshop” on page 3.
1 When you are connected to Photoshop, tap to enter Theme Library mode.
2 Tap a theme twice to open the theme details. Then, tap either of the following buttons:
Send To Photoshop Theme colors appear in the Swatches panel.
E-mail Opens an e-mail message so you can send the theme to someone. The e-mail includes a .png preview of the
theme, a .png preview of the canvas, and a .ase swatch library file. For instructions on loading a swatch library in
Photoshop, see “Manage swatch libraries” on page 107.
Using Adobe Eazel
9
Adobe Eazel for Photoshop lets you paint watercolor pictures on a canvas. Each stroke goes on “wet” and takes a few
seconds to “dry.” The paints blend according to the options you choose and the wetness of the previous stroke. You
can save Eazel artwork to the iPad photo gallery, and can bring it into Photoshop for further editing or compositing.
Important: Adobe Eazel is available in English, French, German, and Japanese. Other language versions of Photoshop
can connect to Adobe Eazel, but only in those languages. Adobe Eazel requires Photoshop 12.0.4 or later. To download
the latest version of Photoshop, choose Help > Updates.
For a video tutorial on using Adobe Eazel, visit the Adobe CS5.5 update page of the NAPP website.
B
C
A
Adobe Eazel for Photoshop.
A. Brush sample B. Finger controls C. Canvas
Last updated 12/5/2011
Page 16

USING PHOTOSHOP
Photoshop companion apps
Note: Adobe Eazel automatically detects right and left hands.
Brush sample Shows the color, size, and opacity of the current brush.
Thumb control Undo, redo, and erase all.
Index finger control Choose a color.
Third finger control Adjust the brush size.
Fourth finger control Change paint opacity.
Fifth finger control Save artwork and send it to Photoshop.
Adobe Eazel work modes
Adobe Eazel offers two work modes: persistent and ephemeral. In persistent mode, all five finger controls stay visible
onscreen while you specify options. To work in persistent mode, do the following:
1 Touch all five fingers to canvas at once, then lift.
2 Tap, or touch and drag, a setting to adjust it.
3 Touch the canvas to accept the change.
4 Touch the canvas again to set another option, or tap a second time to start painting.
In ephemeral mode, only one control appears onscreen at a time. The control appears only for as long as your finger
interacts with it. To work in ephemeral mode, do the following:
10
1 Place all five fingers on the canvas and lift all but the finger whose options you want to adjust.
2 Drag the finger to adjust the setting or, with the fifth finger, tap to select an option.
3 Touch the canvas again to set another option or start painting.
Choose colors in Adobe Eazel
Adobe Eazel keeps five color swatches in a palette available under your index finger. The selected swatch has a flashing
border.
A
C
B
D
Choosing a color in Eazel.
A. Color swatches B. Brush sample C. Current color D. Color wheel
• To choose a swatch, drag your index finger to it and lift.
Last updated 12/5/2011
Page 17

USING PHOTOSHOP
Photoshop companion apps
• To change a swatch, drag your index finger to it to select it. Continue to drag to the color wheel or to a color in the
artwork on the canvas.
Specify stroke size and opacity in Adobe Eazel
• To make the brush larger, drag up with your third finger. To make the brush smaller, drag down with your third
finger. The brush sample updates as you drag.
• To make the paint more opaque, drag up with your fourth finger. To make the paint more transparent, drag down
with your fourth finger. The brush sample updates as you drag.
Undo, redo, and erase in Adobe Eazel
• To undo your last stroke, use your thumb to choose or swipe from right to left.
• To redo your last stroke, use your thumb to choose or swipe from left to right.
• To erase the canvas, use your thumb to choose or swipe up.
Save Adobe Eazel artwork and send it to Photoshop
You can save Adobe Eazel artwork to the iPad gallery as .jpeg photo. Then, you can use the Photos app to e-mail it to
someone, use it as wallpaper, or print it. You can also send Adobe Eazel artwork to Photoshop, where you can open it
for additional editing or compositing.
11
Important: For instructions on how to connect Photoshop and Adobe Eazel, see “Connecting Photoshop companion apps
to Photoshop” on page 3.
• To save artwork to the iPad, choose Settings with your fifth finger and then tap the
• Save To
• Photos button.
• To send artwork to Photoshop, choose Settings with your fifth finger and then tap the Transmit to Photoshop
button.
Adobe Eazel sends image data to Photoshop, which opens the artwork at 4096-x-3092 resolution. In Photoshop,
you can save Adobe Eazel artwork in any supported file format.
Note: Adobe Eazel artwork may look slightly different in Photoshop. Due to rendering, minor geometrical differences
occur.
Last updated 12/5/2011
Page 18

Chapter 3: Workspace
For detailed instructions, click the links below. To ask questions, request features, or report problems, visit
feedback.photoshop.com.
Workspace basics
For detailed instructions, click the links below. To ask questions, request features, or report problems, visit
feedback.photoshop.com.
Workspace overview
You create and manipulate your documents and files using various elements, such as panels, bars, and windows. Any
arrangement of these elements is called a workspace. The workspaces of the different applications in Adobe®
Creative Suite
12
® 5 share the same appearance so that you can move between the applications easily. You can also adapt each
application to the way you work by selecting from several preset workspaces or by creating one of your own.
Although the default workspace layout varies in different products, you manipulate the elements much the same way
in all of them.
Last updated 12/5/2011
Page 19

USING PHOTOSHOP
Workspace
13
A
E
F
B DC
G
H
Default Illustrator workspace
A. Tabbed Document windows B. Application bar C. Workspace switcher D. Panel title bar E. Control panel F. Tools panel G. Collapse To
Icons button H. Four panel groups in vertical dock
• The Application bar across the top contains a workspace switcher, menus (Windows only), and other application
controls. On the Mac for certain products, you can show or hide it using the Window menu.
• The Tools panel contains tools for creating and editing images, artwork, page elements, and so on. Related tools are
grouped.
• The Control panel displays options for the currently selected tool. In Illustrator, the Control panel displays options
for the currently selected object. (In Adobe Photoshop® this is known as the Options bar. In Adobe Flash®, Adobe
Dreamweaver®, and Adobe Fireworks® this is known as the Property Inspector and includes properties of the
currently selected element.)
• The Document window displays the file you’re working on. Document windows can be tabbed and, in certain cases,
grouped and docked.
• Panels help you monitor and modify your work. Examples include the Timeline in Flash, the Brush panel in
Illustrator, the Layers panel in Adobe Photoshop®, and the CSS Styles panel in Dreamweaver. Panels can be
grouped, stacked, or docked.
• The Application frame groups all the workspace elements in a single, integrated window that lets you treat the
application as a single unit. When you move or resize the Application frame or any of its elements, all the elements
within it respond to each other so none overlap. Panels don’t disappear when you switch applications or when you
accidentally click out of the application. If you work with two or more applications, you can position each
application side by side on the screen or on multiple monitors.
Last updated 12/5/2011
Page 20

USING PHOTOSHOP
Workspace
If you are using a Mac and prefer the traditional, free-form user interface, you can turn off the Application frame.
In Adobe Illustrator®, for example, select Window > Application Frame to toggle it on or off. (In Flash, the
Application frame is on permanently for Mac, and Dreamweaver for Mac does not use an Application frame.)
Hide or show all panels
• (Illustrator, Adobe InCopy®, Adobe InDesign®, Photoshop, Fireworks)To hide or show all panels, including the
Tools panel and Control panel, press Tab.
• (Illustrator, InCopy, InDesign, Photoshop) To hide or show all panels except the Tools panel and Control panel,
press Shift+Tab.
You can temporarily display hidden panels if Auto-Show Hidden Panels is selected in Interface preferences. It’s
always on in Illustrator. Move the pointer to the edge of the application window (Windows®) or to the edge of the
monitor (Mac OS®) and hover over the strip that appears.
• (Flash, Dreamweaver, Fireworks) To hide or show all panels, press F4.
Display panel options
❖ Click the panel menu icon in the upper-right corner of the panel.
You can open a panel menu even when the panel is minimized.
14
In Photoshop, you can change the font size of the text in panels and tool tips. In the Interface preferences, choose a
size from the UI Font Size menu.
(Illustrator) Adjust panel brightness
❖ In User Interface preferences, move the Brightness slider. This control affects all panels, including the Control
panel.
Reconfigure the Tools panel
You can display the tools in the Tools panel in a single column, or side by side in two columns. (This feature is not
available in the Tools panel in Fireworks and Flash.)
In InDesign and InCopy, you also can switch from single-column to double-column (or single-row) display by setting
an option in Interface preferences.
❖ Click the double arrow at the top of the Tools panel.
Manage windows and panels
You can create a custom workspace by moving and manipulating Document windows and panels. You can also save
workspaces and switch among them. For Fireworks, renaming custom workspaces can lead to unexpected behavior.
Note: The following examples use Photoshop for demonstration purposes. The workspace behaves the same in all the
products.
Rearrange, dock, or float document windows
When you open more than one file, the Document windows are tabbed.
• To rearrange the order of tabbed Document windows, drag a window’s tab to a new location in the group.
• To undock (float or untab) a Document window from a group of windows, drag the window’s tab out of the group.
Last updated 12/5/2011
Page 21

USING PHOTOSHOP
Workspace
Note: In Photoshop you can also choose Window > Arrange > Float in Window to float a single Document window,
or Window > Arrange > Float All In Windows to float all of the Document windows at once. See tech note kb405298
for more information.
Note: Dreamweaver does not support docking and undocking Document windows. Use the Document window’s
Minimize button to create floating windows (Windows), or choose Window > Tile Vertically to create side-by-side
Document windows. Search “Tile Vertically” in Dreamweaver Help for more information on this topic. The workflow
is slightly different for Macintosh users.
• To dock a Document window to a separate group of Document windows, drag the window into the group.
• To create groups of stacked or tiled documents, drag the window to one of the drop zones along the top, bottom, or
sides of another window. You can also select a layout for the group by using the Layout button on the Application bar.
Note: Some products do not support this functionality. However, your product may have Cascade and Tile commands
in the Window menu to help you lay out your documents.
• To switch to another document in a tabbed group when dragging a selection, drag the selection over the document’s
tab for a moment.
Note: Some products do not support this functionality.
Dock and undock panels
A dock is a collection of panels or panel groups displayed together, generally in a vertical orientation. You dock and
undock panels by moving them into and out of a dock.
15
• To dock a panel, drag it by its tab into the dock, at the top, bottom, or in between other panels.
• To dock a panel group, drag it by its title bar (the solid empty bar above the tabs) into the dock.
• To remove a panel or panel group, drag it out of the dock by its tab or title bar. You can drag it into another dock
or make it free-floating.
Navigator panel being dragged out to new dock, indicated by blue vertical highlight
Last updated 12/5/2011
Page 22
USING PHOTOSHOP
Workspace
Navigator panel now in its own dock
You can prevent panels from filling all the space in a dock. Drag the bottom edge of the dock up so it no longer meets
the edge of the workspace.
Move panels
As you move panels, you see blue highlighted drop zones, areas where you can move the panel. For example, you can
move a panel up or down in a dock by dragging it to the narrow blue drop zone above or below another panel. If you
drag to an area that is not a drop zone, the panel floats freely in the workspace.
16
Note: The position of the mouse (rather than the position of the panel), activates the drop zone, so if you can’t see the drop
zone, try dragging the mouse to the place where the drop zone should be.
• To move a panel, drag it by its tab.
• To move a panel group, drag the title bar.
A
B
C
Narrow blue drop zone indicates Color panel will be docked on its own above the Layers panel group.
A. Title bar B. Tab C. Drop zone
Press Ctrl (Windows) or Command (Mac OS) while moving a panel to prevent it from docking. Press Esc while
moving the panel to cancel the operation.
Add and remove panels
If you remove all panels from a dock, the dock disappears. You can create a dock by moving panels to the right edge
of the workspace until a drop zone appears.
• To remove a panel, right-click (Windows) or Control-click (Mac) its tab and then select Close, or deselect it from
the Window menu.
• To add a panel, select it from the Window menu and dock it wherever you want.
Last updated 12/5/2011
Page 23

USING PHOTOSHOP
Workspace
Manipulate panel groups
• To move a panel into a group, drag the panel’s tab to the highlighted drop zone in the group.
Adding a panel to a panel group
• To rearrange panels in a group, drag a panel’s tab to a new location in the group.
• To remove a panel from a group so that it floats freely, drag the panel by its tab outside the group.
• To move a group, drag the title bar (the area above the tabs).
Stack floating panels
When you drag a panel out of its dock but not into a drop zone, the panel floats freely. The floating panel allows you
to position it anywhere in the workspace. You can stack floating panels or panel groups so that they move as a unit
when you drag the topmost title bar.
17
Free-floating stacked panels
• To stack floating panels, drag a panel by its tab to the drop zone at the bottom of another panel.
• To change the stacking order, drag a panel up or down by its tab.
Note: Be sure to release the tab over the narrow drop zone between panels, rather than the broad drop zone in a title bar.
• To remove a panel or panel group from the stack, so that it floats by itself, drag it out by its tab or title bar.
Resize panels
• To minimize or maximize a panel, panel group, or stack of panels, double-click a tab. You can also double-click the
tab area (the empty space next to the tabs).
• To resize a panel, drag any side of the panel. Some panels, such as the Color panel in Photoshop, cannot be resized
by dragging.
Collapse and expand panel icons
You can collapse panels to icons to reduce clutter on the workspace. In some cases, panels are collapsed to icons in the
default workspace.
Last updated 12/5/2011
Page 24

USING PHOTOSHOP
Workspace
Panels collapsed to icons
18
Panels expanded from icons
• To collapse or expand all panel icons in a column, click the double arrow at the top of the dock.
• To expand a single panel icon, click it.
• To resize panel icons so that you see only the icons (and not the labels), adjust the width of the dock until the text
disappears. To display the icon text again, make the dock wider.
• To collapse an expanded panel back to its icon, click its tab, its icon, or the double arrow in the panel’s title bar.
In some products, if you select Auto-Collapse Icon Panels from the Interface or User Interface Options preferences,
an expanded panel icon collapses automatically when you click away from it.
• To add a floating panel or panel group to an icon dock, drag it in by its tab or title bar. (Panels are automatically
collapsed to icons when added to an icon dock.)
• To move a panel icon (or panel icon group), drag the icon. You can drag panel icons up and down in the dock, into
other docks (where they appear in the panel style of that dock), or outside the dock (where they appear as floating
icons).
Save and switch workspaces
By saving the current size and position of panels as a named workspace, you can restore that workspace even if you
move or close a panel. The names of saved workspaces appear in the workspace switcher in the Application bar.
Save a custom workspace
1 With the workspace in the configuration you want to save, do one of the following:
• (Illustrator) Choose Window > Workspace > Save Workspace.
• (Photoshop, InDesign, InCopy) Choose Window > Workspace > New Workspace.
• (Dreamweaver) Choose Window > Workspace Layout > New Workspace.
Last updated 12/5/2011
Page 25

USING PHOTOSHOP
Workspace
• (Flash) Choose New Workspace from the workspace switcher in the Application bar.
• (Fireworks) Choose Save Current from the workspace switcher in the Application bar.
2 Type a name for the workspace.
3 (Photoshop, InDesign) Under Capture, select one or more options:
Panel Locations Saves the current panel locations (InDesign only).
Keyboard shortcuts Saves the current set of keyboard shortcuts (Photoshop only).
Menus or Menu Customization Saves the current set of menus.
Display or switch workspaces
❖ Select a workspace from the workspace switcher in the Application bar.
In Photoshop, you can assign keyboard shortcuts to each workspace to navigate among them quickly.
Delete a custom workspace
• Select Manage Workspaces from the workspace switcher in the Application bar, select the workspace, and then
click Delete. (The option is not available in Fireworks.)
• (Photoshop, InDesign, InCopy) Select
• Delete Workspace
• from the workspace switcher.
• (Illustrator) Choose Window > Workspace > Manage Workspaces, select the workspace, and then click the Delete icon.
• (Photoshop, InDesign) Choose Window > Workspace >
• Delete Workspace
• , select the workspace, and then click Delete.
19
Restore the default workspace
1 Select the Default or Essentials workspace from the workspace switcher in the application bar. For Fireworks, see
the article http://www.adobe.com/devnet/fireworks/articles/workspace_manager_panel.html.
Note: In Dreamweaver, Designer is the default workspace.
2 For Fireworks (Windows), delete these folders:
Windows Vista \\Users\<username>\AppData\Roaming\Adobe\Fireworks CS4\
Windows XP \\Documents and Settings\<username>\Application Data\Adobe\Fireworks CS4
3 (Photoshop, InDesign, InCopy) Select Window > Workspace > Reset [Workspace Name].
(Photoshop) Restore a saved workspace arrangement
In Photoshop, workspaces automatically appear as you last arranged them, but you can restore the original, saved
arrangement of panels.
• To restore an individual workspace, choose Window > Workspace > Reset Workspace Name.
• To restore all the workspaces installed with Photoshop, click Restore Default Workspaces in the Interface
preferences.
Last updated 12/5/2011
Page 26

USING PHOTOSHOP
Workspace
To rearrange the order of workspaces in the application bar, drag them.
Hide tool tips
When you position the pointer over most tools and options, descriptions appear in tool tips by default. If you find tool
tips visually distracting, you can hide them.
❖ In the Interface preferences, deselect Show Tool Tips.
Note: Tool tips are not available in some dialog boxes.
Panels and menus
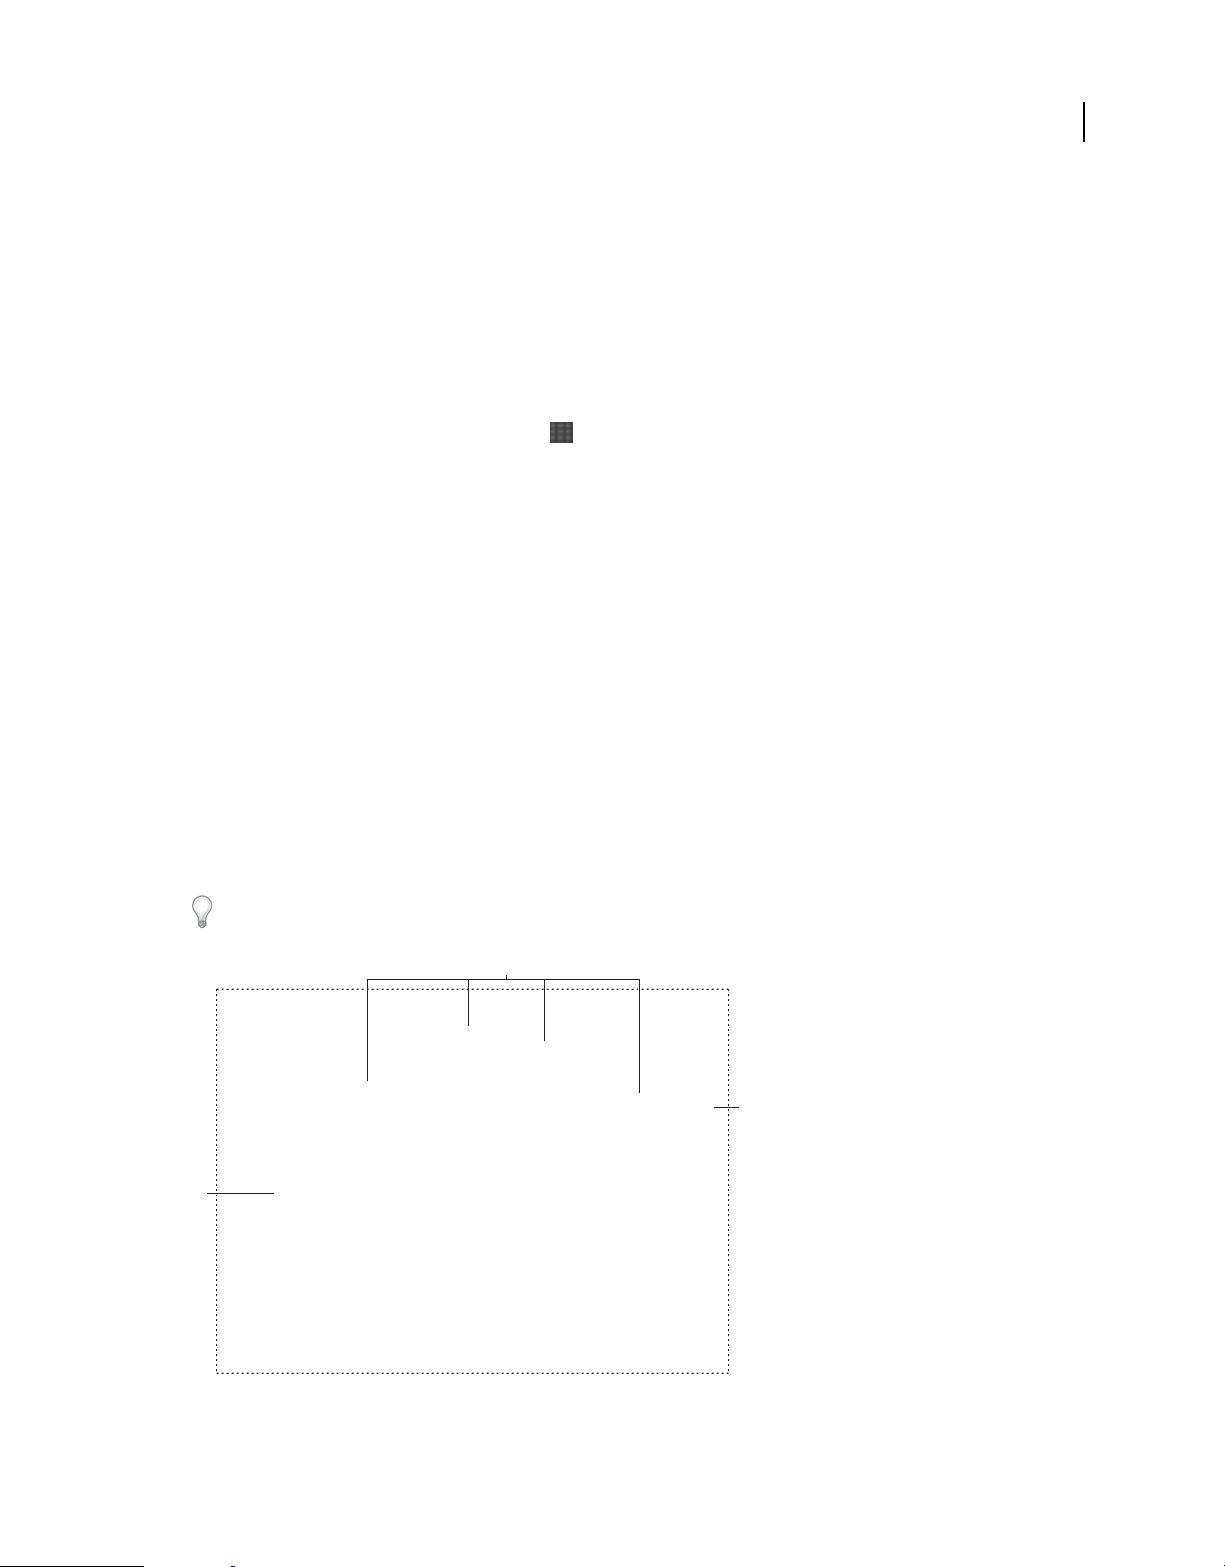
Enter values in panels, dialog boxes, and the options bar
❖ Do any of the following:
• Type a value in the text box, and press Enter (Windows) or Return (Mac OS).
• Drag the slider.
• Move the pointer over the title of a slider or pop-up slider. When the pointer turns to a pointing finger, drag the
scrubby slider to the left or right. This feature is available only for selected sliders and pop-up sliders.
• Drag the dial.
• Click the arrow buttons in the panel to increase or decrease the value.
• (Windows) Click the text box and then use the Up Arrow key and the Down Arrow key on the keyboard to increase
or decrease the value.
• Select a value from the menu associated with the text box.
ADB C
20
E
Ways to enter values
A. Menu arrow B. Scrubby slider C. Text box D. Dial E. Slider
More Help topics
“About scrubby sliders” on page 21
Last updated 12/5/2011
Page 27
USING PHOTOSHOP
Workspace
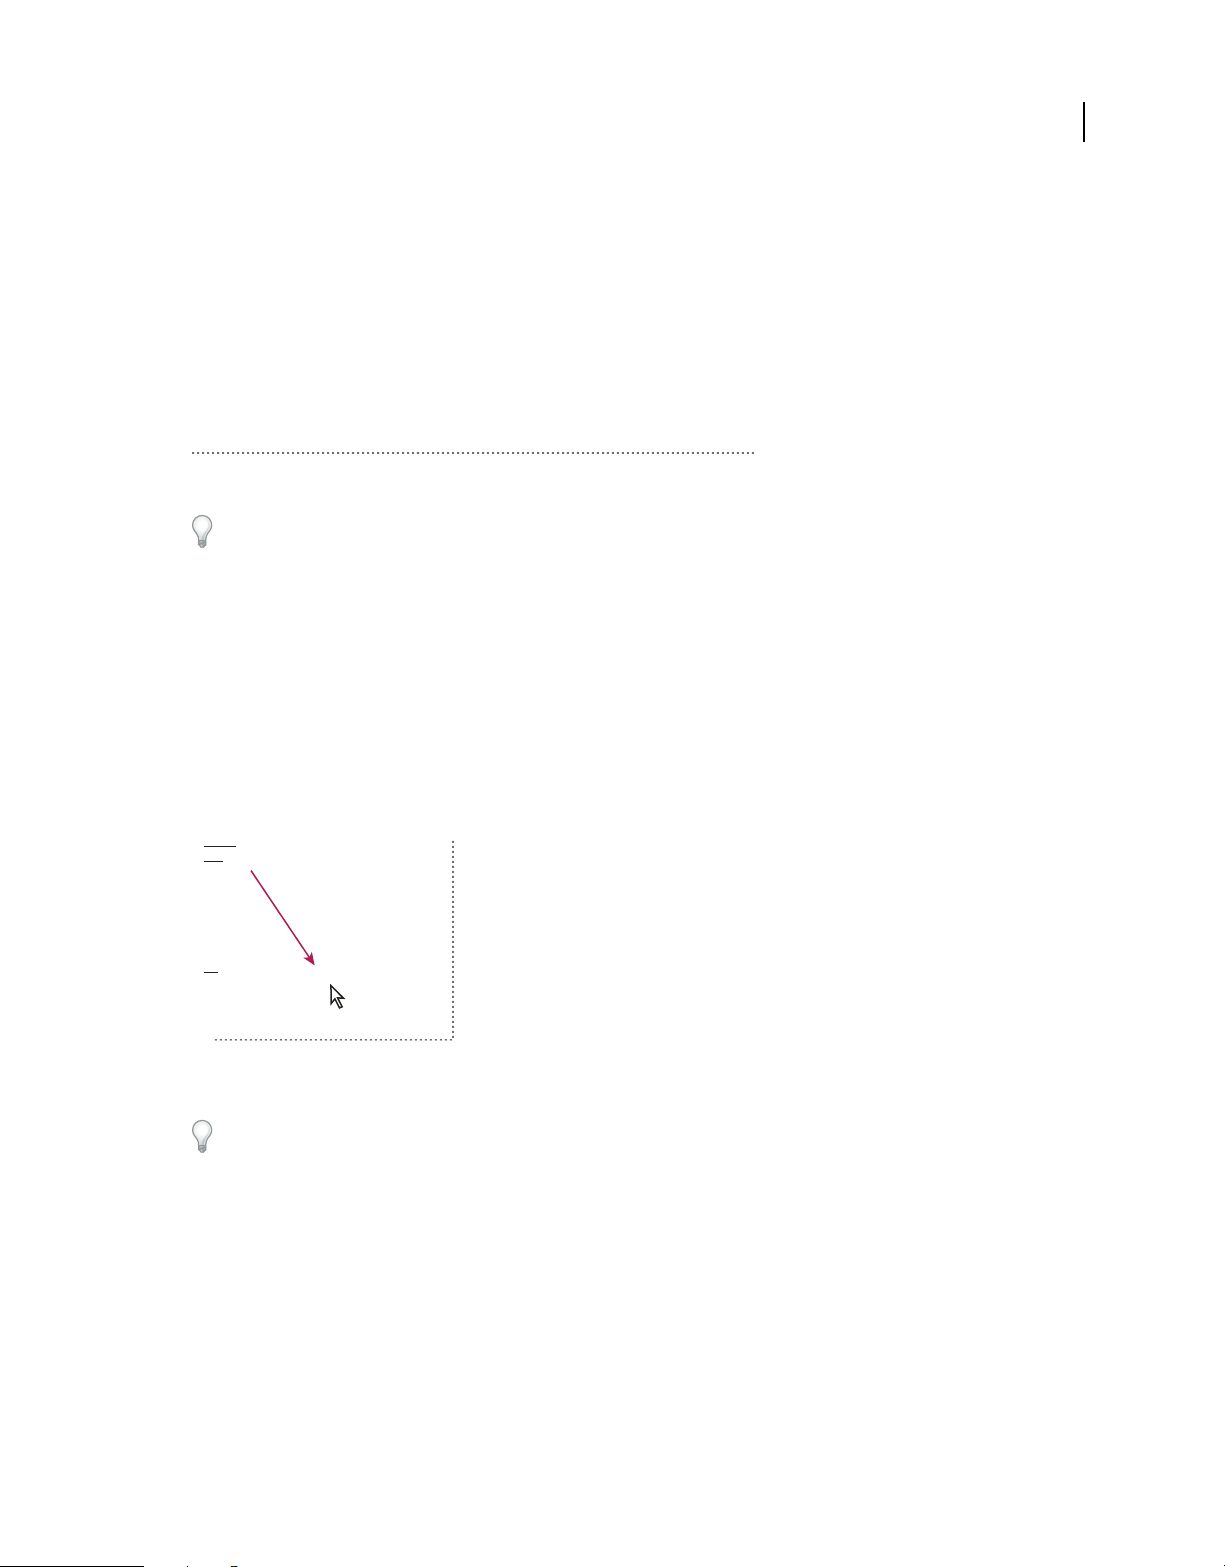
Working with sliders
About pop-up sliders
Some panels, dialog boxes, and options bars contain settings that use pop-up sliders (for example, the Opacity option
in the Layers panel). If there is a triangle next to the text box, you can activate the pop-up slider by clicking the triangle.
Position the pointer over the triangle next to the setting, hold down the mouse button, and drag the slider or angle
radius to the desired value. Click outside the slider box or press Enter to close the slider box. To cancel changes, press
the Esc key.
To increase or decrease values in 10% increments when the pop-up slider box is open, hold down Shift and press the
Up Arrow or Down Arrow key.
A
B
Using different kinds of pop-up sliders
A. Click to open pop-up slider box. B. Drag slider or angle radius.
You can also “scrub” some pop-up sliders. For example, if you hold the pointer over the word “Fill” or “Opacity” in
the Layers panel, the pointer changes to the Hand icon. Then you can move the pointer left or right to change the fill
or opacity percentage.
21
About scrubby sliders
In some panels, dialog boxes, and options bars, you can drag scrubby sliders to change option values. Scrubby sliders
are hidden until you position the pointer over the title of sliders and pop-up sliders. When the pointer changes to a
pointing finger, you drag to the left or right. Holding down the Shift key while dragging accelerates the scrubbing by
a factor of 10.
Hovering over the title of a slider or pop-up slider shows the scrubby slider
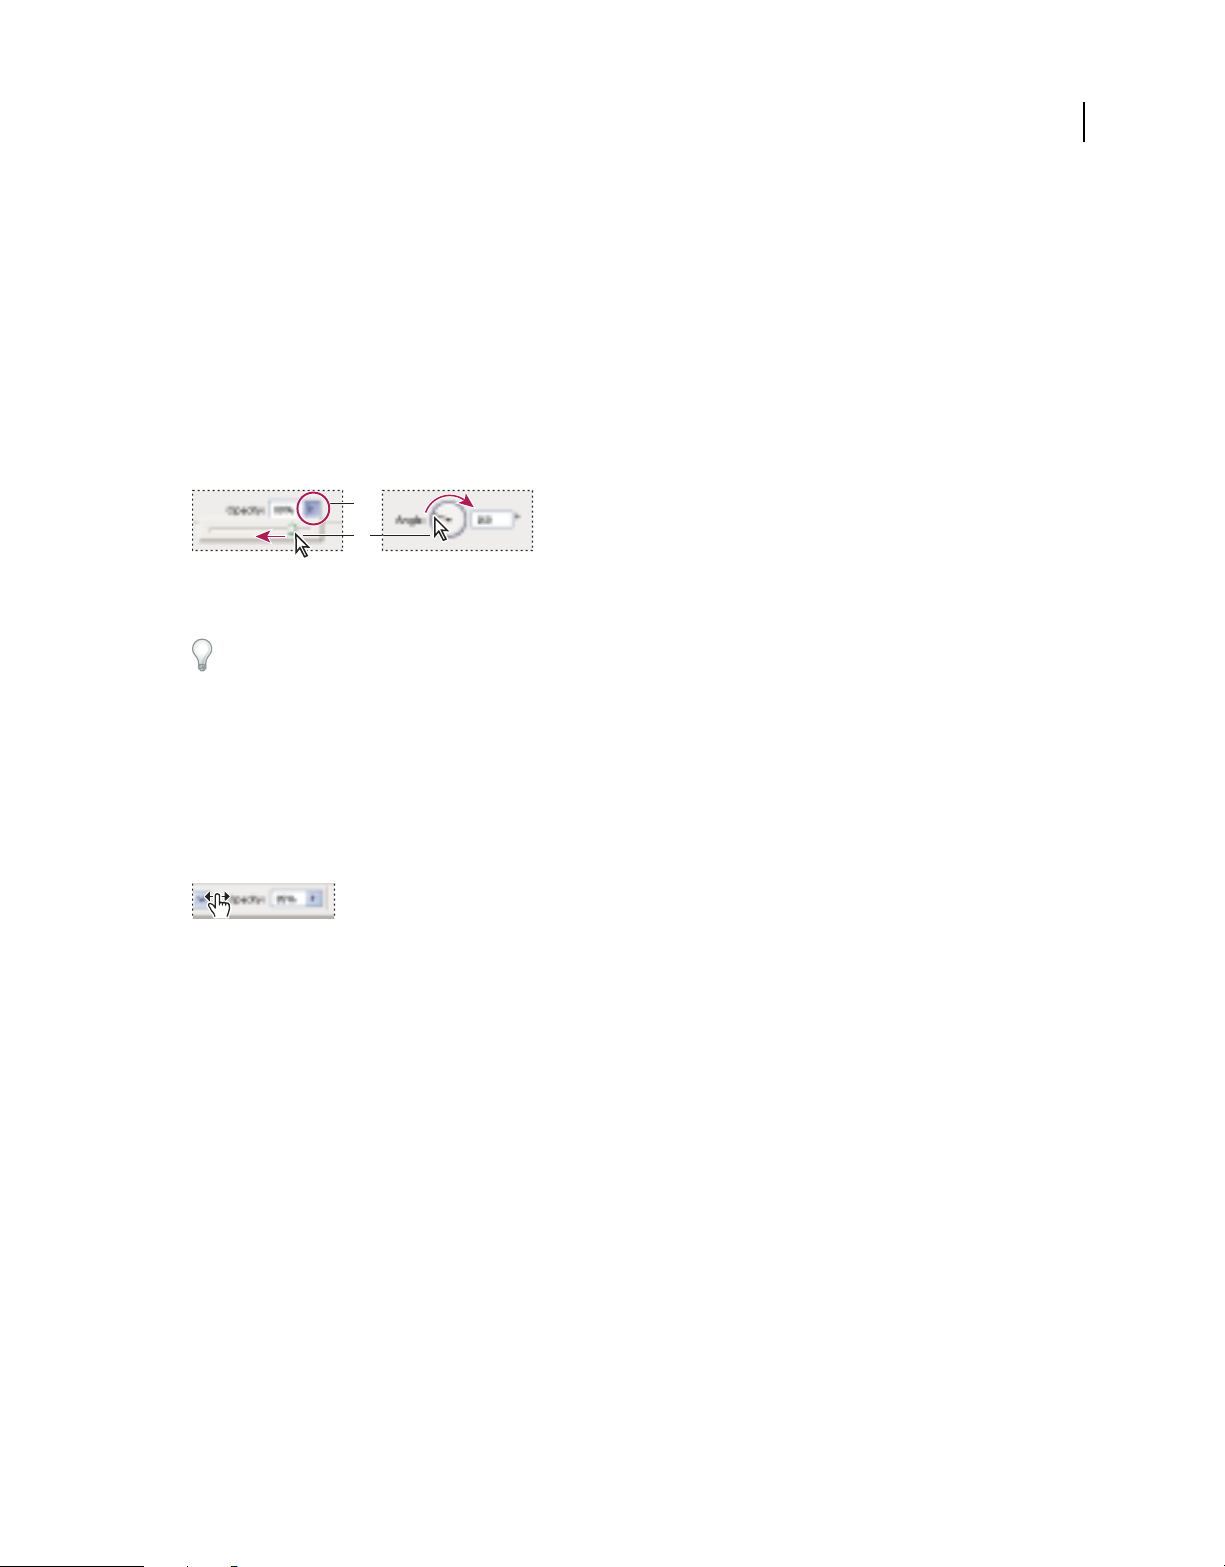
Working with pop-up panels
Pop-up panels provide easy access to available options for brushes, swatches, gradients, styles, patterns, contours, and
shapes. You can customize pop-up panels by renaming and deleting items and by loading, saving, and replacing
libraries. You can also change the display of a pop-up panel to view items by their names, as thumbnail icons, or with
both names and icons.
Click a tool thumbnail in the options bar to show its pop-up panel. Click an item in the pop-up panel to select it.
Last updated 12/5/2011
Page 28

USING PHOTOSHOP
Workspace
AB
Viewing the Brush pop-up panel in the options bar
A. Click to show the pop-up panel. B. Click to view the pop-up panel menu.
Rename or delete an item in a pop-up panel
❖ Select an item, click the triangle in the upper right corner of the pop-up panel, and choose one of the following:
Rename Tool Preset Lets you enter a new name for the item.
22
Delete Tool Preset Deletes an item in the pop-up panel.
Note: You can also delete an item in a pop-up panel by holding down Alt (Windows) or Option (Mac OS) and clicking
the item.
Customize the list of items in a pop-up panel
1 Click the triangle in the upper right corner of the pop-up panel to view the panel menu.
2 To return to the default library, choose the Reset Tool Presets command. You can either replace the current list or
add the default library to the current list.
3 To load a different library, do one of the following:
• Choose the Load Tool Presets command to add a library to the current list. Then select the library file you want to
use, and click Load.
• Choose the Replace Tool Presets command to replace the current list with a different library. Then select the library
file you want to use, and click Load.
• Choose a library file (displayed at the bottom of the panel menu). Then click OK to replace the current list, or click
Append to add it to the current list.
4 To save the current list as a library for later use, choose the Save Tool Presets command. Then enter a name for the
library file, and click Save.
(Mac OS) Include the extension of the library file name so that you can easily share the libraries across operating
systems. Select Append File Extension Always in the File Handling Preferences to append extensions to file names.
Change the display of items in a pop-up panel
1 Click the triangle in the upper right corner of the pop-up panel to view the panel menu.
2 Select a view option: Text Only, Small List, and Large List.
Last updated 12/5/2011
Page 29

USING PHOTOSHOP
Workspace
Display and define menus
Display context menus
Context menus display commands relevant to the active tool, selection, or panel. They are distinct from the menus
across the top of the workspace.
Viewing the context menu for the Eyedropper tool
1 Position the pointer over an image or panel item.
2 Right-click (Windows) or Control-click (Mac OS).
Define a set of menus
1 Do one of the following:
• Choose Edit > Menus.
• Choose Window > Workspace > Keyboard Shortcuts & Menus and click the Menus tab.
2 In the Keyboard Shortcuts and Menus dialog box, choose a set of menus from the Set drop-down menu.
3 Choose a type from the Menu For menu:
Application Menus Lets you show, hide, or add color to items in the application menus.
23
Panel Menus Lets you show, hide, or add color to items in panel menus.
4 Click the triangle next to a menu or panel name.
5 Do one of the following:
• To hide a menu item, click the Visibility button .
• To show a menu item, click the empty Visibility button.
• To add color to a menu item, click the color swatch (if no color is assigned, it will say None) and choose a color.
6 When you finish changing the menus, do one of the following:
• To save all changes to the current set of menus, click the Save Set button . Changes to a custom set are saved. If
you’re saving changes to the Photoshop Defaults set, the Save dialog box opens. Enter a name for the new set and
click Save.
• To create a new set based on the current set of menus, click the Save Set As button .
Note: If you haven’t saved the current set of changes, you can click Cancel to discard all changes and close the dialog box.
7 In the Save dialog box, enter a name for the set and click Save.
Last updated 12/5/2011
Page 30

USING PHOTOSHOP
Workspace
Choosing a color for a menu item using the Keyboard Shortcuts & Menus dialog box
Delete a set of menus
1 Do one of the following:
• Choose Edit > Menus.
• Choose Window > Workspace > Keyboard Shortcuts & Menus and click the Menu tab.
2 In the Keyboard Shortcuts & Menus dialog box, choose a set of menus from the Set menu.
3 Click the Delete Set icon .
24
Temporarily show hidden menu items
It’s possible to temporarily show items that you’ve hidden in a menu. After the menu closes, the items return to their
hidden state.
❖ Do one of the following:
• From a menu with hidden items, choose Show All Menu Items.
• Ctrl-click (Windows) or Command-click (Mac OS) a menu with hidden items.
To permanently reveal all menu items, select Window > Workspace > Essentials.
Turn menu colors on or off
❖ In Interface preferences, select or deselect Show Menu Colors.
Tools
When you start Photoshop, the Tools panel appears at the left of the screen. Some tools in the Tools panel have options
that appear in the context-sensitive options bar.
You can expand some tools to show hidden tools beneath them. A small triangle at the lower right of the tool icon
signals the presence of hidden tools.
Last updated 12/5/2011
Page 31

USING PHOTOSHOP
Workspace
You can view information about any tool by positioning the pointer over it. The name of the tool appears in a tool tip
below the pointer.
Tools panel overview
25
A
Selection tools
Move (V)*
A
B
C
E
D
F
G
Rectangular Marquee (M)
Elliptical Marquee (M)
Single Column Marquee
Single Row Marquee
Lasso (L)
Polygonal Lasso (L)
Magnetic Lasso (L)
Quick Selection (W)
Magic Wand (W )
B
Crop and slice tools
Crop (C)
Slice (C)
Slice Select (C)
C
Measuring tools
Eyedropper (I)
Color Sampler (I)
Ruler (I)
Note (I)
Count (I)†
D
Retouching tools
Spot Healing Brush (J)
Healing Brush (J)
Patch (J)
Red Eye (J)
Clone Stamp (S)
Pattern Stamp (S)
Eraser (E)
Background Eraser (E)
Magic Eraser (E)
Blur
Sharpen
Smudge
Dodge (O)
Burn (O)
Sponge (O)
E
Painting tools
Brush (B)
Pencil (B)
Color Replacement (B)
Mixer Brush (B)
History Brush (Y)
Art History Brush (Y )
Gradient (G)
Paint Bucket (G)
Drawing and
F
type tools
Pen (P)
Freeform Pen (P)
Add Anchor Point
Delete Anchor Point
Convert Point
Horizontal Type (T)
Vertical Type (T )
Horizontal Type Mask (T)
Vertical Type Mask (T)
Path Selection (A)
Direct Selection (A)
Rectangle (U)
Rounded Rectangle (U)
Ellipse (U)
Polygon (U)
Line (U)
Custom Shape (U)
G
Navigation & 3D tools
3D Object Rotate (K)†
3D Object Roll (K)†
3D Object Pan (K)†
3D Object Slide (K)†
3D Object Scale (K)†
3D Rotate Camera (N)†
3D Roll Camera (N)†
3D Pan Camera (N)†
3D Walk Camera (N)†
3D Zoom Camera (N)†
Hand (H)
Rotate View (R)
Zoom (Z)
Indicates default tool * Keyboard shortcuts appear in parenthesis † Extended only
More Help topics
“Workspace overview” on page 12
Last updated 12/5/2011
Page 32

USING PHOTOSHOP
Workspace
Tool galleries
Selection tools gallery
26
The marquee tools make
rectangular, elliptical, single
row, and single column
selections.
The Magic Wand tool
selects similarly colored
areas.
The Move tool moves
selections, layers, and guides.
The lasso tools make
freehand, polygonal
(straight-edged), and
magnetic (snap-to)
selections.
Crop and slice tools gallery
The Crop tool trims images. The Slice tool creates slices. The Slice Select tool selects
slices.
The Quick Selection tool lets
you quickly “paint” a
selection using an adjustable
round brush tip
Retouching tools gallery
The Spot Healing Brush
tool removes blemishes and
objects
The Healing Brush tool
paints with a sample or
pattern to repair
imperfections in a image.
The Patch tool repairs
imperfections in a selected
area of an image using a
sample or pattern.
Last updated 12/5/2011
The Red Eye tool removes
the red reflection caused by a
flash.
Page 33

USING PHOTOSHOP
Workspace
27
The Clone Stamp tool
paints with a sample of an
image.
The Magic Eraser tool
erases solid-colored areas to
transparency with a single
click.
The Dodge tool lightens
areas in an image.
Painting tools gallery
The Pattern Stamp tool
paints with part of an image
as a pattern.
The Blur tool blurs hard
edges in an image.
The Burn tool darkens areas
in an image.
The Eraser tool erases pixels
and restores parts of an
image to a previously saved
state.
The Sharpen tool sharpens
soft edges in an image.
The Sponge tool changes the
color saturation of an area.
The Background Eraser
tool erases areas to
transparency by dragging.
The Smudge tool smudges
data in an image.
The Brush tool paints brush
strokes.
The Pencil tool paints hardedged strokes.
Last updated 12/5/2011
The Color Replacement tool
replaces a selected color with
a new color.
The Mixer Brush tool
Simulates realistic painting
techniques such as blending
canvas colors and varying
paint wetness.
Page 34

USING PHOTOSHOP
Workspace
28
The History Brush tool
paints a copy of the selected
state or snapshot into the
current image window.
The Art History brush tool
paints with stylized strokes
that simulate the look of
different paint styles, using a
selected state or snapshot.
Drawing and type tools gallery
The path selection tools
make shape or segment
selections showing anchor
points, direction lines, and
direction points.
The type tools create type on
an image.
The gradient tools create
straight-line, radial, angle,
reflected, and diamond
blends between colors.
The type mask tools create a
selection in the shape of type.
The Paint Bucket tool fills
similarly colored areas with
the foreground color.
The pen tools let you draw
smooth-edged paths.
The shape tools and Line
tool draw shapes and lines in
a normal layer or a shape
layer.
The Custom Shape tool
makes customized shapes
selected from a custom shape
list.
Navigation, notes, and measuring tools gallery
The Hand tool moves an
image within its window.
The Rotate View tool nondestructively rotates the
canvas.
Last updated 12/5/2011
The Zoom tool magnifies
and reduces the view of an
image.
The Note tool makes notes
that can be attached to an
image.
Page 35

USING PHOTOSHOP
Workspace
29
The Eyedropper tool
samples colors in an image.
The Color Sampler tool
displays color values for up
to four areas.
3D tools gallery (Photoshop Extended)
The 3D Object Rotate tool
rotates the object around its
x-axis.
The 3D Object Scale tool
scales the object larger or
smaller.
The 3D Object Roll tool
rotates the object around its
z-axis.
The 3D Rotate Camera tool
orbits the camera in the x or
y direction.
The Ruler tool measures
distances, locations, and
angles.
The 3D Object Pan tool
pans the object in the x or y
direction.
The 3D Roll Camera tool
rotates the camera around
the z-axis.
The Count tool counts
objects in an image.
(Photoshop Extended only)
The 3D Object Slide tool
moves the object laterally
when you drag horizontally,
or forward and back when
you drag vertically.
The 3D Pan Camera tool
pans the camera in the x or y
direction.
The 3D Walk Camera tool
moves laterally when you
drag horizontally, or
forward and back when you
drag vertically.
The 3D Zoom Camera tool
changes the field of view
closer or farther away.
Last updated 12/5/2011
Page 36

USING PHOTOSHOP
Workspace
Selecting and displaying tools
Select a tool
❖ Do one of the following:
• Click a tool in the Tools panel. If there is a small triangle at a tool’s lower right corner, hold down the mouse button
to view the hidden tools. Then click the tool you want to select.
• Press the tool’s keyboard shortcut. The keyboard shortcut is displayed in its tool tip. For example, you can select
the Move tool by pressing the V key.
Pressing and holding a keyboard shortcut key lets you temporarily switch to a tool. When you let go of the shortcut
key, Photoshop returns to the tool you were using before the temporary switch.
30
A
B
C
Accessing tools
A. Tools panel B. Active tool C. Hidden tools D. Tool name E. Tool shortcut F. Hidden tool triangle
D E
F
Cycle through hidden tools
By default, you cycle through a set of hidden tools by holding down Shift and repeatedly pressing a tool shortcut key.
If you prefer to cycle through tools without holding down Shift, you can disable this preference.
1 Choose Edit > Preferences > General (Windows) or Photoshop > Preferences > General (Mac OS).
2 Deselect Use Shift Key For Tool Switch.
Change tool pointers
Each default pointer has a different hotspot, where an effect or action in the image begins. With most tools, you can
switch to precise cursors, which appear as cross hairs centered around the hotspot.
In most cases, the pointer for a tool is the same as the icon for that tool; you see that pointer when you select the tool.
The default pointer for the marquee tools is the cross-hair pointer ; for the text tool, the default pointer is the
I-beam ; and for the painting tools the default pointer is the Brush Size icon.
1 Choose Edit > Preferences > Cursors (Windows) or choose Photoshop > Preferences > Cursors (Mac OS).
2 Choose tool pointer settings under Painting Cursors or Other Cursors:
Standard Displays pointers as tool icons.
Precise Displays pointers as cross hairs.
Normal Brush Tip The pointer outline corresponds to approximately 50% of the area that the tool will affect. This
option shows the pixels that would be most visibly affected.
Full Size Brush Tip The pointer outline corresponds to nearly 100% of the area that the tool will affect, or nearly all the
pixels that would be affected.
Show Crosshair In Brush Tip Displays cross hairs in the center of the brush shape.
Last updated 12/5/2011
Page 37

USING PHOTOSHOP
Workspace
Show Only Crosshair While Painting Improves performance with large brushes.
3 Click OK.
The Painting Cursors options control the pointers for the following tools:
Eraser, Pencil, Paintbrush, Healing Brush, Rubber Stamp, Pattern Stamp, Quick Selection, Smudge, Blur, Sharpen,
Dodge, Burn, and Sponge tools
The Other Cursors options control the pointers for the following tools:
Marquee, Lasso, Polygonal Lasso, Magic Wand, Crop, Slice, Patch, Eyedropper, Pen, Gradient, Line, Paint Bucket,
Magnetic Lasso, Magnetic Pen, Freeform Pen, Measure, and Color Sampler tools
To toggle between standard and precise cursors in some tool pointers, press Caps Lock.
Visually resize or change hardness of painting cursors
You can resize or change the hardness of a painting cursor by dragging in the image. As you drag, the painting cursor
previews your changes. (Previews require OpenGL. See “Enable OpenGL and optimize GPU settings” on page 58.)
❖ To resize a cursor, press Alt + right-click (Windows) or Control + Option (Mac OS), and drag left or right. To
change hardness, drag up or down.
31
Using the options bar
The options bar appears below the menu bar at the top of the workspace. The options bar is context sensitive—it
changes as you select different tools. Some settings in the options bar (such as painting modes and opacity) are
common to several tools, and some are specific to one tool.
You can move the options bar in the workspace by using the gripper bar, and you can dock it at the top or bottom of
the screen. Tool tips appear when you position the pointer over a tool. To show or hide the options bar, choose
Window > Options.
AB
Lasso options bar
A. Gripper bar B. Tool tip
To return tools to their default settings, right-click (Windows) or Control-click (Mac OS) the tool icon in the options
bar, and then choose Reset Tool or Reset All Tools from the context menu.
For more information on setting options for a specific tool, search for the tool’s name in Photoshop Help.
Tool presets
Tool presets let you save and reuse tool settings. You can load, edit, and create libraries of tool presets using the Tool
Preset picker in the options bar, the Tool Presets panel, and the Preset Manager.
To choose a tool preset, click the Tool Preset picker in the options bar, and select a preset from the pop-up panel. You
can also choose Window > Tool Presets and select a preset in the Tools Presets panel.
Last updated 12/5/2011
Page 38

USING PHOTOSHOP
Workspace
A
B
C
Viewing the Tool Preset picker
A. Click the Tool Preset picker in the options bar to show the Tool Preset pop-up panel. B. Select a preset to change the tool’s options to the
preset, which applies each time you select the tool until you choose Reset Tool from the panel menu. C. Deselect to show all tool presets; select
to show presets for only the tool selected in the toolbox.
Create a tool preset
1 Choose a tool, and set the options you want to save as a tool preset in the options bar.
2 Do one of the following:
• Click the Tool Preset button next to the tool at the left of the options bar.
• Choose Window > Tool Presets to display the Tool Presets panel.
3 Do one of the following:
• Click the Create New Tool Preset button .
• Choose New Tool Preset from the panel menu.
4 Enter a name for the tool preset, and click OK.
32
Change the list of tool presets
❖ Click the triangle to open the Tool Presets pop-up panel menu and choose one of the following:
Show All Tool Presets Shows all loaded presets.
Sort By Tool Sorts the presets by tool.
Show Current Tool Presets Shows only the loaded presets for the active tool. You can also select the Current Tool Only
option in the Tool Presets pop-up panel.
Text Only, Small List, or Large List Determines how presets are displayed in the pop-up panel.
Note: To create, load, and manage libraries of tool presets, see “Working with pop-up panels” on page 21 and “Work with
the Preset Manager” on page 47.
Last updated 12/5/2011
Page 39

USING PHOTOSHOP
Workspace
Viewing images
Change the screen mode
You can use the screen mode options to view images on your entire screen. You can show or hide the menu bar, title
bar, and scroll bars.
❖ Do one of the following:
• To display the default mode (menu bar at the top and scroll bars on the side), choose View > Screen Mode >
Standard Screen Mode. Or, click the Screen Mode button in the Application bar, and select Standard Screen
Mode from the pop-up menu.
• To display a full-screen window with a menu bar and a 50% gray background, but no title bar or scroll bars, choose
View > Screen Mode > Full Screen Mode With Menu Bar. Or, click the Screen Mode button in the Application bar,
and select Full Screen Mode With Menu Bar from the pop-up menu.
• To display a full-screen window with only a black background (no title bar, menu bar, or scroll bars), choose View >
Screen Mode > Full Screen Mode. Or, click the Screen Mode button in the Application bar, and select Full Screen
Mode from the pop-up menu.
33
View another area of an image
❖ Do one of the following:
• Use the window scroll bars.
• Select the Hand tool and drag to pan over the image. To use the Hand tool while another tool is selected, hold down
the spacebar as you drag in the image.
If your computer has OpenGL, you can use the Hand tool to flick the image in the direction you want to view. After a
quick mouse gesture, the image will move as if you were continuously dragging. Enable this feature by choosing Edit
> Preferences > General (Windows) or Photoshop > Preferences > General (Mac OS) and then select Enable Flick
Panning.
Dragging the Hand tool to view another area of an image
• Drag the colored box (proxy view area) in the Navigator panel.
Use the Rotate View tool
You use the Rotate View tool to rotate the canvas non-destructively; it does not transform the image. Rotating the
canvas can be useful for any number of reasons, including facilitating easier painting or drawing. (OpenGL is
required.)
Last updated 12/5/2011
Page 40

USING PHOTOSHOP
Workspace
You can also use rotate gestures on MacBook computers with multi-touch trackpads.
1 In the toolbox, select the Rotate View tool . (If the tool isn’t visible, hold down the Hand tool.)
2 Do any of the following:
• Drag in the image. A compass will indicate north in the image, regardless of the current canvas angle.
• In the options bar, enter degrees in the Rotation Angle field.
• Click or drag the circular Set Angle of Rotation control.
3 To restore the canvas to the original angle, click Reset View.
For a video on the Rotate View tool and other workspace tips, see www.adobe.com/go/lrvid4001_ps. (Discussion of
the Rotate View tool begins at the 5:10 mark.)
Disable trackpad gestures (Mac OS)
If you have a MacBook computer with a multi-touch trackpad, you can use the trackpad to flick, rotate, or zoom
images. This functionality can greatly increase your efficiency, but you can disable it if inadvertent changes occur.
1 Choose Photoshop > Preferences > Interface (Mac OS).
2 In the General section, deselect Enable Gestures.
34
Use the Navigator panel
You use the Navigator panel to quickly change the view of your artwork using a thumbnail display. The colored box
in the Navigator (called the proxy view area) corresponds to the currently viewable area in the window.
❖ Do one or more of the following:
• To display the Navigator panel, select Window > Navigator.
• To change the magnification, type a value in the text box, click the
• Zoom Out
• or
• Zoom In
• button, or drag the zoom slider.
• To move the view of an image, drag the proxy view area in the image thumbnail. You can also click the image
thumbnail to designate the viewable area.
To simultaneously set the size and position of the proxy area, Control-drag (Windows) or Command-drag (Mac OS)
in the image thumbnail.
• To change the color of the proxy view area, select Panel Options from the panel menu. Select a preset color from
the Color pop-up menu, or click the color box to choose a custom color.
Last updated 12/5/2011
Page 41

USING PHOTOSHOP
Workspace
A
B
C
DE FG
Navigator panel
A. Panel menu button B. Thumbnail display of artwork C. Proxy preview area D. Zoom text box E.
Zoom Out
button F. Zoom slider G.
Zoom In
button
35
Zoom in or out
Use the Zoom tool or the View menu commands to zoom in or zoom out of an image. When you use the Zoom
tool, each click magnifies or reduces the image to the next preset percentage and centers the display around the point
you click. When the image has reached its maximum magnification level of 3200% or minimum size of 1 pixel, the
magnifying glass appears empty.
You can use zoom gestures on MacBook computers with multi-touch trackpads.
Set Zoom tool preferences
1 Choose Edit > Preferences > Performance (Windows) or Photoshop > Preferences > Performance (Mac OS). In the
GPU Settings section, select Enable OpenGL Drawing.
Note: Some Zoom tool preferences require OpenGL. If Enable OpenGL Drawing is unavailable, your video card does not
support this technology.
2 In the General preferences, select any of the following:
Animated Zoom Enables continuous zooming while holding down the Zoom tool
Zoom Resizes Windows See “Automatically resize the window when zooming” on page 37.
Zoom With Scroll Wheel Enables zooming with the scroll wheel on your mouse.
Zoom Clicked Point To Center Centers the zoom view on the clicked location.
Last updated 12/5/2011
Page 42

USING PHOTOSHOP
Workspace
Zoom a preset amount
❖ Do any of the following:
• Select the Zoom tool , and click either the
• Zoom In
• or
• Zoom Out
• button in the options bar. Then, click the area you want to zoom in or out.
To quickly switch to zoom out mode, hold down Alt (Windows) or Option (Mac OS).
• Choose View >
• Zoom In
• or View >
• Zoom Out
• . The
• Zoom In
• or
• Zoom Out
• command becomes unavailable when the maximum image magnification or reduction is reached.
• Set the zoom level at the lower left corner of the document window or in the Navigator panel.
36
Zoom continuously
To zoom continuously, your video card must support OpenGL, and Animated Zoom must be selected in the General
preferences.
❖ Select the Zoom tool, and then do any of the following:
• Click and hold in the image to zoom in. Press Alt (Windows) or Option (Mac OS) to zoom out.
• In the options bar, select Scrubby Zoom. Then drag to the left in the image to zoom out, or to the right to zoom in.
Magnify a specific area
1 Select the Zoom tool.
2 Drag over the part of the image that you want to magnify.
Dragging the Zoom tool to magnify the view of an image
Last updated 12/5/2011
Page 43

USING PHOTOSHOP
Workspace
The area inside the zoom marquee is displayed at the highest possible magnification. To move the marquee around the
artwork in Photoshop, begin dragging a marquee and then hold down the spacebar.
Temporarily zoom an image
1 Hold down the H key, and then click in the image and hold down the mouse button.
The current tool changes to the Hand tool, and the image magnification changes as follows:
• If the entire image originally fit within the document window, the image zooms in to fit the window.
• If only a portion of the image was originally visible, the image zooms out. Drag the zoom marquee to magnify a
different part of the image.
2 Release the mouse button and then the H key.
The image returns to the previous magnification and tool.
Automatically resize the window when zooming
❖ With the Zoom tool active, select Resize Windows To Fit in the options bar. The window is resized when you
magnify or reduce the view of the image.
When Resize Windows To Fit is deselected (the default), the window maintains a constant size regardless of the image
magnification. This can be helpful when using smaller monitors or working with tiled views.
37
Note: To automatically resize the window when using keyboard shortcuts for zooming, choose Edit > Preferences >
General (Windows) or Photoshop > Preferences > General (Mac OS). Then select the Zoom Resizes Windows.
Display an image at 100%
❖ Do one of the following:
• Double-click the Zoom tool in the toolbox.
• Choose View > Actual Pixels.
• Enter 100% in the Status Bar and press Enter (Windows) or Return (Mac OS).
Note: The 100% view of an image displays an image as it will appear in a browser (based on the monitor resolution and
the image resolution).
Fit an image to the screen
❖ Do one of the following:
• Double-click the Hand tool in the toolbox.
• Choose View > Fit On Screen.
• Select a zoom tool or the Hand tool, and click the Fit On Screen button in the options bar.
These options scale both the zoom level and the window size to fit the available screen space.
Hide the pixel grid
Over 500% magnification, the image’s pixel grid becomes visible by default. To hide the grid, do the following.
❖ Choose View > Show, and deselect Pixel Grid.
More Help topics
“Match zoom and location in multiple images” on page 38
Last updated 12/5/2011
Page 44

USING PHOTOSHOP
Workspace
View images in multiple windows
The document window is where your images appear. You can open multiple windows to display different images or
different views of the same one. A list of open windows appears in the Window menu. To bring an open image to the
front, choose the file name from the bottom of the Window menu. Available memory may limit the number of
windows per image.
1 Choose Window > Arrange > New Window For [Image
File Name].
2 If you want to arrange the windows, choose Window > Arrange and then choose one of the following:
Cascade Displays undocked windows stacked and cascading from the upper-left to the lower right of the screen.
Tile Displays windows edge to edge. As you close images, the open windows are resized to fill the available space.
Float in Window Allows image to float freely.
Float All in Windows Floats all images.
Consolidate All to Tabs Shows one image in full screen and minimizes the other images to tabs.
You can use the Hand tool’s Scroll All Windows option to scroll through all open images. Select it in the options bar
and drag in one image to scroll through all visible images.
38
Match zoom and location in multiple images
Match only zoom
1 Open one or more images, or open one image in multiple windows.
2 Choose Window > Arrange > Tile to display the images edge to edge.
3 Select the Zoom tool, and then do one of the following:
• Select Zoom All Windows in the options bar, and then click one of the images. The other images zoom in or out
the same relative amount.
• Choose Window > Arrange > Match Zoom. Hold down the Shift key and click one of the images. The other images
zoom in or out at the same magnification.
Match only location
1 Open one or more images, or open one image in multiple windows.
2 Choose Window > Arrange > Tile.
3 Do either of the following:
• Choose Window > Arrange > Match Location.
• Select the Hand tool, select Scroll All Windows in the options bar, and then drag to view another area in one of the
images. (To temporarily enable this option, hold down the Shift key while dragging with the Hand tool.)
Note: Photoshop automatically scrolls to the same relative location on the horizontal and vertical axes. You may need to
manually scroll to reveal the edges of images.
Match zoom and location
1 Open one or more images, or open one image in multiple windows.
2 Choose Window > Arrange > Tile.
Last updated 12/5/2011
Page 45

USING PHOTOSHOP
Workspace
3 Choose Window > Arrange > Match All.
Without Match All command (top), and with Match All command (bottom) selected
4 Select the Zoom tool or the Hand tool.
5 Select one of the images, hold down the Shift key, and click in or drag an area of an image. The other images are
magnified to the same percentage and snap to the area you clicked.
39
Image information
Work with the Info panel
The Info panel shows the color values beneath the pointer and, depending on the tool in use, gives other useful
information. The Info panel also displays a hint on using the selected tool, gives document status information, and can
display 8-bit, 16-bit, or 32-bit values.
The Info panel displays the following information:
• Depending on the option you specify, the Info panel displays 8-bit, 16-bit, or 32-bit values.
• When displaying CMYK values, the Info panel displays an exclamation point next to the CMYK values if the color
beneath the pointer or color sampler is out of the printable CMYK color gamut.
• When a marquee tool is being used, the Info panel displays the x and y coordinates of the pointer position and the
width (W) and height (H) of the marquee as you drag.
• When the Crop tool or Zoom tool is being used, the Info panel displays the width (W) and height (H) of the
marquee as you drag. The panel also shows the angle of rotation of the crop marquee.
• When the Line tool, the Pen tool, or Gradient tool is being used, or when a selection is being moved, the Info panel
displays the x and y coordinates of your starting position, the change in X (DX), the change in Y (DY), the angle
(A), and the length (D) as you drag.
• When a two-dimensional transformation command is being used, the Info panel displays the percentage change in
width (W) and height (H), the angle of rotation (A), and the angle of horizontal skew (H) or vertical skew (V).
• When any color adjustment dialog box (for example, Curves) is being used, the Info panel displays before-and-after
color values for the pixels beneath the pointer and beneath color samplers.
• If the Show Tool Hints option is enabled, you see hints for using the tool selected in the toolbox.
Last updated 12/5/2011
Page 46

USING PHOTOSHOP
Workspace
• Depending on the options selected, the Info panel displays status information, such as document size, document
profile, document dimensions, scratch sizes, efficiency, timing, and current tool.
Use the Info panel
The Info panel displays file information about an image and also provides feedback about the color values as you move
a tool pointer over an image. Make sure the Info panel is visible in your workspace if you want to view information
while dragging in the image.
1 (Optional) Do one of the following if you need to display the Info panel:
• Click the Info panel tab if it’s docked with other panels.
• Choose Window > Info. File information about the image is displayed at the bottom of the Info panel. You can
change the information displayed by clicking the triangle in the upper right corner of the panel and choosing Panel
Options from the panel menu.
2 Set the options for the information you want displayed in the Info Panel by doing any of the following:
• Choose Panel Options from the Info panel menu and specify options in the Info Panel Options dialog box.
• Click an eyedropper icon and choose display options from the pop-up menu. You can also use the pop-up menu to
specify whether the Info panel displays 8-bit, 16-bit, or 32-bit values.
• Click the cursor coordinates icon and choose a unit of measurement.
3 Select a tool.
4 Move the pointer in the image, or drag in the image to use the tool. The following information may appear,
depending on which tool you’re using:
Displays the numeric values for the color beneath the pointer.
40
Displays the x and y coordinates of the pointer.
Displays the width (W) and height (H) of a marquee or shape as you drag, or the width and height of an active
selection.
Change the Info panel options
1 Click the triangle in the upper right corner to open the Info panel menu and choose Panel Options.
2 In the Info Panel Options dialog box, for First Color Readout, choose one of the following display options:
Actual Color Displays values in the current color mode of the image.
Proof Color Displays values for the output color space of the image.
A color mode Displays the color values in that color mode.
Total Ink Displays the total percentage of all CMYK ink at the pointer’s current location, based on the values set in the
CMYK Setup dialog box.
Opacity Displays the opacity of the current layer. This option does not apply to the background.
You can also set the readout options by clicking the eyedropper icon in the Info panel. In addition to the First Color
Readout options, you can also display 8-bit, 16-bit, or 32-bit values.
3 For Second Color Readout, choose a display option from the list in step 2. For the second readout, you can also click
the eyedropper icon in the Info panel and choose readout options from the pop-up menu.
Last updated 12/5/2011
Page 47

USING PHOTOSHOP
Workspace
Clicking an eyedropper icon and choosing a readout mode from the pop-up menu
4 For Ruler Units, choose a unit of measurement.
5 Under Status information, select from the following to display file information in the Info panel:
Document Sizes Displays information on the amount of data in the image. The number on the left represents the
printing size of the image—approximately the size of the saved, flattened file in Adobe Photoshop format. The number
on the right indicates the file’s approximate size including layers and channels.
Document Profile Displays the name of the color profile used by the image.
41
Document Dimensions Displays the dimensions of the image.
Scratch Sizes Displays information on the amount of RAM and the scratch disk used to process the image. The
number on the left represents the amount of memory that is currently being used by the program to display all open
images. The number on the right represents the total amount of RAM available for processing images.
Efficiency Displays the percentage of time spent performing an operation instead of reading or writing to the scratch
disk. If the value is below 100%, Photoshop is using the scratch disk and is therefore operating more slowly.
Timing Displays the amount of time it took to complete the last operation.
Current Tool Displays the name of the active tool.
Measurement Scale Displays the scale of the document.
6 (Optional) Select Show Tool Hints to display a hint for using a selected tool at the bottom of the Info panel.
7 Click OK.
To change measurement units, click the crosshair icon in the Info panel and choose from the menu.
Display file information in the document window
The status bar is located at the bottom of every document window and displays useful information—such as the
current magnification and file size of the active image, and brief instructions for using the active tool.
Note: You can also view copyright and authorship information that has been added to the file. This information includes
standard file information and Digimarc watermarks. Photoshop automatically scans opened images for watermarks
using the Digimarc Detect Watermark plug-in. If a watermark is detected, Photoshop displays a copyright symbol in the
image window’s title bar and updates the Copyright fields of the
Note: File Info
Note: dialog box.
1 Click the triangle in the bottom border of the document window.
Last updated 12/5/2011
Page 48

USING PHOTOSHOP
Workspace
File information view options when Version Cue is enabled
2 Choose a view option from the pop-up menu:
Note: If you have Version Cue enabled, choose from the Show submenu.
Version Cue Displays the Version Cue workgroup status of your document, such as open, unmanaged, unsaved, and
so forth. This option is available only if you have Version Cue enabled.
Document Sizes Information on the amount of data in the image. The number on the left represents the printing size
of the image—approximately the size of the saved, flattened file in Adobe Photoshop format. The number on the right
indicates the file’s approximate size, including layers and channels.
Document Profile The name of the color profile used by the image.
42
Document Dimensions The dimensions of the image.
Measurement Scale The scale of the document.
Scratch Sizes Information on the amount of RAM and the scratch disk used to process the image. The number on the
left represents the amount of memory currently being used by the program to display all open images. The number on
the right represents the total amount of RAM available for processing images.
Efficiency The percentage of time actually spent performing an operation instead of reading or writing to the scratch
disk. If the value is below 100%, Photoshop is using the scratch disk and is therefore operating more slowly.
Timing The time it took to complete the last operation.
Current Tool The name of the active tool.
32-bit Exposure Option for adjusting the preview image for viewing 32-bits-per-channel high dynamic range (HDR)
images on your computer monitor. The slider is available only when the document window displays an HDR image.
Click the file information area of the status bar to display document width, height, channels, and resolution. Control-
click (Windows) or Command-click (Mac OS), to display tile width and height.
More Help topics
“Adjust displayed dynamic range for 32-bit HDR images” on page 82
Rulers, the grid, and guides
About rulers
Rulers help you position images or elements precisely. When visible, rulers appear along the top and left side of the
active window. Markers in the ruler display the pointer’s position when you move it. Changing the ruler origin (the (0,
0) mark on the top and left rulers) lets you measure from a specific point on the image. The ruler origin also determines
the grid’s point of origin.
Last updated 12/5/2011
Page 49

USING PHOTOSHOP
Workspace
To show or hide rulers, choose View > Rulers.
Change a ruler’s zero origin
1 (Optional) Choose View > Snap To, then choose any combination of options from the submenu. This snaps the
ruler origin to guides, slices, or document bounds. You can also snap to the grid.
2 Position the pointer over the intersection of the rulers in the upper-left corner of the window, and drag diagonally
down onto the image. A set of cross hairs appears, marking the new origin on the rulers.
You can hold down Shift as you drag to make the ruler origin snap to the ruler ticks.
To reset a ruler’s origin to its default value, double-click the upper-left corner of the ruler.
43
Dragging to create new ruler origin
More Help topics
“Use snapping” on page 46
Change the unit of measurement
1 Do one of the following:
• Double-click a ruler.
• (Windows) Choose Edit > Preferences > Units & Rulers, or right-click the ruler and then choose a new unit from
the context menu.
• (Mac OS) Choose Photoshop > Preferences > Units & Rulers, or Control-click the ruler and then choose a new unit
from the context menu.
2 For Rulers, choose a unit of measurement.
Note: Changing the units on the Info panel automatically changes the units on the rulers.
3 For Point/Pica Size, choose from the following options:
PostScript (72 points per inch) Sets a unit size compatible for printing to a PostScript device.
Traditional Uses 72.27 points per inch, as traditionally used in printing.
4 Click OK.
Specify columns for an image
Columns help you position images or elements precisely. The New,
Last updated 12/5/2011
Page 50

USING PHOTOSHOP
Workspace
Image Size
, and Canvas Size commands let you specify image width in terms of columns. Using columns is convenient when you
plan to import an image into a page-layout program, such as Adobe InDesign®, and you want the image to fit exactly
within a certain number of columns.
1 Choose Edit > Preferences > Units & Rulers (Windows) or Photoshop > Preferences > Units & Rulers (Mac OS).
2 Enter values for Width and Gutter.
Position with the Ruler tool
The Ruler tool helps you position images or elements precisely. The Ruler tool calculates the distance between any
two points in the workspace. When you measure from one point to another, a nonprinting line is drawn, and the
options bar and Info panel show the following information:
• The starting location (X and Y)
• The horizontal (W) and vertical (H) distances traveled from the x and y axes
• The angle measured relative to the axis (A)
• The total length traveled (D1)
• The two lengths traveled (D1 and D2), when you use a protractor
All measurements except the angle are calculated in the unit of measure currently set in the Units & Rulers
preference dialog box.
44
If your document has an existing measuring line, selecting the Ruler tool causes it to be displayed.
Measure between two points
1 Select the Ruler tool . (If the Ruler isn’t visible, hold down the Eyedropper tool.)
2 Drag from the starting point to the ending point. Hold down the Shift key to constrain the tool to 45° increments.
3 To create a protractor from an existing measuring line, Alt-drag (Windows) or Option-drag (Mac OS) at an angle
from one end of the measuring line, or double-click the line and drag. Hold down the Shift key to constrain the tool
to multiples of 45°.
Edit a measuring line
1 Select the Ruler tool .
2 Do one of the following:
• To resize the line, drag one end of an existing measuring line.
• To move the line, place the pointer on the line away from either endpoint, and drag the line.
• To remove the line, place the pointer on the line away from either endpoint, and drag the line out of the image, or
click Clear in the tool options bar.
Note: You can drag out a measure line on an image feature that should be horizontal or vertical, and then choose Image >
Image Rotation > Arbitrary. The correct angle of rotation required to straighten the image is automatically entered into
the Rotate Canvas dialog box.
Position with guides and the grid
Guides and the grid help you position images or elements precisely. Guides appear as nonprinting lines that float over
the image. You can move and remove guides. You can also lock them so that you don’t move them by accident.
Last updated 12/5/2011
Page 51

USING PHOTOSHOP
Workspace
Smart Guides help you align shapes, slices, and selections. They appear automatically when you draw a shape, or create
a selection or slide. You can hide Smart Guides if you need to.
The grid is useful for laying out elements symmetrically. The grid appears by default as nonprinting lines but can also
be displayed as dots.
Guides and grids behave in similar ways:
• Selections, selection borders, and tools snap to a guide or the grid when dragged within 8 screen (not image) pixels.
Guides also snap to the grid when moved. You can turn this feature on and off.
• Guide spacing, along with guide and grid visibility and snapping, is specific to an image.
• Grid spacing, along with guide and grid color and style, is the same for all images.
More Help topics
“Slice a web page” on page 465
Show or hide a grid, guides, or smart guides
❖ Do one of the following:
• Choose View > Show > Grid.
• Choose View > Show > Guides.
• View > Show > Smart Guides.
• Choose View > Extras. This command also shows or hides layer edges, selection edges, target paths, and slices.
45
Place a guide
1 If the rulers are not visible, choose View > Rulers.
Note: For the most accurate readings, view the image at 100% magnification or use the Info panel.
2 Do one of the following to create a guide:
• Choose View > New Guide. In the dialog box, select Horizontal or Vertical orientation, enter a position, and
click OK.
• Drag from the horizontal ruler to create a horizontal guide.
Dragging to create a horizontal guide
• Hold down Alt (Windows) or Option (Mac OS), and drag from the vertical ruler to create a horizontal guide.
• Drag from the vertical ruler to create a vertical guide.
• Hold down Alt (Windows) or Option (Mac OS), and drag from the horizontal ruler to create a vertical guide.
Last updated 12/5/2011
Page 52

USING PHOTOSHOP
Workspace
• Hold down Shift and drag from the horizontal or vertical ruler to create a guide that snaps to the ruler ticks. The
pointer changes to a double-headed arrow when you drag a guide.
3 (Optional) If you want to lock all guides, choose View > Lock Guides.
Move a guide
1 Select the Move tool , or hold down Ctrl (Windows) or Command (Mac OS) to activate the Move tool.
2 Position the pointer over the guide (the pointer turns into a double-headed arrow).
3 Move the guide in any of the following ways:
• Drag the guide to move it.
• Change the guide from horizontal to vertical, or vice versa, by holding down Alt (Windows) or Option (Mac OS)
as you click or drag the guide.
• Align the guide with the ruler ticks by holding down Shift as you drag the guide. The guide snaps to the grid if the
grid is visible and View > Snap To > Grid is selected.
Remove guides from the image
❖ Do one of the following:
• To remove a single guide, drag the guide outside the image window.
• To remove all guides, choose View > Clear Guides.
46
Set guide and grid preferences
1 Do one of the following:
• (Windows) Choose Edit > Preferences > Guides, Grid, & Slices.
• (Mac OS) Choose Photoshop > Preferences > Guides, Grid, & Slices.
2 For Color, choose a color for the guides, the grid, or both. If you choose Custom, click the color box, choose a color,
and click OK.
3 For Style, choose a display option for guides or the grid, or both.
4 For Gridline Every, enter a value for the grid spacing. For Subdivisions, enter a value by which to subdivide the grid.
If desired, change the units for this option. The Percent option creates a grid that divides the image into even sections.
For example, choosing 25 for the Percent option creates an evenly divided 4-by-4 grid.
5 Click OK.
Use snapping
Snapping helps with precise placement of selection edges, cropping marquees, slices, shapes, and paths. However, if
snapping prevents you from correctly placing elements, you can disable it.
Enable or disable snapping
❖ Choose View > Snap. A check mark indicates that snapping is enabled.
To temporarily disable snapping while using the Move tool, hold down Ctrl.
Last updated 12/5/2011
Page 53

USING PHOTOSHOP
Workspace
Specify what to snap to
❖ Choose View > Snap To, and choose one or more options from the submenu:
Guides Snaps to guides.
Grid Snaps to the grid. You cannot select this option when the grid is hidden.
Layer Snaps to the content in the layer.
Slices Snaps to slice boundaries. You cannot select this option when slices are hidden.
Document Bounds Snaps to the edges of the document.
All Selects all Snap To options.
None Deselects all Snap To options.
A check mark indicates that the option is selected and snapping is enabled.
If you want to enable snapping for only one option, make sure the Snap command is disabled, and then choose View >
Snap To and choose an option. This automatically enables snapping for the selected option, and deselects all other
Snap To options.
Show or hide Extras
Guides, grids, selection edges, slices, and text baselines are examples of nonprinting Extras that help you select, move,
or edit objects. You can enable or disable any combination of Extras without affecting the image. You can also show
or hide enabled Extras to clean up the workspace.
47
❖ Do one of the following:
• To show or hide all enabled Extras, choose View > Extras. (A check mark appears next to enabled Extras in the
Show submenu.)
• To enable and show an individual Extra, choose View > Show, and select the Extra from the submenu.
• To enable and show all available Extras, choose View > Show > All.
• To disable and hide all Extras, choose View > Show > None.
• To enable or disable groups of Extras, choose View > Show > Show Extra Options.
Note: Color samplers are affected by the Extras, All, and None commands, though they are not an option in the Show
submenu.
Presets, Preferences, and Plug-ins
Work with the Preset Manager
About the Preset Manager
The Preset Manager lets you manage the libraries of preset brushes, swatches, gradients, styles, patterns, contours,
custom shapes, and preset tools that come with Photoshop. For example, you can use the Preset Manager to change
the current set of preset items or create new libraries. After you load a library in the Preset Manager, you can access
the library’s items in locations such as the options bar, panels, dialog boxes, and so on.
In general, when you change a preset, Photoshop prompts you to save the changes as a new preset so that both the
original and changed preset remain available.
Last updated 12/5/2011
Page 54

USING PHOTOSHOP
Workspace
Each type of library has its own file extension and default folder. Preset files are installed on your computer inside the
Presets folder in the Adobe Photoshop application folder.
To open the Preset Manager, choose Edit > Preset Manager. Choose an option from the Preset Type menu to switch
to a specific preset type.
You can adjust the configuration of presets by clicking the panel menu button and choosing a display mode from the
top section of the menu:
Text Only Displays the name of each preset item.
Small Thumbnail or Large Thumbnail Displays a thumbnail of each preset item.
Small List or Large List Displays the name and thumbnail of each preset item.
Stroke Thumbnail Displays a sample brush stroke and brush thumbnail of each brush preset. (This option is available
for brush presets only.)
To rearrange the list of items, drag an item up or down in the list.
48
Rearranging tool presets in the Preset Manager
Note: To delete a preset in the Preset Manager, select the preset and click Delete. You can always use the Reset command
to restore the default items in a library.
Load a library of preset items
❖ Do one of the following:
• Click the triangle to the right of the Preset Type pop-up menu and then choose a library file from the bottom of the
panel menu. Click OK to replace the current list, or click Append to add the current list.
• To add a library to the current list, click Load, select the library file you want to add, and click Load.
• To replace the current list with a different library, choose Replace [Preset Type] from the panel menu. Select the
library file you want to use, and click Load.
Note: Each type of library has its own file extension and default folder.
Manage preset items
You can rename or delete preset items, as well as create or restore libraries of presets.
Rename preset items
1 Select a preset item. Shift-click to select multiple items.
2 Do one of the following:
• Click Rename, and then enter a new name for the brush, swatch, and so on.
Last updated 12/5/2011
Page 55

USING PHOTOSHOP
Workspace
• If the Preset Manager currently displays presets as thumbnails, double-click a preset, enter a new name, and
click OK.
• If the Preset Manager currently displays presets as a list or text only, double-click a preset, enter a new name inline,
and press Enter (Windows) or Return (Mac OS).
Delete preset items
❖ Do one of the following:
• Select a preset item, and click Delete.
• Alt-click (Windows) or Option-click (Mac OS) the items you want to delete.
Create a new library of presets
1 Do one of the following:
• To save all the presets in the list as a library, make sure that all items are selected.
• To save a subset of the current list as a library, hold down Shift, and select the items you want to save.
2 Click Save Set, choose a location for the library, enter a file name, and click Save.
You can save the library anywhere. However, if you place the library file in the appropriate Presets folder in the default
preset location, the library name will appear at the bottom of the panel menu after you restart Photoshop.
49
Restore the default library of preset items
❖ Choose Reset from the panel menu. You can either replace the current list or append the default library to the
current list.
Default preset locations
1 The default location for saving/loading/replacing presets depends on your operating system.
• Mac: <User>/Library/Application Support/Adobe/Adobe
• Photoshop CS5
• /Presets.
• Windows XP: [Drive]:\Document and Settings\<user>\Application Data\Adobe\Adobe
• Photoshop CS5
• \Presets.
• Windows Vista: [Drive]:\Users\<user>\AppData\Roaming\Adobe\Adobe Photoshop CS5\Presets.
2 Presets that ship with Adobe Photoshop are stored in the Photoshop program folder.
Displaying Hidden Files in Windows
The default locations for saving/loading/replacing presets are hidden by default in Windows.
1 To display hidden files in Windows XP:
a Go to Start > Control Panel > Folder Options.
b In the View tab, under Hidden files and folders, select Show hidden files and folders.
c Click OK.
2 To display hidden files in Windows Vista:
a Go to Start > Control Panel > Appearance and Personalization > Folder Options.
Last updated 12/5/2011
Page 56

USING PHOTOSHOP
Workspace
b In the View tab, under Hidden files and folders, select Show hidden files and folders.
c Click OK.
Preferences
About preferences
Numerous program settings are stored in the Adobe Photoshop CS5 Prefs file, including general display options, filesaving options, performance options, cursor options, transparency options, type options, and options for plug-ins and
scratch disks. Most of these options are set in the Preferences dialog box. Preference settings are saved each time you
quit the application.
Unexpected behavior may indicate damaged preferences. If you suspect damage to preferences, restore preferences to
their default settings.
Detailed information about specific preference settings appears in task-specific topics. For example, search Help for
“Transparency preferences” to see those settings discussed in the context of related features such as layers.
Open a preferences dialog box
1 Do one of the following:
• (Windows) Choose Edit > Preferences and choose the desired preference set from the submenu.
• (Mac OS) Choose Photoshop > Preferences, and then choose the desired preference set from the submenu.
2 To switch to a different preference set, do one of the following:
• Choose the preference set from the menu at the left of the dialog box.
• Click Next to display the next preference set in the list; click Prev to display the previous set.
For information on a specific preference option, see the index.
50
Restore all preferences to default settings
❖ Do one of the following:
• Press and hold Alt+Control+Shift (Windows) or Option+Command+Shift (Mac OS) as you start Photoshop. You
are prompted to delete the current settings.
• (Mac OS only) Open the Preferences folder in the Library folder, and drag the Adobe Photoshop CS Settings folder
to the Trash.
New Preferences files are created the next time you start Photoshop.
Disable and enable warning messages
Sometimes you will see messages containing warnings or prompts. You can suppress the display of these messages by
selecting the Don’t Show Again option in the message. You can also globally redisplay all messages that have been
suppressed.
1 Do one of the following:
• (Windows) Choose Edit > Preferences > General.
• (Mac OS) Choose Photoshop > Preferences > General.
2 Click Reset All Warning Dialogs, and click OK.
Last updated 12/5/2011
Page 57

USING PHOTOSHOP
Workspace
Plug-ins
About plug-in modules
Plug-in modules are software programs developed by Adobe Systems and by other software developers in conjunction
with Adobe Systems to add features to Photoshop. A number of importing, exporting, and special-effects plug-ins
come with your program. They are automatically installed in folders inside the Photoshop Plug-ins folder.
You can select an additional Plug-ins folder for compatible plug-ins stored with another application. You can also
create a shortcut (Windows) or an alias (Mac OS) for a plug-in stored in another folder on your system. You can then
add the shortcut or alias to the plug-ins folder and use that plug-in with Photoshop.
Once installed, plug-in modules appear as options in the Import or Export menu; as file formats in the Open, and
Save As
dialog boxes; or as filters in the Filter submenus. Photoshop can accommodate a large number of plug-ins. However,
if the list of installed plug-in modules becomes too long, Photoshop may not be able to display all the plug-ins in their
appropriate menus. If so, newly installed plug-ins appear in the Filter > Other submenu.
Install a plug-in module
In Mac OS, you cannot run Photoshop in the Classic environment. Plug-ins originally intended to work on Mac OS 9
won’t appear.
51
❖ Do one of the following:
• To install an
• Adobe Systems
• plug-in module, use the plug-in installer, if provided. In Windows, you can also install or copy the module into the
appropriate Plug-ins folder in the Photoshop program folder. In Mac OS, drag a copy of the module to the
appropriate Plug-Ins folder in the Photoshop program folder. Make sure that the files are uncompressed.
• To install a third-party plug-in module, follow the installation instructions that came with the plug-in module. If
you cannot run a third-party plug-in, it may require a legacy Photoshop serial number.
Select an additional plug-ins folder
1 Choose Edit > Preferences > Plug-ins (Windows) or choose Photoshop > Preferences > Plug-ins (Mac OS).
2 Select Additional Plug-ins Folder.
3 Click Choose, and select a folder or directory from the list. Make sure that you do not select a location inside the
Plug-ins folder. To display the contents of a folder, double-click the directory (Windows) or click Open (Mac OS).
4 When you have highlighted the additional plug-ins folder, click OK (Windows) or Choose (Mac OS).
5 Restart Photoshop for the plug-ins to take effect.
Suppress the loading of plug-ins
❖ Add a tilde ~ character at the beginning of the plug-in name, folder, or directory. That file (or all files in the folder)
will be ignored by the application.
View information about installed plug-ins
❖ Do one of the following:
• (Windows) Choose Help > About Plug-in and choose a plug-in from the submenu.
Last updated 12/5/2011
Page 58

USING PHOTOSHOP
Workspace
• (Mac OS) Choose Photoshop > About Plug-in, and then choose a plug-in from the submenu.
Undo and history
Use the Undo or Redo commands
The Undo and Redo commands let you undo or redo operations. You can also use the History panel to undo or redo
operations.
❖ Choose Edit > Undo or Edit > Redo.
If an operation can’t be undone, the command is dimmed and changes to Can’t Undo.
More Help topics
“Using the History panel” on page 53
Revert to the last saved version
❖ Choose File > Revert.
Note: Revert is added as a history state in the History panel and can be undone.
52
Restore part of an image to its previously saved version
❖ Do one of the following:
• Use the History Brush tool to paint with the selected state or snapshot on the History panel.
• Use the Eraser tool with the Erase To History option selected.
• Select the area you want to restore, and choose Edit > Fill. For Use, choose History, and click OK.
Note: To restore the image with a snapshot of the initial state of the document, choose History Options from the Panel
menu and make sure that the Automatically Create First Snapshot option is selected.
More Help topics
“Erase with the Eraser tool” on page 296
Cancel an operation
❖ Hold down Esc until the operation in progress has stopped. In Mac OS, you can also press Command+period.
Receive notification when an operation is completed
A progress bar indicates that an operation is being performed. You can interrupt the operation or have the program
notify you when it has finished the operation.
1 Do one of the following:
• (Windows) choose Edit > Preferences > General.
• (Mac OS) choose Photoshop > Preferences > General.
2 Select Beep When Done.
Last updated 12/5/2011
Page 59

USING PHOTOSHOP
Workspace
3 Click OK.
Using the History panel
You can use the History panel to jump to any recent state of the image created during the current working session.
Each time you apply a change to an image, the new state of that image is added to the panel.
For example, if you select, paint, and rotate part of an image, each of those states is listed separately in the panel. When
you select one of the states, the image reverts to how it looked when that change was first applied. You can then work
from that state.
You can also use the History panel to delete image states and, in Photoshop, to create a document from a state or
snapshot.
To display the History panel, choose Window > History, or click the History panel tab.
A
B
53
C
D
Photoshop History panel
A. Sets the source for the history brush B. Thumbnail of a snapshot C. History state D. History state slider
Keep the following in mind when using the History panel:
• Program-wide changes, such as changes to panels, color settings, actions, and preferences, are not reflected in the
History panel, because they are not changes to a particular image.
• By default, the History panel lists the previous 20 states. You can change the number of remembered states by
setting a preference. Older states are automatically deleted to free more memory for Photoshop. To keep a
particular state throughout your work session, make a snapshot of the state.
• Once you close and reopen the document, all states and snapshots from the last working session are cleared from
the panel.
• By default, a snapshot of the initial state of the document is displayed at the top of the panel.
• States are added to the bottom of the list. That is, the oldest state is at the top of the list, the most recent one at the
bottom.
• Each state is listed with the name of the tool or command used to change the image.
• By default, when you select a state, the states below it are dimmed. This way you can easily see which changes will
be discarded if you continue working from the selected state.
• By default, selecting a state and then changing the image eliminates all states that come after it.
Last updated 12/5/2011
Page 60

USING PHOTOSHOP
Workspace
• If you select a state and then change the image, eliminating the states that came after, you can use the Undo
command to undo the last change and restore the eliminated states.
• By default, deleting a state deletes that state and those that came after it. If you choose the Allow Non-Linear History
option, deleting a state deletes only that state.
Revert to a previous image state
❖ Do any of the following:
• Click the name of the state.
• Choose Step Forward or Step Backward from the History panel menu or the Edit menu to move to the next or
previous state.
Delete one or more image states
❖ Do one of the following:
• Click the name of the state, and choose Delete from the History panel menu to delete that change and those that
came after it.
• Drag the state to the Delete icon to delete that change and those that came after it.
• Choose Clear History from the panel menu to delete the list of states from the History panel, without changing the
image. This option doesn’t reduce the amount of memory used by Photoshop.
• Hold down Alt (Windows) or Option (Mac OS), and choose Clear History from the panel menu to purge the list
of states without changing the image. If you get a message that Photoshop is low on memory, purging states is
useful, because the command deletes the states from the Undo buffer and frees up memory. You can’t undo the
Clear History command.
• Choose Edit > Purge > Histories to purge the list of states for all open documents. You can’t undo this action.
54
Create or replace a document with an image state
❖ Do one of the following:
• Drag a state or snapshot onto the Create a New Document From Current State button in the History panel.
The history list for the newly created document contains only the Duplicate State entry.
• Select a state or snapshot, and click the Create a New Document From Current State button . The history list
for the newly created document contains only the Duplicate State entry.
• Select a state or snapshot, and choose New Document from the History panel menu. The history list for the newly
created document contains only the Duplicate State entry.
• Drag a state onto an existing document.
To save one or more snapshots or image states for use in a later editing session, create a new file for each state you
save, and save each in a separate file. When you reopen your original file, plan to open the other saved files also. You
can drag each file’s initial snapshot to the original image to access the snapshots again from the original image’s History
panel.
Set history options
You can specify the maximum number of items to include in the History panel and set other options to customize the
panel.
1 Choose History Options from the History panel menu.
Last updated 12/5/2011
Page 61

USING PHOTOSHOP
Workspace
2 Select an option:
Automatically Create First Snapshot Automatically creates a snapshot of the initial state of the image when the
document is opened.
Automatically Create New Snapshot When Saving Generates a snapshot every time you save.
Allow Non-Linear History Makes changes to a selected state without deleting the states that come after. Normally,
when you select a state and change the image, all states that come after the selected one are deleted. In this way, the
History panel can display a list of the editing steps in the order that they were made. By recording states in a nonlinear
way, you can select a state, make a change to the image, and delete just that state. The change is appended at the end
of the list.
Show New Snapshot Dialog By Default Forces Photoshop to prompt you for snapshot names even when you use the
buttons on the panel.
Make Layer Visibility Changes Undoable By default, turning layer visibility on or off is not recorded as a history step
and therefore can’t be undone. Select this option to include layer visibility changes in history steps.
Set Edit History Log options
You may need to keep careful track of what’s been done to a file in Photoshop, either for your own records, client
records, or legal purposes. The Edit History Log helps you keep a textual history of changes made to an image. You
can view the Edit History Log metadata using Adobe Bridge or the
55
File Info
dialog box.
You can choose to export the text to an external log file, or you can store the information in the metadata of edited
files. Storing many editing operations as file metadata increases file size; such files may take longer than usual to open
and save.
If you need to prove that the log file hasn’t been tampered with, keep the edit log in the file’s metadata, and then use
Adobe Acrobat to digitally sign the log file.
By default, history log data about each session is saved as metadata embedded in the image file. You can specify where
the history log data is saved and the level of detail contained in the history log.
1 Choose Edit > Preferences > General (Windows) or Photoshop > Preferences > General (Mac OS).
2 Click the History Log preference to toggle from on to off or vice versa.
3 For the Save Log Items To option, choose one of the following:
Metadata Saves the history log as metadata embedded in each file.
Text File Exports the history log to a text file. You are prompted to name the text file and choose a location in which
to store it.
Both Stores metadata in the file and creates a text file.
Note: If you want to save the text file in a different location or save another text file, click the Choose button, specify where
to save the text file, name the file if necessary, and click Save.
4 From the Edit Log Items menu, choose one of the following options:
Sessions Only Keeps a record of each time your start or quit Photoshop and each time you open and close files (each
image’s filename is included). Does not include any information about edits made to the file.
Concise Includes the text that appears in the History panel in addition to the Sessions information.
Last updated 12/5/2011
Page 62

USING PHOTOSHOP
Workspace
Detailed Includes the text that appears in the Actions panel in addition to the Concise information. If you need a
complete history of all changes made to files, choose Detailed.
Make a snapshot of an image
The Snapshot command lets you make a temporary copy (or snapshot) of any state of the image. The new snapshot is
added to the list of snapshots at the top of the History panel. Selecting a snapshot lets you work from that version of
the image.
Snapshots are similar to the states listed in the History panel, but they offer additional advantages:
• You can name a snapshot to make it easy to identify.
• Snapshots can be stored for an entire work session.
• You can compare effects easily. For example, you can take a snapshot before and after applying a filter. Then select
the first snapshot, and try the same filter with different settings. Switch between the snapshots to find the settings
you like best.
• With snapshots, you can recover your work easily. When you experiment with a complex technique or apply an
action, take a snapshot first. If you’re not satisfied with the results, you can select the snapshot to undo all the steps.
Note: Snapshots are not saved with the image—closing an image deletes its snapshots. Also, unless you select the Allow
Non-Linear History option, selecting a snapshot and changing the image deletes all of the states currently listed in the
History panel.
56
More Help topics
“Blending modes” on page 312
“Create a brush and set painting options” on page 302
“Paint with the Art History Brush” on page 295
Create a snapshot
1 Select a state and do one of the following:
• To automatically create a snapshot, click the Create New Snapshot button on the History panel, or if
Automatically Create New Snapshot When Saving is selected in the history options, choose New Snapshot from the
History panel menu.
• To set options when creating a snapshot, choose New Snapshot from the History panel menu, or Alt-click
(Windows) or Option-click (Mac OS) the Create New Snapshot button.
2 Enter the name of the Snapshot in the Name text box.
3 Choose the snapshot contents from the From menu:
Full Document Makes a snapshot of all layers in the image at that state
Merged Layers Makes a snapshot that merges all layers in the image at that state
Current Layer Makes a snapshot of only the currently selected layer at that state
Work with snapshots
❖ Do one of the following:
• To select a snapshot, click the name of the snapshot or drag the slider at the left of the snapshot up or down to a
different snapshot.
Last updated 12/5/2011
Page 63

USING PHOTOSHOP
Workspace
• To rename a snapshot, double-click the snapshot and enter a name.
• To delete a snapshot, select the snapshot and either choose Delete from the panel menu, click the Delete icon ,
or drag the snapshot to the Delete icon.
Paint with a state or snapshot of an image
The History Brush tool lets you paint a copy of one image state or snapshot into the current image window. This
tool makes a copy, or sample, of the image and then paints with it.
For example, you might make a snapshot of a change you made with a painting tool or filter (with the Full Document
option selected when you create the snapshot). After undoing the change to the image, you could use the History Brush
tool to apply the change selectively to areas of the image. Unless you select a merged snapshot, the History Brush tool
paints from a layer in the selected state to the same layer in another state.
The History Brush tool copies from one state or snapshot to another, but only at the same location. In Photoshop, you
can also paint with the Art History Brush tool to create special effects.
1 Select the History Brush tool .
2 Do one of the following in the options bar:
• Specify the opacity and blending mode.
• Choose a brush and set brush options.
3 In the History panel, click the left column of the state or snapshot to be used as the source for the History Brush tool.
4 Drag to paint with the History Brush tool.
57
More Help topics
“Paint with the Art History Brush” on page 295
Memory and performance
Allocate RAM to Photoshop
Photoshop displays the RAM available to Photoshop and the ideal range of RAM for Photoshop (a percentage of the
total available RAM) in Performance preferences.
❖ In the Performance preferences, enter the amount of RAM you want to allocate to Photoshop in the Let Photoshop
Use text box. Alternatively, drag the slider.
For detailed information on improving Photoshop performance, including specifying RAM settings in preferences, see
Optimize performance | Photoshop CS4, CS5 (kb404439) in the Adobe support knowledgebase.
Assigning scratch disks
When your system does not have enough RAM to perform an operation, Photoshop uses a proprietary virtual memory
technology, also called scratch disks. A scratch disk is any drive or drive partition with free memory. By default,
Photoshop uses the hard drive on which the operating system is installed as the primary scratch disk.
Photoshop detects and displays all available internal disks in the Preferences panel. Using the Preferences panel, you
can enable other scratch disks to be used when the primary disk is full. Your primary scratch disk should be your fastest
hard disk; make sure it has plenty of defragmented space available.
Last updated 12/5/2011
Page 64

USING PHOTOSHOP
Workspace
The following guidelines can help you assign scratch disks:
• For best performance, scratch disks should be on a different drive than any large files you are editing.
• Scratch disks should be on a different drive than the one your operating system uses for virtual memory.
• RAID disks/disk arrays are good choices for dedicated scratch disk volumes.
• Drives with scratch disks should be defragmented regularly.
Change the scratch disk assignment
1 Do any of the following in the Scratch Disks area of Performance preferences:
• To change the scratch disk order, click the arrow buttons.
• To enable or disable a scratch disk, select or deselect the Active checkbox.
To ensure optimal performance, only local drives are available as scratch disks.
2 Click OK.
3 To apply the changes, restart Photoshop.
58
Specify history and cache settings
❖ In the Performance preferences, do any of the following:
• Specify the maximum number of History States that appear in the History panel.
• Specify the Cache Levels and Tile Size for image data. To quickly optimize these settings, click a preset for images
with these characterstics:
Tall and Thin Many layers and small dimensions.
Default Moderate dimensions and layers.
Big and Flat Large dimensions and few layers.
You must restart Photoshop to apply new cache settings.
Free memory
The Purge command lets you free memory used by the Undo command, the History panel, or the clipboard.
❖ Choose Edit > Purge, and choose the item type or buffer you want to clear. If it is already empty, the item type or
buffer is dimmed.
Note: The Purge command permanently clears from memory the operation stored by the command or buffer; Purge
cannot be undone. For example, choosing Edit > Purge > Histories deletes all history states from the History panel. Use
the Purge command when the amount of information in memory is so large that Photoshop performance is noticeably
affected.
Enable OpenGL and optimize GPU settings
OpenGL is a software and hardware standard that accelerates video processing when working with large or complex
images such as 3D files. OpenGL requires a video adapter that supports the OpenGL standard. Your performance
when opening, moving, and editing 3D models is significantly improved on a system with OpenGL. (If OpenGL is not
available on your system, Photoshop uses software-based ray-trace rendering to display 3D files.)
Last updated 12/5/2011
Page 65

USING PHOTOSHOP
Workspace
If OpenGL is present on your system, you can enable it in the Preferences dialog box.
1 Do one of the following:
• (Windows) Choose Edit > Preferences > Performance.
• (Mac OS) Choose Photoshop > Preferences > Performance.
2 In the GPU Settings section, select Enable OpenGL Drawing.
3 Click OK. The preference affects subsequently opened images. No restart is necessary.
For more information, see:
• GPU and OpenGL support | Photoshop CS4, CS5 (kb404898)
• GPU and OpenGL features and preferences | Photoshop and Bridge CS5, CS4 (kb405745)
• Tested video cards | Photoshop CS5 (cpsid_83117)
Adobe online services
Adobe online services are hosted web applications that work similarly to traditional desktop tools. The advantage of
online services is that they are always up to date because they are hosted on the web, as opposed to on your computer.
59
Photoshop integrates directly with Adobe® CS Live online services. For more information, see Using Adobe CS Live.
For information on managing Adobe online services, see the Adobe website at
www.adobe.com/go/learn_creativeservices_en.
Last updated 12/5/2011
Page 66

Chapter 4: Understanding and opening
images
For detailed instructions, click the links below. To ask questions, request features, or report problems, visit
feedback.photoshop.com.
Image essentials
About bitmap images
Bitmap images—technically called raster images—use a rectangular grid of picture elements (pixels) to represent
images. Each pixel is assigned a specific location and color value. When working with bitmap images, you edit pixels
rather than objects or shapes. Bitmap images are the most common electronic medium for continuous-tone images,
such as photographs or digital paintings, because they can more efficiently represent subtle gradations of shades and
color.
60
Bitmap images are resolution-dependent—that is, they contain a fixed number of pixels. As a result, they can lose detail
and appear jagged if they are scaled to high magnifications on-screen or if they are printed at a lower resolution than
they were created for.
3:1
24:1
Example of a bitmap image at different levels of magnification
Bitmap images sometimes require large amounts of storage space, and often need to be compressed to keep file sizes
down when used in certain
Creative Suite
components. For instance, you compress an image file in its original application before you import it into a layout.
Note: In Adobe Illustrator, you can create bitmap effects in your artwork using effects and graphic styles.
More Help topics
“About vector graphics” on page 60
About vector graphics
Vector graphics (sometimes called vector shapes or vector objects) are made up of lines and curves defined by
mathematical objects called vectors, which describe an image according to its geometric characteristics.
Last updated 12/5/2011
Page 67

USING PHOTOSHOP
Understanding and opening images
You can freely move or modify vector graphics without losing detail or clarity, because they are resolutionindependent—they maintain crisp edges when resized, printed to a PostScript printer, saved in a PDF file, or imported
into a vector-based graphics application. As a result, vector graphics are the best choice for artwork, such as logos, that
will be used at various sizes and in various output media.
The vector objects you create using the drawing and shape tools in Adobe
Creative Suite
are examples of vector graphics. You can use the Copy and Paste commands to duplicate vector graphics between
Creative Suite
components.
More Help topics
“About bitmap images” on page 60
Combining vector graphics and bitmap images
When combining vector graphics and bitmap images in a document, it’s important to remember that how your
artwork looks on-screen isn’t always how it will look in its final medium (whether commercially printed, printed on a
desktop printer, or viewed on the web). The following factors influence the quality of your final artwork:
61
Transparency Many effects add partially transparent pixels to your artwork. When your artwork contains
transparency, Photoshop performs a process called flattening before printing or exporting. In most cases, the default
flattening process produces excellent results. However, if your artwork contains complex, overlapping areas and you
require high-resolution output, you will probably want to preview the effects of flattening.
Image Resolution The number of pixels per inch (ppi) in a bitmap image. Using too low a resolution for a printed
image results in pixelation—output with large, coarse-looking pixels. Using too high a resolution (pixels smaller than
what the output device can produce) increases the file size without increasing the quality of the printed output, and
slows the printing of the artwork.
Printer resolution and screen frequency The number of ink dots produced per inch (dpi) and the number of lines per
inch (lpi) in a halftone screen. The relationship between image resolution, printer resolution, and screen frequency
determines the quality of detail in the printed image.
Color channels
Every Photoshop image has one or more channels, each storing information about color elements in the image. The
number of default color channels in an image depends on its color mode. By default, images in Bitmap, Grayscale,
Duotone, and Indexed Color mode have one channel; RGB and Lab images have three; and CMYK images have four.
You can add channels to all image types except Bitmap mode images. For more information, see “Color modes” on
page 89.
Channels in color images are actually grayscale images that represent each of the color components of an image. For
example, an RGB image has separate channels for red, green, and blues color values.
In addition to color channels, alpha channels, can be added to an image for storing and editing selections as masks,
and spot color channels can be added to add spot color plates for printing. For more information, see “Channel basics”
on page 230.
Last updated 12/5/2011
Page 68

USING PHOTOSHOP
Understanding and opening images
More Help topics
“About masks and alpha channels” on page 236
“About spot colors” on page 458
Bit depth
Bit depth specifies how much color information is available for each pixel in an image. The more bits of information
per pixel, the more available colors and more accurate color representation. For example, an image with a bit depth of
8
1 has pixels with two possible values: black and white. An image with a bit depth of 8 has 2
Grayscale mode images with a bit depth of 8 have 256 possible gray values.
RGB images are made of three color channels. An 8-bit per pixel RGB image has 256 possible values for each channel
which means it has over 16 million possible color values. RGB images with 8-bits per channel (bpc) are sometimes
called 24-bit images (8 bits x 3 channels = 24 bits of data for each pixel).
In addition to 8-bpc images, Photoshop can also work with images that contain 16-bpc or 32-bpc. Images with 32-bpc
are also known as high dynamic range (HDR) images.
Photoshop support for 16-bit images
Photoshop provides the following support for working with 16-bpc images:
, or 256, possible values.
62
• Working in Grayscale, RGB Color, CMYK Color, Lab Color, and Multichannel, modes.
• All tools in the toolbox, except the Art History Brush tool, can be used with 16-bpc images.
• All color and tonal adjustment commands, except Variations, are available
• You can work with layers, including adjustment layers, in 16-bpc images.
• Some filters, including Liquify, can be used with 16-bpc images.
To take advantage of certain Photoshop features, such as some filters, you can convert a 16-bpc image to an 8-bpc
image. It’s best if you do a
Save As
and convert a copy of the image file so the original file retains the full 16-bpc image data.
More Help topics
“About high dynamic range images” on page 78
Convert between bit depths
❖ Do any of the following:
• To convert between 8 bpc and 16 bpc, Choose Image > Mode > 16 Bits/Channel or 8 Bits/Channel.
• To convert from 8 bpc or 16 bits to 32 bpc, choose Image > Mode > 32 Bits/Channel.
More Help topics
“Convert from 32 bits to 16 or 8 bpc” on page 82
Last updated 12/5/2011
Page 69

USING PHOTOSHOP
Understanding and opening images
Image size and resolution
For detailed instructions, click the links below. To ask questions, request features, or report problems, visit
feedback.photoshop.com.
About pixel dimensions and printed image resolution
Pixel dimensions measure the total number of pixels along an image’s width and height. Resolution is the fineness of
detail in a bitmap image and is measured in pixels per inch (ppi). The more pixels per inch, the greater the resolution.
Generally, an image with a higher resolution produces a better printed image quality.
63
Same image at 72-ppi and 300-ppi; inset zoom 200%
Unless an image is resampled (see “Resampling” on page 66), the amount of image data remains constant as you
change either the pixel dimension or resolution. For example, if you change the resolution of a file, its width and height
change accordingly to maintain the same amount of image data.
In Photoshop, you can see the relationship between image size and resolution in the
Image Size
dialog box (choose Image >
Image Size
). Deselect Resample Image, because you don’t want to change the amount of image data in your photo. Then change
width, height, or resolution. As you change one value, the other two values change accordingly.
Last updated 12/5/2011
Page 70

USING PHOTOSHOP
Understanding and opening images
A
64
B C
Pixel dimensions equal document (output) size times resolution.
A. Original dimensions and resolution B. Decreasing the resolution without changing pixel dimensions (no resampling) C. Decreasing the
resolution at same document size decreases pixel dimensions (resampling).
Quickly display the current image size
If you want to quickly display a document’s current image size, use the information box at the bottom of the document
window.
❖ Position the pointer over the file information box, and hold down the mouse button.
More Help topics
“Display file information in the document window” on page 41
File size
The file size of an image is the digital size of the image file, measured in kilobytes (K), megabytes (MB), or gigabytes
(GB). File size is proportional to the pixel dimensions of the image. Images with more pixels may produce more detail
at a given printed size, but they require more disk space to store and may be slower to edit and print. Image resolution
thus becomes a compromise between image quality (capturing all the data you need) and file size.
Another factor that affects file size is file format. Because of the varying compression methods used by GIF, JPEG, and
PNG file formats, file sizes can vary considerably for the same pixel dimensions. Similarly, color bit-depth and the
number of layers and channels in an image affect file size.
Photoshop supports a maximum pixel dimension of 300,000 by 300,000 pixels per image. This restriction places limits
on the print size and resolution available to an image.
Last updated 12/5/2011
Page 71

USING PHOTOSHOP
Understanding and opening images
About monitor resolution
Your monitor’s resolution is described in pixel dimensions. For example, if your monitor resolution and your photo’s
pixel dimensions are the same size, the photo will fill the screen when viewed at 100%. How large an image appears
on-screen depends on a combination of factors—the pixel dimensions of the image, the monitor size, and the monitor
resolution setting. In Photoshop, you can change the image magnification on-screen, so you can easily work with
images of any pixel dimensions.
20"
15"
65
832 x 624 / 640 x 480
A 620- by 400-pixel image displayed on monitors of various sizes and resolutions.
1024 x 768 / 640 x 480
When preparing images for viewing on-screen, you should consider the lowest monitor resolution that your photo is
likely to be viewed on.
About printer resolution
Printer resolution is measured in ink dots per inch, also known as dpi. Generally, the more dots per inch, the finer the
printed output you’ll get. Most inkjet printers have a resolution of approximately 720 to 2880 dpi. (Technically, inkjet
printers produce a microscopic spray of ink, not actual dots like imagesetters or laser printers.)
Printer resolution is different from, but related to image resolution. To print a high quality photo on an inkjet printer,
an image resolution of at least 220 ppi should provide good results.
Screen frequency is the number of printer dots or halftone cells per inch used to print grayscale images or color
separations. Also known as screen ruling or line screen, screen frequency is measured in lines per inch (lpi)—or lines
of cells per inch in a halftone screen. The higher the resolution of the output device, the finer (higher) a screen ruling
you can use.
The relationship between image resolution and screen frequency determines the quality of detail in the printed image.
To produce a halftone image of the highest quality, you generally use an image resolution that is from 1.5 to at most 2
times the screen frequency. But with some images and output devices, a lower resolution can produce good results. To
determine your printer’s screen frequency, check your printer documentation or consult your service provider.
Note: Some imagesetters and 600-dpi laser printers use screening technologies other than halftoning. If you are printing
an image on a nonhalftone printer, consult your service provider or your printer documentation for the recommended
image resolutions.
Last updated 12/5/2011
Page 72

USING PHOTOSHOP
Understanding and opening images
66
A
C D
Screen frequency examples
A. 65 lpi: Coarse screen typically used to print newsletters and grocery coupons B. 85 lpi: Average screen typically used to print newspapers
C. 133 lpi: High-quality screen typically used to print four-color magazines D. 177 lpi: Very fine screen typically used for annual reports and
images in art books
B
More Help topics
“About desktop printing” on page 442
“Preparing images for press” on page 450
Resampling
Resampling is changing the amount of image data as you change either the pixel dimensions or the resolution of an
image. When you downsample (decrease the number of pixels), information is deleted from the image. When you
resample up (increase the number of pixels, or upsample), new pixels are added. You specify an interpolation method
to determine how pixels are added or deleted.
A
B
C
Resampling pixels
A. Downsampled B. Original C. Resampled up (selected pixels displayed for each set of images)
Last updated 12/5/2011
Page 73

USING PHOTOSHOP
Understanding and opening images
Keep in mind that resampling can result in poorer image quality. For example, when you resample an image to larger
pixel dimensions, the image loses some detail and sharpness. Applying the Unsharp Mask filter to a resampled image
can help refocus the image details.
You can avoid the need for resampling by scanning or creating the image at a sufficiently high resolution. If you want
to preview the effects of changing pixel dimensions on-screen or to print proofs at different resolutions, resample a
duplicate of your file.
Photoshop resamples images using an interpolation method to assign color values to any new pixels based on the color
values of existing pixels. You can choose which method to use in the
Image Size
dialog box.
Nearest Neighbor A fast but less precise method that replicates the pixels in an image. This method is for use with
illustrations containing edges that are not anti-aliased, to preserve hard edges and produce a smaller file. However, this
method can produce jagged effects, which become apparent when you distort or scale an image or perform multiple
manipulations on a selection.
Bilinear A method that adds pixels by averaging the color values of surrounding pixels. It produces medium-quality
results.
Bicubic A slower but more precise method based on an examination of the values of surrounding pixels. Using more
complex calculations, Bicubic produces smoother tonal gradations than Nearest Neighbor or Bilinear.
67
Bicubic Smoother A good method for enlarging images based on Bicubic interpolation but designed to produce
smoother results.
Bicubic Sharper A good method for reducing the size of an image based on Bicubic interpolation with enhanced
sharpening. This method maintains the detail in a resampled image. If Bicubic Sharper oversharpens some areas of an
image, try using Bicubic.
You can specify a default interpolation method to use whenever Photoshop resamples image data. Choose Edit >
Preferences > General (Windows) or Photoshop > Preferences > General (Mac OS), and then choose a method from
the Image Interpolation Methods menu.
More Help topics
“Sharpening recommendations” on page 173
Change pixel dimensions of an image
Changing an image’s pixel dimensions affects not only its on-screen size but also its image quality and its printed
characteristics—either its printed dimensions or its image resolution.
1 Choose Image >
2 Image Size
3 .
4 To maintain the current ratio of pixel width to pixel height, select Constrain Proportions. This option automatically
updates the width as you change the height, and vice versa.
5 Under Pixel Dimensions, enter values for Width and Height. To enter values as percentages of the current
dimensions, choose Percent as the unit of measurement. The new file size for the image appears at the top of the
6 Image Size
Last updated 12/5/2011
Page 74

USING PHOTOSHOP
Understanding and opening images
7 dialog box, with the old file size in parentheses.
8 Make sure that Resample Image is selected, and choose an interpolation method.
9 If your image has layers with styles applied to them, select Scale Styles to scale the effects in the resized image. This
option is available only if you selected Constrain Proportions.
10 When you finish setting options, click OK.
For best results when you produce a smaller image, downsample and apply the Unsharp Mask filter. To produce a
larger image, rescan the image at a higher resolution.
Change the print dimensions and resolution
When creating an image for print media, it’s useful to specify image size in terms of the printed dimensions and the
image resolution. These two measurements, referred to as the document size, determine the total pixel count and
therefore the file size of the image; document size also determines the base size at which an image is placed into another
application. You can further manipulate the scale of the printed image using the Print command; however, changes
you make using the Print command affect only the printed image, not the document size of the image file.
If you turn on resampling for the image, you can change print dimensions and resolution independently (and change
the total number of pixels in the image). If you turn off resampling, you can change either the dimensions or the
resolution—Photoshop adjusts the other value automatically to preserve the total pixel count. For the highest print
quality, it’s generally best to change the dimensions and resolution first, without resampling. Then resample only as
necessary.
68
1 Choose Image >
2 Image Size
3 .
4 Change the print dimensions, image resolution, or both:
• To change only the print dimensions or only the resolution and adjust the total number of pixels in the image
proportionately, select Resample Image and then choose an interpolation method.
• To change the print dimensions and resolution without changing the total number of pixels in the image, deselect
Resample Image.
5 To maintain the current ratio of image width to image height, select Constrain Proportions. This option
automatically changes the width as you change the height, and vice versa.
6 Under Document Size, enter new values for the height and width. If desired, choose a new unit of measurement.
Note that for Width, the Columns option uses the width and gutter sizes specified in the Units & Rulers preferences.
7 For Resolution, enter a new value. If desired, choose a new unit of measurement.
To restore the initial values displayed in the
Image Size
dialog box, hold down Alt (Windows) or Option (Mac OS), and click Reset.
More Help topics
“Position and scale images” on page 445
“Print images” on page 443
“Specify columns for an image” on page 43
Last updated 12/5/2011
Page 75

USING PHOTOSHOP
Understanding and opening images
Determine a suggested resolution for an image
If you plan to print your image using a halftone screen, the range of suitable image resolutions depends on the screen
frequency of your output device. Photoshop can determine a recommended image resolution based on the screen
frequency of your output device.
Note: If your image resolution is more than 2.5 times the screen ruling, an alert message appears when you try to print
the image. This means that the image resolution is higher than necessary for the printer. Save a copy of the file, and then
reduce the resolution.
1 Choose Image >
2 Image Size
3 .
4 Click Auto.
5 For Screen, enter the screen frequency for the output device. If necessary, choose a different unit of measurement.
Note that the screen value is used only to calculate the image resolution, not to set the screen for printing.
6 For Quality, select an option:
Draft Produces a resolution that is the same as the screen frequency (no lower than 72 pixels per inch).
Good Produces a resolution 1.5 times the screen frequency.
69
Best Produces a resolution 2 times the screen frequency.
View the print size on-screen
❖ Do one of the following:
• Choose View > Print Size.
• Select the Hand tool or Zoom tool, and click Print Size in the options bar.
The image is redisplayed in its approximate printed size, as specified in the Document Size area of the
Image Size
dialog box. The size and resolution of your monitor affect the on-screen print size.
Acquiring images from cameras and scanners
Acquiring digital images from cameras
You can copy images to your computer by connecting your camera or a media card reader to your computer.
• Use the
• Get Photos From Camera
• command in Adobe® Bridge® to download photos, and to organize, rename, and apply metadata to them.
• If your camera or the card reader appears as a drive on your computer, copy images directly to your hard disk or
into Adobe Bridge.
• Use the software that came with your camera, Windows Image Acquisition (WIA), or Image Capture (Mac OS).
For more information on using Windows Image Acquisition or Image Capture, see your computer documentation.
Last updated 12/5/2011
Page 76

USING PHOTOSHOP
Understanding and opening images
Import images from a digital camera using WIA (Windows only)
Certain digital cameras import images using Windows Image Acquisition (WIA) support. When you use WIA,
Photoshop works with Windows and your digital camera or scanner software to import images directly into
Photoshop.
1 Choose File > Import > WIA Support.
2 Choose a destination in which to save your image files on your computer.
3 Make sure that Open Acquired Images in Photoshop is selected. If you are importing a large number of images, or
if you want to edit the images later, deselect Open Acquired Images.
4 To save the imported images directly into a folder whose name is the current date, select Unique Subfolder.
5 Click Start.
6 Select the digital camera from which to import images.
Note: If the name of your camera does not appear in the submenu, verify that the software and drivers were properly
installed and that the camera is connected.
7 Choose the image or images you want to import:
• Click the image from the list of thumbnails to import the image.
• Hold down Shift and click multiple images to import them at the same time.
• Click
• Select All
• to import all available images.
8 Click Get Picture to import the image.
70
Importing scanned images
To import scanned images, either open TIFF files saved from separate scanning software, or use a TWAIN or WIA
interface directly in Photoshop. In either case, make sure to install the software necessary for your scanner. For
installation instructions, see the documentation provided by the scanner manufacturer.
Note: Scanner drivers are supported by the scanner manufacturer, not Adobe. If you have problems with scanning, make
sure that you are using the latest version of the scanner driver and software.
More Help topics
“About plug-in modules” on page 51
“Determine scan resolution for printing” on page 454
Import images from a separate scanning application
Most scanners come with software you can run outside of Photoshop, providing identical scanning options and
quality. This method avoids issues caused by outdated TWAIN scanning drivers.
1 Start the scanning software, and set options as desired. (In Mac OS, you can also use the Image Capture utility.)
2 Save scanned images in TIFF format.
3 In Photoshop, open the saved TIFF files.
Some scanner software lets you designate Photoshop as the external editor for an image after a scanning is completed.
Last updated 12/5/2011
Page 77

USING PHOTOSHOP
Understanding and opening images
Import images using a TWAIN interface
TWAIN is a cross-platform interface for acquiring images captured by certain scanners, digital cameras, and frame
grabbers.
1 Install the TWAIN software provided by the device manufacturer.
2 Download the Photoshop TWAIN plug-in for Windows or Mac OS.
The plug-in supports 32-bit Windows and Mac OS. It also supports 64-bit Mac OS 10.6 if the scanner manufacturer
provides 64-bit drivers. (Very few do, so most Mac OS users must run Photoshop in 32-bit mode.)
3 Choose File > Import, and select the device you want to use from the submenu.
Import images using a WIA interface (Windows only)
1 Choose File > Import > WIA Support.
2 Choose a destination on your computer for saving your image files.
3 Click Start.
4 Select Open Acquired Images In Photoshop (unless you have a large number of images to import, or if you want to
edit the images at a later time).
5 Select Unique Subfolder if you want to save imported images in a folder named with the current date.
6 Select the scanner that you want to use.
Note: If the name of your scanner does not appear in the submenu, verify that the software and drivers were properly
installed and that the scanner is connected.
71
7 Choose the kind of image you want to scan: Color Picture, Grayscale Picture, or Black And White Picture or Text.
To specify custom settings, select Adjust The Quality Of The Scanned Picture.
8 Click Preview. If necessary, drag the handles of the bounding box to adjust the size of the crop.
9 Click Scan.
The scanned image is saved in BMP format.
Creating, opening, and importing images
For detailed instructions, click the links below. To ask questions, request features, or report problems, visit
feedback.photoshop.com.
Create an image
1 Choose File > New.
2 In the New dialog box, type a name for the image.
3 (Optional) Choose document size from the Preset menu.
Note: To create a document with the pixel dimensions set for a specific device, click the Device Central button.
4 Set the width and height by choosing a preset from the Size menu or entering values in the Width and Height text
boxes.
Last updated 12/5/2011
Page 78

USING PHOTOSHOP
Understanding and opening images
To match the width, height, resolution, color mode, and bit depth of the new image to that of any open image, choose
a filename from the bottom section of the Preset menu.
5 Set the Resolution, Color Mode, and bit depth.
If you’ve copied a selection to the clipboard, the image dimensions and resolution are automatically based on that
image data.
6 Select a canvas color option:
White Fills the background layer with white, the default background color.
Background Color Fills the background layer with the current background color.
Transparent Makes the first layer transparent, with no color values. The resulting document has a single, transparent
layer as its contents.
7 (Optional) If necessary, click the Advanced button to display more options.
8 (Optional) Under Advanced, choose a color profile, or choose Don’t Color Manage This Document. For Pixel
Aspect Ratio, choose Square unless you’re using the image for video. In that case, choose another option to use nonsquare pixels.
9
When you finish, you can save the settings as a preset by clicking Save Preset, or you can click OK to open the new file.
72
More Help topics
“Color modes” on page 89
“About creating images for video” on page 480
“About foreground and background colors” on page 98
Duplicate an image
You can duplicate an entire image (including all layers, layer masks, and channels) into available memory without
saving to disk.
1 Open the image you want to duplicate.
2 Choose Image > Duplicate.
3 Enter a name for the duplicated image.
4 If you want to duplicate the image and merge the layers, select Duplicate Merged Layers Only. To preserve the
layers, make sure this option is deselected.
5 Click OK.
Open files
You can open files using the Open command and Open Recent command. You can also open files into Photoshop
from Adobe Bridge or Adobe® Photoshop® Lightroom™.
When opening certain files, such as camera raw and PDF, you specify settings and options in a dialog box before the
files completely open in Photoshop.
In addition to still images, Photoshop® Extended users can open and edit 3D files, video and image sequence files. For
more information, see “Importing video files and image sequences (Photoshop Extended)” on page 485.
Last updated 12/5/2011
Page 79

USING PHOTOSHOP
Understanding and opening images
Note: Photoshop uses plug-in modules to open and import many file formats. If a file format does not appear in the Open
dialog box or in the File > Import submenu, you may need to install the format’s plug-in module.
Sometimes Photoshop may not be able to determine the correct format for a file. This can happen, for example,
because the file has been transferred between two operating systems. Sometimes a transfer between Mac OS and
Windows can cause the file format to be mislabeled. In such cases, you must specify the correct format in which to
open the file.
You can retain (where possible) layers, masks, transparency, compound shapes, slices, image maps, and editable type
when bringing your Illustrator art into Photoshop. In Illustrator, export the art in the Photoshop (PSD) file format. If
your Illustrator art contains elements that Photoshop doesn’t support, the appearance of the artwork is preserved, but the
layers are merged and the artwork is rasterized.
More Help topics
“About plug-in modules” on page 51
Open a file using the Open command
1 Choose File > Open.
2 Select the name of the file you want to open. If the file does not appear, select the option for showing all files from
the Files Of Type (Windows) or Enable (Mac OS) pop-up menu.
3 Click Open. In some cases, a dialog box appears, letting you set format-specific options.
Note: If a color profile warning message appears, specify whether to use embedded profile as the working space, convert
the document color to working space, or reverse the embedded profile. For more information, see Color-managing
imported images.
73
Open a recently used file
❖ Choose File > Open Recent, and select a file from the submenu.
Note: To specify the number of files listed in the Open Recent menu, change the Recent File List Contains option in the
File Handling preferences. Choose Edit > Preferences > File Handling (Windows), or Photoshop > Preferences > File
Handling (Mac OS).
Specify the file format in which to open a file
If a file was saved with an extension that doesn’t match its true format (for example, a PSD file saved with a .gif
extension), or has no extension, Photoshop may not be able to open the file. Selecting the correct format will allow
Photoshop to recognize and open the file.
❖ Do one of the following:
• (Windows) Choose File > Open As, and select the file you want to open. Then choose the desired format from the
Open As pop-up menu, and click Open.
• (Mac OS) Choose File > Open, and choose All Documents from the Show pop-up menu. Then select the file you
want to open, choose the desired file format from the Format pop-up menu, and click Open.
Note: If the file does not open, then the chosen format may not match the file’s true format, or the file may be damaged.
Last updated 12/5/2011
Page 80

USING PHOTOSHOP
Understanding and opening images
Open PDF files
Adobe Portable Document Format (PDF) is a versatile file format that can represent both vector and bitmap data. It
has electronic document search and navigation features. PDF is the primary format for Adobe Illustrator and Adobe
Acrobat.
Some PDF files contain a single image, and others contain multiple pages and images. When you open a PDF file in
Photoshop, you can choose which pages or images to open and specify rasterization options.
You can also import PDF data using the Place command, the Paste command, and the drag-and-drop feature. The
page or image is placed on a separate layer as a Smart Object.
Note: The following procedure is only for opening generic PDF files in Photoshop. You don’t need to specify options in the
Import PDF dialog box, when opening Photoshop PDF files.
1 Do one of the following:
• (Photoshop) Choose File > Open.
• (Bridge) Select the PDF file and choose File >
• Open With
• > Adobe Photoshop. Skip to step 3.
2 In the Open dialog box, select the name of the file, and click Open.
3 Under Select in the Import PDF dialog box, select Pages or Images, depending on what elements of the PDF
document you want to import.
4 Click the thumbnails to select the pages or images you want to open. Shift-click to select more than one page or
image. The number of selected items appears under the preview window. If you’re importing images, skip to step 8.
Note: Use the Thumbnail Size menu to adjust the thumbnail view in the preview window. The Fit Page option fits one
thumbnail in the preview window. A scroll bar appears if there are multiple items.
74
5 To give the new document a name, type it in the Name text box. If you’re importing more than one page or image,
multiple documents open with the base name followed by a number.
6 Under Page Options, choose from the Crop To menu to specify what part of the PDF document to include:
Bounding Box Crops to the smallest rectangular region that includes all the text and graphics of the page. This option
eliminates extraneous white space and any document elements outside the Trim Box.
Note: Bounding Box will not crop white space that is part of a background created by the source application.
Media Box Crops to the original size of the page.
Crop Box Crops to the clipping region (crop margins) of the PDF file.
Bleed Box Crops to the region specified in the PDF file for accommodating limitations inherent in production
processes such as cutting, folding, and trimming.
Trim Box Crops to the region specified for the intended finished size of the page.
Art Box Crops to the region specified in the PDF file for placing the PDF data into another application.
7 Under
8 Image Size
9 , enter values (if necessary) for Width and Height:
• To preserve the aspect ratio of the pages as they’re scaled to fit within the rectangle defined by the Width and Height
values, select Constrain Proportions.
Last updated 12/5/2011
Page 81

USING PHOTOSHOP
Understanding and opening images
• To scale the pages exactly to the Width and Height values, deselect Constrain Proportions. Some distortion might
occur when the pages are scaled.
When more than one page is selected, the Width and Height text boxes display the maximum width and height values
of the selected pages. All pages are rendered at their original size if Constrain Proportions is selected and you don’t
change the Width and Height values. Changing the values will scale all pages proportionately as they're rasterized.
10 Specify the following options under
11 Image Size
12 :
Resolution Sets the resolution for the new document. See also “About pixel dimensions and printed image resolution”
on page 63.
Mode Sets the color mode for the new document. See also “Color modes” on page 89.
Bit Depth Sets the bit depth for the new document. See also “Bit depth” on page 62.
The Width and Height values plus the Resolution determine the final pixel dimension of resulting document.
13 To suppress color profile warnings, select Suppress Warning.
14 Click OK.
75
More Help topics
“PDF” on page 430
“About Smart Objects” on page 275
“Placing files” on page 76
“Copy between applications” on page 228
Open an EPS file
Encapsulated PostScript (EPS) can represent both vector and bitmap data and is supported by virtually all graphic,
illustration, and page-layout programs. The Adobe application that primarily produces PostScript artwork is Adobe
Illustrator. When you open an EPS file containing vector art, it is rasterized—the mathematically defined lines and
curves of the vector artwork are converted into the pixels or bits of a bitmap image.
You can also bring PostScript artwork into Photoshop using the Place command, the Paste command, and the dragand-drop feature.
1 Choose File > Open.
2 Select the file you want to open, and click Open.
3 Indicate the desired dimensions, resolution, and mode. To maintain the same height-to-width ratio, select
Constrain Proportions.
4 To minimize jagged lines at the edges of artwork, select Anti-aliased.
More Help topics
“Placing files” on page 76
“Copy between applications” on page 228
Last updated 12/5/2011
Page 82

USING PHOTOSHOP
Understanding and opening images
Placing files
The Place command adds a photo, art, or any Photoshop-supported file as a Smart Object to your document. Smart
Objects can be scaled, positioned, skewed, rotated, or warped without degrading the image.
Place a file in Photoshop
1 Open the Photoshop document that is the destination for the placed art or photo.
2 Do one of the following:
• (Photoshop) Choose File > Place, select the file you want to place, and click Place.
You can also drag a file from Windows or Mac OS onto an open Photoshop image.
• (Bridge) Select the file and choose File > Place > In Photoshop.
3 If you are placing a PDF or Illustrator (AI) file, the Place PDF dialog box appears. Select the page or image you want
to place, set the Crop options, and click OK. For more information on the Place PDF dialog box options, see “Place
PDF or Illustrator files in Photoshop” on page 77.
The placed artwork appears inside a bounding box at the center of the Photoshop image. The artwork maintains its
original aspect ratio; however, if the artwork is larger than the Photoshop image, it is resized to fit.
76
Note: In addition to the Place command, you can also add Adobe Illustrator art as a Smart Object by copying and pasting
the art from Illustrator into a Photoshop document. See “Paste Adobe Illustrator art into Photoshop” on page 77.
4 (Optional) Reposition or transform the placed artwork by doing any of the following:
• To reposition the placed art, position the pointer inside the bounding box of the placed artwork and drag, or in the
options bar, enter a value for X to specify the distance between the center point of the placed artwork and the left
edge of the image. Enter a value for Y to specify the distance between the center point of the placed artwork and the
top edge of the image.
• To scale the placed art, drag one of the corner handles of the bounding box or enter values for W and H in the
options bar. When dragging, hold down the Shift key to constrain proportions.
• To rotate the placed art, position the pointer outside the bounding box (the pointer turns into a curved arrow) and
drag, or enter a value (in degrees) for the Rotation option in the options bar. The artwork rotates around the
center point of the placed artwork. To adjust the center point, drag it to a new location, or click a handle on the
Center Point icon in the options bar.
•
To skew the placed art, hold down Ctrl (Windows) or Command (Mac OS) and drag a side handle of the bounding box.
• To warp the placed art, choose Edit > Transform > Warp and then choose a warp from the Warp Style pop-up
menu in the options bar.
If you choose Custom from the Warp Style pop-up menu, drag the control points, a segment of the bounding box or
mesh, or an area within the mesh to warp the image.
5 If you’re placing a PDF, EPS, or Adobe Illustrator file, set the Anti-alias option in the options bar as desired. To
blend edge pixels during rasterization, select the Anti-alias option. To produce a hard-edged transition between
edge pixels during rasterization, deselect the Anti-alias option.
6 Do one of the following:
• Click Commit in the options bar or press Enter (Windows) or Return (Mac OS) to commit the placed artwork
to a new layer.
Last updated 12/5/2011
Page 83

USING PHOTOSHOP
Understanding and opening images
• Click Cancel in the options bar, or press Esc to cancel the placement.
More Help topics
“Scale, rotate, skew, distort, apply perspective, or warp” on page 180
“Warp an item” on page 183
Place PDF or Illustrator files in Photoshop
When you place a PDF or Adobe Illustrator file, use the Place PDF dialog box to set options for placing the artwork.
1 With the destination Photoshop document open, place a PDF or Adobe Illustrator file.
2 Under Select in the Place PDF dialog box, select Page or Image, depending on what elements of the PDF document
you want to import. If the PDF file has multiple pages or images, click the thumbnail of the page or file you want
to place.
Note: Use the Thumbnail Size menu to adjust the thumbnail view in the preview window. The Fit Page option fits one
thumbnail in the preview window. A scroll bar appears if there are multiple items.
3 Under Options, choose from the Crop To menu to specify what part of the PDF or Illustrator (AI) document to
include:
Bounding Box Crops to the smallest rectangular region that includes all the text and graphics of the page. This option
eliminates extraneous white space.
77
Media Box Crops to the original size of the page.
Crop Box Crops to the clipping region (crop margins) of the PDF file.
Bleed Box Crops to the region specified in the PDF file for accommodating limitations inherent in production
processes such as cutting, folding, and trimming.
Trim Box Crops to the region specified for the intended finished size of the page.
Art Box Crops to the region specified in the PDF file for placing the PDF data into another application.
4 Click OK to close the Place PDF dialog box.
5 If necessary, set any positioning, scaling, skewing, rotating, warping, or anti-aliasing options in the options bar.
6 Click Commit to place the artwork as a Smart Object on a new layer of the destination document.
Paste Adobe Illustrator art into Photoshop
You can copy art from Adobe Illustrator and paste it into a Photoshop document.
1 In Adobe Illustrator, specify preferences for the copy-and-paste behavior:
• To automatically rasterize the art when pasting it into a Photoshop document, turn off the PDF and the AICB (No
Transparency Support) options in the File Handling & Clipboard preferences.
• To paste the art as a Smart Object, rasterized image, path, or shape layer, turn on the PDF and the AICB (No
Transparency Support) options in the File Handling & Clipboard preferences.
2 Open a file in Adobe Illustrator, select the art you want to copy, and choose Edit > Copy.
3 In Photoshop, open the document that you want to paste the Adobe Illustrator art into and then choose Edit >
Paste.
Last updated 12/5/2011
Page 84

USING PHOTOSHOP
Understanding and opening images
Note: If the PDF and the AICB (No Transparency Support) options are turned off in the File Handling & Clipboard
preferences of Adobe Illustrator, the art is automatically rasterized as it’s pasted into the Photoshop document. You can
skip the rest of the steps in this procedure.
4 In the Paste dialog box, select how you want to paste the Adobe Illustrator art and then click OK:
Smart Object Pastes the art as a Vector Smart Object that can be scaled, transformed, or moved without degrading the
image. As the art is placed, its file data is embedded in the Photoshop document on a separate layer.
Pixels Pastes the art as pixels that can be scaled, transformed, or moved before it is rasterized and placed on its own
layer in the Photoshop document.
Path Pastes the art as a path that can be edited with the pen tools, Path Selection tool, or Direct Selection tool. The
path is pasted into the layer that’s selected in the Layers panel.
Shape Layer Pastes the art as a new shape layer (a layer containing a path filled with the foreground color).
5 If you selected Smart Object or Pixels in the Paste dialog box, make any transformations you wish, and then click
Enter or Return to place the art.
More Help topics
“Placing files” on page 76
78
“About Smart Objects” on page 275
“Path segments, components, and points” on page 339
“Create a shape on a shape layer” on page 327
High dynamic range images
About high dynamic range images
The dynamic range (ratio between dark and bright regions) in the visible world far exceeds the range of human vision
and of images that are displayed on a monitor or printed. But whereas human eyes can adapt to very different
brightness levels, most cameras and computer monitors can reproduce only a fixed dynamic range. Photographers,
motion picture artists, and others working with digital images must be selective about what’s important in a scene
because they are working with a limited dynamic range.
High dynamic range (HDR) images open up a world of possibilities because they can represent the entire dynamic
range of the visible world. Because all the luminance values in a real-world scene are represented proportionately and
stored in an HDR image, adjusting the exposure of an HDR image is like adjusting the exposure when photographing
a scene in the real world.
Last updated 12/5/2011
Page 85

USING PHOTOSHOP
Understanding and opening images
A
79
C
B
Merging images of different exposures to create an HDR image
A. Image with shadow detail but highlights clipped B. Image with highlight detail but shadows clipped C. HDR image containing the dynamic
range of the scene
In Photoshop, the luminance values of an HDR image are stored using a floating-point numeric representation that’s
32 bits long (32-bits-per-channel). The luminance values in an HDR image are directly related to the amount of light
in a scene. By contrast, non-floating point 16- and 8-bpc image files store luminance values only from black to paper
white, reflecting an extremely small segment of dynamic range in the real world.
In Photoshop, the Merge To HDR Pro command lets you create HDR images by combining multiple photographs
captured at different exposures. Because an HDR image contains brightness levels that far exceed the display
capabilities of a standard 24-bit monitor, Photoshop lets you adjust the HDR preview. If you need to print or use tools
and filters that don’t work with HDR images, you can convert them to 16- or 8-bpc images.
Take photos for HDR images
Keep the following tips in mind when you take photos to be combined with the Merge To HDR Pro command:
• Secure the camera to a tripod.
• Take enough photos to cover the full dynamic range of the scene. You can try taking at least five to seven photos,
but you might need to take more exposures depending on the dynamic range of the scene. The minimum number
of photos should be three.
Last updated 12/5/2011
Page 86

USING PHOTOSHOP
Understanding and opening images
• Vary the shutter speed to create different exposures. Changing the aperture changes the depth of field in each
exposure and can produce lower-quality results. Changing the ISO or aperture may also cause noise or vignetting
in the image.
• In general, don’t use your camera’s auto-bracket feature, because the exposure changes are usually too small.
• The exposure differences between the photos should be one or two EV (exposure value) steps apart (equivalent to
about one or two f-stops apart).
• Don’t vary the lighting; for instance, don’t use a flash in one exposure but not the next.
• Make sure that nothing is moving in the scene. Exposure Merge works only with differently exposed images of the
identical scene.
Merge images to HDR
The Merge To HDR Pro command combines multiple images with different exposures of the same scene, capturing
the full dynamic range in a single HDR image. You can output the merged image as a 32-, 16-, or 8-bpc file. However,
only a 32-bpc file can store all the HDR image data.
HDR merging works best when photos are optimized for the process. For recommendations, see “Take photos for
HDR images” on page 79.
1 Do one of the following:
• (Photoshop) Choose File > Automate > Merge To HDR Pro.
• (Bridge) Select the images you want to use and choose Tools > Photoshop > Merge To HDR Pro. Skip to step 5.
2 In the Merge To HDR Pro dialog box, click Browse to select specific images, click Add Open Files, or choose Use >
Folder. (To remove a particular item, select it in files list, and click Remove.)
3 (Optional) Select Attempt To Automatically Align Source Images if you held the camera in your hands when you
photographed the images.
4 Click OK.
Note: If images lack exposure metadata, enter values in the Manually Set EV dialog box.
80
A second Merge To HDR Pro dialog box displays thumbnails of the source images, and a preview of the merged result.
5 To the upper right of the preview, choose a bit depth for the merged image.
Choose 32 Bit if you want the merged image to store the entire dynamic range of the HDR image. 8-bit and (non-
floating point) 16-bit image files cannot store the entire range of luminance values in an HDR image.
6 To adjust the tonal range, see “Options for 32-bit images” on page 80 or “Options for 16- or 8-bit images” on
page 81.
7 (Optional) To save your tonal settings for future use, choose Preset > Save Preset. (To later reapply the settings,
choose Load Preset.)
Options for 32-bit images
Move the slider below the histogram to adjust the white point preview of the merged image. Moving the slider adjusts
the image preview only; all HDR image data remains in the merged file.
The preview adjustment is stored in the HDR file and applied whenever you open the file in Photoshop. To readjust
the white point preview at any time, choose View > 32-Bit Preview Options.
Last updated 12/5/2011
Page 87

USING PHOTOSHOP
Understanding and opening images
Options for 16- or 8-bit images
HDR images contain luminance levels that far exceed the dynamic range that 16- or 8-bpc images can store. To
produce an image with the dynamic range you want, adjust exposure and contrast when converting from 32-bpc to
lower bit depths.
Choose one of the following tone-mapping methods:
Local Adaptation Adjusts HDR tonality by adjusting local brightness regions throughout the image.
• Edge Glow Radius specifies the size of the local brightness regions. Strength specifies how far apart two pixels’ tonal
values must be before they’re no longer part of the same brightness region.
• Tone and Detail Dynamic range is maximized at a Gamma setting of 1.0; lower settings emphasize midtones, while
higher settings emphasize highlights and shadows. Exposure values reflect f-stops. Drag the Detail slider to adjust
sharpness and the Shadow and Highlight sliders to brighten or darken these regions.
• Color Vibrance adjusts the intensity of subtle colors, while minimizing clipping of highly saturated colors.
Saturation adjusts the intensity of all colors from –100 (monochrome) to +100 (double saturation).
• Toning Curve Displays an adjustable curve over a histogram showing luminance values in the original, 32-bit HDR
image. The red tick marks along the horizontal axis are in one EV (approximately one f-stop) increments.
Note: By default, the Toning Curve and Histogram limit and equalize your changes from point to point. To remove the
limit and apply more extreme adjustments, select the Corner option after inserting a point on the curve. When you insert
and move a second point, the curve becomes angular.
81
A B
Toning Curve and Histogram adjustment using the Corner option
A. Inserting a point and selecting the Corner option. B. Adjusting new point makes the curve angular at the point where the Corner option is
used.
Equalize Histogram Compresses the dynamic range of the HDR image while trying to preserve some contrast. No
further adjustments are necessary; this method is automatic.
Exposure and Gamma Lets you manually adjust the brightness and contrast of the HDR image. Move the Exposure
slider to adjust gain and the Gamma slider to adjust contrast.
Highlight Compression Compresses the highlight values in the HDR image so they fall within the luminance values
range of the 8- or 16-bpc image file. No further adjustments are necessary; this method is automatic.
Last updated 12/5/2011
Page 88

USING PHOTOSHOP
Understanding and opening images
Compensate for moving objects
If images have different content due to moving objects like cars, people, or foliage, select Remove Ghosts in the Merge
To HDR Pro dialog box.
Photoshop displays a green outline around the thumbnail with the best tonal balance, identifying the base image.
Moving objects found in other images are removed. (If movement occurs in very light or dark areas, click a different
thumbnail where moving objects are better exposed to improve results.)
For a tutorial on the Remove Ghosts option, see this video. (Discussion of Remove Ghosts begins at 3:00.)
Save or load camera response curves
Response curves indicate how camera sensors interpret different levels of incoming light. By default, the Merge To
HDR Pro dialog box automatically calculates a camera response curve based on the tonal range of images you are
merging. You can save the current response curve and later apply it to another group of merged images.
❖ In the upper-right corner of the Merge to HDR Pro dialog box, click the response curve menu , and then choose
Save Response Curve. (To later reapply the curve, choose Load Response Curve.)
Convert from 32 bits to 16 or 8 bpc
If you originally created a 32-bit image during the Merge to HDR Pro process, you can later convert it to a 16- or 8-bit
image.
82
1 Open a 32-bpc image in Photoshop, and choose Image > Mode > 16 Bits/Channel or 8 Bits/Channel.
2 Adjust exposure and contrast to produce an image with the dynamic range you want. (See “Options for 16- or 8-
bit images” on page 81.)
3 Click OK to convert the 32-bit image.
More Help topics
“Curves overview” on page 124
Adjust displayed dynamic range for 32-bit HDR images
The dynamic range of HDR images exceeds the display capabilities of standard computer monitors. When you open
an HDR image in Photoshop, it can look very dark or washed out. Photoshop lets you adjust the preview so that the
monitor displays an HDR image whose highlights and shadows aren’t washed out or too dark. The preview settings
are stored in the HDR image file (PSD, PSB, and TIFF only) and are applied whenever the file is opened in Photoshop.
Preview adjustments don’t edit the HDR image file; all the HDR image information remains intact. Use the Exposure
adjustment (Image > Adjustments > Exposure) to make exposure edits to the 32-bpc HDR image.
To view 32-bit readouts in the Info panel, click the Eyedropper icon in the Info panel and choose 32-Bit from the
pop-up menu.
1 Open a 32-bpc HDR image in Photoshop, and choose View > 32-Bit Preview Options.
2 In the 32-bit Preview Options dialog box, choose an option from the Method menu:
Exposure And Gamma Adjusts the brightness and contrast.
Highlight Compression Compresses the highlight values in the HDR image so they fall within the luminance values
range of the 8- or 16-bpc image file.
Last updated 12/5/2011
Page 89

USING PHOTOSHOP
Understanding and opening images
3 If you chose Exposure And Gamma, move the Exposure and Gamma sliders to adjust the brightness and contrast
of the image preview.
4 Click OK.
You can also adjust the preview of an HDR image open in Photoshop by clicking the triangle in the status bar of the
document window and choosing 32-Bit Exposure from the pop-up menu. Move the slider to set the white point for
viewing the HDR image. Double-click the slider to return to the default exposure setting. Since the adjustment is made
per view, you can have the same HDR image open in multiple windows, each with a different preview adjustment.
Preview adjustments made with this method are not stored in the HDR image file.
More Help topics
“Adjust HDR exposure” on page 135
About the HDR Color Picker
The HDR Color Picker allows you to accurately view and select colors for use in 32-bit HDR images. As in the regular
Adobe Color Picker, you select a color by clicking a color field and adjusting the color slider. The Intensity slider allows
you to adjust the brightness of a color to match the intensity of the colors in the HDR image you’re working with. A
Preview area lets you view swatches of a selected color to see how it will display at different exposures and intensities.
83
A
B
C
D
E
F
G
H
HDR Color Picker
A. Preview area B. Adjusted color C. Original color D. 32-bit floating point values E. Intensity slider F. Picked color G. Color slider H. Color
values
More Help topics
“Adobe Color Picker overview” on page 100
“Adjust displayed dynamic range for 32-bit HDR images” on page 82
Last updated 12/5/2011
Page 90

USING PHOTOSHOP
Understanding and opening images
Display the HDR Color Picker
❖ With a 32-bpc image open, do one of the following:
• In the toolbox, click the foreground or background color selection box.
• In the Color panel, click the Set
• Foreground Color
• or Set
• Background Color
• selection box.
The Color Picker is also available when features let you choose a color. For example, by clicking the color swatch in
the options bar for some tools, or the eyedroppers in some color adjustment dialog boxes.
Choose colors for HDR images
The lower part of the HDR Color Picker functions like the regular Color Picker does with 8- or 16-bit images. Click in
the color field to select a color and move the color slider to change hues, or use the HSB or RGB fields to enter numeric
values for a particular color. In the color field, brightness increases as you move from bottom to top, and saturation
increases as you move from left to right.
84
Use the Intensity slider to adjust the brightness of the color. The color value plus the intensity value are converted to
32-bit floating point number values in your HDR document.
1 Select a color by clicking in the color field and moving the color slider, or by entering HSB or RGB numeric values,
as in the Adobe Color Picker.
2 Adjust the Intensity slider to boost or reduce the color’s brightness. The new color swatch in the Preview scale at
the top of the Color Picker shows the effect of increasing or decreasing stops for the selected color.
The Intensity Stops correspond inversely to exposure setting stops. If you boost the Exposure setting of the HDR image
two stops, reducing the Intensity stops by two will maintain the same color appearance as if the HDR image exposure
and the color intensity were both set to 0.
If you know the exact 32-bit RGB values for the color you want, you can enter them directly in the 32-bit value RGB
fields.
3 (Optional) Adjust settings for the Preview area.
Preview Stop Size Sets the stop increments for each preview swatch. For example, a setting of 3 results in swatches of
-9, -6, -3, +3, +6, +9. These swatches let you preview the appearance of your selected color at different exposure
settings.
Relative to Document Select to adjust the preview swatches to reflect the current exposure setting for the image. For
example, if the document exposure is set higher, the new preview swatch will be lighter than the color selected in the
Color Picker’s color field, to show the effect of the higher exposure on the selected color. If the current exposure is set
to 0 (the default), checking or unchecking this option will not change the new swatch.
4 (Optional) Click Add to Swatches to add the selected color to the Swatches panel.
5 Click OK.
Paint on HDR images
You can edit and add effects to HDR/32-bpc images using any of the following Photoshop tools: Brush, Pencil, Pen,
Shape, Clone Stamp, Pattern Stamp, Eraser, Gradient, Blur, Sharpen, Smudge, and History Brush. You can also use the
Text tool to add 32-bpc text layers to an HDR image.
Last updated 12/5/2011
Page 91

USING PHOTOSHOP
Understanding and opening images
When editing or painting on HDR images, you can preview your work at different exposure settings using either the
32-Bit Exposure slider in the document info area or the 32-Bit Preview Options dialog box (View > 32-Bit Preview
Options). The HDR Color Picker also lets you preview your selected foreground color at different intensity settings,
to match different exposure settings in an HDR image.
1 Open an HDR image.
2 (Optional) Set the exposure for the image. See “Adjust displayed dynamic range for 32-bit HDR images” on
page 82.
3 For the Brush or Pencil tools, click the foreground color to open the HDR Color Picker and select a color. For the
Text tool, click the color chip in the Text tool options bar to set the text color.
The Preview area of the HDR Color Picker helps you select and adjust a foreground color in relation to different
exposure settings in the HDR image. See “About the HDR Color Picker” on page 83.
To view the effects of painting at different HDR exposures, use the Window > Arrange > New Window command to
open simultaneous views of the same HDR image, then set each window to a different exposure using the Exposure
slider in the document status bar area.
Features that support 32-bpc HDR images
You can use the following tools, adjustments, and filters with 32-bpc HDR images. (To work with more Photoshop
features, convert a 32-bpc image to a 16-bpc or an 8-bpc image. To preserve the original image, create a copy with the
85
Save As
command.)
Adjustments Levels, Exposure, Hue/Saturation, Channel Mixer, Photo Filter.
Note: Although the Exposure command can be used with 8- and 16-bpc images, it is designed for making exposure
adjustments to 32-bpc HDR images.
Blend Modes Normal, Dissolve, Darken, Multiply, Lighten, Darker Color, Linear Dodge (Add), Lighter Color,
Difference, Subtract, Divide, Hue, Saturation, Color, and Luminosity.
Create new 32-bpc documents In the New dialog box, 32 bit is an option in the bit depth pop-up menu to the right of
the Color Mode pop-up menu.
Edit menu commands All commands including Fill, Stroke, Free Transform, and Transform.
File Formats Photoshop (PSD, PSB), Radiance (HDR), Portable Bit Map (PBM), OpenEXR, and TIFF.
Note: Although Photoshop cannot save an HDR image in the LogLuv TIFF file format, it can open and read a LogLuv
TIFF file.
Filters Average, Box Blur,
Gaussian Blur
, Motion Blur, Radial Blur, Shape Blur, Surface Blur, Add Noise, Clouds, Difference Clouds, Lens Flare, Smart Sharpen,
Unsharp Mask, Emboss, De-Interlace, NTSC Colors, High Pass, Maximum, Minimum, and Offset.
Image commands Image Size
, Canvas Size, Image Rotation, Crop, Trim, Duplicate, Apply Image, Calculations, and Variables.
View Pixel Aspect Ratio (Custom Pixel Aspect Ratio, Delete Pixel Aspect Ratio, Reset Pixel Aspect Ratio, etc.)
Layers New layers, duplicate layers, adjustment layers (Levels, Vibrance, Hue/Saturation, Channel Mixer, Photo
Filter, and Exposure), fill layers, layer masks, layer styles, supported blending modes, and Smart Objects.
Last updated 12/5/2011
Page 92

USING PHOTOSHOP
Understanding and opening images
Modes RGB Color, Grayscale, conversion to 8 Bits/Channel or 16 Bits/Channel.
Pixel Aspect Ratio Support for square and non-square documents.
Selections Invert, Modify Border, Transform Selection, Save Selection and Load Selection.
Tools All tools in the toolbox except: Magnetic Lasso, Magic Wand, Spot Healing Brush, Healing Brush, Red Eye,
Color Replacement, Art History Brush, Magic Eraser, Background Eraser, Paint Bucket, Dodge, Burn, and Sponge.
Some tools work with supported blend modes only.
86
Last updated 12/5/2011
Page 93

Chapter 5: Color fundamentals
For detailed instructions, click the links below. To ask questions, request features, or report problems, visit
feedback.photoshop.com.
About color
Understanding color
Knowing how colors are created and how they relate to each other lets you work more effectively in Photoshop. Instead
of achieving an effect by accident, you’ll produce consistent results thanks to an understanding of basic color theory.
Primary colors
Additive primaries are the three colors of light (red, green, and blue) that produce all the colors in the visible spectrum
when added together in different combinations. Adding equal parts of red, blue, and green light produces white. The
complete absence of red, blue, and green light results in black. Computer monitors are devices that use the additive
primaries to create color.
87
R
Additive colors (RGB)
R. Red G. Green B. Blue
Subtractive primaries are pigments, which create a spectrum of colors in different combinations. Unlike monitors,
printers use subtractive primaries (cyan, magenta, yellow, and black pigments) to produce colors through subtractive
mixing. The term “subtractive” is used because the primary colors are pure until you begin mixing them together,
resulting in colors that are less pure versions of the primaries. For example, orange is created through the subtractive
mixing of magenta and yellow together.
G
B
Last updated 12/5/2011
Page 94

USING PHOTOSHOP
Color fundamentals
C MY K
Subtractive colors (CMYK)
C. Cyan M. Magenta Y. Yellow K. Black
The color wheel
If you’re new to adjusting color components, it helps to keep a standard color wheel diagram on hand when you work
on color balance. You can use the color wheel to predict how a change in one color component affects other colors and
also how changes translate between RGB and CMYK color models.
0/360
R
88
M
B
C
180
Color wheel
R. Red Y. Yellow G. Green C. Cyan B. Blue M. Magenta
Y
90270
G
For example, you can decrease the amount of any color in an image by increasing the amount of its opposite on the
color wheel—and vice versa. Colors that lie opposite each other on the standard color wheel are known as
complementary colors. Similarly, you can increase and decrease a color by adjusting the two adjacent colors on the
wheel, or even by adjusting the two colors adjacent to its opposite.
In a CMYK image, you can decrease magenta either by decreasing the amount of magenta or by increasing its
complement, which is green (the color on the opposite side of the color wheel from magenta). In an RGB image, you
can decrease magenta by removing red and blue or by adding green. All of these adjustments result in an overall color
balance containing less magenta.
More Help topics
“Choose a color with the Adobe Color Picker” on page 101
Color models, spaces, and modes
A color model describes the colors we see and work with in digital images. Each color model, such as RGB, CMYK, or
HSB, represents a different method (usually numeric) for describing color.
A color space is a variant of a color model and has a specific gamut (range) of colors. For example, within the RGB color
model are a number of color spaces:
Last updated 12/5/2011
Page 95

USING PHOTOSHOP
Color fundamentals
Adobe RGB
, sRGB, ProPhoto RGB, and so on.
Each device, like your monitor or printer, has its own color space and can only reproduce colors in its gamut. When
an image moves from one device to another, image colors may change because each device interprets the RGB or
CMYK values according to its own color space. You can use color management when moving images to ensure that
most colors are the same or similar enough so they appear consistent. See Why colors sometimes don’t match.
In Photoshop, a document’s color mode determines which color model is used to display and print the image you’re
working on. Photoshop bases its color modes on the color models that are useful for images used in publishing. You
can choose from RGB (Red, Green, Blue), CMYK (Cyan, Magenta, Yellow, Black), Lab Color (based on CIE L* a* b*),
and Grayscale. Photoshop also includes modes for specialized color output such as Indexed Color and Duotone. Color
modes determine the number of colors, the number of channels, and the file size of an image. Choosing a color mode
also determines which tools and file formats are available. See “Color modes” on page 89.
When you work with the colors in an image, you are adjusting numerical values in the file. It’s easy to think of a
number as a color, but these numerical values are not absolute colors in themselves—they only have a color meaning
within the color space of the device that is producing the color.
Adjusting color hue, saturation, and brightness
Based on the human perception of color, the HSB model describes three fundamental characteristics of color:
89
Hue Color reflected from or transmitted through an object. It is measured as a location on the standard color wheel,
expressed as a degree between 0° and 360°. In common use, hue is identified by the name of the color, such as red,
orange, or green.
Saturation Strength or purity of the color (sometimes called chroma). Saturation represents the amount of gray in
proportion to the hue, measured as a percentage from 0% (gray) to 100% (fully saturated). On the standard color
wheel, saturation increases from the center to the edge.
Brightness Relative lightness or darkness of the color, usually measured as a percentage from 0% (black) to 100%
(white).
0 360
100
SB
0
HSB color model
H. Hue S. Saturation B. Brightness
H
100
0
Color modes
More Help topics
“About duotones” on page 455
Last updated 12/5/2011
Page 96

USING PHOTOSHOP
Color fundamentals
RGB Color mode
Photoshop RGB Color mode uses the RGB model, assigning an intensity value to each pixel. In 8-bits-per-channel
images, the intensity values range from 0 (black) to 255 (white) for each of the RGB (red, green, blue) components in
a color image. For example, a bright red color has an R value of 246, a G value of 20, and a B value of 50. When the
values of all three components are equal, the result is a shade of neutral gray. When the values of all components are
255, the result is pure white; when the values are 0, pure black.
RGB images use three colors, or channels, to reproduce colors on screen. In 8-bits-per-channel images, the three
channels translate to 24 (8 bits x 3 channels) bits of color information per pixel. With 24-bit images, the three channels
can reproduce up to 16.7 million colors per pixel. With 48-bit (16-bits-per-channel) and 96-bit (32-bits-per-channel)
images, even more colors can be reproduced per pixel. In addition to being the default mode for new Photoshop
images, the RGB model is used by computer monitors to display colors. This means that when working in color modes
other than RGB, such as CMYK, Photoshop converts the CMYK image to RGB for display on screen.
Although RGB is a standard color model, the exact range of colors represented can vary, depending on the application
or display device. The RGB Color mode in Photoshop varies according to the working space setting that you specify
in the
Color Settings
dialog box.
90
CMYK Color mode
In the CMYK mode, each pixel is assigned a percentage value for each of the process inks. The lightest (highlight)
colors are assigned small percentages of process ink colors; the darker (shadow) colors higher percentages. For
example, a bright red might contain 2% cyan, 93% magenta, 90% yellow, and 0% black. In CMYK images, pure white
is generated when all four components have values of 0%.
Use the CMYK mode when preparing an image to be printed using process colors. Converting an RGB image into
CMYK creates a color separation. If you start with an RGB image, it’s best to edit first in RGB and then convert to
CMYK at the end of your editing process. In RGB mode, you can use the
Proof Setup
commands to simulate the effects of a CMYK conversion without changing the actual image data. You can also use
CMYK mode to work directly with CMYK images scanned or imported from high-end systems.
Although CMYK is a standard color model, the exact range of colors represented can vary, depending on the press and
printing conditions. The CMYK Color mode in Photoshop varies according to the working space setting that you
specify in the
Color Settings
dialog box.
Lab Color mode
The CIE L*a*b* color model (Lab) is based on the human perception of color. The numeric values in Lab describe all
the colors that a person with normal vision sees. Because Lab describes how a color looks rather than how much of a
particular colorant is needed for a device (such as a monitor, desktop printer, or digital camera) to produce colors, Lab
is considered to be a device-independent color model. Color management systems use Lab as a color reference to
predictably transform a color from one color space to another color space.
Last updated 12/5/2011
Page 97

USING PHOTOSHOP
Color fundamentals
The Lab Color mode has a lightness component (L) that can range from 0 to 100. In the Adobe Color Picker and Color
panel, the a component (green-red axis) and the b component (blue-yellow axis) can range from +127 to –128.
Lab images can be saved in Photoshop, Photoshop EPS, Large Document Format (PSB), Photoshop PDF, Photoshop
Raw, TIFF, Photoshop DCS 1.0, or Photoshop DCS 2.0 formats. You can save 48-bit (16-bits-per-channel) Lab images
in Photoshop, Large Document Format (PSB), Photoshop PDF, Photoshop Raw, or TIFF formats.
Note: The DCS 1.0 and DCS 2.0 formats convert the file to CMYK when opened.
Grayscale mode
Grayscale mode uses different shades of gray in an image. In 8-bit images, there can be up to 256 shades of gray. Every
pixel of a grayscale image has a brightness value ranging from 0 (black) to 255 (white). In 16 and 32-bit images, the
number of shades in an image is much greater than in 8-bit images.
Grayscale values can also be measured as percentages of black ink coverage (0% is equal to white, 100% to black).
Grayscale mode uses the range defined by the working space setting that you specify in the
Color Settings
dialog box.
91
Bitmap mode
Bitmap mode uses one of two color values (black or white) to represent the pixels in an image. Images in Bitmap mode
are called bitmapped 1-bit images because they have a bit depth of 1.
Duotone mode
Duotone mode creates monotone, duotone (two-color), tritone (three-color), and quadtone (four-color) grayscale
images using one to four custom inks.
Indexed Color mode
Indexed Color mode produces 8-bit image files with up to 256 colors. When converting to indexed color, Photoshop
builds a color lookup table (CLUT), which stores and indexes the colors in the image. If a color in the original image
does not appear in the table, the program chooses the closest one or uses dithering to simulate the color using available
colors.
Although its palette of colors is limited, indexed color can reduce file size yet maintain the visual quality needed for
multimedia presentations, web pages, and the like. Limited editing is available in this mode. For extensive editing, you
should convert temporarily to RGB mode. Indexed color files can be saved in Photoshop, BMP, DICOM (Digital
Imaging and Communications in Medicine), GIF, Photoshop EPS, Large Document Format (PSB), PCX, Photoshop
PDF, Photoshop Raw, Photoshop 2.0, PICT, PNG, Targa®, or TIFF formats.
Multichannel mode
Multichannel mode images contain 256 levels of gray in each channel and are useful for specialized printing.
Multichannel mode images can be saved in Photoshop, Large Document Format (PSB), Photoshop 2.0, Photoshop
Raw, or Photoshop DCS 2.0 formats.
These guidelines apply when converting images to Multichannel mode:
• Layers are unsupported and therefore flattened.
Last updated 12/5/2011
Page 98

USING PHOTOSHOP
Color fundamentals
• Color channels in the original image become spot color channels in the converted image.
• Converting a CMYK image to Multichannel mode creates cyan, magenta, yellow, and black spot channels.
• Converting an RGB image to Multichannel mode creates cyan, magenta, and yellow spot channels.
• Deleting a channel from an RGB, CMYK, or Lab image automatically converts the image to Multichannel mode,
flattening layers.
• To export a multichannel image, save it in Photoshop DCS 2.0 format.
Note: Indexed Color and 32-bit images cannot be converted to Multichannel mode.
Converting between color modes
Convert an image to another color mode
You can change an image from its original mode (source mode) to a different mode (target mode). When you choose
a different color mode for an image, you permanently change the color values in the image. For example, when you
convert an RGB image to CMYK mode, RGB color values outside the CMYK gamut (defined by the CMYK working
space setting in the
92
Color Settings
dialog box) are adjusted to fall within gamut. As a result, some image data may be lost and can’t be recovered if you
convert the image from CMYK back to RGB.
Before converting images, it’s best to do the following:
• Do as much editing as possible in the original image mode (usually RGB for images from most scanners or digital
cameras, or CMYK for images from traditional drum scanners or imported from a Scitex system).
• Save a backup copy before converting. Be sure to save a copy of your image that includes all layers so that you can
edit the original version of the image after the conversion.
• Flatten the file before converting it. The interaction of colors between layer blending modes changes when the
mode changes.
Note: In most cases, you’ll want to flatten a file before converting it. However, it isn't required and, in some cases, it
isn’t desirable (for example, when the file has vector text layers).
❖ Choose Image > Mode and the mode you want from the submenu. Modes not available for the active image appear
dimmed in the menu.
Images are flattened when converted to Multichannel, Bitmap, or Indexed Color mode, because these modes do not
support layers.
Convert a color photo to Grayscale mode
1 Open the photo you want to convert to black-and-white.
2 Choose Image > Mode > Grayscale.
3 Click Discard. Photoshop converts the colors in the image to black, white, and shades of gray.
Note: The technique above minimizes file size but discards color information and can convert adjacent colors to the exact
same shade of gray. Using a Black & White adjustment layer increases file size but retains color information, letting you
map colors to shades of gray. (See “Convert a color image to black and white” on page 132.)
Last updated 12/5/2011
Page 99

USING PHOTOSHOP
Color fundamentals
Convert an image to Bitmap mode
Converting an image to Bitmap mode reduces the image to two colors, greatly simplifying the color information in the
image and reducing its file size.
When converting a color image to Bitmap mode, first convert it to Grayscale mode. This removes the hue and
saturation information from the pixels and leaves just the brightness values. However, because only a few editing
options are available for Bitmap mode images, it’s usually best to edit the image in Grayscale mode and then convert
it to Bitmap mode.
Note: Images in Bitmap mode are 1 bit per channel. You must convert a 16- or 32-bits-per-channel image to 8-bit
Grayscale mode before converting it to Bitmap mode.
1 Do one of the following:
• If the image is in color, choose Image > Mode > Grayscale. Then choose Image > Mode > Bitmap.
• If the image is grayscale, choose Image > Mode > Bitmap.
2 For Output, enter a value for the output resolution of the Bitmap mode image, and choose a unit of measurement.
By default, the current image resolution appears as both the input and the output resolutions.
3 Choose one of the following bitmap conversion methods from the Use pop-up menu:
50% Threshold Converts pixels with gray values above the middle gray level (128) to white and pixels with gray values
below that level to black. The result is a very high-contrast, black-and-white representation of the image.
93
Pattern Dither Converts an image by organizing the gray levels into geometric configurations of black and white dots.
Diffusion Dither Converts an image by using an error-diffusion process, starting at the pixel in the upper-left corner
of the image. If the pixel’s value is above middle gray (128), the pixel is changed to white—if below it, to black. Because
the original pixel is rarely pure white or pure black, error is inevitably introduced. This error is transferred to
surrounding pixels and diffused throughout the image, resulting in a grainy, film-like texture.
Halftone Screen Simulates the appearance of halftone dots in the converted image. Enter values in the Halftone Screen
dialog box:
• For Frequency, enter a value for the screen frequency, and choose a unit of measurement. Values can range from
1.000 to 999.999 for lines per inch and from 0.400 to 400.00 for lines per centimeter. You can enter decimal values.
The screen frequency specifies the ruling of the halftone screen in lines per inch (lpi). The frequency depends on
the paper stock and type of press used for printing. Newspapers commonly use an 85-line screen. Magazines use
higher resolution screens, such as 133-lpi and 150-lpi. Check with your print shop for correct screen frequencies.
• Enter a value for the screen angle in degrees from -180 to +180. The screen angle refers to the orientation of the
screen. Continuous-tone and black-and-white halftone screens commonly use a 45° angle.
• For Shape, choose the dot shape you want.
Important: The halftone screen becomes part of the image. If you print the image on a halftone printer, the printer will
use its own halftone screen as well as the halftone screen that is part of the image. On some printers, the result is a moiré
pattern.
Custom Pattern Simulates the appearance of a custom halftone screen in the converted image. Choose a pattern that
lends itself to thickness variations, typically one with a variety of gray shades.
To use this option, you first define a pattern and then screen the grayscale image to apply the texture. To cover the
entire image, the pattern must be as large as the image. Otherwise, the pattern is tiled. Photoshop comes with several
self-tiling patterns that can be used as halftone screen patterns.
To prepare a black-and-white pattern for conversion, first convert the image to grayscale and then apply the Blur
More filter several times. This blurring technique creates thick lines tapering from dark gray to white.
Last updated 12/5/2011
Page 100

USING PHOTOSHOP
Color fundamentals
Original grayscale image, and 50% Threshold conversion method
Pattern Dither conversion method, and Diffusion Dither conversion method
94
Convert a Bitmap mode image to Grayscale mode
You can convert a Bitmap mode image to Grayscale mode in order to edit it. Keep in mind that a Bitmap mode image
edited in Grayscale mode may not look the same when you convert it back to Bitmap mode. For example, suppose a
pixel that is black in Bitmap mode is edited to a shade of gray in Grayscale mode. When the image is converted back
to Bitmap mode, that pixel is rendered as white if its gray value is above the middle gray value of 128.
1 Choose Image > Mode > Grayscale.
2 Enter a value between 1 and 16 for the size ratio.
The size ratio is the factor for scaling down the image. For example, to reduce a grayscale image by 50%, enter 2 for the
size ratio. If you enter a number greater than 1, the program averages multiple pixels in the Bitmap mode image to
produce a single pixel in the grayscale image. This process lets you generate multiple shades of gray from an image
scanned on a 1-bit scanner.
Convert a grayscale or RGB image to indexed color
Converting to indexed color reduces the number of colors in the image to at most 256—the standard number of colors
supported by the GIF and PNG-8 formats and many multimedia applications. This conversion reduces file size by
deleting color information from the image.
To convert to indexed color, you must start with an image that is 8 bits per channel and in either Grayscale or RGB mode.
1 Choose Image > Mode > Indexed Color.
Note: All visible layers will be flattened; any hidden layers will be discarded.
For grayscale images, the conversion happens automatically. For RGB images, the Indexed Color dialog box appears.
2 Select Preview in the Indexed Color dialog box to display a preview of the changes.
3 Specify conversion options.
Last updated 12/5/2011
 Loading...