

Page 1
ADOBE® PHOTOSHOP® CS3
USER GUIDE
Page 2

Copyright
© 2007 Adobe Systems Incorporated. All rights reserved.
Adobe® Photoshop® CS3 User Guide for Windows® and Mac OS.
If this guide is distributed with software that includes an end user agreement, this guide, as well as the software described in it, is furnished under license and may be used or
copied only in accordance with the terms of such license. Except as permitted by any such license, no part of this guide may be reproduced, stored in a retrieval system, or transmitted, in any form or by any means, electronic, mechanical, recording, or other wise, without the prior written permission of Adobe Systems Incorporated.Pleasenotethatthe
content in this guide is protected under copyright law even if it is not distributed with software that includes an end user license agreement.
Thecontentofthisguideisfurnishedforinformationaluseonly,issubjecttochangewithoutnotice,andshouldnotbeconstruedasacommitmentbyAdobe Systems Incorporated. Adobe Systems Incorporated assumes no responsibility or liability for any errors or inaccuracies that may appear in the informational content contained in this guide.
Please remember that existing artwork or images that you may want to include in your project may be protected under copyright law. The unauthorized incorporation of such
material into your new work could be a violation of the rights of the copyright owner. Please be sure to obtain any permission required from the copyright owner.
Any references to company names in sample templates are for demonstration purposes only and are not intended to refer to any actual organization.
Adobe, the Adobe logo, Acrobat, Adobe Dimensions, Adobe Premiere, AdobePS, After Effects, Creative Suite, Distiller, Dreamweaver, Flash, GoLive, Illustrator, ImageReady,
Incopy, InDesign, Lightroom, the OpenType logo, PageMaker, Photomerge, Photoshop, PostScript, Streamline, and Version Cue are either registered trademarks or trademarks
of Adobe Systems Incorporated in the United States and/or other countries.
Microsoft, OpenType, and Windows are either registered trademarks or trademarks of Microsoft Corporation in the United States and/or other countries. Apple, Mac OS, and
Macintosh are trademarks of Apple Inc., registered in the U.S. and other countries. OS/2 is a trademark of International Business Machines Corporation in the United States,
other countries, or both. Kodak is a registered trademark of Eastman Kodak Company. All other trademarks are the property of their respective owners.
The Spelling portion of this product is based on Proximity Linguistic Technology. The Proximity Hyphenation System ©1989 All rights reserved Proximity Technology, Inc.
Proximity and Linguibase are registered trademarks of Proximity Technology Inc.
This product includes software developed by the Apache Software Foundation (
www.apache.org).
This product contains either BISAFE and/or TIPEM software by RSA Data Security, Inc.
This product includes cryptographic software written by Eric Young (eay@cryptosoft.com).
This software is based in part on the work of the Independent JPEG Group.
© 1994 Hewlett Packard Company.
PortionsofthiscodearelicensedfromAppleInc.underthetermsofthePublicSourceLicenseVersion2.Thesourcecodeversionofthelicensedcodeand thelicense are available
www.opensource.apple.com/apsl.
at
PANTONE® Colors displayed in the software application orin the user documentation may not match PANTONE-identified standards. Consult current PANTONE Color Publications for accurate color. PANTONE® and other Pantone, Inc. trademarks are the property of Pantone, Inc. © Pantone, Inc., 2006. Pantone, Inc. is the copyright owner of color
data and/orsoftware whichare licensedto AdobeSystems Incorporated todistribute for use only in combinationwith AdobePhotoshop.PANTONE Color Data and/or Software
shall not be copied onto another disk or into memory unless as part of the execution of Adobe Photoshop.
Notice to U.S. Government End Users: The Software and Documentation are “Commercial Items,” as that term is defined at 48 C.F.R. §2.101, consisting of “Commercial
Computer Software” and “Commercial Computer Software Documentation,” as such terms are used in 48 C.F.R. §12.212 or 48 C.F.R. §227.7202, as applicable. Consistent with
48 C.F.R. §12.212 or 48 C.F.R. §§227.7202-1 through 227.7202-4, as applicable, the Commercial Computer Software and Commercial Computer Software Documentation are
being licensed to U.S. Government end users (a) only asCommercial Itemsand (b) with only those rights asare grantedto all other endusers pursuantto the terms and conditions
herein. Unpublished-rights reserved under the copyright laws of the United States. Adobe agrees to comply with all applicable equal opportunity laws including, if appropriate,
the provisions of Executive Order 11246, as amended, Section 402 of the Vietnam Era Veterans Readjustment Assistance Act of 1974 (38 USC 4212), and Section 503 of the
Rehabilitation Act of 1973, as amended, and the regulations at 41 CFR Parts 60-1 through 60-60, 60-250, and60-741. The affirmative action clause andregulations contained in
the preceding sentence shall be incorporated by reference.
Adobe Systems Incorporated, 345 Park Avenue, San Jose, California 95110, USA.
Page 3

Contents
Chapter 1: Getting started
Installation . . . . . . . . . . . . . . . . . . . . . . . . . . . . . . . . . . . . . . . . . . . . . . . . . . . . . . . . . . . . . . . . . . . . . . . . . . . . . . . 1
Adobe Help . . . . . . . . . . . . . . . . . . . . . . . . . . . . . . . . . . . . . . . . . . . . . . . . . . . . . . . . . . . . . . . . . . . . . . . . . . . . . . . 2
Resources . . . . . . . . . . . . . . . . . . . . . . . . . . . . . . . . . . . . . . . . . . . . . . . . . . . . . . . . . . . . . . . . . . . . . . . . . . . . . . . . 5
What’s new? . . . . . . . . . . . . . . . . . . . . . . . . . . . . . . . . . . . . . . . . . . . . . . . . . . . . . . . . . . . . . . . . . . . . . . . . . . . . . 11
Chapter 2: Workspace
Workspace basics . . . . . . . . . . . . . . . . . . . . . . . . . . . . . . . . . . . . . . . . . . . . . . . . . . . . . . . . . . . . . . . . . . . . . . . . 14
Palettes and menus . . . . . . . . . . . . . . . . . . . . . . . . . . . . . . . . . . . . . . . . . . . . . . . . . . . . . . . . . . . . . . . . . . . . . . 21
Tools . . . . . . . . . . . . . . . . . . . . . . . . . . . . . . . . . . . . . . . . . . . . . . . . . . . . . . . . . . . . . . . . . . . . . . . . . . . . . . . . . . . . 25
Viewing images . . . . . . . . . . . . . . . . . . . . . . . . . . . . . . . . . . . . . . . . . . . . . . . . . . . . . . . . . . . . . . . . . . . . . . . . . . 33
Rulers, the grid, and guides . . . . . . . . . . . . . . . . . . . . . . . . . . . . . . . . . . . . . . . . . . . . . . . . . . . . . . . . . . . . . . . 41
Work with the Preset Manager . . . . . . . . . . . . . . . . . . . . . . . . . . . . . . . . . . . . . . . . . . . . . . . . . . . . . . . . . . . . 46
Preferences . . . . . . . . . . . . . . . . . . . . . . . . . . . . . . . . . . . . . . . . . . . . . . . . . . . . . . . . . . . . . . . . . . . . . . . . . . . . . 48
Plug-ins . . . . . . . . . . . . . . . . . . . . . . . . . . . . . . . . . . . . . . . . . . . . . . . . . . . . . . . . . . . . . . . . . . . . . . . . . . . . . . . . . 50
Recovery and undo . . . . . . . . . . . . . . . . . . . . . . . . . . . . . . . . . . . . . . . . . . . . . . . . . . . . . . . . . . . . . . . . . . . . . . 51
Memory and performance . . . . . . . . . . . . . . . . . . . . . . . . . . . . . . . . . . . . . . . . . . . . . . . . . . . . . . . . . . . . . . . 56
iii
Chapter 3: Opening and importing images
Photoshop images . . . . . . . . . . . . . . . . . . . . . . . . . . . . . . . . . . . . . . . . . . . . . . . . . . . . . . . . . . . . . . . . . . . . . . . 58
Image size and resolution . . . . . . . . . . . . . . . . . . . . . . . . . . . . . . . . . . . . . . . . . . . . . . . . . . . . . . . . . . . . . . . . 61
Acquiring images from cameras and scanners . . . . . . . . . . . . . . . . . . . . . . . . . . . . . . . . . . . . . . . . . . . . 67
Creating, opening, and importing images . . . . . . . . . . . . . . . . . . . . . . . . . . . . . . . . . . . . . . . . . . . . . . . . . 69
Placing files . . . . . . . . . . . . . . . . . . . . . . . . . . . . . . . . . . . . . . . . . . . . . . . . . . . . . . . . . . . . . . . . . . . . . . . . . . . . . . 74
High dynamic range images . . . . . . . . . . . . . . . . . . . . . . . . . . . . . . . . . . . . . . . . . . . . . . . . . . . . . . . . . . . . . . 77
Chapter 4: Camera Raw
Introduction to Camera Raw . . . . . . . . . . . . . . . . . . . . . . . . . . . . . . . . . . . . . . . . . . . . . . . . . . . . . . . . . . . . . . 85
Navigating, opening, and saving images . . . . . . . . . . . . . . . . . . . . . . . . . . . . . . . . . . . . . . . . . . . . . . . . . 90
Making color and tonal adjustments in Camera Raw . . . . . . . . . . . . . . . . . . . . . . . . . . . . . . . . . . . . . . 93
Modifying images with Camera Raw . . . . . . . . . . . . . . . . . . . . . . . . . . . . . . . . . . . . . . . . . . . . . . . . . . . . . 100
Camera Raw settings . . . . . . . . . . . . . . . . . . . . . . . . . . . . . . . . . . . . . . . . . . . . . . . . . . . . . . . . . . . . . . . . . . . . 103
Chapter 5: Color
About color . . . . . . . . . . . . . . . . . . . . . . . . . . . . . . . . . . . . . . . . . . . . . . . . . . . . . . . . . . . . . . . . . . . . . . . . . . . . . 107
Color modes . . . . . . . . . . . . . . . . . . . . . . . . . . . . . . . . . . . . . . . . . . . . . . . . . . . . . . . . . . . . . . . . . . . . . . . . . . . . 110
Converting between color modes . . . . . . . . . . . . . . . . . . . . . . . . . . . . . . . . . . . . . . . . . . . . . . . . . . . . . . . 112
Choosing colors . . . . . . . . . . . . . . . . . . . . . . . . . . . . . . . . . . . . . . . . . . . . . . . . . . . . . . . . . . . . . . . . . . . . . . . . 118
Chapter 6: Color management
Understanding color management . . . . . . . . . . . . . . . . . . . . . . . . . . . . . . . . . . . . . . . . . . . . . . . . . . . . . . 128
Keeping colors consistent . . . . . . . . . . . . . . . . . . . . . . . . . . . . . . . . . . . . . . . . . . . . . . . . . . . . . . . . . . . . . . . 130
Color-managing imported images . . . . . . . . . . . . . . . . . . . . . . . . . . . . . . . . . . . . . . . . . . . . . . . . . . . . . . . 134
Page 4

Color-managing documents for online viewing . . . . . . . . . . . . . . . . . . . . . . . . . . . . . . . . . . . . . . . . . .136
Proofing colors . . . . . . . . . . . . . . . . . . . . . . . . . . . . . . . . . . . . . . . . . . . . . . . . . . . . . . . . . . . . . . . . . . . . . . . . . 137
Color-managing documents when printing . . . . . . . . . . . . . . . . . . . . . . . . . . . . . . . . . . . . . . . . . . . . . . 139
Working with color profiles . . . . . . . . . . . . . . . . . . . . . . . . . . . . . . . . . . . . . . . . . . . . . . . . . . . . . . . . . . . . . . 141
Color settings . . . . . . . . . . . . . . . . . . . . . . . . . . . . . . . . . . . . . . . . . . . . . . . . . . . . . . . . . . . . . . . . . . . . . . . . . . . 146
Chapter 7: Making color and tonal adjustments
Viewing histograms and pixel values . . . . . . . . . . . . . . . . . . . . . . . . . . . . . . . . . . . . . . . . . . . . . . . . . . . . 151
Understanding color adjustments . . . . . . . . . . . . . . . . . . . . . . . . . . . . . . . . . . . . . . . . . . . . . . . . . . . . . . . 156
Adjusting image color and tone . . . . . . . . . . . . . . . . . . . . . . . . . . . . . . . . . . . . . . . . . . . . . . . . . . . . . . . . . 160
Targeting images for press . . . . . . . . . . . . . . . . . . . . . . . . . . . . . . . . . . . . . . . . . . . . . . . . . . . . . . . . . . . . . . 174
Matching, replacing, and mixing colors . . . . . . . . . . . . . . . . . . . . . . . . . . . . . . . . . . . . . . . . . . . . . . . . . .176
Making quick image adjustments . . . . . . . . . . . . . . . . . . . . . . . . . . . . . . . . . . . . . . . . . . . . . . . . . . . . . . . 182
Applying special color effects to images . . . . . . . . . . . . . . . . . . . . . . . . . . . . . . . . . . . . . . . . . . . . . . . . . 187
Chapter 8: Retouching and transforming
Adjusting crop, rotation, and canvas . . . . . . . . . . . . . . . . . . . . . . . . . . . . . . . . . . . . . . . . . . . . . . . . . . . . . 190
Retouching and repairing images . . . . . . . . . . . . . . . . . . . . . . . . . . . . . . . . . . . . . . . . . . . . . . . . . . . . . . . 195
Correcting image distortion and noise . . . . . . . . . . . . . . . . . . . . . . . . . . . . . . . . . . . . . . . . . . . . . . . . . . . 205
Adjusting image sharpness and blur . . . . . . . . . . . . . . . . . . . . . . . . . . . . . . . . . . . . . . . . . . . . . . . . . . . . . 207
Transforming objects . . . . . . . . . . . . . . . . . . . . . . . . . . . . . . . . . . . . . . . . . . . . . . . . . . . . . . . . . . . . . . . . . . . 213
Liquify filter . . . . . . . . . . . . . . . . . . . . . . . . . . . . . . . . . . . . . . . . . . . . . . . . . . . . . . . . . . . . . . . . . . . . . . . . . . . . . 219
Vanishing Point . . . . . . . . . . . . . . . . . . . . . . . . . . . . . . . . . . . . . . . . . . . . . . . . . . . . . . . . . . . . . . . . . . . . . . . . . 225
Create panoramic images . . . . . . . . . . . . . . . . . . . . . . . . . . . . . . . . . . . . . . . . . . . . . . . . . . . . . . . . . . . . . . . 239
iv
Chapter 9: Selecting
Making selections . . . . . . . . . . . . . . . . . . . . . . . . . . . . . . . . . . . . . . . . . . . . . . . . . . . . . . . . . . . . . . . . . . . . . . . 244
Adjusting pixel selections . . . . . . . . . . . . . . . . . . . . . . . . . . . . . . . . . . . . . . . . . . . . . . . . . . . . . . . . . . . . . . . 252
Moving and copying selected pixels . . . . . . . . . . . . . . . . . . . . . . . . . . . . . . . . . . . . . . . . . . . . . . . . . . . . . 258
Deleting and extracting objects . . . . . . . . . . . . . . . . . . . . . . . . . . . . . . . . . . . . . . . . . . . . . . . . . . . . . . . . . 262
Channels . . . . . . . . . . . . . . . . . . . . . . . . . . . . . . . . . . . . . . . . . . . . . . . . . . . . . . . . . . . . . . . . . . . . . . . . . . . . . . . 264
Saving selections and using masks . . . . . . . . . . . . . . . . . . . . . . . . . . . . . . . . . . . . . . . . . . . . . . . . . . . . . . 269
Channel calculations . . . . . . . . . . . . . . . . . . . . . . . . . . . . . . . . . . . . . . . . . . . . . . . . . . . . . . . . . . . . . . . . . . . . 275
Chapter 10: Layers
Layer Basics . . . . . . . . . . . . . . . . . . . . . . . . . . . . . . . . . . . . . . . . . . . . . . . . . . . . . . . . . . . . . . . . . . . . . . . . . . . . . 278
Selecting, grouping, and linking layers . . . . . . . . . . . . . . . . . . . . . . . . . . . . . . . . . . . . . . . . . . . . . . . . . . . 283
Moving, stacking, and locking layers . . . . . . . . . . . . . . . . . . . . . . . . . . . . . . . . . . . . . . . . . . . . . . . . . . . . . 284
Managing layers . . . . . . . . . . . . . . . . . . . . . . . . . . . . . . . . . . . . . . . . . . . . . . . . . . . . . . . . . . . . . . . . . . . . . . . . 289
Setting opacity and blending . . . . . . . . . . . . . . . . . . . . . . . . . . . . . . . . . . . . . . . . . . . . . . . . . . . . . . . . . . . . 292
Layer effects and styles . . . . . . . . . . . . . . . . . . . . . . . . . . . . . . . . . . . . . . . . . . . . . . . . . . . . . . . . . . . . . . . . . . 297
Adjustment and fill layers . . . . . . . . . . . . . . . . . . . . . . . . . . . . . . . . . . . . . . . . . . . . . . . . . . . . . . . . . . . . . . . 306
Nondestructive editing . . . . . . . . . . . . . . . . . . . . . . . . . . . . . . . . . . . . . . . . . . . . . . . . . . . . . . . . . . . . . . . . . 308
Layer comps . . . . . . . . . . . . . . . . . . . . . . . . . . . . . . . . . . . . . . . . . . . . . . . . . . . . . . . . . . . . . . . . . . . . . . . . . . . . 315
Masking layers . . . . . . . . . . . . . . . . . . . . . . . . . . . . . . . . . . . . . . . . . . . . . . . . . . . . . . . . . . . . . . . . . . . . . . . . . . 318
Page 5

Chapter 11: Painting
Painting tools . . . . . . . . . . . . . . . . . . . . . . . . . . . . . . . . . . . . . . . . . . . . . . . . . . . . . . . . . . . . . . . . . . . . . . . . . . . 325
Brush presets . . . . . . . . . . . . . . . . . . . . . . . . . . . . . . . . . . . . . . . . . . . . . . . . . . . . . . . . . . . . . . . . . . . . . . . . . . . 330
Creating and modifying brushes . . . . . . . . . . . . . . . . . . . . . . . . . . . . . . . . . . . . . . . . . . . . . . . . . . . . . . . . . 332
Blending modes . . . . . . . . . . . . . . . . . . . . . . . . . . . . . . . . . . . . . . . . . . . . . . . . . . . . . . . . . . . . . . . . . . . . . . . . 343
Gradients . . . . . . . . . . . . . . . . . . . . . . . . . . . . . . . . . . . . . . . . . . . . . . . . . . . . . . . . . . . . . . . . . . . . . . . . . . . . . . . 347
Filling and stroking selections, layers, and paths . . . . . . . . . . . . . . . . . . . . . . . . . . . . . . . . . . . . . . . . . 351
Creating and managing patterns . . . . . . . . . . . . . . . . . . . . . . . . . . . . . . . . . . . . . . . . . . . . . . . . . . . . . . . . 354
Chapter 12: Drawing
Drawing vector graphics . . . . . . . . . . . . . . . . . . . . . . . . . . . . . . . . . . . . . . . . . . . . . . . . . . . . . . . . . . . . . . . . 358
Drawing shapes . . . . . . . . . . . . . . . . . . . . . . . . . . . . . . . . . . . . . . . . . . . . . . . . . . . . . . . . . . . . . . . . . . . . . . . . . 359
Drawing with the Pen tools . . . . . . . . . . . . . . . . . . . . . . . . . . . . . . . . . . . . . . . . . . . . . . . . . . . . . . . . . . . . . 363
Managing paths . . . . . . . . . . . . . . . . . . . . . . . . . . . . . . . . . . . . . . . . . . . . . . . . . . . . . . . . . . . . . . . . . . . . . . . . 369
Editing paths . . . . . . . . . . . . . . . . . . . . . . . . . . . . . . . . . . . . . . . . . . . . . . . . . . . . . . . . . . . . . . . . . . . . . . . . . . . 371
Converting between paths and selection borders . . . . . . . . . . . . . . . . . . . . . . . . . . . . . . . . . . . . . . . 379
Adding color to paths . . . . . . . . . . . . . . . . . . . . . . . . . . . . . . . . . . . . . . . . . . . . . . . . . . . . . . . . . . . . . . . . . . 380
Chapter 13: Filters
Filter basics . . . . . . . . . . . . . . . . . . . . . . . . . . . . . . . . . . . . . . . . . . . . . . . . . . . . . . . . . . . . . . . . . . . . . . . . . . . . . 383
Filter effects reference . . . . . . . . . . . . . . . . . . . . . . . . . . . . . . . . . . . . . . . . . . . . . . . . . . . . . . . . . . . . . . . . . . . 388
Applying specific filters . . . . . . . . . . . . . . . . . . . . . . . . . . . . . . . . . . . . . . . . . . . . . . . . . . . . . . . . . . . . . . . . . 396
Add Lighting Effects . . . . . . . . . . . . . . . . . . . . . . . . . . . . . . . . . . . . . . . . . . . . . . . . . . . . . . . . . . . . . . . . . . . . 399
v
Chapter 14: Type
Creating type . . . . . . . . . . . . . . . . . . . . . . . . . . . . . . . . . . . . . . . . . . . . . . . . . . . . . . . . . . . . . . . . . . . . . . . . . . . 403
Editing text . . . . . . . . . . . . . . . . . . . . . . . . . . . . . . . . . . . . . . . . . . . . . . . . . . . . . . . . . . . . . . . . . . . . . . . . . . . . . 406
Formatting characters . . . . . . . . . . . . . . . . . . . . . . . . . . . . . . . . . . . . . . . . . . . . . . . . . . . . . . . . . . . . . . . . . . . 411
Fonts . . . . . . . . . . . . . . . . . . . . . . . . . . . . . . . . . . . . . . . . . . . . . . . . . . . . . . . . . . . . . . . . . . . . . . . . . . . . . . . . . . . 415
Line and character spacing . . . . . . . . . . . . . . . . . . . . . . . . . . . . . . . . . . . . . . . . . . . . . . . . . . . . . . . . . . . . . . 419
Scaling and rotating type . . . . . . . . . . . . . . . . . . . . . . . . . . . . . . . . . . . . . . . . . . . . . . . . . . . . . . . . . . . . . . . 421
Formatting paragraphs . . . . . . . . . . . . . . . . . . . . . . . . . . . . . . . . . . . . . . . . . . . . . . . . . . . . . . . . . . . . . . . . . . 422
Creating type effects . . . . . . . . . . . . . . . . . . . . . . . . . . . . . . . . . . . . . . . . . . . . . . . . . . . . . . . . . . . . . . . . . . . . 428
Asian type . . . . . . . . . . . . . . . . . . . . . . . . . . . . . . . . . . . . . . . . . . . . . . . . . . . . . . . . . . . . . . . . . . . . . . . . . . . . . . 433
Chapter 15: Saving and exporting images
Saving images . . . . . . . . . . . . . . . . . . . . . . . . . . . . . . . . . . . . . . . . . . . . . . . . . . . . . . . . . . . . . . . . . . . . . . . . . . 440
Saving PDF files . . . . . . . . . . . . . . . . . . . . . . . . . . . . . . . . . . . . . . . . . . . . . . . . . . . . . . . . . . . . . . . . . . . . . . . . . 444
Saving and exporting files in other formats . . . . . . . . . . . . . . . . . . . . . . . . . . . . . . . . . . . . . . . . . . . . . . 452
File formats . . . . . . . . . . . . . . . . . . . . . . . . . . . . . . . . . . . . . . . . . . . . . . . . . . . . . . . . . . . . . . . . . . . . . . . . . . . . . 459
Metadata and annotations . . . . . . . . . . . . . . . . . . . . . . . . . . . . . . . . . . . . . . . . . . . . . . . . . . . . . . . . . . . . . . 466
Adding and viewing Digimarc copyright protection . . . . . . . . . . . . . . . . . . . . . . . . . . . . . . . . . . . . . . 469
Presentations and photo layouts . . . . . . . . . . . . . . . . . . . . . . . . . . . . . . . . . . . . . . . . . . . . . . . . . . . . . . . . 472
Placing Photoshop images in other applications . . . . . . . . . . . . . . . . . . . . . . . . . . . . . . . . . . . . . . . . . 478
Page 6

Chapter 16: Printing
Printing from Photoshop . . . . . . . . . . . . . . . . . . . . . . . . . . . . . . . . . . . . . . . . . . . . . . . . . . . . . . . . . . . . . . . . 483
Printing with color management . . . . . . . . . . . . . . . . . . . . . . . . . . . . . . . . . . . . . . . . . . . . . . . . . . . . . . . . 487
Printing images to a commercial printing press . . . . . . . . . . . . . . . . . . . . . . . . . . . . . . . . . . . . . . . . . . 491
Printing duotones . . . . . . . . . . . . . . . . . . . . . . . . . . . . . . . . . . . . . . . . . . . . . . . . . . . . . . . . . . . . . . . . . . . . . . . 498
Printing spot colors . . . . . . . . . . . . . . . . . . . . . . . . . . . . . . . . . . . . . . . . . . . . . . . . . . . . . . . . . . . . . . . . . . . . . 501
Chapter 17: Web graphics
Working with web graphics . . . . . . . . . . . . . . . . . . . . . . . . . . . . . . . . . . . . . . . . . . . . . . . . . . . . . . . . . . . . . 505
Slicing web pages . . . . . . . . . . . . . . . . . . . . . . . . . . . . . . . . . . . . . . . . . . . . . . . . . . . . . . . . . . . . . . . . . . . . . . 507
Modifying slices . . . . . . . . . . . . . . . . . . . . . . . . . . . . . . . . . . . . . . . . . . . . . . . . . . . . . . . . . . . . . . . . . . . . . . . . 510
Slice output options . . . . . . . . . . . . . . . . . . . . . . . . . . . . . . . . . . . . . . . . . . . . . . . . . . . . . . . . . . . . . . . . . . . . 514
Creating web photo galleries . . . . . . . . . . . . . . . . . . . . . . . . . . . . . . . . . . . . . . . . . . . . . . . . . . . . . . . . . . . 516
Optimizing images . . . . . . . . . . . . . . . . . . . . . . . . . . . . . . . . . . . . . . . . . . . . . . . . . . . . . . . . . . . . . . . . . . . . . . 523
Web graphics optimization options . . . . . . . . . . . . . . . . . . . . . . . . . . . . . . . . . . . . . . . . . . . . . . . . . . . . . . 530
Output settings for web graphics . . . . . . . . . . . . . . . . . . . . . . . . . . . . . . . . . . . . . . . . . . . . . . . . . . . . . . . . 541
Chapter 18: Video and animation
Video and animation in Photoshop . . . . . . . . . . . . . . . . . . . . . . . . . . . . . . . . . . . . . . . . . . . . . . . . . . . . . . 544
Creating images for video . . . . . . . . . . . . . . . . . . . . . . . . . . . . . . . . . . . . . . . . . . . . . . . . . . . . . . . . . . . . . . . 549
Import video files and image sequences (Photoshop Extended) . . . . . . . . . . . . . . . . . . . . . . . . . . 554
Interpreting video footage (Photoshop Extended) . . . . . . . . . . . . . . . . . . . . . . . . . . . . . . . . . . . . . . . 556
Painting frames in video layers (Photoshop Extended) . . . . . . . . . . . . . . . . . . . . . . . . . . . . . . . . . . . . 557
Editing video and animation layers (Photoshop Extended) . . . . . . . . . . . . . . . . . . . . . . . . . . . . . . . 560
Creating frame animations . . . . . . . . . . . . . . . . . . . . . . . . . . . . . . . . . . . . . . . . . . . . . . . . . . . . . . . . . . . . . . 564
Creating timeline animations (Photoshop Extended) . . . . . . . . . . . . . . . . . . . . . . . . . . . . . . . . . . . . . 572
Preview video and animations . . . . . . . . . . . . . . . . . . . . . . . . . . . . . . . . . . . . . . . . . . . . . . . . . . . . . . . . . . . 579
Save and export video and animations . . . . . . . . . . . . . . . . . . . . . . . . . . . . . . . . . . . . . . . . . . . . . . . . . . 581
vi
Chapter 19: Technical imaging
Photoshop and MATLAB (Photoshop Extended) . . . . . . . . . . . . . . . . . . . . . . . . . . . . . . . . . . . . . . . . . . 590
DICOM files (Photoshop Extended) . . . . . . . . . . . . . . . . . . . . . . . . . . . . . . . . . . . . . . . . . . . . . . . . . . . . . . 592
Image Stacks (Photoshop Extended) . . . . . . . . . . . . . . . . . . . . . . . . . . . . . . . . . . . . . . . . . . . . . . . . . . . . . 594
Measurement (Photoshop Extended) . . . . . . . . . . . . . . . . . . . . . . . . . . . . . . . . . . . . . . . . . . . . . . . . . . . . 597
Counting objects in an image (Photoshop Extended) . . . . . . . . . . . . . . . . . . . . . . . . . . . . . . . . . . . . 603
Working with 3D files (Photoshop Extended) . . . . . . . . . . . . . . . . . . . . . . . . . . . . . . . . . . . . . . . . . . . . . 604
Chapter 20: Automating tasks
Automating with actions . . . . . . . . . . . . . . . . . . . . . . . . . . . . . . . . . . . . . . . . . . . . . . . . . . . . . . . . . . . . . . . . 610
Creating actions . . . . . . . . . . . . . . . . . . . . . . . . . . . . . . . . . . . . . . . . . . . . . . . . . . . . . . . . . . . . . . . . . . . . . . . . 614
Processing a batch of files . . . . . . . . . . . . . . . . . . . . . . . . . . . . . . . . . . . . . . . . . . . . . . . . . . . . . . . . . . . . . . . 618
Scripting . . . . . . . . . . . . . . . . . . . . . . . . . . . . . . . . . . . . . . . . . . . . . . . . . . . . . . . . . . . . . . . . . . . . . . . . . . . . . . . 622
Creating data-driven graphics . . . . . . . . . . . . . . . . . . . . . . . . . . . . . . . . . . . . . . . . . . . . . . . . . . . . . . . . . . . 623
Page 7

Chapter 21: Keyboard shortcuts
Customizing keyboard shortcuts . . . . . . . . . . . . . . . . . . . . . . . . . . . . . . . . . . . . . . . . . . . . . . . . . . . . . . . . 629
Default keyboard shortcuts . . . . . . . . . . . . . . . . . . . . . . . . . . . . . . . . . . . . . . . . . . . . . . . . . . . . . . . . . . . . . 630
Index . . . . . . . . . . . . . . . . . . . . . . . . . . . . . . . . . . . . . . . . . . . . . . . . . . . . . . . . . . . . . . . . . . . . . . . . . . . . . . . . . . 653
vii
Page 8

Chapter 1: Getting started
If you haven’t installed your new software, begin by reading some information on installation and other preliminaries. Before you begin working with your software, take a few moments to read an overview of Adobe Help and of
the many resources available to users. You haveaccess to instructional videos,plug-ins, templates,user communities,
seminars, tutorials, RSS feeds, and much more.
Installation
Requirements
❖ To review complete system requirements and recommendations for your Adobe® software, see the Read Me file
on the installation disc.
Install the software
1 Close any other Adobe applications open on your computer.
2 Insert the installation disc into the disc drive, and follow the on-screen instructions.
1
Note: For more information, see the Read Me file on the installation disc.
Activate the software
Ifyouhaveasingle-userretaillicenseforyourAdobesoftware,youwillbeaskedtoactivateyoursoftware;thisisa
simple, anonymous process that you must complete within 30 days of starting the software.
For more informationon product activation, see the Read Me file onyour installationdisc, or visitthe Adobe website
at www.adobe.com/go/activation.
1 If the Activation dialog box isn’t already open, choose Help > Activate.
2 Follow the on-screen instructions.
Note: If you want to install the software on a different computer, you must first deactivate it on your computer. Choose
Help > Deactivate.
Register
Register your product to receive complimentary installation support, notifications of updates, and other services.
❖ To register, follow the on-screen instructions in the Registration dialog box, which appears after you install and
activate the software.
If you postpone registration, you can register at any time by choosing Help > Registration.
Page 9
PHOTOSHOP CS3
User Guide
Read Me
The installation disc contains the Read Me file for your software. (This file is also copied to the application folder
during product installation.) Open the file to read important information about the following topics:
• System requirements
• Installation (including uninstalling the software)
• Activation and registration
• Font installation
• Troubleshooting
• Customer support
• Legal notices
Adobe Help
Adobe Help resources
Documentation for your Adobe software is available in a variety of formats.
2
In-product and LiveDocs Help
In-product Help provides access to all documentation and instructional content available at the time the software
ships. It is available through the Help menu in your Adobe software.
LiveDocs Help includes all the content from in-product Help, plus updates and links to additional instructional
content available on the web. For some products, you can also add comments to the topics in LiveDocs Help. Find
LiveDocs Help for your product in the Adobe Help Resource Center, at www.adobe.com/go/documentation.
Page 10

PHOTOSHOP CS3
User Guide
Most versions of in-product and LiveDocs Help let you search across the Help systems of multiple products. Topics
may also contain links to relevant content on the web or to topics in the Help of another product.
Think of Help, both in the product and on the web, as a hub for accessing additional content and communities of
users. The most complete and up-to-date version of Help is always on the web.
Adobe PDF documentation
The in-product Help is also available as a PDF that is optimized for printing. Other documents, such as installation
guides and white papers, may also be provided as PDFs.
All PDF documentation is available through the Adobe Help Resource Center, at www.adobe.com/go/documen-
tation.Tosee the PDF documentation includedwith your software,look in the Documents folder on the installation
or content DVD.
Printed documentation
Printed editions of the in-product Help are available for purchase in the Adobe Store, at www.adobe.com/go/store.
You can also find books published by Adobe publishing partners in the Adobe Store.
A printed workflow guide is included with all Adobe Creative Suite® 3 products, and stand-alone Adobe products
may include a printed getting started guide.
3
Using Help in the product
In-productHelpisavailablethroughtheHelpmenu.AfteryoustarttheAdobeHelpViewer,clickBrowsetoseeHelp
for additional Adobe products installed on your computer.
These Help features facilitate cross-product learning:
• Topics may contain links to the Help systems of other Adobe products or to additional content on the web.
• Some topics are shared across two or more products. For instance, if you see a Help topic with an Adobe
Photoshop® CS3 icon and an Adobe AfterEffects® CS3 icon, you know that the topic either describes functionality
that is similar in the two products or describes cross-product workflows.
• You can search across the Help systems of multiple products.
If you search for a phrase, such as “shape tool,” enclose it in quotation marks to see only those topics that include all
the words in the phrase.
Page 11
PHOTOSHOP CS3
User Guide
A
C
D
B
4
Adobe Help
A. Back/Forward buttons(previouslyvisited links) B. Expandablesubtopics C. Icons indicating shared topic D. Previous/Next buttons (topics
in sequential order)
Accessibility features
Adobe Help content is accessible to people with disabilities—such as mobility impairments, blindness, and low
vision. In-product Help supports these standard accessibility features:
• The user can change text size with standard context menu commands.
• Links are underlined for easy recognition.
• If link text doesn’t match the title of the destination, the title is referenced in the Title attribute of the Anchor tag.
For example, the Previous and Next links include the titles of the previous and next topics.
• Content supports high-contrast mode.
• Graphics without captions include alternate text.
• Each frame has a title to indicate its purpose.
• Standard HTML tags define content structure for screen reading or text-to-speech tools.
• Style sheets control formatting, so there are no embedded fonts.
Keyboard shortcuts for Help toolbar controls (Windows)
Back button Alt+Left Arrow
Forward button Alt+Right Arrow
Print Ctrl+P
About button Ctrl+I
Browse menu Alt+Down Arrow or Alt+Up Arrow to view Help for another application
Search box Ctrl+S to place the insertion point in the Search box
Page 12
PHOTOSHOP CS3
User Guide
Keyboard shortcuts for Help navigation (Windows)
• To move between panes, press Ctrl+Tab (forward) and Shift+Ctrl+Tab (backward).
• To move through and outline links in a pane, press Tab (forward) or Shift+Tab (backward).
• To activate an outlined link, press Enter.
• To make text bigger, press Ctrl+equal sign.
• To make text smaller, press Ctrl+hyphen.
Resources
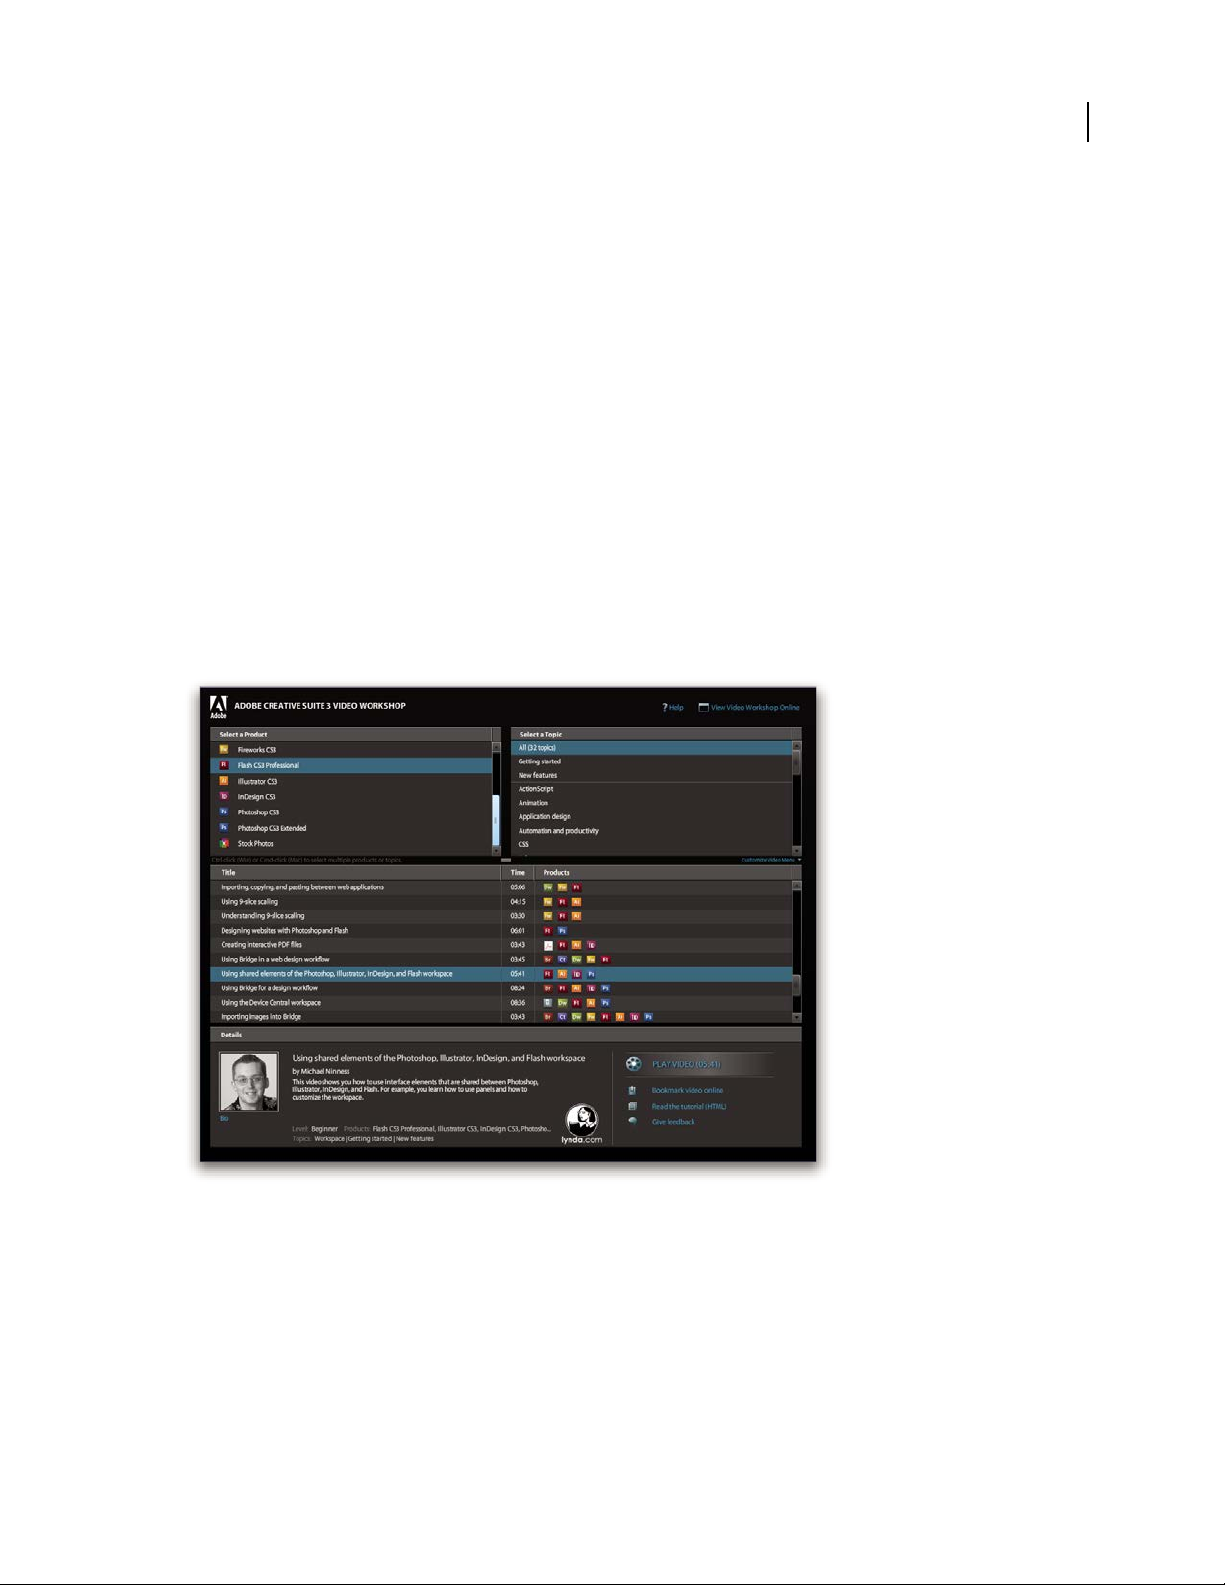
Adobe Video Workshop
The Adobe Creative Suite 3 Video Workshop offers over 200 training videos covering a wide range of subjects for
print, web, and video professionals.
YoucanusetheAdobeVideoWorkshoptolearnaboutanyCreativeSuite3product.Manyvideosshowyouhowto
use Adobe applications together.
5
Page 13
PHOTOSHOP CS3
User Guide
When you start the Adobe Video Workshop, you choose the products you want to learn and the subjects you want
to view. You can see details about each video to focus and direct your learning.
6
Community of presenters
With this release, Adobe Systems invited the community of its users to share their expertise and insights. Adobe and
lynda.com present tutorials, tips, and tricks from leading designers and developers such as Joseph Lowery, Katrin
Eismann, and Chris Georgenes. You can see and hear Adobe experts such as Lynn Grillo, Greg Rewis, and Russell
Brown. In all, over 30 product experts share their knowledge.
Tutorials and source files
The Adobe Video Workshop includes training for novices and experienced users. You’ll also find videos on new
features and key techniques. Each video covers a single subject and typically runs about 3-5 minutes. Most videos
come with an illustrated tutorial and source files, so you can print detailed steps and try the tutorial on your own.
Using Adobe Video Workshop
YoucanaccessAdobeVideoWorkshopusingtheDVDincludedwithyourCreativeSuite 3product.It’salsoavailable
online at www.adobe.com/go/learn_videotutorials. Adobe will regularly add new videos to the online Video
Workshop, so check in to see what’s new.
Photoshop CS3 videos
Adobe Video Workshop covers a wide range of subjects for Adobe Photoshop® CS3 and Adobe Photoshop® CS3
Extended, including these:
• Using and aligning layers
• Making selections
• Applying Smart Filters
• Using Vanishing Point
Page 14

PHOTOSHOP CS3
User Guide
• Printing photos
Videos also show you how to use Photoshop CS3 with other Adobe products:
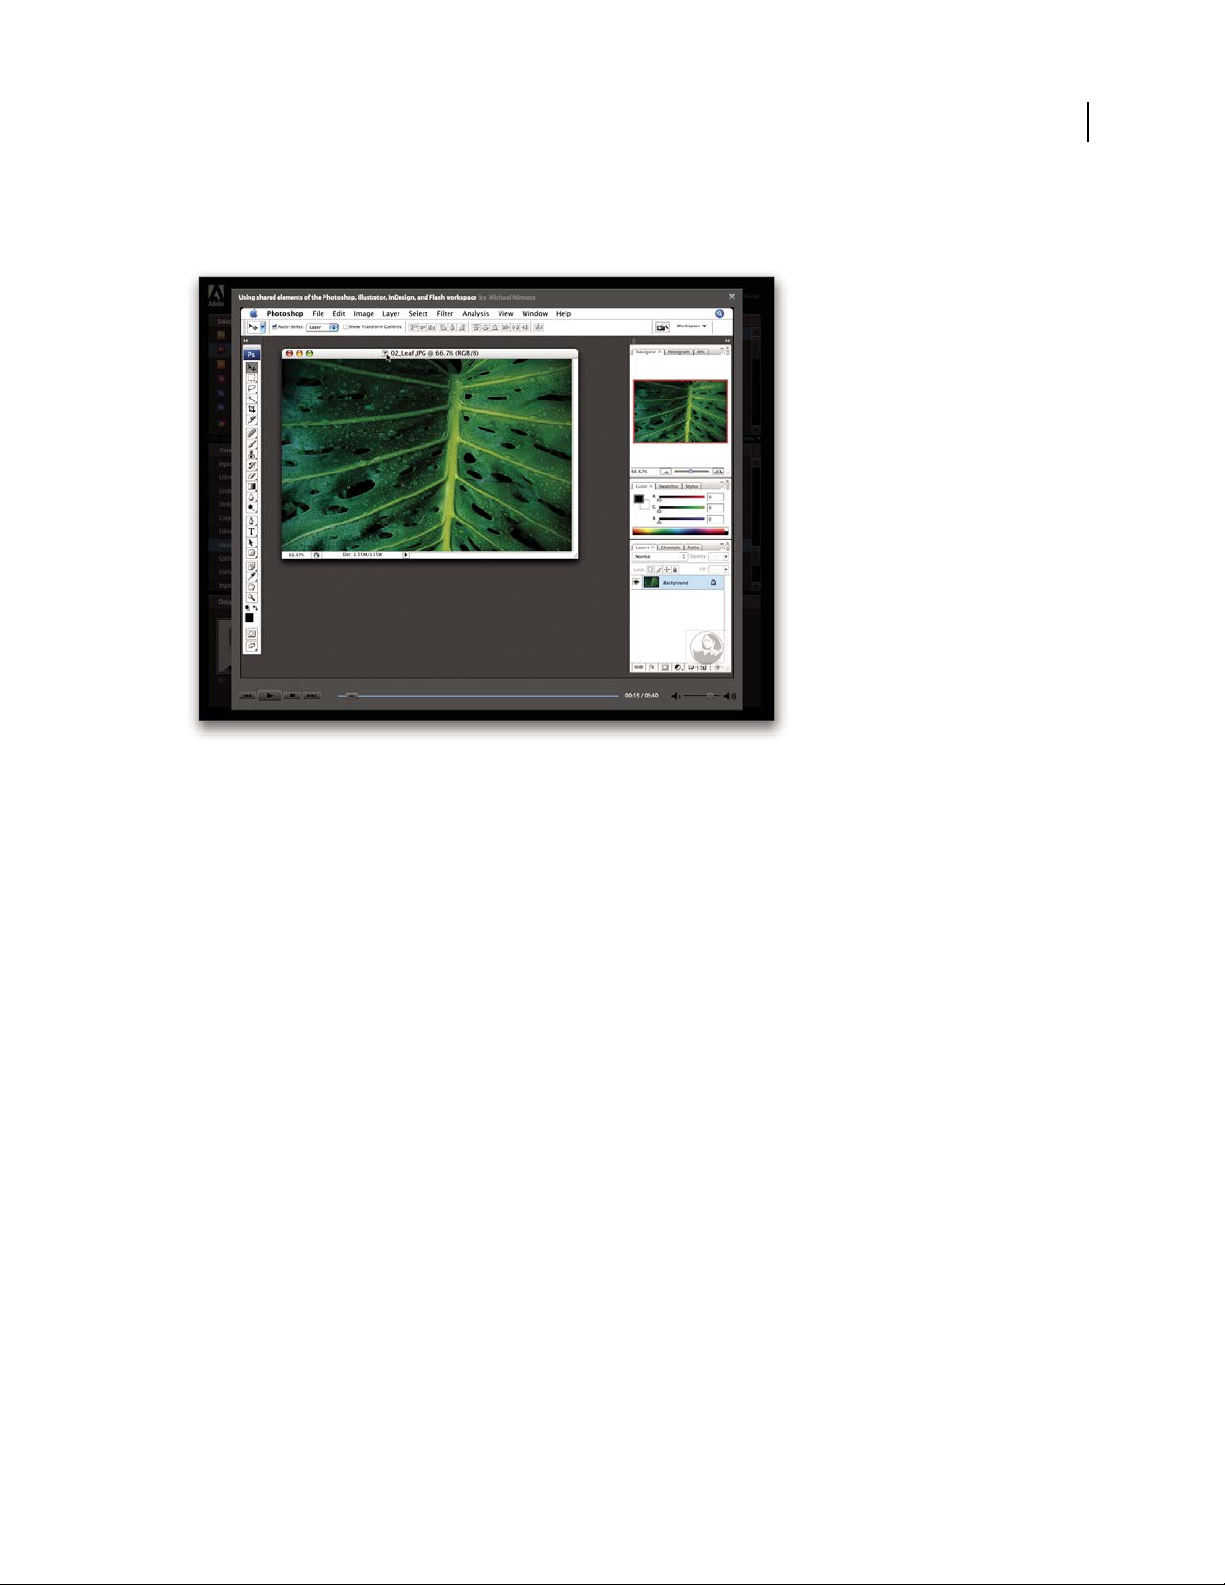
• Using shared elements in Adobe Photoshop, Illustrator®, InDesign®, and Flash®
• Using Smart Objects and Live Color
• Using Bridge in a photography workflow
To access Adobe Creative Suite 3 video tutorials, visit Adobe Video Workshop at
www.adobe.com/go/learn_videotutorials.
Extras
You have access to a wide variety of resources that will help you make the most of your Adobe software. Some of
these resources are installed on your computer during the setup process; additional helpful samples and documents
are included on the installation or content disc. Unique extras are also offered online by the Adobe Exchange
community, at www.adobe.com/go/exchange.
Installed resources
During software installation, a number ofresources are placed in your applicationfolder.To view thosefiles, navigate
to the application folder on your computer.
7
• Windows®: [startup drive]\Program Files\Adobe\[Adobe application]
• Mac OS®: [startup drive]/Applications/[Adobe application]
The application folder may contain the following resources:
Plug-ins Plug-in modules are small software programs that extend or add features to your software. Once installed,
plug-in modules appear as options in the Import or Export menu; as file formats in the Open, Save As, and Export
Original dialog boxes; or as filters in the Filter submenus. For example, a number of special effects plug-ins are
automatically installed in the Plug-ins folder inside the Photoshop CS3 folder.
Presets Presets include a wide variety of useful tools, preferences, effects, and images. Product presets include
brushes, swatches, color groups, symbols, custom shapes, graphic and layer styles, patterns, textures, actions,
workspaces, and more. Preset content can be found throughout the user interface. Some presets (for example,
Photoshop Brush libraries) become available only whenyou select the corresponding tool. If you don’t want to create
an effect or image from scratch, go to the preset libraries for inspiration.
Templates Template files can be opened and viewed from Adobe Bridge CS3, opened from the Welcome Screen, or
opened directly from the File menu. Depending on the product, template files range from letterheads, newsletters,
Page 15
PHOTOSHOP CS3
E
T
V
ER
O
EO
S
E
T
AC
C
U
S
AM
E
T
JU
S
T
O
D
UO
DO
LO
R
ES
ET
EA
RE
B
U
M
.
S
T
E
T
CL
I
T
A
KA
SD
.
ET
COSETETUR SAD
IPSCING
01
PelletirInc.
CORE I
NVESTM
ENT SPE CTRUM
Vel illu
m do
lore eu feugiat nulla facilisis
at vero eros et accums
an
et iusto odio dignissim qui.
RETI
REMEN
T SAVI
NG
PLAN
Vel illu
m do
lor
e eu feugiat nulla facilisis
at vero eros et accums
an
et iusto odio
dignissim qui.
Your Inv estment Guide
Are
you leav ing mo
ney on the tab le?
01
Typi non habent cla
ritatem
insitam; est usu
s leg
entis in iis qui facit eo
rum
claritate
m.
In
vestig
ationes dem
onstraverunt lectores lege
re me li
us q
uod ii
legu
nt saepi
us. Cla
ritas est e
tiam processu
s.
Typi
non
habent cla
ritatem
insitam; est usu
s leg
en
tis in iis qui facit eo
rum
claritatem.
Investig
ationes dem
onstraverunt lectores lege
re me li
us q
uod
ii
legunt saepi
us
. Cla
ritas est e
tiam processu
s.
SURVICE MENU
NULCHE
vero dio eum
nulche
agiam
e
t ad lorperi
t
sum a
$45
agiame
t ad atin utet
vero dio eum
nulche suma
agaim
et ad eum
nullam
$25
lorperit sum a
agiam
e
t ad lorperit
vero dio
eum nullam
$35
SUCCIVEROS
sucicvero dio
vero dio
eum
nul
che su
ma
$15
eum nul
lam
vero dio eum
nulche suma
agaimet ad e
um
nullam
$35
N
eum nullam
$35
SUCCI
VEROS
sucicvero dio
vero dio eum
nulche suma
$15
eum
nullam
vero dio eum
nulche suma
agaimet ad eum
nullam
$35
CC
a
s
i
o
p
i
a
S
p
A
User Guide
and websites to DVD menus and video buttons. Each template file is professionally constructed and represents a
best-use example of product features. Templates can be a valuable resource when you need to jump-start a project.
8
Travel Earth
Best 100 places to see on the planet
in your lifetime
Vel: Ad : Vulputate:
volute
ipsummy
, commy
re eugiarud tem
eraes-
exer
n ullutet
Samples Sample files include more complicated designs and are a great way to see new features in action. These files
demonstrate the range of creative possibilities available to you.
Fonts Several OpenType® fonts and font families are included with your Creative Suite product. Fonts are copied to
your computer during installation:
• Windows: [startup drive]\Windows\Fonts
• Mac OS X: [startup drive]/Library/Fonts
For information about installing fonts, see the Read Me file on the installation DVD.
DVD content
The installation or content DVD included with your product contains additional resources for use with your
software. The Goodies folder contains product-specific files suchas templates,images, presets,actions, plug-ins, and
effects, along with subfolders for Fonts and Stock Photography. The Documentation folder contains a PDF version
of the Help, technical information, and other documents such as specimen sheets, reference guides, and specialized
feature information.
Adobe Exchange
For more free content, visit www.adobe.com/go/exchange, an online community where users download and share
thousands of free actions, extensions, plug-ins, and other content for use with Adobe products.
Bridge Home
Bridge Home, a new destination in Adobe Bridge CS3, provides up-to-date information on all your Adobe Creative
Suite 3 software in one convenient location. Start Adobe Bridge, then click the Bridge Home icon at the top of the
Favorites panel to access the latest tips, news, and resources for your Creative Suite tools.
Page 16

Note: Bridge Home may not be available in all languages.
PHOTOSHOP CS3
User Guide
9
Adobe Design Center
Adobe Design Center offers articles, inspiration, and instruction from industry experts, top designers and Adobe
publishing partners. New content is added monthly.
You can find hundreds of tutorials for design products and learn tips and techniques through videos, HTML
tutorials, and sample book chapters.
Page 17
PHOTOSHOP CS3
User Guide
New ideas are the heart of Think Tank, Dialog Box, and Gallery:
• ThinkTankarticlesconsiderhowtoday’sdesignersengagewithtechnologyandwhattheirexperiencesmeanfor
design, design tools, and society.
• In Dialog Box, experts share new ideas in motion graphics and digital design.
• The Gallery showcases how artists communicate design in motion.
Visit Adobe Design Center at www.adobe.com/designcenter.
Adobe Developer Center
Adobe Developer Center provides samples, tutorials, articles, and community resources for developers who build
rich Internet applications,websites, mobilecontent, and other projects usingAdobe products. The Developer Center
also contains resources for developers who develop plug-ins for Adobe products.
10
In addition to sample code and tutorials, you'll find RSS feeds, online seminars, SDKs, scripting guides, and other
technical resources.
Visit Adobe Developer Center at www.adobe.com/go/developer.
Customer support
VisittheAdobeSupportwebsite,atwww.adobe.com/support, to find troubleshooting information for your product
and to learn about free and paid technical support options. Follow the Training link for access to Adobe Press books,
a variety of training resources, Adobe software certification programs, and more.
Downloads
Visit www.adobe.com/go/downloads to find free updates, tryouts, and other useful software. In addition, the Adobe
Store (at www.adobe.com/go/store) provides access to thousands of plug-ins from third-party developers, helping
you to automate tasks, customize workflows, create specialized professional effects, and more.
Page 18

PHOTOSHOP CS3
User Guide
Adobe Labs
Adobe Labs gives youthe opportunity toexperience andevaluate new and emerging technologies and products from
Adobe.
At Adobe Labs, you have access to resources such as these:
• Prerelease software and technologies
• Code samples and best practices to accelerate your learning
• Early versions of product and technical documentation
• Forums, wiki-based content, and other collaborative resources to help you interact with like-minded developers
Adobe Labs fosters a collaborative software development process. In this environment, customers quickly become
productive with new products and technologies. Adobe Labs is also a forum for early feedback, which the Adobe
development teams use to create software that meets the needs and expectations of the community.
Visit Adobe Labs at www.adobe.com/go/labs.
User communities
User communities feature forums, blogs, and other avenues for users to share technologies, tools, and information.
Users can ask questions and find out how others are getting the most out of their software. User-to-user forums are
available in English, French, German, and Japanese; blogs are posted in a wide range of languages.
11
To participate in forums or blogs, visit www.adobe.com/communities.
What’s new?
Productivity enhancements
Streamlined interface
Take advantage of the self-adjusting docks, workspace presets for specialized tasks, and other refinements in the
streamlined interface. See “Workspace basics” on page 14.
Zoomify report
Exportfull-resolutionimagesintheZoomifyformatsoyoucandisplaythemontheInternetorsendthembye-mail
without having to first decrease their resolution. See “Export to Zoomify” on page 506.
Adobe Bridge CS3 with stacks and filters
Organize and manage your images with the new tools—the Loupe tool, filters, and stacks—in Adobe Bridge.
Improved print experience
Get better control over print quality with color management and better print preview features. See “Printing from
Photoshop” on page 483.
Adobe Device Central
Create and view artwork for display on cell phones and other mobile devices, and preview how your photos will look
on different devices. See “Testing Photoshop images for mobile devices with Adobe Device Central” on page 443.
Page 19

PHOTOSHOP CS3
User Guide
Next generation Camera Raw
Process raw data—at high quality—from more than 150 digital cameras. You can also apply Camera Raw processing
to JPEG and TIFF files. See “Camera Raw” on page 85.
Image editing improvements
Smart Filters
Preserve image data integrity as you enhance your images with flexible, nondestructive smart filters. These filters
may be added, replaced, and re-edited at any time. See “About Smart Filters” on page 312.
Black and white conversion
Quickly remap colors in an image to monochrome, or have Photoshop analyze the image and recommend
conversion settings. See “Convert a color image to black and white” on page 170.
Improved curves
Use the color-correction presets to make automatic adjustments to curves. You can also create your own Curve
presets. See “Curves overview” on page 163.
Adjusted cloning and healing with preview overlay
Control multiple clone sources, as well as rotate and scale each clone source. You can also view an overlay of the clone
source as you paint. See “Retouch with the Clone Stamp tool” on page 195.
12
Expanded 32-bit HDR functionality
Capture bracketed exposures and then combine them into a single 32-bit HDR image with maximum range and
fidelity using nearly every tool and feature in Photoshop, including brushes, layers, selection tools, and other imageadjustment and filter features. See “High dynamic range images” on page 77.
Compositing enhancements
Quick Selection tool
Make a quick, accurate selection of an irregularly shaped object without having to manually trace the object’s edges.
You just paint the selection using a brush tool and apply the Photoshop automatic edge enhancement for greater
selection accuracy. See “Select with the Quick Selection tool” on page 249.
Refine Edge feature
Modify the edge of a selection by expanding or contracting, feathering, or smoothing it using slider controls. Refine
Edge is a simple, flexible way to modify the edge of a selection. See “Refine selection edges” on page 255.
Photomerge with advanced alignment blending
Create advanced composite images with Photoshop. Place images with overlapping content on separate layers and
let Photoshopanalyze the contents and blend the images seamlessly into a continuous image. See “Create panoramic
images” on page 239.
Page 20

PHOTOSHOP CS3
User Guide
3D and motion advances
Vanishing Point with 3D support
Edit images in perspective across multiple planes at any angle, and export 3D information in formats supported by
3D applications. See “Vanishing Point” on page 225.
3D visualization and texture editing (Photoshop Extended)
Import 3D models; change model position, lighting, or rendering; edit model textures; and easily composite models
with 2D content. See “Working with 3D files (Photoshop Extended)” on page 604.
Motion graphics and video layers (Photoshop Extended)
Edit a video on a frame-by-frame basis, or add a layer to the video and create edits that will appear in every frame.
The Animation palette now includes a new timeline with keyframe capabilities in addition to the frame-based
interface. See “Video and animation in Photoshop” on page 544.
Movie paint (Photoshop Extended)
Quickly find and edit any frame of a movie file with Photoshop tools. Photoshop painting, retouching, and pixellevel editing is available for every frame of your movie file. See “Painting frames in video layers (Photoshop
Extended)” on page 557.
13
Comprehensive image analysis
Measurement (Photoshop Extended)
Assign a measurement scale to an image and measure length, area, perimeter, density, or other values in accurate
scale units. Record results in the Measurement Log as well as export the measurement data to a spreadsheet or
database. See “About measurement (Photoshop Extended)” on page 597.
Ruler and Count tool
Measure distance across an image, or count features in an image or in a selection. You can count manually, count
automatically, or use a script. See “Counting objects in an image (Photoshop Extended)” on page 603.
DICOM file support (Photoshop Extended)
Open, edit, annotate or animate single-frame or multi-frame radiological images. View and edit metadata stored in
DICOM files. See “DICOM files (Photoshop Extended)” on page 592.
MATLAB support (Photoshop Extended)
Access Photoshop from the MATLAB (Matrix Laboratory) command prompt, run image-processing routines, and
view the results in Photoshop. See “Photoshop and MATLAB (Photoshop Extended)” on page 590.
Image stack processing
Combine multiple images and apply advanced rendering options to produce enhanced composite images, eliminating noise or unwanted content. See “Image Stacks (Photoshop Extended)” on page 594.
Page 21

Chapter 2: Workspace
The Adobe® Photoshop® CS3workspace is arranged to help you focus on creating and editing images. Theworkspace
includes menus and a variety of tools and palettes for viewing, editing, and adding elements to your images.
Workspace basics
Workspace overview
You create and manipulate your documents and files using various elements such as panels, bars, and windows. Any
arrangement of these elements is called a workspace.WhenyoufirststartanAdobeCreativeSuitecomponent,you
see the default workspace, which you can customize for the tasks you perform there. For instance, you cancreate one
workspace for editing and another for viewing, save them, and switch between them as you work.
You can restore the default workspace at any time by choosing the default option on the Window > Workspace menu.
14
Although default workspaces vary across Flash, Illustrator, InCopy, InDesign, and Photoshop, you manipulate the
elements much the same way in all of them. The Photoshop default workspace is typical:
• The menu bar across the top organizes commands under menus.
• The Tools panel (called the Tools palette in Photoshop) contains tools for creating and editing images, artwork,
page elements, and so on. Related tools are grouped together.
• The Control panel (called the options bar in Photoshop) displays options for the currently selected tool. (Flash has
no Control panel.)
• The Document window (called the Stage in Flash) displays the file you’re working on.
• Panels (called palettes in Photoshop) help you monitor and modify your work. Examples include the Timeline in
Flash and the Layers palette in Photoshop. Certain panels are displayed by default, but you can add any panel by
selecting it from the Window menu.Many panels have menus with panel-specific options. Panels can be grouped,
stacked, or docked.
Page 22

PHOTOSHOP CS3
User Guide
A B C
D
E
G
15
F
Default Photoshop workspace
A. Document window B. Dock of panels collapsed to icons C. Panel title bar D. Menu bar E. Options bar F. Tools palette G. Collapse To
Icons button H. Three palette (panel) groups in vertical dock
H
For a video on understanding the workspace, see www.adobe.com/go/vid0187.
Hide or show all panels
• (Illustrator, InCopy, InDesign, Photoshop) To hide or show all panels, including the Tools panel and options bar
or Control panel, press Tab.
• (Illustrator, InCopy, InDesign, Photoshop) To hide or show all panels except the Tools panel and options bar or
Control panel, press Shift+Tab.
You can temporarily display panels hidden by these techniques by moving the pointer to the edge of the application
window (Windows) or to the edge of the monitor (Mac OS) and hovering over the strip that appears.
• (Flash) To hide or show all panels, press F4.
Display panel menu options
❖ Position the pointer on the panel menu icon in the upper-right corner of the panel, and press the mouse
button.
(Illustrator) Adjust panel brightness
❖ In User Interface preferences, move the Brightness slider. This control affects all panels, including the Control
panel.
Page 23
PHOTOSHOP CS3
User Guide
Reconfigure the Tools panel
You can display the tools in the Tools panel in a single column, or side by side in two columns.
In InDesign, you also can switch from single-column to double-column display by setting an option in Interface
preferences.
❖ Click the double arrow at the top of the Tools panel.
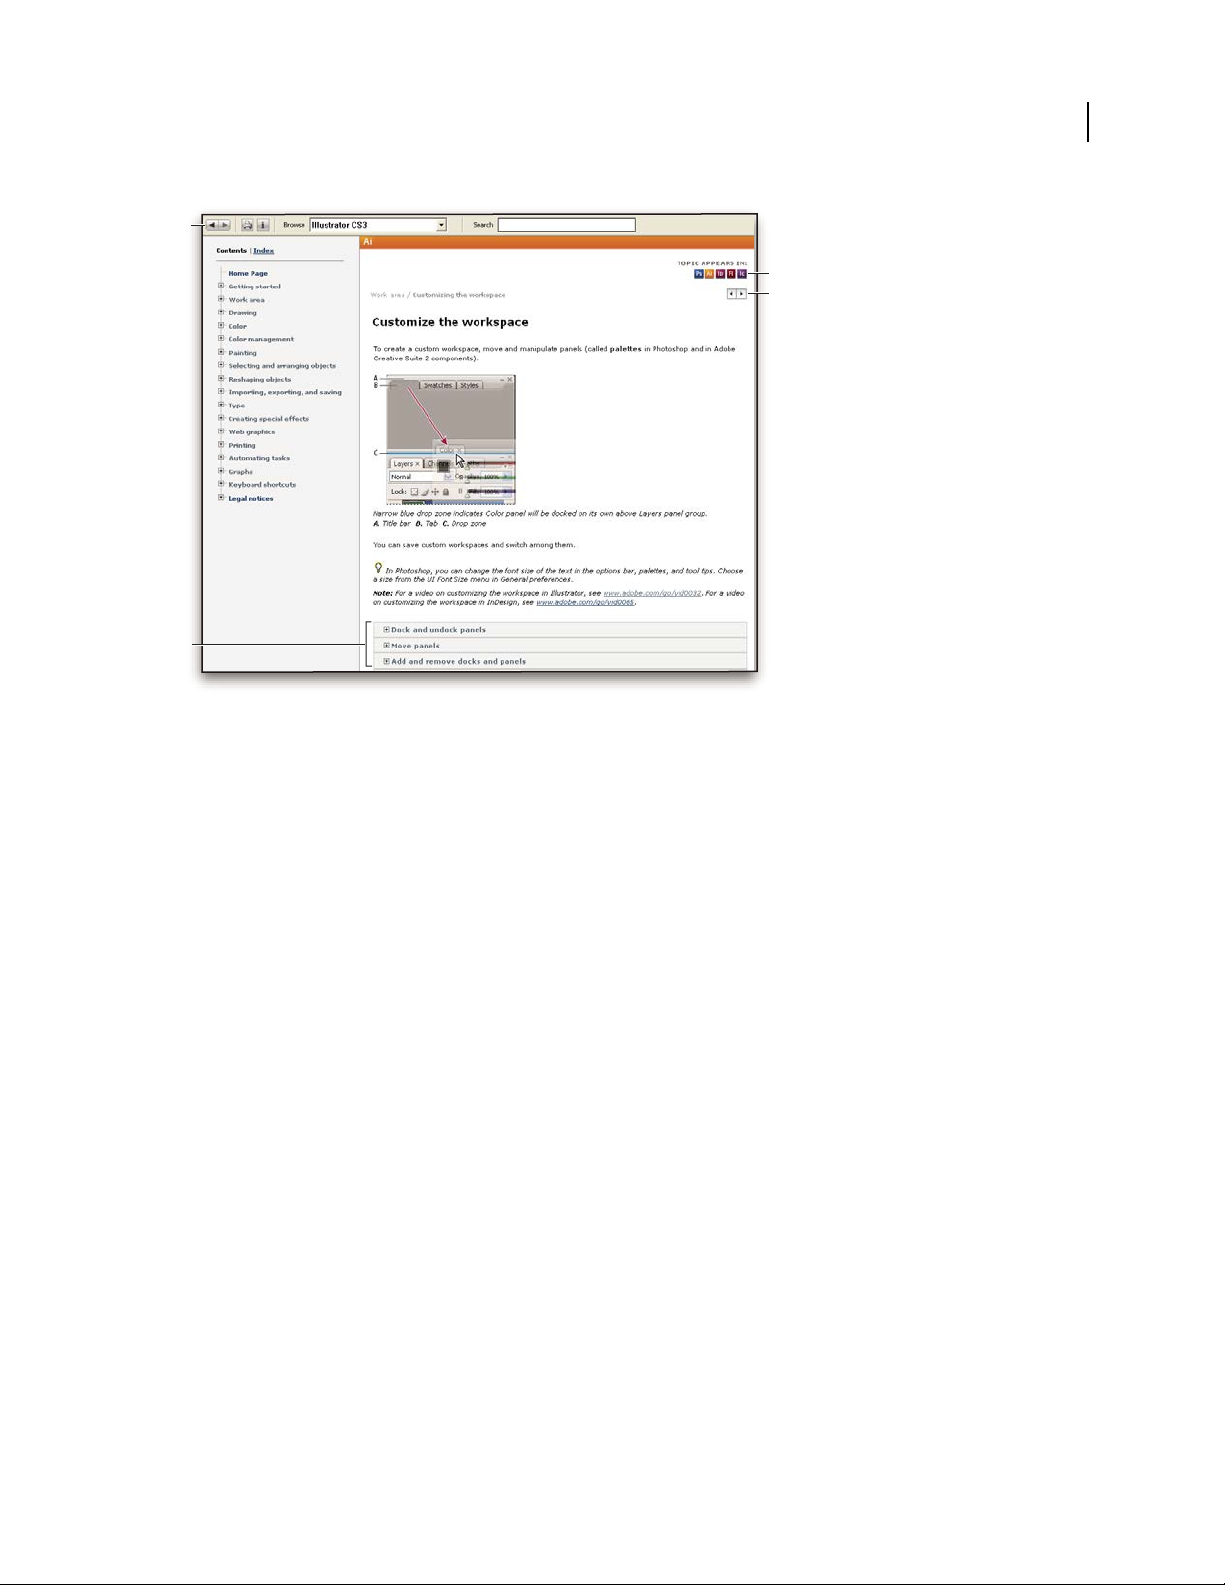
Customize the workspace
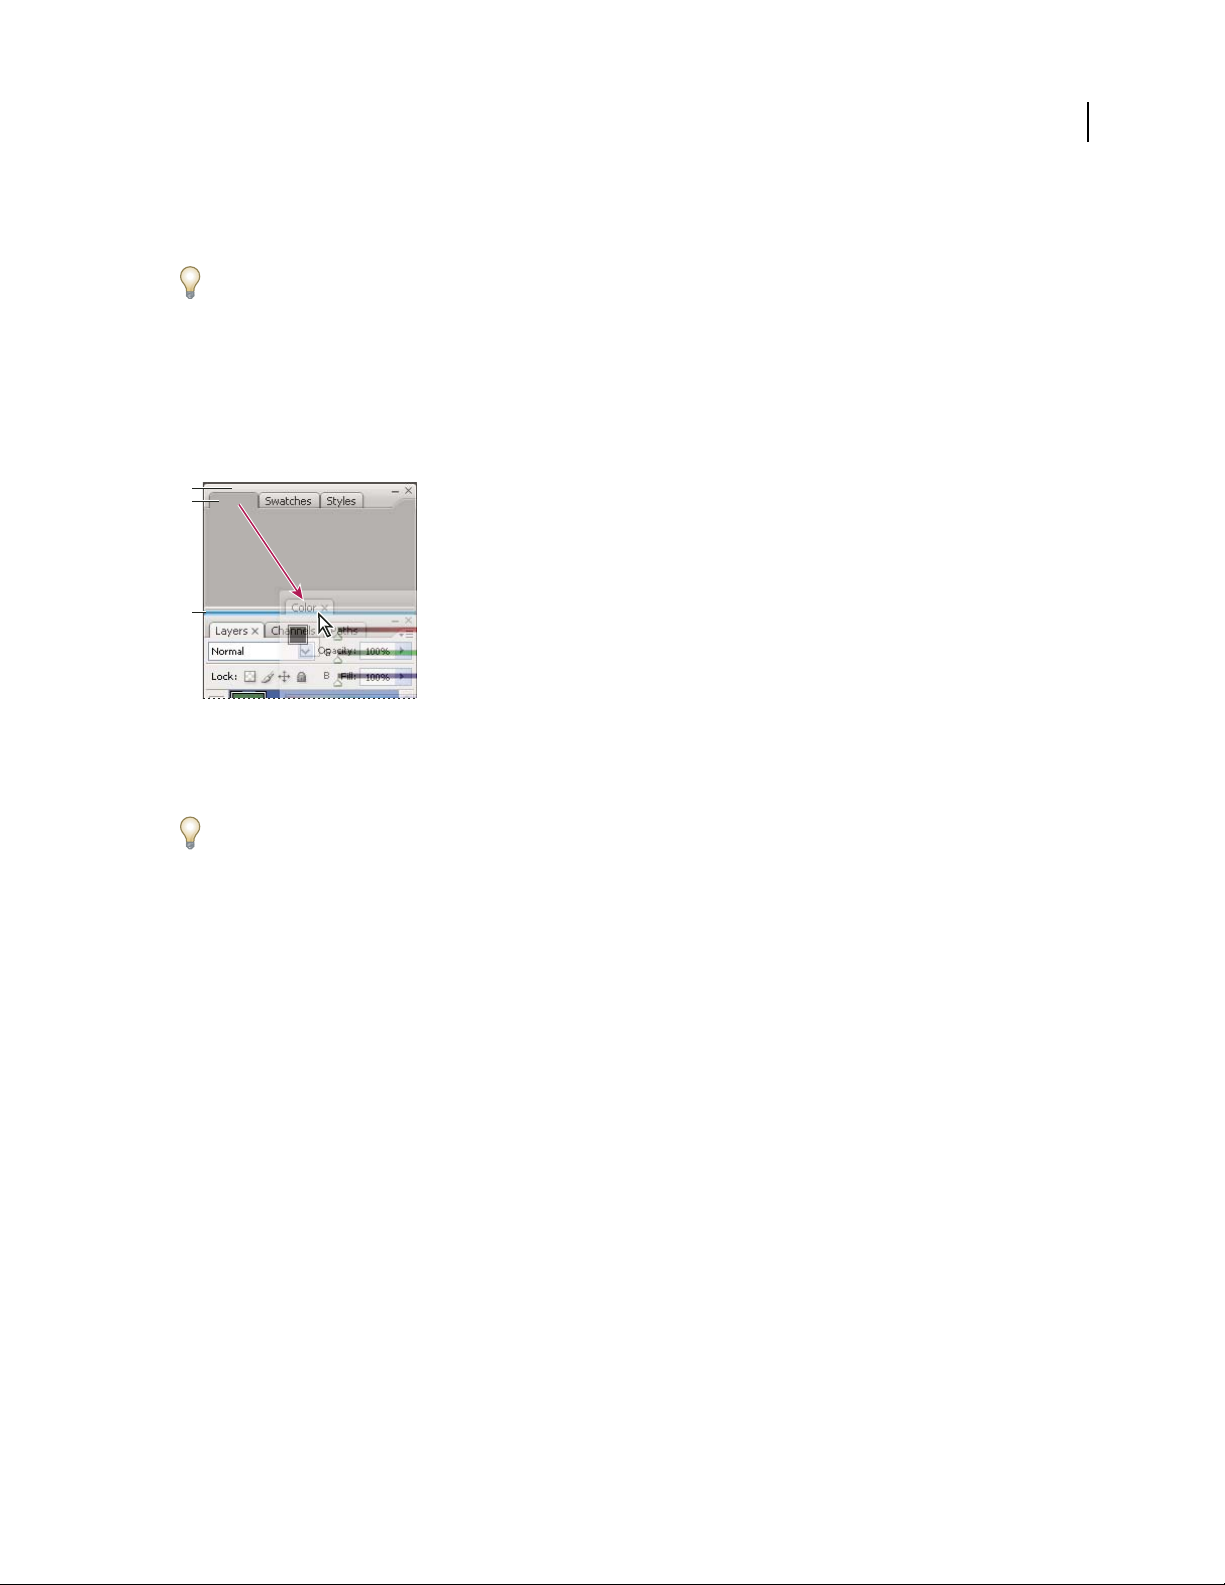
To create a custom workspace, move and manipulate panels (called palettes in Photoshop and in Adobe Creative
Suite 2 components).
A
B
C
16
Narrow blue drop zone indicates Color panel will be docked on its own above Layers panel group.
A. Title bar B. Ta b C. Drop zone
You can save custom workspaces and switch among them.
In Photoshop, you can change the font size of the text in the options bar, palettes, and tool tips. Choose a size from
the UI Font Size menu in General preferences.
Note: For a video on customizing the workspace in Illustrator, see www.adobe.com/go/vid0032. For a video on custom-
izing the workspace in InDesign, see www.adobe.com/go/vid0065.
Dock and undock panels
A dock is a collection of panels or panel groups displayed together, generally in a vertical orientation. You dock and
undock panels by moving them into and out of a dock.
Note: Docking is not the same as stacking. A stack is a collection of free-floating panels or panel groups, joined top to
bottom.
• To dock a panel, drag it by its tab into the dock, at the top, bottom, or in between other panels.
• To dock a panel group, drag it by its title bar (the solid empty bar above the tabs) into the dock.
• To remove a panel or panel group, drag it out of the dock by its tab or title bar. You can drag it into another dock
or make it free-floating.
Page 24
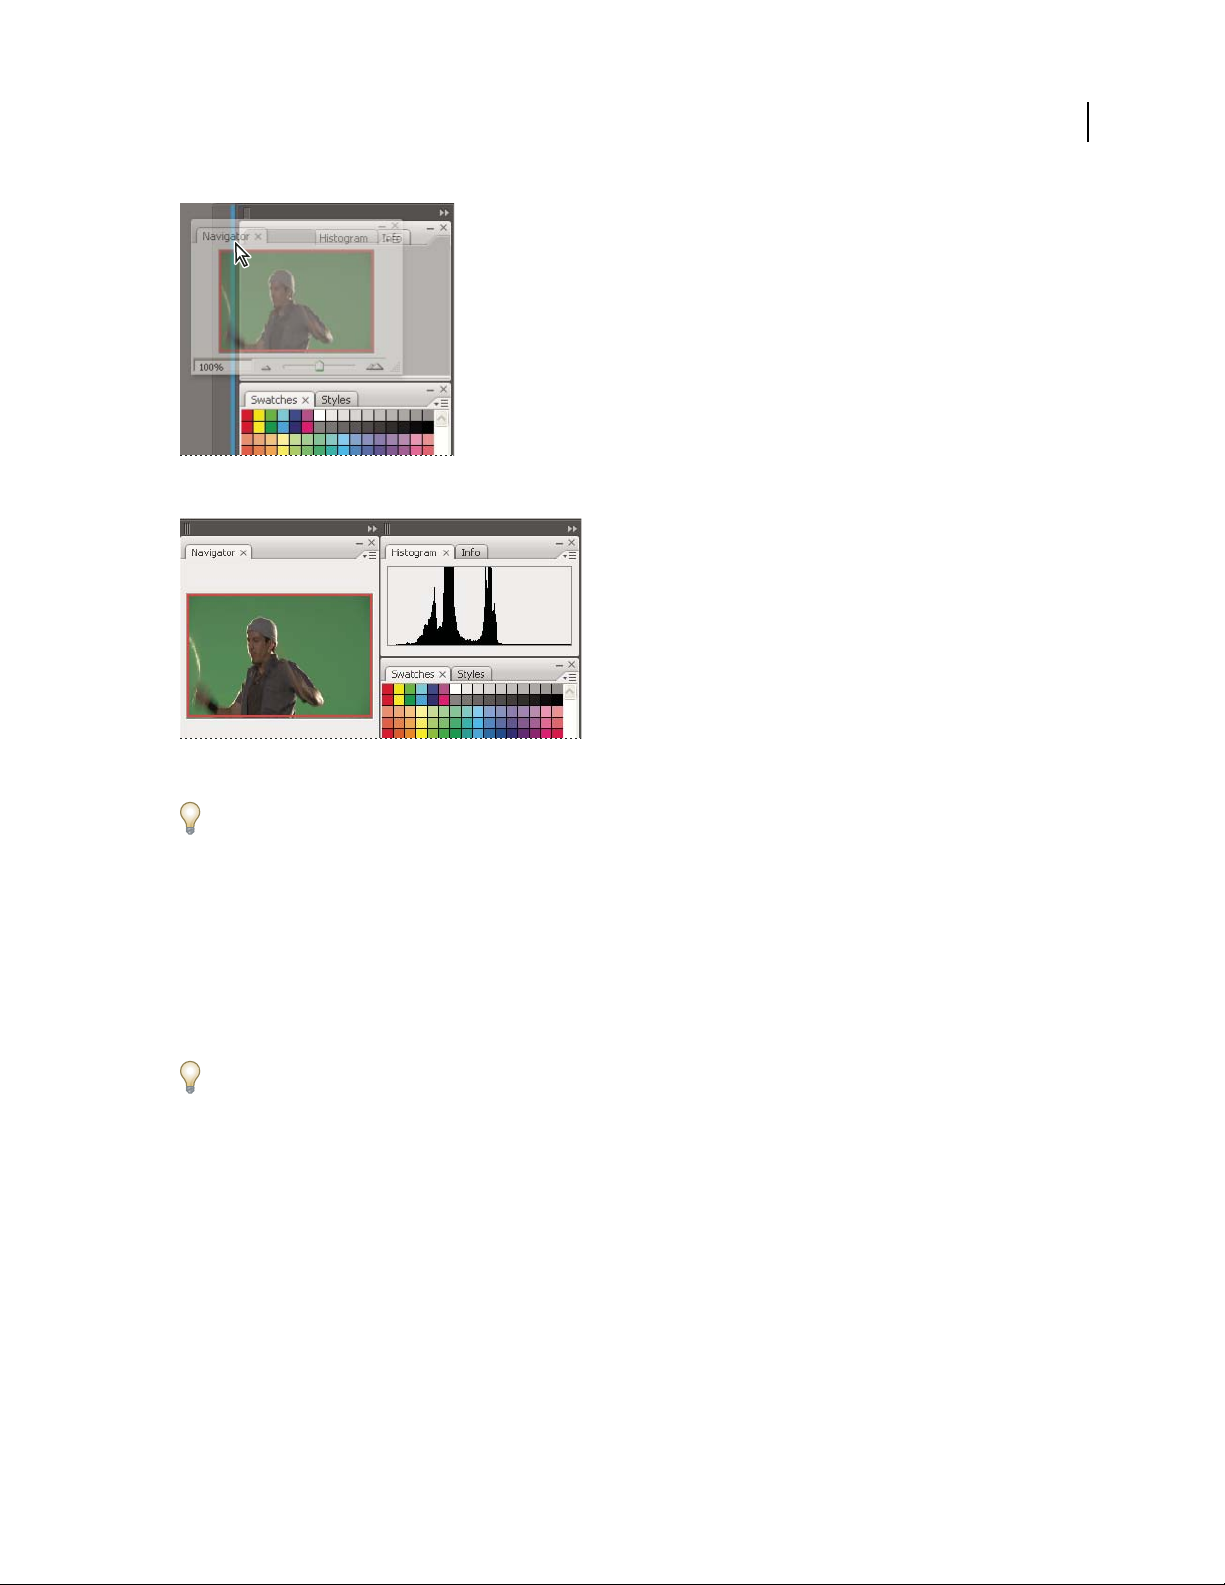
Navigator panel being dragged out to new dock, indicated by blue vertical highlight
PHOTOSHOP CS3
User Guide
17
Navigator panel now in its own dock
To prevent panels from filling all space in a dock, drag the bottom edge of the dock up so it no longer meets the edge
of the workspace.
Move panels
As you move panels, you see blue highlighted drop zones,areaswhereyoucanmovethepanel.Forexample,youcan
moveapanelupordowninadockbydraggingittothenarrowbluedropzoneaboveorbelowanotherpanel.Ifyou
drag to an area that is not a drop zone, the panel floats freely in the workspace.
• To move a panel, drag it by its tab.
• To move a panel group or a stack of free-floating panels, drag the title bar.
Press Ctrl (Windows) or Control (Mac OS) while moving a panel to prevent it from docking.
Add and remove docks and panels
If you remove all panels from a dock, the dock disappears. You can create new docks by moving panelsto drop zones
next to existing docks or at the edges of the workspace.
• To remove apanel, click its close icon (the X at the upper-right corner of the tab), or deselect it from the Window menu.
• To add a panel, select it from the Window menu and dock it wherever you wish.
Manipulate panel groups
• To move a panel into a group, drag the panel’s tab to the highlighted drop zone at the top of the group.
Page 25
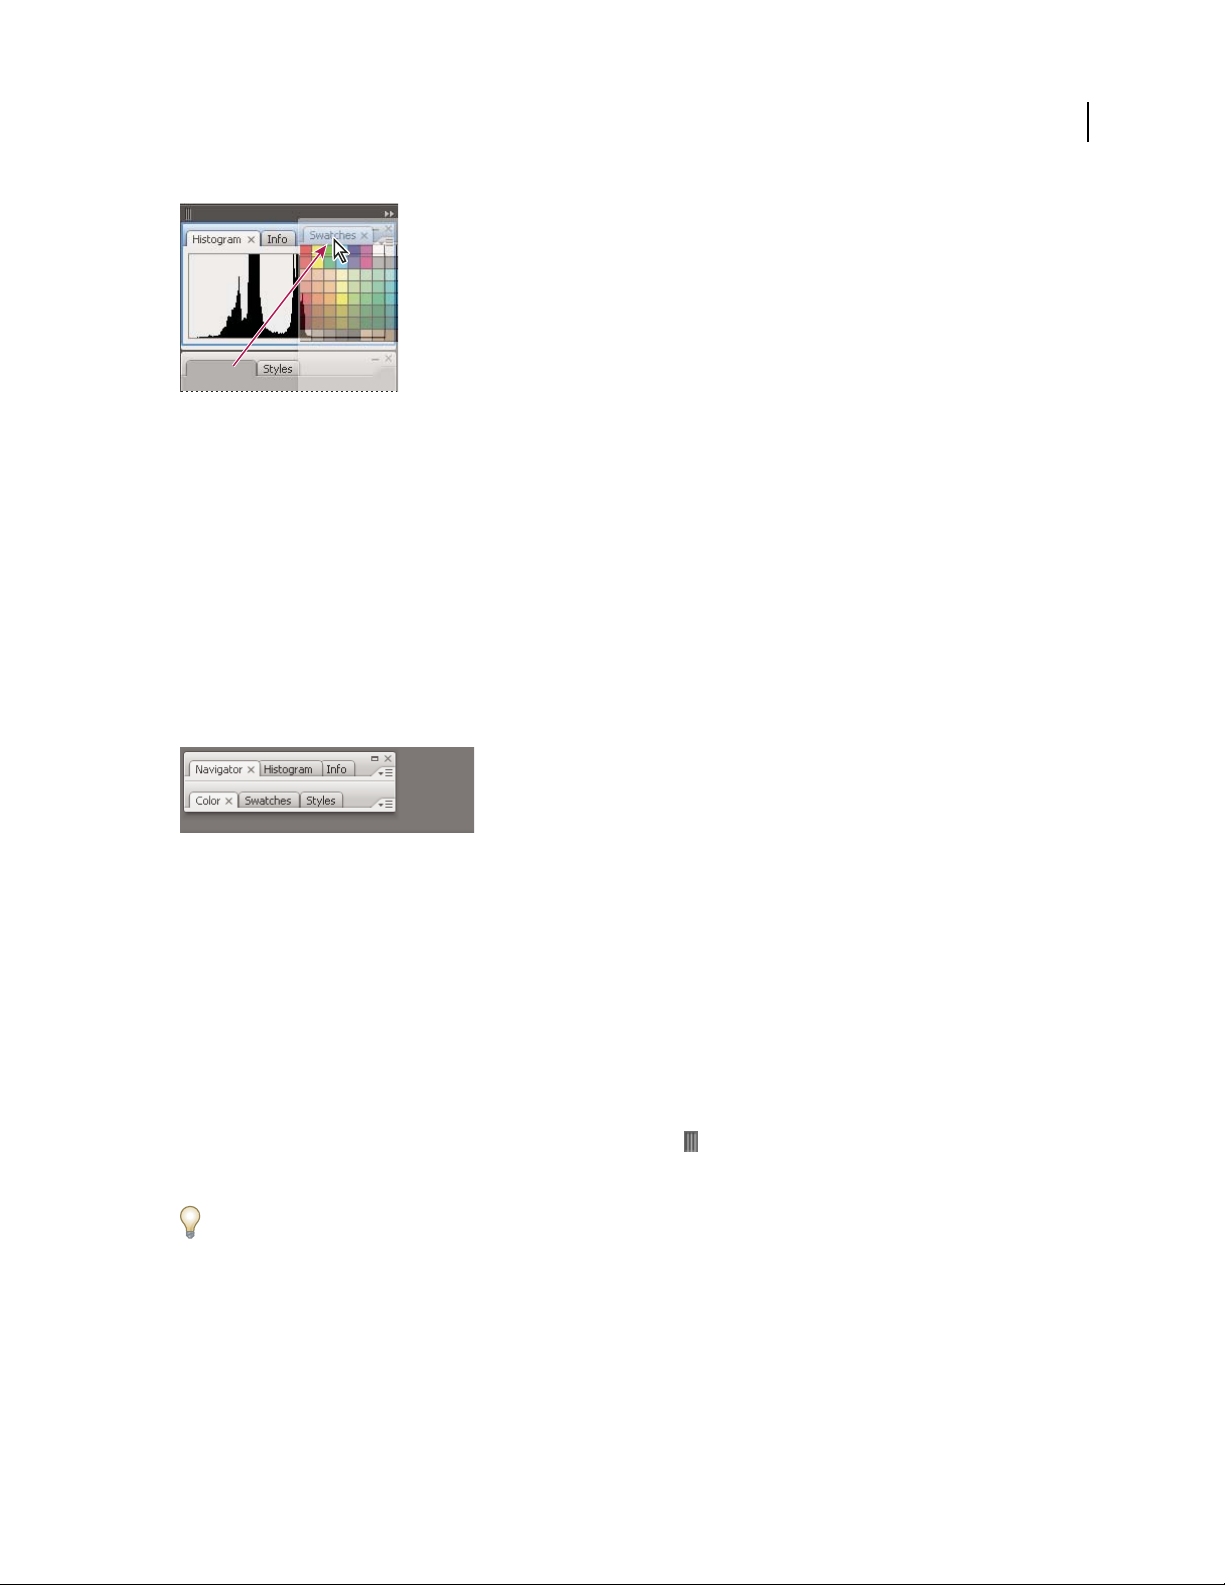
PHOTOSHOP CS3
User Guide
Adding a panel to a panel group
• To rearrange panels in a group, drag a panel’s tab to a new location in the group.
• To remove a panel from a group so that it floats freely, drag the panel by its tab outside the group.
• To make a panel appear at the front of its group, click its tab.
• To move grouped panels together, drag their title bar (above the tabs).
Stack free-floating panels
When you drag a panel out of its dock but not into a drop zone, the panel floats freely, allowing you to position it
anywhere in the workspace. Panels may also float in the workspace when first selected from the Window menu. You
can stack free-floating panels or panel groups together so that they move as a unit when you drag the topmost title
bar. (Panels that are part of a dock cannot be stacked or moved as a unit in this way.)
18
Free-floating stacked panels
• To stack free-floating panels, drag a panel by its tab to the drop zone at the bottom of another panel.
• To change the stacking order, drag a panel up or down by its tab.
Note: Be sure to release the tab over the narrow drop zone between panels, rather than the broad drop zone in a title bar.
• To remove a panel or panel group from the stack, so that it floats by itself, drag it out by its tab or title bar.
Resize or minimize panels
• To resize a panel, drag any side of the panel or drag the size box at its lower-right corner. Some panels, such as the
Color panel in Photoshop, cannot be resized by dragging.
• To change the width of all the panels in a dock, drag the gripper at the top left of the dock.
• To minimize a panel, panel group, or stack of panels, click the Minimize button in its title bar.
You can open a panel menu even when the panel is minimized.
Page 26
PHOTOSHOP CS3
User Guide
Minimize button
Manipulate panels collapsed to icons
Collapse panels to icons to reduce clutter on the workspace. (In some cases, panels are collapsed to icons in the
default workspace.) Click a panel icon to expand the panel. You can expand only one panel or panel group at a time.
19
Panels collapsed to icons
Panels expanded from icons
• To collapse or expand all panels in a dock, click the double arrow at the top of the dock.
• To resize panel icons so that you see only the icons (and not the labels), drag the gripper at the top of the dock
toward the icons until the text disappears. (To display the icon text again, drag the gripper away from the panels.)
• To expand a single panel icon, click it.
• To collapse an expanded panel back to its icon, click its tab, its icon, or the double arrow in the panel’s title bar.
If you select Auto-Collapse Icon Panels from the Interface or User Interface Options preferences, an expanded panel
icon will collapse automatically when you click away from it.
• To add a panel or panel group to an icon dock, drag it in by its tab or title bar. (Panels are automatically collapsed
to icons when added to an icon dock.)
• To move a panel icon (or panel icon group), drag the bar that appears above the icon. You can drag panel icons up
and down in the dock, into other docks (where they appear in the panel style of that dock), or outside the dock
(where they appear as free-floating, expanded panels).
Page 27

PHOTOSHOP CS3
User Guide
Save, delete, and switch between workspaces
Bysavingthecurrentsizeandpositionofpanelsasanamedworkspace,youcanrestorethatworkspaceevenifyou
move or close a panel. The names of saved workspaces appear in the Window > Workspace menu.
In Photoshop, the saved workspace can include a specific keyboard shortcut set and menu set.
Save a custom workspace
1
With the workspace in the configuration you want to save, do one of the following:
• (Photoshop, Illustrator, InDesign) Choose Window > Workspace > Save Workspace.
• (Flash) Choose Window > Workspace > Save Current, or choose Save Current from the Workspace menu in the
Edit bar.
• (Photoshop) Choose Save Workspace from the Workspace menu in the options bar.
2 Type a name for the workspace.
3 (Photoshop) Under Capture, select one or more options:
Palette Locations Saves the current palette locations.
Keyboard Shortcuts Saves the current set of keyboard shortcuts.
Menus Saves the current set of menus.
20
4 Click OK.
Display or switch between workspaces
Flash, Illustrator, InDesign, and Photoshop include preset workspaces designed to make certain tasks easier.
• Choose Window > Workspace, and select a workspace.
• (Photoshop) Select a workspace from the Workspace menu in the options bar.
• (Flash) Select a workspace from the Workspace menu in the Edit bar.
(InDesign and Photoshop) Assign keyboard shortcuts to each workspace to navigate among them quickly.
Delete a custom workspace
• (Illustrator)Choose Window >Workspace > Manage Workspaces, select the workspace, and then click theDelete icon.
• (InDesign) Choose Window > Workspace > Delete Workspace, select the workspace, and then click Delete.
• (Flash) Choose Manage from the Workspace menu in the Edit bar, select the workspace, and then click Delete.
Alternatively, choose Window > Workspace > Manage, select the workspace, and then click Delete.
• (Photoshop) Choose Delete Workspace from the Workspace menu in the options bar. Alternatively, choose
Window > Workspace > Delete Workspace, select the workspace, and then click Delete.
(Photoshop) Start with the last or default palette locations
When you start Photoshop, palettes can either appear in their original default locations, or appear as you last used them.
❖ In Interface preferences:
• To display palettes in their last locations on startup, select Remember Palette Locations.
• To display palettes in their default locations on startup, deselect Remember Palette Locations.
Page 28

PHOTOSHOP CS3
User Guide
Display or hide tool tips
❖ In Interface preferences, select or deselect Show Tool Tips.
Note: Tool tips may not be available in some dialog boxes.
Adobe Bridge
Adobe® Bridge is a cross-platform application included with Adobe® Creative Suite® 3 components that helps you
locate,organize,andbrowsetheassetsyouneedtocreateprint,web,video,andaudiocontent.YoucanstartBridge
from any Creative Suite component, and use it to access both Adobe and non-Adobe assets.
From Adobe Bridge, you can:
• Manage image, footage, and audio files: Preview, search, sort, and process files in Bridge without opening
individual applications. You can also edit metadata for files, and use Bridge to place files into your documents,
projects, or compositions.
• Manage your photos: Import and edit photos from your digital camera card, group related photos in stacks, and
open or import camera raw files and edit their settings without starting Photoshop. You can also search leading
stock libraries and download royalty-free images by way of Adobe Stock Photos.
• Work with Adobe Version Cue®-managed assets.
• Perform automated tasks, such as batch commands.
• Synchronize color settings across color-managed Creative Suite components.
• Start a real-time web conference to share your desktop and review documents.
21
Palettes and menus
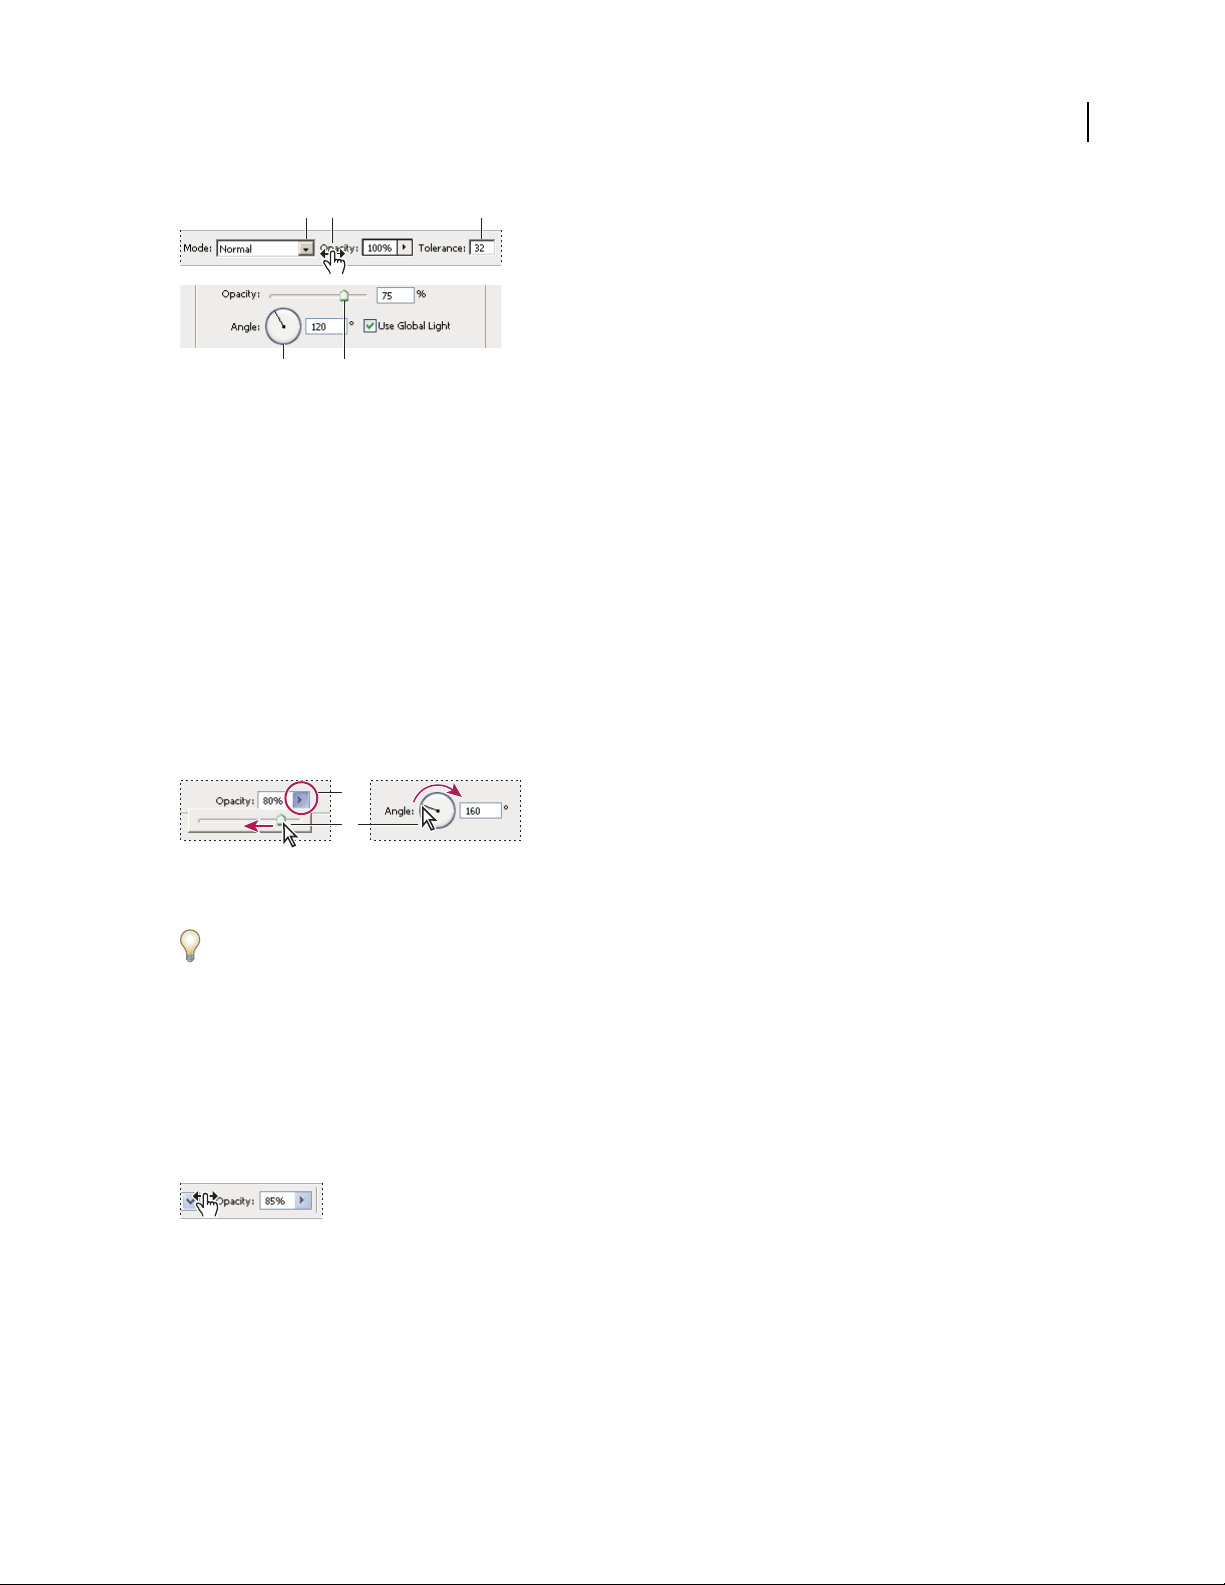
Enter values in palettes, dialog boxes, and the options bar
❖ Do any of the following:
• Type a value in the text box, and press Enter (Windows) or Return (Mac OS).
• Drag the slider.
• Move the pointer over the title of a slider or pop-up slider. When the pointer turns to a pointing finger, drag the
scrubby slider to the left or right. This feature is available only for selected sliders and pop-up sliders.
• Drag the dial.
• Click the arrow buttons in the palette to increase or decrease the value.
• (Windows) Click the text box and then use the Up Arrow key and the Down Arrow key on the keyboard to
increase or decrease the value.
• Select a value from the menu associated with the text box.
Page 29
PHOTOSHOP CS3
User Guide
ADB C
E
Ways to enter values
A. Menu arrow B. Scrubby slider C. Text box D. Dial E. Slider
See also
“About scrubby sliders” on page 22
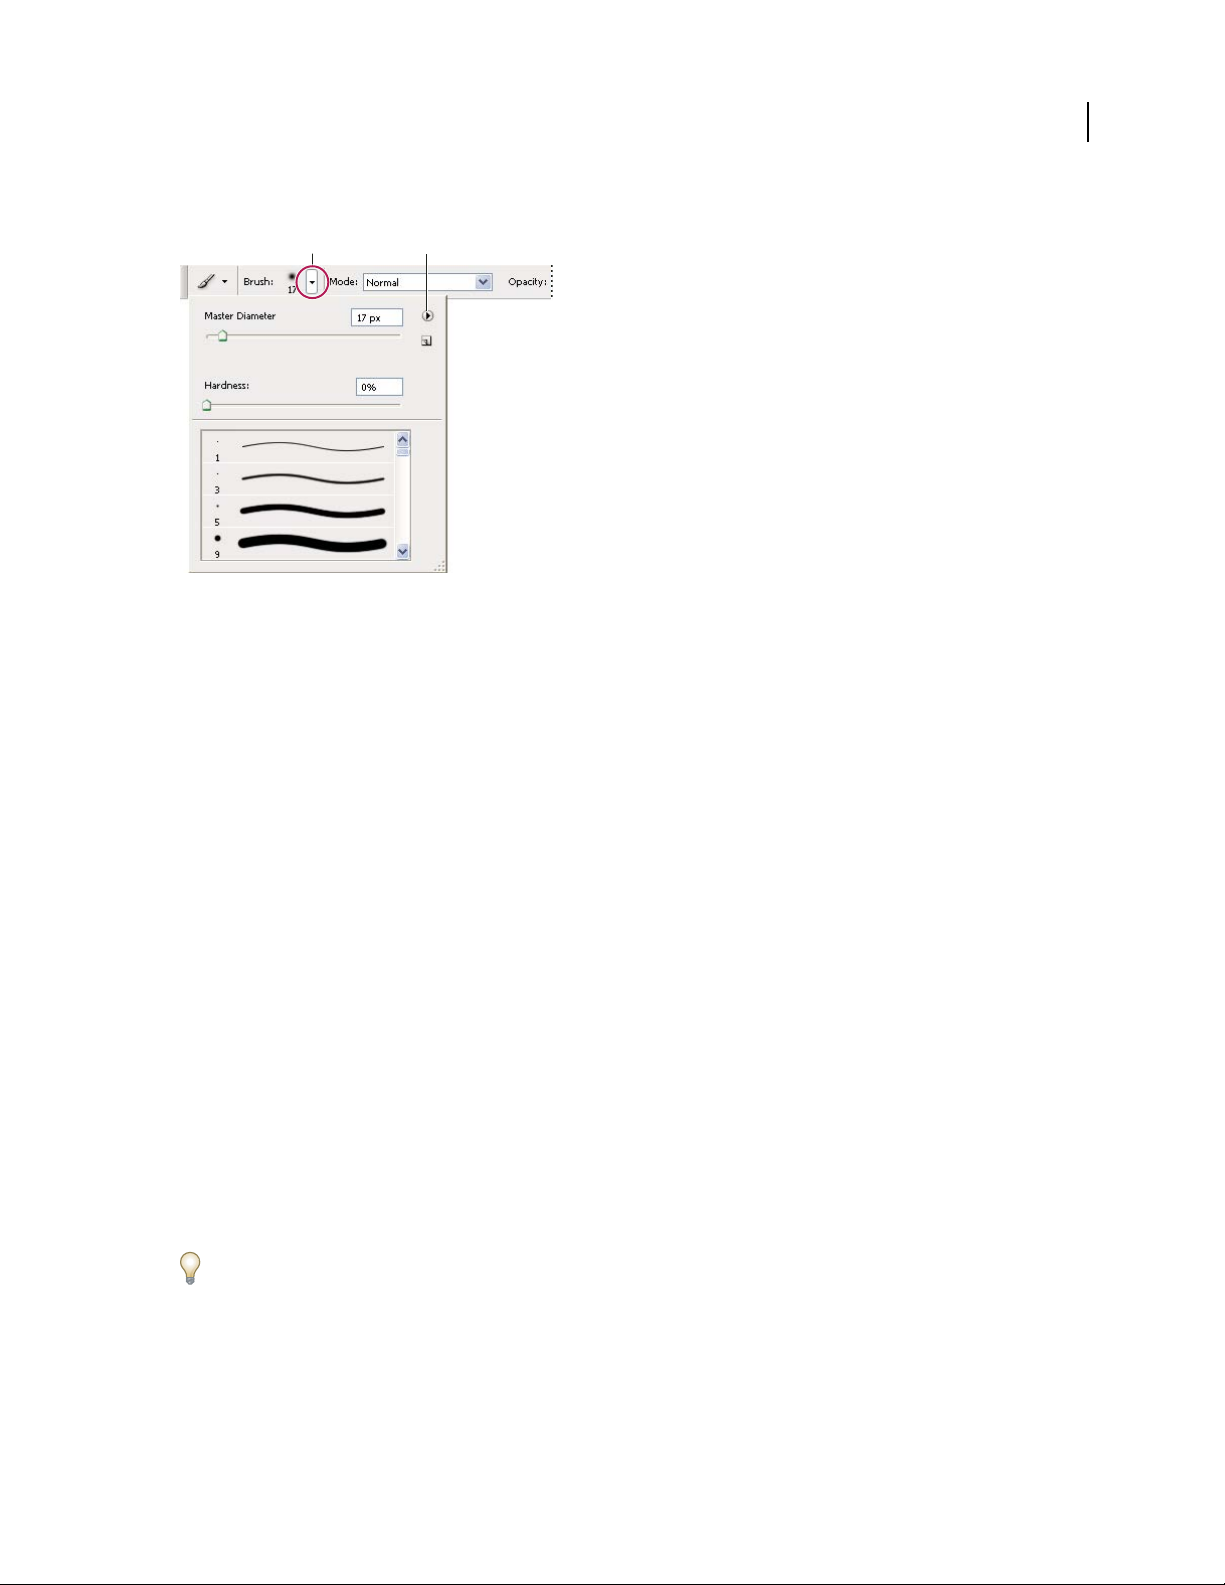
About pop-up sliders
Some palettes, dialog boxes, and options bars contain settings that use pop-up sliders (for example, the Opacity
option in the Layers palette). If there is a triangle next to the text box, you can activate the pop-up slider by clicking
the triangle. Position the pointer over the triangle next to the setting, hold down the mouse button, and drag the
slider or angle radius to the desired value. Click outside the slider box or pressEnter to close the slider box. To cancel
changes, press the Esc key.
22
To increase or decrease values in 10% increments when the pop-up slider box is open, hold down Shift and press the
Up Arrow or Down Arrow key.
A
B
Using different kinds of pop-up sliders
A. Click to open pop-up slider box. B. Drag slider or angle radius.
You can also “scrub” some pop-up sliders. For example, if you hold the pointer over the word “Fill” or “Opacity” in
the Layers palette, the pointer changes to the Hand icon. Then you can move the pointer left or right to change the
fill or opacity percentage.
About scrubby sliders
In some palettes, dialog boxes, and options bars, you can drag scrubby sliders to change option values. Scrubby
sliders are hiddenuntil youposition the pointer over the titleof sliders and pop-up sliders. Whenthe pointer changes
to apointing finger, you drag to the left or right. Holding downthe Shift key whiledragging accelerates the scrubbing
by a factor of 10.
Hovering over the title of a slider or pop-up slider shows the scrubby slider
Working with pop-up palettes
Pop-up palettes provide easy access to available options for brushes, swatches, gradients, styles, patterns, contours,
and shapes. You can customize pop-up palettes by renaming and deleting items and by loading,saving, and replacing
libraries. You can also change the display of a pop-up palette to view items by their names, as thumbnail icons, or
with both names and icons.
Page 30
PHOTOSHOP CS3
User Guide
Click a tool thumbnail in the options bar to show its pop-up palette. Click an item in the pop-up palette to select it.
AB
Viewing the Brush pop-up palette in the options bar
A. Click to show the pop-up palette. B. Click to view the pop-up palette menu.
Rename or delete an item in a pop-up palette
❖ Selectanitem,clickthetriangleintheupperrightcornerofthepop-uppalette,andchooseoneofthefollowing:
Rename Lets you enter a new name for the item.
23
Delete Deletes an item in the pop-up palette.
Note: You can also delete an item in a pop-up palette by holding down Alt (Windows) or Option (Mac OS) and clicking
the item.
Customize the list of items in a pop-up palette
1
Click the triangle in the upper right corner of the pop-up palette to view the palette menu.
2 To return to the default library, choose the Reset command. You can either replace the current list or add the
default library to the current list.
3 To load a different library, do one of the following:
• Choose the Load command to add a library to the current list. Then select the library file you want to use, and
click Load.
• Choose the Replace command to replace the current list with a different library. Then select the library file you
want to use, and click Load.
• Choose a library file (displayed at the bottom of the palette menu). Then click OK to replace the current list, or
click Append to add it to the current list.
4 Tosavethecurrentlistasalibraryforlateruse,choosetheSavecommand.Thenenteranameforthelibraryfile,
and click Save.
(Mac OS) Include the extension of the library file name so that you can easily share the libraries across operating
systems. Select Append File Extension Always in the File Handling Preferences to append extensions to file names.
Change the display of items in a pop-up palette
1
Click the triangle in the upper right corner of the pop-up palette to view the palette menu.
2 Select a view option: Text Only, Small List, or Large List.
Page 31

PHOTOSHOP CS3
User Guide
Display context menus
Context menus display commands relevant to the active tool, selection, or palette. They are distinct from the menus
across the top of the workspace.
Viewing the context menu for the Eyedropper tool
1 Position the pointer over an image or palette item.
2 Right-click (Windows) or Control-click (Mac OS).
Define a set of menus
1 Do one of the following:
• Choose Edit > Menus.
• Choose Window > Workspace > Keyboard Shortcuts & Menus and click the Menus tab.
2 In the Keyboard Shortcuts and Menus dialog box, choose a set of menus from the Set menu (Photoshop Defaults
is the only option until you create a new set). For information on customizing keyboard shortcuts, see “About
customizing keyboard shortcuts” on page 629.
3 Choose a type from the Menu For menu:
Application Menus Lets you show, hide, or add color to items in the application menus.
24
Palette Menus Lets you show, hide, or add color to items in palette menus.
4 Click the triangle next to a menu or palette name.
5 Do one of the following:
• To hide a menu item, click the Visibility button .
• To show a menu item, click the empty Visibility button.
• To add color to a menu item, click the color swatch and choose a color.
6 When you finish changing the menus, do one of the following:
• To save all changes to the current set of menus, click the Save Set button . Changes to a custom set are saved.
If you’re saving changes to the Photoshop Defaults set, the Save dialog box opens. Enter a name for the new set
and click Save.
• To create a new set based on the current set of menus, click the Save Set As button .
Note: Ifyouhaven’tsavedthecurrentsetofchanges,youcanclickCanceltodiscardallchangesandclosethedialogbox.
7 In the Save dialog box, enter a name for the set and click Save.
Page 32

Choosing a color for a menu item using the Keyboard Shortcuts & Menus dialog box
Delete a set of menus
1 Do one of the following:
• Choose Edit > Menus.
• Choose Window > Workspace > Keyboard Shortcuts & Menus and click the Menu tab.
2 In the Keyboard Shortcuts & Menus dialog box, choose a set of menus from the Set menu.
3 Click the Delete Set icon .
PHOTOSHOP CS3
User Guide
25
Temporarily show hidden menu items
It’s possible to temporarily show items that you’ve hidden in a menu. After the menu closes, the items return to their
hidden state.
❖ Do one of the following:
• From a menu with hidden items, choose Show All Menu Items.
• Shift-click a menu with hidden items.
Turn menu colors on or off
❖ In Interface preferences, select or deselect Show Menu Colors.
Tools
About tools
When you start Photoshop, the Tools palette appears at the left of the screen. Some tools in the Tools palette have
options that appear in the context-sensitive options bar. These include the tools that let you use type, select, paint,
draw, sample, edit, move, annotate, and view images. Other tools allow you to change foreground/background
colors, go to Adobe Online, and work in different modes.
You can expand some tools to show hidden tools beneath them. A small triangle at the lower right of the tool icon
signals the presence of hidden tools.
Page 33

PHOTOSHOP CS3
User Guide
You can view information about any tool by positioning the pointer over it. The name of the tool appears in a tool tip
below the pointer. Some tool tips contain links leading to additional information about the tool.
Tool b ox overview
26
A
Selection tools
Move (V)*
Rectangular
Marquee (M)
A
B
C
E
F
D
Elliptical Marquee (M)
Single Column
Marquee
Single Row
Marquee
Lasso (L)
Polygonal Lasso (L)
Magnetic Lasso (L)
Quick Selection (W)
Magic Wand (W)
B
Crop and slice tools
Crop (C)
Slice (K)
Slice Select
C
Retouching tools
Spot Healing Brush (J)
Healing Brush (J)
Patch (J)
Red Eye (J)
Clone Stamp (S)
Pattern Stamp (S)
Eraser (E)
Background Eraser (E)
Magic Eraser (E)
Blur (R)
Sharpen (R)
Smudge (R)
Dodge (O)
Burn (O)
Sponge (O)
D
Painting tools
Brush (B)
Pencil (B)
Color
Replacement (B)
History Brush (Y)
Art History Brush (Y)
Gradient (G)
Paint Bucket (G)
Drawing and type
E
tools
Pen (P)
Freeform Pen (P)
Add Anchor
Point
Delete Anchor
Point
Convert Anchor
Point
Horizontal Type (T)
Vertical Type (T)
Horizontal Type
Mask (T)
Vertical Type
Mask (T)
Path Selection (A)
Direct Selection (A)
Rectangle (U)
Rounded
Rectangle (U)
Ellipse (U)
Polygon (U)
Line (U)
Custom Shape (U)
F
Annotation,
measuring, and
navigation tools
Notes (N)
Audio Annotation (N)
Eyedropper (I)
Color Sampler (I)
Ruler (I)
Count (I)†
Hand (H)
Zoom (Z)
Indicates default tool * Keyboard shortcuts appear in parenthesis † Extended only
See also
“Workspace overview” on page 14
Page 34

Selection tools gallery
PHOTOSHOP CS3
User Guide
27
The marquee tools make
rectangular, elliptical, single
row, and single column selections.
The Magic Wand tool selects
similarly colored areas.
The Move tool moves selections, layers, and guides.
The lasso tools make
freehand, polygonal
(straight-edged), and
magnetic (snap-to) selections.
Crop and slice tools gallery
The Crop tool trims images. The Slice tool creates slices. The Slice Select tool selects
slices.
The Quick Selectiontool lets
you quickly “paint” a
selection using an adjustable
round brush tip
Retouching tools gallery
The Spot HealingBrush tool
removes blemishes and
objects
The Healing Brush tool
paints with a sample or
pattern to repair imperfections in a image.
The Patch tool repairs
imperfections in a selected
area of an image using a
sample or pattern.
The Red Eye tool removes
the red reflection caused by a
flash.
Page 35

PHOTOSHOP CS3
User Guide
28
TheCloneStamptoolpaints
with a sample of an image.
The Magic Eraser tool
erases solid-colored areas to
transparency with a single
click.
The Dodge tool lightens
areas in an image.
The Pattern Stamp tool
paints with part of an image
as a pattern.
The Blur tool blurs hard
edges in an image.
The Burntool darkens areas
in an image.
The Erasertool erases pixels
and restores parts of an
image to a previously saved
state.
The Sharpen tool sharpens
soft edges in an image.
TheSpongetoolchanges the
color saturation of an area.
The BackgroundEraser tool
erases areas to transparency
by dragging.
The Smudge tool smudges
data in an image.
Painting tools gallery
The Brush tool paints brush
strokes.
The Pencil tool paints hardedged strokes.
The ColorReplacement tool
replaces a selected color with
a new color.
The History Brush tool
paints a copy of the selected
state or snapshot into the
current image window.
Page 36

PHOTOSHOP CS3
User Guide
29
The Art History brush tool
paints with stylized strokes
that simulate the look of
different paint styles, using a
selected state or snapshot.
The gradient tools create
straight-line, radial, angle,
reflected, and diamond
blends between colors.
Drawing and type tools gallery
The path selection tools
make shape or segment selections showing anchor points,
direction lines, and direction
points.
Thetypetoolscreate type on
an image.
The Paint Bucket tool fills
similarly colored areas with
the foreground color.
Thetypemasktoolscreate a
selection in the shape of type.
The pen tools let you draw
smooth-edged paths.
The shape tools and Line
tool draw shapes and lines in
a normal layer or a shape
layer.
The Custom Shape tool
makes customized shapes
selectedfrom a custom shape
list.
Annotation, measuring, and navigation tools gallery
The annotation tools make
notes and audio annotations
that can be attached to an
image.
The Eyedropper tool
samples colors in an image.
The Ruler tool measures
distances, locations, and
angles.
The Hand tool moves an
image within its window.
Page 37

PHOTOSHOP CS3
User Guide
The Zoom tool magnifies
and reduces the view of an
image.
Use a tool
❖ Do one of the following:
• Click a tool in the Tools palette. If there is a small triangle at a tool’s lower right corner, hold down the mouse
button to view the hidden tools. Then click the tool you want to select.
• Press the tool’s keyboard shortcut. The keyboard shortcut is displayed in its tool tip. For example, you can select
the Move tool by pressing the V key.
30
A
B
C
Using the selecting tools
A. Tools palette B. Active tool C. Hidden tools D. To o l n a m e E. Tool shortcut F. Hidden tool triangle
D E
F
Cycle through hidden tools
You can select a preference that allows you to cyclethrough a set of hiddentools byholding downthe Shift key.When
this preference is not selected, you cancycle through a set of hidden tools by pressing the tool’s shortcut key (without
holding down Shift).
1 Choose Edit > Preferences > General (Windows) or Photoshop > Preferences > General (Mac OS).
2 Select Use Shift Key For Tool Switch.
Change tool pointers
Each default pointer has a different hotspot, where an effect or action in the image begins. With most tools, you can
switch to precise cursors, which appear as cross hairs centered around the hotspot.
Inmostcases,thepointerforatoolisthesameastheiconforthattool;youseethatpointerwhenyouselectthetool.
The default pointer for the marquee tools is the cross-hair pointer ; for the text tool, the default pointer is the
I-beam ; and for the painting tools the default pointer is the Brush Size icon.
1 Choose Edit > Preferences > Cursors (Windows) or choose Photoshop > Preferences > Cursors (Mac OS).
2 Choose tool pointer settings under Painting Cursors or Other Cursors:
Standard Displays pointers as tool icons.
Page 38

PHOTOSHOP CS3
User Guide
Precise Displays pointers as cross hairs.
Brush Size (painting cursors only) Displays the painting tool cursors as brush shapes representing the size of the
current brush. Brush Size cursors may not appear for very large brushes.
3 Select Brush Cursor options if you selected Brush Size as the tool pointer setting:
Normal The pointer outline corresponds to approximately 50% of thearea that the tool willaffect. This option shows
the pixels that would be most visibly affected.
Full Size The pointer outline corresponds to nearly 100% of the area that the tool will affect, or nearly all the pixels
that would be affected.
Always Show Crosshair Displays cross hairs in the center of the brush shape.
4 Click OK.
The Painting Cursors options control the pointers for the following tools:
Eraser, Pencil, Paintbrush, Healing Brush, Rubber Stamp, Pattern Stamp, Quick Selection, Smudge, Blur, Sharpen,
Dodge, Burn, and Sponge tools
The Other Cursors options control the pointers for the following tools:
Marquee, Lasso, Polygonal Lasso, Magic Wand, Crop, Slice, Patch, Eyedropper, Pen, Gradient, Line, Paint Bucket,
Magnetic Lasso, Magnetic Pen, Freeform Pen, Measure, and Color Sampler tools
31
To toggle between standard and precise cursors in some tool pointers, press Caps Lock.
Using the options bar
The options bar appears below the menu bar at the top of the workspace. The options bar is context sensitive—it
changes as you select different tools. Some settings in the options bar (such as painting modes and opacity) are
common to several tools, and some are specific to one tool.
Youcanmovetheoptionsbarintheworkspacebyusingthegripperbar,andyoucandockitatthetoporbottomof
the screen. Tool tips appear when you position the pointer over a tool. To show or hide the options bar, choose
Window > Options.
AB
Lasso options bar
A. Gripper bar B. To ol tip
To return tools totheir defaultsettings, right-click(Windows) or Control-click (Mac OS) the tool icon inthe options
bar, and then choose Reset Tool or Reset All Tools from the context menu.
For more information on setting options for a specific tool, search for the tool’s name in Photoshop Help.
Create and use tool presets
Tool presets let you save and reuse tool settings. You can load, edit, and create libraries of tool presets using the Tool
Preset picker in the options bar, the Tool Presets palette, and the Preset Manager.
Page 39

PHOTOSHOP CS3
User Guide
To choose a tool preset, click the Tool Preset picker in the options bar, and select a preset from the pop-up palette.
You can also choose Window > Tool Presets and select a preset in the Tools Presets palette.
A
B
C
Viewing the Tool Preset picker
A. Click the Tool Preset picker in the options bar to show the Tool Preset pop-up palette. B. Select a preset to change the tool’s options to the
preset,whichapplieseachtimeyouselectthetooluntilyouchooseResetToolfromthepalettemenu. C. Deselect to show all tool presets; select
to show presets for only the tool selected in the toolbox.
Create a tool preset
1
Choose a tool, and set the options you want to save as a tool preset in the options bar.
2 Do one of the following:
• Click the Tool Preset button next to the tool at the left of the options bar.
• Choose Window > Tool Presets to display the Tool Presets palette.
3 Do one of the following:
• Click the Create New Tool Preset button .
• Choose New Tool Preset from the palette menu.
4 Enter a name for the tool preset, and click OK.
32
Change the list of tool presets
❖ Click the triangle to open the Tool Presets pop-up palette menu and choose one of the following:
Show All Tool Presets Shows all loaded presets.
Sort By Tool Sorts the presets by tool.
Show Current Tool Presets Shows only the loaded presets for the active tool. You can also select the Current Tool
Only option in the Tool Presets pop-up palette.
Text Only, Small List, or Large List Determines how presets are displayed in the pop-up palette.
Note: To create, load, and manage libraries of tool presets, see “Working with pop-up palettes” on page 22 and “Work
with the Preset Manager” on page 46.
Page 40

PHOTOSHOP CS3
User Guide
Viewing images
Change the screen mode
Youcanusethescreenmodeoptionstoviewimagesonyourentirescreen.Youcanshoworhidethemenubar,title
bar, and scroll bars.
❖ Do one of the following:
• To display the default window, (menu bar at the top and scroll bars on the side), choose View > Screen Mode >
Standard Screen Mode, or click the Screen Mode button in the Tools palette until Standard Screen Mode
appears.
• Todisplay a full-screen window with amenu bar and a 50%gray background, but notitle bar or scroll bars, choose
View > Screen Mode > Full Screen Mode With Menu Bar, or click the Screen Mode button in the Tools palette
until Full Screen Mode With Menu Bar appears.
• To display a full-screen window with only a black background (no title bar, menu bar, or scroll bars), choose
View > Screen Mode > Full Screen Mode, or click the Screen Mode button in the Tools palette until Full
Screen Mode appears.
• To display a maximized document window that fills all available space between docks and that resizes when dock
widths change, choose View > Screen Mode > Maximized Screen Mode, or click the Screen Mode button in
the Tools palette until Maximized Screen Mode appears.
33
View another area of an image
❖ Do one of the following:
• Use the window scroll bars.
• Select the Hand tool and drag to pan over the image.
Dragging the Hand tool to view another area of an image
• Drag the colored box (proxy view area) in the Navigator palette.
To use the Hand tool while another tool is selected, hold down the spacebar as you drag in the image.
Page 41

PHOTOSHOP CS3
User Guide
Use the Navigator palette
You use the Navigator palette to quickly change the view of your artwork using a thumbnail display. The colored box
in the Navigator (called the proxy view area) corresponds to the currently viewable area in the window.
❖ Do one or more of the following:
• To display the Navigator palette, select Window > Navigator.
• Tochange themagnification, type a value in thetext box, click the ZoomOut orZoom In button, ordrag the zoom
slider.
• To move the view of an image, drag the proxy view area in the image thumbnail. You can also click the image
thumbnail to designate the viewable area.
• Tochange the colorof theproxy view area, select Palette Options from the palette menu. Select apreset color from
the Color pop-up menu, or double-click the color box to choose a custom color.
A
B
C
D E F G
Navigator palette
A. Palette menu button B. Thumbnail display of artwork C. Proxy preview area D. Zoom text box E. Zoom Out button F. Zoom slider
G. Zoom In button
34
Zoom in or out
❖ Do any of the following:
• Select the Zoom tool , and click either the Zoom In or Zoom Out button in the options bar. Click the
area you want to magnify.
• Select the Zoom tool. The pointer becomes a magnifying glass with a plus sign in its center. Click the center of the
area that you want to magnify, or hold down Alt (Windows) or Option (Mac OS) and click the center of the area
that you want to reduce. Each click magnifies or reduces the view to the previous preset percentage.
Note: When you use the Zoom or Zoom Out tool, each click magnifies or reduces the image to the next preset percentage
and centers the display around the point you click. When the image has reached its maximum magnification level of
1600% or minimum size of 1 pixel, the magnifying glass appears empty.
• Select the Zoom tool and draga dotted rectangle, calleda marquee,aroundtheareayouwanttomagnify.Tomove
the marquee around the artwork, hold down the spacebar and continue dragging until the marquee is in the
desired location.
• Choose View > Zoom In or View > Zoom Out. When the image reaches its maximum or minimum magnifi-
cation, the command is dimmed.
• Set the zoom level at the lower left corner of the document window or in the Navigator palette.
• To display a file at 100%, choose View > Actual Pixels.
• To change the view to fit the document window, choose View > Fit on Screen.
If your mouse has a scroll wheel, you can use it to zoom in or out after selecting the Zoom tool. Choose Edit >
Preferences > General (Windows) or Photoshop > Preferences > General (Mac OS) and select the Zoom With Scroll
Wheel option to enable this behavior.
Page 42

PHOTOSHOP CS3
User Guide
Zoom into or out of multiple images
1
Open one or more images, or copies of a single image.
2 Choose Window > Arrange > Tile Horizontally/Tile Vertically to display the images edge to edge.
3 Select the Zoom tool, and then do one of the following:
• Select Zoom All Windows in the options bar, and then click one of the images. The other images zoom in or out
at the same time.
• Choose Window > Arrange > Match Zoom. Hold down the Shift key and click one of the images. The other
images zoom in or out at the same magnification.
Magnify by dragging
1
Select the Zoom tool.
2 Drag over the part of the image that you want to magnify.
35
Dragging the Zoom tool to magnify the view of an image
Theareainsidethezoommarqueeisdisplayedatthehighestpossiblemagnification.Tomovethemarqueearound
the artwork in Photoshop, begin dragging a marquee and then hold down the spacebar while dragging.
Automatically resize the window when zooming
❖ With the Zoom tool active, select Resize Windows To Fit in the options bar. The window is resized when you
magnify or reduce the view of the image.
When Resize Windows To Fit is deselected (the default), the window maintains a constant size regardless of the
image magnification. This can be helpful when using smaller monitors or working with tiled views.
Note: To automatically resize the window when using keyboard shortcuts to reduce or magnify an image view, choose
Edit > Preferences > General (Windows) or Photoshop > Preferences > General (Mac OS), then select the Zoom Resizes
Windows preference and click OK.
Display an image at 100%
❖ Do one of the following:
• Double-click the Zoom tool in the toolbox.
• Choose View > Actual Pixels.
• Enter 100% in the Status Bar and press Enter (Windows) or Return (Mac OS).
Note: The 100% view of an image displays an image as it will appear in a browser (based on the monitor resolution and
the image resolution).
Page 43

PHOTOSHOP CS3
User Guide
Fit an image to the screen
❖ Do one of the following:
• Double-click the Hand tool in the toolbox.
• Choose View > Fit On Screen.
• Select a zoom tool or the Hand tool, and click the Fit On Screen button in the options bar.
These options scale both the zoom level and the window size to fit the available screen space.
View images in multiple windows
The document window is where your images appear. You can open multiple windows to display different images or
different views of the same one. A list of open windows appears in the Window menu. To bring an open image to the
front, choose the file name from the bottom of the Window menu. Available memory may limit the number of
windows per image.
1 Choose Window > Arrange > New Window For [Image File Name].
2 If you want to arrange the windows, choose Window > Arrange and then choose one of the following:
Cascade Displays windows stacked and cascading from the upper left to the lower right of the screen.
Tile Horizontally or Tile Vertically Displays windows edge to edge. As you close images, the open windows are
resized to fill the available space.
36
(Windows) Arrange Icons Aligns minimized image windows along the bottom of the screen.
You can use the Hand tool’s Scroll All Windows option to scroll through all open images. Select it in the options bar
and drag in one image to scroll through all visible images.
Match locations in images
1 Open one or more images, or multiple copies of a single image.
2 Choose either Window > Arrange > Tile Horizontally/Tile Vertically to display the images edge to edge.
3 Select the Hand tool, and then do one of the following:
• Select Scroll All Windows in the options bar, and then drag to view another area in one of the images.
• Choose Window > Arrange > Match Location, hold down the Shift key, and click or drag an area in one of the
images. The other images snap to the corresponding area.
Match zoom and locations in images
1 Open one or more images, or multiple copies of a single image.
2 Choose Window > Arrange > Tile Horizontally/Tile Vertically.
3 Choose Window > Arrange > Match Zoom And Location.
Page 44

PHOTOSHOP CS3
User Guide
Without Match Zoom And Location (top), and with Match Zoom And Location (bottom) selected
4 Select the Zoom tool or the Hand tool.
5 Select one of the images, hold down the Shift key, and click in or drag an area of an image. The other images are
magnified to the same percentage and snap to the area you clicked.
37
Work with the Info palette
The Info palette shows the color values beneath the pointer and, depending on the tool in use, gives other useful
information. The Info palette also displays a hint on using the selected tool, gives document status information, and
can display 8-bit, 16-bit, or 32-bit values.
The Info palette displays the following information:
• Depending on the option you specify, the Info palette displays 8-bit, 16-bit, or 32-bit values.
• When displaying CMYK values, the Info palette displays an exclamation point next to the CMYK values if the
color beneath the pointer or color sampler is out of the printable CMYK color gamut.
• When a marquee tool is being used, the Info palette displays the x and y coordinates of the pointer position and
the width (W) and height (H) of the marquee as you drag.
• When the Crop tool or Zoom tool is being used, the Info palette displays the width (W) and height (H) of the
marquee as you drag. The palette also shows the angle of rotation of the crop marquee.
• When the Line tool, the Pen tool, or Gradient tool is being used, or when a selection is being moved, the Info
palette displays the x and y coordinates of your starting position, the change in X (DX), the change in Y (DY), the
angle (A), and the length (D) as you drag.
• When a two-dimensional transformation command is being used, the Info palette displays the percentage change
in width (W) and height (H), the angle of rotation (A), and the angle of horizontal skew (H) or vertical skew (V).
• When any color adjustment dialog box (for example, Curves) is being used, the Info palette displays before-and-
after color values for the pixels beneath the pointer and beneath color samplers.
• If the Show Tool Hints option is enabled, you see hints for using the tool selected in the toolbox.
• Depending on the options selected, the Info palettedisplays status information, such as document size, document
profile, document dimensions, scratch sizes, efficiency, timing, and current tool.
Page 45

PHOTOSHOP CS3
User Guide
Use the Info palette
The Info palette displays file information about an image and also provides feedback about the color values as you
move a tool pointer over an image. Make sure the Info palette is visible in your workspace if you want to view information while dragging in the image.
1 (Optional) Do one of the following if you need to display the Info palette:
• Click the Info palette tab if it’s docked with other palettes.
• Choose Window > Info. File information about the image is displayed at the bottom of the Info palette. You can
change the information displayed by clicking the triangle in the upper right corner of the palette and choosing
Palette Options from the palette menu.
2 Set the options for the information you want displayed in the Info Palette by doing any of the following:
• Choose Palette Options from the Info palette menu and specify options in the Info Palette Options dialog box.
• Click an eyedropper icon and choose display options from the pop-up menu. You can also use the pop-up menu
to specify whether the Info palette displays 8-bit, 16-bit, or 32-bit values.
• Click the cursor coordinates icon and choose a unit of measurement.
3 Select a tool.
4 Move the pointer in the image, or drag in the image to use the tool. The following information may appear,
depending on which tool you’re using:
Displays the numeric values for the color beneath the pointer.
38
Displays the x and y coordinates of the pointer.
Displays the width (W) and height (H) of a marquee or shape as you drag, or the width and height of an active
selection.
Change the Info palette options
1
Click the triangle in the upper right corner to open the Info palette menu and choose Palette Options.
2 In the Info Palette Options dialog box, for First Color Readout, choose one of the following display options:
Actual Color Displays values in the current color mode of the image.
Proof Color Displays values for the output color space of the image.
A color mode Displays the color values in that color mode.
Total Ink Displays the total percentage of all CMYK ink at the pointer’s current location, based on the values set in
the CMYK Setup dialog box.
Opacity Displays the opacity of the current layer. This option does not apply to the background.
Version Cue Displays Version Cue workgroup status. This option is valid when Version Cue is active.
Measurement Scale Displays the scale of the document.
YoucanalsosetthereadoutoptionsbyclickingtheeyedroppericonintheInfopalette.InadditiontotheFirstColor
Readout options, you can also display 8-bit, 16-bit, or 32-bit values.
3 For Second Color Readout, choose a display option from the list in step 2. For the second readout, you can also
click the eyedropper icon in the Info palette and choose readout options from the pop-up menu.
Page 46

PHOTOSHOP CS3
User Guide
Clicking an eyedropper icon and choosing a readout mode from the pop-up menu
4 For Ruler Units, choose a unit of measurement.
5 Under Status information, select from the following to display file information in the Info palette:
Document Sizes Displays information on the amount of data in the image. The number on the left represents the
printing size of the image—approximately the size of the saved, flattened file in Adobe Photoshop format. The
number on the right indicates the file’s approximate size including layers and channels.
Document Profile Displays the name of the color profile used by the image.
39
Document Dimensions Displays the dimensions of the image.
Scratch Sizes Displays information on the amount of RAM and the scratch disk used to process the image. The
number on the left represents the amount of memory that is currently being used by the program to display all open
images. The number on the right represents the total amount of RAM available for processing images.
Efficiency Displays the percentage oftime spent performing an operation instead of reading or writingto the scratch
disk. If the value is below 100%, Photoshop is using the scratch disk and is therefore operating more slowly.
Timing Displays the amount of time it took to complete the last operation.
Current Tool Displays the name of the active tool.
6 (Optional) Select Show Tool Hints to display a hint for using a selected tool at the bottom of the Info palette.
7 Click OK.
Tochangemeasurementunits,clickthecross-hairiconintheInfopaletteandchoosefromthemenu.
Display file information in the document window
The status bar is located at the bottom of every document window and displays useful information—such as the
currentmagnificationandfilesizeoftheactiveimage,andbriefinstructionsforusingtheactivetool.Thestatusbar
also displays Version Cue information if you have Version Cue enabled.
Note: You can also view copyright and authorship information that has been added to the file. This information includes
standard file information and Digimarc watermarks. Photoshop automatically scans opened images for watermarks
using the Digimarc Detect Watermark plug-in. If a watermark is detected, Photoshop displays a copyright symbol in the
image window’s title bar and updates the Copyright & URL area of the File Info dialog box.
1 Click the triangle in the bottom border of the document window.
Page 47

PHOTOSHOP CS3
User Guide
File information view options when Version Cue is enabled
2 Choose a view option from the pop-up menu:
Note: If you have Version Cue enabled, choose from the Show submenu.
Version Cue Displays the Version Cue workgroup status of yourdocument, such as open, unmanaged, unsaved, and
so forth. This option is available only if you have Version Cue enabled.
Document Sizes Information on the amount of data in the image. The number on the left represents the printing
size of the image—approximately the size of the saved, flattened file in Adobe Photoshop format. The number on the
right indicates the file’s approximate size, including layers and channels.
Document Profile The name of the color profile used by the image.
40
Document Dimensions The dimensions of the image.
Measurement Scale The scale of the document.
Scratch Sizes Information on the amount of RAM and the scratch disk used to process the image. The number on
the left represents the amount of memory currently being used by the program to display all open images. The
number on the right represents the total amount of RAM available for processing images.
Efficiency The percentage of timeactually spentperforming an operation insteadof reading or writing to the scratch
disk. If the value is below 100%, Photoshop is using the scratch disk and is therefore operating more slowly.
Timing The time it took to complete the last operation.
Current Tool The name of the active tool.
32-bit Exposure Option for adjusting the preview image for viewing 32-bits-per-channel high dynamic range
(HDR) images on your computer monitor. The slider is available only when the document window displays an HDR
image.
Clickanywhereinthefileinformationareaofthestatusbartoseeathumbnailpreviewshowinghowyourdocument
(at its current image size) will be printed in the current page setup.
Click the file information area in the status bar to see a thumbnail preview of how the image will be printed.
Page 48

PHOTOSHOP CS3
User Guide
See also
“Adjust dynamic range view for HDR images” on page 81
Duplicate an image
You can duplicate an entire image (including all layers, layer masks, and channels) into available memory without
saving to disk.
1 Open the image you want to duplicate.
2 Choose Image > Duplicate.
3 Enter a name for the duplicated image.
4 If you want to duplicate the image and merge the layers, select Duplicate Merged Layers Only. To preserve the
layers, make sure this option is deselected.
5 Click OK.
Rulers, the grid, and guides
41
About rulers
Rulershelpyoupositionimagesorelementsprecisely.Whenvisible,rulersappearalongthetopandleftsideofthe
active window. Markers in the ruler display the pointer’s position when you move it. Changing the ruler origin (the
(0, 0) mark on the topand left rulers) lets you measure from a specific point on theimage. The ruler origin also determines the grid’s point of origin.
To show or hide rulers, choose View > Rulers.
Change a ruler’s zero origin
1 (Optional) Choose View > Snap To, then choose any combination of options from the submenu. This snaps the
ruler origin to guides, slices, or document bounds. You can also snap to the grid.
2 Position the pointer over the intersection of therulers in the upper left corner of the window, and drag diagonally
down onto the image. A set of cross hairs appears, marking the new origin on the rulers.
You can hold down Shift as you drag to make the ruler origin snap to the ruler ticks.
To reset a ruler’s origin to its default value, double-click the upper left corner of the ruler.
Dragging to create new ruler origin
Page 49

PHOTOSHOP CS3
User Guide
See also
“Use snapping” on page 45
Change the unit of measurement
1 Do one of the following:
• Double-click a ruler.
• (Windows) Choose Edit > Preferences > Units & Rulers, or right-click the ruler and then choose a new unit from
the context menu.
• (Mac OS) Choose Photoshop > Preferences > Units & Rulers, or Control-click the ruler and then choose a new
unit from the context menu.
2 For Rulers, choose a unit of measurement.
Note: Changing the units on the Info palette automatically changes the units on the rulers.
3 For Point/Pica Size, choose from the following options:
PostScript (72 points per inch) Sets a unit size compatible for printing to a PostScript device.
Traditional Uses 72.27 points per inch, as traditionally used in printing.
42
4 Click OK.
Specify columns for an image
Columns help you position images or elements precisely. The New, Image Size, and Canvas Size commands let you
specify image width in terms of columns. Using columns is convenient when you plan to import an image into a
page-layout program, such as Adobe InDesign®, and you want the image to fit exactly within a certain number of
columns.
1 Choose Edit > Preferences > Units & Rulers (Windows) or Photoshop > Preferences > Units & Rulers (Mac OS).
2 Enter values for Width and Gutter.
Position with the Ruler tool
The Ruler tool helps you position images or elements precisely. The Ruler tool calculates the distance between
any two points in the workspace. When you measure from one point to another, a nonprinting line is drawn, and the
options bar and Info palette show the following information:
• The starting location (X and Y)
• The horizontal (W) and vertical (H) distances traveled from the x and y axes
• The angle measured relative to the axis (A)
• The total length traveled (D1)
• The two lengths traveled (D1 and D2), when you use a protractor
All measurements except the angle are calculated in the unit of measure currently set in theUnits & Rulers preference
dialog box.
If your document has an existing measuring line, selecting the Ruler tool causes it to be displayed.
Page 50

PHOTOSHOP CS3
User Guide
Measure between two points
1
Select the Ruler tool .
2 Drag from the starting point to the ending point. Hold down the Shift key to constrain the tool to 45˚ increments.
3 To create a protractor from an existing measuring line, Alt-drag (Windows) or Option-drag (Mac OS) at an angle
from one end of the measuring line, or double-click the line and drag. Hold down the Shift key to constrain the tool
to multiples of 45˚.
Edit a measuring line or protractor
1
Select the Ruler tool .
2 Do one of the following:
• To resize the line, drag one end of an existing measuring line.
• To move the line, place the pointer on the line away from either endpoint, and drag the line.
• To remove the line, place the pointer on the line away from either endpoint, and drag the line out of the image, or
click Clear in the tool options bar.
Note: You can drag out a measure line on an image feature that should be horizontal or vertical, and then choose
Image > Rotate Canvas > Arbitrary. The correct angle of rotation required to straighten the image is automatically
entered into the Rotate Canvas dialog box.
43
Position with guides and the grid
Guidesandthegridhelpyoupositionimagesorelementsprecisely.Guidesappearasnonprintinglinesthatfloatover
the image. You can move and remove guides.You can also lock them so that you don’t move them by accident.
Thegridisusefulforlayingoutelementssymmetrically.Thegridappearsbydefaultasnonprintinglinesbutcanalso
be displayed as dots.
Guides and grids behave in similar ways:
• Selections, selection borders, and tools snap to a guide or the grid when dragged within 8 screen (not image)
pixels. Guides also snap to the grid when moved. You can turn this feature on and off.
• Guide spacing, along with guide and grid visibility and snapping, is specific to an image.
• Grid spacing, along with guide and grid color and style, is the same for all images.
You can use Smart Guides to help align shapes, slices, and selections. They appear automatically when you draw a
shape, or create a selection or slide. You can hide Smart Guides if you need to.
See also
“Slice a web page” on page 508
Show or hide a grid, guides, or smart guides
❖ Do one of the following:
• Choose View > Show > Grid.
• Choose View > Show > Guides.
• View > Show > Smart Guides.
• Choose View > Extras. This command also shows or hides layer edges, selection edges, target paths, slices, and
annotations.
Page 51

PHOTOSHOP CS3
Place a guide
1
If the rulers are not visible, choose View > Rulers.
Note: For the most accurate readings, view the image at 100% magnification or use the Info palette.
2 Do one of the following to create a guide:
• Choose View > New Guide. In the dialog box, select Horizontal or Vertical orientation, enter a position, and
click OK.
• Drag from the horizontal ruler to create a horizontal guide.
Dragging to create a horizontal guide
User Guide
44
• Hold down Alt (Windows) or Option (Mac OS), and drag from the vertical ruler to create a horizontal guide.
• Drag from the vertical ruler to create a vertical guide.
• Hold down Alt (Windows) or Option (Mac OS), and drag from the horizontal ruler to create a vertical guide.
• HolddownShiftanddragfromthehorizontalorverticalrulertocreateaguidethatsnapstotherulerticks.The
pointer changes to a double-headed arrow when you drag a guide.
3 (Optional) If you want to lock all guides, choose View > Lock Guides.
Move a guide
1
Select the Move tool , or hold down Ctrl (Windows) or Command (Mac OS) to activate the Move tool. (This
option does not work with the Hand tool or the Slice tool .)
2 Position the pointer over the guide (the pointer turns into a double-headed arrow).
3 Move the guide in any of the following ways:
• Drag the guide to move it.
• Change the guide from horizontal to vertical, or vice versa, by holding down Alt (Windows) or Option (Mac OS)
as you click or drag the guide.
• Align the guide with the ruler ticks by holding down Shift as you drag the guide. The guide snaps to the grid if the
grid is visible and View > Snap To > Grid is selected.
Remove guides from the image
❖ Do one of the following:
• To remove a single guide, drag the guide outside the image window.
• To remove all guides, choose View > Clear Guides.
Page 52

PHOTOSHOP CS3
User Guide
Set guide and grid preferences
1
Do one of the following:
• (Windows) Choose Edit > Preferences > Guides, Grid, Slices & Count.
• (Mac OS) Choose Photoshop > Preferences > Guides, Grid, Slices & Count.
2 For Color, choose a color for the guides, the grid, or both. If you choose Custom, click the color box, choose a
color, and click OK.
3 For Style, choose a display option for guides or the grid, or both.
4 For Gridline Every, enter a value for the grid spacing. For Subdivisions, enter a value by which to subdivide the
grid.
If desired, change the units for this option. The Percent option creates a grid that divides the image into even
sections. For example, choosing 25 for the Percent option creates an evenly divided 4-by-4 grid.
5 Click OK.
Use snapping
Snapping helps with precise placement of selection edges, cropping marquees, slices, shapes, and paths. However,
sometimes snapping prevents you from correctly placing elements. You can enable or disable snapping using the
Snap command. You can also specify different elements to which you want to snap when snapping is enabled.
45
Enable snapping
❖ Choose View > Snap. A check mark indicates that snapping is enabled.
Specify what to snap to
❖ Choose View > Snap To, and choose one or more options from the submenu:
Guides Snaps to guides.
Grid Snaps to the grid. You cannot select this option when the grid is hidden.
Layer Snaps to the content in the layer.
Slices Snaps to slice boundaries. You cannot select this option when slices are hidden.
Document Bounds Snaps to the edges of the document.
All Selects all Snap To options.
None Deselects all Snap To options.
A check mark indicates that the option is selected and snapping is enabled.
If you want to enable snapping for only one option, make sure the Snap command is disabled, and then choose
View > Snap To and choose an option. This automatically enables snapping for the selected option, and deselects all
other Snap To options.
Show or hide Extras
Guides, grid,target paths, selection edges,slices, image maps, text bounds,text baselines, textselections, and annotations are nonprinting Extras that help you select, move, or edit images and objects. You can turn on or off an Extra
or any combination of Extras without affecting the image. You can also show or hide Extras by choosing the Extras
command in the View menu.
Page 53

PHOTOSHOP CS3
User Guide
Hiding Extras only suppresses the display of Extras. It does not turn off these options.
❖ Do one of the following:
• To show or hide Extras, choose View > Extras. A check mark appears next to all shown Extras in the Show
submenu.
• To turn on and show an Extra from a group of hidden Extras, choose View > Show and choose an Extra from the
submenu.
• To turn on and show all available Extras, choose View > Show > All.
• To turn off and hide all Extras, choose View > Show > None.
Note: Showing Extras causes color samplers to be shown as well, even though color samplers are not an option in the
Show submenu.
Work with the Preset Manager
About the Preset Manager
The Preset Manager lets you manage the libraries of preset brushes, swatches, gradients, styles, patterns, contours,
custom shapes, and preset tools that come with Photoshop. For example, you can use the Preset Manager to change
the current set of preset items or create new libraries. After you load a library in the Preset Manager, you can access
the library’s items in locations such as the options bar, palettes, dialog boxes, and so on.
46
In general, when you change a preset, Photoshop prompts you to save the changes as a new preset so that both the
original and changed preset remain available.
Each type of library has its own file extension and default folder. Preset files are installed on your computer inside
the Presets folder in the Adobe Photoshop CS3 application folder.
ToopenthePresetManager,chooseEdit>PresetManager.ChooseanoptionfromthePresetTypemenutoswitch
to a specific preset type.
You can adjust the configuration of presets by clicking the palette menu button and choosing a display mode from
the top section of the menu:
Text Only Displays the name of each preset item.
Small Thumbnail or Large Thumbnail Displays a thumbnail of each preset item.
Small List or Large List Displays the name and thumbnail of each preset item.
Stroke Thumbnail Displays a sample brush stroke and brush thumbnail of each brush preset. (This option is
available for brush presets only.)
To rearrange the list of items, drag an item up or down in the list.
Page 54

PHOTOSHOP CS3
User Guide
Rearranging tool presets in the Preset Manager
Note: To delete a preset in the Preset Manager, select the preset and click Delete. You can always use the Reset command
to restore the default items in a library.
Load a library of preset items
❖ Do one of the following:
• Click the triangle to the right of the Preset Type pop-up menu and then choose a library file from the bottom of
the palette menu. Click OK to replace the current list, or click Append to add the current list.
• To add a library to the current list, click Load, select the library file you want to add, and click Load.
• Toreplacethecurrentlistwithadifferentlibrary,chooseReplace[Preset Type] fromthepalettemenu.Selectthe
library file you want to use, and click Load.
47
Note: Each type of library has its own file extension and default folder.
Manage preset items
You can rename or delete preset items, as well as create or restore libraries of presets.
Rename preset items
1
Select a preset item. Shift-click to select multiple items.
2 Do one of the following:
• Click Rename, and then enter a new name for the brush, swatch, and so on.
• If the Preset Manager currently displays presets as thumbnails, double-click a preset, enter a new name, and
click OK.
• If the Preset Manager currently displays presets asa list or textonly, double-click a preset, enter anew name inline,
and press Enter (Windows) or Return (Mac OS).
Delete preset items
❖ Do one of the following:
• Select a preset item, and click Delete.
• Alt-click (Windows) or Option-click (Mac OS) the items you want to delete.
Page 55

PHOTOSHOP CS3
User Guide
Create a new library of presets
1
Do one of the following:
• To save all the presets in the list as a library, make sure that all items are selected.
• To save a subset of the current list as a library, hold down Shift, and select the items you want to save.
2 Click Save Set, choose a location for the library, enter a file name, and click Save.
You can save the library anywhere. However, if you place the library file in the appropriate Presets folder in the
default preset location, the library name will appear at the bottom of the palette menu after you restart Photoshop.
Restore the default library of preset items
❖ Choose Reset from the palette menu. You can either replace the current list or append the default library to the
current list.
Default preset locations
1
The default location for saving/loading/replacing presets depends on your operating system.
• Mac: <User>/Library/Application Support/Adobe/Adobe Photoshop CS3/Presets.
• Windows XP: [Drive]:\Document and Settings\<user>\Application Data\Adobe\Adobe Photoshop CS3\Presets.
• Windows Vista: [Drive]:\Users\<user>\AppData\Roaming\Adobe\Adobe Photoshop CS3\Presets.
2 Presets that ship with Adobe Photoshop CS3 are stored in the Photoshop program folder.
48
Displaying Hidden Files in Windows
The default locations for saving/loading/replacing presets are hidden by default in Windows.
1 To display hidden files in Windows XP:
a Go to Start > Control Panel > Folder Options.
b In the View tab, under Hidden files and folders, select Show hidden files and folders.
c Click OK.
2 To display hidden files in Windows Vista:
a Go to Start > Control Panel > Appearance and Personalization > Folder Options.
b In the View tab, under Hidden files and folders, select Show hidden files and folders.
c Click OK.
Preferences
About preferences
Numerousprogram settings are stored in the Adobe Photoshop CS3 Prefs file, includinggeneral display options, filesaving options, performance options, cursor options, transparency options, type options, and options for plug-ins
and scratchdisks. Most of these options are set in the Preferences dialog box. Preference settings are saved each time
you quit the application.
Unexpected behavior may indicate damaged preferences. If you suspect damage to preferences, restore preferences
to their default settings.
Page 56

PHOTOSHOP CS3
User Guide
Open a preferences dialog box
1 Do one of the following:
• (Windows) Choose Edit > Preferences and choose the desired preference set from the submenu.
• (Mac OS) Choose Photoshop > Preferences, and then choose the desired preference set from the submenu.
2 To switch to a different preference set, do one of the following:
• Choose the preference set from the menu at the left of the dialog box.
• Click Next to display the next preference set in the menu list; click Prev to display the previous preference set.
For information on a specific preference option, see the index.
Restore all preferences to default settings
❖ Do one of the following:
• Press and hold Alt+Control+Shift (Windows) or Option+Command+Shift (Mac OS)as you start Photoshop. You
are prompted to delete the current settings.
• (Mac OS only) Open the Preferences folder in the Library folder, and drag the Adobe Photoshop CS Settings
folder to the Trash.
New Preferences files are created the next time you start Photoshop.
49
Disable and enable warning messages
Sometimes you will see messages containing warnings or prompts. You can suppress the display of these messages
by selecting the Don’t Show Again option in the message. You can also globally redisplay all messages that have been
suppressed.
1 Do one of the following:
• (Windows) Choose Edit > Preferences > General.
• (Mac OS) Choose Photoshop > Preferences > General.
2 Click Reset All Warning Dialogs, and click OK.
Specify a legacy serial number
1 Do one of the following:
• (Windows) Choose Edit > Preferences > Plug-ins.
• (Mac OS) Choose Photoshop > Preferences > Plug-ins.
2 Enter the serial number from Photoshop CS or earlier in the Legacy Photoshop Serial Number text box.
Page 57

PHOTOSHOP CS3
User Guide
Plug-ins
About plug-in modules
Plug-in modules are software programs developed by Adobe Systems and by other software developers in
conjunction with Adobe Systems to add features to Photoshop. A number of importing, exporting, and specialeffects plug-ins come with your program. They are automatically installed in folders inside the Photoshop Plug-ins
folder.
You can select an additional Plug-ins folder for compatible plug-ins stored with another application. You can also
create a shortcut (Windows) or an alias (Mac OS) for a plug-instored in another folder on your system. You can then
add the shortcut or alias to the plug-ins folder and use that plug-in with Photoshop.
Once installed, plug-in modules appear as options in the Import or Export menu; as file formats in the Open, and
Save As dialog boxes; or as filters in the Filter submenus. Photoshop can accommodate a large number of plug-ins.
However, if the list of installed plug-in modules becomes too long, Photoshop may not be able to display all the
plug-ins in their appropriate menus. If so, newly installed plug-ins appear in the Filter > Other submenu.
Install a plug-in module
In Mac OS, you cannot run Photoshop in the Classic environment. Plug-ins originally intended to work on
Mac OS 9 won’t appear.
50
❖ Do one of the following:
• Toinstall an Adobe Systemsplug-in module, use the plug-in installer,if provided.In Windows, you can also install
or copy the module into the appropriate Plug-ins folder in the Photoshop program folder. In Mac OS, drag a copy
of the module to the appropriate Plug-Ins folder in the Photoshop program folder. Make sure that the files are
uncompressed.
• To install a third-party plug-in module, follow the installation instructions that came with the plug-in module. If
you cannot run a third-party plug-in, it may require a legacy Photoshop serial number.
Select an additional plug-ins folder
1 Choose Edit > Preferences > Plug-ins (Windows) or choose Photoshop > Preferences > Plug-ins (Mac OS).
2 Select Additional Plug-ins Folder.
3 Click Choose, and select a folder or directory from the list. Make sure that you do not select a location inside the
Plug-ins folder. To display the contents of a folder, double-click the directory (Windows) or click Open (Mac OS).
4 When you have highlighted the additional plug-ins folder, click OK (Windows) or Choose (Mac OS).
5 Restart Photoshop for the plug-ins to take effect.
Suppress the loading of plug-ins
❖ Add a tilde ~ character at the beginning of the plug-in name, folder, ordirectory. That file(or all files in the folder)
will be ignored by the application.
View information about installed plug-ins
❖ Do one of the following:
• (Windows) Choose Help > About Plug-in and choose a plug-in from the submenu.
Page 58

PHOTOSHOP CS3
User Guide
• (Mac OS) Choose Photoshop > About Plug-in, and then choose a plug-in from the submenu.
Recovery and undo
Use the Undo or Redo commands
The Undo and Redo commands let you undo or redo operations. You can also use the History palette to undo or
redo operations.
❖ Choose Edit > Undo or Edit > Redo.
If an operation can’t be undone, the command is dimmed and changes to Can’t Undo.
See also
“Work with the History palette” on page 52
Revert to the last saved version
❖ Choose File > Revert.
51
Note: Revert is added as a history state in the History palette and can be undone.
Restore part of an image to its previously saved version
❖ Do one of the following:
• Use the History Brush tool to paint with the selected state or snapshot on the History palette.
• Use the Eraser tool with the Erase To History option selected.
• Select the area you want to restore, and choose Edit > Fill. For Use, choose History, and click OK.
Note: Torestoretheimagewithasnapshotoftheinitialstateofthedocument,chooseHistoryOptionsfromthePalette
menu and make sure that the Automatically Create First Snapshot option is selected.
See also
“Erase with the Eraser tool” on page 328
Cancel an operation
❖ Hold down Esc until the operation in progress has stopped. In Mac OS, you can also press Command+period.
Receive notification when an operation is completed
A progress bar indicates that an operation is being performed. You can interrupt the operation or have the program
notify you when it has finished the operation.
1 Do one of the following:
• (Windows) choose Edit > Preferences > General.
• (Mac OS) choose Photoshop > Preferences > General.
2 Select Beep When Done.
Page 59

PHOTOSHOP CS3
User Guide
3 Click OK.
Work with the History palette
You can use the History palette to jump to any recent state of the image created during the current working session.
Each time you apply a change to an image, the new state of that image is added to the palette.
For example, if you select, paint, and rotate part of an image, each of those states is listed separately in the palette.
When you select one of the states, the image reverts to how it looked when that change was first applied. You can
then work from that state.
You can also use the History palette to delete image states and, in Photoshop, to create a document from a state or
snapshot.
To display the History palette, choose Window > History, or click the History palette tab.
A
B
52
C
D
Photoshop History palette
A. Sets the source for the history brush B. Thumbnail of a snapshot C. History state D. History state slider
Keep the following in mind when using the History palette:
• Program-wide changes, such aschanges topalettes, colorsettings, actions, and preferences,are notreflected in the
History palette, because they are not changes to a particular image.
• By default, the History palette lists the previous 20 states. You can change the number of remembered states by
setting a preference. Older states are automatically deleted to free more memory for Photoshop. To keep a
particular state throughout your work session, make a snapshot of the state.
• Onceyoucloseandreopenthedocument,allstatesandsnapshotsfromthelastworkingsessionareclearedfrom
the palette.
• By default, a snapshot of the initial state of the document is displayed at the top of the palette.
• Statesareaddedtothebottomofthelist.Thatis,theoldeststateisatthetopofthelist,themostrecentoneatthe
bottom.
• Each state is listed with the name of the tool or command used to change the image.
• By default, when you select a state, the states below it are dimmed. This way you can easily see which changes will
be discarded if you continue working from the selected state.
• By default, selecting a state and then changing the image eliminates all states that come after it.
• If you select a state and then change the image, eliminating the states that came after, you can use the Undo
command to undo the last change and restore the eliminated states.
Page 60

PHOTOSHOP CS3
User Guide
• By default, deleting a state deletes that state and those that came after it. If you choose the Allow Non-Linear
History option, deleting a state deletes only that state.
Revert to a previous image state
❖ Do any of the following:
• Click the name of the state.
• Choose Step Forward or Step Backward from the History palette menu or the Edit menu to move to the next or
previous state.
Delete one or more image states
❖ Do one of the following:
• Click the name of the state, and choose Delete from the History palette menu to delete that change and those that
came after it.
• Drag the state to the Delete icon to delete that change and those that came after it.
• Choose Clear History from the palette menu to delete the list of states from the History palette, without changing
the image. This option doesn’t reduce the amount of memory used by Photoshop.
• Hold down Alt (Windows) or Option (Mac OS), and choose Clear History from the palette menu to purge the list
of states without changing the image. If you get a message that Photoshop is low on memory, purging states is
useful, because the command deletes the states from the Undo buffer and frees up memory. You can’t undo the
Clear History command.
• Choose Edit > Purge > Histories to purge the list of states for all open documents. You can’t undo this action.
53
Create or replace a document with an image state
❖ Do one of the following:
• Drag a state or snapshot onto the New Document button . The history list for the newly created document
will be empty.
• Select a state or snapshot, and click the New Document button. The history list for the newly created document
will be empty.
• Selectastateorsnapshot,andchooseNewDocumentfromtheHistorypalettemenu.Thehistorylistforthenewly
created document will be empty.
• Drag a state onto an existing document.
To save one or more snapshots or image states for use in a later editing session, create a new file for each state you
save, and save each in a separate file. When you reopen your original file, plan to open the other saved files also.You
can drag each file’s initial snapshot to the original image to access the snapshots again from the original image’s History
palette.
Set history options
You can specify the maximum number of items to include in the History palette and set other options to customize
the palette.
1 Choose History Options from the History palette menu.
2 Select an option:
Automatically Create First Snapshot Automatically creates a snapshot of the initial state of the image when the
document is opened.
Page 61

PHOTOSHOP CS3
User Guide
Automatically Create New Snapshot When Saving Generates a snapshot every time you save.
Allow Non-Linear History Makes changes to a selected state without deleting the states that come after. Normally,
whenyouselectastateandchangetheimage,allstatesthatcomeaftertheselectedonearedeleted.Inthisway,the
History palette can display a list of the editing steps in the order that they were made. By recording states in a
nonlinear way, you can select a state, make a change to the image, and delete just that state. The change is appended
at the end of the list.
Show New Snapshot Dialog By Default ForcesPhotoshoptopromptyouforsnapshotnamesevenwhenyouusethe
buttons on the palette.
Make Layer Visibility Changes Undoable By default, turning layer visibility on or off is not recorded asa history step
and therefore can’t be undone. Select this option to include layer visibility changes in history steps.
Set Edit History Log options
You may need to keep careful track of what’s been done to a file in Photoshop, either for your own records, client
records, or legal purposes. The Edit History Log helps you keep a textual history of changes made to an image. You
can view the Edit History Log metadata using Adobe Bridge or the File Info dialog box.
You can choose to export the text to an external log file, or you can store the information in the metadata of edited
files. Storing many editing operationsas file metadata increases file size;such files may take longer thanusual to open
and save.
54
If you need to prove that the log file hasn’t been tampered with, keep the edit log in the file’s metadata, and then use
Adobe Acrobat to digitally sign the log file.
By default, history log data about each session is saved as metadata embedded in the image file. You can specify
where the history log data is saved and the level of detail contained in the history log.
1 Choose Edit > Preferences > General (Windows) or Photoshop > Preferences > General (Mac OS).
2 Click the History Log preference to toggle from on to off or vice versa.
3 In the History Log Options panel, choose one of the following options:
Metadata Saves the history log as metadata embedded in each file.
Text File Exports the history log to a text file. You are prompted to name the text file and choose a location in which
to store it.
Both Stores metadata in the file and creates a text file.
Note: If you want to save the text file in a different location or save another text file, click the Choose button, specify
where to save the text file, name the file if necessary, and click Save.
4 From the Edit Log Items menu, choose one of the following options:
Sessions Only Keeps a record of eachtime your start or quit Photoshop and each time youopen and close files (each
image’s filename is included). Does not include any information about edits made to the file.
Concise Includes the text that appears in the History palette in addition to the Sessions information.
Detailed IncludesthetextthatappearsintheActionspaletteinadditiontotheConciseinformation.Ifyouneeda
complete history of all changes made to files, choose Detailed.
Page 62

PHOTOSHOP CS3
User Guide
Make a snapshot of an image
TheSnapshotcommandletsyoumakeatemporarycopy(orsnapshot)ofanystateoftheimage.Thenewsnapshot
is added to the list of snapshots at the top of the History palette. Selecting a snapshot lets you work from that version
of the image.
Snapshots are similar to the states listed in the History palette, but they offer additional advantages:
• You can name a snapshot to make it easy to identify.
• Snapshots can be stored for an entire work session.
• You can compare effects easily. For example, you can take a snapshot before and after applying a filter. Then select
the first snapshot, and try the same filter with different settings. Switch between the snapshots to find the settings
you like best.
• With snapshots, you can recover your work easily. When you experiment with a complex technique or apply an
action, take a snapshot first. If you’re not satisfiedwith the results, you can select the snapshot to undo all the steps.
Note: Snapshots are not saved with the image—closing an image deletes its snapshots. Also, unless you select the Allow
Non-Linear History option, selecting a snapshot and changing the image deletes all of the states currently listed in the
History palette.
See also
“About blending modes” on page 343
55
“Create a brush and set painting options” on page 334
“Paint with the Art History Brush” on page 327
Create a snapshot
1
Select a state and do one of the following:
• To automatically create a snapshot, click the New Snapshot button on the History palette, or if Automatically
Create New Snapshot When Saving is selected in the history options, choose New Snapshot from the History
palette menu.
• To set options when creating a snapshot, choose New Snapshot from the History palette menu, or Alt-click
(Windows) or Option-click (Mac OS) the New Snapshot button.
2 Enter the name of the Snapshot in the Name text box.
3 Choose the snapshot contents from the From menu:
Full Document Makes a snapshot of all layers in the image at that state
Merged Layers Makes a snapshot that merges all layers in the image at that state
Current Layer Makes a snapshot of only the currently selected layer at that state
Work with snapshots
❖ Do one of the following:
• To select a snapshot, click the name of the snapshot or drag the slider at the left of the snapshot up or down to a
different snapshot.
• To rename a snapshot, double-click the snapshot and enter a name.
Page 63

PHOTOSHOP CS3
User Guide
• Todelete asnapshot, select the snapshot and either choose Delete from the palettemenu, click the Delete icon ,
or drag the snapshot to the Delete icon.
Paint with a state or snapshot of an image
The History Brush tool lets you paint a copy of one image state or snapshot into the current image window. This
tool makes a copy, or sample, of the image and then paints with it.
Forexample,youmightmakeasnapshotofachangeyoumadewithapaintingtoolorfilter(withtheFullDocument
option selected when you create the snapshot). After undoing the change to the image, you could use the History
Brush tool to apply the change selectively to areas of the image. Unless you select a merged snapshot, the History
Brush tool paints from a layer in the selected state to the same layer in another state.
The History Brush tool copies from one state or snapshot to another, but only at the same location. In Photoshop,
you can also paint with the Art History Brush tool to create special effects.
1 Select the History Brush tool .
2 Do one of the following in the options bar:
• Specify the opacity and blending mode.
• Choose a brush and set brush options.
3
IntheHistorypalette,clicktheleftcolumnofthestateorsnapshottobeusedasthesourcefortheHistoryBrushtool.
4 Drag to paint with the History Brush tool.
56
Memory and performance
Allocate RAM to Photoshop
Photoshop displays the RAM available to Photoshop and the ideal range of RAM for Photoshop (a percentage of the
total available RAM) in Performance preferences.
❖ In Performance preferences, enter the amount of RAM you want to allocate to Photoshop in the Let Photoshop
Use text box. Alternatively, drag the slider.
Assigning scratch disks
When your system does not have enough RAM to perform an operation, Photoshop uses a proprietary virtual
memory technology, also called scratch disks. A scratch disk is any drive or drive partition with free memory. By
default, Photoshop uses the hard drive on which the operating system is installed as the primary scratch disk.
Photoshop detects and displays all available internal disks in the Preferences panel. Using the Preferences panel, you
can enable other scratch disks to be used when the primary disk is full. Your primary scratch disk should be your
fastest hard disk; make sure it has plenty of defragmented space available.
The following guidelines can help you assign scratch disks:
• For best performance, scratch disks should be on a different drive than any large files you are editing.
• Scratch disks should be on a different drive than the one used for virtual memory.
• RAID disks/disk arrays are good choices for dedicated scratch disk volumes.
• Drives with scratch disks should be defragmented regularly.
Page 64

PHOTOSHOP CS3
User Guide
Change the scratch disk assignment
1 Do any of the following in the Scratch Disks area of Performance preferences:
• To change the scratch disk order, click the arrow buttons.
• To enable or disable a scratch disk, select or deselect the Active checkbox.
2 Click OK.
3 For the changes to take effect, you will need to restart Photoshop.
Enable 3D Acceleration (Adobe® Photoshop® CS3 Extended)
Enabling 3D acceleration lets you override software rendering of 3D layers.
❖ In Performance preferences, select Enable 3D Acceleration.
Specify history and cache settings
❖ In Performance preferences, do any of the following:
• To specify how many states the History palette displays by default, click the triangle on the History States menu
and drag the slider.
• To specify the cache level Photoshop uses, drag the Cache Level slider. You must restart Photoshop to have the
cache settings take effect.
57
Free memory
The Purge command lets you free memory used by the Undo command, the History palette, or the clipboard.
❖ Choose Edit > Purge, and choose the item type or buffer you want to clear. If it is already empty, the item type or
buffer is dimmed.
Note: The Purge command permanently clears from memory the operation stored by the command or buffer; Purge
cannot be undone. For example, choosing Edit > Purge > Histories deletes all history states from the History palette. Use
the Purge command when the amount of information in memory is so large that Photoshop performance is noticeably
affected.
Page 65

Chapter 3: Opening and importing images
Adobe® Photoshop® CS3 can open and import many types of graphic files. To work effectively, you should understand basic imaging concepts, and how to acquire, import, and resize images.
Photoshop images
About bitmap images
Bitmap images—technically called raster images—use a rectangular grid of picture elements (pixels) to represent
images. Each pixel is assigned a specific location and color value. When working with bitmap images, you edit pixels
rather than objects or shapes. Bitmap images are the most common electronic medium for continuous-tone images,
such as photographs or digital paintings, because they can more efficiently represent subtle gradations of shades and
color.
58
Bitmap images are resolution-dependent—that is, they contain a fixed number of pixels. As a result, they can lose
detail andappear jagged if they are scaled to high magnifications on-screen or ifthey are printed at alower resolution
than they were created for.
3:1
24:1
Example of a bitmap image at different levels of magnification
Bitmap images sometimes require large amounts of storage space, and often need to be compressed to keep file sizes
down when used in certain Creative Suite components. For instance, you compress an image file in its original application before you import it into a layout.
Note: In Adobe Illustrator, you can create bitmap effects in your artwork using filters, effects, and graphic styles.
See also
“About vector graphics” on page 58
About vector graphics
Vector graphics (sometimes called vector shapes or vector objects) are made up of lines and curves defined by mathematical objects called vectors, which describe an image according to its geometric characteristics.
Page 66

PHOTOSHOP CS3
User Guide
3:1
24:1
Example of a vector image at different levels of magnification
You can freely move or modify vector graphics without losing detail or clarity, because they are resolutionindependent—they maintain crisp edges when resized, printed to a PostScript printer, saved in a PDF file, or
imported into a vector-based graphics application. As a result, vector graphics are the best choice for artwork, such
as logos, that will be used at various sizes and in various output media.
The vector objects you create using the drawing and shape tools in Adobe Creative Suite are examples of vector
graphics. You can use the Copy and Paste commands to duplicate vector graphics between Creative Suite components.
See also
“About bitmap images” on page 58
59
Combining vector graphics and bitmap images
When combining vector graphics and bitmap images in a document, it’s important to remember that how your
artwork looks on-screen isn’t always how it will look in its final medium (whether commercially printed, printed on
a desktop printer, or viewed on the web). The following factors influence the quality of your final artwork:
Transparency Many effects add partially transparent pixels to your artwork. When your artwork contains trans-
parency, Photoshop performs a process called flattening before printing or exporting. In most cases, the default
flattening process produces excellent results. However, if your artwork contains complex, overlapping areas and you
require high-resolution output, you will probably want to preview the effects of flattening.
Image Resolution The number of pixels per inch (ppi) in a bitmap image. Using too low a resolution for a printed
image results in pixelation—output with large, coarse-looking pixels. Using too high a resolution (pixels smallerthan
what the output device can produce) increases the file size without increasing the quality of the printed output, and
slows the printing of the artwork.
Printer resolution and screen frequency The number of ink dots produced per inch (dpi) and the number of lines
per inch (lpi) in a halftone screen. The relationship between image resolution, printer resolution, and screen
frequency determines the quality of detail in the printed image.
Color channels
EveryPhotoshopimagehasoneormorechannels, each storing information about color elements in the image. The
number of default color channels in an image depends on its color mode. By default, images in Bitmap, Grayscale,
Duotone, and Indexed Color mode have onechannel; RGB and Lab images have three; and CMYK images have four.
You can add channels to all image types except Bitmap mode images. For more information, see “Color modes” on
page 110.
Channels in color images are actually grayscale images that represent each of the color components of an image. For
example, an RGB image has separate channels for red, green, and blues color values.
Page 67

PHOTOSHOP CS3
User Guide
In addition to color channels, alphachannels, can be added to an image for storing and editing selections as masks,
andspotcolorchannelscanbeaddedtoaddspotcolorplatesforprinting.Formoreinformation,see“Channels”on
page 264.
See also
“About masks and alpha channels” on page 269
“About spot colors” on page 501
Bit depth
Bit depth specifies how much color information is available for each pixel in an image. The more bits of information
per pixel, the more available colors and more accurate color representation. For example, an image with a bit depth
8
of 1 has pixels with two possible values: black and white. An image with a bit depth of 8 has 2
Grayscale mode images with a bit depth of 8 have 256 possible gray values.
RGB images are made ofthree color channels.An 8-bit per pixel RGB imagehas 256 possible values for each channel
which means it has over 16 million possible color values. RGB images with 8-bits per channel (bpc) are sometimes
called 24-bit images (8 bits x 3 channels = 24 bits of data for each pixel).
In addition to 8-bpc images, Photoshop can also work with images that contain 16-bpc or 32-bpc. Images with
32-bpc are also known as high dynamic range (HDR) images.
, or256, possible values.
60
See also
“About high dynamic range images” on page 77
Photoshop support for 16-bit images
Photoshop provides the following support for working with 16-bpc images:
• Working in Grayscale, RGB Color, CMYK Color, Lab Color, and Multichannel, modes.
• All tools in the toolbox, except the Art History Brush tool, can be used with 16-bpc images.
• All color and tonal adjustment commands, except Variations, are available.
• You can work with layers, including adjustment layers, in 16-bpc images.
• Some filters, including Liquify, can be used with 16-bpc images.
To take advantage of certain Photoshop features, such as Extract, Pattern Maker, and some filters, you can convert a
16-bpcimagetoan8-bpcimage.It’sbestifyoudoaSaveAsandconvertacopyoftheimagefilesotheoriginalfile
retains the full 16-bpc image data.
Convert between bit depths
❖ Do any of the following:
• To convert between 8 bpc and 16 bpc, Choose Image > Mode > 16 Bits/Channel or 8 Bits/Channel.
• To convert from 8 bpc or 16 bits to 32 bpc, choose Image > Mode > 32 Bits/Channel.
See also
“Convert from 32 bits to 8 or 16 bpc” on page 81
Page 68

PHOTOSHOP CS3
User Guide
Image size and resolution
About pixel dimensions and resolution
The pixel dimensions (image size or height and width) of a bitmap image is a measure of the number of pixels along
an image’s width and height. Resolution is the fineness of detail in a bitmap image and is measured in pixels per inch
(ppi). The more pixels per inch, the greater the resolution. Generally, an image with a higher resolution produces a
better printed image quality.
61
Same image at 72-ppi and 300-ppi; inset zoom 200%
The combination of pixel dimension and resolution determine the amount of image data. Unless an image is
resampled,theamountofimagedataremainsthesameasyouchangeeitherthepixeldimensionorresolution.Ifyou
change the resolution of a file, its width and height change accordingly to maintain the same amount of image data.
And, vice versa. For more information, see “Resampling” on page 64.
In Photoshop, you can see the relationship between image size and resolution in the Image Size dialog box (choose
Image > Image Size). Deselect Resample Image, because you don’t want to change the amount of image data in your
photo. Then change the width or the height or the resolution. As you change one value, the other two values change
accordingly.
Page 69

PHOTOSHOP CS3
C
User Guide
A
62
B
Pixel dimensions equal document (output) size times resolution.
A. Original dimensions and resolution B. Decreasing the resolution without changing pixel dimensions (no resampling) C. Decreasing the
resolution at same document size decreases pixel dimensions (resampling).
Display the current image size quickly
If you want to quickly display a document’s current image size, use the information box at the bottom of the
document window.
❖ Press Alt (Windows) or Option (Mac OS), position the pointer over the file information box, and hold down the
mouse button.
File size
The file size of an image is the digital size of the image file, measured in kilobytes (K), megabytes (MB), or gigabytes
(GB). Filesize is proportional to the pixel dimensions ofthe image. Images with more pixelsmay produce more detail
atagivenprintedsize,buttheyrequiremorediskspacetostoreandmaybeslowertoeditandprint.Imageresolution
thus becomes a compromise between image quality (capturing all the data you need) and file size.
Another factor that affects file size is file format. Because of the varying compression methods used by GIF, JPEG,
and PNG file formats, file sizes can vary considerably for the same pixel dimensions. Similarly, color bit-depth and
the number of layers and channels in an image affect file size.
Photoshop supports a maximum pixel dimension of 300,000 by 300,000 pixels per image. This restriction places
limits on the print size and resolution available to an image.
Page 70

PHOTOSHOP CS3
User Guide
About monitor resolution
Your monitor’s resolution is described in pixel dimensions. For example, if your monitor resolution and your photo’s
pixel dimensions are the same size, the photo will fill the screen when viewed at 100%. How large an image appears
on-screen depends on a combination of factors—the pixel dimensions of the image, the monitor size, and the
monitor resolution setting. In Photoshop,you can change the imagemagnification on-screen, so you can easily work
with images of any pixel dimensions.
20"
15"
63
832 x 624 / 640 x 480
A 620- by 400-pixel image displayed on monitors of various sizes and resolutions.
1024 x 768 / 640 x 480
When preparing images for viewing on-screen, you should consider the lowest monitor resolution that your photo
is likely to be viewed on.
About printer resolution
Printer resolution is measured in ink dots per inch, also known as dpi. Generally, the more dots per inch, the finer
the printed output you’ll get. Most inkjet printers have a resolution of approximately 720 to 2880 dpi. (Technically,
inkjet printers produce a microscopic spray of ink, not actual dots like imagesetters or laser printers.)
Printer resolution isdifferent from,but related to image resolution.Toprint a high quality photo on an inkjet printer,
an image resolution of at least 220 ppi should provide good results.
See also
“About desktop printing” on page 483
“Preparing images for press” on page 491
Screen frequency and printer resolution
Screen frequency is the number of printer dots or halftone cells per inch used to print grayscale images or color
separations. Also known as screen ruling or line screen, screen frequency is measured in lines per inch (lpi)—or lines
of cellsper inch in a halftone screen.The higher theresolution ofthe output device, the finer (higher) ascreen ruling
you can use.
The relationship between image resolution and screen frequency determines the quality of detail in the printed
image. To produce a halftone image of the highest quality, you generally use an image resolution that is from 1.5 to
at most 2 times the screen frequency. But with some images and output devices, alower resolution can producegood
results. To determine your printer’s screen frequency, check your printer documentation or consult your service
provider.
Note: Some imagesetters and 600-dpi laser printers use screening technologies other than halftoning. If you are printing
an image on a nonhalftone printer, consult your service provider or your printer documentation for the recommended
image resolutions.
Page 71

PHOTOSHOP CS3
User Guide
64
A
C D
Screen frequency examples
A. 65 lpi: Coarse screen typically used to print newsletters and grocery coupons B. 85 lpi: Average screen typically used to print newspapers
C. 133 lpi: High-quality screen typically used to print four-color magazines D. 177 lpi: Very fine screen typically used for annual reports and
images in art books
B
Resampling
Resampling is changing the amount of image data as you change either the pixel dimensions or the resolution of an
image. When you downsample (decrease the number of pixels), information is deleted from the image. When you
resample up (increase the number of pixels, or upsample), new pixels are added. You specify an interpolation method
to determine how pixels are added or deleted.
A
B
C
Resampling pixels
A. Downsampled B. Original C. Resampled up (selected pixels displayed for each set of images)
Keep inmind that resampling can result in poorer image quality. For example, when you resample an imageto larger
pixel dimensions, theimage loses somedetail and sharpness.Applying the Unsharp Mask filter to a resampled image
can help refocus the image details.
Page 72

PHOTOSHOP CS3
User Guide
You can avoid the need for resampling by scanning orcreating the image at a sufficiently high resolution. If you want
to preview the effects of changing pixel dimensions on-screen or to print proofs at different resolutions, resample a
duplicate of your file.
Photoshop resamples images using an interpolation method to assign color values to any new pixels based on the
color values of existing pixels. You can choose which method to use in the Image Size dialog box.
Nearest Neighbor A fast but less precise method that replicates the pixels in an image. This method is for use with
illustrations containing edges that are not anti-aliased, to preserve hard edges and produce a smaller file. However,
this method can produce jagged effects, which become apparent when you distort or scale an image or perform
multiple manipulations on a selection.
Bilinear A method that adds pixels by averaging the color values of surrounding pixels. It produces medium-quality
results.
Bicubic A slowerbut more precise method based on anexamination of the values of surrounding pixels. Usingmore
complex calculations, Bicubic produces smoother tonal gradations than Nearest Neighbor or Bilinear.
Bicubic Smoother A good method for enlarging images based on Bicubic interpolation but designed to produce
smoother results.
Bicubic Sharper A good method for reducing the size of an image based on Bicubic interpolation with enhanced
sharpening. This method maintains the detail in a resampled image. If Bicubic Sharper oversharpens some areas of
an image, try using Bicubic.
65
You can specify a default interpolation method to use whenever Photoshop resamples image data. Choose Edit >
Preferences > General (Windows) or Photoshop > Preferences > General (Mac OS), and then choose a method from
the Image Interpolation Methods menu.
See also
“Sharpen images” on page 207
Change pixel dimensions of an image
Changing an image’s pixel dimensions affects not only its on-screen size but also its image quality and its printed
characteristics—either its printed dimensions or its image resolution.
1 Choose Image > Image Size.
2 To maintain the current ratio of pixel width to pixel height, select Constrain Proportions. This option automati-
cally updates the width as you change the height, and vice versa.
3 Under Pixel Dimensions, enter values for Width and Height. To enter values as percentages of the current dimen-
sions, choose Percent as the unit of measurement. The new file size for the image appears at the top of the Image Size
dialog box, with the old file size in parentheses.
4 Make sure that Resample Image is selected, and choose an interpolation method.
5 If your image haslayers with styles applied tothem, select Scale Styles to scale the effects inthe resized image. This
option is available only if you selected Constrain Proportions.
6 When you finish setting options, click OK.
For best results when you produce a smaller image, downsample and apply the Unsharp Mask filter. To produce a
larger image, rescan the image at a higher resolution.
Page 73

PHOTOSHOP CS3
User Guide
Change the print dimensions and resolution
When creating an image for print media, it’s useful to specify image size in terms of the printed dimensions and the
image resolution. These two measurements, referred to as the document size, determine the total pixel count and
therefore the file size of the image; document size also determines the base size at which an image is placed into
another application. You can further manipulate the scale of the printed image using the Print command; however,
changes you make using the Print command affect only the printed image, not the document size of the image file.
If you turn on resampling forthe image, you can change print dimensions and resolution independently (andchange
the total number of pixels in the image). If you turn off resampling, you can change either the dimensions or the
resolution—Photoshop adjusts the other value automatically to preserve the total pixel count. For the highest print
quality, it’s generally best to change the dimensions and resolution first, without resampling. Then resample only as
necessary.
1 Choose Image > Image Size.
2 Change the print dimensions, image resolution, or both:
• To change only the print dimensions or only the resolution and adjust the total number of pixels in the image
proportionately, select Resample Image and then choose an interpolation method.
• To change the print dimensions and resolution without changing the total number of pixels in the image, deselect
Resample Image.
3 To maintain the current ratio of image width to image height, select Constrain Proportions. This option automat-
ically changes the width as you change the height, and vice versa.
4 Under Document Size, enter new values for the height and width. If desired, choose a new unit of measurement.
NotethatforWidth,theColumnsoptionusesthewidthandguttersizesspecifiedintheUnits&Rulerspreferences.
5 For Resolution, enter a new value. If desired, choose a new unit of measurement.
66
To restore the initial values displayed in the Image Size dialog box, hold down Alt (Windows) or Option (Mac OS),
and click Reset.
See also
“Position and scale images” on page 486
“Print images” on page 484
“Specify columns for an image” on page 42
“Selecting halftone screen attributes” on page 493
Determine a suggested resolution for an image
If you planto print your image usinga halftone screen,the range of suitable imageresolutions depends on the screen
frequency of your output device. Photoshop can determine a recommended image resolution based on the screen
frequency of your output device.
Note: Ifyourimageresolutionismorethan2.5timesthescreenruling,analertmessageappearswhenyoutrytoprint
the image. This means that the image resolution is higher than necessary for the printer. Save a copy of the file, and then
reduce the resolution.
1 Choose Image > Image Size.
2 Click Auto.
Page 74

PHOTOSHOP CS3
User Guide
3 For Screen,enter the screen frequency for the output device. If necessary,choose a different unit of measurement.
Note that the screen value is used only to calculate the image resolution, not to set the screen for printing.
Note: To specify the halftone screen ruling for printing, you must use the Halftone Screens dialog box, accessible through
the Print command.
4 For Quality, select an option:
Draft Produces a resolution that is the same as the screen frequency (no lower than 72 pixels per inch).
Good Produces a resolution 1.5 times the screen frequency.
Best Produces a resolution 2 times the screen frequency.
View the print size on-screen
❖ Do one of the following:
• Choose View > Print Size.
• Select the Hand tool or Zoom tool, and click Print Size in the options bar.
The image is redisplayed in its approximate printed size, as specified in the Document Size area of the Image Size
dialog box. The size and resolution of your monitor affect the on-screen print size.
67
Acquiring images from cameras and scanners
Acquiring digital images from cameras
You can copy images to your computer by connecting your camera or a media card reader to your computer.
• Use the Get Photos From Camera commandin Adobe® Bridge® CS3 to download photos, and toorganize, rename,
and apply metadata to them.
• If your camera or the card reader appears as a drive on your computer, copy images directly to your hard disk or
into Adobe Bridge.
• Use the software that came with your camera, Windows Image Acquisition (WIA), or Image Capture (Mac OS).
For more information on using Windows Image Acquisition or Image Capture, see your computer documentation.
For a video on importing camera files, see www.adobe.com/go/vid0005.
Import images from a digital camera using WIA (Windows only)
Certain digital cameras import images using Windows Image Acquisition (WIA) support. When you use WIA,
Photoshop works with Windows and your digital camera or scanner software to import images directly into
Photoshop.
1 Choose File > Import > WIA Support.
2 Choose a destination in which to save your image files on your computer.
3 Make sure that Open Acquired Images in Photoshop is selected. If you are importing a large number of images,
or if you want to edit the images later, deselect Open Acquired Images.
4 To save the imported images directly into a folder whose name is the current date, select Unique Subfolder.
Page 75

PHOTOSHOP CS3
User Guide
5 Click Start.
6 Select the digital camera from which to import images.
Note: If the name of your camera does not appear in the submenu, verify that the software and drivers were properly
installed and that the camera is connected.
7 Choose the image or images you want to import:
• Click the image from the list of thumbnails to import the image.
• Hold down Shift and click multiple images to import them at the same time.
• Click Select All to import all available images.
8 Click Get Picture to import the image.
Importing scanned images
There are different ways to bring images into Photoshop from a scanner. Make sure to install the software necessary
for your scanner. Some scanner software lets you designate Photoshop as the external editor or viewer for an image
after ascanning is completed. Other scanning software saves theimage as a file on your computerthat can be opened
in Photoshop.
Note: Scanner drivers are supported by the scanner manufacturer, not Adobe® Systems Incorporated. If you have
problems with scanning, make sure that you are using the latest version of the scanner driver.
68
You can also import scanned images directly from any scanner that has a Photoshop-compatible plug-in module or
that supports the TWAIN interface. To import the scan using a plug-in module, choose the scanner name from the
File > Import submenu. See your scanner documentation for instructions on installing the scanner plug-in.
If your scanner does not have Photoshop-compatible scanner driver, import the scan using the TWAIN interface.
If you can’timport the scan using the TWAIN interface, use thescanner manufacturer’s software to scan your images,
and save the images as TIFF, PICT, or BMP files. Then open the files in Photoshop.
See also
“About plug-in modules” on page 50
“Determine scan resolution for printing” on page 497
Import an image using the TWAIN interface
TWAIN is a cross-platform interface for acquiring images captured by certain scanners, digital cameras, and frame
grabbers. The manufacturer of the TWAIN device must provide a Source Manager and TWAIN data source for your
device to work with Photoshop.
You mustinstall the TWAIN device and its software and restart your computerbefore you can useit to import images
into Photoshop. See the documentation provided by your device manufacturer for installation information.
❖ Choose File > Import, and choose the device you want to use from the submenu.
Import images from a scanner using WIA Support
1
Choose File > Import > WIA Support.
2 Choose a destination on your computer for saving your image files.
3 Click Start.
Page 76

PHOTOSHOP CS3
User Guide
4 Make sure that Open Acquired Images in Photoshop is selected. If you have a large number of images to import,
or if you want to edit the images at a later time, deselect it.
5 Make sure that Unique Subfolder is selected if you want to save the imported images directly into a folder whose
name is the current date.
6 Select the scanner that you want to use.
Note: If the name of your scanner does not appear in the submenu, verify that the software and drivers were properly
installed and that the scanner is connected.
7 Choose the kind of image you want to scan:
Color Picture Uses the default settings for scanning color images.
Grayscale Picture Uses the default settings for scanning grayscale images.
Black And White Picture or Text Uses the default settings.
Adjust The Quality Of The Scanned Picture Uses custom settings.
8 Click preview to view the scan. If necessary, drag the handles of the bounding box to adjust the size of the crop.
9 Click Scan.
10 The scanned image is saved in BMP format.
69
Creating, opening, and importing images
Create a new image
1 Choose File > New.
2 In the New dialog box, type a name for the image.
3 (Optional) Choose document size from the Preset menu.
Note: To create a new document with the pixel dimensions set for a specific device, click the Device Central button.
4 Set the width and height by choosing a preset from the Size menu or entering values in the Width and Height text
boxes.
Tomatchthewidth,height,resolution,colormode,andbitdepthofthenewimagetothatofanyopenimage,choose
a filename from the bottom section of the Preset menu.
5 Set the Resolution, Color Mode, and bit depth.
If you’ve copied a selection to the clipboard, the image dimensions and resolution are automatically based on that
image data.
6 Select a canvas color option:
White Fills the background or first layer with white, the default background color.
Background Color Fills the background or first layer with the current background color.
Transparent Makes the first layer transparent, with no color values. The resulting document hasa single, transparent
layer as its contents.
7 (Optional) If necessary, click the Advanced button to display more options.
Page 77

PHOTOSHOP CS3
User Guide
8 (Optional) Under Advanced, choose a color profile, or choose Don’t Color Manage This Document. For Pixel
Aspect Ratio, choose Square unless you’re using the image for video. In that case, choose another option to use nonsquare pixels.
9
When you finish, you can save the settings as a preset by clicking Save Preset, oryou can click OK to open the new file.
See also
“Color modes” on page 110
“About creating images for video” on page 549
“About foreground and background colors” on page 118
Adobe Version Cue
Adobe® Version Cue® is a file-version manager included with Adobe Creative Suite 3 Design, Web, and Master
Collection editions that consists of two pieces: the Version Cue Server and Version Cue connectivity. The
Version Cue Server hosts Version Cue projects and PDF reviews, and can be installed locally or on a centralized
computer. Version Cue connectivity enables you to connect to Version Cue Servers, and is included with all
Version Cue-enabled components (Adobe Acrobat®, Adobe Flash®, Adobe Illustrator®, Adobe InDesign®, Adobe
InCopy®, Adobe Photoshop®, and Adobe Bridge).
70
Use Version Cue to track changes to a file as you work on it, and to enable workgroup collaboration such as file
sharing, version control, and online reviews. You can use Version Cue ina single Version Cue-enabledCreative Suite
component, such as Photoshop, or across multiple components, such as Photoshop, Flash, and Illustrator.
You access Version Cue features by way of the Adobe dialog box or through Adobe Bridge, depending on whether
you are using Version Cue-enabled software and whether or not you have installed a Creative Suite software set (for
example, Adobe Creative Suite 3 Design Premium).
Version Cue handles the following tasks:
• Creating versions of your files
• Enabling workgroup collaboration (file sharing, version control, the ability to check files in and out)
• Organizing files into private or shared projects
• Providing thumbnails so you can browse and view files
• Organizing data so you can view and search on file information, version comments, and file status
• Creating and managing user access, projects, and PDF reviews by way of Version Cue Server Administration
Open files
You can open files using the Open command and Open Recent command. You can also open files into Photoshop
from Adobe Bridge or Adobe® Photoshop® Lightroom™.
When opening certain files, such as camera raw and PDF, you specify settings and options in a dialog box before the
files completely open in Photoshop.
In addition to still images, Photoshop® CS3 Extended users can open and edit video and image sequence files. For
more information, see “Import video files and image sequences (Photoshop Extended)” on page 554.
Note: Photoshop uses plug-in modules to open andimport many file formats. If a file format does not appear in the Open
dialog box or in the File > Import submenu, you may need to install the format’s plug-in module.
Page 78

PHOTOSHOP CS3
User Guide
Sometimes Photoshop may not be able to determine the correct format for a file. This can happen, for example,
because the file has been transferred between two operating systems. Sometimes a transfer between Mac OS and
Windows can cause the file format to be mislabeled. In such cases, you must specify the correct format in which to
open the file.
You can retain (where possible) layers, masks, transparency, compound shapes, slices, image maps, and editable type
when bringing your Illustrator art into Photoshop. In Illustrator, export the art in the Photoshop (PSD) file format.
If your Illustrator art contains elements that Photoshop doesn’t support, the appearance of the artwork is preserved, but
the layers are merged and the artwork is rasterized.
See also
“About plug-in modules” on page 50
“Processing images with Camera Raw” on page 87
Open a file using the Open command
1
Choose File > Open.
2 Selectthenameofthefileyouwanttoopen.Ifthefiledoesnotappear,selecttheoptionforshowingallfilesfrom
the Files Of Type (Windows) or Enable (Mac OS) pop-up menu.
3 Click Open. In some cases, a dialog box appears, letting you set format-specific options.
71
Note: If a color profile warning message appears, specify whether to use embedded profile as the working space, convert
the document color to working space, or reverse the embedded profile. For more information, see “Color-managing
imported images” on page 134.
Open a recently used file
❖ Choose File > Open Recent, and select a file from the submenu.
Note: To specify the number of files listed in the Open Recent menu, change the Recent File List Contains option in the
File Handling preferences. Choose Edit > Preferences > File Handling (Windows), or Photoshop > Preferences > File
Handling (Mac OS).
Specify the file format in which to open a file
If a file was saved with an extension that doesn’t match its true format (for example, a PSD file saved with a .gif
extension), or has no extension, Photoshop may not be able to open the file. Selecting the correct format will allow
Photoshop to recognize and open the file.
❖ Do one of the following:
• (Windows)ChooseFile>OpenAs,andselectthefileyouwanttoopen.Thenchoosethedesiredformatfromthe
Open As pop-up menu, and click Open.
• (Mac OS) Choose File > Open, and choose All Documents from the Show pop-up menu. Then select the file you
want to open, choose the desired file format from the Format pop-up menu, and click Open.
Note: If the file does not open, then the chosen format may not match the file’s true format, or the file may be damaged.
Open PDF files
AdobePortableDocumentFormat(PDF)isaversatilefileformatthatcanrepresentbothvectorandbitmapdata.It
has electronic document search and navigation features. PDF is the primary format for Adobe Illustrator and Adobe
Acrobat.
Page 79

PHOTOSHOP CS3
User Guide
Some PDF files contain a single image, and others contain multiple pages and images. When you open a PDF file in
Photoshop, you can choose which pages or images to open and specify rasterization options.
You can also import PDF data using the Place command, the Paste command, and the drag-and-drop feature. The
page or image is placed on a separate layer as a Smart Object.
Note: The following procedure is only for opening generic PDF files in Photoshop. You don’t need to specify options in
the Import PDF dialog box, when opening Photoshop PDF files.
1 Do one of the following:
• (Photoshop) Choose File > Open.
• (Bridge) Select the PDF file and choose File > Open With > Adobe Photoshop CS3. Skip to step 3.
2 In the Open dialog box, select the name of the file, and click Open.
3 Under Select in the Import PDF dialog box, select Pages or Images, depending on what elements of the PDF
document you want to import.
4 Click the thumbnails to select the pages or images you want to open. Shift-click to select more than one page or
image. The number of selected items appears under the preview window. If you’re importing images, skip to step 8.
Note: Use the Thumbnail Size menu to adjust the thumbnail view in the preview window. The Fit Page option fits one
thumbnail in the preview window. A scroll bar appears if there are multiple items.
72
5 Togivethenewdocumentaname,typeitintheNametextbox.Ifyou’reimportingmorethanonepageorimage,
multiple documents open with the base name followed by a number.
6 Under Page Options, choose from the Crop To menu to specify what part of the PDF document to include:
Bounding Box Crops to the smallest rectangular region that includes all the text and graphics of the page. This
option eliminates extraneous white space and any document elements outside the Trim Box.
Note: Bounding Box will not crop white space that is part of a background created by the source application.
Media Box Crops to the original size of the page.
Crop Box Crops to the clipping region (crop margins) of the PDF file.
Bleed Box Crops to the region specified in the PDF file for accommodating limitations inherent in production
processes such as cutting, folding, and trimming.
Trim Box Crops to the region specified for the intended finished size of the page.
Art Box Crops to the region specified in the PDF file for placing the PDF data into another application.
7 Under Image Size, (if necessary) enter values for Width and Height:
• To preserve the aspect ratio of the pages as they’re scaled to fit within the rectangle defined by the Width and
Height values, select Constrain Proportions.
• To scale the pages exactly to the Width and Height values, deselect Constrain Proportions. Some distortion might
occur when the pages are scaled.
When more than one page is selected, the Width and Height text boxes display the maximum width and height
values of the selected pages. All pages are rendered at their original size if Constrain Proportions is selected and you
don’t change the Width and Height values. Changing the values will scale all pages proportionately as they're
rasterized.
8 Specify the following options under Image Size:
Resolution Sets the resolution for the new document. See also “About pixel dimensions and resolution” on page 61.
Page 80

PHOTOSHOP CS3
User Guide
Mode Sets the color mode for the new document. See also “Color modes” on page 110.
Bit Depth Sets the bit depth for the new document. See also “Bit depth” on page 60.
The Width and Height values plus the Resolution determine the final pixel dimension of resulting document.
9 To suppress color profile warnings, select Suppress Warning.
10 Click OK.
See also
“PDF” on page 464
“About Smart Objects” on page 309
“About placing files” on page 74
“Copy between applications” on page 260
Open an EPS file
Encapsulated PostScript (EPS) can represent both vector and bitmap data and is supported by virtually all graphic,
illustration, and page-layout programs. Adobe applications that produce PostScript artwork include Adobe
Illustrator, Adobe® Dimensions®, and Adobe® Streamline™. When you open an EPS file containing vector art, it is
rasterized—the mathematically defined lines and curves of the vector artwork are converted into the pixels or bits of
a bitmap image.
73
You can also bring PostScript artwork into Photoshop using the Place command, the Paste command, and the dragand-drop feature.
1 Choose File > Open.
2 Select the file you want to open, and click Open.
3 Indicate the desired dimensions, resolution, and mode. To maintain the same height-to-width ratio, select
Constrain Proportions.
4 To minimize jagged lines at the edges of artwork, select Anti-aliased.
See also
“About placing files” on page 74
“Copy between applications” on page 260
Open a Photo CD file
You can open Kodak Photo CD (PCD) files, including high-resolution files from Pro Photo CD discs. You cannot
save files in PCD format from Photoshop.
Note: You can find the PhotoCD plug-in on the Photoshop CS3 DVD (Goodies/Optional Plug-Ins/Kodak PhotoCD. The
ReadMe included in the DVD mentions where to copy the PhotoCD plug-ins and the color profiles.
1 Choose File > Open.
2 Select the PCD file you want to open, and click Open. If the file does not appear, select the option for showing all
files from the Files Of Type (Windows) or Show (Mac OS) menu.
Page 81

PHOTOSHOP CS3
User Guide
3 Select options for the source image:
Pixel Size Specifies the pixel dimensions of the image. Keep in mind that the on-screen size of the opened image
depends on both the pixel size and resolution you choose.
Profile Specifies a device profile for color management.
4 Select options for the destination image:
Resolution Specifies the resolution of the opened image.
Color Space Specifies a color profile for the opened image.
Landscape or Portrait Specifies the orientation of the opened image.
Import PICT files and resources (Mac OS)
You can import object-oriented PICT files (such as those created with MacDraw and Canvas) as smooth-edged, or
anti-aliased, images. In Photoshop, the PICT Resource module lets you read PICT resources from a file—for
example, from another application.
Importing PICT files (Mac OS)
❖ Choose File > Import > Anti-aliased PICT.
74
Because the entire PICT file must be held in memory for this module to operate, you may not be able to use the
module with large PICT files.
The Anti-aliased PICT dialog box indicates the current file size and dimensions. To change the image dimensions,
enter new values for Width and Height. The file size is then updated. To maintain image proportions, select
Constrain Proportions.
You can choose Grayscale or RGB color mode for an anti-aliased PICT file.
Importing PICT resources (Mac OS)
❖ Choose File > Import > PICT Resource.
To preview aresource, clickPreview. Click the arrows to stepforward and backward throughthe resources. Note that
the number displayed for Resource refers to the resource’s position in ascending order in the resource fork and not
to the resource’s identification number.
Note: You can also open a file in the PICT Resource file format by choosing File > Open, choosing All Documents from
the Show pop-up menu, selecting the file you want to open, choosing PICT Resource from the Format pop-up menu, and
clicking Open. However, the Open command automatically opens the first resource in the file and does not display any
other PICT resources in the file.
Placing files
About placing files
The Place command adds a photo, art, or any Photoshop-supported file as a Smart Object to your document. Smart
Objects can be scaled, positioned, skewed, rotated, or warped without degrading the image.
Page 82

PHOTOSHOP CS3
User Guide
See also
“About Smart Objects” on page 309
Place a file in Photoshop
1 Open the Photoshop document that is the destination for the placed art or photo.
2 Do one of the following:
• (Photoshop) Choose File > Place, select the file you want to place, and click Place.
• (Bridge) Select the file and choose File > Place > In Photoshop.
3 If you are placing a PDF or Illustrator (AI) file, the Place PDF dialog box appears. Select the page or image you
want to place, set the Crop options, and click OK. For more information on the Place PDF dialog box options, see
“Place PDF or Illustrator files in Photoshop” on page 76.
TheplacedartworkappearsinsideaboundingboxatthecenterofthePhotoshopimage.Theartworkmaintainsits
original aspect ratio; however, if the artwork is larger than the Photoshop image, it is resized to fit.
Note: In addition to the Place command, you can also add Adobe Illustrator art as a Smart Object by copying and
pastingtheartfromIllustratorintoaPhotoshopdocument.See“PasteAdobeIllustratorartintoPhotoshop”onpage76.
4 (Optional) Reposition or transform the placed artwork by doing any of the following:
• To reposition the placed art, position the pointer inside the bounding box of the placed artwork and drag, or in
the options bar, enter a value for X to specify the distance between the center point of the placed artwork and the
left edge of the image. Enter a value for Y to specify the distance between the center point of the placed artwork
and the top edge of the image.
• To scale the placed art, drag one of the corner handles of the bounding box or enter values for W and H in the
options bar. When dragging, hold down the Shift key to constrain proportions.
• To rotate the placed art, position the pointer outside thebounding box (the pointer turnsinto a curved arrow) and
drag, or enter a value (in degrees) for the Rotation option in the options bar. The artwork rotates around the
center point of the placed artwork. To adjust the center point, drag it to a new location, or click a handle on the
Center Point icon in the options bar.
• To skew the placed art, holddown Ctrl (Windows) orCommand (Mac OS) and drag aside handle of thebounding box.
• To warp the placed art, choose Edit > Transform > Warp and then choose a warp from the Warp Style pop-up
menu in the options bar.
75
If you choose Custom from the Warp Style pop-up menu, drag the control points, a segment of the bounding box or
mesh, or an area within the mesh to warp the image.
5 If you’re placing a PDF, EPS, or Adobe Illustrator file, set the Anti-alias option in the options bar as desired. To
blend edgepixels duringrasterization, select the Anti-aliasoption. To producea hard-edgedtransition betweenedge
pixels during rasterization, deselect the Anti-alias option.
6 Do one of the following:
• Click Commit in the options bar or press Enter (Windows) or Return (Mac OS) to committhe placed artwork
to a new layer.
• Click Cancel in the options bar, or press Esc to cancel the placement.
Page 83

PHOTOSHOP CS3
User Guide
See also
“Scale, rotate, skew, distort, apply perspective, or warp” on page 214
“Warp an item” on page 217
Place PDF or Illustrator files in Photoshop
WhenyouplaceaPDForAdobeIllustratorfile,usethePlacePDFdialogboxtosetoptionsforplacingtheartwork.
1 With the destination Photoshop document open, place a PDF or Adobe Illustrator file.
2 Under Select in the Place PDF dialog box, select Page or Image, depending on what elements of the PDF
document you want to import. If the PDF file has multiple pages or images, click the thumbnail of the page or file
you want to place.
Note: Use the Thumbnail Size menu to adjust the thumbnail view in the preview window. The Fit Page option fits one
thumbnail in the preview window. A scroll bar appears if there are multiple items.
3 Under Options, choose from the Crop To menu to specify what part of the PDF or Illustrator (AI) document to
include:
Bounding Box Crops to the smallest rectangular region that includes all the text and graphics of the page. This
option eliminates extraneous white space.
76
Media Box Crops to the original size of the page.
Crop Box Crops to the clipping region (crop margins) of the PDF file.
Bleed Box Crops to the region specified in the PDF file for accommodating limitations inherent in production
processes such as cutting, folding, and trimming.
Trim Box Crops to the region specified for the intended finished size of the page.
Art Box Crops to the region specified in the PDF file for placing the PDF data into another application.
4 Click OK to close the Place PDF dialog box.
5 If necessary, set any positioning, scaling, skewing, rotating, warping, or anti-aliasing options in the options bar.
6 Click Commit to place the artwork as a Smart Object on a new layer of the destination document.
Paste Adobe Illustrator art into Photoshop
You can copy art from Adobe Illustrator and paste it into a Photoshop document.
1 In Adobe Illustrator, specify preferences for the copy-and-paste behavior:
• Toautomatically rasterize the art when pasting it intoa Photoshop document, turn off thePDF and the AICB (No
Transparency Support) options in the File Handling & Clipboard preferences.
• To paste the artas a Smart Object, rasterized image, path, or shape layer,turn on the PDF andthe AICB (No Trans-
parency Support) options in the File Handling & Clipboard preferences.
2 Open a file in Adobe Illustrator, select the art you want to copy, and choose Edit > Copy.
3 In Photoshop, open the document that you want to paste the Adobe Illustrator art into and then choose Edit >
Paste.
Note: If the PDF and the AICB (No Transparency Support) options are turned off in the File Handling & Clipboard
preferences of Adobe Illustrator, the art is automatically rasterized as it’s pasted into the Photoshop document. You can
skip the rest of the steps in this procedure.
Page 84

PHOTOSHOP CS3
User Guide
4 In the Paste dialog box, select how you want to paste the Adobe Illustrator art and then click OK:
Smart Object Pastes the art as a Vector Smart Object that can be scaled, transformed, or moved without degrading
the image. As the art is placed, its file data is embedded in the Photoshop document on a separate layer.
Pixels Pastestheartaspixelsthatcanbescaled,transformed,ormovedbeforeitisrasterizedandplacedonitsown
layer in the Photoshop document.
Path Pastes the art as a path that can be edited with the pen tools, Path Selection tool, or Direct Selection tool. The
path is pasted into the layer that’s selected in the Layers palette.
Shape Layer Pastes the art as a new shape layer (a layer containing a path filled with the foreground color).
5 If you selected Smart Object or Pixels in the Paste dialog box, make any transformations you wish, and then click
Enter or Return to place the art.
See also
“About placing files” on page 74
“About Smart Objects” on page 309
“Path segments, components, and points” on page 371
“Create a shape on a shape layer” on page 359
77
High dynamic range images
About high dynamic range images
Thedynamicrange(ratiobetweendarkandbrightregions)inthevisibleworldfarexceedstherangeofhumanvision
and of images that are displayed on a monitor or printed. But whereas human eyes can adapt to very different
brightness levels, most cameras and computer monitors can capture and reproduce only a fixed dynamic range.
Photographers, motion picture artists, and others working with digital images must be selective about what’s
important in a scene because they are working with a limited dynamic range.
High dynamic range (HDR) images open up a world of possibilities because they can represent the entire dynamic
range of the visibleworld. Because all the luminancevalues in a real-world scene are represented proportionately and
stored in an HDR image, adjusting the exposure of an HDR image islike adjusting theexposure when photographing
a scene in the real world. This capability lets you create blurs and other real-world lighting effects that look realistic.
Currently, HDR images are used mostly in motion pictures, special effects, 3D work, and some high-end photography.
Page 85

PHOTOSHOP CS3
User Guide
A
C
B
Merging images of different exposures to create an HDR image
A. Imagewithshadowdetailbuthighlightsclipped B. Image with highlight detailbut shadows clipped C. HDR image containing the dynamic
range of the scene
78
In Photoshop, the luminance values of an HDRimage are stored using a floating-point numeric representation that’s
32 bitslong (32-bits-per-channel). Theluminance values in an HDR image are directly related to the amount of light
in a scene. This is not so with (non-floating point) 16-bits-per-channel (bpc) and 8-bpc image files, which can store
luminance values only from black to paper white; this represents an extremely small segment of the dynamic range
in the real world.
Adobe Photoshop CS3 now offers layers support for 32-bpc images, as well as access to more tools, filters, and
commands. 32 bit has been added as an option when creating new documents in Photoshop. For more information,
see below.
Another added feature is painting on 32-bpc images. Enhancements have been made to the Adobe Color Picker so
you can specify colors that have a brightness intensity that exceeds 1.0 (the equivalent ofthe 255 levelin an 8-bit RGB
document). See also “About the HDR Color Picker (Photoshop Extended)” on page 83.
You can create an HDR image using multiple photographs, each captured at a different exposure. In Photoshop, the
Merge To HDR command lets you create HDR images from multiple photographs. Because an HDR image contains
brightness levels thatfar exceed the display capabilities of astandard 24-bitmonitor or therange of tones in aprinted
image, Photoshop lets you adjust the preview of the HDR image so it can be viewed on a computer monitor. If you
need to print the image or use Photoshop tools and filters that don’t work with HDR images, you can convert the
HDR image to an 8- or 16-bpc image.
Photoshop support for 32-bpc images
Use the following tools, adjustments, and filters with 32-bpc HDR images:
Adjustments Levels, Cut Down Saturation, Hue/Saturation, Channel Mixer, Photo Filter, and Exposure.
Note: Although the Exposure command can be used with 8- and 16-bpc images, it is designed for making exposure
adjustments to 32-bpc HDR images.
Page 86

PHOTOSHOP CS3
User Guide
Blend Modes Normal, Dissolve, Behind, Clear, Darken, Multiply, Lighten, Color Darken, Linear Dodge (Add),
Color Lighter, Difference, Hue, Saturation, Color, and Luminosity.
Create new 32-bpc documents In the New dialog box, 32 bit is an option in the bit depth pop-up menu to the right
of the Color Mode pop-up menu.
Edit menu commands All commands including Fill, Stroke, Free Transform, and Transform.
File Formats Photoshop (PSD, PSB), Radiance (HDR), Portable Bit Map (PBM), OpenEXR, and TIFF.
Note: Although Photoshop cannot save an HDR image in the LogLuv TIFF file format, it can open and read a LogLuv
TIFF file.
Filters Average, Box Blur, Gaussian Blur, Motion Blur, Radial Blur, Shape Blur, Surface Blur, Add Noise, Clouds 1,
Clouds 2, Lens Flare, Smart Sharpen, Unsharp Mask, Emboss, De-Interlace, NTSC Colors, High Pass, Maximum,
Minimum, and Offset.
79
Image commands
Layers New layers, duplicate layers, adjustment layers (Levels, Hue/Saturation, Channel Mixer, Photo Filter, and
Duplicate, Image Size, Canvas Size, Pixel Aspect Ratio,Rotate Canvas,Calculation, Variable, and Trim.
Exposure), fill layers, layer masks, layer styles, supported blending modes, and Smart Objects.
Modes RGB Color, Grayscale, conversion to 8 Bits/Channel or 16 Bits/Channel.
Pixel Aspect Ratio Support for square and non-square documents.
Selections Invert, Modify Border, Transform Selection, Save Selection and Load Selection.
Tools All tools in the toolbox except: Magnetic Lasso, Magic Wand, Spot Healing Brush, Healing Brush, Red Eye,
Color Replacement, Art History Brush, Magic Eraser, Background Eraser, Paint Bucket, Dodge, Burn, and Sponge.
Some tools work with supported blend modes only.
To work with certain Photoshop features, you can convert a 32-bpc image to a 16-bpc or an 8-bpc image. Do a Save
As and convert a copy of the image file to preserve the original.
Merge images to HDR
Use the Merge To HDR command to combine multiple images (with different exposures) of thesame image or scene,
capturing the dynamic range of a scene in a single HDR image. You can choose to save the merged image as a 32-bpc
HDR image.
Note: It’salsopossibletousetheMergeToHDRcommandtosavethemergedimageasan8-or16-bpcimage.However,
only a 32-bpc image can store all the HDR image data; 8- and 16-bpc images will be clipped.
For information on taking photos to merge into HDR images, see Take photos for merging to HDR, below.
1 Do one of the following:
• (Photoshop) Choose File > Automate > Merge To HDR.
• (Bridge) Select the images you want to use and choose Tools > Photoshop > Merge To HDR. Skip to step 3.
2 In the Merge To HDR dialog box, click Browse, browse to select the images, and click Open.
To remove an item, select it in the Merge To HDR dialog box and click Remove.
Note: IfyouwanttoaddafolderofimagesorimagesthatareopeninPhotoshop,chooseFolderorOpenFilesfromthe
Use menu.
3 (Optional)SelecttheAttemptToAutomaticallyAlignSourceImagesoptionifyouheldthecamerainyourhands
when you photographed the multiple images.
Page 87

PHOTOSHOP CS3
User Guide
4 Click OK.
A second Merge To HDR dialog box displays thumbnails of the images being used in the merged result, a preview of
the merged result, a Bit Depth menu, and a slider for setting the white point preview.
5 If necessary, do one of the following to set the view options for the merged result preview:
• Click the Minus or Plus buttons below the preview image to zoom out or zoom in.
• Choose a view percentage or mode from the pop-up menu below the preview image.
6 (Optional) Deselect or select the thumbnails in the Sources filmstrip to specify which imagesto use in the merged
image.
80
Selecting the thumbnails in the Sources filmstrip
7 Choose a bit depth for the merged image from the Bit Depth menu.
Be sure to choose 32 Bits/Channel if you want the merged image to store the entire dynamic range data of the HDR
image. 8-bits and (non-floating point) 16-bpc images files cannot store the entire range of luminance values in an
HDR image.
8 Move the slider below the histogram to preview the merged image.
Moving the slider adjusts the image preview only. All the HDR image data remains intact in the merged image file.
If you’re saving the merged image as 32-bpc, the preview adjustment is stored in the HDR image file and applied
whenever the file is opened in Photoshop. The preview adjustment is always accessible and adjustable by choosing
View > 32-Bit Preview Options.
9 Click OK to create the merged image.
If you chose to save the merged image as an 8-bits or 16-bpc image, the HDR Conversion dialog box opens. Make
the exposureand contrast corrections to produce an imagewith the dynamic range (tonal range) you want. For more
information, see “Convert from 32 bits to 8 or 16 bpc” on page 81.
Take photos for merging to HDR
Keep the following tips in mind when you take photos to be combined with the Merge To HDR command:
• Secure the camera to a tripod.
• Take enough photos to cover the full dynamic range of the scene. You can try taking at least five to seven photos,
but you might need to take more exposures depending on the dynamicrange of the scene. The minimum number
of photos should be three.
Page 88

PHOTOSHOP CS3
User Guide
• Vary the shutter speed to create different exposures. Changing the aperture changes the depth of field in each
exposure and can produce lower-quality results. Changing the ISO or aperture may also cause noise or vignetting
in the image.
• In general, don’t use your camera’s auto-bracket feature, because the exposure changes are usually too small.
• The exposure differences between the photos should be one or two EV (exposure value) steps apart (equivalent to
about one or two f-stops apart).
• Don’t vary the lighting; for instance, don’t use a flash in one exposure but not the next.
• Make sure that nothingis moving in the scene. Exposure Merge works only with differentlyexposed images of the
identical scene.
Adjust dynamic range view for HDR images
The dynamic range of HDR images exceeds the display capabilities of standard computer monitors. When you open
an HDR image in Photoshop, it can look very dark or washed out. Photoshop lets you adjust the preview so that the
monitor displays an HDR image whose highlights and shadows aren’t washed out or too dark. The preview settings
are stored in the HDR image file (PSD, PSB, and TIFF only) and are applied whenever the file is opened in
Photoshop. Preview adjustments don’t edit the HDR image file, all the HDR image information remains intact. Use
the Exposure adjustment (Image > Adjustments > Exposure) to make exposure edits to the 32-bpc HDR image.
81
To view 32-bit readouts in the Info palette, click the Eyedropper icon in the Info palette and choose 32-Bit from the
pop-up menu.
1 Open a 32-bpc HDR image in Photoshop, and choose View > 32-Bit Preview Options.
2 In the 32-bit Preview Options dialog box, choose an option from the Method menu:
Exposure And Gamma Adjusts the brightness and contrast.
Highlight Compression Compresses the highlight values in the HDR image so they fall within the luminance values
range of the 8- or 16-bpc image file.
3 IfyouchoseExposureAndGamma,movetheExposureandGammasliderstoadjustthebrightnessandcontrast
of the image preview.
4 Click OK.
You can also adjust the preview of an HDR image open in Photoshop by clicking the triangle in the status bar of the
document window and choosing 32-Bit Exposure from the pop-up menu. Move the slider to set the white point for
viewing the HDR image. Double-click the slider to return to the default exposure setting. Since the adjustment is made
per view, you can have the same HDR image open in multiple windows, each with a different preview adjustment.
Preview adjustments made with this method are not stored in the HDR image file.
See also
“Adjust Exposure for HDR images” on page 173
Convert from 32 bits to 8 or 16 bpc
HDR images contain luminance levels that far exceed the luminance data that can be stored in 8- or 16-bpc image
files. You can make exposure and contrast corrections when converting a 32-bpc HDR image to 8 or 16 bpc to
produce an image with the dynamic range (tonal range) you want.
1 Open a 32-bpc image and choose Image > Mode > 16 Bits/Channel or 8 Bits/Channel.
Page 89

PHOTOSHOP CS3
User Guide
2 In the HDR Conversion dialog box, choose a method for adjusting the brightness and contrast in the image:
Exposure And Gamma Lets you manually adjust the brightness and contrast of the HDR image.
Highlight Compression Compresses the highlight values in the HDR image so they fall within the luminance values
range of the 8- or 16-bpc image file. No further adjustments are necessary; this method is automatic. Click OK to
convert the 32-bpc image.
Equalize Histogram Compresses the dynamic range of the HDR image while trying to preserve some contrast. No
further adjustments are necessary; this method is automatic. Click OK to convert the 32-bpc image.
Local Adaptation Adjusts the tonality in the HDR image by calculating the amount of correction necessary for local
brightness regions throughout the image.
3 (Optional) Click the arrow to display the toning curve and histogram.The histogram shows the luminance values
in the original HDR image. The red tick marks along the horizontal axis are in 1 EV (approximately 1 f-stop) increments. The toning curve is active only for the Local Adaptation method.
4 Do any of the following:
• If you chose Exposure And Gamma, move the Exposure slider to adjust the gain and move the Gamma slider to
adjust the contrast.
• If you chose Local Adaptation, move the Radius slider to specify the size of the local brightness regions. Move the
Thresholdslidertospecifyhowfaraparttwopixels’tonalvaluesmustbebeforethey’renolongerpartofthesame
brightness region. You can also use the toning curve to make adjustments.
82
Note: The toning curve usually lets you make limited changes from point to point and attempts to equalize your changes
across the points. If you select the Corner option after inserting a point on the curve, the limit is removed and no equalizationisperformedwhenyouinsertandmoveasecondpoint.You’llnoticethatthecurvebecomesangularatapoint
with the Corner option applied.
A B
Toning curve adjustment using the Corner option
A. InsertingapointdisplaystheCorneroption. B. Adjusting new point makes the curve angular at the point where the Corner option is used.
5 (Optional) To save your 32-bit toning options as a file, click Save. Type a name for the file in the Save dialog box
and click Save.
You can reuse the saved 32-bit toning option file. Click Load to convert another 32-bpc image to an 8- or 16-bpc
image.
Page 90
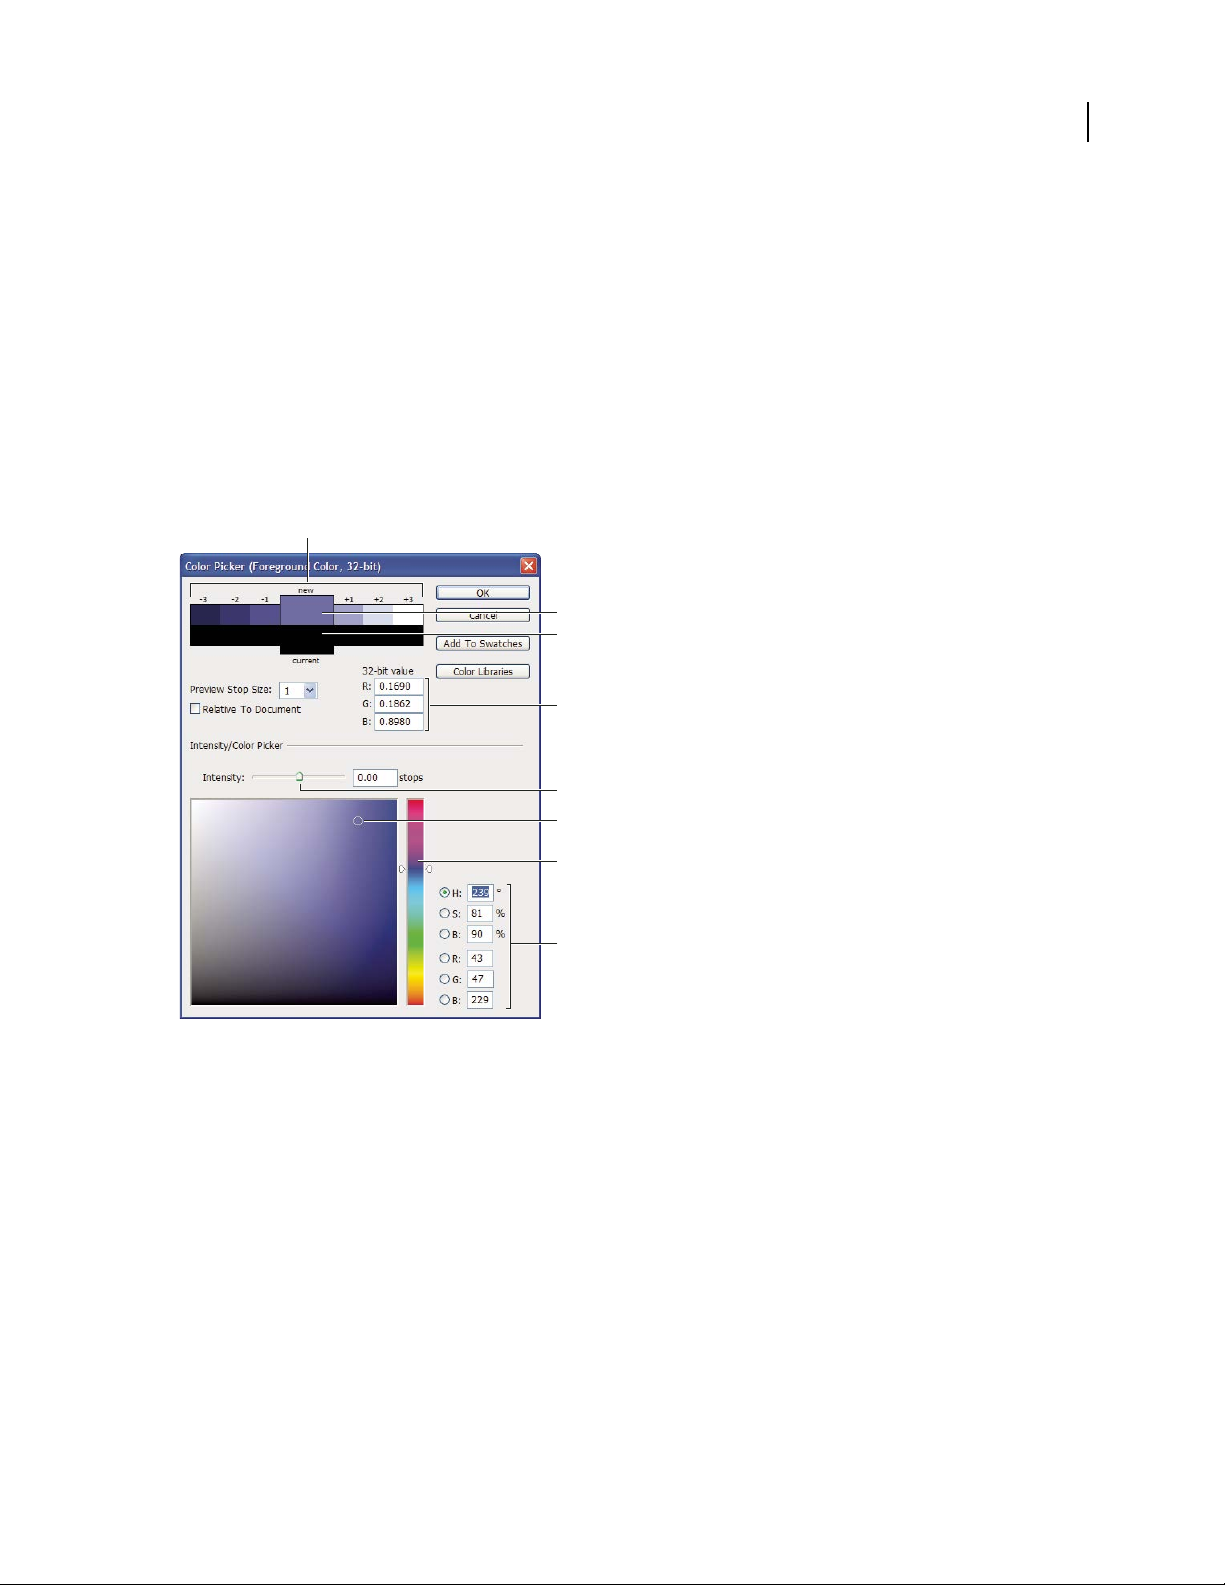
PHOTOSHOP CS3
User Guide
6 Click OK to convert the 32-bpc image.
See also
“Curves overview” on page 163
About the HDR Color Picker (Photoshop Extended)
The HDRColor Pickerallows youto accuratelyview and select colors for use in32-bit HDRimages. Asin the regular
Adobe Color Picker, you select a color by clicking a color field and adjusting the color slider. The Intensity slider
allows you to adjust the brightness of a color to match the intensity of the colors in the HDR image you’re working
with. A Preview area lets you view swatches of a selected color to see how it will display at different exposures and
intensities.
A
B
C
83
D
E
F
G
H
HDR Color Picker
A. Preview area B. Adjusted color C. Original color D. 32-bit floating point values E. Intensity slider F. Picked color G. Color slider
H. Color values
See also
“Adobe Color Picker overview” on page 119
“Adjust dynamic range view for HDR images” on page 81
Display the HDR Color Picker
❖ With a 32-bpc image open, do one of the following:
• In the toolbox, click the foreground or background color selection box.
• In the Color palette, click the Set Foreground Color or Set Background Color selection box.
The color picker is also available when features let you choose a color. For example, by clicking the color swatch in
the options bar for some tools, or the eyedroppers in some color adjustment dialog boxes.
Page 91

PHOTOSHOP CS3
User Guide
Choose Colors for HDR images
The lower part of the HDR Color Picker functions like the regular color picker does with 8- or 24-bit images. Click
in the color field to select a color and move the color slider to change hues, or use the HSB or RGB fields to enter
numeric values for a particular color. In the color field, brightness increases as you move from bottom to top, and
saturation increases as you move from left to right.
Use the Intensity slider to adjust the brightness of the color. The color value plus the intensity value are converted to
32-bit floating point number values in your HDR document.
1 Select a color by clicking inthe color fieldand moving the color slider, or by entering HSB orRGB numeric values,
as in the Adobe Color Picker.
2 AdjusttheIntensityslidertoboostorreducethecolor’sbrightness.ThenewcolorswatchinthePreviewscaleat
the top of the color picker shows the effect of increasing or decreasing stops for the selected color.
The Intensity Stops correspond inversely to exposure setting stops. If you boost the Exposure setting of the HDR
image two stops, reducing the Intensity stops by two will maintain the same color appearance as if the HDR image
exposure and the color intensity were both set to 0.
If you know the exact 32-bit RGB values for the color you want, you can enter them directly in the 32-bit value RGB
fields.
3 (Optional) Adjust settings for the Preview area.
Preview Stop Size Sets the stop increments for each preview swatch. For example, a setting of 3 results in swatches
of -9, -6, -3, +3, +6, +9. These swatches let you preview the appearance of your selected color at different exposure
settings.
84
Relative to Document Select to adjust the preview swatches to reflect the current exposure setting for the image. For
example, if the document exposure is set higher, the new preview swatch will be lighter than the color selected in the
colorpicker’scolorfield,toshowtheeffectofthehigherexposureontheselectedcolor.Ifthecurrentexposureisset
to 0 (the default), checking or unchecking this option will not change the new swatch.
4 (Optional) Click Add to Swatches to add the selected color to the Swatches palette.
5 Click OK.
Paint on HDR images (Photoshop Extended)
You can edit and add effects to HDR/32-bpc images using any of the following Photoshop tools: Brush, Pencil, Pen,
Shape, Clone Stamp, Pattern Stamp, Eraser, Gradient, Blur, Sharpen, Smudge, and History Brush. You can also use
the Text tool to add 32-bpc text layers to an HDR image.
When editing or painting on HDR images, you can preview your work at different exposure settings using either the
32-Bit Exposure slider in the document info area or the 32-Bit Preview Options dialog box (View > 32-Bit Preview
Options). The HDR Color Picker also lets you preview your selected foreground color at different intensity settings,
to match different exposure settings in an HDR image.
1 Open an HDR image.
2 (Optional) Set the exposure for the image. See “Adjust dynamic range view for HDR images” on page 81.
3 For the Brush or Pencil tools, click the foreground color to open the HDR Color Picker and select a color. For the
Text tool, click the color chip in the Text tool options bar to set the text color.
The Preview area of the HDR Color Picker helps you select and adjust a foreground color in relation to different
exposure settings in the HDR image. See “About the HDR Color Picker (Photoshop Extended)” on page 83.
To view the effects of painting at different HDR exposures, use the Window > Arrange > New Window command to
open simultaneous views of the same HDR image, then set each window to a different exposure using the Exposure
slider in the document status bar area.
Page 92

Chapter 4: Camera Raw
AdobePhotoshopCameraRawsoftwareworkswithAdobePhotoshop,AdobeAfterEffects,andAdobeBridge.You
can use Photoshop Camera Raw software to import and adjust camera raw, JPEG, and TIFF files.
Introduction to Camera Raw
About camera raw files
A camera raw file contains unprocessed, uncompressed grayscale picture data from a digital camera’s image sensor,
along with information about how the image was captured (metadata). Photoshop Camera Raw software interprets
the camera raw file, using information about the camera and the image’s metadata to construct and process a color
image.
Think of a camera raw file as your photo negative. You can reprocess the file at any time, achieving the results that
you want by making adjustments for white balance, tonal range, contrast, color saturation, and sharpening. When
you adjust a camera raw image, the original camera raw data is preserved. Adjustments are stored as metadata in an
accompanying sidecar file, in a database, or in the file itself (in the case of DNG format).
85
When you shoot JPEG files with your camera, the camera automatically processes the JPEG to enhance and
compress the image. You generally have little control over how this processing occurs. Shooting camera raw images
with your camera gives you greater control than shooting JPEG images, because camera raw does not lock you into
processing done by your camera. You can still edit JPEG and TIFF images in Camera Raw, but you will be editing
pixels that were already processed by the camera. Camera raw files always contain the original, unprocessed pixels
from the camera.
To shoot camera raw images, you need to set your camera to save files in its own camera raw file format.
Note: The Photoshop Raw format (.raw) is a file format for transferring images between applications and computer
platforms. Don’t confuse Photoshop raw with camera raw file formats.
Digital cameras capture and store camera rawdata with a linear tone response curve (gamma 1.0). Both film and the
human eye have a nonlinear, logarithmic response to light (gamma greater than 2). An unprocessed camera raw
image viewed as a grayscale image would seem very dark, because what appears twice as bright to the photosensor
and computer seems less than twice as bright to the human eye.
About Camera Raw
Camera Raw software is included as a plug-in with Adobe After Effects and Adobe Photoshop, and also adds
functionality to Adobe Bridge. Camera Raw gives each of these applications the ability to import and work with
camera raw files. You can also use Camera Raw to work with JPEG and TIFF files.
You must have Photoshop or After Effects installed to open files in the Camera Raw dialog box from Bridge.
However, if Photoshop or After Effects is not installed, you can still preview the images and see their metadata in
Bridge. If another application is associated with the image file type, it’s possible to open the file in that application
from Bridge.
Page 93

PHOTOSHOP CS3
User Guide
Using Bridge, you can apply, copy, and clear image settings, and you can see previews and metadata for camera raw
files without opening them in the Camera Raw dialog box. The preview in Bridge is a JPEG image generated using
the current image settings; the preview is not the raw camera data itself, which would appear as a very dark grayscale
image.
Note: A caution icon appears in the thumbnails and preview image in the Camera Raw dialog box while the preview
is generated from the camera raw image.
You can modify the default settings that Camera Raw uses for a particular model of camera. For each camera model,
you can also modify the defaults for a particular ISO setting or a particular camera (by serial number). You can
modify and save image settings as presets for use with other images.
When you use Camera Raw to make adjustments (includingstraightening and cropping) to a camera raw image, the
image’s original camera raw data is preserved. The adjustments are stored for each image in either the Camera Raw
database, as metadata embedded inthe imagefile, or in a sidecar XMP file (ametadata file that accompaniesa camera
raw file). For more information, see “Specify where Camera Raw settings are stored” on page 104.
After you process and edit a camera raw file using the Camera Raw plug-in, an icon appears in the image
thumbnail in Bridge.
If you open a camera raw file in Photoshop,you can save the imagein other image formats, such as PSD, JPEG, Large
Document Format (PSB), TIFF, Cineon, Photoshop Raw, PNG, or PBM. From the Camera Raw dialog box in
Photoshop, you can save the processed files in Digital Negative (DNG), JPEG, TIFF, or Photoshop (PSD) formats.
Although Photoshop Camera Raw software can open and edit a camera raw image file, it cannot save an image in a
camera raw format.
86
Note: In Photoshop, the Camera Raw dialog box is automatically suppressed when youuse a batch offiles for a webphoto
gallery, picture package, or contact sheet.
As new versions of Camera Raw become available, you can update this software by installing a new version of the
plug-in. You can check for updates to Adobe software by choosing Help > Updates.
For up-to-date documentation for Camera Raw, go to the Adobe website at
www.adobe.com/go/learn_ps_camerarawhelp.
Different camera models save camera raw images in many different formats, and the data must be interpreted differently for these formats. Camera Raw includes profiles for many camera models, and it can interpret many camera
raw formats.
Note: For a list of supported cameras and for more information about Camera Raw, see
www.adobe.com/go/learn_ps_cameraraw.
About the Digital Negative (DNG) format
The Digital Negative (DNG) format is a non-proprietary, publicly documented, and widely supported format for
storing raw camera data. Hardware and software developers use DNG because it results in a flexible workflow for
processing and archiving camera raw data. You may also use DNG as an intermediate format for storing images that
were originally captured using a proprietary camera raw format.
Because DNG metadata is publicly documented, software readers such as Camera Raw do not need camera-specific
knowledge to decode and process files created by a camera that supports DNG. If support for a proprietary format
is discontinued, users may not be able to access images stored in that format, and the images may be lost forever.
Because DNG is publicly documented, it is far more likely that raw images stored as DNG files will be readable by
software in the distant future, making DNG a safer choice for archival storage.
Page 94

PHOTOSHOP CS3
User Guide
DNG is an extension of the TIFF 6.0 format and is compatible with the TIFF-EP standard. It is possible (but not
required) for a DNG file to simultaneously comply with both the Digital Negative specification and the TIFF-EP
standard.
Metadata for adjustments made to images stored as DNG files can be embedded in the DNG file itself instead of in
a sidecar XMP file or in the Camera Raw database.
YoucanconvertcamerarawfilestotheDNGformatbyusingtheAdobeDNGConverterortheCameraRawdialog
box. For more information on the DNG format and DNG Converter, see www.adobe.com/go/learn_ps_dng.
Processing images with Camera Raw
1. Copy camera raw files to your hard disk, organize them, and (optionally) convert them to DNG.
Before you do any work on the images that your camera raw files represent, transfer them from the camera’s memory
card, organize them,give them useful names, and otherwise prepare them for use. Use the Get Photos From Camera
command in Bridge to accomplish these tasks automatically.
2. Open the image files in Camera Raw.
You can open camera raw files in Camera Raw from Bridge, After Effects, or Photoshop. You can also open JPEG
and TIFF files in Camera Raw from Bridge. (See “Open images in Camera Raw” on page 92.)
87
To see a video tutorial on importing images with Camera Raw, go to the Adobe website at
www.adobe.com/go/vid0005.
3. Adjust color.
Color adjustments include white balance, tone, and saturation. Youcan make most adjustments on the Basictab, and
then use controls on the other tabs to fine-tune the results. If you want Camera Raw toanalyze your image and apply
approximate tonal adjustments, click Auto on the Basic tab.
To apply the settings used for the previous image, or to apply the default settings for the camera model, camera, or
ISO settings, choose the appropriate command from the Camera Raw Settings menu . (See “Apply saved Camera
Raw settings” on page 105.)
To see a video tutorial on adjusting images with Camera Raw, go to the Adobe website at
www.adobe.com/go/vid0006.
To see a video tutorial on adjusting multiple images with Camera Raw, go to the Adobe website at
www.adobe.com/go/vid0007.
4. Make other adjustments and image corrections.
Use other tools and controls in the Camera Raw dialog box to perform such tasks as sharpening the image, reducing
noise, correcting for lens defects, and retouching.
5. (Optional) Save image settings as a preset or as default image settings.
To apply the same adjustments to other images later, save the settings as a preset. To save the adjustments as the
defaults to be applied to all images from a specific camera model, a specific camera, or a specific ISO setting, save
the image settings as the new Camera Raw defaults. (See “Save, reset, and load Camera Raw settings” on page 103.)
Page 95

PHOTOSHOP CS3
User Guide
6. Set workflow options for Photoshop.
Set options to specify how images are saved from Camera Raw and how Photoshop should open them. You can
accesstheWorkflowOptionssettingsbyclickingthelinkbeneaththeimagepreviewintheCameraRawdialogbox.
7. Save the image, or open it in Photoshop or After Effects.
When youfinish adjusting the image in Camera Raw, you can apply the adjustments to the camera raw file, open the
adjusted image in Photoshop or After Effects, save the adjusted image to another format, or cancel and discard
adjustments. If you open the Camera Raw dialog box from After Effects or Photoshop, the Save and Done buttons
are unavailable.
Save Applies the Camera Raw settings to the images and saves copies of them in JPEG, PSD, TIFF, or DNG format.
Press Alt (Windows) or Option (Mac OS) to suppress the Camera Raw Save Options dialog box and save the files
using the last set of save options. (See “Save a camera raw image in another format” on page 92.)
Open or OK Opens copies of the camera raw image files (with the Camera Raw settings applied) in Photoshop or
After Effects. The original camera raw image file remains unaltered. Press Shift while clicking Open to open the raw
file in Photoshop as a Smart Object. At any time, you can double-click the Smart Object layer that contains the raw
file to adjust the Camera Raw settings.
Done Closes the Camera Raw dialog box and storesfile settings either in the camera raw database file, in the sidecar
XMP file, or in the DNG file.
88
Cancel Cancels the adjustments specified in the Camera Raw dialog box.
Page 96

Camera Raw dialog box overview
A F GDCB E
PHOTOSHOP CS3
User Guide
89
H JI K
Camera Raw dialog box
A. Filmstrip B. Togg l e F i l m s t r i p C. Camera, file name, and Exif information D. Toggle full screen mode E. Image adjustment tabs
F. His togram G. Camera RawSettings menu H. Zoom levels I. Clicktodisplayworkflowoptions J. Navigation arrows K. Adjustment sliders
Note: Somecontrols,suchastheWorkflowOptionslink,thatareavailablewhenyouopentheCameraRawdialogbox
from Bridge or Photoshop are not available when you open the Camera Raw dialog box from After Effects.
Camera Raw Settings menu
To open the Camera Raw Settings menu, click the button in the upper-right corner of any of the image
adjustment tabs. Several of the commands in this menu are also available from the Edit > Develop Settings menu in
Bridge.
Camera Raw view controls
Zoom tool Sets the preview zoom to the next higher preset value when you click the preview image. Alt-click
(Windows) or Option-click (Mac OS) to use the next lower zoom value. Drag the Zoom tool in the preview image
to zoom in on a selected area. To return to 100%, double-click the Zoom tool.
Hand tool Moves the image in the preview window if the preview image is set at a zoom level higher than 100%.
Hold down the spacebar to temporarily activate the Hand tool while using another tool. Double-click the Hand tool
to fit the preview image to the window.
Select Zoom Level Choose a magnification setting from the menu or click the Select Zoom Level buttons.
Preview Displays a preview of the image adjustments made in the current tab, combined with the settings in the
other tabs. Deselect to show the image with the original settings of the current tab combined with the settings in the
other tabs.
Page 97

PHOTOSHOP CS3
User Guide
RGB Shows the red, green, and blue values of the pixel under the pointer in the preview image.
Shadows and Highlights Displays shadow and highlight clipping. Clipped shadows appear in blue, and clipped
highlights appear in red. Highlight clipping is shown if any one of the three RGB channels is clipped (fully saturated
with no detail). Shadow clipping is shown if all three RGB channels are clipped (black with no detail).
Image adjustment tabs
Basic Adjust white balance, color saturation, and tonality.
Tone Curve Fine-tune tonality using a Parametric curve and a Point curve.
Detail Sharpen images or reduce noise.
HSL / Grayscale Fine-tune colors using Hue, Saturation, and Luminance adjustments.
Split Toning Color monochrome images or create special effects with color images.
Lens Corrections Compensate for chromatic aberration and vignetting caused by the camera lens.
Camera Calibration Correct a color cast in the shadows and adjust non-neutral colors to compensate for the
difference between the behavior of your camera and the Camera Raw profile for your camera model.
Presets Save and apply sets of image adjustment settings as presets.
90
Work with the Camera Raw cache in Bridge
When you view camera raw files inAdobe Bridge, the thumbnails and previews use eitherthe default settings or your
adjusted settings. The cache in Bridge and the Camera Raw cache store data for the file thumbnails, metadata, and
file information. Caching this data shortens the loading time when you return to a previously viewed folder.
Because caches can become very large, you may want to purge the cache or limit its size. You can also purge and
regenerate the cache if you suspect that it is corrupted or old. Purging the cache deletes thumbnail information and
metadata added since the camera raw file was opened in Bridge.
Note: The Camera Raw cache holds data for about 200 images for each gigabyte of disk storage allocatedto it. By default,
the Camera Raw cache is set to a maximum size of 1 GB. You can increase its limit in the Camera Raw preferences.
1 In Bridge, choose Edit > Camera Raw Preferences (Windows) or Bridge > Camera Raw Preferences (Mac OS), or,
with the Camera Raw dialog box open, click the Open Preferences Dialog button .
2 Do any of the following:
• To change the cache size, enter a Maximum Size value.
• To purge the camera raw cache, click the Purge Cache button.
• To change the location of the camera raw cache, click Select Location.
Navigating, opening, and saving images
Process, compare, and rate multiple images in Camera Raw
The most convenient way to work with multiple camera raw images is to use the Filmstrip view in Camera Raw,
which opens by default when you open multiple images in Camera Raw from Bridge.
Images can have three states in Filmstrip view: deselected, selected (but not active), and active (also selected). In
general, adjustments are applied to all selected images.
Page 98

PHOTOSHOP CS3
User Guide
You can also synchronize settings toapply settingsfrom the active image to all selected images.You can quickly apply
a set of adjustments to an entire set of images—such as all shots taken under the same conditions—and then do finetuning on the individual shots later, after you’ve determined which you’ll use for your final output.
• To select an image, click its thumbnail. To select a range of images, Shift-click two thumbnails. To add an image
to a selection, Ctrl-click (Windows) or Command-click (Mac OS) its thumbnail.
• To change which image is active without changing which images are selected, click a navigation arrow at
the bottom of the preview pane.
• To apply settings from the active image to all selected images, click the Synchronize button at the top of the
Filmstrip pane and choose which settings to synchronize.
• To apply a star rating, click a rating under the image thumbnail.
• To mark selected images for deletion, click Mark For Deletion .
A red cross appears in the thumbnail of an image marked for deletion. The file is sent to the Recycle Bin (Windows) or
Trash (Mac OS) when youclose the Camera Rawdialog box. (If you decide to keepan imagethat you marked for deletion,
select it in the Thumbnail pane and click Mark For Deletion again, before you close the Camera Raw dialog box.)
Automating image processing with Camera Raw
You can create an action to automate the processing of image files with Camera Raw. You can automate the editing
process, and the process of saving the files in formats such as PSD, DNG, JPEG, Large Document Format (PSB),
TIFF, and PDF. In Photoshop, you can also use the Batch command, the Image Processor, or the Create Droplet
command to process one or more image files. The Image Processor is especially useful for saving image files in
different file formats during the same processing session.
91
Here are some tips for automating the processing of camera raw image files:
• When you record an action, first select Image Settings from the Camera Raw Settings menu in the Camera Raw
dialog box. In this way, thesettings particular to each image (from the Camera Raw database or sidecar XMPfiles)
are used to play back the action.
• IfyouplantousetheactionwiththeBatchcommand,youmaywanttousetheSaveAscommandandchoosethe
file format when saving the camera raw image.
• When you use an action to open a camera raw file, the Camera Raw dialog box reflects the settings that were in
effect when the action was recorded. You may want to create different actions for opening camera raw image files
with different settings.
• WhenusingtheBatchcommand,selectOverrideAction“Open”Commands.AnyOpencommandsintheaction
will then operate on the batched files rather than the files specified by name in the action. Deselect Override
Action “Open” Commands only if you want the action to operate on open files or if the action uses the Open
command to retrieve needed information.
• WhenusingtheBatchcommand,selectSuppressFileOpenOptionsDialogstopreventthedisplayoftheCamera
Raw dialog box as each camera raw image is processed.
• When using the Batch command, select Override Action “Save As” Commands if you want to use the Save As
instructions from the Batch command instead of the Save As instructions in the action. If you select this option,
theactionmustcontainaSaveAscommand,becausetheBatchcommanddoesnotautomaticallysavethesource
files. Deselect Override Action “Save As” Commands to save the files processed by the Batch command in the
location specified in the Batch dialog box.
• When creating a droplet, select Suppress File Open Options Dialogs in the Play area of the Create Droplet dialog
box. This prevents the display of the Camera Raw dialog box as each camera raw image is processed.
Page 99

PHOTOSHOP CS3
User Guide
See also
“Convert files with the Image Processor” on page 618
“Processing a batch of files” on page 618
Open images in Camera Raw
• To process raw images in Camera Raw, select one or more camera raw files in Bridge, and then choose File > Open
In Camera Raw or press Ctrl+R (Windows) or Command+R (Mac OS). When you finish making adjustments in
the Camera Raw dialog box, click Done to accept changes and close the dialog box. You can also click Open to
open a copy of the adjusted image in Photoshop.
• To process JPEG or TIFF images in Camera Raw, select one or more JPEG or TIFF files in Bridge, and then choose
File > Open In Camera Raw or press Ctrl+R (Windows) or Command+R (Mac OS). When you finish making
adjustments in the Camera Raw dialog box, click Doneto accept changes and close the dialog box.You can specify
whether JPEG or TIFF images with Camera Raw settings are always opened in Camera Rawin the JPEG and TIFF
Handling section of the Camera Raw preferences. You can also specify that JPEG and TIFF images are opened in
Camera Raw in the Thumbnail section of the Bridge preferences and the File Handling section of the Photoshop
preferences.
• To import camera raw images in Photoshop, select one or more camera raw files in Bridge, and then choose File >
Open With > Photoshop CS3. (You can also choose File > Open In Photoshop, and browse to select camera raw
files.) When you finish making adjustments in the Camera Raw dialog box, click Open to accept changes. Press
Shift while clicking Open to open the image as a Smart Object in Photoshop. At any time, you can double-click
the Smart Object layer that contains the raw file to adjust the Camera Raw settings.
92
Shift-double-click a thumbnail in Bridge to open a camera raw image in Photoshop without opening the Camera
Raw dialog box. Hold down Shift while choosing File > Open to open multiple selected images.
• To import camera raw images in After Effects using Bridge, select one or more camera raw files in Bridge, and
then choose File > Place In After Effects. (You can also choose a File > Import command in After Effects and
browse to select camera raw files.) When you finish making adjustments in the Camera Raw dialog box, click OK
to accept changes.
• To import TIFF and JPEG files into After Effects using Camera Raw, select File > Import in After Effects, select
All Files from the Enable menu (Mac OS) orFiles of Type menu (Windows) in theAfter Effects Import dialog box.
Select the file to import, select Camera Raw from the Format menu, and click Open.
• Placing or dragging image stacks from Bridge into After Effects imports them as an image sequence. Add an extra
bullet specific to importing camera raw files as a sequence into After Effects. Camera Raw settings applied to the
first camera raw file upon import are applied to the remaining files in the sequence unless an XMP sidecar file is
present for any subsequent file in the sequence. In that case, the settings in the XMP file or in the DNG file are
applied to that specific frame in the sequence, all other frames use the settings that the first file in the sequence
specifies.
Save a camera raw image in another format
You can save camera raw files from the Camera Raw dialog box in PSD, TIFF, JPEG, or DNG formats.
When you use the Save command in the Camera Raw dialog box, files are placed in a queue to be processed and
saved. This is useful if you are processing several files in the Camera Raw dialog box and saving them in the same
format.
1 In the Camera Raw dialog box, click the Save button in the lower-left corner of the dialog box.
Page 100

PHOTOSHOP CS3
User Guide
Alt-click (Windows) or Option-click (Mac OS) Save to suppress the Camera Raw Save Options dialog box when
saving a file.
2 In the Save Options dialog box, specify the following options:
Destination Specifies where to save the file. If necessary, click the Select Folder button and navigate to the location.
File Naming Specifies the file nameusing a naming conventionthat includes elements such asdate and camera serial
number. Using informative file names based on a naming convention helps you keep image files organized.
3 Choose a file format from the Format menu.
4 Click Save.
Format options
Digital Negative Saves a copy of the camera raw file in the DNG file format.
• Compressed (lossless) Uses lossless compression, meaning that no information is lost while reducing the file size.
• Convert To Linear Image Stores theimage datain aninterpolated (demosaiced)format. The resulting interpolated
image can be interpreted by other software even if that software does not have a profile for the digital camera that
captured the image.
• Embed Original Raw File Stores all of the original camera raw image data in the DNG file.
93
• JPEG Preview Embeds a JPEG preview in the DNG file. If you decide to embed a JPEG preview, you can choose
the preview size. If you embed JPEG previews, other applications can view the contents of the DNG file without
parsing the camera raw data.
JPEG Saves copies of the camera raw files in JPEG (Joint Photographic Experts Group) format. To specify the
amount of compression, enter a value from 0 to 12 or choose from the menu. Entering a higher value, or choosing
High or Maximum, applies less compression and increases file size and image quality. JPEG format is commonly
used todisplay photographsand othercontinuous-toneimages in web photogalleries, slideshows, presentations, and
other online services.
TIFF Saves copies of the camera raw files as TIFF (Tagged-Image File Format) files. Specify whether to apply no
compression, or LZW or ZIP file compression. TIFF is a flexible bitmap image format supported by virtually all
paint, image-editing, and page-layout applications. TIFF provides greater compression and compatibility with other
applications than does PSD format.
Photoshop Saves copies of the camera raw files in the PSD file format. You can specify whether to preserve cropped
pixel data in the PSD file.
Making color and tonal adjustments in Camera Raw
Using histogram and RGB levels in Camera Raw
A histogram is a representation of the number of pixels at each luminance value in an image. A histogram that has
nonzero values for each luminance value indicates an image that takes advantage of the full tonal scale. A histogram
that doesn’t use the full tonal range corresponds to a dull image that lacks contrast. A histogram with a spike at the
left side indicates shadow clipping; a histogram with a spike on the right side indicates highlight clipping.
Select Shadows or Highlights to see, in the preview image, which pixels are being clipped. For more information, see
“Preview highlight and shadow clipping in Camera Raw” on page 94.
 Loading...