

Page 1

®
Adobe
Atmosphere
™
User Guide
Page 2

Page 3

®
Adobe
Atmosphere
™
User Guide
Page 4

©2003 Adobe Systems Incorporated. All rights reserved.
Adobe® Atmosphere™ User Guide for Windows®
If this guide is distributed with software that includes an end user agreement, this guide, as well as the software described
in it, is furnished under license and may be used or copied only in accordance with the terms of such license. Except as
permitted by any such license, no part of this guide may be reproduced, stored in a retrieval system, or transmitted, in any
form or by any means, electronic, mechanical, recording, or otherwise, without the prior written permission of Adobe
Systems Incorporated. Please note that the content in this guide is protected under copyright law even if it is not distributed
with software that includes an end user license agreement.
The content of this guide is furnished for informational use only, is subject to change without notice, and should not be
construed as a commitment by Adobe Systems Incorporated. Adobe Systems Incorporated assumes no responsibility or
liability for any errors or inaccuracies that may appear in the informational content contained in this guide.
Please remember that existing artwork or images that you may want to include in your project may be protected under
copyright law. The unauthorized incorporation of such material into your new work could be a violation of the rights of the
copyright owner. Please be sure to obtain any permission required from the copyright owner.
Any references to company names in sample templates are for demonstration purposes only and are not intended to refer to
any actual organization.
Adobe, the Adobe logo, Acrobat, Adobe Reader, GoLive, Illustrator, InDesign, Photoshop, Minion, and Myriad are either
registered trademarks or trademarks of Adobe Systems Incorporated in the United States and/or other countries. Microsoft,
DirectX, Direct3D, Windows, and Windows NT are registered trademarks of Microsoft Corporation in the U.S and/or
other countries. Apple, Macintosh, and QuickTime are trademarks of Apple Computer, Inc. registered in the U.S. and other
countries. QuickTime and the QuickTime logo are trademarks used under license. Pentium is a registered trademark of
Intel Corporation. 3ds max is a registered trademark of Autodesk Corporation. Maya is a registered trademark of Alias
Systems. SoftImage is a registered trademark of Avid Technology. LightWave is a registered trademark of NewTek. Bryce is
a registered trademark of Corel Corporation. Poser and Avatar Lab are registered trademarks of Curious Labs and EGISYS
AG. TrueSpace is a registered trademark of Caligari Corporation. GeForce and Quadro are either registered trademarks or
trademarks NVIDIA Corporation. Radeon, Mobility, and All-In-Wonder are either registered trademarks or trademarks ATI
Technologies. Macromedia and Flash are trademarks or registered trademarks of Macromedia, Inc. in the United States and/
or other countries. All other trademarks are the property of their respective owners.
Contains an implementation of the LZW algorithm licensed under various patents.
Adobe Systems Incorporated, 345 Park Avenue, San Jose, California 95110, USA.
Notice to U.S. Government End Users. The Software and Documentation are “Commercial Items,” as that term is defi ned at
48 C.F.R. §2.101, consisting of “Commercial Computer Software” and “Commercial Computer Software Documentation,” as
such terms are used in 48 C.F.R. §12.212 or 48 C.F.R. §227.7202, as applicable. Consistent with 48 C.F.R. §12.212 or 48 C.F.R.
§§227.7202-1 through 227.7202-4, as applicable, the Commercial Computer Software and Commercial Computer Software
Documentation are being licensed to U.S. Government end users (a) only as Commercial Items and (b) with only those
rights as are granted to all other end users pursuant to the terms and conditions herein. Unpublished-rights reserved under
the copyright laws of the United States. Adobe Systems Incorporated, 345 Park Avenue, San Jose, CA 95110-2704, USA. For
U.S. Government End Users, Adobe agrees to comply with all applicable equal opportunity laws including, if appropriate, the
provisions of Executive Order 11246, as amended, Section 402 of the Vietnam Era Veterans Readjustment Assistance Act of
1974 (38 USC 4212), and Section 503 of the Rehabilitation Act of 1973, as amended, and the regulations at 41 CFR Parts 601 through 60-60, 60-250, and 60-741. The affi rmative action clause and regulations contained in the preceding sentence shall
be incorporated by reference.
Part Number: 90047303 (11/03)
Page 5

Contents
Chapter 1: The Atmosphere Platform
Platform Features. . . . . . . . . . . . . . . . . . . . . . . . . . . . . . . . . . . . . . . . . . . . . . . . . . . . . .1
The Atmosphere Architecture. . . . . . . . . . . . . . . . . . . . . . . . . . . . . . . . . . . . . . . . . .1
Why 3-D?. . . . . . . . . . . . . . . . . . . . . . . . . . . . . . . . . . . . . . . . . . . . . . . . . . . . . . . . . . . . . . 5
Chapter 2: Exploring Atmosphere Environments
Using the Atmosphere Player . . . . . . . . . . . . . . . . . . . . . . . . . . . . . . . . . . . . . . . . . .7
Tutorial: Visiting Atmosphere Environments at Adobe.com . . . . . . . . . . . . . .8
Tutorial: Viewing Atmosphere Environments in Photoshop Album. . . . . . .9
Tutorial: Viewing Atmosphere Environments in PDF Documents. . . . . . . 10
Navigating Atmosphere Environments . . . . . . . . . . . . . . . . . . . . . . . . . . . . . . . 11
Tutorial: Practicing Navigation. . . . . . . . . . . . . . . . . . . . . . . . . . . . . . . . . . . . . . . . 12
Using the Toolbar. . . . . . . . . . . . . . . . . . . . . . . . . . . . . . . . . . . . . . . . . . . . . . . . . . . . 14
Tutorial: Moving to an Overhead View of the Environment . . . . . . . . . . . . 16
Working with Bookmarks . . . . . . . . . . . . . . . . . . . . . . . . . . . . . . . . . . . . . . . . . . . . 17
Tutorial: Bookmarking New Environments . . . . . . . . . . . . . . . . . . . . . . . . . . . . 18
Understanding and Using Avatars. . . . . . . . . . . . . . . . . . . . . . . . . . . . . . . . . . . . 18
Tutorial: Swapping Your Avatar . . . . . . . . . . . . . . . . . . . . . . . . . . . . . . . . . . . . . . . 20
Setting Player Preferences . . . . . . . . . . . . . . . . . . . . . . . . . . . . . . . . . . . . . . . . . . . 21
ADOBE ATMOSPHERE i
User Guide
Chapter 3: Interacting with Atmosphere Environments
Moving Through Portals . . . . . . . . . . . . . . . . . . . . . . . . . . . . . . . . . . . . . . . . . . . . . 27
Tutorial: Jumping Between Environments . . . . . . . . . . . . . . . . . . . . . . . . . . . . 28
Understanding Entry Points . . . . . . . . . . . . . . . . . . . . . . . . . . . . . . . . . . . . . . . . . . 29
Communicating and Collaborating with Other Visitors. . . . . . . . . . . . . . . . 29
Tutorial: Communicating with Other Users. . . . . . . . . . . . . . . . . . . . . . . . . . . . 30
Interacting with the Environment . . . . . . . . . . . . . . . . . . . . . . . . . . . . . . . . . . . . 31
Using Custom Controls . . . . . . . . . . . . . . . . . . . . . . . . . . . . . . . . . . . . . . . . . . . . . . 34
Chapter 4: Atmosphere Overview
Scene Object Types. . . . . . . . . . . . . . . . . . . . . . . . . . . . . . . . . . . . . . . . . . . . . . . . . . 42
Chapter 5: Exploring the Interface
Using the Menus . . . . . . . . . . . . . . . . . . . . . . . . . . . . . . . . . . . . . . . . . . . . . . . . . . . . 44
Page 6

ii CONTENTS
Learning the Toolbars. . . . . . . . . . . . . . . . . . . . . . . . . . . . . . . . . . . . . . . . . . . . . . . . 46
Working with Palettes . . . . . . . . . . . . . . . . . . . . . . . . . . . . . . . . . . . . . . . . . . . . . . . 49
Tutorial: Maximizing Screen Space by Docking. . . . . . . . . . . . . . . . . . . . . . . . 50
Tutorial: Positioning and Combining Palettes . . . . . . . . . . . . . . . . . . . . . . . . . 56
Using context menus . . . . . . . . . . . . . . . . . . . . . . . . . . . . . . . . . . . . . . . . . . . . . . . . 56
Using Undo and Redo . . . . . . . . . . . . . . . . . . . . . . . . . . . . . . . . . . . . . . . . . . . . . . . 57
Customizing Atmosphere. . . . . . . . . . . . . . . . . . . . . . . . . . . . . . . . . . . . . . . . . . . . 57
Chapter 6: Working with Files
Understanding the Atmosphere Formats . . . . . . . . . . . . . . . . . . . . . . . . . . . . . 61
Opening Environment Files . . . . . . . . . . . . . . . . . . . . . . . . . . . . . . . . . . . . . . . . . . 61
Tutorial: Viewing Sample Environments. . . . . . . . . . . . . . . . . . . . . . . . . . . . . . . 62
Saving Environments . . . . . . . . . . . . . . . . . . . . . . . . . . . . . . . . . . . . . . . . . . . . . . . . 63
Closing Environments . . . . . . . . . . . . . . . . . . . . . . . . . . . . . . . . . . . . . . . . . . . . . . . 63
Importing Files . . . . . . . . . . . . . . . . . . . . . . . . . . . . . . . . . . . . . . . . . . . . . . . . . . . . . . 63
Tutorial: Importing a Viewpoint Object . . . . . . . . . . . . . . . . . . . . . . . . . . . . . . . 64
Importing to Preset Palettes. . . . . . . . . . . . . . . . . . . . . . . . . . . . . . . . . . . . . . . . . . 65
Tutorial: Importing Wood Textures. . . . . . . . . . . . . . . . . . . . . . . . . . . . . . . . . . . . 66
Managing Object Sets . . . . . . . . . . . . . . . . . . . . . . . . . . . . . . . . . . . . . . . . . . . . . . . 67
Exporting Objects . . . . . . . . . . . . . . . . . . . . . . . . . . . . . . . . . . . . . . . . . . . . . . . . . . . 68
Saving World Settings . . . . . . . . . . . . . . . . . . . . . . . . . . . . . . . . . . . . . . . . . . . . . . . 69
Publishing. . . . . . . . . . . . . . . . . . . . . . . . . . . . . . . . . . . . . . . . . . . . . . . . . . . . . . . . . . . 69
Chapter 7: Views
Introduction to Views. . . . . . . . . . . . . . . . . . . . . . . . . . . . . . . . . . . . . . . . . . . . . . . . 71
Working with the View Windows . . . . . . . . . . . . . . . . . . . . . . . . . . . . . . . . . . . . . 72
Working with the Actor Object . . . . . . . . . . . . . . . . . . . . . . . . . . . . . . . . . . . . . . . 74
Using the Reference Point Object . . . . . . . . . . . . . . . . . . . . . . . . . . . . . . . . . . . . 75
Working with Views. . . . . . . . . . . . . . . . . . . . . . . . . . . . . . . . . . . . . . . . . . . . . . . . . . 76
Controlling the View. . . . . . . . . . . . . . . . . . . . . . . . . . . . . . . . . . . . . . . . . . . . . . . . . 80
Zooming to fi t Objects . . . . . . . . . . . . . . . . . . . . . . . . . . . . . . . . . . . . . . . . . . . . . . . 82
Tutorial: Viewing a Character’s Good Side. . . . . . . . . . . . . . . . . . . . . . . . . . . . . 82
Chapter 8: Using Scene Objects
Positioning Models as Scene Objects . . . . . . . . . . . . . . . . . . . . . . . . . . . . . . . . . 85
Positioning Solid Objects . . . . . . . . . . . . . . . . . . . . . . . . . . . . . . . . . . . . . . . . . . . . 86
Adding Scripts to the Scene. . . . . . . . . . . . . . . . . . . . . . . . . . . . . . . . . . . . . . . . . . 86
Using Viewpoint Objects. . . . . . . . . . . . . . . . . . . . . . . . . . . . . . . . . . . . . . . . . . . . . 86
Page 7

Tutorial: Adding a Viewpoint Object to a Scene . . . . . . . . . . . . . . . . . . . . . . . 87
Tutorial: Adding a Viewpoint Object from the Object Presets palette. . . 88
Tutorial: Scaling a Viewpoint Object . . . . . . . . . . . . . . . . . . . . . . . . . . . . . . . . . . 89
Converting 3-D Files for Import into Atmosphere . . . . . . . . . . . . . . . . . . . . . 91
Converting Viewpoint Objects to Surface Objects. . . . . . . . . . . . . . . . . . . . . 91
Creating Avatars. . . . . . . . . . . . . . . . . . . . . . . . . . . . . . . . . . . . . . . . . . . . . . . . . . . . . 93
Creating a Portal. . . . . . . . . . . . . . . . . . . . . . . . . . . . . . . . . . . . . . . . . . . . . . . . . . . . . 94
Positioning an Entry Point. . . . . . . . . . . . . . . . . . . . . . . . . . . . . . . . . . . . . . . . . . . . 95
Using Anchors. . . . . . . . . . . . . . . . . . . . . . . . . . . . . . . . . . . . . . . . . . . . . . . . . . . . . . . 96
Naming Scene Objects. . . . . . . . . . . . . . . . . . . . . . . . . . . . . . . . . . . . . . . . . . . . . . . 96
Locking Scene Objects. . . . . . . . . . . . . . . . . . . . . . . . . . . . . . . . . . . . . . . . . . . . . . . 96
Setting Visibility . . . . . . . . . . . . . . . . . . . . . . . . . . . . . . . . . . . . . . . . . . . . . . . . . . . . . 97
Chapter 9: Assembling Solid Objects
Understanding Solid Objects. . . . . . . . . . . . . . . . . . . . . . . . . . . . . . . . . . . . . . . . . 99
Understanding Boolean Operations . . . . . . . . . . . . . . . . . . . . . . . . . . . . . . . . . 100
Connectors, Welding, Constraints and Layouts . . . . . . . . . . . . . . . . . . . . . . . 101
Naming Objects . . . . . . . . . . . . . . . . . . . . . . . . . . . . . . . . . . . . . . . . . . . . . . . . . . . . 102
Tutorial: Creating a Table . . . . . . . . . . . . . . . . . . . . . . . . . . . . . . . . . . . . . . . . . . . . 102
Learning the Primitive Types . . . . . . . . . . . . . . . . . . . . . . . . . . . . . . . . . . . . . . . . 104
Triangular Slab . . . . . . . . . . . . . . . . . . . . . . . . . . . . . . . . . . . . . . . . . . . . . . . . . . . . . 106
Deleting Objects . . . . . . . . . . . . . . . . . . . . . . . . . . . . . . . . . . . . . . . . . . . . . . . . . . . 110
Duplicating Objects . . . . . . . . . . . . . . . . . . . . . . . . . . . . . . . . . . . . . . . . . . . . . . . . 110
Grouping Objects. . . . . . . . . . . . . . . . . . . . . . . . . . . . . . . . . . . . . . . . . . . . . . . . . . . 111
Ungrouping Objects . . . . . . . . . . . . . . . . . . . . . . . . . . . . . . . . . . . . . . . . . . . . . . . . 117
Locking Objects . . . . . . . . . . . . . . . . . . . . . . . . . . . . . . . . . . . . . . . . . . . . . . . . . . . . 117
Hiding Objects . . . . . . . . . . . . . . . . . . . . . . . . . . . . . . . . . . . . . . . . . . . . . . . . . . . . . 118
ADOBE ATMOSPHERE iii
User Guide
Chapter 10: Selecting and Editing Objects
Selecting Objects . . . . . . . . . . . . . . . . . . . . . . . . . . . . . . . . . . . . . . . . . . . . . . . . . . . 121
Moving Objects . . . . . . . . . . . . . . . . . . . . . . . . . . . . . . . . . . . . . . . . . . . . . . . . . . . . 124
Editing using Connectors . . . . . . . . . . . . . . . . . . . . . . . . . . . . . . . . . . . . . . . . . . . 126
Snapping to a Grid. . . . . . . . . . . . . . . . . . . . . . . . . . . . . . . . . . . . . . . . . . . . . . . . . . 130
Tutorial: Building a Chess Board . . . . . . . . . . . . . . . . . . . . . . . . . . . . . . . . . . . . . 132
Rotating Objects . . . . . . . . . . . . . . . . . . . . . . . . . . . . . . . . . . . . . . . . . . . . . . . . . . . 133
Tutorial: Tilting a Top. . . . . . . . . . . . . . . . . . . . . . . . . . . . . . . . . . . . . . . . . . . . . . . . 134
Clearing Transformations . . . . . . . . . . . . . . . . . . . . . . . . . . . . . . . . . . . . . . . . . . . 135
Subtracting Objects . . . . . . . . . . . . . . . . . . . . . . . . . . . . . . . . . . . . . . . . . . . . . . . . 135
Page 8

iv CONTENTS
Tutorial: Making Alphabet Letters . . . . . . . . . . . . . . . . . . . . . . . . . . . . . . . . . . . 136
Chapter 11: Applying Colors and Textures
The Appearance Editor. . . . . . . . . . . . . . . . . . . . . . . . . . . . . . . . . . . . . . . . . . . . . . 139
Adding Color . . . . . . . . . . . . . . . . . . . . . . . . . . . . . . . . . . . . . . . . . . . . . . . . . . . . . . . 139
Tutorial: Coloring Chess Pieces . . . . . . . . . . . . . . . . . . . . . . . . . . . . . . . . . . . . . . 142
Adding Preset Colors . . . . . . . . . . . . . . . . . . . . . . . . . . . . . . . . . . . . . . . . . . . . . . . 143
Texture Formats . . . . . . . . . . . . . . . . . . . . . . . . . . . . . . . . . . . . . . . . . . . . . . . . . . . . 145
Applying Textures . . . . . . . . . . . . . . . . . . . . . . . . . . . . . . . . . . . . . . . . . . . . . . . . . . 145
Tutorial: Adding Textures to an Object . . . . . . . . . . . . . . . . . . . . . . . . . . . . . . . 146
Working with Movies and Sound . . . . . . . . . . . . . . . . . . . . . . . . . . . . . . . . . . . . 147
Tutorial: Making a Television Come Alive. . . . . . . . . . . . . . . . . . . . . . . . . . . . . 148
Removing Textures . . . . . . . . . . . . . . . . . . . . . . . . . . . . . . . . . . . . . . . . . . . . . . . . . 149
Sampling and Editing Colors and Textures . . . . . . . . . . . . . . . . . . . . . . . . . . . 149
Chapter 12: Manipulating Textures
Editing Textures . . . . . . . . . . . . . . . . . . . . . . . . . . . . . . . . . . . . . . . . . . . . . . . . . . . . 151
Tutorial: Applying a texture to a single face . . . . . . . . . . . . . . . . . . . . . . . . . . 152
Tutorial: Scaling a Texture to Fit. . . . . . . . . . . . . . . . . . . . . . . . . . . . . . . . . . . . . . 156
Tutorial: Creating Seamless Textures . . . . . . . . . . . . . . . . . . . . . . . . . . . . . . . . . 159
Positioning Projective Textures. . . . . . . . . . . . . . . . . . . . . . . . . . . . . . . . . . . . . . 160
Creating Billboards . . . . . . . . . . . . . . . . . . . . . . . . . . . . . . . . . . . . . . . . . . . . . . . . . 161
Tutorial: Making a Billboard object . . . . . . . . . . . . . . . . . . . . . . . . . . . . . . . . . . 161
Chapter 13: Lighting a Scene
Understanding Lighting . . . . . . . . . . . . . . . . . . . . . . . . . . . . . . . . . . . . . . . . . . . . 166
Working with Emissive Surfaces . . . . . . . . . . . . . . . . . . . . . . . . . . . . . . . . . . . . . 167
Pre-Computed Lighting. . . . . . . . . . . . . . . . . . . . . . . . . . . . . . . . . . . . . . . . . . . . . 168
Tutorial: Making a Light Bulb . . . . . . . . . . . . . . . . . . . . . . . . . . . . . . . . . . . . . . . . 169
Setting Light Parameters. . . . . . . . . . . . . . . . . . . . . . . . . . . . . . . . . . . . . . . . . . . . 170
Tutorial: Changing Scene Brightness. . . . . . . . . . . . . . . . . . . . . . . . . . . . . . . . . 173
Using Sunlight. . . . . . . . . . . . . . . . . . . . . . . . . . . . . . . . . . . . . . . . . . . . . . . . . . . . . . 174
Tutorial: Coloring the Sun . . . . . . . . . . . . . . . . . . . . . . . . . . . . . . . . . . . . . . . . . . . 176
Using the Background as a Light Source . . . . . . . . . . . . . . . . . . . . . . . . . . . . . 176
Tutorial: Creating a Sky Cone . . . . . . . . . . . . . . . . . . . . . . . . . . . . . . . . . . . . . . . . 177
Using Object Light Maps . . . . . . . . . . . . . . . . . . . . . . . . . . . . . . . . . . . . . . . . . . . . 178
Using Dynamic Lighting . . . . . . . . . . . . . . . . . . . . . . . . . . . . . . . . . . . . . . . . . . . . 178
Effective Lighting Techniques . . . . . . . . . . . . . . . . . . . . . . . . . . . . . . . . . . . . . . . 179
Page 9

Tutorial: Preparing Textures for Lighting . . . . . . . . . . . . . . . . . . . . . . . . . . . . . 180
Chapter 14: Adding Interactivity
Drag and Drop Scripting . . . . . . . . . . . . . . . . . . . . . . . . . . . . . . . . . . . . . . . . . . . . 181
Tutorial: Adding Fog . . . . . . . . . . . . . . . . . . . . . . . . . . . . . . . . . . . . . . . . . . . . . . . . 183
Defi ning Properties and Setting Values . . . . . . . . . . . . . . . . . . . . . . . . . . . . . . 185
Tutorial: Adding Background Sound . . . . . . . . . . . . . . . . . . . . . . . . . . . . . . . . . 186
Adding New Properties . . . . . . . . . . . . . . . . . . . . . . . . . . . . . . . . . . . . . . . . . . . . . 187
Associating a Script with an Object. . . . . . . . . . . . . . . . . . . . . . . . . . . . . . . . . . 188
Tutorial: Making a Showroom Car Rotate . . . . . . . . . . . . . . . . . . . . . . . . . . . . 190
Tutorial: Creating a Free Moving Soccer Ball. . . . . . . . . . . . . . . . . . . . . . . . . . 191
Linking a Script to a Script . . . . . . . . . . . . . . . . . . . . . . . . . . . . . . . . . . . . . . . . . . 193
Tutorial: Starting Rotation with the onClick Script . . . . . . . . . . . . . . . . . . . . 193
Chapter 15: Publishing
Testing and Debugging Environments . . . . . . . . . . . . . . . . . . . . . . . . . . . . . . 195
Testing the Final Environment. . . . . . . . . . . . . . . . . . . . . . . . . . . . . . . . . . . . . . . 196
Using World Settings . . . . . . . . . . . . . . . . . . . . . . . . . . . . . . . . . . . . . . . . . . . . . . . 196
Publishing an Atmosphere Environment . . . . . . . . . . . . . . . . . . . . . . . . . . . . 197
Publishing a Single Model . . . . . . . . . . . . . . . . . . . . . . . . . . . . . . . . . . . . . . . . . . 198
Publishing Preferences. . . . . . . . . . . . . . . . . . . . . . . . . . . . . . . . . . . . . . . . . . . . . . 198
Embedding within a Web Page . . . . . . . . . . . . . . . . . . . . . . . . . . . . . . . . . . . . . . 199
Tutorial: Adding an Atmosphere Scene to an Existing Web Page . . . . . . 199
Publishing in a PDF Document . . . . . . . . . . . . . . . . . . . . . . . . . . . . . . . . . . . . . . 200
Tutorial: Adding an Atmosphere environment to a PDF Document . . . 200
Optimization Techniques . . . . . . . . . . . . . . . . . . . . . . . . . . . . . . . . . . . . . . . . . . . 201
ADOBE ATMOSPHERE v
User Guide
Appendix A: Installing and Confi guring
Installing the Atmosphere Player . . . . . . . . . . . . . . . . . . . . . . . . . . . . . . . . . . . . 203
Installing Atmosphere . . . . . . . . . . . . . . . . . . . . . . . . . . . . . . . . . . . . . . . . . . . . . . 203
Using Hardware Acceleration . . . . . . . . . . . . . . . . . . . . . . . . . . . . . . . . . . . . . . . 203
Tutorial: Helping Atmosphere Recognize Your Card . . . . . . . . . . . . . . . . . . 206
Supported Video Cards . . . . . . . . . . . . . . . . . . . . . . . . . . . . . . . . . . . . . . . . . . . . . 208
Appendix B: Keyboard Shortcuts
Appendix C: Resource Libraries
Textures – Set 1. . . . . . . . . . . . . . . . . . . . . . . . . . . . . . . . . . . . . . . . . . . . . . . . . . . . . 214
Page 10

vi CONTENTS
Textures – Set 2. . . . . . . . . . . . . . . . . . . . . . . . . . . . . . . . . . . . . . . . . . . . . . . . . . . . . 223
Objects – Set 1 . . . . . . . . . . . . . . . . . . . . . . . . . . . . . . . . . . . . . . . . . . . . . . . . . . . . . 227
Objects – Set 2 . . . . . . . . . . . . . . . . . . . . . . . . . . . . . . . . . . . . . . . . . . . . . . . . . . . . . 229
Objects – Set 3 . . . . . . . . . . . . . . . . . . . . . . . . . . . . . . . . . . . . . . . . . . . . . . . . . . . . . 231
Scripts - Set 1 - Basic . . . . . . . . . . . . . . . . . . . . . . . . . . . . . . . . . . . . . . . . . . . . . . . . 232
Scripts - Set 2 - Intermediate . . . . . . . . . . . . . . . . . . . . . . . . . . . . . . . . . . . . . . . . 233
Scripts - Set 3 - Advanced . . . . . . . . . . . . . . . . . . . . . . . . . . . . . . . . . . . . . . . . . . . 234
Appendix D: JavaScript API Overview
Introduction. . . . . . . . . . . . . . . . . . . . . . . . . . . . . . . . . . . . . . . . . . . . . . . . . . . . . . . . 235
SceneGraph Overview . . . . . . . . . . . . . . . . . . . . . . . . . . . . . . . . . . . . . . . . . . . . . . 235
Physical Simulation . . . . . . . . . . . . . . . . . . . . . . . . . . . . . . . . . . . . . . . . . . . . . . . . . 238
JavaScript Interpreter Information. . . . . . . . . . . . . . . . . . . . . . . . . . . . . . . . . . . 240
Script Context . . . . . . . . . . . . . . . . . . . . . . . . . . . . . . . . . . . . . . . . . . . . . . . . . . . . . . 241
Appendix E: JavaScript API
JavaScript API Features . . . . . . . . . . . . . . . . . . . . . . . . . . . . . . . . . . . . . . . . . . . . . 243
Utility Functions . . . . . . . . . . . . . . . . . . . . . . . . . . . . . . . . . . . . . . . . . . . . . . . . . . . . 243
Application. . . . . . . . . . . . . . . . . . . . . . . . . . . . . . . . . . . . . . . . . . . . . . . . . . . . . . . . . 248
Application . . . . . . . . . . . . . . . . . . . . . . . . . . . . . . . . . . . . . . . . . . . . . . . . . . . 248
View . . . . . . . . . . . . . . . . . . . . . . . . . . . . . . . . . . . . . . . . . . . . . . . . . . . . . . . . . . 250
Button . . . . . . . . . . . . . . . . . . . . . . . . . . . . . . . . . . . . . . . . . . . . . . . . . . . . . . . . 251
Slider . . . . . . . . . . . . . . . . . . . . . . . . . . . . . . . . . . . . . . . . . . . . . . . . . . . . . . . . . 253
PrintDevice & Object Synchronization. . . . . . . . . . . . . . . . . . . . . . . . . . 254
Math . . . . . . . . . . . . . . . . . . . . . . . . . . . . . . . . . . . . . . . . . . . . . . . . . . . . . . . . . . . . . . . 257
Rotation . . . . . . . . . . . . . . . . . . . . . . . . . . . . . . . . . . . . . . . . . . . . . . . . . . . . . . 257
Transform. . . . . . . . . . . . . . . . . . . . . . . . . . . . . . . . . . . . . . . . . . . . . . . . . . . . . 259
Vector . . . . . . . . . . . . . . . . . . . . . . . . . . . . . . . . . . . . . . . . . . . . . . . . . . . . . . . . 261
Effects. . . . . . . . . . . . . . . . . . . . . . . . . . . . . . . . . . . . . . . . . . . . . . . . . . . . . . . . . . . . . . 263
Fog . . . . . . . . . . . . . . . . . . . . . . . . . . . . . . . . . . . . . . . . . . . . . . . . . . . . . . . . . . . 263
Glare. . . . . . . . . . . . . . . . . . . . . . . . . . . . . . . . . . . . . . . . . . . . . . . . . . . . . . . . . . 264
Sound . . . . . . . . . . . . . . . . . . . . . . . . . . . . . . . . . . . . . . . . . . . . . . . . . . . . . . . . 265
Event Handlers . . . . . . . . . . . . . . . . . . . . . . . . . . . . . . . . . . . . . . . . . . . . . . . . . . . . . 267
CollisionEventHandler. . . . . . . . . . . . . . . . . . . . . . . . . . . . . . . . . . . . . . . . . 267
KeyEventHandler. . . . . . . . . . . . . . . . . . . . . . . . . . . . . . . . . . . . . . . . . . . . . . 268
KeyEvent. . . . . . . . . . . . . . . . . . . . . . . . . . . . . . . . . . . . . . . . . . . . . . . . . . . . . . 270
MouseEventHandler. . . . . . . . . . . . . . . . . . . . . . . . . . . . . . . . . . . . . . . . . . . 272
MouseEvent. . . . . . . . . . . . . . . . . . . . . . . . . . . . . . . . . . . . . . . . . . . . . . . . . . . 274
Page 11

ADOBE ATMOSPHERE vii
User Guide
OverlapEventHandler . . . . . . . . . . . . . . . . . . . . . . . . . . . . . . . . . . . . . . . . . 275
Scene Objects . . . . . . . . . . . . . . . . . . . . . . . . . . . . . . . . . . . . . . . . . . . . . . . . . . . . . . 277
Actor . . . . . . . . . . . . . . . . . . . . . . . . . . . . . . . . . . . . . . . . . . . . . . . . . . . . . . . . . 277
Anchor. . . . . . . . . . . . . . . . . . . . . . . . . . . . . . . . . . . . . . . . . . . . . . . . . . . . . . . . 285
Camera . . . . . . . . . . . . . . . . . . . . . . . . . . . . . . . . . . . . . . . . . . . . . . . . . . . . . . . 286
EntryPoint . . . . . . . . . . . . . . . . . . . . . . . . . . . . . . . . . . . . . . . . . . . . . . . . . . . . 290
PhysicalModel . . . . . . . . . . . . . . . . . . . . . . . . . . . . . . . . . . . . . . . . . . . . . . . . 291
ReferencePoint. . . . . . . . . . . . . . . . . . . . . . . . . . . . . . . . . . . . . . . . . . . . . . . . 302
SceneGroup. . . . . . . . . . . . . . . . . . . . . . . . . . . . . . . . . . . . . . . . . . . . . . . . . . . 303
Script . . . . . . . . . . . . . . . . . . . . . . . . . . . . . . . . . . . . . . . . . . . . . . . . . . . . . . . . . 312
SolidObject . . . . . . . . . . . . . . . . . . . . . . . . . . . . . . . . . . . . . . . . . . . . . . . . . . . 315
SurfaceObject. . . . . . . . . . . . . . . . . . . . . . . . . . . . . . . . . . . . . . . . . . . . . . . . . 321
ViewpointObject . . . . . . . . . . . . . . . . . . . . . . . . . . . . . . . . . . . . . . . . . . . . . . 325
Solid Object Structure . . . . . . . . . . . . . . . . . . . . . . . . . . . . . . . . . . . . . . . . . . . . . . 330
Face . . . . . . . . . . . . . . . . . . . . . . . . . . . . . . . . . . . . . . . . . . . . . . . . . . . . . . . . . . 330
Primitive . . . . . . . . . . . . . . . . . . . . . . . . . . . . . . . . . . . . . . . . . . . . . . . . . . . . . . 332
Materials . . . . . . . . . . . . . . . . . . . . . . . . . . . . . . . . . . . . . . . . . . . . . . . . . . . . . . . . . . . 336
SurfaceTexture . . . . . . . . . . . . . . . . . . . . . . . . . . . . . . . . . . . . . . . . . . . . . . . . 336
Texture . . . . . . . . . . . . . . . . . . . . . . . . . . . . . . . . . . . . . . . . . . . . . . . . . . . . . . . 337
Viewpoint Object Structure . . . . . . . . . . . . . . . . . . . . . . . . . . . . . . . . . . . . . . . . . 339
MTSBaseObject . . . . . . . . . . . . . . . . . . . . . . . . . . . . . . . . . . . . . . . . . . . . . . . 339
MTSImageStream . . . . . . . . . . . . . . . . . . . . . . . . . . . . . . . . . . . . . . . . . . . . . 340
MTSScene. . . . . . . . . . . . . . . . . . . . . . . . . . . . . . . . . . . . . . . . . . . . . . . . . . . . . 341
MTSGeometry. . . . . . . . . . . . . . . . . . . . . . . . . . . . . . . . . . . . . . . . . . . . . . . . . 343
MTSInstance . . . . . . . . . . . . . . . . . . . . . . . . . . . . . . . . . . . . . . . . . . . . . . . . . . 343
MTSTexture . . . . . . . . . . . . . . . . . . . . . . . . . . . . . . . . . . . . . . . . . . . . . . . . . . . 346
MTSInstance2d. . . . . . . . . . . . . . . . . . . . . . . . . . . . . . . . . . . . . . . . . . . . . . . . 347
MTSMaterial . . . . . . . . . . . . . . . . . . . . . . . . . . . . . . . . . . . . . . . . . . . . . . . . . . 350
MTSTimeElem. . . . . . . . . . . . . . . . . . . . . . . . . . . . . . . . . . . . . . . . . . . . . . . . . 351
MTSTimeElemSWFView . . . . . . . . . . . . . . . . . . . . . . . . . . . . . . . . . . . . . . . 353
Physics . . . . . . . . . . . . . . . . . . . . . . . . . . . . . . . . . . . . . . . . . . . . . . . . . . . . . . . . . . . . . 355
FastConstraintSolver . . . . . . . . . . . . . . . . . . . . . . . . . . . . . . . . . . . . . . . . . . 355
AngularDashpot . . . . . . . . . . . . . . . . . . . . . . . . . . . . . . . . . . . . . . . . . . . . . . 359
Actions. . . . . . . . . . . . . . . . . . . . . . . . . . . . . . . . . . . . . . . . . . . . . . . . . . . . . . . . . . . . . 360
DragAction . . . . . . . . . . . . . . . . . . . . . . . . . . . . . . . . . . . . . . . . . . . . . . . . . . . 360
FluidAction . . . . . . . . . . . . . . . . . . . . . . . . . . . . . . . . . . . . . . . . . . . . . . . . . . . 361
MagneticAction . . . . . . . . . . . . . . . . . . . . . . . . . . . . . . . . . . . . . . . . . . . . . . . 362
MotorAction . . . . . . . . . . . . . . . . . . . . . . . . . . . . . . . . . . . . . . . . . . . . . . . . . . 364
Page 12

viii CONTENTS
SingleDragAction . . . . . . . . . . . . . . . . . . . . . . . . . . . . . . . . . . . . . . . . . . . . . 365
SimpleRigidWindAction . . . . . . . . . . . . . . . . . . . . . . . . . . . . . . . . . . . . . . . 366
Constraints . . . . . . . . . . . . . . . . . . . . . . . . . . . . . . . . . . . . . . . . . . . . . . . . . . . . . . . . . 367
BreakableConstraint. . . . . . . . . . . . . . . . . . . . . . . . . . . . . . . . . . . . . . . . . . . 367
HingeConstraint. . . . . . . . . . . . . . . . . . . . . . . . . . . . . . . . . . . . . . . . . . . . . . . 368
PointToPointConstraint. . . . . . . . . . . . . . . . . . . . . . . . . . . . . . . . . . . . . . . . 369
PrismaticConstraint . . . . . . . . . . . . . . . . . . . . . . . . . . . . . . . . . . . . . . . . . . . 370
StiffSpringConstraint . . . . . . . . . . . . . . . . . . . . . . . . . . . . . . . . . . . . . . . . . . 371
WheelConstraint . . . . . . . . . . . . . . . . . . . . . . . . . . . . . . . . . . . . . . . . . . . . . . 373
Colophon
Page 13

ADOBE ATMOSPHERE 1
User Guide
Chapter 1: The Atmosphere Platform
Welcome to the Adobe® Atmosphere™ platform – revolutionary software for creating immersive 3-D multimedia rich
stage sets for delivery on the web and within PDF documents.
What is Atmosphere?
The Adobe® Atmosphere™ platform is a completely integrated end-to-end solution for creating 3-D interactive
environments, delivering them over the web or within PDF documents, and allowing users to collaborate within
them. The Atmosphere embedded multimedia type gives the web or document designer the ability to present a rich
variety of interactive content, including three-dimensional objects, directional sound, streaming audio and video,
SWF animations, and physical behaviors, all within the context of a live theater performance. Viewers of Atmosphere
environments can move and interact freely within these spaces, and collaborate with each other.
Atmosphere is different from other multimedia authoring tools in that it provides all of the tools and capabilities
needed to author and play back realistic, immersive experiences within a 3-D stage set.
Platform Features
The Atmosphere platform integrates many features into a single application:
Immersion Create environments with dramatic lighting, animated 3-D objects, real-time behavior, video and audio in
small fi les embedded in a PDF or HTML doucment.
Interactivity Atmosphere users can easily create realisitc enivronments and behavior thanks to the built-in JavaScript
API and integrated physics engine. Users can interact realistically with environments, objects and avatars that can
behave independently or under user control.
Multimedia Atmosphere supports directional sounds, streaming video and audio, SWF animations and high
defi nition 3-D objects including animations.
Collaboration Add multi-user interaction with text chat, avatar motion and gestures, shared object synchronization
and message passing, without additional server software or hardware. An HTTP server is all that’s required.
The Atmosphere Architecture
The Atmosphere platform consists of 3 parts:
Atmosphere An easy to use, powerful authoring application that can be used to create, import and manipulate
3-D objects, light, sound, images, textures, video and other multimedia; attach scripted behaviors to objects and
environments; and securely publish these environments to the Web or PDF.
Page 14
2 CHAPTER 1
Atmosphere Player A web browser plug-in that allows users to interactively view and navigate Atmosphere
environments embedded in web pages. Atmosphere Player for Adobe Reader™ enables users to access Atmosphere
environments embedded in PDF documents.
Atmosphere Collaboration Server A publicly available server, which allows messaging, object synchronization and
interactivity between users of Atmosphere environments.
Atmosphere Player
The Adobe® Atmosphere™ Player® is a free application that allows users to view, interact, and collaborate with others
in environments created with Atmosphere and published online or within PDF documents.
Atmosphere environments can be viewed within a web page using the Player plug-in.
Web Page Integration Atmosphere Player supports communication between web page HTML, Java and JavaScript
allowing web designers full control of user experience using the Player’s JavaScript API.
A Multimedia Experience The Atmosphere Player offers the user a rich and interactive multimedia experience without
requiring a high-bandwidth connection (56K normally suffi ces). Atmosphere environments can also be viewed in
PDF documents using Atmosphere Player for Adobe Reader™.
Page 15

ADOBE ATMOSPHERE 3
User Guide
Atmosphere Player System Requirements:
• Intel Pentium II or faster processor
• Microsoft® Windows® 98SE, Windows ME, Windows 2000, Windows XP Home or Pro
• 64 MB of available RAM (128 MB recommended)
• 14 MB of available hard-disk space
• 16-bit color (32-Bit Color recommended)
• 56K modem or faster Internet connection
• Microsoft Internet Explorer 5.00.2614.3500 and above.
• Graphic Card Support: Radeon 7500 or higher, GeForce 2 or higher
Atmosphere
Adobe® Atmosphere™ is a professional authoring tool for assembling and creating 3-D interactive environments.
This new embedded multimedia type offers a unique way to present a rich variety of interactive content, including
three-dimensional objects, sound, streaming audio and video, SWF animations, and physical behaviors. Atmosphere
enables the designer to easily and quickly create content using intuitive tools. Users can import objects created with
other 3-D authoring applications, add texture, media, interactivity and lighting and then publish the environment for
use on the web or in PDF documents.
Page 16
4 CHAPTER 1
Atmosphere offers powerful, intuitive creation tools.
Import Standard Formats Atmosphere supports importing 3-D assets from applications, libraries and other sources
via the Viewpoint media format (MTX, MTZ). Atmosphere also supports wide range of standard graphics and
multimedia formats.
Scene Modeling Create objects and combine them with imported assets to build a seamless environment. Apply
global appearance properties such as lighting. Texture and fog using intuitive tools.
Interactivity Add interactive elements to the environment using JavaScript and a real-world physics simulation
engine.
Publishing Output the resulting environment in a form that can be embedded in either a web page or a PDF
document. Published worlds cannot be re-opened in Atmosphere, thus securing the author’s intellectual property.
Atmosphere System Requirements Atmosphere, like the Atmosphere Player, can run well on a minimal system
confi guration, but more powerful systems will improve the authoring experience. System requirements for
Atmosphere are:
• Intel® Pentium® III or faster processor
• Microsoft® Windows XP Home or Pro
Page 17

ADOBE ATMOSPHERE 5
User Guide
• 128 MB of available RAM (256 MB recommended)
• 50 MB of available hard-disk space
• 1,024x768 screen resolution
• 16-bit color (32-Bit Color recommended)
• Graphic Card Support: Radeon 7500 or higher, GeForce 2 or higher
Atmosphere is only available for the Windows XP platform.
i
Atmosphere Collaboration Server
The Atmosphere Collaboration Server is a publicly available server that offers messaging and collaboration within any
Atmosphere environment. The source code for the Atmosphere Collaboration Server is available at no cost under a
simple license from Adobe System.
Why 3-D?
The Atmosphere platform is designed to make the power of immersive media rich environments available to a much
wider audience than has been previously possible. The web is a very popular way for individuals and organizations
to present information, but until now, it has largely been limited to the same kinds of 2-D information that can be
presented on a printed page.
People are accustomed to a world that has height, width and depth. Technologies like the telephone, television and
the web offer only a limited lower number of dimensions. Consider the difference in trying to learn to navigate an
unfamiliar place like an airport: directions given over a telephone (1-D), via a map (2-D) or by means of a video fl ythrough (3-D) represent successively easier ways to learn an unfamiliar space.
By making it possible to easily create 3-D environments that can be navigated online, Atmosphere extends a powerful
medium to a much wider audience and range of applications.
Page 18

6 CHAPTER 1
Page 19

ADOBE ATMOSPHERE 7
User Guide
Chapter 2: Exploring Atmosphere
Environments
Before we turn our attention to learning how to create interactive environments in Atmosphere, let’s learn how to
use the Atmosphere Player. The Player is a free plug-in that allows people to view and interact with Atmosphere
environments embedded in web pages and PDF documents.
Using the Atmosphere Player
When you installed Atmosphere, the Player was installed automatically. If you need help with Atmosphere
installation, please see Appendix A, “Installing and Confi guring Atmosphere.” Once installed, Atmosphere
environments will be loaded in the Player automatically when you navigate to a web page or open a PDF document
that contains an Atmosphere .aer fi le. If the Player isn’t installed, a dialog box will appear asking if you wish to install
it.
The Atmosphere Player features support for hardware acceleration. If the Player detects a supported video card, it will
i
enable hardware acceleration automatically.
This animated spinning globe icon and a progress bar will appear as the Atmosphere environment is loading.
When the spinning globe icon disappears, the geometry for the environment has completed loading and will be
i
displayed. Textures and multimedia fi les will continue to download.
Opening Local Atmosphere Files
In addition to Atmosphere environments that are posted online, you can also open environments that are saved
locally. To open a local environment, right-click in the Player window and select File > Open from the pop-up menu.
This will open a fi le dialog box where you can select an Atmosphere environment to open.
The Player can only open and view AER fi les, not ATMO fi les.
Page 20
8 CHAPTER 2
Tutorial: Visiting Atmosphere Environments at Adobe.com
You can begin to explore Atmosphere environments on the Atmosphere product pages at Adobe.com. You can fi nd
these pages at www.adobe.com/products/atmosphere.
To browse the Atmosphere environments at Adobe.com, follow these steps:
1 Open a web browser and enter the URL http://www.adobe.com/products/atmosphere/.
2 The Adobe Atmosphere web pages will open. Click on one of the links under the Atmosphere Showcase heading
3 The Atmosphere environment will load within the web page if the Player is installed. If not, you will be asked if
in the left column.
you wish install the Player. Click Yes to install the Player if necessary. Once downloaded and installed, you will be
able to view the Atmosphere environment.
Atmosphere environments can be viewed from within a web page. Above is an environment built using Atmosphere and
showcased on the Adobe site.
Page 21
ADOBE ATMOSPHERE 9
User Guide
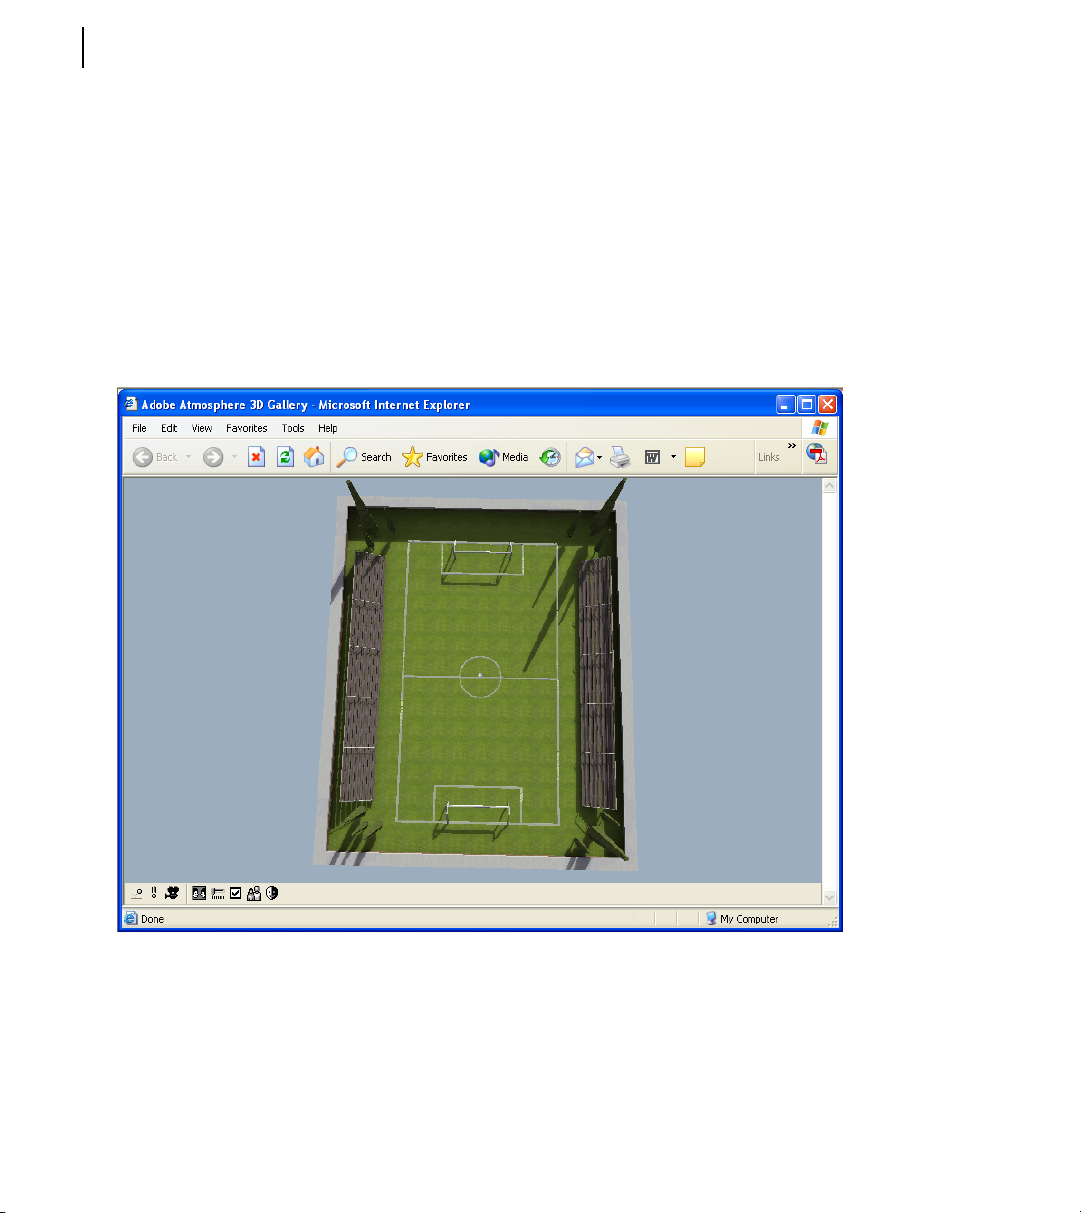
Tutorial: Viewing Atmosphere Environments in Photoshop Album
Even if you’ve never surfed the web, you may have seen Atmosphere if you use Adobe Photoshop Album. All the 3-D
galleries in Photoshop Album are Atmosphere environments. Photoshop Album is available from the Adobe Store
online as well as from authorized Adobe resellers.
To explore the Atmosphere environments in Photoshop Album, follow these steps:
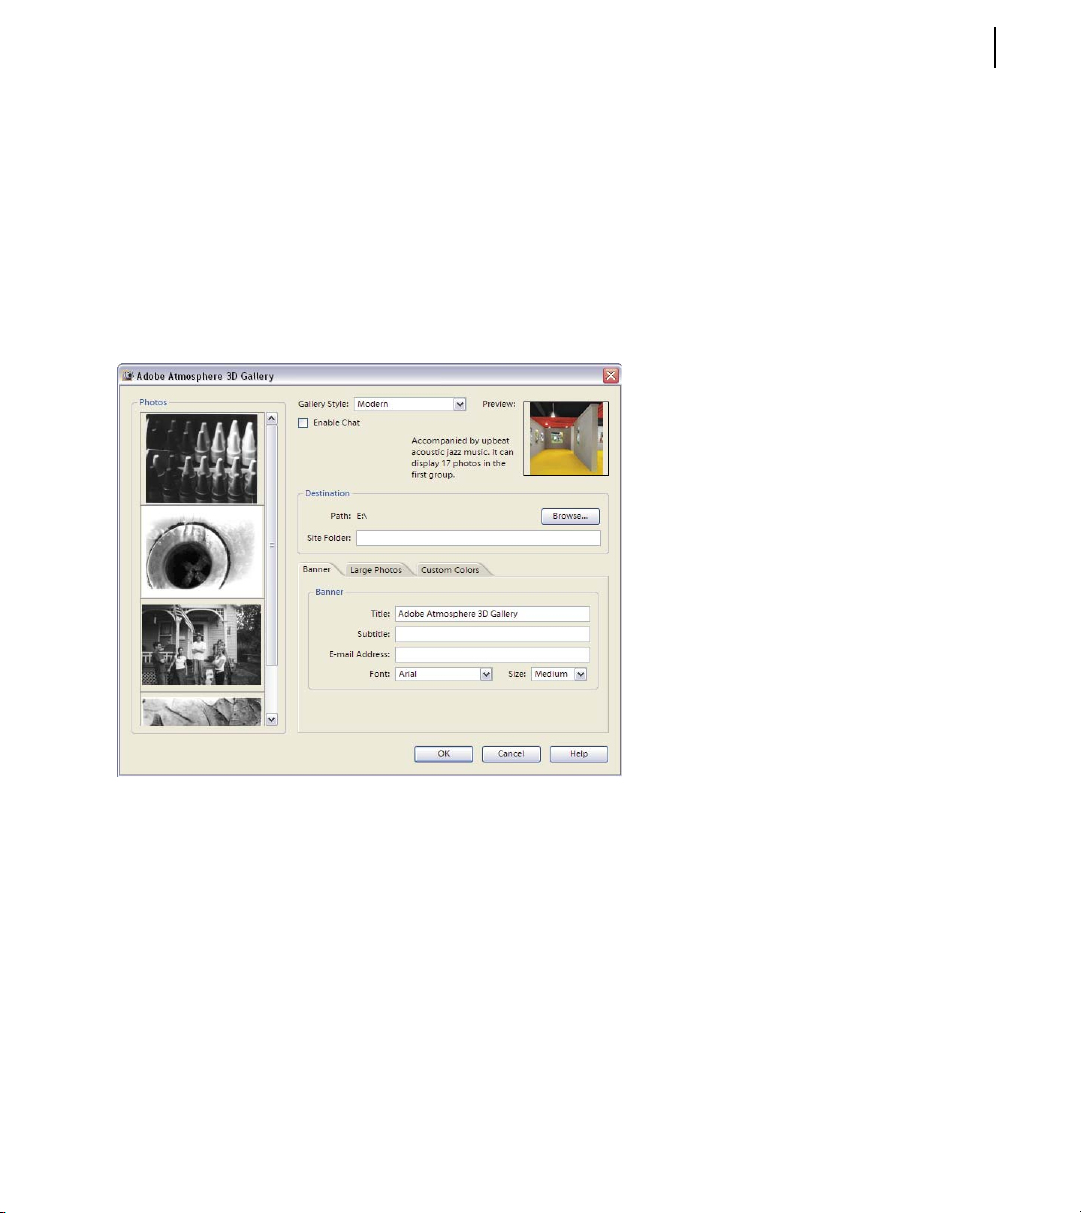
1 Open Photoshop Album and select several images you would like to place in a 3D gallery.
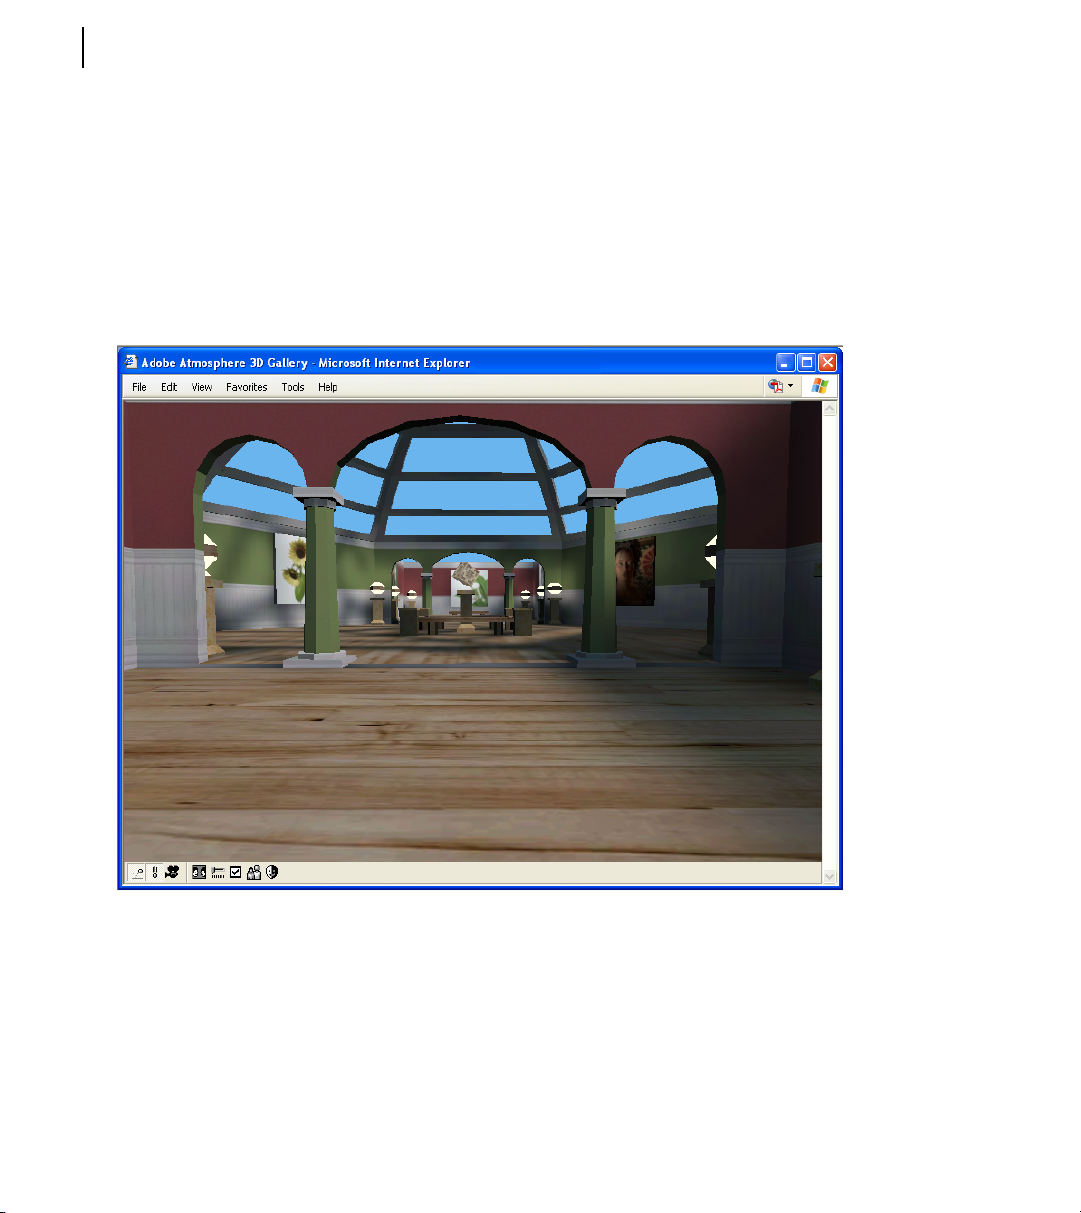
2 Select “Adobe Atmosphere 3D Gallery...” under the Creations menu.
3 Select the gallery you want from the Gallery Style list.
4 Click OK and the 3D Gallery will load within a web browser.
Page 22
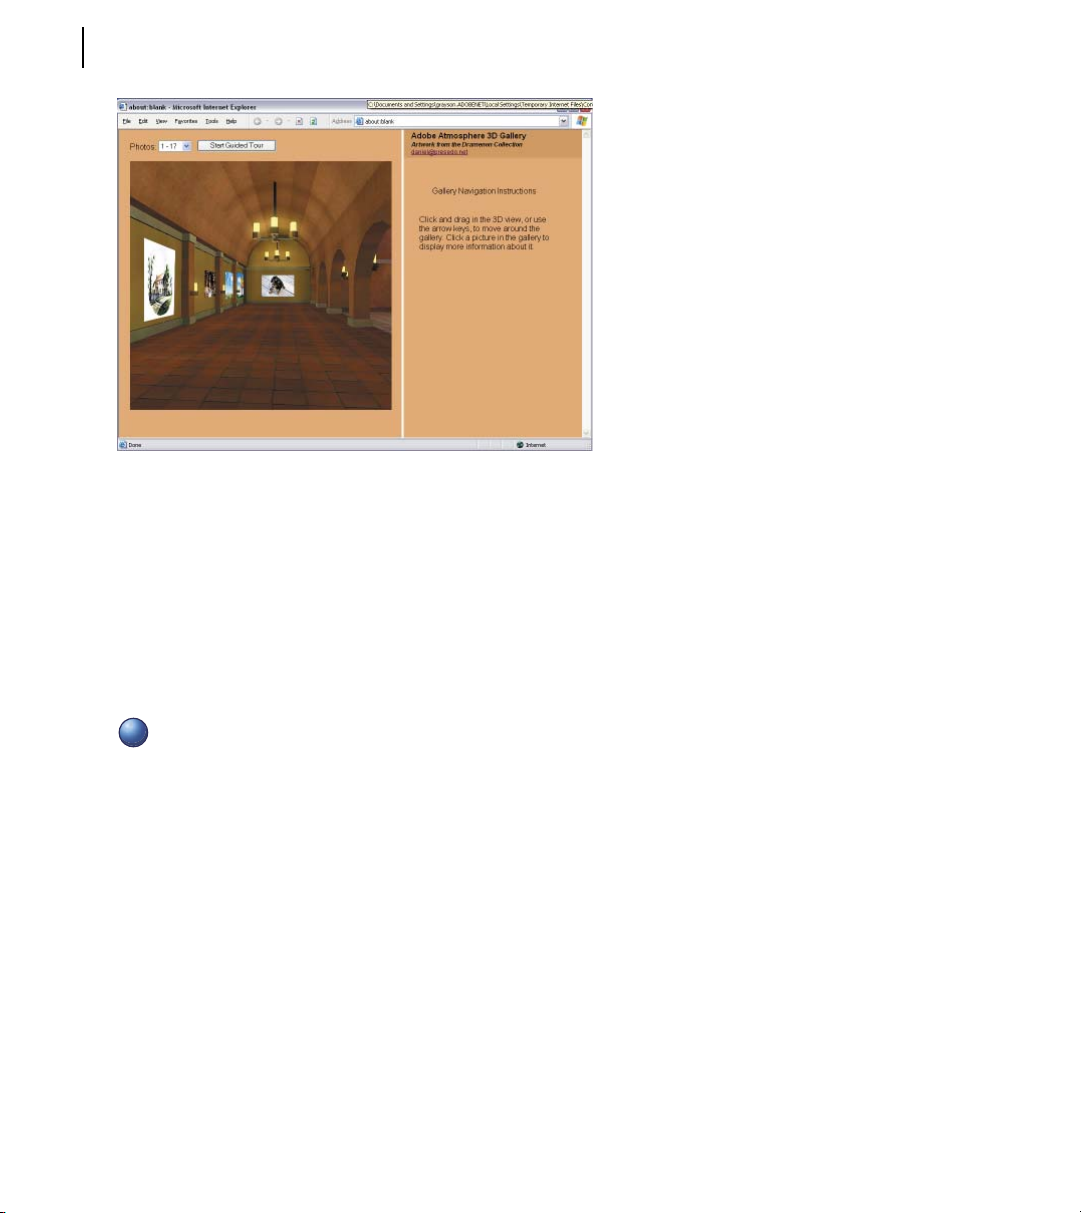
10 CHAPTER 2
An Atmosphere environment created using Photoshop Album’s 3D gallery plug-in.
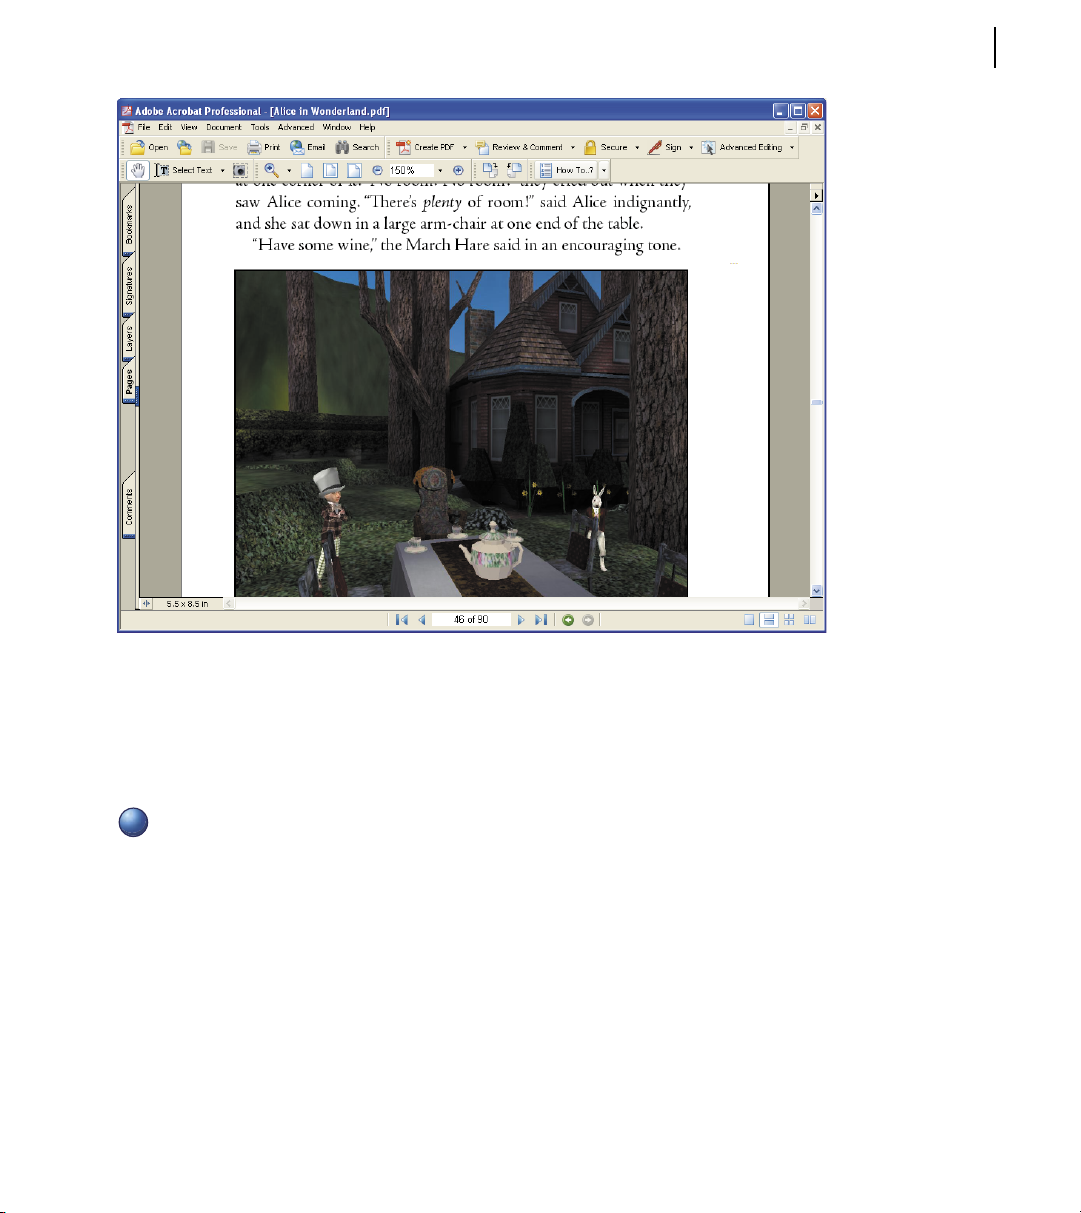
Tutorial: Viewing Atmosphere Environments in PDF Documents
Atmosphere environments can be embedded in PDF documents, providing readers a much richer experience than
static images.
To explore the Atmosphere environments in a PDF document, follow these steps:
1 Open a PDF document that includes an Atmosphere environment.
The Atmosphere web pages at http://www.adobe.com/products/atmosphere/ include an example PDF of Lewis
i
Carroll’s classic Alice in Wonderland that includes Atmosphere environments.
2 Scroll the document until you locate a Atmosphere environment and click on it
3 The Atmosphere environment will load within the document.
Page 23
ADOBE ATMOSPHERE 11
User Guide
The Mad Hater’s Tea Party Atmosphere environments within a PDF document.
Navigating Atmosphere Environments
There are several ways to navigate in Atmosphere Player, using the mouse or keyboard.
Before you can navigate an Atmosphere environment, the environment must be the focus of the web page. You can
i
give the environment focus by clicking on it.
Using the Mouse
Moving about an Atmosphere environment is straightforward. Dragging (moving the mouse with the left button held
down) the mouse forward will move you forward in the environment and dragging backwards will move in reverse.
Dragging the mouse to either side will rotate the view to that side. Holding down the Shift key while dragging forward
will move you upward in the environment. If gravity is enabled, you’ll descend back to the ground when you release
the mouse button. Otherwise, you can move back down by holding down the Shift key and dragging the mouse
backwards.
Page 24

12 CHAPTER 2
Holding down the Ctrl key while dragging the mouse forward will tilt the view perspective up towards the ceiling or
sky, while dragging backwards will tilt down.
i
There is one other movement associated with the Shift key. Holding down the Shift key and moving the mouse to the
side will shuffl e your view horizontally. This movement is called a strafe and it allows you to move linearly to either
side.
These are all the movements possible within the Player. With a little practice, you will fi nd that you can combine
movements to navigate wherever you wish to go within an environment.
Using the Keyboard
If you prefer, you can use the keyboard to navigate instead of the mouse, the arrow keys work just like mouse
dragging. The up arrow will move you forward in the environment and the back arrow will move you backwards.
The side arrows will rotate the view to the side and the Shift and Ctrl keys along with the arrows allow you to move
upwards, strafe to the side and tilt your view.
Using the Ctrl key to tilt the view will not change your horizontal or vertical movements. For example, if you fi rst
hold down Ctrl and drag the mouse backwards so that you are looking at the ground and then, releasing the Ctrl key,
drag the mouse forward, you will still move in a forward direction even though you’re looking at the ground. You will
not move closer to the ground.
The strafe movements is very useful if you want to look at pictures, like those in a gallery, that are lined up on a wall
side by side.
Atmosphere Player Navigation
Movement Mouse motion Keyboard
Move forward Drag mouse forward Up arrow
Move backwards Drag mouse backwards Down arrow
Turn to left Drag mouse to left Left arrow
Turn to right Drag mouse to right Right arrow
Ascend upward Shift+drag mouse upward Shift+up arrow
Descend downward Shift+drag mouse downward Shift+down arrow
Tilt view up Ctrl+drag mouse upward Ctrl+up arrow
Tilt view down Ctrl+drag mouse downward Ctrl+down arrow
Strafe left Shift+Drag mouse to left Shift+Left arrow
Strafe right Shift+Drag mouse to right Shift+Right arrow
Tutorial: Practicing Navigation
The best way to learn how to navigate Atmosphere environments is to practice.
Page 25
ADOBE ATMOSPHERE 13
User Guide
To practice navigating within Atmosphere Player, follow these steps.
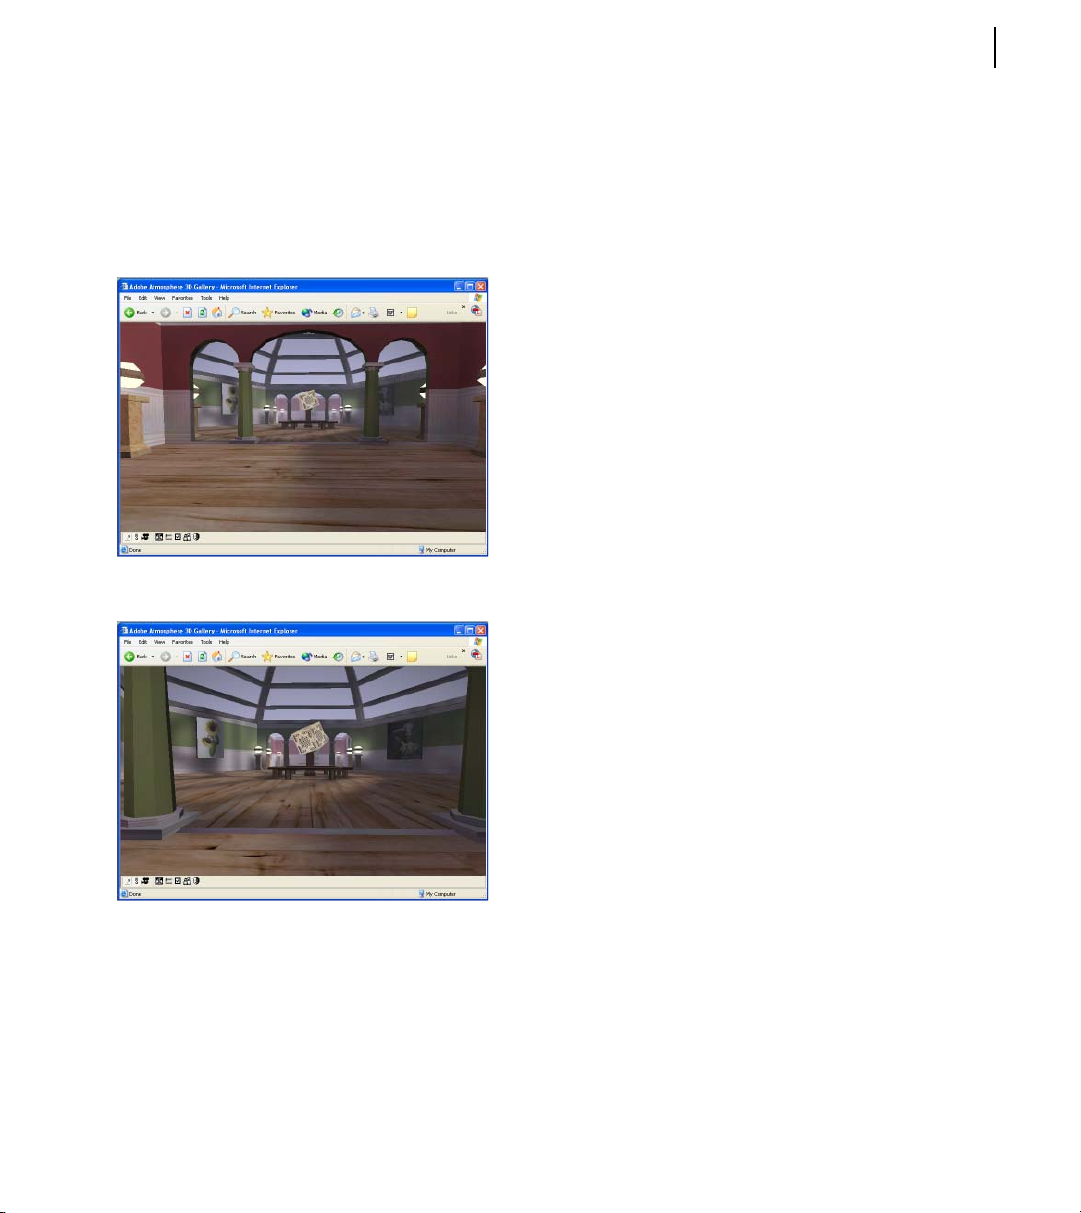
1 Load an Atmosphere environment, one can be found in the Help\Tutorials\Gallery folder under the directory
where Atmosphere was installed. It should be a path similar to c:\Program Files\Adobe\Atmosphere\Help\Tutorials\
Gallery. After navigating to your folder in the open dialog, select the fi le Gallery.html and press Open.
2 Click on the Atmosphere environment to active it, then hold down the up arrow to move forward into the
environment.
A simple environment in a web browser as it appears when fi rst loaded.
The scene changes after moving forward into the environment.
3 Return to your starting point by holding down the down arrow to move backwards through the environment.
4 Next hold down the left arrow key and you’ll spin around in the environment to the left. The right arrow key will
do the opposite.
5 If you’d like some elevation, hold down the Shift key while pressing the up arrow and you’ll ascend in the
environment. When you release the up arrow, you’ll descend again if gravity is enabled.
Page 26
14 CHAPTER 2
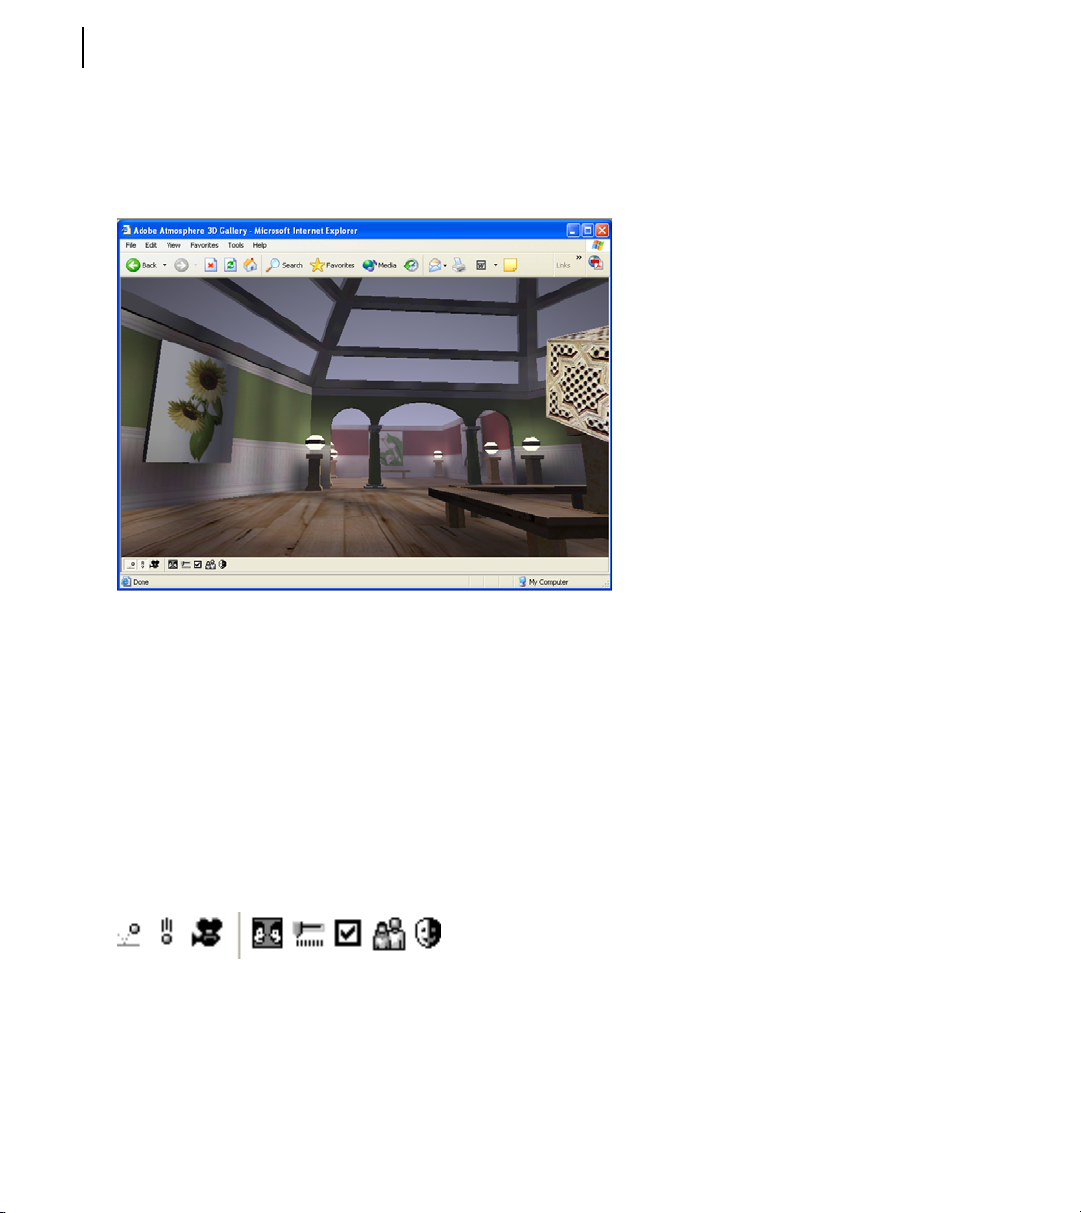
6 Holding down the Ctrl key while pressing the up arrow will tip your view up towards the ceiling. Holding the Ctrl
7 The last move to practice is a strafe. Hold down the Shift key and press the left arrow key. This will move you
The view after moving further into the scene.
key while pressing the down arrow will tip your view down towards the ground.
sideways to the left. Try it with the right arrow key to return to the original location.
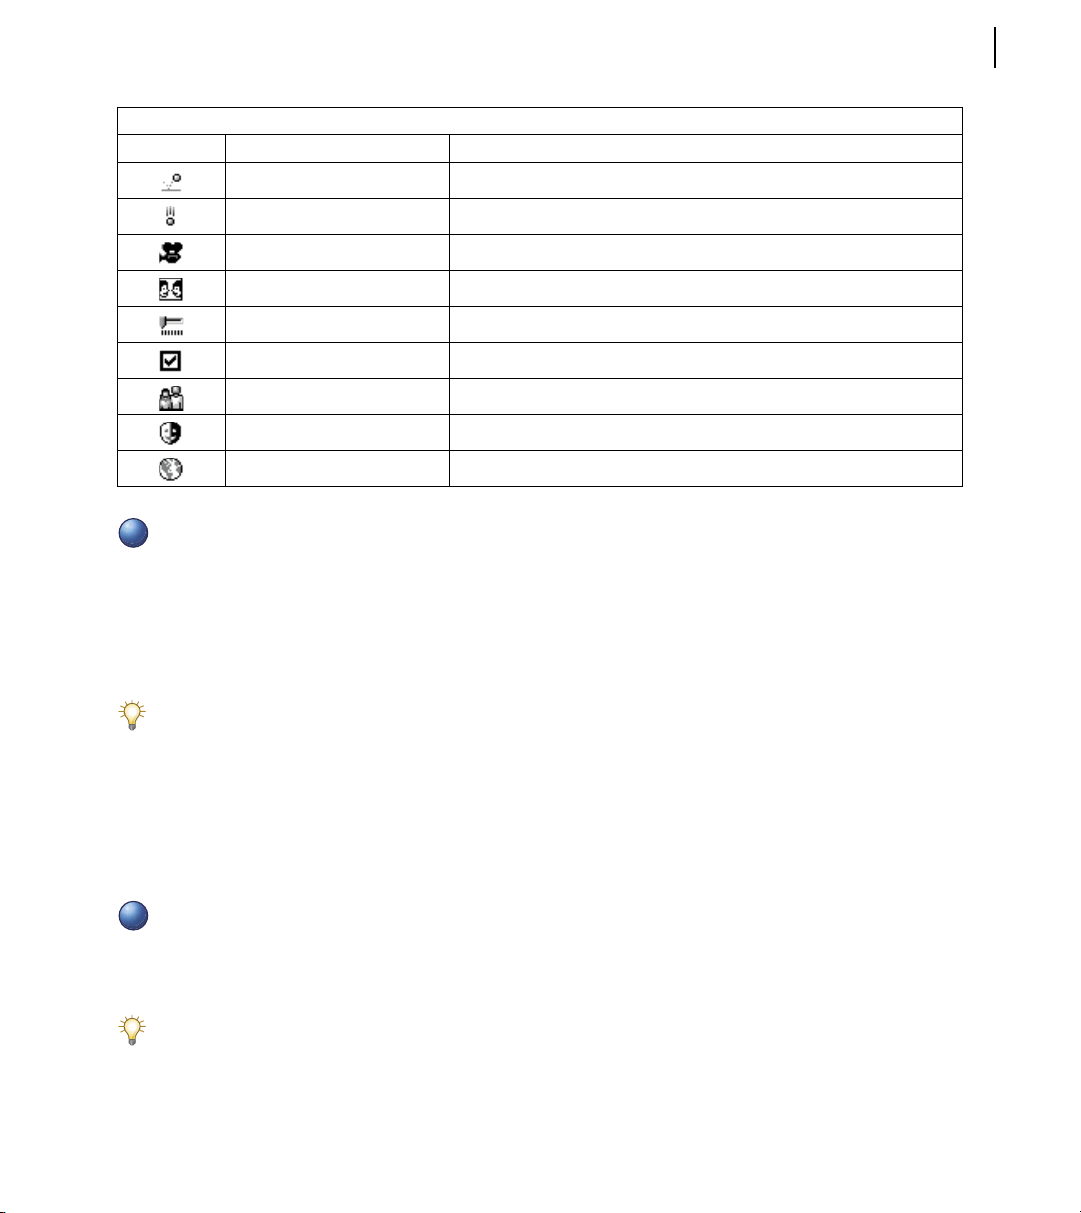
Using the Toolbar
If you look in the lower left corner of an Atmosphere environment, you may see a toolbar of icons. The Atmosphere
Player toolbar includes several icon buttons that toggle properties and open palettes. You can control several settings
using these icon buttons. If you forget which button does what, hold the mouse cursor over the top of the button and
a tooltip will appear with the button name.
You can turn this toolbar on and off using the Contextual menu – right-click to bring up the pop-up menu and
choose Toolbar to make the icons appear or disappear You can also access all the toolbar commands from the
Contextual menu, which is convenient if the toolbar is hidden.
The Player toolbar.
Page 27
ADOBE ATMOSPHERE 15
User Guide
Atmosphere Player Toolbar Buttons
Icon Name Description
Collide toggle Enables collision detection in the environment
Gravity toggle Enables gravity in the world
Show My Avatar toggle Shows your avatar in the environment
Chat Enables chat mode and opens the Chat palette
Controls Opens the Controls palette which may include custom controls
Preferences Opens the Preferences palette for setting Player preferences
Users Opens the Users palette which lists the other users in the current environment
Avatars Opens the Avatar palette where you can change the current avatar
Bookmarks Opens the Bookmarks palette which stores bookmarks of favorite sites
Toggle buttons are enabled when they are indented–highlighted in white.
i
Detecting Collisions
You may notice as you move through Atmosphere environments, that you cannot move through solid objects such as
walls and pillars. This is because the Collide option is enabled. The Collide button allows you to toggle this feature,
enabling movement through solid objects when turned off.
If you have trouble navigating a particular environment, you can disable the Collide button to m ake it easier to move
around.
Setting Gravity
Another physical constraint in Atmosphere environments is gravity. If the Gravity toggle button is enabled while you
are higher than the fl oor of the environment, then you, and avatar - if turned on, will descend until you come to rest
on a solid object.
You won’t descend unless both the Gravity and Collide button are enabled.
i
If there is no solid object underneath you, then you will continue to descend until the entire environment is out of
site. If the Gravity toggle button is disabled, then you will hang in the air after releasing the mouse.
If you ever fi nd yourself falling off the edge of environment, you can right click on the environment and select
Navigation > Reenter World from the pop-up menu to restore yourself to the Entry Point location.
Page 28
16 CHAPTER 2
Tutorial: Moving to an Overhead View of the Environment
Using the Shift and Ctrl keys, you can quickly get a bird’s-eye view of the environment. This overhead view will give
you a good perspective of the entire environment.
To move to an overhead view of an environment, follow these steps.
1 In the Player toolbar, click on the Gravity and Collision buttons to disable them.
2 From a point near the center of the environment, hold down the Shift key and press the Up arrow (or drag the
3 When you ascend suffi ciently, hold down the Ctrl key and press the Down arrow (or drag the mouse backward)
mouse forward) to ascend upwards.
until the environment tilts into view.
Disabling Gravity and Collisions lets you easily ascend high above an environment.
Page 29
ADOBE ATMOSPHERE 17
User Guide
Working with Bookmarks
You can bookmark scenes that you would like to revisit. Bookmarks aren’t enabled by default. To enable bookmarks,
open the Preferences panel, click the Chat tab and check the Enable Bookmarks box. Once enabled, a Bookmarks icon
button appears in the Player toolbar. Clicking this button will open the Bookmarks palette.
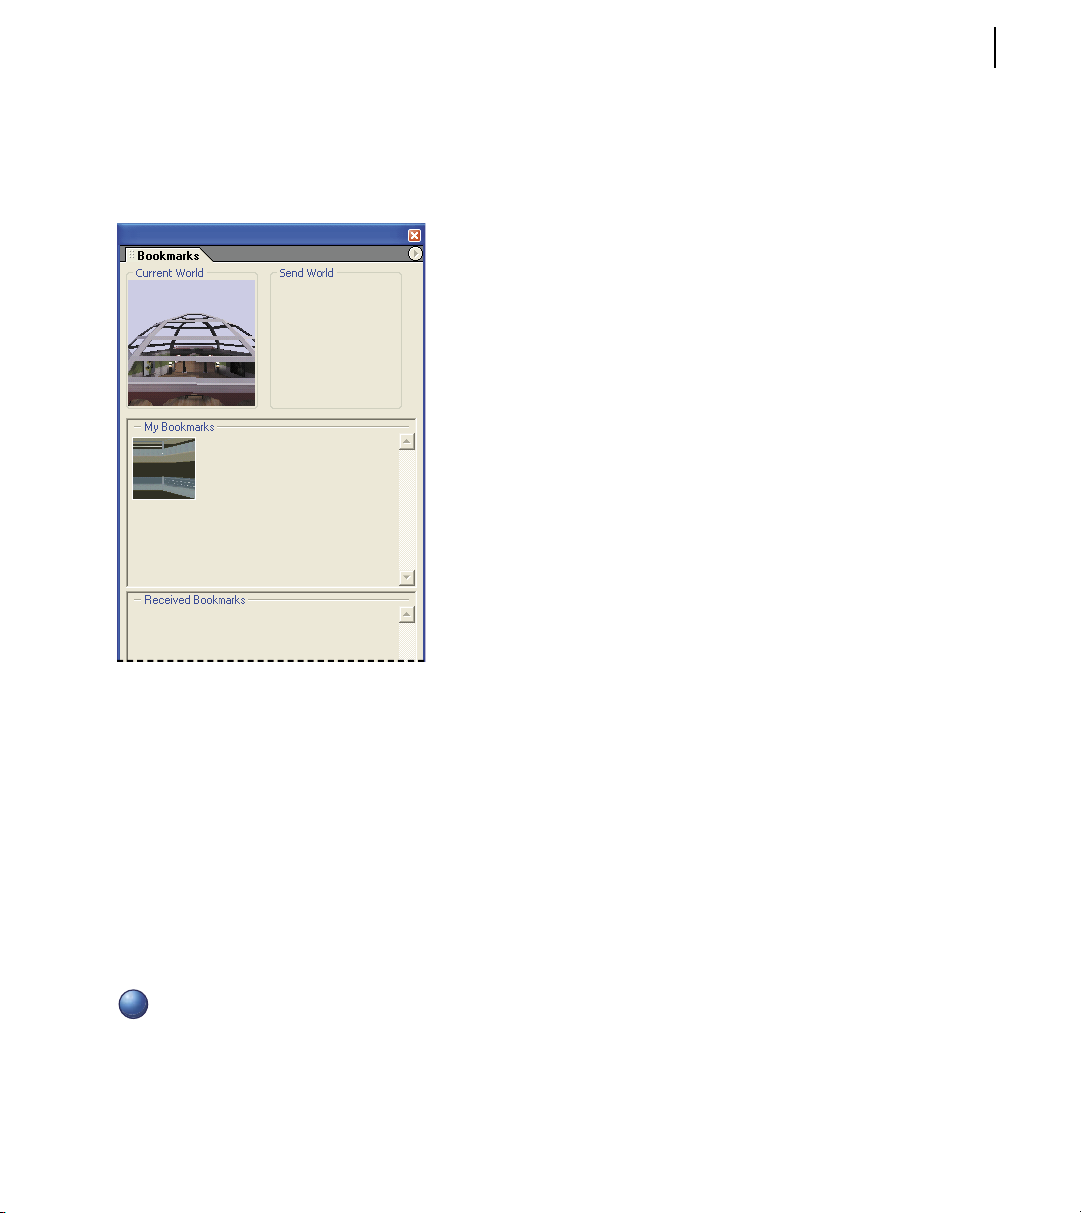
The Bookmarks palette holds snapshots of your favorite Atmosphere environments.
The Bookmarks palette
The Bookmarks palette shows a snapshot of the current environment in the box labeled Current World. If you drag
the environment displayed in the Current World box to the My Bookmarks section, a bookmark to the scene will be
created. You can revisit the bookmarked environment by dragging it from the My Bookmarks section to the Current
World box at the top of the palette.
If you move the mouse over the top of a bookmarked environment, a tooltip will appear that lists the URL to the
bookmarked fi le. You can delete bookmarks by selecting them in the My Bookmarks section and pressing the Delete
key. If you right click in the My Bookmarks section, a pop-up menu will let you change the thumbnail size to Small,
Medium or Large.
You can also share Bookmarked environments with others during a Chat session. Sharing bookmarks is covered in
i
Chapter 3, “Interacting with an Atmosphere Environment.”
Page 30

18 CHAPTER 2
Tutorial: Bookmarking New Environments
If you fi nd an environment that you would like to return to, you can bookmark it. Bookmarks appear in the
Bookmarks palette.
To bookmark an environment, follow these steps.
1 Visit an Atmosphere scene that you wish to bookmark. Right-click in the environment and select Window >
2 Drag the thumbnail of the current environment and drop it in the My Bookmarks section of the palette. This will
3 You can revisit the bookmarked environment at any time by double clicking on it in the Bookmarks palette.
Understanding and Using Avatars
As you move around in public Atmosphere environments on web sites, you may see other characters moving about.
These characters are called avatars and they provide a visual representation of visitors to the environment. Each
visitor has her own avatar. To see your avatar, click on the Show My Avatar button in the Player toolbar.
Bookmarks from the pop-up menu to open the Bookmarks palette. The current environment will be displayed in
the Current World box of the Bookmarks palette.
add the environment to your list of bookmarks.
An environment with the default avatar visible. Click the Show My Avatar button on the toolbar to see the avatar.
Page 31

ADOBE ATMOSPHERE 19
User Guide
The Avatars palette
You can load different avatars using the Avatar palette. Clicking the Avatar button in the Player toolbar will open the
Avatar palette. The top of the Avatar palette includes a box that shows a snapshot of your Current Avatar, another box
that holds an avatar that you can send to others, and a series of snapshots labeled My Avatars that holds a library of
avatars that you can swap at any time.
Avatars, like bookmarks, can be shared with other users in an environment during a Chat session. Chapter 3,
i
“Interacting with an Atmosphere Environment,” explains how to do this.
To change your avatar, simply select one from the library in My Avatars and drag it to the Current Avatar box.
Atmosphere will load the new character and present it in the Atmosphere window. You can delete an avatar by
selecting it in the My Avatars sections and pressing the Delete key. If you right-click in the My Avatars section, a
Contextual menu will let you change the thumbnail size to Small, Medium or Large.
If you delete one of the default avatars from the My Avatars section there is no way to recover it unless you reinstall
Atmosphere.
Page 32

20 CHAPTER 2
The Avatar palette lets you change characters at any time.
Tutorial: Swapping Your Avatar
You can change avatars easily to suit your whim. The Avatar panel holds several different characters that you can use.
To change your character, follow these steps.
1 Click the Avatar button in the Player toolbar to open the Avatar palette.
2 From the My Avatars section, drag the new avatar that you wish to use to the Current Avatar box at the top of the
panel.
3 Enable the Show My Avatar button in the Player toolbar to see the new avatar.
Page 33

ADOBE ATMOSPHERE 21
User Guide
After switching avatars, the new avatar shows up immediately.
Setting Player Preferences
The Preferences button in the Player toolbar will open a palette with three separate tabs – General, Display and Chat.
Each of these tabs includes settings which change how the Player works.
General Preferences
The General tab of the Preferences palette includes settings for the avatar Nickname and URL under the Personal
Defaults heading. The Nickname will appear in the Chat palette along with any message you type when you’re in Chat
mode. It will also identify you in the Users palette to other visitors in the environment.
To load a new avatar, simply enter the avatar’s URL into the Avatar URL fi eld and the avatar will show up as the
Current Avatar in the Avatar palette. From here you can drag it into the My Avatars section. There is also a Show My
Avatar option to make your avatar visible in the Atmosphere Player, which works the same way as the Show My Avatar
button in the toolbar.
Page 34

22 CHAPTER 2
The Preferences panel includes controls for defi ning Player behaviors.
You can enable Collisions and Gravity and set values for Acceleration and Maximum Velocity under the Navigation
heading. These options work the same as their respective toolbar buttons.
The Acceleration value determines how quickly your avatar begins to move. A low Acceleration value will cause your
avatar to start moving slowly and pick up speed the longer the arrow key is held down. A high Acceleration value will
cause the avatar to move with Maximum Velocity as soon as one of the arrow keys is pressed.
i
The Acceleration and Maximum Velocity values are only used when navigating with the keyboard.
The Maximum Velocity value is the fastest speed that the avatar will move, regardless of how long the arrow key is
held down. Both Acceleration and Maximum Velocity can range from 1 to 100.
Don’t be tempted to set the Acceleration and Maximum Velocity to their maximum value. Unless you are navigating
a very large environment, maximizing these values will make the avatar motion diffi cult to manage.
Display Preferences
The Display tab of the Preferences palette lists and lets you choose your Preferred Renderer. Options include
Hardware (Direct3D) and Software. If your computer system has a video card that supports hardware rendering,
then you will see better performance and image quality by selecting the Hardware (Direct3D) option as the Preferred
Renderer. Software rendering, although slower, will always work regardless of your system.
Even if you select the Hardware (Direct3D) option, hardware rendering may be unavailable if Atmosphere is unable
i
to recognize your video card. Appendix A, “Installing and Confi guring Atmosphere,” includes information on
confi guring Atmosphere to recognize your video card as well as a list of supported video cards.
Page 35

ADOBE ATMOSPHERE 23
User Guide
The Display tab of the Preferences panel lets you choose to activate hardware rendering.
The General Rendering Options let you select to Throttle When Not Active. This option will lower the frame rate of
the Atmosphere environment when it is not the active window. By enabling this option, you are allowing your video
card to perform other tasks when it is not being used to render the Atmosphere environment.
The Use 24-bit Textures options allows higher resolution textures that support photo-realistic color. If disabled, the
Atmosphere Player will use lower resolution images. This reduces image quality, but results in an environment that
is rendered more quickly, which may be necessary on older systems with slower processors. This option requires that
you restart Atmosphere.
If you are viewing Atmosphere environments on an older system like a Pentium II, then the frame rate for the
Player may be slow. There are several options in the Display tab of the Preferences palette that can help speed up
Atmosphere. For the Software Rendering Options section, you can select to Use and/or Smooth Textures and Light
Maps. Disabling these options will make the environment render more quickly, but will sacrifi ce image quality.
These options have no effect if the Hardware (Direct3D) option is enabled.
i
Disabling textures will not cause the environment to load any faster. Even if textures are disabled, they will still be
i
downloaded. The performance increase that comes by disabling textures is an increase in frame rate as you navigate
the environment.
Page 36

24 CHAPTER 2
To speed up the Player, you can turn off textures.
To further speed the Player’s performance, you can also disable Light Maps.
The Smooth Textures and Smooth Light Maps options will cause Player to anti-alias textures and light maps. To see
the impact of smoothing textures, zoom in close to a texture.
Page 37

ADOBE ATMOSPHERE 25
User Guide
By enabling the Smooth Textures option, the pixels in the textures are smoothly blended.
With the Smooth Textures option disabled, the Player performance is increased, but the textures will appear jagged.
Page 38

26 CHAPTER 2
Chat Preferences
The Chat tab of the Preferences palette, includes options to Enable Chat, Enable Chat Logging, Print URLs of Shared
Links and Enable Bookmarks. At times, you may wish to turn off some of these options to maintain privacy. Note that
by right-clicking in an environment, a Chat item appears in the pop-down menu. You can control the behavior of
the Chat window – whether it appears at the bottom of the environment window or as a detached, fl oating window
– by toggling this option. Chat features are covered more completely in Chapter 3, “Interacting with Atmosphere
Environments.”
The Chat tab of the Preferences panel includes options for controlling the Chat features.
Page 39

ADOBE ATMOSPHERE 27
User Guide
Chapter 3: Interacting with Atmosphere
Environments
Atmosphere environments are compelling experiences because they allow users to interact with them realistically. For
example, users can interact with other visitors and with objects in the scene that have scripted behaviors attached to
them.
Moving Through Portals
Much like web pages can be linked to each other, Atmosphere environments can be connected using portals. A portal’s
location is denoted by a set of spinning red, green, and blue squares. When a user’s avatar is moved into a portal, the
linked environment will automatically load in place of the existing one.
Portals offer a way to link to other Atmosphere environments.
You can select to move back and forward between linked environments using the Navigation > Back and Forward
right-click pop-up menu commands.
If a Portal’s squares are lying fl at, then it is not active. This could be due to an broken link or a server that is offl ine.
Page 40

28 Chapter 3
Tutorial: Jumping Between Environments
When buiding Atmosphere environments, you may fi nd it easier to work with several smaller interconnected
environments that are linked using Portals. A good example of this is the Museum environment on the Atmosphere
product pages at Adobe.com.
To practice jumping between different Atmosphere environments using Portals, follow these steps.
1 Visit the Atmosphere product pages at Adobe.com by typing http://www.adobe.com/products/atmosphere/ into a
2 Locate the Museum Atmosphere environment in the Showcase pages and enter the Atmosphere scene. Try http://
3 Navigate about the scene until you locate a Portal and move into it.
4 The linked Atmosphere environment is loaded into the Player.
web browser.
www.adobe.com/products/atmosphere/showcase/show_museum.html
Portals offer a way to link to other Atmosphere environments.
Page 41

ADOBE ATMOSPHERE 29
User Guide
Understanding Entry Points
When you fi rst enter an Atmosphere environment, you arrive at a location called the Entry Point that is designated by
the environment creator. From the Atmosphere Player interface, you can have your avatar immediately jump back to
this location using the Navigation > Reenter World command on the Contextual (right-click) menu.
Communicating and Collaborating with Other Visitors
When you visit Atmosphere environments online, you can enable a Chat palette that allows text conversations with
other online visitors if the environment has been designed for collaboration. Open a Chat palette by clicking on the
Chat button in the Player toolbar. The Chat palette can also be used to display information about the environment.
The Chat palette displays the text of online messages as users communicate with one another.
You can also place the Chat window at the bottom of the Atmosphere environment by right-clicking and selecting
Chat from the Contextual menu.
Page 42

30 Chapter 3
The Chat palette can also be opened at the bottom of the Atmosphere Player interface.
Tutorial: Communicating with Other Users
To practice using the Chat features in Atmosphere, you fi rst must locate an Atmosphere environment on the web that
other users are visiting. Once you see other users in an environment (see the section below for instructions), you can
communicate with them using the Chat features.
To chat with other users in an Atmosphere environment, follow these steps.
1 Click on the Chat button in the Player toolbar. A Chat palette will appear.
2 In the lower fi eld of the Chat palette, type a text message and press the Enter key.
3 The text message and your nickname will appear in the Chat palette along with the text messages typed by
other users.
Page 43

ADOBE ATMOSPHERE 31
User Guide
Identifying Users
The Users palette lists all the current visitors in the environment. The names that are displayed are specifi ed in the
Nickname fi eld in the General tab of the Preferences palette. The Whisper option can be used to limit the Chat
features to selected users. To have a private conversation with a specifi c user, check the Whisper box next to the user.
The Users palette lists all the current visitors in an environment.
Sharing Bookmarks and Avatars
You can share your bookmarks and avatars with other users of an environment by using the Send World and Send
Avatar boxes in the Bookmarks and Avatar palettes.
For example, if you wish to share a your new avatar with another user, you can drag your avatar from the My Avatars
section (or from the Current Avatar window) to the Send Avatar box and it will appear in the Received Avatars section
of all current users’ Avatar palette (note that the Send Avatar window is to the right of the Current Avatar window–
you may need to resize the Avatar palette to see it). From here you can drag it to the My Avatar section. When a
bookmark or an avatar is shared, its URL will be listed in the Chat palette if the Print URLs of Shared Links option is
checked in the Chat tab of the Preferences palette.
Interacting with the Environment
In addition to Portals and Chat, you can also interact with some Atmosphere environments through scripting that the
designer has included. Some common interactivity options are listed below.
Page 44

32 Chapter 3
Sounds and movies
Within the Atmosphere environments, you can position sounds near objects that will grow louder as a user
approaches, and softer as they move away. You can also add background sounds to the entire scene. Movies can be
added as textures to any surface.
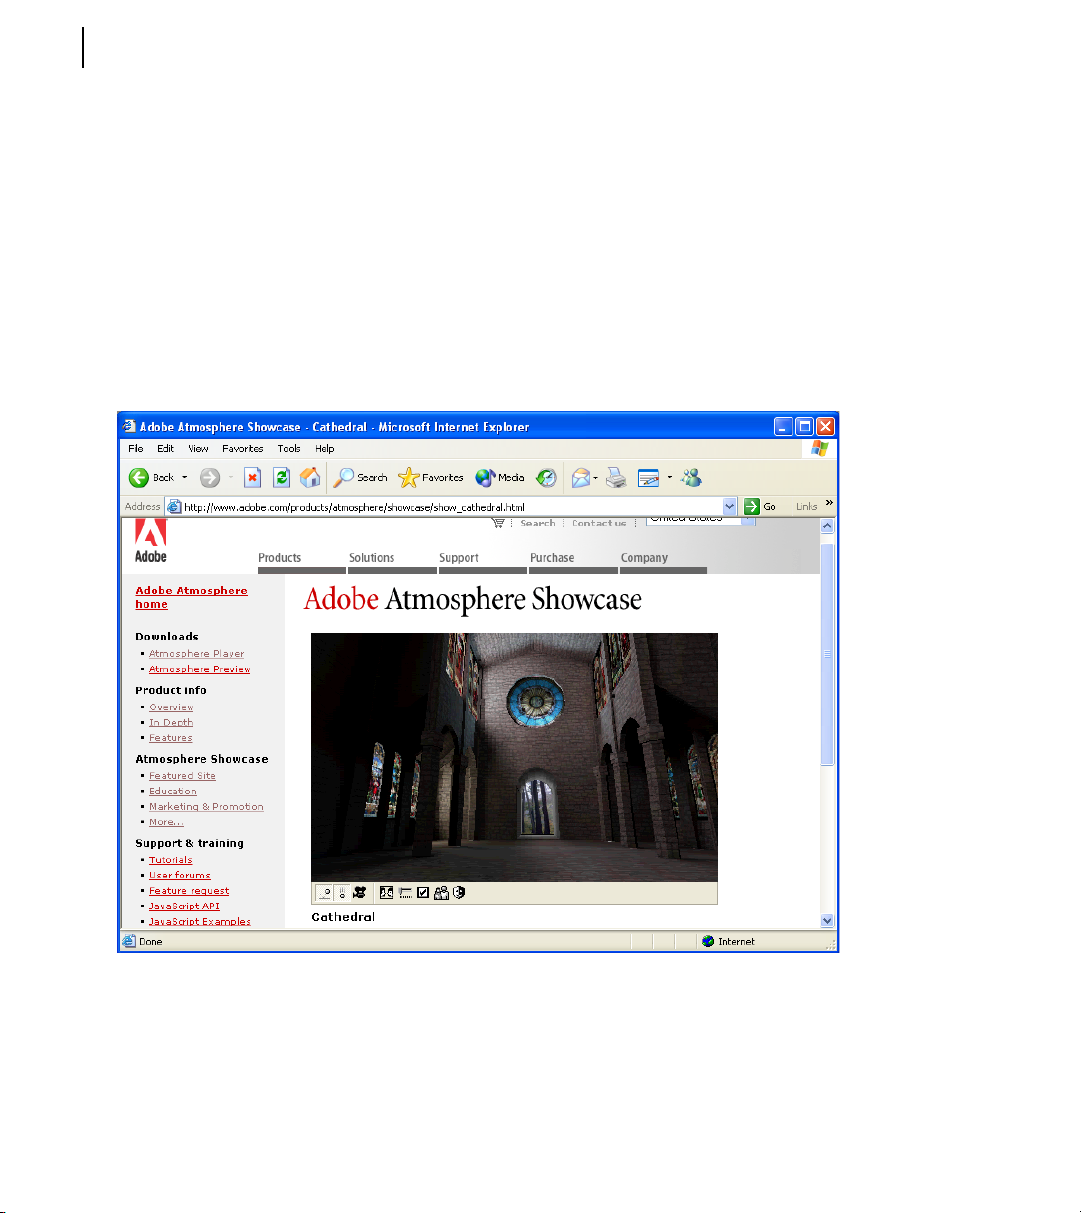
Interacting with the Web Page
Atmosphere environments embedded within web pages can interact with items on the page using standard HTML
form elements such as drop-down lists and buttons.
Atmosphere environments can be controlled using standard web page controls. Above is a Cathedral environment that is
integrated into a web page. The web page includes several controls that communicate with the Atmosphere environment.
The Start Guided Tour button, for instance, will maneuver the visitor about the environment following preset paths.
Interacting with Scripted Objects
Scripts can add interactive behavior to any Atmosphere object. For example, scripts allow users to click on objects to
initiate behavior. Imagine that you’re a builder and are taking your clients through an Atmosphere representatopm of
their new home. Scripted behaviors would allow them to change options like paint color or tile patterns by clicking
on the walls. The scene would be updated as your clients make and evaluate their choices, allowing immediate visual
feedback.
This scene from the Alice in Wonderland environment rewards users with fun behaviors as they click on pictures,
books and a stopwatch that fl oat through the scene.
Page 45

ADOBE ATMOSPHERE 33
User Guide
An example of an environment that uses scripted interactive objects. This environment lets you click on objects that are
fl oating in the scene.
Physics simulation
Atmosphere’s physics simulation engine and JavaScript API support physical simulations like gravity, collisions,
magnetism, friction and wind. Figure 3-8 shows a realistic catapult that also interacts with the web page to allow
users to load and launch a sphere towards a wall of blocks. When the sphere strikes the wall of blocks, the blocks fall
naturally thanks to the physics engine.
Page 46

34 Chapter 3
Atmosphere environments offer real-world physical behavior.
Using Custom Controls
The Controls button on the Player toolbar will open a Controls palette that can contain any custom controls that the
environment creator has included. Custom user controls are built using Atmosphere scripts.
The Controls palette offers custom environment controls.
Using parameter controls
Atmosphere’s physics simulation engine allows users to set parameters in the Controls palette which control the
physical properties of objects within the scene.
Page 47

ADOBE ATMOSPHERE 35
User Guide
An example of magnetic attraction controlled by using the strength and falloff controls in the Controls palette. The
Controls palette lets user change physical properties for objects in the scene.
Page 48

36 Chapter 3
Page 49

ADOBE ATMOSPHERE 37
User Guide
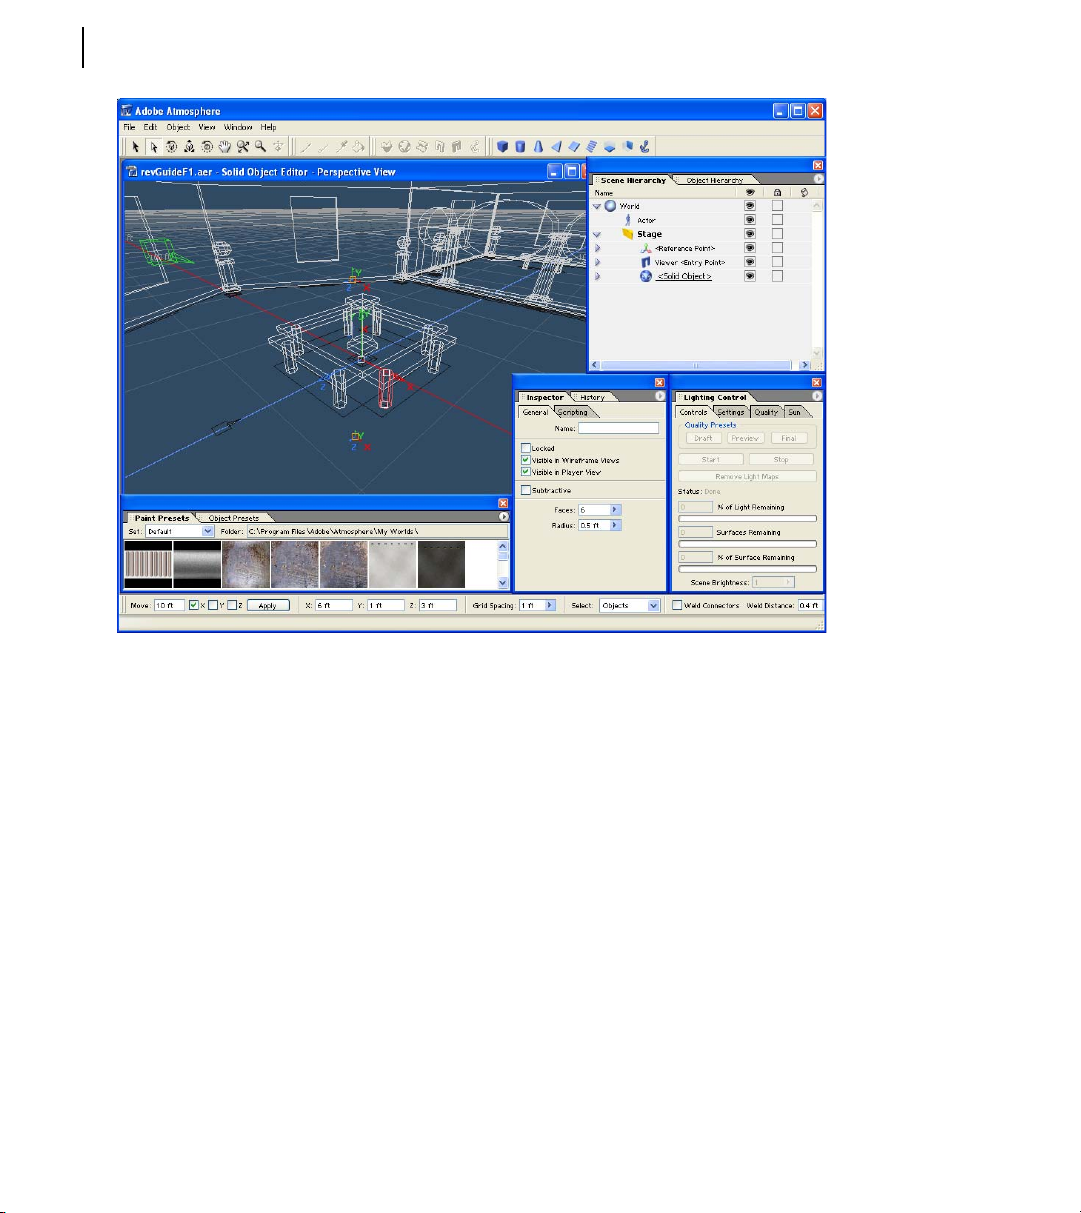
Chapter 4: Atmosphere Overview
Adobe Atmosphere is a professional authoring tool for assembling and creating 3-D interactive stage sets. This new
embedded multimedia type gives the web or document designer the ability to present a rich variety of interactive
content, including three-dimensional objects, sound, streaming audio and video, SWF animations, and physical
behaviors, all within the context of a live theater performance.
The Atmosphere platform includes Atmosphere – an easy to use but powerful authoring tool designed to enable
the creation of Atmosphere content; Atmosphere Player, web browser and Adobe Reader plug-in for navigating and
interacting with 3-D environments on the Web and in PDF documents; and Atmosphere Collaboration Server which
enables user communication and object synchronization. This chapter focuses on Atmosphere, the tool you use to
build Atmosphere content.
Workfl ow
Asset Creation and Acquisition
Atmosphere scenes are composed of multiple assets. These assets can come from a variety of places. They can be
created directly in Atmosphere, loaded from a library of pre-built objects, imported from other 2D and 3D design
applications, or created at run-time using the Atmosphere Player’s JavaScript API (Application Programming
Interface). Assets of an Atmosphere scene can contain geometric, appearance, animation, and interaction
information. Some of the assets that make up an Atmosphere scene are:
•
2D Text Created at run-time
•
2D Sprites Loaded at run-time
•
Props 3D Objects which are created in an external design application and either imported into a scene using
Atmosphere or loaded at run-time
•
Surface Objects 3D objects which are either created by importing other formats into Atmosphere and converting
to this native type or converted by Atmosphere, then exported and loaded at run-time
•
Solid Objects 3D objects which are created in Atmosphere and either placed into a scene by Atmosphere or
exported and loaded at run-time
Script Objects - Imported into a scene using Atmosphere
This phase of the Atmosphere workfl ow includes asset creation (Solid Objects), asset import (Props, Surface Objects,
Solid Objects, Script Objects), and asset import and conversion (Surface Objects).
Atmosphere can import 3-D models, including animations, saved in the standard Viewpoint Media format (MTX
and MTZ). 3-D objects created in Atmosphere can be wrapped with textures, which can be still or video images.
Atmosphere supports video in AVI, WMV, MPEG and MOV (QuickTime) formats and still images in GIF, JPEG and
PNG formats. Applications like Adobe Photoshop and Image Ready and Adobe Premiere can be used to prepare still
images and video for use in Atmosphere.
Page 50

38 CHAPTER 4
Scene Modeling
In this phase of the workfl ow, you combine scene assets geometrically, modify their appearance, and specify the
appearance of the scene as a whole. This is the process of building a spatially and visually coherent 3D environment
or stage set. Geometric combination includes positioning 3D assets and possibly scaling them in relationship to each
other. Appearance editing includes applying color and textures to 3D object surfaces, and editing imported surface
properties. Textures can include local or streamed video content in popular formats. Finally, global illumination
computation can be used to make all the assets in the scene work together visually in a more realistic way.
Interaction Modeling
In this phase, interaction is added to the scene and to the objects within it. This is done by attaching scripts to the
scene and it’s individual objects and by wiring Script Objects to other Scene Objects and to each other.
Publishing
In this phase, the esulting environment is ouput in a form that can be immediately embedded in either a web site
or a PDF document. All assets known to Atmosphere are combined in a single directory, URL references are made
relative and resolved to the moved assets, and a Web browser with the Atmosphere Player is brought up to preview the
published content, if desired. The published folder can then be copied intact to a Web server or embedded in a PDF
document for fi nal publication.
New Concepts
Before diving into learning the specifi cs of Atmosphere, it will be helpful to understand some basic concepts.
Preparing Content
Successful projects depend on good planning, and Atmosphere projects are no exception. Paper sketches and a rough
plan can save wasted effort later on.
Learning the Views and Editors
Two key concepts in Atmosphere are views and editors. Atmosphere offers two different view types – wireframe and
shaded or Player View.
Page 51

ADOBE ATMOSPHERE 39
User Guide
3-D geometries are manipulated using the wireframe views. The Player View is used to apply colors, textures, and lighting.
The wireframe views can be changed to show different perspectives such as Top, Front, Right and Perspective. The
shaded view is also called the Player View and it shows the environment as it will appear in the Player.
Although the Player View shows textures and lighting, it does not preview scripted behaviors. To make it easy to fully
i
test environments, including behaviors, Atmosphere offers one-click publishing, which publishes the environment and
immediately launches it in a Web browser window hosting the Atmosphere Player.
Atmosphere uses editors to change content specifi c to the two view types. The wireframe views shows the skeletal
underpinnings of the 3-D environment, while the shaded Player View shows the scene as it will actually appear to
users.
There are three editors in Atmosphere – the Scene Editor, the Solid Object Editor, and the Appearance Editor. The
Scene Editor and Solid Object Editor are related and work in the wireframe views, while the Appearance Editor
works in the Player View. The actions you can perform depend on the editor that you are using in the currently active
view. For example, colors, textures, and lighting can only be applied using the Appearance Editor. The Scene Editor
manipulates the entire environment. All of the objects are treated as a single scene, like a theatre set, where you, the
director, make the action unfold by placing props and actors for greatest effect.
The Solid Object Editor is used to create and modify individual Solid Objects, which can be used as assets in the
scene. For example, you could use the Solid Object Editor to assemble a chair from simple geometric shapes called
primitives, and then toggle back to Scene Editor mode to place the chair with other objects. You might also use the
Solid Object Editor to create rooms, and use the Scene Editor to combine these rooms into a complete building. The
Appearance Editor allows you to apply sophisticated lighting effects to scenes, and colors and textures to the surfaces
of objects. Finally, the Scene Editor is used to apply interaction to scene elements.
Changing editors can be accomplished in a number of ways. To enter the Solid Object Editor, double-click the object
that you wish to edit. To enter Scene Editor, double click on the background away from any objects. The wire frame
view background color changes to distinguish the modes – a blue tint indicates the Solid Object Editor is active.
Page 52

40 CHAPTER 4
The window title bar also changes to indicate which editor is active. Using these editors is covered in more detail in
Chapter 8, “Using Scene Objects,” and Chapter 9, “Assembling Solid Objects.”
Working with Hierarchies
All Atmosphere objects are held in a hierarchy, which keeps scenes organized as you add and alter objects. Atmosphere
includes two different hierarchy interfaces – one for Scene Objects and one for the active Solid Object. There are
palettes for each of these hierarchies that also provide another way to select and work with objects – selecting an
object in a hierarchy also selects it in the wire frame view. Each object in the hierarchy can be named and child
objects can be grouped under their parent object. By expanding and contracting the hierarchies, you can easily fi nd
objects you want to work with. In addition, the Hierarchy palettes can be used to hide and lock objects, make objects
subtractive and add scripts to objects.
This Hierarchy palette shows an organized view of all the objects that make up the current Solid Object.
Objects in Hierarchies can be grouped. For example, a house scene can include a door object, which includes a
doorknob group, which includes a lock object.
Presets
Another concept in Atmosphere is the Preset. Presets are Atmosphere resources, like textures, that are organized in a
library that makes it easy to view and select the right object. For example, textures in the Paint Presets can be applied
by selecting them and clicking on objects. Presets, contained in the Paint and Object Presets palettes can include
colors, textures, Viewpoint Objects, models and scripts.
Presets are references to resources that are accessed via palettes like the Paint Presets palette.
Page 53

ADOBE ATMOSPHERE 41
User Guide
Presets appear as thumbnails or icons in the Presets palette. Since these thumbnails are only references to the actual
resources, deleting a texture preset doesn’t delete the texture fi le, only the reference to the fi le. When an environment
is published, Atmosphere reads the reference to copy the resource fi le to the published fi le.
Presets can be saved into different sets using a Manage Sets dialog box which allows you to create and manage sets via
a Set drop-down list at the top of the Presets palette. For example, texture sets could include metal, wood, roofi ng,
grass, etc. allowing you to quickly navigate large libraries of resources.
Lighting and Light Maps
The Lighting Control palette allows you to light Atmosphere scenes in the Appearance Editor’s Player View.
Atmosphere uses two different lighting methods – pre-computed and dynamic lighting. Pre-computed lighting
information is placed in Light Maps that are saved along with the environment’s geometry information. Dynamic
lighting is applied in real-time using scripts.
Atmosphere offers sophisticated lighting called Radiosity: you can learn more about lighting in Chapter 13, “Lighting
a Scene.”
Script Objects
One of the most powerful aspects of Atmosphere is the ability to associate scripts with objects or scenes. Atmosphere
ships with a library of pre-built Script Object Presets (like Fog and Rotation) that allow even those who are new to
scripting to associate behaviors with objects or scenes. Drag a script preset to the Scene view and the Inspector palette
will display properties for controlling the behavior of the script. Changing these properties will change the scripted
behavior.
Atmosphere’s JavaScript API includes support for the built-in Havok physics engine. This engine includes realistic
simulation of many physical behaviors including collisions, springs, wheels, wind and fl uids. Chapter 14, “Adding
Interactivity with Scripts,” covers using Script Object Presets.
Publishing and Dual File Formats
Atmosphere creates fi les in two different fi le formats. Project fi les created in Atmosphere and saved using the File >
Save command are given the ATMO fi le extension. These fi les can only be opened in Atmosphere.
Atmosphere scenes that are complete and ready to be viewed by others go through a process called publishing. This
process bundles all referenced assets like textures, models and scripts into a single folder. It then saves the Atmosphere
environment fi le, with all references resolved, with the AER fi le extension. Atmosphere can also create a separate web
page in an HTML fi le that allows the AER fi le to be viewed in a web browser.
Published Atmosphere scenes (with the AER fi le extension) cannot be re-opened in Atmosphere. This helps protect
the intellectual property contained within the Atmosphere scene. AER fi les that were created by the Atmosphere
Public Beta can, however, be opened in Atmosphere, in order to allow Beta users to convert their previously created
content.
The publishing process is explained in Chapter 15, “Publishing Atmosphere Scenes.”
Page 54

42 CHAPTER 4
Scene Object Types
Atmosphere supports a number of object types. Everything that Atmosphere can place in a scene is called a Scene
Object. Some of the Scene Objects have special properties and uses, as explained below.
Solid Objects
This is a geometric object type that is built directly in Atmosphere. You can create and edit these objects using the
Solid Object Editor. Solid Objects, are constructed by combining a small set of primitives such as Box, Cylinder and
Cone into arbitrarily complex constructs using boolean operations (sometimes called Constructive Solid Geometry,
or CSG). Solid Objects can be lit and textured in the Appearance Editor.
Solid Object creation is covered in Chapter 9, “Assembling Solid Objects.”
Viewpoint Objects
Viewpoint Objects are 3-D models created in other applications and imported into Atmosphere using the Viewpoint
Media format (MTX, MTZ).
Viewpoint Objects carry their own lighting and textures and cannot be globally lit by Atmosphere. They can contain
animations that can be controlled by the JavaScript API at run-time. Currently, Viewpoint Objects directly loaded
into an Atmosphere scene act as the “props” in that scene.
Viewpoint Objects are covered in Chapter 8, “Using Scene Objects.”
Surface Objects
Surface Objects are 3D mesh objects in a format native to the Atmosphere platform. They provide a way in which
users can import external 3D scene components (including geometry, UV coordinates, and texture properties), and
use them as full “citizens” of an Atmosphere scene. In this way, parts of an environment can be constructed as Solid
Objects using Atmosphere, and parts can be created in external design applications and imported into Atmosphere.
External formats must be converted into Viewpoint format in order to be imported and converted to native Surface
Objects. Once imported as Viewpoint Objects, they are then converted into Surface Objects using Atmosphere’s
Object > Convert to Surface menu command. Surface Objects are included in global illumination processing and will
cast and receive soft shadows within the scene. Surface objects can also be textured in Atmosphere, or the textures that
were imported with them can be edited.
The basic form of Surface Objects cannot be edited using Atmosphere and the conversion process loses any
animations that were associated with the original Viewpoint Objects that were imported and converted.
Surface Objects are covered in Chapter 8, “Using Scene Objects”.
Page 55

ADOBE ATMOSPHERE 43
User Guide
Chapter 5: Exploring the Interface
Adobe Atmosphere uses a graphical user interface that will be familiar to users of Adobe products such as Photoshop
or Illustrator. Since Atmosphere is a new category of application, it will be worthwhile to take the time to familiarize
yourself with the user interface even if you have previous graphics and / or 3-D design experience.
The Interface Elements
The Atmosphere interface uses interface elements that are commonly found in graphics software, including:
• Menus
• Toolbars
• Docking palettes and tabbed panes
• Context menus
• View windows
The Atmosphere interface includes menus, tabbed panes, palettes, toolbars, and view windows.
Many features can be accessed in several different ways. For example, you can create a new view using the Views
i
menu, the context menu or a keyboard shortcut. All three methods perform the same function.
Page 56

44 CHAPTER 5
Using the Menus
Located in the menu bar, Atmosphere’s pull-down menus include: File, Edit, Object, View, Window, and Help.
Menus may contain submenus, which are indicated by a small black arrow, that point to the right. The File menu
includes submenus for Import, Export and Publish.
Menus offer visual clues for keyboard shortcuts, dialog boxes and submenus.
Some menu commands, such as File > Save As, have an ellipsis (three dots in a row) next to the menu command. This
indicates that the menu command will open a dialog box.
Some menus items appear in light gray type, indicating that they are not available. An example of this is the Objects >
Ungroup command isn’t enabled unless a grouped object is selected.
To the right of some menu items, a keyboard shortcut is listed, allowing these commands to be triggered from the
keyboard. Ctrl+S means hold down the Control key while typing S – this is the keyboard shortcut for the File > Save
command. A complete list of keyboard shortcuts can be found in Appendix B, “Atmosphere Keyboard Shortcuts.”
All menus can be accessed using the keyboard by holding down the Alt key and pressing the letter that is underlined
on the main menu. For example, pressing Alt+F will select the File menu. Once a menu item is selected you can use
the arrow keys to move up and down the current menu or the left and right arrow keys to move to adjacent menus.
Pressing the Enter key will execute the selected menu option.
The File menu
The File menu holds commands for opening, saving and closing fi les in Atmosphere. Commands include New
(Ctrl+N), Open (Ctrl+O), Close (Ctrl+W) and Save (Ctrl+S). Each Atmosphere environment can have several
settings that defi ne attributes such as the environment’s name and URL. These settings are entered in the World
Settings (Shift+Ctrl+S) dialog box. The File menu also includes commands to Import and Export objects and a
submenu to Publish a completed environment (Ctrl+P) along with the Exit (Ctrl+Q) menu command. At the bottom
Page 57

ADOBE ATMOSPHERE 45
User Guide
of the File menu is a list of recently opened fi les. Selecting one of these choices will re-open the selected fi le. The File
menu commands are covered in more detail in Chapter 6, “Working with Files.”
Keyboard shortcuts are useful for working effi ciently in Atmosphere and are included in parentheses in the manual
i
text.
The Edit menu
The Edit menu includes the Undo (Ctrl+Z) and Redo (Shift+Ctrl+Z) commands, which undo (or redo) the last
command. Edit also includes Duplicate (Ctrl+D), Clear (Delete), Clear Transform (Shift+Ctrl+T) and the Extrude
Walls From Floor (Ctrl+E) commands. The Edit menu also includes Select All (Ctrl+A), Deselect All (Shift+Ctrl+A)
and the Preferences (Ctrl+K) dialog box.
The Object menu
The Object menu includes commands that let you work with groups including Group (Ctrl+G), Ungroup
(Shift+Ctrl+G), New Group and Activate Group. The Object menu also contains commands for Hiding (Ctrl+H) and
Locking (Ctrl+L) objects. It also includes the Edit Selected Object command for switching between the Scene Editor
and Solid Object Editor. The Convert to Surface command enables you to convert Viewpoint Objects to Surface
Objects and the Edit Script (Ctrl+E) menu command opens a text editor where you can work with scripts. These
commands are covered in depth in Chapter 10, “Selecting and Editing Objects.”
The View menu
The View menu includes commands to create a new wireframe view (Shift+N) or to display the Player View (F4)
window. You can also switch the current active wireframe view between Top (F5), Front (F6), Right (F7), and
Perspective (F8) views or Bottom (F5), Back (Shift+F6), Left (Shift+F7) and Isometric (Shift+F8).
The View menu includes options to control the window layout. Options include Cascade Views, Tile Views and
Mosaic Views. You can choose to have one, two, three, or four view windows and view settings can be saved and
restored.
There are commands to Zoom In (Ctrl++) and Out (Ctrl+-), Fit All (Ctrl+0) or Fit Selected (Shift+Ctrl+0) and
Rotate Clockwise or Counterclockwise 90 degrees. For each view you can choose to show or hide Grids (Ctrl+’),
Guidelines (Shift+Ctrl+’) and Shadows. The fi nal command is to Reset Views (Shift+Ctrl+R). Chapter 7, “Changing
Views,” covers working with views in more detail.
The Window menu
The Window menu includes commands to open all the toolbars and palettes. Palettes and toolbars that are open have
a checkmark to the left of their name. Selecting an unchecked palette or toolbar will open it. At the bottom of the
Window menu is a list of open views for the current scene.
Page 58

46 CHAPTER 5
The Help menu
The Help menu allows you to open help documentation for Atmosphere (F1), JavaScript (F2) and Lighting (F3).
The About Atmosphere menu command will open the Atmosphere splash screen listing all the people involved in
producing Atmosphere. It also shows the current build number. The Adobe Online menu command will connect you
to the Adobe Atmosphere web site where you can check for updates.
Learning the Toolbars
There are fi ve different toolbars in Atmosphere: Tools, Scene Tools, Primitive Tools, Texture Tools and Options.
If you accidentally close any of the toolbars, you can open them again by selecting them from the Window menu.
The toolbar will reappear in the same location where it was when it was closed. By default, the toolbars are fl oating,
which means they aren’t tied to the interface and can be moved close to a work area. You can drag them to wherever
you want by clicking and dragging the title bar. You can also dock the toolbars to the top or bottom edge of the
window. Users with a single monitor may wish to keep toolbars docked to save screen space, while those with multiple
monitors may wish to group toolbars and palettes on a side monitor
Atmosphere’s main window with two toolbars that have been docked to the top of the window, the options toolbar docked
to the bottom, and two that are left fl oating. Drag or Double-click on the toolbar title bar to dock it to the top or bottom
edge of the window.
As an aid to learning and remembering the tools, a tooltip – a text box containing the name of the tool – appears
when you position the mouse cursor over the tool. The tooltip also lists the keyboard shortcut if one if available, e.g.
the tooltip for the fi rst icon in the Tools panel reads “Selection Tool (V)” meaning Ctrl+V is the keyboard shortcut for
this tool.
To ol s
The Tools toolbar includes tools to select, manipulate, zoom and navigate:
Page 59

ADOBE ATMOSPHERE 47
User Guide
General Toolbar Tools
Icon Name Description
Selection Tool (V) Used to select objects
Direct Selection Tool (A) Used to select objects and/or connectors
Rotate Tool (R) Used to rotate objects
Scale Tool (S) Used to scale objects
Orbit Camera Tool (C) Used to spin the camera along its center axis
Hand Tool (H) Used to pan the current view
Dynamic Zoom Tool (D) Used to zoom by clicking and dragging
Zoom Tool (Z) Used to zoom by dragging an area in the view
Navigate Tool (N) Used in the Player View to navigate
Solid Object Tools
The Solid Object Tools toolbar includes an assortment of objects (or “primitives”) that are used to create solid objects.
These tools are only available when the Solid Object Editor is active.
Solid Object Toolbar Tools
Icon Name Description
Box Box primitive, described by two corner points
Column Column primitive, described by two endpoints and a radius
Cone Cone primitive, described by two endpoints and two radii
Triangular Slab Triangular slab primitive,, described by three points and a thickness
Stairs Stairs primitive, described by four control points.
Floor Floor primitive, described by four control points, constrained to be horizontal
Wall Wall primitive, described by four control points, constrained to be vertical
Anchor Anchor point, used as reference position and orienation in scripting
Scene Tools
The Scene Tools are used for placing scene objects. These tools are only available when the Scene Editor is active.
Page 60

48 CHAPTER 5
Scene Toolbar Tools
Icon Name Description
Texture Tools
The Texture Tools toolbar is used to apply, edit and remove textures from objects. These tools will only be available
when an Appearance Editor window (also called a Player View) is selected.
Texture Toolbar Tools
Icon Name Description
Place Scene Object Preset Places the currently selected Scene Object Preset in the scene
Place Empty Solid Object Places an Empty Solid Object in the scene
Script Places an Script in the scene
Portal Places a Portal in the scene
Entry Point Places an Entry Point in the scene
Anchor Places an Anchor point in the scene
Edit Texture Tool Selects textures and displays texture properties in the Inspector palette
Remove Texture Tool Removes texture from the object
Sample Texture Tool Loads texture properties in the Inspector palette
Apply Texture Tool Applies texture to the object or face
Using the Options Toolbar
The Options toolbar includes controls that change based on the active view. For example, when a Scene View or a
Solid Object view is selected, the Options toolbar includes include controls for numerically moving, rotating and
scaling the selected object, setting grid spacing and welding connectors. If a Player View window is active, options for
Collide, Gravity and Show Hidden Objects appear.
The Options toolbar will also change as you select tools to move, rotate and scale objects.
The Options toolbar offers an easy way to position items precisely.
The Options toolbar fi ts nicely along the bottom edge of the interface.
Page 61

ADOBE ATMOSPHERE 49
User Guide
Working with Palettes
Palettes are small windows that group related controls including drop-down lists, checkboxes, value fi elds and
buttons.
Each palette can include one or more tabbed panes. For example, the Lighting Control palette includes four tabbed
panes – Controls, Settings, Quality, and Sun. Each pane is selected by clicking on its tab at the top of the palette. You
can combine palettes by clicking on a tab and dragging it to another palette.
Palettes can include several tabbed panes.
Palettes can have a menu, accessed by clicking on the triangular arrow icon in the upper-right corner, that includes
additional commands. If the palette has no menu, the icon button is disabled.
Clicking on the red X in the upper-right corner will close the palette. You can reopen a palette using the Window
menu.
Just like toolbars, palettes can be docked. To dock a palette, drag it to the menu bar or the edge of the atmosphere
window and release the mouse. You can open a docked palette by clicking on its tab. Clicking a second time on the tab
will retract the palette. This provides easy access to palettes without consuming screen real estate.
Be aware that if you dock a palette you will not be able to access its palette menu. However, you will be able to access
all the palette menu commands from the palette’s right-click menu.
Page 62

50 CHAPTER 5
Palettes can be docked to the edges of the main window.
Tutorial: Maximizing Screen Space by Docking
Some people like to work with fl oating toolbars and palettes because they can move them close to where they
are working. Others like everything docked, so they know exactly where to fi nd them. Atmosphere offers you the
fl exibility to handle both cases. For those who fi nd themselves in the second camp, you might want to follow these
steps.
To dock your toolbars and palettes to conserve space:
1 Drag the four toolbars into the menu bar so that they are aligned horizontally across the top. Then drag the
Options toolbar to dock in the bottom edge of the interface.
2 Using the Windows menu, open all palettes and place them in the center of the screen.
3 Drag and dock the Paint Presets and Object Presets to the lower left corner of the interface above the docked
Options toolbar.
4 Drag and dock the Inspector palette to the menu bar on the right side.
5 Drag and dock the other four palettes to the right edge of the Atmosphere window.
Page 63

ADOBE ATMOSPHERE 51
User Guide
The interface with all toolbars and palettes docked, confi gured to maximize screen space.
History palette
The History palette includes a list of all the actions done in the Scene Editor and the Solid Object Editor. Selecting an
item in the History palette will return the state of the active view to refl ect the actions up to that point, just as if you’d
repeatedly used the Edit > Undo (Ctrl+Z) menu command.
If you select an action in the History palette and then perform another action, all actions that follow the selected
action will be deleted.
Page 64

52 CHAPTER 5
The History palette enables you to undo several commands at once.
The History palette includes a pop-up menu with two options – Options and Clear. The Options menu command
will open a dialog box where you can specify the number of Maximum States to keep in the history. The Clear
command will remove all items from the current History palette without changing the scene. This also makes the
Undo command unavailable. Using the History palette is covered later in this chapter.
Inspector palette
The Inspector palette displays properties and options available for the currently selected object, tool or preset. For
example, when the Cone Object tool is selected, the Inspector palette includes settings for the number of Faces and
the size of the Top and Bottom Radius for the cone.
The Inspector palette shows tabbed panes that change depending on what is being inspected. For tools and objects
in the Scene and Solid Object Editors, the General and Scripting tabs are available. In Player View, the Surface and
Light Map tabs are available for inspecting colors and the Surface, Light Map, Texture and Movie tabs are available for
inspecting textures.
The Inspector palette changes based on the object selected.
Page 65

ADOBE ATMOSPHERE 53
User Guide
General tab When a single object or a group is selected in the Solid Object or the Scene Editor, the General tab will be
available. It includes a fi eld for entering an object Name. It also includes options for making the object Locked, hiding
the object in the wireframe or Player views, and, for the Solid Object Editor, making it Subtractive. It also includes any
additional parameter values for the selected object.
Scripting tab The Scripting tab includes a text fi eld in which to enter or edit the URL for a JavaScript script that can
be attached to the object, primitive, or group. The Edit button will open the script for editing in a Text Editor. You can
learn more about working with scripts in Chapter 14, “Adding Interactivity with Scripts.”
Inspector palette for textures
In the Player View, the Inspector palette will present several tabbed panes for working with colors and textures in the
Paint Presets palette. Colors and Textures can be created or loaded by right-clicking in the Paint Presets palette.
For colors, the Surface and Light Map tabbed panes are available. The Surface tabbed pane includes an option for
specifying whether the object emits light and the Emitted Brightness and Self-Illumination Factor values. It also
includes a Color swatch and color values of Red, Green and Blue that can be mixed to create any RGB color. The
specifi ed values for brightness and color can be applied to either the entire Object or to a selected Face depending on
the selection in the drop-down list at the top of the palette.
For colors and textures, the Inspector palette offers this set of tabbed panes.
The Light Map tab has a control that turns the Light Map on or off. You can also specify Light Map Brightness and
Sampling Density. More information on Light Maps can be found in Chapter 13 “Working with Lights.”
For Textures, two additional tabs appear – Texture and Movie. The Texture tab includes a Scaling Type, which can be
set to Pixel, Tile, Parametric or Projective. There is also an option to constrain proportions when scaling. The Size and
Offset values control how big the image is and where the upper left corner of the image is located. The Rotation value
will rotate the texture about its center, counterclockwise for positive values and clockwise for negative values. The
Texture URL fi eld lets you select the location of the texture image fi le.
Page 66

54 CHAPTER 5
The Movie tab lets you set the number of times the movie loops and the volume of the movie’s sound. The details of
editing textures are covered in Chapter 12, “Manipulating Textures.”
Lighting Control palette
The Lighting Control palette is one of the most powerful. It consists of four different tabbed panes – Controls,
Settings, Quality, and Sun. These controls are used to specify and compute the parameters for the Atmosphere
lighting engine when it computes global illumination (radiosity) for the scene. Chapter 13, “Working with Lights,”
explains these controls in detail.
The Lighting Control palette groups all of the lighting parameters
Hierarchy palettes
Atmosphere has two hierarchy palettes: Scene Objects Hierarchy and Solid Objects Hierarchy. The palettes are similar,
but they contain very different sets of information. The Object Hierarchy palette includes a complete hierarchical list
of all the objects or primitives contained in a Solid Object. Each item is listed on a separate row with easy access to
settings for enabling and disabling visibility, locking, subtraction and scripts associated with the object.
The Object Hierarchy palette shows all the objects that make up a Solid Object.
Page 67

ADOBE ATMOSPHERE 55
User Guide
The Scene Hierarchy palette shows all of the Scene Objects in the current document’s scene in a hierarchical list. It
also includes columns for enabling and disabling visibility, locking and scripts. Both palettes provide an easy way to
select, rename and move objects into and out of groups.
The Scene Hierarchy palette includes all the scene objects.
Presets alettes
There are two Presets palettes. The Paint Presets palette holds presets for colors and textures (which can include
movies) and the Object Presets palette holds presets for models, Script Objects, and Viewpoint Objects.
Colors in the Paint Presets palette have a separate paint bucket icon indicating the selected color, and textures are
shown as image thumbnails. Selecting these icons and thumbnails lets you apply colors and textures to objects
surfaces in the Appearance Editor’s Player View window.
The Paint Presets palette holds colors and textures.
The Objects Presets palette holds all imported scene objects. These objects can be Atmosphere models, Viewpoint
objects, or Script Objects. Scene objects imported into this palette can be placed in a Scene Editor view.
Page 68

56 CHAPTER 5
The Object Presets palette holds imported models, scripts and Viewpoint objects.
Tutorial: Positioning and Combining Palettes
Combining palettes can save screen space. To combine the two Hierarchy palettes into one, follow these steps:
1 Select Windows > Object Hierarchy and Windows > Scene Hierarchy to make sure that both palettes are open.
2 Click on the Object Hierarchy tab and drag it from its own palette to the Scene Hierarchy palette and release the
3 The two palettes will now sit side by side in the same pane.
4 If you want to move the Object Hierarchy back to its own palette, just drag it away from the Scene Hierarchy
mouse.
palette.
Palettes can be combined by dragging and dropping tabs.
Using context menus
Unlike the menus that appear at the top of the screen, context-sensitive menus display commands related to the active
tool or selection. You can use context menus as a quick way to choose commonly used commands.
To display context menus:
1 Position the pointer over the view or an object in the view.
Page 69

ADOBE ATMOSPHERE 57
User Guide
2 Click the right mouse button
Using Undo and Redo
Actions can be undone using the Edit > Undo (Ctrl+Z) menu command. If you change your mind, Edit > Redo
(Shift+Ctrl+Z) puts it back. Each successive access will move one more action backward (Undo) or forward (Redo).
Using the History Palette
Its may be easier to undo multiple commands at once by using the History palette which keeps a sequential list of
all the actions and commands used in the Scene and Solid Object editors. The most recent commands are listed at
the bottom of the History list and the oldest ones are at the top. Clicking an item causes all commands below it to be
undone. You can restore commands by clicking lower down on the list.
The History palette doesn’t keep track of actions performed in the Appearance Editor (Player View).
i
If you perform a new action after jumping back in the History list, the former subsequent actions are lost.
The total number of commands that are remembered in the History palette can be set in the the Maximum States
value in the Options dialog box accessed in the fl yout menu of the History palette.
Customizing Atmosphere
There are several ways to customize Atmosphere by setting preferences. These options are found in the Preferences
(Ctrl+K) dialog box, opened with the Edit > Preferences menu command. Additionally, Atmosphere, like other Adobe
products, remembers the interface changes that you’ve made and will return to the same layout the next time you
launch Atmosphere.
The Preferences dialog includes sections for defi ning how Atmosphere fi les are saved, how the grid is used during
editing, and the displayed colors.
Page 70

58 CHAPTER 5
The Preferences dialog box includes controls to customize Atmosphere.
Output Settings
To make Atmosphere fi les smaller, you can enable the Save in Compressed Format option. Compressed fi les take up
less disk space and download faster, but they need to be uncompressed before they can be used. This is a one-time
action that happens when the environment is fi rst loaded.
The Launch Web Browser on Publish option will open a specifi ed web browser once the Publish command is used.
You can select the web page to load when the browser is launched by typing in a URL.
Display
The second section of the Preferences dialog box includes controls that affect the Display including options that apply
to the wireframe views including Grid, Snap to Grid, Guidelines and Shadows. You can also set the grid Spacing and
Subdivisions. The default is set to 10. Units can be set to be Feet, Meters, Inches, Yards, Centimeters, Millimeters,
Miles, or Kilometers.
Page 71

ADOBE ATMOSPHERE 59
User Guide
All scripting values refer to units in feet regardless of Display Preferences settings.
Colors
Atmosphere uses colors to indicate states. For example, a selected object is displayed in red. If you prefer to display
selected objects as yellow, click on the color next to Selection and use the color picker to change it to yellow.
Henceforth all selected objects will appear yellow instead of red. The Reset Colors to Defaults button will reset colors
to the factory defaults.
Page 72

60 CHAPTER 5
Page 73

ADOBE ATMOSPHERE 61
User Guide
Chapter 6: Working with Files
Atmosphere introduces two new fi le formats that allow the creation and playback of immersive 3-D environments.
Atmosphere also supports importing most common 3-D through the Viewpoint format as well as standard video,
audio, image and animation fi le formats.
Understanding the Atmosphere Formats
Atmosphere defi nes two native formats – ATMO and AER. The ATMO format is used to save project fi les under
construction in Atmosphere and the AER format is used to publish Atmosphere environments to the web or for
inclusion in PDF fi les.
Files that are published using the AER format cannot be re-opened in Atmosphere. This helps to secure your
published content from being reused by others. Older AER fi les, representing projects created in the earlier Public
Beta version of Atmosphere, can be opened and converted by Atmosphere into the new ATMO project format.
Creating New Environments
The File > New (Ctrl+N) menu command will create a new Atmosphere environment called “untitled.atmo.” You
can give your project a name by using the File > Save (Ctrl+S) command which will prompt you for a fi le name and
directory into which to save your work.
New environments will open with at least one view window and there will already be some objects in the Scene
Hierarchy palette. These default objects are required by all environments, so Atmosphere includes them for you. The
default objects are the Reference Point object, the Actor object, the default Entry Point object named Viewer and a
single Solid Object. The new project will open in whatever viewing mode was active the last time Atmosphere was
launched.
Opening Environment Files
Saved environments can be reopened using the File > Open (Ctrl+O) menu command. This command will open a
fi le dialog box from which you can select a fi le to open.
Page 74

62 CHAPTER 6
The File > Open menu command will open a Windows File dialog box from which you canselect a fi le to open.
This is a standard Windows fi le dialog box. Using the buttons to the left, you can choose other directories. There are
also icon buttons that will let you Go Up a Directory, Create a New Folder and View the fi les in the current directory
as Thumbnails, Tiles, Icons, List, and Details.
With a fi le selected in the fi le dialog box, you can open it by double clicking on the fi lename or by selecting it and
pressing the Open button.
You can also drag an ATMO fi le from Windows Explorer and drop it into Atmosphere to open it.
Tutorial: Viewing Sample Environments
The default installation of Atmosphere includes several sample environments. To open a sample environment in
Atmosphere, follow these steps.
1 In Atmosphere, select File > Open (or press the Ctrl+O shortcut) to access a fi le dialog box.
2 Locate the Help\Tutorials\Gallery folder under the directory where Atmosphere was installed. It should be a path
similar to c:\Program Files\Adobe\Atmosphere\Help\Tutorials\Gallery. After navigating to your folder in the open
dialog, select the fi le gallery.atmo and press Open.
The environment will load in Atmosphere ready for editing.
Page 75

ADOBE ATMOSPHERE 63
User Guide
Saving Environments
One of the most important menu commands is the File > Save (Ctrl+S) menu command, which saves the current
environment. The File > Save As (Shift+Ctrl+S) menu command will open another File dialog box in which you can
give the current fi le a different name and/or location to be saved.
The name given to the environment in the fi le dialog box will be displayed in the title bar of each of the views.
The Preferences dialog box (Ctrl+K) includes an option to Save Files in Compressed Format. If this option is enabled,
then the fi les will be compressed before saving. This can greatly reduce the fi le size – the example fi le reduces from
743 kb to 115 kb with the Compressed Format option enabled.
Compressed Atmosphere fi les will have the same AER fi le extension as uncompressed fi les. The Atmosphere Player
i
knows whether the fi le is compressed or uncompressed by data stored in it’s header.
Closing Environments
The File > Close (Ctrl+W) menu command will close the currently open document. If the fi le has not been saved
since the last change to it, a dialog box will ask if you wish to save your changes. The Close menu command will not
exit the application. You can also close the fi le by clicking the red X close buttons at the top of all currently open view
windows. However, you will then have to reestablish your preferred Views setup after opening the next Atmosphere
document.
Importing Files
The File > Import menu includes several different options – Models, Scripts, and Viewpoint Objects. Each of these
options will import a different fi le format.
In the fi le dialog box, you can select multiple fi les to be imported by holding down the Ctrl key and clicking
individually on the fi les to select or by holding down the Shift key and selecting the fi rst and last items in a range of
fi les. All selected fi les will be imported at one time.
Importing Models
When the File > Import > Models menu command is selected, you can import an existing Atmosphere project fi le
into the current scene. This menu command is only available when a wireframe view is selected. These fi les must have
the ATMO fi le extension. Imported models will appear in the scene in the same location as that to which they were
saved. Imported models will be listed in the Scene Hierarchy as <Model>.
You may wish to save objects you create in Atmosphere to a Models or other directory so that they can be imported
and reused as needed.
Page 76

64 CHAPTER 6
Importing Scripts
Scripts are used to control the behavior of objects and environments. The Import menu will open JavaScript (JS)
fi les. Scripts are Scene Objects and can only be imported when the Scene Editor is active. Imported Script Objects will
appear at the origin of the current scene. Scripts are covered in more detail in Chapter 14, “Adding Interactivity with
Scripts,” and Appendix C, “JavaScript API Documentation.”
Importing Viewpoint Objects
Atmosphere can import models created in other 3-D applications and saved as Viewpoint Media fi les. Viewpoint
Objects can be imported into Atmosphere using the File > Import > Viewpoint Objects menu command. This menu
command is only enabled when the Scene Editor is active. Viewpoint Objects have an MTS, MTZ or XML extension.
These objects will appear at the origin of the Scene Editor view window. You can learn more about using these objects
in Chapter 8, “Using Scene Objects.”
Tutorial: Importing a Viewpoint Object
In this tutorial, we’ll import a Viewpoint Object of a chandelier created in an external 3-D package.
To import the chandelier, follow these steps.
1 In Atmosphere, select a wireframe view and double click on its background to make sure Scene Editor is active.
The default background color will be dark gray.
2 Select the File > Import > Viewpoint Object menu command. A fi le dialog will open. Locate the Chandelier
directory under the Extras\Objects\Set_1 folder in the directory where Atmosphere was installed. It should be a
path similar to c:\Program Files\Adobe\Atmosphere\Extras\Set_1. Click on the chandelier.mtx fi le and select Open.
The chandelier will appear in the center of the view.
3 Select View > Player View (F4) to open a Player View window and then select the View > Fit All (Ctrl+0)
command to size the chandelier to the Player View window.
Page 77

ADOBE ATMOSPHERE 65
User Guide
The imported Viewpoint Object as seen in the Player View.
Importing to Preset Palettes
In addition to the File > Import menu, you can also import textures and objects using the palette menus found in the
Paint and Object Presets palettes. Right-click on the Presets palettes to access Import menu options. Using the palette
commands will cause the objects to appear in the Presets palettes where you can further organize them into sets.
Importing Texture Presets
The Paint Preset palette menu includes a menu option to Add Texture Preset. This menu command will open a fi le
dialog where you can select a texture image to open. Supported formats include most standard image and movie fi les:
• Graphics Image Format (GIF)
• Joint Pictures Expert Group (JPEG, JPG, JPE)
• Portable Network Graphics (PNG)
• Microsoft Video (AVI)
• Active Streaming Format (ASF)
• Windows Media Format (WMV)
• Motion Picture Expert Group (MPEG, MP3)
• QuickTime (MOV)
Page 78

66 CHAPTER 6
Imported textures will be displayed in the Paint Presets palette as thumbnails. If you move the mouse cursor over the
top of the thumbnails, the path to the texture image will be displayed as a tooltip. You can learn more about colors
and textures in Chapter 11, “Applying Colors and Textures.”
Imported textures appear as thumbnails in the Paint Presets palette.
If a source texture image fi le is moved after it has been imported, its thumbnail in the Paint Presets palette will show a
red “URL?” icon to indicate that the image fi le can no longer be located.
Missing texture fi les are marked with this icon in the Paint Presets palette.
Tutorial: Importing Wood Textures
The Paint Presets palette offers a convenient way to browse and quickly locate items in large collections of textures
and colors.
To add a library of wood textures to the Paint Presets palette, follow these steps.
1 Select the Window > Paint Presets menu command to open the Paint Presets palette. Click the palette menu and
select the Add Texture Preset menu command. A fi le dialog box will open.
2 Locate and open the Extras\Textures\Set_2 folder in the directory where Atmosphere was installed. It should be a
path similar to c:\Program Files\Adobe\Atmosphere\Extras\Textures\Set_2
3 Click on the wood01.jpg fi le.
4 While holding down the shift key, click on the wood16.jpg fi le.
5 Click the Open button.
Page 79

ADOBE ATMOSPHERE 67
User Guide
The Paint Presets palette loaded with wood textures.
Importing Object Presets
Models, scripts and Viewpoint Objects can also be loaded into the Object Presets palette using the palette menu. The
difference between the File > Import menu and the Object Presets palette menu is that fi les added via the Presets
menu will stay in the Presets palette as icons and can more easily be placed multiple times in a scene.
If you plan on using an imported object more than once, add it to the Object Presets palette.
The Object Presets palette can hold models, scripts and Viewpoint Objects.
Each object type has a different icon.
i
Managing Object Sets
It is easier to navigate large collections of textures and objects if they are grouped into Sets. Textures, for example, are
easier to fi nd if they are grouped under categories like wood, metal, grass etc. Grouping can also be done per project,
or in any other manner the user desires.
In the Paint and Object Presets palette menus, you can select the Manage Sets menu command to create categories
called Sets. This command will open the Manage Preset Sets dialog box. In this dialog box, you can create a New set,
and Edit or Delete an existing set. Each set will have a name and a folder where its presets are located. These new sets
will appear in the Set drop-down list at the top of the corresponding Preset palette along with their fi le path.
Page 80

68 CHAPTER 6
The Manage Preset Sets dialog box lets you create and manage sets of objects and textures.
Once a new set is created, you can add presets to it using the Add Presets menu commands found in the Object and
Paint Presets palettes. The new presets will then be added to the selected set.
If you look in the directories where presets are stored, you will fi nd Atmosphere has created fi le names such as
Material001.amt, Model001.asc and ScriptObject001.ajs. These small fi les hold parameter information for the preset.
The preset fi le type can be identifi ed by its extension; amt for textures, amc for colors, asc for models, ajs for scripts
and avp for Viewpoint Objects. Atmosphere uses the operating system’s native fi le system as an integral part of it’s
presets management system. A Preset Set is simply a named directory on your disk. When switching to a Preset Set, all
presets of the appropriate type (Paint or Object) will be read from the specifi ed directory and loaded into the Presets
palette. You can rename a Preset Set at any time, and also change the directory on your disk that it points to. You can
use the operating system, independently of Atmosphere, to reorganize presets across various directories by simply
moving, copying, or deleting preset fi les.
Exporting Objects
The File > Export menu includes a single command - Model. This command is available in the Scene and Solid
Object editors is enabled when an appropriate subset of objects is selected in either the Scene Hierarchy palette or the
Objects Hierarchy palette. An exported model is saved as an ATMO fi le.
Selected objects are exported with their positions relative to their active coordinates. When exported models are
imported into other scenes, the objects will be placed at the origin of the current scene and the parts of the object will
be placed relative to the origin.
For example, let’s say you create a Solid Object icon in the Scene view at 10ft on the X-axis and place a Box object
belonging to the Solid Object at 25ft on the X-axis. If you select and export the Box object, it will appear at 15ft on the
X-axis when imported into a new scene.
Page 81

ADOBE ATMOSPHERE 69
User Guide
You can export as a model an entire subset of the current scene, including a collection of interlinked Scene Objects
and Script Objects. In this way, you can create a library model that includes both objects and their behaviors. When
importing such a library model back into a new scene, all of the objects, with their behaviors, will be loaded and
reconnected together.
Saving World Settings
The World Settings dialog box lets you include environment-specifi c information that is saved with the scene fi le. This
information includes the following:
• World Name
• Reference URL
• Server URL
• Topic
The World Settings dialog box includes environment settings such as name and URL.
The File > World Settings (Alt+Ctrl+S) menu command will open a dialog box in which you can give the entire
environment a name and specify where it will be located on the web.
You specify the environment’s home server and path in the Reference URL fi eld. The Server URL fi eld specifi es the
location of the server used to enable chat and synchronization features. The Topic fi eld is used to identify the type of
environment and can be a descriptive keyword or two. For example, a product storefront scene could have the Topic
set to “commerce”.
Publishing
Publishing is the fi nal process that compiles all of the your project’s geometry, lighting, texture, media types and
behavior into an AER fi le, and places it on a server (or locally for testing). The process is initiated using the File >
Publish > World (Ctrl+P) or File > Publish > Model menu commands. Publishing a model will only save the selected
Page 82

70 CHAPTER 6
object as an AER fi le. Publishing a world will launch a web browser and display the Atmosphere environment in all its
glory. You can learn more about publishing in Chapter 15, “Publishing Atmosphere Scenes.”
i
Publishing a scene opens it in a web browser, but publishing a model does not.
Page 83

ADOBE ATMOSPHERE 71
User Guide
Chapter 7: Views
Since computer monitors are 2-D devices, content creators have to switch views frequently to check the dimensions
and position of the 3-D objects they create. This might not be immediately apparent to people used to 2-D authoring
applications.
Atmosphere displays projects in two types of views. Wireframe views show just the lines at the edges of objects
and are used for geometric creation and editing tasks, while the Player View is a preview of fi nal visual results and
performance, with textures and lighting (global illumination) applied.
Experienced Atmosphere designers often keep several views of the same scene open so that they can check the size
and placement of objects in all three dimensions. Atmosphere has commands that will automatically open multiple
views in three or four windows placed for easy object viewing.
Introduction to Views
Atmosphere’s three editors display scene contents in either wireframe views or the Player View. The Solid Object
Editor and the Scene Editor display objects using wireframe views and the Appearance Editor displays objects in the
Player View.
Wireframe views show the lines that make up edges of objects and are commonly used in 3-D applications to create
and modify the geometry of objects. In Atmosphere, wireframes are used to create and edit the geometry of objects
and to compose scenes by applying geometric transformations to these objects.
The Player View is a preview of the scene including lighting, and textures. The Player View shows the scene as it will
appear in the Atmosphere Player. Scripted behaviors, run-time interaction and loaded models, sound, video, physics
(with the exception of Player navigation), and dynamic lighting will not appear in the Player View. In order to test
the full experience of an Atmosphere environment, the user must publish the scene and view it in a copy of the
Atmosphere Player, usually within a Web browser. The Publish feature of Atmosphere will do this automatically for
you.
Wireframe views can be switched to eight preset positions by right-clicking in a Solid Object or Scene Editor window
and selecting the Preset Position menu item. The Preset Positions are grouped in two sets in the menu: Top (F5),
Front (F6), Right (F7) and Perspective (F8) in one group, and Bottom (Shift+F5), Back (Shift+F6), Left (Shift+F7)
and Isometric (Shift+F8) in the second. Note that the Shift key toggles the reverse perspective for the Top, Front and
Right positions. F5 shows Top view while Shift+F5 shows bottom view etc.
The Player View position is independent from the wireframe views and is controlled by the Navigate tool in the Tools
toolbar.
Page 84

72 CHAPTER 7
Working with the View Windows
Each view window includes a title bar that lists the fi le name of the project currently being edited, the current Editor,
and the view’s positional type. You can open any number of wireframe views, but only one Player View.
The Solid Object Editor is used to compose primitives into more complex objects like this fountain.
Solid Object Editor
The Solid Object Editor is used to create objects and displays them in windows that can have eight positional types.
You can switch to the Scene Editor from the Solid Object Editor by toggling the Object > Edit Selected Object menu
command (or you can double-click on the background of the scene).
Scene Editor
The Scene Editor is used to place scene objects and also has eight wireframe positional presets. When the Scene Editor
is active, the Scene Tools toolbar is active.
Page 85

ADOBE ATMOSPHERE 73
User Guide
Notice that the background color changes when selecting Solid Object and Scene Editor. By default the Solid Object
Editor’s background is a dark blue and the Scene Editor’s background is a dark gray.
The same water fountain viewed in perspective in the Scene Editor. The Scene Editor is used to work with scene objects.
You can switch between The Scene Editor and Solid Object Editor by selecting a Solid Object and choosing the Object
> Edit Selected Object menu command (or by double clicking on the Solid Object in the Scene view). You can switch
from Solid Object Editor to Scene Editor by double-clicking in the background away from any objects.
Appearance Editor and Player View
The View > Player View (F4) menu command opens the Appearance Editor and displays the current scene in Player
View. You can navigate around the scene just as you would in the Atmosphere Player by selecting the Navigate Tool in
the Tools toolbar. The Appearance Editor also allows you to apply and remove lighting, colors and textures.
Page 86

74 CHAPTER 7
The fountain once again in the Player View. The Appearance Editor’s Player View lets you see objects as they will appear in
the Atmosphere Player.
Working with the Actor Object
The Actor object designates the position and orientation of the viewer in the Player View. In the Scene view, the Actor
object looks like a small human fi gure
Hierarchy palette. To see a scene in the Player View from a specifi c viewpoint, you can move and rotate the Actor
object in the Scene Editor and then switch to the Player View to see the scene from the Actor’s location. Conversely,
if you navigate to a position in the Player View and then select a Scene Editor view, the Actor object’s position will be
updated to that position.
The Actor object can help you position the Entry Point location. The Entry Point is the location where viewers and
avatars appear when they fi rst enter an environment. If you select the default Entry Point in the Scene Hierarchy
palette, two buttons will appear in the Inspector palette: Move Entry Point to Actor Location and Move Actor to Entry
Point Location. The fi rst will place the Entry Point at the same position as the Actor object. The second button will
move the Actor object to the Entry Point’s current location.
. The easiest way to select the Actor object is to click on its name in the Scene
Page 87

ADOBE ATMOSPHERE 75
User Guide
When the Entry Point object is selected, the Inspector displays buttons that allow you to sync the locations of the Actor and
Entry Point objects.
Using the Reference Point Object
Another Scene default is the Reference Point object. This object displays the X, Y and Z axes as a reference. Although
this object can be moved, rotated and scaled, the orientation of the axes remains constant. You can move this object
around the scene as needed to check orientation. In wireframe views, the Reference Point object is used to specify the
position of the dimension in which you are not editing. For example, if you are editing in a Top view, then the height
(y position) of the Reference Point object becomes the height of any new object or primitive you add to the view. By
moving the Reference Point object, you can move the implied planes of the editors.
Page 88

76 CHAPTER 7
The Reference Point object displays the orientation of the X, Y and Z axes.
Working with Views
In the Scene and Solid Object Editors, you can select a different view from the View > Preset Position menu. The
options include Top (F5), Front (F6), Right (F7), and Perspective (F8). You can also choose Bottom (Shift+F5), Back
(Shift+F6), Left (Shift+F7), and Isometric (Shift+F8).
All of these views (except for the Perspective and Isometric views) are planar in that they show the scene looking in
the direction of one of the axes. For example, the Top view looks along the Y-axis to the XZ plane. The Perspective
and Isometric views are different. They look down on the view from an angled, elevated position raised from the XZ
plane showing all three dimensions.
The difference between the Perspective and Isometric views is that lines converge to a common point in the
Perspective view as they do when we look at a real scene that stretches to the horizon. Line in the Isometric view are
dimensionally correct, i.e. parallel lines remain parallel. You can see the difference by comparing the grid for both
views.
Page 89

ADOBE ATMOSPHERE 77
User Guide
In the Isometric view parallel lines remain parallel.
Opening a New View
Selecting View > New View will open a new Solid Object or Scene Editor wireframe view window. Remember that
you can open only one Player View.
Only one view can be active at a time. The active view is identifi ed by a darker blue title bar. Inactive views will have a
lighter blue title bar.
Selecting a Layout
With more than one view window open, it can become diffi cult to fi nd a specifi c view. The View > Layout menu
offers commands to organize and select windows. Cascade Views will align all view windows so the title bar for each
window is just below and offset from the one above it.
Page 90
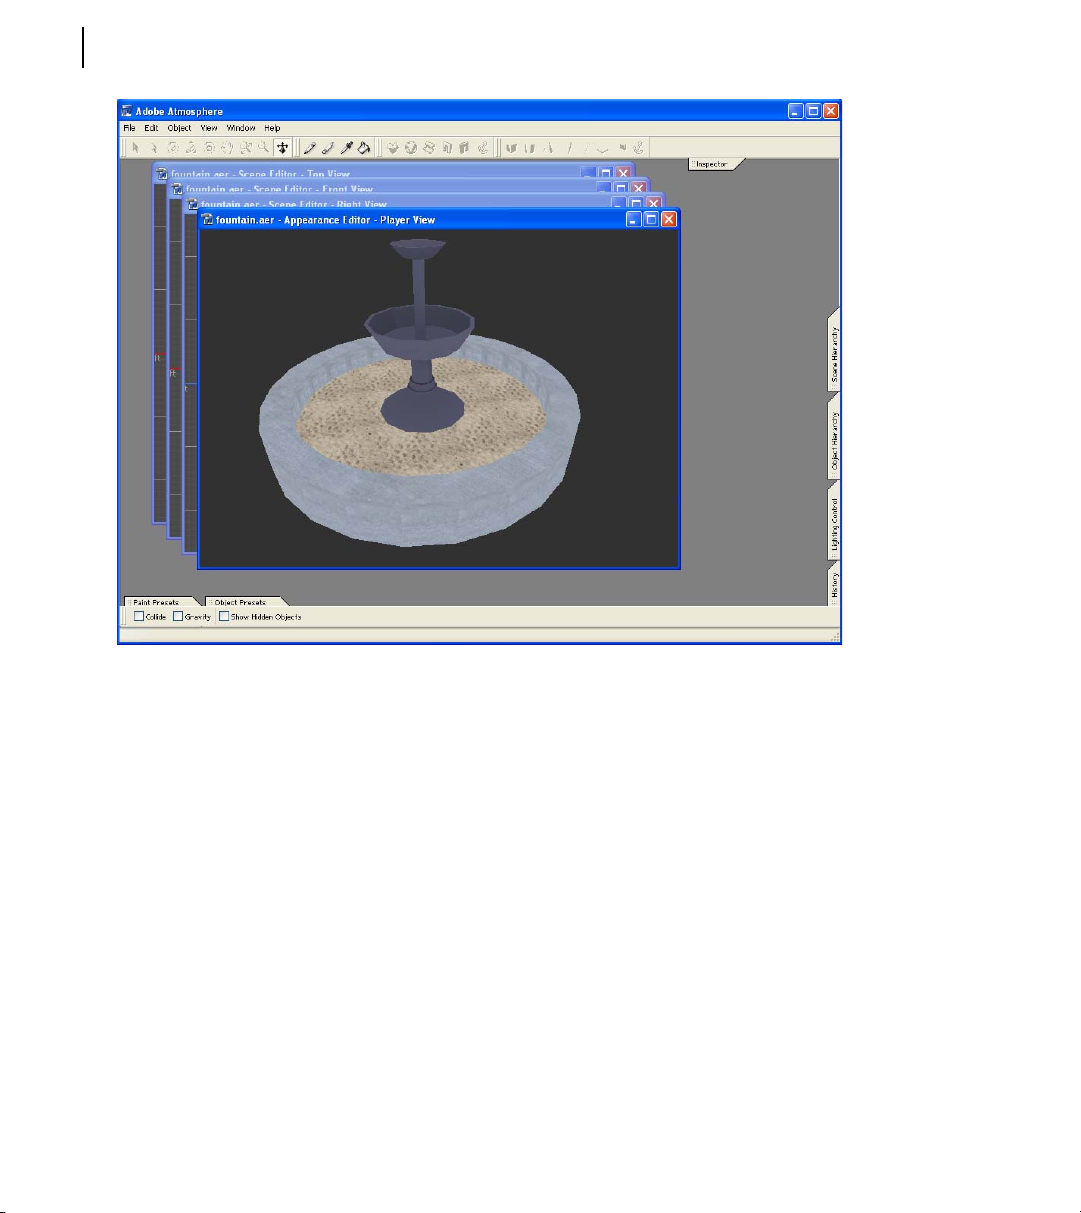
78 CHAPTER 7
Cascading views are positioned so you can see the title bar of each view.
The View > Layout > Tile Views menu option will place all view windows side by side, fi lling the screen with equalsized windows.
Page 91

ADOBE ATMOSPHERE 79
User Guide
Tile Views places equal-sized windows side-by-side. Note that each wireframe window has a different view.
The View > Layout > Mosaic Views menu option will open the current view in a large window and place other views
in small windows to the right.
Page 92

80 CHAPTER 7
The Mosaic Views option maximizes the active window and places the other views off to the side.
The View > Layout menu offers window layout options consisting of one to four view windows. Selecting View >
Layout > one View will open a single Top view window. Selecting View > Layout > 2 Views will open Top and Front
cascading views. The View > Layout > 3 Views option will show a Top, Front and Player View windows with the Top
view being the largest. Finally, the 4 Views option will open Top, Front and Right views along with a Player window.
Controlling the View
You can pan, zoom, and rotate wireframe views using the Tools toolbar. As scenes fi ll with objects and other detail,
these tools enable you to quickly fi nd and manipulate objects of interest.
Panning a View
When a new wireframe view appears, the center of the grid is located in the center of the window. You can pan the
view to a different location using the Hand tool (H)
scene in the window.
. With the Hand tool selected, click and drag to move the
Page 93

ADOBE ATMOSPHERE 81
User Guide
You can also grab and pan the current wireframe view using the spacebar. Holding the spacebar down will change the
cursor to the Hand icon, allowing you to drag the scene with the mouse.
Zooming a View
To zoom in or out of a scene in wireframe view, use the Zoom tool (Z) or the Dynamic Zoom (D) tool.
The Zoom tool will zoom in with each left-click of the mouse. Holding down the Ctrl key causes the + sign in the
magnifying glass icon to change to a – and left-clicking will zoom out. You can also click and drag a rectangle around
an area, and the area will zoom to fi ll the window when the mouse button is released.
The Dynamic Zoom tool lets you zoom continuously using the left mouse button and dragging forward to zoom in
and backward to zoom out.
Both tools support a mouse equipped with a scroll wheel. Forward scroll zooms in, and backward scroll zooms out.
Another way to zoom in and out of the view in steps is by using the View > Zoom In (Ctrl++) and View > Zoom Out
(Ctrl+-) menu commands.
Rotating a View
The Orbit Camera Tool (C) lets you rotate a view about its center point by dragging in the view.
You can also rotate the view using the View > Rotate Clockwise 90 degrees and View > Rotate Counterclockwise
90 degrees menu commands.
With the Orbit Camera Tool (C) selected, hold down the Ctrl key to rotate the view about any axis.
Resetting a View
It’s easy to get lost in wireframe views, especially if you are new to editing in three dimensions. You can reset the view
to place the grid origin in the center of the window with the View > Reset Views (Shift+Ctrl+R) menu command.
Navigating the Player View
With the Player View active, select the Navigate tool (N) to move about the Player View just as you would in the
Atmosphere Player using the mouse or arrows keys. Holding down the Shift key will move you vertically (fl y) or
horizontally (“strafe”) and holding down the Ctrl key will let you tilt your view up, down, and around.
When the Player View is active, the Options toolbar includes Collide and Gravity controls and an option to Show
Hidden Objects.
Page 94

82 CHAPTER 7
Zooming to fi t Objects
The View menu includes two useful commands that zoom the current view to fi t all the current objects or just the
selected object. View > Fit All (Ctrl+0) fi ts the whole scene to the current window. View > Fit Selected (Shift+Ctrl+0)
fi ts just the selected objects. The Fit All and Fit Selected features can also be used in the Player View.
The Fit All command will zoom and pan the current view so all objects are visible.
Tutorial: Viewing a Character’s Good Side
We all have a good side, but fi nding it in a 3-D application takes a bit of skill. This tutorial will give you a chance to
practice fi nding your good side.
To practice working with views, follow these steps.
1 Locate the Help\Tutorials\Avatar_Male folder under the directory where Atmosphere was installed. It should be a
path similar to c:\Program Files\Adobe\Atmosphere\Help\Tutorials\Avatar_Male. After navigating to your folder in
the open dialog, select the fi le avatar_male.atmo and press Open.
2 Select the View > Layout > 1 View menu option to open a single Top view.
Page 95

ADOBE ATMOSPHERE 83
User Guide
3 To see the objects in the scene, select View > Fit All (Ctrl+0). This will zoom and pan the window so all objects are
visible in the Top view.
4 Select View > New View (Shift+Ctrl+N) to open a new view window. This new view window will also be a Top
view.
5 With the new view window active, select View > Preset Position > Front (or press the F6 key). Use the View > Fit
All (Ctrl+0) command to see all the objects in this view.
6 Select View > Player View (F4) to open a Player View window to see a shaded version of the scene.
7 Select View > Layout > 4 Views to open four view windows. This will add a Right view.
8 Select each view and use the View > Fit All (Ctrl+0) command to fi t the objects in the view.
The fi nal layout has four views with the object fi tted to each view.
Page 96

84 CHAPTER 7
Page 97

ADOBE ATMOSPHERE 85
User Guide
Chapter 8: Using Scene Objects
The Scene Editor is used to assemble the parts of an Atmosphere environment – the Scene Objects, which include
Solid Objects, Viewpoint Objects, Surface Objects, Script Objects, Scene Groups, the Actor, and Entry Points and
Portals. You can think of the Scene as the movie or theatre set where the action of your environment takes place.
This chapter explains the elements that you will work with in the Scene Editor. The Scene Editor has its own toolbar
which contains a Scene Object Preset, Empty Solid Objects, Scripts, Portals, Entry Points and Anchors. You can also
place imported Viewpoint Objects using the Scene Editor.
Positioning Models as Scene Objects
Scene Objects include models that are imported using the File > Import > Model menu command or that are placed
in the Scene from the Object Presets palette. Scene Models are Atmosphere scenes that have been saved as an ATMO
fi le. These saved scenes can be imported to create new scenes or add to scenes. When imported, Scene Models appear
as a new Scene Group in the Scene Hierarchy called <model>.
Scene Objects imported using the File > Import > Model menu command will appear in the same location as they
were when they were exported.
To place a Scene Model from the Object Presets palette, select it in the Object Presets palette then click in a Scene
Editor window. Alternately, click on the Place Scene Object Preset tool in the Scene Tools toolbar, then click in the
Scene Editor window where you wish to position the object.
If you click and drag the mouse while placing a Scene Object, you can move the model about in the scene.
The Scene object will be displayed in the Scene Hierarchy palette using the name given the object before it was
exported. It also is identifi ed as a new Scene Group called <model>. Scene Objects can be edited by selecting the
object and choosing the Object > Edit Selected Object menu command or by double-clicking on the Scene Object.
Currently, the only type of Scene Object that has it’s own editor (and for which double-clicking will have the effect of
switching to it’s editor) is a Solid Object. Double-clicking on a Solid Object in the Scene Editor will switch all of the
wireframe editor views to a Solid Object editor for that object.
All Scene Objects presets are identifi ed with this icon and a title.
Page 98

86 CHAPTER 8
Positioning Solid Objects
The second button from the left in the Scene Tools toolbar is the Place Empty Solid Objects button. Solid Objects are
collections of primitive objects that behave as a single rigid geometric object.
To create a new Solid Object, click on the Place Empty Solid Object button in the Scene Tools toolbar, then click in the
Scene Editor window at the point where you wish to position the Solid Object. The Solid Object icon
and becomes the origin of the Solid Object’s collection of primitives. Solid Objects are listed in the Scene Hierarchy
as a “parent” Solid Object with its “child” primitives located in an indented list below it. Each scene can have multiple
Solid Objects.
Double-clicking on an Empty Solid Object in the Scene Editor will automatically switch to Solid Object Editor
mode. All new primitive objects will be added to the selected Solid Object. Solid Objects are covered in more detail in
Chapter 9, “Assembling Solid Objects.”
Adding Scripts to the Scene
When you click on an object in the Objects Presets palette, the Scene Object button in the Scene Tools toolbar will be
selected automatically. By holding down the Shift button while placing an object in the Scene Editor, you can create
multiple copies of the object.
will appear
Script Objects can be attached to Scenes or Solid Objects using the Scene Editor. To add a script to a scene, click the
script button (third from left) in the Scene Toolbar and then click at a point in the Scene. A script icon will appear,
and its position becomes the origin about which the script action will take place. Script Objects can also be loaded
using the File > Import > Script menu command, and these will appear at the origin of the current Scene.
Script Objects can also be added as presets to the Object Presets palette and are identifi ed with a Script Object icon .
If you double-click on a script icon in the Scene Editor, a text editor will open allowing you to edit it’s script. You can
learn more about working with Script Objects in Chapter 14, “Adding Interactivity with Scripts.”
Script Object presets are identifi ed by this icon and a title.
Using Viewpoint Objects
Viewpoint Objects are 3-D objects that were exported from other 3-D software packages in the Viewpoint Media
format. Viewpoint object fi les carry the MTX, MTZ or XML extension. Unless they are subsequently converted to the
Page 99

ADOBE ATMOSPHERE 87
User Guide
Atmosphere native Surface Object type, Viewpoint Objects are considered “props”. That is, they do not participate
in global illumination calculated by Atmosphere, nor can they be edited in most ways in Atmosphere (they can be
positioned, scaled, and rotated as a whole, however). The advantage of props is that they do continue to retain most
of the characteristics they had when exported from the design application in which they were originally authored
(including key-frame animations, special surface properties, and so on), and they can be controlled at run-time
through the JavaScript API. Use props for dynamic objects within the scene. When importing a Viewpoint Object to
be used as a full-fl edged “citizen” of the scene (part of the environment), import the Viewpoint Object and then use
Atmosphere to convert it to a Surface Object.
Large, complex Viewpoint Objects with thousands of polygons can cause Atmosphere to perform sluggishly. Before
saving a 3-D model to be used in Atmosphere, optimize the model by reducing it to the smallest number of polygons
possible.
Viewpoint Objects can be imported using the File > Import > Viewpoint Object menu command or from a preset
loaded into the Object Presets palette. Viewpoint Objects that are imported will initially be placed at the Scene’s
origin, while Viewpoint Objects added from the Object Presets palette can be placed anywhere in the Scene by
clicking at that point. Select the object icon in the Object Presets palette, then click in the Scene at the point where
you wish to position the object. Holding down the Shift key allows placing multiple copies of the Viewpoint Object.
Viewpoint Objects presets are identifi ed by this icon and a title.
Viewpoint Objects can also include animation sequences which are controlled by the JavaScript API at run-time See
i
chapter 14, “Adding Interactivity with Scripts.”
Moving Viewpoint Objects
Selecting and dragging a Viewpoint Object in a Scene Editor view will move the object about in the scene. If you
hold down the Shift key while dragging the Viewpoint Object, it will move vertically, perpendicular to the XY plane.
Holding down the Ctrl key while dragging will constrain it to moving along a single axis.
Tutorial: Adding a Viewpoint Object to a Scene
To add a Viewpoint Object to an existing scene, follow these steps.
1 With the Scene Editor active, select File > Import > Viewpoint Object. Select a Viewpoint Object to add to the
scene, then click the Open button (Viewpoint Object fi les must have the MTX, MTZ or XML fi le extension). The
Viewpoint Object will appear at the origin of the Scene view.
Page 100
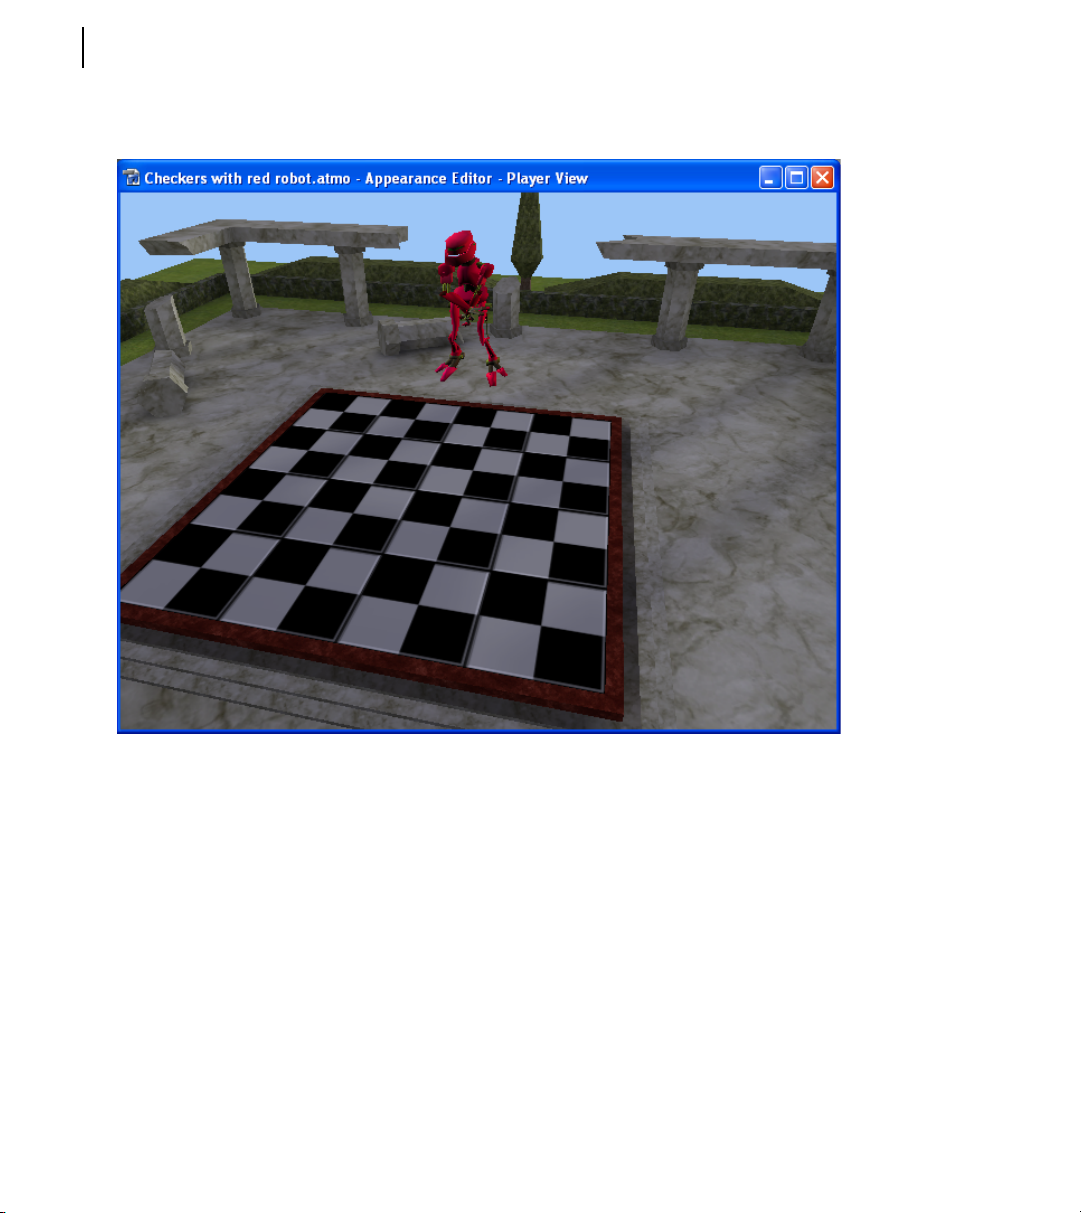
88 CHAPTER 8
2 Select and drag the Viewpoint Object to the position you wish. You may need to use several different views to
correctly position the Viewpoint Object.
Viewpoint Objects can be imported into Atmosphere Scenes.
Tutorial: Adding a Viewpoint Object from the Object Presets palette
Another way to add Viewpoint Objects to the scene is by using the Object Presets palette. To add a Viewpoint Object
from the Object Presets palette, follow these steps.
1 With the Scene Editor active, select Window > Object Presets to open the Object Presets palette. Click on the
palette menu symbol (or right-click in the palette) and select the Add Viewpoint Object Preset menu command.
This will open a fi le dialog box. Select a Viewpoint Object and click the Open button. The Viewpoint Object
preset will appear in the Object Presets palette.
2 Select the Viewpoint Object preset in the Object Presets palette and then click in the Scene at the point where you
wish to place the Viewpoint Object.
 Loading...