


P 0 6 HL
Safety Instructions
Observe the following safety guidelines when connection and using your monitor: |
|
|
∙ |
Be sure that your monitor is electrically rated to operate with the AC power available in your location. |
English |
∙ |
Locate your monitor near an easily accessible electrical outlet. |
|
∙ |
Never use your monitor if the power cable has been damaged. Do not allow anything to rest on the power cable, and keep |
|
∙ |
Place the monitor on a solid surface and treat it carefully. The screen can be damaged if dropped, sharply hit, or touched |
|
∙ |
with a sharp or abrasive implement. |
|
Put your monitor in a location with low humidity and a minimum of dust. |
|
|
∙ |
the cable away from where people could trip over it. |
|
Never insert anything metallic into the monitor openings. Doing so may create the danger of electric shock. |
|
|
∙ |
To avoid electric shock, never touch the inside of the monitor. Only a qualified technician should open the monitor’s case. |
|
∙ |
Be sure to hold the plug, not the cable, when disconnecting the monitor from an electrical outlet. |
|
∙ |
Openings in the monitor cabinet are provided for ventilation. To prevent overheating, these openings should not be |
|
∙ |
blocked or covered. Also, avoid using the monitor on a bed, sofa, rug, or other soft surface. |
|
Doing so may block the ventilation openings in the bottom of the cabinet. If you put the monitor in a bookcase or some |
|
|
∙ |
other enclosed space, be sure to provide adequate ventilation. |
|
Do not expose the monitor to rain or use it near water. If the monitor accidentally gets wet, unplug it and contact an |
|
|
|
authorized dealer immediately. You can clean the exterior of the monitor with a damp cloth when necessary, but be sure |
|
|
to unplug the monitor first. If your monitor does not operate normally-in particular, if there are any unusual sounds or smells |
|
coming from it -unplug the monitor immediately and contact an authorized dealer or service center.
Connecting Your Monitor to a Computer
1.1-1 Connect Video Cable
a.Make sure both the monitor and computer are powered-OFF.
b.Connect the video cable to the computer.
1-2 (only Dual-Input Model) Connect one end of the 24-pin DVI cable to the back of the monitor and connect the other end to the computer’s port.
2.Connect power cord
Connect the power cord to the monitor, then to a properly grounded AC outlet.
3.Connect the Audio Cable.(optional)
4.Power-ON Monitor and Computer
Power-ON the monitor first, then power-ON the computer. This sequence is very important.
5.If the monitor still does not function properly, please refer to the troubleshooting section to diagnose the problem.
Troubleshooting Tips
No Power - The monitor’s power indicator is off.
Make sure the monitor power cable is fully inserted in the monitor’s power port and the electrical outlet. Test the electrical oulet by plugging in a working electrical device such as a lamp.
Try another power cable on the monitor. You can use the computer’s power cable to perform this test.
No Video - The monitor’s power indicator is on but there are no image on the screen.
Ensure that the video connector is properly connected to the computer. Ensure that the computer is on and functioning properly.
Turn off the monitor and check the video cable pins. Make sure no pins are bent.
Operationg Detail
Please refer to user’s guide in CD-ROM packaged with this monitor
LCD Monitor Quick Setup Guide

English
P 0 6 HL
Regulations and safety notices
FCC notice
This device has been tested and found to comply with the limits for a Class B digital device pursuant to Part 15 of the FCC rules. These limits are designed to provide reasonable protection against harmful interference in a residential installation. This device generates, uses, and can radiate radio frequency energy and, if not installed and used in accordance with the instructions, may cause harmful interference to radio communications.
However, there is no guarantee that interference will not occur in a particular installation. If this device does cause harmful interference to radio or television reception, which can be determined by turning the device off and on, the user is encouraged to try to correct the interference by one or more of the following measures:
•Reorient or relocate the receiving antenna.
•Increase the separation between the device and receiver.
•Connect the device into an outlet on a circuit different from that to which the receiver is connected.
•Consult the dealer or an experienced radio/television technician for help.
CE declaration of Conformity
Hereby, Acer Inc., declares that this LCD monitor is in compliance with the essential requirements and other relevant provisions of EMC Directive 89/336/EEC, amended by 92/31/EEC and 93/68/EEC, Low Voltage Directive 2006/95/EC, RoHS Directive2002/95/EC and Directive 2009/125/EC with regard to establishing a framework for the setting of eco-design requirements for energy-related product.
Notice: Shielded cables
All connections to other computing devices must be made using shielded cables to maintain compliance with EMC regulations.
Notice: Peripheral devices
Only peripherals (input/output devices, terminals, printers, etc.) certified to comply with the Class B limits may be attached to this equipment. Operation with non-certified peripherals is likely to result in interference to radio and TV reception.
Caution
Changes or modifications not expressly approved by the manufacturer could void the user authority, which is granted by the Federal Communications Commission, to operate this product.
Operation conditions
This device complies with Part 15 of the FCC Rules. Operation is subject to the following two conditions: (1) this device may not cause harmful interference, and (2) this device must accept any interference received, including interference that may cause undesired operation.
Notice: Canadian users
This Class B digital apparatus complies with Canadian ICES-003.
Remarque à l’intention des utilisateurs canadiens
Cet appareil numérique de la classe B est conforme a la norme NMB-003 du Canada.
LCD Monitor Quick Setup Guide
P 0 6 HL
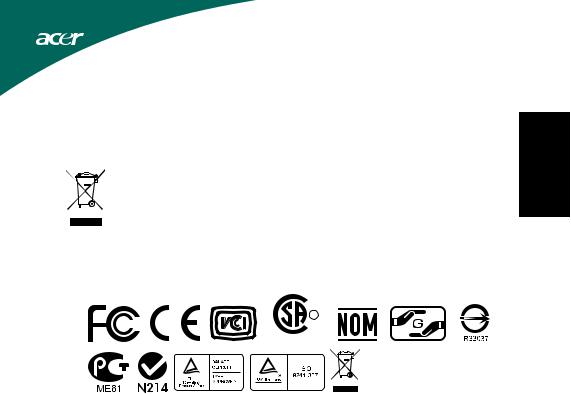
Disposal of W aste Equipment by Users in Private Household in the European Union
This symbol on the product or on its packaging indicates that this product must not be disposed of with your other household waste. Instead, it is your responsibility to dispose of your waste equipment by handing it over to a designated collection point for the recycling of waste electrical and electronic equipment. The separate collection and recycling of your waste equipment at the time of disposal will help to conserve natural resources and ensure that it is recycled in a manner that protects human health and the environment. For more information about where you can drop off your waste equipment for recycling, please contact your local city office, your household waste disposal service or the shop where you purchased the product.
Regulatory Compliance
English
R
C LR60441US
LCD Monitor Quick Setup Guide
|
|
SPECIFICATION |
|
P 0 6 HL |
|
|
|
|
|
||
|
|
|
|
|
|
|
|
|
Driving system |
TFT Color LCD |
|
|
|
|
Size |
20” W FP |
|
|
|
|
|
||
|
|
LCD Panel |
Pixel pitch |
0.276mm(H)x 0.276mm(V) |
|
English |
|
Brightness |
250cd/m2 (Typical) |
|
|
|
|
Contrast |
12000000:1 Max (ACM) |
|
|
|
|
|
|
||
|
|
|
Viewable angle |
170o(H)160o(V)(CR=10), 176o(H)170o(V)(CR=5) |
|
|
|
|
Response time |
5 ms (Typical) |
|
|
|
|
Video |
R,G,B Analog Interface |
|
|
|
|
H-Frequency |
30 80KHz |
|
|
|
|
V-Frequency |
55 75Hz |
|
|
|
|
|
||
|
|
Display Colors |
|
16.7M Colors |
|
|
|
Dot Clock |
|
160MHz |
|
|
|
Max. Resolution |
|
1600x900@60Hz |
|
|
|
Plug & Play |
|
VESA DDCCI/DDC2B |
|
|
|
Power consumption |
ON Mode |
18W(typ.) |
|
|
|
Sleep Mode |
0.38W(typ.) |
|
|
|
|
@200cd/m2 |
|
||
|
|
|
Off/Standby Mode |
0.33W(typ.) |
|
|
|
Input Connector |
|
D-Sub |
|
|
|
|
DVI-D 24pin (Only Dual-Input Model) |
||
|
|
|
|
||
|
|
Input Video Signal |
|
Analog:0.7Vp-p(standard), 75 OHM, Positive |
|
|
|
|
Digital signal (Only Dual-Input Model) |
||
|
|
|
|
||
 Speaker
Maximum Screen Size
 Power Source
Environmental Considerations
 Dimensions
Weight (N. W.)
Switch
External Controls:
Functions
 1 W x 2 (Only With Speaker Model) Horizontal : 442.8 mm
Vertical : 249.075 mm  100~240VAC,50/60Hz
Operating Temp: 0oC to 40oC Storage Temp.: -20oC to 60oC Operating Humidity: 20% to 85%
 476.80 (W) x 353.00 (H) x 185(D)mm
3.2 kg Unit (net)
Empowering Key and Automatic adjustment/ Exit </ >
Power Button
MENU/ENTER
Contrast
Brightness Focus Clock H.Position V.Position
(Warm) Color
(Cool) Color
RGB Color temperature Language
OSD position. timeout
Auto configuration (only Analog input model) Input signal Selection (only Dual input model) Display information
Reset
Exit
* All specifications are subject to change without notice.
LCD Monitor Quick Setup Guide

P 0 6 HL
Bahasa Indonesia
1-1 


1-2
Standar spesifikasi
R
C LR60441US
LCD Monitor Quick Setup Guide
Bahasa Indonesia
SPESIFIKASI |
|
P 0 6 HL |
||
|
Sistem penggerak |
LCD TFT Berwarna |
|
|
|
Ukuran |
20” W FP |
|
|
|
Pitch Piksel |
0.276mm(H)x 0.276mm(V) |
|
|
Panel LCD |
Kecerahan |
250cd/m2 (Typ.) |
|
|
Rasio Kontras |
12000000:1 Maksimum (ACM) |
|
||
|
|
|||
|
Sudut tampilan |
170o(H)160o(V)(CR=10), 176o(H)170o(V)(CR=5) |
|
|
|
Waktu respon |
5 ms (Typ.) |
||
|
Video |
Antar muka Analog R, G, B |
||
|
Frekuensi-H |
30 80KHz |
||
|
Frekuensi-V |
55 75Hz |
||
Warna Display |
|
16.7M juta warna |
||
Clock Dot |
|
160MHz |
||
Resolusi Maks. |
|
1600x900@60Hz |
||
Plug & Play |
|
VESA DDCCI/DDC2B |
||
Pemakaian daya |
Mode Hidup |
18W (Typ. ) |
||
Mode Tidur |
0.38W (Typ. ) |
|||
@200cd/m2 |
||||
Mati/Készenléti |
0.33W (Typ. ) |
|||
|
mód/Mode Siaga |
|||
|
|
|
||
Konektor Input |
|
D-Sub |
||
|
DVI 24 pin (Model Dual-Input) |
|||
|
|
|||
 Sinyal Input Video
Speaker
 Ukuran layar maksimum
Stopkontak:
Persyaratan lingkungan
 Dimensi
Berat (Bersih)
Video
Berat (Bersih)50450
Fungsi
 Analog: 0,7Vp-p (standar), 75 OHM, Positif
Sinyal Digital (Model Dual-Input)
1 W x 2 Hanya dengan Model Speaker
Horisontal:442.8 mm Vertikal :249.075 mm
 100~240VAC,50/60Hz Suhu Kerja:0oC to 40oC
Suhu penyimpanan.:-20oC to 60oC Kelembaban operasional::20% hingga 85%
 476.80 (W) x 353.00 (H) x185 (D)mm
3.2kg Switch Daya < / >
Tombol Pengaturan Otomatis MENU/ Keluar
Kontras Kecerahan Fokus Clock Posisi H. Posisi V.
(Panas) Warna (Dingin)Warna Temperatur Warna RGB Bahasa
Batas waktu posisi OSD
Konfigurasi Otomatis (Hanya Model Analog) Pilihan sinyal Input (Hanya Dual model) Informasi Display
Reset
Keluar
* Semua spesifikasi gampang dirobah tanpa pemberitahuan.
LCD Monitor Quick Setup Guide
P 0 6 HL
Español
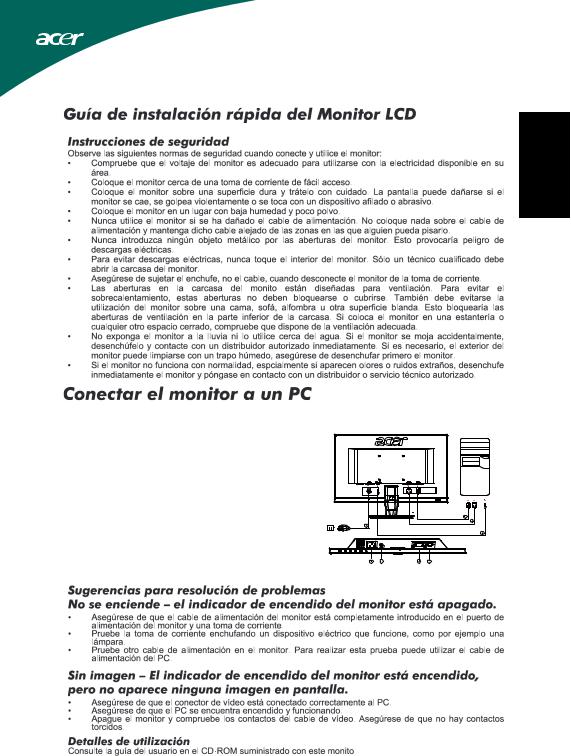
1.1-1 Conexión del Cable Video
a.Asegúrese de que tanto el monitor como la computadora estén apagado.
b.Conecte el cable video a la computadora.
1-2 Cable Digital (Sólo en modelos con entrada dual)
a.Asegúrese de que tanto el monitor como la computadora estén apagado.
b.Conecte un extremo del cable DVI de 24 contanctos a la parte trasera del monitor y conecte el otro extremo al puerto DVI del equipo.
2.Conexión del cordón eléctrico.
3.Opcional: Conecte la toma de entrada de audio (AUDIO IN) del monitor LCD al puerto de salida de línea del ordenador con el cable de audio.
4.Prendido del Monitor y la Computadora
Prende primero el monitor y luego la computadora. Esta secuencia es muy importante.
5. Si el monitor no funciona correctamente, consulte el apartado de solución de anomalías para intentar corregir el problema.
LCD Monitor Quick Setup Guide

Español
P 0 6 HL
Notas administrativas y de seguridad
Nota de la comisión FCC
Este equipo ha sido probado y es compatible con los límites de un dispositivo digital de Clase B, según el párrafo 15 del Reglamento de FCC. Estos límites han sido diseñados para ofrecer un nivel de protección razonable frente a interferencias perjudiciales en una instalación residencial. Este dispositivo genera, utiliza y puede irradiar energía en radiofrecuencia y, si no se instala y utiliza según sus instrucciones, podría provocar interferencias perjudiciales en comunicaciones de radio.
No obstante, no es posible garantizar que no se produzcan interferencias en una instalación particular. Si este dispositivo causa interferencias perjudiciales en la recepción de radio o televisión, lo cual podrá determinar encendiendo y apagando el dispositivo, animamos al usuario a intentar corregir la interferencia llevando a cabo una o más de las siguientes medidas:
•Reorientar o recolocar la antena receptora.
•Aumentar la separación entre el dispositivo y el receptor.
•Conectar el dispositivo a un enchufe perteneciente a un circuito distinto al que pertenece el enchufe al que está conectado el receptor.
•Consulte con su proveedor o con un técnico experimentado en radio / TV para más información.
Declaración de conformidad de la CE
Acer Inc. kinnitab käesolevaga, et see LCD monitor vastab EMC direktiiivi 89/336/EMÜ, viimati muudetud direktiividega 92/31/EMÜ ja 93/68/EMÜ, madalpingedirektiivi 2006/95/EÜ, RoHS direktiivi 2002/95/EÜ ja direktiivi 2009/125/EÜ peamistele nõuetele ja teistele asjakohastele sätetele, mis on seotud raamistiku kehtestamisega energiamõjuga toodete ökodisaini nõuetele.
Nota: Cables blindados
Todas las conexiones realizadas a otros dispositivos informáticos deberán hacerse utilizando cables blindados para mantener el cumplimiento con las normativas EMC.
Nota: dispositivos periféricos
Únicamente podrán conectarse a este dispositivo aquellos periféricos (dispositivos de entrada/salida, terminales, impresoras, etc.) certificados dentro de los límites de Clase B. El uso de periféricos no certificados podría provocar interferencias en la recepción de señales de radio y TV.
Precaución
Los cambios o modificaciones no aprobados explícitamente por el fabricante podrían invalidar la autoridad del usuario, otorgada por la Comisión Federal de Comunicaciones (FCC), para utilizar este producto.
Condiciones de uso
Este dispositivo satisface los requisitos de la Parte 15 de la Normativa FCC. Su funcionamiento se encuentra sometido a las siguientes dos condiciones: (1) Este dispositivo no debe causar interferencias perjudiciales, y (2) este dispositivo debe aceptar cualquier interferencia recibida, incluyendo aquellas interferencias que puedan provocar funcionamientos no deseados.
Nota: Usuarios canadienses
Este aparato digital de Clase B satisface los requisitos de la norma canadiense ICES-003.
Remarque à l’intention des utilisateurs canadiens
Cet appareil numérique de la classe B est conforme a la norme NMB-003 du Canada.
LCD Monitor Quick Setup Guide
P 0 6 HL
Eliminación de residuos de equipos eléctricos y electrónicos por parte de usuarios particulares en la Unión Europea
Este símbolo en el producto o en su envase indica que no debe eliminarse junto con los desperdicios generales de la casa. Es responsabilidad del usuario eliminar los residuos de este tipo depositándolos en un “punto limpio” para el reciclado de residuos eléctricos y electrónicos. La recogida y el reciclado selectivos de los residuos de aparatos eléctricos en el momento de su eliminación contribuirá a conservar los recursos naturales y a garantizar el reciclado de estos residuos de forma que se proteja el medio ambiente y la salud. Para obtener más información sobre los puntos de recogida de residuos eléctricos y electrónicos para reciclado, póngase en contacto con su ayuntamiento, con el servicio de eliminación de residuos domésticos o con el establecimiento en el que adquirió el producto.
Cumplimiento legal
R
C LR60441US
Español
LCD Monitor Quick Setup Guide
|
|
ESPECIFICACIONES |
|
P 0 6 HL |
||
|
|
|
|
|
||
|
|
|
|
Sistema conductor |
LCD Color TFT |
|
|
|
|
|
Tamaño |
20” W FP |
|
|
|
|
|
Punto de pixel |
0.276mm(H)x 0.276mm(V) |
|
|
|
Panel LCD |
|
Brillo |
250cd/m2 (típico) |
|
Español |
|
|
|
Contraste |
12000000:1 Máx (ACM) |
|
|
|
|
Ángulo visible |
170o(H)160o(V)(CR=10), 176o(H)170o(V)(CR=5) |
|
|
|
|
|
|
Tiempo de respuesta |
5 ms (típico) |
|
|
|
|
|
Video |
Interfaz analógica R,G,B |
|
|
|
|
|
Frecuencia H |
30 80KHz |
|
|
|
|
|
Frecuencia V |
55 75Hz |
|
|
|
|
|
|
|
|
|
|
Colores mostrados |
|
|
16.7M de colores |
|
|
|
Sincronización de punto |
|
160MHz |
|
|
|
|
Resolución máxima |
|
1600x900@60Hz |
|
|
|
|
Plug & Play |
|
VESA DDCCI/DDC2B |
|
|
|
|
Consumo de energía |
|
Modo Activado |
18W(typ.) |
|
|
|
|
Modo de suspensión |
0.38W(typ.) |
|
|
|
|
@200cd/m2 |
|
Apagado/ |
0.33W(typ.) |
|
|
|
|
|
Modo en espera |
|
|
|
|
|
|
|
|
|
|
|
Conector de entrada |
|
D-Sub |
|
|
|
|
|
DVI-D 24pin(Sólo en modelos con entrada dual) |
|||
|
|
|
|
|
||
 Señal de vídeo de entrada
 altavoz
Tamaño máximo de pantalla  Fuente de alimentación
Consideraciones medioambientales
Dimensioner
 Weight (N. W.)
Interruptor
Controles externos:
Funciones
 Analógica:0.7Vp-p(estándar), 75 OHM, Positiva Señal digital (Sólo en modelos con entrada dual)
1 W x 2 (sólo en modelo con altavoces)
 Horizontal :442.8 mm Vertical :249.075 mm
  100~240VAC,50/60Hz
 Temperatura 0°C a 40°C
Temperatura de almacenamiento: -20°C a 60°C Humedad de funcionamiento: 20% a 85%
 476.80 x 353.00 x 185(BxHxD)mm
 3.2 kg Unit (net)
 empowering(Encender)/Salir Botón Ajuste automático / Salir < / >
Botón de encendido MENú / INTRO
Contraste Brillo Nicidez Reloj
H. Posicion
V. Posicion Idioma
Auto configuración (Sólo Modelo de entrada analógico)
Selección de señal de entrada (Sólo Modelo de entrada dual)
Cálido Frio
Temperatura de color RGB Reiniciar
Posición OSD . tiempo de espera Información de pantalla
Salida
* Todo el contenido de este manual está sujeto a cambios sin previo aviso.
LCD Monitor Quick Setup Guide
 Loading...