


Pelco 20185, 6200, 20145JF, 2009, 2012 User Manual
...Before operating the Refrigerator, please read this manual carefully and retain for future reference.
Refrigerator
Instruction Manual
All cautions & notes on this refrigerator are important: please pay attention to them.
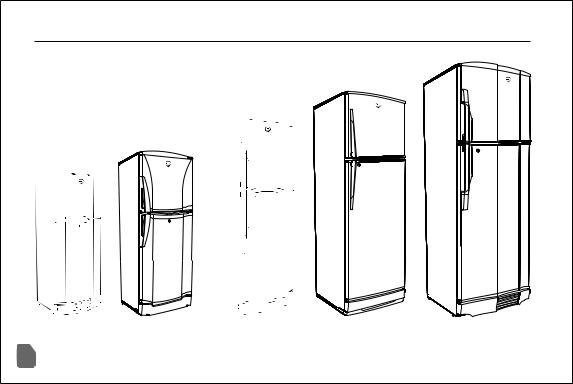
REFRIGERATOR MODELS & SERIES
SL Series |
WB Series |
6 Series |
2009 |
20145JF |
6200 |
2010 |
20165 |
6300 |
2012 |
2017 |
6400 |
2300JF |
20175 |
|
2500JF |
20185 |
|
Slim Line Series |
Slim Line Series |
Slim Line Series |
6 Series |
Wide Body Series |
Crystal |
Star Plus |
Premier |
|
|
01 |
Please read all safety and operating instructions before operating this appliance. |

INSIDE YOUR STARTER PACK
Dear Valued Customer
We congratulate you on your choice. You now are a proud owner of a PEL product having joined millions of others who are benefitting from quality PEL products for more than 50 years.
We want to assure you that each PEL product is built to last with state-of-the-art, energy efficient technology adapted to suit our local environment.
Distinctive qualities that we are proud to share with all our valued customers providing high performance, reliability, durability and most of all prompt customer care whenever and wherever you need it.
Kindly fill out the Warranty Card and send the Company's Copy to the given address for Warranty Registration.
Please read this Instruction Manual carefully as it will guide you to install, operate and maintain this appliance in its original condition for years to come.
Welcome to the PEL family, and wishing you many years of ease and comfort that come with the PEL name.
Thank you
REFRIGERATOR MODELS & SERIES |
01 |
PARTS IDENTIFICATION |
03 |
INSTALLATION |
04 |
Leveling the Appliance |
|
Personal safety |
|
GETTING STARTED |
05 |
Food storage |
|
Vegetable / Fruit compartment |
|
ICE CUBES MAKING |
06 |
TEMPERATURE CONTROL |
06 |
DEFROSTING |
07 |
Single Door Refrigerator |
|
Double Door Refrigerator |
|
GENERAL CARE AND CLEANING |
09 |
DEODORIZER |
10 |
TROUBLE SHOOTING TIPS |
11 |
SAFETY PRECAUTIONS |
13 |

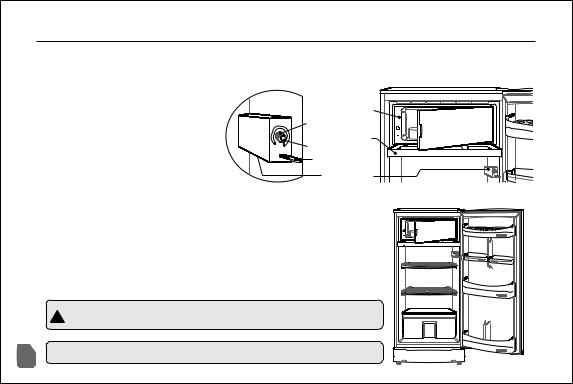
PARTS IDENTIFICATION
Ice Trays |
Upper Hinge |
|
Ice Tray Carrier |
|
|
Ice Tray Knob |
|
|
Ice Cube Container |
||
(For 6 Series) Door Switch |
||
(For 6 Series) Frz. Light Cover |
||
|
Frz. Grid Shelf |
|
|
Frz. Grid Frame/Trim |
|
|
Lock Latch |
|
Thermostat Box SL & WB Series |
Central Hinge |
|
Thermostat Box |
||
|
||
|
Door Switch |
|
Ref. Light Cover |
Ref. Drain Hole |
|
Deodorizer Cover |
Ref. Grid Shelf |
|
Thermostat Knob |
||
Ref. Grid Frame/Trim |
||
|
||
|
Bottle Shelf |
|
Thermostat Box 6 Series |
Veg./Fruit Cover |
|
|
||
Vegetable / Fruit Compartment |
||
Bottle Opener |
|
|
Main Cable with 3 pin Plug |
||
|
Leveling Screw |
|
03
Frz. Central
Supporting Plate
Frz. Supporting Grid
Frz. Door Gasket
Frz. Inner Liner
Frz. Balcony
Butter & Cheese
Cover
Butter & Cheese
Compartment
Eggs Balcony
Utility Pocket
Ref. Balcony Strip
Ref. Balcony
Ref. Inner Liner
Ref. Door Gasket
Lower Hinge
Kick Plate
Ice Scraper |
NOTE: Specifications may vary from model to model. |
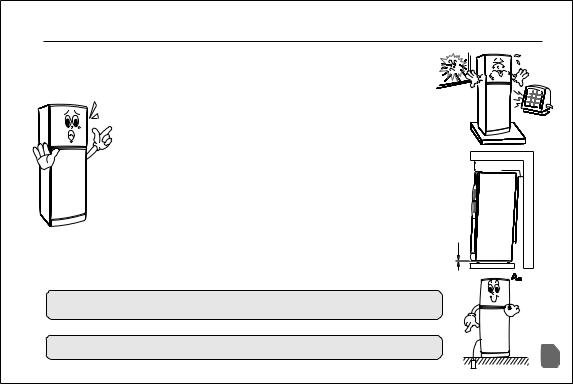
INSTALLATION
1.Remove packing carton and all thermopore pieces from the refrigerator, specially one at the back of the compressor. Install the Appliance on a firm, flat surface or a Wooden Pedestal (Chowki).
2. For optimum performance install the refrigerator in a well ventilated
place. Avoid installing the refrigerator near heat generating home
appliances such as heater, stove and in small nooks / corners, direct sun light.
3.Leveling the Appliance
To compensate any floor unevenness, adjust the balance of Appliance by rotating the Leveling Screws clock wise or anti clock wise.
4. Always install your refrigerator in a tilted position as shown.
5. For personal safety, properly ground this Appliance.
Do not ground the refrigerator with a telephone line, gas pipe, etc. It is necessary that refrigerator should be connected to the proper earth point.
12”above |
above 4” |
|
|
1/3” |
|
approx. |
|
The manufacturer will not be responsible for any loss or damage if
IMPORTANT:
precaution in this regard is not observed.
NOTE: Retain the original packing in case you need to ship it at a later date.
04
GETTING STARTED
Clean the refrigerator before turning it ON. After plugging check that the light inside the cabinet is ON, when the door is opened. Turn the thermostat knob to the maximum position “8”, close the refrigerator doors, let it run idle for 2 ~3 hours, then turn the thermostat knob to the medium position (4) in normal condition, now the refrigerator is ready to store food . If it is peak summer, set the thermostat position at (5 ~ 6).
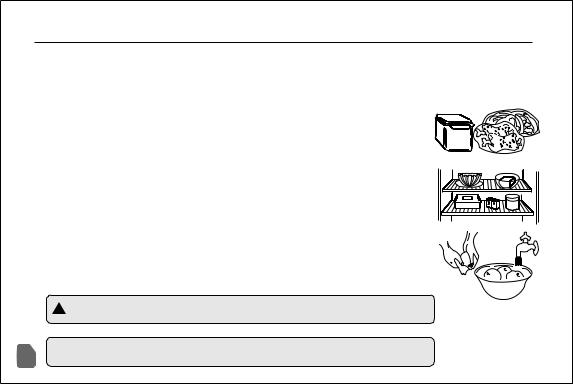
FOOD STORAGE
1. Seal food in containers with lids or in plastic bags to prevent drying and mingling of odour.
2. In Freezer compartment keep food in small quantities for quick freezing.
3. Allow hot food and drinks to cool down before placing in the refrigerator or freezer.
4. Food should be arranged so as to ensure free circulation of cool air in the compartment, never cover grid shelves with plastic mats or sheets.
5. Food stored in the refrigerator compartment can be refrigerated up to a certain limit.
6. Wash and dry meat, fruits and vegetables before placing them in the refrigerator.
VEGETABLE / FRUIT COMPARTMENT
This compartment maintains the moisture of vegetables & fruits, to sustain their freshness for longer period.
! CAUTION:
NOTE:
05
Do not freeze the meat again after getting it defrosted. It can be harmful for health.
Incase of prolonged power failures, it is recommended that stored food should be consumed within 6~8 hours.
ICE CUBES MAKING
When you want to make ice cubes, take out complete set of ice tray carrier, pour water in ice trays and slide it back.
After ice cubes have been formed in the ice trays, free the ice cubes from the ice trays by turning the ice tray’s knob clockwise. Twist it again and allow ice cubes to drop into the ice cube container underneath.
PRECAUTION: Make sure that the ice cube container is beneath the ice trays.
NOTE: Ice tray design may differ in different models.
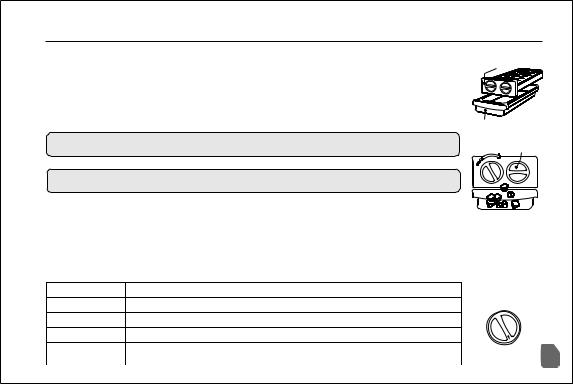
TEMPERATURE CONTROL
The temperature inside the refrigerator may vary according to the frequency of door opening, food status or the amount of food stored in the refrigerator. Adjust the thermostat knob to change the internal temperature according to the environmental temperature. For reference, please see the following table:
Ice Tray set
Ice Cube container
Ice Tray Knob
Position “0” |
Off position |
|
|
Position “2 ~ 3” |
When environmental temperature is below 15 °C |
|
Winter season |
Position “4” |
When environmental temperature is 15 °C - 30 °C |
|
Moderate season |
Position “5 ~ 6” |
When environmental temperature is 30 °C - 40 °C |
|
Summer Season |
Position “7 ~ 8” |
When environmental temperature is above 40 °C |
|
In special cases, not |
|
recommended normally |
||
|
|
|
Thermostat Knob
|
0 |
1 |
8 |
|
|
|
2 |
|
7 |
|
|
|
3 |
|
6 |
|
|
|
5 |
4 |
|
|
06
DEFROSTING
Defrosting is necessary for efficient performance of the Appliance. When the layer of frost on the walls of freezer compartment becomes 5 ~ 8 millimeters or over, the Appliance needs to be defrosted.
Single Door Refrigerator
This refrigerator is equipped with a semi automatic defrosting thermostat with a Push-Button.
To defrost the refrigerator, follow these instructions:
Freezer Compartment |
Thermostat Knob |
Drip Tray |
Defrosting Push-Button |
Door Switch |
Thermostat Box |
1.Remove food and ice trays from freezer compartment.
2.Press Push-Button of thermostat knob, let the Refrigerator & Freezer doors open for defrosting.
3.Wait till the frost melts then remove it carefully with the help of Ice scraper.
4.Take out Drip tray carefully when it is filled with water, dispose of this water and slide it back to its original position. You may repeat this action till defrosting is completed.
5.Push-Button will automatically come back to its original position when defrosting is completed.
! CAUTION:
Do not remove frost with knife or sharp metal tools.
Always use company provided Ice Scraper.
07 |
NOTE: Complete defrosting is recommended after every month. |
DEFROSTING
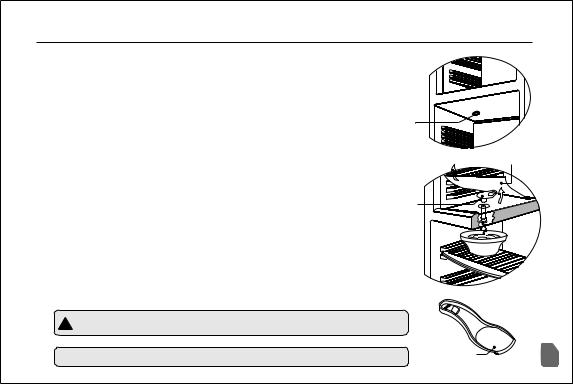
Double Door Refrigerator
Refrigerator Compartment
This compartment defrosts automatically. Manual defrosting is not required.
Freezer Compartment |
Drain Hole 6 Series |
Models only |
|
To defrost the freezer compartment, follow the instructions given below: |
|
1. Remove food, ice trays set, ice cube container and grid shelves from Freezer compartment.
Frz. Protection Plate
2. Turn the thermostat knob to position “0” unplug the Appliance and
let the Freezer door open for defrosting. 3. Wait till the frost melts then remove it carefully with the help of Ice Scraper.
4. When frost is removed, take out protection plate care fully and detach the drain plug in order to drain out defrosted water.
5. (a) (For 6 series only) Place a container exactly under the drain to collect defrosted water.
(b) In Slim Line series & Wide Body series defrosted water will drain out and collect in the condensate tray provided at the back of the cabinet as shown in page # 9.
6. Now clean the whole compartment with a soft dry cloth. Insert drain plug back to its original position and place protection plate over it.
7.Close the Freezer door and let it run for about one hour before reloading the food.
Do not remove frost with knife or sharp metal tools. Always
! CAUTION:
use company provided Ice Scraper.
NOTE: Complete defrosting is recommended after every month. |
Ice Scraper |
08 |
|
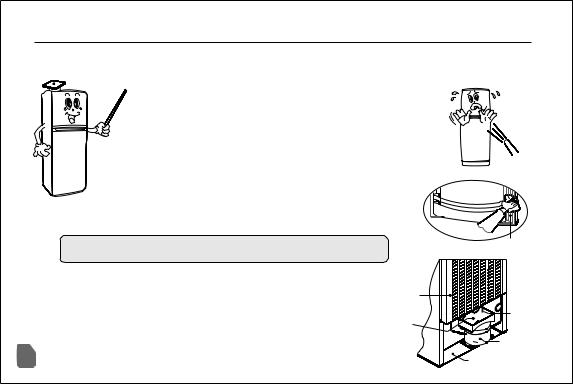
GENERAL CARE AND CLEANING
This refrigerator does not require any special maintenance. It is however advised to keep your refrigerator neat and clean, this will increase the life of your refrigerator.
1. Always unplug the refrigerator before cleaning. Do not use liquid cleaners or aerosol cleaners.
2. Never apply water directly inside or outside the refrigerator. Water spoils the insulation of electric parts and may cause electrical shock.
|
Interior Cleaning |
|
|
|
For inside cleaning take out all food and accessories from refrigerator, |
||
|
use a solution of 9 parts water and 1 part vinegar, rinse thoroughly with |
||
|
a sponge and fresh water. Finally dry whole cabinet with a soft cloth. |
||
|
Door Gasket |
|
|
|
Clean the gasket thoroughly in order to maintain its sticking quality. |
||
|
Dry all the accessories completely before putting them |
Gasket |
|
|
NOTE: |
|
|
|
back at their original position. |
|
|
|
Exterior Cleaning |
|
|
|
To clean the external side of the refrigerator use only |
|
Condenser |
|
a slightly damp soft cloth. |
|
Drain Pipe |
|
|
|
|
|
Condenser |
Condensate tray |
|
|
Clean the refrigerator condenser with a brush or vacuum |
Compressor |
|
09 |
cleaner, this maintains the efficiency of your refrigerator. |
|
|
refrigerator. |
|
Compressor base plate |
|
DEODORIZER
DEODORIZER |
6 Series |
|
|
Lamp / Bulb |
Deodorizer Cover |
|
|
Deodorizer removes odour from the refrigerator.
PRECAUTION:
NOTE:
Storing food or liquids which can pick up or transmit odour or flavors
easily, must be kept in
sealed container.
Light Cover Deodorizer Thermostat Box Thermostat Knob
SL Series & WB Series
Deodorizer Cover Lamp / Bulb
The deodorizer does not harm stored Food.
Thermostat Box |
Thermostat Knob |
Light Cover |
If you are not using the refrigerator for more than 01 week, unplug the appliance, IMPORTANT: take out all the food stuffs, clean both Ref. & Frz. inner cabinets properly and keep
the doors open. If you keep the doors in closed position, it will give foul smell.
10
 Loading...