


 Loading...
Resuscitation System Model 100
AutoPulse® Power System User Guide
P/N. 12457-001 Rev. 2


 Power System User Guide
Notice
About this Guide
The information in this User Guide applies to the ZOLL AutoPulse® Power System designed for the AutoPulse Resuscitation System Model 100. The AutoPulse Power System consists of the AutoPulse Multi-Chemistry Battery Charger and the AutoPulse Li-Ion Battery and/or the AutoPulse NiMH Battery.
ZOLL shall not be liable for errors contained herein or for incidental or consequential damages in connection with the furnishing, performance, or use of this material.
Copyright
© Copyright ZOLL 2012. All rights reserved.
No part of this publication may be reproduced, stored in a retrieval system, or transmitted, in any form or by any means, mechanical, electronic, photocopying, recording, or otherwise, without prior written permission of ZOLL.
AutoPulse and LifeBand® are trademarks of ZOLL. All other trademarks mentioned herein belong to their respective owners.
0344
USA |
|
|
EU Authorized Representative |
ZOLL Circulation |
|
|
ZOLL International Holding B.V. |
|
|
||
650 Almanor Avenue |
|
|
Newtonweg 18 |
Sunnyvale, CA 94085 USA |
|
|
6662 PV ELST |
t: +1.408.541.2140 |
|
|
The Netherlands |
|
|
|
|
f: +1.408.541.1030 |
|
|
t: +31 481 366 410 |
Page ii |
P/N. 12457-001 Rev. 2 |


 Power System User Guide
Table of Contents
Figures ...................................................................................................................... |
v |
|
Tables ....................................................................................................................... |
vi |
|
Preface .................................................................................................................... |
vii |
|
Who Should Read this Guide ................................................................................ |
vii |
|
General Warnings and Precautions ...................................................................... |
vii |
|
Symbols ................................................................................................................... |
ix |
|
1 Introduction of the AutoPulse Power System ................................................ |
1-1 |
|
1.1 |
Recommended Battery, Charger and AutoPulse Ratios .................................................... |
1-2 |
2 AutoPulse Li-Ion Battery .................................................................................. |
2-1 |
|
2.1 |
Expected AutoPulse Li-Ion Battery Life ............................................................................. |
2-2 |
2.2 |
Handling New AutoPulse Li-Ion Batteries ......................................................................... |
2-2 |
3 AutoPulse NiMH Battery ................................................................................... |
3-1 |
|
3.1 |
Expected AutoPulse NiMH Battery Life ............................................................................. |
3-2 |
3.2 |
Handling New AutoPulse NiMH Batteries ......................................................................... |
3-2 |
4 The AutoPulse Multi-Chemistry Battery Charger .......................................... |
4-1 |
|
4.1 |
Setting Up the AutoPulse Multi-Chemistry Battery Charger .............................................. |
4-1 |
4.2 |
Operating the AutoPulse Multi-Chemistry Battery Charger .............................................. |
4-2 |
4.2.1 AutoPulse Multi-Chemistry Battery Charger Test-Cycle mode ................................... |
4-5 |
|
5 Using the AutoPulse Battery ............................................................................ |
5-1 |
|
5.1 |
AutoPulse Li-Ion Battery Status Check ............................................................................. |
5-1 |
5.2 |
AutoPulse Li-Ion Battery Installation ................................................................................. |
5-2 |
5.3 |
AutoPulse NiMH Battery Status Check ............................................................................. |
5-3 |
5.4 |
AutoPulse NiMH Battery Installation ................................................................................ |
5-4 |
5.5 |
Battery Rotation .............................................................................................................. |
5-6 |
6 Managing the AutoPulse Power System ......................................................... |
6-1 |
|
6.1 |
AutoPulse Battery Management ...................................................................................... |
6-1 |
6.2 |
AutoPulse Battery Maintenance ....................................................................................... |
6-1 |
6.2.1 Cleaning the AutoPulse Battery ................................................................................ |
6-1 |
|
6.2.2 AutoPulse Battery Inspection .................................................................................... |
6-2 |
|
6.2.3 Storing AutoPulse Batteries ...................................................................................... |
6-2 |
|
6.2.4 Reaching the End of AutoPulse Li-Ion Battery Service Life ......................................... |
6-3 |
|
6.2.5 Reaching the End of AutoPulse NiMH Battery Service Life ......................................... |
6-3 |
|
6.2.6 Disposing of AutoPulse Batteries .............................................................................. |
6-3 |
|
7 AutoPulse Multi-Chemistry Battery Charger Maintenance ........................... |
7-1 |
|
7.1 |
Cleaning the AutoPulse Multi-Chemistry Battery Charger ................................................ |
7-1 |
|
|
|
P/N. 12457-001 Rev. 2 |
Page iii |
|

|
|
Power System User Guide |
|
|
|
7.2 Replacing a AutoPulse Multi-Chemistry Battery Charger Fuse |
...........................................7-1 |
|
Appendix A AutoPulse Daily Checklist .............................................................. |
A-1 |
|
Appendix B Troubleshooting .............................................................................. |
B-1 |
|
Appendix C Technical Specifications ................................................................. |
C-1 |
|
C.1 |
Li-Ion Battery Physical and Environmental ....................................................................... |
C-1 |
C.2 |
NiMH Battery Physical and Environmental ....................................................................... |
C-2 |
C.3 |
Multi-Chemistry Battery Charger Physical And Environmental ......................................... |
C-3 |
C.4 |
FCC Statement ............................................................................................................... |
C-4 |
C.5 |
Limited Warranty for AutoPulse Resuscitation System ..................................................... |
C-5 |
Index ....................................................................................................................... |
I-1 |
|
Page iv |
P/N. 12457-001 Rev. 2 |


 Power System User Guide
Figures
Figure 1-1 AutoPulse System ................................................................................................. |
1-1 |
|
Figure 1-2 Recommended component ratios ......................................................................... |
1-2 |
|
Figure 2-1 The AutoPulse Li-Ion Battery ................................................................................. |
2-2 |
|
Figure 3-1 AutoPulse System NiMH Battery ............................................................................ |
3-2 |
|
Figure 4-1 AutoPulse Multi-Chemistry Battery Charger .......................................................... |
4-1 |
|
Figure 4-2 Sliding the Battery into a Multi-Chemistry Battery Charger Charging Bay .............. |
4-3 |
|
Figure 4-3 Multi-Chemistry Charger Control Panel ................................................................. |
4-3 |
|
Figure 5-1 AutoPulse Li-Ion Battery Status Check Button and Status LEDs .............................. |
5-1 |
|
Figure 5-2 AutoPulse Li-Ion Battery Installation and Removal ................................................. |
5-2 |
|
Figure 5-3 Battery Status Check Button and Status LEDs ........................................................ |
5-3 |
|
Figure 5-4 AutoPulse NiMH Battery Installation and Removal ................................................. |
5-4 |
|
Figure 5-5 |
Four Battery rotation ............................................................................................. |
5-6 |
Figure 5-6 |
Three Battery rotation ........................................................................................... |
5-7 |
Figure 6-1 |
Examples of a damaged Battery connector and housing ........................................ |
6-2 |
Figure 7-1 |
AutoPulse Multi-Chemistry Battery Charger Fuse Location .................................... |
7-1 |
P/N. 12457-001 Rev. 2 |
Page v |


 Power System User Guide
Tables
Table 4-1 AutoPulse Multi-Chemistry Battery Charger Status LEDs ....................................... |
4-4 |
|
Table 5-1 |
AutoPulse Li-Ion Battery Status LEDs ...................................................................... |
5-1 |
Table 5-2 |
Battery Status LEDs ................................................................................................ |
5-3 |
Table B-1 |
Battery Troubleshooting Procedures ....................................................................... |
B-1 |
Table B-2 |
Multi-Chemistry Battery Charger Troubleshooting Procedures ................................ |
B-2 |
Table C-1 Li-Ion Battery Specifications ................................................................................... |
C-1 |
|
Table C-2 NiMH Battery Specifications ................................................................................... |
C-2 |
|
Table C-3 Multi-Chemistry Battery Charger Specifications ...................................................... |
C-3 |
|
P/N. 12457-001 Rev. 2 |
Page vi |


 Power System User Guide
Preface
This document describes the operating steps and maintenance requirements for the AutoPulse Power System for use as part of the AutoPulse Resuscitation System Model 100. The AutoPulse Power System consists of the AutoPulse Multi-Chemistry Battery Charger and the AutoPulse Li-Ion Battery and/or the AutoPulse NiMH Battery.
Proper use of the AutoPulse Power System requires a thorough understanding of the Power System, and appropriate training and practice using the Power System.
Please read the entire AutoPulse Power System User Guide and AutoPulse User Guide before using the AutoPulse Power System.
Who Should Read this Guide
This document should be read by personnel who are tasked with the care and maintenance of the Power System used to operate the AutoPulse System.
General Warnings and Precautions
Warning:
•Always charge a new Battery. Failure to charge a Battery may cause reduced Battery performance.
•Always charge a stored Battery before placing the Battery in active operation. Battery may self-discharge when not in use. Failure to charge a Battery before use may cause device power failure. In no case should any Battery be used if it has not been charged within 2 days.
•No modification of the AutoPulse Multi-Chemistry Battery Charger, the AutoPulse Li-Ion Battery, or the AutoPulse NiMH Battery is allowed.
Caution: United States federal law restricts this device to sale by or on the order of a licensed physician.
Caution: The AutoPulse System is designed to be used only with ZOLL-approved accessories. The AutoPulse System will perform improperly if non-approved accessories are used.
Caution: Do not short the Battery leads. Electrical connection (short) between the Battery power leads on the connector permanently damages the Battery and renders the Battery inoperable.
Caution: Always charge AutoPulse Batteries at temperatures between 41ºF (5ºC) and 95ºF (35ºC). Charging Batteries at temperatures below 41ºF (5ºC) or above 95ºF (35ºC) will prevent the Battery from reaching its full capacity (operational time) and may lead to irreversible Battery damage.
Caution: Do not block the Multi-Chemistry Battery Charger’s ventilation slots.
P/N. 12457-001 Rev. 2 |
Page vii |


 Power System User Guide
Caution: Do not operate the Multi-Chemistry Battery Charger in a confined space.
Caution: Do not position the Multi-Chemistry Battery Charger so that it is difficult to unplug the power cord.
Caution: Keep the Multi-Chemistry Battery Charger away from moisture.
Caution: Do not remove the Multi-Chemistry Battery Charger cover. The Multi-Chemistry Battery Charger has no internal user-serviceable parts.
Caution: Use the Multi-Chemistry Battery Charger only with ZOLL AutoPulse Multi-Chemistry Battery Charger Power Cord, as supplied.
Caution: The OPERATOR shall not touch simultaneously any Battery Charger conductive parts and the PATIENT
Caution: The AutoPulse System is designed to be used only with ZOLL approved Batteries. The AutoPulse System will perform improperly if non-approved batteries are used. The use of other batteries may cause permanent damage to the AutoPulse and will void the warranty.
Caution: ZOLL Batteries are to be used only with the AutoPulse Platform or with ZOLL Chargers. Use of a Battery in other applications may damage the Battery and will void warranty.
Caution: It is strongly recommended that a Battery not be stored in AutoPulse when AutoPulse is not in active service (shift deployment) or is in extended storage. Storage in AutoPulse longer than a week may result in irreversible damage to a Battery.
Caution: Always inspect a Battery for damage prior to insertion into either the AutoPulse or the MultiChemistry Charger. Never place a damaged Battery into the AutoPulse Platform or Charger. If damage to a Battery is found, contact ZOLL Technical Service.
Caution: ZOLL AutoPulse Batteries are mechanically keyed to the AutoPulse Platform and Battery Charger to facilitate correct installation. Insert a Battery, connector first, into the AutoPulse Battery Bay or Multi-Chemistry Charger until it properly latches into position. Do not force a connection if you cannot easily connect Battery to either the Charger or the AutoPulse. Doing so may result in damage to the Battery, Charger, and/or AutoPulse.
Caution: Remove the protective plastic cap from a Battery before attempting to charge the Battery. Caution: The Battery is intended to be used by trained professionals. Keep out of the reach of children. Caution: Do not attempt to swallow the Battery in whole or in part.
Caution: Do not use a Battery that has cracks in the Battery case exposing internal components. Do not strike or throw a Battery. Do not use a Battery to strike another object. Mishandling of a Battery may lead to physical damage and present a fire or shock hazard.
Caution: Do not immerse any portion of a Battery in water or other fluids. Do not allow fluids to enter a Battery or a Battery Connector. Fluid immersion or spillage may permanently damage the Battery or present a fire or shock hazard.
Page viii |
P/N. 12457-001 Rev. 2 |


 Power System User Guide
Caution: If Battery pack leaks, do not allow the liquid to come into contact with skin or eyes. If contact has been made, do not rub. Rinse skin or eyes with clean running water and immediately seek medical attention.
Caution: Do not heat, burn, or incinerate a Battery. Never expose a Battery to an open flame. Exposure to heat above 158ºF (70ºC) may irreversibly damage the Battery. Incinerating the Battery may result in flames or explosion.
Caution: If the Battery gives off an odor, generates heat, becomes discolored or deformed, or in any way appears abnormal during use, recharging, or storage, immediately remove it from the AutoPulse or Charger and stop using it. Otherwise, the problematic Battery may develop acid and/or electrolyte leakage, overheating, smoke emission, bursting and/or ignition.
Caution: Do not throw your Batteries away or send them to municipal dumps. Call you local waste management officials for proper disposal instructions.
Caution: Do not transport or store Battery pack together with metal objects such as necklaces, keys, zippers, etc. Contact with these and other similar metal objects may cause the Battery to short and generate high heat and burns.
Caution: Do not attempt to open a Battery. AutoPulse Batteries have no user-serviceable parts.
Caution: Clean the Battery Connector and contacts only with a clean dry cloth and/or a non-conductive brush.
Caution: Do not autoclave the AutoPulse Battery or the Multi-Chemistry Battery Charger. Caution: Retain the original product literature for future reference.
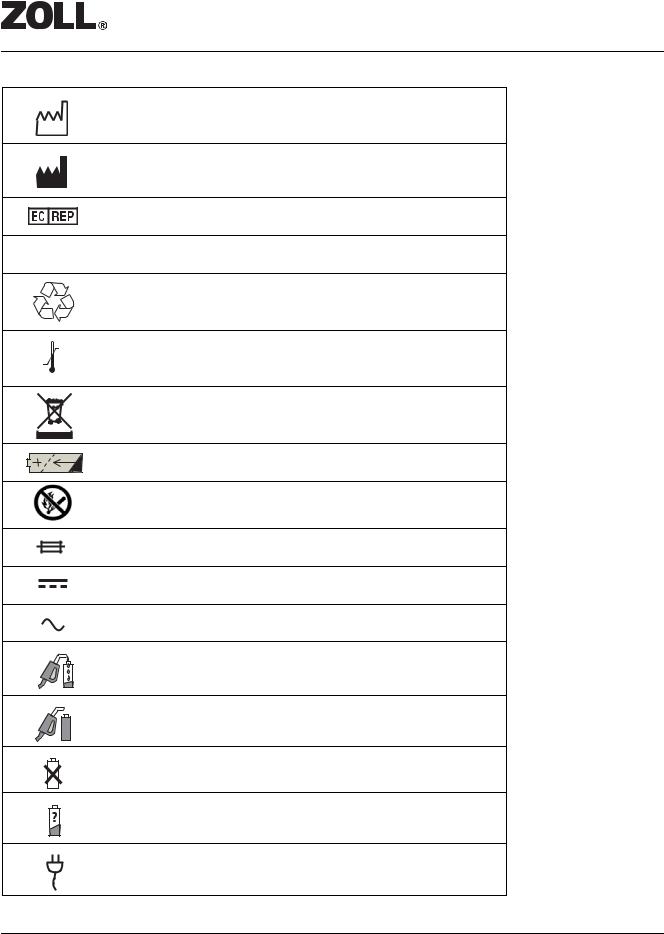
Symbols
The symbols below may be found in this User Guide, on the AutoPulse Multi-Chemistry Battery Charger, or Li-Ion or NiMH Battery.
Follow instructions for use
Indoor Use Only
Class II Equipment
P/N. 12457-001 Rev. 2 |
Page ix |


 Power System User Guide
|
Date of Manufacture |
|
Manufacturer |
|
EU Authorized Representative |
SN |
Serial Number |
|
|
|
Recycle |
Li Ion
+113ºF Temperature Limitations
(+45ºC)
-4ºF (-20ºC)
Do not discard
Rechargeable Battery
Do Not Incinerate
Fuse
DC Voltage
AC Voltage
Charging
Ready
Fail
Test Cycle
Power
Page x |
P/N. 12457-001 Rev. 2 |


 Power System User Guide
1 Introduction of the AutoPulse Power System
The AutoPulse Power System consists of a battery (either the AutoPulse Li-Ion Battery or AutoPulse NIMH Battery) and battery charger (the AutoPulse Multi-Chemistry Battery Charger).
Battery: Both the AutoPulse Li-Ion Battery and the AutoPulse NIMH Battery are proprietary, rechargeable, removable batteries that are specifically designed to supply power for AutoPulse operation.
Battery Charger: The AutoPulse Multi-Chemistry Battery Charger is a stand alone unit designed to charge and automatically maintain both the AutoPulse Li-Ion Battery and the AutoPulse NIMH Battery.
The AutoPulse Platform is intended to be deployed with other emergency equipment and should always be kept in a state of high-readiness. Customers should integrate an AutoPulse and Battery check into their daily equipment check procedures. Like other life supporting equipment, good battery management practices are essential to provide proper operation, and to avoid problems during use.
User Control Panel |
Multi-Chemistry |
AutoPulse Platform |
Battery Charger |
|
|
LifeBand |
|
Li-Ion Batteries
(Primary and Spare)
or
NiMH Batteries
(Primary and Spare)
Figure 1-1 AutoPulse System
P/N. 12457-001 Rev. 2 |
Page 1-1 |


 Power System User Guide
1.1Recommended Battery, Charger and AutoPulse Ratios
An AutoPulse unit in general should be equipped with three to four Batteries to allow for two with the device (one for operation and one as a spare) and one to two being charged to support the next shift change, exchange or replacement after a patient use (see Figure 1-2 below).
AutoPulse Platform |
Multi-Chemistry |
|
|
|
Battery Charger |
LifeBand |
|
|
Four Batteries |
Figure 1-2 Recommended component ratios
A one-to-one AutoPulse to Charger ratio is recommended. It is important that there be sufficient capability to both charge and Test-Cycle Batteries while supplying the recommended minimum of two Batteries for use.
Page 1-2 |
P/N. 12457-001 Rev. 2 |


 Power System User Guide
2 AutoPulse Li-Ion Battery
The AutoPulse Li-Ion Battery (see Figure 2-1) is a proprietary, rechargeable, removable Lithium-Ion battery that is a power source for the AutoPulse Platform.
The AutoPulse Li-Ion Battery is mechanically keyed to the AutoPulse Platform and Multi-Chemistry Battery Charger to facilitate correct installation. One end of the AutoPulse Li-Ion Battery contains connections for power and communications. A Battery Status Check button illuminates the AutoPulse Li-Ion Battery’s status light-emitting diodes (LEDs).
ZOLL recommends that users change AutoPulse Li-Ion Batteries daily or after each use. Charged AutoPulse Li-Ion Batteries left for an extended period in the AutoPulse or as a spare may not have sufficient capacity to operate effectively.
Warning: Always charge a stored Battery before placing the Battery in active operation. Battery may self-discharge when not in use. Failure to charge a Battery before use may cause device power failure. In no case should any Battery be used if it has not been charged within 2 days.
Caution: Remove the protective plastic cap from the Battery before attempting to charge the Battery.
Caution: Only use ZOLL Batteries specifically designed for use with the AutoPulse System. The use of other batteries may cause permanent damage to the AutoPulse Platform and will void the warranty.
P/N. 12457-001 Rev. 2 |
Page 2-1 |


 Power System User Guide
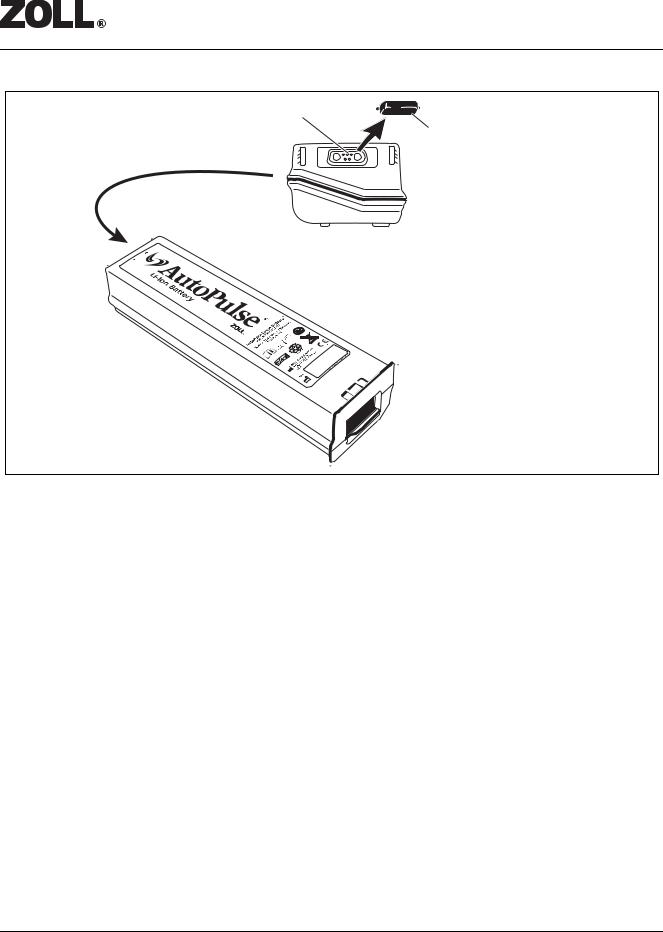
Power and Communications
Remove Protective
Plastic Cap before use
 Status Check Button
Figure 2-1 The AutoPulse Li-Ion Battery
2.1Expected AutoPulse Li-Ion Battery Life
The expected service life of a properly maintained AutoPulse Li-Ion Battery is three years from its date of manufacture. ZOLL recommends that customers plan to purchase batteries on intervals that reduce the likelihood that they will have all batteries due for replacement simultaneously. A specific replacement interval may be difficult to establish until use and charging patterns are well established. Some customers may want to replace batteries on a preventative basis regardless of the Battery’s capacity or remaining life.
Note: The Battery will not operate after five years from its date of manufacture.
2.2Handling New AutoPulse Li-Ion Batteries
New AutoPulse Li-Ion Batteries should be unpacked immediately and not stored for any extended period. Before putting new AutoPulse Li-Ion Batteries into service, they must be placed into the AutoPulse Multi-Chemistry Battery Charger. The Multi-Chemistry Charger will charge and test the Battery, and may automatically initiate a Test-Cycle. If a test cycle is initiated, do not remove the AutoPulse Li-Ion Battery from the Charger until the Test-Cycle is complete. This process could take up to 12 hours.
Page 2-2 |
P/N. 12457-001 Rev. 2 |


 Power System User Guide
3 AutoPulse NiMH Battery
The AutoPulse NiMH Battery (see Figure 3-1) is a proprietary, rechargeable, removable Nickel-Metal Hydride battery that is a power source for the AutoPulse Platform.
The AutoPulse NiMH Battery is mechanically keyed to the AutoPulse Platform and the AutoPulse Multi-Chemistry Battery Charger to facilitate correct installation. One end of the AutoPulse NiMH Battery contains connections for power and communications. A Battery Status Check button illuminates the AutoPulse NiMH Battery’s status light-emitting diodes (LEDs).
Batteries experience a loss of capacity when left standing. ZOLL recommends AutoPulse NiMH Batteries be changed daily or after each use. Charged AutoPulse NiMH Batteries left for any extended period in the AutoPulse or as a spare may not have sufficient capacity to operate effectively.
Warning: Always charge a stored Battery before placing the Battery in active operation. Battery may self-discharge when not in use. Failure to charge a Battery before use may cause device power failure. In no case should any Battery be used if it has not been charged within 2 days.
Caution: Remove the protective plastic cap from the Battery before attempting to charge the Battery.
Caution: Only use ZOLL Batteries specifically designed for use with the AutoPulse System. The use of other batteries may cause permanent damage to the AutoPulse Platform and will void the warranty.
P/N. 12457-001 Rev. 2 |
Page 3-1 |
Loading...