

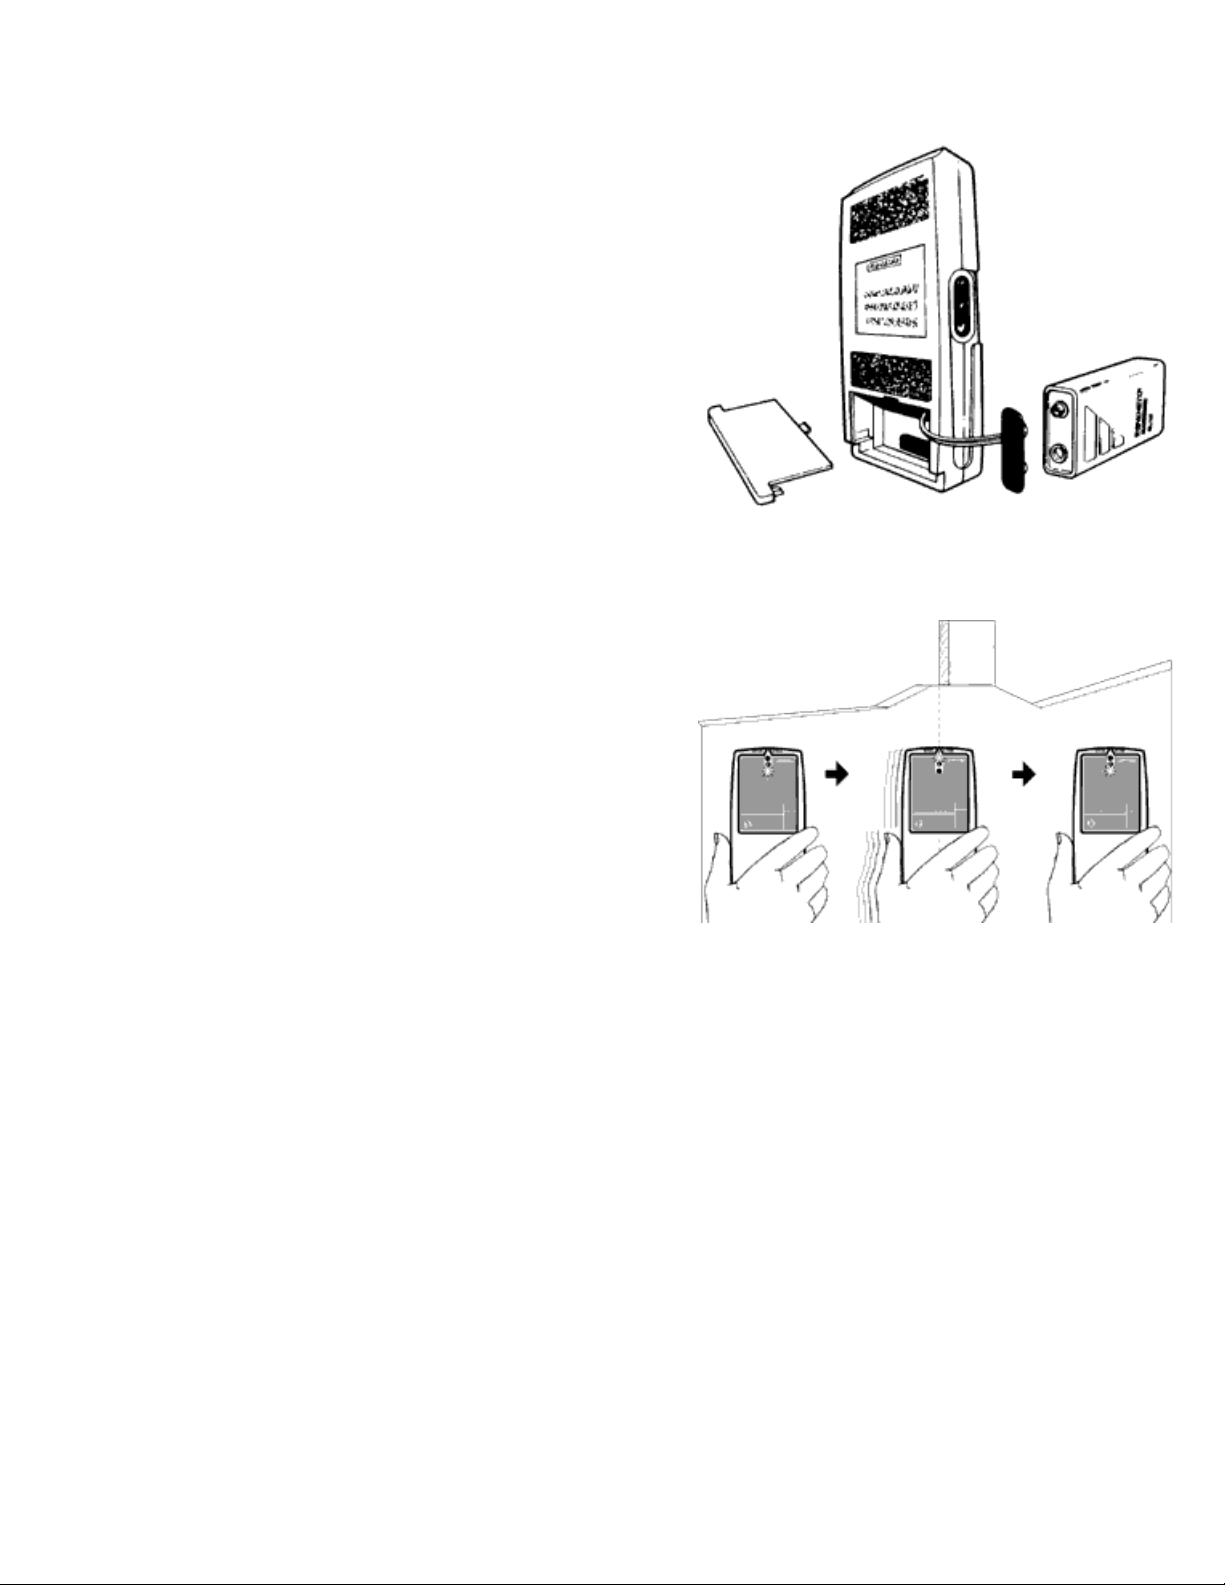
Installing the Battery
1. Slide open battery door on back of case.
2. Connect a 9-volt battery to battery clip.
3. Insert battery into case and replace battery door.
Battery will last approximately two years under normal
conditions.
Scanning for Studs
1. Place the StudSensor™ unit against the wall. Hold as
shown. (Figure 2).
2. Press and hold the ON/OFF switch. Slide the tool
slowly across the wall.
3. LED lower lights (or bottom light on the StudSensor™
2 unit) indicate increasing density. Top LED indicates
stud edge. Mark this spot.
Note: Top LED may not always light when scanning
through some dense surfaces. In that case, a lower LED indicates max density and therefore stud
edge. (StudSensor™ 3 model only)
4. Continue moving across the stud until the top LED turns off, and then, still holding the switch in,
reverse direction and locate the other edge of the stud. Mark this spot.
5. The midpoint between the two marks is the center of the stud.
Flashing lights! Error indicator
The StudSensor™ tool finds dense objects beneath the wall surface. The position where you start
is important.
To work right, the tool must start (by holding the button) over a part of the wall that is not dense.
Otherwise, an error is indicated.
If top and bottom LEDs start blinking and beeping, move over a few inches and start again.

Hint 1: Keep your free hand out of the way. To avoid interference, do not place your free hand
within 6 inches of the top of the StudSensor™ tool while scanning.
Hint 2: The StudSensor™ stud finder will detect only the outer edge of double studs and headers
around doors, windows and corners.
Hint 3: The StudSensor™ stud finder usually finds studs, but can sometimes find pipes or other
objects.
Be sure you've found a stud by finding other studs equally spaced to either side (16 or so inches
apart), and finding the same stud at several places directly above and below the first.
CAUTION
If electrical wiring, metal or plastic pipes are close to or touching the inside surface of the wall, the
StudSensor™ tool may detect them in the same manner as studs.
Caution should always be used when nailing, cutting, or drilling into walls, floors, and ceilings that
may contain these items.
To avoid surprises, remember that studs or joists are normally spaced 16 inches or 24 inches apart
on center and are 1 1/2 inches in width.
Anything closer together or of a different width may not be a stud, joist, or fire break.
Note: Always turn off the power if working near electrical wires.
Working with Different Materials
StudSensor™ stud finders are designed for use on interior walls only.
Three main factors affect sensing depth while scanning for studs. They are thickness, density, and
moisture content.
Wallpaper: the StudSensor™ stud finders can penetrate smooth wallpaper except patterns
containing metallic foil.
New wallpaper must be thoroughly dry, which may take as long as two weeks.
Plaster and Lath: stud finders are not recommended and may give erratic indications on lath and
plaster because of uneven thicknesses. There are other Zircon® tools for this purpose such as
VideoScanner® and TriScanner® products.
Ceilings: When scanning a ceiling with a thin, sprayed surface, place paper or thin cardboard on
the ceiling and scan through it.
Because of inconsistent density of material, the StudSensor™ stud finder is not effective on

ceramic floor tile or carpeting and pad.
 Loading...