


About This Guide
Introduction
This guide provides information about using the mobile computer and accessories.
NOTE: Screens and windows pictured in this guide are samples and can differ from actual screens.
Configurations
This guide covers the following configurations:
Table 1 Configurations
Configuration |
|
Radios |
|
Display |
Memory |
Data Capture |
Operating |
|
|
Options |
System |
||||
|
|
|
|
REVIEW |
|||
MC33XX–G |
|
WLAN: IEEE® |
|
4.0” color |
2 GB RAM / |
Imager or |
Android-base |
Standard/Premium/Premi |
802.11a/b/g/n/a |
|
16 GB Flash |
laser scanner, |
d, Android |
||
um + |
|
c/d/h/i/k/r/w |
|
|
4 GB RAM / |
Interactive |
Open-Source |
|
|
WPAN: |
|
|
16 GB Flash |
Sensor |
Project/GMS |
|
|
|
|
Technology |
7.1.2 |
||
|
|
Bluetooth V4.1, |
|
|
4GB RAM / 32 |
||
|
|
|
|
(IST) |
|
||
|
|
V2.1 + EDR w/ |
|
|
GB Flash |
|
|
|
|
|
|
|
|
||
|
FORBluetooth Low |
|
|
|
|
|
|
|
|
Energy (BLE) |
|
|
|
|
|
Software Versions
To determine the current software versions touch  >
>  About phone.
•Model– Displays the model number.
•Android version– Displays the operating system version.
•Kernel version– Displays the kernel version number.
•Build number– Displays the software build number.
To determine the device serial number touch  >
>  About phone > Status.
9
About This Guide
•Serial number - Displays the serial number.
Chapter Descriptions
Topics covered in this guide are as follows:
• Getting Started provides information on getting the MC33XX up and running for the first time.
• Using the MC33XX provides basic instructions for using the MC33XX with Android OS, including powering on and resetting the MC33XX.
• Applications describes the applications installed on the device.
• Data Capture provides information for capturing bar code data using the internal camera and optional scan
|
modules and Bluetooth scanner. |
• |
Wireless provides information on the various wireless options. |
• |
REVIEW |
Accessories describes the available accessories and how to use them with the MC33XX. |
• Maintenance and Troubleshooting includes instructions on cleaning and storing the MC33XX, and provides troubleshooting solutions for potential problems during MC33XX operation.
• Technical Specifications provides the technical specifications for the MC33XX.
• MC33XX Keypads provides keypad descriptions and special character generation tables.
The following conventions are used in this document:
•Bold text is used to highlight the following:
•Dialog box, window and screen names
•Drop-down list and list box names
•Check box and radio button names
•Icons on a screen
•Key names on a keypad
•Button names on a screen.
•Bullets (•) indicate:
•Action items
•Lists of alternatives
•Lists of required steps that are not necessarily sequential.
•Sequential lists (e.g., those that describe step-by-step procedures) appear as numbered lists.
Icon Conventions
The documentation set is designed to give the reader more visual clues. The following graphic icons are used throughout the documentation set. These icons and their associated meanings are described below.
10

About This Guide
NOTE: NOTE contains information more important than the surrounding text, such as exceptions or preconditions. They also refer the reader elsewhere for additional information, remind the reader how to complete an action (when it is not part of the current procedure, for instance), or tell the reader where something is located on the screen. There is no warning level associated with a note.
CAUTION:The word CAUTION with the associated safety icon implies information that, if disregarded, may result in minor or moderate injury, or serious product damage.
WARNING: The word WARNING with the associated safety icon implies information that, if disregarded, could result in death or serious injury, or serious product damage.
Related Documents
For the latest version of this guide and all guides,REVIEWgo to: http://www.zebra.com/support.
• MC33XX Quick Start Guide, p/n MN-003143-01
• MC33XX Regulatory Guide, p/n MN-003144-01
• MC33XX Integrator Guide, p/n MN-003136-01
If you have a problem with your equipment, contact Zebra Support Center for your region. Contact information is |
|
available at: http://www.zebra.com/support. |
|
When contacting the Zebra Support Center, please have the following information available: |
|
• |
FOR |
Serial number of the unit (found on manufacturing label) |
|
• Model number or product name (found on manufacturing label)
• Software type and version number
Figure 1 Manufacturing Label Location
11

About This Guide
Zebra responds to calls by email or telephone within the time limits set forth in support agreements.
If your problem cannot be solved by the Zebra Support Center, you may need to return your equipment for servicing and will be given specific directions. Zebra is not responsible for any damages incurred during shipment if the approved shipping container is not used. Shipping the units improperly can possibly void the warranty.
If you purchased your product from a Zebra business partner, contact that business partner for support.
Provide Documentation Feedback
If you have comments, questions, or suggestions about this guide, send an email to EVM-Techdocs@zebra.com.
FOR |
REVIEW |
|
12

Getting Started
Introduction
This chapter provides the features of the MC33XX and explains how to set it up for the first time.
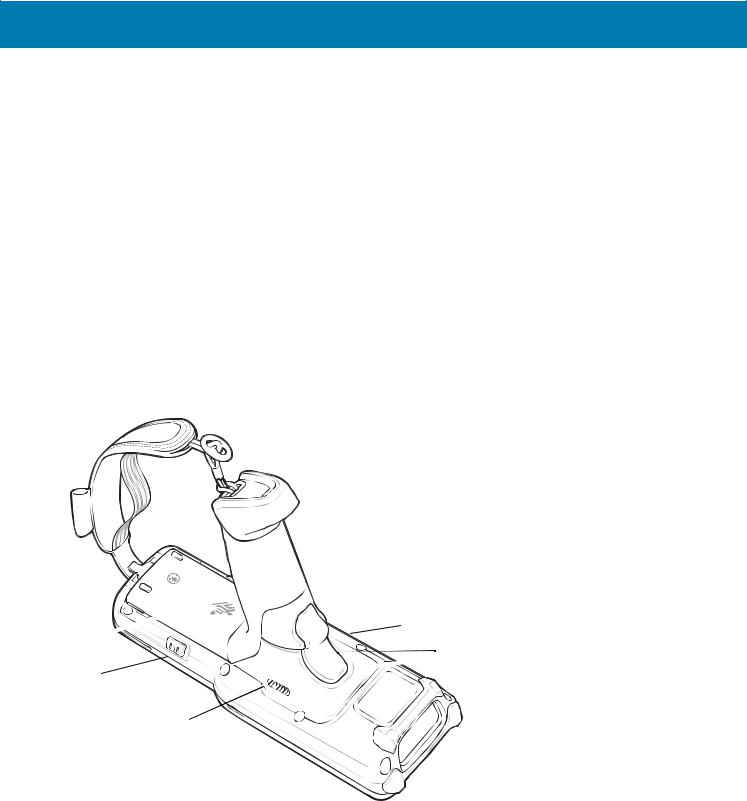
MC33XX-G Features
Figure 2 Front View
1 |
|
|
|
|
|
|
|
|
|
7 |
6 |
|
|
|
|
|
|
|
|
|
|
|
5 |
|
2 |
|
FOR |
REVIEW |
|
|
|
|
|
||
|
|
3 |
|
|
|
|
|
|
|
|
|
|
|
|
|
|
4 |
Features - Front View
Number |
Item |
Function |
1 |
Display |
Displays all information needed to operate the MC33XX. |
|
|
|
2 |
Charge LED |
Indicates the battery charge state while charging. |
|
|
|
13
Getting Started
Table 2 |
Features - Front View (Continued) |
|||
Number |
Item |
|
Function |
|
3 |
|
Trigger |
Initiates data capture when a scan application is enabled. |
|
|
|
|
|
|
4 |
|
Handstrap |
Use for securely holding the device. |
|
|
|
|
|
|
5 |
|
Power Button |
Press and hold to turn on the MC33XX. Press to turn on or off the |
|
|
|
|
screen. Press and hold to select one of these options: |
|
|
|
|
Power off - Turn off the MC33XX. |
|
|
|
|
Reset - Reboot the MC33XX when software stops responding. |
|
|
|
|
Airplane mode - Disable all wireless connections. |
|
|
|
|
Battery swap - Places the device in Battery Swap mode when |
|
|
|
|
replacing the battery. |
|
|
|
|
Silent mode - All notifications are disabled except for alarms. |
|
|
|
|
|
|
6 |
|
Keypad |
|
REVIEW |
|
Use to enter data and navigate on screen functions. |
|||
7 |
|
Scan Button |
Initiates data capture when a scan application is enabled. |
|
Figure 3 |
Back View |
|
|
|
|
|
FOR |
10 |
|
|
|
|
|
|
8 |
11 |
|
|
|
9 |
|
10 |
14

Getting Started
Table 3 Features - Back View
Number |
Item |
Function |
8 |
Battery |
Provides power for operating the device. |
|
|
|
9 |
Battery Release |
Release the battery from the device. |
|
Buttons |
|
|
|
|
10 |
Speakers |
Provides audio output for video and music playback. |
|
|
|
11 |
Trigger |
Initiates data capture when a scan application is enabled. |
|
|
|
FOR |
REVIEW |
|
15
Getting Started
Unpacking
Carefully remove all protective material from the MC33XX and save the shipping container for later storage and shipping.
Verify the following items are in the box:
•MC33XX
•Lithium-ion battery
•Quick Start Guide
•Regulatory Guide.
Inspect the equipment for damage. If any equipment is missing or damaged, contact the Zebra Support Center immediately. See Service Information on page 12 for contact information.
Setup
• Install a microSD card (optional)
• Install the battery
• Charge the MC33XX
• Power on the MC33XX.
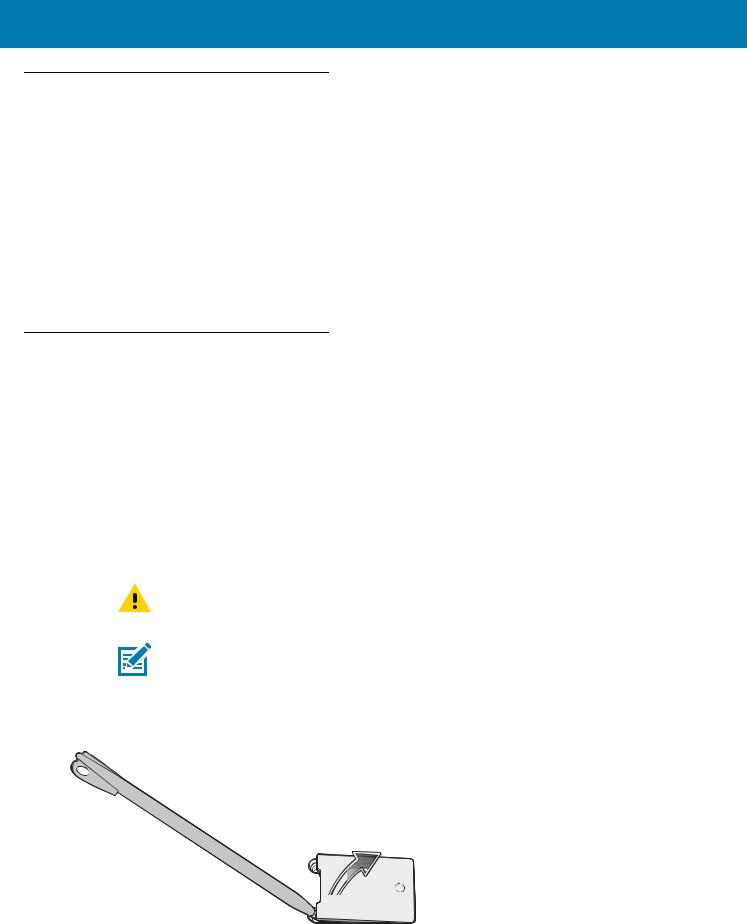
Installing a microSD Card
The microSD card slot provides secondary non-volatile storage. The slot is located under the battery pack. Refer to the
documentation provided with the card for more information, and follow the manufacturer’s recommendations for use. |
|
FOR |
REVIEW |
CAUTION:Follow proper electrostatic discharge (ESD) precautions to avoid damaging the microSD card.
Proper ESD precautions include, but are not limited to, working on an ESD mat and ensuring that the operator is properly grounded.
NOTE: After installing the microSD card, the device will automatically reset. This ensures proper reading of
the file content on the microSD card.
1. Remove the microSD card cover.
Figure 4 Remove microSD Card Cover
16
Getting Started
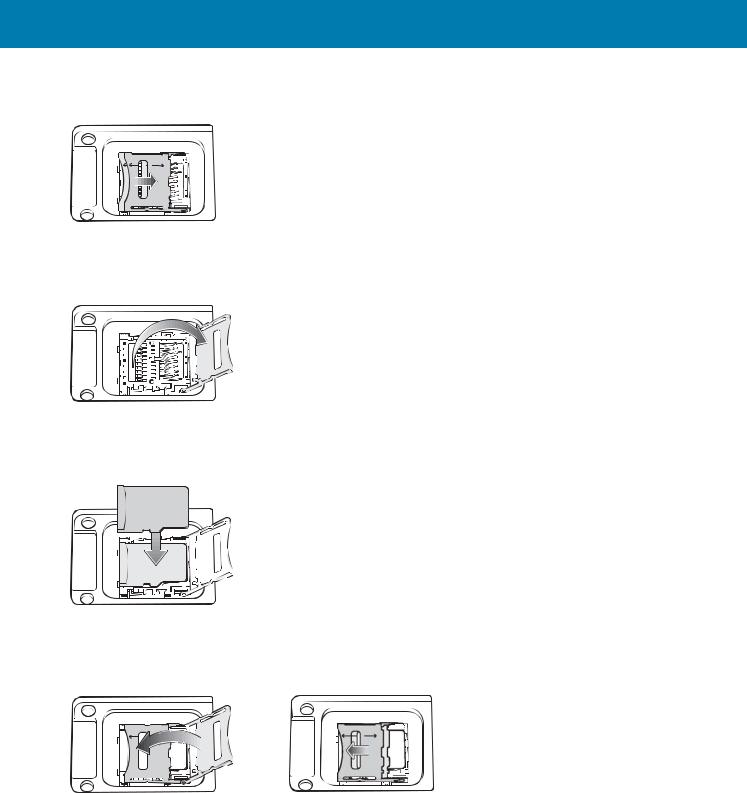
2.Slide the microSD card holder down to unlock.
Figure 5 Unlock microSD Card Holder
3.Lift the microSD card holder.
Figure 6 Lift microSD Card Holder
4. Place the microSD card into the contact area.
Figure 7 Install microSD Card
REVIEW
5.Close the microSDFORcard holder and slide the microSD card holder up to lock.
6.Replace the microSD card cover and ensure that it is installed properly.
17

Getting Started
Figure 9 Replace Cover
FOR |
REVIEW |
|
18
Getting Started
Installing the MC33XX-G Battery
To install the battery:
1.Align the battery into the battery compartment.
Figure 10 Inserting the Battery
2. |
|
FOR |
REVIEW |
Rotate the bottom of the bottom into the battery compartment. |
|||
3. |
Press battery down firmly. Ensure that both battery release buttons on the sides of the MC33XX return to the |
||
|
home position. |
|
|
Figure 11 Press Battery Down
4.Press the Power button to turn on the device.
19

Getting Started
Charging the Battery
CAUTION:Ensure that you follow the guidelines for battery safety described in Battery Safety Guidelines on page 113.
Use the mobile computer cradles, cables and spare battery chargers to charge the mobile computer main battery.
The main battery can be charged before insertion into the mobile computer or after it is installed. The Extended Life Battery ships from the factory in all MC33XX-G configurations. Use one of the spare battery chargers to charge the main battery (out of the mobile computer) or one of the cradles to charge the main battery while it is installed in the mobile computer.
Before using the mobile computer for the first time, fully charge the main battery until the amber Charge LED Indicator remains lit (see LED Charge Indicators on page 21 for charge status indications). The Standard Battery fully charges in less than five hours and the Extended Life Battery fully charges in less than eight hours.
The MC33XX retains data in memory for at least five minutes when the mobile computer’s main battery is removed or fully discharged.
When the main battery reaches a very low battery state, the battery retains data in memory for at least 36 hours. Batteries must be charged within the 0° to +40° C (32° to 104° F) ambient temperature range.
The following accessories can be used to charge batteries:
•
Single Slot Serial/USB Cradle with Battery Adapter
•
REVIEW
1.Insert the mobile computerFORinto a cradle. See Accessories for accessory setup.
2.The mobile computer starts to charge automatically. The amber Charge LED Indicator indicates the charge status. See the table below for charging indications.
To charge the mobile computer using the cables:
1.Connect the MC33XX Communication/Charge Cable to the appropriate power source and connect to the mobile computer. See Accessories for accessory setup.
2.The mobile computer starts to charge automatically. The amber Charge LED Indicator indicates the charge status.
20

Getting Started
Table 4 LED Charge Indicators
|
Status |
|
Indications |
• |
Off |
• MC33XX is not charging. |
|
|
|
• MC33XX is not inserted correctly in the cradle. |
|
|
|
• MC33XX is not connected to a power source. |
|
|
|
• Charger or cradle is not powered. |
|
|
|
|
|
• |
Slow Blinking Amber |
• |
MC33XX is charging. |
|
|
|
|
• |
Solid Amber |
• Charging complete. Note: When the battery is initially inserted in the |
|
|
|
|
mobile computer, the amber LED flashes once if the battery power is |
|
|
|
low. |
|
|
|
|
• |
Fast Blinking Amber |
• |
Charging error, e.g.: |
|
|
|
REVIEW |
|
|
• Temperature is too low or too high. |
|
|
|
• Charging has gone on too long without completion (typically eight |
|
|
|
|
hours). |
Charging Temperature
Charge batteries in ambient temperatures from 0 °C to 40 °C (32 °F to 104 °F) or up to 45 °C (113 °F) as reported
by the battery. To view the battery temperature, touch the Battery Info icon on the Home screen or touch |
> |
About device > Battery Information. |
|
Note that charging is intelligently controlled by the MC33N0. To accomplish this, for small periods of time, the MC33N0 or accessory alternately enables and disables battery charging to keep the battery at acceptable temperatures. The MC33XX or accessory indicates when charging is disabled due to abnormal temperatures via its LED.
Charging Spare BatteriesFOR
See Accessories for information on using accessories to charge spare batteries.
Google Account Setup
NOTE: The MC33XX has to be connected to the internet in-order to set up a Google account.
The first time the MC33XX starts, the Setup Wizard displays. Follow the on-screen instructions to set up a Google account, configure Google Wallet for purchasing items from the Play Store, entering your personal information, and enabling backup/restore features.
Replacing the MC33XX-G Battery
1.Press the Power button until the menu appears.
2.Touch Battery swap. Wait for the Scan LED to light red and then turn off.
3.Push in the two Battery Release buttons. The battery ejects slightly.
21

Getting Started
Figure 12 Release Battery
|
REVIEW |
4. Remove the battery from the battery compartment. |
|
Figure 13 Remove Battery |
|
FOR |
|
5.Align the battery into the battery compartment.
22

Getting Started
Figure 14 Inserting the Battery
6.Rotate the bottom of the bottom into the batteryREVIEWcompartment.
7.Press battery down firmly. Ensure that both battery release buttons on the sides of the MC33XX return to the home position.Figure 15 Press Battery Down

 FOR
FOR

8.Press the Power button to turn on the device.
23

Getting Started
Accessing Device Settings
Throughout this guide, the user can access device:
1.Swipe down with two fingers from the status bar to open the quick access panel and then touch  .
.
2.On the Home screen, swipe up from the bottom of the screen and touch  .
.
Battery Management
NOTE: Prior to checking the battery charge level, remove the MC33XX from any AC power source (cradle or cable).
REVIEW |
||
To check the charge status of the main battery, touch |
> |
About phone > Status. |
Battery status indicates that the battery is discharging and Battery level lists the battery charge (as a percentage of fully charged).
The Battery screen lists which applications consume the most battery power. Also use it to turn off applications that were downloaded if they are consuming too much power.
 >
>  Battery or swipe down with two fingers from the status bar to open the quick access panel and FOR
The Battery screen lists the applications using the battery. The discharge graph at the top of the screen shows the rate of the battery discharge since last charged (short periods of time when connected to a charger are shown as thin green lines at the bottom of the chart), and how long it has been running on battery power.
Touch an application in the Battery screen to display details about its power consumption. Different applications display different information. Some applications include buttons that open screens with settings to adjust power use.
24

Getting Started
Low Battery Notification
When the battery charge drops below 11% (Extended Capacity Battery), the MC33XX displays a notice to connect the MC33XX to power. The user should charge the battery using one of the charging accessories.
Figure 17 Low Battery Notification Screen
When the battery charge drops below 8% (Extended Capacity Battery), the MC33XX goes into critical suspend mode to save data. The screen turns off. If the Power button is pressed, the Right LED flashes amber.
The
Battery
Observe
• Leave the MC33XX connected to AC power at all times when not in use.
• Disable DataWedge Launcher profile. Refer to the MC33XX Mobile Computer Integrator Guide for instructions.
• Set the screen to turn off after a short period of non-use. See Changing the Screen Timeout Setting on page 27.
• Set the MC33XX to turn off when not in use. See Scheduled Power On and Off on page 50. |
|
|
FOR |
• |
Reduce the screen brightness. See SettingREVIEWthe Screen Brightness on page 26. |
• |
Turn off all wireless radios when not in use. |
• Turn off automatic syncing for Email, Calendar, Contacts, and other applications.
• Minimize use of applications that keep the MC33XX from suspending, for example, music and video applications.
Turning
To turn off all the radios:
1.Press the Power button until the menu appears.
2.Touch Airplane mode. The airplane icon  appears in the Status bar indicating that all the radios are off.
Using a Bluetooth Headset
You can use a Bluetooth headset for audio communication when an audio enabled application is used. See Bluetooth on page 84 for information on connecting a Bluetooth device to the mobile computer. Ensure that the mobile computer’s volume is set appropriately before putting the headset on. When a Bluetooth headset is connected the speaker is muted.
25
Getting Started
NOTE: If the mobile computer goes into suspend mode the Bluetooth connection is disabled and the mobile computer automatically switches to speakerphone mode.
Real-Time Clock Backup
The MC33XX provides a Real-time Clock (RTC) backup feature. After boot-up, the device saves the system time in a file in persistent storage. When the device re-boots, it compares the system time to the time saved in a file. If the system time in not the latest, it restores the time from the file.
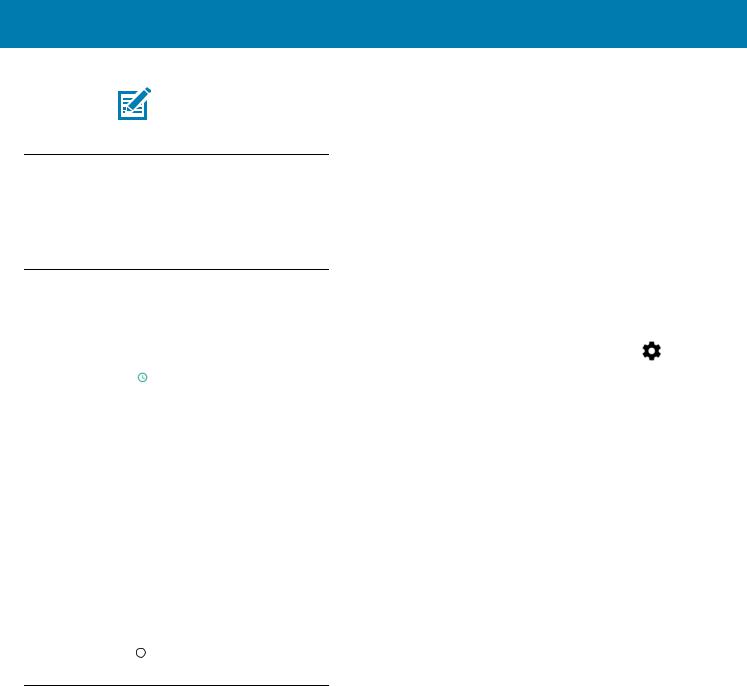
Setting the Date and Time
The user is only required to set the time zone or set the date and time when not connected to a wireless network. |
||||
11. |
Touch OK. |
|
REVIEW |
. |
1. |
Swipe down with two fingers from the status bar to open the quick access panel and then touch |
|||
2. |
Touch Date & time. |
|
|
|
3. |
Touch Automatic date & time to disable automatic date and time synchronization. |
|
||
4. |
Touch Set date. |
|
|
|
5. |
In the calendar, set today’s date. |
|
|
|
6. |
Touch OK. |
|
|
|
7. |
Touch Set time. |
|
|
|
8. |
Touch the green circle, drag to the current hour and then release. |
|
||
9. |
Touch the green circle, drag to the current minute and then release. |
|
||
10. |
Touch AM or PM. |
|
|
|
12. |
|
FOR |
|
|
Touch Automatic time zone to disable automatic date and time synchronization. |
|
|||
13. |
Touch Select time zone. |
|
|
|
14. |
Select the current time zone from the list. |
|
||
15. |
Touch . |
|
|
|
Display Setting
Use Display settings to change the screen brightness, change the background image, enable screen rotation, set sleep time and change font size.
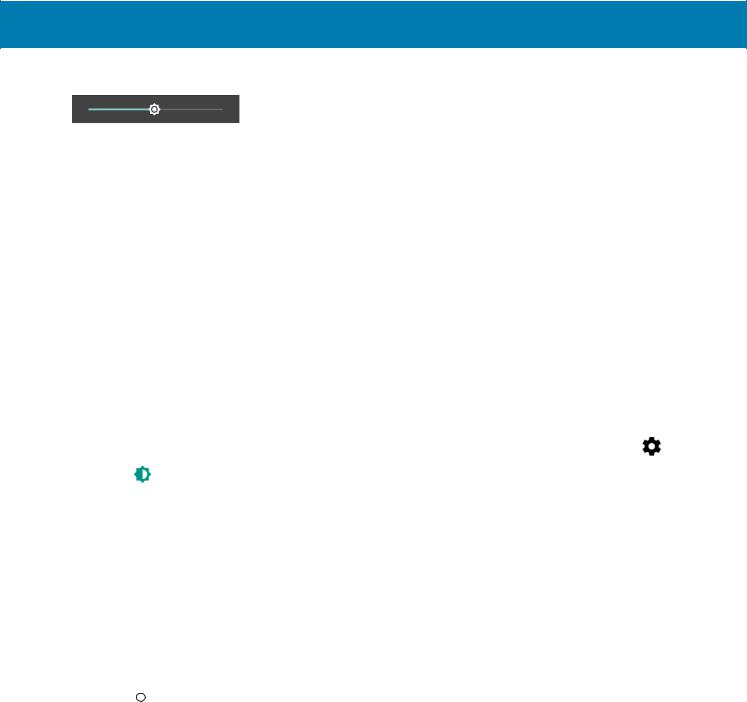
Setting the Screen Brightness
To manually set the screen brightness:
1.Swipe down with two fingers from the status bar to open the quick access panel.
2.Slide the icon to adjust the screen brightness level.
26
Getting Started
Figure 18 Brightness Slider
To let the MC33XX automatically adjust the screen brightness using the built-in light sensor:
1.Swipe down with two fingers from the status bar to open the quick access panel and then touch  .
.
2.Touch  Display.
3.Touch Brightness Level.
4.Touch Adaptive brightness to automatically adjust the brightness.
5.Touch  .
.
Night Light
|
• |
30 seconds |
|
REVIEW |
turn on |
|
|
|
|
|
|
|
|
Changing |
|
|
|
|
||
1. |
Swipe down with two fingers from the status bar to open the quick access panel and then touch . |
|||||
2. |
Touch |
Display. |
|
|
||
3. |
Touch Sleep |
|
|
|
||
4. |
Select one of the sleep values. |
|
|
|||
|
• |
15 seconds |
FOR |
|
|
|
|
• |
|
|
|
|
|
|
1 minute (default) |
|
|
|||
|
• |
2 minutes |
|
|
|
|
|
• |
5 minutes |
|
|
|
|
|
• |
10 minutes |
|
|
|
|
|
• |
30 minutes |
|
|
|
|
5. |
Touch . |
|
|
|
|
|
Setting Font Size
To set the size of the font in system applications:
1.Swipe down with two fingers from the status bar to open the quick access panel and then touch  .
.
2.Touch  Display.
3.Touch Font Size.
27

3.Touch When deviceFORis rotated and select Rotate the contents of the screen to set the MC33XX to automatically switch orientation when the MC33XX is rotated.
4.Touch  .
.
General Sound Setting
Use the Sounds settings to configure media and alarm volumes.
1.Swipe down with two fingers from the status bar to open the quick access panel and then touch  .
.
2.Touch  Sounds.
Figure 20 Sound Screen
•Media volume - Controls the music, games and media volume.
•Alarm volume - Controls the alarm clock volume.
•Notification volume -
28
Getting Started
• Do not disturb - Mutes the MC33XX so that it does not make sounds or vibrate when you do not want it to.
• Priority only allows - Use to set priorities.
• |
Alarms - Disabled. |
• Reminders and Events - Switch on or off. |
|
• |
Messages and Calls - Choose from anyone, starred contacts, any contact, or none. To star |
|
contacts, use the Contacts app. |
• Repeat callers - Choose whether to let the MC33XX ring if the same person calls again within 15 minutes.
• Automatic rules - To automatically silence the MC33XX during certain times, like at night or on weekends. Touch a default rule Weekend or Weeknight. Or, to make your own rule, tap Add rule and then Time rule.
• Block visual disturbances
• Block when screen is on - option pertains to notifications you receive when you are actively using the device. If you would like to disable the banner like notifications when Do not Disturb is enabled, turn this option On. This will also prevent you from peeking at notifications.
• Block when screen is off - option pertains to notifications you receive when you are not using your device i.e. the display is asleep. If you want to prevent the display from waking up when a new notification is received, turn this option On. This will additionally disable the LED light alerts your phone sends you when you have new notifications.
• Default notification ringtone - Touch to select a sound to play for all system notifications.
• Default alarm ringtone - Touch to select a sound to play for alarms.
• Other sounds
• Screen locking sounds - play a sound when locking and unlocking the screen (default – enabled)
• Charging sounds - Not applicable.
• |
Touch sounds - Play a sound when making screen selections (default – enabled). |
|
FOR |
• |
Vibrate on tap - Device vibratesREVIEWwhen making screen selections (default – disabled). |
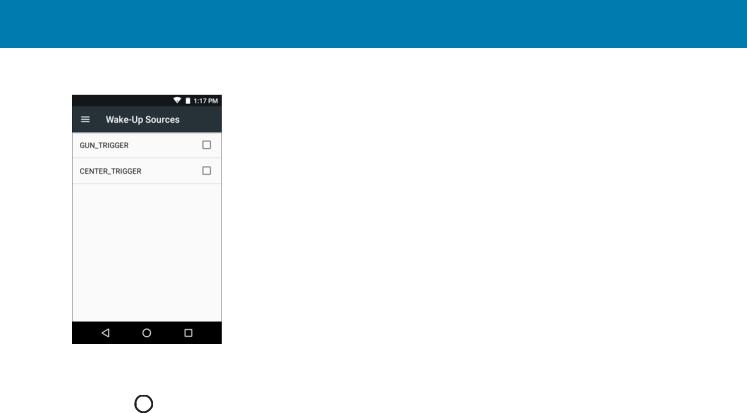
WakeUp
By default configured
1.Swipe down with two fingers from the status bar to open the quick access panel and then touch  .
.
2.Touch  Wake-Up Sources.
29
Getting Started
Figure 21 Wake-Up Sources
3. |
Touch GUN_TRIGGER |
|
REVIEW |
|||
checkbox. A check appears in the checkbox. |
||||||
4. |
Touch CENTER_TRIGGER |
checkbox. A check appears in the checkbox. |
||||
|
|
|
|
|
||
5. |
Touch |
|
. |
|
|
|
|
|
|
|
|||
|
|
|
|
|
|
|
|
|
|
|
FOR |
|
|
30

Using the MC33XX
Introduction
REVIEW
This chapter describes the screens, status and notification icons, and controls on the MC33XX, and provides basic instructions for using the MC33XX.
Google Mobile Services
NOTE This section only applies to MC33XX devices with Google Mobile Services (GMS) software.
The MC33XX with GMS contains applications and services that provide additional functionality to the MC33XX.
• Applications -FORGMS adds a variety of Google applications and associated widgets including Chrome, Gmail, Drive and Maps.
• Services:
• Speech to Text - Allows for free format speech to text, in many languages for both connected and disconnected network. Launch by touching the microphone icon on the keyboard.
• TalkBack Service - Provides spoken feedback on various parts of the user interface. To enable, go to Settings > Accessibility.
• Network Location Provider - Adds a location provider which uses mobile network tower information and Wi-Fi access point information to provide a location without using GPS. To enable, go to Settings > Location access.
• Widevine DRM - Enables the digital rights management so that protected content can be played. Enable via DRM Info from the Play Store.
• Google Cloud Messaging - Allows the sending of data from your server to your MC33XX and also to receive messages from devices on the same connection.
• Backup and Restore - Allows the users settings and applications to be backed up to a Google server and subsequently restored from that server after a factory reset.
• Google accounts - Create and use a Google account to synchronize mail, files, music, photos, contacts and calendar events.
30

Using the MC33
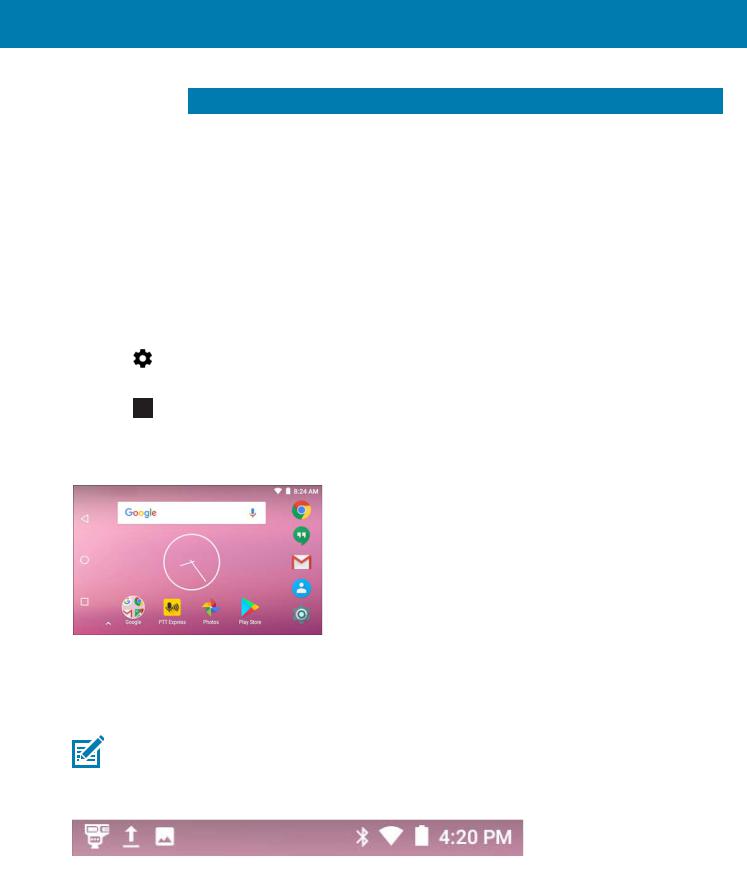
Home Screen
The Home screen displays when the MC33XX turns on. Depending upon the configuration, the Home screen might appear different. Contact your system administrator for more information.
After a suspend or screen time-out, the Home screen displays with the lock sliders. Touch the screen and slide up to unlock. For screen locking information see Un-Locking the Screen on page 48.
Figure 22 Home Screen
1
2
|
3 |
|
|
|
|
|
|
|
|
|
|
|
|
REVIEW |
||
|
|
|
|
|
|
|
|
|
|
|
|
|
|
|
|
|
|
4 |
|
|
|
|
|
|
|
|
|
|
|
|
|
9 |
|
|
|
|
|
|
|
|
|
|
|
|
|
|
|
|||
|
5 |
|
|
|
|
|
|
|
|
|
|
|
|
|
|
|
|
|
|
|
|
|
|
|
|
|
|
|
|
|
|
||
|
|
|
|
|
|
|
|
|
|
|
|
|
|
|
|
|
|
|
|
|
|
|
|
|
|
|
|
|
|
|
|
||
|
|
|
|
|
|
|
|
|
|
|
|
|
|
|
|
|
|
|
|
|
|
|
|
|
|
|
|
|
|
|
|
|
|
|
|
|
|
|
|
6 |
|
7 |
|
8 |
|
|
|
|||
|
|
|
|
|
|
FOR |
|
|
|
|||||||
|
NOTE: The Home screen icons can be configured by the user and may look different than shown. |
|||||||||||||||
The Home screen consists of the following: |
|
|
|
|||||||||||||
Table 5 Home Screen Items |
|
|
|
|
|
|
|
|
||||||||
|
|
|
|
|
|
|
|
|
|
|
|
|
||||
|
Item |
|
|
|
|
|
|
|
|
|
|
Description |
||||
1 |
— Status Bar |
Displays the time, status icons (right side), and notification icons (left side). For more |
||||||||||||||
|
|
|
|
|
|
information see |
on page 32 and Managing Notifications on page 35. |
|||||||||
|
|
|
||||||||||||||
2 |
— Widgets |
Launches stand-alone applications that run on the Home screen. See Application Shortcuts |
||||||||||||||
|
|
|
|
|
|
and Widgets on page 37 for more information. |
||||||||||
|
|
|
||||||||||||||
3 |
— Shortcut |
Opens applications installed on the MC33XX. See Application Shortcuts and Widgets on |
||||||||||||||
Icons |
page 37 for more information. |
|
||||||||||||||
|
|
|
|
|
|
|
|
|||||||||
4 |
— Folder |
Contains apps. |
|
|
|
|
|
|||||||||
|
|
|
|
|||||||||||||
5 |
— Settings Icon |
Opens the Settings window. |
|
|||||||||||||
|
|
|
|
|||||||||||||
6 |
— Back |
Displays the previous screen. |
|
|||||||||||||
|
|
|
|
|
|
|
|
|
|
|
|
|
|
|
|
|
31
Using the MC33
Table 5 Home Screen Items (Continued)
|
Item |
Description |
7 |
— Home |
Displays the Home screen. |
|
|
|
8 |
— Recent |
Displays recently used applications. |
Button |
|
|
|
|
|
9 |
— All Apps Icon |
Opens the APPS window. |
|
|
|
The Home screen provides four additional screens for placement of widgets and shortcuts. Swipe the screen left or right to view the additional screens.
Setting Home Screen Rotation
By default the Home screen rotation is disabled. To enable Home screen rotation:
1. |
Touch and hold anywhere on the Home screen until the options appear. |
||
2. |
Touch |
. |
|
3. |
Touch Allow Home screen rotation switch. |
||
4. |
Touch |
|
|
|
. |
||
|
|||
5. |
Rotate the device. |
||
Figure 23 Rotated Home Screen |
REVIEW |
|
|
FOR |
|
Status Bar |
|
|
|
|
|
The Status bar displays the notification icons (left side), time and status icons (right side).
NOTE: Some status icons may not appear in the Status Bar if there are too many icons to display.
Figure 24 Notification and Status Icons
|
|
|
|
|
|
|
|
|
|
|
|
|
|
Notifications |
|
icons |
|
Status |
|
icons |
|
||||||
|
|
32

Using the MC33
If there are more notifications than can fit in the Status bar,  displays indicating that more notifications exist. Open the Notifications panel to view all notifications and status.
Status Icons
Table 6 |
Status Icons |
|
|
Icon |
Description |
|
Indicates that all sounds except media and alarms are silenced. |
|
|
|
Indicates that the Orange key is locked. |
|
|
|
Indicates that the Blue key is pressed. |
|
|
|
REVIEW |
|
Indicates that the ALT key is pressed. |
|
Indicates that the CTRL key is pressed. |
|
Indicates that the Shift key is pressed. |
|
Indicates that the Shift key is locked. |
|
|
|
Indicates that the Alarm is active. |
|
|
|
Indicates that the main battery is fully charged. |
|
|
|
Indicates that the main battery is partially drained. |
|
|
|
Indicates that the main battery charge is low. |
|
|
|
Indicates that the main battery charge is very low. |
|
FOR |
|
Indicates that the main battery is charging. |
|
|
|
Indicates that all sounds except media and alarms are silenced and vibrate mode is active. |
|
|
|
Indicates that the Airplane Mode is active. All radios are turned off. |
|
|
|
Indicates that Bluetooth is on. |
|
|
|
Indicates that the MC33XX is connected to a Bluetooth device. |
|
|
|
Connected to a Wi-Fi network. |
|
|
|
Not connected to a Wi-Fi network or no Wi-Fi signal. |
|
|
33

Using the MC33
Table 6 |
Status Icons (Continued) |
Icon |
Description |
|
Connected to an Ethernet network. |
|
|
|
Portable Wi-Fi Hotspot is active. |
|
|
Notification Icons
Table 7 |
Notification Icons |
|
|
|
|
Icon |
|
Description |
|
Indicates that the internal storage disc is almost full. |
|
|
|
|
|
Screenshot captured. |
REVIEW |
|
|
|
|
|
|
|
Error capturing screenshot. |
|
|
|
|
|
Indicates the status of the PTT Express Voice Client. For a complete list of PTT Express |
|
|
notification icons see Table 11 on page 65 |
|
|
|
|
|
Indicates that DataWedge application is running on the device. |
|
|
|
|
|
FOR |
|
|
Indicates that more notifications are available for viewing. |
|
|
Indicates that data is syncing. |
|
|
Indicates an upcoming event. |
|
|
Indicates that an open Wi-Fi network is available. |
|
|
|
|
|
Indicates that a song is playing. |
|
|
|
|
|
Indicates that a problem with sign-in or sync has occurred. |
|
|
|
|
|
Indicates that the MC33XX is uploading data. |
|
|
|
|
|
Indicates that the MC33XX is downloading data when animated and download is complete |
|
|
when static. |
|
|
|
|
|
Indicates that USB tethering is active. |
|
|
|
|
|
Indicates that the MC33XX is connected to or disconnected from virtual private network (VPN). |
|
|
|
|
|
Preparing Internal Storage. |
|
|
|
|
34

Using the MC33
Table 7 |
Notification Icons (Continued) |
Icon |
Description |
|
Indicates that USB debugging is enabled on the MC33XX. |
|
|
|
Indicates the status of the PTT Express Voice Client. See Notification Icons for complete list of |
|
PTT Express notification icons. |
|
|
|
Indicates that RxLogger application is running. |
|
|
|
Indicates a Bluetooth scanner is connected to the MC33XX. |
|
|
Managing Notifications
Notification icons report the arrival of new messages, calendar events, and alarms, as well as ongoing events. When a notification occurs, an icon appears inREVIEWthe Status bar with a brief description. See Notification Icons on
page 34 for a list of possible notification icons and their description. Open the Notifications panel to view a list of all the notifications.
To open the Notification panel drag the Status bar down from the top of the screen.
Figure 25
To respond to a notification,FORopen the Notifications Panel and then touch a notification. The Notifications Panel closes and the subsequent activity is dependent on the notification.
To clear all notifications, open the Notifications Panel and then touch CLEAR ALL. All event-based notifications disappear. Ongoing notifications remain in the list.
To close the Notification Panel, swipe the Notifications Panel up.
Setting Application Notifications
To change notification settings for a specific app:
1. Swipe down with two fingers from the status bar to open the quick access panel and then touch  .
.
2.Touch Notifications.
3.Select an app.
4.Select an available option:
•Block all
•Show silently
•On the lock screen
•Override Do Not Disturb.
35
Using the MC33
IMPORTANT In the notification, slide the notification slightly left or right and touch  .
.
Viewing Notification Settings for All Apps
1.Swipe down with two fingers from the status bar to open the quick access panel and then touch  .
.
2.Touch Notifications.
3.Touch down-arrow next to All apps.
4.To see all the apps currently set to a specific setting, touch that setting.
Controlling Lock Screen Notifications
To control notification content on the lock screen:
1. |
|
REVIEW |
Swipe down with two fingers from the status bar to open the quick access panel and then touch . |
||
2. |
Touch Notifications > . |
|
3. |
Touch On the lock screen. |
|
4. |
Select Show all notification content to or select Don’t show notifications at all. |
|
Use Quick Settings to get to frequently used settings, like turning on airplane mode. To open the Quick Settings bar, swipe down once from the top of an unlocked screen.
Figure 26
To see the full Quick Settings panel:
•If the MC33XX is locked, swipe down once.
•If the MC33XX is unlocked, swipe down once with 2 fingers, or twice with one finger.
•If the Quick Settings bar is open, touch the Down arrow.FOR
Figure 27 Full Quick Settings
Available setting tiles:
•Display brightness: Slide to lower or increase the brightness of the screen.
•Wi-Fi network: Turn Wi-Fi on or off. To open Wi-Fi settings, touch the Wi-Fi network name.
•Battery Power - Indicates percentage of battery power remaining. Touch to view battery usage.
•Do not disturb: Control how and when to receive notifications.
•Flashlight: Turn camera flash on or off.
•Auto-rotate: Lock the device’s orientation in portrait or landscape mode or set to automatically rotate.
•Bluetooth settings: Turn Bluetooth on or off. To open Bluetooth settings, touch the Bluetooth.
•Airplane mode: Turn airplane mode on or off. Airplane mode means device will not connect to Wi-Fi or Bluetooth.
36
Using the MC33
•Location - Turn locationing on or off.
•Hotspot - Turn mobile hotspot on or off.
•Invert colors - Invert the display colors.
•Data Saver - Turn on to prevent some apps from sending or receiving data in the background.
•Night Light - Tint the screen amber to make it easier to look at the screen in dim light. Set Night Light to turn on automatically from sunset to sunrise, or at other times.
•Nearby - Helps find and interact with services and devices close to the device.
Edit Icons on Quick Settings
The first several setting tiles become the Quick Settings bar.
To move a setting tile:
1. |
Touch and drag a setting tile to another location. |
||||
2. |
Release the tile. |
|
|
||
3. |
Touch |
to save tiles and return to quick settings. |
|||
To add a setting tile: |
|
|
|||
1. |
Open Quick Settings. |
|
|||
2. |
Touch |
. |
|
|
|
3. |
Slide Quick Settings panel up to reveal additional tiles. |
||||
4. |
Touch and drag a setting tile from the Drag to add tiles area to the main area. |
||||
5. |
Release the tile. |
|
|
||
6. |
Touch |
to save tiles and return to quick settings. |
|||
To remove a setting tile: |
REVIEW |
||||
1. |
Open Quick Settings. |
||||
|
|||||
2. |
Touch |
. |
|
|
|
3. |
Touch and drag a setting tile to the Drag here to remove area. |
||||
4. |
Release the tile. |
|
|
||
5. |
Touch |
to save tiles and return to quick settings. |
|||
|
|
|
FOR |
|
|
Application Shortcuts and Widgets
Application shortcuts placed on the Home screen allow quick and easy access to applications. Widgets are self-contained applications placed on the Home screen to access frequently used features.
Adding an Application to the Home Screen
1.Go to the desired Home screen.
2.Swipe up from the bottom of the screen.
3.Scroll through the list to find the application icon.
4.Touch and hold the icon until the Home screen appears.
5.Position the icon on the screen and then release.
37
 Loading...