

Page 1
Owner’s Manual
Bedienungsanleitung
Mode d’emploi
Manual de instrucciones
ESPAÑOL FRANÇAIS DEUTSCH ENGLISH
Page 2

Wichtiger Hinweis für die Benutzung in der Bundesrepublik Deutschland.
Bescheinigung des Importeurs
Hiermit wird bescheinigt, daß der/die/das
Electronic Keyboard Typ: PSR-1700/PSR-2700
(Gerät, Typ, Bezeichnung)
in Übereinstimmung mit den Bestimmungen der
VERFÜGUNG 1046/84
(Amtsblattverfügung)
funk-entstört ist.
Der Deutschen Bundespost wurde das Inverkehrbringen dieses Gerätes
angezeigt und die Berechtigung zur Überprüfung der Serie auf
Einhaltung der Bestimmungen eingeräumt.
NAME PLATE LOCATION: The graphic below indicates the location of the name plate. The model number,
serial number, power requirements, etc., are located on this
plate. You should record the model number, serial number,
and the date of purchase in the spaces provided below and
retain this manual as a permanent record of your purchase.
CAUTION
WARNING:
RISK OF ELECTRIC SHOCK
PEDAL
SAMPLE IN
AUX OUT
HEADPHONES
2
1LINE
MICR
L+R/L
DO NOT OPEN
MIDI
THRU
OUT IN
AVIS:
RISQUE DE CHOC ELECTRIQUE NE PAS OUVRIR.
TO REDUCE THE RISK OF FIRE OR ELECTRIC SHOCK,
DO NOT EXPOSE THIS PRODUCT TO RAIN OR MOISTURE.
Yamaha Europa GmbH
Name des Importeurs
• This applies only to products distributed by Yamaha Europa GmbH.
• Dies bezieht sich nur auf die von der Yamaha Europa GmbH vertriebenen Produkte.
Entsorgung leerer Batterien (nur innerhalb Deutschlands)
Leisten Sie einen Beitrag zum Umweltschutz. Verbrauchte
Batterien oder Akkumulatoren dürfen nicht in den Hausmüll. Sie
können bei einer Sammelstelle für Altbatterien bzw. Sondermüll
abgegeben werden. Informieren Sie sich bei Ihrer Kommune.
CANADA
THIS DIGITAL APPARATUS DOES NOT EXCEED THE “CLASS
B” LIMITS FOR RADIO NOISE EMISSIONS FROM DIGITAL
APPARATUS SET OUT IN THE RADIO INTERFERENCE REGULATION OF THE CANADIAN DEPARTMENT OF COMMUNICATIONS.
LE PRESENT APPAREIL NUMERIQUE N’EMET PAS DE BRUITS
RADIOELECTRIQUES DEPASSANT LES LIMITES APPLICABLES
AUX APPAREILS NUMERIQUES DE LA “CLASSE B”
PRESCRITES DANS LE REGLEMENT SUR LE BROUILLAGE
RADIOELECTRIQUE EDICTE PAR LE MINISTERE DES COMMUNICATIONS DU CANADA.
• This applies only to products distributed by Yamaha Canada Music Ltd.
• Ceci ne s’applique qu’aux produits distribués par Yamaha Canada Music Ltd.
Model _________________________________________
Serial No.______________________________________
Purchase Date _________________________________
Dit produkt is gefabriceerd in overeenstemming met de
radiostoringsvoorschriften van de Richtlijn van de Raad (82/499/EEG).
ΑΥΤΗ Η ΣΥΣΚΕΥΗ ΑΝΤΑΠΟΚΡΙΝΕΤΑΙ ΣΤΙΣ ΑΠΑΙΤΗΣΕΙΣ ΤΩΝ
Ο∆ΗΓΙΩΝ ΤΗΣ ΕΥΡΩΠΑΙΚΗΣ ΟΙΚΟΝΟΜΙΚΗΣ ΚΟΙΝΟΤΗΤΑΣ 82/499/
Ε.Ο.Κ..
Este produto está de acordo com o radio de interferencia frequente
requiridos do Conselho Diretivo 82/499/EEC.
Dette apparat overholder det gaeldende EF-direktiv vedrørende
radiostøj.
Cet appareil est conforme aux prescriptions de la directive
communautaire 87/308/CEE.
Diese Geräte entsprechen der EG-Richtlinie 82/499/EWG und/oder 87/
308/EWG.
This product complies with the radio frequency interference requirements of the Council Directive 82/499/EEC and/or 87/308/EEC.
Questo apparecchio è conforme al D.M.13 aprile 1989 (Direttiva CEE/
87/308) sulla soppressione dei radiodisturbi.
Este producto está de acuerdo con los requisitos sobre interferencias de
radio frequencia fijados por el Consejo Directivo 87/308/CEE.
YAMAHA CORPORATION
OBSERVERA!
Apparaten kopplas inte ur växelströmskällan (nätet) sá länge som
den ar ansluten till vägguttaget, även om själva apparaten har
stängts av.
ADVARSEL: Netspæendingen til dette apparat er IKKE afbrudt,
sálæenge netledningen siddr i en stikkontakt, som er t endt — ogsá
selvom der or slukket pá apparatets afbryder.
VAROITUS: Laitteen toisiopiiriin kytketty käyttökytkin ei irroita
koko laitetta verkosta.
Page 3
Congratulations!
You are the proud owner of a Yamaha PSR-1700/PSR-2700. Your PSR1700/PSR-2700 is a high-quality musical instrument that incorporates
advanced Yamaha digital technology and many versatile features. In order to
obtain maximum performance and enjoyment from your PSR-1700/PSR-2700,
we urge you to read this Owner ’s Manual thoroughly while trying out the
various features described. Keep the Owner’s Manual in a safe place for later
reference.
Contents
Panel Controls 2
Taking Care of Your PortaTone 4
Preparation 5
■ Power Supply..............................................................................5
■ Installing the Backup Batteries ...................................................5
■ Using Headphones .....................................................................6
■ Connecting to an External Sound System ..................................6
■ Using Pedals...............................................................................6
■ The Music Stand.........................................................................6
Listen to the Demo! 7
■ Try the Disk Demo, Too! .............................................................8
Basic Editing Procedure 9
Selecting & Playing the Voices 11
■ Orchestration ............................................................................11
■ Voice Assignment .....................................................................13
■ Volume......................................................................................14
■ Octave ...................................................................................... 14
■ DSP Depth ................................................................................15
■ Pan ...........................................................................................15
■ Auto Harmony...........................................................................16
■ Effects.......................................................................................17
■ Keyboard Percussion................................................................18
■ Pitch Bend ................................................................................18
■ Modulation ................................................................................19
Overall Control 20
■ Split Point Change ....................................................................20
■ Transpose.................................................................................21
■ Tuning.......................................................................................21
■ DSP Type .................................................................................22
■ Touch Sensitivity.......................................................................23
Auto Accompaniment 24
■ Selecting a Style .......................................................................24
■ Setting the Auto Accompaniment Split Point ............................25
■ Auto Accompaniment Fingering................................................25
■ Tempo Control ..........................................................................28
■ Accompaniment Control ...........................................................29
■ Accompaniment Volume ...........................................................32
■ The Track Buttons ....................................................................33
■ Re-voicing the Tracks ...............................................................34
One Touch Setting 36
Registration Memory 37
Record Functions 39
Song Memory ................................................................................39
■ Realtime Accompaniment Track Recording .............................40
■ Realtime Melody Track Recording............................................42
■ Accompaniment And Melody Playback ....................................43
■ The [RESET] Button .................................................................44
■ Record Or Play from a Specified Measure ...............................44
The Multi Pads ............................................................................... 45
■ Realtime Recording ..................................................................45
■ Playback ...................................................................................46
Custom Accompaniment ..............................................................47
■ Realtime Custom Accompaniment Recording ..........................47
■ Using a Custom Accompaniment .............................................49
Step Recording..............................................................................50
Editing Functions ..........................................................................53
■ Quantization ..............................................................................53
■ Clearing Tracks ......................................................................... 54
■ Changing the Recorded Settings ..............................................55
Using Floppy Disks 56
■ Formatting a New Floppy Disk ..................................................57
■ Saving, Loading, & Deleting Disk Files .....................................58
● Saving to Disk .......................................................................58
● Loading From Disk ................................................................60
● Deleting a Disk File ...............................................................61
■ Quick Play:
Disk Orchestra Collection & Standard MIDI File Disks .............62
● Minus One Playback .............................................................62
PSR-2700 Digital Sampling 63
■ Connections ..............................................................................63
■ Setting the Input Level ..............................................................63
■ Setting the Sampling Frequency ............................................... 64
■ Setting the Trigger Level ...........................................................65
■ Recording .................................................................................66
■ Playing the Sample Pads .......................................................... 67
■ Editing Samples ........................................................................68
● Clearing Samples..................................................................68
● Tuning the Samples ..............................................................68
● Volume, DSP Depth, & Pan Settings ....................................69
◆ Individual SAMPLE PAD Volume Settings.........................69
■ Playing Samples via the Keyboard ...........................................70
● Mapping ................................................................................70
■ Sample Memory Backup & Disk Storage ..................................71
Pedal Assign 72
MIDI 73
MIDI Reception Modes ..................................................................74
■ Channel Reception Modes .......................................................74
■ Clock Mode ...............................................................................75
■ Start/Stop Mode ........................................................................75
MIDI Transmission ........................................................................76
■ MIDI Transmit Channels ...........................................................76
■ Local & MIDI Output ON/OFF ...................................................76
Appendix ........................................................................................77
■ Voice & Polyphony List .............................................................77
■ Style List ...................................................................................78
■ Error Messages ........................................................................81
■ System Reset Procedure ..........................................................82
■ Troubleshooting ........................................................................83
Index ...............................................................................................84
Percussion Kit List ......................................................................338
MIDI Implementation Chart.........................................................340
Specifications .............................................................................343
| | | | | | | | | | | | | | | | | | | | | | | | | | | | | | | | | | | | | | | | | | | | | | | | | | | | | | | | | | | | | | | | | | | | | | | | | | | | | | | | | | | | | | | | | | | | | | | | | | | | | | | | | | | | | | | | | | | | | | | | | | | | | | | | | | | | | | | | | | | | |
1
Page 4
Page 5
Page 6

Taking Care of Your PortaTone
Your PortaTone will give you years of playing pleasure if you follow the
simple rules given below:
■ Location
Do not expose the instrument to the following
conditions to avoid deformation, discoloration, or
more serious damage.
• Direct sunlight (e.g. near a window).
• High temperatures (e.g. near a heat source, out-
side, or in a car during the daytime).
• Excessive humidity.
• Excessive dust.
• Strong vibration.
■ Power Supply
• Turn the power switch OFF when the instrument
is not in use.
• The power cord should be unplugged from the
AC outlet if the instrument is not to be used for
an extended period of time.
• Unplug the instrument during electric storms.
• Avoid plugging the instrument into the same AC
outlet as appliances with high power consumption, such as electric heaters or ovens. Also avoid
using multi-plug adaptors since these can result
in reduced sound quality and possibly damage.
■ Turn Power OFF When Making
Connections
• To avoid damage to the instrument and other
devices to which it is connected (a sound system,
for example),
lated devices OFF prior to connecting or disconnecting audio and MIDI cables.
■ Handling and Transport
• Never apply excessive force to the controls, con-
nectors or other parts of the instrument.
• Always unplug cables by gripping the plug
firmly, not by pulling on the cable.
• Disconnect all cables before moving the instru-
ment.
• Physical shocks caused by dropping, bumping, or
placing heavy objects on the instrument can result in scratches and more serious damage.
turn the power switches of all re-
■ Cleaning
• Clean the cabinet and panel with a dry soft cloth.
• A slightly damp cloth may be used to remove
stubborn grime and dirt.
• Never use cleaners such as alcohol or thinner.
• Avoid placing vinyl objects on top of the instrument (vinyl can stick to and discolor the surface).
■ Electrical Interference
• This instrument contains digital circuitry and
may cause interference if placed too close to radio or television receivers. If this occurs, move
the instrument further away from the affected
equipment.
■ Service and Modification
• The PSR-1700/PSR-2700 contains no user serviceable parts. Opening it or tampering with it in
anyway can lead to irreparable damage and possibly electric shock. Refer all servicing to qualified YAMAHA personnel.
■ Data Backup
• Internal data (e.g. Song Memory data) is retained
in memory even if the power switch is turned off
as long as backup batteries are installed (page 5)
or the AC plug is connected. The internal
memory can, however, be corrupted by incorrect
operation. Be sure to save important data to
floppy disk frequently so you have a backup to
revert to if the data in memory is accidentally
damaged. Also note that magnetic fields can
damage data on floppy disks, so it is advisable to
make a second backup copy of disks that contain
particularly important data. Always keep backup
disks in a safe place away from stray magnetic
fields (e.g. those produced by speakers, appliances containing motors, etc.). More important
precautions for floppy disk use are given in the
“Floppy Disk” section beginning on page 56.
YAMAHA is not responsible for damage caused by improper handling or operation.
| | | | | | | | | | | | | | | | | | | | | | | | | | | | | | | | | | | | | | | | | | | | | | | | | | | | | | | | | | | | | | | | | | | | | | | | | | | | | | | | | | | | | | | | | | | | | | | | | | | | | | | | | | | | | | | | | | | | | | | | | | | | | | | | | | | | | | | | | | | | |
4
Page 7

Preparation
This section contains information about setting up your PSR-1700 or PSR-2700 and preparing to
play. Be sure to go through this section carefully before using your PSR-1700/PSR-2700.
HEADPHONES
AUX OUT
L+R/L
PEDAL
2
1R
■ Power Supply
After making sure that the AC mains voltage and frequency specified for your PSR-1700/PSR-2700 matches
your local power supply (check the label on the bottom panel), plug the power cord into a convenient AC outlet.
CAUTION
WARNING:
RISK OF ELECTRIC SHOCK
DO NOT OPEN
MIDI
THRU
OUT IN
AVIS:
RISQUE DE CHOC ELECTRIQUE NE PAS OUVRIR.
TO REDUCE THE RISK OF FIRE OR ELECTRIC SHOCK,
DO NOT EXPOSE THIS PRODUCT TO RAIN OR MOISTURE.
CAUTION
• Never interrupt the power supply (e.g. unplug the power cord)
during any record or disk operation! Doing so can result in a loss
of data.
■Installing the Backup Batteries
For memory backup the PSR-1700/PSR-2700 requires four 1.5V SUM-3, “AA” size, R-6 or equivalent
batteries. All PSR-1700 and PSR-2700 features will operate without these batteries installed, but song
memory and other data that is not saved to disk will be lost when then power is turned off. To prevent accidental loss of data, we recommend that a set of backup batteries be installed while the instrument is in regular
use. When the backup batteries need to be replaced “Backup Battery Low” will appear on the LCD display
panel when the power is initially turned on (this also occurs if no backup batteries are installed). Try to replace the batteries
before they fail and the backup memory contents are lost.
Open the battery compartment cover located on the instrument’s bottom
Z
panel.
Insert the four new batteries, being careful to follow the polarity markings
X
on the inside of the compartment.
Replace the compartment cover, making sure that it locks firmly in place.
C
CAUTION
• When the batteries run down, replace them with a complete set of
four new batteries. NEVER mix old and new batteries.
• Do not use different kinds of batteries (e.g. alkaline and manganese)
at the same time.
• To prevent possible damage due to battery leakage, remove the
batteries from the instrument if it is not to be used for an extended
period of time.
• When you replace the batteries, any backed-up data will be lost. To
avoid this, be sure to save your valuable data to a floppy disk before
replacing the batteries.
| | | | | | | | | | | | | | | | | | | | | | | | | | | | | | | | | | | | | | | | | | | | | | | | | | | | | | | | | | | | | | | | | | | | | | | | | | | | | | | | | | | | | | | | | | | | | | | | | | | | | | | | | | | | | | | | | | | | | | | | | | | | | | | | | | | | | | | | | | | | |
5
Page 8
Preparation
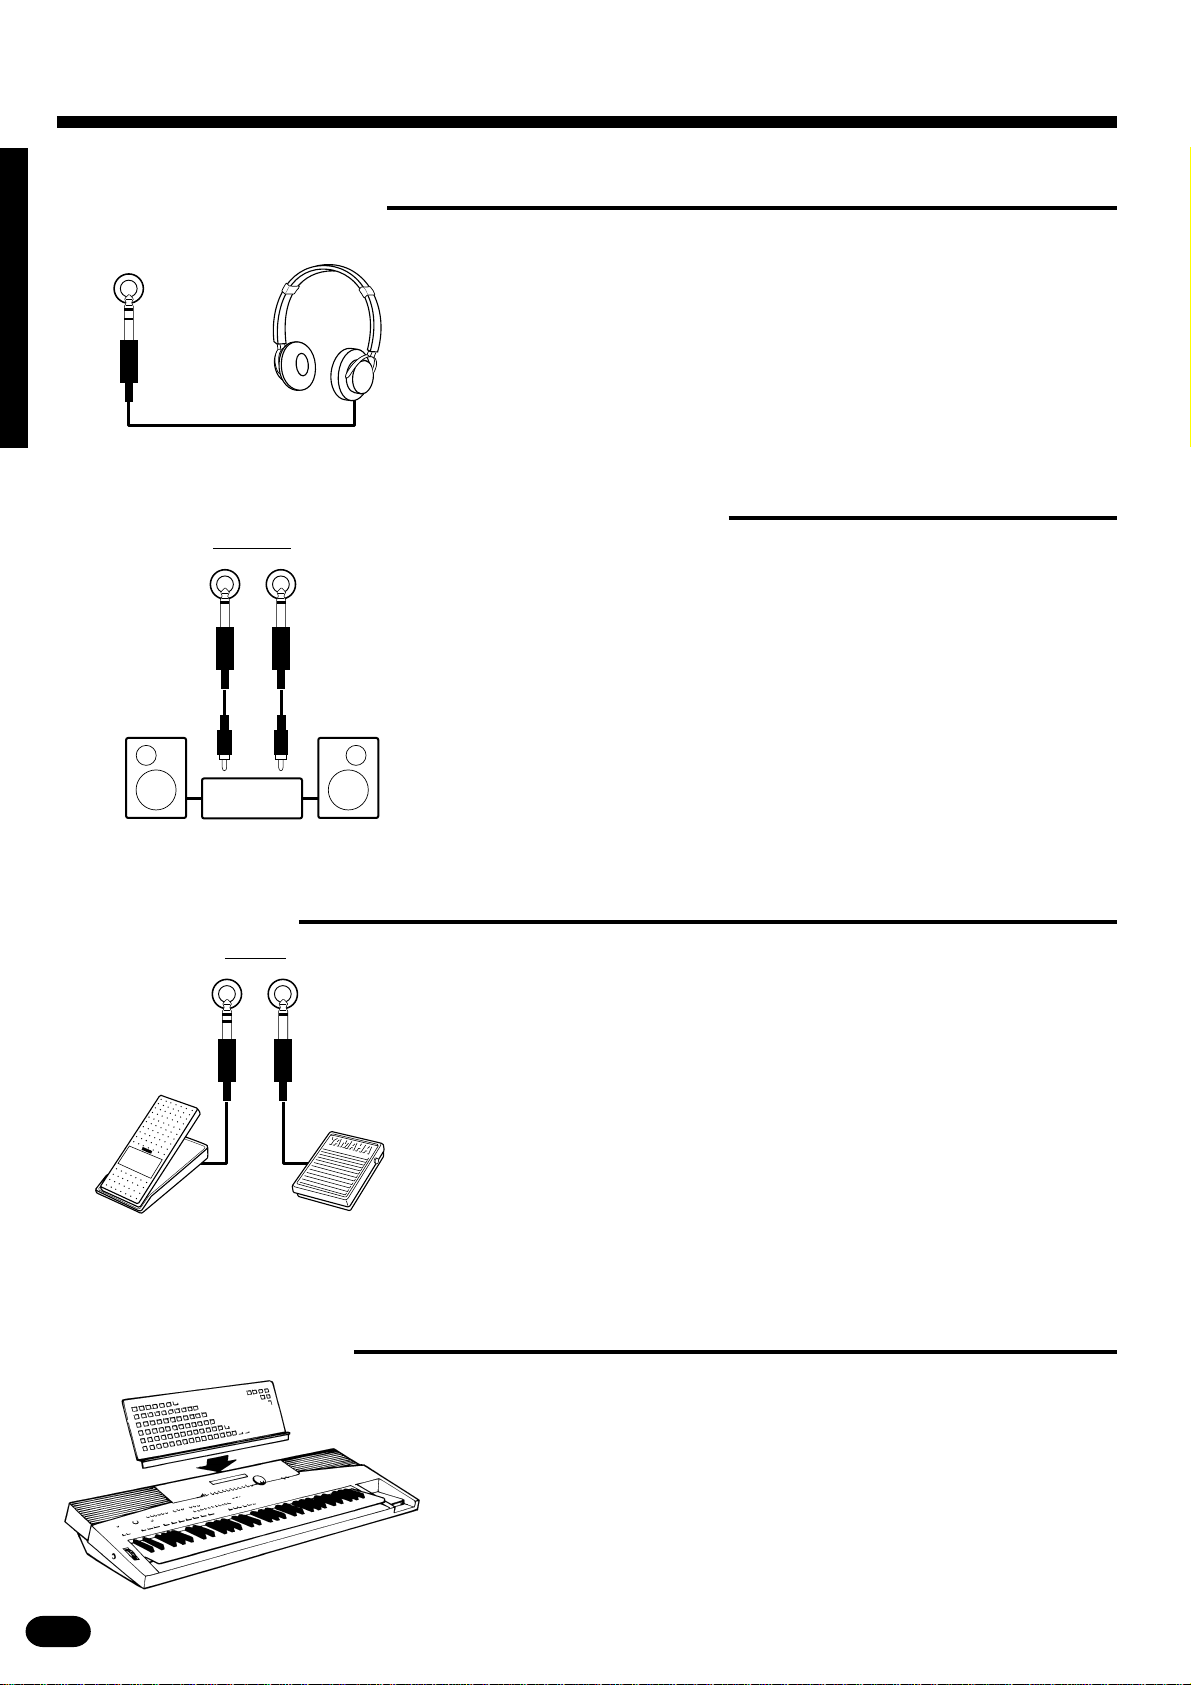
■Using Headphones
HEADPHONES
A standard pair of stereo headphones can be plugged into the rear-panel
HEADPHONES jack for private practice or late-night playing. The internal
speaker system is automatically shut off when a pair of headphones is
plugged into the HEADPHONES jack.
■Connecting to an External Sound System
AUX OUT
R
L+R/L
The AUX OUT L+R/L and R jacks deliver the output of the PSR-1700/
PSR-2700 for connection to an instrument amplifier, mixing console, PA
system, or recording equipment. If you will be connecting the PSR-1700/
PSR-2700 to a monophonic sound system, use only the L+R/L jack. When
a plug is inserted into the L+R/L jack only, the left- and right-channel sig-
nals are combined and delivered via the L+R/L jack so you don’t lose any
of the instrument’s sound.
Stereo sound system
■Using Pedals
PEDAL
2
1
(FC7) (FC5)
■The Music Stand
An optional Yamaha FC4 or FC5 footswitch or FC7 foot controller can
be plugged into either or both of the rear-panel PEDAL jacks.
The PEDAL 1 jack is initially assigned to sustain control. A footswitch
connected to this jack functions as a damper pedal, controlling sustain.
Press the pedal to sustain notes after the keys are released.
The PEDAL 2 jack is initially assigned to the voice volume control
(MIDI Expression control). An FC7 foot controller connected to this jack
can be used to control voice volume: press the pedal forward to increase
voice volume; backward to decrease voice volume.
Both the PEDAL jacks can be assigned to a wide range of other func-
tions as described in the “Pedal Assign” section on page 72.
Insert the bottom edge of the music stand into the slot located at the rear
of the control panel.
| | | | | | | | | | | | | | | | | | | | | | | | | | | | | | | | | | | | | | | | | | | | | | | | | | | | | | | | | | | | | | | | | | | | | | | | | | | | | | | | | | | | | | | | | | | | | | | | | | | | | | | | | | | | | | | | | | | | | | | | | | | | | | | | | | | | | | | | | | | | |
6
Page 9
Listen to the Demo!
Once you’ve set up your PSR-1700/PSR-2700, try listening to the pre-programmed demonstration songs — they’ll give you a good idea of what the PSR-1700/PSR-2700 can do!
DEMO
SONG #
ON/ OFF
POWER
MIN MAX
MASTER VOLUME
START/STOP
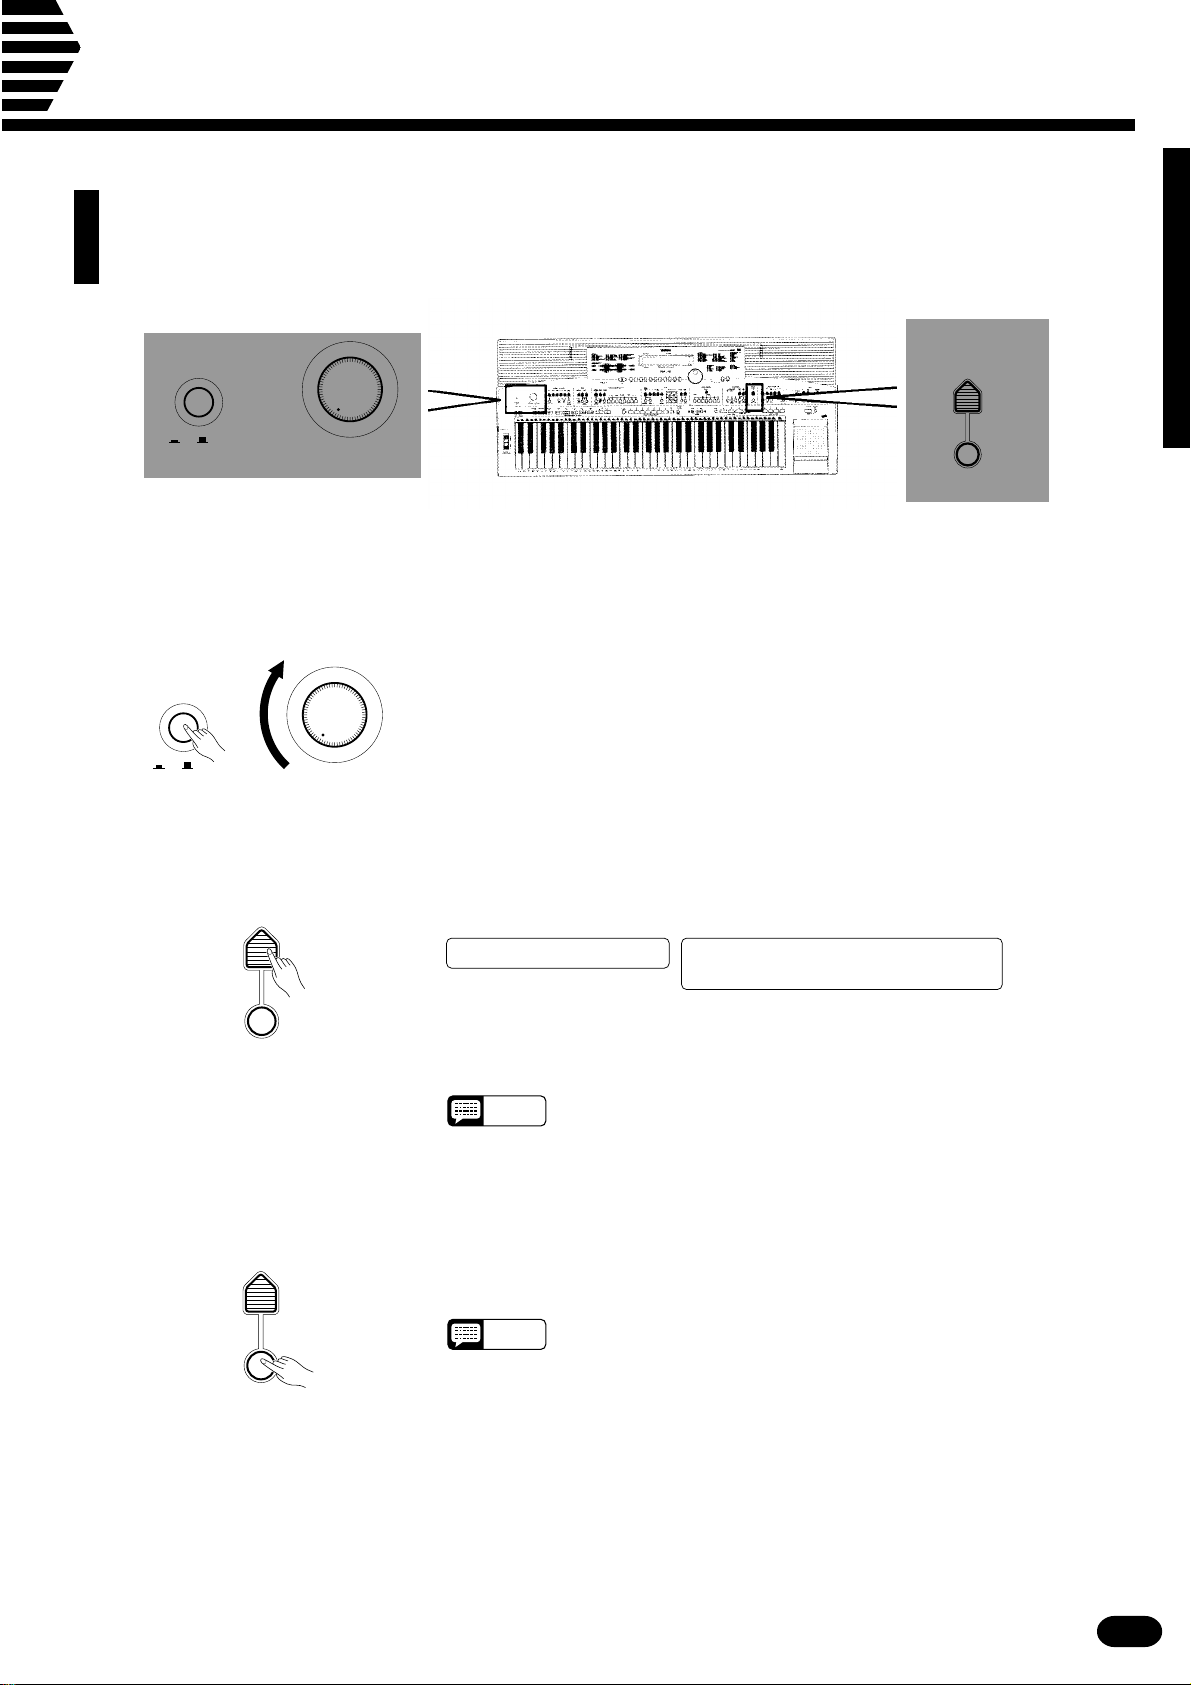
ZTurn the Power ON & Set the Volume ..................................................................................................
Before playing the demo turn the power ON by pressing the POWER
switch (the panel indicators and LCD display panel will light), and turn the
MASTER VOLUME control up (clockwise) about a quarter-turn from its
ON/ OFF
POWER
MIN MAX
MASTER VOLUME
minimum position.
XSelect a Song..........................................................................................................................................
DEMO
SONG #
Press the DEMO [SONG #] button a few times until the number of the
desired demo song appears on the LCD display.
PSR-2700PSR-1700
Demo=0–:ChainPlay
08:Showtune 001:GrandPno
AccOff Demo=0–:ChainPlay
0 (ChainPlay): Repeat playback of all demo songs in sequence.
START/STOP
1-8: Repeat playback of the selected demo song number.
NOTES
• “0:ChainPlay” is automatically selected whenever the power switch is
turned on.
CPress DEMO [START/STOP] to Start ....................................................................................................
DEMO
SONG #
START/STOP
Press the DEMO [START/STOP] button to start playback, and use the
MASTER VOLUME control to set the ideal listening level. The selected
demonstration will play repeatedly.
NOTES
• During demo playback you can select different voices and play along
on the keyboard — see the “Selecting & Playing the Voices” section
beginning on page 11.
VPress DEMO [START/STOP] to Stop ....................................................................................................
Press the DEMO [START/STOP] button again to stop demo playback.
| | | | | | | | | | | | | | | | | | | | | | | | | | | | | | | | | | | | | | | | | | | | | | | | | | | | | | | | | | | | | | | | | | | | | | | | | | | | | | | | | | | | | | | | | | | | | | | | | | | | | | | | | | | | | | | | | | | | | | | | | | | | | | | | | | | | | | | | | | | | |
7
Page 10
Listen to the Demo!
■Try the Disk Demo, Too!
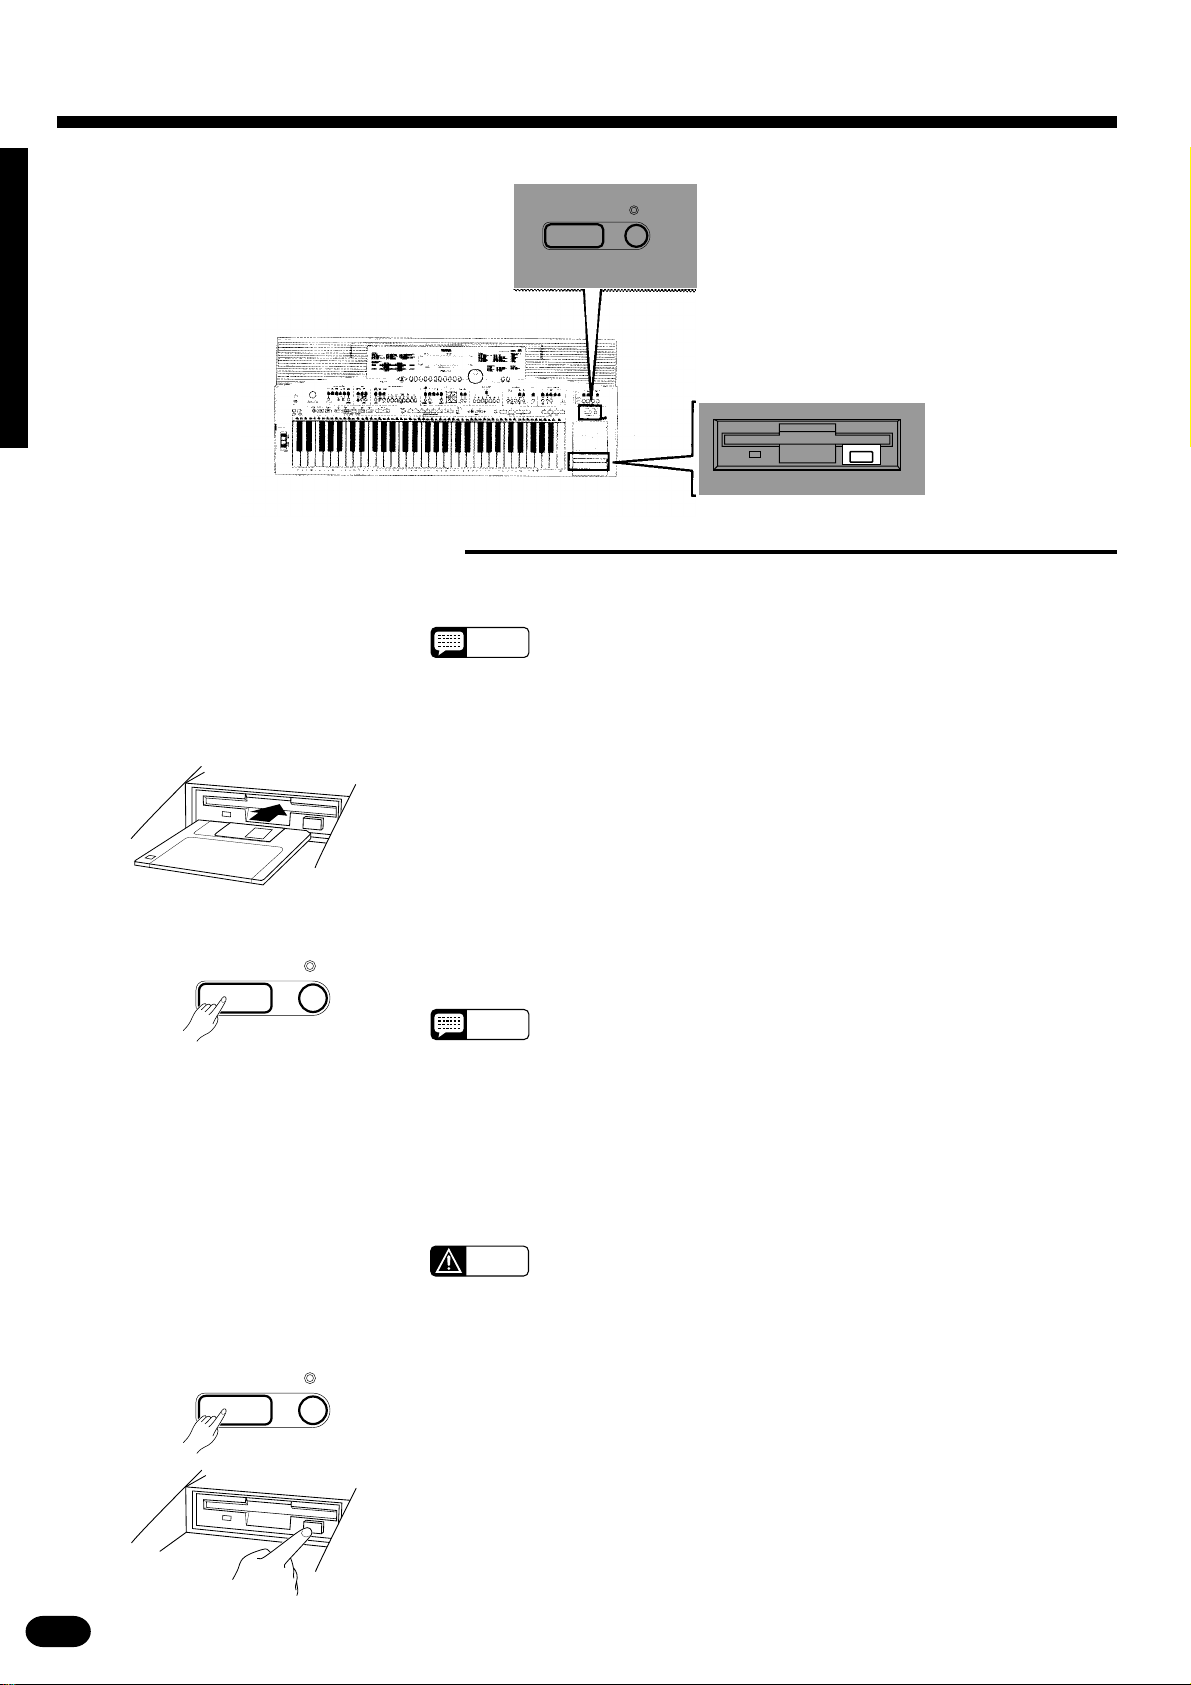
The PSR-1700 and PSR-2700 also come supplied with demonstration floppy disks that you can play as
follows:
NOTES
MINUS ONESTART/STOP
QUICK PLAY
• The PSR-1700 comes with one demonstration disk containing 4 demonstration songs, while the PSR-2700 includes an additional disk
containing 2 demo songs that make use of the PSR-2700’s Digital
Sampling feature.
ZInsert the Demo Disk..............................................................................................................................
Insert demonstration disk into the disk drive unit with the sliding door
facing the drive slot and the label side of the disk facing upward. The disk
should click securely into place.
XStart Playback.........................................................................................................................................
MINUS ONESTART/STOP
QUICK PLAY
Press the QUICK PLAY [START/STOP] button to start playback. The
disk demo songs will play back in sequence.
NOTES
CAUTION
• If the demo requires sampled voice data included in the disk
(PSR-2700 only) the sampled voice data will automatically be
loaded into sampled voice number 128 before demo playback
begins. If there is already sampled voice data in memory or the
wave RAM is full, the disk may not load automatically. See page
60 for details.
• If you simply press the QUICK PLAY [START/STOP] button playback
will begin from the lowest file number on the disk. It is also possible to
specify the file number from which playback is to begin prior to pressing the [START/STOP] button.
• Never attempt to eject the demonstration disk(s) or turn the
power off during demo playback. Doing so can damage both the
disk drive and the disk.
CStop the Demo & Eject the Disk............................................................................................................
MINUS ONESTART/STOP
QUICK PLAY
| | | | | | | | | | | | | | | | | | | | | | | | | | | | | | | | | | | | | | | | | | | | | | | | | | | | | | | | | | | | | | | | | | | | | | | | | | | | | | | | | | | | | | | | | | | | | | | | | | | | | | | | | | | | | | | | | | | | | | | | | | | | | | | | | | | | | | | | | | | | |
8
When you’re ready to stop the demo, press the QUICK PLAY [START/
STOP] button to stop playback, then press the disk drive eject button and
remove the disk.
Page 11
Basic Editing Procedure
The PSR-1700 and PSR-2700 feature a flexible-but-consistent interface that lets you edit just
about all of its parameters using the same basic procedure. Once familiar with the system,
you’ll be able to edit any parameter quickly and easily. Here’s the basic procedure:
+
–+
RESET
0 234567891
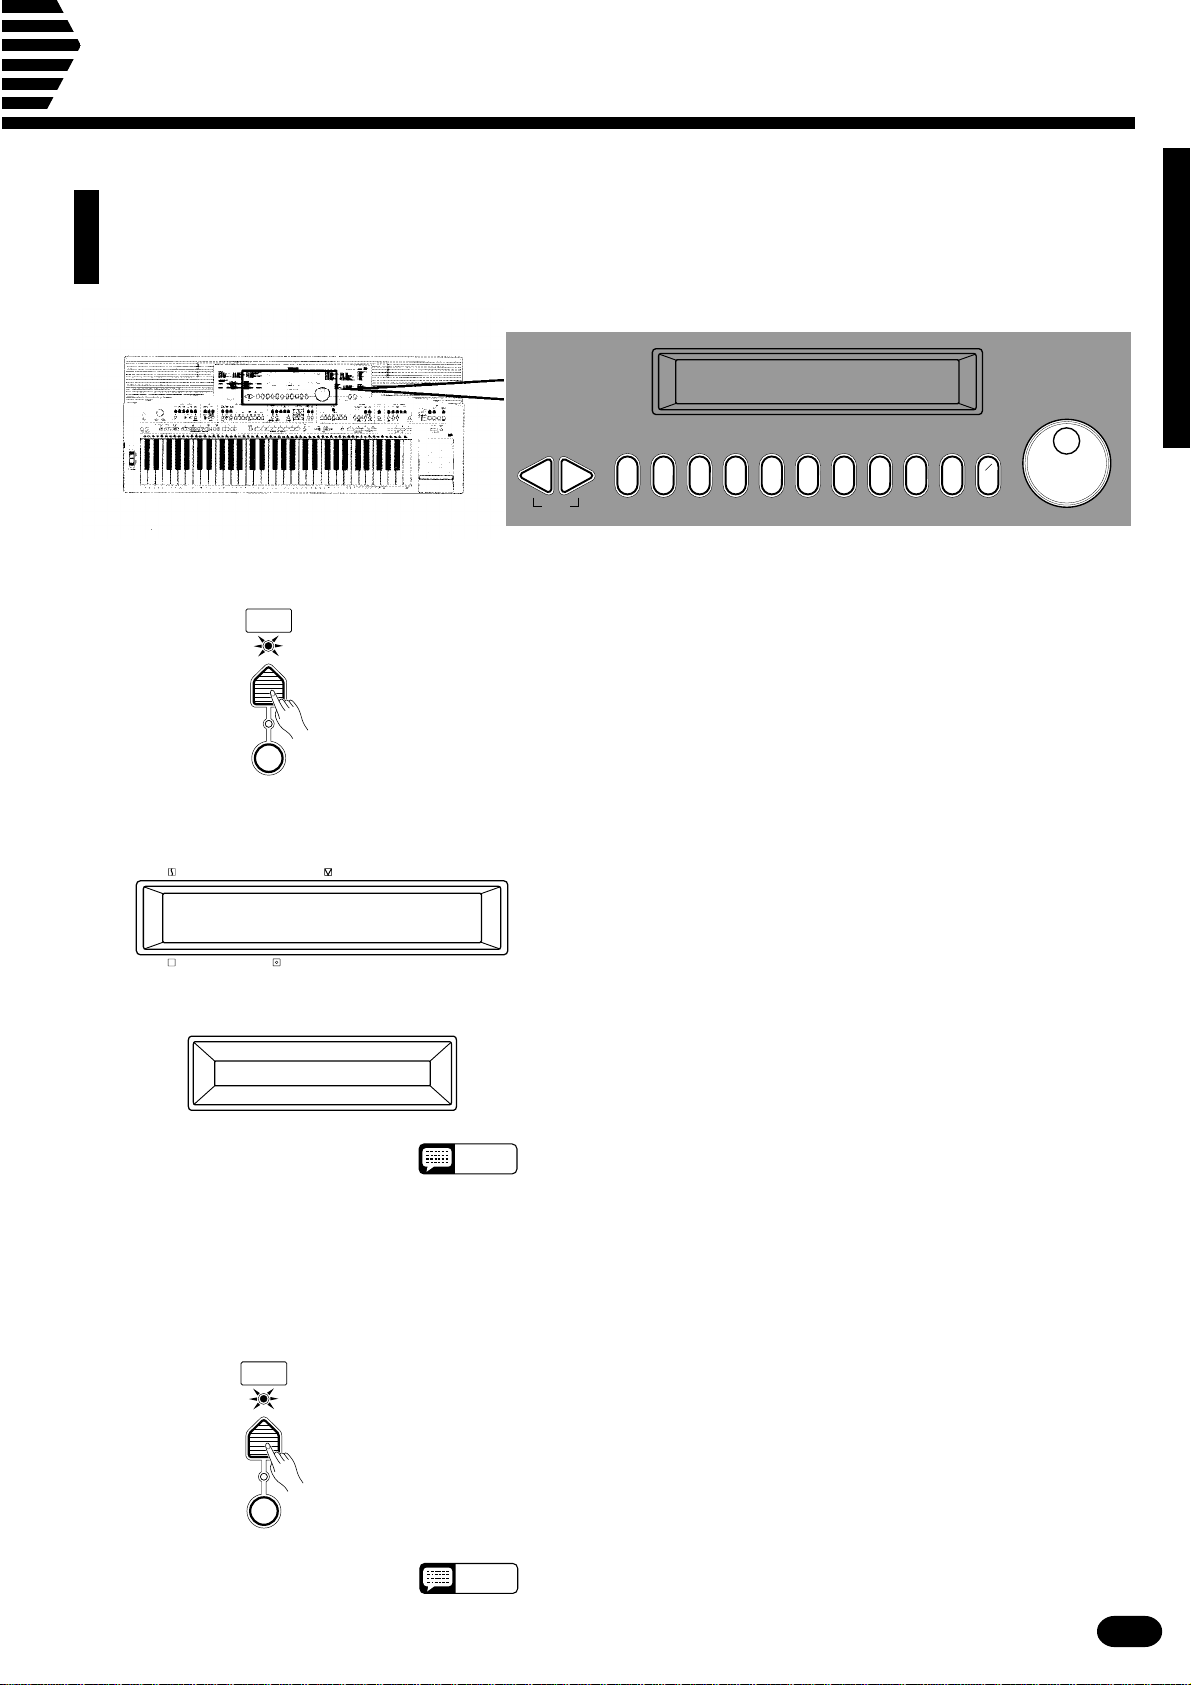
ZPress a Function Button ........................................................................................................................
–
_ _
1
VOICE
SELECT
KEYBOARD
PERCUSSION
PSR-2700
STYLE VOICE
08:Showtune 001:GrandPno
AccOff VCE=00–1:GrandPno
CHORD
PSR-1700
PARAMETER & VALUE
VCE=00–1:GrandPno
First press the button corresponding to the function or parameter you want
to edit. To select voice numbers, for example, press the [VOICE SELECT]
button (its indicator will light). The name of the selected parameter and its
current value will be shown on the LCD display panel.
● The LCD Display Panel
The PSR-2700 and PSR-1700 feature backlit LCD display panels that make
it easy to select and edit parameters as well as perform all other operations.
The PSR-2700 display has two lines of 24 characters each, while the PSR1700 has one line of 16 characters.
The PSR-2700 display has four sections: STYLE, VOICE,
CHORD, and PARAMETER & VALUE. The STYLE and
VOICE sections on the upper line always show the currently selected accompaniment style and voice. The CHORD section on
the lower line shows the detected chord when the Auto Accompaniment feature is used, and the PARAMETER & VALUE section
shows the parameter and value currently selected for editing.
The PSR-1700 display always shows the parameter and value
currently selected for editing.
NOTES
• “Now Processing” may appear on the LCD display panel while the PSR1700/PSR-2700 is processing the data (for example recorded data) or
ready to process it.
XEdit the Parameter..................................................................................................................................
The PSR-1700 and PSR-2700 let you edit parameters using four different
methods. Use the one that best suits the parameter you have selected:
2-1: The Function Button
VOICE
SELECT
KEYBOARD
PERCUSSION
| | | | | | | | | | | | | | | | | | | | | | | | | | | | | | | | | | | | | | | | | | | | | | | | | | | | | | | | | | | | | | | | | | | | | | | | | | | | | | | | | | | | | | | | | | | | | | | | | | | | | | | | | | | | | | | | | | | | | | | | | | | | | | | | | | | | | | | | | | | | |
Each time you press a function button after initially selecting the function,
the value of the corresponding parameter will be incremented (increased) by
one. If you hold the function button for a few seconds, the parameter will
begin to increment continuously as long as you hold the button.
If, for example, you press the [VOICE SELECT] button and LCD display
panel shows that voice number 36 (VCE=036:Fretless) is currently selected,
you can select voice number 37 (VCE=037:SlapBas1) simply by pressing the
[VOICE SELECT] button again.
NOTES
• The SPLIT POINT button, MAPPING button (PSR-2700), and PITCH
button (PSR-2700) are exceptions.
9
Page 12
Basic Editing Procedure
2-2: The [+] and [−] Buttons
–+
RESET
2-3: The Number Buttons
02341
+
–
_ _
789
Example: Voice number “120”
+
–
_ _
1
1
02
The [+] and [–] buttons can be used to increment (increase by one) or decrement (decrease by one) the currently selected parameter. Press the [+] button
briefly to increment the parameter value, or the [–] button to decrement. If you
hold the [+] or [–] button down, the value will increment or decrement continuously — simply release the button when the desired value has been
reached.
The number buttons — to the right of the [+] and [–] buttons — allow
direct numeric entry of the desired value, and are therefore the fastest way to
edit in many situations.
To select a voice, for example, choose one of the 128 voices — numbered
“01” through “128” — listed in the “Voice & Polyphony List” on page 77, then
enter its number using the number buttons. To select “Harmonica” (number
23), for example, first press [2] then [3]. The number “23” should then appear
on the LCD display panel along with the name “Harmnica”.
The [+/–] button is used to switch between positive and negative values
with parameters that allow negative values (Transpose, Tuning, Octave, and
Pan, for example). A “–” appears before negative values on the LCD display
panel.
When selecting voice numbers the [+/–] button is used to enter the hundreds
digit of the voice number (the button alternately selects no hundreds digit or
“1”), as required, prior to entering the tens and ones digits. The [1] number
button cannot be used to enter the hundreds digit when selecting voices.
2-4: The Data Dial
● Yes/No Confirmation
YES NO
ARE YOU SURE ?
Values outside the range of the selected parameter can not be entered.
This is undoubtedly the easiest way to edit most parameters. Simply rotate
the dial clockwise to increment or counter-clockwise to decrement.
NOTES
Some operations that change important settings or erase data may require you to
confirm your choice by pressing the [YES] or [NO] button. When a choice needs to be
confirmed the ARE YOU SURE? indicator will flash and a digitally sampled voice will ask
“Are you sure?”. Press the [YES] button to execute the specified operation or the [NO]
button to cancel and leave the settings or data unaffected.
If you don’t want to hear the “Are you sure?” confirmation sound, hold down the [NO]
button while initially turning the power switch on. To restore the confirmation sound, turn
the power switch off, then turn it back on again while holding down the [YES] button. The
on/off status of the confirmation sound is retained in memory even when the power
switch is turned off as long as the backup batteries are installed or an AC plug is
connected.
• After editing a parameter other than [VOICE SELECT], the [VOICE SELECT] parameter will automatically be re-selected after a brief delay.
• If you attempt to change a parameter that can not be edited in the
current mode, “IllegalOperation” will appear on the LCD display.
| | | | | | | | | | | | | | | | | | | | | | | | | | | | | | | | | | | | | | | | | | | | | | | | | | | | | | | | | | | | | | | | | | | | | | | | | | | | | | | | | | | | | | | | | | | | | | | | | | | | | | | | | | | | | | | | | | | | | | | | | | | | | | | | | | | | | | | | | | | | |
10
Page 13
Selecting & Playing the Voices
The PSR-1700 and PSR-2700 have 128 stunning
voices plus 8 different drum and percussion kits
that you can select and play in a number of ways.
MODULATION PITCH BEND
PSR-1700
VOICE
SELECT
KEYBOARD
PERCUSSION
PSR-2700
VOICE
SELECT
KEYBOARD
PERCUSSION
VOL OCTAVE DSP
VOL OCTAVE DSP
SAMPLED
VOICE
DEPTH
DEPTH
VOICE
PAN ORCHESTRATION HARMONY
L1 R1
EDIT
ONE TOUCH
SETTING
ONE TOUCH
SETTING
L2 R2
VOICE
PAN ORCHESTRATION HARMONY
L1 R1
EDIT
L2 R2
■Orchestration
The unique ORCHESTRATION button group in the VOICE control section lets you select and play from one
to four “parts” at the same time using a variety of “orchestrations”. One of the 128 voices is assigned to each
part.
● Single: One voice over the entire keyboard.
EFFECT
TYPE
TYPE
HARMONY EFFECT
EFFECT
TYPE
TYPE
HARMONY EFFECT
● Dual: Two voices simultaneously over the entire keyboard.
● Split: Different voices with the left and right hands.
● Split & Dual: Combinations of the Split and Dual modes.
There are actually a number of variations on
each of the above orchestrations. The ORCHESTRATION buttons are used to choose the type of
orchestration you want.
Right-hand voice 1
Left-hand voice 1
ORCHESTRATION
L1 R1
EDIT
L2 R2
Left-hand voice 2
(or single voice)
Right-hand voice 2
(or single voice)
The four available parts are turned on and off by
the [R1], [R2], [L1], and [L2] buttons. The indicators next to each of these buttons tell you which
parts are on and which are off, and therefore indicate the current orchestration mode. The [EDIT]
button determines which of the four orchestration
parts is to be edited. You can, for example, assign
any of the 128 voices to each of the orchestration
parts. But before we discuss voice assignment and
editing, let’s take a look at the various orchestration
modes:
● Single Modes
In the “single” modes either the [R1] or [R2] part
voice can be played over the entire keyboard. The R1
and R2 single-voice modes are selected simply by
pressing either the [R1] or [R2] button if neither the
[L1] or [L2] indicators are lit. If the [L1] and/or [L2]
indicators are lit, press them so that both indicators
go out.
Note that when you select the [R1] or [R2] single-
voice mode, the triangular EDIT indicator for the selected voice also lights. This means you can select a
different voice number or otherwise edit the current
voice using the procedures described on page 13.
L1 R1
EDIT
L2 R2
L1 R1
EDIT
L2 R2
The R1 voice is played across the
entire keyboard.
The R2 voice is played across the
entire keyboard.
| | | | | | | | | | | | | | | | | | | | | | | | | | | | | | | | | | | | | | | | | | | | | | | | | | | | | | | | | | | | | | | | | | | | | | | | | | | | | | | | | | | | | | | | | | | | | | | | | | | | | | | | | | | | | | | | | | | | | | | | | | | | | | | | | | | | | | | | | | | | |
11
Page 14
Selecting & Playing the Voices
● Dual Mode
In the dual mode both the [R1] and [R2] part
voices are selected so they can be played simultaneously across the entire keyboard. To select the dual
mode, make sure that both the [L1] and [L2] indicators are out, then press both the [R1] and [R2] buttons simultaneously (or hold one while pressing the
other).
You can switch back to either of the single modes
from the dual mode simply by pressing the [R1] or
[R2] button, as required.
L1 R1
EDIT
L2 R2
The R1 & R2 voices are played
across the entire keyboard.
● Split Modes
The PSR-1700 and PSR-2700 allow four different
split modes, with one voice played on the left-hand
section of the keyboard ([L1] or [L2]) and a different
voice on the right-hand section of the keyboard ([R1]
or [R2]). Selecting a split mode is simply a matter of
pressing the buttons corresponding to the desired
left- and right-hand parts.
● Split & Dual Modes
There are five possible combinations of the split
and dual modes, as shown below. The part for the
single-voice side of the combination is selected simply by pressing the appropriate part button, while for
the dual-voice side both buttons must be pressed
simultaneously (or one while holding the other).
▼
L1 R1
EDIT
L2 R2
L1 R1
EDIT
L2 R2
L1 R1
EDIT
L2 R2
L1 R1
EDIT
L2 R2
L1 voice. R1 & R2 voices.
▼
L2 voice.
L1 & L2 voices.
L1 & L2 voices.
R1 & R2 voices.
▼
R2 voice.
▼
R1 voice.
The split point (i.e. the key at which the voices
change over) can be set at any desired key by using
the SPLIT POINT CHANGE function described on
page 20.
▼
L1 R1
EDIT
L2 R2
L1 R1
EDIT
L2 R2
L1 R1
EDIT
L2 R2
L1 R1
EDIT
L2 R2
L1 voice.
L2 voice. R1 voice.
L1 voice. R2 voice.
L2 voice. R2 voice.
R1 voice.
▼
▼
▼
L1 R1
EDIT
L2 R2
L1 & L2 voices.
▼
R1 & R2 voices.
| | | | | | | | | | | | | | | | | | | | | | | | | | | | | | | | | | | | | | | | | | | | | | | | | | | | | | | | | | | | | | | | | | | | | | | | | | | | | | | | | | | | | | | | | | | | | | | | | | | | | | | | | | | | | | | | | | | | | | | | | | | | | | | | | | | | | | | | | | | | |
12
Page 15
■V oice Assignment
You can assign any of the 128 voices to each of the ORCHESTRATION parts, whether the part is currently
ON or OFF.
ZPress the [VOICE SELECT] Button .......................................................................................................
VOICE
SELECT
You don’t need to do this if the [VOICE SELECT] indicator is already
lit. Also make sure that the [KEYBOARD PERCUSSION] and [SAM-
PLED VOICE] (PSR-2700) indicators are out.
KEYBOARD
PERCUSSION
SAMPLED
VOICE
(PSR-2700)
XSelect the Part You Want to Edit...........................................................................................................
Use the ORCHESTRATION [EDIT] button to select the part to which
you want to assign a new voice. The [EDIT] indicators light in sequence in
EDIT
the clockwise direction each time the [EDIT] button is pressed.
NOTES
• You can edit the voice number of a part that is OFF while playing a
different part.
• Actually, the [VOICE SELECT] mode is automatically selected whenever the [EDIT] button is pressed, so you don’t really need to press
[VOICE SELECT] as described in step 1 if you’re going to use the
[EDIT] button prior to selecting a voice number.
CSelect a Voice Number...........................................................................................................................
Use the [+] and [–] buttons, the number buttons, the data dial, or the
–+
RESET
021
[VOICE SELECT] button itself to select the required voice number (see
page 9 for editing procedure details).
Example: Voice number “120”
+
–
_ _
1
| | | | | | | | | | | | | | | | | | | | | | | | | | | | | | | | | | | | | | | | | | | | | | | | | | | | | | | | | | | | | | | | | | | | | | | | | | | | | | | | | | | | | | | | | | | | | | | | | | | | | | | | | | | | | | | | | | | | | | | | | | | | | | | | | | | | | | | | | | | | |
02
When entering voice numbers higher than 99, use the [+/–] button to
enter the hundreds digit prior to entering the tens and ones digits: the button
alternately selects no hundreds digit or “1”.
NOTES
• The voice categories are listed in the “VOICE” list on the PSR-1700/
PSR-2700 panel. See page 77 for a complete list.
• The optimum keyboard range is preset for each voice.
13
Page 16

Selecting & Playing the Voices
■V olume
You can individually set the volume of each orchestration part to set up the ideal balance between parts.
ZSelect the Part You Want to Edit...........................................................................................................
Use the ORCHESTRATION [EDIT] button to select the part you want
to edit.
XPress the [VOL] Button ..........................................................................................................................
VOL
CSet the Volume .......................................................................................................................................
Press the VOICE control section [VOL] button. The current volume
value of the selected part will appear on the LCD display panel.
PSR-2700PSR-1700
Volume=2–1
08:Showtune 001:GrandPno
AccOff Volume=2–1
Use the [+] and [–] buttons, the number buttons, the data dial, or the
–+
RESET
021
[VOL] button itself to set the desired volume. The volume range is from 00
(no sound) to 24 (maximum volume). The default volume value (21) can be
recalled instantly by pressing both the [+] and [–] buttons at the same time.
■Octave
You can individually shift the octave of each orchestration part up or down by up to two octaves. This makes
it easy, for example, to lower the pitch of a bass voice to an appropriate octave without affecting the other parts
in your orchestration.
ZSelect the Part You Want to Edit...........................................................................................................
Use the ORCHESTRATION [EDIT] button to select the part you want
to edit.
XPress the [OCTAVE] Button ..................................................................................................................
OCTAVE
Press the VOICE control section [OCTAVE] button. The current octave
value of the selected part will appear on the LCD display panel.
PSR-2700PSR-1700
Octave= 0–
08:Showtune 001:GrandPno
AccOff Octave= 0–
CSet the Octave ........................................................................................................................................
Use the [+] and [–] buttons, the number buttons, the data dial, or the
–+
RESET
| | | | | | | | | | | | | | | | | | | | | | | | | | | | | | | | | | | | | | | | | | | | | | | | | | | | | | | | | | | | | | | | | | | | | | | | | | | | | | | | | | | | | | | | | | | | | | | | | | | | | | | | | | | | | | | | | | | | | | | | | | | | | | | | | | | | | | | | | | | | |
14
021
[OCTAVE] button itself to set the desired octave. The octave range is from
–2 (down two octaves) to +2 (up two octaves). The normal octave value for
the selected voice can be recalled instantly by pressing both the [+] and [–]
buttons at the same time.
Page 17

■DSP Depth
The PSR-1700 and PSR-2700 features a built-in digital signal processor (DSP) that can be used to apply a
range of reverb and delay effects to the voices. The [DSP TYPE] button in the OVERALL CONTROL section
(page 22) determines the type of effect to be applied, while the VOICE section [DSP DEPTH] button lets you
individually set the amount of effect applied to each orchestration part.
ZSelect the Part You Want to Edit...........................................................................................................
Use the ORCHESTRATION [EDIT] button to select the part you want
to edit.
XPress the [DSP DEPTH] Button.............................................................................................................
DSP
DEPTH
CSet the DSP Depth ..................................................................................................................................
–+
RESET
021
Press the VOICE control section [DSP DEPTH] button. The current
DSP depth value of the selected part will appear on the LCD display panel.
PSR-2700PSR-1700
DSP Depth=0–6
08:Showtune 001:GrandPno
AccOff DSP Depth=0–6
Use the [+] and [–] buttons, the number buttons, the data dial, or the
[DSP DEPTH] button itself to set the desired DSP depth. The depth range
is from 00 (OFF: no effect, direct sound only) to 15 (maximum effect).
The default DSP depth value (06) can be recalled instantly by pressing
both the [+] and [–] buttons at the same time.
■Pan
The PSR-1700 and PSR-2700 delivers true stereo sound, and you can use this parameter to individually set
the stereo (pan) position of each orchestration part to create a broad stereo image of your sound.
ZSelect the Part You Want to Edit...........................................................................................................
Use the ORCHESTRATION [EDIT] button to select the part you want
to edit.
XPress the [PAN] Button..........................................................................................................................
PAN
CSet the Pan Position...............................................................................................................................
–+
RESET
021
Press the VOICE control section [PAN] button. The current pan value of
the selected part will appear on the LCD display panel.
PSR-2700PSR-1700
Panpot= 0–:Center
08:Showtune 001:GrandPno
AccOff Panpot= 0–:Center
Use the [+] and [–] buttons, the number buttons, the data dial, or the
[PAN] button itself to set the desired pan value. The pan range is from –7
(full left) to +7 (full right). A setting of “0” places the sound of the selected
part in the center of the stereo sound field. Other settings produce in-between positions. “–4”, for example, would place the sound between center
and full left.
The center pan position (0) can be recalled instantly by pressing both the
[+] and [–] buttons at the same time.
NOTES
| | | | | | | | | | | | | | | | | | | | | | | | | | | | | | | | | | | | | | | | | | | | | | | | | | | | | | | | | | | | | | | | | | | | | | | | | | | | | | | | | | | | | | | | | | | | | | | | | | | | | | | | | | | | | | | | | | | | | | | | | | | | | | | | | | | | | | | | | | | | |
• The new pan value will apply from the next note played — i.e. you
can’t pan the sound of a note while it is playing.
15
Page 18

Selecting & Playing the Voices
■Auto Harmony
Auto Harmony is used with the Auto Accompaniment feature (see page 24). It automatically adds appropriate
harmony notes to a single-note melody line you play on the keyboard. You can choose from 10 different types of
harmony that can be assigned to the right-hand orchestration parts.
NOTES
• The Auto Harmony feature cannot be used when Auto Accompaniment fingering mode 5 “Full” is selected (page 28).
ZTurn Auto Harmony ON .........................................................................................................................
HARMONY
TYPE
HARMONY
Press the [HARMONY] button so that its indicator lights. This turns
Auto Harmony ON.
NOTES
• The HARMONY can’t be engaged when Keyboard Percussion is ON.
XPress the [HARMONY TYPE] Button ....................................................................................................
HARMONY
TYPE
HARMONY
Press the VOICE control section [HARMONY TYPE] button. The
number of the currently selected harmony type will appear on the LCD display panel.
PSR-2700PSR-1700
Harm.=0–1:Duet
08:Showtune 001:GrandPno
AccOff Harm.=0–1:Duet
CSelect a Harmony Type ..........................................................................................................................
Use the [+] and [–] buttons, the number buttons, the data dial, or the
–+
RESET
021
[HARMONY TYPE] button itself to select the desired effect.
The Harmony Types
This harmony type produces a duophonic melody
with the second voice below the melody line. If
you turn both the R1 and R2 voices on (DUAL
01: Duet
02: 1 + 5
03: Country
04: Trio
05: Block
mode) the notes you play on the keyboard will be
played by the R1 voice, and the harmony notes by
the R2 voice. You can individually set the R1 and
R2 voices and voice parameters as required.
A parallel voice is produced a fifth above the
melody voice. As in the Duet type, the R1 and R2
voices can be set individually in the dual mode.
Similar to Duet, but the second voice is above the
melody line. The R1 and R2 voices can be set
individually in the dual mode.
This harmony type generates two voices in addition to the melody voice. Both of the harmony
voices are assigned to R2 in the dual mode.
Three or four notes are added to the melody to
produce four or five-note chords. In the dual mode
the highest and lowest voices (always one octave
apart) are assigned to R1, and the inner two or
three notes are assigned to R2.
06:4-way
close 1
07:4-way
close 2
08:4-way
open
09: Octave
10: Strum
Three harmony notes are generated to produce a
four-note chord. If both the R1 and R2 voices are
turned on (dual mode), the 1st (melody) and 3rd
notes are assigned to R1 while the 2nd and 4th
are assigned to R2.
Similar to the preceding type, but depending on
the chords played this type will sometimes produce a more colorful sound. The note assignment
in the dual mode is also different: 1st and 2nd
notes to R1, 3rd and 4th notes to R2.
Four-note chords with open voice (large intervals
between the notes). The result is a very “open”
sound. Since the harmony notes can be as much
as two octaves below the melody, avoid playing in
the lower registers. With certain voices you might
find that changing the octave (see “Octave” on
page 14) results in better sound. In the dual mode
the top (melody) note is assigned to R1 and all
three harmony notes are assigned to R2.
One note is added an octave below the melody.
In the dual mode the melody is assigned to R1
and the lower note to R2.
The notes and assignments are the same as in
the Block type, but the notes are arpeggiated.
| | | | | | | | | | | | | | | | | | | | | | | | | | | | | | | | | | | | | | | | | | | | | | | | | | | | | | | | | | | | | | | | | | | | | | | | | | | | | | | | | | | | | | | | | | | | | | | | | | | | | | | | | | | | | | | | | | | | | | | | | | | | | | | | | | | | | | | | | | | | |
16
Page 19

VTurn Auto Harmony ON or OFF as Required .......................................................................................
HARMONY
TYPE
Use the [HARMONY] button to turn Auto Harmony ON or OFF. Auto
Harmony is ON when the [HARMONY] button indicator is lit.
NOTES
• Only a single note can be played at a time on the keyboard (or the
right-hand section of the keyboard) when the Auto Harmony feature is
used.
HARMONY
• If you play more than one note at the same time while Auto Harmony
is ON, only the highest note will sound.
• Auto Harmony will only function when the Auto Accompaniment function is being used (page 24).
■Effects
The PSR-1700 and PSR-2700 have a range of 12 delay-based effects — in addition to the DSP effects (pages
15 and 22) — that can be selected and applied to the right-hand orchestration parts (the left-hand orchestration
parts are not affected).
ZTurn the Effect ON..................................................................................................................................
EFFECT
TYPE
Press the [EFFECT] button so that its indicator lights. This turns ON
the effect.
NOTES
• The EFFECT can’t be engaged when Keyboard Percussion is ON.
EFFECT
XPress the [EFFECT TYPE] Button .........................................................................................................
EFFECT
TYPE
Press the VOICE control section [EFFECT TYPE] button. The number
of the currently selected effect will appear on the LCD display panel.
PSR-2700PSR-1700
Eff.=0–4:Echo4
EFFECT
08:Showtune 001:GrandPno
AccOff Eff.=0–4:Echo4
CSelect an Effect.......................................................................................................................................
Use the [+] and [–] buttons, the number buttons, the data dial, or the
–+
RESET
021
[EFFECT TYPE] button itself to select the desired effect.
The Effects
01 Echo 1
02 Echo 2
03 Echo 3
04 Echo 4
3
3
05 Tremolo 1
06 Tremolo 2
07 Tremolo 3
08 Tremolo 4
09 Trill 1
10 Trill 2
11 Trill 3
12 Trill 4
3
VTurn the Effect ON or OFF as Required ...............................................................................................
EFFECT
TYPE
Use the [EFFECT] button to turn the effect ON or OFF. The selected
effect is ON when the [EFFECT] button indicator is lit.
NOTES
EFFECT
| | | | | | | | | | | | | | | | | | | | | | | | | | | | | | | | | | | | | | | | | | | | | | | | | | | | | | | | | | | | | | | | | | | | | | | | | | | | | | | | | | | | | | | | | | | | | | | | | | | | | | | | | | | | | | | | | | | | | | | | | | | | | | | | | | | | | | | | | | | | |
• You can change the effect type whether the effect is ON or OFF.
17
Page 20

Selecting & Playing the Voices
■Keyboard Percussion
The PSR-1700 and PSR-2700 have 8 different drum and percussion “kits” that can be played on the keyboard
when the Keyboard Percussion function is turned ON. The types of drum and percussion instruments played by
the various keys when Keyboard Percussion function is selected are marked by symbols above the keys.
ZTurn Keyboard Percussion ON .............................................................................................................
VOICE
SELECT
Press the [KEYBOARD PERCUSSION] button so that its indicator
lights to turn Keyboard Percussion ON. The percussion kit number will
appear on the LCD display panel.
PSR-2700PSR-1700
VCE=1–:STANDARD
08:Showtune 1:STANDARD
AccOff VCE=1–:STANDARD
KEYBOARD
PERCUSSION
XSelect a Percussion Kit..........................................................................................................................
Use the [+] and [–] buttons, the number buttons, the data dial, or the
–+
RESET
021
[VOICE SELECT] button to select the desired percussion kit (1 through
8). See page 338 for a complete list of the percussion kit instruments.
The Percussion Kits
1 Standard
2 Room
3 Rock
4 Electronic
NOTES
• The HARMONY, EFFECT, and TRANSPOSE functions (pages 16,
17, and 21) do not affect the percussion sounds. The HARMONY and
EFFECT functions will be canceled when Keyboard Percussion is
turned ON.
• The ORCHESTRATION [EDIT] button does not function when Keyboard Percussion is turned ON.
5 Analog
6 Jazz
7 Brush
8 Classic
■Pitch Bend
The PITCH BEND wheel to the left of the keyboard allows the pitch of
notes played on the keyboard to be bent up or down — roll the wheel away
+
–
PITCH BEND
● Setting the Pitch Bend Range
The maximum amount of pitch bend produced by the PITCH BEND wheel can be set anywhere from ±1
semitone to
| | | | | | | | | | | | | | | | | | | | | | | | | | | | | | | | | | | | | | | | | | | | | | | | | | | | | | | | | | | | | | | | | | | | | | | | | | | | | | | | | | | | | | | | | | | | | | | | | | | | | | | | | | | | | | | | | | | | | | | | | | | | | | | | | | | | | | | | | | | | |
18
±12 semitones (i.e. plus or minus one octave).
from you to bend up, and toward you to bend down (this situation can be
reversed, as described below). When the PITCH BEND wheel is moved
almost all the way in either direction, the current pitch bend range value
will appear on the LCD display panel (see below).
Page 21

ZCall the Pitch Bend Range Parameter ..................................................................................................
To set the pitch bend range, roll the PITCH BEND wheel all the way in
either direction so that the current range value appears on the LCD display
+
–
PITCH BEND
panel.
P.B.Range=+–02
PSR-2700PSR-1700
08:Showtune 001:GrandPno
AccOff P.B.Range=+–02
XSet the Pitch Bend Range......................................................................................................................
While holding the PITCH BEND wheel at its maximum position, use
–+
RESET
021
the [+] and [–] buttons, the number buttons, or the data dial to select the
desired pitch bend range. Use the [+/–] button to enter negative values. The
pitch bend range value is displayed in semitones (–12 through 12). If a minus setting is selected pitch bend wheel operation is reversed — i.e. roll the
wheel away from you to lower pitch. The default pitch bend range (02) can
be instantly recalled by pressing [+] and [–] buttons simultaneously.
CRelease the PITCH BEND Wheel...........................................................................................................
Release the PITCH BEND wheel when you’ve set the required pitch
bend range.
■Modulation
The MODULATION button on the side panel of the instrument, next to
the PITCH BEND wheel, can be used to apply pitch modulation (vibrato) to
most voices. The modulation speed is preset for each voice, but the depth
can be set as required.
ZCall the Modulation Depth Parameter ..................................................................................................
To set the modulation depth, press and hold the MODULATION button
so that the current depth value appears on the LCD display panel.
PSR-2700PSR-1700
Mod.Depth=2– 08:Showtune 001:GrandPno
AccOff Mod.Depth=2–
XSet the Modulation Depth ......................................................................................................................
While holding the MODULATION button, use the [+] and [–] buttons,
–+
RESET
021
the number buttons, or the data dial to select the desired modulation depth.
The available modulation depth range is from 1 (minimum depth) to 3
(maximum depth).
CRelease the MODULATION Button .......................................................................................................
Release the MODULATION button when you’ve set the required
modulation depth.
NOTES
| | | | | | | | | | | | | | | | | | | | | | | | | | | | | | | | | | | | | | | | | | | | | | | | | | | | | | | | | | | | | | | | | | | | | | | | | | | | | | | | | | | | | | | | | | | | | | | | | | | | | | | | | | | | | | | | | | | | | | | | | | | | | | | | | | | | | | | | | | | | |
• The same modulation depth setting may produce slightly different
effects with different voices.
19
Page 22

Overall Control
The OVERALL CONTROL section includes a range of parameters that, as their title
suggests, apply to the overall sound of the PSR-1700 and PSR-2700.
OVERALL CONTROL
SPLIT
■ Split Point Change
This function lets you set the split point (the key that separates the left-hand and right-hand orchestration
parts) to any key on the keyboard.
TEMPOTRANS-
POINT
METRONOME TOUCH
POSE
TUNING
0 OFF
.....................................
1 HALL 1
2 HALL 2
3 ROOM 1
4 ROOM 2
DSP TYPE
5 PLATE 1
6 PLATE 2
7 DELAY 1
8 DELAY 2
DSP
TYPE
RESPONSE
TOUCH
SENSE
ZTurn Auto Accompaniment OFF ...........................................................................................................
STYLE
SELECT
AUTO
ACCOMP
To set the split point for the left- and right-hand orchestration parts,
make sure that the [AUTO ACCOMP] indicator is off before proceeding.
NOTES
• The PSR-1700/PSR-2700 actually memorizes two separate split
points: one for the left- and right-hand orchestration parts, and one for
Auto Accompaniment mode. See page 25 for details on setting the
Auto Accompaniment split point.
XPress the [SPLIT POINT] Button ...........................................................................................................
SPLIT
POINT
Press the OVERALL CONTROL section [SPLIT POINT] button. The
key number of the current split point will appear on the LCD display panel.
PSR-2700PSR-1700
SplitPt=0–61:C#3
NOTES
• The key numbers for each note are listed above the keyboard. The C3
(middle C) key number, for example, is 60.
08:Showtune 001:GrandPno
AccOff SplitPt=0–61:C#3
CSet the Split Point...................................................................................................................................
SPLIT
POINT
The easiest way to set the split point is to press the key you want to set
as the split point while holding the [SPLIT POINT] button. The number of
the selected key will appear on the LCD display panel.
PSR-2700PSR-1700
SplitPt=0–65:F3
08:Showtune 001:GrandPno
AccOff SplitPt=0–65:F3
As with all other parameters, you can also use the [+] and [–] buttons,
the number buttons, or the data dial to select the desired split point. The
default split point (69) can be recalled instantly by pressing both the [+] and
[–] buttons at the same time.
NOTES
| | | | | | | | | | | | | | | | | | | | | | | | | | | | | | | | | | | | | | | | | | | | | | | | | | | | | | | | | | | | | | | | | | | | | | | | | | | | | | | | | | | | | | | | | | | | | | | | | | | | | | | | | | | | | | | | | | | | | | | | | | | | | | | | | | | | | | | | | | | | |
20
• The split-point key becomes the lowest key in the right-hand section of
the keyboard.
Page 23

■Transpose
The [TRANSPOSE] button makes it possible to shift the pitch of the PSR-1700/PSR-2700 up or down in
semitone intervals up to a maximum of 12 semitones (one octave). Transposing the pitch of the keyboard makes
it easier to play in difficult key signatures, and you can easily match the pitch of the keyboard to the range of a
singer or other instrumentalist.
ZPress the [TRANSPOSE] Button ...........................................................................................................
TRANS-
POSE
XSet the Desired Degree of Transposition.............................................................................................
–+
RESET
021
Press the OVERALL CONTROL section [TRANSPOSE] button. The
current transpose value will appear on the LCD display panel.
PSR-2700PSR-1700
Transpose= 0–0
08:Showtune 001:GrandPno
AccOff Transpose= 0–0
Use the [+] and [–] buttons, the number buttons, the data dial, or the
[TRANSPOSE] button itself to set the desired degree of transposition. Use
the [+/–] button to enter negative values.
The transposition range is from –12 to +12, with –12 corresponding to
downward transposition by 12 semitones (one octave), and +12 corresponding to upward transposition by 12 semitones. 00 is the “normal” keyboard
pitch value. The normal transpose value (00) can be recalled instantly by
pressing both the [+] and [–] buttons at the same time.
NOTES
• The new transpose value will apply from the next note played — i.e.
you can’t transpose the sound of a note while it is playing.
■Tuning
The [TUNING] button makes it possible to tune the pitch of the PSR-1700/PSR-2700 to match other instru-
ments. Tuning can be accomplished over a ±50-cent range (that’s 100 cents total, or one semitone) in 33 steps.
ZPress the [TUNING] Button....................................................................................................................
TUNING
XSet the Tuning ........................................................................................................................................
–+
RESET
021
Press the OVERALL CONTROL section [TUNING] button. The current
tuning value will appear on the LCD display panel.
PSR-2700PSR-1700
Tune= 0–0:440.0Hz 08:Showtune 001:GrandPno
AccOff Tune= 0–0:440.0Hz
Use the [+] and [–] buttons, the number buttons, the data dial, or the
[TUNING] button itself to set the desired tuning value.
The tuning range is from –16 (–50 cents) to +16 (+50 cents). “00” (±0
cents) is the “normal” tuning value. The normal tuning value (00) can be
recalled instantly by pressing both the [+] and [–] buttons at the same time.
NOTES
| | | | | | | | | | | | | | | | | | | | | | | | | | | | | | | | | | | | | | | | | | | | | | | | | | | | | | | | | | | | | | | | | | | | | | | | | | | | | | | | | | | | | | | | | | | | | | | | | | | | | | | | | | | | | | | | | | | | | | | | | | | | | | | | | | | | | | | | | | | | |
• The tuning setting is retained in memory even when the power switch
is turned off, as long as the backup batteries are installed or the AC
plug is connected.
21
Page 24

Overall Control
■DSP Type
The [DSP TYPE] button selects one of eight digital effects that you can use for extra depth and expressive
power. This button determines the type of effect to be used, while the [DSP DEPTH] button in the VOICE section allow the depth of the effect to be individually set for each orchestration part.
ZPress the [DSP TYPE] Button ...............................................................................................................
DSP
TYPE
0 OFF
DSP TYPE
.....................................
1 HALL 1
5 PLATE 1
2 HALL 2
6 PLATE 2
3 ROOM 1
7 DELAY 1
4 ROOM 2
8 DELAY 2
XSelect a DSP Type ..................................................................................................................................
–+
RESET
021
Press the OVERALL CONTROL section [DSP TYPE] button. The
number of the current DSP type will appear on the LCD display panel.
PSR-2700PSR-1700
DspTyp=1–:Hall1 08:Showtune 001:GrandPno
AccOff DspTyp=1–:Hall1
Use the [+] and [–] buttons, the number buttons, the data dial, or the
[DSP TYPE] button itself to select the desired DSP type (0 for OFF, or 1 …
8 as listed below). The default DSP type (1) can be recalled instantly by
pressing both the [+] and [–] buttons at the same time.
The DSP Types
1 Hall 1
2 Hall 2
3 Room 1
4 Room 2
5 Plate 1
6 Plate 2
7 Delay 1
8 Delay 2
NOTES
• DSP effects may sound different with different voices.
• The DSP Type setting is retained in memory even when the power
For a spacious reverb sound use one of the Hall settings. These effects
simulate the natural reverberation of a concert hall. Hall 2 has a longer
reverb time and therefore simulates a larger hall than Hall 1.
These settings add relatively short reverb effects to the sound that are
similar to the type of acoustic reverberation you might hear in different
rooms.
These are simulations of the large plate reverb devices traditionally
used in professional recording studios.
Delay 1 produces a distinct series of delay repeats, while Delay 2 produces a smoother multiple-delay sound.
switch is turned off, as long as the backup batteries are installed or
the AC plug is connected.
| | | | | | | | | | | | | | | | | | | | | | | | | | | | | | | | | | | | | | | | | | | | | | | | | | | | | | | | | | | | | | | | | | | | | | | | | | | | | | | | | | | | | | | | | | | | | | | | | | | | | | | | | | | | | | | | | | | | | | | | | | | | | | | | | | | | | | | | | | | | |
22
Page 25

■Touch Sensitivity
This function varies the touch sensitivity of the keyboard. Use this capability to adjust the keyboard touch
sensitivity for the best results with your own particular playing style.
ZPress the [TOUCH SENSE] Button .......................................................................................................
TOUCH
SENSE
TOUCH
RESPONSE
XTurn Touch Sensitivity ON ....................................................................................................................
TOUCH
SENSE
TOUCH
RESPONSE
Press the OVERALL CONTROL section [TOUCH SENSE] button. The
current sensitivity setting will appear on the LCD display panel.
PSR-2700PSR-1700
Touch=4–:Mid-High
08:Showtune 001:GrandPno
AccOff Touch=4–:Mid-High
Press the [TOUCH RESPONSE] button so that its indicator lights. This
turns touch sensitivity ON.
CSet the Sensitivity ..................................................................................................................................
Use the [+] and [–] buttons, the number buttons, the data dial, or the
–+
RESET
021
[TOUCH SENSE] button itself to set the desired sensitivity value (1 … 5).
A setting of “1” produces the least touch sensitivity, and therefore the
smallest dynamic range. A setting of “5” produces the greatest sensitivity
and broadest dynamic range. The default touch sensitivity value (4) can be
recalled instantly by pressing both the [+] and [–] buttons at the same time.
VTurn Touch Sensitivity ON or OFF as Required..................................................................................
TOUCH
SENSE
TOUCH
RESPONSE
Use the [TOUCH RESPONSE] button to turn touch sensitivity ON or
OFF as required. When OFF (i.e. when the indicator is off) the same volume is produced no matter how hard you play on the keyboard. Touch sensitivity can be turned OFF to produce a more realistic effect with voices
that normally do not have touch response: e.g. organ and harpsichord.
| | | | | | | | | | | | | | | | | | | | | | | | | | | | | | | | | | | | | | | | | | | | | | | | | | | | | | | | | | | | | | | | | | | | | | | | | | | | | | | | | | | | | | | | | | | | | | | | | | | | | | | | | | | | | | | | | | | | | | | | | | | | | | | | | | | | | | | | | | | | |
23
Page 26

Auto Accompaniment
The PSR-1700 and PSR-2700 have 100 accompaniment styles that can be used to provide fullyorchestrated Auto Accompaniment. When the Auto Accompaniment function is turned ON, the
PSR-1700 and PSR-2700 create fully-orchestrated rhythm, bass, and chord accompaniment
based on chords you play with the left hand in the Auto Accompaniment section of the keyboard
(i.e. all keys to the left of the Auto Accompaniment split point). The right-hand section of the keyboard is available for normal playing.
The default Auto Accompaniment split point
is the G2 (55) key. The Auto Accompaniment
section of the keyboard consists of all keys to
its left. The Auto Accompaniment split point
can be set to any other key as described in
“Setting the Auto Accompaniment Split Point”
on page 25.
Auto Accompaniment
Left-hand fingering specifies
the auto accompaniment chords.
AUTO ACCOMPANIMENT
Normal
▼
The right-hand plays
normally.
NOTES
• The PSR-1700/PSR-2700 also has a special “Full” Auto Accompaniment fingering mode in which chords
played anywhere on the keyboard determine the Auto Accompaniment chords. See page 28 for details.
STYLE
SELECT
MODE
................
1 CHORD 1
2 CHORD 2
3 SINGLE
4 MULTI
5 FULL
AUTO
ACCOMP
SYNC-START/STOP BREAK
FADE IN/OUTSTART/STOP INTRO FILL IN 1 FILL IN 2 ENDING VARIATION
ACCOMPANIMENT CONTROL
FINGE-
RING
AUTO ACCOMPANIMENT
ACCOMP
VOLUME
RHYTHM
1 2
REVOICE
RHYTHMIC
BASS
CHORD
1 2
TRACK
A B
■Selecting a Style
Any of the 100 accompaniment styles can be selected via the normal editing procedure. This can be done
either before or during accompaniment playback. See page 78 for descriptions of all 100 styles.
NOTES
• Eight additional styles are provided on floppy disk. These can be loaded, one at a time, into the PortaTone’s “Custom Style” memory location — style number “00” — and used in the same way as the
100 preset styles. See page 60 for instructions on loading styles from disk.
PAD
CHORDPHRASE
1 2
ZPress the [STYLE SELECT] Button ......................................................................................................
STYLE
SELECT
AUTO
ACCOMP
When you press the [STYLE SELECT] button the currently selected
style number and name will appear on the LCD display panel.
PSR-2700PSR-1700
Styl=0–8:Showtune
08:Showtune 001:GrandPno
AccOff Styl=0–8:Showtune
XSelect a Style Number............................................................................................................................
Use the [+] and [–] buttons, the number buttons, the data dial, or the
–+
RESET
| | | | | | | | | | | | | | | | | | | | | | | | | | | | | | | | | | | | | | | | | | | | | | | | | | | | | | | | | | | | | | | | | | | | | | | | | | | | | | | | | | | | | | | | | | | | | | | | | | | | | | | | | | | | | | | | | | | | | | | | | | | | | | | | | | | | | | | | | | | | |
24
02
1
[STYLE SELECT] button itself to select the required style number (see
page 9 for editing procedure details).
Page 27

■Setting the Auto Accompaniment Split Point
NOTES
STYLE
SELECT
AUTO
ACCOMP
SPLIT
POINT
To set the Auto Accompaniment split point, first turn Auto Accompani-
ment ON — press the [AUTO ACCOMP] button so that its indicator lights
— then proceed with steps 2 and 3 as described in “Split Point Change” on
page 20. The default Auto Accompaniment split point (55) can be instantly
recalled by pressing both the [+] and [–] buttons at the same time.
Auto Accompaniment split point
Auto
Accompaniment
Orchestration split point
Left voice
Auto Accompaniment
Left voice Right voice
Left voice Right voice
Orchestration split point
Auto Accompaniment
Orchestration split point
▼▼
Auto Accompaniment split point
▼▼
Right voice
▼
• If the Auto Accompaniment split point is set at a lower key than
the orchestration split point, the L1 and/or L2 voice will sound
between the Auto Accompaniment and orchestration split
points.
• If the Auto Accompaniment split point is set at a higher key
than the orchestration split point, the L1 and/or L2 voice will
sound throughout the entire Auto Accompaniment section.
• If the Auto Accompaniment “Full” fingering mode is selected,
the L1 and/or L2 voice will sound to the left of the orchestration
split point while the R1 and/or R2 voice will sound to the right of
the orchestration split point.
■Auto Accompaniment Fingering
The PSR-1700 and PSR-2700 have 5 Auto Accompaniment fingering modes, selected via the [FINGERING]
button.
ZPress the [FINGERING] Button .............................................................................................................
FINGE-
RING
MODE
................
1 CHORD 1
2 CHORD 2
3 SINGLE
4 MULTI
5 FULL
XSelect a Fingering Mode ........................................................................................................................
–+
RESET
| | | | | | | | | | | | | | | | | | | | | | | | | | | | | | | | | | | | | | | | | | | | | | | | | | | | | | | | | | | | | | | | | | | | | | | | | | | | | | | | | | | | | | | | | | | | | | | | | | | | | | | | | | | | | | | | | | | | | | | | | | | | | | | | | | | | | | | | | | | | |
021
When you press the [FINGERING] button the currently selected Auto
Accompaniment fingering number and type name will appear on the LCD
display panel.
PSR-2700PSR-1700
Fingrng=1–:Chord1
08:Showtune 001:GrandPno
C Fingrng=1–:Chord1
Use the [+] and [–] buttons, the number buttons, the data dial, or the
[FINGERING] button itself to select the required fingering mode (see page
9 for editing procedure details).
25
Page 28

Auto Accompaniment
● Mode 1: Chord 1
PSR-1700
Fingrng=1–:Chord1
PSR-2700
08:Showtune 001:GrandPno
C Fingrng=1–:Chord1
Example for “C” chords
C
CMadd
Cm
Cmadd
CmM
C sus
7
b9
C
7
C aug
7
( )
6
CM
Cm
Cm
Cdim
C
7
C
7
Csus
9
6
9
9
b13
4
9
9
9
( )
4
( )
CMCM
C
6
( )
Cm
Cm
( )
Cdim
C
7
( )
C
7
( )
C
1+2+5
( )
( )
7
9
7
11
#11
#9
The Chord 1 mode is ideal if you already know how to play chords
on a keyboard, since it allows you to supply your own chords for the
Auto Accompaniment feature.
The PSR-1700/PSR-2700 will accept the following chord types:
Major [M] ................................................................... 1 - 3 - 5
#11
CM
7
( )
( )
Caug
( )
b5
Cm
7
( ) ( )
CmM
7
( )
( )
C
7
7
( )
13
C
7
( )
( )
CM aug
7
( )
Major sixth [M6].................................................... 1 - 3 - 5 - 6
Major seventh [M7] ........................................... 1 - 3 - (5) - 7
Major seventh sharp eleventh [M7#11] ..
1 - (2) - 3 - #4 - (5) - 7
Major add ninth [Madd9] ...................................... 1 - 2 - 3 - 5
Major ninth [M9] ........................................... 1 - 2 - 3 - (5) - 7
Major sixth add ninth [6 9] ............................ 1 - 2 - 3 - (5) - 6
Augmented [aug]..................................................... 1 - 3 - #5
Minor [m] ................................................................. 1 - b3 - 5
Minor sixth [m6].................................................. 1 - b3 - 5 - 6
Minor seventh [m7] ........................................ 1 - b3 - (5) - b7
Minor seventh flatted fifth [m7b5] ................... 1 - b3 - b5 - b7
Minor add ninth [madd9] .................................... 1 - 2 - b3 - 5
Minor ninth [m9] ........................................ 1 - 2 - b3 - (5) - b7
Minor eleventh [m11] ........................ 1 - (2) - b3 - 4 - 5 - (b7)
Minor major seventh [mM7] .............................1 - b3 - (5) - 7
Minor major ninth [mM9] ............................ 1 - 2 - b3 - (5) - 7
Diminished [dim].................................................... 1 - b3 - b5
Diminished seventh [dim7]............................... 1 - b3 - b5 - 6
Seventh [7]....................................................... 1 - 3 - (5) - b7
Seventh suspended fourth [7sus4] .................... 1 - 4 - 5 - b7
Seventh ninth [7 9] ..................................... 1 - 2 - 3 - (5) - b7
Seventh sharp eleventh [7#11] ......... 1 - (2) - 3 - #4 - (5) - b7
Seventh thirteenth [7 13] ............................ 1 - 3 - (5) - 6 - b7
or 2 - 3 - 5 - 6 - b7
Seventh flatted ninth [7b9] ........................1 - b2 - 3 - (5) - b7
Seventh flatted thirteenth [7b13] ................ 1 - 3 - 5 - b6 - b7
Seventh sharp ninth [7#9] ...................... (1) - #2 - 3 - (5) - b7
Major seventh augmented [M7aug] ................... 1 - 3 - #5 - 7
Seventh augmented [7aug]............................ (1) - 3 - #5 - b7
Suspended fourth [sus4] ........................................... 1 - 4 - 5
One plus two plus five [1+2+5].................................. 1 - 2 - 5
NOTES
• Notes in parentheses can be omitted.
• A perfect fifth (1+5) produces accompaniment based only
on the root and fifth which can be used with many major
and minor chords.
• An octave (1+8) produces accompaniment based only on
the root.
• If three adjacent keys are played simultaneously (white and
black keys), chord accompaniment will be cancelled and
only the rhythm accompaniment will sound. (Chord 1/Chord
2 mode)
* 6 9 chords are only recognized in root position. All other
inversions are interpreted as m11.
* m6 chords are only recognized in root position. All other
b
inversions are interpreted as m7
5.
* 1+2+5 chords are only recognized in root position. All
other inversions are interpreted as sus4.
* With aug and dim7 chords the lowest note played is as-
sumed to be the root.
#
* With 7
11 chords the lowest note played is assumed to be
the root or
b
7.
• The chord fingerings listed are all in “root position”, but
other inversions can be used — with the following exceptions:
* M6 chords are only recognized in root position. All other
inversions are interpreted as m7.
| | | | | | | | | | | | | | | | | | | | | | | | | | | | | | | | | | | | | | | | | | | | | | | | | | | | | | | | | | | | | | | | | | | | | | | | | | | | | | | | | | | | | | | | | | | | | | | | | | | | | | | | | | | | | | | | | | | | | | | | | | | | | | | | | | | | | | | | | | | | |
26
Page 29

● Mode 2: Chord 2 This is essentially the same as the Chord 1 mode, above, except
PSR-1700
Fingrng=2–:Chord2
PSR-2700
08:Showtune 001:GrandPno
C Fingrng=2–:Chord2
that the lowest note played in the Auto Accompaniment section of the
keyboard will be played by the bass part rather than the chord root.
C
C on E
C on G
● Mode 3: Single
PSR-1700
Fingrng=3–:Single
PSR-2700
08:Showtune 001:GrandPno
C Fingrng=3–:Single
C
Cm
C
7
Cm
7
SINGLE mode fingering makes it simple to produce beautifully
orchestrated accompaniment using major, seventh, minor and minorseventh chords by pressing a minimum number of keys in the Auto
Accompaniment section of the keyboard. The accompaniment produced is perfectly matched to the currently selected accompaniment
style.
Major Chords:
If you press a “C” key in the left-hand section of the keyboard, for
example, a C-major accompaniment will be played. Press another key
in the left-hand section of the keyboard to select a new chord. The key
you press will always determine the “root” of the chord played (i.e.
“C” for a C chord).
Minor Chords:
Simultaneously press the root key and a black key to its left.
Seventh Chords:
Simultaneously press the root key and a white key to its left.
Minor-seventh Chords:
Simultaneously press the root key and both a white and black key
to its left.
● Mode 4: Multi
PSR-1700
Fingrng=4–:Multi
PSR-2700
08:Showtune 001:GrandPno
C Fingrng=4–:Multi
NOTES
• The Auto Accompaniment will continue playing even if you lift
your fingers from the Auto Accompaniment keys. You only need
to press the Auto Accompaniment keys when changing chords.
This is a combination of the Single and Chord 1 modes. In this
mode the PSR-1700/PSR-2700 automatically discriminates between
Single and Chord 1 mode fingerings and generates the appropriate
accompaniment.
NOTES
• If more than two keys are played and all but the highest key are
black keys, and the chord is not recognized by the Chord 1
mode, the highest note will be interpreted as the root of a minor
(m) chord.
• If more than three keys are played and, excluding the highest
key, are a mixture of black and white keys, and the chord is not
recognized by the Chord 1 mode, the highest note will be interpreted as the root of a minor-seventh (m7) chord.
• If more than two keys are played and all but the highest key are
white keys, and the chord is not recognized by the Chord 1
mode, the highest note will be interpreted as the root of a seventh (7) chord.
| | | | | | | | | | | | | | | | | | | | | | | | | | | | | | | | | | | | | | | | | | | | | | | | | | | | | | | | | | | | | | | | | | | | | | | | | | | | | | | | | | | | | | | | | | | | | | | | | | | | | | | | | | | | | | | | | | | | | | | | | | | | | | | | | | | | | | | | | | | | |
27
Page 30

Auto Accompaniment
TEMPO
METRONOME
● Mode 5: Full
PSR-1700
Fingrng=5–:Full
PSR-2700
08:Showtune 001:GrandPno
C Fingrng=5–:Full
Playing Chords When the
Accompaniment is Stopped
■Tempo Control
In this mode chords played anywhere on the keyboard are detected
and used for Auto Accompaniment. Otherwise the keyboard functions
normally, and the entire range is available for playing. Chord recognition is the same as in the Chord 1 mode. Please note that in this mode
all notes you play on the keyboard at any one time will be interpreted
as the Auto Accompaniment chord.
NOTES
• A single note played more than one octave below the lowest
note in a chord will be interpreted as a bass note, and notes
played more than an 11th above the lowest chord note will be
interpreted as melody.
Chords played in the Auto Accompaniment section of the keyboard are
also detected and played by the PSR-1700/PSR-2700 Auto Accompaniment
system when the accompaniment is stopped (except in the Full fingering
mode). In this case the bass note and chord voices are selected automatically.
The [TEMPO] button can be used to control the tempo of AUTO ACCOMPANIMENT, SONG MEMORY
and MULTI PAD playback (see pages 43 and 46).
ZPress the [TEMPO] Button.....................................................................................................................
Press the OVERALL CONTROL section [TEMPO] button. The current
tempo (quarter-note beats per minute) will appear on the LCD display
panel.
PSR-2700PSR-1700
Tempo œ=1–28
08:Showtune 001:GrandPno
C Tempo œ=1–28
XSet the Tempo.........................................................................................................................................
Use the [+] and [–] buttons, the number buttons, the data dial, or the
–+
RESET
021
[TEMPO] button itself to set the desired tempo.
Each accompaniment style has a different “default” tempo which is automatically set whenever a new style is selected (but not when a new style
is selected while the accompaniment is playing). The default tempo for the
currently selected accompaniment style can be recalled instantly by pressing both the [+] and [–] buttons at the same time.
28
● The [METRONOME] Button
TEMPO
The PSR-1700 and PSR-2700 include a metronome function that you’ll
use primarily with the recording functions described on page 39. If you
press the [METRONOME] button so that its indicator lights when using
Auto Accompaniment, the metronome will sound at the currently set tempo
when the synchro-start mode is engaged, and while the accompaniment is
playing.
METRONOME
| | | | | | | | | | | | | | | | | | | | | | | | | | | | | | | | | | | | | | | | | | | | | | | | | | | | | | | | | | | | | | | | | | | | | | | | | | | | | | | | | | | | | | | | | | | | | | | | | | | | | | | | | | | | | | | | | | | | | | | | | | | | | | | | | | | | | | | | | | | | |
Page 31

■Accompaniment Control
The PSR-1700 and PSR-2700 provide a range of accompaniment “sections” — introduction, fill-ins, break,
variations on the main pattern, ending — that you can select to control the “flow” of the accompaniment to
achieve the desired musical results. Accompaniment start/stop and sections are controlled by the ACCOMPANIMENT CONTROL buttons.
● Straight Start ...........................................................................................................................................
SELECT
ACCOMP
START/STOP
4/4 time
1st beat
2nd beat
3rd beat
4th beat
3/4 time
1st beat
2nd beat
3rd beat
6/8 time
1st beat
2nd beat
3rd beat
4th beat
5th beat
6th beat
STYLE
AUTO
BEAT
BEAT
BEAT
The [START/STOP] button starts the selected accompaniment style
immediately.
Press the [AUTO ACCOMP] button so that its indicator lights before
starting the accompaniment. The accompaniment will start with the rhythm
sound only when the [START/STOP] button is pressed, then the bass and
chord parts will begin playing as soon as the first note or chord is played on
the Auto Accompaniment section of the keyboard.
NOTES
• A different accompaniment style can be selected at any time while the
accompaniment is playing. The style number and name on the LCD
display panel will change as soon as the selection is made, but the
new style will begin playback from the top of the next measure. The
only exception is if you change styles while an intro is playing (see
page 30), in which case the new style begin playing after the intro has
finished. The tempo will not change when the new style begins playing.
The Beat Indicator
The four BEAT indicator LEDs located above the AUTO ACCOMPANIMENT control section flash to indicate the tempo and beat as the accompaniment plays. The LEDs flash individually in sequence on each beat of the
measure. In 4/4, 3/4, and 6/8 time, for example, the beat indicator LEDs
will flash as shown to the left.
NOTES
• Each accompaniment style has a preset “normal” tempo which is automatically selected whenever the style is selected while the accompaniment is stopped. The current tempo is maintained if you select a
different style during accompaniment playback (except when the One
Touch Setting function is used — page 36). You can change the
tempo as required by using the TEMPO function described on page
28.
● Synchro Start ..........................................................................................................................................
Press the [SYNC-START/STOP] button if you want the accompani-
SYNC-START/STOP
ment to start when you play the first note or chord on the keyboard. In this
case the accompaniment is started by playing in the left-hand section of the
keyboard.
NOTES
• If the AUTO ACCOMP mode is OFF, playing anywhere on the keyboard causes the rhythm-only accompaniment to start.
If you press the [SYNC-START/STOP] button, the BEAT indicator
LEDs will flash at the current tempo. The synchro start mode can be disengaged by pressing the [SYNC-START/STOP] button again so that its indi-
cator goes out.
| | | | | | | | | | | | | | | | | | | | | | | | | | | | | | | | | | | | | | | | | | | | | | | | | | | | | | | | | | | | | | | | | | | | | | | | | | | | | | | | | | | | | | | | | | | | | | | | | | | | | | | | | | | | | | | | | | | | | | | | | | | | | | | | | | | | | | | | | | | | |
29
Page 32

Auto Accompaniment
● Starting the Accompaniment with an Introduction .............................................................................
INTRO
INTRO
VARIATION
A B
Any of the accompaniment styles can be started with an appropriate intro-
duction by pressing the [INTRO] button and then the [START/STOP] button.
If you press the [SYNC-START/STOP] button and then the [INTRO] button,
the accompaniment will start from the introduction as soon as a chord is detected in the Auto Accompaniment section of the keyboard.
Once the [INTRO] button is pressed, the [INTRO] indicator will be lit
continuously and the VARIATION [A] or [B] indicator will flash to indicate
which section will play when the introduction has finished. You can change the
“destination” section by pressing the VARIATION [A] or [B] button while its
indicator is flashing. When the introduction ends, the [INTRO] indicator will
go out and the [A] or [B] indicator will light continuously. The introductions
for the VARIATION [A] and [B] sections are different. The A intro has no
chord progression while the B intro has its own chord progression. The actual
format of the intro, however, depends on the selected style. Although it is
generally not advisable to change chords manually while the B intro is playing,
the A intro has no progression of its own so you can play your own chords as
required.
NOTES
• It is possible to start the accompaniment from any section — even the
ending — by pressing the corresponding button prior to pressing the
[START/STOP] button. The destination MAIN [A] or [B] section can be
selected as described above.
• The [INTRO] button can be used to select the introduction pattern even
while the accompaniment is playing.
● The Main [A] and [B] Sections...............................................................................................................
VARIATION
Each accompaniment style has two main sections — [A] and [B]. These are
variations of the same musical style. If the VARIATION [A] or [B] button is
A B
pressed while the accompaniment is playing, the corresponding section will
begin from the top of the next measure. You can also select [A] or [B] before
starting the accompaniment.
NOTES
• The Main [A] section is automatically selected whenever the power switch
is turned on (the VARIATION [A] indicator will be lit).
● Adding Fill-ins & Breaks ........................................................................................................................
The PSR-1700 and PSR-2700 provide two types of fill-ins that can be used
FILL IN 1 FILL IN 2
as musical transitions between sections of a song or simply to add variety
where required. Press the [FILL IN 1] button at any time while the accompaniment is playing to add a one-measure fill-in and or return to the current MAIN
section, or press the [FILL IN 2] button to add a one-measure fill-in and go to
the other MAIN section. Although there are two FILL IN buttons there are
actually four fill-ins per style: FILL IN 1 for the MAIN [A] section, FILL IN 1
for the MAIN [B] section, FILL IN 2 for the transition MAIN [A] to [B], and
FILL IN 2 for the transition MAIN [B] to [A].
BREAK
While the fill-ins are one measure long, the BREAK is two measures. The
first measure is similar to a fill-in while the second measure is an actual rhythmic break — a thinner arrangement with drums and percussion predominating.
Like the fill-ins, there are actually two BREAK patterns — one for the MAIN
[A] section and one for the MAIN [B] section.
| | | | | | | | | | | | | | | | | | | | | | | | | | | | | | | | | | | | | | | | | | | | | | | | | | | | | | | | | | | | | | | | | | | | | | | | | | | | | | | | | | | | | | | | | | | | | | | | | | | | | | | | | | | | | | | | | | | | | | | | | | | | | | | | | | | | | | | | | | | | |
30
Page 33

FILL IN 1 FILL IN 2 BREAK
VARIATION
A B
If the MAIN A section is playing, for example, the
[A] indicator will flash while FILL IN 1 or the
BREAK plays, and the [B] indicator will flash while
FILL IN 2 plays. You can change the section that will
begin playing after the selected fill-in or break by
pressing the desired section button while the indicator
is still flashing.
NOTES
• If you hold the [FILL IN 1], [FILL IN 2] or [BREAK] button, the fill-in or
second measure of the break pattern will repeat until the button is
released, then the MAIN A or B section will play from the beginning of
the next measure.
• If the [FILL IN 1], [FILL IN 2] or [BREAK] button is pressed after the
last beat of a measure, the fill-in or break will begin from the first beat
of the next measure. If pressed at any other time the fill-in or break will
begin immediately.
• It is also possible to start the accompaniment with a fill-in or break by
pressing the desired fill-in or break button prior to pressing the
[START/STOP] button. The destination MAIN [A] or [B] section can be
selected in the normal way.
● Stopping the Accompaniment...............................................................................................................
An accompaniment in progress can be stopped immediately by pressing
START/STOP ENDINGSYNC-START/STOP
the [START/STOP] button or the [SYNC-START/STOP] button. In the
latter case the synchro start mode will be engaged when the accompaniment
stops. The accompaniment can also be stopped with an appropriate ending
by pressing the [ENDING] button. The endings for the MAIN [A] and [B]
sections are different. The A ending has no chord progression while the B
ending has its own chord progression. The actual format of the ending,
however, depends on the selected style.
INTRO A
INTRO B
NOTES
• The ending will begin from the first beat of the next measure.
• If the [FILL IN 1], [FILL IN 2], or [BREAK] button is pressed while the
ending pattern is playing, a fill-in or break will be played, followed by a
return to the MAIN A or B pattern.
Accompaniment Structure Diagram
FILL 1 A
BREAK A
MAIN A
FILL 2 A
FILL 2 B
MAIN B
FILL 1 B
BREAK B
ENDING A
ENDING B
| | | | | | | | | | | | | | | | | | | | | | | | | | | | | | | | | | | | | | | | | | | | | | | | | | | | | | | | | | | | | | | | | | | | | | | | | | | | | | | | | | | | | | | | | | | | | | | | | | | | | | | | | | | | | | | | | | | | | | | | | | | | | | | | | | | | | | | | | | | | |
31
Page 34

Auto Accompaniment
● Fade In & Fade Out .................................................................................................................................
The [FADE IN/OUT] button can be used to produce smooth accompaniment and melody fade-ins or fade-
outs.
Start Playback with a Fade-in
FADE IN/OUT FADE IN/OUT FADE IN/OUT
You can start the accompaniment with a fade-in by pressing the
[FADE-IN/OUT] button before starting playback. The [FADE-IN/
OUT] button indicator will light continuously until the accompani-
ment is started. The fade-in will begin automatically as soon as the
accompaniment is started. The [FADE-IN/OUT] button indicator
will flash during the fade-in, and will go out when the fade-in is
complete.
FADE IN/OUT
FADE IN/OUT
Fade-out to stop the accompaniment during Playback
Press the [FADE-IN/OUT] button during accompaniment play-
back to fade out the accompaniment and melody sound. The
[FADE-IN/OUT] button indicator will flash during the fade-out,
and will go out when the fade-out is complete.
■Accompaniment V olume
While the VOICE control section [VOL] button can be used to set the volume levels of the orchestration
parts, the [ACCOMP V OLUME] button can be used to adjust the volume of the selected accompaniment in
relation to the voices.
ZPress the [ACCOMP VOLUME] Button .................................................................................................
ACCOMP
VOLUME
Press the AUTO ACCOMPANIMENT control section [ACCOMP VOL-
UME] button. The current accompaniment volume value will appear on the
LCD display panel.
PSR-2700PSR-1700
Accomp.Volume=2–1
08:Showtune 001:GrandPno
C Accomp.Volume=2–1
XSet the Volume .......................................................................................................................................
Use the [+] and [–] buttons, the number buttons, the data dial, or the
–+
RESET
| | | | | | | | | | | | | | | | | | | | | | | | | | | | | | | | | | | | | | | | | | | | | | | | | | | | | | | | | | | | | | | | | | | | | | | | | | | | | | | | | | | | | | | | | | | | | | | | | | | | | | | | | | | | | | | | | | | | | | | | | | | | | | | | | | | | | | | | | | | | |
32
021
[ACCOMP V OLUME] button itself to set the desired volume. The volume
range is from 00 (no sound) to 24 (maximum volume). The default volume
value (21) can be recalled instantly by pressing both the [+] and [–] buttons
at the same time.
Page 35

■The Track Buttons
RHYTHM
1 2
BASS
RHYTHMIC
CHORD
1 2
TRACK
PAD
CHORDPHRASE
1 2
The Auto Accompaniment system includes eight TRACK buttons
which allow you to control the accompaniment arrangement in real
time. You can turn tracks on or off while playing for extra accompaniment variety.
The various tracks are turned on or off by pressing the corresponding TRACK button. When a part is turned off the corresponding indicator will go out. To silence the bass part, for example, press the
TRACK [BASS] button so that its indicator goes out. Press the button
again to turn that part back on.
NOTES
• The indicators for all tracks that contain data in any section will
light whenever an accompaniment style is selected. (Depending on the selected accompaniment style, some tracks may not
contain any data.)
● What’s In the Tracks...............................................................................................................................
Here’s how the tracks are normally used:
RHYTHM 1: This is the main rhythm track, and usually plays a drum kit.
RHYTHM 2: Additional rhythm. Turning the RHYTHM 2 track ON will usually increase
the “energy” of the rhythm. In many styles this track plays percussion instruments such as congas, bongos, etc. This means you can turn off the
RHYTHM 1 track and use only RHYTHM 2 for a “light” rhythm sound.
BASS: The BASS track always plays a bass line, but the voice will change to fit
the selected style … acoustic bass, synth bass, tuba, etc.
RHYTHMIC CHORD 1 & 2:
Both these tracks provide the rhythmic chordal accompaniment required by
each style. You’ll find guitar, piano, and other chordal instruments here.
PAD CHORD: This track plays long chords where necessary, using sustained instruments
such as strings, organ, choir.
PHRASE 1 & 2: This is where the musical embellishments reside. The PHRASE tracks are
used for punchy brass stabs, arpeggiated chords, and other extras that make
the accompaniment more interesting.
Try different combinations of tracks with each style. Some styles will sound best with the full arrangement
(all tracks ON), while others might suit your needs better if a smaller arrangement is used. To “thin out” an
arrangement, the PHRASE 1 and PHRASE 2 tracks are the first ones you’ll want to turn OFF.
Another way to use the tracks is to gradually build up the arrangement during the course of a song. Start
with a small arrangement — e.g. RHYTHM 1, BASS, and RHYTHMIC CHORD 1 — then add tracks one by
one as you want to thicken the musical texture.
Some styles will actually sound quite different depending on the combination of tracks you choose. Try,
for example, just RHYTHM 1, BASS, and PAD CHORD.
| | | | | | | | | | | | | | | | | | | | | | | | | | | | | | | | | | | | | | | | | | | | | | | | | | | | | | | | | | | | | | | | | | | | | | | | | | | | | | | | | | | | | | | | | | | | | | | | | | | | | | | | | | | | | | | | | | | | | | | | | | | | | | | | | | | | | | | | | | | | |
33
Page 36

Auto Accompaniment
■ Re-voicing the Tracks
To make the TRACK buttons even more versatile, the PSR-1700 and PSR-2700 feature a REVOICE function
that lets you individually change the voices and several related VOICE section parameters assigned to each
track. The parameters that can be changed using the REVOICE function are as follows:
• Voice Number (Percussion Kit, Sampled Voice Number (PSR-2700))
• Volume
• Pan
• DSP Depth
• Octave
ZSelect a Track to Re-voice.....................................................................................................................
RHYTHM
1 2
BASS
RHYTHMIC
CHORD
1 2
Press the TRACK button corresponding to the track you want to re-voice
while holding the [REVOICE] button. Both the selected TRACK and
[REVOICE] button indicators will flash. At the same time, the number of
REVOICE
TRACK
the voice currently assigned to the selected track will appear on the LCD
display panel.
PSR-2700PSR-1700
VCE=03–4:FngrBass
NOTES
• At this point you can play the selected track’s voice on the keyboard.
• Keyboard percussion is automatically turned on if the RHYTHM 1 or 2
track is selected.
08:Showtune 034:FngrBass
C VCE=03–4:FngrBass
XMake the Required Voice Settings........................................................................................................
Use the [+] and [–] buttons, the number buttons, the data dial, or the
–+
RESET
VOICE
SELECT
KEYBOARD
PERCUSSION
021
VOL OCTAVE DSP
SAMPLED
VOICE
DEPTH
(PSR-2700)
PAN
[VOICE SELECT] button itself to select a new voice for the selected
track. You can also use the [VOL], [OCTAVE], [DSP DEPTH], and [PAN]
buttons to change the corresponding parameters for the selected voice.
NOTES
• You can use the REVOICE function either while the accompaniment is
playing or stopped.
• You cannot edit the orchestration parts while the REVOICE indicator
is flashing.
• You can play the keyboard and hear the re-voiced voice except for
octave changes.
CRepeat For All Tracks To Be Re-voiced ...............................................................................................
Repeat steps Z and X to re-voice all the tracks you want to change.
| | | | | | | | | | | | | | | | | | | | | | | | | | | | | | | | | | | | | | | | | | | | | | | | | | | | | | | | | | | | | | | | | | | | | | | | | | | | | | | | | | | | | | | | | | | | | | | | | | | | | | | | | | | | | | | | | | | | | | | | | | | | | | | | | | | | | | | | | | | | |
34
Page 37

VConfirm the Re-voiced Data ..................................................................................................................
RHYTHM
1 2
BASS
RHYTHMIC
CHORD
1 2
Press the [REVOICE] button when you’ve finished re-voicing the de-
sired tracks to confirm the re-voiced data. The [REVOICE] button and
selected track indicators will light.
REVOICE
TRACK
BPlay the Re-voiced Accompaniment ....................................................................................................
Play and use the re-voiced accompaniment as required.
NTurn REVOICE OFF to Restore the Original Voices............................................................................
Press the [REVOICE] button so that its indicator goes out to disengage
the REVOICE function when done. The re-voiced settings will be cancelled
and the original voices for the selected accompaniment style will be restored.
NOTES
• ALL REVOICE settings are reset to their default values if you
changes styles while the REVOICE function is OFF. If you want to
keep a re-voiced setup so that it can be easily recalled later,
store it in the PSR-1700/PSR-2700 REGISTRATION MEMORY,
described on page 37.
• As long as you don’t change styles while the REVOICE function is
OFF, the re-voiced settings are maintained and can be recalled at any
time simply by turning the REVOICE function ON.
• If you change styles while the REVOICE function is engaged, the revoiced settings will be maintained.
• In some cases it may not be possible to re-voice a Custom Accompaniment during accompaniment playback. If this problem occurs, try revoicing the style while the accompaniment is stopped.
REVOICE
RHYTHM
1 2
BASS
RHYTHMIC
CHORD
1 2
TRACK
| | | | | | | | | | | | | | | | | | | | | | | | | | | | | | | | | | | | | | | | | | | | | | | | | | | | | | | | | | | | | | | | | | | | | | | | | | | | | | | | | | | | | | | | | | | | | | | | | | | | | | | | | | | | | | | | | | | | | | | | | | | | | | | | | | | | | | | | | | | | |
35
Page 38

One Touch Setting
Each accompaniment style has a suitable preset voice and other settings that can be instantly
recalled by pressing the [ONE TOUCH SETTING] button in the VOICE control section. This
makes it simple to recall the optimum settings for each style in one quick operation.
To use the One Touch Setting function: select a style, press the [ONE TOUCH SETTING] button so that its indicator lights, then play. As long as the [ONE TOUCH SETTING] indicator is lit
the ideal voice and other settings (see list below) will be automatically recalled whenever you
select a new style. The One Touch Settings can be turned off by pressing the [ONE TOUCH
SETTING] button so that its indicator goes out.
If you don’t want to use the One Touch Settings as they are, they can be edited and stored in
a Registration Memory for easy recall at any time (see page 37 for details on the Registration
memory).
ONE TOUCH
SETTING
The One Touch Setting function recalls the following settings:
• The preset voice settings for the currently selected style — including orchestration,
voice assignments, volume, octave, DSP depth, pan, harmony, and effect settings.
• ACCOMP VOLUME level (21).
ONE TOUCH
SETTING
• AUTO ACCOMP is turned ON.
• The default tempo for the currently selected style.
• The track ON/OFF status for the currently selected style.
• [REVOICE] is turned OFF.
• KEYBOARD PERCUSSION is turned OFF.
• Auto Accompaniment split point (55).
• Orchestration split point (69).
NOTES
• If you press [ONE TOUCH SETTING] while rhythm-only accompaniment is playing, AUTO ACCOMP will be turned ON.
• The synchro start mode will be engaged if the [ONE TOUCH SETTING] button is turned on while the accompaniment is stopped.
• The [ONE TOUCH SETTING] button cannot be turned on when style
number “00” is selected.
| | | | | | | | | | | | | | | | | | | | | | | | | | | | | | | | | | | | | | | | | | | | | | | | | | | | | | | | | | | | | | | | | | | | | | | | | | | | | | | | | | | | | | | | | | | | | | | | | | | | | | | | | | | | | | | | | | | | | | | | | | | | | | | | | | | | | | | | | | | | |
36
Page 39

Registration Memory
The REGISTRATION MEMORY can be used to store eight complete sets of VOICE and AUTO
ACCOMPANIMENT settings that can be recalled anytime at the touch of a button.
The REGISTRATION MEMORY stores the following parameters:
VOICE
1. Voice numbers for all four orchestration parts.
2. Keyboard percussion ON/OFF &
percussion kit number.
3. PSR-2700
Sampled voice ON/OFF (all four
orchestration parts).
Sampled voice number in DIGITAL
SAMPLING section.
Sampled voice volume in DIGITAL
SAMPLING section.
Sampled voice DSP depth in DIGITAL SAMPLING section.
Sampled voice pan in DIGITAL
SAMPLING section.
4. Volume (all four orchestration parts
and percussion).
5. Pan (all four orchestration parts
and percussion).
6. DSP Depth (all four orchestration
parts and percussion).
7. Octave (all four orchestration parts
and percussion).
8. Harmony ON/OFF & Harmony
type.
9. Effect ON/OFF & Effect type.
10. Orchestration & Edit ON/OFF.
11. Split point.
12. Touch sense & Touch response.
13. Pitch bend range.
14. Modulation depth.
15. Local ON/OFF status (L & R)
16. MIDI OUT ON/OFF (L & R)
17. Pedal assign 1 & 2.
AUTO ACCOMPANIMENT
1. Style number.
2. Accompaniment volume.
3. Track button settings.
4. Tempo.
5. REVOICE ON/OFF and settings.
6. Split point.
7. Transpose.
8. Accomp. ON/OFF.
9. Fingering mode.
FREEZE
VOICE
ACCOMP
MEMORIZE
1
256
34 78
REGISTRATION MEMORY
● Memorizing the Settings ........................................................................................................................
The panel settings listed above can be stored to any one of
MEMORIZE
1
2 34
the eight REGISTRATION MEMORY buttons by pressing the
button — [1] through [8] — while holding the [MEMORIZE]
button. The indicator of the selected button will light continuously indicating that the data has been stored.
NOTES
• Please note that anytime you store to a REGISTRA-
TION MEMORY button, all settings previously stored
in that button will be erased and replaced by the new
settings.
• The indicator of the selected REGISTRATION MEMORY
will flash as soon as any change is made to the panel
settings. In other words, if the REGISTRATION
MEMORY indicator is flashing, the current panel settings
are different from those stored in the memory.
• The Registration Memory data is retained in memory
even when the power switch is turned off, as long as the
backup batteries are installed or the AC plug is connected.
| | | | | | | | | | | | | | | | | | | | | | | | | | | | | | | | | | | | | | | | | | | | | | | | | | | | | | | | | | | | | | | | | | | | | | | | | | | | | | | | | | | | | | | | | | | | | | | | | | | | | | | | | | | | | | | | | | | | | | | | | | | | | | | | | | | | | | | | | | | | |
37
Page 40

Registration Memory
● Recalling the Settings ............................................................................................................................
The settings stored to a REGISTRATION MEMORY button
MEMORIZE
1
2 34
can be recalled at any time simply by pressing the appropriate
button. The indicator of the selected button will light continuously when initially recalled, but will flash as soon as any
change is made to the panel settings. A flashing REGISTRATION MEMORY indicator therefore indicates that the current
panel settings do not correspond to those stored in the REGISTRATION MEMORY.
NOTES
• REGISTRATION MEMORY number 1 is always initially
selected when the power is turned on.
● The FREEZE Function ............................................................................................................................
The [FREEZE] button can be used to “freeze” the VOICE or
5 6
78
VOICE
ACCOMP
AUTO ACCOMPANIMENT settings so that they are not recalled when a REGISTRATION MEMORY button is pressed. If
FREEZE
you press the [FREEZE] button so that only the VOICE indicator is lit, for example, then only the stored AUTO ACCOMPANIMENT settings will be recalled when a REGISTRATION
MEMORY button is pressed.
To use the [FREEZE] button, simply press it as many times
as necessary to cause the appropriate indicators to light. When
an indicator is lit, then the corresponding group of settings is
“frozen”.
NOTES
• The FREEZE on/off status is retained in memory even
when the power switch is turned off, as long as the
backup batteries are installed or the AC plug is connected.
| | | | | | | | | | | | | | | | | | | | | | | | | | | | | | | | | | | | | | | | | | | | | | | | | | | | | | | | | | | | | | | | | | | | | | | | | | | | | | | | | | | | | | | | | | | | | | | | | | | | | | | | | | | | | | | | | | | | | | | | | | | | | | | | | | | | | | | | | | | | |
38
Page 41

Record Functions
The PSR-1700/PSR-2700 RECORDING section controls three recording functions:
● The SONG MEMORY:
Record complete songs including an accompaniment track and up to six melody tracks. Songs can
be saved to and loaded from floppy disk as required (page 56).
● MULTI PADS:
Record short chord, melody, or rhythm sequences that can be played back anytime by simply
pressing a button. The MULTI PAD data can be saved to and loaded from floppy disk as required.
● CUSTOM ACCOMPANIMENT:
Create your own accompaniment style for use with the Auto Accompaniment feature. Custom accompaniments can be saved to and loaded from floppy disk as required.
Operation of all three functions is essentially the same, so once you’re familiar with the basic procedure, recording songs, multi-pad phrases, or custom accompaniments should be easy. We’ll start with
the SONG MEMORY.
CAUTION
• Turning the power OFF during recording or while the record-
ready mode is engaged can result in a loss of recorded data.
Song Memory
The SONG MEMORY allows you to record and play back complete songs including chord sequences created
using the Auto Accompaniment feature and melody lines you play on the keyboard. The SONG MEMORY has one
ACCOMP track and six MELODY tracks. You also have a choice of realtime and step recording modes: the realtime
mode records what you play as you play it; the step mode lets you record one step at a time.
Only one song can be retained in the PSR-1700 or PSR-2700 memory at a time, but your songs can be saved to
floppy disk — at most 99 songs per disk (the actual number depends on the volume of the song data) — and then
reloaded later whenever you want to play them (page 56).
NOTES
• Material recorded using the SONG MEMORY is retained in memory
even when the POWER switch is turned OFF if backup batteries are
present or the AC plug is connected.
SONG MEMORY RECORDING
MEASURE # GATE
SONG
MELODY
TRACK
STEP
FWD
ACCOMP
12345
RESET PLAY/STOP
STEP
BWD
| | | | | | | | | | | | | | | | | | | | | | | | | | | | | | | | | | | | | | | | | | | | | | | | | | | | | | | | | | | | | | | | | | | | | | | | | | | | | | | | | | | | | | | | | | | | | | | | | | | | | | | | | | | | | | | | | | | | | | | | | | | | | | | | | | | | | | | | | | | | |
6
CUSTOM ACCOMP
SONG MEMORY
MULTI PADS
REC
REWRITE
SETTING
CLEAR
TIME
STEP
REC
STEP
SIZE
QUANTIZE
39
Page 42

Record Functions
O
D
■ Realtime Accompaniment Track Recording
The SONG MEMORY ACCOMP track records the following operations and data:
• Chord changes.
• Intro, Main, Fill in, Break, & Ending sections.
• Accompaniment volume.
• Fade-in/out.
• Auto accompaniment TRACK button operations.
• Tempo.
• Style number.
• Revoice.
ZSelect a Style ..........................................................................................................................................
STYLE
SELECT
FINGE-
RING
Select an accompaniment style that is appropriate for the type of music
you want to record. Also select the fingering mode you want to use, if necessary.
MODE
................
1 CHORD 1
2 CHORD 2
3 SINGLE
4 MULTI
5 FULL
AUTO
ACCOMP
XEngage the Accompaniment Track Record Ready Mode...................................................................
ACCOMP
123
BEAT
MEL
TRACK
REC
Press the SONG MEMORY section [ACCOMP] track button while
holding the RECORDING section [REC] button. This engages the record
ready mode for the accompaniment track. If [AUTO ACCOMP] is not already turned on, it will be automatically engaged. The [REC],
[ACCOMP], and [SYNC-START/STOP] button indicators will flash, and
the BEAT indicator dots will flash at the currently selected tempo. If the
OVERALL CONTROL section [METRONOME] button indicator is lit,
the metronome will sound at the currently selected tempo.
The current measure (“Mes”) and beat (“BT”) — in this case
“Mes=001:BT=1” — will be shown on the LCD display panel.
PSR-2700PSR-1700
Mes=0–01:BT=1
08:Showtune 001:GrandPno
Mes=0–01:BT=1
• Accompaniment track recording is carried out using the currently selected Auto Accompaniment fingering mode (page 25).
• Previously-recorded SONG MEMORY tracks that are turned ON (their
indicators are lit) can be monitored while recording. If you don’t want
ACCOMP
12345
MELODY
NOTES
6
to hear any of the previous tracks while recording, simply press the
corresponding SONG MEMORY TRACK buttons so their indicators go
out.
• It is also possible to record one MELODY track at the same time as
you record the ACCOMP track. Hold the [REC] button and press the
ACCOMP
123
TRACK
MELO
MELODY track button on which you want to record after engaging the
ACCOMP track record ready mode. Refer to “Realtime Melody Track
TRACK
REC
Recording” on page 42.
• The ACCOMP track record-ready mode can be disengaged by pressing the [ACCOMP] track button. ACCOMP track record ready cannot
be disengaged by pressing the [SYNC-START/STOP] button.
| | | | | | | | | | | | | | | | | | | | | | | | | | | | | | | | | | | | | | | | | | | | | | | | | | | | | | | | | | | | | | | | | | | | | | | | | | | | | | | | | | | | | | | | | | | | | | | | | | | | | | | | | | | | | | | | | | | | | | | | | | | | | | | | | | | | | | | | | | | | |
40
Page 43

CRecord .....................................................................................................................................................
Recording will begin as soon as you play a chord on the Auto Accompaniment section of the keyboard. If you’ve selected a MELODY track to
record with the ACCOMP track, a right-hand note will also start the recording process. The [REC] indicator lights continuously once recording has
started, and the current measure and beat will appear on the LCD display
panel.
FADE IN/OUTSTART/STOPSYNC-START/STOP
Recording can also be started by pressing the ACCOMPANIMENT
CONTROL [START/STOP] button. In this case only the rhythm will begin
without bass and chord accompaniment until you play the first chord on the
Auto Accompaniment section of the keyboard.
Play the required chords in the Auto Accompaniment section of the keyboard. If you’ve also selected a MELODY track to be recorded, play the
melody on the right-hand section of the keyboard.
NOTES
• Whenever you record using the SONG MEMORY, any previously
recorded material in the same track will be erased and replaced
by the new material.
• You can also start recording from any specified measure number —
see page 44.
• If the SONG MEMORY becomes full while recording, “Memory Full”
will appear on the LCD display panel and recording will stop. Up to
approximately 4,800 notes can be recorded in all MELODY tracks. Up
to approximately 4,800 chords can be recorded. These figures only
apply, however, if
only chords or notes are recorded. The total is re-
duced when notes and chords are recorded together.
• If you start recording by pressing the [PLAY/STOP] button, nothing will
be recorded until you begin playing on the keyboard.
• If you use a function button during recording the corresponding value
will appear on the LCD display panel while the button is held. The
measure number display will resume a few seconds after the button is
released.
• The SONG MEMORY ACCOMP track can also be recorded using the
Step Record mode (page 50).
VStop Recording.......................................................................................................................................
ACCOMP
12345
FADE IN/OUT
MELODY
TRACK
ENDING
6
Stop recording by pressing the [ACCOMP] track button. Recording can
also be stopped by pressing the [ENDING] button, [FADE IN/OUT] but-
ton, or the SONG [PLAY/STOP] button. The [REC] indicator will go out
and “Now Processing” will appear on the LCD display panel while the
PSR-1700/2700 is processing recorded data. “Completed” will appear
briefly when the data has been processed.
NOTES
RESET PLAY/STOP
STEP
BWD
| | | | | | | | | | | | | | | | | | | | | | | | | | | | | | | | | | | | | | | | | | | | | | | | | | | | | | | | | | | | | | | | | | | | | | | | | | | | | | | | | | | | | | | | | | | | | | | | | | | | | | | | | | | | | | | | | | | | | | | | | | | | | | | | | | | | | | | | | | | | |
STEP
FWD
• When recording is stopped the Song Memory automatically returns to
the measure at which recording was started.
41
Page 44

Record Functions
■ Realtime Melody Track Recording
The SONG MEMORY MELODY tracks record the following operations and data:
• Key on/off
(i.e. notes played on the keyboard).
• Key velocity.
• Voice number (Percussion Kit, Sampled
Voice Number (PSR-2700)).
* SAMPLE PAD (PSR-2700) and MULTI PAD data cannot be recorded to SONG MEMORY.
ZSelect a Voice and Set the Voice Parameters......................................................................................
used), and set the voice effects and other parameters as required.
XSelect a Track and Engage the Record Ready Mode..........................................................................
BEAT
MELODY
TRACK
REC
holding the RECORDING section [REC] button. Both the [REC] button
indicator and the selected MELODY track indicator will flash, indicating
that the SONG MEMORY is ready to record. If the OVERALL CONTROL
section [METRONOME] button indicator is lit the metronome will also
begin to sound at the currently selected tempo, while the BEAT indicator
dots flash at the current tempo.
“Mes=001:BT=1” — will be shown on the LCD display panel.
ACCOMP
1234
• Volume.
• Pan.
• DSP depth.
• Harmony on/off & harmony type.
• Effect on/off & effect type.
• Sustain (footswitch) on/off.
• Pitch bend.
• Octave.
• Modulation.
• Expression (foot controller).
Select the voice you want to record with (the R1 and R2 voices can be
Press one of the MELODY track buttons — [1] through [6] — while
The current measure (“Mes”) and beat (“BT”) — in this case
NOTES
• Previously-recorded SONG MEMORY tracks that are turned ON (their
indicators are lit) can be monitored while recording. If you don’t want
to hear any of the previous tracks while recording, simply press the
corresponding SONG MEMORY TRACK buttons so their indicators go
out.
• Only one melody track can be recorded at a time.
• If the MELODY track record ready mode is engaged, Auto Accompaniment is automatically turned off.
CRecord .....................................................................................................................................................
Recording will begin as soon as you play a note on the keyboard or
press the SONG [PLAY/STOP] button, and the BEAT indicator dots will
begin to indicate the current beat as in the Auto Accompaniment mode, and
the current measure and beat number will appear on the LCD display panel.
Play the melody using the entire keyboard if you are recording only a
MELODY track, or on the right-hand section of the keyboard if you are
recording a MELODY track at the same time as the ACCOMP track.
NOTES
• The SONG MEMORY MELODY tracks can also be recorded using the
Step Record mode — see page 50.
VStop Recording.......................................................................................................................................
ACCOMP
12345
RESET PLAY/STOP
STEP
BWD
MELODY
TRACK
STEP
FWD
6
Stop recording by pressing the TRACK button of the melody track be-
ing recorded, or the SONG [PLAY/STOP] button. The [REC] indicator
will go out and “Now Processing” will appear on the LCD display panel
while the PSR-1700/2700 is processing recorded data. “Completed” will
appear briefly when the data has been processed. The measure number will
automatically return to the measure at which recording was started.
| | | | | | | | | | | | | | | | | | | | | | | | | | | | | | | | | | | | | | | | | | | | | | | | | | | | | | | | | | | | | | | | | | | | | | | | | | | | | | | | | | | | | | | | | | | | | | | | | | | | | | | | | | | | | | | | | | | | | | | | | | | | | | | | | | | | | | | | | | | | |
42
Page 45

BSave Your Completed Song to Floppy Disk ........................................................................................
When you’ve finished recording your song — or have recorded as much
as you want to in the current session — save your song to floppy disk as
described on page 58. Making this step a habit will prevent accidental loss
of data.
NOTES
• The song data is retained in memory even when the power switch is
turned off as long as the backup batteries are installed or the AC plug
is connected. It is nevertheless a good idea to save important song
data to floppy disk so you have a backup in case of accidental erasure.
■ Accompaniment And Melody Playback
ZLoad a Song If Necessary......................................................................................................................
If necessary, load the song you want to play back from floppy disk (refer
to page 60). This step can be ignored if the song you want to play is already
in the PSR-1700 or PSR-2700 memory.
XSelect the Tracks to Play Back .............................................................................................................
ACCOMP
12345
MELODY
TRACK
6
Any number of MELODY tracks and/or the ACCOMP track can be
played back at the same time. Press the SONG MEMORY TRACK buttons
corresponding to the tracks you want to play back — the indicators of the
selected tracks will light.
NOTES
• All SONG MEMORY tracks that contain recorded data are automatically turned ON when the power switch is turned on or a song is
loaded from floppy disk.
• Measure number 1 is automatically selected whenever the power
switch is turned on or a song is loaded from floppy disk.
CStart Playback.........................................................................................................................................
RESET PLAY/STOP
STEP
BWD
STEP
FWD
Playback will begin as soon as the SONG [PLAY/STOP] button is
pressed. You can turn the ACCOMP and MELODY tracks on and off during
playback by pressing the appropriate TRACK buttons. During playback the
current measure and beat will appear on the LCD display panel.
NOTES
• Use the [RESET] button to return to the first measure of the song at
any time (see page 44).
• You can also start playback from any specified measure by using the
[MEASURE #] button (see page 44).
VPlay Along If You Like............................................................................................................................
Play along on the keyboard if you like. You can also change the tempo
during playback.
NOTES
• The maximum polyphony is 28. If more than 28 notes are played at
the same time, some notes may be truncated. If you are using a sampled voice an additional 26 notes are available for the sampled voice
only.
BStop Playback .........................................................................................................................................
RESET PLAY/STOP
STEP
BWD
STEP
FWD
Accompaniment and melody playback will stop automatically when all
recorded data has been played back. You can also stop playback at any time
by pressing the SONG [PLAY/STOP] button.
| | | | | | | | | | | | | | | | | | | | | | | | | | | | | | | | | | | | | | | | | | | | | | | | | | | | | | | | | | | | | | | | | | | | | | | | | | | | | | | | | | | | | | | | | | | | | | | | | | | | | | | | | | | | | | | | | | | | | | | | | | | | | | | | | | | | | | | | | | | | |
43
Page 46

Record Functions
■ The [RESET] Button
RESET PLAY/STOP
STEP
BWD
STEP
FWD
Press the SONG [RESET] button to go directly to the first measure of
the song and turn ON all tracks that contain data. Measure number “001”
will appear on the LCD display panel. The [RESET] button also functions
during playback or realtime recording.
PSR-2700PSR-1700
Mes=0–01:BT=1
08:Showtune 001:GrandPno
AccOff Mes=0–01:BT=1
■ Record Or Play from a Specified Measure
You can start SONG MEMORY recording or playback from any specified measure, as long as the specified
measure is within the range of measures that has already been recorded:
ZPress the [MEASURE #] Button If Necessary ......................................................................................
MEASURE #
If the measure number is not currently shown on the LCD display panel,
press the [MEASURE #] button. If the measure number is already showing,
go directly to step X.
XEnter the Desired Measure Number .....................................................................................................
Use the [+] and [–] buttons, the number buttons, the data dial, or the
–+
RESET
021
[MEASURE #] button itself to enter the desired measure number.
CStart Playback or Recording .................................................................................................................
Start playback or recording. You can now start playback or recording
from the specified measure number.
• This function allows you to “punch-in” and “punch-out” at any measure
to re-record a section of a previously-recorded track.
• Voice, volume, pan, pitch
bend, modulation, tempo,
harmony on/off, effect on/off,
dual on/off, DSP depth and
revoice data changes made
during the punch-in remain in
effect even after the punchout point until further parameter changes are encountered in the old data.
(Punch In)
VOICE
B
▲▲
VOICE
C
New Data
Stop Recording
(Punch Out)
VOICE
B
(Same as Before)
Old Data
Before Punch In/Out
After Punch In/Out
NOTES
Example:
VOICE
A
123456789
Start Recording
VOICE
A
123456789
Old Data
(Same as Before)
NOTES
| | | | | | | | | | | | | | | | | | | | | | | | | | | | | | | | | | | | | | | | | | | | | | | | | | | | | | | | | | | | | | | | | | | | | | | | | | | | | | | | | | | | | | | | | | | | | | | | | | | | | | | | | | | | | | | | | | | | | | | | | | | | | | | | | | | | | | | | | | | | |
44
• Recording is carried out in 1-measure units. If you punch out in the
middle of a measure, rests will be recorded for the remainder of that
measure.
Page 47

The Multi Pads
The PSR-1700 and PSR-2700 MULTI PADS can be used to record short rhythmic or melodic sequences, percus-
sion fill-ins, or single percussion sounds that can be played at any time simply by pressing the appropriate pad. Pads
[1] and [2] play back exactly as recorded, while pads [3] and [4] are “CHORD MATCH” types which are automati-
cally transposed to match chords played using the Auto-accompaniment feature.
Only one set of MULTI PAD data can be retained in the PSR-1700 or PSR-2700 memory at a time, but any
number of MULTI PAD sets can be saved to floppy disks and then reloaded later when needed (page 56).
The MULTI PADs record the following operations and data:
• Key on/off
(i.e. notes played on the keyboard).
• Key velocity.
• Voice number (Percussion Kit, Sampled
Voice Number (PSR-2700)).
• Volume.
• Pan.
• DSP depth.
RESET PLAY/STOP
STEP
BWD
SONG
• Octave.
• Harmony on/off & harmony type.
• Effect on/off & effect type.
• Sustain on/off (footswitch).
• Pitch bend.
• Modulation.
• Expression (foot controller).
CUSTOM ACCOMP
SONG MEMORY
MULTI PADS
REC
1
STEP
FWD
STOP
NOTES
• Before recording, the PSR-1700/PSR-2700
memory contains a preset set of MULTI PAD
data that will be erased when new MULTI PAD
data is recorded. The original preset data can
be restored by using the “System Reset” function described on page 82.
RECORDING
REWRITE
SETTING
2 3 4
MULTI PADS
CLEAR
GATE
STEP
TIME
SIZE
STEP
QUANTIZE
REC
CHORD MATCH
■ Realtime Recording
ZSelect a Voice to Record and an Appropriate Tempo.........................................................................
Select the voice you want to record on the MULTI PADS. Only the [R1]
and [R2] voices can be used. You might also want to set a tempo that will
be easy to record at.
XEngage the MULTI PAD Record Ready Mode ......................................................................................
Press one of the MULTI PAD buttons — [1] through [4] — while hold-
ing the [REC] button. The [REC] button indicator and the selected MULTI
REC
1 2 3 4
CHORD MATCH
| | | | | | | | | | | | | | | | | | | | | | | | | | | | | | | | | | | | | | | | | | | | | | | | | | | | | | | | | | | | | | | | | | | | | | | | | | | | | | | | | | | | | | | | | | | | | | | | | | | | | | | | | | | | | | | | | | | | | | | | | | | | | | | | | | | | | | | | | | | | |
PAD indictor will flash to indicate that the record ready mode is engaged,
and the metronome will begin to sound at the currently selected tempo if
the OVERALL CONTROL section [METRONOME] button indicator is
lit.
NOTES
• Only the R1 and R2 orchestration parts can be recorded to the MULTI
PADS.
• If the MULTI PAD record ready mode is engaged, Auto Accompaniment is automatically turned off.
45
 Loading...