

Page 1

KCU105 PCI Express
Streaming Data Plane
TRD User Guide
KUCon-TRD03
Vivado Design Suite
UG920 (v2017.1) June 01, 2017
Page 2

Revision History
Send Feedback
The following table shows the revision history for this document.
Date Version Revision
06/01/2017 2017.1 Released with Vivado Design Suite 2017.1. Updated Figure 3-2 through Figure 3-5
and Figure 4-1 through Figure 4-7 (no changes to text).
01/20/2017 2016.4 Released with Vivado Design Suite 2016.4 without changes from the previous
version.
10/05/2016 2016.3 Released with Vivado Design Suite 2016.3 without changes from the previous
version.
06/08/2016 2016.2 Released with Vivado Design Suite 2016.2 without changes from the previous
version.
04/14/2016 2016.1 Released with Vivado Design Suite 2016.1 without changes from the previous
version.
11/24/2015 2015.4 Released with Vivado Design Suite 2015.4 without changes from the previous
version.
10/05/2015 2015.3 Released with Vivado Design Suite 2015.3 with minor textual edits.
06/22/2015 2015.2 Updated for Vivado Design Suite 2015.2. Figure 3-1 and Figure 3-2 were replaced.
Figure 3-13 through Figure 3-15 were updated. In Hardware SGL Prepare Block,
page 49, element buffer size changed from 512 bytes to 4096 bytes. Figure 5-14 and
Figure 5-25 were updated.
05/13/2015 2015.1 Updated for Vivado Design Suite 2015.1. The TRD ZIP file changed to
rdf0307-kcu105-trd03-2015-1.zip. Updated Information about resource
utilization for the base design and the user extension design in Table 1-1 and
Table 1-2. Added details about Windows 7 driver support, setup, and test of the
reference design, updating these sections: Features, Computers, and Appendix A,
Directory Structure. Added section Install TRD Drivers on the Host Computer
(Windows 7) to Chapter 2, Setup and added Appendix B, Recommended Practices
and Troubleshooting in Windows. Removed QuestaSim/ModelSim Simulator
information, because QuestaSim simulation is not supported in Vivado tool release
2015.1. Updated many figures and replaced Figure 1-1, Figure 1-2, and Figure 5-12.
Updated XDMA Driver Stack and Design in Chapter 5. In Table C-3, traffic generator
was changed to traffic checker. Added Appendix E, APIs Provided by the XDMA Driver
in Windows.
02/26/2015 2014.4.1 Initial Xilinx release.
PCIe Streaming Data Plane TRD www.xilinx.com 2
UG920 (v2017.1) June 01, 2017
Page 3

Table of Contents
Send Feedback
Revision History . . . . . . . . . . . . . . . . . . . . . . . . . . . . . . . . . . . . . . . . . . . . . . . . . . . . . . . . . . . . . . . . . . . . 2
Chapter 1: Introduction
Overview . . . . . . . . . . . . . . . . . . . . . . . . . . . . . . . . . . . . . . . . . . . . . . . . . . . . . . . . . . . . . . . . . . . . . . . . 5
Features . . . . . . . . . . . . . . . . . . . . . . . . . . . . . . . . . . . . . . . . . . . . . . . . . . . . . . . . . . . . . . . . . . . . . . . . . 7
Resource Utilization. . . . . . . . . . . . . . . . . . . . . . . . . . . . . . . . . . . . . . . . . . . . . . . . . . . . . . . . . . . . . . . . 8
Chapter 2: Setup
Requirements. . . . . . . . . . . . . . . . . . . . . . . . . . . . . . . . . . . . . . . . . . . . . . . . . . . . . . . . . . . . . . . . . . . . . 9
Preliminary Setup. . . . . . . . . . . . . . . . . . . . . . . . . . . . . . . . . . . . . . . . . . . . . . . . . . . . . . . . . . . . . . . . . 10
Chapter 3: Bringing Up the Design
Set the Host System to Boot from the LiveDVD (Linux) . . . . . . . . . . . . . . . . . . . . . . . . . . . . . . . . . . 15
Configure the FPGA . . . . . . . . . . . . . . . . . . . . . . . . . . . . . . . . . . . . . . . . . . . . . . . . . . . . . . . . . . . . . . . 16
Run the Design on the Host Computer. . . . . . . . . . . . . . . . . . . . . . . . . . . . . . . . . . . . . . . . . . . . . . . . 21
Test the Reference Design. . . . . . . . . . . . . . . . . . . . . . . . . . . . . . . . . . . . . . . . . . . . . . . . . . . . . . . . . . 27
Remove Drivers from the Host Computer
(Windows Only) . . . . . . . . . . . . . . . . . . . . . . . . . . . . . . . . . . . . . . . . . . . . . . . . . . . . . . . . . . . . . . . 32
Chapter 4: Implementing and Simulating the Design
Implementing the Base Design . . . . . . . . . . . . . . . . . . . . . . . . . . . . . . . . . . . . . . . . . . . . . . . . . . . . . . 33
Implementing the User Extension Design . . . . . . . . . . . . . . . . . . . . . . . . . . . . . . . . . . . . . . . . . . . . . 36
Simulating the Designs Using Vivado Simulator . . . . . . . . . . . . . . . . . . . . . . . . . . . . . . . . . . . . . . . . 38
Chapter 5: Targeted Reference Design Details and Modifications
Hardware . . . . . . . . . . . . . . . . . . . . . . . . . . . . . . . . . . . . . . . . . . . . . . . . . . . . . . . . . . . . . . . . . . . . . . . 41
Data Flow . . . . . . . . . . . . . . . . . . . . . . . . . . . . . . . . . . . . . . . . . . . . . . . . . . . . . . . . . . . . . . . . . . . . . . . 54
Software . . . . . . . . . . . . . . . . . . . . . . . . . . . . . . . . . . . . . . . . . . . . . . . . . . . . . . . . . . . . . . . . . . . . . . . . 55
Reference Design Modifications . . . . . . . . . . . . . . . . . . . . . . . . . . . . . . . . . . . . . . . . . . . . . . . . . . . . . 68
PCIe Streaming Data Plane TRD www.xilinx.com 3
UG920 (v2017.1) June 01, 2017
Page 4

Appendix A: Directory Structure
Send Feedback
Appendix B: Recommended Practices and Troubleshooting in Windows
Recommended Practices . . . . . . . . . . . . . . . . . . . . . . . . . . . . . . . . . . . . . . . . . . . . . . . . . . . . . . . . . . . 90
Troubleshooting. . . . . . . . . . . . . . . . . . . . . . . . . . . . . . . . . . . . . . . . . . . . . . . . . . . . . . . . . . . . . . . . . . 90
Appendix C: Register Space
Generator and Checker Configuration Registers . . . . . . . . . . . . . . . . . . . . . . . . . . . . . . . . . . . . . . . . 92
Ethernet MAC Registers. . . . . . . . . . . . . . . . . . . . . . . . . . . . . . . . . . . . . . . . . . . . . . . . . . . . . . . . . . . . 93
Appendix D: APIs Provided by the XDMA Driver in Linux
Appendix E: APIs Provided by the XDMA Driver in Windows
Appendix F: Network Performance
Private Network Setup and Test . . . . . . . . . . . . . . . . . . . . . . . . . . . . . . . . . . . . . . . . . . . . . . . . . . . . 105
Appendix G: Additional Resources and Legal Notices
Xilinx Resources . . . . . . . . . . . . . . . . . . . . . . . . . . . . . . . . . . . . . . . . . . . . . . . . . . . . . . . . . . . . . . . . . 108
Solution Centers. . . . . . . . . . . . . . . . . . . . . . . . . . . . . . . . . . . . . . . . . . . . . . . . . . . . . . . . . . . . . . . . . 108
References . . . . . . . . . . . . . . . . . . . . . . . . . . . . . . . . . . . . . . . . . . . . . . . . . . . . . . . . . . . . . . . . . . . . . 108
Please Read: Important Legal Notices . . . . . . . . . . . . . . . . . . . . . . . . . . . . . . . . . . . . . . . . . . . . . . . 109
PCIe Streaming Data Plane TRD www.xilinx.com 4
UG920 (v2017.1) June 01, 2017
Page 5

Introduction
3URFHVVRU
5RRW
&RPSOH[
'0$
'ULYHU
3&,H
[*HQ
/LQN
ELWVDW
0+]
User
App
3&,H'0$
XCKU040-2FFVA1156E FPGA
KCU105 Evaluation Board
+RVW&RPSXWHU
+:6*/3UHSDUH
PPVVPP
$;,/LWH6ODYHV
$;,
,QWHUFRQQHFW
+DUGZDUHPRGXOHV
6RIWZDUHUXQQLQJRQKRVWFRPSXWHU
&RPSRQHQWRQKRVWFRPSXWHU
*(1
&+.
00ELWV
DW0+]
6WUHDPELWV
DW0+]
UG920_c1_01_040615
Send Feedback
This document describes the features and functions of the PCI Express® Streaming Data
Plane targeted reference design (TRD). The TRD comprises a base design and a user
extension design. The user extension design adds custom logic on top of the base design.
The pre-built user extension design in this TRD adds an Ethernet application.
Overview
The TRD targets the Kintex® UltraScale™ XCKU040-2FFVA1156E FPGA running on the
KCU105 evaluation board and provides a platform for data transfer between the host
machine and the FPGA. The top-level block diagram of the TRD base design is shown in
Figure 1-1.
Chapter 1
X-Ref Target - Figure 1 -1
Figure 1-1: KCU105 PCI Express Streaming Data Plane Base Design
The TRD uses an integrated Endpoint block for PCI Express (PCIe®) in a x8 Gen2
configuration along with an Expresso DMA Bridge Core from Northwest Logic [Ref 1] for
high performance data transfers between host system memory and the Endpoint (the FPGA
on the KCU105 board).
The DMA bridge core (DMA block) provides protocol conversion between PCIe transaction
layer packets (TLPs) and AXI transactions. The core’s hardware scatter gather list (SGL) DMA
interface provides buffers management at the Endpoint to enable the streaming interface.
PCIe Streaming Data Plane TRD www.xilinx.com 5
UG920 (v2017.1) June 01, 2017
Page 6

X-Ref Target - Figure 1-2
UG920_c1_02_040615
352&(6625
Root
Complex
'0$
'ULYHU
3&,H
[*HQ
/LQN
128 bits at
250 MHz
User
App
3&,H
'0$
;&.8))9$()3*$
.&8(YDOXDWLRQ%RDUG
+RVW&RPSXWHU
$;,/LWH
6ODYHV
$;,
,QWHUFRQQHFW
+DUGZDUHPRGXOHV
6RIWZDUHUXQQLQJRQKRVWFRPSXWHU
&RPSRQHQWRQKRVWFRPSXWHU
MM - 128 bits
at 250 MHz
Stream - 64 bits
at 156.25 MHz
*
7
User Extension logic
*
0$&
*
7
*
0$&
Depending on the user application, the two modules (red colored arrows) need to be changed.
All other blocks in the hardware design and software components can be reused.
+:6*/3UHSDUH
PPVVPP
Send Feedback
Chapter 1: Introduction
The downstream AXI4-Lite slaves include a power monitor module, user space registers,
and an AXI performance monitor.
In the system to card direction (S2C), the DMA block moves data from host memory to the
FPGA through the integrated Endpoint block and then makes the data available at the AXI
streaming interface. In the card to system (C2S) direction, theDMA block uses the data
available on the AXI streaming interface and writes to host system memory through the
integrated Endpoint block.
The base design uses a simple generator/checker (GEN/CHK) block as a data
provider/consumer on the AXI streaming interface. This base platform can be extended to
a variety of applications such as Ethernet, and Crypto Engine.
The user extension design (shown in Figure 1-2) provides an example of a dual 10GbE
network interface card. The Ethernet frames received from the host system are directed to
respective Ethernet ports for transmission, and incoming frames from Ethernet are directed
to the host after performing an address filtering operation.
Figure 1-2: KCU105 PCI Express Streaming Data Plane User Extension Design
The designs delivered as part of this TRD use Vivado® IP integrator to build the system. IP
Integrator provides intelligent IP integration in a graphical, Tcl-based,
correct-by-construction IP and system-centric design development flow. For further details
on IPI, see Vivado Design Suite Tutorial: Designing IP Subsystems Using IP Integrator (UG995)
[Ref 2].
PCIe Streaming Data Plane TRD www.xilinx.com 6
UG920 (v2017.1) June 01, 2017
Page 7

Features
Send Feedback
The TRD includes these features:
•Hardware
Integrated Endpoint block for PCI Express
°
- 8 lanes, each operating at 5 GT/s (gigatransfers per second) per lane per
direction
- 128-bit at 250 MHz
DMA bridge core
°
- Scatter gather enabled
- 4 channels: 2 channels are used as S2C and 2 as C2S
- Support for an AXI3 interface
Chapter 1: Introduction
- Two ingress and two egress translation regions supported
Note:
built to support only two such regions. Contact Northwest Logic for further customization of
IP
SGL DMA interface block
°
The IP can support a higher number of translation regions. The netlist used here is
[Ref 1].
- Queue management of channels: Destination queue for S2C and source queue
for C2S
- AXI memory map (MM) to AXI-stream interface conversion and AXI-stream to
MM conversion
- 128-bit at 250 MHz rate operation
- SGL submission block interface between the DMA bridge core and the SGL
preparation block for SGL element submission to DMA channels on a
round-robin basis across channels
- Traffic generator (packets on AXI4-stream interface) and checker block
operating at a 128-bit, 250 MHz rate
- AXI performance monitor capturing AXI4-stream interface throughput numbers
- Two 10G Ethernet MAC, PCS PMA blocks operating at 64-bit, 156.25 MHz
•Software
64-bit Linux kernel space drivers for DMA and a raw data driver
°
64-bit Windows 7 drivers for DMA and a raw data driver
°
User space application
°
Control and monitoring graphical user interface (GUI)
°
PCIe Streaming Data Plane TRD www.xilinx.com 7
UG920 (v2017.1) June 01, 2017
Page 8

Chapter 1: Introduction
Send Feedback
Resource Utilization
Table 1-1 and Table 1-2 list the resources used by the TRD base and user extension designs
after synthesis. Place and route can alter these numbers based on placements and routing
paths. These numbers are to be used as a rough estimate of resource utilization. These
numbers might vary based on the version of the TRD and the tools used to regenerate the
design.
Table 1-1: Base Design Resource Utilization
Resource Type Available Used Usage (%)
CLB registers 484,800 79,865 16.63
CLB LUT 242,400 51,404 21.21
Block RAM 600 39.5 6.58
MMCME3_ADV 10 1 10
Global Clock Buffers 240 3 1.25
BUFG_GT 120 5 4.17
IOB 520 18 3.46
SYSMONE1 1 1 100
PCIE_3_1 3 1 33.33
GTHE3_CHANNEL 20 8 40
Table 1-2: User Extension Design Resource Utilization
Resource Type Available Used Usage (%)
CLB registers 484,800 101,313 20.90
CLB LUT 242,400 64,884 26.77
Block RAM 600 80 13.33
MMCME3_ADV 10 1 10
Global Clock Buffers 240 3 1.25
BUFG_GT 120 12 10.00
IOB 520 23 4.42
SYSMONE1 1 1 100
PCIE_3_1 3 1 33.33
GTHE3_CHANNEL201050
PCIe Streaming Data Plane TRD www.xilinx.com 8
UG920 (v2017.1) June 01, 2017
Page 9

Setup
Send Feedback
This chapter identifies the hardware and software requirements, and the preliminary setup
procedures required prior to bringing up the targeted reference design.
Requirements
Hardware
Board and Peripherals
• KCU105 board with the Kintex® UltraScale™ XCKU040-2FFVA1156E FPGA
Chapter 2
• USB cable, standard-A plug to micro-B plug (Digilent cable)
• Power supply: 100 VAC–240 VAC input, 12 VDC 5.0A output
• ATX power supply
• ATX power supply adapter
Computers
A control computer is required to run the Vivado® Design Suite and configure the on-board
FPGA. This can be a laptop or desktop computer with any operating system supported by
Vivado tools, such as Redhat Linux or Microsoft® Windows 7.
The reference design test configuration requires a host computer comprised of a chassis
containing a motherboard with a PCI Express slot, monitor, keyboard, and mouse. A DVD
drive is also required if a Linux operating system is used. If a Windows 7 operating system
is used, the 64-bit Windows 7 OS and the Java SE Development Kit 7 must be installed.
PCIe Streaming Data Plane TRD www.xilinx.com 9
UG920 (v2017.1) June 01, 2017
Page 10

Chapter 2: Setup
Send Feedback
Software
Vivado Design Suite 2017.1 is required. The Fedora 20 LiveDVD, on which the TRD software
and GUI run, is only required if a Linux operating system is used.
Preliminary Setup
Complete these tasks before bringing up the design.
Install the Vivado Design Suite
Install Vivado Design Suite 2017.1 on the control computer. Follow the installation
instructions provided in the Vivado Design Suite User Guide Release Notes, Installation, and
Licensing (UG973) [Ref 3].
Download the Targeted Reference Design Files
1. Download rdf0307-kcu105-trd03-2017-1.zip from the Xilinx Kintex UltraScale
FPGA KCU105 Evaluation Kit - Documentation & Designs website
the hardware design, software drivers, and application GUI executables.
2. Extract the contents of the file to a working directory.
3. The extracted contents are located at <working_dir>/kcu105_axis_dataplane.
The TRD directory structure is described in Appendix A, Directory Structure.
. This ZIP file contains
Install TRD Drivers on the Host Computer (Windows 7)
Note: This section provides steps to install KUCon-TRD drivers and is only applicable to a host
computer running Windows 7 64-bit OS. If running Linux, proceed to Set DIP Switches, page 12.
Disable Driver Signature Enforcement
Note: Windows only allows drivers with valid signatures obtained from trusted certificate
authorities to load in a Windows 7 64-bit OS computer. Windows drivers provided for this reference
design do not have a valid signature. Therefore, you have to disable Driver Signature Enforcement on
the host computer as follows:
1. Power up the host system.
2. Press F8 to go to the Advanced Boot Options menu.
3. Select the Disable Driver Signature Enforcement option shown in Figure 2-1, and
press Enter.
PCIe Streaming Data Plane TRD www.xilinx.com 10
UG920 (v2017.1) June 01, 2017
Page 11

X-Ref Target - Figure 2-1
UG920_c2_01_040915
Send Feedback
Chapter 2: Setup
Figure 2-1: Disable Driver Signature Enforcement
PCIe Streaming Data Plane TRD www.xilinx.com 11
UG920 (v2017.1) June 01, 2017
Page 12

Chapter 2: Setup
UG920_c2_02_040915
Send Feedback
Install Drivers
1. From Windows Explorer, navigate to the folder in which the reference design is
downloaded (<dir>\kcu105_axis_dataplane\software\windows) and run the
setup file with Administrator privileges as shown in Figure 2-2.
X-Ref Target - Figure 2-2
Figure 2-2: Run the Setup File with Administrator Privileges
2. Click Next after the InstallShield Wizard opens.
3. Click Next to install to the default folder; or click Change to install to a different folder.
4. Click Install to begin driver installation.
5. A warning screen is displayed as the drivers are installed, because the drivers are not
signed by a trusted certificate authority yet. To install the drivers, ignore the warning
message and click Install this driver software anyway. This warning message pops up
two times. Repeat this step.
6. After installation is complete, click Finish to exit the InstallShield Wizard.
Set DIP Switches
Ensure that the DIP switches and jumpers on the KCU105 board are set to the factory
default settings as identified in the Kintex UltraScale FPGA KCU105 Evaluation Board User
Guide (UG917) [Ref 4].
PCIe Streaming Data Plane TRD www.xilinx.com 12
UG920 (v2017.1) June 01, 2017
Page 13

X-Ref Target - Figure 2-3
UG920_c3_01_061915
Send Feedback
Chapter 2: Setup
Install the KCU105 Board
1. Remove all rubber feet and standoffs from the KCU105 board.
2. Power down the host chassis and disconnect the power cord.
CAUTION! Remove the power cord to prevent electrical shock or damage to the KCU105 board or other
components.
3. Ensure that the host computer is powered off.
4. Open the chassis. Select a vacant PCIe Gen2-capable expansion slot and remove the
expansion cover at the back of the chassis.
5. Plug the KCU105 board into the PCIe connector slot, as shown in Figure 2-3.
PCIe Streaming Data Plane TRD www.xilinx.com 13
UG920 (v2017.1) June 01, 2017
Figure 2-3: PCIe Connector Slot
Page 14

Chapter 2: Setup
UG920_c3_02_061915
%RDUG3RZHU
6ZLWFK6
Send Feedback
6. Connect the ATX power supply to the KCU105 board using the ATX power supply
adapter cable as shown in Figure 2-4.
Note:
A 100 VAC–240 VAC input, 12 VDC 5.0A output external power supply can be substituted
for the ATX power supply.
X-Ref Target - Figure 2-4
Figure 2-4: Power Supply Connection to the KCU105 Board
7. Slide the KCU105 board power switch SW1 to the ON position (ON/OFF is marked on the
board).
PCIe Streaming Data Plane TRD www.xilinx.com 14
UG920 (v2017.1) June 01, 2017
Page 15

Bringing Up the Design
Send Feedback
This chapter describes how to bring up and test the targeted reference design.
Set the Host System to Boot from the LiveDVD
(Linux)
Note: This section is only applicable to host computers running Linux. If running Windows 7,
proceed to Configure the FPGA, page 16.
1. Power on the host system. Stop it during BIOS to select options to boot from a DVD
drive. BIOS options are entered by pressing DEL, F12, or F2 keys on most systems.
Chapter 3
Note:
first. Then power on the host system.
2. Place the Fedora 20 LiveDVD into the DVD drive.
3. Select the option to boot from DVD.
Complete the Configure the FPGA procedures before exiting the BIOS setup to boot from
the DVD.
If an external power supply is used instead of the ATX power, the FPGA can be configured
PCIe Streaming Data Plane TRD www.xilinx.com 15
UG920 (v2017.1) June 01, 2017
Page 16

Chapter 3: Bringing Up the Design
UG920_c3_03_021215
Send Feedback
Configure the FPGA
While in BIOS, program the FPGA with the BIT file.
1. Connect the standard-A plug to micro-B plug USB cable to the JTAG port on the KCU105
board and to the control computer laptop as shown in Figure 3-1.
X-Ref Target - Figure 3-1
Note:
The host system can remain powered on.
Figure 3-1: Connect the USB Cable to the KCU105 Board and the Control Computer
Note: Figure 3-1 shows a Rev C board. The USB JTAG connector is on the PCIe panel for
production boards.
PCIe Streaming Data Plane TRD www.xilinx.com 16
UG920 (v2017.1) June 01, 2017
Page 17

Chapter 3: Bringing Up the Design
8*BFBB
Send Feedback
2. Launch the Vivado® Integrated Design Environment (IDE) on the control computer:
a. Select Start > All Programs > Xilinx Design Tools > Vivado 2017.1 > Vivado
2017.1.
b. On the getting started page, click Open Hardware Manager (Figure 3-2).
X-Ref Target - Figure 3-2
Figure 3-2: Vivado IDE Getting Started Page, Open Hardware Manager
PCIe Streaming Data Plane TRD www.xilinx.com 17
UG920 (v2017.1) June 01, 2017
Page 18

Chapter 3: Bringing Up the Design
8*BFBB
Send Feedback
3. Open the connection wizard to initiate a connection to the KCU105 board:
a. Click Open target > Auto connect (Figure 3-3).
X-Ref Target - Figure 3-3
Figure 3-3: Using the User Assistance Bar to Open a Hardware Target
PCIe Streaming Data Plane TRD www.xilinx.com 18
UG920 (v2017.1) June 01, 2017
Page 19

Chapter 3: Bringing Up the Design
8*BFBB
Send Feedback
4. Configure the wizard to establish connection with the KCU105 board by selecting the
default value on each wizard page. Click Next > Next > Next > Finish.
a. In the hardware view, right-click xcku040 and click Program Device (Figure 3-4).
X-Ref Target - Figure 3-4
PCIe Streaming Data Plane TRD www.xilinx.com 19
UG920 (v2017.1) June 01, 2017
Figure 3-4: Select Device to Program
Page 20

Chapter 3: Bringing Up the Design
8*BFBB
UG920_c3_08_092414
Send Feedback
b. In the Bitstream file field, browse to the location of the BIT file
<working_dir>/kcu105_axis_dataplane/ready_to_test/trd03_base_
top.bit and click Program (see Figure 3-5).
X-Ref Target - Figure 3-5
Figure 3-5: Program Device Window
5. After the FPGA is programmed, the DONE LED status should illuminate as shown in
Figure 3-6.
X-Ref Target - Figure 3-6
PCIe Streaming Data Plane TRD www.xilinx.com 20
UG920 (v2017.1) June 01, 2017
Figure 3-6: GPIO LED Indicators
Page 21

Chapter 3: Bringing Up the Design
Send Feedback
6. Exit the BIOS and let the system boot.
7. On most systems, this gives a second reset on the PCIe connector, which should discover
the device during enumeration.
To know that the PCIe Endpoint is discovered, see Check for PCIe Devices, page 22.
°
If the PCIe Endpoint is not discovered, reboot the system. Do not power off.
°
8. Check the status of the design by looking at the GPIO LEDs positioned at the top right
corner of the KCU105 board (see Figure 3-6). After FPGA configuration, the LED status
from left to right indicates the following:
LED 3: ON if the link speed is Gen2, else flashing (Link Speed Error)
°
LED 2: ON if the lane width is x8, else flashing (Lane Width Error)
°
LED 1: Heartbeat LED, flashes if PCIe user clock is present
°
LED 0: ON if the PCIe link is UP
°
Note:
These LED numbers match the silkscreened numbers on the board.
PCIe Streaming Data Plane TRD www.xilinx.com 21
UG920 (v2017.1) June 01, 2017
Page 22

Chapter 3: Bringing Up the Design
UG920_c3_09_042015
Send Feedback
Run the Design on the Host Computer
This section provides instructions to run the reference design on either a host computer
with Linux, or a host computer with Windows 7.
Run the Design on a Linux Host Computer
Setup
This section describes how to set up the reference design using the Linux drivers and the
Fedora 20 LiveDVD.
Figure 3-7 shows different boot stages of Fedora 20. After you reach the third screen,
shown in Figure 3-7, click the Try Fedora option, then click Close. It is recommended that
you run the Fedora operating system from the DVD.
CAUTION! If you want to install Fedora 20 on the hard drive connected to the host system, click
the Install to Hard Drive option. BE CAREFUL! This option erases any files on the hard disk!
X-Ref Target - Figure 3-7
Figure 3-7: Fedora 20 Boot Stages
Check for PCIe Devices
1. After the Fedora 20 OS boots, open a terminal and use lspci to see a list of PCIe devices
detected by the host computer:
$ lspci | grep Xilinx
The following is displayed:
04:00.0 Communications controller: Xilinx Corporation Device 8082
Note:
Xilinx device.
PCIe Streaming Data Plane TRD www.xilinx.com 22
UG920 (v2017.1) June 01, 2017
If the host computer does not detect the Xilinx PCIe Endpoint, lspci does not show a
Page 23

Chapter 3: Bringing Up the Design
UG920_c3_10_041615
Send Feedback
Run the Design
1. Navigate to the <working_dir>/kcu105_axis_dataplane/software folder and
open a terminal. (The TRD files were extracted to your <working_dir> in Download
the Targeted Reference Design Files, page 10).
2. Enter:
$ cd /home/<working_dir>/kcu105_aximm_dataplane
$ su --> command to login as super user
$ chmod +x quickstart.sh
$ ./quickstart.sh
3. The TRD setup screen is displayed (Figure 3-8) and indicates detection of a PCIe device
with an ID of 8082 in lspci—by default the AXI Stream Dataplane design is selected.
Choose GEN-CHK under the Performance section menu. Click Install to install the
drivers. (This takes you to the Control & Monitoring GUI shown in Figure 3-12.)
X-Ref Target - Figure 3-8
Figure 3-8: TRD Setup Screen with a PCIe Device Detected
PCIe Streaming Data Plane TRD www.xilinx.com 23
UG920 (v2017.1) June 01, 2017
Page 24

Chapter 3: Bringing Up the Design
UG920_c3_11_042815
Send Feedback
Run the Design on a Windows 7 Host Computer
After booting the Windows OS, follow these steps:
1. Repeat the steps in section Disable Driver Signature Enforcement, page 10.
2. Open Device Manager (click Start > devmgmt.msc then press Enter) and look for the
Xilinx PCI Express device as shown in Figure 3-9.
X-Ref Target - Figure 3-9
Figure 3-9: Xilinx PCI Express Device in Device Manager
PCIe Streaming Data Plane TRD www.xilinx.com 24
UG920 (v2017.1) June 01, 2017
Page 25

Chapter 3: Bringing Up the Design
UG920_c3_12_041415
Send Feedback
3. Open the command prompt with administrator privileges, as shown in Figure 3-10.
X-Ref Target - Figure 3-10
Figure 3-10: Command Prompt with Administrator Privileges
PCIe Streaming Data Plane TRD www.xilinx.com 25
UG920 (v2017.1) June 01, 2017
Page 26

Chapter 3: Bringing Up the Design
UG920_c3_13_042015
Send Feedback
4. Navigate to the folder where the reference design is copied:
cd <dir>\kcu105_axis_dataplane\software
5. Run the batch script quickstart_win7.bat:
quickstart_win7.bat
6. Figure 3-11 shows the TRD Setup screen. Click Proceed to test the reference design.
(This takes you to the Control & Monitoring GUI shown in Figure 3-12.)
X-Ref Target - Figure 3-11
PCIe Streaming Data Plane TRD www.xilinx.com 26
UG920 (v2017.1) June 01, 2017
Figure 3-11: TRD Setup Screen
Page 27

Chapter 3: Bringing Up the Design
UG920_c3_14_042015
Send Feedback
Test the Reference Design
The control and monitoring GUI, shown in Figure 3-12, provides information on power and
FPGA die temperature, PCI Express Endpoint link status, host system initial flow control
credits, PCIe write and read throughput, and AXI throughput.
X-Ref Target - Figure 3-12
Figure 3-12: Control & Monitoring GUI
The following tests can be done through the main control and monitoring GUI:
• Data transfer from the host computer to the FPGA can be started by selecting System
to Card (S2C) test control mode, as shown in Figure 3-13.
• Data transfer from the FPGA to the host computer can be started by selecting Card to
System (C2S) test control mode, as shown in Figure 3-14.
• Data transfer from the FPGA to the host computer and vice versa can be started at the
same time by selecting both S2C and C2S test control modes together, as shown in
Figure 3-15.
Click Start to initiate the test. To stop the test, click Stop. (The Start button changes to Stop
after the test is initiated). The packet size for all the above modes can be between 64 bytes
and 32768 bytes.
PCIe Streaming Data Plane TRD www.xilinx.com 27
UG920 (v2017.1) June 01, 2017
Page 28

X-Ref Target - Figure 3-13
UG920_c3_15_061915
UG920_c3_16_061915
Send Feedback
Chapter 3: Bringing Up the Design
X-Ref Target - Figure 3-14
Figure 3-13: System to Card Performance
PCIe Streaming Data Plane TRD www.xilinx.com 28
UG920 (v2017.1) June 01, 2017
Figure 3-14: Card to System Performance
Page 29

X-Ref Target - Figure 3-15
UG920_c3_17_061915
Send Feedback
Chapter 3: Bringing Up the Design
Figure 3-15: System to Card and Card to System Performance Together
PCIe Streaming Data Plane TRD www.xilinx.com 29
UG920 (v2017.1) June 01, 2017
Page 30

X-Ref Target - Figure 3-16
UG920_c3_18_042015
Software Components
6RIWZDUH&RPSRQHQWV
Send Feedback
Chapter 3: Bringing Up the Design
You can view the block diagram by clicking Block Diagram in top right corner of the screen
(Figure 3-16).
Figure 3-16: Block Diagram View
PCIe Streaming Data Plane TRD www.xilinx.com 30
UG920 (v2017.1) June 01, 2017
Page 31

X-Ref Target - Figure 3-17
UG920_c3_19_042015
Send Feedback
Chapter 3: Bringing Up the Design
Power and die temperature monitored by the FPGA’s SYSMON block, PCIe Endpoint status,
and the host system's initial flow control credits can be seen in the SYSMON & PCIe Info tab
shown in Figure 3-17.
Figure 3-17: SYSMON and PCIe Information
Click the X mark on the top right corner to close the GUI. On a Linux host computer, this
step uninstalls the drivers and returns the GUI to the TRD Setup screen. On a Windows host
computer, this step returns to the TRD Setup screen.
Note:
LiveDVD boot.
Any files copied or icons created in a Linux machine are not present after the next Fedora 20
PCIe Streaming Data Plane TRD www.xilinx.com 31
UG920 (v2017.1) June 01, 2017
Page 32

Chapter 3: Bringing Up the Design
Send Feedback
Remove Drivers from the Host Computer
(Windows Only)
IMPORTANT: Shutdown the host computer and power off the KCU105 board. Then use the following
steps to remove the Windows drivers.
1. Power on the host computer, and from Windows Explorer, navigate to the folder in
which the reference design is downloaded
(<dir>\kcu105_axis_dataplane\software\windows\). Run the setup file with
Administrator privileges.
2. Click Next after the InstallShield Wizard opens.
3. Select Remove and click Next.
4. Click Remove to remove drivers from the host system.
5. Click Finish to exit the wizard.
PCIe Streaming Data Plane TRD www.xilinx.com 32
UG920 (v2017.1) June 01, 2017
Page 33

Chapter 4
Send Feedback
Implementing and Simulating the Design
This chapter describes how to implement and simulate the targeted reference design. The
time required to do so can vary from system to system depending on the control computer
configuration.
Note:
implementation or simulation using Vivado Design Suite might fail due to a Windows OS limitation.
Refer to the
In Windows, if the project directory path length is more than 260 characters, design
KCU105 Evaluation Kit Master Answer Record (AR 63175) for more details.
Implementing the Base Design
1. If not already done so, copy the reference design ZIP file to the desired directory on the
control PC and unzip the ZIP file. (The TRD files were extracted to your
<working_dir> in Download the Targeted Reference Design Files, page 10).
2. Open a terminal window on a Linux system with the Vivado environment set up, or open
a Vivado tools Tcl shell on a Windows system.
3. Navigate to the kcu105_axis_dataplane/hardware/vivado/scripts folder.
4. To run the implementation flow in GUI mode, enter:
$ vivado -source trd03_base.tcl
This opens the Vivado Integrated Design Environment (IDE), loads the block diagram,
and adds the required top file and Xilinx design constraints (XDC) file to the project (see
Figure 4-1).
PCIe Streaming Data Plane TRD www.xilinx.com 33
UG920 (v2017.1) June 01, 2017
Page 34

X-Ref Target - Figure 4-1
UG920_c4_01_0411175
Send Feedback
Chapter 4: Implementing and Simulating the Design
Figure 4-1: Base Design – Project View
PCIe Streaming Data Plane TRD www.xilinx.com 34
UG920 (v2017.1) June 01, 2017
Page 35

Chapter 4: Implementing and Simulating the Design
UG920_c4_02_041117
Send Feedback
5. In the Flow Navigator, click the Generate Bitstream option which runs synthesis,
implementation, and generates a BIT file (Figure 4-2). Click Yes if a window indicating
No Implementation Results are available is displayed. The BIT file can be
found under the following directory:
kcu105_axis_dataplane/hardware/vivado/runs_base/trd03_base.runs/
impl_1
X-Ref Target - Figure 4-2
Note:
AXIS represents AXI Streaming.
Figure 4-2: Base Design – Generate Bitstream
PCIe Streaming Data Plane TRD www.xilinx.com 35
UG920 (v2017.1) June 01, 2017
Page 36

X-Ref Target - Figure 4-3
UG920_c4_03_041117
Send Feedback
Chapter 4: Implementing and Simulating the Design
Implementing the User Extension Design
1. Open a terminal window on a Linux system with the Vivado environment set up, or open
a Vivado tools Tcl shell on a Windows system.
2. Navigate to the kcu105_axis_dataplane/hardware/vivado/scripts folder.
3. To run the implementation flow in GUI mode, enter:
$ vivado -source trd03_2x10g.tcl
This opens the Vivado IDE, loads the block diagram, and adds the required top file and
XDC file to the project (see Figure 4-3).
Figure 4-3: User Extension Design – Project View
PCIe Streaming Data Plane TRD www.xilinx.com 36
UG920 (v2017.1) June 01, 2017
Page 37

X-Ref Target - Figure 4-4
UG920_c4_04_041117
Send Feedback
Chapter 4: Implementing and Simulating the Design
4. In the Flow Navigator panel, click the Generate Bitstream option which runs synthesis,
implementation, and generates the bit file (Figure 4-4). The generated bitstream can be
found under the following directory:
kcu105_axis_dataplane/hardware/vivado/runs_2x10g/trd03_2x10g.run
s/impl_1
Figure 4-4: User Extension Design – Generate Bitstream
PCIe Streaming Data Plane TRD www.xilinx.com 37
UG920 (v2017.1) June 01, 2017
Page 38

Chapter 4: Implementing and Simulating the Design
UG920_c4_05_041117
Send Feedback
Simulating the Designs Using Vivado Simulator
Both the base and user extension TRD designs can be simulated using the Vivado simulator.
The testbench and the endpoint PCIe IP block are configured to use PHY Interface for PCI
Express (PIPE) mode simulation.
The test bench initializes the bridge and DMA, and sets up the DMA for system to card (S2C)
and card to system (C2S) data transfer. For the base design, the test bench configures the
DMA and hardware Generator/Checker to transfer one 64-byte packet in both the S2C and
C2S directions. For the Ethernet design, the datapaths are looped back at the PHY serial
interface. The test bench configures the DMA to transfer and receive one 64-byte packet in
the S2C and C2S direction, respectively.
Running Simulation using the Vivado Simulator
1. Open a terminal window on a Linux system and set up the Vivado environment or open
a Vivado Tcl shell on a Windows system.
2. Navigate to the kcu105_axis_dataplane/hardware/vivado/scripts folder.
3. To simulate the base design enter:
$ vivado -source trd03_base_xsim.tcl
This opens the Vivado IDE, loads the block diagram, and adds the required top file.
4. In the Flow Navigator, under Simulation, click Run Simulation and select Run
Behavioral Simulation (see Figure 4-5). This generates all the simulation files, loads
the Vivado simulator, and runs the simulation. The result is shown in Figure 4-6.
X-Ref Target - Figure 4-5
PCIe Streaming Data Plane TRD www.xilinx.com 38
UG920 (v2017.1) June 01, 2017
Figure 4-5: Run Behavioral Simulation
Page 39

X-Ref Target - Figure 4-6
UG920_c4_06_041117
Send Feedback
Chapter 4: Implementing and Simulating the Design
Figure 4-6: Base Design Vivado Simulation using the Vivado Simulator
5. To simulate the user extension Ethernet design enter:
$ vivado -source trd03_2x10g_xsim.tcl
This command opens the Vivado IDE, loads the block diagram, and adds the required
top file.
PCIe Streaming Data Plane TRD www.xilinx.com 39
UG920 (v2017.1) June 01, 2017
Page 40

X-Ref Target - Figure 4-7
UG920_c4_07_041117
Send Feedback
Chapter 4: Implementing and Simulating the Design
6. In the Flow Navigator panel, under Simulation, click Run Simulation and select Run
Behavioral Simulation. This generates all the simulation files, loads Vivado simulator,
and runs the simulation. The result is shown in Figure 4-7.
Figure 4-7: Ethernet Design Vivado Simulation
PCIe Streaming Data Plane TRD www.xilinx.com 40
UG920 (v2017.1) June 01, 2017
Page 41

Chapter 5
$;,3&,H
%ULGJH
1:/
5DZ
'DWD
'ULYHU
.HUQHO
VSDFH
3&,H
/LQN
;
*HQ
+DUGZDUH6RIWZDUH
$
3
3
*
7
,QWHJUDWHG3&,H%ORFN
3&,H,3
:UDSSHU
,QWHJUDWHG%ORFN
RQ)3*$
;LOLQ[,QKRXVH,3
&XVWRP/RJLFLQ
)3*$
6RIWZDUH
&RPSRQHQWV
$;,00,QWHUIDFH
ELW#0+]
7KLUG3DUW\,3
*
8
,
'0$
'ULYHU
.HUQHO
VSDFH
([SUHVVR
'0$
1:/
$;,
,QWHUFRQQHFW
0DLQ
+DUGZDUH
6*/6XEPLW
$;,
,QWHUFRQQHFW
/LWH
+DUGZDUH
6*/3UHSDUH
$;,
3HUIRUPDQFH
0RQLWRU
8VHU
5HJLVWHUV
$;,
6WUHDP
*(1&+.
3&,H3HUIRUPDQFH
0RQLWRU
$;,6WUHDP,QWHUIDFH
ELW#0+]
+:6*/,QWHUIDFH
ELW#0+]
$;,/LWH,QWHUIDFH
ELW#0+]
5;7;%\WH&RXQW
&XVWRP,QWHUIDFH
$;,00,QWHUIDFH
ELW#0+]
+:6*/ $;,0DVWHU
UG920_c5_01_021715
$;,6ODYH
$;,0DVWHU$;,0DVWHU
Send Feedback
Targeted Reference Design Details and
Modifications
This chapter describes the TRD hardware design and software components in detail, and
provides modifications to add an Ethernet application to the design.
Hardware
The functional block diagram in Figure 5-1 identifies the different TRD hardware design
components. Subsequent sections discuss each of the components in detail.
X-Ref Target - Figure 5-1
PCIe Streaming Data Plane TRD www.xilinx.com 41
UG920 (v2017.1) June 01, 2017
Figure 5-1: TRD Functional Block Diagram
Page 42

Chapter 5: Targeted Reference Design Details and Modifications
Send Feedback
Endpoint Block for PCI Express
The Endpoint block for PCI Express is used in the following configuration:
• x8 Gen2 line rate (5 GT/s per lane per direction) where GT/s is GigaTransfers per second
• Three 64-bit BARs, 1 MB each
• MSI-X capability
See the LogiCORE IP UltraScale FPGAs Gen3 Integrated Block for PCI Express Product Guide
(PG156) [Ref 6] for more information.
DMA Bridge Core
The DMA bridge core includes an AXI-PCIe bridge and Expresso DMA in one netlist bundle.
See the Northwest Logic Expresso DMA Bridge Core website for more information [Ref 7].
Note:
of DMA channels and translation regions is fixed. For higher configurations of the IP, contact
Northwest Logic.
Note: The Northwest Logic Expresso IP Core provided with t h e d esign is an evaluation version of the
IP. It times out in hardware after 12 hours. To obtain a full license of the IP, contact Northwest Logic.
The IP netlist used in the reference design supports a fixed configuration where the number
AXI-PCIe Bridge
The AXI-PCIe bridge translates protocol to support transactions between the PCIe and AXI3
domains. It provides support for two ingress translation regions to convert PCIe
BAR-mapped transactions to AXI3 domain transactions.
Bridge Initialization
The AXI-PCIe bridge consumes transactions hitting BAR0 in the Endpoint.
• The bridge registers are accessible from BAR0 + 0x8000.
• During ingress translation initialization:
Single ingress translation is enabled (0x800).
°
Address translation is set up as shown in Table 5-1.
°
For example, assume that the PCIe BAR2 physical address is 0x2E000000. A memory
read request targeted to address 0x2E000000 is translated to 0x44A00000.
Table 5-1: Address Translation Maps
Ingress Source Base Ingress Destination Base Aperture Size
BAR2 0x44A00000 1M
PCIe Streaming Data Plane TRD www.xilinx.com 42
UG920 (v2017.1) June 01, 2017
Page 43
Chapter 5: Targeted Reference Design Details and Modifications
6RXUFH$GGUHVV>@
6RXUFH$GGUHVV>@
%\WH&RXQW>@
)ODJV>@
8VHU+DQGOH>@
8VHU,'>@
65&6*/)ODJV
>@/RFDWLRQ$;,RU3&,H
>@(23
>@,QWHUUXSW
>@$WWULEXWHV
65&6*/
8VHU+DQGOH>@
8VHU,'>@
&03/7
(UURU>@
&RPSOHWHG%\WH
&RXQW>@
8SSHU6WDWXV
1RQ=HUR
(UURU
>@6RXUFH(UURU
>@'HVWLQDWLRQ(UURU
>@,QWHUQDO'0$(UURU
67$667$'6*/
'HVWLQDWLRQ$GGUHVV>@
'HVWLQDWLRQ$GGUHVV>@
%\WH&RXQW>@
)ODJV>@
8VHU+DQGOH>@
8VHU,'>@
'676*/)ODJV
>@/RFDWLRQ$;,RU3&,H
>@(QDEOHRQHSDFNHWSHU
HOHPHQW
>@$WWULEXWHV
'676*/
8*BFBB
Send Feedback
• During bridge register initialization:
Bridge base low (0x210) is programmed to (BAR0 + 0x8000).
°
Bridge Control register (0x208) is programmed to set the bridge size and enable
°
translation.
• After bridge translation has been enabled, ingress registers can be accessed with
bridge base + 0x800.
• The read and write request size for Master AXI read and write transactions is
programmed to be 256B (cfg_axi_master register at offset 0x08 from [BAR0 +
0x8000]).
Expresso DMA
Key features of Expresso DMA are:
• High-performance scatter gather DMA designed to achieve full bandwidth of AXI and
PCIe
X-Ref Target - Figure 5-2
• Separate source and destination scatter-gather queues with separate source and
destination DMA completion status queues
• DMA channels merge the source and destination scatter gather information
DMA Operation
Note: In this section, Q is short for queue.
The Expresso DMA has four queues per channel:
• SRC-Q provides data buffer source information and corresponding STAS-Q which
indicates SRC-Q processing completion by DMA
• DST-Q provides destination buffer information and corresponding STAD-Q which
indicates DST-Q processing completion by DMA
The queue element layout is depicted in Figure 5-2.
PCIe Streaming Data Plane TRD www.xilinx.com 43
UG920 (v2017.1) June 01, 2017
Figure 5-2: SGL Queue Element Structure
Page 44

Chapter 5: Targeted Reference Design Details and Modifications
,QLWLDO6*/4ZLWK6:
4B6,=( 1
4B/,0,7
(OHPHQW
(OHPHQW1
6XEPLWQHZHOHPHQWVWR+:
4B6,=( 1
4B/,0,7
4B6,=( 1
4B/,0,7
4B6,=( 1
4B/,0,7
'0$ZUDSV
DURXQG
8*BFBB
Send Feedback
These queues can be resident either in host memory or can be provided by the hardware
SGL submission block depending on the channel (S2S/C2S). The software driver sets up the
queue elements in contiguous locations and DMA handles wraparound of the queue. Every
DMA channel has these registers which pertain to each queue:
• Q_PTR: Starting address of the queue
• Q_SIZE: Number of SGL elements in queue
• Q_LIMIT: Index of the first element still owned by the software; DMA hardware wraps
around to start element location when Q_LIMIT is equal to Q_SIZE.
Figure 5-3 depicts DMA operation.
X-Ref Target - Figure 5-3
Using Expresso DMA for Streaming Applications
The Expresso DMA IP core provides an additional interface called Hardware-SGL interface
for FIFO mode applications that require AXI-Stream data transfers. The Hardware-SGL mode
allows hardware logic to manage one set of SGL-Qs per DMA channel.
To summarize the Hardware-SGL operation:
PCIe Streaming Data Plane TRD www.xilinx.com 44
UG920 (v2017.1) June 01, 2017
• In the S2C direction, host software manages SRC-Q and STAS-Q elements. DST-Q
elements are provided by hardware logic (through the SGL interface). There is no
STAD-Q involved. The data from DMA is available on the AXI interface with additional
sidebands (which are part of the awuser port) providing information on actual packet
byte count which can be used to build packets across the AXI-Stream interface.
• In the C2S direction, host software manages DST-Q and STAD-Q elements. SRC-Q
elements are provided by the hardware logic (through the SGL interface) based on
incoming data received from the AXI-Stream application. There is no STAS-Q involved.
Figure 5-3: DMA Operation
Page 45

X-Ref Target - Figure 5-4
+DQGOH
(23
+DQGOH
(23
+DQGOH
(23
+DQGOH
(23
+DQGOH
(23
+DQGOH
+DQGOH
65&4 67$64
3DFNHW
3DFNHW
+DQGOH
+DQGOH
+DQGOH
+DQGOH
+DQGOH
+DQGOH
%\WH&RXQW
+DQGOH
%\WH&RXQW
'674 67$'4
3DFNHW
3DFNHW
UG920_c5_04_100214
Send Feedback
Chapter 5: Targeted Reference Design Details and Modifications
Status Updates
The status elements are updated only on end of packet (EOP) and not for every SGL
element. This section describes the status updates and use of the User Handle field.
Relationship between SRC-Q and STAS-Q
As depicted in Figure 5-4, packet-0 spans across three SRC-Q elements. The third element
indicates EOP=1 with UserHandle=2. On EOP, DMA updates STAS-Q with UserHandle=2
which corresponds to the handle value in SRC-Q element with EOP=1. Similarly, packet-1
spans two elements, and in STAS-Q, the updated handle value corresponds to the EOP =1
element. This UserHandle mechanism allows software to associate the number of SRC-Q
elements with a corresponding STAS-Q update.
Relationship between DST-Q and STAD-Q
Software sets up DST-Q elements with predefined UserHandle values and pointing to
empty buffers. As shown in Figure 5-4, packet-0 spans two DST-Q elements. One STAD-Q
element is updated with a handle value of the last DST-Q element used by the packet and
the corresponding packet length. Software thus maintains the number of DST-Q elements
used (that is, buffers used and the appropriate buffer fragment pointers) for a particular
status completion.
AXI Interconnect
The AXI Interconnect is used to connect the various IPs together in a memory-mapped
system. The interconnect is responsible for:
• Converting AXI3 transactions from the AXI-PCIe bridge into AXI4 transactions for
PCIe Streaming Data Plane TRD www.xilinx.com 45
UG920 (v2017.1) June 01, 2017
various slaves
• Decoding address to target the appropriate slave
Figure 5-4: SRC-Q and STAS-Q
Page 46

Chapter 5: Targeted Reference Design Details and Modifications
65&6*/
0DQDJHPHQW
/RJLF
$;,6WUHDP
'676*/
0DQDJHPHQW
/RJLF
$;,6WUHDP
([SUHVVR
'0$
LBVJOBLQWHUIDFH
$;,0DVWHU
&67UDQVIHUV
6&7UDQVIHUV
&XVWRPHU5HXVDEOH3LHFHIRU
6WUHDPLQJ$SSOLFDWLRQV
+DUGZDUH6*/
6XEPLVVLRQ/RJLF
8*BFBB
$;,%5$0
$;,%5$0
Send Feedback
See LogiCORE IP AXI Interconnect Product Guide (PG059) [Ref 8] for more details.
Two interconnects are connected in a hierarchical fashion to segregate the bursty DMA
transactions and AXI4-Lite transactions, which helps improve the timing closure of the
design. There are two slaves connected to the AXI4-Lite interconnect in the base design.
The AXI interconnect directs the read/write requests to the appropriate slaves based on the
address hit shown in Table 5-2.
Table 5-2: AXI4-Lite Slaves Address Decoding
AXI4-Lite Slave Address Range Size
GenCheck 0x44A00000 - 0x44A0FFF 4K
User space registers 0x44A01000 - 0x44A01FFF 4K
AXI Performance Monitor 0x44A10000 - 0x44A1FFFF 64K
Hardware SGL Interfacing
The hardware SGL interface (Figure 5-5) allows the design to provide SGL elements directly
to DMA channels. This is useful in a FIFO mode of operation. The logic designed handles
both S2C and C2S traffic scenarios.
X-Ref Target - Figure 5-5
PCIe Streaming Data Plane TRD www.xilinx.com 46
UG920 (v2017.1) June 01, 2017
Figure 5-5: Hardware SGL Interfacing
Page 47

Chapter 5: Targeted Reference Design Details and Modifications
+:6*/
6XEPLVVLRQ/RJLF
+:6*/
3UHSDUDWLRQ/RJLF
RQHLQVWDQFHSHU
FKDQQHO
LBVJOBLQWHUIDFH
'0$
VJOBDYDLODEOH
VJOBGRQH
VJOBGDWD
$;,6WUHDP
8VHU$SS
$;,0DVWHUWKURXJK
LQWHUFRQQHFW
'0$
VJOBHUURU
8*BFBB
Send Feedback
Note: Refer to the Northwest Logic Expresso DMA user guide for more details on the SGL
Interface
[Ref 1].
Because the i_sgl_* interface is a shared interface, a central logic for hardware SGL
submission is designed that performs these tasks:
• Handles the i_sgl_* protocol-based transfers.
• All user logic blocks submit the SGL elements along with identifiers like DMA channel,
byte count, and so on to this block.
• This block submits SGL elements to DMA in a round-robin mechanism for each DMA
channel.
Figure 5-6 depicts an interface between the hardware SGL Submit block and one of the
hardware SGL Prepare blocks. Each Prepare block interacts with Submit blocks with a
separate set of the mentioned interface signals.
X-Ref Target - Figure 5-6
Figure 5-6: Interface between Hardware SGL Prepare and Submit Blocks
Table 5-3: Hardware SGL Prepare and Submit Blocks Interface Signals Descriptions
Signal Description
sgl_available Indicates data on the sgl_data bus is a valid SGL element queued up for DMA.
sgl_data Carries the required SGL element information.
sgl_done Acknowledgment signal back from SGL submission logic when the sgl_data has been
submitted to DMA.
sgl_error An error is signaled when either SGL allocation or SGL submission fails for that
channel.
Hardware SGL Submit Block
The SGL submit logic polls for the SGL available status from SGL preparation logic in a
round-robin fashion. The logic reserves one SGL element per AXI4-Stream DMA channel
and iterates over all the channels. The SGL submission logic communicates with the SGL
preparation logic using a ready-acknowledge handshaking mechanism. The handshaking
protocol for communicating with the DMA SGL interface happens in two phases:
PCIe Streaming Data Plane TRD www.xilinx.com 47
UG920 (v2017.1) June 01, 2017
Page 48

Chapter 5: Targeted Reference Design Details and Modifications
Send Feedback
1. In the SGL allocation phase, the SGL submission logic requests the DMA SGL interface to
reserve the DMA shared memory-mapped interface for a particular AXI4-Stream
channel. The DMA SGL interface acknowledges the request with a Grant status.
2. After the allocation phase is over, the SGL element is fetched from the SGL preparation
logic and the SGL submission logic informs the hardware SGL preparation logic with a
SGL Done status.
The padding of additional fields in the SGL element is performed by the SGL padding logic
in the submission block. The SGL data that the preparation logic submits contains the fields
of the SGL element shown in Table 5-4.
Table 5-4: Description of SGL Element by SGL Preparation Block
Field Name Bit Position in sgl_data Description
ByteCount [23:0] DMA ByteCount based on the FIFO occupancy count
Flags (per SRC/DST SGL description)
UserId [47:32] User-defined information
Buffer Address [79:48] or [111:48]
[31:24] Populated as per flag definition in SRC/DST-SGL
Buffer Address
Would be reduced to 32 bits.
Keep option for 64-bit programmable to address
future needs.
64-bit addressing selected through attribute
64_BIT_ADDR_EN.
Figure 5-7 shows the state diagram for the SGL submission finite state machine (FSM) that
reserves the SGL allocation interface and submits SGL elements based on the allocation
status.
The FSM arbitrates over the DMA channels in a round-robin order. The FSM checks for SGL
valid from a specific DMA channel and if sgl_available is not asserted, moves over to the
next channel. If the sgl_available signal is asserted, the FSM moves ahead, reserving the
DMA interface for the requesting channel. After the allocation phase is over, it submits the
elements with appropriate padding to the SGL allocation interface of the Expresso DMA.
The FSM embodies two timers:
• The first timer in the SGL allocation phase defines the wait time while waiting for the
DMA interface to issue a grant for the particular channel. If timeout occurs, the FSM
moves over to the next channel.
• The second timer waits on the acknowledgment from the DMA SGL interface while the
submission block submits the SGL elements to DMA. If a timeout occurs, the
submission block flags an error to the preparation logic.
PCIe Streaming Data Plane TRD www.xilinx.com 48
UG920 (v2017.1) June 01, 2017
Page 49

X-Ref Target - Figure 5-7
6WDUW
&KDQQHOQ0RQLWRU
VJOBYDOLG
3DG6*/HOHPHQWV
$OORFDWLRQVXFFHVV"
:ULWH6*/
&KDQQHOQ0RQLWRU
$OORFDWH6*/
7LPHRXW"
1R
<HV1R
1R
)URPFKDQQHOQP
<HV
:ULWH6XFFHVV7LPHRXW"
)ODJ(UURU
<HV
1R
6*/B'RQH
8*BFBB
Send Feedback
Chapter 5: Targeted Reference Design Details and Modifications
Figure 5-7: SGL Allocation FSM
Hardware SGL Prepare Block
The hardware SGL Prepare block implements the data memory for temporary data
buffering, SGL Prepare logic, and a protocol conversion logic for data conversion from AXI
memory-mapped (MM) to AXI-Stream and vice versa.
PCIe Streaming Data Plane TRD www.xilinx.com 49
UG920 (v2017.1) June 01, 2017
Page 50

X-Ref Target - Figure 5-8
758('8$/3257
%5$0
8*BFBB
+DUGZDUH6*/3UHSDUDWLRQ/RJLF
%5$0
&21752//(5
5'(QJLQH
'0$B0B$;,B:ULWH
$;,6WUHDP2XW
&XVWRP,QWHUIDFH
%LW[
'0$+:6*/,QWHUIDFH
Send Feedback
Chapter 5: Targeted Reference Design Details and Modifications
This block handles one S2C and one C2S channel data transfer.
S2C SGL preparation logic handles these tasks:
• Uses an AXI memory-mapped block RAM per DMA channel to drain out data from
DMA. This data is used by the user application beyond DMA.
• Provides DST-SGL elements to corresponding DMA channels. Each element provides a
buffer size of 4096 bytes.
• Writes data to AXI MM block memory.
• Reads data from block RAM and converts the data to AXI Streaming before sending it
out.
• Keeps submitting DST-SGL elements (maximum of 8) per DMA channel as
corresponding buffers as the block RAM gets emptied.
Figure 5-8 depicts a block diagram of the S2C Prepare block.
The S2C Prepare module consists of following:
• Block RAM controller
• True dual port block RAM
• Read engine
• Hardware SGL Prepare block
PCIe Streaming Data Plane TRD www.xilinx.com 50
UG920 (v2017.1) June 01, 2017
Figure 5-8: S2C Prepare Block Diagram
Page 51

Chapter 5: Targeted Reference Design Details and Modifications
Send Feedback
S2C Prepare block has a true dual port block memory capable of storing up to eight buffers
of 4096 bytes each. One side of the block RAM is accessed by DMA through the AXI MM
interface to update buffers, whereas the other side of the block RAM is accessed by the read
engine to read the data buffers.
After reset, hardware SGL Prepare logic submits eight SGL elements to DMA about the
availability of eight buffers, 4096 bytes each. This logic monitors the AXI MM (from DMA)
write interface for minimum buffer data received (4096 bytes) or end of packet (one buffer
update event). With the buffer update event, it communicates to the read engine about the
data availability with buffer address, size, and EOP information for TLAST generation. After
the read engine fetches the buffer, Prepare logic submits a new SGL element to DMA
informing it of the availability of an empty buffer. To handle the latency of the
communication and for better performance, eight buffers are implemented in the design to
support pipelining.
The interface between the Prepare block and the read engine is listed in Table 5-5.
Table 5-5: Description of Interface between the Prepare Block and the Read Engine
Signal Description
rd_addr Buffer starting address to read
rd_bcnt Valid bytes in the buffer
is_eop End of packet information
rd_valid Valid signal for read request
rd_valid_rdy Read Valid acknowledgment from the read engine
rd_start Start signal for read request
rd_start_rdy Read Start acknowledgment from the read engine
rd_done Read completion signal from the read engine
rd_done_ack Acknowledgment for Read completion signal
The Read engine module has two queues (read_valid and read_start) that are implemented
with FIFOs for handling multiple read requests from the preparation block. The Read engine
also handles the data conversion from the block RAM native interface to the AXI Streaming
interface.
C2S SGL Prepare logic handles the following:
• AXI block RAM is instantiated in the design to handle the DMA AXI MM read interface.
Data from the user application (beyond DMA) is buffered here temporarily. Each block
RAM can hold up to 4 KB of data (8 buffers of 4096 bytes each).
• After the data size reaches 4096 bytes or end of packet (tlast) occurs (whichever occurs
first), builds the SRC-SGL element and submits it to the corresponding DMA channel.
• Continues providing SRC_SGL elements as newer data keeps coming into block RAM.
PCIe Streaming Data Plane TRD www.xilinx.com 51
UG920 (v2017.1) June 01, 2017
Page 52

X-Ref Target - Figure 5-9
8*BFBB
+DUGZDUH6*/3UHSDUDWLRQ/RJLF
7UXH'XDO3RUW
%5$0
%5$0&RQWUROOHU
'0$B0B$;,B5HDG
$;,6WUHDP,Q
(23%8))(5B)8//
%LW[
'0$+:6*/,QWHUIDFH
6WUHDPWR%5$0
1DWLYH,QWHUIDFH
&RQYHUWHU
Send Feedback
Chapter 5: Targeted Reference Design Details and Modifications
A block diagram of the C2S Prepare block is shown in Figure 5-9.
Figure 5-9: C2S Prepare Block Diagram
The C2S Prepare module consists of the following:
• Block RAM controller
• True dual port block RAM
• Custom logic for stream to block RAM native interface conversion
• Hardware SGL Prepare block
The C2S Prepare block has a true dual port block memory capable of storing up to eight
buffers, 4096 bytes each. One side of the block RAM is accessed by DMA through the AXI
MM interface to read buffers, whereas the other side of the block RAM is accessed by
custom logic to update the data buffers.
Custom logic converts the incoming stream data into block RAM native interface and
updates the block RAM buffer one after the other, depending on empty buffer availability.
The hardware SGL Prepare block prepares an SGL element whenever it sees an end of packet
or with the minimum buffer size update (4096 bytes).
PCIe Streaming Data Plane TRD www.xilinx.com 52
UG920 (v2017.1) June 01, 2017
Page 53

Chapter 5: Targeted Reference Design Details and Modifications
Send Feedback
Streaming Generator/Checker
The design has a 128-bit streaming interface-based traffic generator and checker
(Generator/Checker) module. It operates at a 200 MHz user clock derived from the PCIe
interface. Hardware SGL Prepare module interfaces between this block and the Northwest
Logic DMA block in the data plane. The traffic generator and checker interface follow
AXI4-Stream protocol. The packet length is configurable through the control interface.
Refer to Appendix C, Register Space for register map details of Generator/Checker.
The traffic Generator/Checker module can be used in three different modes: a loopback
mode, a data checker mode, and a data generator mode. The module enables specific
functions depending on the configuration options selected. On the transmit path, the data
checker verifies the data transmitted from the host system through the packet DMA. On the
receive path, data can be sourced either by the data generator or transmit data from the
host system can be looped back to itself. Based on user inputs, the software driver programs
the core to enable the checker, generator, or loopback mode of operation. The data
received and transmitted by the module is divided into packets. The first two bytes of each
packet define the length of the packet. All other bytes carry the tag, which is the sequence
number of the packet.
Packet Checker
If the Enable Checker bit is set (registers are defined in Appendix C, Register Space), as soon
as data is valid on the DMA transmit channel (S2C) through the hardware SGL block, each
data byte received is checked against a pre-decided data pattern. If there is a mismatch
during a comparison, the data mismatch signal is asserted. This status is reflected back in a
register which can be read by the software driver through the control plane.
Packet Generator
If the Enable Generator bit is set (registers are defined in Appendix C, Register Space), the
data produced by the generator is passed to the receive channel of the DMA (C2S) through
the hardware SGL block. The data from the generator also follows the same pre-decided
data pattern as the packet checker.
Power and Temperature Monitoring
The design uses a SYSMON block (17 channel, 200 ksps) to provide system power and die
temperature monitoring capabilities. The block provides analog-to-digital conversion and
monitoring capabilities. It enables reading of voltage and current on different power supply
rails (supported on the KCU105 board) which are then used to calculate power.
PCIe Streaming Data Plane TRD www.xilinx.com 53
UG920 (v2017.1) June 01, 2017
Page 54

Chapter 5: Targeted Reference Design Details and Modifications
8*BFBB
6<6021
3LFR%OD]H
%ORFN5$0
5HJLVWHUVSDFH
)60
$;,/,7(WR,3,)
397021%ORFN
$QDORJ,)
$;,/,7(
Send Feedback
A lightweight PicoBlaze™ controller is used to set up the SYSMON registers in continuous
sequence mode and read various rail data periodically. The output from the PicoBlaze
controller is made available in block RAM, and an FSM reads various rails from the block
RAM (as shown in Figure 5-10) and updates the user space registers. These registers can be
accessed over PCIe through a BAR-mapped region.
The AXI4-Lite IP interface (IPIF) core is used in the design and the interface logic between
the block RAM and the AXI4-Lite IPIF reads the power and temperature monitor registers
from block RAM. Providing an AXI4-Lite slave interface adds the flexibility of using the
module in other designs.
X-Ref Target - Figure 5-10
See the UltraScale Architecture System Monitor User Guide (UG580) [Ref 9] for more
information.
Data Flow
The data transfer between the host and the card uses the following data flow.
S2C Traffic Flow
1. The Host maintains SRC-Q, STAS-Q.
2. Hardware SGL block provides DST-Q through hardware SGL interface.
3. DMA fetches SRC-Q and buffer pointed to by SRC-Q.
4. DMA provides data on AXI MM interface as indicated by the DST-Q SGL element.
5. Due to use of a hardware SGL interface, DMA does not fetch DST-Q elements and there
Figure 5-10: PVTMON Functional Block Diagram
is no STAD SGL involved.
PCIe Streaming Data Plane TRD www.xilinx.com 54
UG920 (v2017.1) June 01, 2017
Page 55

Chapter 5: Targeted Reference Design Details and Modifications
Send Feedback
6. DMA updates STAS-Q after transfer completion.
7. Hardware SGL Prepare block converts the AXI MM data from DMA to AXI Streaming data
to Generator/Checker block.
C2S Traffic Flow
1. Host maintains DST-Q, STAD-Q.
2. Hardware SGL block provides SRC-Q through hardware SGL interface.
3. DMA fetches DST-Q.
4. DMA fetches buffer pointed to by SRC-Q.
5. Due to use of a hardware SGL interface, DMA does not fetch SRC-Q and there is no
STAS-Q involved.
6. Hardware SGL Prepare block converts the AXI Streaming data from Generator/Checker
to AXI MM data to Northwest Logic DMA.
7. DMA writes buffer to address pointed to by DST-Q and updates STAD-Q after
completion of transfer.
Note:
logic registers. This design uses predefined regions.
The section on Setup Procedure for 2x10G Ethernet Design, page 69 explains how the steps
described above can be extended to include a user application block.
The address regions to be used on card memory can be pre-defined or advertised by the user
Software
Expresso DMA Driver Design
The section describes the design of the PCIe Expresso DMA (XDMA) driver with the
objective of enabling use of the XDMA driver in the software stack.
Prerequisites
An awareness of the Expresso DMA hardware design and a basic understanding of the PCIe
protocol, software engineering fundamentals, and Windows and Linux OS internals are
required.
PCIe Streaming Data Plane TRD www.xilinx.com 55
UG920 (v2017.1) June 01, 2017
Page 56

Chapter 5: Targeted Reference Design Details and Modifications
Send Feedback
Frequently Used Terms
Table 5-6 defines terms used in this document.
Table 5-6: Frequently Used Terms
Term Description
XDMA driver Low level driver to control the Expresso DMA. The driver is agnostic of the
applications stacked on top of it and serves the basic purpose of ferrying data
across the PCIe link.
application driver Device driver layer stacked on the XDMA driver and hooks up with a protocol stack
or user space application. For example, Ethernet driver, user traffic generator.
host/system Typically a server/desktop PC with PCIe connectivity.
Endpoint (EP) card PCIe Endpoint, an Ethernet card attached to PCIe slots of a server/desktop PC.
SGL Scatter gather list. This is a software array with elements in the format proscribed
for Expresso DMA. This list is used to point to I/O buffers from/to which Expresso
DMA transfers data across a PCIe link. This SGL exists in the host system memory.
Source SGL SGL used to point to source I/O buffers. Expresso DMA takes data from Source SGL
I/O buffers and drains into EP I/O buffers pointed to by buffer descriptors that are
populated by hardware logic in EP.
Destination SGL SGL used to point to destination I/O buffers. Expresso DMA takes data from EP I/O
buffers pointed to by buffer descriptors that are populated by hardware logic in EP
and drains into host I/O buffers pointed to by Destination SGL I/O buffers. The
Destination SGL is resident in the host system memory.
S2C System to (PCIe) card. Data transfers from host I/O buffers (source) to EP I/O
buffers (destination).
C2S (PCIe) card to system. Data transfer from EP I/O buffers (source) to host I/O buffers
(destination).
Design Goals
Design goals for this TRD include the following:
• Provide a driver to facilitate I/Os over PCIe using Expresso DMA
• Present to the application driver a set of APIs using application drivers that can
perform high speed I/Os between the host (server) and EP
• Abstract the inner working of Expresso DMA which can be treated as a black box by
application drivers through APIs
• Create a common driver for different scenarios where the source and destination SGL
can reside on the host, EP, or both host and EP. In this TRD, the scenario of the host
software controlling source/destination SGL while EP hardware logic controlling
corresponding destination/source SGL is explored.
PCIe Streaming Data Plane TRD www.xilinx.com 56
UG920 (v2017.1) June 01, 2017
Page 57

Chapter 5: Targeted Reference Design Details and Modifications
Send Feedback
SGL Model
In the SGL model of operation used in this TRD, all four SGLs corresponding to the four
DMA channels (one SGL per channel) reside in host memory. Note that a real-world use
case might not require all four channels to be operational.
For every channel, one source/destination SGL is used to point to I/O buffers in the host
memory. Corresponding source/destination scatter gather (SG) elements of the channel are
managed by hardware logic.
Based on application logic requirements, each channel (and a SGL corresponding to the
channel) is configured as IN/OUT. For example, an Ethernet application might configure
channel 0 to send Ethernet packets from the host to the EP (say the EP is an Ethernet host
bus adaptor (HBA) card for transmitting to the external world (S2C direction), while channel
1 is configured to get incoming Ethernet packets from the external world and send them
into host memory (C2S direction).
With this SGL model of operation, the application driver need not be aware of the memory
map of the PCIe EP because the driver does not have any control of the EP
source/destination location from which data is transferred. This model is typically used
where there is hardware logic in the EP that is aware of the Expresso DMA SGL format and
operating principles.
PCIe Streaming Data Plane TRD www.xilinx.com 57
UG920 (v2017.1) June 01, 2017
Page 58

X-Ref Target - Figure 5-11
Host Memory
PCIe Endpoint
Channel 0 SW
Descriptor
Host SGL
Host SGL
(Channel 0)
I/O Buffer
I/O Buffer
I/O Buffer
Host SGL
(Channel 1)
I/O Buffer
I/O Buffer
I/O Buffer
Host SGL
(Channel 2)
I/O Buffer
I/O Buffer
I/O Buffer
Host SGL
(Channel 3)
I/O Buffer
I/O Buffer
I/O Buffer
UG920_c5_11_111114
PCIe Link
Expresso DMA Aware
Hardware Logic
Populate
Buffer
Descriptors
(BDs) for I/Os
BD BD BD
Buffer Descriptor
(BD) FIFO
I/O Buffer
I/O Buffer
I/O Buffer
Endpoint Memory
Channel 1 SW
Descriptor
Host SGL
Channel 2 SW
Descriptor
Host SGL
Channel 3 SW
Descriptor
Host SGL
Send Feedback
Chapter 5: Targeted Reference Design Details and Modifications
Figure 5-11 provides a functional block diagram of the SGL model of operation used in the
TRD.
• Descriptors: There are four SGL descriptors instantiated (assuming all four channels
are in use). One SGL descriptor has to be created for each channel (host SGL) to use.
The XDMA driver creates an SGL corresponding to each SGL descriptor. The application
driver passes a pointer to the SGL descriptor to APIs when it wants to perform any
operation on the SGL, for example, perform I/O, activate SGL, stop I/O, and so on after
the creation of the SGL descriptor.
• Host SGL: There is one host SGL per channel and it is used by the application driver by
invoking APIs to perform operations on the SGL, for example, to perform I/O, activate
SGL, stop I/O, and so on. The host SGL list elements are used to point to I/O buffers
which are source or sink (destination) of data, depending on the direction in which the
channel is used for data transfer. In the S2C direction, host SGL elements point to
source I/O buffers and in the C2S direction. the host SGL elements point to sink
(destination) I/O buffers. The I/O buffers belong to (that is, are resident on) the host.
An important attribute of host SGL loc_axi is set to false to indicate to Expresso DMA
that the I/O buffer being pointed to by the SGL element is present on the host.
PCIe Streaming Data Plane TRD www.xilinx.com 58
UG920 (v2017.1) June 01, 2017
Figure 5-11: SGL Model of Operation
Page 59

Chapter 5: Targeted Reference Design Details and Modifications
Send Feedback
• EP memory: This memory is used to store I/O buffers from/to which Expresso DMA
transfers data to/from the host I/O buffers.
• Buffer descriptor (BD) FIFO: In the hardware SGL model, there is no SGL in EP. Instead,
there is a FIFO in which buffer descriptors pointing to I/O buffers in EP memory are
populated. Expresso DMA processes each BD and transfers data between the I/O buffer
pointed to by the BD and the host I/O buffer.
• Expresso DMA-aware hardware logic: This hardware logic is aware of the BD format
of Expresso DMA and its principles of operation. Whenever data is to be transferred
to/from host I/O buffers, this logic populates an appropriate BD in BD FIFO. Expresso
DMA then performs the I/O, resulting in data transfer.
• I/O buffer/FIFO: These are the memory locations on the host/EP from/to which
Expresso DMA actually performs data transfers. Expresso DMA makes use of buffer
descriptor elements and the loc_axi flag in these elements to determine the location of
source and destination of I/O buffers/FIFOs for data transfer. The XDMA driver on the
host and hardware logic on the EP mark the appropriate flag in the buffer descriptor to
facilitate data transfer.
PCIe Streaming Data Plane TRD www.xilinx.com 59
UG920 (v2017.1) June 01, 2017
Page 60

Chapter 5: Targeted Reference Design Details and Modifications
UG920_c5_12_041415
Send Feedback
XDMA Driver Stack and Design
The XDMA driver provides APIs to application drivers. Most of these APIs require passing
the pointer to the SGL descriptor. The application driver has to create two SGL descriptors
for each channel it intends to use. Figure 5-11 provides a functional block diagram.
X-Ref Target - Figure 5-12
• API Logic: APIs exported to the application driver. This logic executes in the context of
the calling process. APIs can be invoked from process and bottom half context.
• Interrupt handling and post-processing logic: This logic performs post-processing
after an I/O buffer is submitted and Expresso DMA is done processing the buffer. For
source buffers, this logic takes affect when the data has been taken from source buffers
and copied into destination buffers. For destination buffers, this logic takes affect when
data is copied from source buffers into it. Post-processing logic performs cleanups after
a source or destination buffer is used (as source/sink of data) by DMA. Post-processing
logic invokes callbacks that might have been provided by the application driver.
• Bridge Initialization: The Expresso IP Core contains a bridge for protocol conversion
(AXI to PCIe and vice versa) which needs initialization. The details on bridge
initialization are documented under Bridge Initialization, page 42.
PCIe Streaming Data Plane TRD www.xilinx.com 60
UG920 (v2017.1) June 01, 2017
Figure 5-12: XDMA Driver Stack and Design
Page 61

Chapter 5: Targeted Reference Design Details and Modifications
Send Feedback
Performing Transfers using the XDMA Driver with Linux
Use these steps to prepare the application driver to use the XDMA driver to transfer data
between the host and EP in a Linux environment. Passing of an OUT direction parameter
indicates to the XDMA driver that the SGL is a source-side SGL; passing of an IN parameter
indicates to the XDMA driver that the SGL is a destination-side SGL.
S2C I/O
In these steps channel 0 is used and data from the host I/O buffer resident at a virtual
address of 0x12340000 has to be transferred to a fixed AXI address of 0x12340000) in the
EP.
1. Create a source SGL software descriptor using XDMA API xlnx_get_dma_channel ().
Specify the direction as OUT. Call this descriptor s2c_chann0_out_desc. This is the
descriptor for source SGL.
2. Allocate queues for the SGL using XDMA API xlnx_alloc_queues ().
3. Activate the DMA channel using XDMA API xlnx_activate_dma_channel ().
4. Invoke XDMA API xlnx_data_frag_io () passing parameters s2c_chann0_out_desc,
0x12340000, and address type as VIRT_ADDR. A pointer to a callback function also can
be passed (optional).
This causes the data to be drained from the host I/O buffer pointed to by 0x12340000
to the EP memory pointed to by a BD element populated by hardware logic. The host
side software stays agnostic of this location. Optional callbacks are invoked for SGL
descriptors so that application drivers can do necessary post-data transfer clean up.
C2S I/O
In these steps channel 1 is used and data from the EP has to be transferred to a host I/O
buffer at a physical address of 0x880000.
1. Create a destination SGL software descriptor using XDMA API xlnx_get_dma_channel ().
Specify the direction as IN. For this example, the descriptor is called
c2s_chann1_in_desc. This is the descriptor for destination SGL.
2. Allocate Qs for the SGL using XDMA API xlnx_alloc_queues ().
3. Activate the DMA channel using XDMA API xlnx_activate_dma_channel ().
4. Invoke XDMA API xlnx_data_frag_io () passing parameters c2s_chann1_in_desc,
0x880000, and address type as PHYS_ADDR. A pointer to a callback function also can
be optionally passed.
This causes the data to be drained from the EP I/O buffer to the host I/O buffer physical
address location 0x880000. The host software is agnostic of the EP memory location
PCIe Streaming Data Plane TRD www.xilinx.com 61
UG920 (v2017.1) June 01, 2017
Page 62

Chapter 5: Targeted Reference Design Details and Modifications
Send Feedback
from which the transfer took place. Optional callbacks are invoked for both SGL
descriptors so that application drivers can do the necessary post-data transfer clean up.
Performing Transfers using the XDMA Driver with Windows
The following are required for an application driver to make use of an XDMA driver to
perform data transfer between the host and EP in a Windows environment.
Application Driver Registration
The application driver must register itself with the XDMA driver to be able to communicate
through the DMA channel of its choice. The DMA driver exports an interface for other
drivers to enable this registration process.
The application driver has to open an interface exported by the XDMA driver and invoke
DmaRegister and relevant information such as number of buffer descriptors, coalesce
count, and callback routines to be invoked after transfers are complete.
If the channel requested by the aplication driver is free, the DMA driver accepts the
registration of the application driver and provides a handle to it for initiating transfers.
Initiating Transfers
The application driver can initiate transfers using the handle provided by the XDMA driver
after registration. Using the XDMADataTransfer API, an application driver can update either
the source or destination SGL of the channel by specifying the relevant value in
QueueToBeServiced parameter.
Callback Invocation
After completion of the DMA transaction, either transmit or receive for a particular channel.
the relevant callback provided by the application driver during the registration phase is
invoked. The application driver can take appropriate action based on the information
provided by the DMA driver, such as number of bytes completed or notification of errors (if
any) during the transfer.
PCIe Streaming Data Plane TRD www.xilinx.com 62
UG920 (v2017.1) June 01, 2017
Page 63

Chapter 5: Targeted Reference Design Details and Modifications
Send Feedback
Driver Configuration with Linux
Note: This section is only applicable to host computers running Linux.
The driver for Expresso DMA is developed to be highly configurable, depending on the
design of the end application using the Expresso DMA. Supported configurations are
detailed in Table 5-7.
Table 5-7: Driver Configuration Modes
Operating Mode Details Driver Macro to Enable
No Endpoint
processor (firmware)
based DMA
operation
Endpoint hardware
logic based DMA
operation
The macros PFORM_NO_EP_PROCESSOR and HW_SGL_DESIGN are mutually exclusive (only
one can be enabled). Enabling more than one of the macros can result in unpredictable
results.
In this mode, there is no firmware operation on the
Scatter Gather queues of the Expresso DMA inside the
PCIe Endpoint. The Expresso driver running on the host
manages the source-side and destination-side Scatter
Gather queues. The host driver has to be aware of the
source/destination address on the Endpoint from/to
which data is to be moved into the host/endpoint.
In this mode, the driver needs to be built for deployment
on the host only.
In this mode, hardware logic inside the Endpoint
operates source-/destination-side Scatter Gather
queues of a DMA channel (Hardware-SGL), while the
host-side DMA driver manages destination-/source-side
Scatter Gather queues of the channel. In this mode, the
Endpoint hardware logic is aware of the working of
Expresso DMA.
In this mode, the driver needs to be built for deployment
on the host only.
PFORM_NO_EP_PROCESSOR
HW_SGL_DESIGN
MSIx Support
The driver, when built for the host machine, supports MSIx mode. To disable MSIx mode,
comment out macro USE_MSIX in file ps_pcie_dma_driver.h.
API List
APIs are provided by the Expresso DMA (XDMA) driver to facilitate I/Os over the Expresso
DMA channels. Refer to Appendix D, APIs Provided by the XDMA Driver in Linux for more
information on the APIs for Linux and Appendix E, APIs Provided by the XDMA Driver in
Windows for more information on the APIs for Windows.
PCIe Streaming Data Plane TRD www.xilinx.com 63
UG920 (v2017.1) June 01, 2017
Page 64

Chapter 5: Targeted Reference Design Details and Modifications
Send Feedback
User Space Application Software Components
The user space software component comprises the application traffic generator block and
the GUI. The function of the traffic generator block is to feed I/O buffers to the XDMA driver
for demonstrating raw I/O performance capable by the Expresso DMA.
The user space software interfaces with the XDMA driver through an application data driver
in the I/O path and directly with the XDMA driver to fetch performance data from hardware
performance monitoring registers.
The application data driver provides a character driver interface to user space software
components.
Graphical User Interface
The user space GUI is a Java-based interface that provides these features:
• Install/uninstall selected mode device drivers
• Gather statistics like power, PCIe reads/writes, and AXI reads/writes from the DMA
driver and display them in the Java GUI
• Control test parameters like packet size and mode (S2C/C2S)
• Display PCIe information such as credits, etc.
• Graphically represent performance numbers
• JNI layer of the GUI interacts with the application traffic generator and driver interface.
It is written in C++.
Application Traffic Generator
The application traffic generator is a multi-threaded application that generates traffic. It
constructs a packet according to the format of the application driver and includes these
threads:
•A TX thread allocates and formats a packet according to test parameters.
•A TX done thread polls for packet completion.
•An RX thread provides buffers to the DMA ring.
•An RX done thread polls for receiving packets. I
•A main thread spawns all these threads according to test parameters.
PCIe Streaming Data Plane TRD www.xilinx.com 64
UG920 (v2017.1) June 01, 2017
Page 65

Chapter 5: Targeted Reference Design Details and Modifications
Send Feedback
The GUI and Application Traffic Generator Interface
In Linux, the GUI and application traffic generator communicate through UNIX sockets. The
GUI opens a UNIX socket and sends messages to the application traffic generator. The main
thread of the application traffic generator waits for a message from the GUI and spawns
threads according to the test mode.
In Windows, the application traffic generator is a part of the GUI itself, so there is no
requirement for any socket communication. It is implemented in a dynamic linked library
which is invoked by the GUI when it starts. The GUI spawns threads according to the test
mode.
The GUI and XDMA Driver Interface
The XDMA driver polls power monitor and performance monitor statistics periodically and
stores the statistics in internal data structures. The GUI periodically polls these statistics
from the XDMA driver by opening the driver interface and sending IOCTL system calls.
PCIe Streaming Data Plane TRD www.xilinx.com 65
UG920 (v2017.1) June 01, 2017
Page 66

X-Ref Target - Figure 5-13
8*BFBB
Application Traffic Generator GUI
Driver Entry Points
Driver Private
Interface
DMA Queue Management
Driver Entry Points
Interrupt / Polling
Operations
Perf Monitor
DMA Engine
PCIe link, DMA Engine
and Power Statistics
User Space
Kernel Space
Application Data Driver
Base DMA Driver
Software
Hardware
Data Path Flow
Control Path Flow
DMA RX PORT DMA TX PORT
Application Layer Interface
Socket
Communication
User
Registers
DMA Engine Interface and Interrupt
Management Interface
Send Feedback
Chapter 5: Targeted Reference Design Details and Modifications
Application Traffic Generator and Application Driver Interface
The application traffic generator spawns threads that prepare packets according to test
parameters from the GUI. These packets are sent to the application driver by opening the
application driver and issuing write/read system calls. the control and path interfaces are
shown in Figure 5-13.
Figure 5-13: Control and Data Path Interfaces
PCIe Streaming Data Plane TRD www.xilinx.com 66
UG920 (v2017.1) June 01, 2017
Page 67

Chapter 5: Targeted Reference Design Details and Modifications
Send Feedback
Application Data Driver
The user space application opens the application driver interface and operates write/read
system calls. The application driver performs these steps for each direction of data transfer:
S2C Direction
1. Receives a WRITE system call from the user application along with the user buffer.
2. Pins the user buffer pages to protect them from swapping.
3. Converts the pages to physical addresses.
4. Stores all page address and buffer information in a local data structure for
post-processing usage.
5. Calls the relevant data transfer API of the XDMA driver for transfer of packets.
6. In the process of registration with the XDMA driver, a callback function is registered and
invoked after the XDMA driver receives the completion of the packet.
7. The completed packet is queued in the driver.
8. The application periodically polls for the completion of packet by reading the driver’s
queues.
C2S Direction
1. Sends free buffers from the user space by issuing a READ system call.
2. Pins the user buffer pages to protect them from swapping.
3. Converts the pages to physical addresses.
4. Stores all page address and buffer information in a local data structure for
post-processing usage.
5. Calls the relevant data transfer API of the XDMA driver for transfer of packet.
6. In the process of registration with the XDMA driver, a callback function is registered and
invoked after the XDMA driver receives a packet.
7. The received packet is queued in the driver.
8. The application periodically polls for receipt of a packet by reading the driver’s queues.
PCIe Streaming Data Plane TRD www.xilinx.com 67
UG920 (v2017.1) June 01, 2017
Page 68

Chapter 5: Targeted Reference Design Details and Modifications
Send Feedback
Reference Design Modifications
The TRD includes a pre-built Ethernet application as an extension of the base design. The
following section describes the setup procedure required to add the Ethernet application.
IMPORTANT: The pre-built user extension design can be tested only on Linux and not on Windows.
There is no support for the user extension design on the Windows platform.
The Generator and Checker based application (base design) is explained in the previous
section. With the base design, functionality of PCIe-DMA with the AXI4-Stream interface is
established. Consider adding a packet-based application, for example, 10-Gigabit Ethernet.
Because this is a x8 Gen2 link, dual 10-Gigabit Ethernet can operate at full bandwidth.
Consider what additional components would be needed to stitch the whole design
together. Figure 5-29 highlights the blocks that need to be added to the base design for
developing the Ethernet design. It is an extension of the base design. Two instances of
10-Gigabit Ethernet MAC and 10-Gigabit BASE-R PHY are added to convert this design to a
dual 10-Gigabit network interface card (NIC). The following section describes the setup
procedure required to test the 2x10G Ethernet design in both Application and Performance
modes.
PCIe Streaming Data Plane TRD www.xilinx.com 68
UG920 (v2017.1) June 01, 2017
Page 69

Chapter 5: Targeted Reference Design Details and Modifications
UG920_c5_14_061915
Send Feedback
Setup Procedure for 2x10G Ethernet Design
Refer to Chapter 3, Bringing Up the Design, for steps on preliminary setup. The only
addition to this setup is to connect the SFP+ (Avago AFBR-709SMZ or AFBR-703SDZ)
back-to-back connection cable (10GGBLCX20) to both the SFP cages of the board (as shown
in Figure 5-14) and to connect both J6 and J7 jumpers on the board to enable SFP. Follow
the same procedure until FPGA configuration is done and PCIe Endpoint is discovered. The
BIT file to be used for this is
<working_dir>/kcu105_axis_dataplane/ready_to_test/trd03_2x10g_top.bit
X-Ref Target - Figure 5-14
.
PCIe Streaming Data Plane TRD www.xilinx.com 69
UG920 (v2017.1) June 01, 2017
Figure 5-14: SFP+ Back-to-Back Connection
Page 70

Chapter 5: Targeted Reference Design Details and Modifications
UG920_c5_15_111914
Send Feedback
Check the status of the design using the KCU105 board LEDs. The design provides status
with the GPIO LEDs located on the upper right portion of the KCU105 board. When the PC
is powered on and the TRD has successfully configured, the LED status from left to right
indicates these conditions (see Figure 5-15):
• LED position 6: ON if reset for both the PHYs are done
• LED position 5: ON if the PHY1 Link is up
• LED position 4: ON if the PHY0 Link is up
• LED position 3: ON if the link speed is Gen2, else flashing (Link Speed Error)
• LED position 2: ON if the lane width is x8, else flashing (Lane Width Error)
• LED position 1: Heartbeat LED, flashes if PCIe user clock is present
• LED position 0: ON if the PCIe link is UP
Note:
X-Ref Target - Figure 5-15
The LED position numbering used here matches LED positions on the board.
PCIe Streaming Data Plane TRD www.xilinx.com 70
UG920 (v2017.1) June 01, 2017
Figure 5-15: GPIO LED Indicators for Ethernet
Page 71

X-Ref Target - Figure 5-16
UG920_c5_16_041615
Send Feedback
Chapter 5: Targeted Reference Design Details and Modifications
1. After the PC boots from the Fedora 20 LiveDVD, copy the software folder to the
/tmp directory.
2. Log in as super user by entering su on the terminal.
3. Enter cd /tmp/software
4. Enter chmod +x quickstart.sh
This shows up on the installer page which has detected a PCIe device with ID 8182 in
lspci. By default AXI Stream Dataplane is selected, as shown in Figure 5-16. Make sure
to select the Application check box. Click Install. This installs the drivers.
Figure 5-16: Installer Screen for Ethernet Application Design
PCIe Streaming Data Plane TRD www.xilinx.com 71
UG920 (v2017.1) June 01, 2017
Page 72

X-Ref Target - Figure 5-17
UG920_c5_17_020615
Send Feedback
Chapter 5: Targeted Reference Design Details and Modifications
5. After the device drivers are installed, the Control & Monitoring GUI window displays as
shown in Figure 5-17. Check that PHY link up LEDs on the GUI are green.
Figure 5-17: Control & Monitoring GUI for Ethernet Application
6. Open a terminal with super user permissions and check the IP address for both of the
MACs with this command:
$ ifconfig
PCIe Streaming Data Plane TRD www.xilinx.com 72
UG920 (v2017.1) June 01, 2017
Page 73

Chapter 5: Targeted Reference Design Details and Modifications
UG920_c5_18_121614
UG920_c5_19_121614
Send Feedback
8. A snapshot of the expected response for Ethernet IP settings is shown in Figure 5-18.
X-Ref Target - Figure 5-18
Figure 5-18: Ethernet IP Configuration Snapshot
7. Ping each MAC IP (Figure 5-19). The IP addresses to be used for this are 10.60.0.1 and
10.60.1.1 as opposed to 10.50.0.1 and 10.50.1.1 IP as shown in the ifconfig output. This
is because both the interfaces are supported on the same host and network address
translation (NAT) is used to set up the IP address to 10.60.0.1 and 10.60.1.1. This is done
during driver installation through scripts.
X-Ref Target - Figure 5-19
PCIe Streaming Data Plane TRD www.xilinx.com 73
UG920 (v2017.1) June 01, 2017
Figure 5-19: Ethernet Ping Snapshot
Page 74

X-Ref Target - Figure 5-20
UG920_c5_20_031815
Software Components
6RIWZDUH&RPSRQHQWV
Send Feedback
Chapter 5: Targeted Reference Design Details and Modifications
8. The block diagram of the design can be viewed by clicking Block Diagram on the top
right corner of the GUI, adjacent to the Xilinx logo (Figure 5-20).
Figure 5-20: Ethernet Block Diagram View
9. Close the block diagram by clicking the X button of the pop-up window.
PCIe Streaming Data Plane TRD www.xilinx.com 74
UG920 (v2017.1) June 01, 2017
Page 75

X-Ref Target - Figure 5-21
UG920_c5_21_020615
Send Feedback
Chapter 5: Targeted Reference Design Details and Modifications
10. Click the X mark on the top right corner of the GUI to close the GUI. It uninstalls the
drivers and returns to the TRD Setup screen (Figure 5-21).
Figure 5-21: Uninstall Device Drivers and Close the Ethernet Application GUI
Setup Procedure for Ethernet Design in Performance Mode
The setup procedure for Raw Ethernet is the same as for Ethernet Application until BIT file
programming. The BIT file is the same as the one for the 2x10G application test.
1. After the PC boots from the Fedora 20 LiveDVD, copy the folder software to the /tmp
directory.
2. Log in as super user by typing su on the terminal.
3. Enter cd /tmp/software
4. Enter chmod +x quickstart.sh
PCIe Streaming Data Plane TRD www.xilinx.com 75
UG920 (v2017.1) June 01, 2017
Page 76

X-Ref Target - Figure 5-22
UG920_c5_22_041615
Send Feedback
Chapter 5: Targeted Reference Design Details and Modifications
5. The installer page displays that it has PCIe device ID 8182 in lspci. By default the AXI
Stream Dataplane is selected, as shown in Figure 5-22. Make sure to select the Raw
Ethernet check box. Click Install. This installs the drivers.
Figure 5-22: Installer Screen for Raw Ethernet
PCIe Streaming Data Plane TRD www.xilinx.com 76
UG920 (v2017.1) June 01, 2017
Page 77
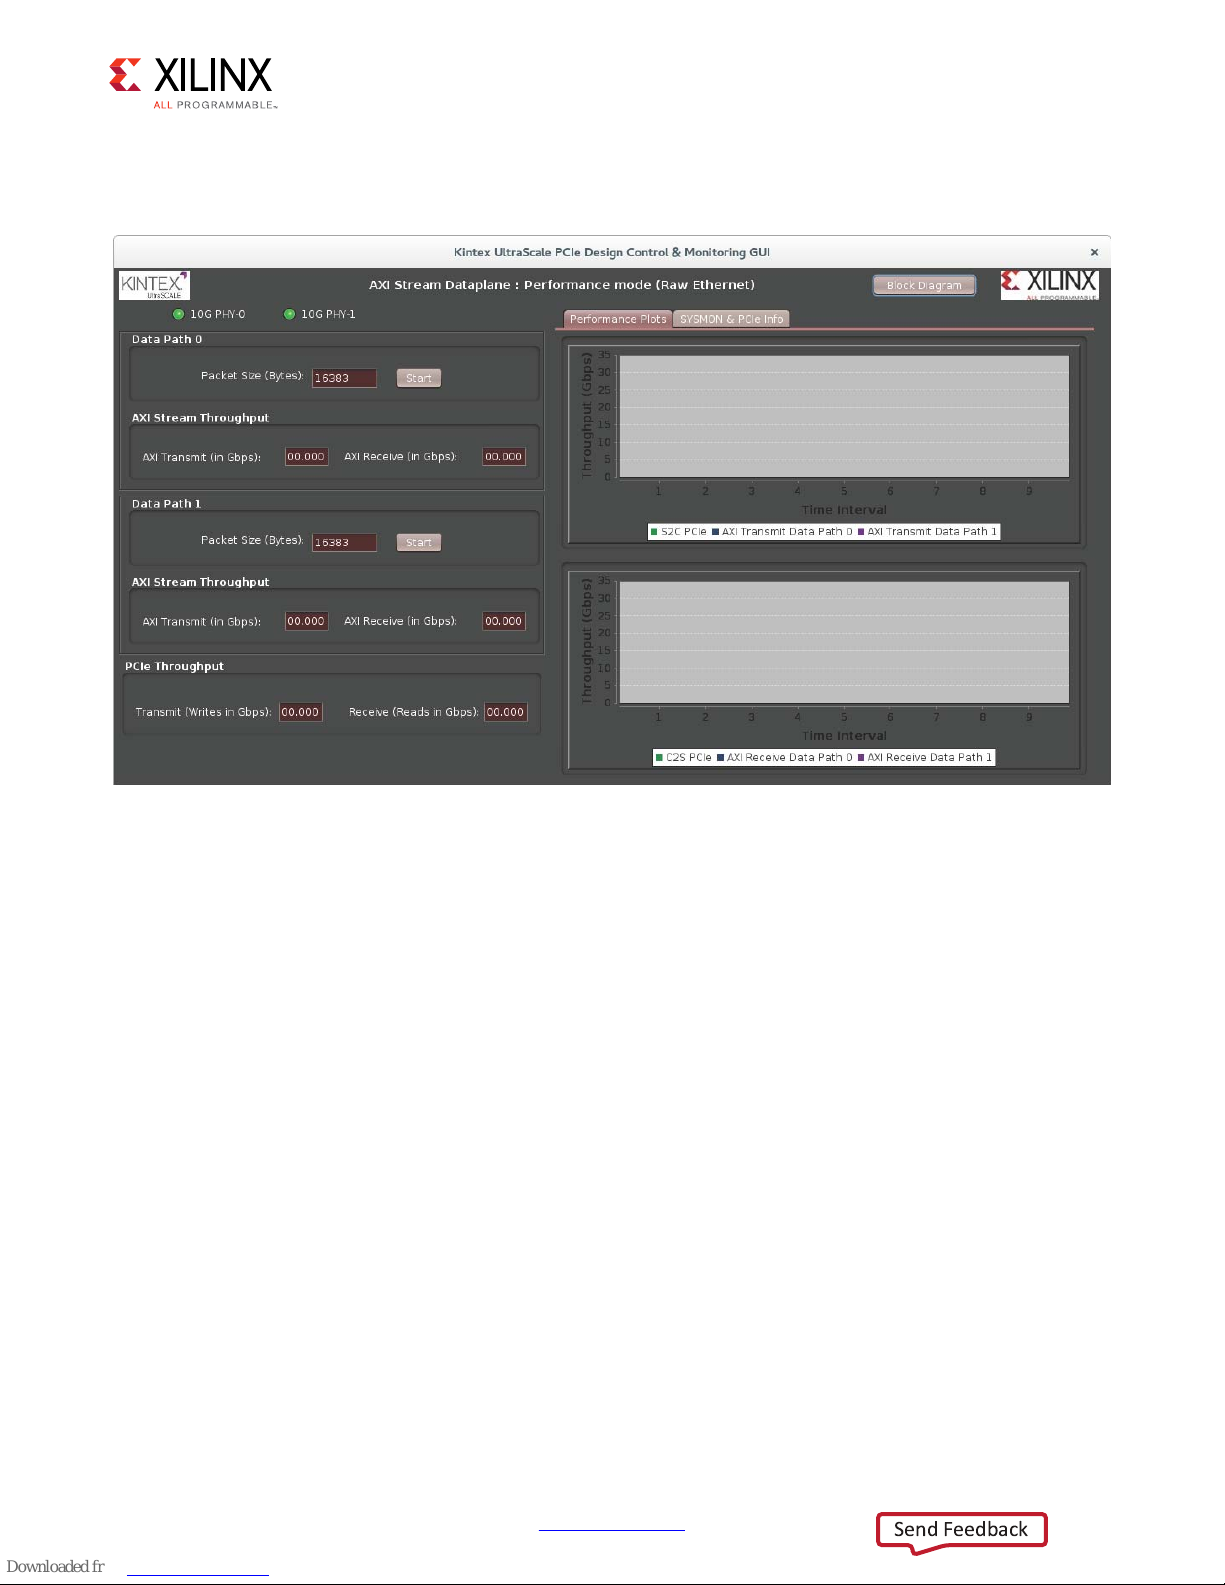
X-Ref Target - Figure 5-23
UG920_c5_23_020615
Send Feedback
Chapter 5: Targeted Reference Design Details and Modifications
6. After the device drivers are installed, the Control & Monitoring GUI window displays as
shown in Figure 5-23. Check that the PHY link up LEDs on the GUI are green.
Figure 5-23: Control & Monitoring GUI for Raw Ethernet
Data traffic can be started in both datapaths.
PCIe Streaming Data Plane TRD www.xilinx.com 77
UG920 (v2017.1) June 01, 2017
Page 78
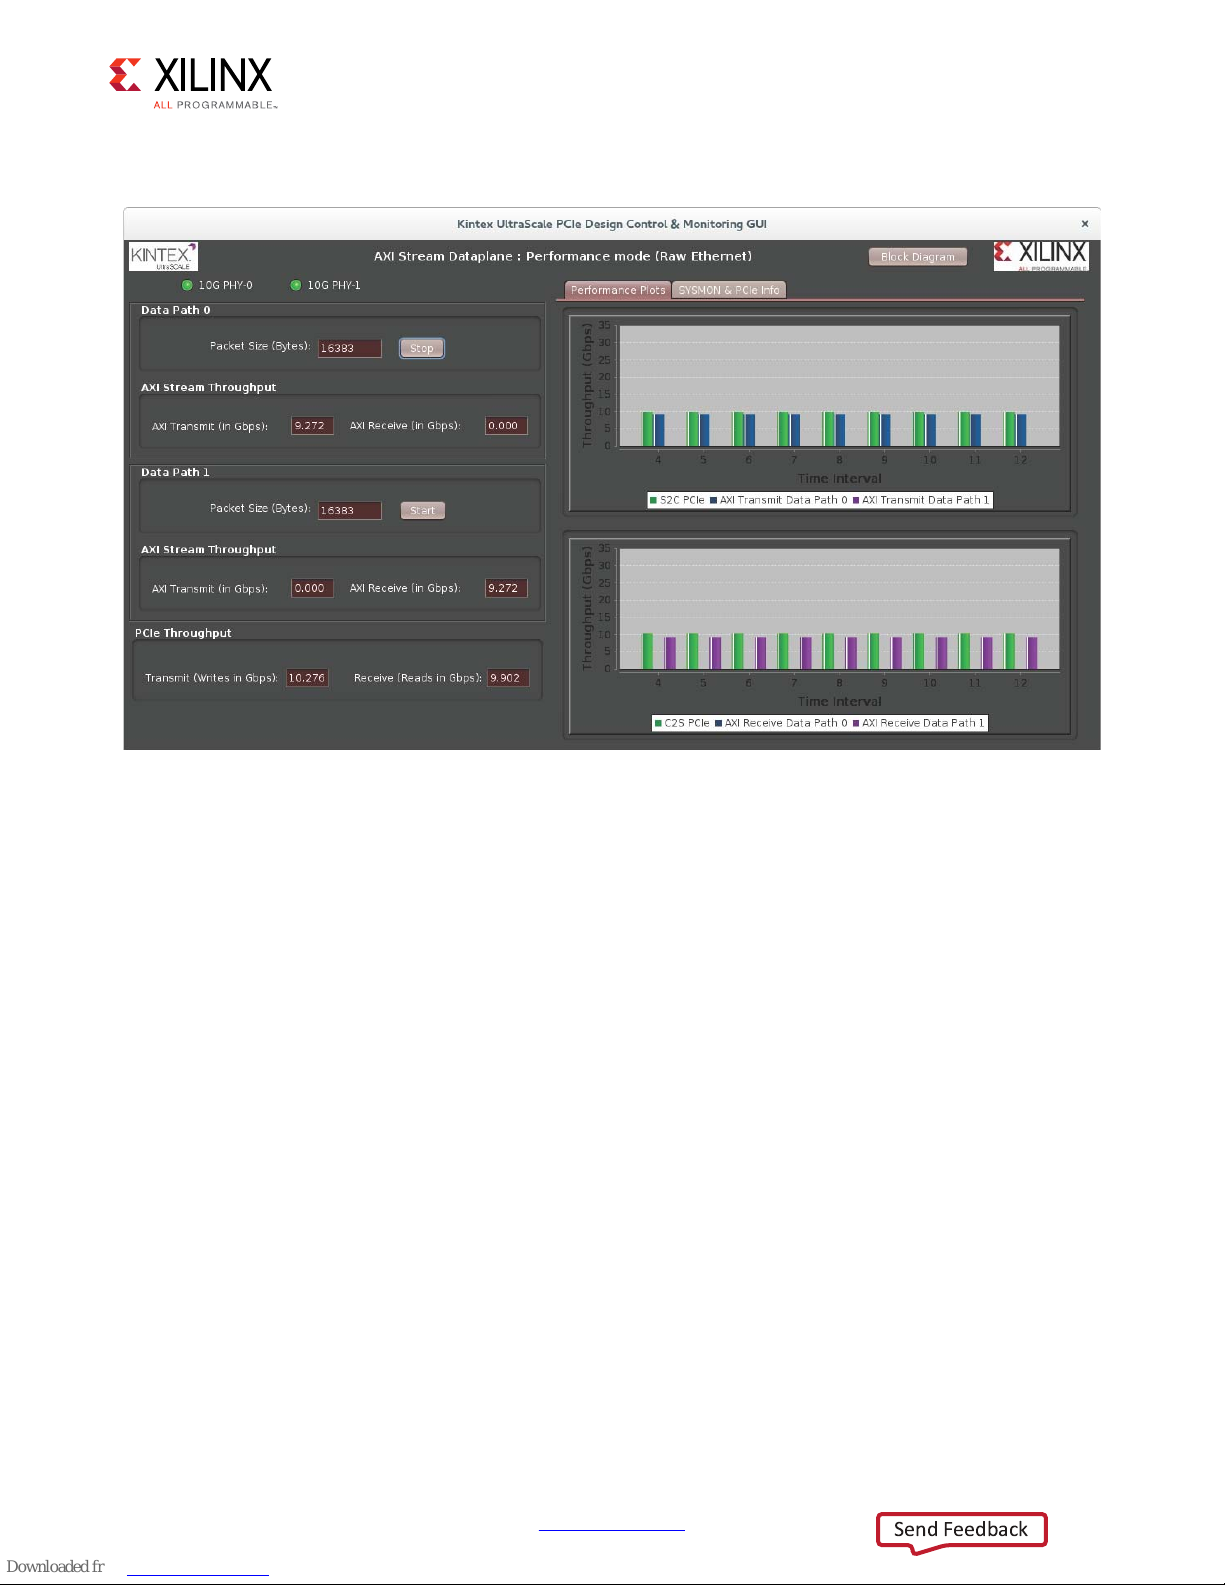
X-Ref Target - Figure 5-24
UG920_c5_24_020615
Send Feedback
Chapter 5: Targeted Reference Design Details and Modifications
7. Figure 5-24 shows the performance with Data Path -0 enabled.
Figure 5-24: Data Path 0 Performance
PCIe Streaming Data Plane TRD www.xilinx.com 78
UG920 (v2017.1) June 01, 2017
Page 79

Chapter 5: Targeted Reference Design Details and Modifications
UG920_c5_25_020615
Send Feedback
8. Figure 5-25 shows the performance with Data Path -1 enabled.
X-Ref Target - Figure 5-25
Figure 5-25: Data Path 1 Performance
PCIe Streaming Data Plane TRD www.xilinx.com 79
UG920 (v2017.1) June 01, 2017
Page 80

X-Ref Target - Figure 5-26
UG920_c5_26_061915
Send Feedback
Chapter 5: Targeted Reference Design Details and Modifications
9. Figure 5-26 shows performance with both the datapaths enabled.
Figure 5-26: Data Path 0 and 1 Performance
PCIe Streaming Data Plane TRD www.xilinx.com 80
UG920 (v2017.1) June 01, 2017
Page 81

X-Ref Target - Figure 5-27
UG920_c5_27_031815
Software Components
6RIWZDUH&RPSRQHQWV
Send Feedback
Chapter 5: Targeted Reference Design Details and Modifications
10. The block diagram of the design can be viewed by clicking Block Diagram on the top
right corner of the GUI, adjacent to the Xilinx logo (Figure 5-27).
Figure 5-27: Raw Ethernet Block Diagram View
11. Close the block diagram by clicking X in the pop-up window.
PCIe Streaming Data Plane TRD www.xilinx.com 81
UG920 (v2017.1) June 01, 2017
Page 82

X-Ref Target - Figure 5-28
UG920_c5_28_020615
Send Feedback
Chapter 5: Targeted Reference Design Details and Modifications
12. Click the X mark on the top right corner of GUI to close the GUI. It uninstalls the drivers
and returns to the TRD Setup screen (Figure 5-28).
Figure 5-28: Uninstall Device Drivers and Close the Raw Ethernet GUI
PCIe Streaming Data Plane TRD www.xilinx.com 82
UG920 (v2017.1) June 01, 2017
Page 83

X-Ref Target - Figure 5-29
$;,
3&,H
%ULGJH
1:/
5DZ'DWD
'ULYHU
.HUQHO
VSDFH
3&,H
/LQN
;
*HQ
+DUGZDUH6RIWZDUH
7&3
,3
6WDFN
*
7
,QWHJUDWHG3&,H%ORFN
3&,H,3
:UDSSHU
,QWHJUDWHG%ORFN
RQ)3*$
;LOLQ[,QKRXVH,3
&XVWRP/RJLF
LQ)3*$
6RIWZDUH
&RPSRQHQWV
$;,00,QWHUIDFH
ELW#0+]
7KLUG3DUW\,3
*8,
'0$
'ULYHU
.HUQHO
VSDFH
([SUHVVR
'0$
1:/
$;,
,QWHUFRQQHFW
0DLQ
+DUGZDUH
6*/6XEPLW
$;,
,QWHUFRQQHFW
/LWH
+DUGZDUH
6*/
3UHSDUH
3&,H3HUIRUPDQFH
0RQLWRU
$;,6WUHDP,QWHUIDFH
ELW#0+]
+:6*/,QWHUIDFH
ELW#0+]
$;,/LWH,QWHUIDFH
ELW#0+]
5;DQG7;%\WH&RXQW
&XVWRP,QWHUIDFH
$;,00,QWHUIDFH
ELW#0+]
+:6*/ $;,0DVWHU
UG920_c5_29_021715
$;,6ODYH
$;,0DVWHU$;,0DVWHU
+DUGZDUH
6*/
3UHSDUH
8VHU
5HJLVWHUV
$;,
3HUIRUPDQFH
0RQLWRU
*
0$&
*
0$&
*%$6(
5
*7
*%$6(
5
*7
ELW;*0,,
6HULDO,QWHUIDFH6)3
*EV
ELW;*0,,
Send Feedback
Chapter 5: Targeted Reference Design Details and Modifications
Pre-built Modification: Adding the Ethernet Application
This section describes the pre-built modification shipped with the TRD. It describes how the
design can be modified to build a PCI Express based Ethernet design.
This design demonstrates the use of PCIe Endpoint as a dual 10G Ethernet network interface
card (NIC). This design demonstrates movement of Ethernet traffic over PCIe. Two instances
of 10GBASE-R PCS-PMA are used with two 10G MACs. This uses the SFP+ interface available
on KCU105 (Figure 5-29).
Figure 5-29: PCIe-based AXIS Data Plane - 2x10G Ethernet Design
This design exercises all four DMA channels: two are used for S2C transfers and two for C2S
transfers. Each Ethernet MAC subsystem uses two DMA channels (one S2C and one C2S).
Two such instances are connected to hardware SGL Prepare blocks. Each hardware SGL
Prepare block is connected to an AXI Interconnect. The addresses get assigned as follows:
• MAC0 AXILITE - 0x44A20000
• MAC1 AXILITE - 0x44A30000
• MAC0 Datapath (Hardware SGL Prepare) - 0x4400_0000
• MAC1 Datapath (Hardware SGL Prepare) - 0x4500_0000
PCIe Streaming Data Plane TRD www.xilinx.com 83
UG920 (v2017.1) June 01, 2017
Page 84

Chapter 5: Targeted Reference Design Details and Modifications
*0$&
*
7
+
*%$6(5
ELW#0+]
;*0,,
3DFNHW
),)2
),)2
$;,/,7(
6HULDO
,QWHUIDFH
&ORFNV
0+]
'53&ORFN
5HVHW
$;,6WUHDP
ELW#0+]
$;,/,7(
0',2
5HFHLYH/RJLF
UG920_c5_30_100214
Send Feedback
Ethernet MAC and PHY Subsystem
This block is the logic comprising packet FIFO for transmit, receive logic for optional
address filtering, 10G MAC, and 10GPCS-PMA (10GBASE-R) IP (see Figure 5-30). The packet
FIFO handles the transmit requirement for 10G MAC where a packet once started cannot be
throttled in between. The maximum Ethernet frame size supported by the MAC is 16383
bytes (when jumbo is enabled), hence the packet FIFO should be deep enough to hold one
full frame of this size.
X-Ref Target - Figure 5-30
Figure 5-30: Ethernet MAC and PHY Subsystem
Receive Logic
The receive interface logic does the following:
• Receives incoming frames from 10G MAC and performs address filtering (if enabled to
do so)
• Based on packet status provided by 10G MAC-RX interface, decides whether to drop a
packet or pass it ahead to the system for further processing
The XGEMAC-RX interface does not allow back-pressure. That is, after a packet reception
has started, it completes the entire packet. The receive interface logic stores the incoming
frame in a local receive FIFO. This FIFO stores the data until it receives the entire frame. If
the frame is received without any error (indicated by tlast and tuser from the XGEMAC-RX
interface), it is passed ahead; otherwise it is dropped. The Ethernet packet length is read
from the receive statistics vector instead of implementing a separate counter in logic.
PCIe Streaming Data Plane TRD www.xilinx.com 84
UG920 (v2017.1) June 01, 2017
Page 85

Chapter 5: Targeted Reference Design Details and Modifications
Send Feedback
The depth of the FIFO in receive interface logic is decided based on the maximum length of
the frame to be buffered and the potential back-pressure imposed by the packet buffer. The
possible scenario of FIFO overflow occurs when the received frames are not drained out at
the required rate, in which case receive interface logic drops Ethernet frames. The logic also
takes care of cleanly dropping entire packets due to this local FIFO overflowing.
Address Filtering
Address filtering logic filters out a specific packet which is output from the XGEMAC receive
interface if the destination address of the packet does not match with the programmed
MAC address. A MAC address can be programmed by software using the register interface.
Address filtering logic does the following:
• Performs address filtering on the fly based on the MAC address programmed by
software
• Allows broadcast frames to pass through
• Allows all frames to pass through when Promiscuous mode is enabled
The receive interface state machine compares this address with the first 48 bits it receives
from the XGEMAC-RX interface during start of a new frame. If it finds a match, it writes the
packet to the receive FIFO in the receive interface; otherwise, the packet is dropped as it
comes out of the XGEMAC receive interface.
Rebuilding Hardware
A pre-built design script is provided for the user extension design which can be run to
generate a bitstream. The steps required to build the user extension design are described in
Chapter 4, Implementing and Simulating the Design.
PCIe Streaming Data Plane TRD www.xilinx.com 85
UG920 (v2017.1) June 01, 2017
Page 86

X-Ref Target - Figure 5-31
Network tools
Ifconfig, eth tool
UG920_c5_31_022615
Network Application
Network tools
Ifconfig, eth tool
GUI
TCP/IP STACK
Driver Entry:
net_device_ops, ethtool_ops
Driver Entry:
net_device_ops, ethtool_ops
Driver Private
Interface
Driver Private
Interface
Application Layer Interface Driver Entry:open,ioctl
Interrupt / Polling
Operations
DMA Operations Perf Monitor
10G MAC and
10G BASE-R PHY
Northwest Logic DMA
10G MAC and
10G BASE-R PHY
PCIe link, DMA Engine
and Power Statistics
User Space
Kernel Space
User Driver
Base DMA Driver
Software
Hardware
Driver Entry Points
Poll/Interrupt
Routines
Data Path Flow Control Path Flow
Send Feedback
Chapter 5: Targeted Reference Design Details and Modifications
Software for Ethernet Application
As shown in Figure 5-31, the Ethernet driver exports driver entry points that are used by the
Networking stack to send and receive data. It interacts with the DMA driver using the APIs
explained in the software DMA section to initiate transfers.
Datapath
System to card:
1. Standard networking applications s uch as w eb b r ows er, teln et, or N etp e rf c an b e us e d to
2. The Ethernet driver, through appropriate API calls in the DMA driver, submits the packet
initiate traffic in the Ethernet flow. The driver fits under the TCP/IP stack software, using
the standard hooks provided.
in buffer descriptors.
Figure 5-31: Ethernet Driver Stack and Design
PCIe Streaming Data Plane TRD www.xilinx.com 86
UG920 (v2017.1) June 01, 2017
Page 87

Chapter 5: Targeted Reference Design Details and Modifications
Send Feedback
Card to system:
1. The DMA driver receives the packet from buffer descriptor and submits the packets with
registered callback functions to the Ethernet driver.
2. The Ethernet driver submits the received packets to the networking stack. which is in
turn submitted to the appropriate application.
Control Path
Networking tools:
The Ethernet functionality in the driver does not require the Control & Monitoring GUI to be
operational. Ethernet comes up with the previously configured settings. Standard Linux
networking tools (for example, ifconfig and ethtool) can be used by the system
administrator when the configuration needs to be changed. The driver provides the
necessary hooks that enable standard tools to communicate with it.
GUI:
The GUI does not control test parameters and traffic generation. The GUI only displays
power. Periodically the GUI polls and updates the statistics through the DMA driver entry
points. The performance monitor is a handler that reads all performance-related registers
(link level for PCI Express, DMA engine level, and power level). Each of these is read
periodically at an interval of one second.
Software for Raw Ethernet Application:
This mode works similarly to the Base Raw data design. The application driver is the
character driver and the User application sends raw data with Ethernet headers appended in
the first 12 bytes. Because there is no Ethernet stack involved in data transfer, networking
stack overhead is eliminated. The two network interfaces are connected back-to-back. The
destination address in the Ethernet header is programmed as a broadcast message. A
packet is transmitted from one network interface and received as a broadcast packet on the
other interface.
This demonstrates maximum performance in eliminating networking stack overhead.
PCIe Streaming Data Plane TRD www.xilinx.com 87
UG920 (v2017.1) June 01, 2017
Page 88

Directory Structure
KDUGZDUH
VRXUFH
UHDG\BWRBWHVW
OLQX[BGULYHUBDSS
VRIWZDUH UHDGPH
kcu105_axis_dataplane
YLYDGR
KGO
FRQVWUDLQWV
LSBSDFNDJH
XL
UG920_aA_01_041415
testbench
ZLQGRZV
Send Feedback
The directory structure for the TRD is shown in Figure A-1 and described in Table A-1. For
a detailed description of each folder, see the Readme file.
X-Ref Target - Figure A-1
Appendix A
PCIe Streaming Data Plane TRD www.xilinx.com 88
UG920 (v2017.1) June 01, 2017
Figure A-1: TRD Directory Structure
Page 89

Appendix A: Directory Structure
Send Feedback
Table A-1: Directory Description
Folder Description
readme A text file that includes revision history information, a detailed description of
each folder, steps to implement and simulate the design, the required
Vivado® tool software version, and known limitations of the design (if any).
hardware Contains hardware design deliverables
sources
hdl Contains HDL files
constraints Contains constraint files
ip_package Contains custom IP packages
ui IP Integrator (IPI) block diagram user interface file location
vivado Contains scripts to create a Vivado® Design Suite project and outputs of
Vivado tool runs
ready to test Contains the BIT files (Base and 2x10G) to program the KCU105 PCI Express
Streaming Data Plane application
software
linux_driver_app
windows
Contains software design deliverables for Linux and Windows
PCIe Streaming Data Plane TRD www.xilinx.com 89
UG920 (v2017.1) June 01, 2017
Page 90

Recommended Practices and
Send Feedback
Troubleshooting in Windows
Recommended Practices
RECOMMENDED: Make a backup of the system image and files using the Backup and Restore
utility of the Windows 7 operating system before installing reference design drivers. (As a
precautionary measure, a fresh installation of the Windows 7 OS is recommended for
testing the reference design.)
Appendix B
Troubleshooting
Problem: The TRD Setup screen of the GUI does not detect the board.
Corrective Actions:
1. If the GUI does not detect the board, open Device Manager and see if the drivers are
loaded under Xilinx PCI Express Device.
2. If the drivers are not loaded, check the PCIe Link Up LED on the board (see Figure 5-15).
3. If the drivers are loaded but the GUI is not detecting the board, remove non-present
devices from Device Manager using the following steps.
a. Open a command prompt with Administrator privileges.
b. At the command prompt, enter the following bold text:
set devmgr_show_nonpresent_devices=1
start devmgmt.msc
c. Click the View menu and select Show hidden devices on the Device Manager
window.
d. Non-present devices are indicated by a lighter shade of text.
e. Look for all the Non Present/Hidden devices. Right-click each one, and select
Uninstall. Remove the driver if prompted for it.
PCIe Streaming Data Plane TRD www.xilinx.com 90
UG920 (v2017.1) June 01, 2017
Page 91

Appendix B: Recommended Practices and Troubleshooting in Windows
Send Feedback
4. Invoke the GUI of the reference design and check if it detects the board.
PCIe Streaming Data Plane TRD www.xilinx.com 91
UG920 (v2017.1) June 01, 2017
Page 92

Register Space
Send Feedback
Generator and Checker Configuration Registers
This section lists register map details for control and configuration of the Generator
Checker IP.
Table C-1: Enable Loopback Register (0x44A0_0000)
Bit Position Mode Default Value Description
31:1 Read only 0 Reserved
0R/W0 To enable Loopback mode. Value of 1 enables Loopback mode.
Table C-2: Enable Generator Register (0x44A0_0004)
Appendix C
Bit Position Mode Default Value Description
31:1 Read only 0 Reserved
0R/W0 Enable traffic generator. Value of 1 enables traffic generator.
Table C-3: Enable Checker Register (0x44A0_0008)
Bit Position Mode Default Value Description
31:1 Read only 0 Reserved
0R/W0 Enable traffic checker. Value of 1 enables traffic checker.
Table C-4: Generator Length Register (0x44A0_000C)
Bit Position Mode Default Value Description
31:0 R/W 0
Table C-5: Checker Length Register (0x44A0_0010)
Bit Position Mode Default Value Description
31:0 R/W 0 Packet length to be checked in Checker mode.
Packet length to be generated in Generate mode.
Maximum supported size is 32 KB packets.
PCIe Streaming Data Plane TRD www.xilinx.com 92
UG920 (v2017.1) June 01, 2017
Page 93

Table C-6: Sequence End Count Register (0x44A0_0014)
Send Feedback
Bit Position Mode Default Value Description
Appendix C: Register Space
31:0 R/W 0
Wrap count.
Value at which the sequence number should wrap around.
Table C-7: Status Register (0x44A0_0018)
Bit Position Mode Default Value Description
31:1 R/W 0 Reserved
0Read only0
Indicates data mismatch in Checker mode.
Value of 1 indicates a mismatch in Checker mode.
Ethernet MAC Registers
This section lists register map details for the MAC ID configuration for two MACs and PHY
status.
Table C-8: MAC_0 Promiscuous Mode Enable Register (0x44A0_1400)
Bit Position Mode Default Value Description
31:1 Read only 0x0000 Reserved
0 R/W 0x1 MAC_0 Promiscuous mode Enable.
Value of 1 enables Promiscuous mode.
Table C-9: MAC_0_ID_LOW Register (0x44A0_1404)
Bit Position Mode Default Value Description
31:0 R/W 0xCCDDEEFF Ethernet MAC 0 address lower 32 bits.
Table C-10: MAC_0_ID_HIGH Register (0x44A0_1408)
Bit Position Mode Default Value Description
31:16 Read only 0x0000 Reserved
15:0 R/W 0xAABB Ethernet MAC 0 address upper 16 bits.
Table C-11: MAC_1 Promiscuous Mode Enable Register (0x44A0_140C)
Bit Position Mode Default Value Description
31:1 Read only 0x0000 Reserved
0 R/W 0x1 MAC_1 Promiscuous mode Enable.
Value of 1 enables Promiscuous mode.
PCIe Streaming Data Plane TRD www.xilinx.com 93
UG920 (v2017.1) June 01, 2017
Page 94

Appendix C: Register Space
Send Feedback
Table C-12: MAC_1_ID_LOW Register (0x44A0_1410)
Bit Position Mode Default Value Description
31:0 R/W 0xDDCCBBAA Ethernet MAC 1 address lower 32 bits.
Table C-13: MAC_1_ID_HIGH Register (0x44A0_1414)
Bit Position Mode Default Value Description
31:16 Read only 0x0000 Reserved
15:0 R/W 0xFFEE Ethernet MAC 1 address upper 16 bits.
Table C-14: PHY_0_STATUS Register (0x44A0_1418)
Bit Position Mode Default Value Description
31:6 Read only 0x0000 Reserved
15:8 Read only 0x00 PHY 0 Status. LSB bit represents PHY link up status.
7:0 Read only 0x00 PHY 1 Status. LSB bit represents PHY link up status.
PCIe Streaming Data Plane TRD www.xilinx.com 94
UG920 (v2017.1) June 01, 2017
Page 95

Appendix D
Send Feedback
APIs Provided by the XDMA Driver in
Linux
Table D-1 describes the application programming interfaces (APIs) provided by the XDMA
driver in a Linux environment.
Table D-1: APIs Provided by the XDMA Driver
API Prototype Details Parameters Return
ps_pcie_dma_desc_t*
xlnx_get_pform_dma_de
sc (void *prev_desc,
unsigned short vendid,
unsigned short devid) ;
Returns pointer to an
instance of a DMA
descriptor. The XDMA
driver creates one
instance of a DMA
descriptor corresponding
to each Expresso DMA
Endpoint plugged into
PCIe slots of a system.
The host side API can be
called, successively
passing the previously
returned descriptor
pointer till all instance
pointers are returned. This
API is typically called by an
application driver (stacked
on the XDMA driver)
during initialization.
On the Endpoint side, this
API needs to be called just
once, because a single
XDMA instance is
supported.
prev_desc – Pointer to the
XDMA descriptor instance
returned in a previous call
to the API. When called for
the first time, NULL is
passed.
vendid – PCIe vendor ID
devid – PCIe device ID
Note: Currently the
XDMA driver does not
support multiple
Endpoints on the host
side, hence this API is
always called with all
parameters as 0.
API returns the pointer to
the XDMA software
descriptor. This pointer
can be used as a
parameter to other XDMA
driver APIs.
PCIe Streaming Data Plane TRD www.xilinx.com 95
UG920 (v2017.1) June 01, 2017
Page 96

Appendix D: APIs Provided by the XDMA Driver in Linux
Send Feedback
Table D-1: APIs Provided by the XDMA Driver (Cont’d)
API Prototype Details Parameters Return
int
xlnx_get_dma_channel(
ps_pcie_dma_desc_t
*ptr_dma_desc, u32
channel_id, direction_t
dir,
ps_pcie_dma_chann_desc
_t **pptr_chann_desc,
func_ptr_chann_health_c
bk_no_block
ptr_chann_health);
API is used to get a
pointer to a DMA channel
descriptor. XDMA has four
DMA channels.
This API is typically called
during initialization by the
application driver to
acquire a DMA channel,
whereby I/Os can be
performed. After the
channel is acquired, same
cannot be acquired until it
is relinquished.
ptr_dma_desc – XDMA
descriptor pointer
acquired from a call to
xlnx_get_pform_dma_desc
.
channel_id – Channel
number
dir – IN/OUT. Specifies the
direction of data
movement for channel. On
the host system OUT is
specified if a channel is
used to move data to the
Endpoint. On an Endpoint,
IN is specified if the
channel is used to move
data from the host to
Endpoint.
pptr_chann_desc –
Pointer to a placeholder to
store the pointer to the
XDMA channel software
descriptor populated by
an API. The Returned
channel descriptor pointer
is used by other APIs.
ptr_chann_health –
Callback that notifies the
application driver about
changes in the state of the
XDMA channel or the
DMA at large. The
application driver might
choose to keep this NULL.
The application driver
should check the channel
state to get more
information.
Returns XLNX_SUCCESS
on success. On failure, a
negative value is returned.
Check “/* Xilinx DMA
driver status messages */”
in
ps_pcie_dma_driver.
h for more information on
error codes.
int
xlnx_rel_dma_channel (
ps_pcie_dma_chann_desc
_t *ptr_chann_desc);
An API is used to
relinquish an acquired
DMA channel.
PCIe Streaming Data Plane TRD www.xilinx.com 96
UG920 (v2017.1) June 01, 2017
ptr_chann_desc –
Channel descriptor
pointer to be released. The
pointer should have been
acquired by an earlier call
to xlnx_get_dma_channel.
Returns XLNX_SUCCESS
on success. On failure, a
negative value is returned.
Check “/* Xilinx DMA
driver status messages */”
in
ps_pcie_dma_driver.
h for more information on
error codes.
Page 97

Appendix D: APIs Provided by the XDMA Driver in Linux
Send Feedback
Table D-1: APIs Provided by the XDMA Driver (Cont’d)
API Prototype Details Parameters Return
int xlnx_alloc_queues(
ps_pcie_dma_chann_desc
_t *ptr_chann_desc,
unsigned int
*ptr_data_q_addr_hi,
unsigned int
*ptr_data_q_addr_lo,
unsigned int
*ptr_sta_q_addr_hi,
unsigned int
*ptr_sta_q_addr_lo,
unsigned int
q_num_elements);
Allocates
Source/Destination side
data and status queues.
Based on the direction of
the channel (specified
during the call to get the
DMA channel),
appropriate queues are
created.
ptr_chann_desc –
Channel descriptor
pointer acquired by an
earlier call to
xlnx_get_dma_channel.
ptr_data_q_addr_hi –
Pointer to a placeholder
for the upper 32 bits of
data queue address
ptr_data_q_addr_lo –
Pointer to a placeholder
for the lower 32 bits of
data queue address
ptr_sta_q_addr_hi –
Pointer to a placeholder
for the upper 32 bits of
status queue address
ptr_sta_q_addr_lo –
Pointer to a placeholder
for the lower 32 bits of
status queue address
q_num_elements –
Number of queue
elements requested. This
determines the number of
buffer descriptors.
Returns XLNX_SUCCESS
on success. On failure, a
negative value is returned.
Check “/* Xilinx DMA
driver status messages */”
in
ps_pcie_dma_driver.
h for more information on
error codes.
int xlnx_dealloc_queues(
ps_pcie_dma_chann_desc
_t *ptr_chann_desc)
De-allocates
source/destination side
data and status queues
ptr_chann_desc –
Channel descriptor
pointer
Returns XLNX_SUCCESS
on success. On failure, a
negative value is returned.
Check “/* Xilinx DMA
driver status messages */”
in
ps_pcie_dma_driver.
h for more information on
error codes.
PCIe Streaming Data Plane TRD www.xilinx.com 97
UG920 (v2017.1) June 01, 2017
Page 98

Appendix D: APIs Provided by the XDMA Driver in Linux
Send Feedback
Table D-1: APIs Provided by the XDMA Driver (Cont’d)
API Prototype Details Parameters Return
int
xlnx_activate_dma_channe
l(
ps_pcie_dma_desc_t
*ptr_dma_desc,
ps_pcie_dma_chann_desc
_t *ptr_chann_desc,
unsigned int
data_q_addr_hi,
unsigned int
data_q_addr_lo,
unsigned int data_q_sz,
unsigned int
sta_q_addr_hi,
unsigned int
sta_q_addr_lo,
unsigned int sta_q_sz,
unsigned char
coalesce_cnt,
bool warm_activate );
Activates acquired DMA
channel for usage.
ptr_chann_desc –
Channel descriptor
pointer acquired by an
earlier call to
xlnx_get_dma_channel
data_q_addr_hi – Upper
32 bits of data queue
address
data_q_addr_lo – Lower
32 bits of data queue
address
data_q_sz – Number of
elements in the data
queue. This is typically the
same as q_num_elements
passed in a call to
xlnx_alloc_queues.
sta_q_addr_hi – Upper 32
bits of status queue
address
sta_q_addr_lo – Lower 32
bits of status queue
address
sta_q_sz - Number of
elements in the status
queue. This is typically the
same as q_num_elements
passed in a call to
xlnx_alloc_queues.
coalesce_cnt – Interrupt
coalesce count
warm_activate – Set to
true if an API is called
after an earlier call to
xlnx_deactivate_dma_chan
nel.
Returns XLNX_SUCCESS
on success. On failure, a
negative value is returned.
Check “/* Xilinx DMA
driver status messages */”
in
ps_pcie_dma_driver.
h for more information on
error codes.
int
xlnx_deactivate_dma_chan
nel(
ps_pcie_dma_chann_desc
_t *ptr_chann_desc)
Deactivates the activated
DMA channel.
PCIe Streaming Data Plane TRD www.xilinx.com 98
UG920 (v2017.1) June 01, 2017
ptr_chann_desc –
Channel descriptor
pointer
Returns XLNX_SUCCESS
on success. On failure, a
negative value is returned.
Check “/* Xilinx DMA
driver status messages */”
in
ps_pcie_dma_driver.
h for more information on
error codes.
Page 99

Appendix D: APIs Provided by the XDMA Driver in Linux
Send Feedback
Table D-1: APIs Provided by the XDMA Driver (Cont’d)
API Prototype Details Parameters Return
int
xlnx_data_frag_io (
ps_pcie_dma_chann_desc
_t *ptr_chan_desc,
unsigned char *
addr_buf,
addr_type_t at,
size_t sz,
func_ptr_dma_chann_cb
k_noblock cbk,
unsigned short uid,
bool last_frag,
void *ptr_user_data);
This API is invoked to
transfer a data fragment
across a PCIe link. A
channel lock has to be
held while invoking this
API. For a multi-fragment
buffer, the channel lock
has to be held till all
fragments of buffer are
submitted to DMA.
The lock should not be
taken if the API is to be
invoked in a callback
context.
ptr_chann_desc –
Channel descriptor
pointer
addr_buf – Pointer to
start memory location for
DMA
at – Type of address
passed in parameter
addr_buf. Valid types can
be virtual memory
(VIRT_ADDR), physical
memory (PHYS_ADDR), or
physical memory inside
Endpoint
(EP_PHYS_ADDR)
sz – Length of data to be
transmitted/received
cbk – Callback registered
to notify completion of
DMA. An application can
unmap, or free buffers in
this callback. An
application can also
invoke the API to submit
new
buffer/buffer-fragments.
Callback is invoked by the
XDMA driver with channel
lock held. Can be NULL.
uid – UserId passed to
identify transactions
spanning multiple
(typically 2) DMA
channels. In a transaction
type of application, this
field is used to match
request/response. This
parameter can never be 0
and must be set to a
non-zero value even if the
field is unused.
last_frag – Set to true to
indicate the last fragment
of a buffer.
ptr_user_data – Pointer to
application-specific data
that is passed as a
parameter when callback
is invoked. Can be NULL.
Returns XLNX_SUCCESS
on success. On failure, a
negative value is returned.
Check “/* Xilinx DMA
driver status messages */”
in
ps_pcie_dma_driver.
h for more information on
error codes.
PCIe Streaming Data Plane TRD www.xilinx.com 99
UG920 (v2017.1) June 01, 2017
Page 100

Appendix D: APIs Provided by the XDMA Driver in Linux
Send Feedback
Table D-1: APIs Provided by the XDMA Driver (Cont’d)
API Prototype Details Parameters Return
int
xlnx_stop_channel_IO (
ps_pcie_dma_chann_desc
_t *ptr_chann_desc,
bool do_rst);
void
xlnx_register_doorbell_cb
k(
ps_pcie_dma_chann_desc
_t *ptr_chann_desc,
func_doorbell_cbk_no_bl
ock ptr_fn_drbell_cbk);
This API is invoked to stop
I/Os asynchronously, and
results in a reset of the
DMA channel.
This is a register callback
to receive doorbell
(scratchpad) notifications.
ptr_chann_desc –
Channel descriptor
pointer
do_rst – Currently this has
to be always set to true.
ptr_chann_desc –
Channel descriptor
pointer
ptr_fn_drbell_cbk –
Function pointer supplied
by the application drive.
Same is invoked when a
software interrupt is
invoked (typically after
populating the
scratchpad) to notify the
host/Endpoint.
Returns XLNX_SUCCESS
on success. On failure, a
negative value is returned.
Check “/* Xilinx DMA
driver status messages */”
in
ps_pcie_dma_driver.
h for more information on
error codes.
Void
PCIe Streaming Data Plane TRD www.xilinx.com 100
UG920 (v2017.1) June 01, 2017
 Loading...