


R511
Whirlpool R511, R512, R513, R515, R611 Use & Care Manual
...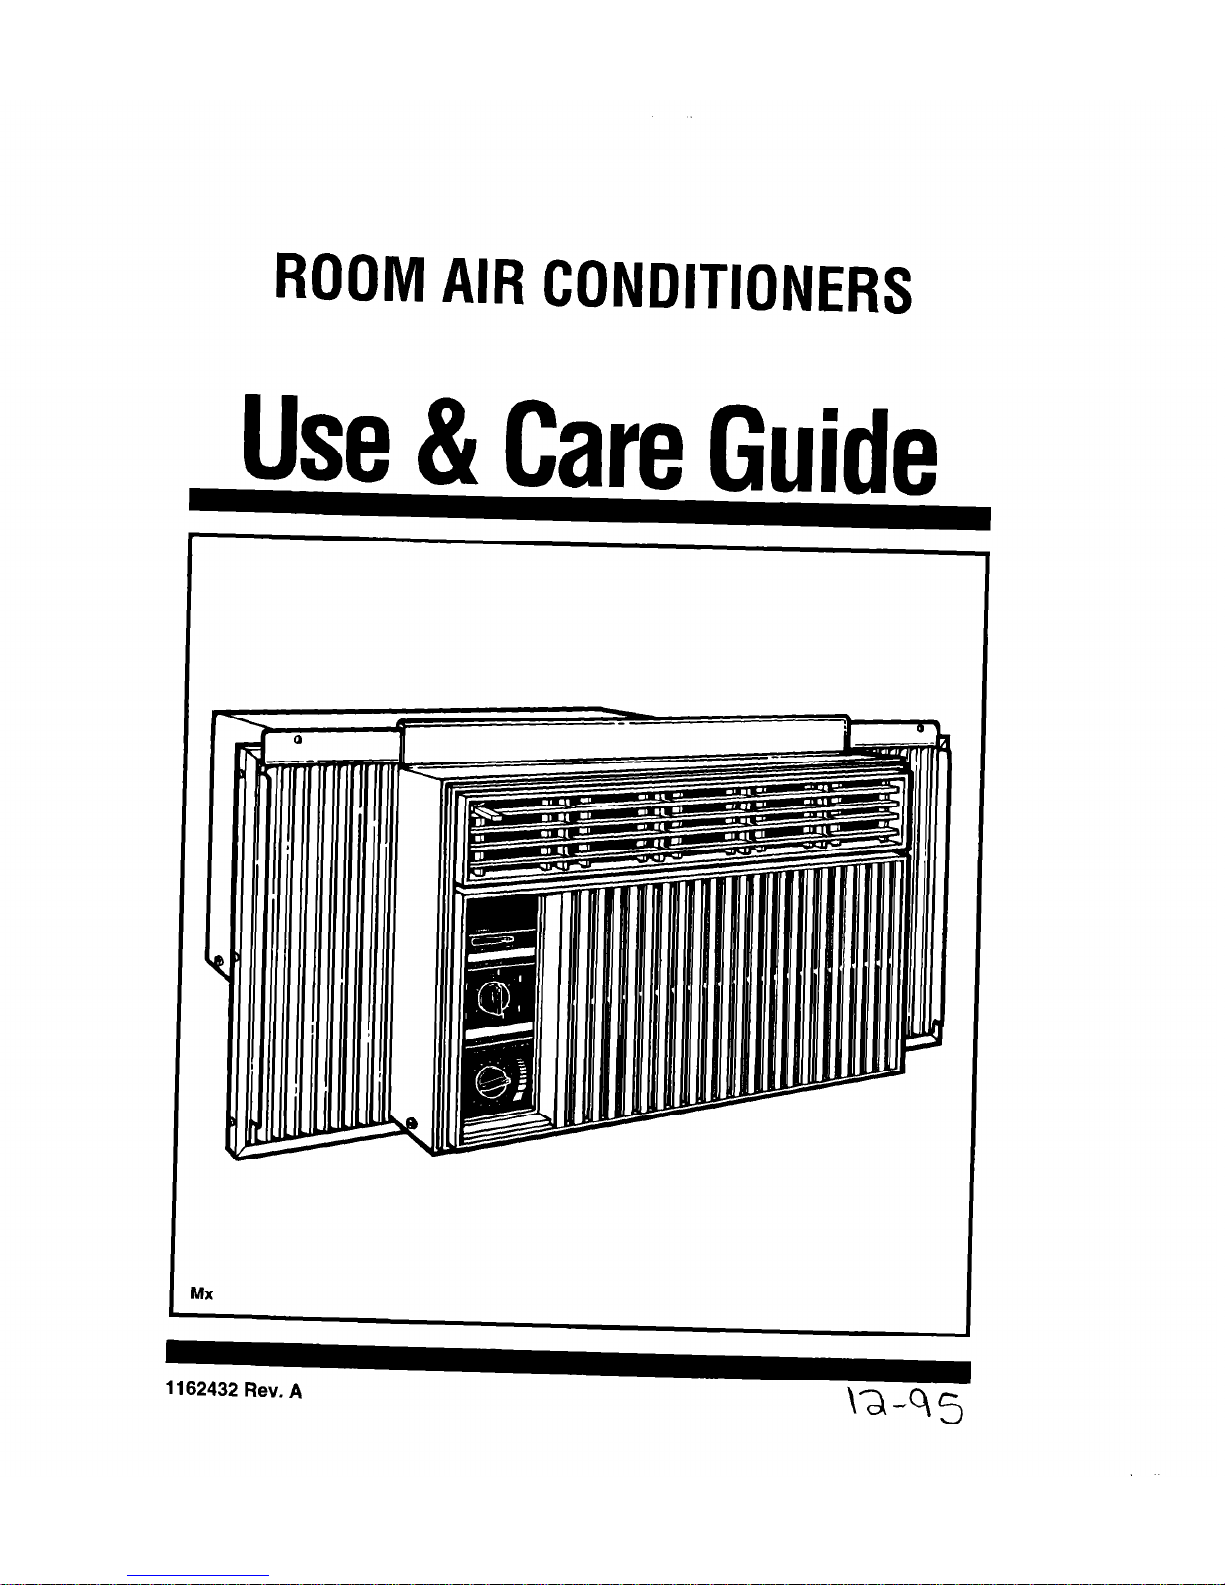
ROOM AIR CONDITIONERS
MX
1162432 Rev. A
\a-95
Use & Care Guide
\
Contents
Page
Important Safety Instructions ........................
2
Operating Your Air Conditioner..
.................... 3
Starting your air conditioner ...........................
3
The exhaust control .......................................
4
The ENERGY SAVER settings ......................
4
Changing air direction ....................................
4
Cleaning Your Air Conditioner.. ......................
5
Cleaning front panel and filter ........................
5
Caring For Your Air Conditioner..
................... 6
Annual maintenance.. .....................................
6
Energy saving tips ..........................................
7
Troubleshooting ..............................................
8
Requesting Assistance or Service
................. 9
Warranty ........................................................
1 1
Thank you for buying this appliance. Please
complete the form below. Have this information
ready if you need service or call with a question.
l
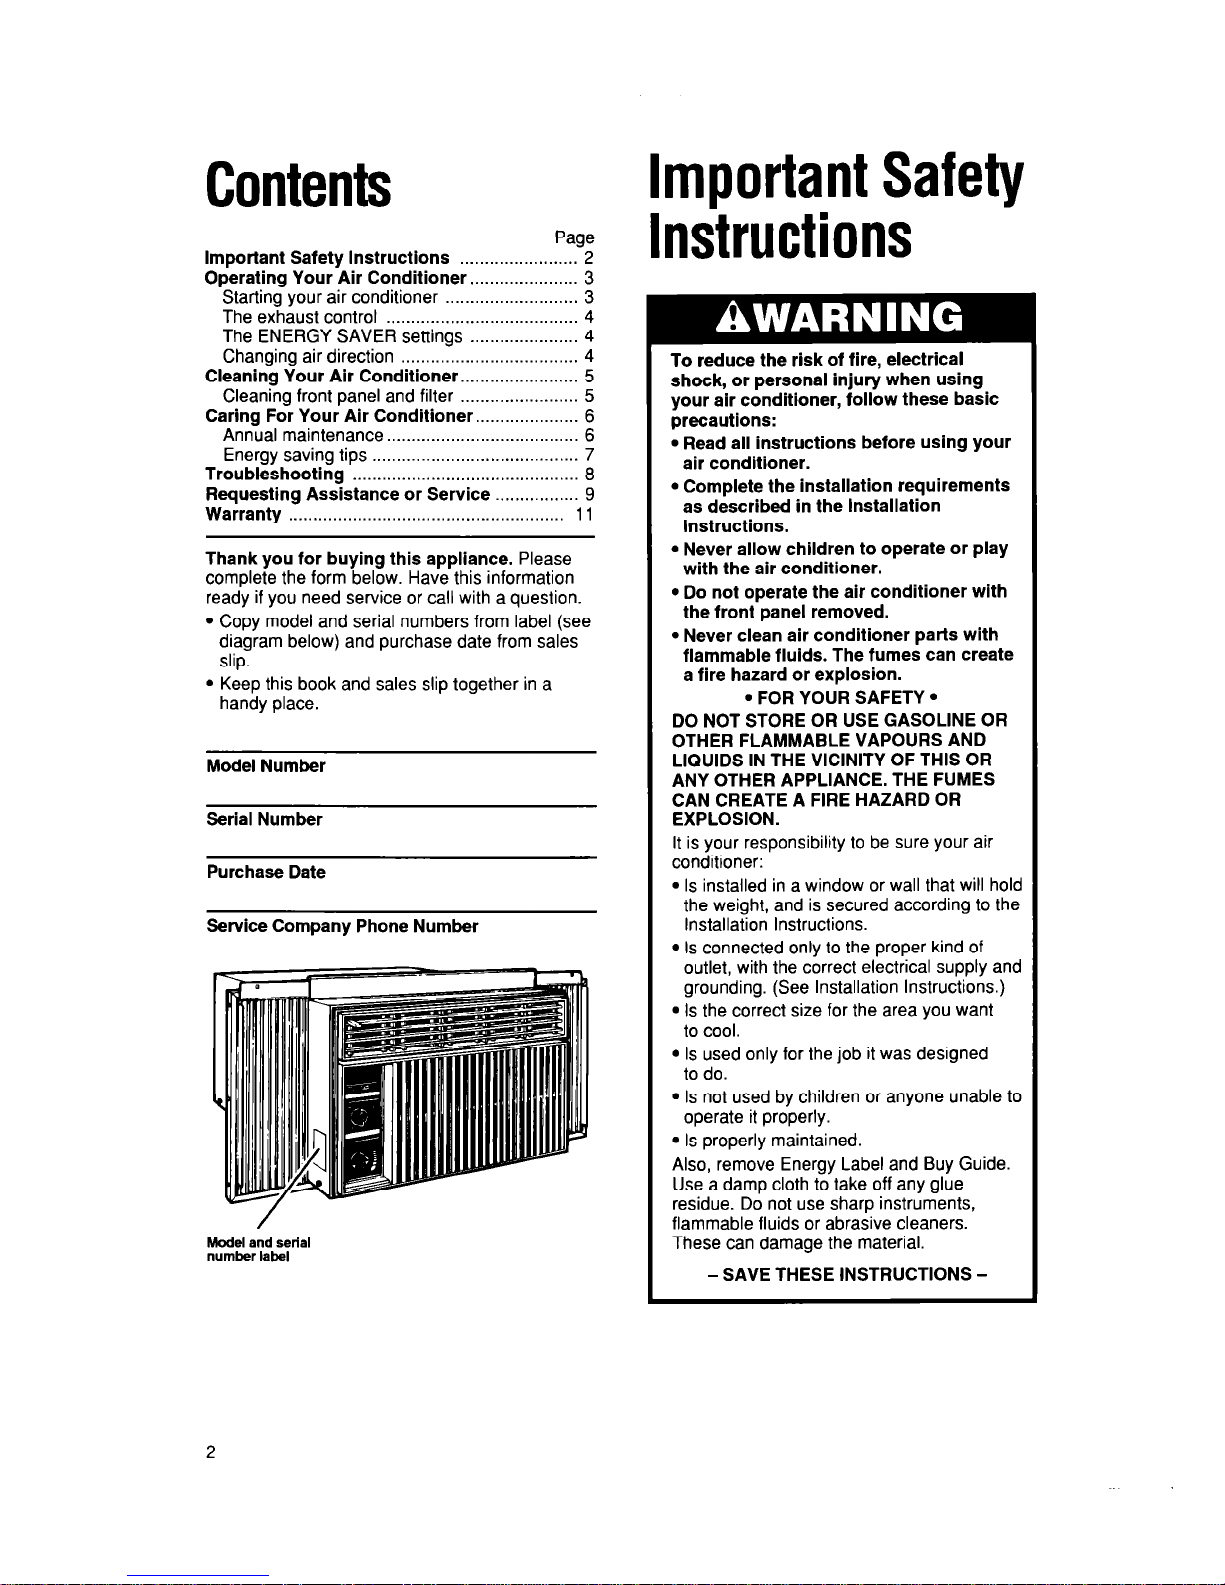
Copy model and serial numbers from label (see
diagram below) and purchase date from sales
slip.
l
Keep this book and sales slip together in a
handy place.
Model Number
Serial Number
Purchase Date
Service Company Phone Number
Model and serial
number label
mportant Safety
nstructions
To reduce the risk of fire, electrical
shock, or personal injury when using
your air conditioner, follow these basic
precautions:
l
Read all instructions before using your
air conditioner.
l
Complete the installation requirements
as described in the Installation
Instructions.
l
Never allow children to operate or play
with the air conditioner.
l
Do not operate the air conditioner with
the front panel removed.
l
Never clean air conditioner parts with
flammable fluids. The fumes can create
a fire hazard or explosion.
. FOR YOUR SAFETY
l
DO NOT STORE OR USE GASOLINE OR
OTHER FLAMMABLE VAPOURS AND
LIQUIDS IN THE VICINITY OF THIS OR
ANY OTHER APPLIANCE. THE FUMES
CAN CREATE A FIRE HAZARD OR
EXPLOSION.
It is your responsibility to be sure your air
conditioner:
l
Is installed in a window or wall that will hold
the weight, and is secured according to the
Installation Instructions.
l
Is connected only to the proper kind of
outlet, with the correct electrical supply and
grounding. (See Installation Instructions.)
l
Is the correct size for the area you want
to cool.
l
Is used only for the job it was designed
to do.
l
Is not used by children or anyone unable to
operate it properly.
l
Is properly maintained.
Also, remove Energy Label and Buy Guide.
Use a damp cloth to take off any glue
residue. Do not use sharp instruments,
flammable fluids or abrasive cleaners.
These can damage the material.
- SAVE THESE INSTRUCTIONS -
Operating Your Air Conditioner
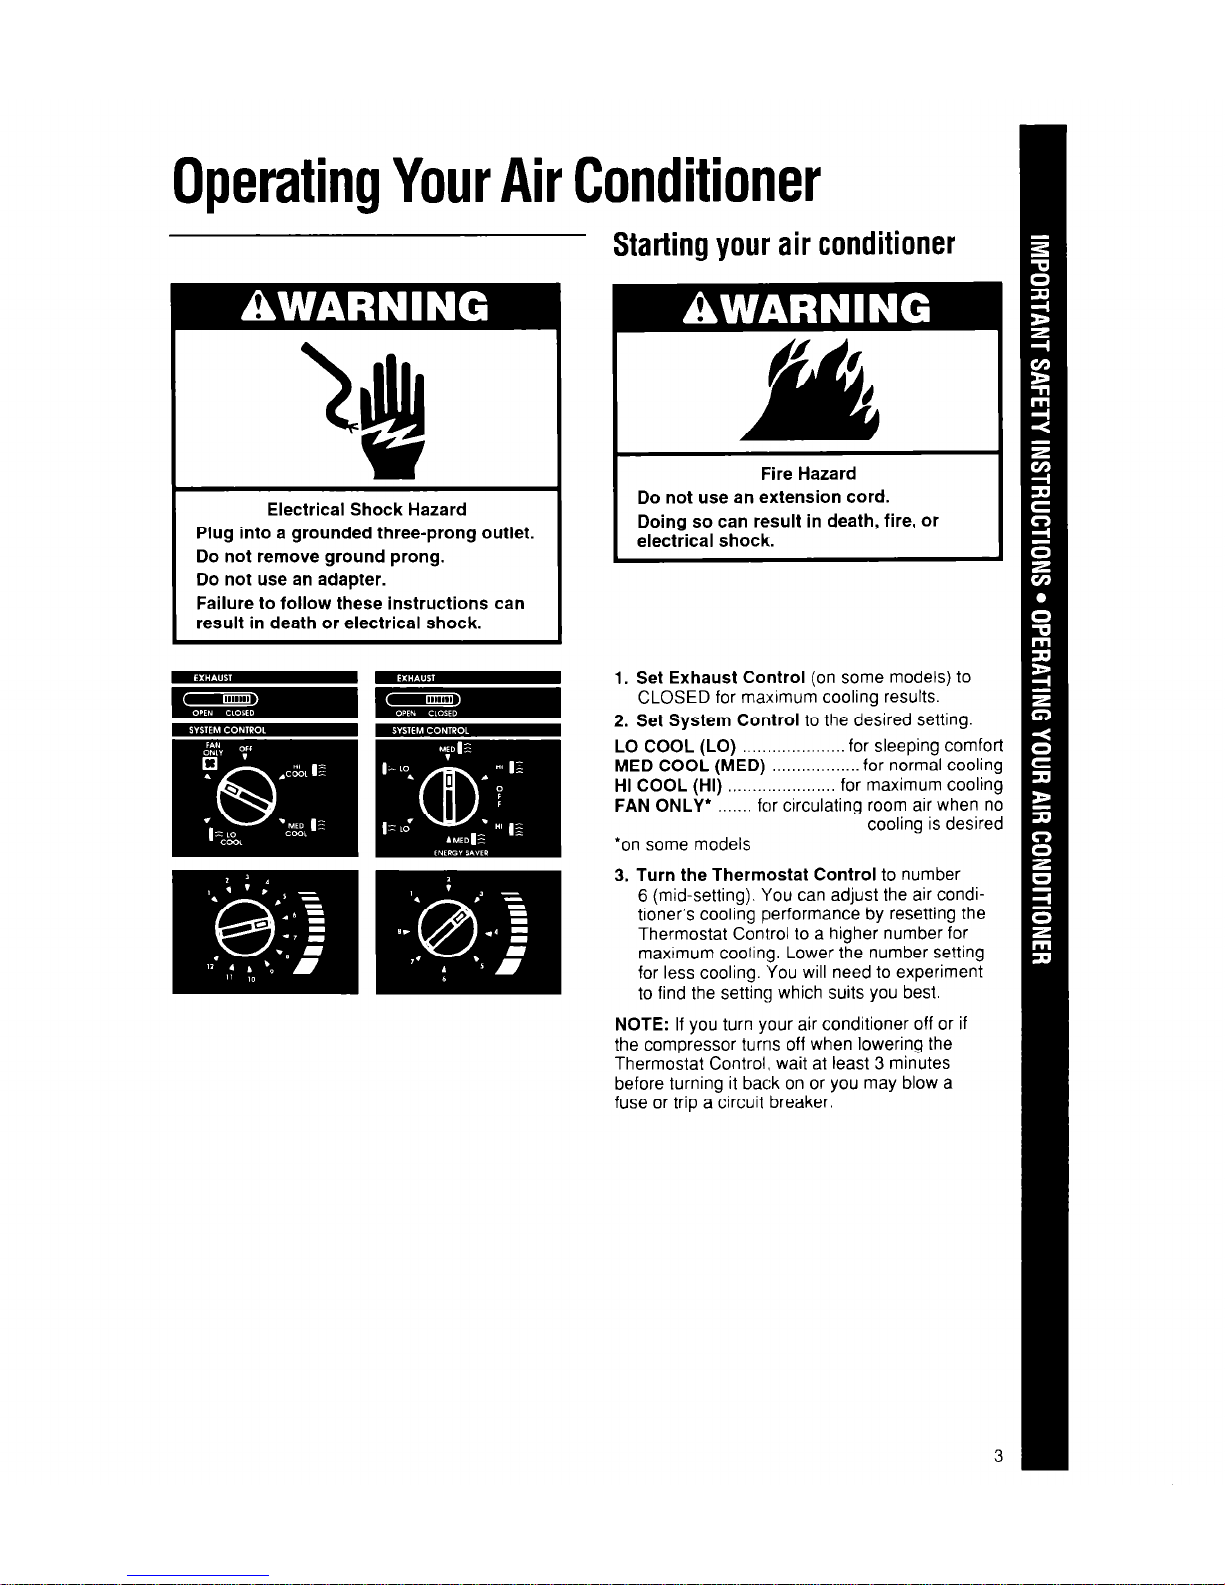
Electrical Shock Hazard
Plug into a grounded three-prong outlet.
Do not remove ground prong.
Do not use an adapter.
Failure to follow these instructions can
result in death or electrical shock.
Starting your air conditioner
Fire Hazard
Do not use an extension cord.
Doing so can result in death, fire, or
electrical shock.
1. Set Exhaust Control (on some models) to
CLOSED for maximum cooling results.
2. Set System Control to the desired setting
LO COOL (LO) . . .._._.. for sleeping comfort
MED COOL (MED) ..______ for normal cooling
HI COOL (HI) . . . . . . . . for maximum cooling
FAN ONLY* ,...__. for circulating room air when no
cooling is desired
*on some models
3. Turn the Thermostat Control to number
6 (mid-setting). You can adjust the air conditioner’s cooling performance by resetting the
Thermostat Control to a higher number for
maximum cooling. Lower the number setting
for less cooling. You will need to experiment
to find the setting which suits you best.
NOTE: If you turn your air conditioner off or if
the compressor turns off when lowering the
Thermostat Control, wait at least 3 minutes
before turning it back on or you may blow a
fuse or trip a circuit breaker.
Operating Your Air Conditioner
Continued
Tab
The exhaust control
(on some models)
The Exhaust Control setting draws stale or
smoky air from the room.
1. To exhaust room air:
l
Set Exhaust Control to OPEN.
l
For cooling, set System Control to desired
fan speed.
l
If no cooling is desired, set System Control to
FAN ONLY (on some models).
If there is no FAN ONLY setting, select a fan
speed setting and set Thermostat Control to its
lowest setting. Be sure to reset Thermostat
Control when cooling action is desired.
2. To circulate room air:
l
Set Exhaust Control to CLOSED.
l
For cooling, set System Control to desired
fan speed.
l
If no cooling is desired, set System Control to
FAN ONLY (on some models).
If there is no FAN ONLY setting, select a fan
speed setting and set Thermostat Control to its
lowest setting. Be sure to reset Thermostat
Control when cooling action is desired.
NOTE: For maximum performance, the Exhaust
Control must be in the CLOSED position when
cooling or room air circulation is desired.
The ENERGY SAVER settings
(on some models)
The ENERGY SAVER settings are the three
settings at the bottom of the System Control (HI,
MED, and LO). These settings save energy. The
fan will cycle on and off as the Thermostat
Control turns the compressor on and off. This
saves the cost of electrical energy that would be
used to run the fan continuously.
It is normal for the fan to turn on and off in the
ENERGY SAVER settings. The amount of time
the air conditioner will be off depends on the
room temperature and Thermostat Control setting.
Changing air direction
The louvers, In the top grille area of the air
conditioner, control the direction of the cooled air.
Move the tab, at the top of the louvered area, in
the direction you want the air to go (right, left, or
straight ahead).
Cleaning Your Air Conditioner
Proper use and care of your air conditioner will
help ensure longer life of the unit and lower
operating costs. Follow these instructions
carefully. Call your local servicing dealer for an
annual checkup.
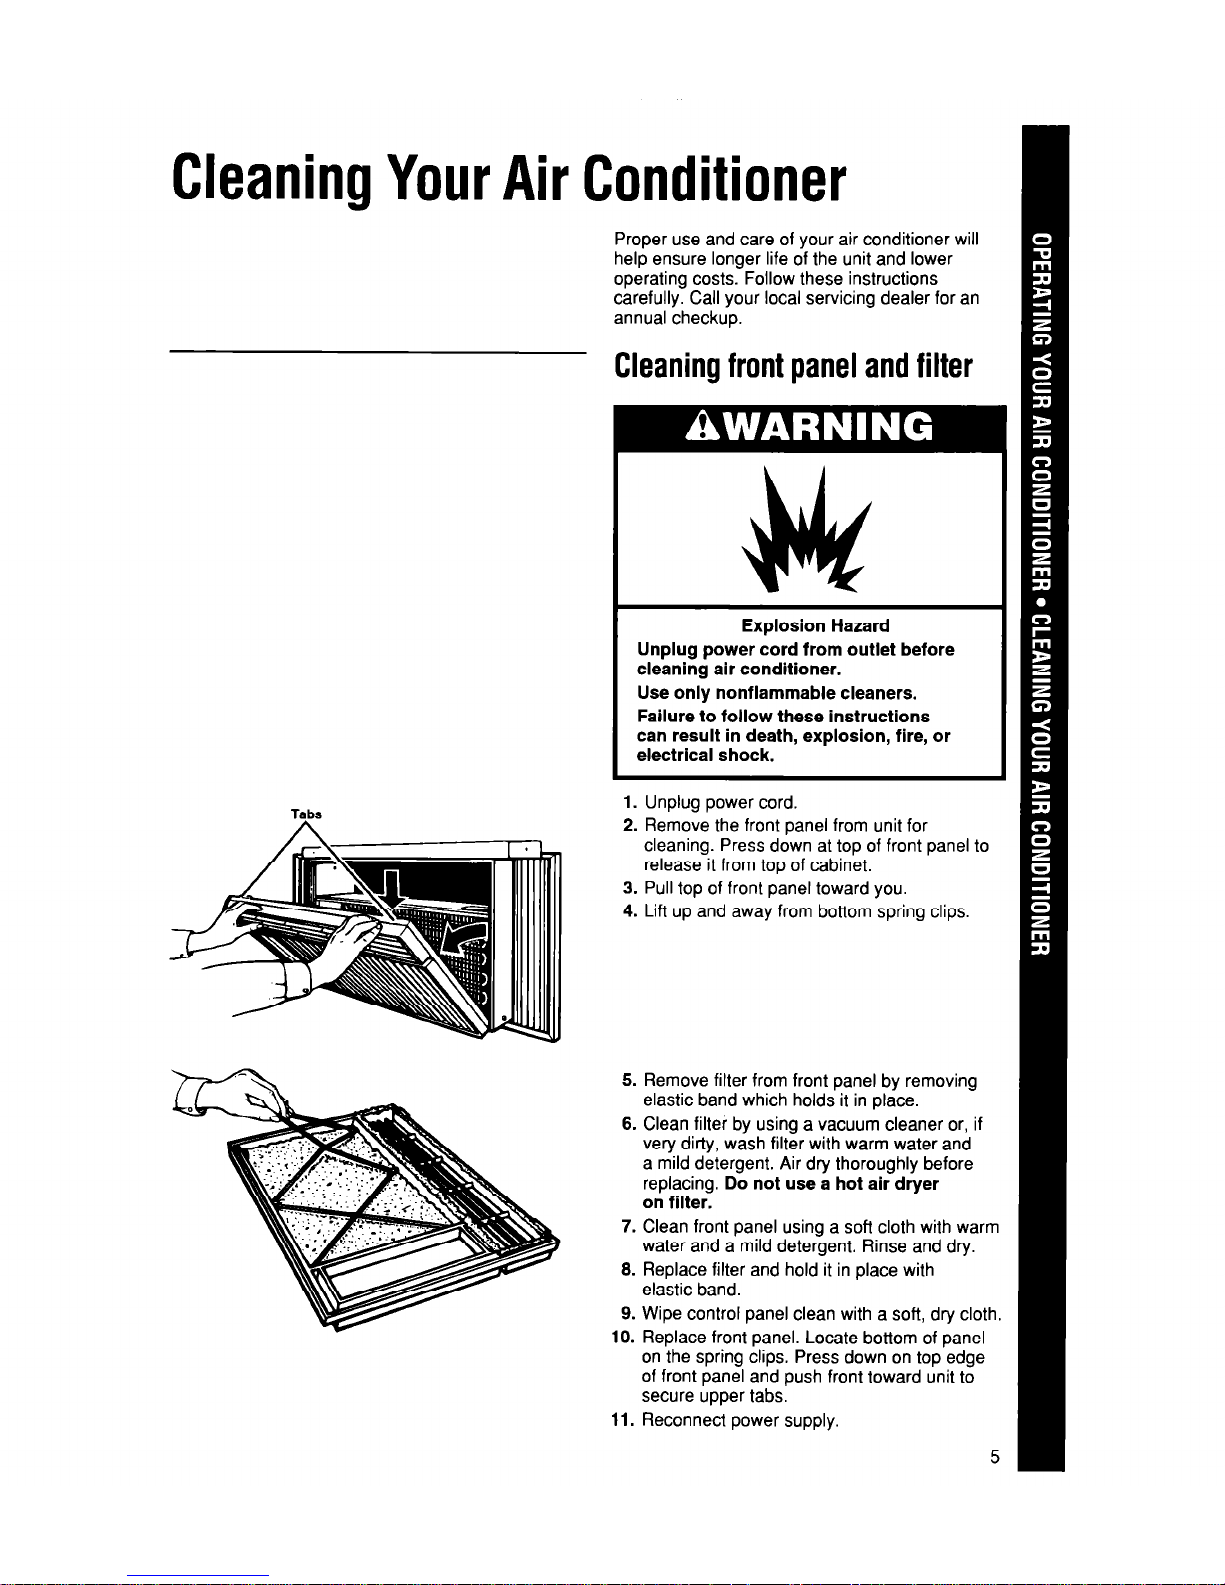
Cleaning front panel and filter
Explosion Hazard
Unplug power cord from outlet before
cleaning air conditioner.
Use only nonflammable cleaners.
Failure to follow these instructions
can result in death, explosion, fire, or
electrical shock.
1. Unplug power cord.
2. Remove the front panel from unit for
cleaning. Press down at top of front panel to
release it from top of cabinet.
3. Pull top of front panel toward you.
4. Lift up and away from bottom spring clips.
5. Remove filter from front panel by removing
elastic band which holds it in place.
6. Clean filter by using a vacuum cleaner or, if
very dirty, wash filter with warm water and
a mild detergent. Air dry thoroughly before
replacing. Do not use a hot air dryer
on filter.
7. Clean front panel using a soft cloth with warm
water and a mild detergent. Rinse and dry.
8. Replace filter and hold it in place with
elastic band.
9. Wipe control panel clean with a soft, dry cloth.
10. Replace front panel. Locate bottom of panel
on the spring clips. Press down on top edge
of front panel and push front toward unit to
secure upper tabs.
11. Reconnect power supply.
5
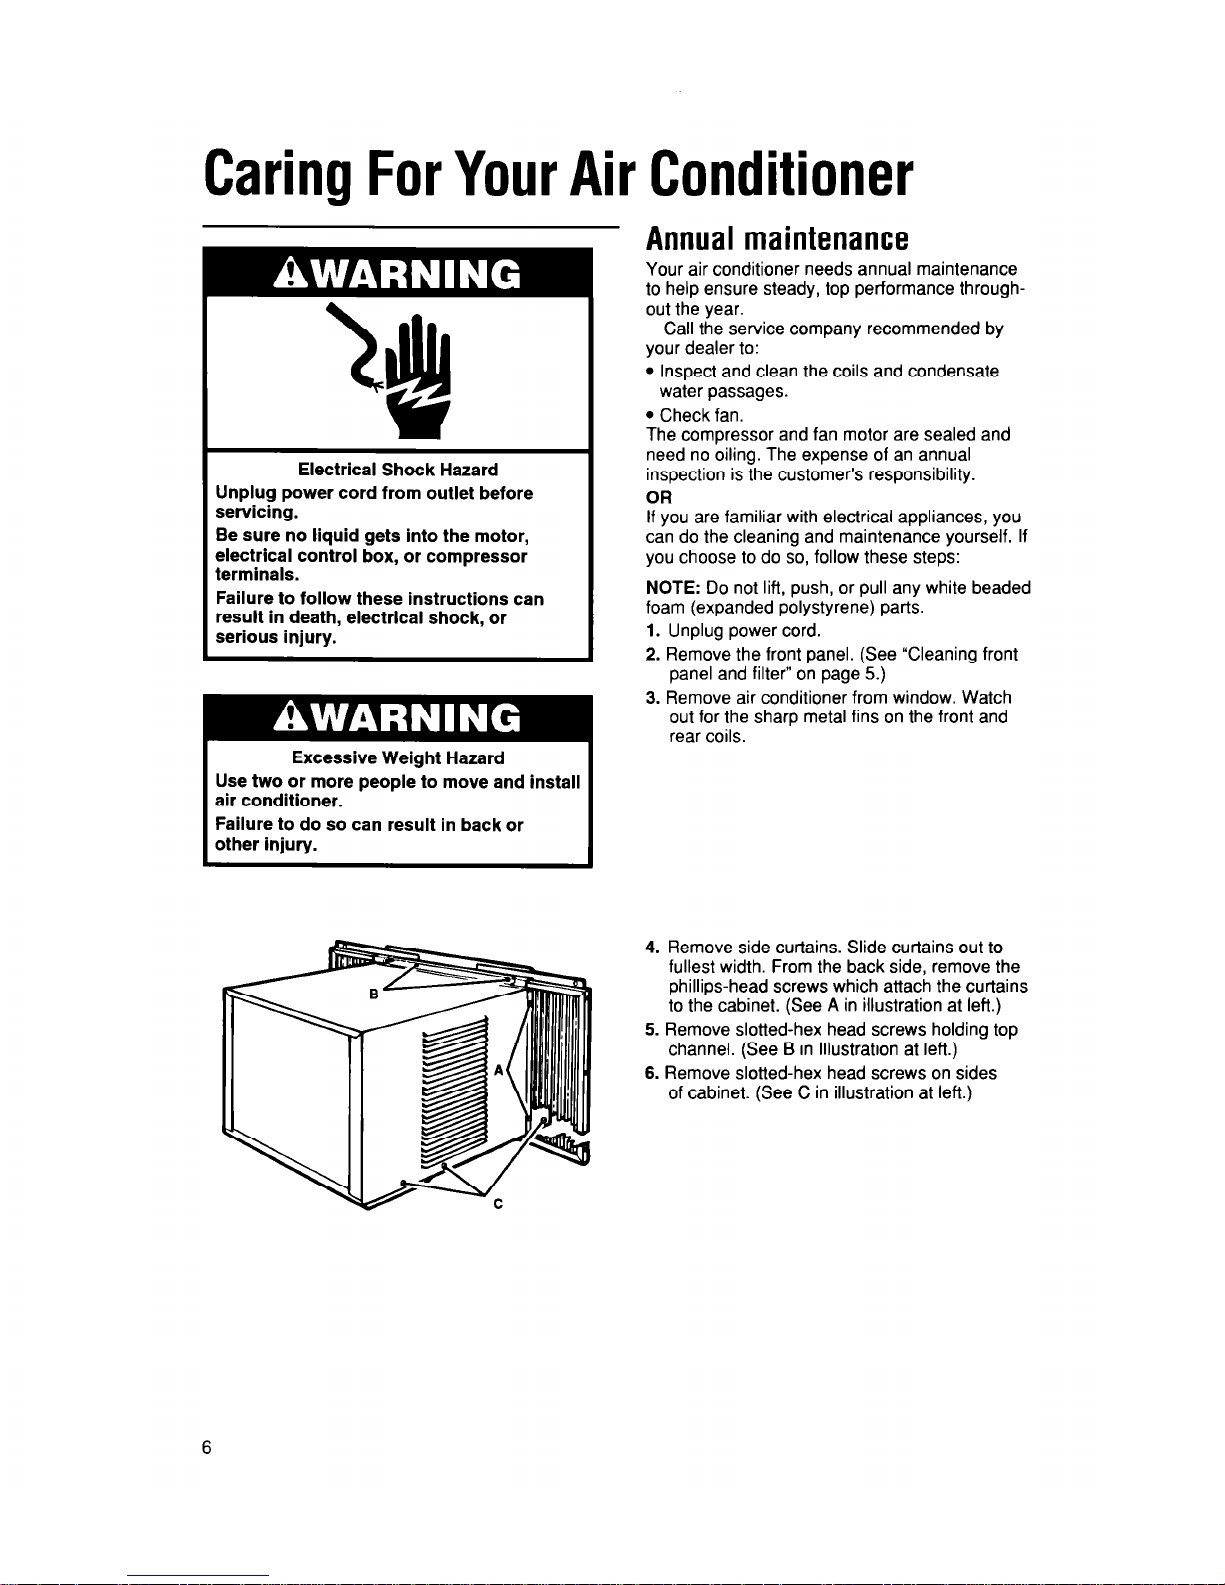
Caring For Your Air Conditioner
Electrical Shock Hazard
Unplug power cord from outlet before
servicing.
Be sure no liquid gets into the motor,
electrical control box, or compressor
terminals.
Failure to follow these instructions can
result in death, electrical shock, or
serious injury.
Excessive Weight Hazard
Use two or more people to move and install
air conditioner.
Failure to do so can result in back or
other injury.
Annual maintenance
Your air conditioner needs annual maintenance
to help ensure steady, top performance throughout the year.
Call the service company recommended by
your dealer to:
l
Inspect and clean the coils and condensate
water passages.
l
Check fan.
The compressor and fan motor are sealed and
need no oiling. The expense of an annual
inspection is the customer’s responsibility.
OR
If you are familiar with electrical appliances, you
can do the cleaning and maintenance yourself. If
you choose to do so, follow these steps:
NOTE: Do not lift, push, or pull any white beaded
foam (expanded polystyrene) parts.
1. Unplug power cord.
2. Remove the front panel. (See “Cleaning front
panel and filter” on page 5.)
3. Remove air conditioner from window. Watch
out for the sharp metal fins on the front and
rear coils.
4. Remove side curtains. Slide curtains out to
fullest width. From the back side, remove the
Phillips-head screws which attach the curtains
to the cabinet. (See A in illustration at left.)
5. Remove slotted-hex head screws holding top
channel. (See B in Illustration at left.)
6. Remove slotted-hex head screws on sides
of cabinet. (See C in illustration at left.)
7.
9.
9.
10.
11.
12.
13.
14.
Holding the cabinet on both sides, carefully
lift cabinet off unit base. Watch out for the
sharp metal fins on the front and rear
condenser coils.
Wrap the motor, electrical control box, and
compressor terminal box in plastic film and
make sure no water or other liquid gets
inside any of these parts. It could damage
the insulation and cause serious
mechanical problems.
Carefully clean and hose out the base, coils,
and condensate pans. Clean at least once a
year, or more often if the condenser coils and
pans collect dirt, sand, leaves, insects, or
algae. Also, clean if you detect an odor
coming from the air conditioner.
Remove plastic film from motor and
electrical parts.
Replace air conditioner in cabinet. Reattach
top channel and side curtains.
Reinstall air conditioner in window.
Replace front panel.
Plug in power cord.
NOTE: It is a good idea to wait 24 hours
before starting the unit again. This allows time
for all areas to dry out. The water from rainfall
or from normal operation does not harm these
components.
Energy saving tips
l
Improve home insulation. Seal doors, windows,
and close fireplace flue.
l
Close blinds or drapes on sunny side of house.
Add window awnings.
l
Keep air filter clean. Do not block airflow with
drapes or furniture.
l
Ventilate attic (high temperature levels add to
normal cooling load).
l
Try not to use heat producing appliances
during the hottest part of the day. Turn lights,
radios, televisions, and other appliances off
when not needed.
l
Keep heat registers and cool air returns closed.
l
Use exhaust venting fans while cooking, doing
laundry, and bathing.
Troubleshooting
Before you call for service . . .
If you are having an operating problem, check
the chart to see what the cause might be before
you call for assistance.
PROBLEM
CHECK IF
WHAT TO DO
Unit won’t run.
l
Power cord is plugged into a live
l
Firmly plug power cord into
circuit with proper voltage.
electrical outlet. Check circuit
voltage at fuse/circuit breaker box.
l
Fuse has blown or circuit breaker has
l
Replace fuse with a time-delay
tripped. Also, check if a time-delay
fuse of the correct capacity. Reset
fuse has been used.
circuit breaker.
l
System Control is set to OFF.
l
Set System Control to another
setting.
l
Local power has failed.
l
Wait for power to be restored.
Unit blows fuses or
l
Time-delay fuse being used is of
l
Replace fuse with a time-delay
trips circuit breaker.
correct capacity.
fuse of the correct capacity.
l
An extension cord is being used.
l
Do not use an extension cord with
this or any other appliance.
l
Cooling circuit was turned off and on
l
Wait at least 3 minutes after
again quickly.
turning cooling circuit off before
trying to restart unit.
Unit turns on and
l
Filter is dirty.
l
Clean filter. (See page 5.)
off, or does not cool
l
Inside evaporator coils and
l
Clean coils. (See page 6.)
room.
outside condenser coils are dirty.
l
There is excessive heat or moisture
l
Use exhaust fans to reduce room
in room.
heat, or set Exhaust Control to
CLOSED to reduce moisture.
l
Fan speed is too low.
l
Set System Control to a higher
setting.
l
Thermostat setting is too low.
l
Set Thermostat Control to a higher
number.
Normal operating sounds . . .
When your room air conditioner is operating
normally, you will hear sounds such as:
l
Droplets of water hitting the condenser, causing
a “pinging” or “clicking” sound. Water droplets
help to cool the condenser.
l
Air movement from the fan, especially on high
fan speed settings.
l
Clicks from the cooling cycle.
Sounds also may be caused by house construction - such as vibration of the unit due to wall
construction or unsteady window mounting area.
 Loading...