

Page 1
DVM105
NON-CONTACT INFRARED POCKET THERMOMETER
INFRAROOD ZAKTHERMOMETER ZONDER CONTACT
THERMOMÈTRE IR DE POCHE SANS CONTACT
TERMÓMETRO IR DE BOLSILLO - SIN CONTACTO
BERÜHRUNGSLOSES INFRAROT-THERMOMETER
USER MANUAL.............................................................2
GEBRUIKERSHANDLEIDING ..........................................8
NOTICE D’EMPLOI...................................................... 14
MANUAL DEL USUARIO............................................... 20
BEDIENUNGSANLEITUNG............................................ 26
Page 2
DVM105
2
USER MANUAL
1.1.
Introduction
To all residents of the European Union
Important environmental information about this product
Thank you for choosing Velleman! Please read the manual thoroughly
before bringing this device into service. If the device was damaged in
transit, don't install or use it and contact your dealer.
1.2.
•
•
•
•
00 (30/06/2008)
This symbol on the device or the package indicates that disposal
of the device after its lifecycle could harm the environment.
Do not dispose of the unit (or batteries) as unsorted municipal
waste; it should be taken to a specialized company for recycling.
This device should be returned to your distributor or to a local
recycling service.
Respect the local environmental rules.
If in doubt, contact your local waste disposal authorities.
Safety Instructions
Do not hold the thermometer too long to objects that
continuously generate high heat (e.g. hot plate). Risk
of overheating the thermometer.
Keep this device away from rain and moisture.
Damage caused by disregard of certain guidelines in this manual is not
covered by the warranty and the dealer will not accept responsibility
for any ensuing defects or problems.
Keep the device away from splashing and dripping liquids.
Note that damage caused by user modifications to the device is not
covered by the warranty.
Keep the device away from children and unauthorised users.
Page 3

DVM105
3
1.3.
General Guidelines
•
This device is designed is battery-operated, using 1 Battery, type
CR2032.
•
Protect this device from shocks and abuse. Avoid brute force when
operating the device.
•
Protected the device against extreme heat (see “Technical
Specifications”), dust and moisture.
•
Familiarise yourself with the functions of the device before actually
using it.
•
Use the original packaging if the device is to be transported.
•
All modifications of the device are forbidden for safety reasons.
•
Only use the device for its intended purpose. Using the device in an
unauthorised way will void the warranty.
•
Readings may be affected if the unit is operated within radio
frequency electromagnetic field strength of about 3 volts per meter,
but the performance of the instrument will not be permanently
affected.
1.4.
Features
• non-contact infrared thermometer
• LCD display
• temperature readout in °C or °F
• max., min. and lock modes
• foldable mini-stand
• adjustable emissivity
• auto power-off
• 'push-to-scan' temperature function
00 (30/06/2008)
Page 4
4
1.5.
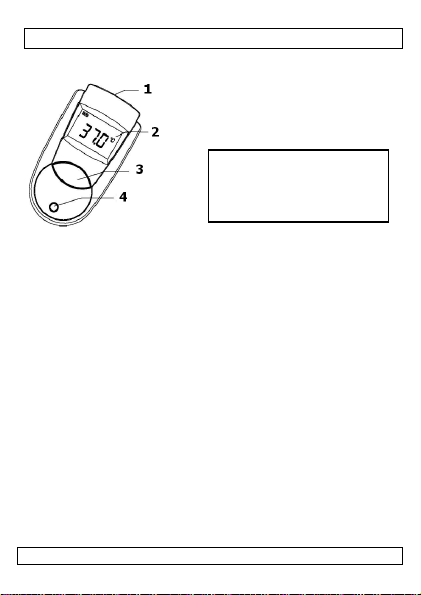
1. Sensor lens
DVM105
Use
2. LCD
3. Meas. button
4. Mode button
•
Simply aim the thermometer at the target and press the Meas. button
(3) to display the surface temperature. The distance to target ratio is
1:1 therefore the thermometer should be positioned as close to the
target as possible.
•
The thermometer can be used in either °C or °F mode. To switch
between modes, turn on the instrument by pressing the Meas. button
(3), then press the Mode button (4) four times. The °C or °F symbol
will flash. Pressing the Meas. Button (3) once will change and save
the mode.
•
To utilize the thermometer’s minimum or maximum mode, turn the
instrument on by pressing the Meas. Button (3), then press the
Mode button (4) once for minimum or twice for maximum function.
The MIN or MAX icon will flash. Press the Meas. Button (3) to
confirm the minimum or maximum mode. Keep pressing the Meas.
Button (3); the thermometer will display the minimum or maximum
reading only.
•
The lock mode is particularly useful for continuous monitoring of
temperatures. To utilize the thermometer’s lock mode, turn the
instrument on by pressing the Meas. Button (3), then press the
Mode button (4) three times for the lock mode function. The LOCK
icon will flash. Press the Meas. Button (3) to confirm the lock
measurement mode. The thermometer will continuously display the
temperature for up to 60 minutes or until the Meas. Button (3) is
pressed.
00 (30/06/2008)
Page 5
5
•
The infrared thermometer is supplied with a default emissivity of
0.95. The emissivity of the thermometer can be changed from 0.05
(5E) to 1 (100E). Changes should only be carried out by
experienced personnel. To change the emissivity, turn the
instrument on by pressing the Meas. Button (3), then press the
Mode button (4) five times for emissivity function. The current
setting is shown on the LCD screen. Press the Meas. Button (3) to
adjust the emissivity value, press the Mode button (4) again to exit
the set up screen. For information relating to the emissivity of
specific materials, please contact the nearest retailer.
Note: non-contact infrared thermometers are not recommended for
measuring the temperature of shiny or polished metals. See table
below for a short overview of emissivity values.
Substance Emissivity Substance Emissivity
Asphalt 0.90 to 0.98 Cloth (black) 0.98
Concrete 0.94 Human skin 0.98
Cement 0.96 Leather 0.95 to 1.00
Sand 0.90 Charcoal (powder) 0.96
Earth 0.92 to 0.96 Lacquer 0.80 to 0.95
Water 0.92 to 0.96 Lacquer (matt) 0.97
Ice 0.96 to 0.98 Rubber (black) 0.94
Snow 0.83 Plastic 0.85 to 0.95
Glass 0.90 to 0.95 Timber 0.90
Ceramic 0.90 to 0.94 Paper 0.70 to 0.94
Marble 0.94 Chromium oxides 0.81
Plaster 0.80 to 0.90 Copper oxides 0.78
Mortar 0.89 to 0.91 Iron oxides 0.78 to 0.82
Brick 0.93 to 0.96 Textiles 0.90
1.6.
Troubleshooting
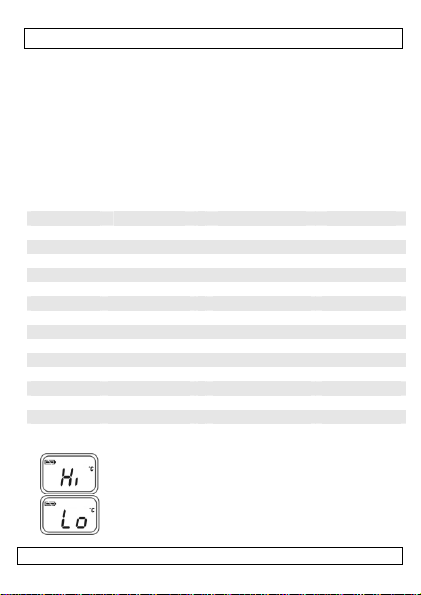
‘Hi’ or ’Lo’ is displayed when the temperature being
measured is outside of the range of the instrument, ‘Hi’
when higher than +220°C (428°F) and ‘Lo’ when lower
than –33°C (-27°F).
00 (30/06/2008)
DVM105
Page 6
6
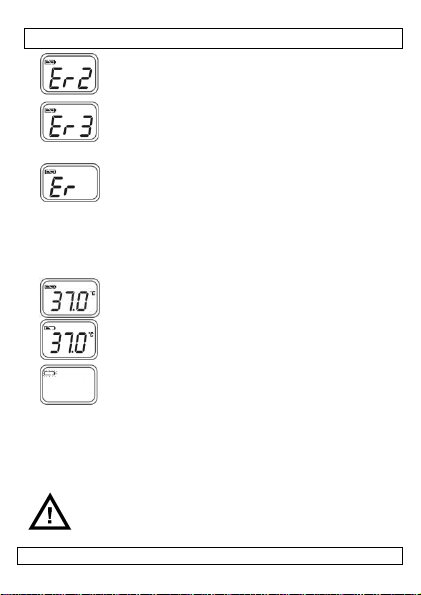
‘Er2’ is displayed when the thermometer is exposed to
rapid changes in ambient temperature. Let the
thermometer stabilize to the ambient temperature for
minimum 30 minutes.
‘Er3’ is displayed when the ambient temperature is
below -10°C (14°F) or above +50°C (122°F).Let the
thermometer stabilize to the ambient temperature for
minimum 30 minutes.
For all other error messages it is necessary to reset the
thermometer. To do this, wait for the instrument to
power off, remove the battery and wait for 30 seconds,
then reinsert the battery and press the Meas. Button
(3). If the error message remains, please contact the
Service Department for further assistance.
1.7.
Battery
• The thermometer incorporates a visual low battery
indication as follows:
‘Battery OK’: measurements are possible
‘Battery low’: battery needs to be replaced,
measurement still possible
‘Battery Exhausted’: measurements no longer possible,
replace battery.
• To replace the battery, wait until the instrument powers off.
• Open the battery compartment by turning the battery cover at the
• Replace the battery with a new CR2032 Lithium cell.
• Close the battery compartment by placing the battery cover back
00 (30/06/2008)
back of the unit (under the foldable stand) clockwise.
and turning it counter clockwise until a click is heard.
A malfunction may occur if the power is on when the
battery is replaced. If a malfunction occurs, restart
the device.
Keep the battery away from children.
DVM105
Page 7

7
1.8.
Cleaning and storage
• The sensor lens is the most delicate part of the thermometer and
should be kept clean at all times.
• To do this, only use a soft cloth or cotton bud with a little water or
medical alcohol.
• Allow the lens to fully dry before using the thermometer.
• Wipe the other parts of the thermometer regularly with a moist, lint-
free cloth. Do not use alcohol or solvents.
• Do not submerge the thermometer in water or any other liquid.
• There are no user-serviceable parts.
• Contact your dealer for spare parts if necessary.
• The thermometer should be stored between –20°C to +65°C (-4°F
to 149 °F).
1.9. Technical Specification
measurement range -33 to +220°C (-27.4~428°F)
operating temperature -10°C ~ +50°C (+14°F ~ +122°F)
storage temperature -20°C ~ +65°C (-4°F ~ 149°F)
DVM105
accuracy
(t
= 23 ± 3 °C)
amb
resolution 0.1°C /0.1°F
Response time (90%) 1 sec
emissivity range 0.05 – 1.00 step 0.01
Display LCD
wavelength 5µm - 14µm
auto switching-off 15 sec
distance-to-spot ratio D/S = 1/1
power supply 1 x CR2032 battery (incl.)
dimensions 18 x 37 x 67mm
weight 32gr (1.13oz)
Use this device with original accessories only. Velleman nv
cannot be held responsible in the event of damage or injury
resulted from (incorrect) use of this device. For more info
concerning this product, please visit our website
www.velleman.eu. The information in this manual is subject to
change without prior notice.
00 (30/06/2008)
± 2% of reading or 2°C (4°F) when t
> +100°C (+100°F)
(1 spare battery also included)
obj
Page 8

DVM105
8
GEBRUIKERSHANDLEIDING
2.1.
Inleiding
Aan alle ingezetenen van de Europese Unie
Belangrijke milieu-informatie betreffende dit product
brengen. Respecteer de plaatselijke milieuwetgeving.
Hebt u vragen, contacteer dan de plaatselijke autoriteiten
inzake verwijdering.
Dank u voor uw aankoop! Lees deze handleiding grondig voor u het
toestel in gebruik neemt. Werd het toestel beschadigd tijdens het
transport, installeer het dan niet en raadpleeg uw dealer.
2.2.
•
•
•
•
00 (30/06/2008)
Dit symbool op het toestel of de verpakking geeft aan
dat, als het na zijn levenscyclus wordt weggeworpen, dit
toestel schade kan toebrengen aan het milieu. Gooi dit
toestel (en eventuele batterijen) niet bij het gewone
huishoudelijke afval; het moet bij een gespecialiseerd
bedrijf terechtkomen voor recyclage. U moet dit toestel
naar uw verdeler of naar een lokaal recyclagepunt
Veiligheidsinstructies
Houd de thermometer nooit te lang dicht tegen hoge
warmtebronnen (bv. kookplaat) om oververhitting te
vermijden.
Bescherm dit toestel tegen regen en vochtigheid.
De garantie geldt niet voor schade door het negeren van bepaalde
richtlijnen in deze handleiding en uw dealer zal de
verantwoordelijkheid afwijzen voor defecten of problemen die hier
rechtstreeks verband mee houden.
Houd dit toestel uit de buurt van opspattende en druppelende
vloeistoffen.
Schade door wijzigingen die de gebruiker heeft aangebracht aan
het toestel vallen niet onder de garantie.
Houd dit toestel uit de buurt van kinderen en onbevoegden.
Page 9

9
2.3.
DVM105
Algemene richtlijnen
•
Deze thermometer wordt gevoed via 1 x CR2032-batterij.
•
Bescherm dit toestel tegen schokken. Vermijd brute kracht tijdens
de installatie en de bediening van dit toestel.
•
Bescherm dit toestel tegen extreme temperaturen (zie ‘Technische
specificaties’), vochtigheid en stof.
•
Leer eerst de functies van het toestel kennen voor u het gaat
gebruiken.
•
Gebruik de oorspronkelijke verpakking wanneer u het toestel
vervoert.
•
Om veiligheidsredenen mag de gebruiker geen wijzigingen
aanbrengen aan het toestel.
•
Gebruik het toestel enkel waarvoor het gemaakt is. Andere
toepassingen kunnen leiden tot kortsluitingen, brandwonden,
elektrische schokken, enz. Bij onoordeelkundig gebruik vervalt de
garantie.
•
Elektromagnetische velden en radiofrequenties van ongeveer 3 volt
per meter kunnen de uitlezing beïnvloeden. De werking van het
toestel zal echter niet permanent verstoord worden.
2.4.
Eigenschappen
•
infraroodthermometer zonder contact
•
lcd-scherm
•
temperatuuruitlezing in °C of °F
•
weergave van de maximum- en minimumwaarde, bevriezing van de
waarde op het scherm
•
opvouwbare houder
•
instelbare emissiviteit
•
automatische uitschakeling
•
meting aan de hand van een simpele druk op de knop
00 (30/06/2008)
Page 10

10
2.5.
1. sensor
Gebruik
DVM105
2. lcd-scherm
3. meetknop
4. MODE-knop
•
Richt de thermometer naar het te meten punt en druk op de
meetknop (3) om de oppervlaktetemperatuur weer te geven. De
verhouding afstand/meetpunt 1:1. Houd daarom de thermometer zo
dicht mogelijk bij het te meten punt.
•
De thermometer geeft de temperatuur weer in zowel °C als in °F. Om
de meeteenheid te selecteren, schakel de thermometer in met de
meetknop (3) en druk daarna viermaal op de MODE-knop (4). Op de
display knippert °C of °F. Druk opnieuw op de meetknop (3) om de
eenheid te selecteren en te bewaren.
•
Weergave van de minimum- of maximumwaarde: Schakel de
thermometer in met de meetknop (3) en druk daarna op de MODEknop (4), eenmaal voor de minimumwaarde en tweemaal voor de
maximumwaarde. Op de display knippert MIN of MAX. Druk nu op
de meetknop (3) om de weergavemodus te selecteren en te bewaren.
Houd de meetknop (3) ingedrukt om enkel de minimum- of de
maximumwaarde weer te geven.
•
De lockfunctie is zeer geschikt wanneer u de temperatuur constant
in het oog wenst te houden. Schakel de thermometer in met de
meetknop (3) en druk daarna driemaal op de MODE-knop (4). Op de
display knippert LOCK. Druk nu op de meetknop (3) om de
lockfunctie in te stellen. De thermometer geeft nu gedurende 60
minuten in real-time de temperatuur weer tot u opnieuw op de
meetknop (3) drukt.
•
Deze thermometer staat ingesteld met een standaardemissiviteit
van 0,95. Deze emissiviteit heeft een instelbaar bereik van 0,05
00 (30/06/2008)
Page 11

11
(5E) tot 1 (100E). Deze instelling mag echter enkel uitgevoerd
worden door een geschoold technicus. De emissiviteit instellen:
Schakel de thermometer in met de meetknop (3) en druk vijfmaal op
de MODE-knop (4). De ingestelde waarde verschijnt op de display.
Stel de waarde nu in met de meetknop (3). Verlaat het instelmenu
door op de MODE-knop (4) te drukken. Neem contact op met uw
dichtst bijzijnde dealer voor meer informatie over de emissiviteit
van welbepaalde materialen.
Opmerking: infraroodthermometers met meting zonder contact
zijn niet geschikt voor gebruik op reflecterende of gepolijste
metalen.
Materie Emissiviteit Materie Emissiviteit
Asfalt 0,90 tot 0,98 Stof (zwart) 0,98
Beton 0,94 Huid 0,98
Cement 0,96 Leer 0,95 tot 1,00
Zand 0,90 Steenkool (poeder) 0,96
Aarde 0,92 tot 0,96 Vernis 0,80 tot 0,95
Water 0,92 tot 0,96 Vernis (mat) 0,97
IJs 0,96 tot 0,98 Rubber (zwart) 0,94
Sneeuw 0,83 Plastic 0,85 tot 0,95
Glas 0,90 tot 0,95 Hout 0,90
Keramiek 0,90 tot 0,94 Papier 0,70 tot 0,94
Marmer 0,94 Chroomoxides 0,81
Plaaster 0,80 tot 090 Koperoxides 0,78
Mortier 0,89 tot 0,91 IJzeroxides 0,78 tot 0,82
Baksteen 0,93 tot 0,96 Textiel 0,90
DVM105
2.6.
Problemen en oplossingen
Display geeft ‘Hi’ of ‘Lo’ weer indien de gemeten
temperatuur hoger (‘Hi’) is dan +220°C (428°F) of lager
(‘Lo’) is dan –33°C (-27°F).
00 (30/06/2008)
Page 12

12
Display geeft ‘Er2’ weer indien de thermometer is
blootgesteld aan een plotse wisseling van de
omgevingstemperatuur. Wacht gedurende een 30-tal
minuten tot de thermometer op kamertemperatuur
gekomen is.
Display geeft ‘Er3’ weer wanneer de omgevingstemperatuur lager is dan -10°C of hoger is dan +50°C.
Wacht gedurende een 30-tal minuten tot de
thermometer op kamertemperatuur gekomen is.
Herstel de thermometer bij alle andere foutmeldingen.
Schakel de thermometer uit, verwijder de batterij en
wacht gedurende 30 seconden. Plaats de batterij en
druk op de meetknop (3). Neem contact op met uw
dealer indien de foutmelding opnieuw verschijnt.
2.7.
De batterij
•
De thermometer is uitgerust met een zichtbare aanduiding bij
zwakke batterij:
‘Batterij o.k.’: metingen mogelijk
‘Zwakke batterij’: vervang de batterij, metingen
mogelijk
‘Lege batterij’: geen metingen mogelijk, vervang de
batterij.
•
•
•
•
00 (30/06/2008)
Schakel eerst de thermometer uit.
Open het batterijvak door het dekseltje achteraan de thermometer
(onder de clip) naar rechts open te draaien.
Vervang de batterij door een nieuwe CR2032 lithiumknoopcel.
Sluit het batterijvak door het dekseltje naar links dicht te draaien
tot u een klikgeluid hoort.
Bij het vervangen van de batterij van een nog
ingeschakelde thermometer kunnen zich storingen
voordoen. Herstart de thermometer.
Houd de batterij uit de buurt van kinderen.
DVM105
Page 13

13
2.8.
DVM105
Reiniging en opslag
•
De sensor is een zeer delicaat onderdeel van de thermometer en
moet altijd schoon gehouden worden.
•
Maak de sensor schoon met een zachte doek of wattenstaafje
gedrenkt in een beetje water of ontsmettingsalcohol.
•
Laat de sensor drogen alvorens de thermometer opnieuw te gebruiken.
•
Maak andere onderdelen schoon met een vochtige, niet-pluizende
doek. Gebruik geen alcohol of solventen.
•
Dompel de thermometer nooit in water of een andere vloeistof.
•
De gebruiker mag geen onderdelen vervangen.
•
Bestel eventuele reserveonderdelen bij uw dealer.
•
Bewaar de thermometer in een ruimte met een temperatuur tussen
–20°C ~ +65°C.
2.9.
Technische specificaties
meetbereik -33 ~ +220°C (-27,4 ~ 428°F)
werktemperatuur -10°C ~ +50°C
opslagtemperatuur -20°C ~ +65°C
nauwkeurigheid
(t
= 23 ± 3°C)
amb
resolutie 0,1°C /0,1°F
responstijd (90 %) 1 sec.
emissiviteit 0,05 – 1,00 stap 0,01
display lcd-scherm
golflengte 5µm - 14µm
automatische uitschakeling 15 sec.
verhouding afstand/meetpunt D/S = 1/1
voeding 1 x CR2032-batterij (meegelev.)
afmetingen 18 x 37 x 67 mm
gewicht 32 g
Gebruik dit toestel enkel met originele accessoires. Velleman nv
is niet aansprakelijk voor schade of kwetsuren bij (verkeerd)
gebruik van dit toestel. Voor meer informatie over dit product,
zie www.velleman.eu. De informatie in deze handleiding kan te
allen tijde worden gewijzigd zonder voorafgaande
kennisgeving.
00 (30/06/2008)
± 2 % vd afl. of 2°C (4°F) indien t
+100°C (+100°F)
(1 reservebatterij meegeleverd)
>
obj
Page 14

DVM105
14
NOTICE D’EMPLOI
3.1.
Introduction
Aux résidents de l'Union européenne
Des informations environnementales importantes concernant ce produit
Ce symbole sur l'appareil ou l'emballage indique que l’élimination d’un
appareil en fin de vie peut polluer l'environnement. Ne pas
jeter un appareil électrique ou électronique (et des piles
éventuelles) parmi les déchets municipaux non sujets au tri
sélectif ; une déchèterie traitera l’appareil en question.
Renvoyer les équipements usagés à votre fournisseur ou à
un service de recyclage local. Il convient de respecter la réglementation
locale relative à la protection de l’environnement.
En cas de questions, contacter les autorités locales pour élimination.
Nous vous remercions de votre achat ! Lire la présente notice
attentivement avant la mise en service de l’appareil. Si l’appareil a été
endommagé pendant le transport, ne pas l’installer et consulter votre
revendeur.
3.2.
Prescriptions de sécurité
Risque de surchauffe : Ne pas tenir le thermomètre
près d’une source de forte chaleur (p.ex. une plaque
chauffante) pendant un délai prolongé.
Protéger l’appareil contre la pluie et l’humidité.
•
La garantie ne s’applique pas aux dommages survenus en
négligeant certaines directives de cette notice et votre revendeur
déclinera toute responsabilité pour les problèmes et les défauts qui
en résultent.
•
Tenir l’appareil à l’écart d’éclaboussures et de jaillissements.
•
Les dommages occasionnés par des modifications à l’appareil par le
client ne tombent pas sous la garantie.
•
Garder le thermomètre hors de la portée de personnes non
qualifiées et de jeunes enfants.
00 (30/06/2008)
Page 15

15
3.3.
DVM105
Directives générales
•
Ce thermomètre est alimenté par une pile type CR2032.
•
Protéger le thermomètre contre les chocs et le traiter avec
circonspection pendant l’installation et l’opération.
•
Tenir le thermomètre à l’écart de la poussière, l’humidité et des
températures extrêmes (voir « Spécifications techniques »).
•
Se familiariser avec le fonctionnement de l’appareil avant de
l’utiliser.
•
Transporter l’appareil dans son emballage originel.
•
Toute modification de l’appareil est interdite pour des raisons de
sécurité.
•
N’utiliser le thermomètre qu’à sa fonction prévue. Tout autre usage
peut causer des courts-circuits, des brûlures, des électrochocs, etc.
Un usage impropre annule d'office la garantie.
•
Les fréquences radio et les champs électromagnétiques de 3 volts par
mètre. Peuvent influencer les valeurs affichées. Cependant, les
performances du thermomètre ne seront pas entravées de manière
permanente.
3.4.
Caractéristiques
•
thermomètre infrarouge à mesure sans contact
•
afficheur LCD
•
affichage de la température en °C ou en °F
•
affichage des valeurs minimale et maximale, gel de l'affichage
•
support pliant
•
émissivité réglable
•
extinction automatique
•
mesure par simple pression sur un bouton
00 (30/06/2008)
Page 16

16
3.5.
1. capteur
Emploi
DVM105
2. afficheur LCD
3. bouton de mesure
4. bouton de mode
•
Pointer le thermomètre vers le point à mesurer et enfoncer le bouton
de mesure (3) pour afficher la température de surface. Le rapport
distance/point de mesure est de 1:1. Il est recommandé de tenir le
thermomètre le plus près possible de ce point de mesure.
•
Le thermomètre affiche des valeurs en °C ou en °F. Pour sélectionner
l’unité de mesure, allumer le thermomètre en enfonçant le bouton de
mesure (3), ensuite enfoncer le bouton de mode (4) à quatre reprises.
Le symbole °C ou °F clignote sur l’afficheur. Enfoncer le bouton de
mesure (3) pour sélectionner et sauvegarder l’unité.
•
Pour afficher la valeur minimale ou maximale, allumer le
thermomètre en enfonçant le bouton de mesure (3), ensuite enfoncer
le bouton de mode (4), une fois pour sélectionner le mode d’affichage
de la valeur minimale, deux fois pour sélectionner le mode d’affichage
de la valeur maximale. Le symbole MIN ou MAX clignote sur
l’afficheur. Enfoncer le bouton de mesure (3) pour confirmer la
sélection. Maintenir enfoncé le bouton de mesure (3) pour afficher la
valeur minimale ou maximale.
•
La fonction de gel d’affichage est utile pour les mesures de
température continues. Allumer le thermomètre en enfonçant le
bouton de mesure (3), ensuite enfoncer le bouton de mode (4) à trois
reprises. Le symbole LOCK clignote sur l’afficheur. Confirmer avec le
bouton de mesure (3). Le thermomètre affiche la température en
temps réelle pendant 60 minutes ou jusqu’à ce que le bouton de
mesure (3) est enfoncé.
00 (30/06/2008)
Page 17

17
•
Le thermomètre est livré avec une émissivité par défaut de 0,95.
Cette émissivité peut être réglée de 0,05 (5E) à 1 (100E). Confier le
thermomètre à un technicien qualifié en cas de réglage. Allumer le
thermomètre en enfonçant le bouton de mesure (3), ensuite enfoncer
le bouton de mode (4) à cinq reprises. La valeur actuelle est affichée.
Régler la valeur en enfonçant le bouton de mesure (3), confirmer et
quitter le menu de réglage avec le bouton de mode (4). Contacter
votre revendeur le plus proche pour plus d’information concernant
l’émissivité de matériaux spécifiques.
Remarque : ce thermomètre infrarouge à mesure sans contact ne
convient pas pour utilisation sur des métaux réfléchissants ou
polies.
Matériau Émissivité Matériau Émissivité
Asphalte 0,90 à 0,98 Étoffe (noir) 0,98
Béton 0,94 Peau 0,98
Ciment 0,96 Cuir 0,95 à 1,00
Sable 0,90 Charbon (Poudre) 0,96
Terre 0,92 à 0,96 Vernis 0,80 à 0,95
Eau 0,92 à 0,96 Vernis (mat) 0,97
Glace 0,96 à 0,98 Caoutchouc (noir) 0,94
Neige 0,83 Plastique 0,85 à 0,95
Verre 0,90 à 0,95 Bois 0,90
Céramique 0,90 à 0,94 Papier 0,70 à 0,94
Marbre 0,94
Plâtre 0,80 à 090 Oxyde de cuivre 0,78
Mortier 0,89 à 0,91 Oxyde de fer 0,78 à 0,82
Brique 0,93 à 0,96 Textile 0,90
3.6.
Problèmes et solutions
« Hi » ou « Lo » s’affiche lorsque la valeur mesurée se
trouve hors de la plage de mesure du thermomètre
(« Hi » = valeur > +220°C (428°F), « Lo » = valeur <
–33°C (-27°F)).
Oxyde de chrome
00 (30/06/2008)
DVM105
0,81
Page 18

18
« Er2 » s’affiche lorsque le thermomètre est sujet à une
variation subite de la température ambiante. Patienter
pendant un délai de 30 minutes jusqu’à ce que e
thermomètre se soit stabilisé.
« Er3 » s’affiche lorsque la température ambiante est
inférieure à -10°C ou supérieure à +50°C. Patienter
pendant un délai de 30 minutes jusqu’à ce que e
thermomètre se soit stabilisé.
Pour tout autre message d’erreur, réinitialiser le
thermomètre en l’éteignant d’abord. Ensuite, retirer la
pile, patienter pendant 30 secondes, réinsérer la pile et
enfoncer le bouton de mesure (3). Contacter votre
revendeur si les messages d’erreur persistent.
3.7.
Concernant la pile
•
Le thermomètre intègre un indicateur de pile faible visuel.
« Pile OK » : possibilité de mesures
« Pile faible » : possibilité de mesures, remplacer la pile
« Pile morte » : utilisation du thermomètre impossible,
remplacer la pile.
•
•
•
•
00 (30/06/2008)
Éteindre le thermomètre avant de remplacer la pile.
Ouvrir le compartiment de la pile en tournant le couvercle situé à
l’arrière de l’appareil vers la droite.
Remplacer la pile usagée par une pile au lithium neuve type
CR2032.
Refermer le compartiment de la pile en tournant le couvercle vers la
gauche jusqu’à ce qu’il fasse un déclic.
Des affichages erronés peuvent apparaître lorsque le
remplacement s’effectue tandis que le thermomètre
est encore allumé. Le cas échéant, réinitialiser le
thermomètre. Tenir la pile à l’écart des enfants.
DVM105
Page 19

DVM105
19
3.8.
Nettoyage et stockage
•
Le capteur est la composante la plus délicate du thermomètre et
doit toujours être propre.
•
Nettoyer le capteur à l’aide d’un chiffon doux ou d’un coton-tige
légèrement humecté d’eau ou d’alcool.
•
Laisser sécher le capteur avant de réutiliser le thermomètre.
•
Nettoyer le thermomètre à l’aide d’un chiffon non pelucheux et un peu
d’eau. Éviter les alcools et les solvants.
•
Ne jamais plonger le thermomètre dans un liquide quelconque.
•
Il n’y a aucune pièce maintenable par l’utilisateur.
•
Commander des pièces de rechange éventuelles chez votre revendeur.
•
Stocker le thermomètre à une température ambiante entre
–20°C et +65°C.
3.9.
Spécification techniques
plage de mesure -33 ~ +220°C (-27,4 ~ 428°F)
température de service -10°C ~ +50°C
température de stockage -20°C ~ +65°C
précision
(t
= 23 ± 3°C)
amb
résolution 0,1°C / 0,1°F
délai de réponse (90 %) 1 sec
plage d’émissivité 0,05 – 1,00 étape 0,01
afficheur LCD
longueur d’onde 5µm - 14µm
extinction automatique 15 sec
rapport distance/point de
mesure
alimentation
dimensions 18 x 37 x 67 mm
poids 32 g
N’employer cet appareil qu’avec des accessoires d’origine. SA
Velleman ne sera aucunement responsable de dommages ou
lésions survenus à un usage (incorrect) de cet appareil. Pour
plus d’information concernant cet article, visitez notre site web
www.velleman.eu. Toutes les informations présentées dans
cette notice peuvent être modifiées sans notification préalable.
00 (30/06/2008)
± 2 % de l’aff. ou 2°C (4°F) lorsque
t
> +100°C (+100°F)
obj
D/S = 1/1
1 pile type CR2032 (incl.)
(1 pile de rechange incluse)
Page 20

DVM105
20
MANUAL DEL USUARIO
4.1.
Introducción
A los ciudadanos de la Unión Europea
Importantes informaciones sobre el medio ambiente
concerniente a este producto
Este símbolo en este aparato o el embalaje indica que, si tira las
muestras inservibles, podrían dañar el medio ambiente. No
tire este aparato (ni las pilas, si las hubiera) en la basura
doméstica; debe ir a una empresa especializada en
reciclaje. Devuelva este aparato a su distribuidor o a la
unidad de reciclaje local. Respete las leyes locales en
relación con el medio ambiente.
Si tiene dudas, contacte con las autoridades locales para residuos.
¡Gracias por haber comprado el DVM105! Lea atentamente las
instrucciones del manual antes de usarlo. Si el aparato ha sufrido algún
daño en el transporte no lo instale y póngase en contacto con su
distribuidor.
4.2.
Instrucciones de seguridad
Riesgo de sobrecalentamiento: No mantenga el
aparato cerca de una fuente de calor (p.ej. una placa
chauffante) durante un tiempo prolongado.
No exponga este equipo a lluvia ni humedad.
•
Daños causados por descuido de las instrucciones de seguridad de
este manual invalidarán su garantía y su distribuidor no será
responsable de ningún daño u otros problemas resultantes.
•
No exponga el aparato a ningún tipo de salpicadura o goteo.
•
Los daños causados por modificaciones no autorizadas, no están
cubiertos por la garantía.
•
Mantenga el aparato lejos del alcance de personas no capacitadas y
niños.
00 (30/06/2008)
Page 21

DVM105
21
4.3.
Normas generales
•
El aparato funciona con una pila tipo CR2032.
•
No agite el aparato. Evite usar excesiva fuerza durante la
instalación y la reparación.
•
No exponga el aparato a polvo, humedad ni temperaturas extremas
(véase « Especificaciones »).
•
Familiarícese con el funcionamiento del aparato antes de utilizarlo.
•
Transporte el aparato en su embalaje original.
•
Por razones de seguridad, las modificaciones no autorizadas del
aparato están prohibidas.
•
Utilice sólo el aparato para las aplicaciones descritas en este
manual a fin de evitar p.ej. cortocircuitos, quemaduras, descargas
eléctricas, etc. Un uso desautorizado puede causar daños y anula la
garantía completamente.
•
Las frecuencias radio y los campos electromagnéticos de 3 voltios por
metro pueden influenciar los valores visualizados. Sin embargo, el
funcionamiento no se perturbará de manera permanente.
4.4.
Características
•
termómetro IR con medición sin contacto
•
pantalla LCD
•
visualización de la temperatura en °C o °F
•
visualización de los valores máx. y mín., retención de lectura (data
hold)
•
soporte plegable
•
emisividad ajustable
•
desactivación automática
•
medición por sencilla presión en un botón
00 (30/06/2008)
Page 22

22
4.5.
1. sensor
Uso
DVM105
2. pantalla LCD
3. botón de medición
4. botón ‘mode’
•
Apunte el aparato al punto que quiere medir y pulse el botón de
medición (3) para visualizar la temperatura de superficie. La relación
distancia/ punto de medición es de 1:1. Mantenga el termómetro lo
más cerca posible de este punta de medición.
•
El termómetro visualiza los valores en °C o °F. Para seleccionar la
unidad de medición, active el termómetro y pulse el botón de
medición (3). Luego, pulse el botón ‘mode’ (4) cuatro veces. El
símbolo °C o °F parpadea en la pantalla. Pulse el botón de medición
(3) para seleccionar y guardar la unidad.
•
Para visualizar el valor mín. o máx., active el aparato al pulsar el
botón de medición (3). Luego, pulse el botón ‘mode’ (4), una vez
para seleccionar el modo de visualización del valor mínimo, dos veces
para seleccionar el modo de visualización del valor máximo. El símbolo
MIN o MAX parpadea en la pantalla. Pulse el botón de medición (3)
para confirmar la selección. Mantenga pulsado el botón de medición
(3) para visualizar el valor mín. o máx.
•
La función ‘data hold’ (retención de lectura) es útil para mediciones
de temperatura continuas. Active el aparato al pulsar el botón de
medición (3). Luego, pulse el botón ‘mode’ (4) tres veces. El símbolo
LOCK parpadea en la pantalla. Confirme con el botón de medición
(3). El aparato visualiza la temperatura en tiempo real durante 60
minutos o hasta que se pulse el botón de medición (3).
•
El termómetro se entrega con una emisividad por defecto de 0,95.
Es posible ajustar la emisividad de 0,05 (5E) a 1 (100E). Contacte
con un técnico cualificado en caso de ajuste. Active el aparato al
00 (30/06/2008)
Page 23

23
pulsar el botón de medición (3). Luego, pulse el botón ‘mode’ (4)
cinco veces. El valor actual se visualiza. Ajuste el valor al pulsar el
botón de medición (3). Confirme y salga del menú de ajuste con el
botón ‘mode’ (4). Contacte con su distribuidor más cercano si quiere
más información sobre la emisividad de materiales específicos.
Nota: Este termómetro IR con medición sin contacto no es apto
para utilizar en metales brillantes o pulidos.
Material Emisividad Material Emisividad
Asfalto de 0,90 a 0,98
Hormigón 0,94 Piel 0,98
Cemento 0,96 Cuero de 0,95 a 1,00
Arena 0,90 Hulla (polvo) 0,96
Tierra de 0,92 a 0,96 Barniz de 0,80 a 0,95
Agua de 0,92 a 0,96 Barniz (opaco) 0,97
Hielo de 0,96 a 0,98
Nieve 0,83 Plástico de 0,85 a 0,95
Cristal de 0,90 a 0,95 Madera 0,90
Cerámica de 0,90 a 0,94 Papel de 0,70 a 0,94
Mármol 0,94
yeso de 0,80 a 090 Óxido de cuero 0,78
Mortero de 0,89 a 0,91 Óxido de hierro de 0,78 a 0,82
Ladrillo de 0,93 a 0,96 Textil 0,90
4.6.
Solución de problemas
« se visualiza si el valor medido está fuera del rango de
medición del termómetro (« Hi » = valor > +220°C
(428°F), « Lo » = valor <
–33°C (-27°F)).
« Er2 » se visualiza si el termómetro está sujeto a una
variación súbita de la temperatura ambiente. Espere
unos 30 minutos hasta que el termómetro llegue a la
temperatura ambiente.
00 (30/06/2008)
DVM105
Tejido (color
negro)
Goma (color
negro)
Óxido de cromo
0,98
0,94
0,81
Page 24

24
« Er3 » se visualiza si la temperatura ambiente es
termómetro al desactivarlo primero. Luego, quite la pila,
inferior a -10°C o superior a +50°C. Espere unos 30
minutos hasta que el termómetro llegue a la
temperatura ambiente.
Para cualquier otro mensaje de error, reinicialice el
espere 30 segundos, vuelva a introducir la pila y pulse
el botón de medición (3). Contacte con su distribuidor si
los mensajes de error vuelvan a aparecer.
4.7.
La pila
•
El termómetro está equipado con un indicador de pila baja visual.
•
•
•
•
00 (30/06/2008)
Desactive el termómetro antes de reemplazar la pila.
Abra el compartimento de pilas al girar la tapa de la parte trasera
del aparato hacia le derecha.
Reemplace la pila agotada por una nueva pila de litio tipo CR2032.
Vuelva a cerrar el compartimento de pilas al girar la tapa hacia la
izquierda hasta que oiga un clic.
Es posible que se visualicen valores incorrectos al
reemplazar las pilas mientras sigue activado el
termómetro. Si es el caso, reinicialice el termómetro.
Mantenga las pilas lejos del alcance de niños.
DVM105
« Pila OK » : es posible efectuar mediciones
« Pile baja » : es posible efectuar mediciones,
reemplazar la pila
« Pila agotada » : no es posible utilizar el
termómetro, reemplazar la pila
Page 25

DVM105
25
4.8.
Limpieza y almacenamiento
•
El sensor es el componente más delicado del termómetro.
Asegúrese de que esté siempre limpio.
•
Limpie el sensor con un paño suave o un bastoncillo de algodón
ligeramente humedecido con agua o alcohol.
•
Deje que el sensor seque antes de volver a utilizar el termómetro.
•
Limpie el termómetro con un paño húmedo sin pelusas. Evite el uso
de alcohol y de disolventes.
•
Nunca sumerja el termómetro en un líquido.
•
El usuario no habrá de efectuar el mantenimiento de ninguna pieza.
•
Contacte con su distribuidor si necesita piezas de recambio.
•
Guarde el termómetro a una temperatura ambiente entre –20°C y +65°C.
4.9.
Especificaciones
rango de medición
temperatura de funcionamiento
temperatura de almacenamiento
precisión
(t
= 23 ± 3°C)
amb
resolución
tiempo de respuesta (90 %)
emisividad
pantalla
longitud de la onda
desactivación automática
relación distancia/ punto
alimentación
dimensiones
peso
Utilice este aparato sólo con los accesorios originales. Velleman
Spain SL no será responsable de daños ni lesiones causados por
un uso (indebido) de este aparato. Para más información sobre
este producto, visite nuestra página web www.velleman.eu. Se
pueden modificar las especificaciones y el contenido de este
manual sin previo aviso.
00 (30/06/2008)
-33 ~ +220°C (-27,4 ~ 428°F)
-10°C ~ +50°C
-20°C ~ +65°C
± 2 % de la visualización o 2°C (4°F) si
t
> +100°C (+100°F)
obj
0,1°C / 0,1°F
1 seg.
0,05 – 1,00 paso 0,01
LCD
5µm - 14µm
15 seg.
D/S = 1/1
1 pila tipo CR2032 (incl.)
(1 pila de recambio incl.)
18 x 37 x 67 mm
32 g
Page 26

DVM105
26
BEDIENUNGSANLEITUNG
5.1.
Einführung
An alle Einwohner der Europäischen Union
Wichtige Umweltinformationen über dieses Produkt
muss an den Händler oder ein örtliches Recycling-Unternehmen
retourniert werden. Respektieren Sie die örtlichen Umweltvorschriften.
Falls Zweifel bestehen, wenden Sie sich für
Entsorgungsrichtlinien an Ihre örtliche Behörde.
Wir bedanken uns für den Kauf des DVM105! Lesen Sie diese
Bedienungsanleitung vor Inbetriebnahme sorgfältig durch. Überprüfen
Sie, ob Transportschäden vorliegen. Sollte dies der Fall sein,
verwenden Sie das Gerät nicht und wenden Sie sich an Ihren Händler.
5.2.
•
•
•
•
00 (30/06/2008)
Dieses Symbol auf dem Produkt oder der Verpackung
zeigt an, dass die Entsorgung dieses Produktes nach
seinem Lebenszyklus der Umwelt Schaden zufügen kann.
Entsorgen Sie die Einheit (oder verwendeten Batterien)
nicht als unsortiertes Hausmüll; die Einheit oder
verwendeten Batterien müssen von einer spezialisierten
Firma zwecks Recycling entsorgt werden. Diese Einheit
Sicherheitshinweise
Halten Sie das Thermometer nie zu lange dicht in der
nähe von Wärmequellen (z.B. Kochplatte) um
Überhitzung zu vermeiden.
Schützen Sie das Gerät vor Regen und Feuchte.
Bei Schäden, die durch Nichtbeachtung der Bedienungsanleitung
verursacht werden, erlischt der Garantieanspruch. Für daraus
resultierende Folgeschäden übernimmt der Hersteller keine
Haftung.
Setzen Sie das Gerät keiner Flüssigkeit wie z.B. Tropf- oder
Spritzwasser, aus.
Bei Schäden verursacht durch eigenmächtige Änderungen erlischt
der Garantieanspruch.
Halten Sie Kinder und Unbefugte vom Gerät fern.
Page 27

DVM105
27
5.3.
Allgemeine Richtlinien
•
Dieses Gerät funktioniert mit 1 x CR2032-Batterie.
•
Vermeiden Sie Erschütterungen. Vermeiden Sie rohe Gewalt während der
Installation und Bedienung des Gerätes.
•
Schützen Sie das Gerät vor Staub, Feuchtigkeit und extremen
Temperaturen (siehe “Technische Daten”).
•
Nehmen Sie das Gerät erst in Betrieb, nachdem Sie sich mit seinen
Funktionen vertraut gemacht haben.
•
Verwenden Sie die Originalverpackung, wenn das Gerät
transportiert werden soll.
•
Eigenmächtige Veränderungen sind aus Sicherheitsgründen
verboten.
•
Verwenden Sie das Gerät nur für Anwendungen beschrieben in
dieser Bedienungsanleitung sonst kann dies zu Schäden am Produkt
führen und erlischt der Garantieanspruch. Jede andere Verwendung
ist mit Gefahren wie Kurzschluss, Brandwunden, elektrischem
Schlag, usw. verbunden.
•
Elektromagnetische Felder und Radiofrequenzen von etwa 3 Volt pro
Meter können die Anzeige beeinflussen. Der Betrieb des Gerätes wird
aber nicht ständig gestört werden.
5.4.
Eigenschaften
•
berührungsloses Infrarot-Thermometer
•
LCD-Display
•
Temperaturanzeige in °C oder °F
•
Anzeige des Höchst-, Mindestwertes-. und Verriegelung des Wertes
im Display
•
faltbarer Ständer
•
regelbarer Emissionsgrad
•
automatische Abschaltung
•
Messung über einen einfachen Tastendruck
00 (30/06/2008)
Page 28

28
5.5.
1. Sensor
Anwendung
DVM105
2. LCD-Display
3. Messtaste
4. MODE-Taste
•
Richten Sie das Thermometer auf den Punkt, den Sie messen
möchten, und drücken Sie die Messtaste (3) um die
Oberflächetemperatur anzuzeigen. Die Abstand-zu-Punktgröße beträgt
1:1. Halten Sie das Thermometer deshalb möglichst dicht beim Punkt,
den Sie messen möchten.
•
Das Thermometer zeigt die Temperatur in °C und °F an. Om Um die
Messeinheit auszuwählen, schalten Sie das Thermometer ein und
drücken Sie die Messtaste (3) und drücken Sie danach vier Mal die
MODE-Taste (4). Im Display blinkt °C oder °F. Drücken Sie die
Messtaste (3) wieder, um die Einheit zu wählen und aufzubewahren.
•
Anzeige des Höchst- oder Mindestwertes: Schalten Sie das
Thermometer mit der Messtaste (3) ein und drücken Sie danach die
MODE-Taste (4), ein Mal für den Mindestwert und zwei Mal für den
Höchstwert. Im Display blinkt MIN oder MAX. Drücken Sie nun die
Messtaste (3), um die Anzeigemodus zu wählen und aufzubewahren.
Halten Sie die Messtaste (3) gedrückt um nur den Mindest- oder
Höchstwert anzuzeigen.
•
Die Lock-Funktion eignet sich sehr wenn Sie die Temperatur ständig im
Auge behalten möchten. Schalten Sie das Thermometer mit der
Messtaste (3) ein und drücken Sie danach die MODE-Taste (4). Im
Display erscheint LOCK. Drücken Sie nun die Messtaste (3) um die Lock-
Funktion einzustellen. Das Thermometer zeigt nun 60 Minuten die
Temperatur in Echtzeit an, bis Sie die Messtaste (3) wieder drücken.
•
Das Thermometer hat einen Standard-Emissionsgrad von 0,95.
Dieser Emissionsgrad hat einen einstellbaren Bereich von 0,05 (5E)
bis 1 (100E). Lassen Sie diese Einstellung nur von einem Fachmann
ausführen. Den Emissionsgrad einstellen: Schalten Sie das
Thermometer mit der Messtaste (3) ein und drücken Sie die MODE-
00 (30/06/2008)
Page 29

29
Taste (4) fünf Mal. Der eingestellte Wert erscheint im Display.
Stellen Sie den Wert nun mit der Messtaste (3) ein. Verlassen Sie
das Einstellmenü indem Sie die MODE-Taste (4) drücken. Setzen Sie
sich mit Ihrem Fachhändler in Verbindung wenn Sie mehr
Informationen über den Emissionsgrad bestimmter Materialien
haben möchten.
Bemerkung: berührungslose IR-Thermometer eignen sich nicht für
Anwendung auf reflektierende oder polierte Metalle.
Materie Emissions-
Asphalt 0,90 tot 0,98 Stoff (schwarz) 0,98
Beton 0,94 Haut 0,98
Zement 0,96 Leder 0,95 tot 1,00
Sand 0,90 Steinkohle (Pulver) 0,96
Erde 0,92 tot 0,96 Lack 0,80 tot 0,95
Wasser 0,92 tot 0,96 Lack (matt) 0,97
Eis 0,96 tot 0,98 Gummi (schwarz) 0,94
Schnee 0,83 Plastik 0,85 tot 0,95
Glas 0,90 tot 0,95 Holz 0,90
Keramik 0,90 tot 0,94 Papier 0,70 tot 0,94
Marmor 0,94 Chromoxiden 0,81
Putz 0,80 tot 090 Kupferoxiden 0,78
Mörser 0,89 tot 0,91 Eisenoxiden 0,78 tot 0,82
Backstein 0,93 tot 0,96 Textilien 0,90
5.6.
00 (30/06/2008)
grad
Problemlösung
Im Display erscheint ‘Hi’ oder ‘Lo’ wenn die gemessene
Temperatur höher (‘Hi’) als +220°C (428°F) oder
niedriger (‘Lo’) als –33°C (-27°F) ist.
Im Display erscheint ‘Er2’ wenn das Thermometer
einem plötzlichen Wechsel der Umgebungstemperatur
ausgesetzt wird. Warten Sie etwa 30 Minuten bis das
Thermometer die Zimmertemperatur erreicht hat.
DVM105
Materie Emissions-
grad
Page 30

30
Im Display erscheint ‘Er3’ wenn die
DVM105
Umgebungstemperatur niedriger -10°C oder höher als
+50°C ist. Warten Sie etwa 30 Minuten bis das
Thermometer die Zimmertemperatur erreicht hat.
Setzen Sie das Thermometer bei allen anderen
Fehlermeldungen zurück. Schalten Sie das
Thermometer aus, entfernen Sie die Batterie und
warten Sie 30 Sekunden. Legen Sie die Batterie ein und
drücken Sie die Messtaste (3). Setzen Sie sich mit
Ihrem Fachhändler in Verbindung wenn die
Fehlermeldung wieder erscheint.
5.7.
Batterie
Das Thermometer verfügt über eine sichtbare Anzeige bei schwacher
Batterie:
‘Batterie OK’: Messungen möglich
‘Schwache Batterie’: führen Sie einen Batteriewechsel
durch, Messungen möglich
‘Leere Batterie’: keine Messungen möglich, führen Sie
einen Batteriewechsel durch.
•
•
•
•
00 (30/06/2008)
Schalten Sie zuerst das Thermometer aus.
Öffnen Sie das Batteriefach, indem Sie den Deckel (3) nach unten
schieben.
Ersetzen Sie die Batterie indem Sie 2 neue 1,5 V AAA-Batterien
einlegen.
Schließen Sie das Batteriefach wieder
Wenn Sie einen Batteriewechsel bei einem
eingeschalteten Thermometer durchführen, können
da Störungen auftreten. Starten Sie das
Thermometer wieder. Halten Sie Kinder vom Gerät
fern.
Page 31

DVM105
31
5.7.
Reinigung und Lagerung
•
Der Sensor ist ein sehr delikater Teil des Thermometers und soll
immer sauber gehalten werden.
•
Reinigen Sie den Sensor mit einem sanften Tuch oder einem
Wattestäbchen mit Wasser oder Alkohol.
•
Lassen Sie den Sensor trocknen, ehe Sie das Thermometer wieder verwenden.
•
Verwenden Sie zur Reinigung der anderen Teile ein sauberes,
feuchtes, fusselfreies Tuch. Verwenden Sie auf keinen Fall Alkohol
oder irgendwelche Lösungsmittel.
•
Tauchen Sie das Gerät nie in Wasser oder eine andere Flüssigkeit.
•
Es gibt keine zu wartenden Teile.
•
Bestellen Sie eventuelle Ersatzunterteile bei Ihrem Fachhändler.
•
Bewahren Sie das Thermometer in einem Zimmer mit einer
Temperatur zwischen –20°C ~ +65°C.
5.8.
Technische Daten
Messbereich -33 ~ +220°C (-27,4 ~ 428°F)
Betriebstemperatur -10°C ~ +50°C
Lagertemperatur -20°C ~ +65°C
Genauigkeit
(t
= 23 ± 3°C)
amb
Auflösung 0,1°C /0,1°F
Ansprechzeit (90 %)
Emissionsgrad
Display
Wellenlänge
automatische Abschaltung
Abstand-zu-Punktgröße
Stromversorgung
Abmessungen
Gewicht
Verwenden Sie dieses Gerät nur mit originellen Zubehörteilen.
Velleman NV übernimmt keine Haftung für Schaden oder
Verletzungen bei (falscher) Anwendung dieses Gerätes. Für
mehr Informationen zu diesem Produkt, siehe
www.velleman.eu. Alle Änderungen ohne vorherige
Ankündigung vorbehalten.
00 (30/06/2008)
± 2 % der Anzeige oder 2°C (4°F)
wenn t
> +100°C (+100°F)
obj
1 Sek.
0,05 – 1,00 Schritt 0,01
LCD-Display
5µm - 14µm
15 Sek.
D/S = 1/1
1 x CR2032-Batterie (mitgeliefert)
(1 Ersatzbatterie mitgeliefert)
18 x 37 x 67 mm
32 g
 Loading...