


User’s Manual
TECRA A8 / Satellite Pro A120
Choose freedom.
computers.toshiba-europe.com

TECRA A8 / Satellite Pro A120
Copyright
© 2007 by TOSHIBA Corporation. All rights reserved. Under the copyright laws, this manual cannot be reproduced in any form without the prior written permission of TOSHIBA. No patent liability is assumed, with respect to the use of the information contained herein.
TOSHIBA TECRA A8 / Satellite Pro A120 Portable Personal Computer User’s Manual
Second edition January 2007
Copyright authority for music, movies, computer programs, data bases and other intellectual property covered by copyright laws belongs to the author or to the copyright owner. Copyrighted material can be reproduced only for personal use or use within the home. Any other use beyond that stipulated above (including conversion to digital format, alteration, transfer of copied material and distribution on a network) without the permission of the copyright owner is a violation of copyright or author’s rights and is subject to civil damages or criminal action. Please comply with copyright laws in making any reproduction from this manual.
Disclaimer
This manual has been validated and reviewed for accuracy. The instructions and descriptions it contains are accurate for the TOSHIBA TECRA A8 / Satellite Pro A120 Portable Personal Computer at the time of this manual’s production. However, succeeding computers and manuals are subject to change without notice. TOSHIBA assumes no liability for damages incurred directly or indirectly from errors, omissions or discrepancies between the computer and the manual.
Trademarks
IBM is a registered trademark and IBM PC is a trademark of International Business Machines Corporation.
Intel, Intel SpeedStep, Intel Core and Centrino are trademarks or registered trademarks of Intel Corporation or its subsidiaries in the United States and other countries/regions.
Windows and Microsoft are registered trademarks and Windows Vista is a trademark of Microsoft Corporation.
Photo CD is a trademark of Eastman Kodak.
Bluetooth is a trademark owned by its proprietor and used by TOSHIBA under license.
i.LINK is trademark and registered trademark of Sony Corporation. InterVideo and WinDVD are registered trademarks of InterVideo Inc. DVD MovieFactory is a registered trademarks of Ulead Systems, Inc.
Other trademarks and registered trademarks not listed above may be used in this manual.
User’s Manual |
ii |

TECRA A8 / Satellite Pro A120
EU Declaration of Conformity
This product is carrying the CE-Mark in accordance with the related European Directives. Responsible for CE-Marking is TOSHIBA Europe GmbH, Hammfelddamm 8, 41460 Neuss, Germany.
The complete and official EU Declaration of Conformity can be found on TOSHIBA’s web site http://epps.toshiba-teg.com on the Internet.
CE compliance
This product is labelled with the CE Mark in accordance with the related European Directives, notably Electromagnetic Compatibility Directive 89/ 336/EEC for the notebook and the electronic accessories including the supplied power adapter, the Radio Equipment and Telecommunications Terminal Equipment Directive 1999/5/EC in case of implemented telecommunication accessories and the Low Voltage Directive 73/23/EEC for the supplied power adapter.
This product and the original options are designed to observe the related EMC (Electromagnetic Compatibility) and safety standards. However, TOSHIBA cannot guarantee that this product still observes these EMC standards if options or cables not produced by TOSHIBA are connected or implemented. In this case the persons who have connected / implemented those options / cables have to provide assurance that the system (PC plus options / cables) still fulfils the required standards. To avoid general EMC problems, the following guidance should be noted:
■Only CE marked options should be connected / implemented
■Only best shielded cables should be connected
Working environment
This product was designed to fulfil the EMC (Electromagnetic Compatibility) requirements to be observed for so-called "Residential, commercial and light industry environments".
TOSHIBA do not approve the use of this product in working environments other than the above mentioned "Residential, commercial and light industry environments".
For example, the following environments are not approved:
■Industrial Environments (e.g. environments where a mains voltage of 380V three-phase is used)
■Medical Environments
■Automotive Environments
■Aircraft Environments
If this product is supplied with a network port, please refer to the paragraph "Network connection".
Any consequences resulting from the use of this product in working environments that are not approved are not the responsibility of TOSHIBA.
User’s Manual |
iii |

TECRA A8 / Satellite Pro A120
The consequences of the use of this product in non-approved working environments may be:
■Interference with other devices or machines in the near surrounding area.
■Malfunction of, or data loss from, this product caused by disturbances generated by other devices or machines in the near surrounding area.
Therefore TOSHIBA strongly recommend that the electromagnetic compatibility of this product should be suitably tested in all non-approved working environments before use. In the case of automobiles or aircraft, the manufacturer or airline respectively should be asked for permission before use of this product.
Furthermore, for general safety reasons, the use of this product in environments with explosive atmospheres is not permitted.
Modem warning notice
Conformity Statement
The equipment has been approved to [Commission Decision "CTR21"] for pan-European single terminal connection to the Public Switched Telephone Network (PSTN).
However, due to differences between the individual PSTNs provided in different countries/regions the approval does not, of itself, give an unconditional assurance of successful operation on every PSTN network termination point.
In the event of problems, you should contact your equipment supplier in the first instance.
Network Compatibility Statement
This product is designed to work with, and is compatible with the following networks. It has been tested to and found to conform with the additional requirements conditional in EG 201 121.
Germany |
ATAAB AN005, AN006, AN007, AN009, AN010 and |
|
DE03, 04, 05, 08, 09, 12, 14, 17 |
|
|
Greece |
ATAAB AN005, AN006 and GR01, 02, 03, 04 |
|
|
Portugal |
ATAAB AN001, 005, 006, 007, 011 and P03, 04, 08, 10 |
|
|
Spain |
ATAAB AN005, 007, 012 and ES01 |
|
|
Switzerland |
ATAAB AN002 |
|
|
All other |
ATAAB AN003, 004 |
countries/regions |
|
Specific switch settings or software setup are required for each network, please refer to the relevant sections of the user guide for more details.
User’s Manual |
iv |

TECRA A8 / Satellite Pro A120
The hookflash (timed break register recall) function is subject to separate national type approvals. It has not been tested for conformity to national type regulations, and no guarantee of successful operation of that specific function on specific national networks can be given.
Following information is only for EU-member states:
The use of the symbol indicates that this product may not be treated as household waste. By ensuring this product is disposed of correctly, you will help prevent potential negative consequences for the environment and human health, which could otherwise be caused by inappropriate waste handling of this product. For more detailed information about recycling of this product, please contact your local city office, your household waste disposal service or the shop where you purchased the product.
User’s Manual |
v |

TECRA A8 / Satellite Pro A120
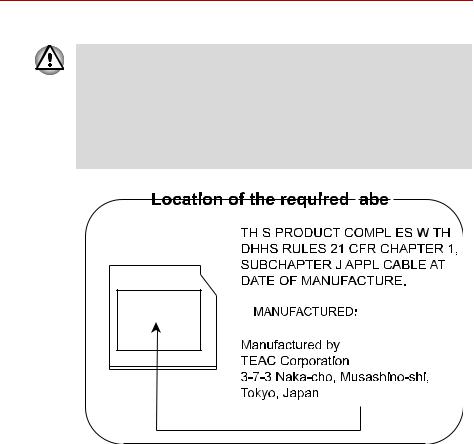
Optical disc drive safety instructions
Be sure to check the international precautions at the end of this section.
Panasonic
DVD-ROM&CD-R/RW UJDA770
■The DVD-ROM&CD-R/RW drive employs a laser system. To ensure proper use of this product, please read this instruction manual carefully and retain for future reference. Should the unit ever require maintenance, contact an authorized service location.
■Use of controls, adjustments or the performance of procedures other than those specified may result in hazardous radiation exposure.
■To prevent direct exposure to the laser beam, do not try to open the enclosure.
|
|
|
|
|
|
|
|
|
|
|
|
|
|
|
|
|
|
|
|
|
|
|
|
|
|
|
|
|
|
|
|
|
|
|
|
|
|
|
|
|
|
|
|
|
|
|
|
|
|
|
|
|
|
|
|
|
|
|
|
|
|
|
|
|
|
|
|
|
|
|
|
|
|
|
|
|
|
|
|
|
|
|
|
|
|
|
|
|
|
|
|
|
|
|
|
|
|
|
|
|
|
|
|
|
|
|
|
|
|
|
|
|
|
|
|
|
|
|
|
|
|
|
|
|
|
|
|
|
|
|
|
|
|
|
|
|
|
|
|
|
|
|
|
User’s Manual |
|
|
|
|
|
|
|
|
|
|
vi |

TECRA A8 / Satellite Pro A120
DVD Super Multi with Double Layer Recording UJ-841
■The DVD Super Multi drive with Double Layer Recording model employs a laser system. To ensure proper use of this product, please read this instruction manual carefully and retain for future reference. Should the unit ever require maintenance, contact an authorized service location.
■Use of controls, adjustments or the performance of procedures other than those specified may result in hazardous radiation exposure.
■To prevent direct exposure to the laser beam, do not try to open the enclosure.
|
|
|
|
|
|
|
|
|
|
|
|
|
|
|
|
|
|
|
|
|
|
|
|
|
|
|
|
|
|
|
|
|
|
|
|
|
|
|
|
|
|
|
|
|
|
|
|
|
|
|
|
|
|
|
|
|
|
|
|
|
|
|
|
|
|
|
|
|
|
|
|
|
|
|
|
|
|
|
|
|
|
|
|
|
|
|
|
|
|
|
|
|
|
|
|
|
|
|
|
|
|
|
|
|
|
|
|
|
|
|
|
|
|
|
|
|
|
|
|
|
|
|
|
|
|
|
|
|
|
|
|
|
|
|
|
|
|
|
|
|
|
|
|
|
|
|
|
|
|
|
|
|
|
|
|
|
|
|
|
|
|
|
|
|
|
|
|
|
|
|
|
|
|
|
|
|
|
|
|
|
|
User’s Manual |
|
|
|
|
|
|
|
|
|
|
|
vii |

TECRA A8 / Satellite Pro A120
TEAC
CD-ROM CD-224E
■The CD-ROM drive employs a laser system. To ensure proper use of this product, please read this instruction manual carefully and retain for future reference. Should the unit ever require maintenance, contact an authorized service location.
■Use of controls, adjustments or the performance of procedures other than those specified may result in hazardous radiation exposure.
■To prevent direct exposure to the laser beam, do not try to open the enclosure.
|
|
|
|
|
|
|
|
|
|
|
|
|
|
|
|
|
|
|
|
|
|
|
|
|
|
|
|
|
|
|
|
|
|
|
|
|
|
|
|
|
|
|
|
|
|
|
|
|
|
|
|
|
|
|
|
|
|
|
|
|
|
|
|
|
|
|
|
|
|
|
|
|
|
|
|
|
|
|
|
|
|
|
|
|
|
|
|
|
|
|
|
|
|
|
|
|
|
|
|
|
|
|
|
|
|
|
|
|
|
|
|
|
|
|
|
|
|
|
|
User’s Manual |
|
|
|
|
|
|
|
|
viii |
TECRA A8 / Satellite Pro A120
DVD-ROM DV-28E
■DVD-ROM drive employs a laser system. To ensure proper use of this product, please read this instruction manual carefully and retain for future reference. Should the unit ever require maintenance, contact an authorized service location.
■Use of controls, adjustments or the performance of procedures other than those specified may result in hazardous radiation exposure.
■To prevent direct exposure to the laser beam, do not try to open the enclosure.
|
|
|
|
|
|
|
|
|
|
|
|
|
|
|
|
|
|
|
|
|
|
|
|
|
|
|
|
|
|
|
|
|
|
|
|
|
|
|
|
|
|
|
|
|
|
|
|
|
|
|
|
|
|
|
|
|
|
|
|
|
|
|
|
|
|
|
|
|
|
|
|
|
|
|
|
|
|
|
|
|
|
|
|
|
|
|
|
|
|
|
|
|
|
|
|
|
|
|
|
|
|
|
|
|
|
|
|
|
|
|
|
|
|
|
|
|
|
|
|
User’s Manual |
|
|
|
|
|
|
|
|
ix |
TECRA A8 / Satellite Pro A120
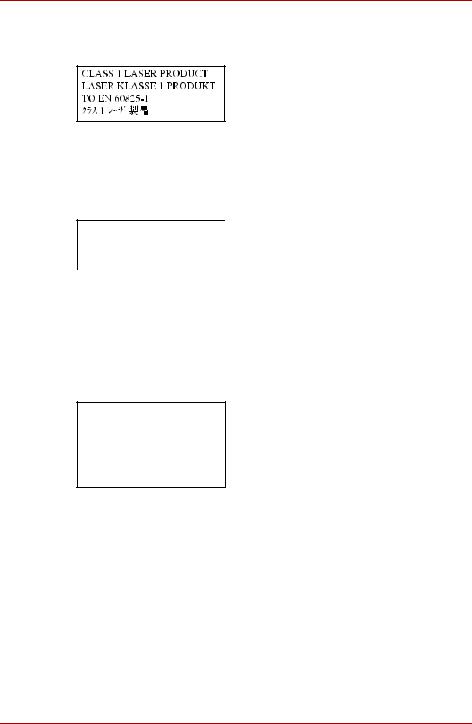
International precautions
CLASS 1 LASER PRODUCT
LASERSCHUTZKLASSE 1
PRODUKT
TOEN60825
ADVERSEL:USYNLIG LASERSTRÅLING VED ÅBNING, NÅR SIKKERHEDSAF-BRYDER
ER UDE AF FUNKTION. UNDGÅ UDSÆTTSLSE FOR STRÅLING
CAUTION: This appliance contains a laser system and is classified as a "CLASS 1 LASER PRODUCT." To use this model properly, read the instruction manual carefully and keep this manual for your future reference. In case of any trouble with this model, please contact your nearest "AUTHORIZED service station." To prevent direct exposure to the laser beam, do not try to open the enclosure.
VORSICHT: Dieses Gerät enthält ein Laser-System und ist als „LASERSCHUTZKLASSE 1 PRODUKT“ klassifiziert. Für den richtigen Gebrauch dieses Modells lesen Sie bitte die Bedienungsanleitung sorgfältig durch und bewahren diese bitte als Referenz auf. Falls Probleme mit diesem Modell auftreten, benachrichtigen Sie bitte die nächste „autorisierte Service-Vertretung“. Um einen direkten Kontakt mit dem Laserstrahl zu vermeiden darf das Gerät nicht geöffnet werden.
ADVARSEL: Denne mærking er anbragt udvendigt på apparatet og indikerer, at apparatet arbejder med laserstråler af klasse 1, hviket betyder, at der anvendes laserstrlier af svageste klasse, og at man ikke på apparatets yderside kan bilve udsat for utilladellg kraftig stråling.
APPARATET BOR KUN ÅBNES AF FAGFOLK MED SÆRLIGT KENDSKAB TIL APPARATER MED LASERSTRÅLER!
Indvendigt i apparatet er anbragt den her gengivne advarselsmækning, som advarer imod at foretage sådanne indgreb i apparatet, at man kan komme til at udsatte sig for laserstråling.
User’s Manual |
x |
TECRA A8 / Satellite Pro A120
OBS! Apparaten innehåller laserkomponent som avger laserstråining överstigande gränsen för laserklass 1.
VAROITUS. Suojakoteloa si saa avata. Laite sisältää laserdiodin, joka lähetää näkymätöntä silmilie vaarallista lasersäteilyä.
CAUTION: USE OF CONTROLS OR ADJUSTMENTS OR PERFORMANCE OF PROCEDURES OTHER THAN THOSE SPECIFIED IN THE OWNER’S MANUAL MAY RESULT IN HAZARDOUS RADIATION EXPOSURE.
VORSICHT: DIE VERWENDUNG VON ANDEREN STEURUNGEN ODER EINSTELLUNGEN ODER DAS DURCHFÜHREN VON ANDEREN VORGÄNGEN ALS IN DER BEDIENUNGSANLEITUNG BESCHRIEBEN KÖNNEN GEFÄHRLICHE STRAHLENEXPOSITIONEN ZUR FOLGE HABEN.
User’s Manual |
xi |

Preface
Congratulations on your purchase of the TECRA A8 / Satellite Pro A120 computer. This powerful notebook computer provides excellent expansion capability, including multimedia devices, and it is designed to provide years of reliable, high-performance computing.
This manual tells how to set up and begin using your TECRA A8 / Satellite Pro A120 computer. It also provides detailed information on configuring your computer, basic operations and care, using optional devices and troubleshooting.
If you are a new user of computers or if you’re new to portable computing, first read over the Introduction and The Grand Tour chapters to familiarize yourself with the computer’s features, components and accessory devices. Then read Getting Started for step-by-step instructions on setting up your computer.
If you are an experienced computer user, please continue reading the preface to learn how this manual is organized, then become acquainted with this manual by browsing through its pages. Be sure to look over the Special features section of the Introduction, to learn about features that are uncommon or unique to the computers and carefully read HW Setup.
If you are going to install PC cards or connect external devices such as a monitor, be sure to read Chapter 8, Optional Devices.
Manual contents
This manual is made up of the following.
Chapter 1, Introduction, is an overview of the computer’s features, capabilities, and options.
Chapter 2, The Grand Tour, identifies the components of the computer and briefly explains how they function.
User’s Manual |
xii |

TECRA A8 / Satellite Pro A120
Chapter 3, Getting Started, provides a quick overview of how to begin operating your computer and gives tips on safety and designing your work area.
Chapter 4, Operating Basics, describes the basic operations of your computer and precautions when using it, as well as the handling of CD/ DVD.
Chapter 5, The Keyboard, describes special keyboard functions including the keypad overlay and hot keys.
Chapter 6, Power and Power-Up Modes, gives details on the computer’s power resources and battery save modes and how to set a password.
Chapter 7, HW Setup, explains how to configure the computer using the HW Setup program.
Chapter 8, Optional Devices, describes the optional hardware available.
Chapter 9, Troubleshooting, provides helpful information on how to perform some diagnostic tests, and suggests courses of action if the computer doesn’t seem to be working properly.
Chapter 10, Legal Footnotes, provides Legal Footnote information related to your computer.
The Appendixes provide technical information about your computer.
The Glossary defines general computer terminology and includes a list of acronyms used in the text.
The Index quickly directs you to the information contained in this manual.
Conventions
This manual uses the following formats to describe, identify, and highlight terms and operating procedures.
Abbreviations
On first appearance, and whenever necessary for clarity, abbreviations are enclosed in parentheses following their definition. For example: Read Only Memory (ROM). Acronyms are also defined in the Glossary.
Icons
Icons identify ports, dials, and other parts of your computer. The indicator panel also uses icons to identify the components which is providing information on.
Keys
The keyboard keys are used in the text to describe many computer operations. A distinctive typeface identifies the key top symbols as they appear on the keyboard. For example, Enter identifies the Enter key.
User’s Manual |
xiii |

TECRA A8 / Satellite Pro A120
Key operation
Some operations require you to simultaneously use two or more keys. We identify such operations by the key top symbols separated by a plus sign
(+). For example, Ctrl + C means you must hold down Ctrl and at the same time press C. If three keys are used, hold down the first two and at the same time press the third.
ABC |
When procedures require an action such as |
|
clicking an icon or entering text, the icon’s name |
|
or the text you are to type in is represented in the |
|
type face you see to the left. |
Display |
|
S ABC |
Names of windows or icons or text generated by |
the computer that appear on its display screen |
|
|
are presented in the type face you see to the left. |
Messages
Messages are used in this manual to bring important information to your attention. Each type of message is identified as shown below.
Pay attention! A caution informs you that improper use of equipment or failure to follow instructions may cause data loss or damage your equipment.
Please read. A note is a hint or advice that helps you make best use of your equipment.
Indicates a potentially hazardous situation, which could result in death or serious injury, if you do not follow instructions.
Terminology
This term is defined in this document as follows:
Start |
The word "Start" refers to the " " button in |
|
Microsoft® Windows Vista™. |
User’s Manual |
xiv |

General Precautions
TOSHIBA computers are designed to optimize safety, minimize strain and withstand the rigors of portability. However, certain precautions should be observed to further reduce the risk of personal injury or damage to the computer.
Be certain to read the general precautions below and to note the cautions included in the text of the manual.
Creating a computer-friendly environment
Place the computer on a flat surface that is large enough for the computer and any other items you are using, such as a printer. Leave enough space around the computer and other equipment to provide adequate ventilation. Otherwise, they may overheat.To keep your computer in prime operating condition, protect your work area from:
■Dust, moisture, and direct sunlight.
■Equipment that generates a strong electromagnetic field, such as stereo speakers (other than speakers that are connected to the computer) or speaker phones.
■Rapid changes in temperature or humidity and sources of temperature change such as air conditioner vents or heaters.
■Extreme heat, cold, or humidity.
■Liquids and corrosive chemicals.
Stress injury
Carefully read the Instruction Manual for Safety and Comfort. It contains information on prevention of stress injuries to your hands and wrists that can be caused by extensive keyboard use.
User’s Manual |
xv |

TECRA A8 / Satellite Pro A120
Heat injury
■Avoid prolonged physical contact with the computer. If the computer is used for long periods, its surface can become very warm. While the temperature will not feel hot to the touch, if you maintain physical contact with the computer for a long time (if you rest the computer on your lap, or if you keep your hands on the palm rest, for example) your skin might suffer low-heat injury.
■If the computer has been used for a long time, avoid direct contact with the metal plate supporting the I/O ports. It can become hot.
■The surface of the AC adaptor can become hot when in use. This condition does not indicate a malfunction. If you need to transport the AC adaptor, disconnect it and let it cool before moving it.
■Do not lay the AC adaptor on a material that is sensitive to heat. The material could be damaged.
Pressure or impact damage
Do not apply heavy pressure to the computer or subject it to strong impact. Excessive pressure or impact can cause damage to computer components or otherwise cause malfunctions.
PC card overheating
Some PC cards can become hot with prolonged use. Overheating of a PC card can result in errors or instability in the PC card operation. Also be careful when you remove a PC card that has been used for a long time.
Mobile phone
Use of mobile phones can interfere with the audio system. Computer operation is not impaired but it is recommended that a distance of 30 cm be maintained between the computer and a mobile phone in use.
Instruction Manual for Safety and Comfort
All important information on the safe and proper use of this computer is described in the enclosed Instruction Manual for Safety and Comfort. Be sure to read it before using the computer.
User’s Manual |
xvi |

Table of Contents
Chapter 1 Introduction
Equipment checklist. . . . . . . . . . . . . . . . . . . . . . . . . . . . . . . . . . . . . . . 1-1 Features. . . . . . . . . . . . . . . . . . . . . . . . . . . . . . . . . . . . . . . . . . . . . . . . . 1-3 Special features . . . . . . . . . . . . . . . . . . . . . . . . . . . . . . . . . . . . . . . . . 1-11 TOSHIBA Value Added Package . . . . . . . . . . . . . . . . . . . . . . . . . . . . 1-13 Utilities and Applications. . . . . . . . . . . . . . . . . . . . . . . . . . . . . . . . . . 1-14 Options . . . . . . . . . . . . . . . . . . . . . . . . . . . . . . . . . . . . . . . . . . . . . . . . 1-17
Chapter 2 The Grand Tour
Front with the display closed . . . . . . . . . . . . . . . . . . . . . . . . . . . . . . . 2-1 Left side . . . . . . . . . . . . . . . . . . . . . . . . . . . . . . . . . . . . . . . . . . . . . . . . . 2-3 Right side . . . . . . . . . . . . . . . . . . . . . . . . . . . . . . . . . . . . . . . . . . . . . . . 2-4 Back side. . . . . . . . . . . . . . . . . . . . . . . . . . . . . . . . . . . . . . . . . . . . . . . . 2-4 Underside . . . . . . . . . . . . . . . . . . . . . . . . . . . . . . . . . . . . . . . . . . . . . . . 2-7 Front with the display open. . . . . . . . . . . . . . . . . . . . . . . . . . . . . . . . . 2-8 System indicators. . . . . . . . . . . . . . . . . . . . . . . . . . . . . . . . . . . . . . . . 2-10 Keyboard indicators. . . . . . . . . . . . . . . . . . . . . . . . . . . . . . . . . . . . . . 2-11 USB floppy disk drive . . . . . . . . . . . . . . . . . . . . . . . . . . . . . . . . . . . . 2-12 Optical disk drive . . . . . . . . . . . . . . . . . . . . . . . . . . . . . . . . . . . . . . . . 2-13 AC adaptor . . . . . . . . . . . . . . . . . . . . . . . . . . . . . . . . . . . . . . . . . . . . . 2-16
Chapter 3 Getting Started
Connecting the AC adaptor . . . . . . . . . . . . . . . . . . . . . . . . . . . . . . . . . 3-2 Opening the display . . . . . . . . . . . . . . . . . . . . . . . . . . . . . . . . . . . . . . . 3-4 Turning on the power . . . . . . . . . . . . . . . . . . . . . . . . . . . . . . . . . . . . . . 3-5 Starting up for the first time . . . . . . . . . . . . . . . . . . . . . . . . . . . . . . . . 3-5 Turning off the power. . . . . . . . . . . . . . . . . . . . . . . . . . . . . . . . . . . . . . 3-6 Restarting the computer . . . . . . . . . . . . . . . . . . . . . . . . . . . . . . . . . . 3-10 System Recovery Options . . . . . . . . . . . . . . . . . . . . . . . . . . . . . . . . . 3-10
User’s Manual |
xvii |

TECRA A8 / Satellite Pro A120
Chapter 4 Operating Basics
Using the USB floppy disk drive . . . . . . . . . . . . . . . . . . . . . . . . . . . . . 4-2 Using optical disk drive . . . . . . . . . . . . . . . . . . . . . . . . . . . . . . . . . . . . 4-3 Writing CDs on DVD-ROM&CD-R/RW drive . . . . . . . . . . . . . . . . . . . . 4-6 Writing CD/DVDs on DVD Super Multi drive . . . . . . . . . . . . . . . . . . . 4-8 Media care . . . . . . . . . . . . . . . . . . . . . . . . . . . . . . . . . . . . . . . . . . . . . . 4-15 Sound system . . . . . . . . . . . . . . . . . . . . . . . . . . . . . . . . . . . . . . . . . . . 4-17 Modem . . . . . . . . . . . . . . . . . . . . . . . . . . . . . . . . . . . . . . . . . . . . . . . . . 4-19 Wireless communications . . . . . . . . . . . . . . . . . . . . . . . . . . . . . . . . . 4-22 LAN . . . . . . . . . . . . . . . . . . . . . . . . . . . . . . . . . . . . . . . . . . . . . . . . . . . 4-26 Cleaning the computer. . . . . . . . . . . . . . . . . . . . . . . . . . . . . . . . . . . . 4-28 Moving the computer . . . . . . . . . . . . . . . . . . . . . . . . . . . . . . . . . . . . . 4-28 Using the Hard Disk Drive (HDD) Protection . . . . . . . . . . . . . . . . . . 4-29 Heat dispersal . . . . . . . . . . . . . . . . . . . . . . . . . . . . . . . . . . . . . . . . . . . 4-31
Chapter 5 The Keyboard
Typewriter keys. . . . . . . . . . . . . . . . . . . . . . . . . . . . . . . . . . . . . . . . . . . 5-1 Function keys: F1 … F12 . . . . . . . . . . . . . . . . . . . . . . . . . . . . . . . . . . . 5-2 Soft keys: Fn key combinations . . . . . . . . . . . . . . . . . . . . . . . . . . . . . 5-2 Hot keys. . . . . . . . . . . . . . . . . . . . . . . . . . . . . . . . . . . . . . . . . . . . . . . . . 5-3 Windows special keys . . . . . . . . . . . . . . . . . . . . . . . . . . . . . . . . . . . . . 5-5 Keypad overlay . . . . . . . . . . . . . . . . . . . . . . . . . . . . . . . . . . . . . . . . . . . 5-6 Generating ASCII characters. . . . . . . . . . . . . . . . . . . . . . . . . . . . . . . . 5-7
Chapter 6 Power and Power-Up Modes
Power conditions . . . . . . . . . . . . . . . . . . . . . . . . . . . . . . . . . . . . . . . . . 6-1 Power indicators. . . . . . . . . . . . . . . . . . . . . . . . . . . . . . . . . . . . . . . . . . 6-2 Battery types. . . . . . . . . . . . . . . . . . . . . . . . . . . . . . . . . . . . . . . . . . . . . 6-3 Care and use of the battery pack . . . . . . . . . . . . . . . . . . . . . . . . . . . . 6-5 Replacing the battery pack . . . . . . . . . . . . . . . . . . . . . . . . . . . . . . . . 6-10 TOSHIBA Password Utility. . . . . . . . . . . . . . . . . . . . . . . . . . . . . . . . . 6-12 Power-up modes. . . . . . . . . . . . . . . . . . . . . . . . . . . . . . . . . . . . . . . . . 6-15 Panel power on/off . . . . . . . . . . . . . . . . . . . . . . . . . . . . . . . . . . . . . . . 6-15 System Auto Off . . . . . . . . . . . . . . . . . . . . . . . . . . . . . . . . . . . . . . . . . 6-15
Chapter 7 HW Setup
Accessing HW Setup . . . . . . . . . . . . . . . . . . . . . . . . . . . . . . . . . . . . . . 7-1 HW Setup window . . . . . . . . . . . . . . . . . . . . . . . . . . . . . . . . . . . . . . . . 7-1
Chapter 8 Optional Devices
PC card . . . . . . . . . . . . . . . . . . . . . . . . . . . . . . . . . . . . . . . . . . . . . . . . . 8-2 SD card . . . . . . . . . . . . . . . . . . . . . . . . . . . . . . . . . . . . . . . . . . . . . . . . . 8-3 Memory expansion . . . . . . . . . . . . . . . . . . . . . . . . . . . . . . . . . . . . . . . . 8-6 Battery pack . . . . . . . . . . . . . . . . . . . . . . . . . . . . . . . . . . . . . . . . . . . . . 8-9 AC adaptor . . . . . . . . . . . . . . . . . . . . . . . . . . . . . . . . . . . . . . . . . . . . . . 8-9 Battery charger . . . . . . . . . . . . . . . . . . . . . . . . . . . . . . . . . . . . . . . . . . 8-10
User’s Manual |
xviii |

TECRA A8 / Satellite Pro A120
USB floppy disk drive . . . . . . . . . . . . . . . . . . . . . . . . . . . . . . . . . . . . 8-10 External monitor . . . . . . . . . . . . . . . . . . . . . . . . . . . . . . . . . . . . . . . . . 8-10 TV . . . . . . . . . . . . . . . . . . . . . . . . . . . . . . . . . . . . . . . . . . . . . . . . . . . . . 8-11 i.LINK (IEEE1394) . . . . . . . . . . . . . . . . . . . . . . . . . . . . . . . . . . . . . . . . 8-12 Advanced Port Replicator III Plus . . . . . . . . . . . . . . . . . . . . . . . . . . . 8-14 Serial port . . . . . . . . . . . . . . . . . . . . . . . . . . . . . . . . . . . . . . . . . . . . . . 8-15 Security lock . . . . . . . . . . . . . . . . . . . . . . . . . . . . . . . . . . . . . . . . . . . . 8-16
Chapter 9 Troubleshooting
Problem solving process. . . . . . . . . . . . . . . . . . . . . . . . . . . . . . . . . . . 9-1 Hardware and system checklist . . . . . . . . . . . . . . . . . . . . . . . . . . . . . 9-3 TOSHIBA support . . . . . . . . . . . . . . . . . . . . . . . . . . . . . . . . . . . . . . . . 9-22
Chapter 10 Legal Footnotes
CPU*1. . . . . . . . . . . . . . . . . . . . . . . . . . . . . . . . . . . . . . . . . . . . . . . . . . 10-1
General Main Memory*2. . . . . . . . . . . . . . . . . . . . . . . . . . . . . . . . . . . 10-2
Battery Life*3 . . . . . . . . . . . . . . . . . . . . . . . . . . . . . . . . . . . . . . . . . . . 10-2
Hard Disk Drive (HDD) Capacity*4 . . . . . . . . . . . . . . . . . . . . . . . . . . 10-2
LCD*5. . . . . . . . . . . . . . . . . . . . . . . . . . . . . . . . . . . . . . . . . . . . . . . . . . 10-3
Graphics Processor Unit ("GPU")*6 . . . . . . . . . . . . . . . . . . . . . . . . . 10-3
Wireless LAN*7 . . . . . . . . . . . . . . . . . . . . . . . . . . . . . . . . . . . . . . . . . . 10-3
Non-applicable Icons*8 . . . . . . . . . . . . . . . . . . . . . . . . . . . . . . . . . . . 10-3
Copy Protection*9 . . . . . . . . . . . . . . . . . . . . . . . . . . . . . . . . . . . . . . . 10-3
Images*10 . . . . . . . . . . . . . . . . . . . . . . . . . . . . . . . . . . . . . . . . . . . . . . 10-3
Appendix A Specifications
Appendix B Display Controller and Modes Appendix C Wireless LAN
Appendix D Bluetooth wireless technology Interoperability Appendix E AC Power Cord and Connectors
Appendix F TOSHIBA Anti-theft Protection Timer Appendix G If your computer is stolen
Glossary Index
User’s Manual |
xix |

Chapter 1
Introduction
This chapter provides an equipment checklist, and it identifies the computer’s features, options and accessories.
Some of the features described in this manual may not function properly if you use an operating system that was not preinstalled by TOSHIBA.
Equipment checklist
Carefully unpack your computer. Save the box and packing materials for future use.
Hardware
Check to make sure you have all the following items:
■TECRA A8 / Satellite Pro A120 Portable Personal Computer
■AC adaptor and power cord (2-pin plug or 3-pin plug)
■USB floppy disk drive (Option or provided with some models)
■Battery pack (installed in the computer)
User’s Manual |
1-1 |
Introduction
Software
The following Windows® operating system and utility softwares are preinstalled.
■Microsoft® Windows Vista™
■TOSHIBA Value Added Package
■TOSHIBA SD Memory Boot Utility
■DVD Video Player
■Ulead DVD MovieFactory®
■TOSHIBA Disc Creator
■TOSHIBA ConfigFree
■TOSHIBA Assist
■TOSHIBA SD Memory Utilities
■TOSHIBA Acoustic Silencer
■TOSHIBA HDD Protection
■Windows Mobility Center
■Online manual
Documentation and Backup Media
■TECRA A8 / Satellite Pro A120 Portable Personal Computer User's Manual
■TECRA A8 / Satellite Pro A120 Quickstart
■Instruction Manual for Safety and Comfort
■Warranty Information
■Product Recovery DVD-ROM
■Microsoft® Windows Vista™ Quick Start Guide
If any of the items are missing or damaged, contact your dealer immediately.
User’s Manual |
1-2 |

Introduction
Features
The computer uses TOSHIBA’s advanced Large Scale Integration (LSI), Complementary Metal-Oxide Semiconductor (CMOS) technology extensively to provide compact size, minimum weight, low power usage, and high reliability. This computer incorporates the following features and benefits:
Processor
Built-in |
The computer is equipped with one of the |
|
following Intel® processors. |
|
■ Intel® Core™ 2 Duo Processor, which |
|
incorporates a 2MB or 4MB level 2 cache |
|
memory. It also supports Enhanced Intel® |
|
SpeedStep® Technology. |
|
■ Intel® Core™ Duo Processor, which |
|
incorporates a 2MB level 2 cache memory. It |
|
also supports Enhanced Intel® SpeedStep® |
|
Technology. |
|
■ Intel® Core™ Solo Processor, which |
|
incorporates a 2MB level 2 cache memory. It |
|
also supports Enhanced Intel® SpeedStep® |
|
Technology. |
|
|
Some models in this series carry Intel® Centrino® Duo Mobile Technology, which is based on three separate technologies of Intel® Core™2 Duo processor, Intel® PRO/Wireless Network Connection, and Mobile Intel® 945 Express Chipset Family.
Some models in this series carry Intel® Centrino® Duo Mobile Technology, which is based on three separate technologies of Intel® Core™ Duo processor, Intel® PRO/Wireless Network Connection, and Mobile Intel® 945 Express Chipset Family.
Some models in this series carry Intel® Centrino® Mobile Technology, which is based on three separate technologies of Intel® Core™ Solo processor, Intel® PRO/Wireless Network Connection, and Mobile Intel® 945 Express Chipset Family.
Legal Footnote (CPU)*1
For more information on the Legal Footnote regarding CPU, please refer to the Legal Footnotes section in Chapter 10. Click the *1.
User’s Manual |
1-3 |

|
|
Introduction |
|
|
|
|
Memory |
|
|
|
|
|
Slots |
256, 512, 1,024 or 2,048 MB memory modules |
|
|
can be installed in the two memory slots for a |
|
|
maximum of 4,096 MB. |
|
|
|
|
Video RAM |
The Video RAM capacity will differ depending on |
|
|
the system memory capacity in the computer. |
|
|
■ If system memory is 512MB, a maximum of |
|
|
64MB will be used as Video RAM. |
|
|
■ If system memory is 1024MB or more, a |
|
|
maximum of 256MB will be used as Video |
|
|
RAM. |
|
|
|
Legal Footnote (General Main Memory)*2
For more information on the Legal Footnote regarding General Main Memory, please refer to the Legal Footnotes section in Chapter 10. Click the *2.
Power
Battery pack |
The computer is powered by one rechargeable |
|
lithium-ion battery pack. |
|
|
Legal Footnote (Battery Life)*3
For more information on the Legal Footnote regarding Battery Life, please refer to the Legal Footnotes section in Chapter 10. Click the *3.
RTC battery |
The internal RTC battery backs up the Real Time |
|
Clock (RTC) and calendar. |
|
|
AC adaptor |
The AC adaptor provides power to the system |
|
and recharges the batteries when they are low. It |
|
comes with a detachable power cord which will |
|
either have a 2-pin or 3-pin plug enclosure. |
|
Because it is universal, it can receive a range of |
|
AC voltage from 100 to 240 volts; however, the |
|
output current varies among different models. |
|
Using the wrong model can damage your |
|
computer. Refer to the AC adaptor section in |
|
Chapter 2, The Grand Tour. |
|
|
User’s Manual |
1-4 |

Introduction
Disks
Hard Disk Drive
(HDD) Capacity
Available in five sizes.
■40.0 billion bytes (37.26 GB)
■60.0 billion bytes (55.89 GB)
■80.0 billion bytes (74.53 GB)
■100.0 billion bytes (93.16 GB)
■120.0 billion bytes (111.79 GB)
Part of the space in the hard disk drive is reserved as administration space.
Legal Footnote (Hard Disk Drive (HDD) Capacity)*4
For more information on the Legal Footnote regarding Hard Disk Drive (HDD) Capacity, please refer to the Legal Footnotes section in Chapter 10. Click the *4.
USB floppy disk Accommodates either 3 1/2" 1.44-megabyte or drive 720-kilobyte floppy disk. It connects to a USB
port. Optional or provide with some models.
Optical disk drive
Computers in this series can be configured with an optical disk drive installed. The available optical disk drives are described below.
CD-ROM drive |
Some models are equipped with a full-size, |
|
CD-ROM drive module that lets you run CD |
|
without using an adaptor. It reads CD-ROMs at |
|
maximum 24 speed. This drive supports the |
|
following formats: |
|
■ CD-DA |
|
■ CD-Text |
|
■ Photo CD™ (single/multi-session) |
|
■ CD-ROM Mode 1, Mode 2 |
|
■ CD-ROM XA Mode 2 (Form1, Form2) |
|
■ Enhanced CD (CD-EXTRA) |
|
■ Addressing Method 2 |
|
|
User’s Manual |
1-5 |

Introduction
DVD-ROM drive Some models are equipped with a full-size, DVD-ROM drive module that lets you run either 12 cm (4.72") or 8 cm (3.15") CDs or 12cm (4.72") DVDs without using an adaptor. It runs DVD-ROMs at maximum 8 speed and CD-ROMs at maximum 24 speed. The drive supports the following formats:
■DVD-ROM
■DVD-Video
■CD-DA
■CD-Text
■Photo CD™ (single/multi-session)
■CD-ROM Mode 1, Mode 2
■CD-ROM XA Mode 2 (Form1, Form2)
■Enhanced CD (CD-EXTRA)
■Addressing Method 2
DVD-ROM&CD-R/RW Some models are equipped with a full-size, drive DVD-ROM&CD-R/RW drive module that lets you
run CD/DVDs without using an adaptor. It reads DVD-ROMs at maximum 8 speed and CD-ROMs at maximum 24 speed. It writes CD-R at up to 24 speed and CD-RW at up to 24 speed. This drive supports the following formats in addition to DVD-ROM drive.
■CD-R
■CD-RW
User’s Manual |
1-6 |

Introduction
DVD Super Multi Some models are equipped with a full-size DVD drive Super Multi drive module that lets you record
data to rewritable CD/DVDs as well as run either 12cm (4.72") or 8cm (3.15") CD/DVDs without using an adaptor. It reads DVD-ROMs at maximum 8 speed and CD-ROMs at maximum 24 speed. It writes CD-R at maximum 24 speed, CD-RW at maximum 10 speed, DVD-R and DVD+R at maximum 8 speed, DVD-RW and DVD+RW at maximum 4 speed, DVD-R DL at maximum 2 speed, DVD+R DL at maximum
2.4 speed, DVD-RAM at maximum 5 speed.This drive supports the following formats in addition to DVD-ROM&CD-R/ RW drive.
■DVD-R
■DVD-RW
■DVD-RAM
■DVD-R DL
■DVD+R
■DVD+RW
■DVD+R DL
2.6GB and 5.2GB DVD-RAM discs cannot be read from or written to.
Display
The computer’ LCD display panel supports high-resolution video graphics.
The LCD screen can be set at a wide range of viewing angles for maximum comfort and readability.
Built-in |
15.4" TFT LCD screen, 16 million colors, with |
|
one of the following resolution: |
|
■ WXGA, 1280 horizontal × 800 vertical pixels |
|
|
Legal Footnote (LCD)*5
For more information on the Legal Footnote regarding LCD, please refer to the Legal Footnotes section in Chapter 10. Click the *5.
Graphics controller The graphics controller maximizes display performance. Refer to Appendix B, Display Controller and Modes, for more information.
User’s Manual |
1-7 |

Introduction
Legal Footnote (Graphics Processor Unit ("GPU"))*6
For more information on the Legal Footnote regarding Graphics Processor Unit ("GPU"), please refer to the Legal Footnotes section in Chapter 10. Click the *6.
Keyboard
Built-in |
85 keys or 87 keys, compatible with IBM® |
|||
|
enhanced keyboard, embedded numeric overlay, |
|||
|
dedicated cursor control, |
and |
|
keys. Refer |
|
|
|||
to Chapter 5, The Keyboard, for details.
TOSHIBA Pointing Device
Built-in Touch Pad |
A Touch Pad and control buttons in the palm rest |
|
enable control of the on-screen pointer and |
|
scrolling of windows. |
|
|
Ports |
|
|
|
Serial |
RS-232C compatible port (16550UART |
|
compatible). |
|
Depending on the model, a serial port is not |
|
present. |
|
|
External monitor |
Analog VGA port supports VESA DDC2B |
|
compatible functions. |
|
|
Universal Serial Bus |
The computer has three Universal Serial Bus |
(USB 2.0) |
ports that comply with the USB 2.0 standard. |
|
|
Docking |
This port enables connection of an optional |
|
Advanced Port Replicator III Plus described in |
|
the Options section. |
|
Depending on the model, a docking port is not |
|
present. |
|
|
Slots |
|
|
|
PC card |
The PC card slot accommodates a Type II card. |
|
|
SD card |
This slot lets you easily transfer data from |
|
devices, such as digital cameras and Personal |
|
Digital Assistants that use SD card flash memory. |
|
Refer to Chapter 8, Optional Devices. |
|
|
User’s Manual |
1-8 |

|
|
Introduction |
|
|
|
|
Multimedia |
|
|
|
|
|
Sound system |
The Windows sound system compatible sound |
|
|
system provides output to internal speakers and |
|
|
a microphone as well as supporting jacks for an |
|
|
external microphone and headphones. |
|
|
|
|
Video-out jack |
The video out jack lets you transfer video data to |
|
(S-Video) |
external devices. Data output speed depends on |
|
|
the type of device connected to the S-Video |
|
|
cable. |
|
|
Depending on the model, a Video out jack is not |
|
|
present. |
|
|
|
|
Headphone jack |
A 3.5 mm mini headphone jack enables |
|
|
connection of stereo headphones. |
|
|
|
|
Microphone jack |
A 3.5 mm mini microphone jack enables |
|
|
connection of a three-conductor mini jack for |
|
|
monaural microphone input. |
|
|
|
|
Communications |
|
|
|
|
|
Modem |
An internal modem provides capability for data |
|
|
and fax communication supporting the V.90 |
|
|
(V.92) standards. Refer to AC Power Cord and |
|
|
Connectors section in Appendix E. The speed of |
|
|
data transfer and fax depends on analog |
|
|
telephone line conditions. It has a modem jack |
|
|
for connecting to a telephone line. It is |
|
|
preinstalled as a standard device in some |
|
|
markets. Both the V.90 and V.92 standards are |
|
|
supported only in the USA, Canada, UK, France, |
|
|
Germany and Australia. Only V.90 is available in |
|
|
other regions. |
|
|
|
|
LAN |
This computer has built-in support for Ethernet |
|
|
LAN (10 megabits per second, 10BASE-T), Fast |
|
|
Ethernet LAN (100 megabits per second, |
|
|
100BASE-TX) or Gigabit Ethernet LAN |
|
|
(1000 megabits per second, 1000BASE-T). |
|
|
|
|
Bluetooth |
Some computers in this series are equipped with |
|
|
Bluetooth functions. Bluetooth wireless |
|
|
technology eliminates the need for cables |
|
|
between electronic devices such as computers |
|
|
and printers. Bluetooth provides fast, reliable, |
|
|
and secure wireless communication in a small |
|
|
space. |
|
|
|
User’s Manual |
1-9 |

|
|
Introduction |
|
|
|
|
|
|
|
Wireless LAN |
Some computers in this series are equipped with |
|
|
a Wireless LAN card that is compatible with other |
|
|
LAN systems based on Direct Sequence Spread |
|
|
Spectrum/Orthogonal Frequency Division |
|
|
Multiplexing radio technology that complies with |
|
|
the IEEE 802.11 Standard (Revision A, B or G). |
■Theoretical maximum speed: 54Mbps (IEEE802.11a, 802.11g)
■Theoretical maximum speed: 11Mbps (IEEE802.11b)
■Frequency Channel Selection (5 GHz: Revision A / 2.4 GHz: Revision B/G)
■Roaming over multiple channels
■Card Power Management
■Wired Equivalent Privacy (WEP) data encryption, based on 128 bit encryption algorithm.
■Wi-Fi Protected Access (WPA).
■Advanced Encryption Standard (AES) data encryption.
■Wake-up on Wireless LAN (Intel module type)
■The values shown above are the theoretical maximums for Wireless LAN standards. The actual values may differ.
■The transmission speed over the Wireless LAN and the distance over which Wireless LAN can reach may vary depending on surrounding electromagnetic environment, obstacles, access point design and configuration, and client design and software/hardware configurations. The transmission rate described is the theoretical maximum speed as specified under the appropriate standard - the actual transmission speed will be lower than the theoretical maximum speed.
Legal Footnote (Wireless LAN)*7
For more information on the Legal Footnote regarding Wireless LAN, please refer to the Legal Footnotes section in Chapter 10. Click the *7.
Wireless |
This switch turns the Wireless LAN and |
communication |
Bluetooth functions on and off. |
switch |
All models are provided with Wireless |
|
Communication switch. Some models are equipped |
|
with both Wireless LAN and Bluetooth functions. |
|
|
User’s Manual |
1-10 |

Introduction
Security
Security lock slot Allows the connection of a security lock to anchor the computer to a desk or other large object.
Special features
The following features are either unique to TOSHIBA computers or are advanced features which make the computer more convenient to use. Access each function using the following procedures.
*1 Click Start, Control Panel, System and Maintenance, and then click Power Options.
TOSHIBA Assist |
Press this button to launch the program |
button |
automatically. When power-off, Sleep Mode and |
|
Hibernation Mode, press this button to start the |
|
computer and launch the program. |
|
This button is available on Tecra A8 models only. |
|
|
TOSHIBA |
Press this button to change internal display, |
Presentation button |
simultaneous display or multi-monitor display. |
|
The TOSHIBA Presentation button has the same |
|
functionality as the Connect display button in the |
|
Mobility Center. Pressing this button when an |
|
external display is connected will open the |
|
Windows Vista™ TMM (Transient Multimon |
|
Manager) screen. |
|
This button is available on Tecra A8 models only. |
|
|
Hot keys |
Hot keys are specific key combinations that let |
|
you quickly change the system configuration |
|
directly from the keyboard without running a |
|
system program. |
|
|
Display automatic |
This feature automatically cuts off power to the |
power off *1 |
computer’s LCD display panel when there is no |
|
keyboard input for a specified time. Power is |
|
restored when any key is pressed. This can be |
|
specified in the Power Options. |
|
|
HDD automatic |
This feature automatically cuts off power to the |
power off *1 |
hard disk drive when it is not accessed for a |
|
specified time. Power is restored when the hard |
|
disk is accessed. This can be specified in the |
|
Power Options. |
|
|
User’s Manual |
1-11 |
 Loading...