


 Loading...
Basic
Manual
Contents/
Getting Ready
Making and
Answering Calls
Character Input
Phone Book
Pair Function
Camera
EZweb
EZ Navi Walk
EZ Television
Smart Mode
Others/Index

 Introduction
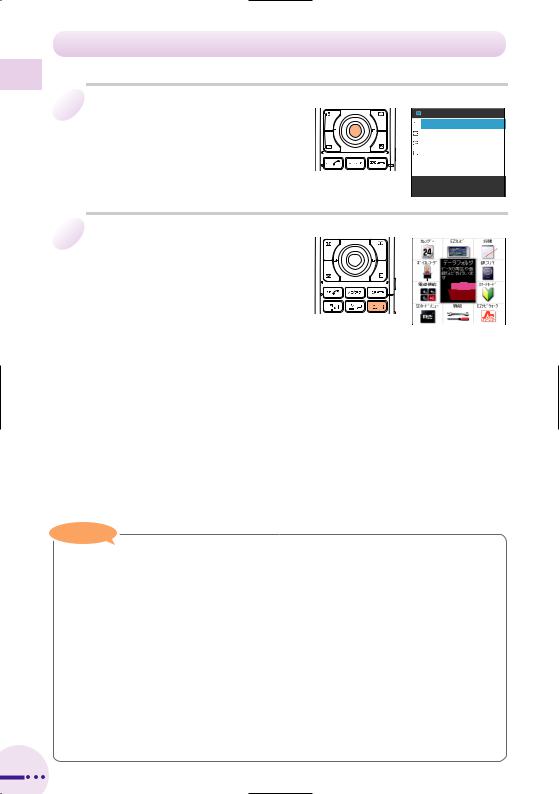
Thank you for purchasing the A5511T. Before using your A5511T, be sure to read the A5511T Basic Manual (this PDF manual) to ensure correct usage. After you have finished reading this manual, store this PDF manual and the printed manuals in safe places so you can retrieve them whenever you need them.
Printed Manuals for the A5511T (Japanese)
The A5511T comes with the Basic Manual and Instruction Manual.
A5511T
Basic Manual
EZweb
EZ
EZ
English
Equivalent to this English PDF manual.
A5511T
Instruction Manual


 miniSD
 EZweb
EZweb
 EZ
EZ
 EZ
EZ
 EZ
EZ

 au
au
クイックガイド
English version is not available.
The following manual is also available on the au homepage.Keyword searchable au Online Manual
http://www.au.kddi.com/manual/index.html
You can also access the au Online Manual from EZweb. <EZweb Access> M 1Top Menu
8 (Charges, Applications, and Information)
au (au Online Manual)
Read this barcode (QR code) for an easy access to au Online Manual.
▲
Note
The typeface and shape of fonts used for characters in the sample screens in this manual may differ from those used for characters in actual screens, or some characters may be omitted.

 Cell Phone Etiquette
Etiquette for Cell Phone Use
■The cell phone always emits weak radio waves when power is on.
■Use the cell phone in an enjoyable and safe manner without forgetting to be considerate of others around you.
●The use of cell phones is not allowed in some places
Do not use the cell phone while you are driving. Doing so is both dangerous and prohibited by law.
Using a cell phone in an aircraft is prohibited by law. Be sure to turn the cell phone off.
●Be considerate of where you use the cell phone and how loudly you talk
Do not make calls from cinemas, theaters, museums, libraries, and other similar places. Turn power off or turn on manner mode to prevent others around you from being inconvenienced by ring tones for incoming
calls or mail.
Manner mode
 ×
×


●Radio waves from cell phones may interfere with medical electrical equipment
Some people close to you in busy places such as crowded trains may be using a pacemaker. Turn the cell phone off in such places.
Abide by the rules of hospitals and other medical institutions where it is forbidden to use or carry cell phones.
OFF 


Do not use the cell phone in places where you will be in the way of others.
Move to areas where you will not inconvenience others on trains or in hotel lobbies.
Take care to avoid talking in a loud voice. 

×


Obtain the permission of other people before you take their photos with the cell phone's camera. 


×


Do not use the cell phone's camera for recording information in bookstores and other locations where taking photos is not permitted.
1
 Cell Phone Basics
Cell Phone Features
You can send mail to other cell phones and personal computers.
Page
52
EZ Television
You can watch TV and record TV programs.
Page
84
Smart Mode
You can select a mode that allows simplified
operation.
Page
92
EZ Navi Walk
Map and voice information lets you know your current location and the route to
your destination.
Page
80
Camera
You can take photos and movie clips and then send them easily by e-mail
Page
65
EZweb
You can download "Chaku-Uta®," and access information sites.
Tomorrow's
weather.
Page
73
2
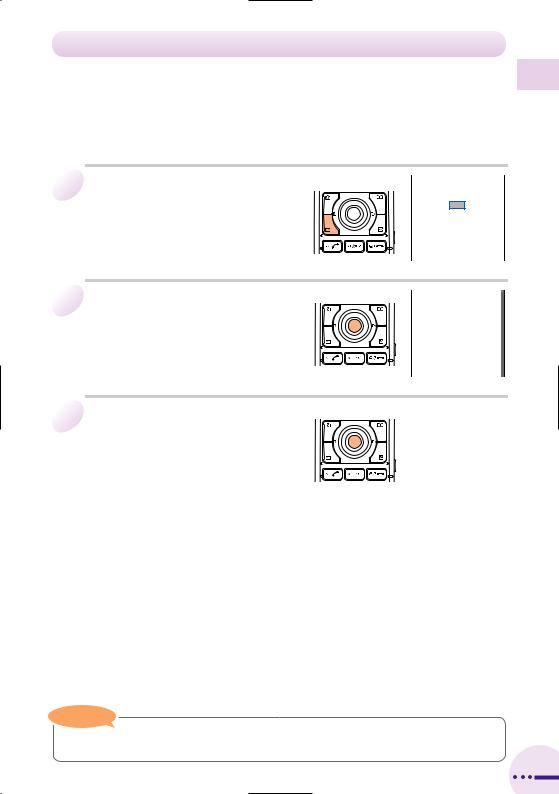
Manner Mode and Voice Memo
Manner Mode |
Voice Memo |
You can use manner mode to turn off the incoming call ring tone and other tones so as not to inconvenience other people.
When the standby screen is displayed, hold down  (side key 2) for at least one second.
Page
32
When you cannot answer calls, the cell phone can play an answering message (Japanese) and record memos.
When the standby screen is displayed, hold down for at least one second.
Page
33
Checking the Power, Signal Strength, and Battery Level
Normally, you should leave the cell phone turned on
|
To make and receive calls, you need to turn on |
|
ON! |
power. |
|
|
Hold down |
for at least |
|
one second. |
Page |
14
If a signal is not being received, you cannot talk on the cell phone
Even in service areas, there are some places where
it is difficult to receive a signal.
indicates the signal |
Page |
strength. |
14 |
|
Pay attention to the battery level
When the battery level is low, the cell phone may
not function properly.
indicates the battery |
Page |
level. |
14 |
|
3
Do not use the cell phone while driving!
Holding a cell phone, talking on a cell phone, looking at a cell phone display to send mail or perform some other operation while driving is against the law in Japan.
(Revised Traffic Control Law, effective November 1, 2004)
×Looking at mail on a cell phone display.
×Holding a cell phone in your hand while talking.
Turn off your cell phone or put it in
Drive Mode while driving.
Drive Mode
In Drive Mode, a Japanese message meaning "I'm driving now, so I can't answer your call." is played when a call is received, and the cell phone uses voice memo to record a message.
When the standby screen is displayed, press  (side key 2), use to select
 Drive Mode, and then press
  (Select).
I'm driving.  (Japanese)
4
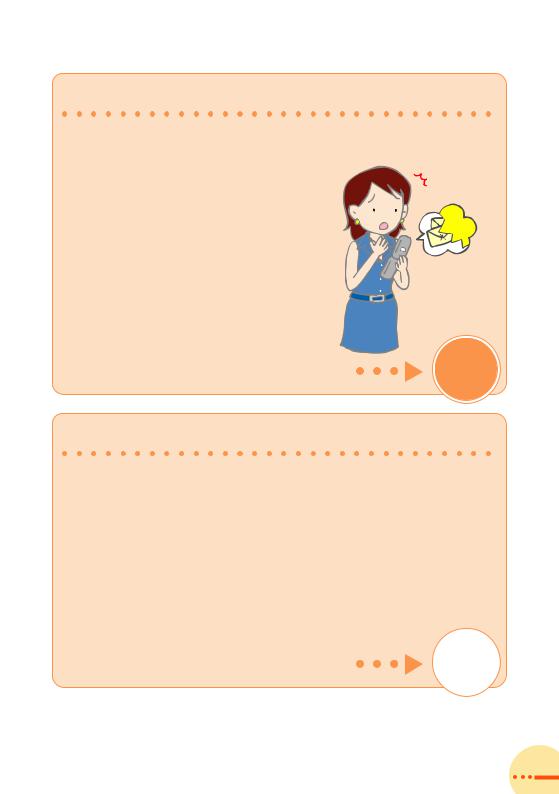
Spam and One-ring Calls
If you receive spam:
You can set the mail filters to reject only specific mail or mail indicated by (Unsolicited Advertisement), which often tends to be spam.
The following mail filters are available for rejecting spam:
|
Danger! |
|
|
(Unsolicited Advertisement Filter) |
|
(Address Filters) |
|
|
|
(for not receiving specific mail) |
|
|
|
(for receiving specific mail only) |
|
|
Page |
59
If you receive a call from an unknown phone number:
It may be an attempt to get you to return a call to a service with very high charges.
|
|
|
|
|
|
|
|
|
Incoming call |
|
|
|
||
03-0002-XXXX |
||
|
||
|
||
|
|
|
|
|
|
|
|
 in the Incoming History indicates that there was
a call which rang three seconds long or shorter.
Page
31
5
Disaster Bulletin Board Service
About Disaster Bulletin Board
When a big scale disaster occurs, you can register your safety information through EZweb. The registered safety information can be referred from anywhere in Japan through EZweb or Internet.
Registering the safety information
Referring the safety information
●When a big scale disaster occurs, from au phone, you can register your safety information such as your condition or comments to the(Disaster Bulletin Board) created on the EZweb.
●After the registration of your safety information, you can notify by e-mail your family or acquaintances you have previously designated that you registered your safety information on the (Disaster Bulletin Board).
●You can refer to the safety information of the person you want to know the information of by entering the phone number of the person from EZweb or Internet.*
*When you refer to the safety information from other carriers' cellphone (except for TU-KA), PHS or PC, you can refer to it from "http://dengon.ezweb.ne.jp/".
|
M→ 1Top menu → (Disaster |
Access |
Bulletin Board) |
|
|
|
http://dengon.ezweb.ne.jp/ |
6

Top display of the Disaster Bulletin Board
み登録可能です

|
|
|
|
|
|
|
|
|
|
|
|
Safety information |
||||||
|
|
|
|
|
|
|
|
|
|
|
|
registration display |
||||||
|
|
|
|
|
|
|
|
|
|
|
|
|
|
|
|
|
|
|
|
|
for registration |
|
|
|
|||||||||||||
|
|
|
|
|||||||||||||||
|
|
|
|
|
||||||||||||||
|
|
|
|
|
|
|
|
|
|
|
|
|
|
|
||||
|
|
|
|
|
|
|
|
|
|
|
|
|
|
|
||||
|
|
|
|
|
|
|
|
|
|
|
|
|
|
|
||||
|
|
|
Safety information |
|
|
|
||||||||||||
|
|
|
|
|
|
|||||||||||||
|
|
|
|
|
||||||||||||||
|
|
|
reference display |
|
|
|
||||||||||||
|
|
|
|
|
|
|||||||||||||
|
|
|
|
|
|
|
|
|
|
|
|
|
|
|||||
|
|
|
|
|
|
|
|
|
|
|
|
|
|
|
||||
|
|
|
|
|
|
|
|
|
|
|
|
|
||||||
|
|
|
|
|
|
|
|
|
|
|
|
|
||||||
|
|
|
|
|
|
|
|
|
|
|
||||||||
|
|
|
|
|
|
|
|
|||||||||||
|
for reference |
|
|
|
|
|
|
|
|
|||||||||
|
|
|
|
|
|
|
||||||||||||
|
|
|
|
|
|
|
||||||||||||
|
|
|
|
|
|
|
|
|
|
|
|
|
|
|
||||
|
|
|
|
|
|
|
|
|
|
|
|
|
|
|
|
|
|
|
|
|
|
|
|
|
|
|
|
|
|
|
|
|
|
|
|
|
|
|
|
|
|
|
|
|
|
|
|
|
|
|
|
|
|
|||
|
|
|
|
|
|
|
|
|
|
|
|
|
|
|
|
|
||
|
|
|
|
|
|
|
|
|
|
|
|
|
|
|||||
|
|
|
|
|
|
|
|
|||||||||||
|
|
|
|
|
|
|
|
|
|
|||||||||

The maximum preservation period of the registered information is 72 hours.
The maximum available number of each registration is 10. When the number of registration exceeds 10, old information will be overwritten in order of registration.
The demonstration of this service can be referred to anytime by pressing M→ 1Top menu →8 (Charges, Applications, and Information) → (Disaster Bulletin Board (Demo version)).
|
|
|
|
|
|
|
|
|
|
|
|
|
|
||
|
|
|
|
|
|
||
|
|
|
|
|
|
||
7

Contents
 Contents
● Introduction |
|
● Cell Phone Etiquette |
1 |
Etiquette for Cell Phone Use 1
● Cell Phone Basics |
2 |
Cell Phone Features 2 Manner Mode and Voice Memo 3
Checking the Power, Signal Strength, and Battery Level 3 Do not use the cell phone while driving! 4
Spam and One-ring Calls 5
Disaster Bulletin Board Service 6
● Contents |
8 |
● Getting Ready |
10 |
Checking the Contents of the Box 10
Names of Parts 11 Attaching the Noise Filter 12 Charging the Battery Pack 13 Built-in Antenna 14 Turning On Power 14 Learning the Basics 15
Personal Identification Numbers and Passwords 17
Configuring Initial Settings 18
Switching the Display Language to English 19
Using Menus 20 Indicators 22
Initializing E-mail and EZweb 23
Checking Your Phone Number and E-mail Address 24
Changing Your E-mail Address 25
Using Extra Large Characters 27
● Making and Answering Calls |
28 |
Making a Call 28 Answering a Call 29
Redialing (Outgoing History/Incoming History) 30
One-ring Calls 31 Turning On Manner Mode 32 Turning On Voice Memo 33 Playing a Voice Memo 34
Changing the Incoming Ring Tone 35
Adjusting the Incoming Ring Tone Volume 37 Adjusting the Earpiece Volume during a Call 38
● Character Input |
39 |
Character Entry Modes 39 Entering Single-byte Alphanumeric Characters 39
Entering E-mail Addresses 41
Entering Pictograms |
43 |
● Phone Book |
44 |
Saving a Phone Book Entry 44 Dialing from the Phone Book 46 Editing Phone Book Entries 47
Saving a Phone Number from the Incoming or Outgoing History 48
8
● Pair Function |
49 |
Registering a Pair Person 49 Making a Call to a Pair Person 50 Sending a Mail to a Pair Person 51
52 |
Using E-mail 52
Creating and Sending E-mail Messages 53
Reading Received E-mail Messages 56
Reading an E-mail Message with an Attached Photo or Movie 58 Rejecting Spam 59
Replying to Received E-mail Messages 60
Using C-mail 62
Creating and Sending C-mail Messages 63
Reading Received C-mail Messages 64
● Camera |
65 |
Camera Image Features 65
Photo and Movie Shooting Tips 66
Data Sizes 67 Taking a Photo 68 Recording a Movie 69 Viewing Photos or Movies 71
Attaching Photos or Movies to E-mail Messages 72
Photo Mail Service 72
● EZweb |
73 |
What is EZweb? 73 Accessing Sites 74 Viewing the EZ Top Menu 75 Downloading Chaku-Uta® 76
Bookmarking Frequently Accessed Pages 78
Viewing Bookmarked Pages 79 Checking Charges 79
● EZ Navi Walk |
80 |
EZ Navi Walk Features 80 Using EZ Navi Walk 82
Registering Your Home Location 82 Looking Up the Way Home 83
● EZ Television |
84 |
EZ Television Features 84 Antenna 86
Watching TV by Connecting the Toshiba Flat-type Stereo Earphone 02 86
Watching TV by Connecting the External TV Antenna with a Clip 87 Watching TV 88 Recording a TV Program 90
● Smart Mode |
92 |
Entering Smart Mode 92 Exiting Smart Mode 93 Viewing the Smart Menu 94
Saving a Phone Book Entry Using Smart Mode 96 Creating and Sending E-mail/C-mail Messages in Smart Mode 98
Using the Camera in Smart Mode 100
●Other Functions 102
●Troubleshooting 103
●Index 104 9
Contents
Ready Getting
 Getting Ready
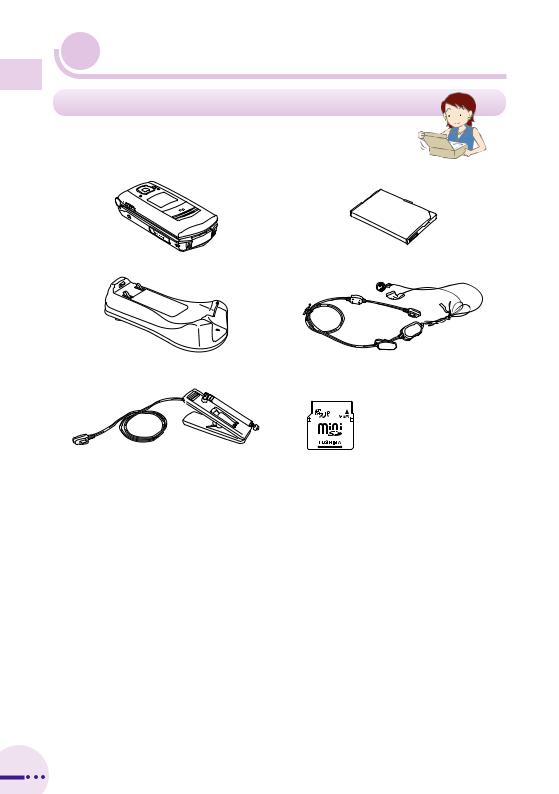
Checking the Contents of the Box
The box contains the cell phone and accessories.
Cell phone |
Battery pack (attached to the cell phone) |
Desktop holder |
Toshiba flat-type stereo earphone 02 |
External TV antenna with a clip |
miniSD™ Memory Card/ |
[free sample] |
miniSD™ adapter [free sample] |
TV stand [free sample] |
Noise filter [free sample] |
CD-ROM (Japanese) |
Basic Manual |
Instruction Manual |
(Japanese) |
(Japanese) |
Warranty (Japanese)
Safety Precautions (Japanese)
|
|
|
|
|
|
|
|
|
|
|
|||||||||||
|
|
|
|
|
|
|
|
|
|
|
|||||||||||
|
|
|
|
|
|
|
|
|
|
|
|
|
|
|
|
|
|
|
|
|
|
|
|
|
|
|
|
|
|
|
|
|
|
|
|
|
|
|
|||||
|
|
|
|
|
|
|
|
|
|
|
|
|
|
|
|
|
|
|
|
|
|
|
|
|
|
|
|
|
|
|
|
||||||||||||
|
|
|
|
|
|
|
|
|
|
|
|
|
|
|
|
||||||
|
|
|
|
|
|
|
|
|
|
|
|
|
|
|
|
|
|
|
|
|
|
|
|
|
|
|
|
|
|
|
|
|
|
|
|
|
|
|
|
||||
|
|
|
|
|
|
|
|
|
|
|
|
|
|
|
|
|
|
|
|
|
|
|
|
|
|
|
|
|
|
|
|
|
|
|
|
|
|
|
|||||
|
|
|
|
|
|
|
|
|
|
|
|||||||||||
|
|
|
|
|
|
|
|
|
|
|
|
miniSD |
|
|
|
|
|
||||
|
|
|
|
|
|
|
|
|
|
|
|
|
|
|
|
||||||
|
|
|
EZweb |
|
|
|
|
|
|
|
|
EZweb |
|
|
|
|
|
|
|
||
|
|
|
|
|
|
|
|
|
|
|
|
|
|
|
|
|
|
|
|
|
|
|
|
|
|
|
|
|
|
|
|
|
|
EZ |
|
|
|
|
|
|
|
|
|
|
|
|
|
|
|
|
|
|
|
|
|
|
|
|
|||||||
|
|
|
EZ |
|
|
|
|
|
|
|
|
EZ |
|||||||||
|
|
|
EZ |
|
|
|
|
|
|
|
|
EZ |
|
|
|
||||||
|
|
|
|
|
|
|
|
|
|
|
|
|
|||||||||
|
|
|
|
|
|
|
|
|
|
|
|
|
|
|
|||||||
|
|
|
|
|
|
|
|
|
|
|
|||||||||||
|
|
|
|
|
|
|
|
|
|
|
|||||||||||
|
|
|
English |
|
|
|
|
|
|
|
|||||||||||
|
|
|
|
|
|
|
|
|
au |
||||||||||||
|
|
|
|
|
|
|
|
|
|
|
|||||||||||
|
|
|
|
|
|
|
|
|
|
|
|
|
|||||||||
|
|
|
|
|
|
|
|
|
|
|
|
|
|
|
|
|
|
|
|
|
|
Note
The AC adapter is not included. Be sure to purchase the Common AC adapter 01.
10
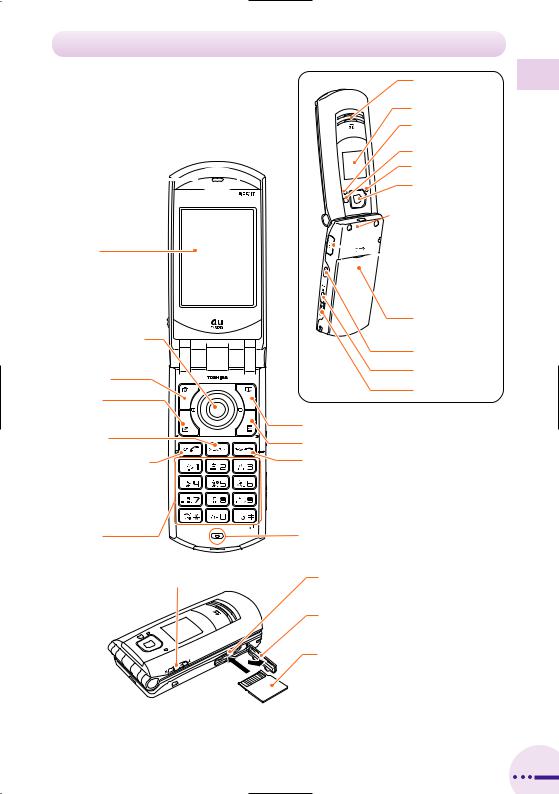
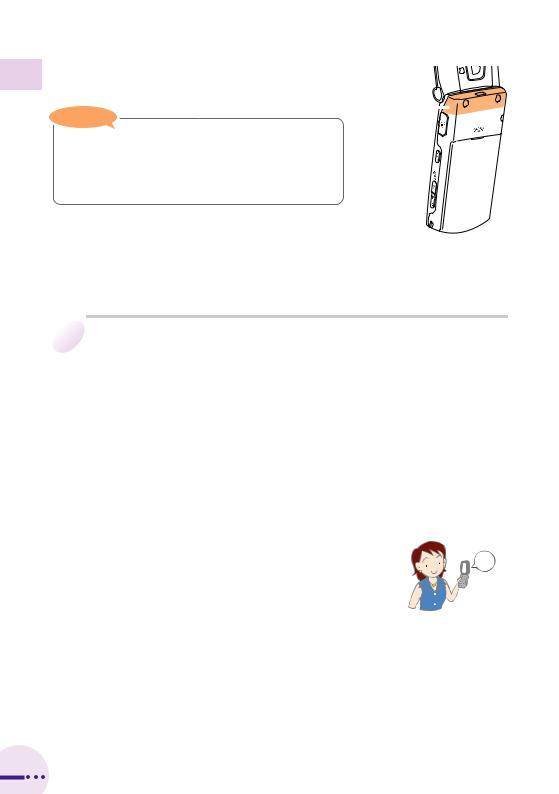
Names of Parts
Earpiece 
Display
Warp function key
Camera key/
Soft key 1
Mail key
Memo key/
Clear key
Send key/Pair key |
Speaker |
|
|
Sub display |
Getting |
|
Incoming indicator |
||
(green) |
||
Ready |
||
Mobile light |
||
Charge indicator (red) |
||
Camera (lens) |
||
|
 Built-in antenna
 Hand-strap hole
 Flat-type
(built-in switch/stereo)
earphone-microphone terminal
Battery pack cover (for built-in battery pack)
Application key
Side key 1
Side key 2
Phone book key/Soft key 2
EZ key
Power key/End key
Keypad, |
|
*key, |
|
-key |
Microphone |
Micro shoot switch |
Memory Card slot |
|
Memory Card slot cap |
|
miniSD™ Memory Card |
|
[free sample] |
11
Ready Getting
Attaching the Noise Filter
When you watch EZ Television while charging the battery pack, be sure to attach the noise filter to the cord of the Common AC adapter 01 (option).
1 Release the stoppers on both sides to open the noise filter.
Stoppers
2
3
Wind the cord one turn around the noise filter.
Attach the noise filter to the cord 3 cm apart from the Common AC adapter 01 (option).
Close the noise filter until it clicks.
Note
Carefully handle the cord not to be caught in the noise filter when you close the filter. Forcefully closing the filter where the cable is caught may cause a failure.
12
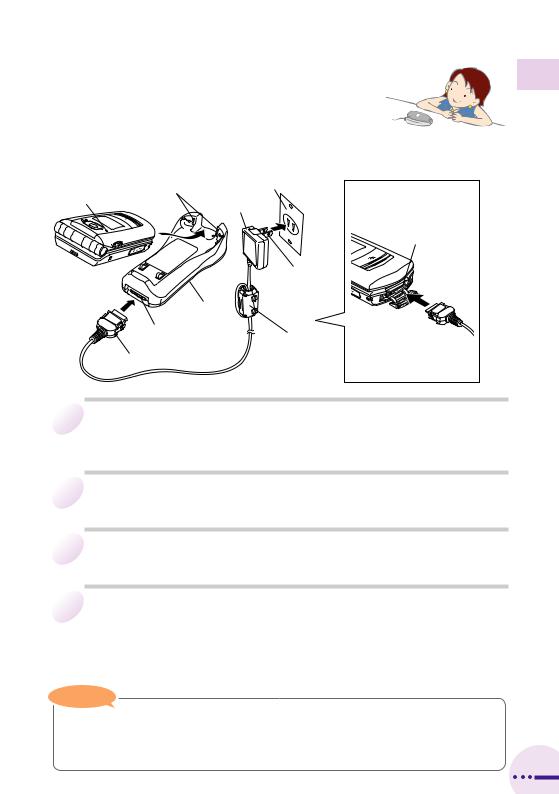
Charging the Battery Pack
The battery pack is not fully charged at the time of purchase.
Be sure to charge the battery pack before using the cell phone for the first time.
The AC adapter is not included. Be sure to purchase the Common AC adapter 01.
|
Charger Terminals |
100 V AC power outlet |
Charge indicator |
|
Common |
|
|
AC adapter 01 |
|
|
|
|
|
|
|
|
Power plug |
|
Desktop holder |
|
|
||
|
Power terminal |
|
|
|
Noise filter |
Connector
*You can also charge the battery pack by connecting the Common AC adapter 01 directly to the A5511T.
External power terminal
Be sure to confirm the shape of the connector before connecting it to the external power terminal.
1 Connect the Common AC adapter 01 to the desktop holder.
After you confirm the shape of the connector, connect the Common AC adapter 01 to the power terminal of the desktop holder.
2 Turn the Common AC adapter 01's power plug 90 degrees and connect it to a 100 V AC power outlet.
3 While the A5511T is closed with the battery pack attached, insert it into the desktop holder as shown in the figure.
4 Confirm that the charge indicator lights red.
Charging: The charge indicator lights red.Charging finished: The charge indicator goes out.
If you turn on power to A5511T and charge the battery pack, A5511T beeps when it starts or finishes charging.
Note
Hold the desktop holder while removing the A5511T.
Hold the buttons on both sides of the connector while removing the connector of the Common AC adapter 01 from the desktop holder or A5511T.
Ready Getting
13
Ready Getting
Built-in Antenna
The antenna of the A5511T is built into its case.
Note
Touching or covering the area around the built-in antenna may weaken a signal. In particular, do not affix any stickers or other decorations in the area around the built-in antenna.
Turning On Power
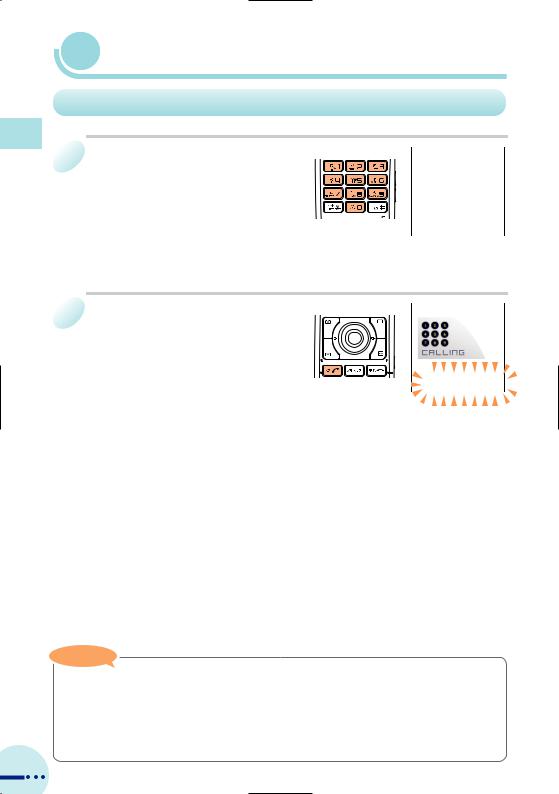
1 Hold down Sfor at least one second.
Built-in antenna 
Check the signal strength.
Strong Medium |
Weak Very weak Out of range |
You cannot receive or make calls if  is displayed.
Check the battery level.
Full |
Low |
Very low |
Empty Charging |
(requires charging) |
Turning Off Power
Hold down Sfor at least one second.
Standby screen
|
|
 ON!
ON!
14

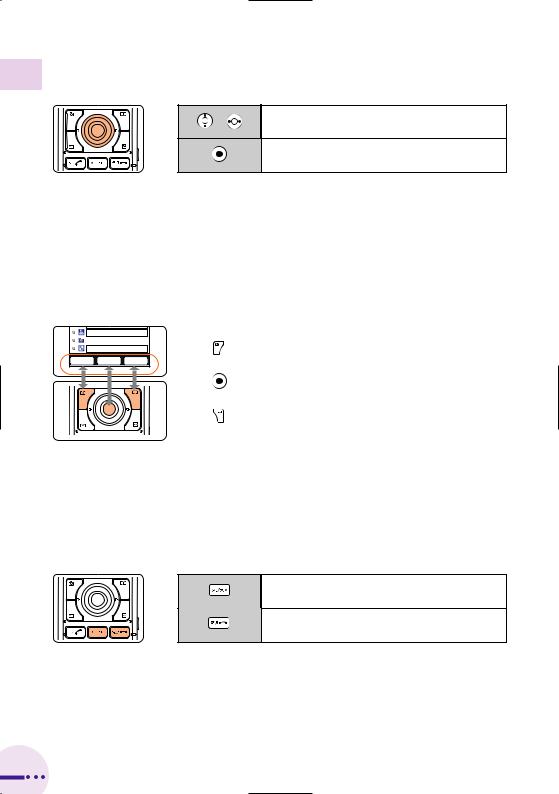
Learning the Basics
Key Assignments
D Incoming History |
C Outgoing History |
|
J Camera |
K Phone Book |
|
L E-mail |
M EZweb |
|
Q Make and receive |
R Voice memo |
|
calls; use the Pair |
setting/cancel; |
|
function |
character delete; |
|
0 9 * # |
operation cancel |
|
S Power on/off; end |
||
Phone number and |
||
call |
||
character input |
||
P EZapps startup |
||
|
||
|
U Mobile light on/off |
|
|
T Manner mode |


 Micro shoot switch
Ready Getting
15
Ready Getting
Warp Function Key
Use the up, down, left, and right parts of the key to select items and to move the cursor. Press the center of the key to confirm a selected item.
|
Selects items, and moves the cursor up, down, |
|
left and right. |
||
|
Confirms the selected item or starts the selected operation.
Soft Keys
When indications such as the following are displayed at the bottom of the display, you can press the corresponding soft keys to perform the indicated operations. The soft key indications vary depending on the screen.
Soft key 1 |
Performs the operation indicated at the bottom |
|
|
|
left of the screen. |
|
|
Center key |
Performs the operation indicated at the bottom |
|
|
|
center of the screen. |
|
|
Soft key 2 |
Performs the operation indicated at the bottom |
|
|
|
right of the screen. |
|
|
If you lose track of where you are or if you make a
mistake...
Perform one of the following operations when you lose track of where you are or if you make a mistake while operating the cell phone.
Returns to the previous screen.
Returns to the standby screen.
16
Personal Identification Numbers and Passwords
You can use the personal identification numbers and passwords described below to restrict use of your A5511T.
Take care not to forget numbers and passwords, because they are required for performing various operations and using subscription services.
PIN
|
Remotely operating the answering service and call forwarding |
|
Usage |
service from a regular phone. |
|
Making inquiries, applications, and changes while using au Customer |
||
Examples |
||
|
Service Center voice guidance, au web pages, and EZweb. |
|
|
Changing various settings from Other Setup of E-mail Setup. |
|
|
|
|
Initial |
The four-digit number you wrote on your subscription form. |
|
Setting |
||
|
||
|
|
Lock No.
Usage |
Changing various settings of the cell phone, etc. |
|
Examples |
||
Initial |
1234 (four digits) |
|
Setting |
||
|
EZ Password
Usage |
Concluding/canceling subscriptions for EZweb fee-based content. |
Examples |
|
|
|
Initial |
The number (four digits) specified when first subscribing for fee-based |
Setting |
content. |
|
|
Premium EZ Password
Concluding/canceling subscriptions for EZweb fee-based content paid Usage by using au (Combined au Payment Service). Examples Purchasing products from EZweb sites that use au
(Combined au Payment Service).
Initial The number (four to eight digits) specified the first time you use Setting au (Combined au Payment Service).
Ready Getting
17
Ready Getting
Configuring Initial Settings
1 When the standby screen is |
Initial menu |
|
|
||
displayed, press @. |
|
|
|
||
|
|
|
|
|
|
|
|
|
2 Press 3 (Do Not |
|
|
Launcher menu |
||
|
||
Setup). |
|
Note
Even if you do not configure the initial settings, you can still make and answer calls.The initial settings include changing the lock number, setting the character size,
setting the Notify Call ID, and setting the call ring tone.
You need to configure initial settings before using the cell phone for the first time only. Furthermore, you can also change each of the initial settings later.
After configuring initial settings, you can switch the display language to English (see page 19).
If you select (Do Not Setup), the initial settings are as shown below.
Lock No. |
1234 |
EZweb |
Small font |
Telephone |
Medium font |
Character Input |
Medium font |
Medium font |
Notify Call ID |
ON |
|
C-mail |
Medium font |
Incoming Call Ring Tone |
Pattern 1 |
|
|
|
|
18
Switching the Display Language to English
You can switch the display language for function names and other items to English.
1 When the standby screen is displayed, press @.
aThe Launcher menu appears.
2 Use Eto select |
|
|
|
(Function) and then press |
|
|
|
@( [Select]). |
|
|
|
|
|
|
|
3 Press 3 (Display). |
|
|
|
|
|
aThe (Display) menu appears. |
|
|
|
|
|
|
|
|
|
|
|
4 Press 5Set Language. |
|
|
|
|
|
aThe Set Language menu appears. |
|
|
Ready Getting
19
Ready Getting
Switching the Display Language to English (continued)
5 Use Gto select English and then press @(Select).
6 Use Gto select Alphabet and then press @(Select).
aThe display language is set to English.
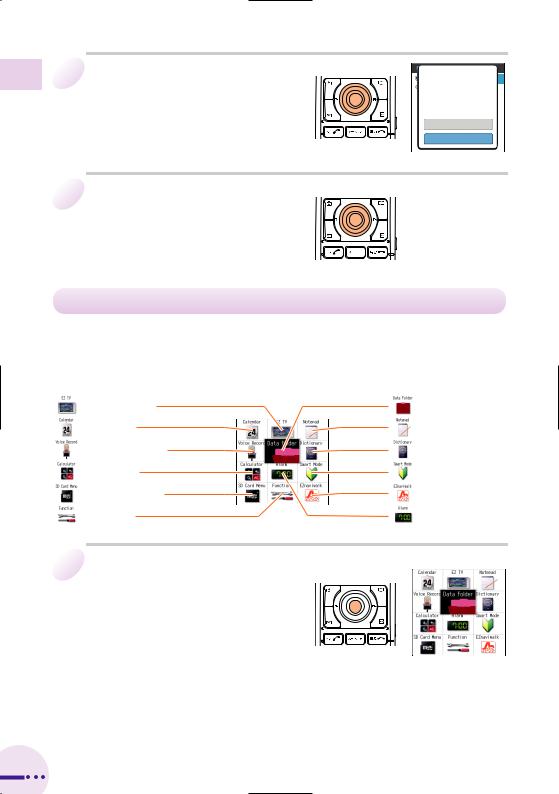
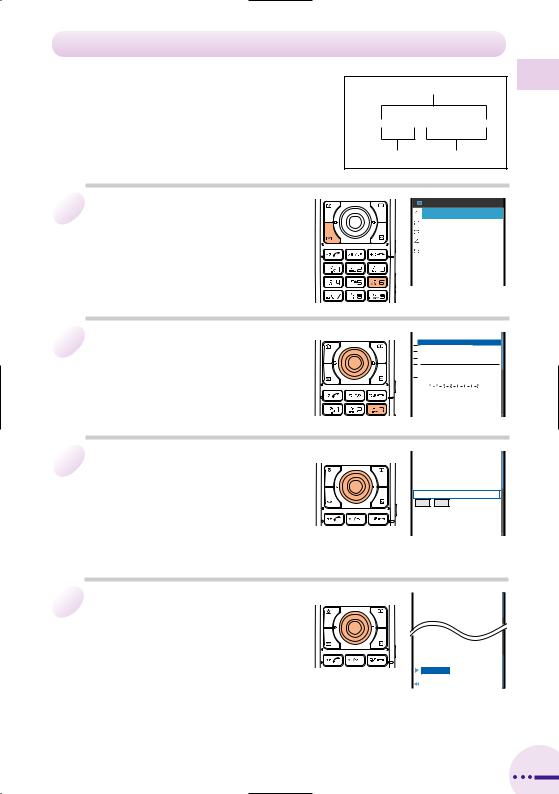
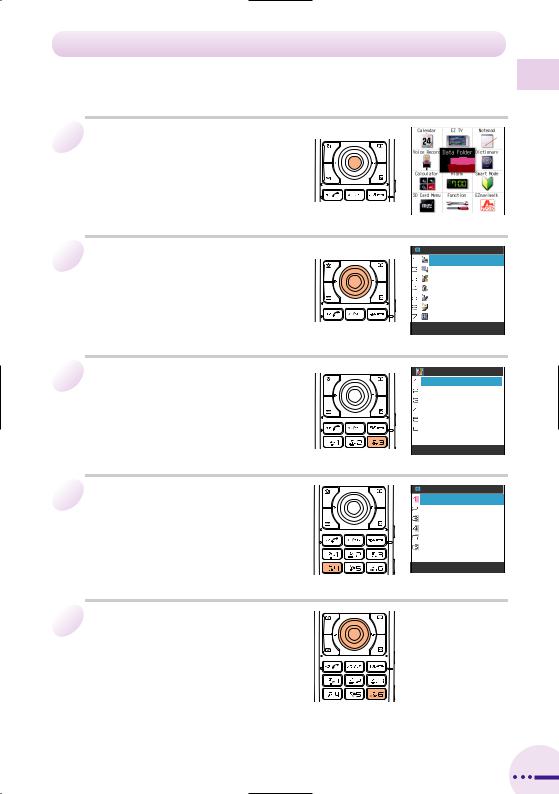
Using Menus
Launcher Menu
The Launcher menu provides you with access to various A5511T functions. The Launcher menu contains the following items.
EZ Television |
Data Folder |
Calendar |
Notepad |
Voice Recorder |
Dictionary |
Calculator |
Smart Mode |
SD Card Menu |
EZ Navi Walk |
Function |
Alarm |
1 When the standby screen is |
Launcher menu |
|
|
displayed, press @. |
|
20
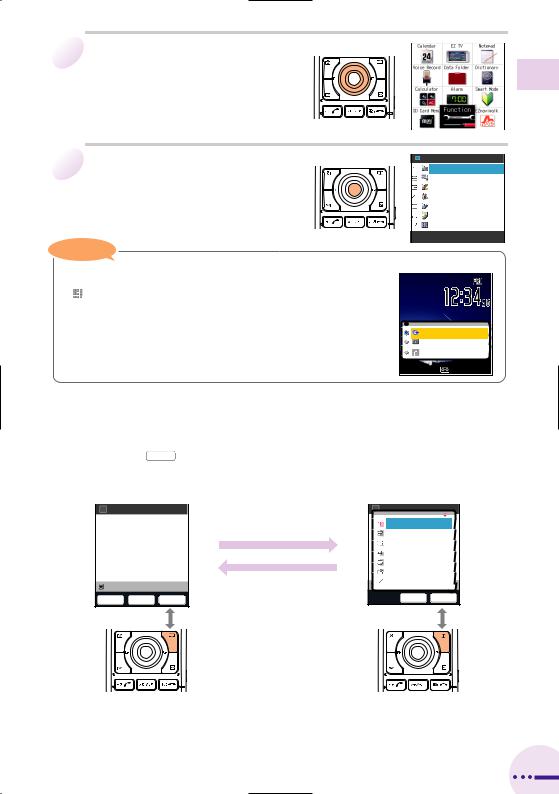
2 Use Eto select an item.
3 Press @(Select). |
|
|
|
|
|
aThe item selected in the Launcher |
|
|
|
||
menu appears. |
|
|
|
|
|
|
|
|
|
|
|
Note |
Alert Window |
|
|
||
If the alert window is displayed on the standby screen, select |
|
|
Launcher Menu and then press @to display the Launcher |
|
|
menu. |
|
|
|
|
|
|
INFORMATION |
|
|
|
|
|
|
|
|
|
|
|
|
|
|
|
|
|
|
|
Option Menus
An Option menu for performing various related operations will open if you press Kwhen is displayed in a screen for configuring function settings, entering characters, or performing other operations.
■
K(Option)
K(Close)
|
|
|
… |
||
… |
||
… |
||
|
||
|
|
|
|
|
|
|
||
|
|
|
Ready Getting
21
Ready Getting
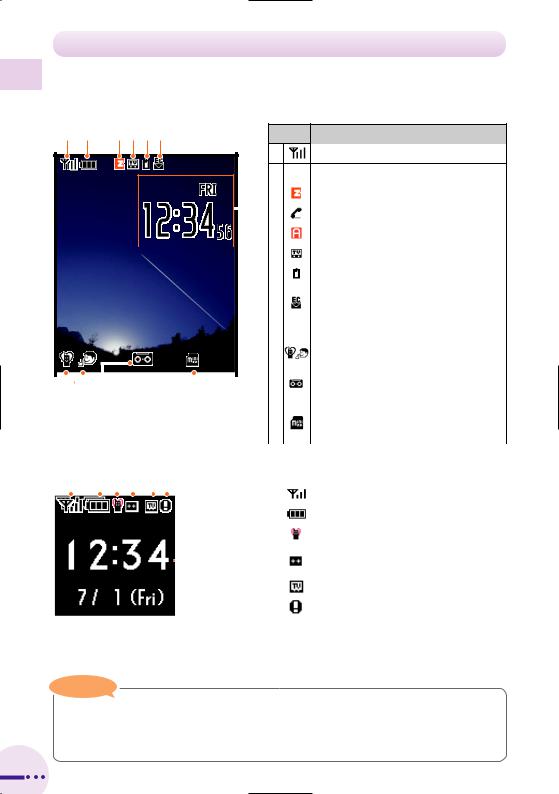
Indicators
Display indicators keep you informed when new e-mail arrives, about the status of function settings, etc.
|
Indicator |
Description |
|
|
Indicates signal strength. |
 Indicates battery level.
|
|
|
|
Indicates that EZweb is in use. |
||||||||||||||||||||||
|
|
|
|
|
|
|
|
|
|
|
|
|
|
|
|
|
|
|
|
|
|
|
||||
|
|
|
|
|
|
|
|
Indicates a call is in progress. |
||||||||||||||||||
|
|
|
|
|
|
|||||||||||||||||||||
|
|
|
|
|
|
|
|
|
|
|
|
Indicates that EZapps is in use. |
||||||||||||||
|
|
|
|
|
|
|
|
|
|
|
|
|
|
|
|
|
|
|||||||||
|
|
|
|
|
|
|
|
|
|
|
|
|
|
|
|
|
||||||||||
|
|
|
|
|
|
|
|
|
|
|
|
Indicates that EZ Television is in use. |
||||||||||||||
|
|
|
|
|
|
|
|
|||||||||||||||||||
|
|
|
|
|
|
|
|
|
|
|
|
|
||||||||||||||
|
|
|
|
|
|
|
|
Indicates an unanswered call. |
||||||||||||||||||
|
|
|
|
|
|
|
|
|||||||||||||||||||
|
|
|
|
|
|
|
|
|
|
|
|
|
||||||||||||||
|
|
|
|
|
|
|
|
|
||||||||||||||||||
|
|
|
|
|
|
|
|
Indicates received or unread e-mail/ |
||||||||||||||||||
|
|
|
|
|
|
|
|
|
|
|
|
|
|
|
|
|
|
|
|
|
|
|
|
|
|
|
|
|
|
|
|
|
|
|
|
|
|
|
|
c-mail. |
|||||||||||||
|
|
|
|
|
|
|
|
|
|
|
|
|
||||||||||||||
|
|
|
|
|
|
|
|
|
|
|
|
Indicates the current date and time. |
||||||||||||||
|
|
|
|
|
|
|
|
|||||||||||||||||||
|
|
|
|
|
|
|
|
|
|
|
|
|
|
|
|
|
|
|
|
|
|
Indicates that manner mode is turned on. |
||||
|
|
|
|
|
|
|
|
|
|
|
|
|
|
|
|
|
|
|
|
|
|
|
|
|
|
|
|
|
|
|
|
|
|
|
|
|
|
|
|
|
|
|
|
|
|
|
|
|
Indicates that voice memo or manner |
||||
|
|
|
|
|
|
|
|
Display |
|
|
|
|
|
|
|
|||||||||||
|
|
|
|
|
|
|
|
|
|
|
|
|
|
|
mode is turned on. |
|||||||||||
|
|
|
|
|
|
|
|
|
|
|
|
|
|
|
|
|
|
|
|
|||||||
|
|
|
|
|
|
|
|
|
|
|
|
|
|
|
|
|
|
|
|
|
|
|
|
|
|
|
|
|
|
|
|
|
|
|
|
|
|
|
|
|
|
||||||||||||
|
|
|
|
|
|
|
|
Indicates that the miniSD™ Memory |
||||||||||||||||||
|
|
|
|
|
|
|
|
|
|
|
|
|
|
|
|
|
|
|
|
|
||||||
|
|
|
|
|
|
|
|
|
|
|
|
|
|
|
|
|
|
|
|
|
Card is inserted. |
|||||
|
|
|
|
|
|
|
|
|
|
|
|
|
|
|
|
|
|
|
|
|
|
|
|
|
|
|
|
|
|
|
|
|
|
|
|
|
|
|
|
|
|
||||||||||||
|
|
|
|
|
|
|
|
|
|
|
|
|
|
|||||||||||||
|
|
|
|
|
|
|
|
Indicator |
Description |
|||||||||||||||||
|
|
|
|
|
|
|
|
|
|
|
|
|
|
|
|
|
|
|
|
|
|
|
|
|
|
|
|
|
|
|
|
|
|
|
|
|
|
|
|
|
|
|
|
|
|
|
|
|
|
|
|
|
Indicates signal strength. |
|
|
|
|
|
|
|
|
|
|
|
|
|
|
|
|
|
|
|
|
|||||||
|
|
|
|
|
|
|
|
|
|
|
|
|
|
|
|
|||||||||||
|
|
|
|
|
|
|
|
|
|
|
|
|
|
|
|
|
|
|
|
|
|
|
|
|
|
|
|
|
|
|
|
|
|
|
|
|
|
|
|
|
|
|
|
|
|
|
|
|
|
|
|
|
Indicates battery level. |
|
|
|
|
|
|
|
|
|
|
|
|
|
|
|
|
|||||||||||
|
|
|
|
|
|
|
|
|
|
|
|
|
|
|
|
|
|
|
|
|
|
|
|
|
|
|
|
|
|
|
|
|
|
|
|
|
|
|
|
|
|
|
|
|
|
|
|
|
|
|
|
|
Indicates that the manner mode is turned on. |
|
|
|
|
|
|
|
|
|
|
|
|
|
|
|
|
|
|
|
|
|||||||
|
|
|
|
|
|
|
|
|
|
|
|
|
|
|
|
|
|
|
|
|
|
|
|
|
|
|
|
|
|
|
|
|
|
|
|
|
|
|
|
|
|
|
|
|
|
|
|
|
|
|
|
Indicates that the voice memo or manner |
|
|
|
|
|
|
|
|
|
|
|
|
|
|
|
|
|
|
|
|
|
|
|
|
mode is turned on. |
|||
|
|
|
|
|
|
|
|
|
|
|
|
|
|
|
|
|
|
|
|
|
|
|
|
|
|
|
|
|
|
|
|
|
|
|
|
|
|
|
|
|
|
|
|
|
|
|
|
|
|
|
|
|
|
|
|
|
|
|
|
|
|
|
|
|
|
|
|
|
|
|
|
|
|
|
|
|
|
|
|
Indicates that EZ Television is displayed. |
|
|
|
|
|
|
|
|
|
|
|
|
|
|
|
|
|
|
|
|
|
|
|
|
|
|
|
|
|
|
|
|
|
|
|
|
|
|
|
|
|
|
|
|
|
|
|
|
|
|
|
|
|
Indicates new mail or an unanswered call. |
|
|
|
|
|
|
|
|
|
|
|
|
|
|
|
|
|
|
|
|
|
|
|
|
|
|
|
|
|
|
|
Sub Display |
|
|
|
|
|
|
|
|
|
|
|
|
Indicates the current date and time. |
|||||||||
|
|
|
|
|
|
|
|
|
|
|
|
|
|
|
||||||||||||
|
|
|
|
|
|
|
|
|
|
|
|
|
|
|
|
|
||||||||||
Note
The date and time are set automatically.
The layout and content of screens in this manual are only for the purpose of explanation and contain some indicators that cannot appear at the same time.
22
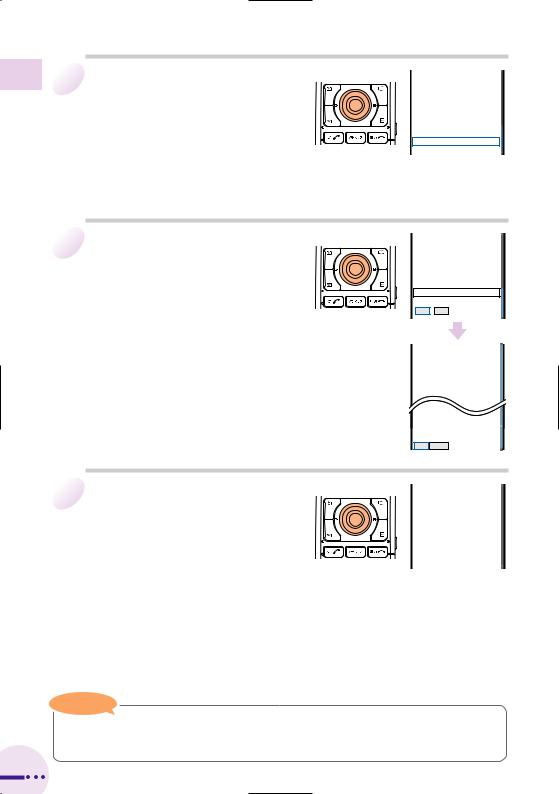
Initializing E-mail and EZweb
To use e-mail and EZweb, you need to apply for an EZweb subscription. If you did not apply for an EZweb subscription at the time of purchase, contact an au shop or the au Customer Service Center.
Also, before use, be sure to configure initial settings. Your e-mail address is assigned automatically when you initialize e-mail and EZweb.
1 |
When the standby screen is |
|
|
||
|
|
|
displayed, press L. |
|
|
|
|
2 |
Press @(OK). |
|
|
|
|
|
|
|
|
aAfter a short while, the screen shown to |
□ □ □ □ □ □ □ |
|
|
|
|
the right will appear. This indicates that |
|
|
|
|
|
|
|
|
the setup is complete. |
|
|
|
3 Press @(OK).
aThe E-mail Menu appears.
Note
You can also configure initial settings by pressing Mor P.
Ready Getting
23
Ready Getting
Checking Your Phone Number and E-mail Address
1 When the standby screen is |
|
|
|
displayed, press @and then |
|
press 0. |
|
□□□ |
|
|
|
aYour phone number and e-mail address |
|
appear. |
|
Phone number  090-0001-XXXX
OK!
24
Changing Your E-mail Address
You can change the account name part of the |
E-mail Address |
|
e-mail address as indicated to the right. |
||
|
||
|
@ezweb.ne.jp |
|
|
Part you can change Domain name |
|
1 When the standby screen is |
|
|
|
|
|
displayed, press Land then |
|
|
|
||
press 6E-mail Setup. |
|
|
|
aThe E-mail Setup menu appears.
2 |
Press 3Other Setup, use |
|
|
|
|
Gto select Yes, and then |
|
|
|
||
|
|
|
|
|
|
|
press @(OK). |
|
|
|
|
|
|
|
|
aThe cell phone connects to the server. |
|
|
|
|
3 |
Use Gto select E |
|
|
|
|
|
|
|
(Change E-mail |
|
|
|
|
|
|
|
|
|
Address), press @(Select), |
|
|
|
|
|
use Gto select the entry box, |
|
|
|
|
|
|
|
|
and then press @(Edit). |
|
4 Enter your PIN, press @(OK), use Gto select (Send), press @(Select), use Gto select (Accept), and then press @(Select).
下のご注意を確認した上で アト゛レスの変更を行ってくださ い。
Your PIN is the four-digit number you wrote on your subscription form.
Any time the wrong PIN is entered three times during a single day, the e-mail address change operation will be disabled until the following day.
Ready Getting
25
Ready Getting
Changing Your E-mail Address (continued)
5 |
Use Gto select the entry |
|
|
|
|
box, press @(Edit), and |
|
|
|
||
|
|
|
|
|
|
|
enter an e-mail address using |
|
|
|
|
|
|
|
|
single-byte alphanumeric |
|
|
characters. |
|
For details on entering e-mail addresses, see page 41.
6 |
Press @(OK), use Gto |
|
|
|
|
select (Send), and then |
|
|
|
||
|
|
|
|
|
|
|
press @(Select). |
|
|
□□□ |
|
|
|
|
|
|
|
|
|
|
|
|
|
|
|
□□□ |
|
|
|
|
|
|
|
|
|
|
|
|
|
|
|
|
|
|
|
|
|
7 Use Gto select OK and then |
|
|
|
press @(Select). |
|
Check that the e-mail address has been updated and then press @(OK).
Note
Your e-mail address will not be changed if the address you enter above is already being used. If this happens, enter a different e-mail address.
26
Using Extra Large Characters
Turning on extra large characters will display the names of callers and addressees on the Call Screen, the phone book list, etc.
1 When the standby screen is displayed, press @.
aThe Launcher menu appears.
2 |
Use Eto select Function and |
|
|
||
then press @(Select). |
|
|
|
|
|
|
|
|
|
|
|
|
|
|
|
|
|
3 |
Press 3Display. |
|
|
||
aThe Display menu appears. |
|
|
|
|
|
|
|
|
|
|
|
|
|
|
4 |
Press 4Character Size. |
|
|
||
aThe Character Size menu appears. |
|
|
|
|
|
|
|
|
|
|
|
|
|
|
|
|
|
5 Press 6Extra Large,
use Gto select ON, and then
press @(OK).
Ready Getting
27
Calls Answering and Making
 Making and Answering Calls
Making a Call
1 When the standby screen is |
|
|
|
displayed, use 0to 9to |
|
|
|
enter the phone number you |
|
|
|
|
|
want to call. |
|
|
When calling to a regular phone, you also need to enter the area code even in the same area.
2 Press Q.
If the caller's phone number and name are in the phone book, the name is also displayed.
When you have finished the call, press S.


Note
After you enter a phone number, you can add 184 or 186 to the phone number if you press K(Option), press 2Add/Off SP No…, and then press 1184 or 2186.
-Select 1184 if you do not want to inform the party you are calling of your phone number.
-Select 2186 if you want to inform the party you are calling of your phone number.
28
Loading...