

Page 1
Page | 1
Version 2 Dec „11 © Teradek, LLC 2011. All rights reserved.
Page 2

Introduction
Thank you for purchasing Cube – the world‟s first camera-top streaming HD video solution. The Cube
Encoder streams HD video over any IP network. Wireless-equipped Cubes can connect directly to
laptops, Cube Decoders, or mobile devices, or join an existing wireless network to stream over a LAN or
WAN. USB-equipped Cubes are also capable of streaming using select 4G capable modems. Cube
features native integration with Livestream.com for turn-key live Internet streaming and content
distribution. Use this reference to help get the most out of your Cube.
1. Three key steps to get started with your Cube:
1. Connect and power your device (page 5)
2. Connect Cube to your network (page 8)
3. Pick your streaming application (page 10)
Support Resources
In addition to this Reference Guide, there are a number of resources available for more
information on Cube‟s features and operation. Included in the box is a USB drive that
includes the full user manual, training videos, and our TeraCentral app. For online
information, see the following:
o Support forum: http://forum.teradek.com - Contains tips, information, and all the latest available
firmware and software updates.
o Training videos: http://cube.teradek.com/training.html
If you are unable to find what you are looking for online, please contact Teradek‟s support staff:
E-mail: support@teradek.com | Phone: (888) 941-2111 ext. 2 (available M-F 9AM-6PM PST)
Disclaimer
This manual is intended for user information only. Every effort has been made to ensure that the contents within are
accurate at the time of printing, and that updates are made in a timely manner. Teradek cannot be held responsible
for inaccuracies, typographical errors, or out-of-date information contained within this manual.
Warning
Teradek Cube products contain no user serviceable parts. Disassembly, modification, or removal of any of the
device‟s components may void your warranty. For up-to-date warranty terms, please visit
http://store.teradek.com/pages/warranty-information .
Page | 2
Version 2 Dec „11 © Teradek, LLC 2011. All rights reserved.
Page 3

Table of Contents
Introduction .................................................................................................................................................. 2
Support Resources ........................................................................................................................................ 2
Disclaimer...................................................................................................................................................... 2
Warning ......................................................................................................................................................... 2
Connect and Power Your Device ................................................................................................................... 5
1. Getting started: ............................................................................................................................... 5
2. Physical connections: .................................................................................................................... 5
Connect Cube to Your Network .................................................................................................................... 8
1. Ad Hoc instructions ........................................................................................................................ 8
2. Infrastructure instructions .............................................................................................................. 8
Connect to Cube using TeraCentral .............................................................................................................. 9
Encoder – Pick Your Application ................................................................................................................. 10
1. Local monitoring with computers and/or decoders ................................................................. 10
2. Local monitoring with iOS devices using TeraCentral ............................................................ 11
3. Internet streaming using Livestream ......................................................................................... 12
Decoder ....................................................................................................................................................... 14
1. Changing output format ............................................................................................................... 14
2. Pairing ............................................................................................................................................ 14
3. Switching between available streams ....................................................................................... 15
4. Manual configuration ................................................................................................................... 15
Stream Modes ............................................................................................................................................. 15
1. RTP/RTSP ..................................................................................................................................... 15
2. Secondary Quickview Stream .................................................................................................... 16
3. HTTP Live ...................................................................................................................................... 16
4. Live Internet Streaming ............................................................................................................... 17
Encoder Controls ......................................................................................................................................... 18
1. Options (in order of display): ...................................................................................................... 19
Network Settings ......................................................................................................................................... 20
1. Network Configuration ................................................................................................................. 21
Version 2 Dec „11 © Teradek, LLC 2011. All rights reserved.
Page | 3
Page 4

2. Network Services ......................................................................................................................... 22
Configuration pages .................................................................................................................................... 23
1. Dashboard ..................................................................................................................................... 23
2. Video Setup ................................................................................................................................... 24
3. System ........................................................................................................................................... 26
4. Info .................................................................................................................................................. 29
Advanced and/or activatable applications ................................................................................................. 30
2. RTSP announce ........................................................................................................................... 30
3. RTP push ....................................................................................................................................... 31
4. UDP multicast ............................................................................................................................... 32
5. Transport stream .......................................................................................................................... 33
6. Proxy Recording ........................................................................................................................... 35
Troubleshooting ..................................................................................................................................... 39
Page | 4
Version 2 Dec „11 © Teradek, LLC 2011. All rights reserved.
Page 5
Connect and Power Your Device
1. Getting started:
1. To power your Cube, connect the included AC adapter (or accessory power cable, sold
separately) to Cube via the 4 pin LEMO connector marked „6-28 DC Input‟ (b). Cube begins to
boot as soon as power is connected. NOTE: The ENC/DEC LED blinks to indicate Cube is
booting. This process takes approximately 1 ½ minutes.
2. Connect your video source to Cube via BNC cable (e) (SD/HD-SDI 1xx models, Composite 5xx
models) or HDMI cable (2xx models).
3. Attach the antenna (a) (if applicable) via the threaded RP-SMA connector.
4. Use the included hot shoe mount and/or ¼” screw (f) to mount Cube to your camera, tripod
mount, or other accessory mount, if desired.
5. Once Cube has booted, verify that the „ENC‟ and „VID‟ LEDs are green, indicating video is
successfully detected (c).
For more information about Cube‟s physical connections and power options, please see the following
sections.
2. Physical connections:
Page | 5
Left: Cube 1xx SDI encoder, Right: Cube 2xx HDMI encoder
Left: Cube 3xx SDI decoder, Right: Cube 4xx HDMI decoder
Version 2 Dec „11 © Teradek, LLC 2011. All rights reserved.
Page 6
Male 0B.304
LEMO on Cable
Female 0B.304
LEMO in Cube
1. Audio/Video Input/Output:
1.1. Video intput: SD/HD-SDI (Cube 1xx Series), HDMI (Cube 2xx Series), PAL/NTSC
Composite (Cube 5xx Series)
1.2. Video output: SD/HD-SDI (Cube 3xx Series), HDMI (Cube 4xx Series)
1.3. Audio input: 2Ch. Embedded HDMI/SDI audio, Line in via 1/8” stereo TRS, Mic in via 1/8”
stereo jack* (Cube 150 and 250 models only)
1.4. Audio output: 2Ch. Embedded HDMI/SDI audio, Line out via 1/8” stereo TRS
2. Power:
2.1. LEMO pin configuration:
1. DC +
2. No Connect
3. No Connect
4. DC -
2.2. Cube accepts 6-28 volts DC input via a 4 pin LEMO connector.
2.3. An AC adapter is included with Cube. Teradek also offers a number of power accessory
cables and battery plates to integrate with your existing power equipment. Accessories are
available online at http://store.teradek.com or through your local Teradek dealer.
3. Ethernet, USB, antenna
Left to right: Cube x00, x20, x50 back connections
3.1. 10/100 Ethernet port – Use this for connecting to networks via Ethernet.
3.2. USB port (if applicable) – Used for connecting to Wireless broadband USB modem.
3.3. Go Live! Button – Used for various tasks including broadcast start and stop, pairing, and
factory resets. Please See Description of Button and Standard LED (page 7) for more
information.
3.4. Antenna (if applicable) – RP-SMA connector used to attach antenna (included). NOTE: this
is labeled 2.4/5GHz on both single and dual-band equipped Cubes.
Version 2 Dec „11 © Teradek, LLC 2011. All rights reserved.
Page | 6
Page 7

3. Description of Button and Standard LED Operation
1. LED functions
1.1. USB/PWR (model dependent):
1.1.1. PWR – Green is on
1.1.2. USB – USB modem status. Off, nothing connected. Green, USB modem connected.
Orange, USB modem connection in progress. Red, USB modem connection failed
1.2. WiFi
1.2.1. Cube 100/200 – USB modem status (see above).
1.2.2. Cube 120/150, 220/250, 320/350, 420/450 – Wireless status. Off, wireless disabled.
Red, wireless disconnected. Green, wireless associated/connected.
1.3. ENC/DEC – Green, encoding/decoding. Orange, no video detected. Red, codec is restarting
or recording is in progress.
1.4. VID – Off, no video sync. Green, video sync. Orange, resolution mismatch. Red, resolution
not supported.
2. Button operation – Hold down the reset/‟Go Live‟ button for the indicated times to use the
following functions:
2.1. 1-3 seconds (Livestream/RTSP Announce/RTMP mode only): Broadcast start or stop. ENC
LED blinks green rapidly, and then indicates broadcast status. See Stream Modes (page
15) for more information.
1-4 seconds (Other stream modes), 7-9 seconds (Livestream, etc.): Pairing – ENC/DEC and
2.2.
WiFi LEDs blink green rapidly. See the Decoder section, page 14 for more information.
2.3. 10-15 seconds: Network reset – WiFi LED cycles red, amber, green. Cube resets all network
settings to their defaults and reboots.
2.4. 20+ seconds: Full factory reset – ENC and WiFi LEDs cycle red, amber, green. Cube
configuration is restored to factory defaults and the unit reboots.
2.5. NOTE: when your stream type is set to „Live Internet Streaming‟ or „RTSP Announce,‟ the
button operation changes as follows:
2.5.1. 1-3 seconds: Broadcast start or stop. ENC LED blinks green rapidly, and then indicates
broadcast status. See Stream Modes (page 15) for more information.
2.5.2. 7-9 seconds: Pairing – see above.
Page | 7
Version 2 Dec „11 © Teradek, LLC 2011. All rights reserved.
Page 8
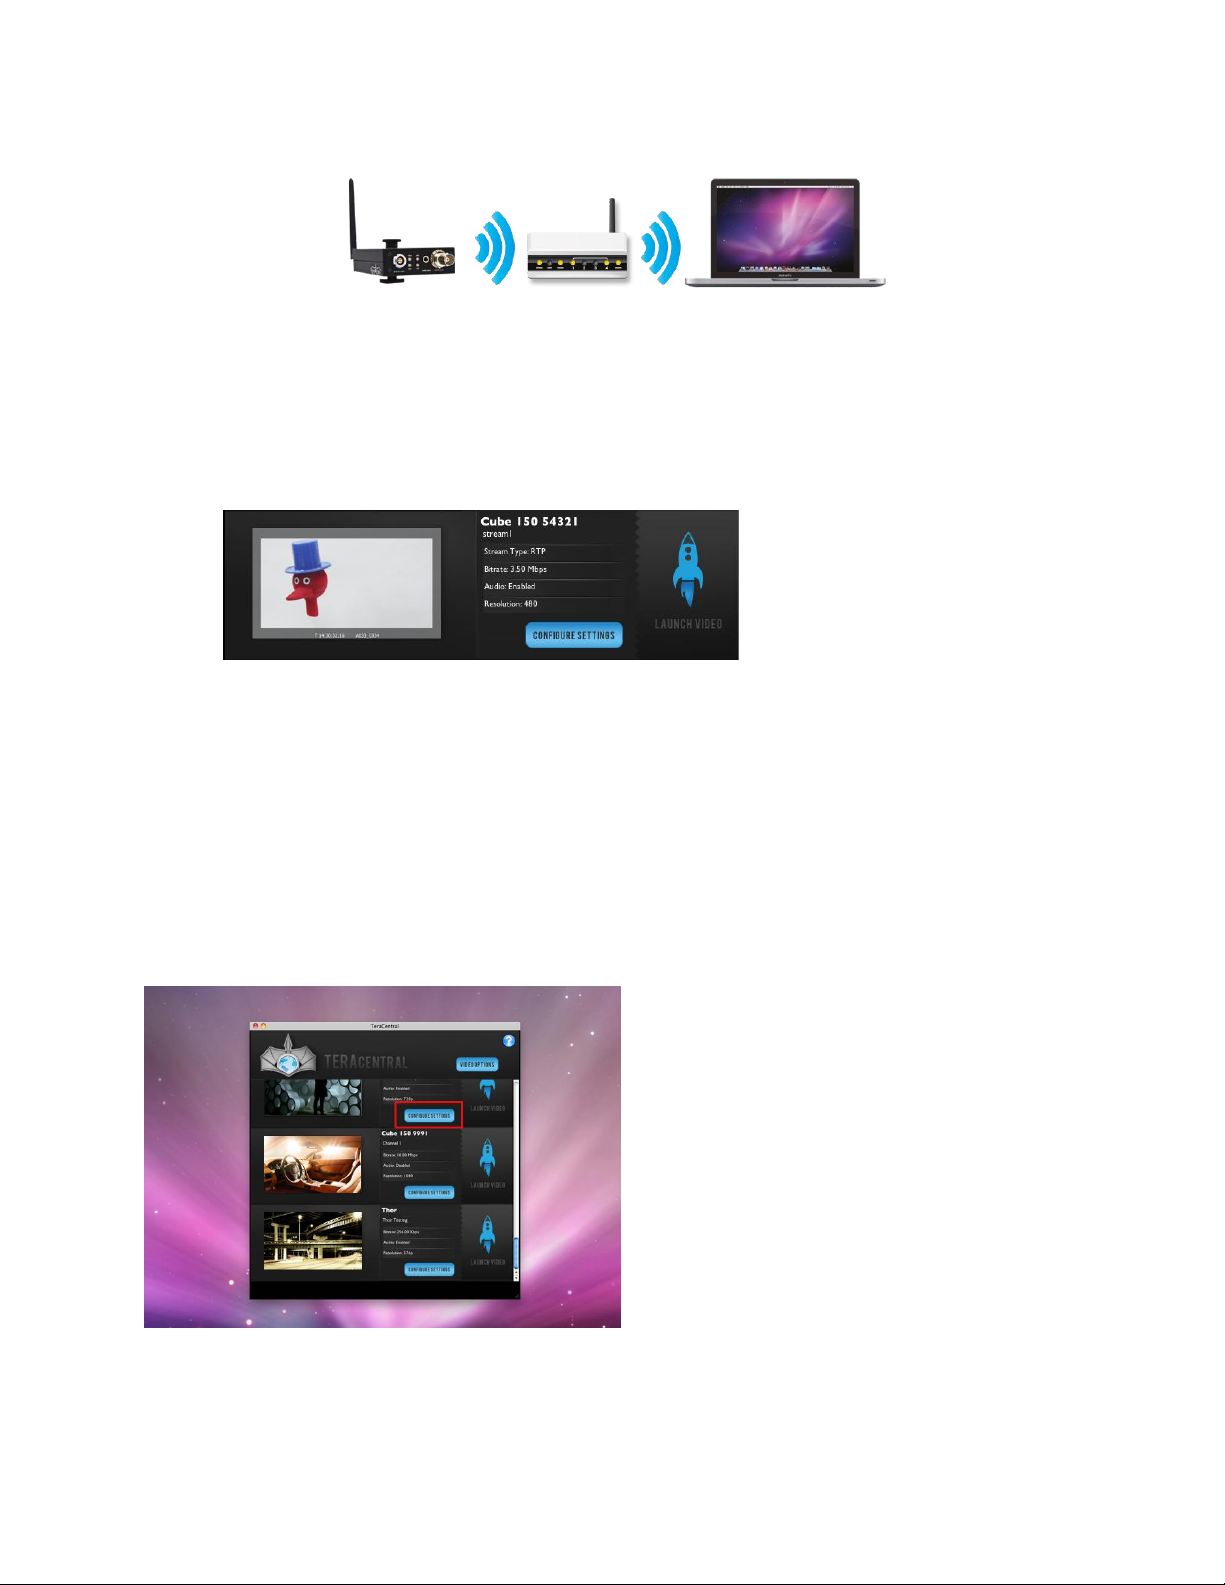
Connect Cube to Your Network
Cube allows you to connect multiple ways. The simplest is to connect Cube to one other device (Ad Hoc
mode), or you can add Cube to an existing network (Infrastructure mode). Find brief descriptions of these
modes below.
In Ad Hoc mode, Cube will create and advertise its own network name (SSID). Your computer,
decoder, or mobile device connects directly to Cube, with no additional network equipment
required.
When using Infrastructure mode, Cube must be configured to join an existing wireless network,
or connected to a network switch via Ethernet. Infrastructure mode allows Cube to communicate
with all devices on your network, and is recommended for streaming to the Internet. Wireless
range is typically improved when Cube is connected via a wireless access point.
1. Ad Hoc instructions
1.1. Connect video and power to your Cube Encoder (see Connect and Power Your Device, page
5).
1.2. On your computer, open your wireless networking utility.
1.3. Choose your Cube from the list of WiFi devices in your area and connect to that network.
2. Infrastructure instructions
Page | 8
Version 2 Dec „11 © Teradek, LLC 2011. All rights reserved.
Page 9
2.1. Connect video and power to your Cube Encoder (see Connect and Power Your Device, page
5).
2.2. Connect Cube to your computer via Ethernet.
2.3. Launch TeraCentral (included on the USB drive), and click the „Configure Settings‟ button next to
your Cube‟s listing. Your browser will open to Cube‟s setup wizard.
2.4. Click „Next‟ and then „Configure Wireless Interface.‟
2.5. Select „Infrastructure Mode,‟ wait for Cube to scan for available wireless networks, and select
your access point‟s SSID.
2.6. Enter the network password, if applicable. Click OK.
2.7. Click „Apply New Network Settings,‟ Cube will join your network.
2.8. Verify that the WiFi LED turns green after applying. You can now disconnect the Ethernet cable
and connect your computer to the chosen wireless network.
Connect to Cube using TeraCentral
1. Launch TeraCentral from the included USB stick, or install TeraCentral on your computer and run the
application.
Version 2 Dec „11 © Teradek, LLC 2011. All rights reserved.
Page | 9
Page 10
2. In TeraCentral, click your video stream‟s Launch button. The video will begin playing in VLC. You can
also launch Cube‟s menu system from TeraCentral by clicking the „Configure settings‟ button next to
your Cube‟s listing.
3. Refer to the following sections for other streaming applications.
Encoder – Pick Your Application
Cube can be used for a variety of different applications – local monitoring with a computer/decoder, local
monitoring with iOS devices, or Internet streaming with Livestream. For information on other advanced or
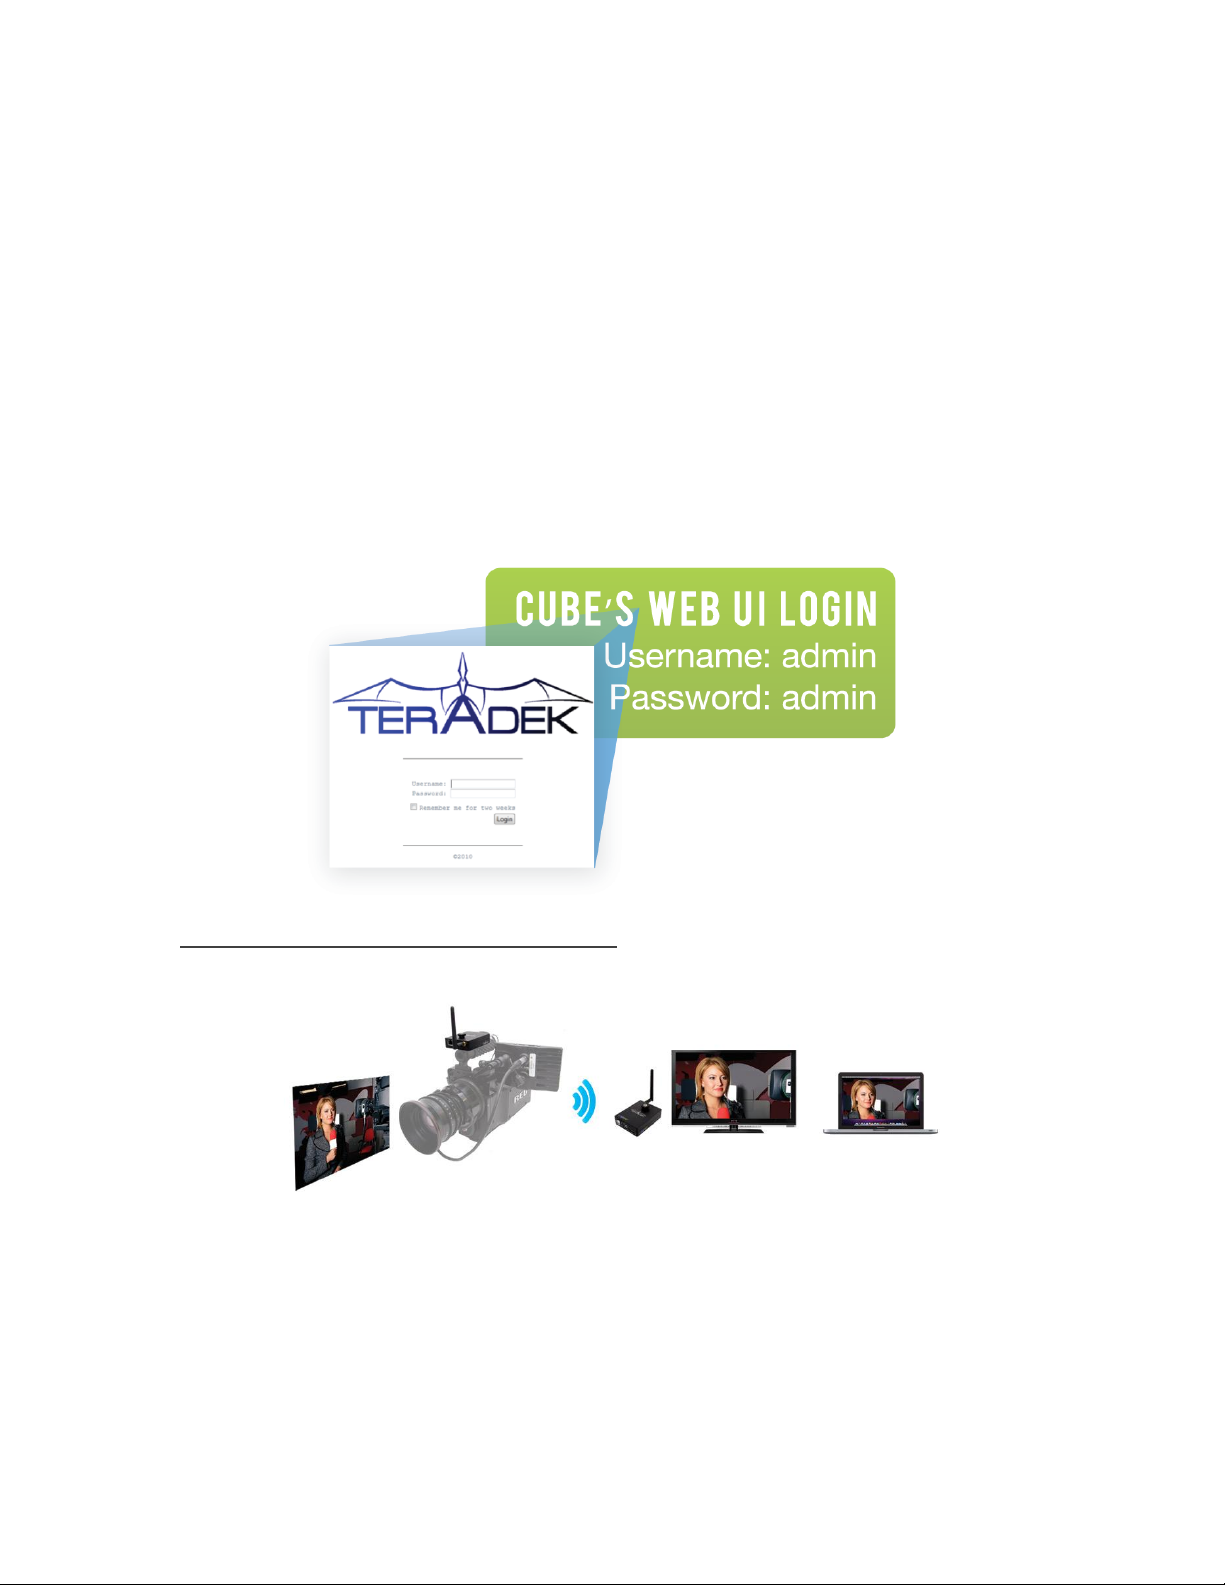
activatable features please refer to this guide‟s later sections. Cube‟s username is „admin‟ and the default
password is „admin.‟ Changing your password is strongly recommended; see System (Page 26) for more
information.
1. Local monitoring with computers and/or decoders
Cube‟s default streaming type is RTP. This is used by many widely available video players for network
video streaming.
1.1. To view your video stream on a PC or Mac with TeraCentral installed, simply open TeraCentral
and click the „Launch Video‟ button. Refer to the Encoder Controls (page 18) section for
Version 2 Dec „11 © Teradek, LLC 2011. All rights reserved.
Page | 10
Page 11
information about the controls you have over the video stream. If using a decoder, please skip to
the Decoder section (page 14).
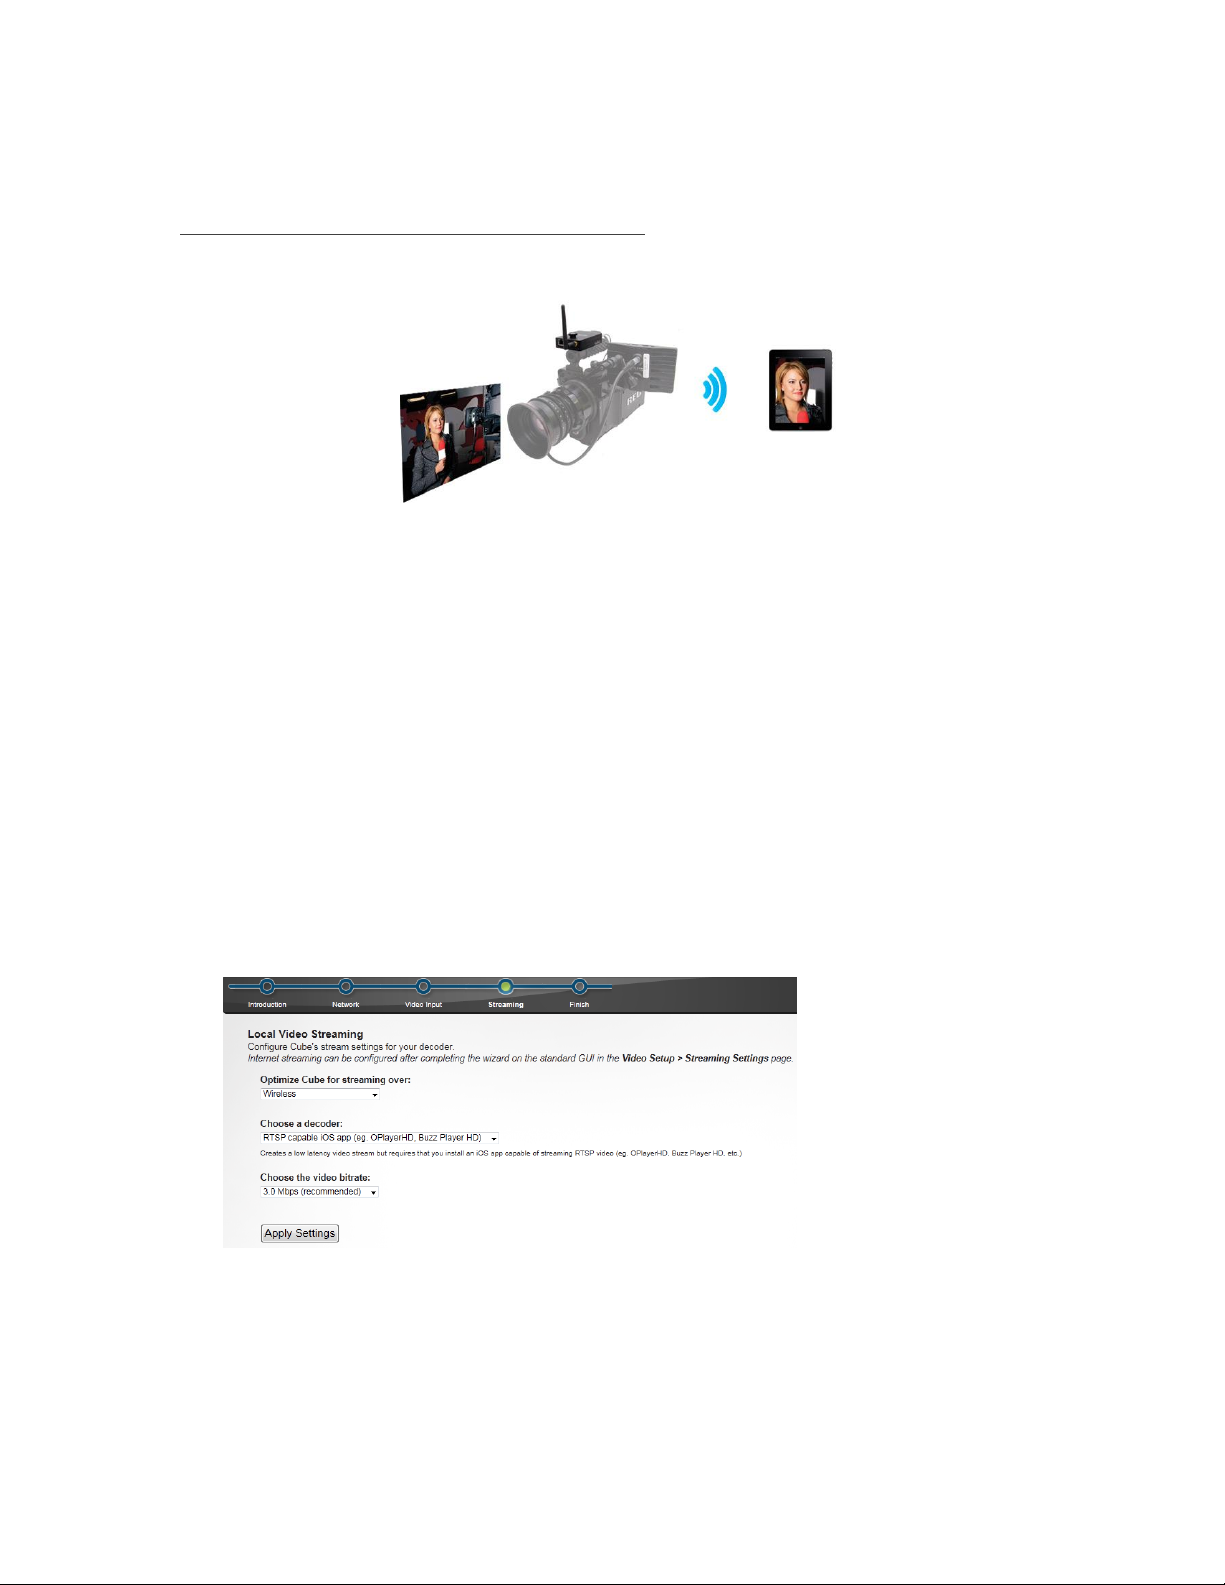
2. Local monitoring with iOS devices using TeraCentral
Cube can stream to iOS devices with a specially-configured stream called Quickview and Teradek‟s
TeraCentral iPad app. You can download TeraCentral for iPad from the app store.
2.1. Open TeraCentral on your iPad. If the Quickview stream is enabled, you will see two stream
listings from the Cube. Select „Play‟ next to the Quickview listing. If you do not see the Quickview
listing, follow the next steps to enable it.
2.2. To enable the Quickview stream, launch Cube‟s configuration page by Clicking “Configure
Settings” in TeraCentral. If you have TeraCentral installed, you can use your iPad to launch
Cube‟s configuration page.
2.3. If the wizard appears, click „Next‟ until you see the Local Video Streaming options.
2.4. Choose your streaming interface and then select „RTSP capable iOS app‟ for your decoder.
Click „Apply Settings.‟ Proceed to step 7.
Page | 11
Version 2 Dec „11 © Teradek, LLC 2011. All rights reserved.
Page 12
2.5. If the login screen appears, log in to Cube‟s web UI and Navigate to „Video Setup‟ -> „Stream
settings.‟
2.6. Click the „Quickview Stream‟ tab, select „Enabled‟ next to the „Quickview Stream‟ option, and
click „Apply.‟
2.7. Open TeraCentral, and wait for the Quickview stream listing (highlighted blue) to appear. Launch
the video by clicking the „Play‟ button‟.
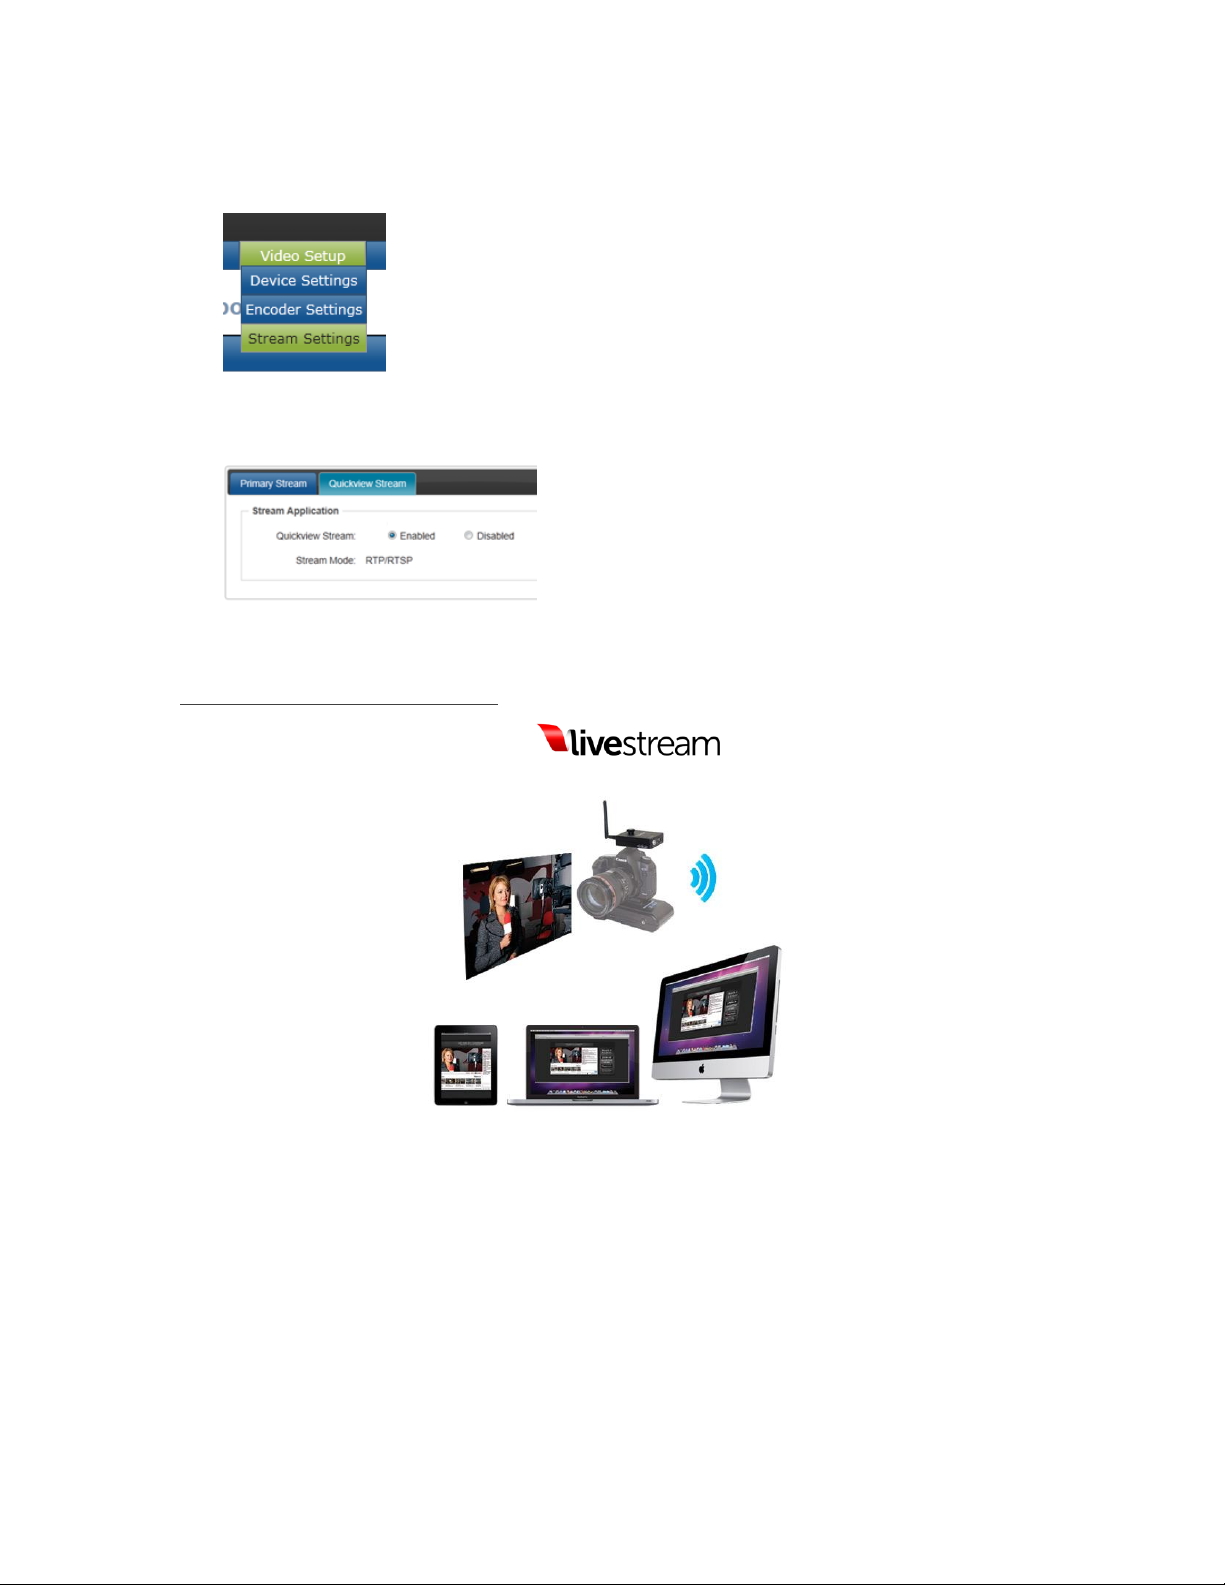
3. Internet streaming using Livestream
Cube offers native integration with Livestream for live event broadcasts and turnkey remote content
distribution. Depending on your needs, Livestream offers multiple free or paid membership options. A
Livestream account is required to use this feature.
Page | 12
Version 2 Dec „11 © Teradek, LLC 2011. All rights reserved.
Page 13

Livestream Configuration
3.1. To enable Live Internet streaming, first launch Cube‟s configuration page by Clicking “Configure
Settings” in TeraCentral.
3.2. If the wizard appears, click „Skip the Setup Wizard,‟ then log in to Cube‟s web UI. Navigate to
„Video Setup‟ -> „Stream settings.‟
3.3. Under General / Type, select „Live Internet Streaming.‟
3.4. Enter your Livestream username, password, and channel short name. Click „Verify Login‟ to
check that Cube can contact Livestream and that your login information is valid. NOTE: the
channel short name is case sensitive.
3.5. Check any options you would like to apply to your channel. Please refer to the Stream Modes
section for more information on these options.
3.6. Click „Apply.‟
3.7. Once the settings have been applied, you can start or stop your broadcasts by clicking the
„Start/Stop Broadcast‟ button, or by holding the „Go Live!‟ hardware button on Cube for
approximately 1 second (ENC LED blinks to indicate when Cube is starting/stopping).
Version 2 Dec „11 © Teradek, LLC 2011. All rights reserved.
Page | 13
Page 14

Decoder
If you purchased your decoder as a „Cubelet‟ (paired with an encoder) there is no additional configuration
required beyond ensuring that the two devices are on the same network (see Connect Cube to Your
Network, page 7). Find instructions for setting your video output resolution and switching between
streams below.
1. Changing output format
1.1. Open your Cube decoder‟s web UI and log into the device.
1.2. Navigate to „Video Setup‟ -> „Device Settings.‟
1.3. Select your desired resolution under „Video Output Format.‟
1.4. Click „Apply.‟
2. Pairing
Page | 14
Version 2 Dec „11 © Teradek, LLC 2011. All rights reserved.
Page 15

2.1. To pair two Cubes without using a computer, hold both devices‟ ‟Go Live!‟ buttons until the
ENC/DEC and WiFi LEDs blink green rapidly. NOTE: if set to „Live Internet Streaming‟ mode, the
encoder will attempt to start a broadcast before entering pairing mode.
2.2. After a short time, the decoder will restart and connect to the encoder.
3. Switching between available streams
3.1. Open your Cube decoder‟s web UI and log into the device.
3.2. Navigate to „Video Setup‟ -> „Decoder Settings.‟
3.3. Choose a video stream from the list of „Available Video Streams‟ and drag it to the „Decoder
Channel 1‟ box.
3.4. Click „Apply.‟ So long as the chosen stream is valid and both Cubes are on the same network,
the decoder will search for and connect to selected stream.
4. Manual configuration
4.1. Refer to the Configuration pages section, page 18, for information about manual decoder
configuration.
Stream Modes
Depending on your video‟s ultimate destination, you can pick from a variety of different stream types.
Cube‟s included stream types are described in this section. For information on the other activatable
options, please refer to Advanced and/or activatable applications, page 30. All stream configuration is
done via the web UI on the „Video Setup‟->‟Stream Settings‟ page.
1. RTP/RTSP
1.1.
Page | 15
Version 2 Dec „11 © Teradek, LLC 2011. All rights reserved.
Page 16

1.2. RTP is Cube‟s default streaming mode. Use this for local streaming to computers and Cube
decoders. The URL for a standard RTP stream is rtsp://xxx.xxx.xxx.xxx/stream1, where the x‟s
are your Cube‟s IP address or link-local hostname.
1.3. RTP Port and Max clients – Use these fields to configure the port Cube accepts RTP requests
on and how many simultaneous clients are allowed. The default port is 554 and the default
maximum number of clients is 10.
1.4. Authentication – Enable this to protect your stream by requiring a username and password for
access. When enabled, some video players (VLC) will prompt for the username and password if
the default stream name is used (see above). Alternately, the username and password can be
added to the stream URL as follows – rtsp://username:password@xxx.xxx.xxx.xxx/stream1.
1.5. HTTP Tunneling – Some networks may require packaging video as HTTP traffic for
transmission. If so, enable „Tunnel RTSP & RTP over HTTP‟. You may need to configure your
video player to work with HTTP Tunneling (in VLC, the option is available under Input/Codecs>Demuxers->RTP/RTSP in the preferences).
2. Secondary Quickview Stream
2.1.
2.2. When enabled, the Quickview stream can be used for low latency streaming to iOS devices. As
the Quickview stream requires less bandwidth (1 Mbps) than a typical HD stream, it can also be
used to enable streaming to a greater number of devices.
2.3. When enabled, the Quickview stream‟s URL is as follows: rtsp://xxx.xxx.xxx.xxx/quickview,
where the x‟s are your Cube‟s IP address or link-local hostname. Use this URL with your video
stream player (VLC, TeraCentral for iPad, OPlayerHD, etc.).
2.4. Audio is currently disabled in the Quickview stream.
3. HTTP Live
Version 2 Dec „11 © Teradek, LLC 2011. All rights reserved.
Page | 16
Page 17

3.1.
3.2. HTTP Live streaming allows native streaming to iOS devices using the built in Safari browser.
While this mode does support audio and HD video, there is a large amount of latency (~10
seconds or more) due to the stream type. For low latency streaming to iOS devices, please refer
to the Secondary Quickview Stream instructions above or Encoder – Pick Your Application
(page 12).
3.3. To open an HTTP Live stream in Safari on iOS, you can click the icon next to the stream URL
(found on both the Dashboard and Stream Settings page), or paste the stream URL:
http://xxx.xxx.xxx.xxx/httplive/stream.m3u8 (Mac users can also open this stream in Quicktime
X).
3.4. Transport Stream over RTP – Enabling this allows Cube to stream an RTP stream while in HTTP
Live mode. This allows you to stream HTTP Live to iOS devices while using the RTP stream on
other devices. NOTE: When enabled, this RTP stream is not compatible with Cube decoders.
4. Live Internet Streaming
4.1. The Live Internet streaming option is used for streaming directly to Livestream.com. For basic
configuration instructions, please refer to the Livestream section of Encoder – Pick Your
Application (page 12).
Page | 17
Version 2 Dec „11 © Teradek, LLC 2011. All rights reserved.
Page 18

4.1.1. Account and Configuration options:
Encoder Controls
In addition to configuring your stream type, Cube allows you to control various characteristics of the
network video stream. These include bitrate, frame rate, video scaling, and more. All of these settings can
be found under „Video Setup‟ -> „Encoder Settings.‟ Use this page to adjust the video stream to best suit
your streaming environment.
Page | 18
Version 2 Dec „11 © Teradek, LLC 2011. All rights reserved.
Page 19

1. Options (in order of display):
1.1. Title Text: Enter your desired title text here. Check „Show Title‟ to display the title text on your
video stream. If the title text is enabled, you can also display Cube‟s system time by checking
„Show Time Code.‟ The title text is also used as your channel name, and is displayed wherever
you see a Cube stream advertisement. The default name is „Channel 1.‟
1.2. Video Bitrate: Allows you to select different bitrates or manually enter your stream‟s target bitrate
(in bits per second). Lower bitrates require less bandwidth and may allow for a more stable
stream. Higher bitrates offer better video quality, but require more network bandwidth.
1.3. Audio Bitrate: Similar to above video bitrate setting. Use this to adjust the audio bitrate, if
applicable.
1.4. Output Resolution: Adjust Cube‟s streaming resolution. If your network conditions have
bandwidth restrictions or if you are streaming to mobile devices or the Internet, you can scale
Cube‟s video to a smaller size to maintain video quality. You can also adjust the video stream‟s
frame rate here.
1.5. Key Frame Interval: Adjusts the number of frames between full picture refreshes. Increasing this
value allows for better video quality at a given bitrate as the full image is not transmitted as often.
Decreasing the value may lower the overall image quality, but will allow for quicker recovery of
the stream if data is lost during transmission.
1.6. Compression Profile: High profile encoding typically gives the best image quality at a given bit
rate and is ideal for most applications. Main and baseline profiles utilize slightly different
features, and may be required by certain decoder clients (e.g. mobile devices, set top boxes,
etc.).
1.7. Latency Options – Caching value: This value can be left at its default (300 ms) in most cases. By
decreasing the value, you can reduce overall latency, but video quality and stability may suffer if
the value is set too low. By increasing the value, you can increase the stream stability. Increase
this value if your video stream stability is affected by a poor or challenging network environment.
Recommended values are 300ms when Intra-refresh (see below) is disabled, 75 ms when
enabled.
1.8. Intra Refresh Mode: This mode allows for the lowest possible latency when streaming between
Cube encoders and decoders. It also allows the above caching value to be set lower without
affecting the stream stability. This mode is not currently compatible with available software
decoders (e.g. VLC, Quicktime, etc.).
1.9. Rate Control Settings: For most applications, Rate Control Settings can be left at their default
values (Mode – Auto, Static Scene Detection – Disabled, and Complexity Detection – Enabled).
Page | 19
Adjusting the rate control settings manually gives more control over the streaming bandwidth,
Version 2 Dec „11 © Teradek, LLC 2011. All rights reserved.
Page 20

and may improve performance in challenging or restricted network environments.
1.9.1. Rate Control Mode: Select „Auto‟ or „Manual.‟ Additional options are present when set to
„Manual‟ mode.
1.9.2. Static Scene Detection: Enabling this prevents bitrate spikes during static-to-dynamic scene
transitions. Disabling static scene detection improves video quality in mostly static scenes.
1.9.3. Complexity Detection: Enabling this allows the encoder to adapt more quickly to very
complex content and scene changes.
1.9.4. QP: Setting the Minimum and Maximum QP values allows you to limit bandwidth by
restricting the compression level range of a stream. Lower numbers correspond to less
compression (higher quality). Valid range is 0 to 51.
1.9.5. Strict CBR: When strict CBR is enabled the stream bitrate is held at the configured bitrate.
Extra data is added to the stream to „pad‟ the bitrate if it would otherwise drop below the
configured value and the bitrate is not allowed to exceed the configured value.
1.9.6. Maximum Bitrate: Sets a hard limit for the maximum bitrate. In normal operation, the actual
bitrate varies above and below the configured value. If your network environment has a
strict upper limit on bandwidth, set the Maximum Bitrate to prevent Cube‟s stream from ever
exceeding that value.
1.10. Deinterlacer (Not pictured): The deinterlacer converts interlaced video input signals into
progressive before streaming. This improves the appearance of interlaced video, particularly
when video is scaled down from the original input resolution.
1.11. Adaptive Frame rate (Not pictured): Enabling adaptive frame rate allows Cube to
dynamically adjust the frame rate up or down to maintain the target bitrate. This is useful when
streaming at low bitrates, as Cube will use the highest possible frame rate without exceeding the
target bitrate.
Network Settings
Page | 20
Version 2 Dec „11 © Teradek, LLC 2011. All rights reserved.
Page 21

Cube‟s network configuration and services options can be found in Cube‟s web UI under the „Network‟
menu item.
1. Network Configuration
1.1. The network configuration page contains all of the necessary options to control Cube‟s wired,
wireless, and USB network interfaces.
1.2. Global settings – The global settings displays the currently used gateway and nameserver
values, current domain, and allows you to set Cube‟s hostname. The default hostname for cube
is cube-xxx-yyyyy, where xxx is Cube‟s model number and yyyyy is the last five digits of the
serial number.
1.3. Wired and Wireless Settings
1.3.1. IP address mode: Depending on the selected wireless interface, you can choose from a
number of IP address modes, detailed below.
1.3.1.1. DHCP Server (wireless only, encoder only) – When in Ad Hoc mode, Cube can
act as a DHCP server. Cube will use the IP address 172.16.1.1 and assign other
devices addresses in the 172.16.x.x range. In this mode, Cube can also be reached
by navigating your browser to http://mycube.teradek.com.
1.3.1.2. Dynamic (DHCP) (wired) / DHCP Client (wireless) – In this mode, Cube requests
an IP address from the DHCP server. This setting is used when connecting to existing
networks. If Cube does not receive an IP address, it will assign a link local IP address.
1.3.1.3. Static – In this mode, you provide network settings for Cube. For local network
streaming, Cube requires (as a minimum) an IP address and subnet mask. For
Page | 21
Internet or wide area streaming, a gateway and nameserver may be required.
Version 2 Dec „11 © Teradek, LLC 2011. All rights reserved.
Page 22

1.3.1.4. Link Local (wireless only) – Cube does not request an IP address via DHCP, and
instead assigns itself a link local IP address.
1.3.2. Nameserver and Search domain: When using DHCP, the DHCP typically assigns the
nameserver and search domain values, but you can set them manually if desired. If the IP
address mode is set to „Static‟, these values must be configured manually.
1.4. Wireless configuration
1.4.1. Mode: Please see Connect Cube to Your Network (page 8) for a brief description of the
available wireless modes.
1.4.2. Network Name (SSID): This field allows you to specify your Ad Hoc network name, or enter
an existing SSID for Cube to connect to. Use the „Scan for Wireless Networks‟ button to
select from a list of available wireless networks. Note that Cube will only scan for networks
with the same wireless mode (see previous). To connect to your existing network, make
sure „Infrastructure‟ is selected before scanning. If your network SSID is not visible, you can
manually enter the SSID and security settings without scanning for networks.
1.4.3. Security mode and password (Infrastructure mode): When connecting to an Infrastructure
network, select the security type that corresponds to your network. The password entered
should match your wireless network‟s password.
1.4.4. Channel (Ad Hoc mode): specify the wireless channel you would like to use. Channels 1 to
11 are in the 2.4GHz range. For dual band models, channels 36 and higher are all in the
5GHz range. Note: For Ad Hoc networks, the channel used depends on what order devices
connect, and may not always match the channel configured on Cube.
1.5. USB modem
1.5.1. Preset: The preset drop-down menu contains a list of currently supported modems. If your
modem is not in the list, you may be able to configure the modem using the „Custom‟
option. Please refer to the FAQ section of http:/forum.teradek.com for a list of currently
supported modems.
1.5.2. Nameserver: If your USB modem is connected, this field should show Cube‟s currently
configured nameserver. The nameserver is configured automatically when a USB modem is
connected.
1.5.3. USB modem status can be seen on Cube‟s Dashboard (see page 23). Additionally, the
„USB‟ LED indicates the modem status.
2. Network Services
2.1. Zero Configuration friendly name: The friendly name is used by TeraCentral, Bonjour, and other
service discovery clients to identify Cube. Bonjour is enabled by default, but can be disabled if
Page | 22
you do not want Cube to be easily discovered on your network. The default friendly name for
cube is Cube xxx yyyyy, where xxx is Cube‟s model number and yyyyy is the last five digits of
Version 2 Dec „11 © Teradek, LLC 2011. All rights reserved.
Page 23

the serial number. The friendly name must only contain alphanumeric characters, and can be up
to 40 characters long.
2.2. SSL/TLS Encryption: Enables or disables encryption using a self-signed certificate. Note: if
encryption is enabled, „https://‟ (not „http://‟ ) must be used to access Cube‟s web UI. Cube will
not redirect users if „http://‟ is entered.
2.3. Dynamic DNS: Cube can utilize DDNS services for remote network discovery. This feature
requires an account with one of the supported DDNS service providers.
Configuration pages
1. Dashboard
1.1. Cube‟s dashboard is the first page you‟ll see after logging on to Cube. The dashboard contains
at-a-glance information about your video and network status, and features some commonly used
configuration options.
1.2. Current Settings – Displays a video snapshot image, detected format information, network, and
stream information. Each one of the above links to the appropriate configuration page. Current
stream URLs are displayed beneath the network status and can be used to launch video
streams. To download a shortcut to the stream, click the icon. This will download a „.vlc‟ file
that you can launch without opening your browser. The file is valid as long as network and
stream settings are not modified.
1.3. Primary Stream Configuration – Use this section to make quick adjustments to Cube‟s primary
video stream. You can select from multiple settings presets or individually adjust Cube‟s output
Version 2 Dec „11 © Teradek, LLC 2011. All rights reserved.
Page | 23
Page 24

(streaming) resolution, frame rate, bitrate, and Key Frame Interval. For more information on
these options, please refer to the Encoder Controls section (page 18).
2. Video Setup
2.1. The Video Setup pages allow you to control options for your video input or output (Device
Settings), options for the encoded video (Encoder Settings, see Encoder Controls, page 16), and
the stream type (Stream Settings, see Stream Types, page 14).
2.2. Device Settings – The Device Settings page contains options related to Cube‟s audio and video
input and output.
2.2.1. Video Input Resolution: select the resolution provided by your video source. It can be set to
Auto (default) in most situations. Change this if Cube does not recognize the input
resolution or if you are using a non-standard input. NOTE (HDMI only): RED One users
should manually select „RED One (720p).‟
2.2.2. Audio Input mode: select audio input. Choices are disabled, embedded audio input, or
analog audio via 1/8” stereo jack. Cube 150 and 250 models have additional level and
volume control options when set to analog input.
2.2.3. DSLR Monitoring Mode (HDMI only): Enable this to avoid signal drops when using
Cameras that switch video resolution when starting/stopping recordings. Currently valid only
for certain Canon DSLR cameras. Enabling this option requires a reboot.
2.2.4. Video Output Format (Decoder only): Select video output resolution. If set to „Auto,‟ Cube
will attempt to determine its output resolutions based on the video stream it connects to. If
not set to „Auto,‟ the output format can be set independent of the decoded video format.
2.3. Decoder settings
Page | 24
Version 2 Dec „11 © Teradek, LLC 2011. All rights reserved.
Page 25

2.3.1. Basic Operation -- The Decoder Settings page contains two main panels, an available
streams panel, and a cameo panel displaying information about the currently configured
stream.
2.3.1.1. Selecting a video stream – To choose a stream to decode, select your Cube from
the list of available streams to expand the listing. Pick your desired stream (if multiple
streams are available) and drag it into the Channel 1 panel.
Page | 25
After you have dragged the stream across, click „Apply.‟ The decoder will search for
the stream, restart, and begin decoding. Once a stream has been selected, the
decoder will search for the encoder whenever it is restarted. NOTE: HTTP Live
streams are not compatible with the Cube decoder. The decoder Channel 1 panel will
highlight red and you will not be able to apply the stream. Supported stream types are
RTP/RTSP and transport stream.
2.3.1.2. Removing a video stream – To stop the decoder and prevent it from searching
for a video stream, click the button, and then click „Apply.‟
2.3.1.3. Previewing a stream – Click the button to preview the video stream in your
browser. This preview requires the VLC plugin, and may not work in all browsers.
2.3.1.4. Stream info – Additional stream information can be seen by clicking the
button.
Version 2 Dec „11 © Teradek, LLC 2011. All rights reserved.
Page 26

2.3.2. Advanced/Manual Configuration – If your network restricts Cube‟s service advertisements
or if streaming over a WAN or the Internet, manual configuration of the Cube decoder may
be necessary. The manual configuration panel also contains options for adjusting Cube‟s
latency settings. Note that after manually configuring your decoder settings and clicking
„Set,‟ you will still need to click „Apply‟ for the configuration to take effect.
2.3.3. Stream Type: RTP
2.3.3.1. Stream Protocol: Select UDP or TCP. Default is UDP. UDP streaming requires
less network overhead but does not guarantee that video data will arrive intact. TCP
streaming ensures data will arrive at its destination, but requires more network
overhead and may impact performance and delay when bandwidth is limited.
2.3.3.2. Host IP Address: Your encoder‟s IP address.
2.3.3.3. Port: Default is 554, this should not be modified.
2.3.3.4. Stream Name: Choose „Stream1‟ for the main stream or „quickview‟ if enabled
(see Stream Modes, page 15).
2.3.3.5. Audio Channel Mode: Choose Stereo or Mono, depending on the encoder‟s
audio input.
2.3.3.6. Audio Sample Rate: Choose 48kHz if audio is enabled on the decoder, choose
„No Audio‟ otherwise.
2.3.3.7. Latency Options – Caching: Set this equal to or greater than the encoder‟s
caching value. Default is 300ms. See Encoder Controls (page 18) for more
information.
2.3.3.8. Intra Refresh: Set this to „Enabled‟ if your encoder is using Intra Refresh mode.
3. System
3.1. Licenses – Cube supports a variety of features that are activatable on a per-device basis. More
Page | 26
details regarding activatable features and license keys can be found in Advanced and/or
Version 2 Dec „11 © Teradek, LLC 2011. All rights reserved.
Page 27

activatable applications, page 30.
3.1.1. Adding licenses – To add a license, paste your 40 digit license string into the „Add a New
License Key‟ field and click „Add Key.‟ If the license is added successfully, you should see
the description and license key displayed in the licenses table. If you see a message saying
„Invalid License,‟ verify that there the full license has been posted and there are no extra
spaces following the string. After adding a license, Cube must be rebooted before the new
feature can be used. Click „Reboot Now‟ to reboot the Cube.
3.1.2. Importing and exporting license files – You can export a list of currently installed licenses by
clicking „Export All Licenses to File.‟ After doing so, this list can be imported by clicking
„Import a License File,‟ browsing for the file in the field at the bottom of the page, and
clicking „Import.‟ You will need to reboot after importing the license file. Note: Licenses and
license files are specific to individual devices. License files are only valid for the Cube they
are exported from.
Page | 27
Version 2 Dec „11 © Teradek, LLC 2011. All rights reserved.
Page 28

3.2. User settings – The user settings page allows you to change your password and import, export,
or reset Cube‟s settings.
3.2.1. Password – To change your password from the default value „admin,‟ enter your desired
password in the „New Password‟ field and click „Change Password.‟ Passwords are case
sensitive and may contain alphanumeric (a to z, 0 to 9) and special characters (@, #, etc.).
3.2.2. Import Settings – To import a saved configuration, click „Browse‟ or „Choose File‟
(dependent on your web browser), select a previously generated Cube settings file, and
click „Import.‟ Leave „Preserve network settings‟ checked if you want to preserve Cube‟s
current network configuration, or uncheck the box if you want to completely overwrite the
configuration. This feature is useful when configuring multiple Cubes at once. See below for
instructions on generating the settings file.
3.2.3. Export Settings – To export Cube‟s current configuration, simply click the „Export‟ button.
You will be prompted to download a file ending in „.hdf.‟ This file can be used by other
Cubes to copy the configuration, see above. In addition to generating a snapshot of Cube‟s
configuration, the export settings feature can also be used for troubleshooting – to include
system status information in the exported file, check the box next to „Include System
Information‟ before clicking „Export.‟
3.2.4. Factory Reset Settings – To restore Cube to its original settings, click the „Reset to Factory
Page | 28
Settings‟ button, and then confirm the reset by clicking „Yes.‟ You can preserve Cube‟s
Version 2 Dec „11 © Teradek, LLC 2011. All rights reserved.
Page 29

network settings by leaving the „Preserve network settings‟ box checked. If you are unable
to access the configuration pages, Cube can also be reset by holding the „Go Live!‟ button
on the back of Cube; see Button Operation, page 7, for more information.
3.3. System Time – The System time page allows you to set Cube‟s system time. Cube‟s system
time can be set manually (Reference mode: Manual), or using NTP (Network Time Protocol). If
NTP is selected, a valid NTP server must be present for the system time to update. The NTP
server can be selected in the „Server Address‟ field. If Cube has an internet connection a public
NTP server (such as the default, pool.ntp.org) can be used.
3.4. Firmware Upgrade – Cube‟s firmware is upgradeable, and updates including new features and
improvements can be found at Teradek‟s Cube forum, located at
http://www.teradek.com/firmware.html.
3.4.1. Firmware upgrade files – The downloadable upgrade file is in a „.zip‟ format. This file
contains both the firmware image binary „.bin‟ and current release notes in PDF format.
3.4.2. If Cube is connected to the internet it will periodically check for updates. When an update is
available, a message is displayed in the top right corner of the web UI.
Clicking the message will open a prompt to walk you through the upgrade process.
3.4.3. To upgrade manually, download and extract the firmware image files. Next, navigate to the
Firmware Upgrade page and click „Browse‟/‟Choose File‟ and select the „.bin‟ firmware
image. Click upgrade. Status messages are displayed as the firmware upgrade processes,
and Cube will reboot at the end.
3.4.4. If the firmware upgrade fails at any point prior to rebooting the Cube, refresh the page and
try again.
4. Info
4.1.
4.2. About – Clicking the „About‟ link pops up a small window that contains information about your
device, including the product, firmware, and hardware versions.
4.3. Dashboard – Click this link to return to Cube‟s dashboard. You can also click the Teradek logo
at the top left of the window or the home icon ( ).
4.4. Video Input Status – This page displays information about the currently detected video input.
4.5. Encoder/Decoder Information – This page displays information about the current state of the
encoder or decoder, including the current frame rate and bitrate. The page also contains a
button to restart the encoder or decoder without rebooting the unit.
Version 2 Dec „11 © Teradek, LLC 2011. All rights reserved.
Page | 29
Page 30

Advanced and/or activatable applications
The following options offer additional functionality over Cube‟s default feature set. Licenses for some
features are available by request at no charge (RTMP, RTSP announce, RTP push). Licenses for the
other features can be purchased through Teradek or your local reseller. For instructions on installing
licenses, please refer to the Licenses section, page 26.
1. RTMP
1.1.
1.2. RTMP streaming allows you to stream to your own custom server or CDN. Configuration for
RTMP requires a destination server URL and a stream name, and allows Cube to push video
content directly to the destination. The RTMP license is provided by request, free of charge.
1.3. Configuration:
1.3.1. Enter the server URL. Depending on where you are streaming to (local server or CDN), this
will look something like rtmp://server.address:1935/live. This will vary by platform, so check
with them to get the proper address. Often the server URL is found with FMLE instructions
or buried in a downloadable XML file.
1.3.2. Enter the stream name. This varies by platform, but should be found somewhere near the
server URL.
1.3.3. Select enabled or disabled for auto-start broadcast. If enabled, Cube will attempt to start a
broadcast whenever it starts up.
1.3.4. Click „Apply.‟ You can start/stop the stream by clicking the buttons on the Stream Settings
page or by holding the 'Go Live!' button on Cube for ~1 second.
2. RTSP announce
Page | 30
Version 2 Dec „11 © Teradek, LLC 2011. All rights reserved.
Page 31

2.1.
2.2. RTSP Announce streaming allows Cube to start and stop broadcasts to a remote streaming
server (such as Wowza). The RTSP announce license is provided by request, free of charge.
2.3. Configuration: Enter the host name or IP address of your server in the „Host Name‟ field. Enter
the host port configured on your server in the „Host Port‟ field (default is 1935). In the „File‟ field,
enter the name of your application and desired stream name. The file will vary based on your
chosen server. For example, if streaming to a Wowza server with an application „live‟ and a
desired stream name „stream1,‟ „live/stream1‟ should be entered in the „File‟ field.
2.4. Using RTSP announce: Once your stream has been configured, start and stop broadcasting to
your server by clicking the „Start‟/‟Stop‟ button on the Stream Settings page, or press and
release the „Go Live!‟ button. The „ENC‟ LED blinks rapidly when starting or stopping a
broadcast.
2.5. User name and password are configurable for streaming servers that require authentication.
3. RTP push
3.1.
3.2. RTP Push streaming allows you to direct video to a server or client and generates an „.sdp‟ file
containing the stream description. SDP files can be stored on a streaming server, or opened by
video players like VLC. The RTP Push license is provided by request, free of charge.
3.3. Configuration: To configure RTP push, select „Enabled,‟ then specify your desired IP address
and port. Click „Apply‟ to save your configuration and generate the SDP file.
Version 2 Dec „11 © Teradek, LLC 2011. All rights reserved.
Page | 31
Page 32

3.4. Using RTP Push: After applying your configuration, a link to the SDP file will be displayed
towards the bottom of the Stream Settings page. To open the stream, either copy the URL and
open it using your video player software, or right click the and save the file. The saved file
can be opened directly, or added to your streaming server‟s content directory.
4. UDP multicast
4.1.
4.2. UDP multicast allows Cube to send multicast streams over RTP/RTSP. Compared to unicast
streaming, where each client connection requires Cube to send additional data, multicast
streaming relies on compatible networking equipment to intelligently duplicate the video streams.
The multicast license can be purchased through Teradek‟s online store, http://store.teradek.com.
The license is available individually, and is also included with the MPEG Transport Stream
license.
4.3. Configuration: To Configure Cube for multicast, Select RTP for the stream type on the Video
Setup -> Stream Settings page. Below that, select „Enabled‟ for Multicast. Enter a destination IP
address if desired, or leave at the default value (239.192.20.1). Set the TTL value equal to or
greater than the number of network segments the video is to traverse, or leave at 1 for local
network streaming. Set the Video and Audio ports, if desired, or leave at their default values.
Lastly, be sure to select the network interface you are using to stream over in the „Network
Streaming Interface‟ field. Click „Apply.‟
4.4. IMPORTANT: Notes regarding multicast use: After applying your settings, your video stream can
be opened in the same manner as a standard RTP stream. The multicast IP address does not
need to be entered to open the video stream. For example, if a Cube has the IP address
192.168.1.100 and is set to multicast using 239.192.20.1, you would use the URL
rtsp://192.168.1.100/stream1 to open the video stream.
4.5. Additional considerations: Many capable network switches do not have multicast enabled by
default. An improperly configured switch will cause the multicast stream to look like a broadcast,
Version 2 Dec „11 © Teradek, LLC 2011. All rights reserved.
Page | 32
Page 33

and may adversely affect network conditions. Please refer to your network device documentation
when using multicast.
5. Transport stream
5.1.
5.2. In transport stream mode, Cube sends video to a specified unicast or multicast address. The
MPEG transport stream protocol is used in many broadcast applications and is also supported
by many IPTV set top boxes. The transport stream license can be purchased online at
http://store.teradek.com .
5.3. Configuration: To enable transport stream, select „Transport Stream‟ for the stream type on the
Stream Settings page. Choose your streaming protocol (see below). Enter your destination IP
address and port. Select your audio codec (AAC or MPEG2). Click „Apply.‟
5.4. Protocol options: TCP is recommended when streaming over the internet or a WAN. For
streaming over a local network, UDP can be used to avoid the additional network overhead of
TCP. On a local network, use „UDP (Unicast)‟ if streaming to a single decoder, or „UDP
(Multicast)‟ when streaming to multiple decoders over a multicast-capable network.
5.5. Using transport stream: If your transport stream is being sent to a computer, a program such as
VLC can open the stream by opening the URL listed on the Stream Settings page. For example,
if streaming to a computer with IP address 192.168.1.100 over port 9710, enter
udp://@192.168.1.100:9710 in VLC‟s „Open Network‟ dialogue. For multicast streams, simply
replace the unicast IP address with the multicast IP address. Please refer to following section for
instructions on configuring your decoder to work with transport stream.
Page | 33
Version 2 Dec „11 © Teradek, LLC 2011. All rights reserved.
Page 34

5.5.1. Decoder Configuration
5.5.2. Select „Manually Configure‟ on the Video Setup ->Decoder Settings page (see page 24).
5.5.3. Stream Protocol: Select UDP or TCP. This value should match the value configured on your
5.5.4. Port: Select the port configured on the encoder. Default is 9710.
5.5.5. Audio Channel Mode: Choose Stereo or Mono, depending on the encoder‟s audio input.
5.5.6. Audio Sample Rate: Choose 48kHz if audio is enabled on the decoder, choose „No Audio‟
5.5.7. Audio Codec: Select the same value configured on the encoder, either AAC or MPEG2.
Page | 34
encoder. UDP streaming requires less network overhead but does not guarantee that video
data will arrive intact on lossy networks. TCP streaming ensures data will arrive at its
destination, but requires more network overhead and may impact performance when
bandwidth is limited.
otherwise.
Version 2 Dec „11 © Teradek, LLC 2011. All rights reserved.
Page 35

5.5.8. Latency Options – Caching: Set this equal to or greater than the encoder‟s caching value.
Default is 300ms. See Encoder Controls (page 18) for more information.
5.5.9. Intra Refresh: Set this to „Enabled‟ if your encoder is using Intra Refresh mode.
5.5.10. Jitter Buffer: The jitter buffer, when enabled, improves stream quality when network
conditions are inconsistent (e.g. when streaming over the internet). The jitter buffer is a
configurable buffer that stores video temporarily before playing it, providing better video
stability at the cost of latency. For best results, set the „Jitter Mode‟ option to „Fixed Delay,‟
and then configure the buffer length in milliseconds.
6. Proxy Recording
6.1. Proxy recording is an activatable feature that allows Cube to generate video files on a remote
server (via NFS) using start/stop information present on your camera‟s SDI output. For
information on installing the proxy recording license, please refer to section 3.1 Licenses (page
26). Please note that Proxy Recording is not supported on HDMI Cubes.
6.2. Recording types
6.2.1. RED Camera Controlled – Cube reads start, stop, timecode, and file name information
from RED One or Epic HD-SDI output. Files generated have the same file name as those
recorded on the camera (e.g. the proxy file generated along with clip
A008_C001_0211PV.RDC would have the file name A008_C001_0211PV.MP4)
6.2.2. Arri Alexa Controlled – Cube reads start, stop, and timecode information from ARRI Alexa
HD-SDI output. Note that the camera must have „SDI Remote‟ enabled on the SDI monitor
output.
6.2.3. Record Run – For cameras with timecode output set to „record run‟ mode, Cube detects
starts and stops based on the timecode start and stop. Frame delay (the number of frames
with different timecode required before Cube starts generating a file) is configurable in this
mode, as some cameras change or increment timecode without recording (for example,
switching into and out of playback mode on the camera).
6.2.4. Manual – Files are started and stopped using buttons on the Recording page of Cube‟s
web UI. The manual start and stop buttons are also available in the other recording modes.
6.3. Configuring NFS
6.3.1. Mac OS X
6.3.1.1. OS X users can set up NFS using our TeraCentral app. Open TeraCentral, click
the „Tools‟ option on the menu bar, and select NFS Server Setup. This opens up the
Server Setup window.
Page | 35
Version 2 Dec „11 © Teradek, LLC 2011. All rights reserved.
Page 36

6.3.1.2.
6.3.1.3. Click „Browse‟ and select the folder you want to share for recording. Click „Open,‟
and then „Add.‟ You may be prompted to enter an administrator password.
6.3.1.4. After the share is created, an entry will appear in the setup menu. Your NFS
share is configured. Clicking „Copy Path to Clipboard‟ will copy your NFS share
location so that it can be entered on Cube.
6.3.2. Windows
6.3.2.1. An NFS server can be enabled with a number of third party NFS tools (nfsAxe,
HaneWin NFS, etc.). Please refer to your chosen software‟s documentation for set up
instructions.
6.4. Configuring Cube
6.4.1. Log in to Cube‟s web UI and go to the Recording page under Video Setup. Change the
„Recording Mode‟ setting from „Disabled‟ to „Camera Controlled‟ and click „Apply.‟
Page | 36
Version 2 Dec „11 © Teradek, LLC 2011. All rights reserved.
Page 37

6.4.2.
6.4.3. Mounting your NFS share
6.4.3.1. Click „Mount Network Volume‟ under the „Volume Management‟ field. A window
appears for you to enter your NFS share information.
6.4.3.2.
6.4.3.3. Enter your NFS Server computer‟s IP Address (found under your Network
Preferences), and paste the NFS share path that you configured previously. Click
mount.
6.4.3.4. If the share is successfully mounted, the dialog window will disappear and you
will see information about the current Volume displayed in the „Volume Management‟
field.
6.4.4. Recording options
6.4.4.1. Record Mode – Select „RED Camera,‟ „Record Run,‟ or „Manual‟ mode. Please
refer to the beginning of this section (page 35) for more information.
6.4.4.2. File Options – RED Camera Mode
Page | 37
Version 2 Dec „11 © Teradek, LLC 2011. All rights reserved.
Page 38

6.4.4.2.1.
6.4.4.2.2. Recording Format – Choose your preferred format (MOV, MP4, MKV,
H4V)
6.4.4.2.3. Recording Destination – Choose none (place files directly in the mounted
directory), „Sort by Magazine‟ (places files into a folder named for the current
magazine, e.g. „A001‟), or „Sort by Date‟ (places files into a folder named with
the current month and day, e.g. „0704‟ for July 4
th
).
6.4.4.2.4. Embedded Timecode – Enable to add a timecode track to recorded files.
6.4.4.2.5. Append Timecode – Adds the start timecode to the end of each file
name.
6.4.4.2.6. Clip Name Burn in – Recorded clips will display the clip name in the
upper left corner of the video.
6.4.4.3. File Options – Other Modes
Page | 38
6.4.4.3.1.
6.4.4.3.2. Recording Format – Choose your preferred format (MOV, MP4, MKV,
H4V)
6.4.4.3.3. Filename Format – Specify the filename for your recordings. The
filename can contain various information, added by putting the following strings
into the filename; $TC (clip start timecode), $PN (product name), $MA (MAC
address), $SN (serial number). You can mix those options with other plain text
filenames. Files with the same file name string will not be overwritten,
successive files will be denoted with „_1,‟ „_2,‟ etc. at the end of the file name.
6.4.4.3.4. Embedded Timecode – Enable to add a timecode track to recorded files.
Version 2 Dec „11 © Teradek, LLC 2011. All rights reserved.
Page 39

Troubleshooting
SYMPTOM
CAUSE
REMEDY
Cube will not power on.
Power cable may be connected
incorrectly. External battery may be
discharged.
-Remove video cable.
Verify power cable or battery plates are
connected and cables are not damaged.
-Check battery charge.
VID LED stays off, ENC LED
cycles orange to red
No video input is detected.
Verify that your source is connected to
Cube. Check cables for damage.
On some cameras, video output must
be enabled on the camera.
VID LED stays orange
Resolution mismatch.
Change Cube‟s input format to match
your source (See Video Setup, page
24). Alternately, set the input format to
„Auto.‟
SYMPTOM
CAUSE
REMEDY
Cannot open video stream
Cube may not be encoding. Stream
URL may be incorrect.
Verify that Cube is encoding (ENC LED
is green). If ENC LED is red, but VID is
green, wait for encoder to start.
Verify stream URL is correct. Stream
URL is available to copy on the
Dashboard page (see page 23).
Video stream is breaking up,
freezing.
Bitrate/resolution is set too high for
the network‟s available bandwidth.
Lower the bit rate and or resolution to
avoid lost/late video data. See Encoder
Controls, page 18.
VLC video latency is more than a
second.
VLC‟s buffer (by default) is set to 1.2
seconds.
Reduce the buffer size. See
http://forum.teradek.com under the
Tutorials section for instructions.
Video to iPad has more than a ten
second delay.
HTTP Live mode is enabled.
Enable the Quickview stream and use a
third party video player. See page 11.
My video stream does not have
audio.
Audio is disabled or Quickview
stream is being used.
Enable audio (embedded or analog) on
the Device Settings page (see page 24).
NOTE: audio is not currently supported
for Quickview stream.
SYMPTOM
CAUSE
REMEDY
Cannot Connect to Cube (Ad Hoc
mode).
May be disconnected from network,
network settings may be incorrect.
-Verify you are connected to Cube‟s
wireless network (see Ad Hoc
instructions, page 8). Check that Cube
Wifi LED is green.
-Verify your computer is set to DHCP or
has an IP address in the 172.16.x.x
1. Power/Connection Issues
2. Audio/Video Streaming
3. Networking/ Web UI
Page | 39
Version 2 Dec „11 © Teradek, LLC 2011. All rights reserved.
Page 40

range.
Cannot Connect to Cube
(Infrastructure mode).
May be disconnected from network,
network settings may be incorrect.
-If Wifi LED stays red, connect ethernet
to Cube, access web UI and double
check that infrastructure SSID,
password, and security type are correct
(see Network Settings, page 20).
Cube is visible in TeraCentral/
Bonjour, but the webpage will not
open.
Advertisement may be taking a long
time to update, network settings may
be incorrect.
Close and reopen TeraCentral and/or
your web browser.
-In Ad Hoc mode, you can attempt to
connect to the encoder by navigating to
http://mycube.teradek.com or
http://172.16.1.1
-Ensure your Computer‟s network
connection is set to DHCP in Ad Hoc
mode.
Cannot log in to Web UI
Password may be changed.
Default login information for Cube:
Login: admin
Password: admin
If the password has been changed,
perform a full factory reset (see page 7).
SYMPTOM
CAUSE
REMEDY
Cannot verify login
Incorrect account information, no
Internet connection.
Verify your Livestream account
information is entered correctly
Verify your network‟s internet
connection. Check Cube‟s Network
Configuration page for valid gateway
and name server values.
Cannot start broadcast
No internet connection. Cube
encoder may not be started.
Verify Cube‟s internet connection (see
above).
Verify ENC LED is green and solid.
(See page 39 if the LED does not turn
green).
Broadcast starts, channel shows
„LIVE,‟ but only a black screen is
shown
Bit rate is too high for available
bandwidth.
Lower the bit rate and or resolution to
avoid lost/late video data. See Encoder
Controls, page 18.
Video drops out, freezes
Bit rate is too high for available
bandwidth.
Lower the bit rate and or resolution to
avoid lost/late video data. See Encoder
Controls, page 18.
4. Live Internet Streaming
Page | 40
Version 2 Dec „11 © Teradek, LLC 2011. All rights reserved.
 Loading...