


VidiU Go
REFERENCE GUIDE
Teradek, LLC 2019. All rights reserved.
v1.2-0919

TABLE OF CONTENTS
1. Introduction ............................................................ 3
Support Resources ........................................ 3
Disclaimer ....................................................... 3
Warning ........................................................... 3
2. Physical Properties ............................................... 3
3. Getting Started ...................................................... 5
Power Your Device .......................................... 5
Connect to a Network .................................... 6
Choose a Platform .......................................... 9
Internet Streaming with Live:Air Action ........ 10
4. Settings Overview ............................................... 11
Settings Diagrams ........................................ 12
Broadcast: Platform Settings ........................ 15
Broadcast: Quality Settings .......................... 21
Video/Audio .................................................. 23
System ......................................................... 24
Network ......................................................... 25
Wired ........................................................... 25
Wireless ........................................................ 25
Nodes ........................................................... 26
Mobile .......................................................... 26
Recording ..................................................... 27
Core ............................................................. 27
Sharelink ...................................................... 29
Recovery Mode ............................................ 29
5. Troubleshooting .................................................... 31
6. Technical Specications ...................................... 33
7. FCC Statement ..................................................... 35

3
Thank you for purchasing Teradek’s VidiU Go, the ultimate entry-level streaming solution for HDMI
or SDI video sources. VidiU Go delivers high denition live streaming video with the quality and
reliability expected in traditional HD broadcast. VidiU Go features native integration with some of the
most popular video platforms, oering a seamless streaming experience. Use this reference guide to
enhance your usage and knowledge of VidiU Go.
Support Resources
In addition to this reference guide, there are a number of resources available for more information
on VidiU Go’s features and operation. For tips, information, and all the latest available rmware and
software updates, visit Teradek’s support forum at https://support.teradek.com. If you are unable to
nd what you are looking for online, please contact Teradek’s support sta at support@teradek.com |
Phone: (888) 941-2111 Ext. 2 (available M-F 5am-6pm PST).
Disclaimer
This manual is intended for user information only. Every eort has been made to ensure that the
contents within are accurate at the time of printing, and that updates are made in a timely manner.
Teradek cannot be held responsible for inaccuracies, typographical errors, or out-of-date information
contained within this manual.
Warning
Teradek VidiU products contain no user serviceable parts. Disassembly, modication, or removal of
any of the device’s components may void your warranty. Please visit http://store.teradek.com/pages/
warranty-information for up-to-date warranty terms and conditions.
INTRODUCTION

4
B
BUTTON OPERATION
Use the Menu button to navigate the front panel interface.
K
J
O
L
N P
F
DC E
J
A
A: Power button
B: Broadcast button
C: Video status indicator
D: Network status indicator
E: Broadcast status indicator
F: Menu navigation button
G: Detachable plate
H: USB modem port (not shown)
I: Micro SD card slot (not shown)
J: RP-SMA connectors
K: HDMI input
L: SD/HD/3G-SDI input
M: Ethernet port
N: Mic/Line stereo input
O: USB-C power input
P: 1/8” headphone output
Q: Thumb screws
R: SMA antennas
H
H
I
G
M
Q
R
VidiU Go includes two USB
ports designed for VidiU
Node (sold separately) or
any compatible 3G/4G/LTE
USB modem.
VidiU Node
Menu Navigation Button
Use the arrow buttons to navigate
through the menus. Press the
center button to conrm or open
selection.
Broadcast/Record Button
Start/stop broadcast or
recording.
To check the battery life while the device is powered o, press the center of the Menu Navigation
Button. The battery life percentage will then be displayed on the front panel.
Power Button
Turn power on/o
PHYSICAL PROPERTIES

5
POWER AND CONNECT
1. To power VidiU Go, connect the USB-C A/C
adapter to the USB-C port (Fig. 2-1) located on
the back of the device, then press the power
button. VidiU Go begins to boot as soon as the
power is activated.
2. Turn on your video source then connect it to
VidiU Go using either the HDMI or SDI input
(Fig. 2-2).
3. Use a hot shoe mount and a 1/4”-20 screw to
mount VidiU Go to your camera, tripod mount, or
other accessory mount, if desired.
4. Once VidiU Go has booted, verify that the
Video status indicator is illuminated (Fig. 2-3). This
indicates a video source has been successfully
detected and the encoder is running.
Fig. 2-1
Fig. 2-2
Fig. 2-3
GETTING STARTED
1. Power your device
2. Connect VidiU Go to a network
3. Choose your streaming platform
There are three key steps to going live with VidiU Go:
6
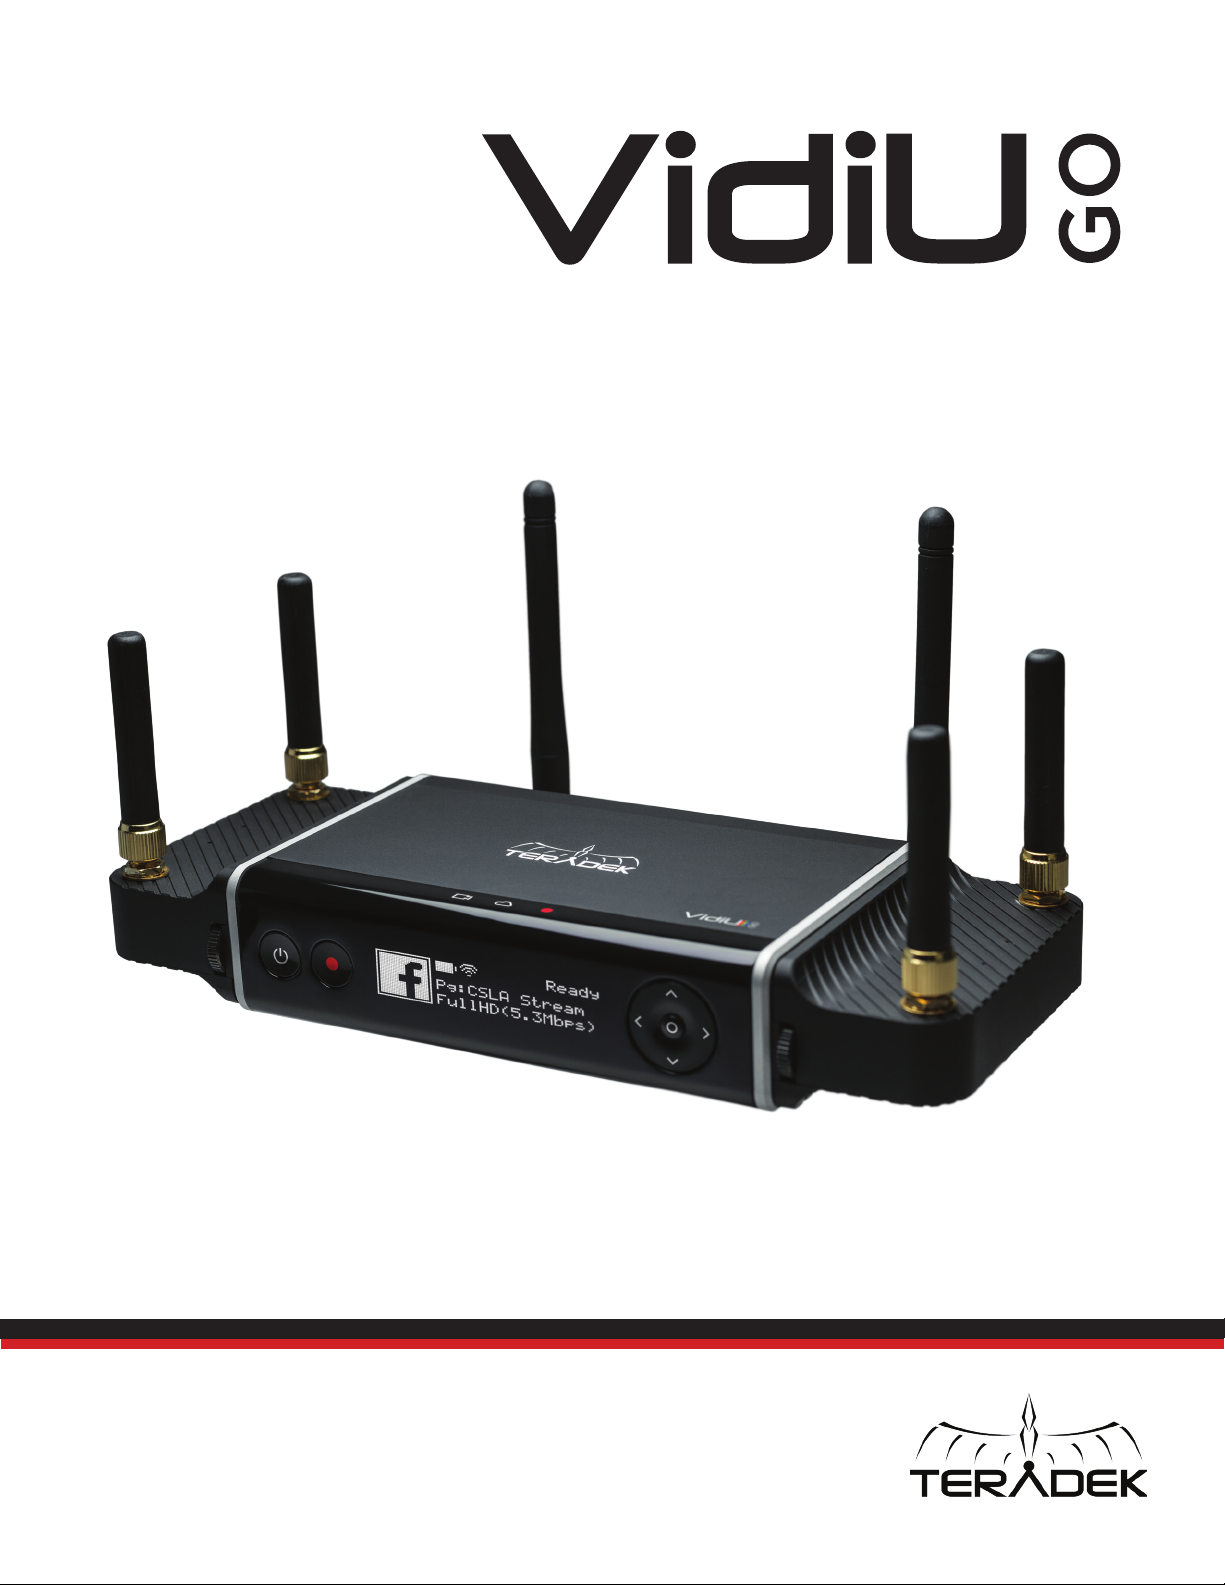
Connect to a Wi-Fi Network
Fig. 2-4
You can use the VidiU app, the Web User Interface (Web UI), or the front panel interface to connect
VidiU Go to a network. Select one of the following options.
CONNECT TO A NETWORK
Using the VidiU App
The VidiU app. allows you to remotely monitor and
congure VidiU Go from your iOS or Android device.
Download the VidiU app, then choose one of the
following methods to get VidiU Go online.
From the front panel:
1. Use the Menu Navigation Button to navigate to the
Network menu, then select WiFi.
2. Switch to Client Mode to begin scanning for
networks. Select a Wi-Fi Network, then enter
your credentials.
3. Once the device is congured, select [INFO]
to view the IP address (Fig. 2-5).
To access the Web UI:
4. Open a web browser and enter VidiU Go’s IP
address in the navigation bar.
Fig. 2-5
From the VidiU app:
1. Connect your cellular device to VidiU Go’s Access Point network,
then open the VidiU App.
2. Tap the Settings button, select Network, then select Wireless.
3. Switch to Client Mode, then tap Scan for Networks (Fig. 2-4).
4. Select a network, then connect your device to that same network.
7
Connect to an Ethernet Network
Fig. 2-7
Fig. 2-8
From the front panel:
Verify that the
icon is displayed on the front panel,
indicating that VidiU Go is connected to an Ethernet
network (Fig. 2-7).
Verify Ethernet connection
Plug an Ethernet cable from the VidiU Go’s Ethernet port
to an Ethernet switch or router.
From the VidiU app:
1. Connect your cellular device to VidiU Go’s Access
Point (AP) network (pg. 24): VidiU-Go-XXXXX
(XXXXX represents the serial number of the device).
2. Open the app and select VidiU Go, then verify the
connection status shows Online (Fig. 2-8).
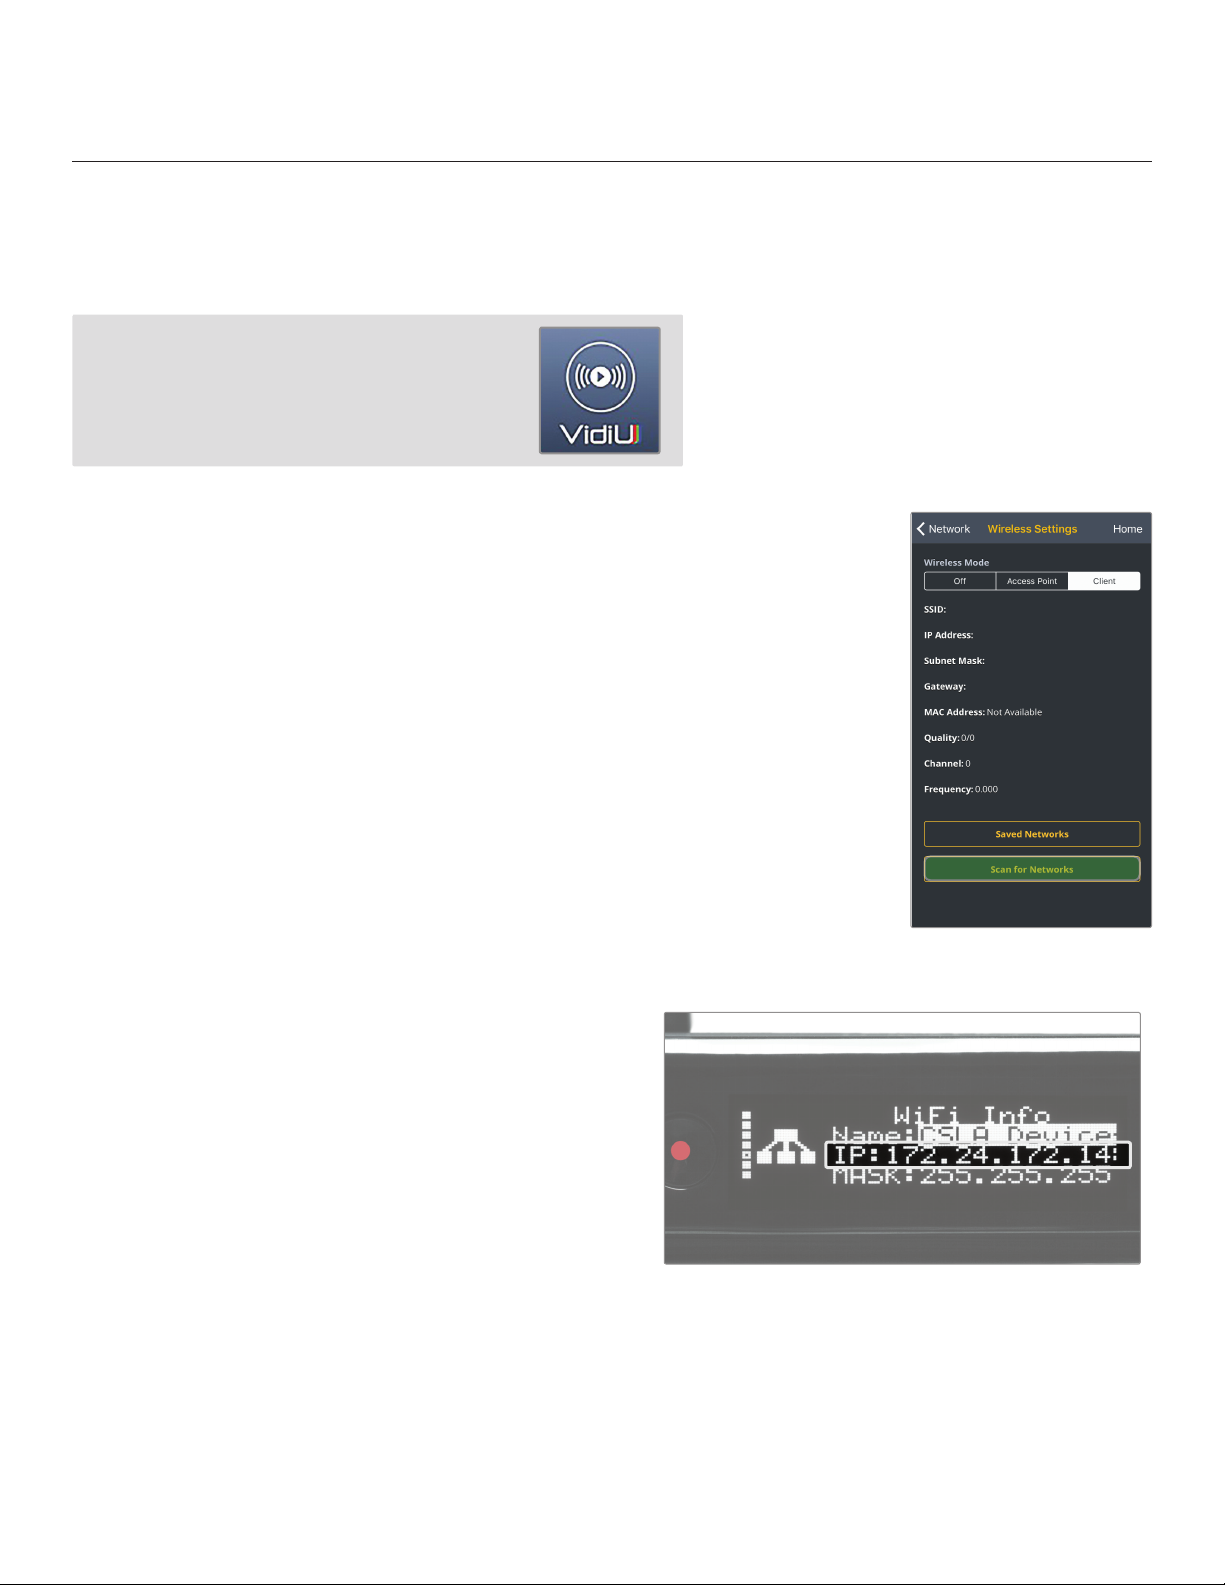
Connect using your cellphone’s data plan (Hotspot)
1. Connect your cellular device to VidiU Go’s Access Point
network (pg. 24): VidiU-Go-XXXXX (XXXXXX represents the
serial number of the device).
2. Open the VidiU app and select the VidiU Go with the
corresponding serial number under the list of Wi-Fi
devices.
3. When prompted, click Yes to use your cellular data
plan (Fig. 2-6).
Fig. 2-6

8
Connect using Node Modems
1. Detach the left and right side panels to expose
the USB ports on VidiU Go.
2. Insert a Node modem on each side. Turn the
thumb screws clockwise (Fig. 2-9), then
wait for the icon to appear.
3. To conrm the modem is connected, navigate
to the Network Settings menu and select USB
Modem.* The IP address will be displayed if the
device is connected the network.
To access the Web UI:
4. Connect your computer to VidiU Go’s AP network.
5. Open a web browser and enter VidiU Go’s IP
address in the navigation bar (Fig. 2-10).
Fig. 2-10
Fig. 2-9
9
CHOOSE YOUR PLATFORM
VidiU Go oers native integration with many popular video streaming services, making it capable
of broadcasting to any compatible online platform. Simply enter your credentials using the VidiU
app, Web UI, or the front panel interface.
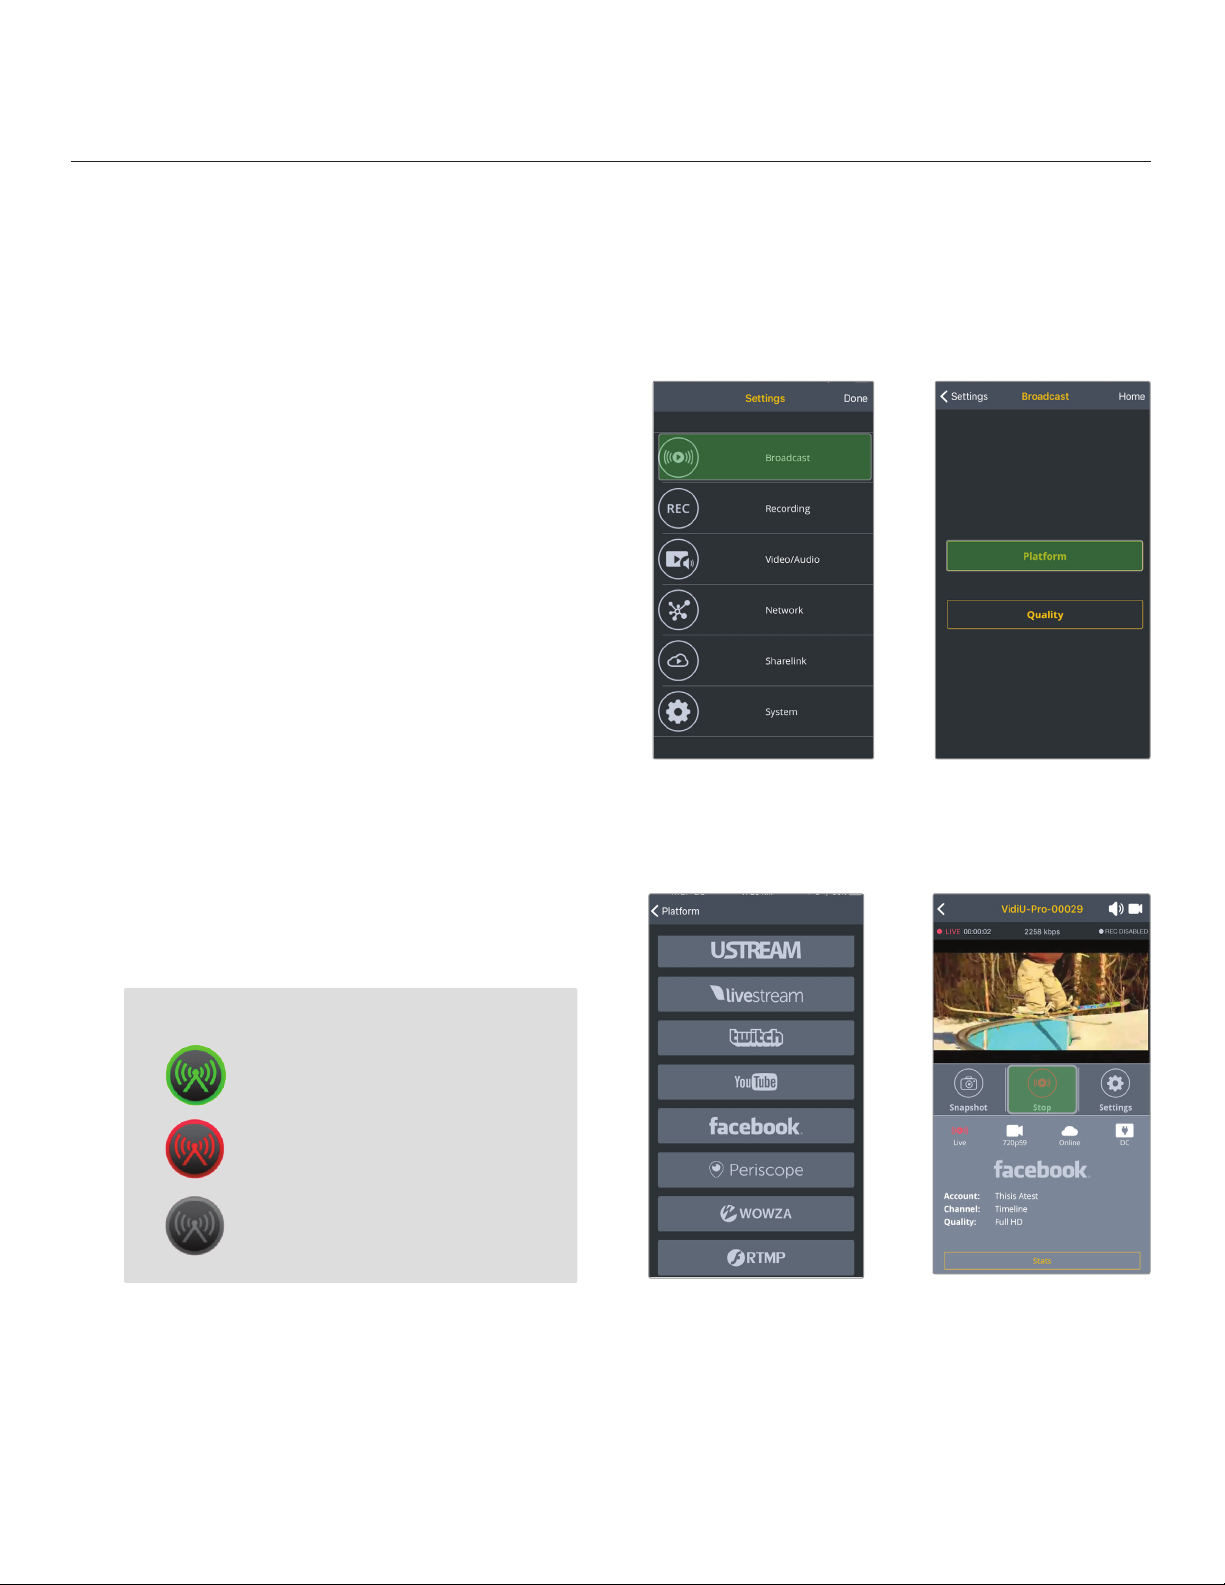
Connect to a Streaming Platform
1. Go to Settings, tap Broadcast (Fig. 2-11),
then select Platform (Fig. 2-12).
2. Tap Setup new destination and select
a streaming platform (Fig. 2-13). Enter your
credentials, or follow the on-screen prompts
to authorize VidiU Go with YouTube or
Facebook. (For more detailed set up instructions,
go to the Platform Settings section on pg.16.)
3. Select a channel or event to stream to.
4. After conguring your device, you will be
redirected to the Settings menu. Select Done
on the upper right corner.
5. Tap the Broadcast button to go live (Fig. 2-14).
Fig. 2-11 Fig. 2-12
Fig. 2-13
Fig. 2-14
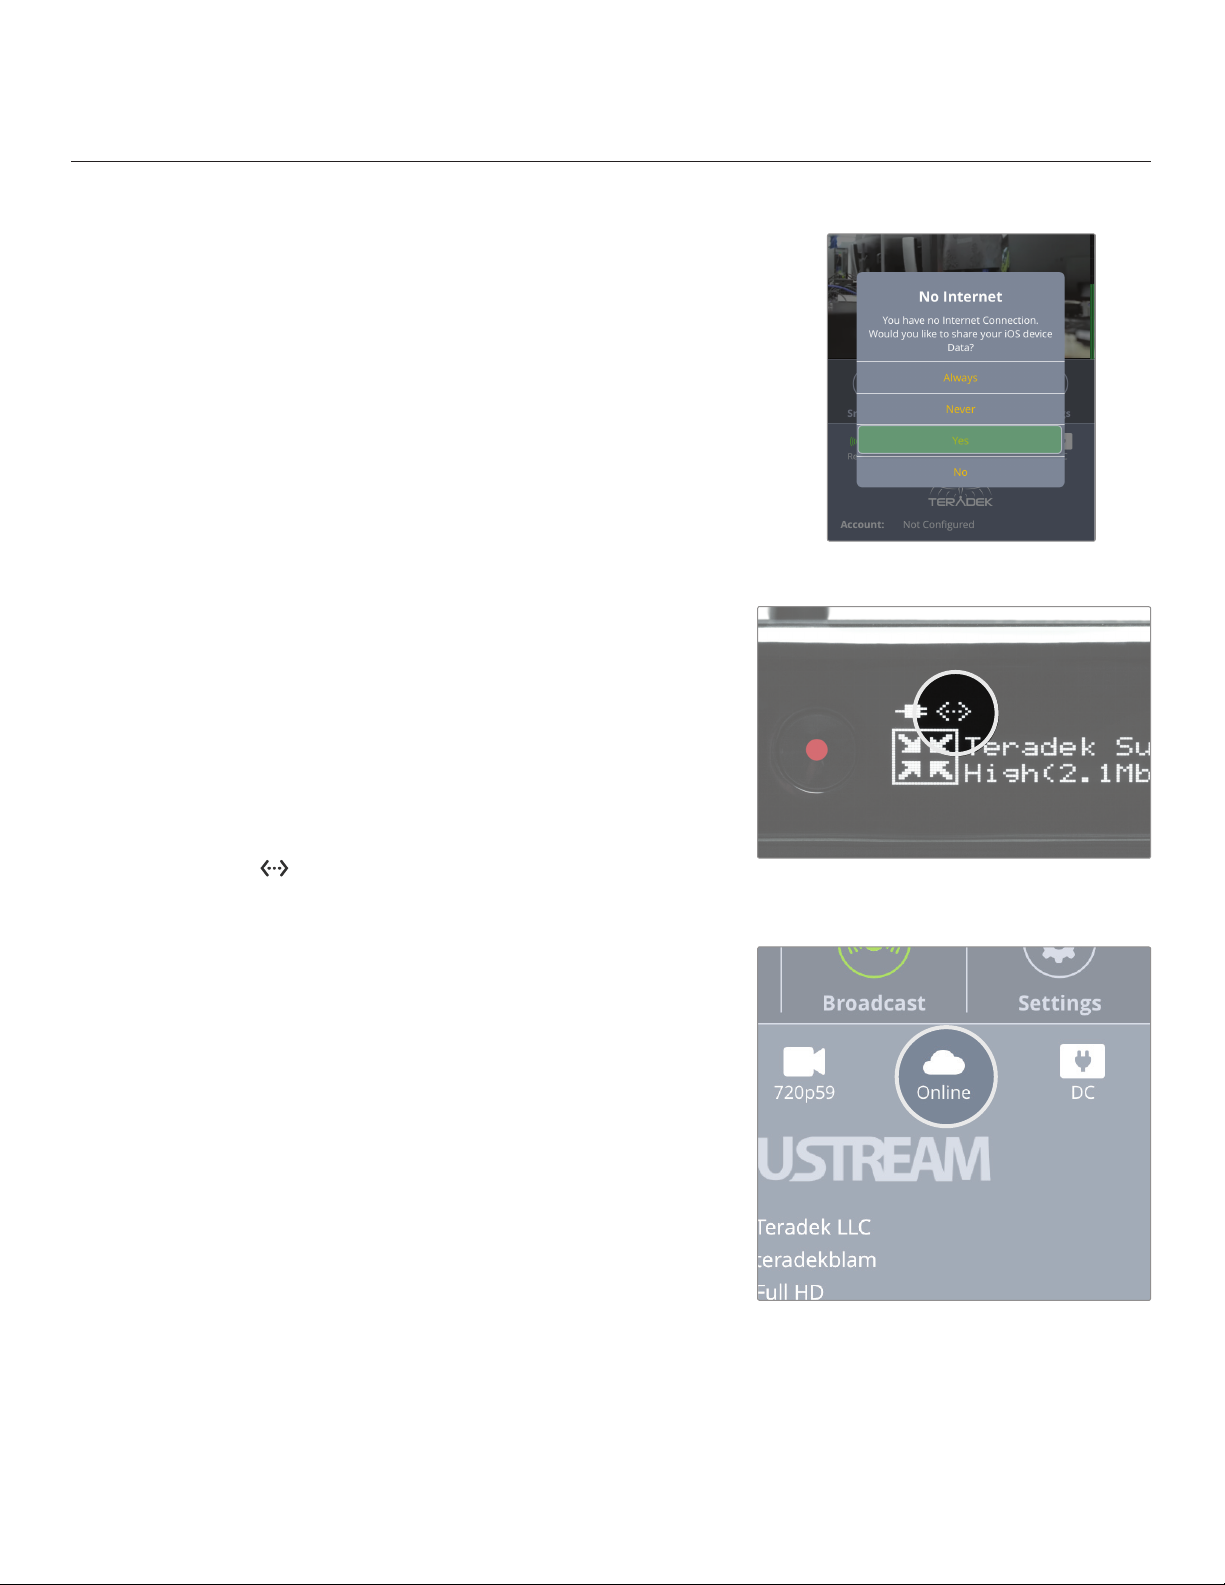
BROADCAST BUTTON:
VidiU is ready to broadcast
Broadcast is in session
VidiU is not ready to broadcast
10
INTERNET STREAMING WITH LIVE:AIR ACTION
Live:Air Action is a live production suite that converts your live stream into a complete multi-camera
production. Live:Air Action oers an entire suite of tools such as switching, graphics, lower-thirds,
looping in pre-recorded videos and more.
Live:Air Action or Live:Air Solo
Live:Air Action is compatible with iPad Air 1
and newer. Live:Air Solo is compatible with
both iPad and iPhone. Both apps are available
in the iTunes App Store.
Connect and Broadcast using Live:Air Action
1. Connect your iPad to the same network as VidiU Go.
2. Launch the Live:Air Action app.
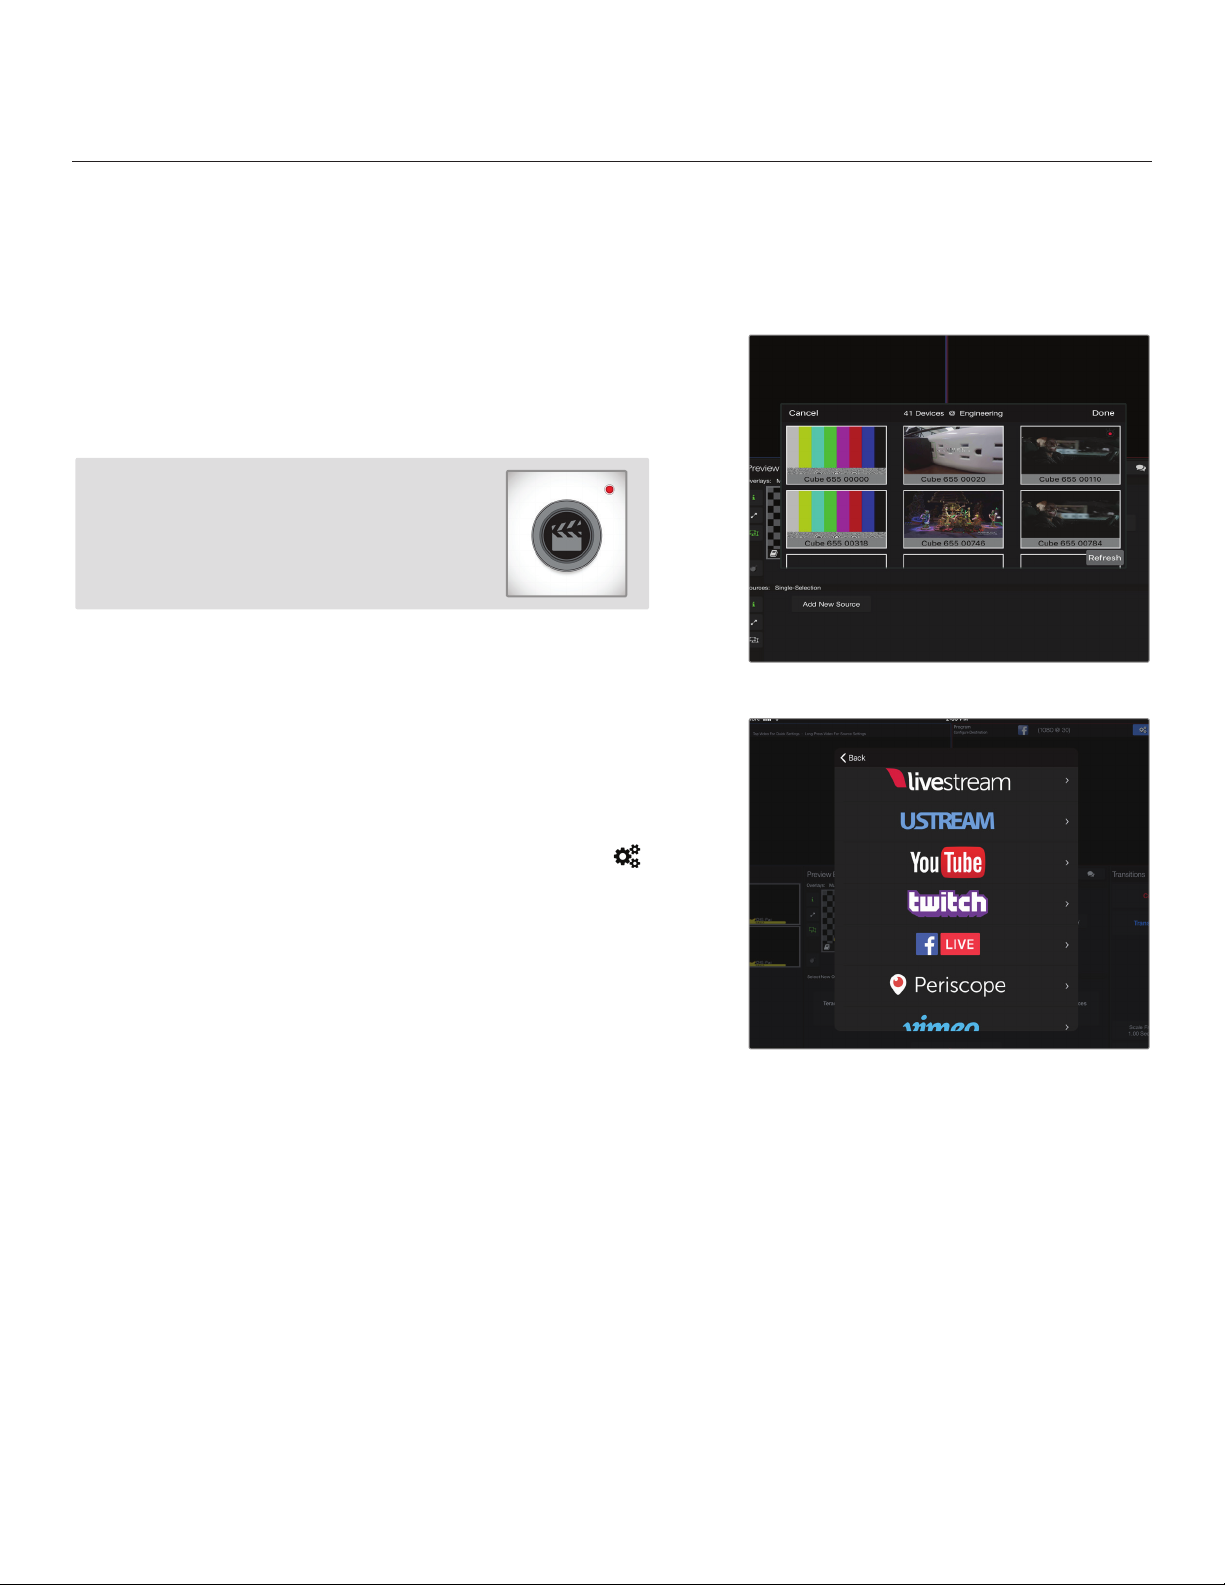
3. Tap the Add New Source button on the Preview
Editor’s bottom panel, then tap the Teradek
Device button. Select a device (Fig. 2-15), then
tap Done.
4. To congure a streaming destination, tap the
button in the upper right-hand corner, enter the
Broadcasting Destinations page, then navigate
to Manage Destinations>Add a Destination
(Fig. 2-16). Select a platform, then enter your
credentials (if applicable).
5. To begin live streaming, tap the Go Live! button
in the upper right-hand corner.
Fig. 2-15
Fig. 2-16
11
SETTINGS OVERVIEW
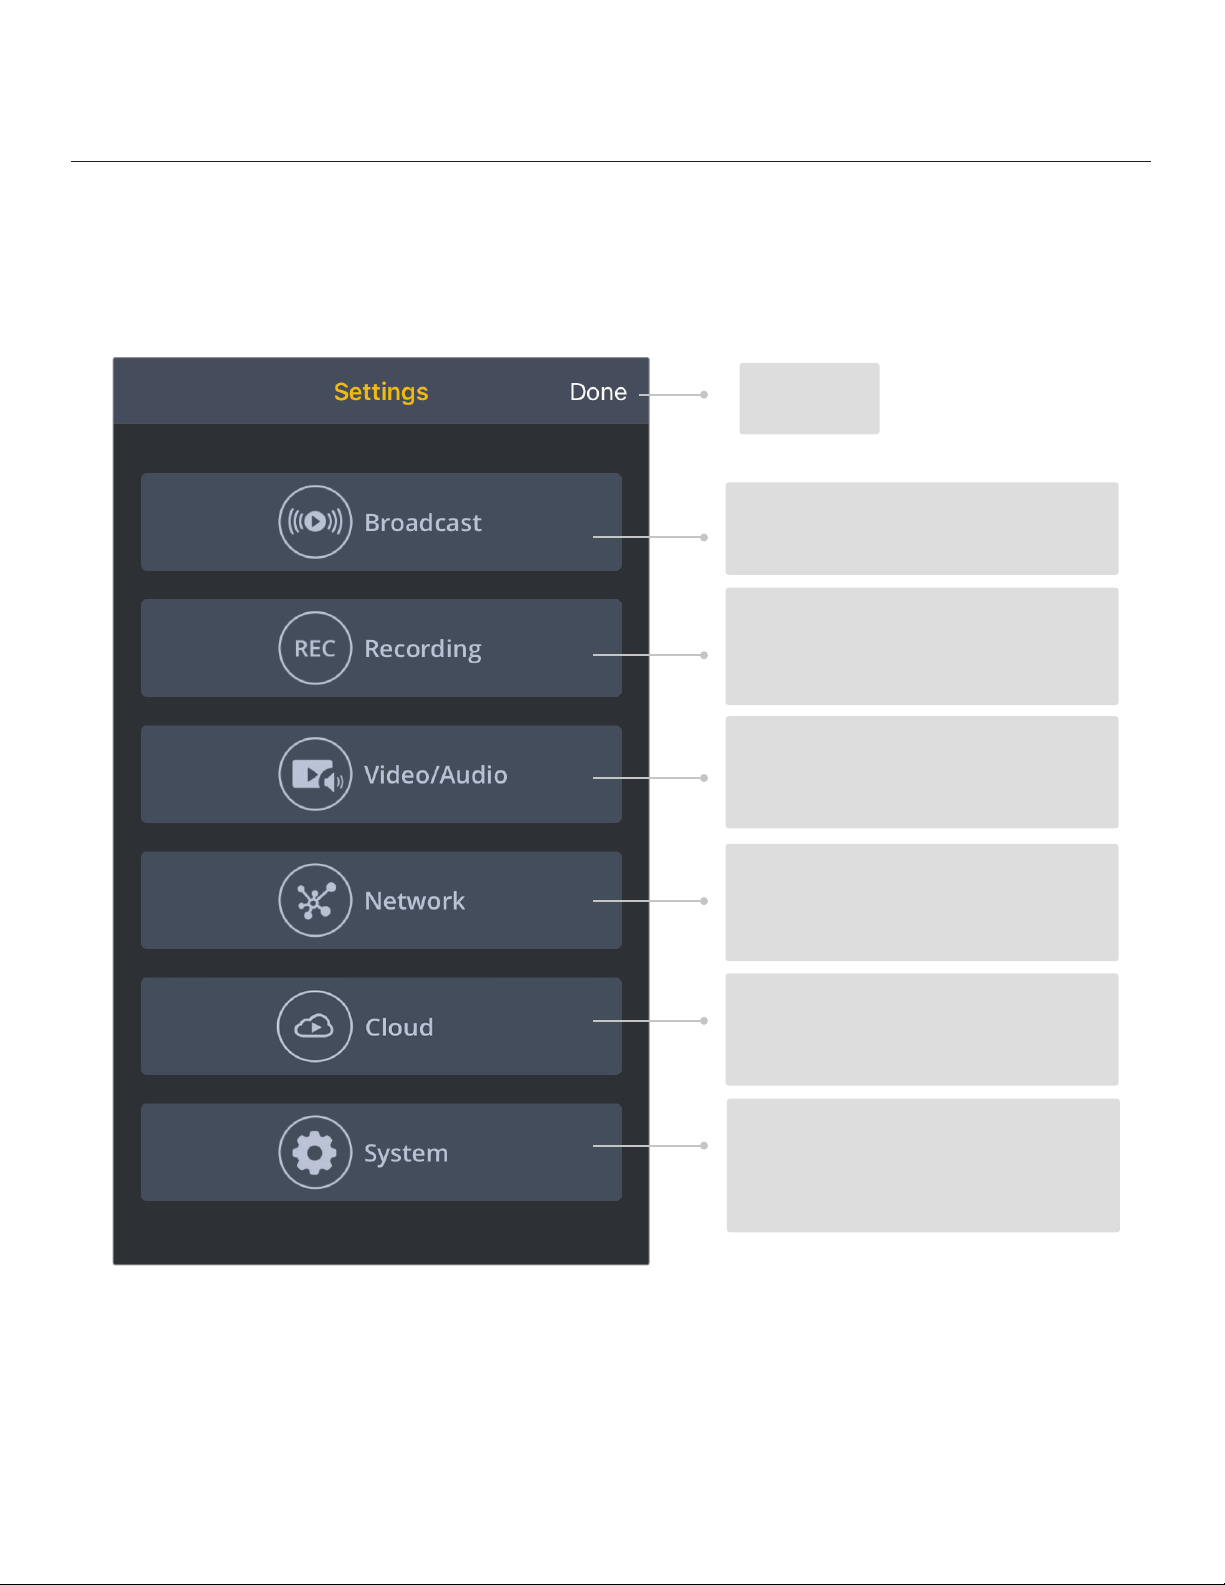
Navigating the Settings Menu
The Settings menu allows you to customize and control VidiU Go’s broadcast, audio/video, and
network settings. Use the VidiU app, Web UI, or the front panel interface to access the Settings
menu, then select a setting to modify.
BROADCAST
Modify Platform and Quality
SYSTEM
Perform factory reset, rmware
upgrade*, and system diagnostics
* Options available only while using the Web UI
RECORDING
Enable recording and select a
media storage option
VIDEO/AUDIO
Adjust the Video and Audio input
settings
NETWORK
Choose a method of connecting
to the Internet
CLOUD
Log in to your Sharelink or Core
account to increase bandwidth
Return to the
Home screen
 Loading...