

Page 1
NETWORK CONNECTION
2.1
CONNECTING TO CASE:
2
C
POWER & CONNECT
Case includes a preconfigured Apple Airport Extreme
wireless Router. All Cubes included with Case associate
with the Router. To view your Cube(s) feed, simply
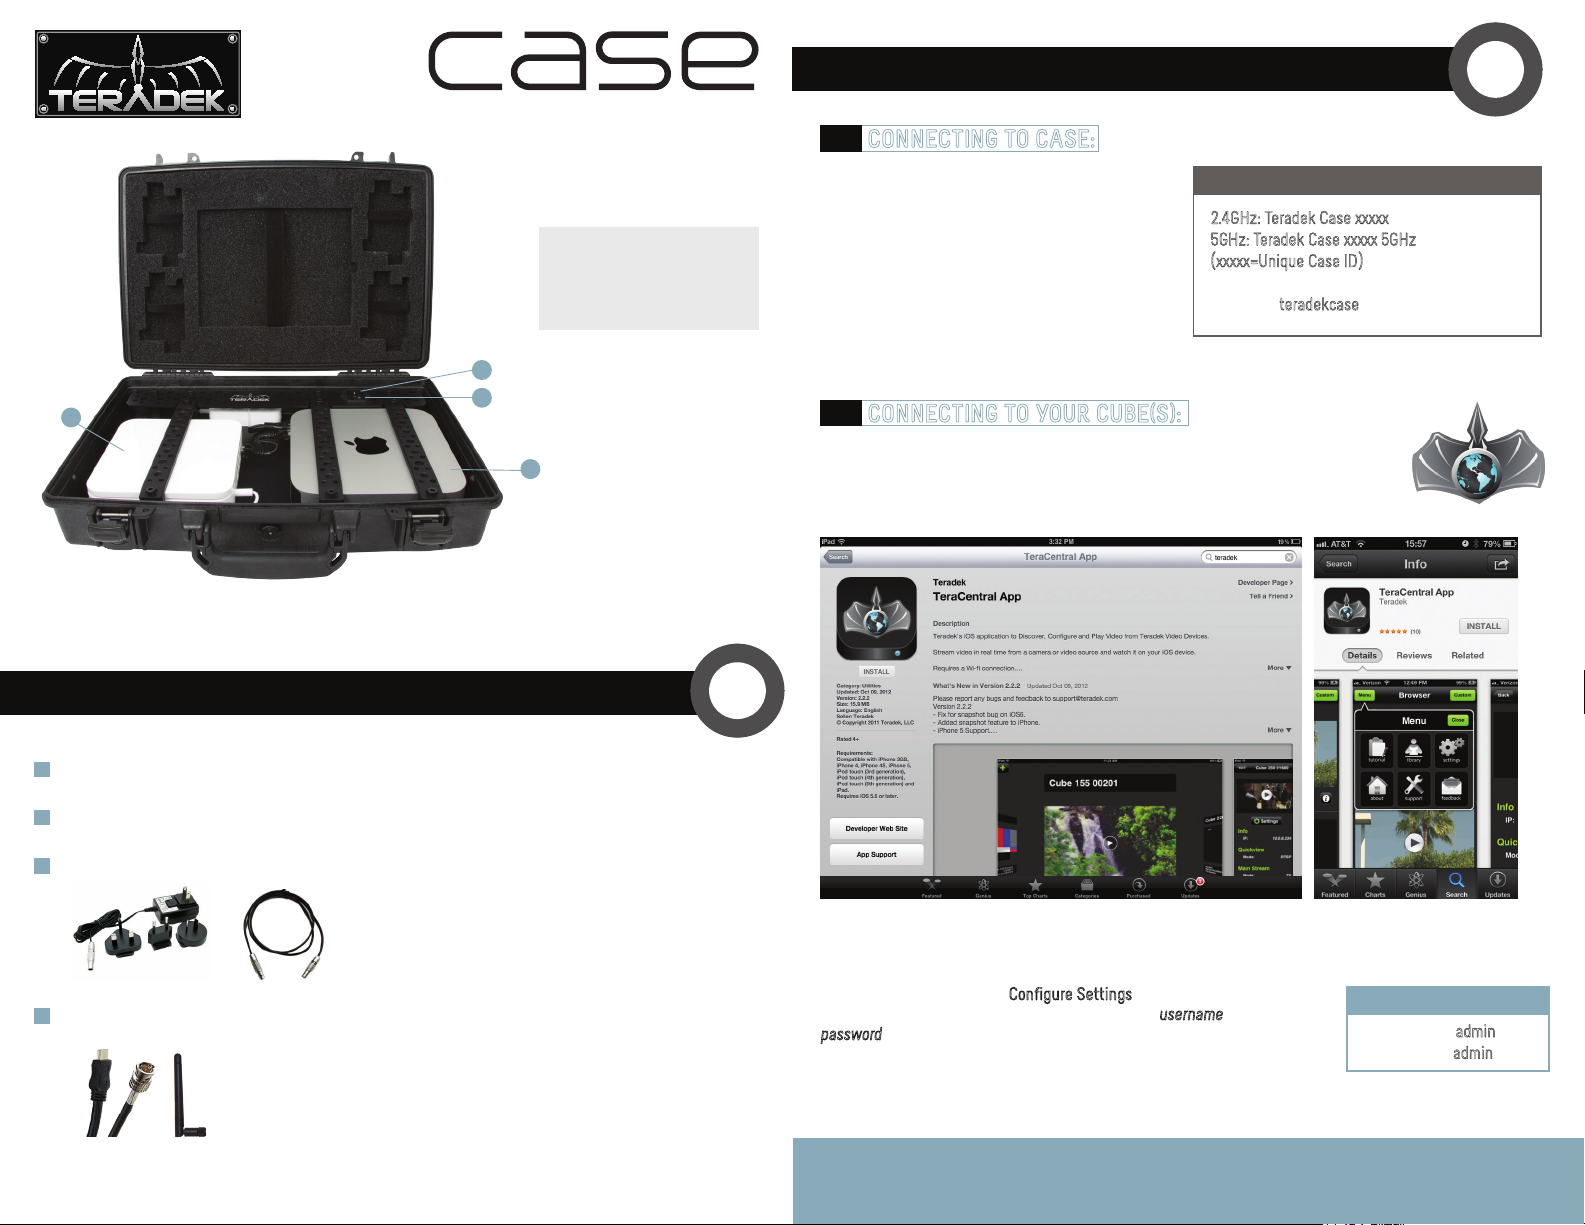
A: Power Input
B: Power Switch
C: Airport Extreme
D: Mac Mini
A
B
D
connect your laptop or tablet to the Router’s wireless
network.
2.2
CONNECTING TO YOUR CUBE(S):
Once connected to Case, your Cubes can be found on the network by using TeraCentral.
TeraCentral is available from the iTunes App store for iPad/iPhone and on the included
USB stick for Windows/Mac computers.
2.4GHz: Teradek Case xxxxx
5GHz: Teradek Case xxxxx 5GHz
(xxxxx=Unique Case ID)
password: teradekcase
SSID:
1
1
Connect the included AC cable to the Case (A) and turn on the power (B).
2
Use the included light stand to raise Case to ~ 8 feet.
3
Connect the included AC adapter (or optional Cubit, sold separately) to the Cube.
or
AC adapter
4
Connect your video source to Cube and attach Cube’s antennas.
HDMI
SDI
Antenna
Cubit
iPad iPhone
To log into your Cube, select
listing. When prompted, log in using Cube’s default
password
NEED MORE HELP?
1. Training videos: http://www.teradek.com/pages/tutorials
2. Support forum: http://www.teradek.com/pages/downloads → information and the latest firmware & software updates.
TERADEK SUPPORT STAFF: support@teradek.com or call 888−941−2111 ext2 (Mon−Fri 9am to 6pm PST)
(admin).
Configure Settings next to your Cube’s stream
username
(admin) and
CUBE’S WEB UI LOGIN
username: admin
password: admin
Page 2
STREAm PLAyBACK
3
4
3.1
LOCAL MONITORING WITH COMPUTERS
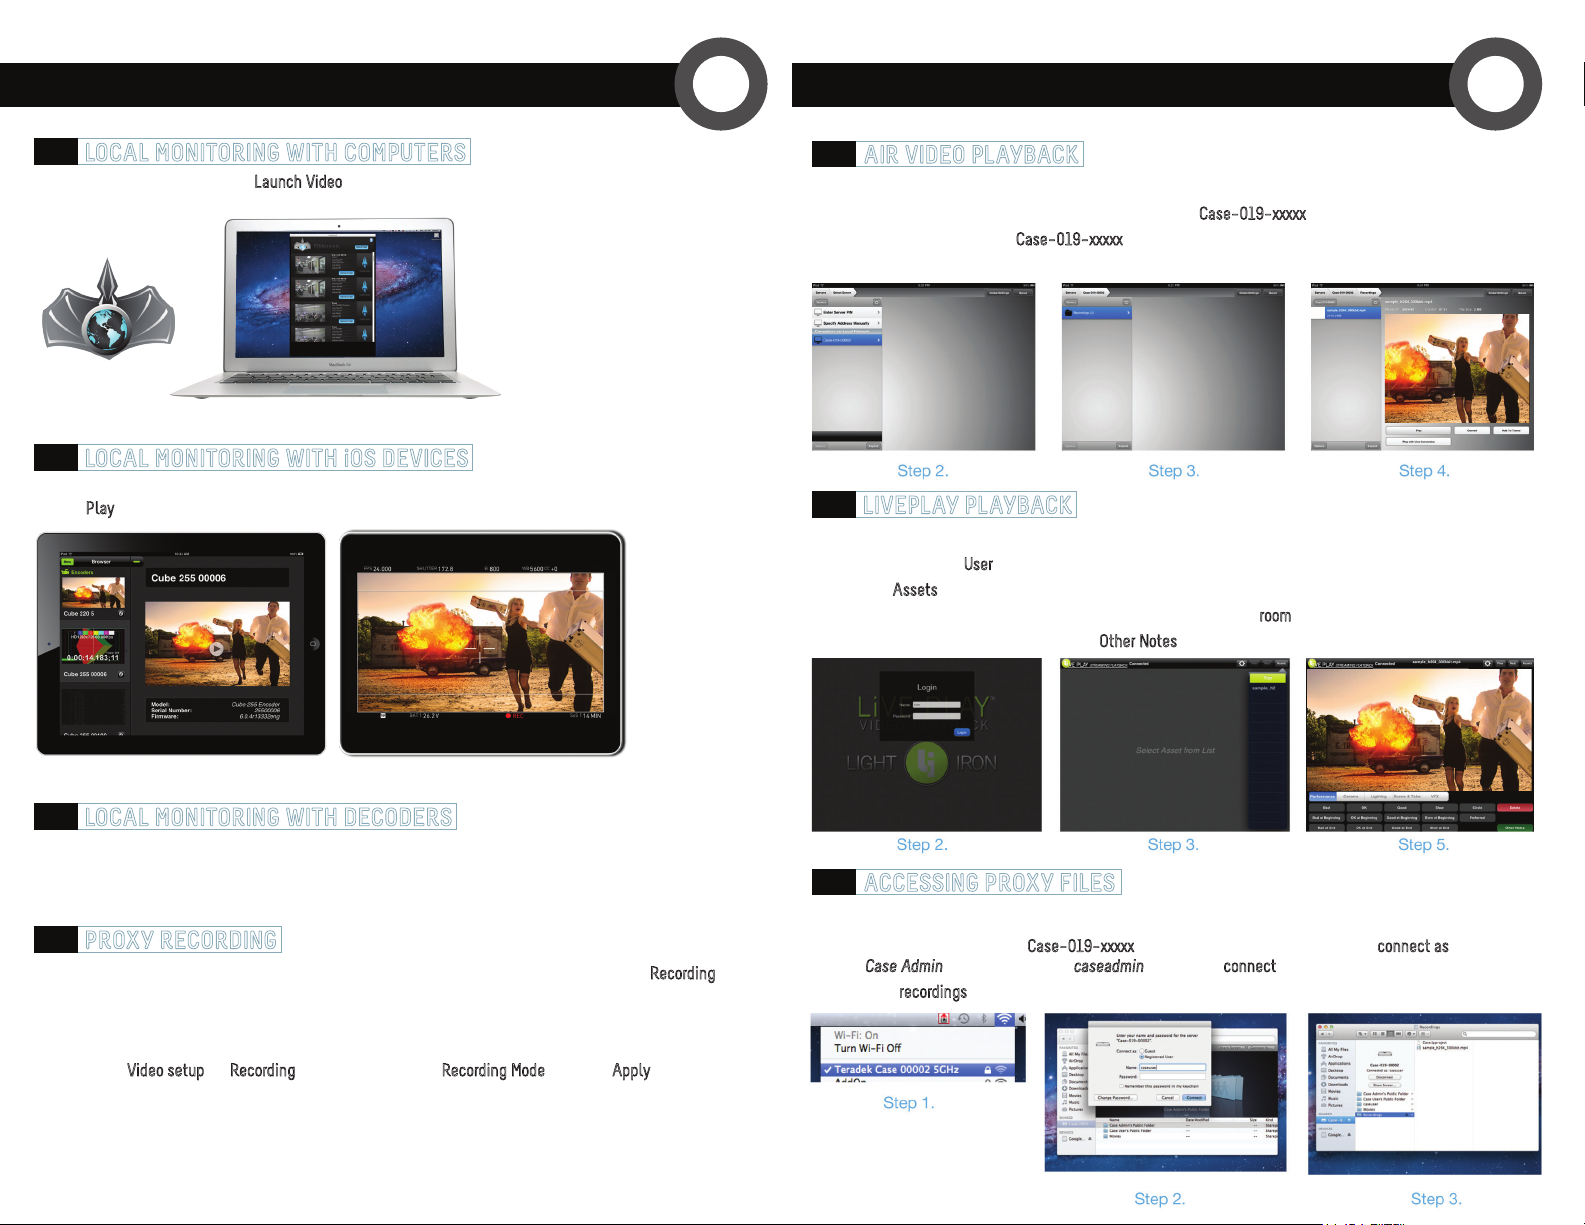
1. Open TeraCentral and click the Launch Video button.
3.2
LOCAL MONITORING WITH iOS DEVICES
1. Connect your iPad/iPhone to the Case network (See Network Connection, 2.1) and open TeraCentral.
Play to view the stream.
2. Click
4.1
AIR VIDEO PLAYBACK
1. Ensure you are connected to the Case network with your iPad (See Networking Connection, 2.1).
2. Open Air Video, press the
3. On the Server screen, select
4. To view, select the clip that you want and then press play.
4.2
LIVEPLAY PLAYBACK
1. Ensure you are connected to the Case network with your iPad (See Network Connection, 2.1).
2. Open LivePlay, enter
3. Press the
4. Comment on your recordings while a clip is playing by selecting a
5. Click on the buttons to comment or press
Assets button to view available clips. Select the clip that you want to play.
icon to add a server, select Case−019−xxxxx.
+
Case−019−xxxxx. Select recordings folder.
User into the name field and leave the password blank. Press the ‘Login’ button.
room (Camera, Lighting, etc).
Other Notes to enter free form text comments.
3.3
LOCAL MONITORING WITH DECODERS
Cube decoders purchased with Case will be paired to one of the encoders and will work upon power up.
3.4
PROXY RECORDING
Cubes purchased as part of Case require no additional configuration beyond ensuring that the
settings are configured for the camera you are using.
1. Open your Cube encoder’s web UI and log into the device (See Networking Connection, 2.2).
2. Navigate to
Video setup ➝ Recording, select Camera under Recording Mode and click Apply.
Recording
4.3
ACCESSING PROXY FILES
1. Connect to the Case network with your computer.
2. Open a Finder window, choose
Enter
Case Admin
3. Select the
, type the password
recordings folder to access proxy recordings.
Case−019−xxxxx from the shared menu and press the connect as button.
caseadmin
, then press connect.
 Loading...