

Page 1

2-109-225-13 (2) GB
DVD Player/
Video Cassette
Recorder
Operating Instructions
PAL
SLV-D930 GI
© 2004 Sony Corporation
Page 2

WARNING
Welcome!
To prevent fire or shock
hazard, do not expose the
unit to rain or moisture.
T o a void electrical shock,
do not open the cabinet.
Refer servicing to
qualified personnel only.
Mains lead must onl y be
changed at a qualified
service shop.
This appliance is classified as
a CLASS 1 LASER product.
The CLASS 1 LASER
PRODUCT MARKING is
located on the rear exterior.
CAUTION
The use of optical instruments
with this product will in crease
eye hazard. As the laser beam
used in this DVD player/
Video Cassette Reco rde r is
harmful to eyes, do not
attempt to disassemble the
cabinet.
Refer servicing to qualified
personnel only.
Notice for customers in
the United Kingdom and
Republic of Ireland
A moulded plug complyi ng
with BS13 6 3 is f itted to this
equipment for your safety and
convenience.
Should the fuse in the plug
supplied need to be repl aced, a
3 AMP fuse approved by
ASTA or BSI to BS1362, (i.e.,
marked with or mark)
must be used.
If the plug supplied with this
equipment has a detachable
fuse cover, be sure to attach
the fuse cover after you
change the fuse. Never use the
plug without the fuse cover. If
you should lose the fuse cover,
please contact your nearest
Sony service station.
Precautions
Safety
• This unit operates on 220 –
240 V AC, 50 Hz. Check
that the unit’s operating
voltage is identical with
your local power supply.
• To prevent fire or shock
hazard, do not place objects
filled with liquids, such as
vases, on the apparatus.
• The unit is not
disconnected from the AC
power source (mains) as
long as it is co n nected to
the wall outl et, even if the
unit itself has been turne d
off.
Installing
• Do not install the unit in a
confined space such as a
bookshelf or similar unit.
• Do not install the unit in an
inclined position. It is
designed to be operated in a
horizontal position only.
• Keep the unit and discs
away from equip men t with
strong magnets, such as
microwave ovens, or large
loudspeakers.
• Do not place heavy objects
on the unit.
• Do not place the unit on
surfaces (rugs, blankets,
etc.) or near materials
(curtains, draperies) th at
may block the ventilation
slots.
VIDEO Plus+ and PlusCode
are registered trademarks of
Gemstar Development
Corporation. The VIDEO
Plus+ system is manufactured
under license from Gemstar
Development Corporation.
Thank you for purchasing this
Sony DVD Player/Video
Cassette Recorder. Before
operating this player, please
read this manual thoroughly
and retain it for future
reference.
2
WARNING
Page 3

Caution
For use of the VCR
Television programmes, films,
video tapes and other
materials may be copyrighted.
Unauthorized rec ording of
such material may be contrary
to the provisions of the
copyright laws. Also, use of
this recorder with cable
television transmission may
require authorization from the
cable tele vision trans mitter
and/or programme owner.
For use of the DVD
player
This product incorporates
copyright protection
technology that is protected by
U.S. patents and other
intellectual property rig hts.
Use of this copyright
protection technology must be
authorized by Macrovision,
and is intended for home and
other limited viewing uses
only unless otherwise
authorized by Macrovision.
Reverse engineering or
disassembly is prohibited.
Caution
3
Page 4

Table of contents
2 WARNING
2 Welcome!
3 Caution
6 About this manual
6 This player can play the foll owi ng discs
7 Notes about discs
Getting Started
8 Step 1 : Unpacking
9 Step 2 : Setting up the remote commander
11 Step 3 : Connecting the DVD-VCR
14 Step 4 : Setting up the DVD-VCR with the Auto Set Up function
16 Step 5 : Selecting a language
17 Step 6 : Setting the clock
19 Step 7 : Presetting channels
Basic Operations
27 Playing discs
31 Guide to the on-screen display
34 Locking the disc tray (Child Lock)
35 Playing a tape
39 Recording TV prog ra mmes
43 Recording TV pr og ra m me s using the
VIDEO Plus+
47 Recording TV pr og ra m me s using the
timer
50 Checking/changing/cancelling timer
settings
4
Table of contents
®
system
Advanced Hookups
52 A/V Receiver hookup
54 S-Video hookup
DVD Settings and
Adjustments
55 Audio Setup
58 Screen Setup
61 Setting the display or sound track
language
63 Parental Control (limiting playback
by children)
Page 5

DVD Additional Operations
66 Using the DVD’s menu
68 Zooming into a scene
69 Changing the angles
70 Displaying the subtitle
71 Various play mode functions
(Programme play, Shuffle play,
Repeat play)
76 Changing the sound
77 Virtual surround setting
79 Playing an MP3 audio track
84 Playing JPEG image files
88 Playing VIDEO CDs with “PBC On/
Off” funct i o ns
VCR Additional Operations
90 Quick Timer Recording
92 Recording stereo and bilingual
programmes
94 Searching using index function
96 Adjusting the picture (tracking)
98 Changing menu options
100 Editing
Additional Information
103 General setup information
105 Troubleshooting
111 Glossary
113 Specifications
114 Index to parts an d controls
119 DVD Audio/Subtitle Language
120 Index
Table of contents
5
Page 6
About this manual
This player can play the
• This manual mainly explains operations
using the remote, but t he same op erations can
also be performed using the buttons on the
DVD-VCR having the same or similar
names.
• “DVD” may be used as a general t er m for
DVD VIDEOs, DVD-RWs/DVD-Rs, and
DVD+RWs/DVD+Rs.
• The meaning of the ico ns used in this man ual
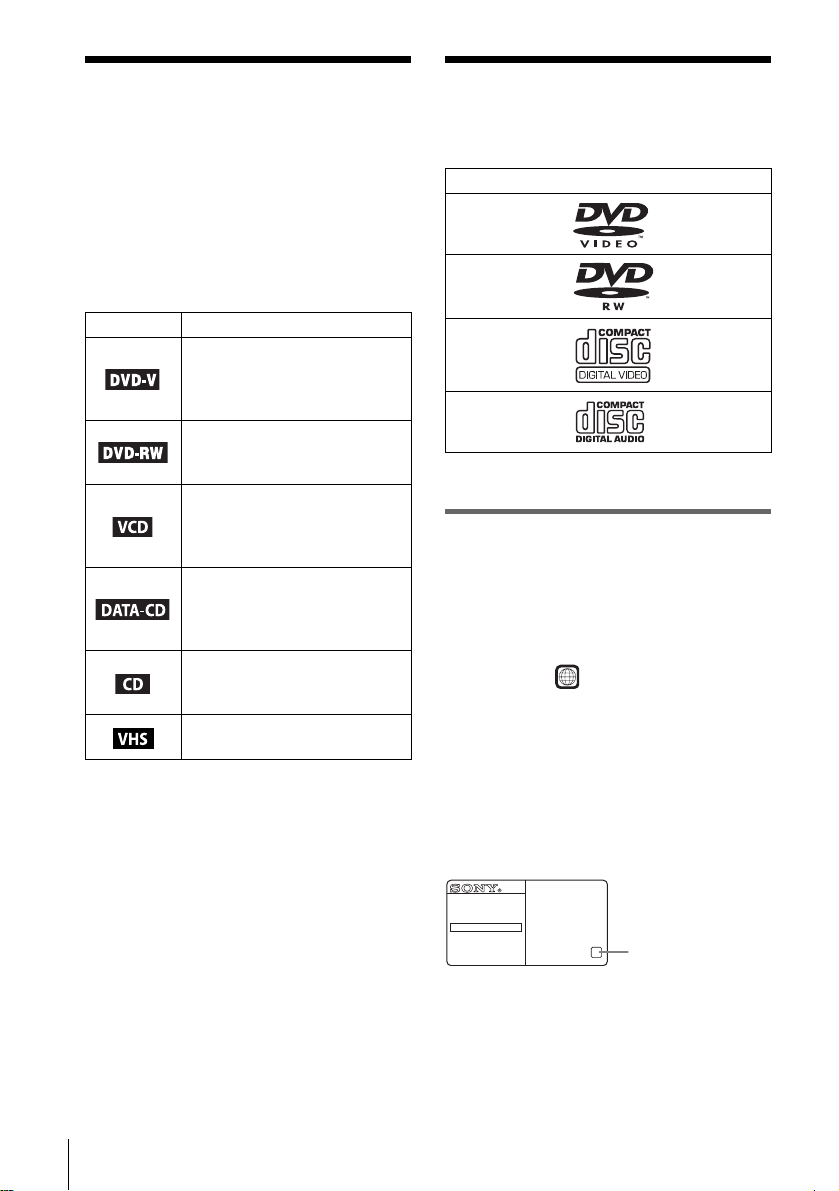
is described bel ow:
Icon Meaning
Functions available for DVD
VIDEOs and DVD-RWs/DVDRs in video mode or
DVD+RWs/DVD+Rs
Functions available for DVDRWs in VR (Video Recording)
mode
Functions available for VIDEO
CDs, Super VCDs or CD - R s/
CD-RWs in video CD format or
Super VCD format
Functions available for DATA
CDs (CD-ROMs/CD-Rs/CDRWs containing MP3
* audio
tracks or JPEG files)
Functions available for music
CDs or CD-Rs/CD-RWs in
music CD format
Functions available for VHS
VIDEOs
* MP3 (MPEG 1 Audio Layer 3) is a sta ndard form at
defined by ISO /MPEG w hich compre sses audio data.
following disc s
Format of discs
DVD VIDEO
DVD-RW
VIDEO CD
Music CD
“DVD VIDEO” and “DVD-RW” are
trademarks.
Region code
Your player has a reg i on code printed on the
back of the unit and only wil l play DVD VIDEO
discs (playback onl y) labelled with ide nt i cal
region code s. T his system is used to protect
copyrights.
DVDs labelled will also play on this
player.
If you try to play any ot her DVD VIDEO , the
message “Playback prohibited by a re a
limitations.” will appear on the TV screen.
Depending on the DVD VIDEO, no region code
indicatio n may be labelled even t hough playing
the DVD VIDEO is prohibited by area
restrictions.
ALL
6
About this manual
DVD PLAYER/
VIDEO CASSETTE RECORDER
MODEL NO.
SLV-DXXXX
NO.
~AC 220–240V 50Hz 20W
X
Region code
Page 7
Example of discs that the player
cannot play
The player cann ot p la y t he following disc s:
• All CD-ROMs (i ncluding PHOTO CDs)/CD Rs/CD-RWs othe r than those recorded in the
following formats:
– music CD format
– video CD format
– MP3 or JPEG format that confor ms to
ISO9660* Level 1/Level 2
• Data part of CD-Extras
• DVD-ROMs
• DVD Audio discs
• HD layer on Super Audio CDs
* A logical format of files and folders on CD-ROMs,
defined by ISO (International Standard
Organization).
Also, the player cannot play the following disc s:
• A DVD VIDEO with a different region code.
• A disc re corded in a color system other th an
PAL, such as NTSC or SECAM (this player
conforms to the PAL color system).
• A disc that has a non-standard shape (e.g.,
card, heart).
• A disc wit h paper or stickers on it .
• A disc that has t he adhesi ve of ce lloph ane tape
or a sticker still left on it.
Notes about DVD-RWs/DVD-Rs,
DVD+RWs/DVD+Rs, or CD-Rs/CDRWs
Some DVD-RWs/DVD-Rs, DVD+RWs/
DVD+Rs, or CD-Rs/CD-RWs cannot be played
on this player due to the recording quality o r
physical condition of the disc, or the
characteristics of the recording device and
authoring software.
The disc will not p lay if i t has not been correctly
finalized. Also, images in DVD-RW disc s with
CPRM* protection ma y not be played if they
contain a copy protection signal.
* CPRM (Content Protection for Recordable
Media) is a coding technology that protects
the copyright of image s.
Note on playback operations of
DVDs and VIDEO CDs
Some playba ck operatio ns of DVDs an d VIDEO
CDs may be intentionally set by software
producers. Since this player plays DVDs and
VIDEO CDs ac cording to the disc contents the
software producers designed, some playback
features ma y no t be a va il able . Als o, re fer to t he
instructions supplied with the DVDs or VIDEO
CDs.
Music discs encoded with
copyright protection technologies
This product is de si gned to playback di scs that
conform to the Compact Disc (CD) standard.
Recently, vari ous music discs encoded with
copyright pr ot ection technologies ar e m arketed
by some record companies. Please be aware that
among those discs, there are some that do not
conform to the CD standard and may not be
playable by this pr oduct.
Notes about discs
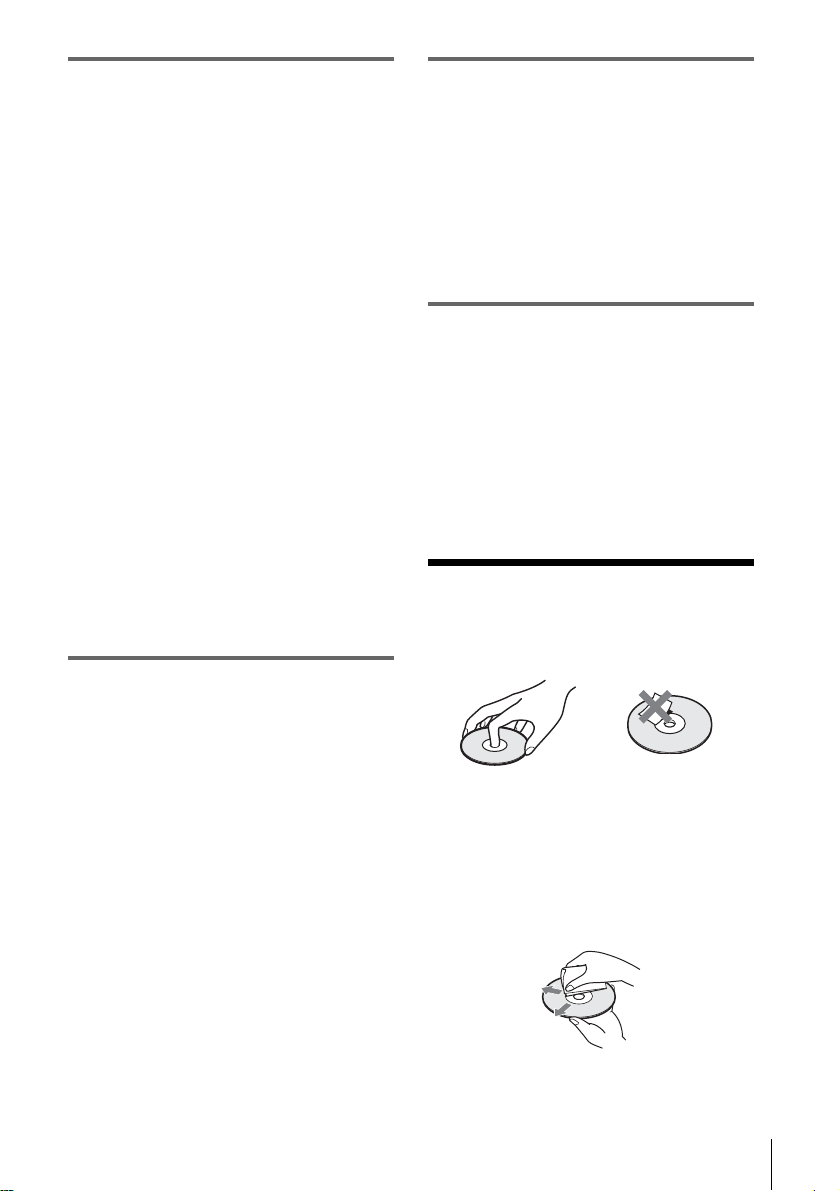
• To keep the disc clean, handle the disc by its
edge. Do not touch the sur fa ce.
• Do not expose the disc to direct sunlight or
heat sources such as hot air du cts, or l eave it in
a car parked in dir ect sunlight as the
temperature may rise considerably inside the
car.
• After play ing, store the disc in i ts case.
• Clean the disc with a cleaning cloth.
Wipe the disc from the centre out.
Do not use solven ts such as benzine, thinner,
commercially available cleaners, or anti-stat ic
spray intended for vinyl LPs.
Notes about discs
7
Page 8

Getting Started
Step 1 :Unpacking
Check that you have received the following items with the DVD-VCR:
• Remote commander • Aerial cable
• R6 (size AA) batteries • Audio cord
(pinplug ×2 y pinplug ×2)
•Video cord
(pinplug ×1 y pinplug ×1)
Note
• The supplied remote commander is for the exclusive use of this DVD-VCR.
8
Unpacking
Page 9

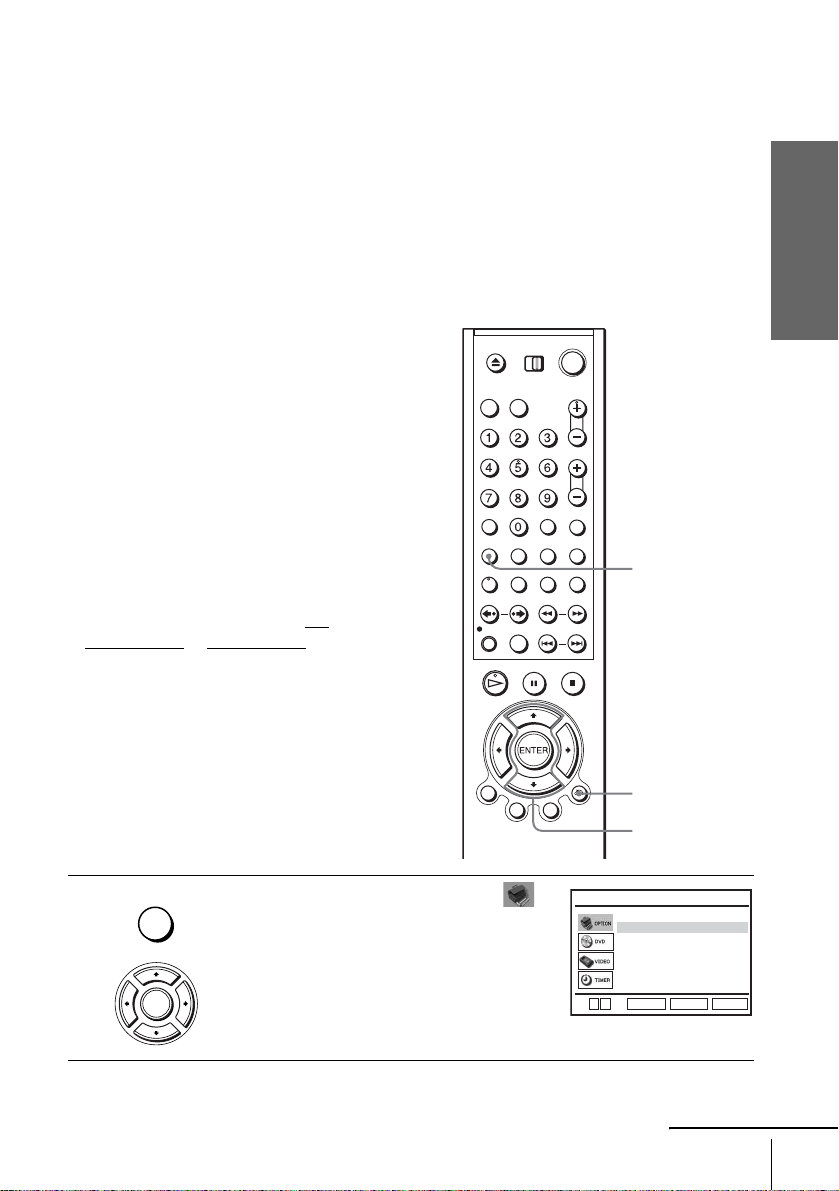
Step 2 : Setting up the remote commander
Inserting the batteries
Insert two size AA (R6) batteries
by matching the + and – on the
batteries to the diagram inside the
battery compartment.
Insert the negative (–) end first,
then push in and down until the
positive (+) end clicks into
position.
Getting Started
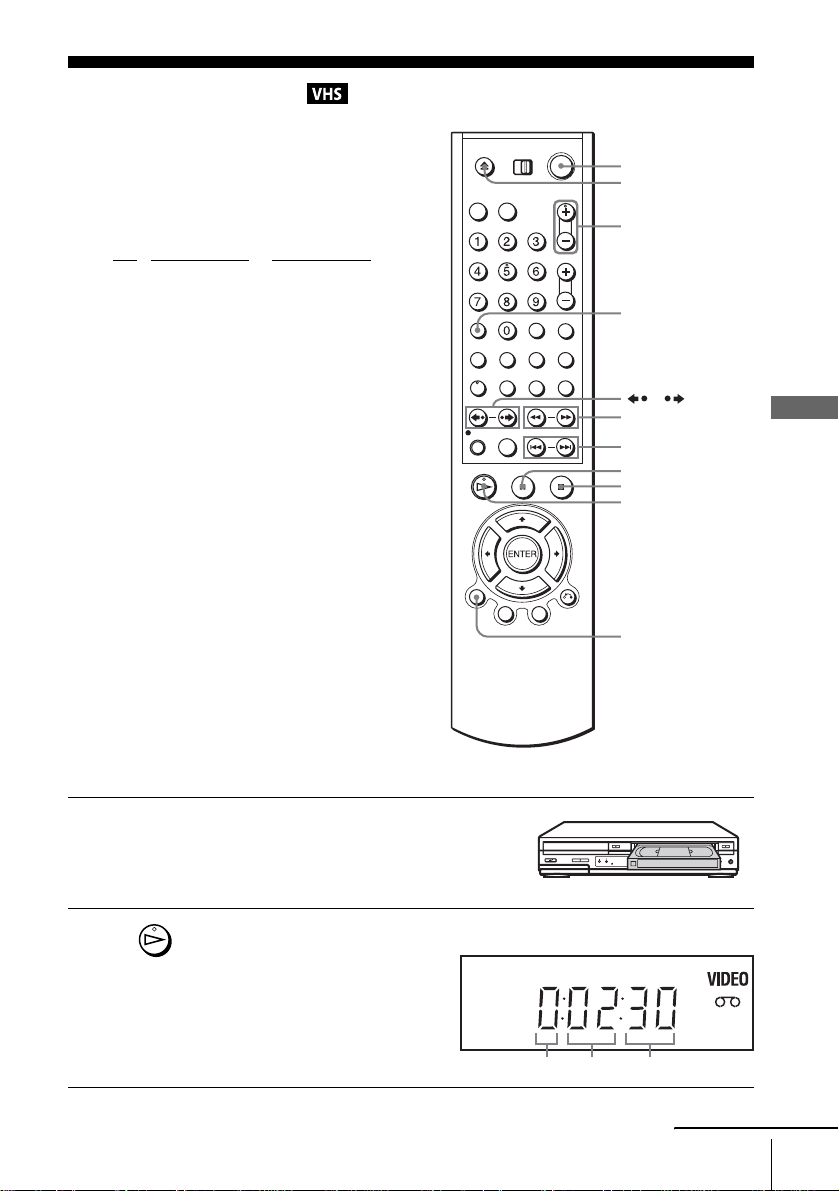
Using the remote
Remote sensor
commander
You can use this remote
commander to operate this DVDVCR and a Sony TV. Buttons on
the remote commander marked
with a dot (•) can be used to
operate your Sony TV.
If the TV does not have the
symbol near the remote sensor , this
remote commander will not
operate the TV.
To operate Set TV / DVD·VIDEO to
the DVD player DVD·VIDEO
the VCR DVD·VIDEO
your TV TV
Notes
• With normal use, the batteries should last about three to six mont hs.
• If you do not use the remote commander for an extended period of time, remove the batteries
to avoid possible damage from batter y le akage.
• Do not use a new battery with an old one.
• Do not use different types of batteries.
• Do not leave the remote commander in an extremely hot or humid place.
• Do not drop any foreign object into the remote casing, particularly when replacing the batteries.
• Do not expose the remote sensor to di re ct light from the sun or lighting apparatus. Doing so
may cause a malfunction.
the DVD-VCR
at the DVD-VCR
and point at the remote sens or at your TV
, then press SELECT DVD and point at the remote sensor at
, then press SELECT VIDEO and point at the remote sensor
TV /
DVD·VIDEO
SELECT
VIDEO
SELECT
DVD
continued
Setting up the remote commander
9
Page 10

Controlling other TVs with the remote commander
The remote commander is preprogrammed to control non-Sony TVs. If your TV is
listed in the following table, set the ap propriate manufacturer’s code number.
Set TV / DVD·VIDEO at the top of the remote commander to TV.
1
Hold down ?/1, and enter your TV’s code number using the numb er buttons.
2
Then release ?/1.
Now you can use the ?/1, VOL +/–, PROG +/–, MUTING*, TV/VIDEO , 0-9 and
-/--* buttons to control your TV. You can also use the buttons marked with a dot (•) to
control a Sony TV. To control the DVD-VCR, reset TV
DVD·VIDEO.
* for Sony TV only
Code numbers of controllable TVs
If more than one code number is listed, try entering th em on e at a time until you find
the one that works with your TV.
/ DVD·VIDEO to
Manufacturer Code number
Sony 01, 02
Akai 68
Ferguson 52
Grundig 10, 11
Hitachi 24
JVC 33
Loewe 45
Mivar 09, 70
NEC 66
Nokia 15, 16, 69
Notes
• If you enter a new code numbe r, the code number previously entered will be erased.
• If the TV uses a different remote con tro l syst em from the one programmed to work with the
DVD-VCR, you cannot control your TV with the remote comm a n der.
• When you replace the batteries of the remote commander, the code number may change. Set
the appropriate code number every time you replace the batterie s.
Manufacturer Code number
Panasonic 17, 49
Philips 06, 07 , 08
Saba 12, 13
Samsung 22, 23
Sanyo 25
Sharp 29
Telefunken 36
Thomson 43
Toshiba 38
10
Setting up the remote commander
Page 11
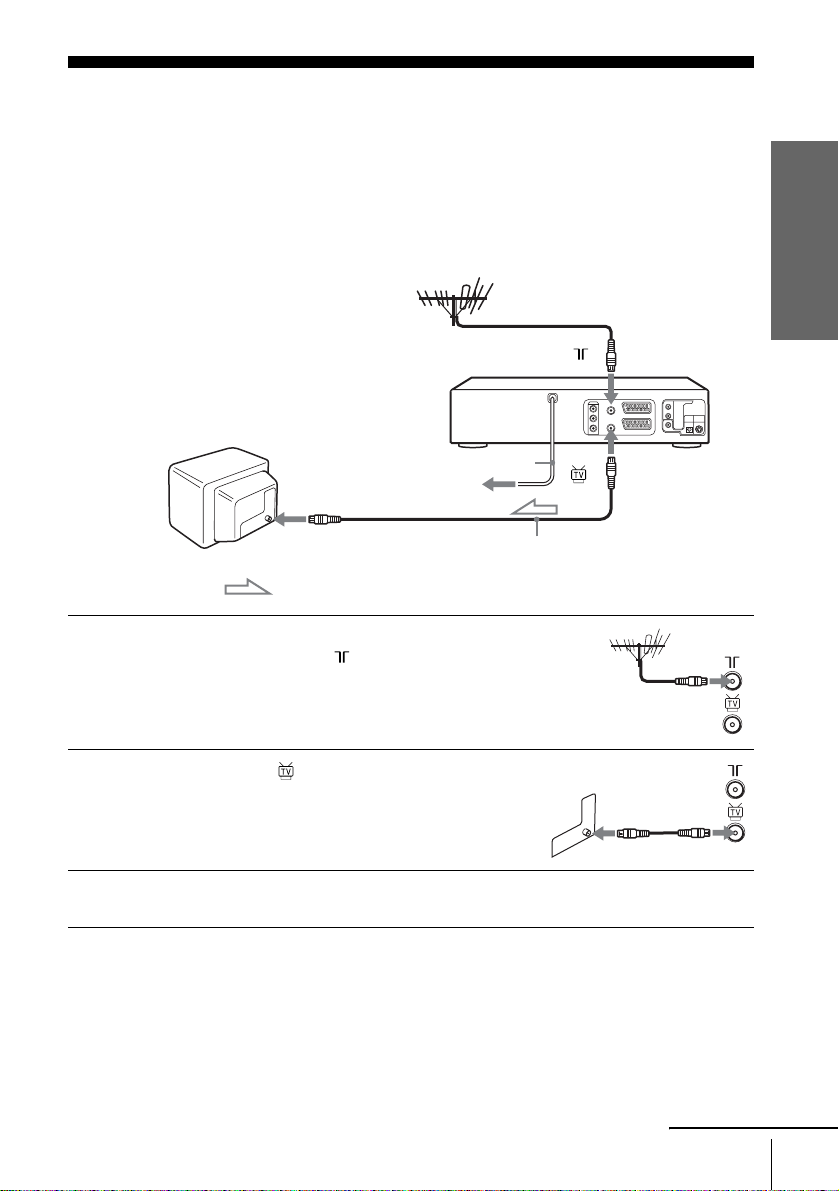
Step 3 : Connecting the DVD-VCR
1
Note that “Advanced Hookups” (page 52) explains additional hookup methods that
will optimize the picture and sound for a true “hometheatre” experience.
If your TV has a Scart (EURO-AV) connector, see page 12.
If your TV does not have a Scart (EURO-AV) connector
Mains lead
to mains
AERIAL IN
Aerial cable (supplied)
: Signal flow
Disconnect the aerial cable from yo ur TV
and connect it to on the rear panel o f the
DVD-VCR.
Getting Started
2
3
Connect of the DVD-VC R an d the
aerial input of your TV using the supplied
aerial cable.
Connect the mains lead to the mains.
Note
• When you connect the DVD-VCR a nd your TV only with an aerial ca ble, you have to tune
your TV to the DVD-VCR (see page 14).
continued
Connecting the DVD-VCR
11
Page 12
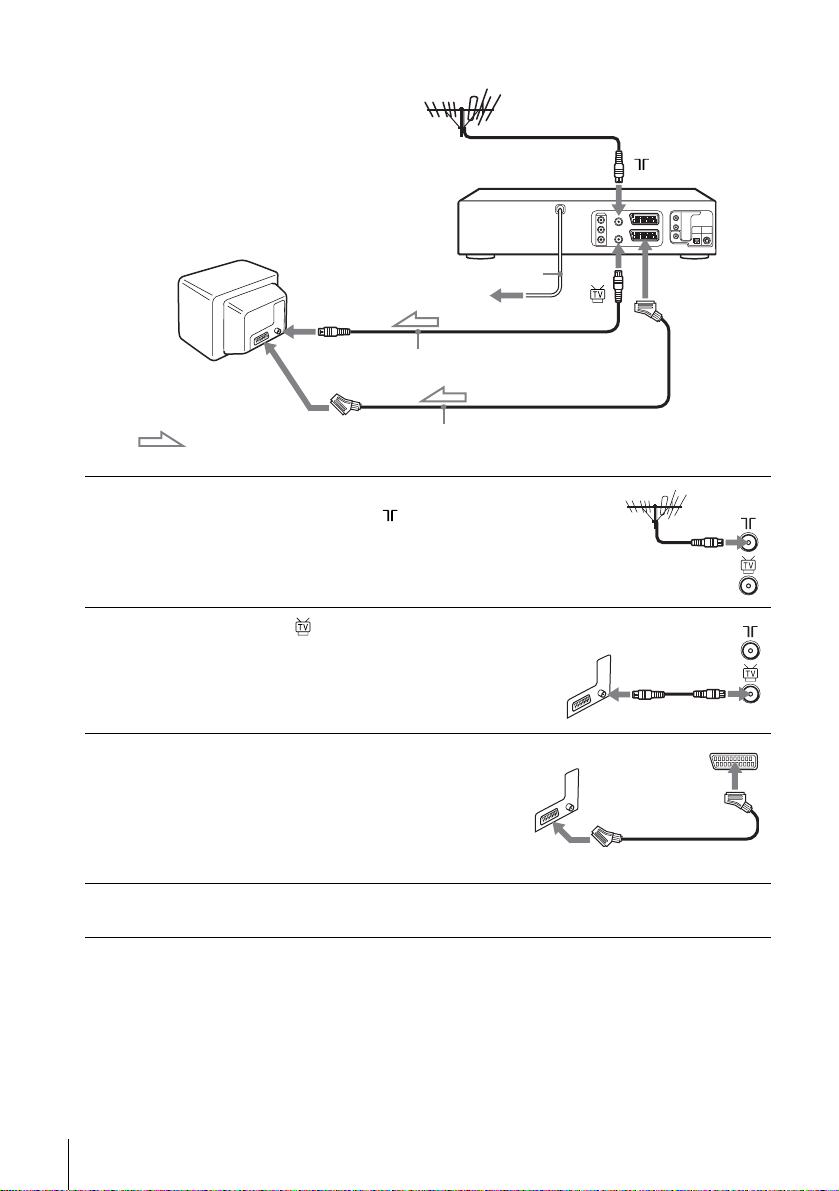
If your TV has a Scar t (EURO-AV) connector
1
2
3
Scart
(EURO-AV)
: Signal flow
Mains lead
AERIAL IN
Aerial cable (supplied)
Scart cable (not supplied)
Disconnect the aerial cable from your
TV and connect it to on the rear
panel of the DVD-VCR.
Connect of the DVD-VCR and the
aerial input of your TV using the
supplied aerial cable.
Connect LINE-1 (EURO AV) on the
DVD-VCR and the Scart (EURO-AV)
connector on the TV with the optional
Scart cable.
This connection improves picture and
sound quality.
LINE-1
(EURO AV)
to mains
4
12
Connecting the DVD-VCR
Connect the mains lead to the mains.
Page 13

Additional connections
T o a satellite or digital tuner
with Line Through
Using the Line Through
function, you can watch
programmes from a satellite or
digital tuner connected to this
DVD-VCR on the TV even
when the DVD-VCR is turned
off. When you turn on the
satellite or digital tuner, this
DVD-VCR automatically sends
the signal from the satellite or
digital tuner to the TV without
turning itself on.
Connect the satellite or digital tuner to the LINE-3 connector as shown above.
1
Turn off the DVD-VCR.
2
To watch a programme, turn on the satellite or digital tuner and the TV.
Notes
• This function may not work with some types of satellite or digital tuners.
• When the DVD-V CR is turned off, s et the TV to the v ideo channel.
• The Line Through function w i ll not op erate properly if “Power Save” in “OPTION ” menu is
set to “On.” Set “Power Save” to “Off” to ensure proper operation.
LINE-3
Scart cable (not supplied)
: Signal flow
LINE OUT
Getting Started
Connecting the DVD-VCR
13
Page 14
Step 4 : Setting up the DVD-VCR with the
Auto Set Up function
Before using the DVD-VCR for the first
time, set up the DVD-VCR using the Auto
Set Up function. With this function, you can
set TV channels, guide channels for the
VIDEO Plus+ system, and DVD-VCR clock
automatically.
Before you start…
• To control the DVD-VCR, set TV
DVD·VIDEO
remote (page 9).
to DVD·VIDEO on the
/
SET UP
V/v/B/b
ENTER
1
2
14
Setting up the DVD-VCR with the Auto Set Up function
Turn on your TV and set it to the video channel.
If your TV does not have a Scart (EURO-AV) connect or, tune the TV to
channel 21 (the initial RF channel for this DVD-VCR). Refer to your TV
manual for TV tuning instructions. If the picture does not appear clearly,
see “To ch ange the RF channel” on page 15.
Connect the mains lead to the mains.
The DVD-VCR automatically turns on and the
DVD-VCR starts searching for all of the
receivable channels and presets them (in the
appropriate order for your local area).
If you want to change the order of the channels
or disable unwanted programme positions, see
“Changing/disabling progra m me po sitio ns” on
page 21.
After the search is complete, the current time appears for any stations that
transmit a time signal. If the time do es not appear, set the clock manually.
See “Setting the clock” on page 17.
AUTO SETUP
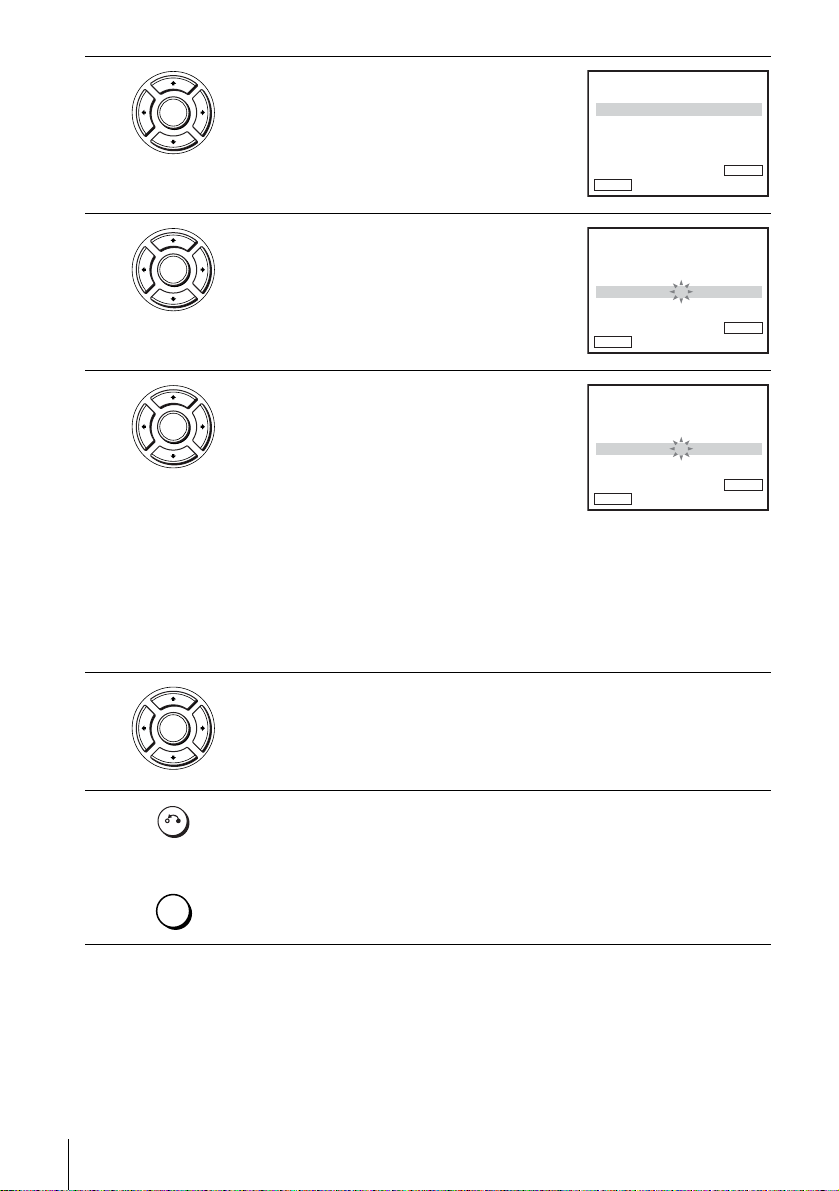
Please wait
RETURN
10%
SET UP
Page 15

To cancel the Auto Set Up function
Press SET UP.
To change the RF channel
If the picture does not appear clearly o n t he TV, change the RF channel on the DVDVCR and TV. Select “Install” in the “OPT ION” menu, then press V/v to select
“Video Output CH.” Select the RF channel by pressing the B/b buttons and press
ENTER. Then, tune the TV to the new RF channel so that a clear picture appears.
Tip
• If you want to change the lan gua ge for the on-screen display from the one preset in the Auto
Set Up function, see page 16.
Notes
• Whenever you operate the Auto Set Up function, some of the settings (VIDEO Plus+, timer,
etc.) will be reset. If this happens, you have to set them again .
• Auto preset starts automatically only when you plug in the mains lead for the first time after
you purchase the DVD-VCR.
• If you want to use the Auto Set Up function again, select “Install” in the “OPTION” menu,
then press V/v to select “Auto Setup.”
• Auto preset can be perform e d by pressi ng x on the unit
during power off with no tape inserted.
continuously for 5 seconds or more
Getting Started
Setting up the DVD-VCR with the Auto Set Up function
15
Page 16

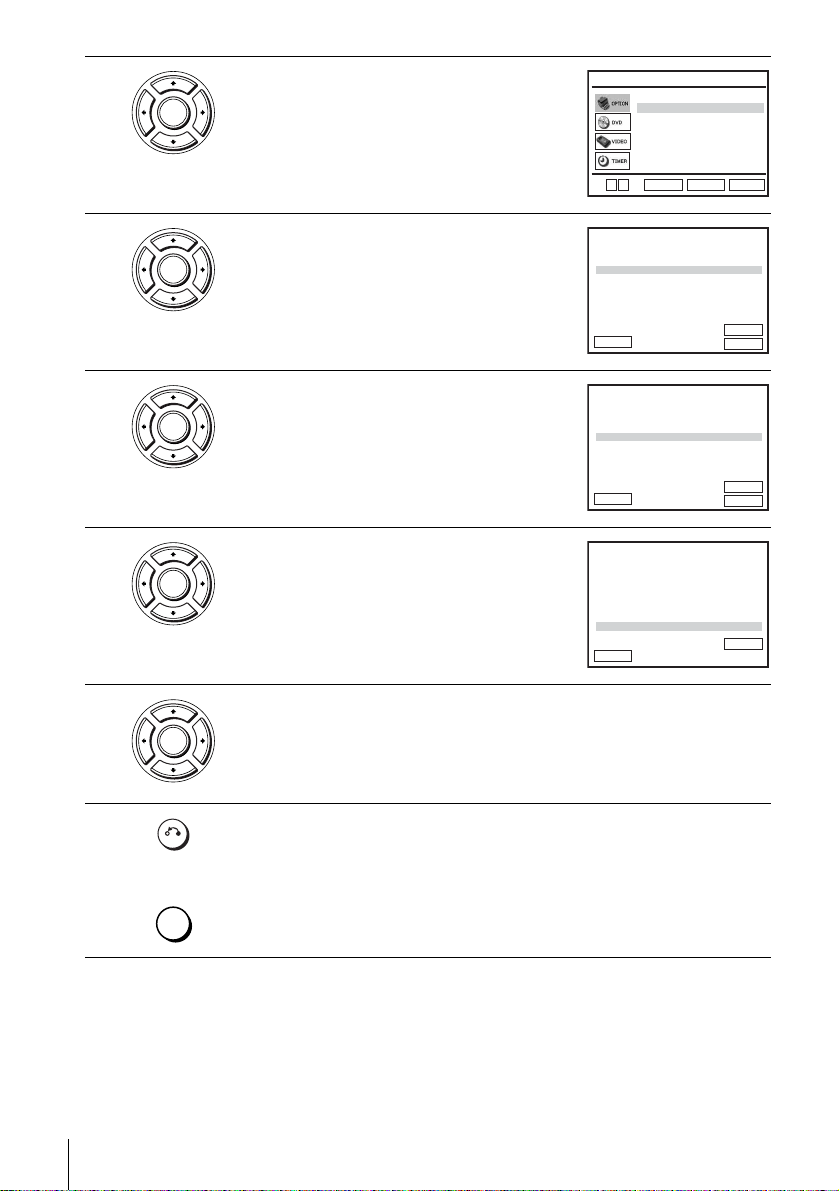
Step 5 :Selecting a language
You can change the on-screen display
language.
Before you start…
• Turn on the DVD-VCR and your TV.
• To control the DVD-VCR, set TV
/
DVD·VIDEO to DVD·VIDEO on the
remote (page 9).
• Set your TV to the vid e o ch a nn e l so that
the signal from the player appe ars on the
TV screen.
• If the DVD player is in play mode, you
cannot display the setup menu. Stop the
DVD playback.
1
SET UP
ENTER
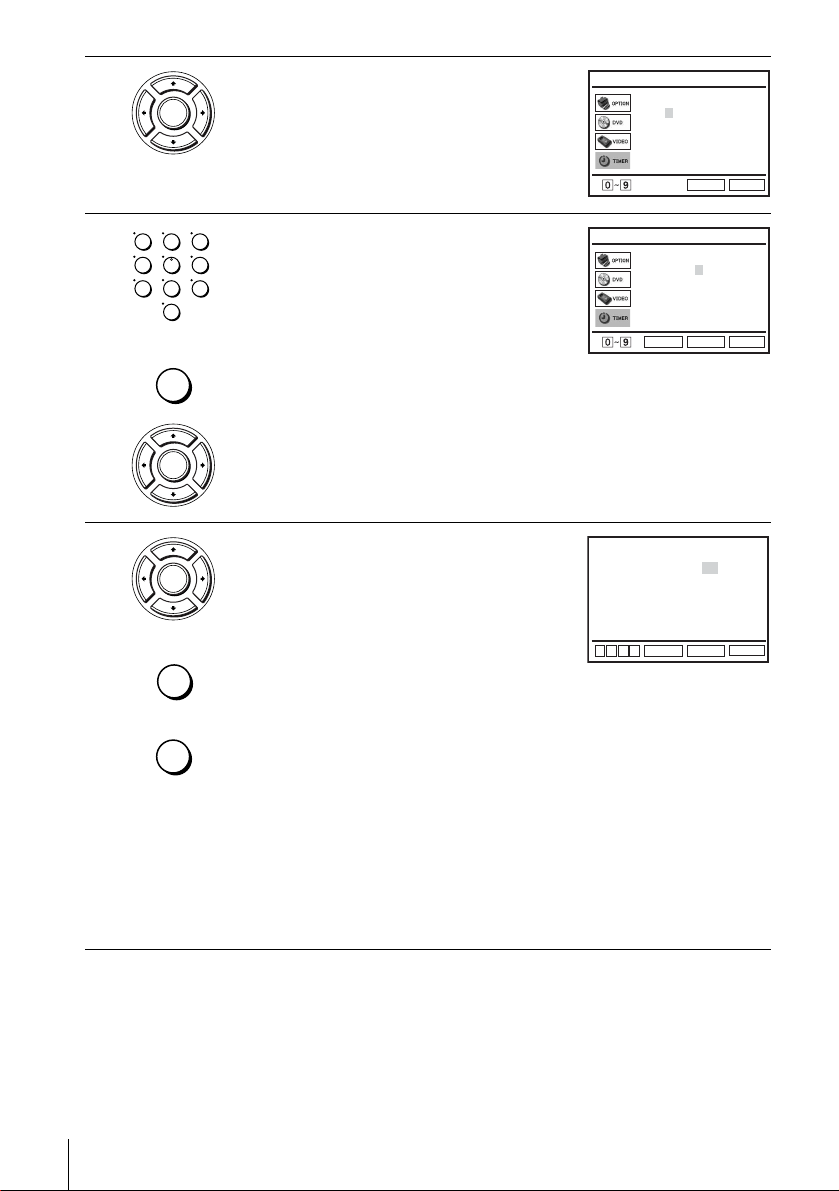
Press SET UP, then press V/v to select
(OPTION) and press ENTER.
Language
Clock
Install
User Set
Auto Power Off
Screen Messages
Power Save
V
v
SET UP
V/v
ENTER
ENTER
:English
RETURN
OPTION
[ Off ]
[ On ]
[ Off ]
SET UP
2
3
4
16
Selecting a language
ENTER
ENTER
SET UP
Press V/v to select “Language,” then press
ENTER.
The “LANGUAGE SET” menu appears.
B
English
Français
Deutsch
Español
Italiano
Nederlands
V
v
ENTER
Press V/v to select the desired language, then press ENTER.
Press SET UP to exit the menu.
LANGUAGE SET
SET UP
RETURN
Page 17
Step 6 : Setting the clock
You must set the time and date on the DVDVCR to use the timer features properly.
The Auto Clock Set function works only if a
station in your area is broadcasting a time
signal.
Before you start…
• Turn on the DVD-VCR and your TV.
• To control the DVD-VCR, set TV
DVD·VIDEO to DVD·VIDEO on the
remote (page 9).
• Set your TV to the video channel so that
the signal from the player appears on the
TV screen.
• If the DVD player is in play mode, you
cannot display the setup menu. Stop the
DVD playback.
/
Getting Started
SET UP
V/v/B/b
ENTER
1
2
3
SET UP
ENTER
ENTER
ENTER
Press SET UP, then press V/v to select
(OPTION) and press ENTER .
Press V/v to select “Clock,” then press
ENTER.
The “CLOCK SET” menu appears.
Press V/v to set the hour.
Language
Clock
Install
User Set
Auto Power Off
Screen Messages
Power Save
V
v
ENTER
Time Date
12:00 1/JAN /2004 THU
Auto Clock
B
vVb
ENTER
Time Date
18:00 1/JAN /2004 THU
Auto Clock
B
vVb
ENTER
continued
Setting the clock
:English
RETURN
CLOCK SET
Year
RETURN
CLOCK SET
Year
RETURN
OPTION
[ On ]
[ On ]
[ Off ]
[ On ]
[ Off ]
SET UP
SET UP
SET UP
17
Page 18

4
ENTER
Press b to select the minutes and set the
minutes by pressing V/v.
Time Date
18:30 1/JAN /2004 THU
Auto Clock
B
vVb
ENTER
CLOCK SET
Year
[ On ]
RETURN
SET UP
5
6
7
8
ENTER
ENTER
Set the day, month, and year in se quence by
pressing b to select the item to be set, and
press V/v to select the digits, then press b.
The day of the week is set automatically.
Press b to select “Auto Clock.”
Press V/v to select “On” for the setting of the
Auto Clock Set function.
The DVD-VCR automatically sets the clock
according to the time signal broadcast between
Time Date
18:30 28/SEP /2004 TUE
Auto Clock
B
vVb
ENTER
Time Date
18:30 28/SEP /2004 TUE
Auto Clock
CLOCK SET
Year
[ On ]
RETURN
CLOCK SET
Year
[ On ]
SET UP
the channels PR 1 to PR 5.
If you do not need the Auto Cloc k Set function,
vVb
ENTER
RETURN
SET UP
B
select “Off.”
Press ENTER to confirm the setting.
ENTER
SET UP
Tips
• If you set “Auto Clock” to “On,” the Auto Clock Set function is activated whenever the DVD-
• To change the digits wh ile setting, pr ess B to return to the item to be changed, and select the
Press SET UP to exit the menu.
VCR is turned off. The time is ad juste d autom atica ll y b y making r efer enc e to the ti me si gnal
from the station.
digits by pressing V/v.
18
Setting the clock
Note
• The clock disp lay appears when VIDEO mode is selected with no tape inserted or when the
DVD-VCR is turned off.
Page 19
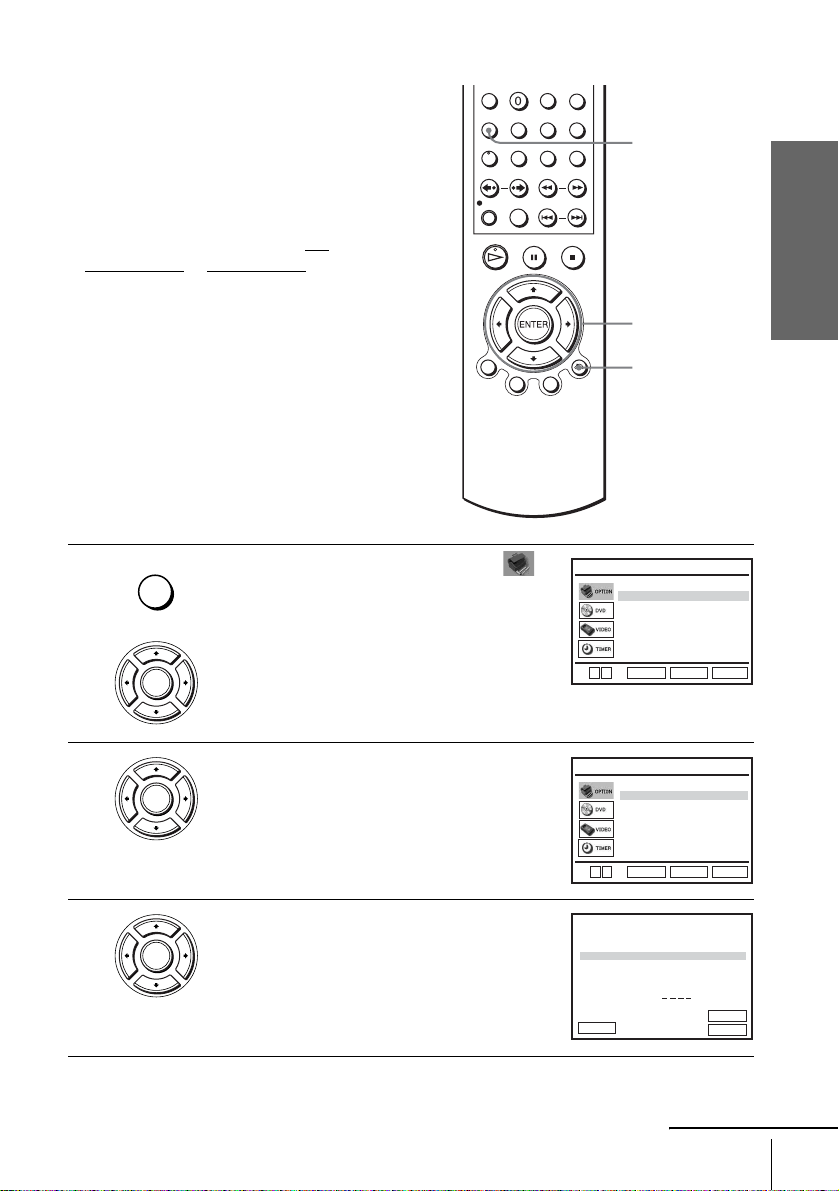
Step 7 : Presetting channels
If some channels could not be preset using
the Auto Set Up function, you can preset
them manually.
Before you start…
• Turn on the DVD-VCR and your TV.
• To control the DVD-VCR, set TV
DVD·VIDEO
to DVD·VIDEO on the
remote (page 9).
• Set your TV to the video channel so that
the signal from the player appears on the
TV screen.
• If the DVD player is in play mode, you
cannot display the setup menu. Stop the
DVD playback.
/
Getting Started
SET UP
V/v/B/b
ENTER
O RETURN
1
2
3
SET UP
ENTER
ENTER
ENTER
Press SET UP, then press V/v to select
(OPTION) and press ENTER .
Press V/v to select “Install,” then press
ENTER.
The “INSTALL” menu appears.
Press V/v to select “Manual Setu p,” then
press ENTER.
Language
Clock
Install
User Set
Auto Power Off
Screen Messages
Power Save [ Off ]
V
v
ENTER
Auto Setup
Manual Setup
Video Output CH
v
V
ENTER
TV STATION TABLE
CH
27
29
30
32
NAME
AAB –
LMN –
CDE –
I J K –
SWAPPING :
DELETE :
PR
1
2
3
4
5
VvB
RETURN
Presetting channels
OPTION
:English
[ Off ]
[ On ]
SET UP
RETURN
INSTALL
[
CH21
SET UP
RETURN
ENTER
CLEAR
continued
]
19
Page 20
4
ENTER
Press V/v to select the row which you want to
preset, then press b.
To display other pages for pr ogramme
positions 6 to 80, press V/v repeatedl y.
PR
CH
MFT
NAME
b
VvB
RETURN
MANUAL TUNING
: 5
: – – –
: –
: – – – –
ENTERMEMORY :
5
6
7
ENTER
ENTER
ENTER
Press B/b repeatedly until the channel you
want is displayed.
Press V/v to select “NAME,” then press b.
Enter the station name.
1 Press V/v to select a character.
Each time you press V, the character
PR
CH
MFT
NAME
b
VvB
RETURN
PR
CH
MFT
NAME
b
VvB
RETURN
PR
CH
MFT
NAME
MANUAL TUNING
: 5
: – – –
: –
: – – – –
MANUAL TUNING
: 5
: 33
: –
: – – – –
MANUAL TUNING
: 5
: 33
: –
: O – – –
changes as shown below.
b
A t B t … t Z t 0 t 1 t … t 9
t A
VvB
RETURN
2 Press b to set the next character.
The next space flashes.
To correct a character, press B/b until the character you want to correct
flashes, then reset it.
You can set up to 4 characters for the station name.
ENTERMEMORY :
ENTERMEMORY :
ENTERMEMORY :
8
9
20
Presetting channels
Press ENTER to confirm the station name.
ENTER
Press O RETURN, then press SET UP to exit the menu.
RETURN
SET UP
Page 21
If the picture is not clear
If the picture is not clear, you may use the Manual Fine Tuning (MFT) fu nction.
After step 5, press V/v to select “MFT.” Press B/b to get a clear picture. Then
press ENTER.
Tip
• The DVD-VCR must receive channel information for station names to appear automatically.
Note
• When adjusting MFT, the menu may become difficult to read due to interference from the
picture being rece ived.
Changing/disabling programme positions
After setting the channels, you can change
the programme positions as you like. If any
programme positions are unused or contain
unwanted channels, you can disable them.
Y ou can also change the station names. If the
station names are not displayed, you can
enter them manually.
Changing programme
positions
Before you start…
• Turn on the DVD-VCR and your TV.
• To control the DVD-VCR, set TV
DVD·VIDEO to DVD·VIDEO on the
remote (page 9).
• Set your TV to the video channel so that
the signal from the player appears on the
TV screen.
• If the DVD player is in play mode, you
cannot display the setup menu. Stop the
DVD playback.
/
Getting Started
SET UP
O RETURN
V/v
ENTER
1
SET UP
ENTER
Press SET UP, then press V/v to select
(OPTION) and press ENTER .
:English
Language
Clock
Install
User Set
Auto Power Off
Screen Messages
Power Save
V
v
ENTER
RETURN
continued
Presetting channels
OPTION
[ Off ]
[ On ]
[ Off ]
SET UP
21
Page 22
2
ENTER
Press V/v to select “Install,” then press
ENTER.
The “INSTALL” menu appears.
Auto Setup
Manual Setup
Video Output CH
v
V
ENTER
RETURN
INSTALL
[
CH21
SET UP
]
3
4
5
6
ENTER
ENTER
ENTER
ENTER
Press V/v to select “Manu al Setup,” then press
ENTER.
Press V/v to select the row containing the
programme position you want to change.
To display other pages for pr ogramme
positions 6 to 80, press V/v repeatedl y.
Press ENTER, then press V/v to move to the
desired programm e position.
PR
1
2
3
4
5
VvB
RETURN
PR
1
2
3
4
5
VvB
RETURN
PR
1
2
3
4
5CH29
VvB
RETURN
TV STATION TABLE
CH
NAME
27
AAB –
29
LMN –
30
CDE –
32
I J K –
SWAPPING :
TV STATION TABLE
CH
NAME
27
AAB –
29
LMN –
30
CDE –
32
I J K –
SWAPPING :
TV STATION TABLE
NAME
27
AAB –
30
CDE –
32
I J K –
LMN –
SWAPPING :
DELETE :
DELETE :
ENTER
CLEAR
ENTER
CLEAR
ENTER
Press ENTER to confirm the setting.
T o change the programme position of another station, repea t steps 4 through 6.
7
22
Presetting channels
Press O RETURN, then press SET UP to exit the menu.
RETURN
SET UP
Page 23
Disabling unwanted programme positions
After presetting channels, you can disable
unused programme positions. The disabled
positions will be skipped later when you
press the PROG +/– buttons.
Before you start…
• Turn on the DVD-VCR and your TV.
• To control the DVD-VCR, set TV
DVD·VIDEO
to DVD·VIDEO on the
remote (page 9).
• Set your TV to the video channel so that
the signal from the player appears on the
TV screen.
• If the DVD player is in play mode, you
cannot display the setup menu. Stop the
DVD playback.
/
Getting Started
CLEAR
SET UP
O RETURN
V/v
ENTER
1
2
SET UP
ENTER
ENTER
Press SET UP, then press V/v to select
(OPTION) and press ENTER .
Press V/v to select “Install,” then press
ENTER.
The “INSTALL” menu appears.
:English
Language
Clock
Install
User Set
Auto Power Off
Screen Messages
Power Save
V
v
v
V
RETURN
ENTER
Auto Setup
Manual Setup
Video Output CH
RETURN
ENTER
continued
Presetting channels
OPTION
[ Off ]
[ On ]
[ Off ]
SET UP
INSTALL
[
CH21
SET UP
]
23
Page 24

3
ENTER
Press V/v to select “Manu al Setup,” then press
ENTER.
PR
1
2
3
4
5
VvB
RETURN
TV STATION TABLE
CH
NAME
27
AAB –
29
LMN –
30
CDE –
32
I J K –
SWAPPING :
DELETE :
ENTER
CLEAR
4
5
6
7
ENTER
CLEAR
Press V/v to select the row which you want to
disable.
To display other pages for pr ogramme
positions 6 to 80, press V/v repeatedl y.
Press CLEAR.
The selected row will be cleared as shown on
the right.
PR
1
2
3
4
5
VvB
RETURN
PR
1
2
3
4
5
VvB
RETURN
TV STATION TABLE
CH
NAME
27
AAB –
29
LMN –
30
CDE –
32
I J K –
SWAPPING :
TV STATION TABLE
CH
NAME
27
AAB –
30
CDE –
32
I J K –
SWAPPING :
DELETE :
DELETE :
Repeat steps 4 and 5 fo r any ot her programme positions you want to
disable.
Press O RETURN, then press SET UP to exit the menu.
RETURN
SET UP
Note
• Be sure to select the programme position you want to disable correctly. If you disable a
programme position by mistake, you ne e d to re set tha t cha nne l m an ua ll y.
ENTER
CLEAR
ENTER
CLEAR
24
Presetting channels
Page 25
Changing the station names
You can change or ent er the station names
(up to 4 characters). The DVD-VCR must
receive channel information for station
names to appear automatically.
Before you start…
• Turn on the DVD-VCR and your TV.
• To control the DVD-VCR, set TV
DVD·VIDEO
to DVD·VIDEO on the
remote (page 9).
• Set your TV to the video channel so that
the signal from the player appears on the
TV screen.
• If the DVD player is in play mode, you
cannot display the setup menu. Stop the
DVD playback.
/
SET UP
Getting Started
V/v/B/b
ENTER
O RETURN
1
2
3
SET UP
ENTER
ENTER
ENTER
Press SET UP, then press V/v to select
(OPTION) and press ENTER .
Press V/v to select “Install,” then press
ENTER.
The “INSTALL” menu appears.
Press V/v to select “Manu al Setup,” then p ress
ENTER.
V
v
v
V
PR
1
2
3
4
5
VvB
RETURN
:English
Language
Clock
Install
User Set
Auto Power Off
Screen Messages
Power Save
RETURN
ENTER
Auto Setup
Manual Setup
Video Output CH
RETURN
ENTER
TV STATION TABLE
CH
NAME
27
AAB –
29
LMN –
30
CDE –
32
I J K –
33
SWAPPING :
DELETE :
continued
OPTION
[ Off ]
[ On ]
[ Off ]
SET UP
INSTALL
[
CH21
SET UP
ENTER
CLEAR
]
Presetting channels
25
Page 26
4
ENTER
Press V/v to select the row which you want to
change or enter the station name, then press b.
To display other pages for pr ogramme
positions 6 to 80, press v/V repeatedl y.
PR
CH
MFT
NAME
b
vVB
RETURN
MANUAL TUNING
: 5
: 33
: –
: – – – –
ENTERMEMORY :
5
6
7
8
ENTER
ENTER
ENTER
RETURN
SET UP
Press V/v to select “NAME,” then press b.
Enter the station name.
1 Press V/v to select a character.
Each time you press V, the character
PR
CH
MFT
NAME
b
vVB
RETURN
PR
CH
MFT
NAME
MANUAL TUNING
: 5
: 33
: –
: – – – –
MANUAL TUNING
: 5
: 33
: –
: O – – –
changes as shown below.
b
A t B t … t Z t 0 t 1 t … t 9
t A
vVB
RETURN
2 Press b to set the next character.
The next space flashes.
To correct a character, press B/b until the character you want to correct
flashes, then reset it.
You can set up to 4 characters for the station name.
Press ENTER to confirm the new name.
Press O RETURN, then press SET UP to exit the menu.
ENTERMEMORY :
ENTERMEMORY :
26
Presetting channels
Page 27
Basic Operations
Playing discs
Depending on the disc, some operations may
be different or restricted. Refer to the
operating instructions supplied with your
disc.
Before you start...
• Turn on the DVD-VCR and your TV.
• Set your TV to the video channel so that
the signal from the player appears on the
TV screen.
•Set TV
/ DVD·VIDEO to D VD·VIDEO,
then press SELECT DVD to control the
DVD player (page 9).
?/1
Z
/
m/M y
./>
X
x
H
Basic Operations
1
Press Z to open the disc tray and
place a disc on the disc tray.
with the playback side
facing down
continued
Playing discs
27
Page 28
2
Press H.
The disc tray closes and the DVD player starts playback.
The display window shows the
playback time.*
Depending on the di sc, a menu
may appear on the TV screen.
For DVDs, see page 66. For
VIDEO CDs, see page 88.
* “– – – – –” appears when no disc
is loaded.
Hour Minute Se c ond
Additional tasks
To Press
Stop play x
2*3
1
Pause play*
Resume play after pause H
Go to the next frame in pause mode SKIP
Go to the previou s f r ame in pause
mode
Go to the next chapter, track, or scene
in continuous play mode
Go back to the pre viou s chapter , track,
or scene in continuous play mo de
Replay the previous scene for 10
seconds in continuous play m ode*
(Instant Replay)
Briefly fast forward the current scene
for 30 seconds in continuous play
mode*
(Instant Advance)
Stop play and remove the disc Z
*1If you pause the DVD player for more than 5 minutes, the DVD player will automatically
stop.
2
For DVD VIDEOs and the DVD-RWs/DVD-Rs or DVD+RWs/DVD+Rs only
*
3
*
You can press SKIP up to 4 times. This allows you to fast forward up to 2 minutes in
total.
X
REPLAY
> NEXT on the remote or M on the unit
. PREV on the remote or m on the unit
2
REPLAY
SKIP
28
Playing discs
Tips
• The Instant Replay function is useful when you want to review a scene or dialogue that you
missed.
• The Instant Advance function is useful when you w ant to pa ss over a scene that yo u don’t
want to watch.
Page 29

Notes
• You may not be able to use the Instant Replay or Instant Advance function with some scenes.
• Switching between original (ORG) and play list (PL) within a disc recorded in VR mode is
possible only while the disc is stopped. Press TOP MENU to switch between ORG and PL.
To Resume playback for the current disc (Resume Play)
The DVD player remembers the point where you stopp ed the disc even if the DVD
player enters standby mode by pressing ?/1.
While playing a disc, press x to stop playback.
1
Press H.
2
The DVD player starts playback from the point where you stopped the disc in
Step 1.
Tip
• To begin playback from the top of the disc, press x twice then press H.
T o locate a point quic kl y b y pla ying a dis c in fast f orwa rd or fa st reve rse
in continuous play mode
Press m or M on the remote (or hold down m or M on the unit).
Each time you press the button, the playback speed changes as follows.
• DVD:
PLAY t FF1/FR1 t FF2/FR2 t FF3/FR3 t FF4/FR4 t FF5/FR5 t
FF6/FR6
• CD, MP3 and VIDEO CD:
PLAY t FF1/FR1 t FF2/FR2 t FF3/FR3
When you find the point you want, press H.
Basic Operations
Note
• The fast reverse operation may not be possible for CD , MP 3 and VIDEO CD depending on
the recording method .
To watch slow motion in continuous play mode (DVD and VIDEO CD
only)
Press X, then press
or y. With each press, th e pl ayback speed changes
cyclically as follows.
* You can not watch reverse slow motion with DVD-RW in VR mod e. Reverse slow motion
playback also may not be possible for som e VID E O CD s de pe nding on the recording
method.
To resume normal playba c k , p res s H.
Tips
• To make a video timer reservation during DVD playback, we recomm end performing the
operations under “Quick Timer Recording” (page 90).
• During DVD playback, DVD-VCR does not standby even if the VCR stops record ing .
continued
Playing discs
29
Page 30

Notes
• Y ou can change the screen type using the “SCREEN SETUP” menu. (See “Screen Setup” on
page 58.)
• Do not perform VIDEO playback while playing back a disc.
• If you play a DVD or VIDEO CD that has scratch es, the player may stop playback at the
point of the s cratch.
• Except for during normal pla y or FF1 pl ay, no sound is output.
• Discs recorded in VR mod e w i th Once Copy signal cannot be playe d be cause of copyright
protection.
• Playback of play lists longer than 10 hours recorded in VR mode is not gu aranteed.
Notes on playing DTS* sound tracks on a CD
• When playing DTS-encoded CDs, no audio out will be output from the analogue stereo jacks.
To avoid possible damage to the audio system, the consum er should take proper precautions
when the analogue stereo jacks of the DVD player are connected to an amplification system.
• Do not play DTS sound tracks without first connecting the DVD player to an audio
component having a built-in DTS deco der. The DVD player outputs the DTS signal via the
DIGITAL AUDIO OUT (COAXIAL or OPTICAL) jack even if “DTS” is set to “Off” in
“AUDIO SETUP” menu (page 56), and may affect your ears or cause your speakers to be
damaged.
Notes on playing DVDs with a DTS sound tra ck
• DTS audio signals are output only through the DIGITAL AUDIO OUT (COAXIAL or
OPTICAL) jack.
• When you play a DVD with DTS sound tracks, set “DTS” to “On” in “AUDIO SETUP”
menu (page 56). You cannot select DTS audio stream when “DTS” is set to “Off”.
• If you connect the player to audio equipment without a DTS de coder, do not set “DTS” to
“On” in “AUDIO SETUP” menu (page 56). A loud noise may come out fr om the speakers,
affecting your ears or causing the speakers to be dam aged.
* “DTS” and “DTS Digital Out” are trademarks of Digital Theater Systems, Inc.
30
Playing discs
Page 31

Guide to the on-screen display
You can chec k disc information duri ng
playback.
The displayed content s differ according to
the type of disc being played.
Number
buttons
Basic Operations
V/v/B/b
ENTER
O RETURN
DISPLAY
Press DISPLAY during playback. The following information appears ; type of disc,
current title/track, chapter, counter position, voice language, subtitle language and
Custom AV Mode setting. Refer to “ D VD A udio/Su btitle Lang uage” on pag e 119 for
the abbreviation of the language.
Current title/track number
Type of dis c
Current chapter number
Counter position
Voice language
Subtitle lan g ua ge
Custom AV Mode
Note
• You cannot select disc information items when the disc is stopped.
N
1/3
1/36
T 0:01:09
ENG 5.1CH
ENG (3/5)
Standard
B
vVb
09
~
ENTER
continued
Guide to the on-screen display
31
Page 32

To playback the desired title/track or chapter
You can playback the desired title/track or cha pt er using
this menu.
vVb
B
N
1/3
1/36
T 0:01:09
ENG 5.1CH
ENG (3/5)
Standard
09
~
ENTER
Press V/v during playback to select the desired item.
1
Press B/b to change the item.
2
Press ENTER to start playback.
3
Press DISPLAY or O RETURN to turn off the
4
menu.
The title/track or chapter icon will appear on the DVD playback screen followed by
the current title/track or chapter number and the counter position.
To playback from the desired title/track counter position
You can playback the desired title/track count er position
using this menu.
vVb
B
N
1/3
1/36
T 0:01:09
ENG 5.1CH
ENG (3/5)
Standard
09
~
ENTER
Press V/v during playback to sel ect the counter
1
position icon.
Enter the desired elapsed playing time of the current
2
title/track using the number buttons.
Press ENTER to start playback.
3
Press DISPLAY or O RETURN to turn off the
4
menu.
Tip
• You can cha nge the counter position information (pl aying time or remaining time) using
B/b (DVD and CD only).
DVD
Indication Counter information
T ∗ : ∗∗ : ∗∗ Elapsed pl ay ing time of the current title
T– ∗ : ∗∗ : ∗∗ Remaining time of the current title
C ∗ : ∗∗ : ∗∗ Elapsed playing time of the current chapter
C– ∗ : ∗∗ : ∗∗ Remaining time of the current chapter
CD
Indication Counter information
T ∗ : ∗∗ : ∗∗ Elapsed playing time of the current track
T– ∗ : ∗∗ : ∗∗ Remaining time of the current track
D ∗ : ∗∗ : ∗∗ Elapsed playing time of the disc
D– ∗ : ∗∗ : ∗∗ Remaining time of the disc
32
Guide to the on-screen display
Page 33
Notes
• The display may not change as operated depending on the disc.
• The display window cont in ue indicating the playing time even when the co u nter position
information on the on- scre e n disp la y is be ing changed.
• The remaining time of the current track and the disc may not be indicated correctly for Copy
Control CDs, CD EXTRA or CDs with jacket pictures on the disc, etc.
To adjust the playback pic ture (Cust om AV Mode)
You can adjust the video signal of the DVD or VIDEO CD (with PBC function off)
from the player to obtain the picture quality you want. Choose the setting that best
suits the programme you are watching.
Press V/v during play bac k to s elect the Cu stom AV
1
Mode icon.
Press B/b to change the setting.
2
Setting Video Setting Audio Setting
Dynamic 2 Produces a more dynami c
picture than Dynamic 1 by
further increasing the picture
Full (modulated) sound with
even cl earer treble and bass than
Dynamic 1.
contrast and the colou r in tensity.
Dynamic 1 Produces a bold dynamic picture
by increasing the picture contrast
Full (modulated) sound with
clear treble an d bass.
and the colo u r intensity.
Standard Off (Default setting)
Standard sound.
Displays a standard picture .
Cinema 1 White colours become brighter
Powerful sound with strong bass.
and black colours become richer,
and the colour contrast is
increased.
Cinema 2 Enhances details in dark areas by
increasin g th e black level.
Powerful sound with even
stronger bass than Cinema 1.
vVb
B
N
1/3
1/36
T 0:01:09
ENG 5.1CH
ENG (3/5)
Standard
09
~
ENTER
Basic Operations
Tip
• When you watch a movie, “C in ema 1” or “Cinema 2” is reco m mended.
Guide to the on-screen display
33
Page 34

Locking the disc tray (Child Lock)
You can lock the disc tray so that the disc tray
is not opened by mistake.
To lock the disc tray
When the DVD-VCR is turned on, press x, X and SELECT DVD on the unit at the
same time. “LOCK” appears in the disp lay window. The disc tray is locked.
To unlock the disc tray
Press x, X and SELECT DVD on the unit at the same time. The disc tray is
unlocked.
Notes
• If you lock the disc tray whil e open, the disc tray will be locked after closing.
• You cannot lock the disc tray when the DVD-VCR is turned off. If the DVD-VCR is turned
on, you can lock the disc tray either in play mode or stop mode.
SELECT DVD
xX
34
Locking the disc tray (Child Lock)
Page 35
Playing a tape
Before you start...
• Turn on the DVD-VCR and your TV.
• Set your TV to the video channel so that
the signal from the player appears on the
TV screen.
•Set TV
/ DVD·VIDEO to D VD·VIDEO,
then press SELECT VIDEO to control the
VCR (page 9).
?/1
Z
TRACKING +/–
CLEAR
/
m/M y
./>
X
x
H
DISPLAY
Basic Operations
1
2
Insert a tape.
The VCR starts playing automatically if
you insert a tape with its safety tab
removed.
Press H.
The display window shows the
playback time.
When the tape reaches the end,
it will rewind automatically.
Hour Minute Second
continued
Playing a tape
35
Page 36

Additional tasks
To Press
Stop play x
Pause play∗ X
Resume play after pause X or H
Fast-forward the tape M duri ng stop
Rewind the tape m dur i ng stop
Eject the tape Z
* If you pa use the VCR for more than 5 minut es, the VCR will automatica ll y resume play.
To turn off the power while rewinding (Rewind Shut Off)
Press ?/1 while the tape is rewinding. The power will turn off, but the tape will keep
rewinding until it reaches the end.
To play/search at various speeds
Playback options Operation
View the picture during fastforward or rewind
Play at high speed • During playback, briefly press M or m. The tape
Play in slow motion*
Replay the previous scene in
continuous play mode*
1
2
(Instant Replay)
Fast forward the cu rre nt scen e
for 30 seconds in continuous
play mode*
3
(Instant Skip)
Play at various speeds
(Shuttle play)
*1You can change the slow motion playback speed by pressing M or m.
2
*
For 10 seconds in SP or LP mode/for 15 seconds in EP mode
3
*
You can press SKIP up to 4 times. This allows you to fast forward up to 2 minutes in
total.
4
“REW” flashes in the display wind ow.
*
5
“FF” flashes in the display window.
*
During fast-forward, hold down M. During rewind, hold
down m.
continues to play at 5 times normal speed.
• During playback, hold down M or m. The tape
continues to play at 5 times normal speed. When you
release the button, normal playback resum es.
During pause, press y.
During playback, press REPLAY.
During playback, press SKIP.
During playback, press .or >. You can change the
playback speed as follows.
4
y –PLAY2 y –PLAY y –SLOW y STILL
REW*
y SLOW y PLAY y PLAY2 y FF*
5
36
Playing a tape
Page 37

To play a recently watched scene
You can immed iately rewind and playback the scene you wan t to watch again.
During playback, press REPLAY (see “To play/search at various speeds” above).
To skip playback
You can skip a sce ne t hat you do not want to watch and restart playback.
During playback, press SKIP (see “To play/search at various speeds” above).
To resume normal playback
Press H.
To set the colour system
If the playback picture has no colour, or streaks appear during playback, set “Colour
System” in the “USER SET” menu to conform to the system that the tape was
recorded in (see page 103). (Normally set the option to “Auto.”)
To use the time counter
Press CLEAR at the point on the tape that you want to find later. The counter in the
display window resets to “0:00:00.”
To display the counter on the TV screen, press DISPLAY during normal playback.
Tip
• Adjust the picture using the TRACKING +/– buttons if:
– Streaks appear while playing in slow motion.
– Bands appea r at the top or bottom while pausing.
– The picture shakes du ring pause.
Basic Operations
continued
Playing a tape
37
Page 38

Notes
• Tapes recorded in the LP mode on other VCRs can be played back on this VCR but the
picture quality ca nnot be guaranteed.
• The counter resets to “0:00:00” when ever a tape is reinserted.
• The counter stops counting when it comes to a por tion w ith no recording.
• Depending on your TV, the following may occur while playing an NTSC-recorded tape:
– The picture becomes bla ck a nd w hi te .
– The picture shakes.
– No picture appears on the TV screen.
– Black streaks app ear horizontally on the TV screen.
– The colour density increases or decreases.
• When 10 hours have passed, the counter in the di spl ay window returns to “0:00:00” and the
count starts over again.
• The sound is muted during playback at various speeds.
• The picture may show noise when playing at high speed in reverse.
• While playing a tape, you can disp la y the setup menu, but the remote commande r’s function
switches to DVD automatically. Press SET UP to exit the menu.
• Stop disc playback while playing back a vide o.
• The picture returns to normal playback from slow motion in reverse in 30 seconds.
38
Playing a tape
Page 39

Recording TV programmes
Before you start...
• Turn on the DVD-VCR and your TV.
• Switch the input selector on your TV so
that the signal from the player appears on
the TV scre en .
•Set TV
• To record from a satellite or digital tuner,
• Make sure the tape is longer than the total
/ DVD·VIDEO to D VD·VIDEO,
then press SELECT VIDEO to control the
VCR (page 9).
turn it on.
recording time.
Z
SELECT DVD
PROG +/–
Number
buttons
-/--
INPUT
SELECT
z REC
SP/LP
x
H
DISPLAY
Basic Operations
1
Insert a tape with its safety tab in place.
continued
Recording TV programmes
39
Page 40

2
P
• PROG/
TRACKING
INPUT
SELECT
• To record a normal channel, press PROG +/– until the programme
position number y ou want appears in the display window.
• To record from other equipment connected to one or more of the LINE
inputs, press INPUT SELECT until the connected line appears in the
display window.
3
4
SP / L
REC
To stop recording
Press x.
Press SP/LP to select the tape speed, SP or LP.
LP (Long Play) provides recording time twice as long as SP. However, SP
(Standard Play) produces better picture and audio quality.
Press z REC to start recording.
The recording in dicator lights up red in the display wi ndow.
Recording indicato r
40
Recording TV programmes
Page 41

To check the remaining time
Press DISPLA Y three times. With the display on, press DISPLA Y again to check the
remaining time.
STEREO
PAL
AUTO
Time counter Remaining tape length
In order to get an accurate remaining time indication, be sure “Tape Select” in the
“VIDEO SETUP” menu is set according to the tape type you use (see page98).
Maximum Recording Time
Tape Length SP LP
E-180 3 hrs 6 hrs
E-240 4 hrs 8 hrs
E-260 4 hrs 20 mins 8 hrs 40 mins
E-300 5 hrs 10 hrs
To watch another TV programme while recording
If your TV is connected to the VCR using A/V con nect ions, set the TV to the
1
TV’s antenna input; if not, skip this step.
Select another channel on the TV.
2
To watch a DVD while recording
PR 1
BBC 1
SP
20:00:2
REMAIN
61:4
Basic Operations
Press SELECT DVD to control the DVD player.
1
Press Z and place the disc on the disc tray.
2
Press H.
3
The disc tray closes and the DVD player starts playback. The TV screen will
automatically change t o t he DVD playback screen.
Recording TV programmes
continued
41
Page 42

To save a recording
To prevent accidental erasure, break
off the safety tab as illustrated. To
record on the tape again, cover the tab
hole with adhesive tape.
Tips
• To select a programme position, you can use the number buttons on the remote commander.
For two-digit numbers, press -/-- (ten’s digit) followed by the number buttons.
• If you connect addit io nal equipment to a LIN E connector or jack, you ca n se l ect the input
signal using the INPUT SELECT or PROG +/– buttons.
• The display appears on the TV screen indicating informat i on about the tape, but the
information will not be recorded on the tape.
• If you do not want to watch TV while re cording, you can turn off the TV. When using a
satellite or digital tuner, make sure to leave it on.
Notes
• If a tape has portions recorded in both PAL and NTSC systems, the time counter reading will
not be correct. This discre pancy is due to the difference betwee n the counting cycles of the
two video systems.
• The remaining tape length m a y not be in di cated accurately for short tape s such a s T-20 or
T-30, or tapes recorded in LP mode.
• The remaining time is inte nd ed fo r roug h measu r ement only.
• About 30 seconds after the tape begin s pla yba c k, the tap e remaining time will be displayed.
• You cannot record a DVD to a VCR tape.
• To watch a TV programme during video record ing , st op di sc playback.
Safety tab
42
Recording TV programmes
Page 43

Recording TV programmes using the
/
®
VIDEO Plus+
The VIDEO Plus+ system is the feature that
simplifies programming the VCR to make
timer recordings. Just enter the PlusCode
number listed in the TV programme guide.
The date, times, and programme position of
that programme are set automatically. You
can preset a total of six programmes,
including settings made with other timer
methods.
system
?/1
SELECT VIDEO
Number
buttons
Before you start...
• Check that the DVD-VCR clock is set to
the correct time.
• Turn on the DVD-VCR and your TV.
• Set your TV to the video channel so that
the signal from the player appears on the
TV screen.
•Set TV
/ DVD·VIDEO to D VD·VIDEO,
then press SELECT VIDEO to control the
VCR (page 9).
• When using a satellite or digital tuner, turn
it on.
• Insert a tape with its safety tab in place.
Make sure the tape is longer than the total
recording time.
• If the DVD player is in play mode, you
cannot display the setup menu. Stop the
DVD playback.
1
SUBTITLE
TIMER
Press TIMER.
The “TIMER METHOD” menu appears.
CLEAR
TV/VIDEO
INPUT SELECT
TIMER
x
V/v/B/b
ENTER
Standard
VideoPlus
v
V
ENTER
TIMER METHOD
SET UP
RETURN
Basic Operations
Recording TV programmes using the VIDEO Plus+® system
continued
43
Page 44
2
ENTER
Press V/v to select “VideoPlus,” then press
ENTER.
The “VideoPlus” menu appears.
VideoPlus
Code –––––––––
: 0–9
Code
B
Correct :
RETURN
SET UP
3
4
123
456
789
0
CLEAR
ENTER
ENTER
INPUT
SELECT
CLEAR
Press the number buttons to enter th e PlusCode
number.
If you make a mistake, press CLEAR and
re-enter the correct number.
You can also press B to delete the last entered
number.
Press ENTER.
The programme position, date, start and stop
times, tape speed and PDC (Programme
Delivery Control ) setting ap pe ar on the TV
screen.
• If “– –” appears in the “PR” (programme)
Code 1234–––––
ENTER
PR DATE START STOP SPEED
SA
35
19
19 : 00
––
––
––
––:––
––
––
––
––:––
––
––
––
––:––
––
––
––
––:––
––
––
––
––:––
B
vVb
ENTER
Code
Correct :
RETURN
20 : 00
––:––
––:––
––:––
––:––
––:––
CLEAR
VideoPlus
: 0–9
B
SET UP
SP
––
––
––
––
––
SETUP
PDC
Off
––
––
––
––
––
column (this may happen for local
broadcasts), you have to set the appropriate programme position
manually.
Press V/v to select the desired programme position. Without setting the
programme position, you cannot select the date, start and stop times, tape
speed and PDC setting.
• To record from other equipment connected to one or more of the LINE
inputs, press INPUT SELECT to display the connected line in the “PR”
position.
You will only have to do this operation once for the referred channel. The
VCR will then store your setting.
If the information is incorrect, press CLEAR to cancel the setting.
44
Recording TV programmes using the VIDEO Plus+® system
Page 45

5
ENTER
If you want to change the date, tape speed and
the PDC setting:
1 Press B/b to select the item you want to
change.
2 Press V/v to reset it.
• To record the same programme every day or
PR DATE START STOP SPEED
SA
––
––
––
––
––
35
––
––
––
––
––
B
vVb
––
––
––
––
––
19
19 : 00
––:––
––:––
––:––
––:––
––:––
ENTER
20 : 00
––:––
––:––
––:––
––:––
––:––
CLEAR
SP
––
––
––
––
––
SETUP
PDC
Off
––
––
––
––
––
the same day every week, see “Daily/weekly
recording” on page 45.
• To use the PDC function, set “PDC” to “On.” For details about the PDC
function, see “Timer recording with PDC signals” on page 45.
6
7
8
Press ENTER to confirm the setting.
ENTER
Press ENTER to confirm all settings.
ENTER
Press ?/1 to turn off the DVD-VCR.
The indicator appears in the display window and the VCR stands by for
recording.
To reco rd from other equipment, leave the connected equipment switched
on.
To stop recording
To stop the DVD-VCR while recording, press SE LECT VIDEO and then press x.
Daily/weekly recording
In step 5 above, press v to sel ect the recording pattern. Each time you press v, the
indication changes as shown below. Press V to change the indication in re v erse order.
today t DLY (Monday to Sunday) t W-SA (every Saturday) ..... t
W-SU (every Sunday) t 1 month later t (dates count down) t today
Basic Operations
Timer recording with PDC signals
Some broadcast systems transmit PDC signals with their TV programmes. These
signals ensure that your timer recordings are made regardless of broadcast delays,
early starts, or broadcast interruptions.
To u se the PDC function, set “PDC” to “On” in step 5 above. You can also use the
PDC function for a source connected t o one or more of the LINE inputs.
continued
Recording TV programmes using the VIDEO Plus+® system
45
Page 46

To record satellite broadcasts
If you connect the satellite tuner and the VCR, you can record satellite programmes.
Turn on the satellite tuner.
1
On the satellite tuner , select the satellite programme for which you want to make
2
a timer setting.
Keep the satellite tuner turned on until the VCR finishes recording the satellite
3
programme for whi ch you have made a timer setting.
To watch another TV programme after setting the timer
If your TV is connected to the VCR using A/V conn ections, set the TV to the
1
TV’s aerial input; if not, skip this step.
Select another channel o n t he T V.
2
Tips
• To set the channel, you can also use the V/v or number buttons.
• If the indicator appears, this means that the VCR is currently recording this programme.
• You can also do the following tasks while the VCR is recording:
– Reset the counter (pa ge 37).
– Display tape informa tion on the TV screen (page 41).
To use the Auto Tape Speed function
In step 5 above, press v to select “Auto.” When you are recording a programme in
the SP mode and the remaining tape length becomes shorter than the recording time,
the recording tape speed is automatically changed to the LP mode. Note that some
noise will appear on the picture when the tape speed is changed. To operate this
function correctly, the “Tape Select” setting in the “VIDEO SETUP” menu must be
accurate (see page 98).
Tips
• To set the line input video source, you can also use the INPUT SELECT button.
• You can set the extended time for the VIDEO Plus+ setting by 10, 20, 30, 40, 50, or 60
minutes. Se t “VideoPlus Extend” in the “USER SET” menu to th e d esired extend ed time on
page 103.
• To check, change, or cancel the programme setting, see “Checking/changing/cancelling timer
settings” on page 50.
Notes
• If the PDC signal is too weak or the broadcasting stat io n f ailed to transmit PDC signals, the
VCR will start recording at the set time without using the PDC function.
• The indicator flashe s in the display window when you press ?/1 with no tape in serted.
46
Recording TV programmes using the VIDEO Plus+® system
Page 47

Record ing TV programmes us ing the timer
/
You can preset up to six programmes at a
time.
Before you start…
• Check that the DVD-VCR clock is set to
the correct time.
• Turn on the DVD-VCR and your TV.
• Switch the input selector on your TV so
that the signal from the player appears on
the TV scre en .
•Set TV
/ DVD·VIDEO to D VD·VIDEO,
then press SELECT VIDEO to control the
VCR (page 9).
• When using a satellite or digital tuner, turn
it on.
• Insert a tape with its safety tab in place.
Make sure the tape is longer than the total
recording time.
• If the DVD player is in play mode, you
cannot display the setup menu. Stop the
DVD playback.
?/1
SELECT VIDEO
Number
buttons
TIMER
INPUT
SELECT
x
V/v/B/b
ENTER
Basic Operations
SUBTITLE
1
TIMER
Press TIMER.
The “TIMER METHOD” menu appears.
Recording TV programmes using the timer
TIMER METHOD
Standard
VideoPlus
v
V
ENTER
SET UP
RETURN
continued
47
Page 48

2
ENTER
Press V/v to select “Standard,” the n press
ENTER.
The timer programm ing menu appears.
PR DATE START STOP SPEED
B
vVb
PDC
SET UP
3
4
5
ENTER
INPUT
SELECT
ENTER
ENTER
Set the programme position, date, st art and
stop times, tape speed and PDC function:
PR DATE START STOP SPEED
PDC
1 Press b to select each item in turn.
2 Press V/v to set each item.
To correct a setting, press B to return to that
setting and reset.
• To recor d the sam e pr o gr a m m e every day or
the same day every week, see “Daily/weekly recording” on page 49.
• To use the PDC function, set “PDC” to “On.” For details about the PDC
function, see “Timer recording with PDC signals” on page 45.
• To record from other equipment connected to one or more of the LINE
inputs, press INPUT SELECT to display the connected line in the “PR”
position.
Press ENTER to confirm the setting.
To ent er another setting, press V/v to select the next row and repeat step 3.
Press ENTER to confirm all settings.
B
vVb
CLEAR
SET UP
6
Press ?/1 to turn off the DVD-VCR.
The indicator appears in the display window and the VCR stands by for
recording.
To reco rd from other equipment, leave the connected equipment switched
on.
To stop recording
To stop the DVD-VCR while recording, press SELECT VIDEO and then press x.
48
Recording TV programmes using the timer
Page 49

Daily/weekly recording
In step 3 above, press v to sel ect the recording pattern. Each time you press v, the
indication changes as shown below. Press V to change the indication in re v erse order.
today t DLY (Monday to Sunday) t W-SA (every Saturday) ..... t
W-SU (every Sunday) t 1 month later t (dates count down) t today
To use the Auto Tape Speed function
In step 3 above, press v to select “Auto.” When you are recording a programme in
the SP mode and the remaining tape length becomes shorter than the recording time,
the recording tape speed is automatically changed to the LP mode. Note that some
noise will appear on the picture when the tape speed is changed. To operate this
function correctly, the “Tape Select” setting in the “VIDEO SETUP” menu must be
accurate (see page 98).
Tips
• To set the line input video source, you can also use the INPUT SELECT button.
• To check, change, or cancel the programme setting, see “Checking/changing/cancelling timer
settings” on page 50.
Notes
• When setting the timer with PDC signals, enter the start times exactly as indicated in the TV
programme guide. Otherwise, the PDC function will not work.
• If the PDC signal is too weak or the broadcasting station failed to transmit PDC signals, the
VCR will start recording at the set time without using the PDC function.
• The indicator flashes in the display wind ow when yo u pre ss ?/1 with no tape inserted.
To watch another TV programme after setting the timer
If your TV is connected to the VCR using A/V con nect ions, set the TV to the
1
TV’s aerial input; if not, skip this step.
Select another channel on the TV.
2
Basic Operations
Tips
• To set the channel, you can also use the V/v or number buttons.
• If the indicator appears, this means that the VCR is currently recording this programme.
• You can also do the following tasks while the VCR is recording:
– Reset the counter (page 37).
– Display tape information on the TV scree n (page 41) .
Recording TV programmes using the timer
49
Page 50

Checking/changing/cancelling timer settings
Before you start…
• Check that the DVD-VCR clock is set to
the correct time.
• Turn on the DVD-VCR and your TV.
• Switch the input selector on your TV so
that the signal from the player app ears on
the TV screen.
•Set TV
• When using a satellite or digital tuner , tu rn
• Insert a tape with its safety tab in place.
• If the DVD player is in play mode, you
/ DVD·VIDEO to DVD·VIDEO,
then press SELECT VIDEO to control the
VCR (page 9).
it on.
Make sure the tape is longer than the total
recording time.
cannot display the setup menu. Stop the
DVD playback.
CLEAR
SET UP
V/v/B/b
ENTER
1
SET UP
Press SET UP, then press V/v to select (TIMER) and press ENTER.
The “TIMER METHOD” menu appears.
ENTER
2
ENTER
Press V/v to select “Standard,” the n press ENTER.
• If you want to change a setting, go on to the next step.
• If you do not need to change the settings, press SET UP to exit the menu.
SET UP
50
Checking/changing/cancelling timer settings
V
v
Standard
VideoPlus
ENTER
TIMER METHOD
SET UP
RETURN
Page 51

3
ENTER
CLEAR
Press V/v to select setting you wa n t to c h ange
or cancel.
• To change the setting, press B/b to select
the item you want to change, and press V/v
to change it.
• To cancel the setting, press CLEAR.
PR DATE START STOP SPEED
0:0
2
MO 30
35
WE 02
20 :00:30 LP
60 :30:00
TU 30
B
vVb
22
02
ENTER
2
01:00 SP
32
22
CLEAR
Auto
PDC
Off
Off
Off
SET UP
4
5
Press ENTER to confirm the setting.
ENTER
Press ENTER to confirm all settings.
ENTER
If any settings remain, turn off the VCR to return to recording standby.
To reco rd from other equipment, leave the connected equipment switched
on.
When the timer settings overlap
The programme that starts first has priority and the second programme st arts
recording only after the first programme has finished. If the programmes start at the
same time, the programme lis ted first in the menu has priority.
Programme 1
Programme 2
will be cut off
Programme 1
Programme 2
about 20 seconds will be cut off
about 20 seconds
Basic Operations
Checking/changing/cancelling timer settings
51
Page 52

Advanced Hookups
A/V Receiver hookup
A Use this hookup if your A/V receiver has a Dolby* Surround (Pro
Logic) decoder and 3 to 6 speakers
You can enjoy the Dolby Surround effects onl y when playing Dolby Surround audio
or multi-channel audio (Dolby Digital) discs.
* Manufactured under license from Dolby Laboratories. “Dolby,” “Pro Logic,” and the double-
D symbol are trademarks of Dolby Laboratories.
DVD-VCR
A
Stereo audio cord (supplied)
(red)
R
AUDIO
L
(white)
l: Signal flow
Rear (L)
52
A/V Receiver hookup
[Speakers]
Subwoofer
VIDEO
to OUT AUDIO L/R
(red)(white)
to audio input
[Speakers]
Amplifier (receiver) with Dolby
Surround decoder
Front (R)Front (L)Rear (R)
Centre
Page 53

B Use this hookup if your A/V receiver has a Dolb y Digital, MPEG audi o
or DTS* decoder, a digital input jack and 6 speakers
This connection will allow you to use the Dolby Digital, MPEG audio or DTS decoder
function of your AV amplifier (receiver). You are not able to enjoy the surround sound
effects of this player. You must make connections using and .
* “D T S ” and “DTS Digital Out” are trademarks of Digital Theater Systems, Inc.
DVD-VCR
B-1 B-2
B-1
R
AUDIO
L
VIDEO
to OUT AUDIO L/R
l: Signal flow
[Speakers]
Rear (L)
Rear (R)
(red)
(white)
to audio input
Subwoofer Centre
Stereo audio cord
(supplied)
and
Coaxial digital
cord (not
supplied)
(red)(white)
AV amplifier (receiver) having
a decoder
B-2
COAXIAL
DIGITAL
AUDIO OUT
OPTICAL
or
to DIGITAL AUD IO OUT
(COAXIAL or OPTICAL)
Optical digital cord
(not suppli e d)
Remove jack cap
before connecting
to coaxial or optical
digital input
[Speakers]
Front (L)
Front (R)
Advanced Hookups
Note
• After you have comp leted the connection, be sure to set “Dolby Digital” to “Dolby Digital”
and “DTS” to “On” in “AUDIO SETUP” m e nu (page 55). If your AV amplifier (receiver)
has an MPEG audio decoder function, set “MPEG” to “MPEG” in “AUDIO SETUP” menu
(page 55). Otherwise, no sound or a loud noi s e w ill c ome from the speakers.
A/V Receiver hookup
53
Page 54

S-Video hooku p
Make audio connections using the OUT AUDIO L/R jacks or DIGITAL AUDIO OUT
(OPTICAL or COAXIAL) jacks when you use S-VIDEO hookup.
Use this hookup if your TV has an S-VIDEO input jack
Connect an S-VIDEO cord (not supplied). You will enjoy high quality images.
DVD-VCR
l : Signal flow
(DVD only)
TV
Audio cord
(supplied)
or
Coaxial digital
cord (not
supplied)
or
S-VIDEO cord
(not supplied)
Optical digital cord
(not suppli e d)
Remove jack cap
before connecting
INPUT
S VIDEO
54
S-Video hookup
to audio input
TV or AV amplifier
Notes
• Set “D V D S-Video Out” to “On ” in the “SCREEN SETUP” menu (page58) to view pictures
from the S-VIDEO jack.
• The connection using S-VIDEO OUT jack is only for the DVD player.
to coaxial or optical
digital input
Page 55

DVD Settings and Adjustmen ts
Audio Setup
“Audio Setup” allows you to set the sound
according to the playback and connection
conditions.
1
SET UP
Press SET UP when the DVD player is in stop
mode, then press V/v to select (DVD)
and press ENTER.
SET UP
V/v/B/b
ENTER
Language Setup
Audio Setup
Screen Setup
Parental Setup
DVD Settings and Adjustments
DVD SETUP
2
3
ENTER
ENTER
ENTER
v
V
Press V/v to select “Audio Setup,” then press
ENTER.
Dolby Digital
MPEG
DTS
Audio DRC
B
vVb
Press V/v to select the setup item from the displayed list:
“Dolby Digital,” “MPEG,” “DTS” or “Audi o DRC.”
ENTER
SET UP
RETURN
AUDIO SETUP
[ D-PCM ]
[ PCM ]
[ Off ]
[ Standard ]
SET UP
RETURN
continued
Audio Setup
55
Page 56
4
Press B/b to select an item.
ENTER
5
SET UP
Press SET UP to exit the menu.
Menu choices
• Dolby Digital
Selects the type of Dolby Digital signal.
The default setting is indicated in bold print.
D-PCM Select this when the player is connected to an audio component
Dolby Digital Select this when the player is connected to an audio component
lacking a built-in Dolby Digital decoder.
with a built-in Dolby Digital decoder.
•MPEG
Selects the type of MPEG audi o signal.
The default setting is indicated in bold print.
PCM Select this when the player is connected to an audio component
MPEG Select this when the player is connected to an audio component
lacking a built-in MPEG decoder. If you play MPEG audio sound
tracks, the pla yer outputs stereo signals via the D IG I TAL AUDIO
OUT (OPTICAL or COAXIAL) jack.
with a built-in MPEG decoder.
•DTS
Selects whether or not to output DTS signals.
The default setting is indicated in bold print.
56
Off Select this when the player is connected to an audio component
lacking a built-in DTS decoder.
On Select this when the player is connected to an audio component
with a built-in DTS decoder.
Audio Setup
Page 57

• Audio DRC (Dynamic Range Control)
Makes the sound clear when the volume is turned down when pl aying a DVD that
conforms to “Audio DRC.” This affects the output from the following jacks:
– OUT AUDIO L/R jacks
– DIGITAL AUDIO OUT (OPTICAL or COAXIAL) jack only when “D olby
Digital” is set to “D-PCM.”
The default setting is indicated in bold print.
Standard Normally select this position.
Wide Range Gives you the feeling of being at alive performance.
Notes
• If you connect a component that does not confo rm to the selected audio sig na l, a lo ud noise
(or no sound) will come out from the speakers, affecting your ears or causing the speakers to
be damaged.
• Noise may occur in the L ine a rPCM double-speed audio. This is not a malfunction.
• If you set “DTS” to “On,” you cannot select surround setting (page 77).
DVD Settings and Adjustments
Audio Setup
57
Page 58

Screen Setup
“Screen Setup” allows you to set the screen
according to the playback and connection
conditions.
1
SET UP
Press SET UP when the DVD player is in stop
mode, then press V/v to select (DVD)
and press ENTER.
ENTER
Language Setup
Audio Setup
Screen Setup
Parental Setup
v
V
SET UP
V/v/B/b
ENTER
RETURN
ENTER
DVD SETUP
SET UP
2
3
58
Screen Setup
ENTER
ENTER
Press V/v to select “Screen Setup,” then press
ENTER.
TV Type
DVD LINE1 RGB Out
DVD S-Video Out
B
vVb
ENTER
Press V/v to select the setup item from the displayed list:
“TV Type,” “DVD LINE1 RGB Out” or “DVD S-Video Out.”
SCREEN SETUP
[
4:3 Letter Box
[
]
Off
[ On ]
RETURN
SET UP
]
Page 59

4
Press B/b to select an item.
ENTER
5
SET UP
Press SET UP to exit the menu.
Menu choices
• TV Type
Selects the aspect ratio of the connected TV (4:3 standard or wide).
The default setting is indicated in bold print.
4:3 Letter Box Select this when you connect a 4:3 screen TV. Displays a wide
4:3 Pan Scan Select this when you conn ect a 4:3 screen TV. Automatically
16:9 Select this when you conne ct a wide-sc reen TV or a TV with a w ide
picture with bands on the upper and lower portions of the screen.
displays the wide picture on the entire screen and cuts off the
portions that do not fit.
mode function.
4:3 Pan Scan4:3 Letter Box 16:9
• DVD LINE1 RGB Out
Selects the method of outputting video signals from the LI NE-1 (EURO AV) jack on
the rear panel of the player.
The default setting is indicated in bold print.
Off Select this to not o utput RGB signals.
On Select this to o u tput RGB signals.
DVD Settings and Adjustments
• DVD S-Video Out
Selects whether or not to output S-video signals from the S-VIDEO OUT jack on the
rear panel of the player.
The default setting is indicated in bold print.
On Select this when the player is conn ected to a TV wi th S-VIDEO
input jack.
Off Select this when the player i s c onn ected t o a T V la ckin g S- VIDE O
input jack.
continued
Screen Setup
59
Page 60

Notes
• Playback settings stored in the disc take priority over the “DVD SETUP” menu settings and
not all the functions described m ay work.
• Depending on the DVD, “4:3 Letter Box” may be selected automatically instead of “4:3 Pan
Scan” or vice versa.
• The connection using S-VIDEO OUT jack is only for the DVD player.
• When you select “On” in the “DVD LINE1 RG B O ut ” se ttin g, “ DVD S-Video Out” is set to
“Off” automatically.
• When you select “On” in the “DVD LINE1 RG B O ut ” se ttin g, S-v ideo signal will not be
output properly.
• When you select “On” in the “DVD S-Video Out” setting, “DVD LINE1 R GB O ut” is set to
“Off” automatically.
60
Screen Setup
Page 61

Setting the display or sound track language
You can set vario us la nguages for the disc’ s
menu, sound track or subtitle.
1
SET UP
Press SET UP when the DVD player is in stop
mode
, then press V/v to select (DVD) and
press ENTER
.
SET UP
V/v/B/b
ENTER
Language Setup
Audio Setup
Screen Setup
Parental Setup
DVD Settings and Adjustments
DVD SETUP
2
ENTER
ENTER
Press V/v to select “Language Set up,” then
press ENTER.
The “LANGUAGE SETUP” menu appears.
Setting the display or sound track language
v
V
DVD Menu
Audio
Subtitle
v
V
RETURN
ENTER
LANGUAGE SETUP
: English
: Original
: Audio Follow
RETURN
ENTER
continued
SET UP
SET UP
61
Page 62

3
ENTER
Press V/v to select the language setup item from the displayed list:
“DVD Menu,” “Audio,” or “Subtitle.”
Then press ENTER.
4
5
Press V/v to select the desired language, then press ENTER.
ENTER
• DVD MENU LANGUAGE
You can select the desired language for the
disc’s menu.
• AUDIO LANGUAGE
Switches the language of the sound track.
When you select “O riginal,” the language
given priority in the disc is selected.
• SUBTITLE LANGUAGE
Switches the language of the subtitle
recorded on the DVD. When you select
“Audio Follow,” the language for the
subtitle changes according to the language
you selected for the sound track.
SET UP
Tip
• If you select “Others” in step 4, an addi t ion al language
Notes
• When you select a language tha t is no t re corded on the DVD in step 4, one of the recorded
• Playback settings stored in the disc take priority over the DVD SETUP settings and not all the
• If you change the DVD MEN U LANGUAGE setting after playing the disc, press Z to open
Press SET UP to exit the menu.
menu appears. Press V/v/B/b to select the desired
language, then press ENTER.
languages will be automatically selected.
functions described may work.
and close the disc tray to activate the menu setting, then play the disc again.
DVD Menu
v
V
Audio
v
V
Subtitle
v
V
Cesky
Dansk
Magyar
Svenska
Norsk
Polski
V
v
B
b
DVD MENU LANGUAGE
B
English
Français
Deutsch
Español
Italiano
Nederlands
Others
SET UP
RETURN
ENTER
AUDIO LANGUAGE
English
Français
Deutsch
Español
Italiano
Nederlands
B
Original
Others
SET UP
RETURN
ENTER
SUBTITLE LANGUAGE
B
Audio Follow
English
Français
Deutsch
Español
Italiano
Nederlands
Others
SET UP
RETURN
ENTER
DVD MENU LANGUAGE
RETURN
Hindi
Japanese
Russian
Turkish
Thai
Korean
SET UP
Português
Suomi
Afrikaans
Arabic
Chinese
Greek
ENTER
62
Setting the display or sound track language
Page 63

Parent al Control (limiting playback by children)
Playback of some DVDs can be limited
according to a predetermined level such as
the age of the users. The parental control
function allows you to set a playback
limitation level.
Number
buttons
SET UP
1
2
SET UP
ENTER
ENTER
Press SET UP when the DVD player is in stop
mode, then press V/v to select (DVD)
and press ENTER.
Press V/v to select “Parental Setup,” then
press ENTER.
Language Setup
Audio Setup
Screen Setup
Parental Setup
v
V
Use Password
b
B
H
V/v/B/b
ENTER
RETURN
ENTER
PARENTAL SETUP
RETURN
continued
DVD Settings and Adjustments
DVD SETUP
SET UP
[ No ]
SET UP
Parental Control (limiting playback by children)
63
Page 64

3
ENTER
123
456
789
0
Press b to select “Yes.”
• If you have not entered a password
The display for regis te ri ng a new password
appears.
Enter a 4-digit password us i ng the number
buttons.
The display for confirming the password
appears.
Re-enter the password.
• When you have already registered a
password
The display for entering the password appears.
Enter a 4-digit password us i ng the number
buttons.
After registering a password, if you set “Use
password” to “No,” “PASSWORD CHECK”
screen will not appear.
Enter Password
––––
-~9
Re-enter Password
––––
-~9
Enter Password
––––
-~9
Use Password
Rating Level
Change Password
B
vVb
CREATE PASSWORD
RETURN
CREATE PASSWORD
RETURN
PASSWORD CHECK
RETURN
PARENTAL SETUP
[ Yes ]
:1
SET UP
RETURN
4
ENTER
5
ENTER
Press V/v to select “Rating Level,” then press
ENTER.
Press V/v to select the level you want, then
press ENTER.
The options are as follows.
Level 8 (Adult) y Level 7 y Level 6 y
Level 5 y Level 4 y Level 3 y Level 2
y Level 1 (Kids Safe)
The lower the value, the stricter the limitation.
6
64
Parental Control (limiting playback by children)
SET UP
Press SET UP to exit the menu.
Level 8 Adult
Level 7
Level 6
Level 5
Level 4
Level 3
Level 2
Level 1 Kids Safe
v
V
ENTER
Level 8 Adult
Level 7
Level 6
Level 5
Level 4
Level 3
Level 2
Level 1 Kids Safe
v
V
ENTER
RATING LEVEL
SET UP
RETURN
RATING LEVEL
SET UP
RETURN
Page 65

To change the password
Select “Change Password” in step 4 on page 64.
1
The display for entering a new password appears.
Enter a new 4-dig it pa s s word using the number buttons.
2
The display for confirming the password appears.
Re-enter the new password.
3
To turn off the Parental Control function
Set “Use Password” to “No” in step 3 on page 64.
To play a disc for which Parental Control is set
Insert the disc, then press H.
1
The display for entering your password appears.
Enter your 4-digit password using the nu mber buttons.
2
The player starts playback .
If you forget your password
Remove the disc and turn off the DVD-VCR.
1
Turn on the DVD-VCR agai n with no disc in the unit.
2
Hold down m and M on the fr ont panel simultaneously for 5 seconds.
3
“Reset OK” appears on the screen.
Turn off the DVD-VCR.
4
The password is cleared.
To create a new password, follow step 3 on page 64.
5
DVD Settings and Adjustments
Notes
• When you play DVDs which do not have the Parental C ont rol function, playback cann ot be
limited on this player.
• All the ratings higher t han the level you select will be blocked.
• Write your password down and keep it in a safe place in ca se you forget it.
• All DVD settings belo w whic h you set i n the “DVD SETUP” menu will also be cleared when
you reset the D V D-VCR to clear the password setting .
– Languag e S et u p
– Audio Setup
– Screen Setup
– Parental Setup
Parental Control (limiting playback by children)
65
Page 66

DVD Additional Operations
Using the DVD’s menu
A DVD is divided into long sections of a
picture or a music feature called “titles.”
When you play a DVD which contains
several titles, you can select the title you
want using the TOP MENU button.
When you play DVDs that allow you to
select items such as the language for the
subtitles and the language for the sound,
select these items using the MENU button.
Number
buttons
x
V/v/B/b
ENTER
MENU
TOP
MENU
1
TOP MENU
2
123
456
789
66
Using the DVD’s menu
MENU
ENTER
0
Press TOP MENU or MENU.
The disc’s menu appears on the TV screen.
The contents of the menu vary from disc to disc.
Press V/v/B/b to select the item you want to play or change.
You can also use t he number buttons to select the item. In this ca se, step 3
is skipped.
Page 67

3
Press ENTER.
ENTER
To turn off the DVD’s menu
Press x.
Note
• Depending on the DVD, you may not be able to use the TOP MENU button or search a point
by setting the time.
DVD Additional Operations
Using the DV D’s menu
67
Page 68

Zooming into a scene
You can zoom into a scene during playback
or still mode.
To zo om into a JPEG image, see “Playing
JPEG image files” on page 84.
1
MUTING/
ZOOM
Press ZOOM.
“ ” appears.
ZOOM
V/v/B/b
ENTER
2
3
68
Zooming into a scene
Press V/v/B/b to move “ ” to the position where you want to zoom in.
ENTER
Press ENTER repeatedly to change the magnification.
ENTER
Notes
• You can not us e 4
• The zoom function may not work de pending on the DVD.
Each time you press the button, the magnification changes as shown below.
2× t 4× t 2× t normal magnification
× magnification whe n you play VIDEO CDs.
Page 69

Changing the angles
If various angles (multi-angles) for a scene
are recorded on the DVD, “ ” appears in
the display when you press ANGLE during
playback. This means that you can change
the viewing angle .
1
ANGLE
Press ANGLE during playback.
The angle number appears on the display.
The number after the slash indicates the total
number of an gles.
Number
buttons
ANGLE
B/b
DVD Additional Operations
2
Press B/b repeatedly or use the num ber buttons t o select the angle number.
ENTER
123
456
789
Note
• Check the user’s manual of the purchased disc to de termine whether it supports angle
The scene changes to the selected angle.
0
operation. However, note that angle operation may not be possible for some discs.
Changing the angles
69
Page 70

Displaying the subtitle
/
If subtitles are recorded on the disc , yo u can
change the subtitles or turn them on and off
whenever you want while playing a DVD.
SUBTITLE
V/v/B/b
SUBTITLE
1
2
3
70
Displaying the subtitle
TIMER
ENTER
ENTER
To turn off the subtitles
Select “Off” in step 3.
Note
• Depending on the DVD, you may not be able to change the subtitles even if multilingual
Press SUBTITLE during playback.
Press B/b repeatedly to select th e language.
Depending on the DVD, the choice of language varies.
Refer to “DVD Aud io/ Sub titl e Lan gu a ge” on pa ge119 for the abbrevi ati on
of the language.
Press V/v repeatedly to select “On.”
subtitles are recorded on the DVD. You also may not be abl e t o turn them off.
Page 71
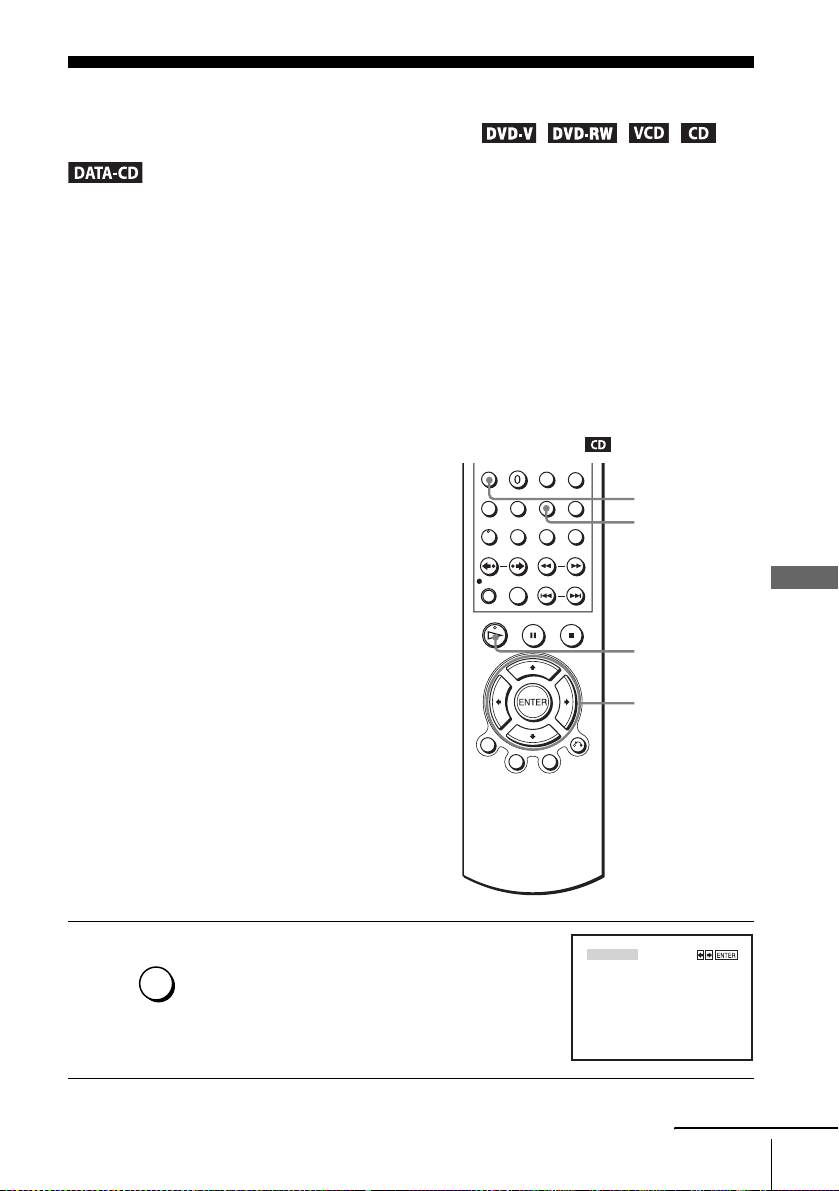
Various play mode functions (Programme
play, Shuffle play, Repeat play)
You can set the following play modes:
• Programme play (page 71), Programme play MP3 audio tracks (page 81)
• Shuffle play (page 73), Shuffle play MP3 audio tracks (page 82)
• Repeat play (page 74)
Note
• The play mode is canc el le d w hen:
– you open the disc tray
– the player enters standby mo de by pre ssing [/1.
Creating your own pr ogramme (Programme play)
You can play t he contents of a disc in the
order you want by arranging the order of the
tracks on the disc to create your own
programme. You can programme up to 20
tracks.
To programme MP3 audio tracks, see
page 81.
CLEAR
REPEAT
DVD Additional Operations
H
V/v/B/b
ENTER
1
REPEAT/
INDEX
Press REPEA T when the DVD player is in stop
mode.
Various play mode functions (Programme play, Shuffle play, Repeat play)
PROGRAM
SHUFFLE
continued
71
Page 72

2
ENTER
Press B/b to select “PROGRAM,” then press
ENTER.
PROGRAM
Track Program Order
01
02
03
04
––
08
12
16
20
ENTER
B
––
––
––
––
––
––
––
––
––
RETURN CLEAR
05
06
07
09
10
11
13
14
15
17
18
19
Clear last track Clear all tracks
B
vVb
––
––
––
––
––
––
––
––
––
––
3
4
5
ENTER
Press V/v/B/b to select the track number you
want to programme, then press ENTER.
PROGRAM
Track Program Order
01
02
03
04
06
08
12
16
20
ENTER
––
––
––
B
––
––
––
––
––
––
RETURN CLEAR
05
06
07
09
10
11
13
14
15
17
18
19
Clear last track Clear all tracks
B
vVb
To programme other tracks, repeat step 3.
The programmed track numbers are displayed in the selected order.
Press H to start programme play.
Programme play starts.
When the programme ends, you can restart the same programme again by
pressing H.
To stop programme play
Press CLEAR until “Off” appears at the upper left top of the TV screen during
programme play.
To change or cancel a programme
Follow steps 1 and 2 of “Creating your own programme (Programme play).”
1
Press v repeatedly to select “Clear last track,” then press ENTER. Each time you
2
press the button, the last programmed number is canceled. You can also cancel
the last programmed number by pressing CLEAR.
Follow step 3 for new programming.
3
––
––
––
––
––
––
––
––
––
––
To cancel all the programmed numbers
Follow steps 1 and 2 of “Creating your own programme (Programme play).”
1
Press v repeatedly to select “Clear last t r ack,” then press b to select “Clear all
2
tracks” and press ENTER.
All the programmed numbers are canceled.
Notes
• Up to 99 tracks can be displaye d.
• Up to 20 tracks can be prog ram med at one time.
72
Various play mode functions (Programme play, Shuffle play, Repeat play)
Page 73

Playing in random order (Shuffle play)
Y ou can shuffle the playback order of tracks.
Subsequent “shuffling” may produce a
different playing order.
To shuffle MP3 audio tracks, see page82.
CLEAR
REPEAT
B/b
ENTER
1
2
REPEAT/
INDEX
ENTER
Press REPEA T when the DVD player is in stop
mode.
Press B/b to select “SHUFFLE,” then press
ENTER.
PROGRAM
PROGRAM
SHUFFLE
SHUFFLE
To return to normal play
Press CLEAR until “Off” appears at the upper left top of the TV screen during shuffle
play.
Tips
• Shuffle play will s top when all the tracks are played back.
• You can not repeat play while in shuffle play.
continued
DVD Additional Operations
Various play mode functions (Programme play, Shuffle play, Repeat play)
73
Page 74

Playing repeatedly (Repeat play)
You can play all of th e titles or tracks on a
disc or a single title, chapter, or track
repeatedly.
CLEAR
REPEAT
B/b
1
2
REPEAT/
INDEX
REPEAT/
INDEX
To return to normal play
Select “Off” in step 2 or press CLEAR during repeat play.
Press REPEAT during playback.
Press REPEAT or B/b to select the item to be repeated.
When playing a D V D
• Chapter: repeats the current chapter.
• Title: repeats the current title on a disc.
When playing a VIDEO CD (with PBC function off) or CD
• Track: repeats the current track .
• Disc: repeats all of the tracks.
When playing a DATA CD (MP3 audio)
• FILE: repeats the current file (track).
• DIR: repeats the current directory (album).
• DISC: repeats the current disc.
Off
74
Various play mode functions (Programme play, Shuffle play, Repeat play)
Page 75

Tip
• When playing a DATA CD, press REPEAT again to cancel repeat play.
Notes
• You can not repeat play with DVD-RW in VR mode.
• You cannot repeat play VIDEO CDs with PBC function on. See “Playing VIDEO CDs with
“PBC On/Off” functions” on page 88.
DVD Additional Operations
Various play mode functions (Programme play, Shuffle play, Repeat play)
75
Page 76

Changing the sound
When playing a DVD recorded in multiple
audio formats (PCM, Dolby Digital, MPEG
or DTS), you can change the audio format. If
the DVD is recorded with multilingual
tracks, you can also change the language.
With CDs, DATA CDs, or VIDEO CDs, you
can select the sound from the right or left
channel and listen to the sound of the
selected channel through both the right and
left speakers. For example, when playing a
Karaoke VIDEO CD containing a song with
the vocals on the right channel and th e
instruments on the left channel, you can hear
the instruments from both speakers by
selecting the left channel.
To enjoy Dolby Digital or DTS effect from a
LinearPCM format disc, you have to make
B-2
the connection as shown on page 53.
AUDIO
B/b
1
2
76
Changing the sound
AUDIO
ENTER
Press AUDIO during playback.
Press B/b repeatedly to select the desired language/audio setting.
• When playing a DVD
Depending on the DVD, the choice of language varies.
Refer to “DVD Audio/Subtitle Language” on page 119 for the
abbreviation of the language.
• When playing a VIDEO CD or CD
The default setting is indicated in bold print.
STEREO
Left The sound of th e l eft channel (monaural )
Right T he sound of the right channel (monaural )
The standard ster eo sound
ENG DOLBY DIGITAL 3/2.1CH 1/2
bB
Page 77

Virtual surround se tting
When you connect a stereo TV or 2 front
speakers, SURROUND lets you enjoy
surround sound effects by usin g sound
imaging to create virtual rear speakers from
the sound of the front speakers without using
actual rear speakers.
SURROUND
B/b
1
2
SURROUND
ENTER
Press SURROUND during playback.
Press B/b repeatedly to select “Surround1,” “Surround2,” “Surro und3.”
Surround effect increases as shown below.
Surround1 Surround2 Surround3
TV TV TV
Off
: Virtual speaker
continued
Virtual surround setting
DVD Additional Operations
77
Page 78

To cancel the setting
Select “Off” in step 2.
Notes
• When the playing signal does not contain a signal for the rear spea kers, the surround effects
will be diffic ul t to hear.
• When you activate the surround effect, turn off the surro und setting of the connected TV or
amplifier (receiver).
• Make sure that your listening position is between and at an equal distance from your
speakers, and that the speakers are located in similar surroundings.
• If you use the DIGITAL AUDIO OUT (OPTICAL or COAXIAL) jack and set “Dolby
Digital” to “Dolby Digital” or “DTS” to “On” in “AUDIO SETUP” menu, sound will come
from your speakers but it will not have the surround effect.
78
Virtual surround setting
Page 79

Playing an MP3 audio track
You can play back DATA CDs (CD-ROMs/
CD-Rs/CD-RWs) recorded in MP3 (MPEG1
Audio Layer 3) format.
Z
CLEAR
REPEAT
H
x
V/v/B/b
ENTER
O RETURN
TOP MENU
DVD Additional Operations
1
Press Z and place a DATA CD on the disc tray,
then press Z to close the tray.
When you load a DATA CD wh ich contains
MP3 audio tracks and JPEG i mage files,
“Select a Media Type” menu appears.
If you load a DATA CD which contains only
MP3 audio files, the MP 3 display appears.
Then you can skip step 2.
Select a Media Type
1 MP3
2 JPEG
V
v
ENTER
continued
Playing an MP3 audio track
79
Page 80

2
ENTER
Press V/v to select “MP3,” then press
ENTER.
The first track starts playing. Press x if
necessary.
Repeat mode
Elapsed playing time
MP3
track 1 00:00
DIRECTORY:007
album 1
album 2
album 3
album 4
album 5
album 6
album 7
B
vVb
ENTER
FILES:014
mp
3
track 1
mp3 track 2
mp3 track 3
mp3 track 4
mp3 track 5
mp3 track 6
mp3 track 7
mp3 track 8
mp3 track 9
mp3 track 10
RETURN
OFF
SET UP
3
4
RETURN
ENTER
ENTER
Press O RETURN, then press V/v to select
the desired directory in the left column, then
press ENTER.
Press V/v to select the desired track in the
right column, then press ENTER.
The selected track starts playing.
When a track or album is being played, the title
is shown in a box. The playing track number
appears on the display window.
MP3
track 1 00:00
DIRECTORY:007
album 1
album 2
album 3
album 4
album 5
album 6
album 7
B
vVb
MP3
track 5 00:01
DIRECTORY:007
album 1
album 2
album 3
album 4
album 5
album 6
album 7
B
vVb
To stop play
Press x.
To repeat play
Press REPEAT repeatedly during playback to change the repeat mode.
• FILE: repeats the current file (track).
• DIR: repeats the current directory (album).
• DISC: repeats the current disc.
To go to the next or previous page
Press b or B.
ENTER
ENTER
FILES:014
mp
3
track 1
mp3 track 2
mp3 track 3
mp3 track 4
mp3 track 5
mp3 track 6
mp3 track 7
mp3 track 8
mp3 track 9
mp3 track 10
RETURN
FILES:014
mp
3
track 1
mp3 track 2
mp3 track 3
mp3 track 4
mp3 track 5
mp3 track 6
mp3 track 7
mp3 track 8
mp3 track 9
mp3 track 10
RETURN
OFF
SET UP
OFF
To return to the previous display
Press O RETURN.
To return to the “Select a Media Type” menu
Press x twice, then press TOP MENU.
To turn off the display
Press x twice, then press O RETURN repeatedly.
80
Playing an MP3 audio track
Page 81

Notes
• Only the letters in the alphabet and numbers can be used for album or track names. Anything
else is displayed as an asterisk.
• Up to 12 alphanumeric cha racters can be displayed for album or track nam es.
• ID3 tags cannot be displayed.
To programme MP3 audio tracks
Press x twice, then press REPEAT.
1
PROGRAM
SHUFFLE
Press B/b to select “PROGRAM,” then press
2
ENTER.
Press V/v to select the desired directory in the left
3
column, then press ENTER.
Press V/v to select the track you want to programme,
4
then press ENTER.
T o programme other tracks, repeat step 4.
5
The programmed tracks are displayed in the selected
order. Press CLEAR to cancel the last programmed
track.
Press H to start programme play.
6
Programme play starts. Wh en the programme ends,
you can restart the same programme again by
pressing H.
PROGRAM
DIRECTORY:007
album 1
album 2
album 3
album 4
album 5
album 6
album 7
V
v
PROGRAM
DIRECTORY:003
mp3 track 1
mp3 track 2
mp3 track 3
mp3 track 4
mp3 track 5
V
v
PROGRAM
DIRECTORY:003
mp3 track 1
mp3 track 2
mp3 track 3
mp3 track 4
mp3 track 5
V
v
ENTER
ENTER
ENTER
00:00
ORDER:000
RETURN
00:00
ORDER:000
RETURN
00:00
ORDER:001
mp3 track 3
RETURN
OFF
CLEAR
OFF
CLEAR
OFF
CLEAR
DVD Additional Operations
To stop programme play
Press x during programme play.
Note
• Up to 20 tracks can be prog ram med at one time.
continued
Playing an MP3 audio track
81
Page 82

To return to normal play
Press CLEAR during programme play.
Tip
• You cannot repeat play while in programme play.
To shuffle MP3 audio tracks
Press REPEAT when the MP3 is in stop mode.
1
Press B/b to select “SHUFFLE,” then press ENTER.
2
PROGRAM
SHUFFLE
To return to normal play
Press CLEAR during shuffle play.
Tips
• Shuffle play will stop when all the t racks are played back.
• You cannot repeat play while in shuffle play.
About MP3 audio tracks
You can play MP3 audio tracks on CD-ROMs, CD-Rs, or CD-RWs. However, the
discs must be recorded according to ISO9660 level 1 or level 2 format for the player
to recognize the tracks.
You can also play discs recorded in Multi Session.
See the instructions of the CD-R/RW device or recording software (not supplied) for
details on the recording format.
To play a Multi Session CD
This player can play Multi Session CDs when an MP3 audio track is located in the
first session. Any subsequent MP3 audio tracks, recorded in the later sessions, can
also be played back. When audio tracks and images in music CD format or video CD
format are recorded in the first session, only the first session will be played back.
Notes
• If you put the extension “.MP3” to data not in MP3 format, the player cannot recognize the
data properly and will gen erate a loud noise which could damage your speaker system.
• The player cannot play audi o tracks in MP3PRO format.
• This player supports MP3 audio tracks rec orded with a bit rate of 128 kbps and a sampling
frequency of 44.1 kHz. Attempt in g to play MP3 audio tracks recorded with different
specifications may result in loud noise, sound skipp in g or spe aker damage.
• Depending on the disc, playback may take some time to start.
82
Playing an MP3 audio track
Page 83

The Playback order of MP3 audio tracks
The playback order of albums and tracks recorded on a DATA CD is as follows.
• S tructure of disc cont ents
Tree 1 Tree 2 Tree 3 Tree 4 Tree 5
album
track
When you insert a DATA CD and press H, the numbered tracks are played
sequentially , from
1 through 7. Any sub-albums/tracks contained within a currently
selected album does not take priority over the next album in the same tree. (Example:
E contains G but
6 is played before 7.)
When you press O RETURN and the list of MP3 albums appears (page 80), the
albums are arranged in the following order: A t B t C t D t F t G.
Albums that do not contain tracks (such as album C) do not appear in the list.
Tips
• If you add numbers (01, 02, 03 , et c .) to the front of the track file names, the tracks w il l be
played in that order.
• A disc with many trees takes longer to start playback. Some discs with many trees cannot be
played back.
Notes
• Depending on the software you use to create the DATA CD, the playback order may differ
from the illustratio n above.
• The playback order above may not be applicable if there are more than a total of 1000 albums
and tracks in the DATA CD.
• A total of up to 999 files can be recognized for di scs th at cont a in bo th MP 3 and JPEG files.
Files are recognized in the order that they were recorded. For example, if 990 JPEG files are
recorded then 100 MP 3 files are recorded, the 990 J P EG files recorded fir st and only the first
9 MP3 files can be recognized.
• Depending on the disc co nten t s , playback may take some time to star t.
Playing an MP3 audio track
DVD Additional Operations
83
Page 84

Playing JPEG image files
You can play JPEG image files on DATA
CDs (CD-ROMs/CD-Rs/CD-RWs).
Z
CLEAR
./>
H
x
V/v/B/b
ENTER
MENU
TOP MENU
1
2
ENTER
84
Playing JPEG image files
Press Z and place a DAT A CD on the disc tray,
then press Z to close the tray.
When you load a DATA CD which contains
MP3 audio tracks and JPEG i mage files,
“Select a Media Type” menu appears.
If you load a DATA CD which contains only
JPEG image files, the “Album” display
appears. Then you can skip step 2.
Press V/v to select “JPEG,” then press
ENTER.
The “Album” display will appears.
If you do not press ENTER after selecting a
media type, the selected me dia will be
automatically played.
Select a Media Type
1 MP3
2 JPEG
V
v
ENTER
Album Photo:
SLIDE SHOW
Page 85

3
ENTER
Press ./> to select the next/previous album page, then press V/v/
B/b to select an image in the “Album” display.
To display the selected image
1 Press ENTER.
The selected image number appears in the
display window.
2 To display the next/previous image, press
./>.
IMAGE
To play the Slide show
1 Press H.
You can also play the Slide s how us ing th e
menu on the selected image.
For details, see “To enjoy the Slide show”
on page 86.
2 Press B/b to select the desired playing
speed on the “Interval” menu, then press
ENTER.
Slide show starts from the selected image.
To rotate the selected image
Press V/v/B/b to select an image in the “Album”
1
display, then press ENTER.
Press B/b to select “ ,” then press ENTER.
2
Each time you press ENTER, the image turns
clockwise by 90°.
To zoom in an image
Press V/v/B/b to select an image in the “Album”
1
display, then press ENTER.
Press B/b to select “ ,” then press ENTER.
2
“ ” appears.
Press V/v/B/b to move “ ” to the position where
3
you want to zoom in.
Press ENTER repeatedly to change the
4
magnification. Each time you press ENTER , the
magnification changes as shown below.
2× t normal magnification
: Fast
: Normal
: Slow
Interval
IMAGE
DVD Additional Operations
IMAGE
IMAGE
continued
Playing JPEG image files
85
Page 86

To enjoy the Slide show
Press V/v/B/b to select an image in the “Album”
1
display, then press ENTER.
Press B/b to select “ ,” then press ENTER.
2
The “Interval” menu appears.
Press B/b to select the desired pla ying speed, then
3
press ENTER.
Slide show starts.
To turn on/off the menu in the single image display
Press CLEAR to turn off the menu. Press B or b to turn on the menu.
To return to the “Album” display
Press MENU to return to the “Album” display. Press . repeatedly to return to the
first “Album” page.
To return to the “Select a Media Type” menu
Press x twice, then press TOP MENU.
Notes
• Slide show can play in only one direction.
• You cannot rota t e or z oom in the image during Slide show.
• If you select “ ” in the rotated image display, the images in the “Album” display will not
be rotated. But if you start the slide show, the images will be rotated. Correct the rotation in
the “ ” menu.
Interval
About JPEG image files
You can play JPEG image files on CD-ROMs, CD-Rs, or CD-RWs. However, the
discs must be recorded according to ISO9660 level 1 or level 2 format for the player
to recognize the files.
You can also play discs recorded in Multi Session.
See the instructions of the CD-R/RW device or recording software (not supplied) for
details on the recording format.
Note
• A total of up to 999 files can be recognized for discs that cont ain both MP3 and JPEG files.
To play a Multi Session CD
This player can play Multi Session CDs when an JPEG image file is located in the
first session. Any subsequent JPEG image files, recorded in the later sessions, can
also be played back. When audio tracks and images in music CD format or video CD
format are recorded in the first session, only the first session will be played back.
86
Playing JPEG image files
Files are recognized in the order that they were recorded. For example, if 990 JPEG files are
recorded then 100 MP3 files are recorded, the 990 JPEG files recorded first and only the first
9 MP3 files can be recognized.
Page 87

Tip
• If you add numbers (01, 02, 03, etc.) to the front of the file names, the files will be pl ayed in
that order.
Notes
• The system can pl ay the extension “.JPG” or “.JPEG. ”
• Some CD-Rs or CD-RWs cannot be played on this system depending on file format.
• If you add the extension “.JPG” or “.JPEG” to data not in JPEG format, “Can no t D isplay”
will appear.
• Depending on the disc or the size of imag e files, playback m ay t ake some time to start.
• Progressive and lossless compression JPEG image files are not supported.
• The image size that can be displa ye d is li m it ed . You can display the following images;
width 32 – 7680 pixels by height 32 – 8192 pixel s.
DVD Additional Operations
Playing JPEG image files
87
Page 88

Playing VIDEO CDs with “PBC On/Off” functions
The PBC (Playback control) function allows
you to search and perform other operations
interactively. PBC playback fo llows a
selection menu displayed on your TV screen.
Number
buttons
H
V/v
ENTER
O RETURN
MENU
1
MENU
2
ENTER
123
456
789
88
Playing VIDEO CDs with “PBC On/Off” functions
Press MENU to select “PBC On.”
The menu for your sele ction appears.
Press V/v to select the item number you want.
You can also use the number buttons to select the item number and track.
0
Page 89

3
Press ENTER.
ENTER
4
Follow the instructions in the menu for interactive operations.
Refer to the instructions supplied with the disc, as the operating procedure
may differ de pe nd in g on the VIDEO CD.
To return to the menu
Press O RETURN.
To play using “PBC Off”
Press MENU to select “PBC Off.”
When “PBC Off” is selected, the DVD player starts continuous play. You cannot
play still pictures such as a menu.
T o return to “PBC On,” press MENU to select “PBC On.”
Tip
• Depending on the VIDEO CD, “Press ENTER ” in st ep 3 may appear as “Press SELECT” in
the instructions supplied with the disc. In this case, press H.
DVD Additional Operations
Playing VIDEO CDs with “PBC On/Off” functions
89
Page 90

VCR Additional Operations
Quick Timer Recording
After you have started r ecording, you can
have the VCR stop recording automatically
after a specified duration.
z REC
x
1
2
90
Quick Timer Recording
REC
REC
While recording, press z REC.
Press z REC repeatedly to set the duration time.
In SP mode
Each press advances the time in increments of 30 minutes.
0:30 1:00
In LP mode
Each press advances the time as shown below.
0:30 1:00
The tape counter decreases minute by minute to 0:00, then the VCR stops
recording.
4:00 4:30
8:00 9:00
Normal recording
Normal recording
Page 91

To extend the duration
Press z REC repeatedly to set a new duration time.
To cancel the duration
Press z REC repeatedly until the indicator disapp ears and the VCR returns to
normal recording mode.
To stop while recording
Press x.
Notes
• You cannot display the current tape time in the disp la y w in dow when setting the recording
duration time.
• During DVD playback, DVD-VCR does not standby even if the VCR stops record ing .
Quick Timer Recording
VCR Additional Operations
91
Page 92
Recording stereo and bilingual programmes
In the NICAM system
This VCR receives and records stereo and bilingual programmes based on the
NICAM system (NICAM appears on the TV screen). When a stereo or bili ngual
programme is received, the STEREO indicator appears in the display window.
To record a NICAM prog ramme, “NICAM” in the “USER SET” menu should be set
to “On” (initial setting). To check the menu setting, see page 103 for details.
To select the sound while recording
Press AUDIO to select the sound you want.
Stereo programmes
To listen to On-screen display Display window
Stereo NICAM, STEREO STEREO
Left channel NICAM, LCH STEREO
Right channel NICAM, RCH STEREO
Left and right channels* NICAM, LCH + RCH STEREO
* Usual ly t he m ixed sound of left and right channels
Bilingual program m e s
To listen to On-screen display Display window
Main NICAM, MAIN STEREO
Sub NICAM, SUB STEREO
Main and sub NICAM, MAIN/SUB STEREO
Standard sound* NICAM, MONO STEREO
* Usually the main sound (monaural)
92
Recording stereo and bilingual programmes
Page 93

Selecting the sound during Hi-Fi playback
Press AUDIO to select the sound you want.
To listen to On-screen display Display window
Stereo STEREO STEREO
Left channel LCH STEREO
Right channel RCH STEREO
Mix sound* MIX STEREO
Mono sound MONO No indicator
* The mi xed sound of left and right channels, and the normal mono audio tra ck
How sound is recorded on a video tape
The VCR records sound onto two separate tracks. Hi-fi audio is recorded onto the
main track along with the picture. Monaural sound is recorded onto the normal audio
track along the edge of the tape.
Normal audio trac k
(monaural)
Hi-fi audio track
(main track)
Stereo
Usually mixed
left/right channels
Stereo sound
(left/right channels)
Bilingual
Usually main sound
Main (left channel)
Sub (right channel)
Notes
• To listen to playback sounds in stereo, you must use the Scart or AUDIO OUT connections.
• When you play a tape recorded in monaural, the sound is heard in monaural regardless of the
AUDIO setting.
Recording stereo and bilingual programmes
VCR Additional Operations
93
Page 94

Searching using index function
The VCR automatically marks the tape with
an index signal at the point whe r e each
recording begins. Use these signals as
references to find a specific recording.
To find a specific recording by scanning (Inde x scan)
INDEX
m/M
H
x
1
2
REPEAT/
INDEX
3
94
Searching using index function
Insert an indexed tape into the tape compartment.
Press INDEX, then press m/M. The
VCR starts scanning each recording for five
seconds in the corresponding direction.
Press H to start playback when you find the desired point.
INDEX SCAN BB
:
Page 95

To search a specific recording (Index search)
1
2
3
4
Insert an indexed tape into the VCR.
REPEAT/
INDEX
To stop searching
Press x.
Note
• No index signal will be added whe n rec ording starts from recording pause . However, an
Press INDEX, then press m/M twice.
• To search ahead, press M twice.
• To search backwards, press m twice.
Press m/M depending on the direction where your desired programme
is located.
Each time you press the button, the number increases or decreases up to
±20, respectively.
The VCR starts searching, and playback starts automatically from that
point.
index signal will be marked if you chang e the programme position during recording pause.
INDEX SEARCH
:
BB
+01
VCR Additional Operations
Searching using index function
95
Page 96

Adjusting the picture (tracking)
Adjusting the tracking
Although the VCR automatically adjusts the
tracking when playing a tape, distortion may
occur if the recording is in poor conditio n. In
this case, manually adjust th e tracking.
During playback, pres s TRACKING +/– to
display the tracking meter. The distortion
should disappear as you press one of the two
buttons. To resume automatic tracking
adjustments, eject the tape and re-insert it.
TRACKING – – – – – – – – – – – –
Tracking meter
Adjusting the picture
sharpness (Smart trilogic)
Y ou can automatically adjust the sharpness of
the picture.
1
SET UP
ENTER
During playback, press S ET UP, then press
V/v to select (OPTION) and press
ENTER.
Language
Clock
Install
User Set
Auto Power Off
Screen Messages
Power Save
V
v
SET UP
V/v/B/b
ENTER
O RETURN
:English
RETURN
ENTER
OPTION
[ Off ]
[ On ]
[ Off ]
SET UP
96
Adjusting the picture (tracking)
Page 97

2
ENTER
Press V/v to select “User Set,” then press
ENTER.
Colour System
NICAM
Smart Trilogic
VideoPlus Extend
B
vVb
USER SET
RETURN
[ Auto ]
[ On ]
[ On ]
[ Off ]
SET UP
3
4
5
ENTER
ENTER
RETURN
Press V/v to select “Smart Trilogic,” then
press b.
Press V/v to set “SMART TRILOGIC” to
“ON” or “OFF.”
• ON: Picture sharpness is automatically
adjusted.
• OFF: Adjust the picture sharpness
manually.
To soften the picture, press B.
To sharpen the picture, press b.
Press O RETURN to return to the original screen.
USER SET
Colour System
NICAM
Smart Trilogic
VideoPlus Extend
B
vVb
SMART TRILOGIC : ON
SOFTEN
–––––––––––* ––––––––
RETURN
RETURN
PICTURE
SHARPEN
b
B
ON / OFF :
[ Auto ]
[ On ]
[ On ]
[ Off ]
SET UP
v
V
VCR Additional Operations
Adjusting the picture (tracking)
97
Page 98

Changing menu options
SET UP
V/v/B/b
ENTER
1
SET UP
2
98
Changing menu options
ENTER
ENTER
Press SET UP when the DVD player is in stop
mode, then press V/v to select
(OPTION) or (VIDEO) and press
ENTER.
Press V/v to select the option to change.
Language
Clock
Install
User Set
Auto Power Off
Screen Messages
Power Save
V
v
Tape Select
Repeat Play
B
vVb
Tape Select
Repeat Play
B
vVb
ENTER
OPTION
:English
SET UP
RETURN
VIDEO SETUP
[ E180 ]
[ Off ]
SET UP
RETURN
VIDEO SETUP
[ E180 ]
[ Off ]
SET UP
RETURN
[ Off ]
[ On ]
[ Off ]
Page 99

3
Press B/b to change the setting.
ENTER
4
SET UP
Press SET UP to exit the menu.
Menu choices
The default settings are indicated in bold print.
OPTION
Menu option S e t t his option to
Auto Power Off • “Off” to deactivate the Auto Power Off function.
• “1Hour”/“2Hours”/“3Hours” to turn the DVD-VCR off
automatically if no signal is re ce ived and you do not press any
of the buttons during this time.
Screen Messages • “On” to display th e menu on the TV screen .
• “Off” to disappear the men u from the TV screen.
Power Save • “On” to turn off the indicators in the display window during
standby mode to reduce the DVD-VCR’s power consumption
to a minimum.
•“Off” to turn on the indicators in the display window while the
DVD-VCR is standing by.
VIDEO SETUP
Menu option S e t t his option to
T ape Select • “E180” to use an E-180 or shorter type tape.
• “E240” to use an E-240 type tape.
• “E260” to use an E-260 type tape.
• “E300” to use an E-300 type tape.
Repeat Play • “On” to play back a tape repeatedly. The VCR rewinds a tape
to the beginning and restarts playback automatically.
•“Off” to turn off Auto repeat.
VCR Additional Operations
Notes
• When the VCR stands by for recording, the indicator in the disp lay w in dow remains lit
even when “Power Save” is set to “On.”
• The Line Through function w i ll not op erate properly if “Power Save” in “OPTION ” menu is
set to “On.” Set “Power Save” to “Off” to ensure proper operation.
Changing menu options
99
Page 100

Editing
How to connect to record on this VCR
Connect the line outputs of the other VCR to the input connector of this VCR. Refer to the
examples A through C and choose the connection that best suits your VCR.
Example A
TV
Your VCR (Recorder)
Other VCR (Player)
Scart
(EURO-AV)
Example B
Scart cable (not supplied)
: Signal flow
Your VCR (Recorder)
LINE-2 IN t/o L/R
LINE OUT
LINE-1 (EURO AV)
TV
Other VCR (Player)
100
Editing
audio/video cord
(not supplied)
: Signal flow
 Loading...