

Sony SLV-D900G User Manual
3-079-775-11 (1) GB
DVD Player/
Video Cassette
Recorder
Operating Instructions
PAL
SLV-D900G
© 2002 Sony Corporation

WARNING
Welcome!
To prevent fire or shock
hazard, do not expose
the unit to rain or
moisture.
To a v oi d electrical shoc k,
do not open the cabinet.
Refer servicing to
qualified personnel only.
Mains lead must only be
changed at a qualified
service shop.
This appliance is classified as
a CLASS 1 LASER product.
The CLASS 1 LASER
PRODUCT MARKING is
located on the re ar exterior.
CAUTION
The use of optical instruments
with this product will in crease
eye hazard. As the laser beam
used in this DVD player/
Video Cassette Recorder is
harmful to eyes, do not
attempt to disassemble the
cabinet.
Refer servicing to qualified
personnel only.
Notice for customers in
the United Kingdom and
Republic of Ireland
A moulded plug complyi ng
with BS1363 is fitted to this
equipment for your safety and
convenience.
Should the fuse in the plug
supplied need to be replaced,
a 5 AMP fuse approved by
ASTA or BSI to BS1362, (i.e.,
marked with or mark)
must be used.
If the plug supplied with this
equipment has a detachable
fuse cover, be sure to attach
the fuse cover after you
change the fuse. Ne v er us e the
plug without the fuse cover. If
you should lose the fuse
cover, please contact your
nearest Sony service station.
Precautions
Safety
• This unit operates on 220 –
240 V AC, 50 Hz. Check
that the unit’s operating
voltage is iden tical with
your local power supply.
• To prevent fire or shock
hazard, do not place objects
filled with liquids, such as
vases, on the apparatus.
• The player is not
disconnected from the AC
power source (mains) as
long as it is co nn ected to
the wall outl et, even if the
player itself has been
turned off.
Installing
• Do not install the unit in an
inclined position. It is
designed to be operated in a
horizontal position only.
• Keep th e unit and discs
away from equip men t with
strong magnets, such as
microwave ovens, or large
loudspeakers.
• Do not place heavy objects
on the unit.
• Do not place the unit on
surfaces (rugs, blankets,
etc.) or near materi als
(curtains, draperies) that
may block the ventilation
slots.
VIDEO Plus+ and PlusCode
are registered trademarks of
Gemstar Development
Corporation. The VIDEO
Plus+ system is manufactured
under license from Gemstar
Development Corporation.
Thank you for purchasing this
Sony DVD Player/Video
Cassette Recorder. Before
operating this player, please
read this manual thoroughly
and retain it for future
reference.
2
WARNING

Caution
For use of the VCR
Tele vision programmes, films,
video tapes and other
materials may be copyrighted.
Unauthorized rec ording of
such material may be contrary
to the provisions of the
copyright laws. Also, use of
this recorder with cable
television transmission may
require authorization from the
cable televis ion transmitt e r
and/or programme owner.
For use of the DVD
player
This product incorporates
copyright protection
technology that is protected
by method claims of certain
U.S. patents, other intell ectual
property rights owned by
Macrovision Corporation, and
other rights owners. Use of
this copyright protection
technology must be
authorized by Macrovision
Corporation, and is inte nded
for home and oth e r l im ited
viewing uses only unless
otherwise authorize d by
Macrovision Corporat io n.
Reverse engineering or
disassembly is prohibited.
Caution
3

Table of contents
2 WARNING
2 Welcome!
3 Caution
6 About this manual
6 This player can play the following discs
7 Notes about discs
Getting Started
8 Step 1 : Unpacking
9 Step 2 : Setting up the remote commander
11 Step 3 : Connecting the DVD-VCR
14 Step 4 : Setting up the DVD-VCR with the Auto Set Up function
16 Step 5 : Selecting a language
17 Step 6 : Setting the clock
19 Step 7 : Presetting channels
Basic Operations
27 Playing dis cs
30 Guide to the on-screen display
31 Playing a tape
34 Recording TV pr ogrammes
38 Recording TV pr og ra m me s using the
VIDEO Plus+
43 Recording TV pr og ra m me s using the
timer
47 Checking/changing/cancelling timer
settings
4
Table of contents
®
system
Advanced Hookups
49 A/V Receiv e r hook up
51 S-Video hookup
DVD Settings and
Adjustments
52 Audio Setup
55 Screen Setup
58 Setting the display or sound track
language
60 Parental Control (limiting playback
by children)

DVD Additional Operations
63 Using the DVD’ s menu
65 Zooming into a scene
66 Changing the angles
67 Displaying the subtitle
68 Picture navigation
69 Various play mode functions
(Programme play, Random play,
Repeat play)
73 Changing the sound
74 Virtual surround setting
76 Playing an MP3 audio track
79 Playing VIDEO CDs with “MENU
ON/OFF” Functions
VCR Additional Operations
81 Playing a tape with SQPB function
82 Setting the recording duration time
84 Recording stereo and bilingual
programs
86 Searching using index function
88 Adjusting the picture (tracking)
90 Changing menu options
92 Editing
Additional Information
95 General setup information
97 Troubleshooting
102 Specifications
104 Index to parts an d controls
109 DVD AUDIO/SUBTITLE
LANGUAGE
110 Index
Table of contents
5
About this manual
• The meaning of the icons used in thi s man ua l is
described below:
Icon Meaning
Functions available for DVD
VIDEOs or DVD-Rs/DVDRWs in video mode
Functions avai lable for VID EO
CDs, Super VCDs or CD-Rs/
CD-RWs in video CD format
Functions available for DATA
CDs (CD-ROMs/C D -Rs / CD RWs containing MP3* audio
tracks)
Functions available for music
CDs or CD-Rs/CD-RWs in
music CD format
Functions available for VHS
VIDEOs
* MP3 (MPEG 1 Audio Layer 3) is a standa rd format
defined by ISO/MPEG which comp resses audio data .
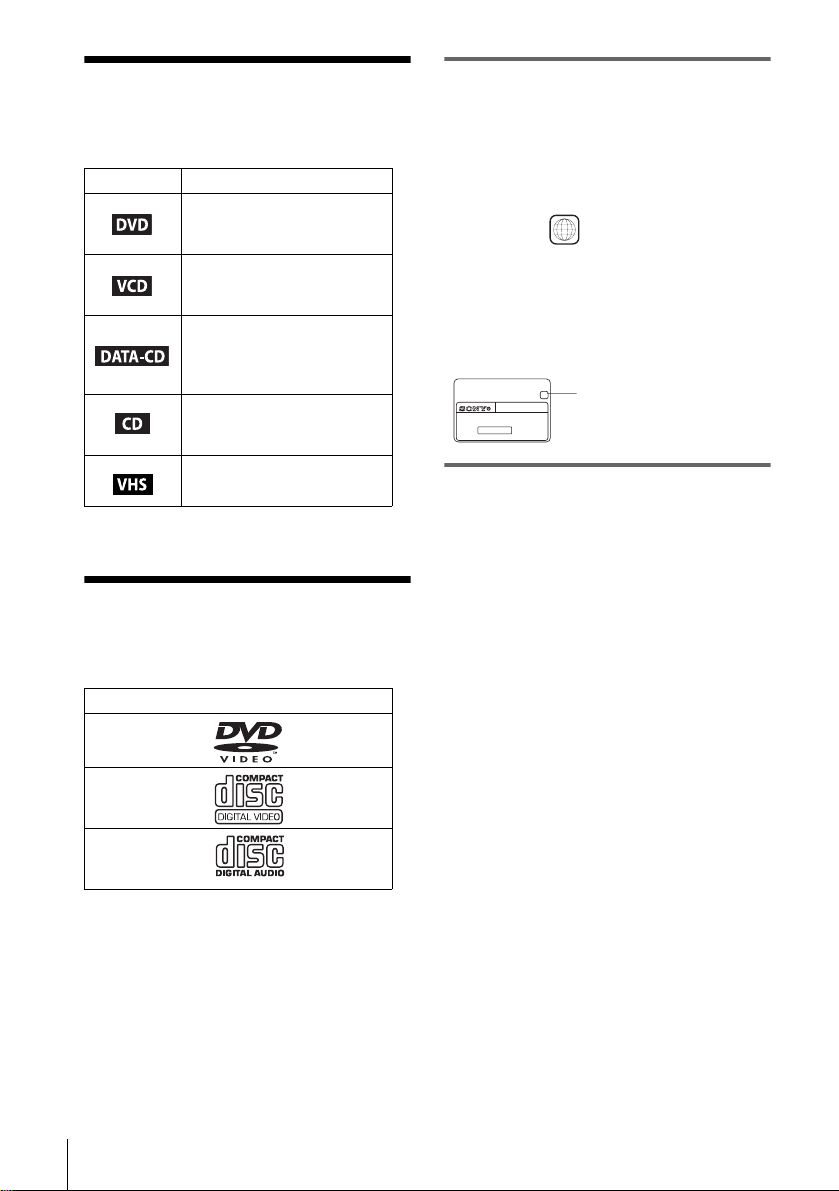
This player can play the following disc s
Format of discs
DVD VIDEO
VIDEO CD
Music CD
Region code
Your player has a reg i on code printed on the
back of the unit and only wil l play DVD VIDEO
discs (playback onl y) labelled with ident i cal
region codes. This system is used to protec t
copyrights.
SLV–DXXXX
0-000-000-00
ALL
X
Region code
DVDs labelled will also play on this pl ayer.
If you try to play any other DVD, the message
“Playback prohibit ed by area limitations.” will
appear on the TV screen. Depending on the DVD,
no region code indication m ay be labelled even
though playing the DVD is prohibited by area
restrictions.
00V 00Hz
NO.
00W
Example of discs that the player
cannot play
The player cannot pla y t he f ol l ow i ng discs:
• All CD-ROMs (including PHOTO CDs)/CDRs/CD-RWs other than those recorded in the
following formats:
–music CD format
–video CD format
–MP3 format that co nforms to ISO9660 *
Level 1/Leve l 2, or its extended format, Joliet
• Data part of CD-Extras
• DVD-RWs in VR mode
• DVD-ROMs
• DVD Audio discs
• HD layer on Super Audio CDs
* A logical format of files and folders on CD-ROMs,
defined by ISO (International Standard
Organization).
The “DVD VIDEO ” l ogo is a trademark.
6
Also, the player cannot play the following
discs:
• A DVD with a different region code.
• A disc that has a non-standard shape (e.g.,
card, heart).
• A disc with paper or stickers on it.
• A disc that has t he adhe sive of celloph ane tap e
or a sticker still left on it.

Note
Some CD-Rs, CD-RWs, DVD-Rs, or DVD-RWs (in
video mode) cannot be played on this player due to the
recording quality or physic a l con dition of the disc, or
the characteristics of the reco rd i n g dev ice.
Furthermore, the d isc w ill not play if it has not been
correctly finalized. For more information , se e the
operating instructions fo r th e reco rd i ng de vice.
Note that discs created in the Packet Write format
cannot be played.
Note on playback operations of
DVDs and VIDEO CDs
Some playba ck operati ons of DVDs and VIDEO
CDs may be intentionally set by software
producers. Since this player plays DVDs and
VIDEO CDs ac cording to the disc co ntents the
software producers designed, som e playback
features ma y no t be av ail ab le . A ls o, ref er to t he
instructions supplied with the DVDs or VIDEO
CDs.
Notes about discs
• To keep the disc clean, handle the disc by its
edge. Do not touch the sur fa ce.
• Do not expose the disc to direct sunlight or
heat sources such as hot air du cts, or l eave it in
a car parked in dir ect sunlight as the
temperature may rise considerably inside the
car.
• After playin g, store the disc in its cas e.
• Clean the disc with a cleaning cloth.
Wipe the disc from the center out.
Do not use solven ts such as benzine, th i nner,
commercially available cleaners, or anti-stat ic
spray intended for vinyl LPs.
7

Getting Started
Step 1 :Unpacking
Check that you have received the following items with the DVD-VCR:
• Remote commander
• R6 (Size AA) batteries
• Aerial cable
•Audio cord
(pinplug ×2 y pinplug ×2)
•Video cord
(pinplug ×1 y pinplug ×1)
8
Unpacking

Step 2 : Setting up the remote commander
Inserting the batteries
Insert two size AA (R6) batteries
by matching the + and – on the
batteries to the diagram inside the
battery compartment.
Insert the negative (–) end first,
then push in and down until the
positive (+) end clicks into
position.
Using the remote
commander
You can use this remote
commander to operate this DVDVCR and a Sony TV. Buttons on
the remote commander marked
with a dot (•) can be used to
operate your Sony TV.
If the TV does not have the
symbol near the remote sensor , this
remote commander will not
operate the TV.
TV /
DVD·VIDEO
Remote sensor
Getting Started
To operate Set TV / DVD·VIDEO to
the DVD player DVD·VIDEO
the VCR DVD·VIDEO, then press SELECT VIDEO and point at the remote sensor
your TV TV and point at the remote sensor at your TV
Notes
• With normal use, the batteries should last about three to six mont hs.
• If you do not use the remote commander for an extended period of time, remove the batteries
to avoid possible damage from batter y le akage.
• Do not use a new battery with an old one.
• Do not use different types of batteries.
DVD-VCR
the
at the
, then press SELECT DVD and point at the remote sensor at
DVD-VCR
continued
Setting up the remote commander
9
Controlling other TVs with the remote commander
The remote commander is preprogrammed t o control non-Sony TVs. If your TV is
listed in the following table, set the ap propriate manufacturer’s code number.
Set TV / DVD·VIDEO at the top of the remote commander to TV.
1
Hold down ?/1, and enter your TV’s code number using the number buttons.
2
Then release ?/1.
Now you can use the ?/1, VOL +/–, PROG +/–, MUTING*, TV/VIDEO, 0-9 and
-/--* buttons to control your TV. You can also use the buttons marked with a dot (•) to
control a Sony TV. To control the DVD-VCR, reset TV
DVD·VIDEO
* for Sony TV only
Code numbers of controllable TVs
If more than one code number is listed, try entering th em on e at a time until you find
the one that works with your TV.
.
/ DVD·VIDEO to
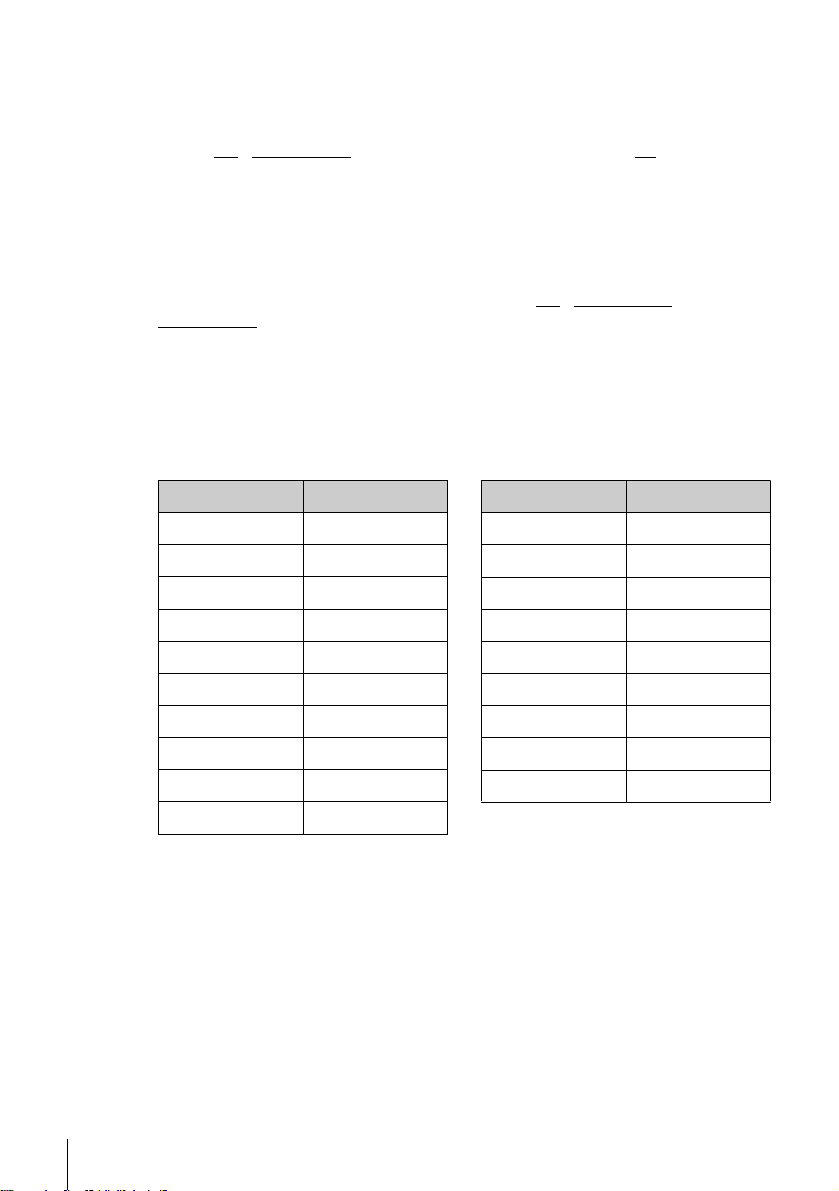
Manufacturer Code number
Sony 01, 02
Akai 68
Ferguson 52
Grundig
Hitachi 24
JVC 33
Loewe 45
Mivar 09, 70
NEC 66
Nokia
Notes
• If you enter a new code numbe r, the code number previously entered will be era se d.
• If the TV uses a different remote con tro l syst em from the one programmed to work with the
DVD-VCR, you cannot control your TV with the remote commander.
• When you replace the batteries of the remote commander, the code number may change. Set
the appropriate code number every time you replace the batteries.
10, 11
15, 16, 69
Manufacturer Code number
Panasonic 17, 49
Philips
Saba 12, 13
Samsung 22, 23
Sanyo 25
Sharp 29
Telefunken 36
Thomson
Toshiba 38
06, 07, 08
43
10
Setting up the remote commander

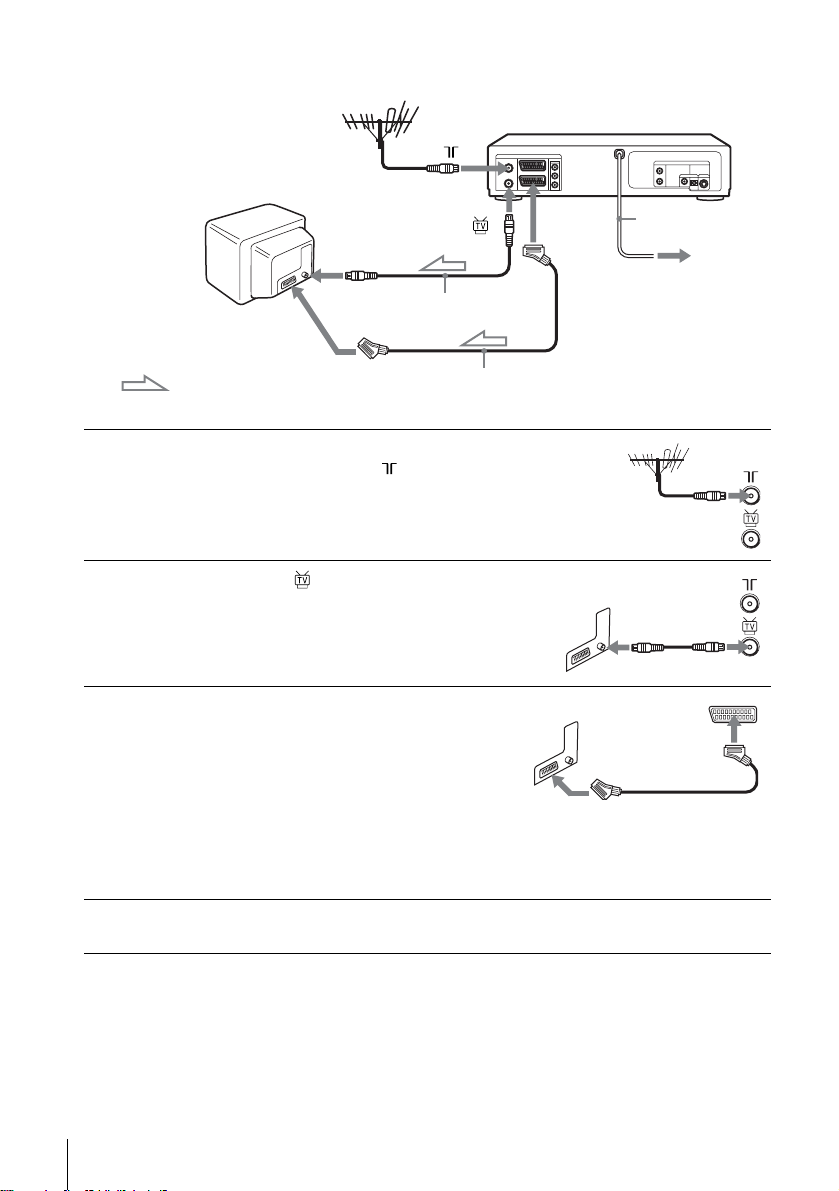
Step 3 : Connecting the DVD-VCR
1
Note that “Advanced Hookups” (page 49) explains additional hookup methods that
will optimize the picture and sound for a true “hometheater” experience.
If your TV has a Scart (EURO-AV) connector, see page 12.
If your TV does not have a Scart (EURO-AV) connector
Mains lead
AERIAL IN
Aerial cable (supplied)
: Signal flow
Disconnect the aerial cable from yo ur TV
and connect it to on the rear panel o f the
DVD-VCR.
to mains
Getting Started
2
3
Connect of the D VD - V CR an d the
aerial input of your TV using the supplied
aerial cable.
Connect the mains lead to the mains.
Note
• When you connect the DVD-VCR and your TV only with an aerial cable, you have
to tune your TV to the DVD-VCR (see page 14).
continued
Connecting the DVD-VCR
11
If your TV has a Scar t (EURO-AV) connector
1
2
3
Scart
(EURO-AV)
: Signal fl ow
Disconnect the aerial cable from your
TV and connect it to on the rear
panel of the DVD-VCR.
Connect of the DVD-VCR and the
aerial input of your TV using the
supplied aerial cable.
Connect LINE-1 (EURO AV) on the
DVD-VCR and the Scart (EURO-AV)
connector on the TV with the optional
Scart cable.
This connection improves picture and
sound quality. Whenever you want to
watch the DVD-VCR picture, press
TV/VIDEO to display the VIDEO
indicator in the display window.
AERIAL IN
Aerial cable (supplied)
Scart cable (not supplied)
LINE-1
(EURO AV)
Mains lead
to mains
4
12
Connecting the DVD-VCR
Connect the mains lead to the mains.

Additional connections
T o a satellite or digital tuner
with Line Through
Using the Line Through
function, you can watch
programmes from a satellite or
digital tuner connected to this
DVD-VCR on the TV even
when the DVD-VCR is turned
off. When you turn on the
satellite or digital tuner, this
DVD-VCR automatically sends
the signal from the satellite or
digital tuner to the TV without
turning itself on.
Connect the satellite or digital tuner to the LINE-3 connector as shown above.
1
Turn off the DVD-VCR.
2
To watch a programme, turn on the satellite or digital tuner and the TV.
Notes
• This function may not work with some types of satellite or digital tuners.
• When the DVD-V CR is turned off, set the TV to the video channel.
LINE-3
Scart cable (not supplied)
: Signal flow
LINE OUT
Getting Started
Connecting the DVD-VCR
13

Step 4 : Setting up the DVD-VCR with the
Auto Set Up function
Before using the DVD-VCR for the first
time, set up the DVD-VCR using the Auto
Set Up function. With this function, you can
set TV channels, guide channels for the
VIDEO Plus+ system, and DVD-VCR clock
automatically.
V/v/B/b
ENTER
O RETURN
1
2
ENTER
14
Setting up the DVD-VCR with the Auto Set Up function
Turn on your TV and set it to the video channel.
If your TV does not have a Scart (EURO-AV) connector, tune the TV to
channel 21 (the initial RF channel for this DVD-VCR). Refer to your TV
manual for TV tuning instructions. If the picture does not appear clearly,
see “To change the RF channel” on page 15.
Connect the mains lead to the mains.
The DVD-VCR automatically turns on and the
DVD-VCR starts searching for all of the
receivable channels and presets them (in the
appropriate order for your local area).
If you want to change the order of the channels
or disable unwanted programme positions, see
“Changing/disabling pro gram m e positio ns” on page 21.
After the search is complete, the current time appears for any stations that
transmit a time signal. If the time do es not appear, set the clock manually.
See “Setting the clock” on page 17.
AUTO SET UP
PLEASE WAIT
40%
RETURN

To cancel the Auto Set Up function
Press O RETURN.
To change the RF channel
If the picture does not appear clearly o n t he TV, change the RF channel on the DVDVCR and TV. Select (INSTALLATION) from the menu, then press V/v to
select VIDEO OUTPUT CH. Select the RF channel by pressing the B/b buttons.
Then, tune the TV to the new RF channel so that a cl ear picture appears.
Tip
• If you want to change the lan gua ge for the on-screen display from th e one preset in the Auto
Set Up function, see page 16.
Notes
• Whenever you operate the Auto Set Up function, some of the settings (VIDEO Plus+, timer,
etc.) will be reset. If this happens, you have to set them again .
• Auto preset starts automatically only when you plug in the mains lead for the first time after
you purchase the DVD-VCR.
• If you want to use the Auto Set Up function again, press SET UP, then press V /v/B/b to
select (INSTALLATION) and press ENTER. Press V/v to select AUTO SET UP.
• Auto preset can be performed by pressing x on the DVD-VCR
more during power off with no tape inserted .
continuously for 5 seconds or
Getting Started
Setting up the DVD-VCR with the Auto Set Up function
15
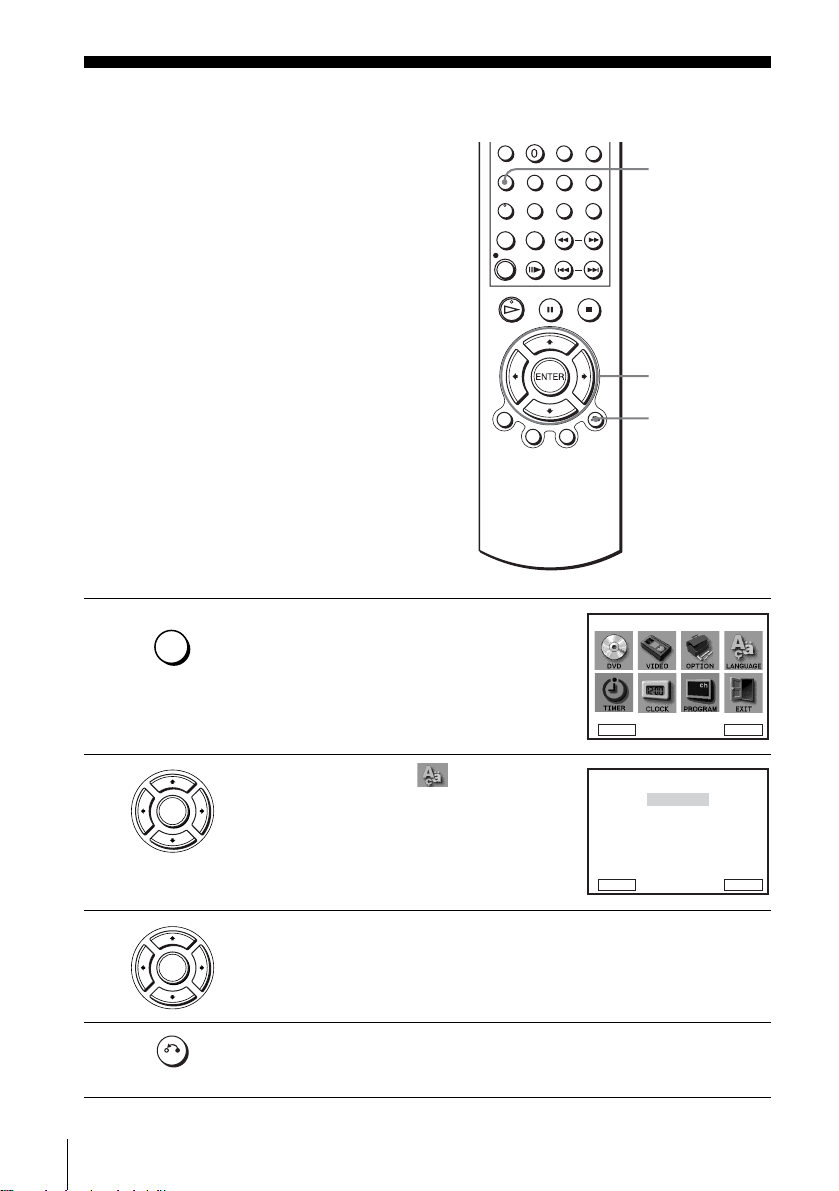
Step 5 :Selecting a language
You can change the on-screen display
language.
Before you start…
• Tur n on the DVD-VCR and your TV.
• Set your TV to the vid e o ch a nn e l so that
the signal from the player appe ars on the
TV screen.
• If the DVD player is in play mode, you
cannot display the “SETUP MENU.” Stop
DVD playback.
SET UP
V/v/B/b
ENTER
O RETURN
1
2
3
4
16
Selecting a language
SET UP
ENTER
ENTER
RETURN
Press SET UP.
The “SETUP MENU” appears.
DVD SETUP
RETURN
Press V/v/B/b to select (LANGUAGE
SET), then press ENTER.
The “LANGUAGE SET” menu appears.
RETURN
B
English
Français
Deutsch
Español
Italiano
Nederlands
Press V/v to select the desired language, then press ENTER.
Press O RETURN to exit the menu.
SETUP MENU
B
b
Vv
ENTER
LANGUAGE SET
V
v
ENTER
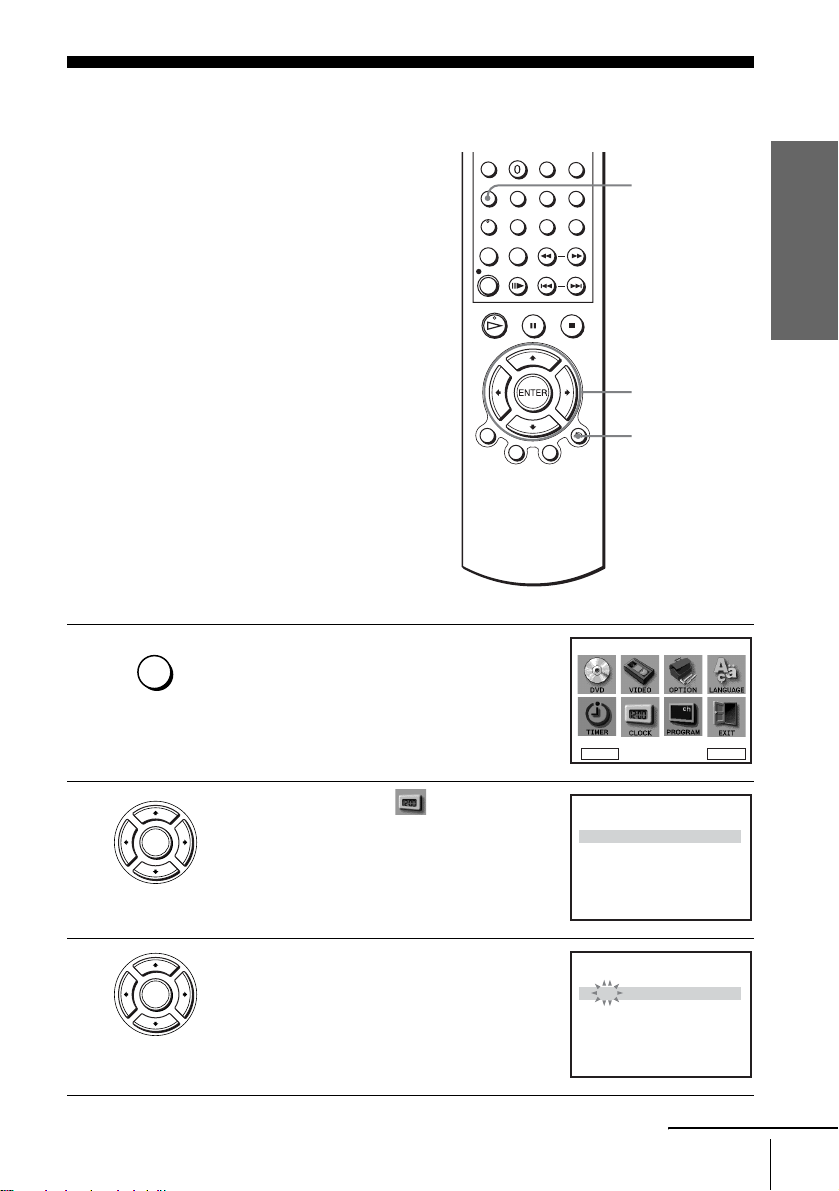
Step 6 : Setting the clock
You must set the time and date on the DVDVCR to use the timer features properly.
The Auto Clock Set function works only if a
station in your area is broadcasting a time
signal.
Before you start…
• Turn on the DVD-VCR and your TV.
• Set your TV to the video channel so that
the signal from the player appears on the
TV screen.
• If the DVD player is in play mode, you
cannot display the “SETUP MENU.” Stop
DVD playback.
1
SET UP
Press SET UP.
The “SETUP MENU” appears.
SET UP
V/v/B/b
ENTER
O RETURN
SETUP MENU
Getting Started
2
3
ENTER
ENTER
Press V/v/B/b to select (CLOCK SET),
then press ENTER.
The “CLOCK SET” menu appears.
Press V/v to set the hour.
DVD SETUP
RETURN
1 2 : 0 0 1 / JAN / 2002
RETURN
1 8 : 0 0 1 / JAN / 2002
RETURN
B
b
Vv
INSTALLATION
CLOCK SET
AUTO CLOCK : ON
vVBb
CLOCK SET
AUTO CLOCK : ON
vVBb
continued
Setting the clock
ENTER
TUE
TUE
17

4
ENTER
Press b to select the minutes and set the
minutes by pressing V/v.
CLOCK SET
1 8 : 3 0 1 / JAN / 2002
AUTO CLOCK : ON
b
B
RETURN
vV
TUE
5
6
7
ENTER
ENTER
Set the day, month, and year in se quence by
pressing b to select the item to be set, and
press V/v to select the digits, then press b.
The day of the week is set automatically.
Press V/v to select “ON” for the setting of the
Auto Clock Set function.
The DVD-VCR automatically sets the clock
according to the time signal broadcast between
1 8 : 3 0 28 / SEP / 2002
AUTO CLOCK : ON
RETURN
1 8 : 3 0 28 / SEP / 2002
AUTO CLOCK : ON
b
B
CLOCK SET
vV
CLOCK SET
the channels PR 1 to PR 5.
b
B
If you do not need the Auto Cloc k Set function,
RETURN
vV
select OFF.
Press O RETURN repeatedly to exit the menu.
RETURN
Tips
• If you set “AUTO CLOCK” to “ O N ”, the Auto Clock Set function is act ivated whenever the
DVD-VCR is tur ne d o ff. The time is adjusted auto matically by making reference to the time
signal from the station.
• To change the digits wh ile setting, p r es s B to return to the item to be changed, and select the
digits by pressing V/v.
SAT
SAT
18
Setting the clock

Step 7 : Presetting channels
If some channels could not be preset using
the Auto Set Up function, you can preset
them manually.
Before you start…
• Turn on the DVD-VCR and your TV.
• Set your TV to the video channel so that
the signal from the player appears on the
TV screen.
• If the DVD player is in play mode, you
cannot display the “SETUP MENU.” Stop
DVD playback.
1
SET UP
Press SET UP.
The “SETUP MENU” appears.
SET UP
V/v/B/b
ENTER
O RETURN
SETUP MENU
Getting Started
2
ENTER
Press V/v/B/b to select
(INSTALLATION), then press ENTER.
The “INSTALLATION” menu appears.
DVD SETUP
RETURN
AUTO SET UP
MANUAL SET UP
VIDEO OUTPUT CH : CH21
RETURN
B
b
Vv
INSTALLATION
INSTALLATION
vV
continued
Presetting channels
ENTER
ENTER
19

3
ENTER
Press V/v to select “MANUAL SET UP ,” then
press ENTER.
PR
1
2
3
4
5
vV
RETURN
CH
27
29
0
332
B
TV STATION TABLE
NAME
A
A
B
–
M
L
–
N
D
E
C
–
J
K
I
–
SWAPPING :
ENTER
CLEARDELETE :
4
5
6
7
ENTER
ENTER
ENTER
ENTER
Press V/v to select the row which you want to
preset, then press b.
To display other pages for programme
positions 6 to 80, press V/v repeatedl y.
Press B/b repeatedly until the channel you
want is displayed.
Press V/v to select “NAME,” then press b.
Enter the station name.
1 Press V/v to select a character.
Each time you press V, the character
changes as shown below.
A t B t … t Z t 0 t 1 t … t 9
t A
MANUAL TUNING
PR : 5
CH :
MFT :
NAME :
b
B
vV
RETURN
PR : 5
CH :
MFT :
NAME :
vV
RETURN
PR : 5
CH :
MFT :
NAME :
vV
RETURN
PR : 5
CH :
MFT :
NAME :
vV
RETURN
b
B
b
B
b
B
MEMORY :
MANUAL TUNING
MEMORY :
MANUAL TUNING
MEMORY :
MANUAL TUNING
MEMORY :
––
–
––––
33
–
––––
33
–
––––
33
–
–––
O
ENTER
ENTER
ENTER
ENTER
8
20
Presetting channels
2 Press b to set the next character.
The next space flashes.
To correct a character, press B/b until the character you want to correct
flashes, then reset it.
You can set up to 4 characte rs for the station name.
Press ENTER to confirm the station name.
ENTER

9
Press O RETURN repeatedly to exit the menu.
RETURN
If the picture is not clear
If the picture is not clear, you may use the Manual Fine Tuning (MFT) fu nction.
After step 5, press V/v to select “MFT .” Press B/b to get a clear picture, then press
O RETURN to exit the menu.
Tip
• The DVD-VCR must receive channel information for station names to appear automatically.
Note
• When adjusting MFT, the menu may become difficult to read due to interference from the
picture being rece ived.
Changing/disabling programme positions
After setting the channels, you can change
the programme positions as you like. If any
programme positions are unused or contain
unwanted channels, you can disable them.
Y ou can also change the station names. If the
station names are not displayed, you can
enter them manually.
Changing programme
positions
Before you start…
• Turn on the DVD-VCR and your TV.
• Set your TV to the video channel so that
the signal from the player appears on the
TV screen.
• If the DVD player is in play mode, you
cannot display the “SETUP MENU.” Stop
DVD playback.
Getting Started
SET UP
V/v/B/b
ENTER
O RETURN
continued
Presetting channels
21

1
SET UP
Press SET UP.
The “SETUP MENU” appears.
SETUP MENU
2
3
4
5
ENTER
ENTER
ENTER
ENTER
Press V/v/B/b to select
(INSTALLATION), then press ENTER.
The “INSTALLATION” menu appears.
Press V/v to select “MANUAL SET UP,” then
press ENTER.
Press V/v to select the row containing the
programme position you want to change.
To display other pages for programme
positions 6 to 80, press V/v repeatedl y.
Press ENTER, then press V/v to move to the
desired programm e position.
DVD SETUP
RETURN
AUTO SET UP
MANUAL SET UP
VIDEO OUTPUT CH : CH21
RETURN
CH
PR
1
27
29
2
3
4
332
5
B
vV
RETURN
CH
PR
1
27
29
2
3
4
332
5
B
vV
RETURN
CH
PR
1
27
2
3
4
332
5
3
vV
RETURN
B
Vv
INSTALLATION
INSTALLATION
vV
TV STATION TABLE
NAME
A
A
B
M
L
N
D
E
C
0
J
K
I
SWAPPING :
TV STATION TABLE
NAME
A
A
B
M
L
N
D
E
C
0
J
K
I
SWAPPING :
TV STATION TABLE
NAME
A
A
B
C
D
E
0
J
I
K
L
M
N
9
SWAPPING :
b
ENTER
ENTER
–
–
–
–
ENTER
CLEARDELETE :
–
–
–
–
ENTER
CLEARDELETE :
–
–
–
–
ENTER
CLEARDELETE :
6
7
22
Presetting channels
ENTER
RETURN
Press ENTER to confirm the setting.
T o change the programme position of another station, repea t steps 4 through 6.
Press O RETURN repeatedly to exit the menu.

Disabling unwanted programme positions
After presetting channels, you can disable
unused programme positions. The disabled
positions will be skipped later when you
press the PROG +/– buttons.
Before you start…
• Turn on the DVD-VCR and your TV.
• Set your TV to the video channel so that
the signal from the player appears on the
TV screen.
• If the DVD player is in play mode, you
cannot display the “SETUP MENU.” Stop
DVD playback.
Getting Started
PROG +/–
CLEAR
SET UP
V/v/B/b
ENTER
O RETURN
1
2
SET UP
ENTER
Press SET UP.
The “SETUP MENU” appears.
Press V/v/B/b to select
(INSTALLATION), then press ENTER.
The “INSTALLATION” menu appears.
SETUP MENU
DVD SETUP
RETURN
AUTO SET UP
MANUAL SET UP
VIDEO OUTPUT CH : CH21
RETURN
B
Vv
INSTALLATION
INSTALLATION
vV
b
continued
Presetting channels
ENTER
ENTER
23

3
ENTER
Press V/v to select “MANUAL SET UP,” then
press ENTER.
TV STATION TABLE
CH
PR
1
27
29
2
3
0
4
332
5
B
vV
RETURN
NAME
A
A
B
–
L
M
–
N
C
D
E
–
J
I
K
–
SWAPPING :
ENTER
CLEARDELETE :
4
5
6
7
ENTER
CLEAR
Press V/v to select the row which you want to
disable.
To display other pages for programme
positions 6 to 80, press V/v repeatedl y.
Press CLEAR.
The selected row will be cleared as shown on
the right.
TV STATION TABLE
CH
PR
1
27
29
2
3
0
4
332
5
B
vV
RETURN
TV STATION TABLE
CH
PR
1
27
2
3
0
4
332
5
B
vV
RETURN
NAME
A
A
B
–
M
L
–
N
D
E
C
–
J
K
I
–
SWAPPING :
NAME
A
A
B
–
C
D
E
–
J
I
K
–
SWAPPING :
Repeat steps 4 and 5 fo r any ot her programme positions you want to
disable.
Press O RETURN repeatedly to exit the menu.
RETURN
Note
• Be sure to select the programme position you want to disable correctly. If you disable a
programme position by mistake, you ne e d to re set tha t cha nne l m an ua ll y.
ENTER
CLEARDELETE :
ENTER
CLEARDELETE :
24
Presetting channels

Changing the station names
You can change or ent er the station names
(up to 4 characters). The DVD-VCR must
receive channel information for station
names to appear automatically.
Before you start…
• Turn on the DVD-VCR and your TV.
• Set your TV to the video channel so that
the signal from the player appears on the
TV screen.
• If the DVD player is in play mode, you
cannot display the “SETUP MENU.” Stop
DVD playback.
Getting Started
SET UP
V/v/B/b
ENTER
O RETURN
1
2
SET UP
ENTER
Press SET UP.
The “SETUP MENU” appears.
Press V/v/B/b to select
(INSTALLATION), then press ENTER.
The “INSTALLATION” menu appears.
SETUP MENU
DVD SETUP
RETURN
AUTO SET UP
MANUAL SET UP
VIDEO OUTPUT CH : CH21
RETURN
B
b
Vv
INSTALLATION
vV
continued
Presetting channels
ENTER
ENTER
25

3
ENTER
Press V/v to select “MANUAL SET UP,” then
press ENTER.
TV STATION TABLE
CH
PR
1
27
29
2
3
0
4
332
5
B
vV
RETURN
NAME
A
A
B
–
M
L
–
N
D
E
C
–
J
K
I
–
––––
SWAPPING :
ENTER
CLEARDELETE :
4
5
6
ENTER
ENTER
ENTER
Press V/v to select the row which you want to
change or enter the station name, then press b.
To display other pages for programme
positions 6 to 80, press v/V repeatedl y.
Press V/v to select “NAME,” then press b.
Enter the station name.
1 Press V/v to select a character.
Each time you press V, the character
PR : 5
CH :
MFT :
NAME :
vV
RETURN
PR : 5
CH :
MFT :
NAME :
vV
RETURN
PR : 5
CH :
MFT :
NAME :
b
B
b
B
MANUAL TUNING
33
–
––––
MEMORY :
MANUAL TUNING
33
–
––––
MEMORY :
MANUAL TUNING
33
–
–––
O
changes as shown below.
A t B t … t Z t 0 t 1 t … t 9
t A
b
vV
RETURN
B
MEMORY :
2 Press b to set the next character.
The next space flashes.
To correct a character, press B/b until the character you want to correct
flashes, then reset it.
You can set up to 4 characte rs for the station name.
ENTER
ENTER
ENTER
7
8
26
Presetting channels
Press ENTER to confirm the new name.
ENTER
Press O RETURN repeatedly to exit the menu.
RETURN
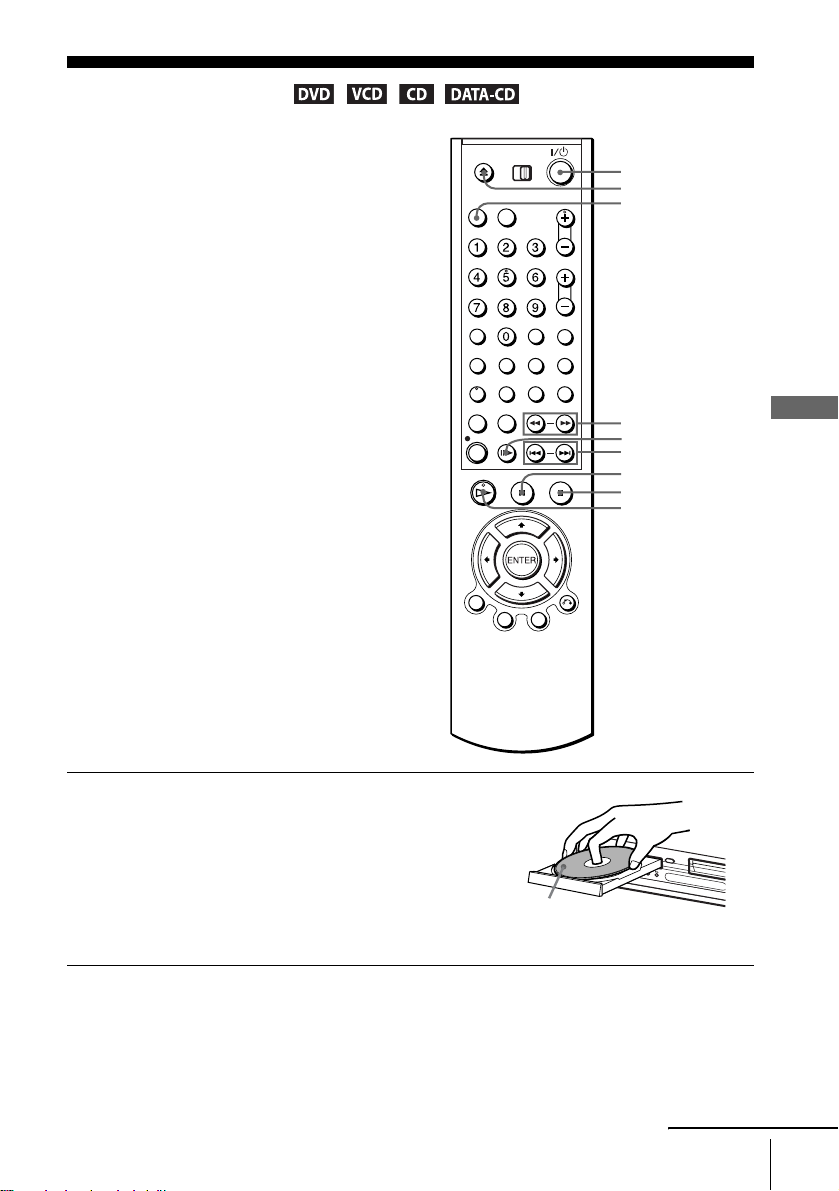
Basic Operations
Playing discs
Depending on the disc, some operations may
be different or restricted. Refer to the
operating instructions supplied with your
disc.
Before you start...
• Turn on the DVD-VCR and your TV.
• Set your TV to the video channel so that
the signal from the player appears on the
TV screen.
• Press SELECT DVD to control the DVD
player.
?/1
Z
SELECT DVD
1
Press Z to open the disc tray and
place a disc on the disc tray.
m/M
C
./ >
X
x
H
with the playback side
facing down
Basic Operations
continued
Playing discs
27
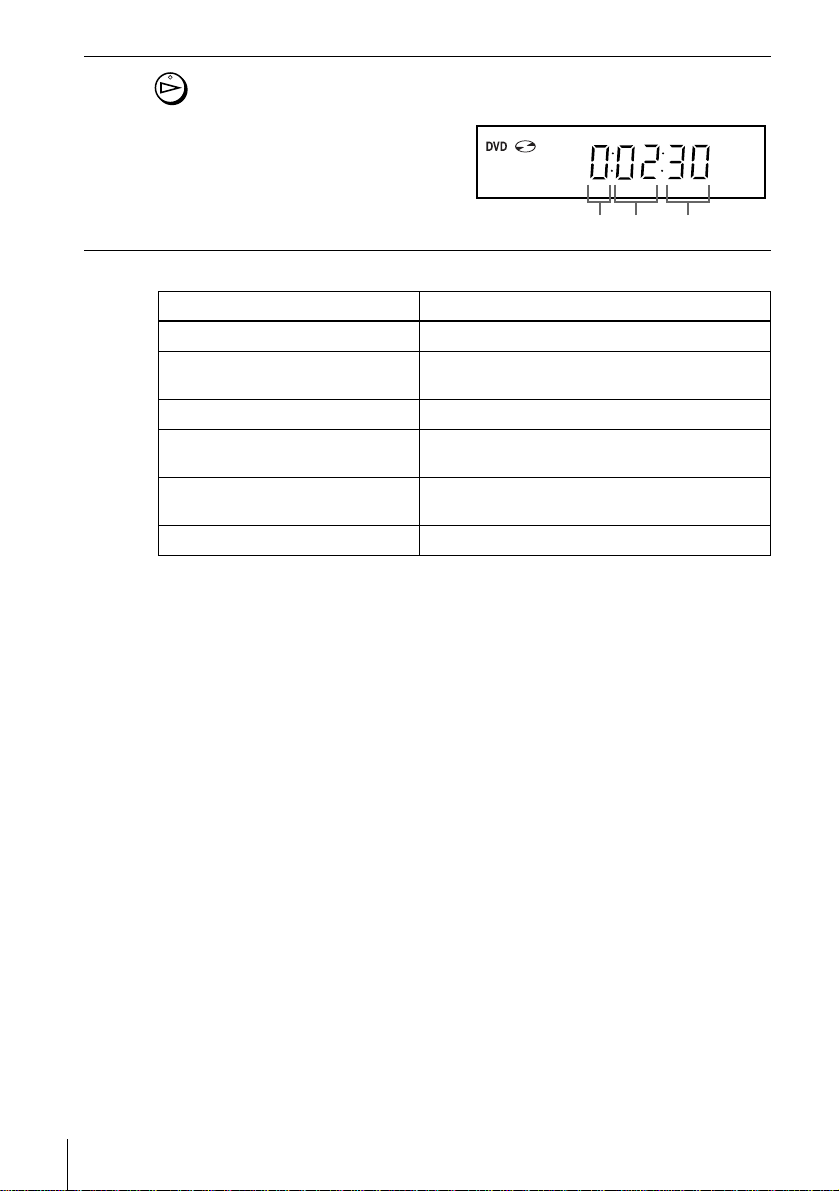
2
Press H.
The disc tray closes and the DVD player starts playback.
The display window shows the
playback time.
Depending on the di sc, a menu
may appear on the TV screen.
For DVDs, see page 63. For
VIDEO CDs, see page 79.
Additional tasks
To Press
Stop x
Pause X
Advance by frame in pause mode C
Go to the next chapter, track, or scene
in continuous play mode
Go back to the pre viou s chapter , track,
or scene in continuous play mo de
Stop play and remove the disc Z
To Resume playback for the current disc (Resume Play)
The DVD play er r eme m be r s the poin t whe r e yo u stopped the disc even if the DVD
player enters standby mode by pressing ?/1.
To resume playback, press H.
> on the remote
. on the remote
Hour Minute Second
28
Playing discs
While playing a disc, press x to stop playback.
1
Press H.
2
The DVD play er s tar t s pl ay ba c k fr om the poin t wh e re you stopped the disc in
Step 1.
T o locate a point quic kl y b y pla yi ng a disc in fast f orwar d or fast re ver se
in continuous play mode
Press m or M. With each press, the playback speed changes as follows.
×2 t ×4 t ×8 t ×16 t ×32 t ×128
Release the button at the desired speed.
When you find the point you want, press H.
To watch slow motion in continuous play mode
Press X, then press M SLOW y. With each press, the playback speed changes as
follows.
1/8 t 1/4 t 1/2
To resume normal playback, press H.

Tip
• You can listen to the sound during ×2 fast forward pla yba ck. However, you cannot listen to
DTS (Only Digital Out), MPEG au di o and LPCM sound.
• To make a video timer reservation during DVD playback, we recomm end performing the
operations under “S etting the recording du rat ion time” (page 82 ) .
Notes
• Y ou can change the screen type using the “SCREEN SETUP” menu. (See “Screen Setup” on
page 55)
• Do not perform VIDEO playback while playing back a disc.
• The VIDEO CD playback speed changes as follows.
t ×8
×4
• You cannot change the CD or DATA-CD playback speed.
Notes on playing DTS* sound tracks on a CD
• When playing DTS-encoded CDs, excessive noise will be heard from the analog stereo jacks.
To avoid possible da ma ge to the audio system, the consumer should take proper precautions
when the analog stereo jacks of the DVD player are connected to an amplification system. To
enjoy DTS Digital Surround™ playback, an external 5.1-channel decoder system must be
connected to the digital jack of the DVD player.
• Set the sound to “STEREO ” usi ng t he AUDIO button when you pl ay DTS sound tracks on a
CD (page 73).
• Do not play DTS sound tracks w ithout first connecting the DVD player to an audio
component having a built-in D TS decoder. The DVD player outputs the DTS signal via the
DIGIT AL AUDIO OUT (COAXIAL or OPTICAL) jack even if “DTS” is set to “Off” in
“AUDIO SETUP” menu (page 5 3), and may affect your ears or cause your spe aker s to be
damaged.
Notes on playing DVDs with a DTS sound track
• DTS audio signals are output only through the DIGITAL AUDIO OUT (COAXIAL or
OPTICAL) jack.
• When you play a DVD with DTS sound tracks, set “DT S ” to “On” in “AUDIO SETUP”
menu (page 53).
• If you connect the player to audio equipment with out a DTS decoder, do not set “DTS” to
“On” in “AUDIO SETUP” menu (page53). A loud noise may come out from the speakers,
affecting your ears or causing the speakers to be da maged.
* “D T S ” and “DTS Digital O ut” are trademarks of D igital Theater Sys te ms, Inc.
Basic Operations
Playing discs
29

Guide to the on-screen display
You can check disc informat i on during
playback.
The displayed contents differ according to
the type of disc being played.
Press DISPLAY. The following information app ears; type of di sc, current title /track ,
chapter, counter position, voice language and subtitle language. Refer to “DVD
AUDIO/SUBTITLE LANGUAGE” on page 109 for the abbreviation of the language.
V/v/B/b
ENTER
O RETURN
DISPLAY
Current title/track number
Type of disc
Current chapter number
Counter position
Voice language
Subtitle language
DVD
Bb
T:01
C:02
0:01:09
ENG 5.1CH
ENG
You can playback the desired title/track, chapter or counter position using this menu.
To playback the desired title/track or chapter
Press V/v to select the desired item.
1
Press B/b to change the item.
2
Press ENTER to start playback.
3
Press DISPLAY or O RETURN to turn off the m enu.
4
DVD
Bb
T:01
C:02
0:01:09
ENG 5.1CH
ENG
The title/track or chapter icon will appear on the DVD playback screen followed by
the current title/track or chapter number and the counter position.
To playback from the desired counter position
Press V/v to select the counter position icon.
1
Enter the desired position using the number buttons.
2
Press ENTER to start playback.
3
Press DISPLAY or O RETURN to turn off the m enu.
4
Note
• The display may not ch ange as operated depending on the disc.
DVD
T:01
C:02
0:01:09
ENG 5.1CH
ENG
30
Guide to the on-screen display
 Loading...