


FOR MEASUREABLE SUCCESS
Basic Terminal 3010
Operating Manual
www.soehnle-professional.com

English |
|
|
|
Contents |
|
|
|
1. |
Introduction . . . . . . . . . . . . . . . . . . . . . . . . . . . . . . . . . . . . . . . . . . . . . . . . . . . |
..Page |
3 |
1.1 |
Operating manual notes . . . . . . . . . . . . . . . . . . . . . . . . . . . . . . . . . . . . . . . . . . . |
Page |
3 |
1.2 |
Description of the appliance . . . . . . . . . . . . . . . . . . . . . . . . . . . . . . . . . . . . . . . . |
Page |
3 |
1.3. |
Putting into operation . . . . . . . . . . . . . . . . . . . . . . . . . . . . . . . . . . . . . . . . . . . . . |
Page |
4 |
1.4. |
Installation . . . . . . . . . . . . . . . . . . . . . . . . . . . . . . . . . . . . . . . . . . . . . . . . . . . . . . |
Page |
4 |
1.5 |
Symbols . . . . . . . . . . . . . . . . . . . . . . . . . . . . . . . . . . . . . . . . . . . . . . . . . . . . . . .. |
Page 5 |
|
1.6 |
Description of the nameplate . . . . . . . . . . . . . . . . . . . . . . . . . . . . . . . . . . . . . . . |
Page |
5 |
1.7 |
Control keys . . . . . . . . . . . . . . . . . . . . . . . . . . . . . . . . . . . . . . . . . . . . . . . . . . . . |
Page |
6 |
1.8 |
Electronic nameplate . . . . . . . . . . . . . . . . . . . . . . . . . . . . . . . . . . . . . . . . . . . . . |
Page |
7 |
2.0 |
Basic functions . . . . . . . . . . . . . . . . . . . . . . . . . . . . . . . . . . . . . . . . . . . . . . . . . . |
Page |
8 |
2.1 |
Power-on . . . . . . . . . . . . . . . . . . . . . . . . . . . . . . . . . . . . . . . . . . . . . . . . . . . . . . |
Page |
8 |
2.2 |
Switching off . . . . . . . . . . . . . . . . . . . . . . . . . . . . . . . . . . . . . . . . . . . . . . . . . . . . |
Page |
8 |
2.3 |
Zeroing . . . . . . . . . . . . . . . . . . . . . . . . . . . . . . . . . . . . . . . . . . . . . . . . . . . . . . . . |
Page |
8 |
2.4 |
Switching over the weight unit kg <> lb . . . . . . . . . . . . . . . . . . . . . . . . . . . . . . . |
Page |
8 |
2.5 |
Taring function . . . . . . . . . . . . . . . . . . . . . . . . . . . . . . . . . . . . . . . . . . . . . . . . . . |
Page |
9 |
2.6 |
Ten times resolution X10 . . . . . . . . . . . . . . . . . . . . . . . . . . . . . . . . . . . . . . . . . . |
Page 10 |
|
2.7 |
Switching over the scales (measuring points) . . . . . . . . . . . . . . . . . . . . . . . . . |
Page 10 |
|
2.8 |
Alibi memory . . . . . . . . . . . . . . . . . . . . . . . . . . . . . . . . . . . . . . . . . . . . . . . . . . . |
Page 10 |
|
2.9 |
Hold function . . . . . . . . . . . . . . . . . . . . . . . . . . . . . . . . . . . . . . . . . . . . . . . . . . . |
Page 11 |
|
2.10 |
Measuring point inputs and outputs . . . . . . . . . . . . . . . . . . . . . . . . . . . . . . . . .. |
Page 12 |
|
2.11 |
LED lamps . . . . . . . . . . . . . . . . . . . . . . . . . . . . . . . . . . . . . . . . . . . . . . . . . . . . . |
Page 12 |
|
3.0 |
Application programs . . . . . . . . . . . . . . . . . . . . . . . . . . . . . . . . . . . . . . . . . . . . |
Page 13 |
|
3.1 |
Weighing and taring . . . . . . . . . . . . . . . . . . . . . . . . . . . . . . . . . . . . . . . . . . . . . . |
Page 13 |
|
3.2 |
Counting . . . . . . . . . . . . . . . . . . . . . . . . . . . . . . . . . . . . . . . . . . . . . . . . . . . . . .. |
Page 13 |
|
3.3 |
Totalising . . . . . . . . . . . . . . . . . . . . . . . . . . . . . . . . . . . . . . . . . . . . . . . . . . . . . .. |
Page 14 |
|
3.4 |
Batching . . . . . . . . . . . . . . . . . . . . . . . . . . . . . . . . . . . . . . . . . . . . . . . . . . . . . . |
Page 15 |
|
3.5 |
Withdrawal weighing . . . . . . . . . . . . . . . . . . . . . . . . . . . . . . . . . . . . . . . . . . . . . |
Page 15 |
|
3.6 |
Switching point programming . . . . . . . . . . . . . . . . . . . . . . . . . . . . . . . . . . . . . . . |
Page 16 |
|
3.7 |
Checking . . . . . . . . . . . . . . . . . . . . . . . . . . . . . . . . . . . . . . . . . . . . . . . . . . . . . . |
Page 16 |
|
3.8 |
Dosing. . . . . . . . . . . . . . . . . . . . . . . . . . . . . . . . . . . . . . . . . . . . . . . . . . . . . . . . . |
Page 16 |
|
4. |
Troubleshooting . . . . . . . . . . . . . . . . . . . . . . . . . . . . . . . . . . . . . . . . . . . . . . . . . |
Page 18 |
|
2

English
Thank you for choosing this Soehnle Professional product. All the features of this product were designed to the state of the art and are optimised for simple and straightforward use.
If you have any queries or experience any problems with the appliance that are not addressed in the operating instructions, please contact your Soehnle Professional service partner or visit us on the web at www.soehnle-professional.com.
1.1 Operating manual notes
This operating manual describes all the standard functions and settings of the Basic Terminal 3010. Further information on the Setting mode is provided on the enclosed CD.
All the information is based on the standard version of the Basic Terminal 3010. There may be deviations on special-purposes versions.
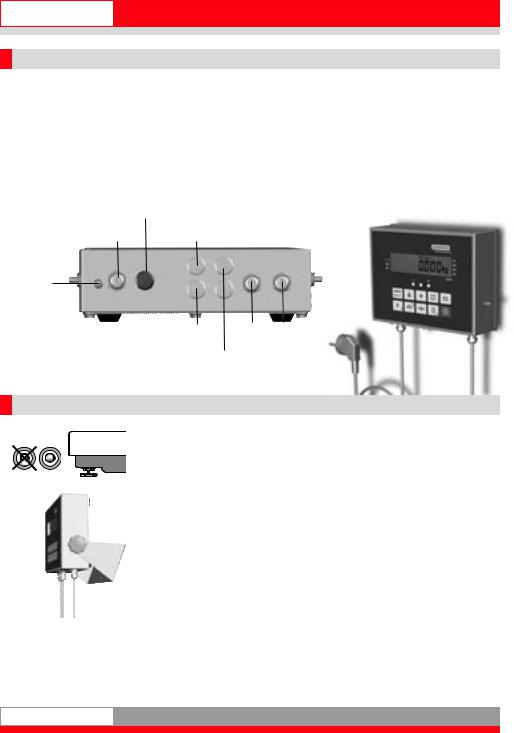
1.2 Appliance description
Technical data
•Housing made of stainless steel, protection class IP 40 or 65, integrated power adapter 100 - 240 VAC, optional DC/DC converter, 12 or 24 V
•2 measuring points connectable internally
•Membrane keyboard with a total of 10 keys, 1 function key
•Display: 7 digits, 7-segment display, 16 mm digit height, backlit and dimmable
•Operating temperature: -10°C to +40°C
•Calibratable to Precision Class III for n = 8000e for multirange and multidivision scales.
•Approvable weighing range 0.1 kg to 120 t.
•Smallest permissible input signal per calibration value = 0.22 µV.
•Load cell power supply 5 VDC
Optional:
•Alibi memory for min. 2 million inputs
•Interfaces: 2 x RS 232, additional ports optional, including bus, analogue output 0 - 20 mA, USB
3
English
1.3 Putting into operation
Before connecting the power plug to the mains, make sure that the power supply specified on the nameplate and the power plug version comply with local conditions.
Place the connected scales on a level and stable surface. Protect the application by selecting a site of installation that is not subject to shocks, vibration, intensive heat or cold, draughts, chemicals or moisture.
The appliance may only be opened by trained service technicians. Before carrying out any service work on the appliance, disconnect the power supply.
After power-on, the measured values stabilise after a warm-up period of 30 minutes.
Pressure compensation membrane on IP 65 housing
Power supply |
Interface 1 |
Ground (GND)
Interface 2 |
Scale 1 + 2 |
Connections
e.g. Profibus, Ethernet, etc.
1.4 Installation
Install the weighing platform at the point of use.
Using a spirit level and the adjustable feet, ensure that the platform is horizontal.
Install the Basic Terminal or mount it on the wall using the optional bracket.
Provide access to a mains power source or connect the appliance to a
DC power source using a DC/DC converter.
The scale is ready for use.
4

English
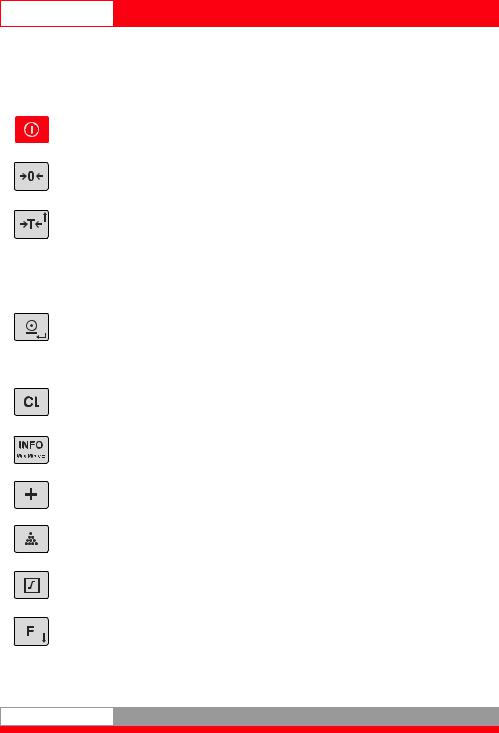
1.5 Symbols
M1  Active measuring point (scale)
Active weighing range
Zero reading
Net weighing
Tare reading
Manual tare
Hold mode (The reading is fixed to improve legibility)
Total memory
Piece count mode
Alibi memory
 O1-O4 Switching points (Outputs O1 - O4)
1.6 Description of the nameplate
|
|
Weighing ranges |
|
|
Max |
Maximum load of weighing range |
|
|
Min |
Minimum load of weighing range |
|
|
e= |
Calibration value (resolution) |
|
|
SNR |
Serial number of scale (scale type, last digits of year |
|
|
|
of manufacture, consecutive number) |
|
|
|
EU conformity mark with year of affixing also start of |
|
|
|
validity of verification |
|
XXXX |
|
Precision class |
|
D07-09-011 Number of EU approval |
|||
|
|||
|
XXXX |
e.g. 0103, Official Code of "Notified Body" |
|
|
|
(this body performed the initial calibration) |
|
|
M |
Symbol for EU calibration |
|
|
001 |
Calibration counter status |
|
5
English
|
|
|
|
|
|
|
|
|
|
|
|
|
|
|
|
|
1.7 |
Control keys |
|
|
|
|
|
|
|
Operating mode |
|
Setpoint input |
|
Setting mode |
|
|
|
|
|
||||
|
|
On / Off |
|
|
|
|
|
|
|
|
|
|
|
|
|
|
|
Zeroing key or Clear |
|
|
|
One menu level back, |
|
|
|
|
Set input to zero |
|
or shift an editable decade |
||
|
|
tare |
|
|
from right to left |
||
|
|
|
|
|
|||
|
|
|
|
|
|
|
|
|
|
Tare key |
|
Increment value |
|
Next setting step or |
|
|
|
|
|
increment value |
|
||
|
|
|
|
|
|
|
|
|
|
|
|
|
|
|
|
|
|
|
|
|
|
Next setting step or |
|
|
|
|
|
|
|
increment value Access edit |
|
|
|
Print key or |
|
|
|
function within setting step |
|
|
|
|
|
|
or |
||
|
|
Enter key |
|
|
|
||
|
|
|
|
|
save parameter and go to |
||
|
|
|
|
|
|
||
|
|
|
|
|
|
next setting step |
|
|
|
|
|
|
|
|
|
|
|
Clear key or Cancel |
|
Cancel key |
|
Go back one menu level in |
|
|
|
key |
|
|
Setting mode |
|
|
|
|
|
|
|
|
||
|
|
|
|
|
|
|
|
|
|
Info key |
|
|
|
|
|
|
|
|
|
|
|
|
|
|
|
Totalise or |
|
|
|
|
|
|
|
Batch |
|
|
|
|
|
|
|
|
|
|
|
|
|
|
|
Count |
|
|
|
|
|
|
|
|
|
|
|
|
|
|
|
Setpoints or corrected |
|
Accept setpoints or cor- |
|
|
|
|
|
values |
|
rected values and continue. |
|
|
|
|
|
|
|
|
|
|
|
|
|
Freely programmable |
|
Decrement value |
|
Go back by one setting step |
|
|
|
function key |
|
|
or decrement value |
||
|
|
|
|
|
|||
|
|
|
|
|
|
|
|
6
 Loading...