

Page 1

PLANCHA DE SOBREMESA
BARBECUE ELETTRICO DA TAVOLO STR 1000 A1
PLANCHA DE SOBREMESA
Instrucciones de uso
BARBECUE ELETTRICO DA TAVOLO
Istruzioni per l'uso
TABLETOP GRILL
Operating instructions
IAN 95855
TISCHGRILL
Bedienungsanleitung
Page 2

Antes de empezar a leer abra la página que contiene las imágenes y, en seguida, familiarícese con todas
las funciones del dispositivo.
Prima di leggere aprire la pagina con le immagini e prendere confi denza con le diverse funzioni
dell'apparecchio.
Before reading, unfold the page containing the illustrations and familiarise yourself with all functions of
the device.
Klappen Sie vor dem Lesen die Seite mit den Abbildungen aus und machen Sie sich anschließend mit allen
Funktionen des Gerätes vertraut.
ES Instrucciones de uso Página 1
IT / MT Istruzioni per l'uso Pagina 11
GB / MT Operating instructions Page 21
DE / AT / CH Bedienungsanleitung Seite 31
Page 3

Page 4

Índice
Introducción . . . . . . . . . . . . . . . . . . . . . . . . . . . . . . . . . . . . . . . . . . . . . . . . . . . . . . . . . . .2
Uso previsto . . . . . . . . . . . . . . . . . . . . . . . . . . . . . . . . . . . . . . . . . . . . . . . . . . . . . . . . . . .2
Volumen de suministro . . . . . . . . . . . . . . . . . . . . . . . . . . . . . . . . . . . . . . . . . . . . . . . . . . .2
Descripción del aparato . . . . . . . . . . . . . . . . . . . . . . . . . . . . . . . . . . . . . . . . . . . . . . . . . .2
Características técnicas . . . . . . . . . . . . . . . . . . . . . . . . . . . . . . . . . . . . . . . . . . . . . . . . . .2
Indicaciones de seguridad . . . . . . . . . . . . . . . . . . . . . . . . . . . . . . . . . . . . . . . . . . . . . . . .3
Montaje y emplazamiento. . . . . . . . . . . . . . . . . . . . . . . . . . . . . . . . . . . . . . . . . . . . . . . .6
Antes del primer uso . . . . . . . . . . . . . . . . . . . . . . . . . . . . . . . . . . . . . . . . . . . . . . . . . . . .6
Ajustes de la temperatura . . . . . . . . . . . . . . . . . . . . . . . . . . . . . . . . . . . . . . . . . . . . . . . .6
Manejo . . . . . . . . . . . . . . . . . . . . . . . . . . . . . . . . . . . . . . . . . . . . . . . . . . . . . . . . . . . . . . .7
Limpieza y mantenimiento . . . . . . . . . . . . . . . . . . . . . . . . . . . . . . . . . . . . . . . . . . . . . . .7
Almacenamiento . . . . . . . . . . . . . . . . . . . . . . . . . . . . . . . . . . . . . . . . . . . . . . . . . . . . . . . .8
Recetas . . . . . . . . . . . . . . . . . . . . . . . . . . . . . . . . . . . . . . . . . . . . . . . . . . . . . . . . . . . . . . .8
Hamburguesas . . . . . . . . . . . . . . . . . . . . . . . . . . . . . . . . . . . . . . . . . . . . . . . . . . . . . . . . . . . . . . . . . . 8
Pechuga de pollo/pavo . . . . . . . . . . . . . . . . . . . . . . . . . . . . . . . . . . . . . . . . . . . . . . . . . . . . . . . . . . . 8
Verduras/frutas. . . . . . . . . . . . . . . . . . . . . . . . . . . . . . . . . . . . . . . . . . . . . . . . . . . . . . . . . . . . . . . . . . 8
Huevos revueltos con hierbas . . . . . . . . . . . . . . . . . . . . . . . . . . . . . . . . . . . . . . . . . . . . . . . . . . . . . . . 9
ES
Eliminación de fallos . . . . . . . . . . . . . . . . . . . . . . . . . . . . . . . . . . . . . . . . . . . . . . . . . . . . .9
Garantía y asistencia técnica . . . . . . . . . . . . . . . . . . . . . . . . . . . . . . . . . . . . . . . . . . . . .10
Desecho . . . . . . . . . . . . . . . . . . . . . . . . . . . . . . . . . . . . . . . . . . . . . . . . . . . . . . . . . . . . . .10
Importador . . . . . . . . . . . . . . . . . . . . . . . . . . . . . . . . . . . . . . . . . . . . . . . . . . . . . . . . . . .10
STR 1000 A1
1
Page 5

PLANCHA DE SOBREMESA
ES
STR 1000 A1
Introducción
Felicidades por la compra de su aparato nuevo.
Ha adquirido un producto de alta calidad. Las instruc-
ciones de uso forman parte del producto y contienen
indicaciones importantes acerca de la seguridad,
el uso y el desecho de este aparato. Antes de usar
el producto, familiarícese con todas las indicaciones
de manejo y de seguridad. Utilice el producto únicamente como se describe y para los ámbitos de
aplicación indicados. Entregue todos los documentos
cuando transfi era el producto a terceros.
Uso previsto
Este aparato está diseñado exclusivamente para
cocinar alimentos en espacios interiores. Este
aparato está previsto exclusivamente para su
uso doméstico privado. No lo utilice con fi nes
comerciales.
Volumen de suministro
Plancha de sobremesa (plancha, base)
Instrucciones de uso
Descripción del aparato
1 Plancha
2 Serpentín
3 Cinta para cables
4 Base
5 Piloto de control
6 Regulador de temperatura
7 Asas
Características técnicas
Tensión nominal: 220 - 240 V ~, 50 Hz
Máx. consumo de potencia: 1000 W
INDICACIÓN
Compruebe que el volumen de suministro esté
completo y que carezca de daños después de
desembalarlo. En caso necesario, póngase en
contacto con el servicio de asistencia técnica.
2
STR 1000 A1
Page 6

Indicaciones de seguridad
¡PELIGRO DE DESCARGA ELÉCTRICA!
► Si la clavija de red o el cable de red están dañados, encomien-
de su sustitución al personal técnico autorizado o al servicio de
asistencia técnica con el fi n de evitar riesgos.
► Proteja el cable de red contra el contacto directo con las piezas
calientes del aparato. No utilice nunca el aparato cerca de llamas
abiertas, placas de cocina u hornos calientes.
► No exponga el aparato a la lluvia ni lo utilice en lugares mojados
o húmedos. Procure que el cable de red nunca se moje ni se
humedezca durante el funcionamiento.
► Antes de usar el aparato, compruebe si hay signos de daños
externos visibles. No utilice un aparato dañado o que se haya
caído.
► Debe inspeccionarse el cable de red regularmente para localizar
cualquier signo de daños. Si el cable de red está dañado, no
debe seguir utilizándose el aparato.
► El aparato debe conectarse a una base de enchufe con conductor
de puesta a tierra.
ES
► El aparato no debe entrar en contacto con la humedad ni con la
lluvia.
No sumerja nunca el aparato en agua ni en otros líquidos.
Posible peligro de muerte por descarga eléctrica si penetran
restos de líquidos en piezas sometidas a tensión.
STR 1000 A1
3
Page 7

ES
¡ADVERTENCIA: PELIGRO DE LESIONES!
► Este aparato puede ser utilizado por niños a partir de 8 años
y por personas cuyas facultades físicas, sensoriales o mentales
sean reducidas o carezcan de los conocimientos y de la experiencia
necesaria siempre que sean vigilados o hayan sido instruidos
correctamente sobre el uso seguro del aparato y hayan comprendido los peligros que entraña.
► Los niños no deben jugar con el aparato.
► Los niños no deben realizar las tareas de limpieza y manteni-
miento del aparato a no ser que sean mayores de 8 años y estén
supervisados por un adulto.
► El aparato y el cable de conexión deben mantenerse fuera del
alcance de los niños menores de 8 años.
► Después de su uso, deje que el aparato se enfríe bien antes de
limpiarlo. ¡Peligro de quemaduras!
► Coloque el aparato lo más cerca posible de una base de enchufe.
Procure que la clavija de red esté fácilmente accesible para su
desconexión rápida si se produce una situación de peligro y
tienda el cable de forma que nadie pueda tropezar con él.
► Procure que el aparato esté colocado de forma estable.
¡Precaución! ¡Superfi cie caliente!
► Durante el funcionamiento, solo pueden tocarse las asas y el
regulador de temperatura. Las superfi cies del aparato se calientan
mucho durante el funcionamiento. Recomendamos el uso de
guantes o trapos de cocina.
► No deje nunca el aparato desatendido durante su funcionamiento.
► No siga utilizando el aparato si está dañado.
4
STR 1000 A1
Page 8

¡ATENCIÓN: DAÑOS MATERIALES!
► No utilice ningún tipo de reloj programador externo ni sistema de
control remoto para accionar el aparato.
► No deje nunca el aparato desatendido durante su funcionamiento.
► Asegúrese de que el aparato, el cable de red o la clavija de
red no entren en contacto con fuentes de calor, como placas de
cocina o llamas abiertas.
► ¡No utilice carbón ni combustibles similares con el aparato!
► Para proteger el revestimiento antiadherente, evite el uso de uten-
silios metálicos, como cuchillos, tenedores, etc. No siga utilizando
el aparato si el revestimiento antiadherente está dañado.
► Utilice el aparato exclusivamente con los accesorios originales
suministrados.
ES
STR 1000 A1
5
Page 9

Montaje y emplazamiento
ES
¡ADVERTENCIA!
¡RIESGO DE INCENDIO!
► No coloque nunca el aparato bajo armarios
suspendidos ni junto a cortinas, paredes de
armarios ni cualquier otro objeto infl amable.
► Coloque el aparato a una distancia sufi ciente
con respecto a materiales infl amables (p. ej.,
cortinas).
► Instale exclusivamente el aparato sobre una
base termorresistente.
1) Extraiga todas las piezas de la caja y deseche
el material de embalaje y las láminas protectoras.
2) Limpie todas las piezas tal y como se describe
en el capitulo "Limpieza y mantenimiento".
Asegúrese de que todas las piezas estén
totalmente secas.
3) Introduzca el cable por la abertura de la parte
inferior de la base 4.
4) Coloque el aparato sobre una superfi cie
termorresistente, limpia y plana. Evite instalar
el aparato directamente junto a una pared o
armario.
5) Coloque la plancha 1 sobre la base 4.
INDICACIÓN
Al calentar el aparato por primera vez, es
►
posible que se genere un poco de humo
y olor debido a los restos derivados de su
fabricación. Esto es perfectamente normal e
inofensivo. Procure que haya sufi ciente ventilación; por ejemplo, abra una ventana.
6) Limpie el aparato una vez se haya enfriado tal
y como se describe en el capítulo "Limpieza y
mantenimiento".
7) Antes de poner en funcionamiento el aparato,
asegúrese de que esté totalmente seco.
El aparato estará ahora listo para funcionar.
Ajustes de la temperatura
Puede ajustar el nivel de temperatura deseado con
el regulador de temperatura 6.
Nivel 0 Plancha apagada
Nivel 0 - 2 Plancha encendida a
baja temperatura
Nivel 2 - 3 Plancha encendida a
temperatura media
Nivel 3 - M Plancha encendida a
temperatura alta
Antes del primer uso
1) Limpie la plancha 1 con un paño húmedo.
2) Engrase ligeramente la plancha 1 con grasa
adecuada para cocinar. De este modo, podrá
eliminar mejor los residuos derivados de la
fabricación de la plancha 1.
3) Conecte la clavija de red en una base de enchufe y coloque el regulador de temperatura
6 en el nivel M. El aparato se calentará.
4) Espere 10 minutos.
5) A continuación, extraiga la clavija de red y
deje que se enfríe el aparato.
6
INDICACIÓN
Seleccione el nivel correcto de temperatura
►
mediante la realización de pruebas. Los
niveles inferiores y medios de temperatura
son más adecuados para verduras, frutas y
alimentos delicados, y los niveles superiores,
para la carne.
Al ajustarse un nivel de temperatura, se enciende
el piloto de control 5. Cuando se alcanza la
temperatura ajustada, se apaga el piloto de
control 5.
No obstante, puede volver a encenderse y apagarse, lo que signifi ca que el aparato mantiene la
temperatura y ha vuelto a calentarse.
STR 1000 A1
Page 10

Manejo
¡ADVERTENCIA!
¡PELIGRO DE LESIONES!
► ¡El aparato está muy caliente durante el uso!
Durante el uso del aparato, solo pueden
tocarse las asas 7 o el regulador de temperatura 6. Utilice guantes o trapos de cocina
para tocar el aparato.
1) Inserte la clavija de red en una base de
enchufe.
2) Ajuste el nivel de temperatura deseado. El
piloto de control 5 se ilumina y el aparato se
calienta.
3) El piloto de control 5 se apaga cuando el
aparato ya está caliente.
Coloque los alimentos de la manera deseada
sobre la plancha 1.
4) Compruebe el resultado de la cocción de forma
regular y, en caso necesario, dé la vuelta a los
alimentos. Cuando esté satisfecho, retire los
alimentos de la plancha 1.
¡ATENCIÓN!
¡PELIGRO DE DAÑOS MATERIALES!
► No utilice utensilios metálicos, como cuchillos,
tenedores, etc. No siga utilizando el aparato
si el revestimiento antiadherente está dañado.
5) Si no desea seguir cocinando alimentos, coloque el regulador de temperatura 6 en el nivel
"0" y extraiga la clavija de red de la base de
enchufe. Solo así se apagará el aparato.
Limpieza y mantenimiento
¡PELIGRO DE DESCARGA ELÉCTRICA!
¡Antes de limpiar el aparato, extraiga siem-
►
pre la clavija de red de la base de enchufe!
¡Existe riesgo de descarga eléctrica!
¡No sumerja nunca la base 4 en agua ni
en otros líquidos!
¡ADVERTENCIA!
¡PELIGRO DE LESIONES!
► Deje que el aparato se enfríe antes de
limpiarlo. De lo contrario, existe peligro de
quemaduras.
¡ATENCIÓN!
¡PELIGRO DE DAÑOS MATERIALES!
No utilice productos de limpieza abrasivos
►
ni agresivos. ¡Podrían dañar la superfi cie!
► No utilice utensilios metálicos, como cuchillos,
tenedores, etc. No siga utilizando el aparato
si el revestimiento antiadherente está dañado.
■ Limpie el aparato en cuanto se haya enfriado.
Así, será más fácil retirar los restos de alimentos.
■ Limpie la base 4 con un paño húmedo. En
caso necesario, añada un detergente suave en
el paño y limpie el aparato con agua limpia.
Seque todo bien.
■ Elimine los restos de mayor extensión de la
plancha 1 con un papel de cocina. Limpie
la plancha 1 con un paño húmedo. Antes
de volver a utilizar la plancha 1, séquela
completamente.
ES
STR 1000 A1
7
Page 11

INDICACIÓN
ES
Si quedan restos incrustados de suciedad en
►
la plancha 1, aplique un poco de detergente
en el paño. A continuación, limpie la plancha
1 con agua limpia. Asegúrese de que no
quede ningún resto de detergente sobre la
plancha 1.
► También puede lavarse la plancha 1 en el
lavavajillas.
► Tras realizar la limpieza con detergente o en
el lavavajillas, la plancha 1 debe volver a
frotarse ligeramente con aceite; de lo contrario, la función del revestimiento antiadherente
se verá perjudicada.
■ Vuelva a montar el aparato.
Almacenamiento
■ Guarde el aparato limpio en un lugar limpio,
seco y sin polvo.
■ Forme un lazo con el cable y fíjelo con la cinta
para cables 3 en la parte inferior del aparato.
■ Coloque los fi letes rusos con la lechuga, las ro-
dajas de tomate y la salsa para hamburguesas
entre ambas mitades del pan de hamburguesa.
INDICACIÓN
El tiempo de preparación puede variar según
►
la forma y el espesor de los fi letes rusos.
Si los fi letes rusos son más fi nos, reduzca el
tiempo de preparación, y si son más gruesos,
auméntelo.
Pechuga de pollo/pavo
Ingredientes
Pechuga de pollo/pavo de 200 g
Un poco de harina
■ Añada un poco de aceite de cocina sobre la
plancha 1 y ajuste el aparato en el nivel 3 - M.
■ Corte los 200 g de pechuga de pollo/pavo en
rodajas y harínelas ligeramente.
■ Cocine las pechugas aprox. 4 minutos por un
lado, deles la vuelta, añada un poco de sal y
cocínelas aprox. 4 minutos por el otro lado.
Recetas
Hamburguesas
Ingredientes
200 g de carne picada de vacuno
Hojas de lechuga
2 tomates
2 panes de hamburguesa
Condimentos (pimienta, sal, pimentón)
Un poco de salsa para hamburguesas
■ Caliente el aparato en el nivel 4.
■ Condimente la carne picada de vacuno con sal,
pimienta y pimentón al gusto.
■ Forme dos fi letes rusos de 100 g cada uno con
la carne picada de vacuno, cocínelos aprox.
9 minutos por cada lado y retírelos.
■ Vuelva a colocar el aparato en el nivel 3, tueste
los panes de hamburguesa por ambos lados y
córtelos por la mitad.
8
Verduras/frutas
■ Caliente el aparato en el nivel 3.
■ Corte las verduras en rodajas, tiras o dados.
Condiméntelas con un poco de aceite, especias
y sal al gusto. Entretanto, dé la vuelta a las
verduras.
■ Por ejemplo, pueden cocinarse las siguientes
verduras en la plancha:
– Berenjenas
(cortadas en rodajas, aprox. 15 minutos
de cocción)
– Patatas
(en juliana, aprox. 25 - 30 minutos
de cocción)
– Calabacines
(cortados en rodajas, aprox. 15 minutos
de cocción)
■ Corte la fruta en rodajas, tiras o dados. Cocínelas
con un poco de azúcar, miel o condimentos
como piel de limón/naranja o vainilla en rama
al gusto. Entretanto, dé la vuelta a la fruta.
STR 1000 A1
Page 12

■ Por ejemplo, pueden cocinarse las siguientes
verduras en la plancha:
– Manzanas
(cortadas en dados, aprox. 3 minutos)
– Plátanos
(cortados en rodajas, aprox. 3 minutos)
– Piñas
(cortadas en rodajas, aprox. 4 minutos)
Eliminación de fallos
Error Causa Solución
Huevos revueltos con hierbas
Ingredientes
2 huevos
2 cucharadas de nata
Sal
Cebollino u otras hierbas
■ Caliente el aparato en el nivel 3.
■ Mezcle 2 huevos con un poco de sal y
2 cucharadas de nata líquida.
■ Añada cebollino picado u otras hierbas al gusto.
■ Vierta la mezcla en la plancha 1 y cocínela sin
parar de remover hasta alcanzar la consistencia
deseada.
ES
La clavija de red no está conectada a la
red eléctrica.
El aparato
no funciona.
El piloto de
control 5 vuelve
a encenderse y
apagarse.
El piloto de
control 5 no se
enciende.
Si no logra solucionar los fallos siguiendo las instrucciones de eliminación de fallos mencionadas o
comprueba la existencia de otras anomalías, póngase en contacto con nuestro servicio de asistencia
técnica.
La base de enchufe está defectuosa.
El aparato está defectuoso.
El aparato mantiene la temperatura. Por
este motivo, es necesario que vuelva a calentarse brevemente de cuando en cuando.
En consecuencia, el piloto de control 5 se
enciende.
El aparato está defectuoso.
El aparato se ha calentado. No hay ninguna avería.
Inserte la clavija de red en una
base de enchufe.
Utilice una base de enchufe
distinta.
Póngase en contacto con el
servicio de asistencia técnica.
No hay ninguna avería.
Póngase en contacto con el
servicio de asistencia técnica.
STR 1000 A1
9
Page 13
Garantía y asistencia técnica
ES
Este aparato tiene 3 años de garantía desde la
fecha de compra. El aparato ha sido fabricado
cuidadosamente y examinado en profundidad
antes de su entrega. Guarde el comprobante de
caja como justifi cante de compra. Si necesitara
hacer uso de la garantía, póngase en contacto
por teléfono con su punto de servicio habitual.
Este es el único modo de garantizar un envío
gratuito.
La garantía cubre los defectos de fabricación o
del material, pero no los daños de transporte, las
piezas sujetas a desgaste ni los daños sufridos por
las piezas frágiles (p. ej., interruptores o pilas).
Este producto ha sido diseñado exclusivamente
para el uso particular y no para el uso industrial.
En caso de manipulación indebida e incorrecta, uso
de la fuerza y apertura del aparato por personas
ajenas a nuestros centros de asistencia técnica
autorizados, la garantía pierde su validez.
Sus derechos legales no se ven limitados por esta
garantía.
La duración de la garantía no se prolonga por
hacer uso de ella. Este principio rige también para
las piezas sustituidas y reparadas. Si después de
la compra del aparato, se detecta la existencia
de daños o de defectos al desembalarlo, deben
notifi carse de inmediato o, como muy tarde, dos
días después de la fecha de compra. Cualquier
reparación que se realice una vez fi nalizado el
plazo de garantía está sujeta a costes.
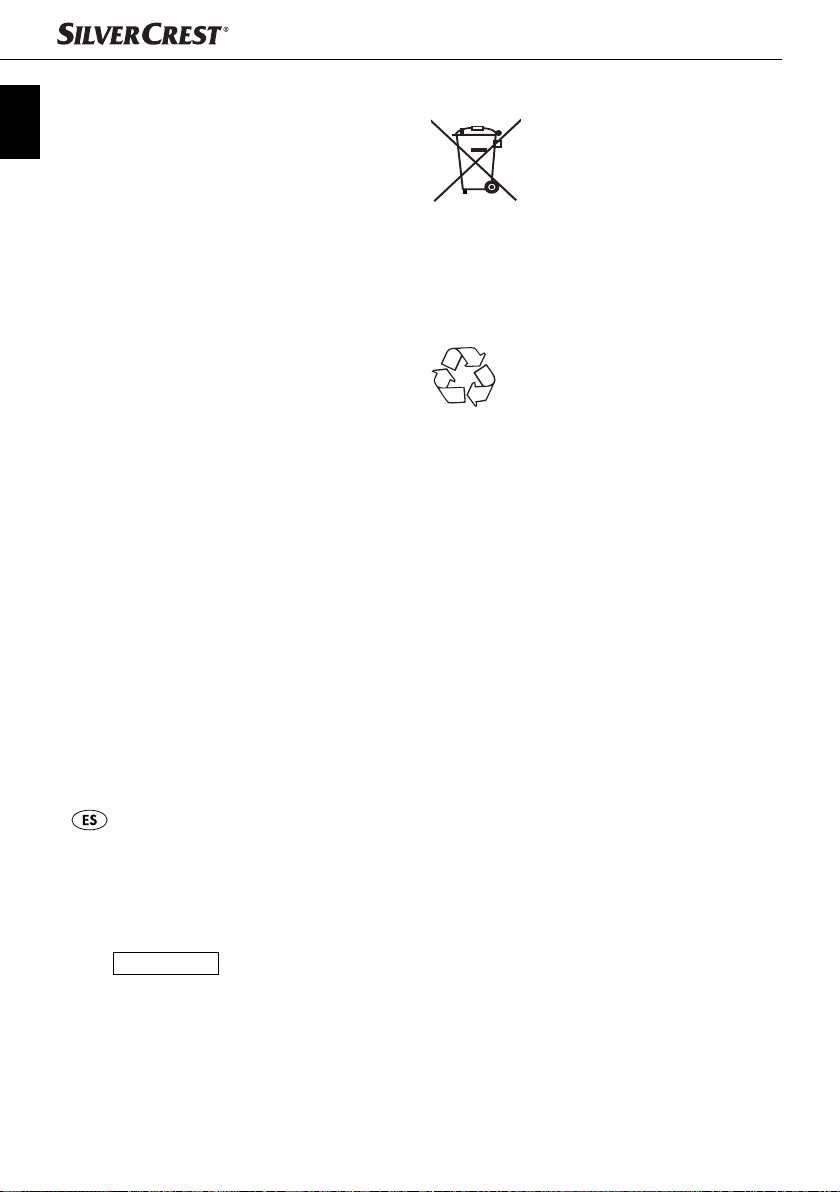
Desecho
No deseche nunca el aparato
con la basura doméstica. Este
aparato está sujeto a la Directiva europea 2012/19/EU.
Deseche el aparato en un centro de residuos autorizado a través de las instalaciones de desecho
de residuos comunitarias. Observe las normas
vigentes. En caso de duda, póngase en contacto
con las instalaciones municipales de desecho de
residuos.
El embalaje consta de materiales ecoló-
gicos que pueden desecharse a través
de los centros de reciclaje locales.
Importador
KOMPERNASS HANDELS GMBH
BURGSTRASSE 21
44867 BOCHUM
GERMANY
www.kompernass.com
Servicio España
Tel.: 902 59 99 22
(0,08 EUR/Min. + 0,11 EUR/
llamada (tarifa normal))
(0,05 EUR/Min. + 0,11 EUR/
llamada (tarifa reducida))
E-Mail: kompernass@lidl.es
IAN 95855
Disponibilidad de la línea de atención al
cliente:
de lunes a viernes de 8.00 a 20.00 h (CET)
10
STR 1000 A1
Page 14

Indice
Introduzione . . . . . . . . . . . . . . . . . . . . . . . . . . . . . . . . . . . . . . . . . . . . . . . . . . . . . . . . . .12
Uso conforme . . . . . . . . . . . . . . . . . . . . . . . . . . . . . . . . . . . . . . . . . . . . . . . . . . . . . . . . .12
Volume della fornitura . . . . . . . . . . . . . . . . . . . . . . . . . . . . . . . . . . . . . . . . . . . . . . . . . .12
Descrizione dell'apparecchio . . . . . . . . . . . . . . . . . . . . . . . . . . . . . . . . . . . . . . . . . . . . .12
Dati tecnici . . . . . . . . . . . . . . . . . . . . . . . . . . . . . . . . . . . . . . . . . . . . . . . . . . . . . . . . . . . .12
Indicazioni relative alla sicurezza . . . . . . . . . . . . . . . . . . . . . . . . . . . . . . . . . . . . . . . . .13
Composizione e disposizione . . . . . . . . . . . . . . . . . . . . . . . . . . . . . . . . . . . . . . . . . . . .16
Prima del primo impiego . . . . . . . . . . . . . . . . . . . . . . . . . . . . . . . . . . . . . . . . . . . . . . . .16
Impostazioni della temperatura . . . . . . . . . . . . . . . . . . . . . . . . . . . . . . . . . . . . . . . . . .16
Uso . . . . . . . . . . . . . . . . . . . . . . . . . . . . . . . . . . . . . . . . . . . . . . . . . . . . . . . . . . . . . . . . . .17
Pulizia e piccola manutenzione . . . . . . . . . . . . . . . . . . . . . . . . . . . . . . . . . . . . . . . . . . .17
Conservazione . . . . . . . . . . . . . . . . . . . . . . . . . . . . . . . . . . . . . . . . . . . . . . . . . . . . . . . .18
Consigli di ricette . . . . . . . . . . . . . . . . . . . . . . . . . . . . . . . . . . . . . . . . . . . . . . . . . . . . . .18
Hamburger . . . . . . . . . . . . . . . . . . . . . . . . . . . . . . . . . . . . . . . . . . . . . . . . . . . . . . . . . . . . . . . . . . . . 18
Petto di tacchino/pollo . . . . . . . . . . . . . . . . . . . . . . . . . . . . . . . . . . . . . . . . . . . . . . . . . . . . . . . . . . . 18
Frutta/verdura . . . . . . . . . . . . . . . . . . . . . . . . . . . . . . . . . . . . . . . . . . . . . . . . . . . . . . . . . . . . . . . . . 18
Tortino alle erbe . . . . . . . . . . . . . . . . . . . . . . . . . . . . . . . . . . . . . . . . . . . . . . . . . . . . . . . . . . . . . . . . 19
IT
MT
Eliminazione dei guasti . . . . . . . . . . . . . . . . . . . . . . . . . . . . . . . . . . . . . . . . . . . . . . . . .19
Garanzia e assistenza . . . . . . . . . . . . . . . . . . . . . . . . . . . . . . . . . . . . . . . . . . . . . . . . . .20
Smaltimento . . . . . . . . . . . . . . . . . . . . . . . . . . . . . . . . . . . . . . . . . . . . . . . . . . . . . . . . . .20
Importatore. . . . . . . . . . . . . . . . . . . . . . . . . . . . . . . . . . . . . . . . . . . . . . . . . . . . . . . . . . .20
STR 1000 A1
11
Page 15

BARBECUE ELETTRICO
DA TAVOLO STR 1000 A1
Introduzione
IT
Congratulazioni per l'acquisto del Suo nuovo
MT
apparecchio.
È stato acquistato un prodotto di alta qualità. Il
manuale di istruzioni è parte integrante del presente
prodotto. Esso contiene importanti indicazioni per
la sicurezza, l'uso e lo smaltimento. Prima di utilizzare il prodotto, familiarizzarsi con tutte le indicazioni relative ai comandi e alla sicurezza.
Utilizzare l'apparecchio solo come descritto e per
i campi d'impiego indicati. In caso di cessione del
prodotto a terze persone, consegnare anche tutta
la relativa documentazione.
Uso conforme
Questo apparecchio serve esclusivamente per
grigliare/cuocere pietanze in luoghi chiusi. Questo
apparecchio è destinato esclusivamente all'uso in
ambienti domestici. Non utilizzare a fi ni commerciali.
Volume della fornitura
Barbecue elettrico da tavolo (piastra grigliante, base)
Istruzioni per l'uso
Descrizione dell'apparecchio
1 Piastra grigliante
2 Serpentino di riscaldamento
3 Nastro per cavo
4 Base
5 Spia di controllo
6 Regolatore della temperatura
7 Impugnatura
Dati tecnici
Tensione nominale: 220 - 240 V ~, 50 Hz
Potenza max. assorbita: 1000 W
AVVERTENZA
Subito dopo aver disimballato il prodotto, controllare che sia completo e integro. Se necessario, rivolgersi al servizio clienti.
12
STR 1000 A1
Page 16

Indicazioni relative alla sicurezza
PERICOLO DI FOLGORAZIONE!
► Al fi ne di evitare pericoli, fare sostituire immediatamente spine
o cavi danneggiati da personale specializzato autorizzato o
dal centro di assistenza clienti.
► Proteggere il cavo di rete dal contatto con le parti surriscaldate
dell'apparecchio. Non utilizzare mai l'apparecchio nelle vicinanze
di fi amme libere, piastre riscaldanti o forni accesi.
► Non esporre l'apparecchio alla pioggia e non utilizzarlo in
ambienti umidi o bagnati. Impedire che il cavo si inumidisca o si
bagni durante il funzionamento.
► Controllare l'apparecchio prima dell'uso per rilevare eventuali
danni visibili. Non mettere in funzione un apparecchio danneggiato o caduto.
► Il cavo deve essere controllato regolarmente alla ricerca di even-
tuali danni. Se il cavo è danneggiato, l'apparecchio non deve
più essere usato.
► L'apparecchio deve essere collegato a una presa con conduttore
di protezione.
IT
MT
► L'apparecchio non deve entrare in contatto con la pioggia o
l'umidità.
Non immergere mai l'apparecchio in acqua o altri liquidi!
Può sussistere pericolo di morte a causa di folgorazione in
caso di contatto di liquidi con parti sotto tensione dell'apparecchio in funzione.
STR 1000 A1
13
Page 17

IT
MT
AVVERTENZA - PERICOLO DI LESIONI!
► Questo apparecchio può essere utilizzato dai bambini di almeno
8anni di età e da persone con capacità fi siche, sensoriali o
mentali ridotte o insuffi ciente esperienza o conoscenza, solo se
sorvegliati o istruiti sull'uso sicuro dell'apparecchio e qualora ne
abbiano compreso i pericoli associati.
► I bambini non devono giocare con l'apparecchio.
► La pulizia e la manutenzione a cura dell'utente non devono essere
eseguite da bambini, a meno che non abbiano almeno 8anni di
età e siano sorvegliati.
► Tenere lontano dall'apparecchio i bambini di età inferiore agli 8
anni.
► Fare raff reddare bene l'apparecchio dopo l'uso e prima della
pulizia. Pericolo di ustioni!
► Posizionare l'apparecchio nelle immediate vicinanze della presa
di corrente. Fare in modo che la presa di corrente sia facilmente
accessibile in caso di pericolo e che il cavo non diventi un elemento di intralcio.
► Provvedere a un posizionamento stabile dell'apparecchio.
Attenzione! Superfi cie rovente!
► Durante l'uso toccare solo le impugnature e il regolatore della
temperatura. Le superfi ci dell'apparecchio si surriscaldano durante
l'uso. Si consiglia di utilizzare il guanto da cucina o le presine.
► Non lasciare mai l'apparecchio incustodito durante l'uso.
► Non continuare a utilizzare l'apparecchio se è danneggiato.
14
STR 1000 A1
Page 18

ATTENZIONE - DANNI MATERIALI!
► Non utilizzare timer esterni o un sistema di telecomando separato
per azionare l'apparecchio.
► Non lasciare mai l'apparecchio incustodito durante l'uso.
► Assicurarsi che l'apparecchio, il cavo di rete o la spina non
vengano mai a contatto con sorgenti di calore come piastre di
cottura o fi amme libere.
► Non utilizzare carbone o altri combustibili simili per azionare
l'apparecchio!
► Proteggere lo strato antiaderente, evitando di utilizzare utensili
metallici come coltelli, forchette, ecc. Se lo strato antiaderente è
danneggiato, non utilizzare più l'apparecchio.
► Usare l'apparecchio solo con gli accessori originali forniti in
dotazione.
IT
MT
STR 1000 A1
15
Page 19

Composizione e disposizione
ATTENZIONE! PERICOLO D'INCENDIO!
IT
MT
► Non collocare mai l'apparecchio sotto pensili
o accanto a tendine, pareti di armadi o altri
oggetti infi ammabili.
► Collocare l'apparecchio sempre ad una
distanza adeguata dai materiali infi ammabili
(ad es. tende).
► Collocare l'apparecchio solo su un supporto
resistente al calore.
1) Prelevare tutte le parti dalla confezione e
rimuovere il materiale di imballaggio ed eventuali pellicole di protezione.
2) Pulire tutti i componenti dell'apparecchio, così
come descritto al capitolo "Pulizia e manutenzione". Assicurarsi che tutte le parti siano
completamente asciutte.
3) Far passare il cavo attraverso la fessura sul
lato inferiore della base 4.
4) Poggiare l'apparecchio su una superfi cie
termoresistente, piana e pulita. Non disporre
l'apparecchio direttamente su una parete o
un armadio.
5) Disporre la piastra grigliante 1 sulla base 4.
Prima del primo impiego
1) Pulire la piastra grigliante 1 con un panno
umido.
2) Ingrassare leggermente la piastra grigliante 1
con grasso adatto per cuocere al forno/cucinare
alla griglia. Così si possono rimuovere meglio
dalla piastra grigliante 1 eventuali residui
legati alla lavorazione.
3) Inserire la spina in una presa di corrente e
disporre il regolatore della temperatura 6
sul livello M. L'apparecchio si riscalda.
4) Attendere 10 minuti.
5) Staccare poi la spina di rete e fare raff reddare
l'apparecchio.
AVVERTENZA
Nel corso del primo riscaldamento dell'appa-
►
recchio, può verifi carsi una leggera formazione di odore e di fumo, dovuta ai resti di
lavorazione. Si tratta di un evento normale
e completamente innocuo. Provvedere a
un'aerazione suffi ciente, aprendo ad esempio
una fi nestra.
6) Pulire ancora l'apparecchio dopo il raff reddamento, così come descritto al capitolo "Pulizia
e cura".
7) Assicurarsi che tutte le parti siano completamente asciutte prima di mettere in funzione
l'apparecchio.
L'apparecchio è pronto per l'uso.
Impostazioni della temperatura
Con il regolatore della temperatura 6 si possono
impostare i livelli di temperatura.
Livello 0 Griglia spenta
Livello 0 - 2 Griglia accesa; temperatura bassa
Livello 2 - 3 Griglia accesa; temperatura media
Livello 3 - M Griglia accesa; temperatura alta
AVVERTENZA
Scegliere il livello di temperatura corretto dopo
►
aver fatto delle prove. I livelli di temperatura
bassa e media sono adatti soprattutto per verdure, frutta e alimenti sensibili, mentre i livelli di
temperatura alti sono idonei per la carne.
Non appena si è impostato il livello di temperatura,
la spia di controllo 5 si accende. Non appena
viene raggiunta la temperatura impostata, la spia
di controllo 5 si spegne.
Tuttavia essa può sempre riaccendersi e spegnersi.
Ciò signifi ca che l'apparecchio mantiene la temperatura e si è di nuovo riscaldato leggermente.
16
STR 1000 A1
Page 20

Uso
Pulizia e piccola manutenzione
ATTENZIONE! PERICOLO DI LESIONI!
► Durante l'uso l'apparecchio è molto caldo!
Pertanto durante l'uso aff errare l'impugnatura 7 o il regolatore della temperatura 6.
Per prendere l'apparecchio utilizzare il guanto da cucina o le presine.
1) Inserire la spina in una presa di corrente.
2) Impostare il livello di temperatura desiderato.
La spia di controllo 5 si accende e l'appa-
recchio si riscalda.
3) Non appena la spia di controllo 5 si spegne,
l'apparecchio è riscaldato.
Disporre il cibo a piacere sulla piastra grigliante 1.
4) Controllare il risultato di cottura regolarmente
e girare eventualmente il prodotto da grigliare.
Se si è soddisfatti, rimuovere il prodotto dalla
piastra grigliante 1.
ATTENZIONE!
PERICOLO DI DANNI MATERIALI!
Non utilizzare utensili di metallo come coltelli,
►
forchette, ecc. Se lo strato antiaderente è
danneggiato, non utilizzare più l'apparecchio.
5) Quando non si desidera grigliare altri alimenti,
portare il regolatore della temperatura 6 su
"0" e staccare la spina dalla presa. Solo in
questo modo l'apparecchio si spegne.
PERICOLO DI FOLGORAZIONE!
Prima della pulizia staccare sempre la spina
►
dalla presa di rete! Sussiste il pericolo di
scossa elettrica!
Non immergere mai la base 4 in acqua o
altri liquidi!
ATTENZIONE! PERICOLO DI LESIONI!
► Fare sempre raff reddare l'apparecchio prima
di pulirlo. In caso contrario, si corre il rischio
di ustioni!
ATTENZIONE!
PERICOLO DI DANNI MATERIALI!
Non utilizzare detergenti abrasivi o aggressivi.
►
Potrebbero danneggiare la superfi cie!
► Non utilizzare utensili di metallo come coltelli,
forchette, ecc. Se lo strato antiaderente è danneggiato, non utilizzare più l'apparecchio.
■ Si consiglia di pulire l'apparecchio appena si è
raff reddato. In tal modo è possibile rimuovere
facilmente i residui di alimenti.
■ Pulire la base 4 con un panno umido. In caso
di necessità, applicare sul panno qualche
goccia di detergente delicato e risciacquare poi
la superfi cie con acqua pulita. Asciugare tutto
accuratamente.
■ Rimuovere residui grossolani con un pezzo di
carta assorbente dalla piastra grigliante 1.
Pulire la piastra grigliante 1 con un panno
umido. Prima dell'ulteriore uso la piastra grigliante 1 deve essere completamente asciutta.
IT
MT
STR 1000 A1
17
Page 21

AVVERTENZA
Se impurità più ostinate aderiscono alla piastra
►
grigliante 1, aggiungere del detersivo sul
IT
MT
panno umido. Risciacquare poi la piastra grigliante 1 con acqua pulita. Assicurarsi che
non vi siano residui di detersivo sulla piastra
grigliante 1.
► La piastra grigliante 1 può anche venire
lavata in lavastoviglie.
► Dopo la pulizia con il detergente o nella
lavastoviglie, la piastra grigliante 1 deve
tuttavia venire leggermente oliata, altrimenti
la funzione del rivestimento antiaderente si
danneggia.
■ Riassemblare l'apparecchio.
Conservazione
■ Riporre l'apparecchio pulito in un luogo asciutto,
privo di polvere e pulito.
■ Disporre il cavo in anelli e fi ssarlo con il nastro
per cavo 3 sul lato inferiore dell'apparecchio.
Consigli di ricette
Hamburger
Ingredienti
200 g carne trita di manzo
Alcune foglie di insalata iceberg
2 pomodori
2 panini per hamburger
Spezie (sale, pepe, paprika in polvere)
Un po' di salsa per hamburger
■ Riscaldare l'apparecchio sul livello 4.
■ Insaporire la carne trita a seconda dei gusti con
sale, pepe e paprica in polvere.
■ Formare due polpette di carne trita ciascuna da
100 g, cuocere per circa 9 minuti su ogni lato e
mettere da parte.
■ Impostare l'apparecchio sul livello 3, arrostire
il pane da hamburger dai due lati e tagliare.
■ Disporre la carne assieme all'insalata, alle fettine
di pomodoro e alla salsa tra le due metà di pane.
AVVERTENZA
A seconda della forma e dello spessore della
►
carne è possibile variare il tempo di cottura!
In caso di polpette di carne sottili ridurre il
tempo di preparazione, in caso di polpette
spesse allungare il tempo di cottura!
Petto di tacchino/pollo
Ingredienti
200 g di petto di tacchino/pollo
Un po' di farina
■ Ungere con poco olio adatto la piastra griglian-
te 1 e riscaldare l'apparecchio al livello 3 - M.
■ Tagliare a fette i 200 g di petto di tacchino/
pollo e infarinarli leggermente.
■ Cuocere per circa 4 minuti da un lato, poi
girare, aggiungere un po' di sale e cuocere il
secondo lato per circa 4 minuti.
Frutta/verdura
■ Riscaldare l'apparecchio sul livello 3.
■ Tagliare la verdura a fettine, striscioline o dadini.
Cuocere a seconda dei gusti con un po' di olio,
spezie e un po' di sale. Di tanto in tanto girare
la verdura.
■ Per cuocere alla griglia sono idonee:
– melanzane
(tagliate a strisce, cuocere
per circa 15 minuti)
– patate
(tagliate alla julienne, cuocere
per circa 25 - 30 minuti)
– zucchine
(tagliate a fette, cuocere per circa 15 minuti)
■ Tagliare la frutta a fettine, striscioline o dadini.
A seconda delle preferenze aggiungere dello
zucchero, miele o spezie come scorza di limone/
arancio o baccelli di vaniglia. Di tanto in tanto
girare la frutta.
18
STR 1000 A1
Page 22

■ Per cuocere alla griglia sono idonee:
– mele
(tagliate a dadini, cuocere per
circa 3 minuti)
– banane
(tagliate a fettine, cuocere per
circa 3 minuti)
– ananas
(tagliate a fettine, cuocere per
circa 4 minuti)
Tortino alle erbe
Ingredienti
2 uova
2 cucchiai di panna
Sale
Erba cipollina o altre erbe
■ Riscaldare l'apparecchio sul livello 3.
■ Mescolare 2 uova con un po' di sale e
2 cucchiai di panna liquida.
■ A piacere aggiungere erba cipollina o altre
erbe tritate.
■ Disporre sulla piastra grigliante 1 e cuocere
continuando a mescolare fi no a ottenere
la consistenza desiderata.
Eliminazione dei guasti
Guasto Causa Soluzione
IT
MT
La spina di rete non è collegata alla rete di
corrente.
L'apparecchio non
funziona.
La spia di
controllo 5 si
accende e spegne
continuamente.
La spia di
controllo 5 non si
accende.
Qualora i guasti non potessero venire risolti con i rimedi indicati sopra o si riscontrassero altri tipi di
guasti, rivolgersi all'assistenza.
La presa di corrente è guasta.
L'apparecchio è guasto. Rivolgersi al servizio clienti.
L'apparecchio mantiene la temperatura
impostata. A tal fi ne è necessario che
l'apparecchio si riscaldi ripetutamente per
breve tempo. In tal caso si accende la spia
di controllo 5.
L'apparecchio è guasto. Rivolgersi al servizio clienti.
L'apparecchio si è riscaldato. Non è presente alcun guasto.
Inserire la spina in una presa di
corrente.
Utilizzare un'altra presa di
corrente.
Non è presente alcun guasto.
STR 1000 A1
19
Page 23

Garanzia e assistenza
Questo apparecchio è garantito per tre anni a
partire dalla data di acquisto. L'apparecchio è
stato prodotto con cura e debitamente collaudato
IT
prima della consegna. Conservare lo scontrino
MT
come prova di acquisto. Nei casi contemplati
dalla garanzia, mettersi in comunicazione telefo-nicamente con il centro di assistenza più vicino.
Solo in tal modo è possibile garantire una spedizione gratuita della merce.
La garanzia vale solo per difetti del materiale o di
fabbricazione, ma non per i danni da trasporto,
danni alle parti soggette a usura o alle parti fragili,
come per es. interruttori o accumulatori. Il prodotto
è destinato esclusivamente all'uso domestico e non
a quello commerciale.
La garanzia decade in caso di impiego improprio
o manomissione, uso della forza e interventi non
eseguiti dalla nostra fi liale di assistenza autorizzata.
Questa garanzia non costituisce alcun limite ai
diritti legali del consumatore.
Il periodo di garanzia non viene prolungato da
interventi in garanzia. Ciò vale anche per le parti
sostituite e riparate. I danni e difetti eventualmente
presenti già all'atto dell'acquisto devono venire
comunicati immediatamente dopo il disimballo, e
comunque entro e non oltre due giorni dalla data
di acquisto. Le riparazioni eseguite dopo la scadenza del periodo di garanzia sono a pagamento.
Smaltimento
Non smaltire per alcun motivo
l'apparecchio assieme ai
normali rifi uti domestici. Questo prodotto è soggetto alla
Direttiva Europea 2012/19/EURAEE.
Smaltire l'apparecchio attraverso un'azienda di
smaltimento autorizzata o attraverso l'ente di smaltimento comunale. Rispettare le norme attualmente
in vigore. In caso di dubbi mettersi in contatto con
l'ente di smaltimento competente.
La confezione è composta da materiali
ecocompatibili che possono venire smaltiti tramite gli appositi centri di raccolta e
riciclaggio.
Importatore
KOMPERNASS HANDELS GMBH
BURGSTRASSE 21
44867 BOCHUM
GERMANY
www.kompernass.com
Assistenza Italia
Tel.: 02 36003201
E-Mail: kompernass@lidl.it
IAN 95855
Assistenza Malta
Tel.: 80062230
E-Mail: kompernass@lidl.com.mt
IAN 95855
Raggiungibilità della hotline:
dal lunedì al venerdì, dalle 8.00 alle 20.00 (CET)
20
STR 1000 A1
Page 24

Contents
Introduction . . . . . . . . . . . . . . . . . . . . . . . . . . . . . . . . . . . . . . . . . . . . . . . . . . . . . . . . . . .22
Proper use . . . . . . . . . . . . . . . . . . . . . . . . . . . . . . . . . . . . . . . . . . . . . . . . . . . . . . . . . . . .22
Package contents . . . . . . . . . . . . . . . . . . . . . . . . . . . . . . . . . . . . . . . . . . . . . . . . . . . . . .22
Appliance description . . . . . . . . . . . . . . . . . . . . . . . . . . . . . . . . . . . . . . . . . . . . . . . . . . .22
Technical details . . . . . . . . . . . . . . . . . . . . . . . . . . . . . . . . . . . . . . . . . . . . . . . . . . . . . . .22
Safety instructions . . . . . . . . . . . . . . . . . . . . . . . . . . . . . . . . . . . . . . . . . . . . . . . . . . . . .23
Assembly and setting up . . . . . . . . . . . . . . . . . . . . . . . . . . . . . . . . . . . . . . . . . . . . . . . .26
Before fi rst use . . . . . . . . . . . . . . . . . . . . . . . . . . . . . . . . . . . . . . . . . . . . . . . . . . . . . . . .26
Temperature settings . . . . . . . . . . . . . . . . . . . . . . . . . . . . . . . . . . . . . . . . . . . . . . . . . . .26
Operation . . . . . . . . . . . . . . . . . . . . . . . . . . . . . . . . . . . . . . . . . . . . . . . . . . . . . . . . . . . .27
Cleaning and care . . . . . . . . . . . . . . . . . . . . . . . . . . . . . . . . . . . . . . . . . . . . . . . . . . . . . .27
Storage . . . . . . . . . . . . . . . . . . . . . . . . . . . . . . . . . . . . . . . . . . . . . . . . . . . . . . . . . . . . . .28
Recipe tips . . . . . . . . . . . . . . . . . . . . . . . . . . . . . . . . . . . . . . . . . . . . . . . . . . . . . . . . . . . .28
Hamburger . . . . . . . . . . . . . . . . . . . . . . . . . . . . . . . . . . . . . . . . . . . . . . . . . . . . . . . . . . . . . . . . . . . . 28
Chicken/turkey breast . . . . . . . . . . . . . . . . . . . . . . . . . . . . . . . . . . . . . . . . . . . . . . . . . . . . . . . . . . . 28
Vegetables/fruit . . . . . . . . . . . . . . . . . . . . . . . . . . . . . . . . . . . . . . . . . . . . . . . . . . . . . . . . . . . . . . . . 28
Savoury scrambled eggs . . . . . . . . . . . . . . . . . . . . . . . . . . . . . . . . . . . . . . . . . . . . . . . . . . . . . . . . . 29
GB
MT
Troubleshooting . . . . . . . . . . . . . . . . . . . . . . . . . . . . . . . . . . . . . . . . . . . . . . . . . . . . . . .29
Warranty and service . . . . . . . . . . . . . . . . . . . . . . . . . . . . . . . . . . . . . . . . . . . . . . . . . .30
Disposal . . . . . . . . . . . . . . . . . . . . . . . . . . . . . . . . . . . . . . . . . . . . . . . . . . . . . . . . . . . . . .30
Importer . . . . . . . . . . . . . . . . . . . . . . . . . . . . . . . . . . . . . . . . . . . . . . . . . . . . . . . . . . . . .30
STR 1000 A1
21
Page 25

TABLETOP GRILL STR 1000 A1
Introduction
Congratulations on the purchase of your new
appliance.
You have selected a high-quality product.
The operating instructions are a constituent of this
GB
product. They contain important information about
safety, use and disposal. Before using the product,
MT
familiarise yourself with all operating and safety
instructions. Use this product only as described and
only for the specifi ed areas of application. Please
also pass these operating instructions on to any
future owner(s).
Proper use
This appliance is exclusively intended for grilling/
cooking food indoors. This appliance is only
intended for use in domestic households. Not to
be used for commercial purposes.
Package contents
Tabletop Grill (griddle, base)
Operating instructions
NOTE
Check contents for completeness and damage
immediately after unpacking. Contact Customer
Services if necessary.
Appliance description
1 Griddle
2 Heating element
3 Cable wrap
4 Base
5 Indicator lamp
6 Temperature control
7 Handles
Technical details
Rated voltage: 220 - 240 V ~, 50 Hz
Max. power consumption: 1000 W
22
STR 1000 A1
Page 26

Safety instructions
DANGER – RISK OF ELECTRICAL SHOCK!
► To avoid danger, have defective plugs and/or power cables
replaced immediately by qualifi ed technicians or our Customer
Service Department.
► Do not allow the power cable to come into contact with hot
appliance parts. NEVER use the appliance near naked fl ames,
a hotplate or a heated oven.
► Do not expose the appliance to rain, and never use it in a humid
or wet environment. Ensure that the power cable never becomes
wet or moist during operation.
► Check the appliance for any visible external damage before use.
Do not use an appliance that has been damaged or dropped.
► The power cable must be checked for signs of damage at regular
intervals. If the power cable is damaged, the appliance may no
longer be used.
► The appliance must be connected to a mains socket with a
protective earth.
GB
MT
► The appliance must not come into contact with moisture such as
rain or water.
NEVER immerse the appliance in water or other liquids!
Risk of electrocution if residual liquids come into contact with
live components during operation.
STR 1000 A1
23
Page 27

GB
MT
WARNING – RISK OF INJURY!
► This appliance may be used by children of the age of 8 years or
more and by persons with reduced physical, sensory or mental
capabilities or lack of experience and/or knowledge if they are
being supervised or have been instructed with regard to the safe
use of the appliance and have understood the potential risks.
► Children must not use the appliance as a plaything.
► Cleaning and user maintenance must not be performed by
children unless they are older than 8 years of age and are
supervised.
► Children younger than 8 years of age must be kept away from
the appliance and the power cable.
► After use, allow the appliance to cool down completely before
cleaning it. Risk of burns!
► Set up the appliance as close as possible to the electrical power
socket. Ensure that the power plug is quickly reachable in case
of danger, and also that there is no danger of tripping over the
cable.
► Provide a stable location for the appliance.
Attention! Hot surface!
► Do not touch anything other than the handles and the temperature
control during operation. The surfaces of the appliance become
extremely hot during use. It is advisable to wear oven gloves or
use a pot holder.
► Never leave the appliance unattended while it is being used.
► Stop using the appliance if it is damaged!
24
STR 1000 A1
Page 28

CAUTION – PROPERTY DAMAGE!
► Do not use an external timing switch or a separate remote control
system to operate the appliance.
► Never leave the appliance unattended during operation.
► Ensure that the appliance, the power cable and the plug do not
come into contact with heat sources such as hotplates or naked
fl ames.
► Do not use charcoal or similar fuels to operate the appliance!
► To protect the non-stick coating, do not use metallic tools such as
knives, forks, etc. Should the non-stick coating become damaged,
stop using the appliance.
► Only operate the appliance with the original accessories supplied.
GB
MT
STR 1000 A1
25
Page 29

Assembly and setting up
WARNING! RISK OF FIRE!
► Never place the appliance beneath wall cup-
boards or next to curtains, cupboard walls or
other fl ammable objects.
► Ensure that the appliance is a suffi cient
GB
MT
distance away from any fl ammable materials
(e.g. curtains).
► Always place the appliance on a heat-resist-
ant surface.
1) Remove all of the parts from the box and
remove the packaging material and any
protective fi lm.
2) Clean all components as described in Chapter
“Cleaning and care”. Ensure that all parts are
completely dry.
3) Lead the cable through the recess on the
underside of the base 4.
4) Place the appliance on a clean and level heatresistant surface. Do not place the appliance
directly next to a wall or a cupboard.
5) Place the griddle 1 on the base 4.
Before fi rst use
1) Wipe the griddle 1 with a damp cloth.
2) Lightly grease the griddle 1 with fat that is suitable for baking/grilling. This makes it easier to
remove any cooking residue on the griddle 1.
3) Insert the plug into a mains power socket and
set the temperature control 6 to level M. The
appliance will heat up.
4) Wait for 10 minutes.
5) Then disconnect the plug and allow the appliance to cool down.
NOTE
The fi rst time the appliance heats up, a small
►
amount of smoke and odour may be generated due to production-related residue. This
is completely normal and is completely harmless. Provide suffi cient ventilation by opening
a window, for example.
6) Thoroughly clean all component parts as described in the section “Cleaning and care”
after it has cooled down.
7) Ensure that all parts are completely dry before
operating the appliance.
The appliance is now ready for use.
Temperature settings
The temperature control 6 can be used to set the
temperature level.
Level 0 Grill switched off
Level 0 - 2 Grill switched on;
low temperature
Level 2 - 3 Grill switched on;
medium temperature
Level 3 - M Grill switched on;
high temperature
NOTE
Select the correct temperature level by trial
►
and error. The lower and medium temperature
levels are better suited for vegetables, fruits
and delicate foods. The higher temperature
levels are better for meat.
As soon as you set a temperature level, the indicator
lamp 5 comes on. When the set temperature has
been reached, the indicator lamp 5 goes off .
However, the lamp may come on and go off again at
any time. This means that the appliance is maintaining
the temperature and has heated up again a little.
26
STR 1000 A1
Page 30

Operation
Cleaning and care
WARNING! RISK OF INJURY!
► The appliance is extremely hot during use!
For this reason, do not touch anything other
than the handles 7 and the temperature
control 6 during use! Use oven gloves or
a pot holder if you need to take hold of the
appliance.
1) Insert the plug into a mains power socket.
2) Set the desired temperature level. The indicator
lamp 5 comes on and the appliance heats up.
3) As soon as the indicator lamp 5 goes off , the
appliance has heated up.
Place the food on the griddle 1 as required.
4) Check grilling progress at regular intervals and
turn the food being grilled if necessary. When
you are satisfi ed with the results, take the food
off the griddle 1.
ATTENTION! DAMAGE TO PROPERTY!
Do not use metal implements such as knives,
►
forks, etc. Should the non-stick coating become damaged, stop using the appliance.
5) If you do not want to grill any more food, turn
the temperature control 6 to “0” and remove
the plug from the mains socket. This is the only
way to switch the appliance off .
DANGER – ELECTRIC SHOCK!
Before cleaning the appliance, disconnect the
►
plug from the mains power socket!
Risk of electric shock!
NEVER submerse the base 4 in water or
other fl uids!
WARNING! RISK OF INJURY!
► Always allow the appliance to cool down
before cleaning it. Otherwise there is a risk
of burns!
ATTENTION! DAMAGE TO PROPERTY!
Do not use abrasive or aggressive cleaning
►
materials. These could damage the surface
of the appliance!
► Do not use metal implements such as knives,
forks, etc. Should the non-stick coating become damaged, stop using the appliance.
■ It is best to clean the appliance as soon as it has
cooled down. This makes food residue easier to
remove.
■ Wipe the base 4 with a damp cloth. If neces-
sary, put a little mild detergent on the cloth and
wipe this off afterwards with clear water. Dry
everything properly.
■ Use a kitchen towel to wipe coarse residue from
the griddle 1. Then wipe the griddle 1 with a
damp cloth. The griddle 1 must be completely
dry before it is used again.
GB
MT
STR 1000 A1
27
Page 31

NOTE
If any stubborn residue is still stuck to the
►
griddle 1, add a little detergent to the damp
cloth. Then wipe off the griddle 1 with
fresh water. Ensure that no detergent residue
remains on the griddle 1.
GB
MT
► The griddle 1 can also be washed in the
dishwasher.
► If you have used detergent to clean the grid-
dle 1 or have washed it in the dishwasher,
be sure to grease it lightly with a little oil
again afterwards, otherwise the non-stick
coating will not function optimally.
■ Then reassemble the appliance.
Storage
■ Store the cleaned appliance in a clean, dust-free
and dry location.
■ Wind the cable up into loops and secure it to
the underside of the appliance using the cable
wrap 3.
Recipe tips
Hamburger
Ingredients
200 g minced beef
A few leaves of iceberg lettuce
2 tomatoes
2 hamburger rolls
Seasoning (salt, pepper, paprika powder)
A little hamburger sauce
■ Heat the appliance up to level 4.
■ Season the minced beef with salt, pepper and
paprika powder to taste.
■ Shape the minced beef into two burgers each
of 100 g weight and grill them for around
9 minutes per side and then put to one side.
■ Reduce the appliance to level 3, then toast the
hamburger rolls on both sides and cut them in half.
■ Put the hamburgers between the roll halves with
salad, sliced tomatoes and hamburger sauce.
NOTE
The grilling time can vary depending on the
►
shape and size of the hamburgers! If the
hamburgers are thinner reduce the cooking
time, and if they are thicker increase it!
Chicken/turkey breast
Ingredients
200 g chicken/turkey breast
A little fl our
■ Coat griddle 1 with a little oil that is suitable for
grilling, and heat the appliance up to level 3 (M).
■ Cut the 200 g of chicken/turkey breast into
slices and dust with fl our.
■ Grill on one side for around 4 minutes then turn,
sprinkle with a little salt and grill the other side
for about 4 minutes.
Vegetables/fruit
■ Heat the appliance up to level 3
■ Cut vegetables into slices, strips or cubes. Add
a little oil, seasoning and a little salt to taste and
then cook. Turn vegetables over occasionally.
■ The following vegetables are suitable for grilling:
– aubergines
(cut into strips, cook for about 15 minutes)
– potatoes
(chipped, grill for about 25 - 30 minutes)
– courgettes
(cut into slices, grill for about 15 minutes)
■ Cut fruit into slices, strips or cubes. Add a little
sugar, honey or seasoning such as lemon or
orange peel, or vanilla pods to taste before
cooking. Turn the fruit over occasionally.
28
STR 1000 A1
Page 32

■ The following vegetables are suitable for grilling:
– apples
cut into cubes, cook for around 3 minutes)
– bananas
(cut into slices, cook for around 3 minutes)
– pineapples
(cut into slices, cook for around 4 minutes)
Savoury scrambled eggs
Ingredients
2 eggs
2 tbsp cream
Salt
Chives or other herbs
■ Heat the appliance up to level 3
■ Mix two eggs with a little salt and 2 table-
spoons of single cream.
■ Add a few chopped chives or other herbs to taste.
■ Put onto on griddle 1 and cook whilst stirring
continuously until the required consistency has
been achieved.
Troubleshooting
Defect Cause Solution
GB
MT
The mains plug is not connected to the
mains power.
The appliance is not
working.
The indicator
lamp 5
illuminates
and goes off again
repeatedly.
The indicator
lamp 5 does not
illuminate.
If the malfunction cannot be corrected with the above suggestions, or if you have found some other
kind of malfunction, please contact our Customer Service.
The mains power socket is defective.
The appliance is defective. Contact Customer Services.
The appliance is maintaining the temperature. To do this, it has to heat up briefl y
every so often. When this occurs, the indicator lamp 5 comes on.
The appliance is defective. Contact Customer Services.
The appliance has heated up. This is not a defect.
Insert the plug into a mains
power socket.
Use a diff erent mains power
socket.
This is not a defect.
STR 1000 A1
29
Page 33

Warranty and service
The warranty provided for this appliance is
3 years from the date of purchase. This appliance has been manufactured with care and
inspected meticulously prior to delivery. Please
retain your receipt as proof of purchase. In the
event of a warranty claim, please contact your
Customer Service by telephone. This is the only
GB
way to guarantee free return of your goods.
MT
The warranty only covers claims for material and
manufacturing defects, not for transport damage,
wearing parts or for damage to fragile components
such as switches or batteries. This appliance is
intended solely for private use and not for commercial purposes.
The warranty is deemed void if this product has
been subjected to improper or inappropriate handling, abuse or modifi cations which were not carried out by one of our authorised service centres.
Your statutory rights are not restricted in any way
by this warranty.
The warranty period is not prolonged by repairs
made under the warranty. This also applies to
replaced and repaired parts. Damage and defects
present at the time of purchase must be reported
immediately after unpacking, or no later than two
days after the date of purchase. Repairs made
after expiry of the warranty period are chargeable.
Disposal
Under no circumstance should
the appliance be disposed of
in the normal domestic waste.
This product is subject to the
provisions of European Directive 2012/19/EU.
Dispose of the appliance via an approved disposal
company or your municipal waste facility. Please
observe the currently applicable regulations.
Please contact your waste disposal centre if you
are in any doubt.
The packaging is made from environ-
mentally friendly material and can be
disposed of at your local recycling plant.
Importer
KOMPERNASS HANDELS GMBH
BURGSTRASSE 21
44867 BOCHUM
GERMANY
www.kompernass.com
Service Great Britain
Tel.: 0871 5000 720 (£ 0.10/Min.)
E-Mail: kompernass@lidl.co.uk
IAN 95855
Service Malta
Tel.: 80062230
E-Mail: kompernass@lidl.com.mt
IAN 95855
Hotline availability:
Monday to Friday 08:00 - 20:00 (CET)
30
STR 1000 A1
Page 34

Inhaltsverzeichnis
Einleitung . . . . . . . . . . . . . . . . . . . . . . . . . . . . . . . . . . . . . . . . . . . . . . . . . . . . . . . . . . . . .32
Bestimmungsgemäßer Gebrauch . . . . . . . . . . . . . . . . . . . . . . . . . . . . . . . . . . . . . . . . .32
Lieferumfang . . . . . . . . . . . . . . . . . . . . . . . . . . . . . . . . . . . . . . . . . . . . . . . . . . . . . . . . . .32
Gerätebeschreibung. . . . . . . . . . . . . . . . . . . . . . . . . . . . . . . . . . . . . . . . . . . . . . . . . . . .32
Technische Daten . . . . . . . . . . . . . . . . . . . . . . . . . . . . . . . . . . . . . . . . . . . . . . . . . . . . . .32
Sicherheitshinweise . . . . . . . . . . . . . . . . . . . . . . . . . . . . . . . . . . . . . . . . . . . . . . . . . . . .33
Zusammenbauen und Aufstellen . . . . . . . . . . . . . . . . . . . . . . . . . . . . . . . . . . . . . . . . .36
Vor dem ersten Gebrauch . . . . . . . . . . . . . . . . . . . . . . . . . . . . . . . . . . . . . . . . . . . . . . .36
Temperatur-Einstellungen . . . . . . . . . . . . . . . . . . . . . . . . . . . . . . . . . . . . . . . . . . . . . . .36
Bedienen . . . . . . . . . . . . . . . . . . . . . . . . . . . . . . . . . . . . . . . . . . . . . . . . . . . . . . . . . . . . .37
Reinigung und Pfl ege . . . . . . . . . . . . . . . . . . . . . . . . . . . . . . . . . . . . . . . . . . . . . . . . . . .37
Aufbewahrung . . . . . . . . . . . . . . . . . . . . . . . . . . . . . . . . . . . . . . . . . . . . . . . . . . . . . . . .38
Rezept-Tipps . . . . . . . . . . . . . . . . . . . . . . . . . . . . . . . . . . . . . . . . . . . . . . . . . . . . . . . . . .38
Hamburger . . . . . . . . . . . . . . . . . . . . . . . . . . . . . . . . . . . . . . . . . . . . . . . . . . . . . . . . . . . . . . . . . . . . 38
Hühner-/Putenbrust . . . . . . . . . . . . . . . . . . . . . . . . . . . . . . . . . . . . . . . . . . . . . . . . . . . . . . . . . . . . . . 38
Gemüse/Früchte . . . . . . . . . . . . . . . . . . . . . . . . . . . . . . . . . . . . . . . . . . . . . . . . . . . . . . . . . . . . . . . . 38
Kräuter-Rührei . . . . . . . . . . . . . . . . . . . . . . . . . . . . . . . . . . . . . . . . . . . . . . . . . . . . . . . . . . . . . . . . . . 39
Fehlerbehebung . . . . . . . . . . . . . . . . . . . . . . . . . . . . . . . . . . . . . . . . . . . . . . . . . . . . . . .39
Garantie und Service . . . . . . . . . . . . . . . . . . . . . . . . . . . . . . . . . . . . . . . . . . . . . . . . . . .40
Entsorgung . . . . . . . . . . . . . . . . . . . . . . . . . . . . . . . . . . . . . . . . . . . . . . . . . . . . . . . . . . .40
Importeur . . . . . . . . . . . . . . . . . . . . . . . . . . . . . . . . . . . . . . . . . . . . . . . . . . . . . . . . . . . .40
DE
AT
CH
STR 1000 A1
31
Page 35

TISCHGRILL STR 1000 A1
Einleitung
Herzlichen Glückwunsch zum Kauf Ihres neuen
Gerätes.
Sie haben sich damit für ein hochwertiges Produkt
entschieden. Die Bedienungsanleitung ist Bestandteil dieses Produkts. Sie enthält wichtige Hinweise
für Sicherheit, Gebrauch und Entsorgung. Machen
Sie sich vor der Benutzung des Produkts mit allen
DE
Bedien- und Sicherheitshinweisen vertraut. Benut-
AT
zen Sie das Produkt nur wie beschrieben und für
die angegebenen Einsatzbereiche. Händigen Sie
CH
alle Unterlagen bei Weitergabe des Produkts an
Dritte mit aus.
Bestimmungsgemäßer
Gebrauch
Dieses Gerät dient ausschließlich dem Grillen/Garen von Lebensmitteln im Innenbereich. Dieses Gerät
ist ausschließlich für die Benutzung in privaten Haushalten bestimmt. Benutzen Sie es nicht gewerblich.
Lieferumfang
Tischgrill (Grillplatte, Basis)
Bedienungsanleitung
Gerätebeschreibung
1 Grillplatte
2 Heizschlange
3 Kabelband
4 Basis
5 Kontrollleuchte
6 Temperaturregler
7 Griff e
Technische Daten
Nennspannung: 220 - 240 V ~, 50 Hz
max. Leistungsaufnahme: 1000 W
HINWEIS
Kontrollieren Sie den Lieferumfang direkt nach
dem Auspacken auf Vollständigkeit und Beschädigungen. Wenden Sie sich, wenn nötig, an den
Service.
32
STR 1000 A1
Page 36

Sicherheitshinweise
GEFAHR - ELEKTRISCHER SCHLAG!
► Lassen Sie beschädigte Netzstecker oder Netzkabel sofort von
autorisiertem Fachpersonal oder dem Kundenservice austauschen, um Gefährdungen zu vermeiden.
► Schützen Sie die Netzleitung vor Berührungen mit heißen Geräte-
teilen. Benutzen Sie das Gerät niemals in der Nähe einer off enen
Flamme, einer Heizplatte oder eines beheizten Ofens.
► Setzen Sie das Gerät nicht dem Regen aus und benutzen Sie
es auch niemals in feuchter oder nasser Umgebung. Achten Sie
darauf, dass die Netzleitung während des Betriebs niemals nass
oder feucht wird.
► Kontrollieren Sie das Gerät vor der Verwendung auf äußere
sichtbare Schäden. Nehmen Sie ein beschädigtes oder heruntergefallenes Gerät nicht in Betrieb.
► Das Netzkabel muss regelmäßig auf Zeichen von Beschädigun-
gen untersucht werden. Falls das Netzkabel beschädigt ist, darf
das Gerät nicht mehr benutzt werden.
DE
AT
CH
► Das Gerät muss an eine Steckdose mit Schutzleiter angeschlossen
werden.
► Das Gerät darf nicht mit Feuchtigkeit, wie Regen oder Nässe, in
Berührung kommen.
Tauchen Sie das Gerät niemals in Wasser oder andere Flüssigkeiten! Hier kann Lebensgefahr durch elektrischen Schlag
entstehen, wenn im Betrieb Flüssigkeitsreste auf spannungsführende Teile gelangen.
STR 1000 A1
33
Page 37

DE
AT
CH
WARNUNG - VERLETZUNGSGEFAHR!
► Dieses Gerät kann von Kindern ab 8 Jahren sowie von Personen mit
reduzierten physischen, sensorischen oder mentalen Fähigkeiten oder
Mangel an Erfahrung und/oder Wissen benutzt werden, wenn sie
beaufsichtigt oder bezüglich des sicheren Gebrauchs des Gerätes
unterwiesen wurden und die daraus resultierenden Gefahren verstanden haben.
► Kinder dürfen nicht mit dem Gerät spielen.
► Reinigung und Benutzer-Wartung dürfen nicht durch Kinder
durchgeführt werden, es sei denn, sie sind älter als 8 Jahre und
beaufsichtigt.
► Kinder jünger als 8 Jahre sind vom Gerät und der Anschlusslei-
tung fernzuhalten.
► Lassen Sie das Gerät nach dem Gebrauch abkühlen, bevor Sie es
reinigen! Verbrennungsgefahr!
► Stellen Sie das Gerät möglichst in der Nähe einer Steckdose auf.
Sorgen Sie dafür, dass der Netzstecker bei Gefahr schnell erreichbar ist und die Netzleitung nicht zur Stolperfalle werden kann.
► Sorgen Sie für einen sicheren Stand des Gerätes.
Vorsicht! Heiße Oberfl äche!
► Berühren Sie nur die Griff e und den Temperaturregler während
des Betriebs. Die Oberfl ächen des Gerätes werden während des
Betriebs sehr heiß. Tragen Sie am Besten Topfhandschuhe oder
benutzen Sie Topfl appen.
► Lassen Sie das Gerät während des Betriebs niemals unbeaufsichtigt.
► Benutzen Sie das Gerät nicht weiter, wenn es beschädigt ist.
34
STR 1000 A1
Page 38

ACHTUNG - SACHSCHADEN!
► Benutzen Sie keine externe Zeitschaltuhr oder ein separates Fern-
wirksystem, um das Gerät zu betreiben.
► Lassen Sie das Gerät während des Betriebes niemals unbeauf-
sichtigt.
► Stellen Sie sicher, dass das Gerät, das Netzkabel oder der Netz-
stecker nicht mit heißen Quellen, wie Kochplatten oder off enen
Flammen, in Berührung kommen.
► Benutzen Sie keine Kohle oder ähnliche Brennstoff e, um das
Gerät zu betreiben!
► Schützen Sie die Antihaftbeschichtung, indem Sie keine metallischen
Werkzeuge wie Messer, Gabel usw. benutzen. Wenn die Antihaftbeschichtung beschädigt ist, benutzen Sie das Gerät nicht weiter.
► Betreiben Sie das Gerät ausschließlich mit dem mitgelieferten
Originalzubehör.
DE
AT
CH
STR 1000 A1
35
Page 39

Zusammenbauen und
Aufstellen
WARNUNG! BRANDGEFAHR!
► Stellen Sie das Gerät niemals unter Hänge-
schränke oder neben Gardinen, Schrankwänden
oder anderen entzündlichen Gegenständen.
► Stellen Sie das Gerät immer mit ausreichen-
dem Abstand zu brennbaren Materialien
DE
AT
CH
(z.B. Gardinen) auf.
► Stellen Sie das Gerät nur auf eine hitzebestän-
dige Unterlage.
1) Entnehmen Sie alle Teile aus dem Karton und
entfernen Sie das Verpackungsmaterial und
eventuelle Schutzfolien.
2) Reinigen Sie alle Teile, wie im Kapitel „Reinigung und Pfl ege“ beschrieben. Stellen Sie
sicher, dass alle Teile vollständig getrocknet
sind.
3) Führen Sie das Kabel durch die Aussparung an
der Unterseite der Basis 4.
4) Stellen Sie das Gerät auf eine hitzebeständige,
saubere und ebene Fläche. Achten Sie dabei
darauf, das Gerät nicht direkt an eine Wand
oder einen Schrank zu stellen.
5) Legen Sie die die Grillplatte 1 auf die Basis 4.
Vor dem ersten Gebrauch
1) Wischen Sie die Grillplatte 1 mit einem
feuchten Tuch ab.
2) Fetten Sie die Grillplatte 1 leicht mit zum
Backen/Grillen geeignetem Fett ein. So lösen
sich eventuelle fertigungsbedingte Rückstände
an der Grillplatte 1 besser.
3) Stecken Sie den Netzstecker in eine Netzsteckdose und stellen Sie den Temperaturregler 6
auf Stufe M. Das Gerät heizt auf.
4) Warten Sie 10 Minuten ab.
5) Ziehen Sie dann den Netzstecker und lassen
Sie das Gerät abkühlen.
HINWEIS
Beim erstmaligen Aufheizen des Gerätes
►
kann es durch fertigungsbedingte Rückstände
zu leichter Rauch- und Geruchsentwicklung
kommen. Das ist normal und völlig ungefährlich. Sorgen Sie für ausreichende Belüftung,
öff nen Sie zum Beispiel ein Fenster.
6) Reinigen Sie das Gerät nach dem Abkühlen
noch einmal wie im Kapitel „Reinigung und
Pfl ege“ beschrieben.
7) Stellen Sie sicher, dass alle Teile vollständig
getrocknet sind, bevor Sie das Gerät in Betrieb
nehmen.
Das Gerät ist nun betriebsbereit.
Temperatur-Einstellungen
Mit dem Temperaturregler 6 können Sie die Tem-
peraturstufen einstellen.
Stufe 0 Grill ausgeschaltet
Stufe 0 - 2 Grill eingeschaltet;
niedrige Temperatur
Stufe 2 - 3 Grill eingeschaltet; mittlere Temperatur
Stufe 3 - M Grill eingeschaltet; hohe Temperatur
HINWEIS
Wählen Sie die korrekte Temperaturstufe
►
durch Ausprobieren aus. Die niedrigeren und
mittleren Temperaturstufen sind dabei eher für
Gemüse, Früchte und empfi ndliche Lebensmittel und die hohen Temperaturstufen für Fleisch
geeignet.
Sobald Sie eine Temperaturstufe einstellen, leuchtet
die Kontrollleuchte 5 auf. Wenn die eingestellte Tem-
peratur erreicht ist, erlischt die Kontrollleuchte 5.
Jedoch kann diese immer wieder aufl euchten und
erlöschen. Das bedeutet, dass das Gerät die Temperatur hält und wieder etwas aufgeheizt hat.
36
STR 1000 A1
Page 40

Bedienen
Reinigung und Pfl ege
WARNUNG! VERLETZUNGSGEFAHR!
► Während der Benutzung ist das Gerät sehr
heiß! Fassen Sie daher während der Benutzung
nur die Griff e 7 oder den Temperaturregler 6
an. Benutzen Sie Topfhandschuhe oder Topfl appen, wenn Sie das Gerät anfassen.
1) Stecken Sie den Netzstecker in eine Netzsteckdose.
2) Stellen Sie die gewünschte Temperaturstufe ein.
Die Kontrollleuchte 5 leuchtet und das Gerät
heizt auf.
3) Sobald die Kontrollleuchte 5 erlischt, ist das
Gerät aufgeheizt.
Legen Sie die Lebensmittel nach Belieben auf
die Grillplatte 1.
4) Kontrollieren Sie das Grillergebnis regelmäßig
und wenden Sie gegebenenfalls das Grillgut.
Wenn Sie zufrieden sind nehmen Sie das
Grillgut von der Grillplatte 1.
ACHTUNG! SACHSCHADEN!
Benutzen Sie keine metallischen Werkzeuge
►
wie Messer, Gabel usw.. Wenn die Antihaftbeschichtung beschädigt ist, benutzen Sie
das Gerät nicht weiter.
5) Wenn Sie keine weiteren Lebensmittel grillen
wollen, stellen Sie den Temperaturregler 6 auf
„0“ und ziehen Sie den Netzstecker aus der
Netzsteckdose. Nur so ist das Gerät ausgeschaltet.
GEFAHR - ELEKTRISCHER SCHLAG!
Ziehen Sie vor jeder Reinigung den Netzste-
►
cker aus der Netzsteckdose! Es besteht die
Gefahr eines elektrischen Schlages!
Tauchen Sie die Basis 4 niemals in Wasser
oder andere Flüssigkeiten!
WARNUNG! VERLETZUNGSGEFAHR!
► Lassen Sie das Gerät immer erst abkühlen,
bevor Sie es reinigen. Es besteht sonst Verbrennungsgefahr!
ACHTUNG! SACHSCHADEN!
Verwenden Sie keine scheuernden oder
►
aggressiven Reinigungsmittel. Diese können
die Oberfl äche beschädigen!
► Benutzen Sie keine metallischen Werkzeuge
wie Messer, Gabel usw.. Wenn die Antihaftbeschichtung beschädigt ist, benutzen Sie
das Gerät nicht weiter.
■ Reinigen Sie das Gerät am besten sofort nach
dem Abkühlen. Dann lassen sich Lebensmittelreste
leichter entfernen.
■ Wischen Sie die Basis 4 mit einem feuchten
Tuch ab. Bei Bedarf geben Sie ein mildes Spülmittel auf das Tuch und wischen Sie mit klarem
Wasser nach. Trocknen Sie alles gut ab.
■ Nehmen Sie grobe Reste mit einem Stück Kü-
chenpapier von der Grillplatte 1 auf. Wischen
Sie die Grillplatte 1 mit einem feuchten Tuch
ab. Vor der erneuten Benutzung muss die Grillplatte 1 vollständig trocken sein.
DE
AT
CH
STR 1000 A1
37
Page 41

HINWEIS
Wenn hartnäckigere Verschmutzungen auf
►
der Grillplatte 1 haften, geben Sie etwas
Spülmittel auf das Tuch. Wischen Sie danach
die Grillplatte 1 mit klarem Wasser ab.
Achten Sie darauf, dass keine Spülmittelreste
auf der Grillplatte 1 verbleiben.
► Die Grillplatte 1 kann auch in der Spülma-
schine gereinigt werden.
DE
AT
CH
► Nach der Reinigung mit Spülmittel oder in der
Spülmaschine muss die Grillplatte 1 jedoch
wieder leicht mit Öl eingerieben werden,
ansonsten ist die Funktion der Antihaftbeschichtung beeinträchtigt.
■ Setzen Sie das Gerät wieder zusammen.
Aufbewahrung
■ Bewahren Sie das gereinigte Gerät an einem
sauberen, staubfreien und trockenen Ort auf.
■ Legen Sie das Kabel in Schlaufen und fi xieren
Sie es mit dem Kabelband 3 an der Unterseite
des Gerätes.
■ Die Frikadelle zusammen mit Salat, Tomaten-
scheiben und Hamburgersauce zwischen die
Brötchenhälften legen.
HINWEIS
Je nach Form und Dicke der Frikadellen kann
►
die Zubereitungszeit variieren! Bei dünnen
Frikadellen verringern Sie die Zubereitungszeit, bei dicken Frikadellen verlängern Sie die
Zubereitungszeit!
Hühner-/Putenbrust
Zutaten
200 g Hühner-/Putenbrust
etwas Mehl
■ Ein wenig zum Braten geeignetes Öl auf die
Grillplatte 1 geben und das Gerät auf Stufe
3 - M aufheizen.
■ Die 200 g Hühner-/Putenbrust in Scheiben
schneiden und leicht bemehlen.
■ Ca. 4 Minuten von der einen Seite braten, dann
wenden, leicht salzen und die zweite Seite ca. 4
Minuten braten.
Rezept-Tipps
Hamburger
Zutaten
200 g Rindergehacktes
einige Blätter Eisbergsalat
2 Tomaten
2 Hamburgerbrötchen
Gewürze (Salz, Pfeff er, Paprikapulver)
etwas Hamburgersauce
■ Gerät auf Stufe 4 aufheizen.
■ Das Rindergehackte je nach Geschmack mit
Salz, Pfeff er und Paprikapulver würzen.
■ Das Rindergehackte zu zwei Frikadellen zu
je 100 g formen und ca. 9 Minuten pro Seite
braten und zur Seite legen.
■ Gerät auf Stufe 3 zurück stellen und Hambur-
ger-Brötchen von beiden Seiten rösten und
durchschneiden.
38
Gemüse/Früchte
■ Gerät auf Stufe 3 aufheizen.
■ Gemüse in Scheiben, Streifen oder Würfel
schneiden. Mit etwas Öl, Gewürzen und ein wenig Salz, je nach Geschmack, garen. Zwischendurch das Gemüse wenden.
■ Zum Garen auf dem Grill eignen sich zum
Beispiel:
– Auberginen
(in Streifen geschnitten, ca. 15 Minuten garen)
– Kartoff eln
(gestiftelt, ca. 25 - 30 Minuten braten)
– Zucchini
(in Scheiben schneiden, ca. 15 Minuten
braten)
■ Früchte in Scheiben, Streifen oder Würfel schnei-
den. Je nach Belieben mit etwas Zucker, Honig
oder Gewürzen wie Zitronen-/Orangenschalen
oder Vanilleschoten garen. Zwischendurch die
Früchte wenden.
STR 1000 A1
Page 42

■ Zum Garen auf dem Grill eignen sich zum
Beispiel:
– Äpfel
(in Würfel geschnitten, ca. 3 Minuten)
– Banane
(in Scheiben geschnitten, ca. 3 Minuten)
– Ananas
(in Scheiben geschnitten, ca. 4 Minuten)
Kräuter-Rührei
Zutaten
2 Eier
2 EL Sahne
Salz
Schnittlauch oder andere Kräuter
■ Gerät auf Stufe 3 aufheizen.
■ 2 Eier mit ein wenig Salz und 2 Esslöff el fl üssi-
ger Sahne vermischen.
■ Nach belieben klein gehacktes Schnittlauch
oder andere Kräuter hinzugeben.
■ Auf die Grillplatte 1 geben und unter ständi-
gem Rühren so lange backen, bis die gewünschte Konsistenz erreicht ist.
Fehlerbehebung
Fehler Ursache Lösung
DE
AT
CH
Der Netzstecker ist nicht mit dem Stromnetz
verbunden.
Das Gerät funktio-
niert nicht.
Die Kontrollleuchte 5
leuchtet immer wieder auf und erlischt
dann wieder.
Die Kontrollleuchte 5
leuchtet nicht.
Sollten sich die Störungen nicht mit oben stehenden Fehlerbehebungen beheben lassen, oder wenn
Sie andere Arten von Störungen feststellen, wenden Sie sich bitte an unseren Service.
Die Netzsteckdose ist defekt.
Das Gerät ist defekt. Wenden Sie sich an den Service.
Das Gerät hält die Temperatur. Dafür ist es
nötig, dass das Gerät immer wieder kurz aufheizt. Dabei leuchtet die Kontrollleuchte 5.
Das Gerät ist defekt. Wenden Sie sich an den Service.
Das Gerät hat aufgeheizt. Es liegt kein Fehler vor.
Stecken Sie den Netzstecker in
eine Netzsteckdose.
Benutzen Sie eine andere Netzsteckdose.
Es liegt kein Fehler vor.
STR 1000 A1
39
Page 43

Garantie und Service
Sie erhalten auf dieses Gerät 3 Jahre Garantie
ab Kaufdatum. Das Gerät wurde sorgfältig
produziert und vor Anlieferung gewissenhaft
geprüft. Bitte bewahren Sie den Kassenbon als
Nachweis für den Kauf auf. Bitte setzen Sie sich
im Garantiefall mit Ihrer Servicestelle telefonisch
in Verbindung. Nur so kann eine kostenlose
Einsendung Ihrer Ware gewährleistet werden.
Die Garantieleistung gilt nur für Material- oder
DE
Fabrikationsfehler, nicht aber für Transportschäden,
AT
Verschleißteile oder für Beschädigungen an zerbrech-
CH
lichen Teilen, z. B. Schalter oder Akkus. Das Produkt
ist lediglich für den privaten und nicht für den
gewerblichen Gebrauch bestimmt.
Bei missbräuchlicher und unsachgemäßer Behandlung, Gewaltanwendung und bei Eingriff en, die
nicht von unserer autorisierten Service-Niederlassung vorgenommen wurden, erlischt die Garantie.
Ihre gesetzlichen Rechte werden durch diese Garantie nicht eingeschränkt.
Die Garantiezeit wird durch die Gewährleistung
nicht verlängert. Dies gilt auch für ersetzte und reparierte Teile. Eventuell schon beim Kauf vorhandene
Schäden und Mängel müssen sofort nach dem
Auspacken gemeldet werden, spätestens aber zwei
Tage nach Kaufdatum. Nach Ablauf der Garantiezeit anfallende Reparaturen sind kostenpfl ichtig.
Service Deutschland
Tel.: 0800 5435 111
E-Mail: kompernass@lidl.de
IAN 95855
Service Schweiz
Tel.: 0842 665566 (0,08 CHF/Min.,
Mobilfunk max. 0,40 CHF/Min.)
E-Mail: kompernass@lidl.ch
IAN 95855
Erreichbarkeit Hotline:
Montag bis Freitag von 8:00 Uhr – 20:00 Uhr (MEZ)
Entsorgung
Werfen Sie das Gerät kei-
nesfalls in den normalen
Hausmüll. Dieses Produkt
unterliegt der europäischen
Richtlinie 2012/19/EU.
Entsorgen Sie das Gerät über einen zugelassenen
Entsorgungsbetrieb oder über Ihre kommunale
Entsorgungseinrichtung. Beachten Sie die aktuell
geltenden Vorschriften. Setzen Sie sich im Zweifelsfall mit Ihrer Entsorgungseinrichtung in Verbindung.
Die Verpackung besteht aus umwelt-
freundlichen Materialien, die Sie über
die örtlichen Recyclingstellen entsorgen
können.
Importeur
KOMPERNASS HANDELS GMBH
BURGSTRASSE 21
44867 BOCHUM
GERMANY
www.kompernass.com
Service Österreich
Tel.: 0820 201 222 (0,15 EUR/Min.)
E-Mail: kompernass@lidl.at
IAN 95855
40
STR 1000 A1
Page 44

KOMPERNASS HANDELS GMBH
BURGSTRASSE 21
44867 BOCHUM
DEUTSCHLAND / GERMANY
www.kompernass.com
Estado de las informaciones · Versione delle informazioni
Last Information Update · Stand der Informationen:
02 / 2014 · Ident.-No.: STR1000A1-112013-2
IAN 95855
5
 Loading...