

Page 1
EPILATEUR BIKINI SBT 3.6 A1
EPILATEUR BIKINI
Mode d’emploi
BIKINI TRIMMER
Operating instructions
IAN 95827
LADY-TRIMMER
Bedienungsanleitung
Page 2

Avant de lire le mode d'emploi, ouvrez la page contenant les illustrations et familiarisezvous ensuite avec toutes les fonctions de l'appareil.
Klappen Sie vor dem Lesen die Seite mit den Abbildungen aus und machen Sie sich anschließend mit allen Funktionen des Gerätes vertraut.
Before reading, unfold the page containing the illustrations and familiarise yourself with all
functions of the device.
FR / BE Mode d'emploi Page 1
DE / AT / CH Bedienungsanleitung Seite 17
GB Operating instructions Page 33
Page 3
A
B
C
Page 4

Table des matières
Introduction . . . . . . . . . . . . . . . . . . . . . . . . . . . . . . . . . . . . . . . . . . . . . . .2
Droits d'auteur . . . . . . . . . . . . . . . . . . . . . . . . . . . . . . . . . . . . . . . . . . . . . . . . . . . . . . .2
Utilisation conforme . . . . . . . . . . . . . . . . . . . . . . . . . . . . . . . . . . . . . . . .2
Matériel livré . . . . . . . . . . . . . . . . . . . . . . . . . . . . . . . . . . . . . . . . . . . . . . 2
Élimination de l'emballage . . . . . . . . . . . . . . . . . . . . . . . . . . . . . . . . . . . . . . . . . . . . . .3
Éléments de commande . . . . . . . . . . . . . . . . . . . . . . . . . . . . . . . . . . . . . 3
Caractéristiques techniques . . . . . . . . . . . . . . . . . . . . . . . . . . . . . . . . . . 4
Consignes de sécurité . . . . . . . . . . . . . . . . . . . . . . . . . . . . . . . . . . . . . . . 4
Charger l'appareil . . . . . . . . . . . . . . . . . . . . . . . . . . . . . . . . . . . . . . . . . .7
Conseils et astuces . . . . . . . . . . . . . . . . . . . . . . . . . . . . . . . . . . . . . . . . . . 7
Utilisation de l'appareil . . . . . . . . . . . . . . . . . . . . . . . . . . . . . . . . . . . . . 8
Mettre les embouts en place et les retirer . . . . . . . . . . . . . . . . . . . . . . . . . . . . . . . . . . .8
Épilation . . . . . . . . . . . . . . . . . . . . . . . . . . . . . . . . . . . . . . . . . . . . . . . . . . . . . . . . . . . .8
Tondre la zone bikini avec la tondeuse et le peigne de précision . . . . . . . . . . . . . . . .9
Sculpter avec la tondeuse de précision . . . . . . . . . . . . . . . . . . . . . . . . . . . . . . . . . . 10
Couper les sourcils avec la tondeuse de précision et le peigne à sourcils . . . . . . . . 10
Sculpter les sourcils avec la micro tondeuse ou éliminer les poils du visage . . . . . . 11
Raser avec le micro rasoir . . . . . . . . . . . . . . . . . . . . . . . . . . . . . . . . . . . . . . . . . . . . 11
Nettoyage et entretien . . . . . . . . . . . . . . . . . . . . . . . . . . . . . . . . . . . . .12
FR
BE
Entreposage . . . . . . . . . . . . . . . . . . . . . . . . . . . . . . . . . . . . . . . . . . . . . .13
Dépannage . . . . . . . . . . . . . . . . . . . . . . . . . . . . . . . . . . . . . . . . . . . . . .13
Élimination de l'appareil . . . . . . . . . . . . . . . . . . . . . . . . . . . . . . . . . . . . 14
Garantie et service . . . . . . . . . . . . . . . . . . . . . . . . . . . . . . . . . . . . . . . .15
Importateur . . . . . . . . . . . . . . . . . . . . . . . . . . . . . . . . . . . . . . . . . . . . . .15
SBT 3.6 A1
1
Page 5

Introduction
FR
Toutes nos félicitations pour l'achat de votre nouvel appareil.
BE
Ainsi, vous venez d'opter pour un produit de grande qualité. Le mode d'emploi fait
partie de ce produit. Il contient des remarques importantes concernant la sécurité,
l'usage et la mise au rebut. Avant l'usage du produit, veuillez vous familiariser avec
toutes les consignes d'utilisation et de sécurité. N'utilisez le produit que conformément
aux consignes et pour les domaines d'utilisation prévus. Si vous cédez le produit à un
tiers, remettez-lui également tous les documents.
Droits d'auteur
Cette documentation est protégée par des droits d'auteur.
Toute reproduction ou réimpression, même partielle, y compris la reproduction des
illustrations, même modifi ées, n'est autorisée qu'avec l'accord écrit du fabricant.
Utilisation conforme
Cet appareil est exclusivement destiné à l'épilation et à la coupe des sourcils et de la
zone du bikini dans les ménages privés. Ne l'utilisez pas à des fi ns professionnelles !
Tout usage autre ou dépassant ce cadre est réputé non conforme.
Aucune réclamation ne sera prise en compte pour des dommages résultant d'une utilisation du matériel non conforme à la destination, de réparations eff ectuées incorrectement,
de modifi cations arbitraires, ou encore de l'utilisation de pièces de rechange non agréées.
L'utilisateur assume seul la responsabilité des risques encourus.
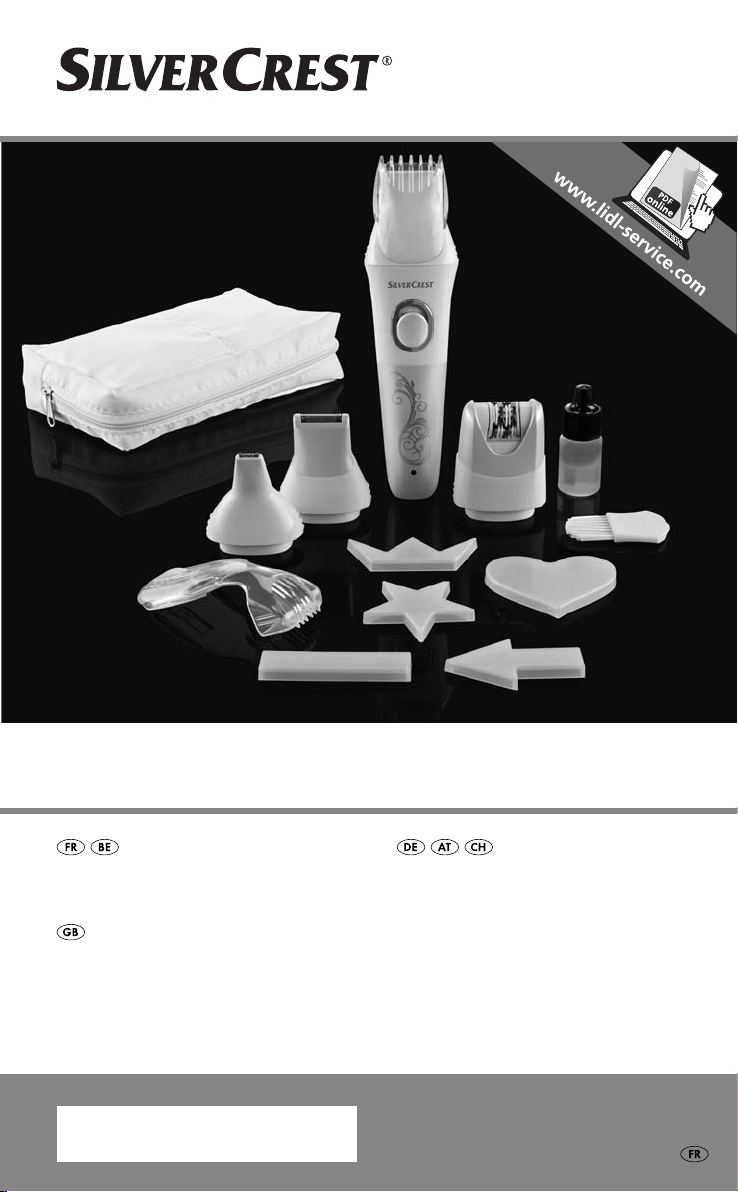
Matériel livré
■ Appareil
■ Tête d'épilation
■ Micro rasoir avec capuchon de protection
■ Tondeuse de précision
■ Micro tondeuse
■ Peigne pour les sourcils à 3 positions
■ Peigne de précision à 5 positions
■ Adaptateur secteur
■ Pinceau de nettoyage
■ Sac de rangement à fermeture éclair
■ 5 × pochoir
■ Huile
■ Mode d'emploi
etirez toutes les pièces de l'appareil du carton et retirez l'ensemble du matériau d'em-
R
ballage. Vérifi ez si la livraison est au complet et ne présente aucun dégât apparent.
2
s de tonte (cœur, fl èche, couronne, étoile et rectangle)
SBT 3.6 A1
Page 6

REMARQUES
► En cas de livraison incomplète ou de dommages résultant d'un emballage défec-
tueux ou du tr
après-vente (voir le chapitre Garantie et service).
ansport, veuillez vous adresser à la ligne téléphonique du service
Élimination de l'emballage
L'emballage protège l'appareil de tous dommages éventuels au cours du transport.
Les matériaux d'emballage ont été sélectionnés selon des critères de respect de
l'environnement et de recyclage permettant une élimination écologique de ceux-ci.
Le retour de l'emballage dans le cycle des matériaux permet d'économiser
les matières premières et réduit la formation de déchets. Veuillez éliminer les
matériaux d'emballage qui ne servent plus en respectant la réglementation
locale.
Éléments de commande
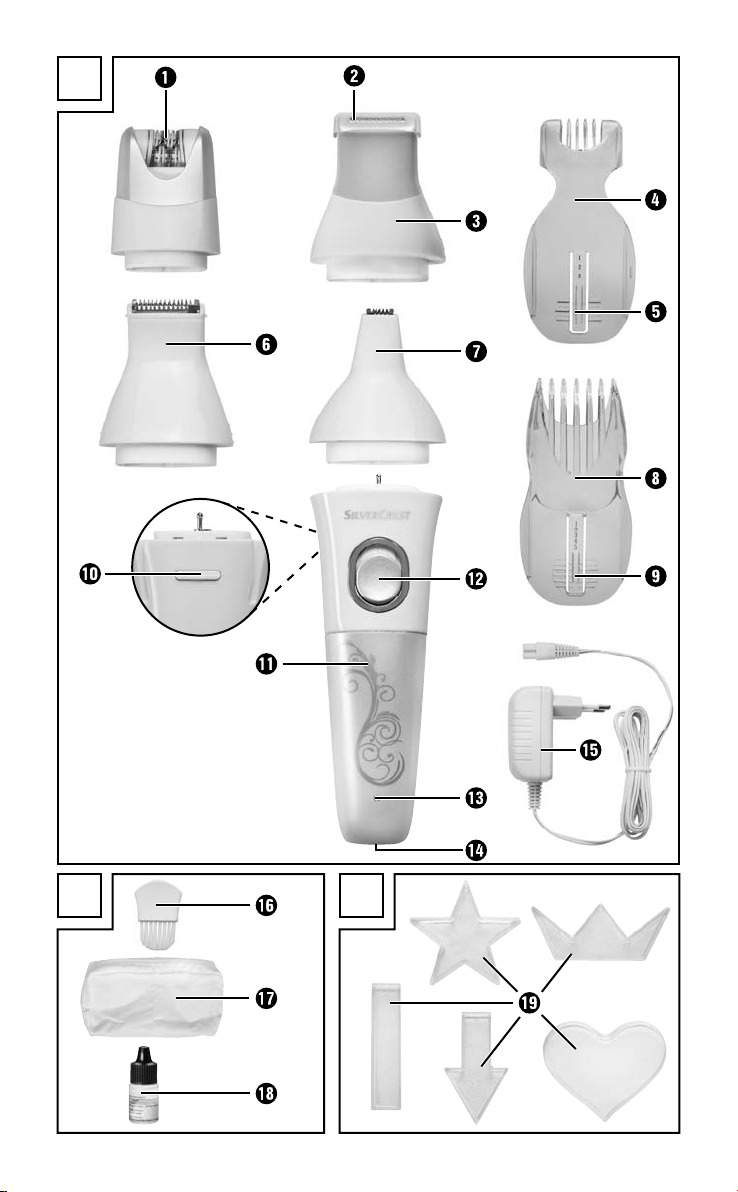
Figure A:
1 Tête d'épilation
2 Capuchon de protection du micro rasoir
3 Micro rasoir
4 Peigne pour les sourcils à 3 positions
5 Crans du peigne pour les sourcils
6 Tondeuse de précision
7 Micro tondeuse
8 Peigne de précision à 5 positions
9 Crans du peigne de précision
0 Bec d'encliquetage
q Appareil
w Bouton marche/arrêt
e Voyant de contrôle rouge/vert
r Prise pour l'adaptateur secteur
t Adaptateur secteur
FR
BE
Figure B:
z Pinceau de nettoyage
u Sac de rangement
i Huile
Figure C:
o 5 × Pochoirs de tonte
SBT 3.6 A1
3
Page 7

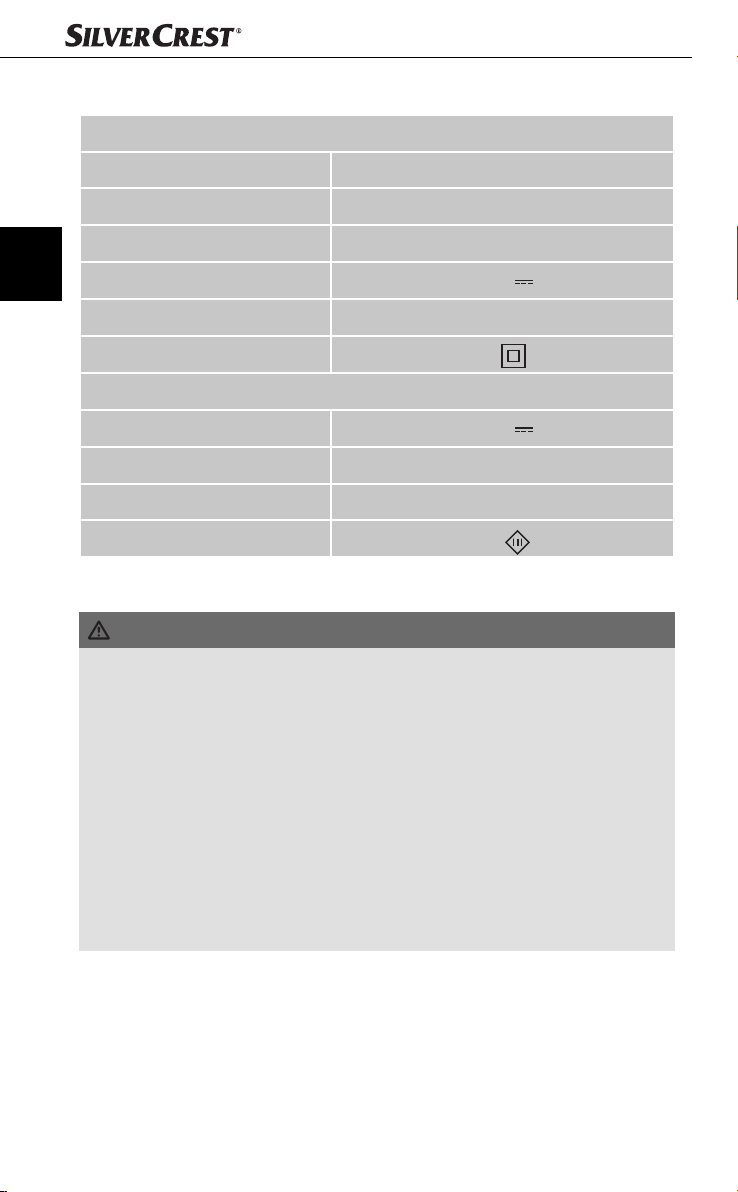
Caractéristiques techniques
FR
BE
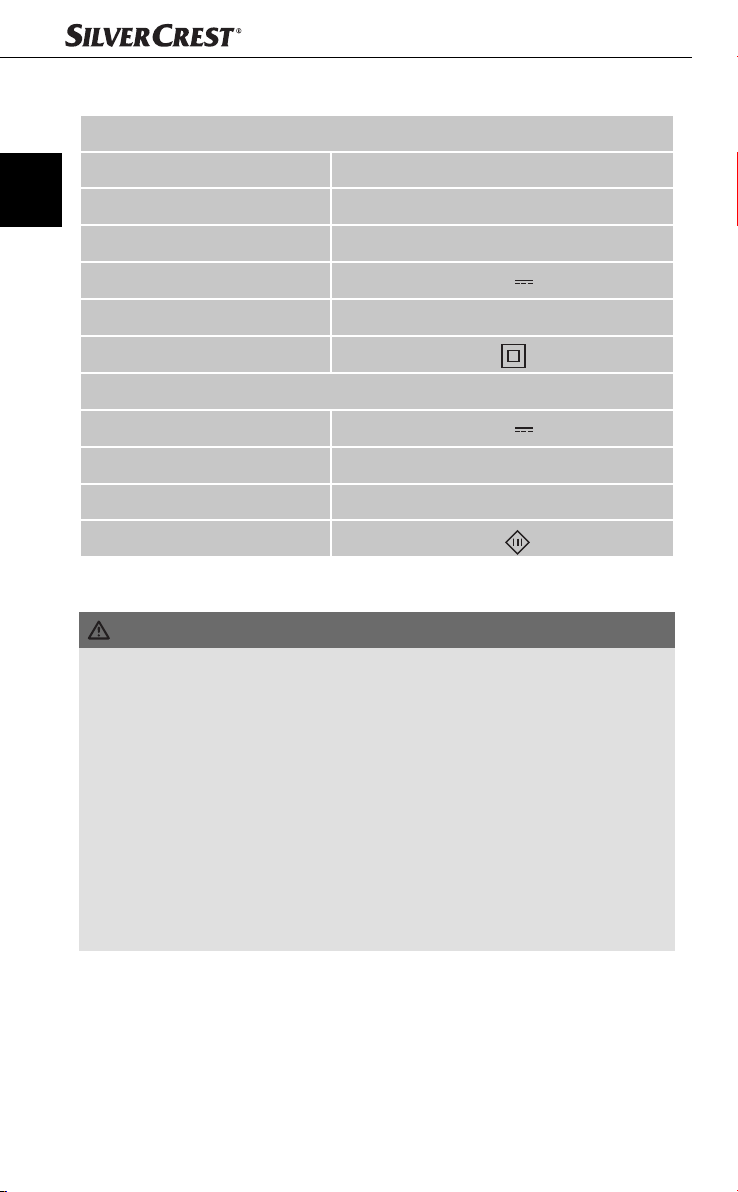
Adaptateur secteur
Type ZDJ045100EU
Tension d'entrée 100 - 240 V ~, 50/60 Hz
Courant absorbé 0,2 A max.
Tension de sortie 4,5 V
Courant de sortie 1000 mA
Classe de protection
Appareil
Tension d'entrée 4,5 V
Courant absorbé 1000 mA
Indice de protection IPX4
Classe de protection
II /
III /
Consignes de sécurité
RISQUE D'ÉLECTROCUTION
► L'adaptateur secteur pour la charge de l'accu intégré ne doit
être branché que dans une prise installée réglementairement
et alimentée par une tension secteur de 100 - 240 V ~ /
50/60 Hz.
► Le câble de l'adaptateur secteur ne peut pas être remplacé.
Si le câble est endommagé, l'appareil doit être détruit.
► En cas de défaillances et avant de nettoyer l'appareil, retirez
l'adaptateur secteur de la prise secteur.
► Retirez toujours l'adaptateur secteur même de la prise de
courant, ne tirez pas sur le câble lui-même.
4
SBT 3.6 A1
Page 8
RISQUE D'ÉLECTROCUTION
► Évitez de plier ou de coincer le câble de l'adaptateur secteur
et posez le câble de manière à ce que personne ne puisse
marcher ou trébucher dessus.
► Veillez à ce que ni l'adaptateur secteur ni son câble ne soit
humide ou mouillé durant le fonctionnement. Guidez-le de
telle manière qu'il ne soit ni coincé ni endommagé.
► Si l'appareil venait à être endommagé, arrêtez aussitôt de
vous en servir pour éviter tous dangers.
► N'utilisez pas l'appareil à l'extérieur.
► N'enroulez pas le câble de l'adaptateur secteur autour de
l'appareil et protégez-le contre les endommagements.
► Ne saisissez jamais l'appareil, l'adaptateur secteur et son fi l
avec les mains mouillées.
► ATTENTION ! Maintenez l'appareil au sec.
L'appareil est protégé contre les projections d'eau conformément à l'indice de protection IPX4, l'adaptateur secteur
ne l'est pas. N'utilisez jamais l'appareil avec l'adaptateur
secteur à proximité de l'eau, en particulier à proximité d'un
lavabo, d'une baignoire ou de récipients similaires. Pour
cette raison, débranchez l'adaptateur secteur de la prise
après chaque usage. À titre de protection supplémentaire,
nous recommandons l'installation d'un relais disjoncteur
contre le courant de fuite avec un seuil de déclenchement
inférieur ou égal à 30 mA dans le circuit électrique de la
salle de bains. Demandez conseil à votre électricien.
FR
BE
SBT 3.6 A1
5
Page 9
FR
BE
AVERTISSEMENT ! RISQUE DE BLESSURES!
► Si l'appareil est tombé ou est endommagé, ne pas le remettre
en service. Faites vérifi er et, le cas échéant, réparer l'appareil
par des techniciens spécialisés et qualifi és.
► N'ouvrez pas le boîtier de l'appareil car il n'est pas réparable
par l'utilisateur. Dans ce cas, la sécurité n'est plus assurée et
vous perdez le bénéfi ce de la garantie. Confi ez les réparations de l'appareil défectueux uniquement à un technicien
spécialisé.
► N'opérez l'appareil qu'avec l'adaptateur secteur fourni.
► Ne chargez l'appareil qu'avec l'adaptateur secteur fourni.
► Cet appareil peut être utilisé par des enfants de plus de 8 ans
ainsi que par des personnes ayant des capacités physiques,
mentales ou sensorielles réduites ou qui n'ont pas l'expérience
et les connaissances nécessaires, s'ils sont sous la surveillance
d'une personne responsable de leur sécurité ou s'ils ont reçu
des instructions concernant l'utilisation de l'appareil et qu'ils
comprennent les dangers pouvant en résulter.
► Ne pas laisser les enfants jouer avec l'appareil.
► Il est interdit aux enfants de nettoyer ou d'entretenir l'appareil
sans surveillance.
AVERTISSEMENT ! RISQUE DE BLESSURES!
► Afi n d'éviter toute blessure, n'utilisez pas l'appareil avec un
embout ou un peigne endommagé ou défectueux.
► Afi n d'éviter toute blessure oculaire, n'utilisez jamais l'appareil
pour couper les cils.
► Afi n d'éviter toute blessure et détérioration, maintenez l'appareil
allumé loin des cheveux, cils et sourcils, ainsi que des vêtements,
fi ls, câbles, brosses etc. lors de l'utilisation de la tête d'épilation.
ATTENTION - RISQUE DE DOMMAGES MATÉRIELS!
► Utilisez toujours l'appareil dans des locaux fermés.
6
SBT 3.6 A1
Page 10

Charger l'appareil
1) Branchez la fi che du câble de l'adaptateur secteur t dans la prise r de l'appareil.
2) Branchez l'adaptateur secteur t dans une prise secteur. Le voyant de contrôle e
est rouge et indique ainsi que le processus de chargement est en cours.
Dès que le voyant de contrôle e est vert, l'appareil est entièrement chargé et vous
pouvez débrancher l'appareil du réseau électrique.
REMARQUE
► L'appareil a besoin d'environ 12 heures pour le premier chargement complet.
Mettez toujour
► Un appareil entièrement chargé vous permet de raser et de tondre env. 60 minutes
ou d'épiler en
► Rechargez uniquement l'appareil lorsque le voyant de contrôle e affi che, par un
clignotement rouge-vert alterné, que la charge de l'accu est trop faible.
s fi n au chargement dès que le voyant de contrôle e devient vert.
v. 30 minutes.
Conseils et astuces
REMARQUE
► N'utilisez pas l'appareil, lorsque vous...
― présentez un coup de soleil sur les zones corporelles concernées.
― présentez des irritations ou rougeurs cutanées.
― souff rez d'une maladie de la peau, comme par exemple la névrodermite.
― avez des boutons d'acné, des taches de naissance ou des verrues sur les
z
ones corporelles concernées.
― avez des plaies, plaies ouvertes, ou des cicatrices saillantes sur les zones
elles concernées.
corpor
► Appliquez d'abord l'appareil sur une petite zone cachée pour tester si votre
peau le tolèr
■ La longueur des poils è épiler doit être comprise entre 0,3 cm et 0,5 cm. S'ils sont
plus cour
très douloureux. S'il y a des poils plus longs, veuillez les raccourcir au préalable.
■ La peau doit être exempte de restes de matières grasses ou de crème. Sinon les
pincettes se collent/s'encr
■ La peau doit être entièrement sèche.
■ Il est recommandé de s'épiler le soir après la douche. La peau s'est alors un peu
amollie, il est plus facile d'arr
la nuit et les éventuelles rougeurs cutanées se résorbent.
■ Avant d'eff ectuer une épilation/un rasage, il est recommandé de procéder à un
peeling ou de frictionner la peau à l'aide d'un gant de massage. Cela permet de
supprimer les pellicules mor
Il en résulte également une meilleure saisie des poils.
■ Après l'épilation/le rasage, appliquez une lotion hydratante ou une crème sur la
peau, contenant de pr
apaiser et hydrater la peau.
e.
ts, les pincettes ne les attraperont pas et l'arrachage de poils plus longs est
assent et la performance de l'appareil diminue.
acher les poils. En outre, la peau "récupère" pendant
tes, d'éviter les poils incarnés et de dresser les poils fi ns.
éférence de l'aloé vera ou des extraits de camomille pour
FR
BE
SBT 3.6 A1
7
Page 11
Utilisation de l'appareil
FR
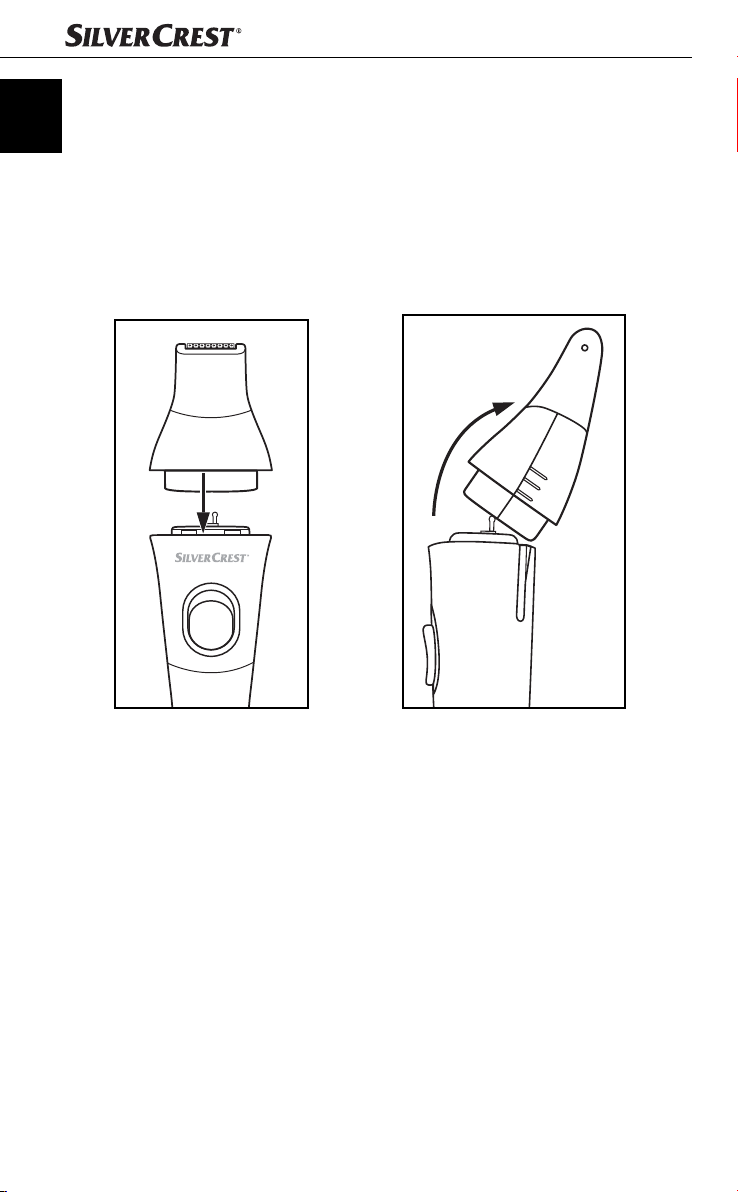
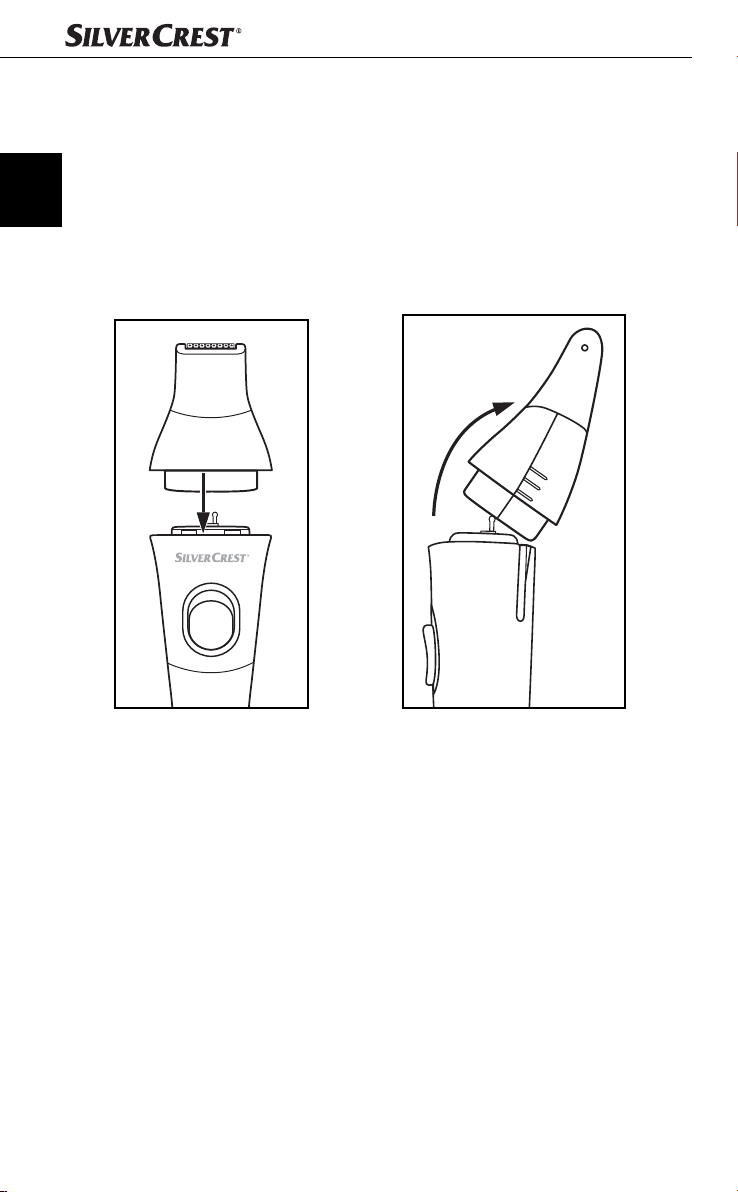
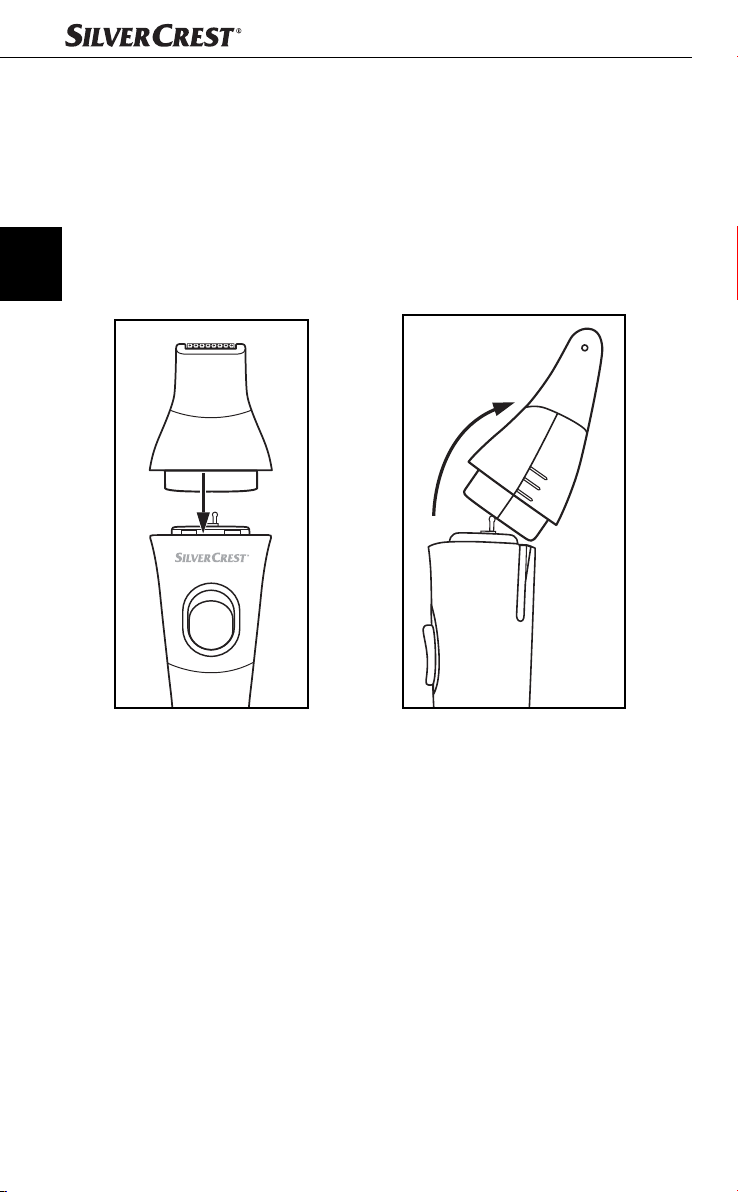
Mettre les embouts en place et les retirer
BE
Tous les embouts joints (tête d'épilation 1, tondeuse de précision 6, micro rasoir 3
et micro tondeuse 7) peuvent être mis en place et retirés de la même manière. Veillez
au bon alignement de l'embout avec l'appareil :
la courbure de l'embout doit toujours pointer vers le côté de l'appareil q sur lequel se
trouve le bouton marche/arrêt w.
♦ Pour mettre en place un embout, appuyez-le sur l'appareil (voir fi g. 1).
♦ Pour retirer un embout, tirez-le de l'appareil (voir fi g. 2).
(fi g. 1) (fi g. 2)
Épilation
Lorsque l'appareil est chargé et que les zones corporelles à épiler sont préparées :
1) Caressez encore une fois les poils à supprimer à rebrousse-poils de la main. Vous
dressez ainsi les poils pour que les pincettes puissent plus facilement les saisir.
2) Placez la tête d'épilation 1 sur l'appareil q. La légère courbure de la tête d'épilation 1 doit pointer vers le côté de l'appareil q sur lequel se trouve le bouton
marche/arrêt w (voir chapitre 'Mettre les embouts en place et les retirer").
3) Faites glisser le bouton marche/arrêt w en direction de l'embout.
4) Tenez la peau bien tendue d'une main.
5) Placez l'appareil verticalement sur la peau et déplacez-le dessus à rebrousse-poils
sans exercer de pression. N'eff ectuez aucun mouvement de va-et-vient ni de
mouvement circulaire. Procédez lentement en eff ectuant des mouvements calmes et
contrôlés. Recommencez toujours au début et passez plusieurs fois sur les zones à
épiler afi n de retirer tous les poils.
8
SBT 3.6 A1
Page 12

REMARQUE
► Il peut arriver qu'après quelques jours, les poils se remettent à pousser. Cela est
lié au fait que lor
être arrachés.
6) Une fois le traitement terminé, repoussez le bouton marche/arrêt w dans la direction
opposée pour éteindre l'appareil.
7) Nettoyez la tête d'épilation 1 comme décrit dans le chapitre "Nettoyage et entretien".
REMARQUE
► Si la tête d'épilation 1 est endommagée, cessez de l'utiliser! P
une nouvelle tête d'épilation 1, veuillez vous adresser au service après-vente
(cf. le chapitre "Garantie et service"). Ayez le numéro IAN à portée de main
(voir la page de couverture du mode d'emploi).
s de la dernière épilation, certains poils étaient trop courts pour
our commander
Tondre la zone bikini avec la tondeuse et le peigne de
précision
Pour tondre la zone de bikini, utilisez la tondeuse de précision 6 avec le peigne de
précision 8.
1) Retirez d'abord éventuellement un embout de l'appareil q. Positionnez la tondeuse
de précision 6 sur l'appareil q de manière à ce que les deux rainures de l'embout
recouvrent celles situées au dos de l'appareil q.
2) Glissez le peigne de précision 8 avec ses glissières latérales dans les deux rainures
de l'appareil jusqu'à ce qu'il s'encliquète de manière audible.
3) Vous pouvez varier cinq fois la longueur de coupe. Appuyez pour cela dans la
zone 9 du peigne de précision 8, de manière à ce que le bec d'encliquetage 0
descende dans le boîtier. Faites ensuite glisser le peigne de précision 8 et réglez
la position d'encliquetage de manière à ce qu'elle corresponde à la longueur de
coupe souhaitée. Orientez-vous aux réglages de crans indiqués sur le peigne de
précision 8 et dans le tableau suivant :
FR
BE
Réglage Longueur de poils après la coupe
1 env. 3 mm
2 env. 5 mm
3 env. 7 mm
4 env. 9 mm
5 env. 11 mm
4) Glissez le bouton marche/arrêt w en direction de l'embout.
5) Tenez la peau bien tendue d'une main.
6) Placez l'appareil verticalement sur la peau et déplacez-le dessus à rebrousse-poils
sans exercer de pression. La face plate du peigne de précision 8 doit toujours être
posée sur la peau pour obtenir une coupe régulière.
SBT 3.6 A1
9
Page 13

7) Si beaucoup de poils se sont accumulés dans le peigne de précision 8, démontez-
FR
BE
le et enlevez les poils en souffl ant ou en le secouant.
8) Une fois le traitement terminé, repoussez le bouton marche/arrêt w dans la direction
opposée pour éteindre l'appareil.
Sculpter avec la tondeuse de précision
Pour donner une forme spécifi que à la zone de bikini, utilisez la tondeuse de précision 6
sans le peigne de précision 8.
1) Si nécessaire, retirez d'abord le peigne de précision 8 de la tondeuse de précision 6 ou bien placez la tondeuse de précision 6 sur l'appareil q.
2) Poussez le bouton marche/arrêt w en direction de l'embout.
3) Modelez le contour souhaité de la zone de bikini avec l'appareil. Ce faisant, touchez
légèrement les poils avec la tondeuse de précision 6. Vous pouvez utiliser la tondeuse de précision 6 directement sur la peau ou glisser sur la peau avec la partie
extérieure du boîtier de l'embout. Donnez libre cours à votre créativité, ou bien
utilisez l'un des pochoirs de tonte o ci-joints pour créer un contour.
4) Une fois le traitement terminé, repoussez le bouton marche/arrêt w dans la direction
opposée pour éteindre l'appareil.
Couper les sourcils avec la tondeuse de précision et le
peigne à sourcils
La tondeuse de précision 6 et le peigne à sourcils 4 vous permettent de couper les
sourcils à longueur identique.
1) Retirez d'abord éventuellement un embout de l'appareil q. Positionnez la tondeuse
de précision 6 sur l'appareil q de manière à ce que les deux rainures de l'embout
recouvrent celles situées au dos de l'appareil q.
2) Glissez le peigne pour sourcils 4 avec ses glissières latérales dans les deux rainures
de l'appareil jusqu'à ce qu'il s'encliquète de manière audible.
3) Vous pouvez varier trois fois la longueur de coupe. Appuyez pour cela dans la
zone 5 du peigne pour sourcils 4, de manière à ce que le bec d'encliquetage 0
descende dans le boîtier. Faites ensuite glisser le peigne pour sourcils 4 et réglez
la position d'encliquetage de manière à ce qu'elle corresponde à la longueur de
coupe souhaitée. Orientez-vous aux réglages de crans indiqués sur le peigne pour
sourcils 4 et dans le tableau suivant :
Réglage Longueur de poils après la coupe
1 env. 3 mm
2 env. 6 mm
3 env. 9 mm
4) Faites glissez le bouton marche/arrêt w en direction de l'embout.
10
SBT 3.6 A1
Page 14

5) Commencez par peigner les sourcils à rebrousse-poils.
6) Faites glisser la tondeuse de précision 6 avec le peigne pour sourcils 4 de l'extrémité
extérieure du sourcil en direction de la racine du nez.
7) Une fois le traitement terminé, repoussez le bouton marche/arrêt w dans la direction
opposée pour éteindre l'appareil.
Sculpter les sourcils avec la micro tondeuse ou éliminer
les poils du visage
La micro tondeuse 7 vous permet de sculpter les sourcils ou d'éliminer des poils du
visage.
1) Retirez d'abord éventuellement un embout de l'appareil q. Placez la micro tondeuse 7 sur l'appareil q. La légère courbure de la micro tondeuse 7 doit pointer
vers le côté de l'appareil q sur lequel se trouve le bouton marche/arrêt w (voir
chapitre 'Mettre les embouts en place et les retirer").
2) Faites glissez le bouton marche/arrêt w en direction de l'embout.
3) Déplacez la micro tondeuse 7 de manière prudente et contrôlée. Faites toujours
glisser la micro tondeuse 7 à rebrousse-poils. Veillez à ce que la micro tondeuse 7
soit toujours en contact avec la peau.
4) Une fois le traitement terminé, repoussez le bouton marche/arrêt w dans la direction
opposée pour éteindre l'appareil.
Raser avec le micro rasoir
Utilisez le micro rasoir 3, pour éliminer les poils courts le long des contours de votre
zone de bikini. Votre zone de bikini demeure ainsi clairement défi nie.
FR
BE
REMARQUE
► Vous devez d'abord raccourcir les poils plus longs avec la tondeuse de précision 6
ant d'utiliser le micro rasoir 3.
av
1) Retirez d'abord éventuellement un embout de l'appareil q. Placez le micro rasoir 3
sur l'appareil q. La légère courbure du micro rasoir 3 doit pointer vers le côté de
l'appareil q sur lequel se trouve le bouton marche/arrêt w (voir chapitre 'Mettre les
embouts en place et les retirer").
2) Retirez le capuchon de protection 2.
3) Faites glissez le bouton marche/arrêt w en direction de l'embout.
4) Placez prudemment la grille de coupe sur la peau et faites glisser l'appareil à
rebrousse poil.
5) Une fois le traitement terminé, repoussez le bouton marche/arrêt w dans la direction
opposée pour éteindre l'appareil.
6) Remettez le capuchon de protection 2 en place.
SBT 3.6 A1
11
Page 15
FR
BE
REMARQUE CONCERNANT LA GRILLE DE COUPE
► Si la grille de coupe est endommagée, cessez d'utiliser l'appareil !
― Pour remplacer la grille de coupe, retirez le micro rasoir 3 de l'appar
Retirez la partie de couleur (support de grille de coupe) 3 du socle du
micro rasoir.
― Appuyez avec un objet fi n sur la grille de coupe sur les côtés courts vers
le bas de manière à ce qu'elle sorte de l'arrêt.
― Retirez la grille de coupe défectueuse.
― Glissez avec précaution une nouvelle grille de coupe par le bas dans le
support de grille de coupe, jusqu'à ce qu'elle s'enclenche dans les arrêts.
► Pour commander des pièces détachées, veuillez vous adresser au service après-
vente (cf. le chapitre "Garantie et service"). Ayez le numéro IAN à portée de
main (voir la page de couverture du mode d'emploi).
Nettoyage et entretien
RISQUE D'ÉLECTROCUTION
► Avant chaque opération de nettoyage, débranchez l'appareil de l'adaptateur
secteur t et l'adaptateur secteur t de la prise de cour
ATTENTION - RISQUE DE DOMMAGES MATÉRIELS!
► N'immergez jamais l'appareil dans de l'eau ou dans d'autres liquides !
■ Après chaque utilisation, nettoyez l'embout utilisé avec le pinceau de nettoyage z
é d'origine afi n de retirer les poils coupés.
livr
■ Désinfectez régulièrement l'embout utilisé en le vaporisant de spray désinfectant
pour le netto
■ Pour procéder au nettoyage complet de la tête d'épilation 1, r
reil q. Nettoyez la tête d'épilation 1 à l'eau courante et laissez-la sécher.
■ Pour procéder au nettoyage complet du micro rasoir 3, r
Retirez la partie de couleur du socle de l'embout et nettoyez avec précaution l'outil
de coupe qui apparaît avec le pinceau de nettoyage z livré. Assemblez ensuite à
nouveau les deux parties du micro rasoir 3.
■ En cas d'utilisation régulière, la tondeuse de précision 6 et la micr
doivent être huilées de temps en temps. Utilisez l'huile i livrée.
■ Essuyez l'appareil, les pochoirs de tonte o et l'adaptateur secteur t à l'aide d'un
chiff
on humide. Si nécessaire, versez un peu de liquide vaisselle doux sur le chiff on.
Avant l'utilisation suivante, assurez-vous que l'appareil a entièrement séché.
yer.
eil q.
ant.
etirez-la de l'appa-
etirez-le de l'appareil q.
o tondeuse 7
12
SBT 3.6 A1
Page 16
REMARQUE
► Pour commander des pièces détachées, veuillez vous adresser au service après-
ente (cf. le chapitre "Garantie et service"). Ayez le numéro IAN à portée de
v
main (voir la page de couverture du mode d'emploi).
Entreposage
■ Protégez toujours le micro rasoir 3 à l'aide du capuchon de protection 2 fourni.
■ Rangez l'appareil, les pochoirs de tonte o, le pinceau de netto
teur secteur t dans le sac de rangement u.
■ Conservez l'appareil dans un endroit sec et exempt de poussière.
yage z et l'adapta-
Dépannage
Problème Cause Solution
L'appareil ne
fonctionne pas.
L'appareil
marche à
vitesse réduite.
L'épilation est
très douloureuse.
Les poils ne sont
pas tous saisis.
La batterie est
déchargée.
L'appareil est
défectueux.
La batterie est
déchargée.
Les poils sont éventuellement trop longs.
Il est possible que
les poils soient trop
courts.
Vous travaillez trop vite.
Chargez l'accu.
Adressez-vous au service clientèle.
Chargez l'accu.
Raccourcissez les poils à env. 0,3 - 0,5
cm. Veuillez également tenir compte du
chapitre "Trucs et astuces".
Les poils devraient avoir une longueur
de 0,3 - 0,5 cm.
Déplacez l'appareil plus lentement sur
la peau.
FR
BE
SBT 3.6 A1
13
Page 17
Élimination de l'appareil
FR
Pour éliminer l'appareil en respectant l'environnement, vous devez en retirer la batterie.
BE
RISQUE D'ÉLECTROCUTION
► Retirez l'appareil du réseau électrique lorsque vous retirez la batterie!
ATTENTION - RISQUE DE DOMMAGES MATÉRIELS!
► Ne retirez la batterie de l'appareil qu'à partir du moment où vous avez l'intention
e l'appareil au rebut/de le recycler! L'appareil est défectueux si vous
de mettr
avez retiré la batterie!
1) Retirez l'éventuel embout (1, 3, 6, 7) de l'appareil.
2) Levez les deux crans d'arrêt situés à l'intérieur à l'aide d'un petit tournevis ou d'un
dispositif similaire et poussez-les vers l'extérieur, afi n que les parties latérales de
l'appareil puissent être détachées.
3) Desserrez les deux vis devenues visibles. Vous pouvez ensuite démonter le boîtier.
4) Sectionnez le fi l rouge et le fi l noir qui relient la carte avec la batterie à gaine
bleue. Vous pouvez à présent retirer la batterie de l'appareil.
Procédez à une mise au rebut respectueuse de l'environnement de la batterie. Respectez la réglementation en vigueur.
En cas de doute, veuillez contacter votre centre de recyclage.
Ne jamais jeter l'appareil avec les ordures ménagères. Ce
produit est assujetti à la directive européenne 2012/19/EU.
Éliminez l'appareil par l'intermédiaire d'une entreprise de traitement des
déchets autorisée ou via le service de recyclage de votre commune.
Respectez la réglementation en vigueur. En cas de doute, veuillez
contacter votre centre de recyclage.
14
SBT 3.6 A1
Page 18
Garantie et service
Cet appareil est garanti 3 ans à partir de la date d'achat. L'appareil a été fabriqué
avec soin et consciencieusement contrôlé avant sa livraison.
Veuillez conserver le ticket de caisse en guise de preuve d'achat. Dans le cas où la
garantie s'applique, veuillez appeler le service après-vente compétent. Cette condition
doit être respectée pour assurer l'expédition gratuite de votre marchandise.
REMARQUE
► La prestation en garantie s'applique uniquement aux vices de matériaux ou aux
défauts de fabrication, mais pas aux dommages du tr
ou aux dommages subis par les pièces fragiles.
Le produit est destiné uniquement à un usage privé et ne répond pas à un usage professionnel. La garantie est annulée en cas de manipulation incorrecte et inappropriée,
d'usage de la force et en cas d'intervention non réalisée par notre centre de service
après-vente agréé.
Vos droits légaux ne sont pas restreints par la présente garantie. L'exercice de la garantie ne prolonge pas la période de garantie. Cette disposition s'applique également aux
pièces remplacées ou réparées.
Les dommages et vices éventuellement déjà présents à l'achat doivent être signalés
immédiatement après le déballage.
Toute réparation fera l'objet d'une facturation après expiration de la période de garantie.
Indépendamment de la garantie commerciale souscrite, le vendeur reste tenu des
défauts de conformité du bien et des vices rédhibitoires dans les conditions prévues aux
articles L211-4 et suivants du Code de la consommation et aux articles 1641 et suivants
du Code Civil.
Service France
Tel.: 0800 919270
E-Mail: kompernass@lidl.fr
IAN 95827
Service Belgique
Tel.: 070 270 171 (0,15 EUR/Min.)
E-Mail: kompernass@lidl.be
IAN 95827
Heures de service de notre hotline : du lundi au vendredi de 8 h à 20 h (HEC)
ansport, aux pièces d'usure
FR
BE
Importateur
KOMPERNASS HANDELS GMBH
BURGSTRASSE 21
44867 BOCHUM
GERMANY
www.kompernass.com
SBT 3.6 A1
15
Page 19

FR
BE
16
16
SBT 3.6 A1
SBT 3.6 A1
Page 20

Inhaltsverzeichnis
Einführung . . . . . . . . . . . . . . . . . . . . . . . . . . . . . . . . . . . . . . . . . . . . . . . 18
Urheberrecht . . . . . . . . . . . . . . . . . . . . . . . . . . . . . . . . . . . . . . . . . . . . . . . . . . . . . . 18
Bestimmungsgemäße Verwendung . . . . . . . . . . . . . . . . . . . . . . . . . .18
Lieferumfang . . . . . . . . . . . . . . . . . . . . . . . . . . . . . . . . . . . . . . . . . . . . .18
Entsorgung der Verpackung . . . . . . . . . . . . . . . . . . . . . . . . . . . . . . . . . . . . . . . . . . . 19
Bedienelemente. . . . . . . . . . . . . . . . . . . . . . . . . . . . . . . . . . . . . . . . . . .19
Technische Daten . . . . . . . . . . . . . . . . . . . . . . . . . . . . . . . . . . . . . . . . . .20
Sicherheitshinweise . . . . . . . . . . . . . . . . . . . . . . . . . . . . . . . . . . . . . . . . 20
Gerät aufl aden . . . . . . . . . . . . . . . . . . . . . . . . . . . . . . . . . . . . . . . . . . .23
Tipps und Tricks . . . . . . . . . . . . . . . . . . . . . . . . . . . . . . . . . . . . . . . . . . .23
Das Gerät benutzen . . . . . . . . . . . . . . . . . . . . . . . . . . . . . . . . . . . . . . .24
Die Aufsätze aufsetzen und abnehmen . . . . . . . . . . . . . . . . . . . . . . . . . . . . . . . . . . 24
Epilieren . . . . . . . . . . . . . . . . . . . . . . . . . . . . . . . . . . . . . . . . . . . . . . . . . . . . . . . . . . 24
Bikinizone mit Präzisionstrimmer und -kamm trimmen . . . . . . . . . . . . . . . . . . . . . . . . 25
Formen mit dem Präzisionstrimmer . . . . . . . . . . . . . . . . . . . . . . . . . . . . . . . . . . . . . . 26
Augenbrauen schneiden mit Präzisionstrimmer und Augenbrauenkamm . . . . . . . . . 26
Mit Mikrotrimmer Augenbrauen formen bzw. einzelne Gesichtshaare entfernen . . 27
Rasieren mit dem Mikrorasierer . . . . . . . . . . . . . . . . . . . . . . . . . . . . . . . . . . . . . . . . 27
Reinigen und Pfl egen . . . . . . . . . . . . . . . . . . . . . . . . . . . . . . . . . . . . . .28
DE
AT
CH
Lagerung . . . . . . . . . . . . . . . . . . . . . . . . . . . . . . . . . . . . . . . . . . . . . . . .29
Fehlerbehebung . . . . . . . . . . . . . . . . . . . . . . . . . . . . . . . . . . . . . . . . . .29
Entsorgung des Gerätes . . . . . . . . . . . . . . . . . . . . . . . . . . . . . . . . . . . . 30
Garantie und Service . . . . . . . . . . . . . . . . . . . . . . . . . . . . . . . . . . . . . .31
Importeur . . . . . . . . . . . . . . . . . . . . . . . . . . . . . . . . . . . . . . . . . . . . . . . . 31
SBT 3.6 A1
17
Page 21

DE
AT
CH
Einführung
Herzlichen Glückwunsch zum Kauf Ihres neuen Gerätes.
Sie haben sich damit für ein hochwertiges Produkt entschieden. Die Bedienungsanleitung
ist Bestandteil dieses Produkts. Sie enthält wichtige Hinweise für Sicherheit, Gebrauch
und Entsorgung. Machen Sie sich vor der Benutzung des Produkts mit allen Bedien- und
Sicherheitshinweisen vertraut. Benutzen Sie das Produkt nur wie beschrieben und für
die angegebenen Einsatzbereiche. Händigen Sie alle Unterlagen bei Weitergabe des
Produkts an Dritte mit aus.
Urheberrecht
Diese Dokumentation ist urheberrechtlich geschützt.
Jede Vervielfältigung, bzw. jeder Nachdruck, auch auszugsweise, sowie die Wiederga-
be der Abbildungen, auch im veränderten Zustand ist nur mit schriftlicher Zustimmung
des Herstellers gestattet.
Bestimmungsgemäße Verwendung
Dieses Gerät ist ausschließlich zum Epilieren und Schneiden von Augenbrauen und
Bikinizone in privaten Haushalten bestimmt. Benutzen Sie es nicht gewerblich! Eine
andere oder darüber hinausgehende Benutzung gilt als nicht bestimmungsgemäß.
Ansprüche jeglicher Art wegen Schäden aus nicht bestimmungsgemäßer Verwendung,
unsachgemäßen Reparaturen, unerlaubt vorgenommenen Veränderungen oder Verwendung nicht zugelassener Ersatzteile sind ausgeschlossen.
Das Risiko trägt allein der Benutzer.
Lieferumfang
■ Handgerät
■ Epilierkopf
■ Mikrorasierer mit Schutzkappe
■ Präzisionstrimmer
■ Mikrotrimmer
■ Augenbrauenkamm mit 3 Raststellungen
■ Präzisionskamm mit 5 Raststellungen
■ Netzadapter
■ Reinigungspinsel
■ Aufbewahrungsbeutel mit Reißverschluss
rimmschablonen (Herz, Pfeil, Krone, Stern und Rechteck)
■ 5 × T
■ Öl
■ Bedienungsanleitung
Entnehmen Sie alle T
Verpackungsmaterial. Prüfen Sie die Lieferung auf Vollständigkeit und auf sichtbare
Schäden.
18
eile des Gerätes aus dem Karton und entfernen Sie sämtliches
SBT 3.6 A1
Page 22
HINWEISE
► Bei einer unvollständigen Lieferung oder Schäden infolge mangelhafter Verpackung
oder dur
Garantie und Service).
ch Transport wenden Sie sich an die Service-Hotline (siehe Kapitel
Entsorgung der Verpackung
Die Verpackung schützt das Gerät vor Transportschäden. Die Verpackungsmaterialien
sind nach umweltverträglichen und entsorgungstechnischen Gesichtspunkten ausgewählt und deshalb recyclebar.
Die Rückführung der Verpackung in den Materialkreislauf spart Rohstoff e
und verringert das Abfallaufkommen. Entsorgen Sie nicht mehr benötigte
Verpackungsmaterialien gemäß den örtlich geltenden Vorschriften.
Bedienelemente
Abbildung A:
1 Epilierkopf
2 Schutzkappe für Mikrorasierer
3 Mikrorasierer
4 Augenbrauenkamm mit 3 Raststellungen
5 Rasterungen für Augenbrauenkamm
6 Präzisionstrimmer
7 Mikrotrimmer
8 Präzisionskamm mit 5 Raststellungen
9 Rasterungen für Präzisionskamm
0 Rastnase
q Handgerät
w Ein-/Ausschalter
e Kontrollleuchte rot/grün
r Buchse für Netzadapter
t Netzadapter
DE
AT
CH
Abbildung B:
z Reinigungspinsel
u Aufbewahrungsbeutel
i Öl
Abbildung C:
o 5 × Trimmschablonen
SBT 3.6 A1
19
Page 23
DE
AT
CH
Technische Daten
Netzadapter
Typ ZDJ045100EU
Eingangsspannung 100 - 240 V ~, 50/60 Hz
Stromaufnahme 0,2 A Max.
Ausgangsspannung 4,5 V
Ausgangsstrom 1000 mA
Schutzklasse
Gerät
Eingangsspannung 4,5 V
Stromaufnahme 1000 mA
Schutzart IPX4
Schutzklasse
II /
III /
Sicherheitshinweise
STROMSCHLAGGEFAHR
► Schließen Sie den Netzadapter zum Laden des eingebauten
Akkus nur an eine vorschriftsmäßig installierte Netzsteckdose
mit einer Netzspannung von 100 - 240 V ~ / 50/60 Hz an.
► Das Kabel des Netzadapters kann nicht ersetzt werden. Bei
Beschädigung der Leitung ist das Gerät zu verschrotten.
► Ziehen Sie bei Betriebsstörungen und bevor Sie das Gerät
reinigen, den Netzadapter aus der Netzsteckdose.
► Ziehen Sie stets den Netzadapter selbst aus der Netzsteck-
dose, ziehen Sie nicht am Kabel.
20
SBT 3.6 A1
Page 24
STROMSCHLAGGEFAHR
► Knicken oder quetschen Sie das Kabel des Netzadapters
nicht und verlegen Sie das Kabel so, dass niemand darauf
treten oder darüber stolpern kann.
► Achten Sie darauf, dass der Netzadapter oder dessen Kabel
im Betrieb nicht nass oder feucht werden. Führen Sie es so,
dass es nicht eingeklemmt oder beschädigt werden kann.
► Sollte das Gerät beschädigt sein, benutzen Sie es auf keinen
Fall weiter, um Gefährdungen zu vermeiden.
► Verwenden Sie das Gerät nicht im Freien.
► Wickeln Sie das Kabel des Netzadapters nicht um das Gerät
und schützen Sie es vor Beschädigungen.
► Fassen Sie das Gerät, den Netzadapter und dessen Kabel
nie mit nassen Händen an.
► ACHTUNG! Das Gerät trocken halten.
Das Gerät ist spritzwassergeschützt gemäß der Schutzart
IPX4, der Netzadapter nicht. Verwenden Sie das Gerät mit
Netzadapter niemals in der Nähe von Wasser, insbesondere nicht in der Nähe von Waschbecken, Badewannen oder
ähnlichen Gefäßen. Ziehen Sie daher nach jedem Gebrauch
den Netzadapter aus der Steckdose. Als zusätzlicher
Schutz wird Ihnen die Installation einer Fehlerstrom-Schutzeinrichtung mit einem Bemessungsauslösestrom von nicht
mehr als 30 mA im Badezimmer-Stromkreis empfohlen.
Fragen Sie Ihren Elektroinstallateur um Rat.
DE
AT
CH
SBT 3.6 A1
21
Page 25

DE
AT
CH
WARNUNG! VERLETZUNGSGEFAHR!
► Falls das Gerät heruntergefallen oder beschädigt ist, dürfen
Sie es nicht mehr in Betrieb nehmen. Lassen Sie das Gerät von
qualifi ziertem Fachpersonal überprüfen und gegebenenfalls
reparieren.
► Sie dürfen das Gerätegehäuse nicht selbst öff nen oder repa-
rieren. In diesem Falle ist die Sicherheit nicht gegeben und
die Gewährleistung erlischt. Lassen Sie das defekte Gerät
nur von autorisiertem Fachpersonal reparieren.
► Benutzen Sie das Gerät nur mit dem mitgelieferten Netzadapter.
► Laden Sie das Gerät nur mit dem mitgelieferten Netzadapter auf.
► Dieses Gerät kann von Kindern ab 8 Jahren sowie von Perso-
nen mit verringerten physischen, sensorischen oder mentalen
Fähigkeiten oder Mangel an Erfahrung und Wissen benutzt
werden, wenn sie beaufsichtigt oder bezüglich des sicheren
Gebrauchs des Gerätes unterwiesen wurden und die daraus
resultierenden Gefahren verstehen.
► Kinder dürfen nicht mit dem Gerät spielen.
► Reinigung und Benutzer-Wartung dürfen nicht von Kindern
ohne Beaufsichtigung durchgeführt werden.
WARNUNG! VERLETZUNGSGEFAHR!
► Um Verletzungen zu vermeiden, benutzen Sie das Gerät nicht
mit einem beschädigten oder defekten Aufsatz oder Kamm.
► Um Augenverletzungen zu vermeiden, benutzen Sie das
Gerät niemals, um Wimpern zu schneiden.
► Um Verletzungen und Beschädigungen zu vermeiden, halten
Sie bei der Nutzung des Epilierkopfes das eingeschaltete
Gerät fern von Kopfhaar, Wimpern und Augenbrauen sowie
von Kleidung, Fäden, Kabeln, Bürsten usw.
ACHTUNG - SACHSCHADEN!
► Benutzen Sie das Gerät nur in geschlossenen Räumen.
22
SBT 3.6 A1
Page 26

Gerät aufl aden
1) Stecken Sie den Anschlussstecker des Netzadapterkabels t in die Buchse r am
Handgerät.
2) Stecken Sie den Netzadapter t in eine Netzsteckdose. Die Kontrollleuchte e
leuchtet rot und zeigt damit den Aufl adevorgang an.
Sobald die Kontrollleuchte e grün leuchtet, ist das Gerät vollständig geladen und Sie
können das Gerät vom Stromnetz trennen.
HINWEIS
► Für das erste vollständige Aufl aden benötigt das Gerät ca. 12 Stunden. Beenden
Sie das Aufl
► Mit voll geladenem Gerät können Sie ca. 60 Minuten Rasieren und Trimmen
oder ca. 30 Minuten epilier
► Laden Sie das Gerät erst wieder auf, wenn die Kontrollleuchte e durch abwech-
selndes rot-grünes Blinken eine niedrige Akkuladung anzeigt.
aden immer, sobald die Kontrollleuchte e grün leuchtet.
en.
Tipps und Tricks
HINWEIS
► Benutzen Sie das Gerät nicht, wenn...
― Sie einen Sonnenbrand an den betroff enen Körperstellen haben.
― Hautreizungen oder -rötungen vorliegen.
― Sie eine Hautkrankheit, wie zum Beispiel Neurodermitis haben.
― Sie Pickel, Muttermale oder Warzen an den betroff enen K
― Sie Wunden, off ene Wunden oder erhabene Narben an den betroff enen
K
örperstellen haben.
► Testen Sie das Gerät erst an einer kleinen versteckten Stelle, um die Hautverträg-
eit zu testen.
lichk
■ Die zu epilierenden Haare sollten zwischen 0,3 cm und 0,5 cm lang sein. Kürzere
Haar
e ergreifen die Pinzetten nicht und das Herauszupfen von längeren Haaren ist
sehr schmerzhaft. Kürzen Sie längere Haare gegebenenfalls zuvor.
■ Die Haut muss frei von Fett- oder Cremerückständen sein. Ansonsten verkleben/ver-
en die Pinzetten und die Leistung des Gerätes wird vermindert.
schmutz
■ Die Haut muss vollständig trocken sein.
■ Epilieren Sie am Besten am Abend nach dem Duschen. Dann ist die Haut etwas auf-
weicht, so dass die Haare leichter herausgezupft werden können. Außerdem kann
ge
sich die Haut in der Nacht erholen und eventuelle Hautrötungen gehen zurück.
■ Behandeln Sie die Haut vor dem Epilieren/Rasieren mit einem Peeling oder einem
Massagehandschuh. Dadur
einwachsende Haare werden vermieden und feine Haare stellen sich auf. Dadurch
kann das Gerät die Haare besser greifen.
■ Pfl egen Sie die Haut nach dem Epilieren/Rasieren mit einer Feuchtigkeitslotion oder
eme. Idealerweise enthält die Creme Aloe Vera oder Kamillenextrakte, um
einer Cr
die Haut zu beruhigen und zu pfl egen.
ch werden abgestorbene Hautschüppchen entfernt,
SBT 3.6 A1
örperstellen haben.
DE
AT
CH
23
Page 27
DE
AT
CH
Das Gerät benutzen
Die Aufsätze aufsetzen und abnehmen
Alle beiliegenden Aufsätze (Epilierkopf 1, Präzisionstrimmer 6, Mikrorasierer 3 und
Mikrotrimmer 7) lassen sich auf die gleiche Weise aufsetzen und abnehmen. Achten
Sie auf die korrekte Ausrichtung von Aufsatz zu Handgerät:
Die Krümmung der Aufsätze muss immer zu der Seite des Handgerätes q weisen, auf
der sich der Ein-/Ausschalter w befi ndet.
♦ Um einen Aufsatz aufzusetzen, drücken Sie ihn auf das Gerät (siehe Abb. 1)
♦ Um einen Aufsatz abzunehmen, ziehen Sie ihn vom Gerät ab (siehe Abb. 2)
(Abb. 1) (Abb. 2)
Epilieren
Wenn das Gerät aufgeladen ist und die zu epilierenden Körperstellen vorbereitet sind:
1) Streichen Sie mit der Hand noch einmal gegen die Wuchsrichtung über die zu
entfernenden Haare. Damit richten Sie diese auf, so dass die Haare besser von den
Pinzetten erfasst werden können.
2) Setzen Sie den Epilierkopf 1 auf das Handgerät q. Die leichte Krümmung des Epilierkopfes 1 muss zu der Seite des Handgerätes q weisen, auf der sich der Ein-/
Ausschalter w befi ndet (siehe Kapitel „Die Aufsätze aufsetzen und abnehmen“).
3) Schieben Sie den Ein-/Ausschalter w in Richtung des Aufsatzes.
4) Halten Sie mit der einen Hand die Haut straff .
5) Setzen Sie das Gerät senkrecht auf die Haut und fahren Sie ohne Druck auszuüben
entgegen der Haarwuchsrichtung darüber. Führen Sie keine Hin- und Herbewegungen oder Kreisbewegungen aus. Gehen Sie langsam mit ruhigen und kontrollierten
Bewegungen vor. Setzen Sie immer wieder neu an und fahren Sie mehrmals über
die zu epilierenden Stellen, so dass alle Haare entfernt werden.
24
SBT 3.6 A1
Page 28

HINWEIS
► Es kann sein, dass nach wenigen Tagen wieder Haare nachwachsen. Das liegt
an, dass diese Haare während des letzten Epilierens noch zu kurz waren, um
dar
entfernt zu werden.
6) Wenn Sie mit der Behandlung fertig sind, schieben Sie den Ein-/Ausschalter w in
die entgegengesetzte Richtung, um das Gerät auszuschalten.
7) Reinigen Sie den Epilierkopf 1 wie im Kapitel „Reinigen und Pfl egen“ beschrieben.
HINWEIS
► Wenn der Epilierkopf 1 beschädigt ist, benutz
einen neuen Epilierkopf 1 zu bestellen, wenden Sie sich an den Service (siehe
Kapitel „Garantie und Service“). Halten Sie die IAN-Nummer bereit (siehe Cover
der Bedienungsanleitung).
en Sie diesen nicht weiter! Um
Bikinizone mit Präzisionstrimmer und -kamm trimmen
Benutzen Sie zum Trimmen der Bikinizone den Präzisionstrimmer 6 mit Präzisionskamm 8.
1) Nehmen Sie zunächst ggf. einen Aufsatz vom Handgerät q ab. Setzen Sie den
Präzisionstrimmer 6 so auf das Handgerät q, dass die beiden Rillen im Aufsatz
sich mit denen auf der Rückseite des Handgerätes q decken.
2) Schieben Sie den Präzisionskamm 8 mit dessen seitlichen Führungsschienen in die
beiden Rillen des Geräts, bis er hörbar einrastet.
3) Sie können die Schnittlänge fünff ach variieren. Drücken Sie dazu im Bereich 9 auf
den Präzisionskamm 8, so dass die Rastnase 0 im Gehäuse versenkt wird. Dann
verschieben Sie den Präzisionskamm 8 und stellen so die Rastposition ein, die der
gewünschten Schnittlänge entspricht. Orientieren Sie sich dabei an den auf dem
Präzisionskamm 8 angegebenen Rasteinstellungen und der folgenden Tabelle:
DE
AT
CH
Einstellung Haarlänge nach dem Schneiden
1 ca. 3 mm
2 ca. 5 mm
3 ca. 7 mm
4 ca. 9 mm
5 ca. 11 mm
4) Schieben Sie den Ein-/Ausschalter w in Richtung des Aufsatzes.
5) Halten Sie mit der einen Hand die Haut straff .
6) Setzen Sie das Gerät senkrecht auf die Haut und fahren Sie ohne Druck auszuüben
entgegen der Haarwuchsrichtung darüber. Die fl ache Seite des Präzisionskamms 8
muss immer auf der Haut aufl iegen, um einen gleichmäßigen Schnitt zu erreichen.
SBT 3.6 A1
25
Page 29

DE
AT
CH
7) Wenn sich viel Haar im Präzisionskamm 8 angesammelt hat, nehmen Sie diesen
ab und pusten oder schütteln Sie die Haare heraus.
8) Wenn Sie mit der Behandlung fertig sind, schieben Sie den Ein-/Ausschalter w in
die entgegengesetzte Richtung, um das Gerät auszuschalten.
Formen mit dem Präzisionstrimmer
Um der Bikinizone eine eigene Form zu geben, benutzen Sie den Präzisionstrimmer 6
ohne den Präzisionskamm 8.
1) Nehmen Sie zunächst ggf. den Präzisionskamm 8 vom Präzisionstrimmer 6 ab,
oder setzen Sie den Präzisionstrimmer 6 auf das Handgerät q.
2) Schieben Sie den Ein-/Ausschalter w in Richtung des Aufsatzes.
3) Modellieren Sie mit dem Gerät die gewünschten Kontur der Bikinizone. Berühren Sie dabei
das Haar leicht mit dem Präzisionstrimmer 6. Sie können den Präzisionstrimmer 6 direkt
auf die Haut gerichtet verwenden, oder mit dem äußeren Teil des Aufsatzgehäuses
über die Haut streichen. Lassen Sie entweder Ihrer Kreativität freien Lauf oder verwenden Sie eine der beiliegenden Trimmschablonen o, um eine Kontur zu erzeugen.
4) Wenn Sie mit der Behandlung fertig sind, schieben Sie den Ein-/Ausschalter w in
die entgegengesetzte Richtung, um das Gerät auszuschalten.
Augenbrauen schneiden mit Präzisionstrimmer
und Augenbrauenkamm
Mit dem Präzisionstrimmer 6 und dem Augenbrauenkamm 4 können Sie Augenbrauen auf gleiche Länge schneiden.
1) Nehmen Sie zunächst ggf. einen Aufsatz vom Handgerät q ab. Setzen Sie den
Präzisionstrimmer 6 so auf das Handgerät q, dass die beiden Rillen im Aufsatz
sich mit denen auf der Rückseite des Handgerätes q decken.
2) Schieben Sie den Augenbrauenkamm 4 mit dessen seitlichen Führungsschienen in
die beiden Rillen des Geräts, bis er hörbar einrastet.
3) Sie können die Schnittlänge dreifach variieren. Drücken Sie dazu im Bereich 5 auf
den Augenbrauenkamm 4, so dass die Rastnase 0 im Gehäuse versenkt wird. Dann
verschieben Sie den Augenbrauenkamm 4 und stellen so die Rastposition ein, die
der gewünschte Schnittlänge entspricht. Orientieren Sie sich dabei an den auf dem
Augenbrauenkamm 4 angegebenen Rasteinstellungen und der folgenden Tabelle:
Einstellung Haarlänge nach dem Schneiden
1 ca. 3 mm
2 ca. 6 mm
3 ca. 9 mm
4) Schieben Sie den Ein-/Ausschalter w in Richtung des Aufsatzes.
26
SBT 3.6 A1
Page 30

5) Kämmen Sie zunächst die Augenbraue entgegen der Haarwuchsrichtung.
6) Führen Sie den Präzisionstrimmer 6 mit dem Augenbrauenkamm 4 vom äußeren
Ende der Augenbraue in Richtung Nasenwurzel.
7) Wenn Sie mit der Behandlung fertig sind, schieben Sie den Ein-/Ausschalter w in
die entgegengesetzte Richtung, um das Gerät auszuschalten.
Mit Mikrotrimmer Augenbrauen formen
bzw. einzelne Gesichtshaare entfernen
Mit dem Mikrotrimmer 7 können Sie Augenbrauen formen oder einzelne Gesichtshaa-
re entfernen.
1) Nehmen Sie zunächst ggf. einen Aufsatz vom Handgerät q ab. Setzen Sie den Mik-
rotrimmer 7 auf das Handgerät q. Die leichte Krümmung des Mikrotrimmers 7
muss zu der Seite des Handgerätes q weisen, auf der sich der Ein-/Ausschalter w
befi ndet (siehe Kapitel „Die Aufsätze aufsetzen und abnehmen“).
2) Schieben Sie den Ein-/Ausschalter w in Richtung des Aufsatzes.
3) Bewegen Sie den Mikrotrimmer 7 vorsichtig und kontrolliert. Führen Sie den
Mikrotrimmer 7 immer gegen die Haarwuchsrichtung. Achten Sie darauf, dass der
Mikrotrimmer 7 stets vollen Kontakt zur Haut hat.
4) Wenn Sie mit der Behandlung fertig sind, schieben Sie den Ein-/Ausschalter w in
die entgegengesetzte Richtung, um das Gerät auszuschalten.
Rasieren mit dem Mikrorasierer
Benutzen Sie den Mikrorasierer 3, um kurze Haare entlang der Konturen Ihrer Bikinizone zu entfernen. So bleibt Ihre Bikinizone gut defi niert.
DE
AT
CH
HINWEIS
► Längere Haare sollten Sie zunächst mit dem Präzisionstrimmer 6 k
Sie den Mikrorasierer 3 verwenden.
1) Nehmen Sie zunächst ggf. einen Aufsatz vom Handgerät q ab. Setzen Sie den
Mikrorasierer 3 auf das Handgerät q. Die leichte Krümmung des Mikrorasierers 3
muss zu der Seite des Handgerätes q weisen, auf der sich der Ein-/Ausschalter w
befi ndet (siehe Kapitel „Die Aufsätze aufsetzen und abnehmen“).
2) Nehmen Sie die Schutzkappe 2 ab.
3) Schieben Sie den Ein-/Ausschalter w in Richtung des Aufsatzes.
4) Setzen Sie die Scherfolie vorsichtig auf die Haut und führen Sie das Gerät gegen
die Haarwuchsrichtung.
5) Wenn Sie mit der Behandlung fertig sind, schieben Sie den Ein-/Ausschalter w in
die entgegengesetzte Richtung, um das Gerät auszuschalten.
6) Setzen Sie die Schutzkappe 2 wieder auf.
ürzen, bevor
SBT 3.6 A1
27
Page 31

DE
AT
CH
HINWEIS ZUR SCHERFOLIE
► Wenn die Scherfolie beschädigt ist, benutzen Sie diese nicht weiter!
― Um die Scherfolie zu wechseln, nehmen Sie den Mikr
Handgerät q ab. Ziehen Sie den farbigen Teil (Scherfolienhalter) vom
Sockel des Mikrorasierers 3 ab.
― Drücken Sie mit einem schmalen Gegenstand die Scherfolie an den kur-
zen Seiten nach unten, so dass diese aus der Arretierung gedrückt wird.
― Entnehmen Sie die defekte Scherfolie.
― Schieben Sie die neue Scherfolie von unten vorsichtig in den Scherfolien-
halter, so dass diese in den Arretierungen einrastet.
► Um Ersatzteile zu bestellen, wenden Sie sich an den Service (siehe Kapitel
„Garantie und Service“). Halten Sie die IAN-Nummer bereit (siehe Cover der
Bedienungsanleitung).
orasierer 3 vom
Reinigen und Pfl egen
STROMSCHLAGGEFAHR
► Trennen Sie vor jeder Reinigung das Gerät vom Netzadapter t
adapter t von der Steckdose.
ACHTUNG - SACHSCHADEN!
► Tauchen Sie das Gerät niemals in Wasser oder andere Flüssigkeiten!
■ Reinigen Sie nach jeder Benutzung den verwendeten Aufsatz mit dem mitgelieferten
einigungspinsel z, um lose Haare zu entfernen.
R
■ Desinfi zieren Sie den verwendeten Aufsatz regelmäßig, indem Sie ihn mit Desinfekti-
onsspr
ay besprühen und reinigen.
■ Um den Epilierkopf 1 gründlich zu r
Reinigen Sie den Epilierkopf 1 unter fl ießendem Wasser und lassen Sie ihn trocknen.
■ Um den Mikrorasierer 3 gründlich zu r
ab. Ziehen Sie den farbigen Teil vom Sockel des Aufsatzes ab und reinigen Sie
das dann zum Vorschein kommende Schneidewerk vorsichtig mit dem beiliegenden
Reinigungspinsel z. Dann setzen Sie die beiden Teile des Mikrorasierers 3 wieder
zusammen.
■ Bei regelmäßigem Gebrauch sollte der Präzisionstrimmer 6 und der Mikr
gelegentlich geölt werden. Benutzen Sie dazu das mitgelieferte Öl i.
■ Wischen Sie das Gerät, die Trimmschablonen o und den Netzadapter t mit
einem feuchten T
Tuch. Stellen Sie sicher, dass das Gerät vor der nächsten Benutzung vollständig
trocken ist.
uch ab. Bei Bedarf geben Sie ein mildes Reinigungsmittel auf das
einigen, nehmen Sie ihn vom Handgerät q ab.
einigen, nehmen Sie ihn vom Handgerät q
und den Netz-
otrimmer 7
28
SBT 3.6 A1
Page 32
HINWEIS
► Um Ersatzteile zu bestellen, wenden Sie sich an den Service (siehe Kapitel
antie und Service“). Halten Sie die IAN-Nummer bereit (siehe Cover der
„Gar
Bedienungsanleitung).
Lagerung
■ Schützen Sie den Mikrorasierer 3 immer mit der mitgelieferten Schutzkappe 2.
■ Bewahren Sie das Gerät, die Trimmschablonen o, den R
den Netzadapter t in dem Aufbewahrungsbeutel u auf.
■ Bewahren Sie das Gerät an einem trockenen und staubfreien Ort auf.
einigungspinsel z und
Fehlerbehebung
Problem Ursache Lösung
DE
AT
CH
Das Gerät funktioniert nicht.
Das Gerät läuft
nur langsam.
Das Epilieren der
Haare ist sehr
schmerzhaft.
Es werden nicht
alle Haare
erfasst.
Der Akku ist leer. Laden Sie den Akku.
Das Gerät ist defekt. Wenden Sie sich an den Kundenservice.
Der Akku ist leer. Laden Sie den Akku.
Die Haare sind
eventuell zu lang.
Es ist möglich,
dass die Haare
zu kurz sind.
Sie arbeiten zu
schnell.
Kürzen Sie die Haare auf
ca. 0,3 - 0,5 cm. Beachten Sie auch
das Kapitel „Tipps und Tricks“.
Die Haare sollten eine Länge von
0,3 - 0,5 cm haben.
Bewegen Sie das Gerät langsamer
über die Haut.
SBT 3.6 A1
29
Page 33
DE
AT
CH
Entsorgung des Gerätes
Um das Gerät umweltgerecht zu entsorgen, müssen Sie den Akku aus dem Gerät
entfernen.
STROMSCHLAGGEFAHR
► Entfernen Sie das Gerät vom Stromnetz, wenn Sie den Akku entfernen!
ACHTUNG - SACHSCHADEN!
► Entnehmen Sie den Akku nur aus dem Gerät, wenn Sie das Gerät entsorgen/ver-
otten wollen! Das Gerät ist defekt, wenn Sie den Akku ausgebaut haben!
schr
1) Nehmen Sie den eventuell aufgesteckten Aufsatz (1, 3, 6, 7) vom Gerät.
2) Heben Sie die beiden innenliegenden Arretierungen mit einem kleinem Schraubendreher oder ähnlichem nach oben und drücken Sie sie nach außen, so dass sich die
Seitenteile des Gerätes lösen lassen.
3) Lösen Sie die beiden nun sichtbaren Schrauben. Sie können dann das Gehäuse
auseinander nehmen.
4) Kneifen Sie das rote und das schwarze Kabel, welches die Platine mit dem blau
ummantelten Akku verbindet, durch. Sie können nun den Akku aus dem Gerät
entfernen.
Entsorgen Sie den Akku umweltgerecht. Beachten Sie die
aktuell geltenden Vorschriften. Setzen Sie sich im Zweifelsfall mit Ihrer Entsorgungseinrichtung in Verbindung .
Werfen Sie das Gerät keinesfalls in den normalen Hausmüll.
Dieses Produkt unterliegt der europäischen Richtlinie
2012/19/EU.
Entsorgen Sie das Gerät über einen zugelassenen Entsorgungsbetrieb
oder über Ihre kommunale Entsorgungseinrichtung. Beachten Sie die
aktuell geltenden Vorschriften. Setzen Sie sich im Zweifelsfall mit Ihrer
Entsorgungseinrichtung in Verbindung.
30
SBT 3.6 A1
Page 34
Garantie und Service
Sie erhalten auf dieses Gerät 3 Jahre Garantie ab Kaufdatum. Das Gerät wurde sorgfältig produziert und vor Anlieferung gewissenhaft geprüft.
Bitte bewahren Sie den Kassenbon als Nachweis für den Kauf auf. Bitte setzen Sie
sich im Garantiefall mit Ihrer Servicestelle telefonisch in Verbindung. Nur so kann eine
kostenlose Einsendung Ihrer Ware gewährleistet werden.
HINWEIS
► Die Garantieleistung gilt nur für Material- oder Fabrikationsfehler, nicht aber für Trans-
tschäden, Verschleißteile oder für Beschädigungen an zerbrechlichen Teilen.
por
Das Produkt ist lediglich für den privaten und nicht für den gewerblichen Gebrauch
bestimmt. Bei missbräuchlicher und unsachgemäßer Behandlung, Gewaltanwendung
und bei Eingriff en, die nicht von unserer autorisierten Service-Niederlassung vorgenommen wurden, erlischt die Garantie.
Ihre gesetzlichen Rechte werden durch diese Garantie nicht eingeschränkt. Die Garantiezeit wird durch die Gewährleistung nicht verlängert. Dies gilt auch für ersetzte und
reparierte Teile.
Eventuell schon beim Kauf vorhandene Schäden und Mängel müssen sofort nach dem
Auspacken gemeldet werden.
Nach Ablauf der Garantiezeit anfallende Reparaturen sind kostenpfl ichtig.
Service Deutschland
Tel.: 0800 5435 111 (Kostenfrei aus dem dt. Festnetz/Mobilfunknetz)
E-Mail: kompernass@lidl.de
IAN 95827
DE
AT
CH
Service Österreich
Tel.: 0820 201 222 (0,15 EUR/Min.)
E-Mail: kompernass@lidl.at
IAN 95827
Service Schweiz
Tel.: 0842 665566 (0,08 CHF/Min., Mobilfunk max. 0,40 CHF/Min.)
E-Mail: kompernass@lidl.ch
IAN 95827
Erreichbarkeit Hotline: Montag bis Freitag von 8:00 Uhr – 20:00 Uhr (MEZ)
Importeur
KOMPERNASS HANDELS GMBH
BURGSTRASSE 21
44867 BOCHUM
GERMANY
www.kompernass.com
SBT 3.6 A1
31
Page 35

DE
AT
CH
32
SBT 3.6 A1
Page 36

Contents
Introduction . . . . . . . . . . . . . . . . . . . . . . . . . . . . . . . . . . . . . . . . . . . . . .34
Copyright . . . . . . . . . . . . . . . . . . . . . . . . . . . . . . . . . . . . . . . . . . . . . . . . . . . . . . . . . 34
Intended use . . . . . . . . . . . . . . . . . . . . . . . . . . . . . . . . . . . . . . . . . . . . . 34
Package contents . . . . . . . . . . . . . . . . . . . . . . . . . . . . . . . . . . . . . . . . .34
Disposal of packaging materials . . . . . . . . . . . . . . . . . . . . . . . . . . . . . . . . . . . . . . . 35
Controls . . . . . . . . . . . . . . . . . . . . . . . . . . . . . . . . . . . . . . . . . . . . . . . . .35
Technical data . . . . . . . . . . . . . . . . . . . . . . . . . . . . . . . . . . . . . . . . . . . .36
Safety guidelines . . . . . . . . . . . . . . . . . . . . . . . . . . . . . . . . . . . . . . . . . 36
Charging the appliance . . . . . . . . . . . . . . . . . . . . . . . . . . . . . . . . . . . . 39
Tips and tricks . . . . . . . . . . . . . . . . . . . . . . . . . . . . . . . . . . . . . . . . . . . .39
Using the appliance . . . . . . . . . . . . . . . . . . . . . . . . . . . . . . . . . . . . . . . 40
Fitting/removing the attachments . . . . . . . . . . . . . . . . . . . . . . . . . . . . . . . . . . . . . . . 40
Epilation . . . . . . . . . . . . . . . . . . . . . . . . . . . . . . . . . . . . . . . . . . . . . . . . . . . . . . . . . . 40
Trimming the bikini line with the precision trimmer and trimming comb . . . . . . . . . . 41
Shaping with the precision trimmer . . . . . . . . . . . . . . . . . . . . . . . . . . . . . . . . . . . . . 42
Trimming eyebrows with the precision trimmer and eyebrow comb . . . . . . . . . . . . . 42
Using the micro trimmer to form the eyebrows or remove individual facial hairs . . . 43
Shaving with the micro shaver . . . . . . . . . . . . . . . . . . . . . . . . . . . . . . . . . . . . . . . . . 43
Cleaning and care . . . . . . . . . . . . . . . . . . . . . . . . . . . . . . . . . . . . . . . . .44
GB
Storage . . . . . . . . . . . . . . . . . . . . . . . . . . . . . . . . . . . . . . . . . . . . . . . . . 45
Troubleshooting . . . . . . . . . . . . . . . . . . . . . . . . . . . . . . . . . . . . . . . . . .45
Disposal of the appliance . . . . . . . . . . . . . . . . . . . . . . . . . . . . . . . . . . .46
Warranty and service . . . . . . . . . . . . . . . . . . . . . . . . . . . . . . . . . . . . . .47
Importer . . . . . . . . . . . . . . . . . . . . . . . . . . . . . . . . . . . . . . . . . . . . . . . . .47
SBT 3.6 A1
33
Page 37

GB
Introduction
Congratulations on the purchase of your new appliance.
You have selected a high-quality product. The operating instructions are part of this
product. They contain important information on safety, usage and disposal. Before
using the product, familiarise yourself with all handling and safety guidelines. Use the
product only as described and for the range of applications specifi ed. Please also
pass these operating instructions on to any future owner(s).
Copyright
This documentation is protected by copyright.
Any copying or reproduction, including in the form of extracts, or any reproduction of
images (even in a modifi ed state), is permitted only with the written authorisation of the
manufacturer.
Intended use
This appliance is intended exclusively for the epilation of human hair from the eyebrows
and bikini line in domestic households. It is not suitable for commercial use! It is not
intended for any other use or use beyond that specifi ed.
Claims of any kind for damage resulting from unintended use, incompetent repairs,
unauthorised modifi cation or the use of unauthorised spare parts will not be accepted.
The risk shall be borne solely by the user.
Package contents
■ Hand element
■ Epilator head
■ Micro shaver with protective cap
■ Precision trimmer
■ Micro trimmer
■ Eyebrow comb with 3 length settings
■ Precision comb with 5 length settings
■ Power adapter
■ Cleaning brush
■ Storage bag with zip
■ 5 × trimming templates (hear
■ Oil
■ Operating instructions
act all parts of the appliance from the carton and remove all packaging material.
Extr
Check the package for completeness and for signs of visible damage.
t, crown, arrow, star and rectangle)
34
SBT 3.6 A1
Page 38

TIPS
► If the delivery is not complete or has been damaged due t
or transportation, contact the Service Hotline (see section Warranty and
Service).
o defective packaging
Disposal of packaging materials
The packaging protects the device from damage during shipment. The packaging
materials have been selected for their environmental friendliness and ease of disposal,
and are therefore recyclable.
Returning the packaging to the material cycle conserves raw materials and
reduces the amount of waste that is generated. Dispose of packaging materials
which are no longer needed in accordance with applicable local regulations.
Controls
Figure A:
1 Epilator head
2 Protective cap for micro shaver
3 Micro shaver
4 Eyebrow comb with 3 length settings
5 Length settings for eyebrow comb
6 Precision trimmer
7 Micro trimmer
8 Precision comb with 5 length settings
9 Length settings for precision comb
0 Locking catch
q Hand element
w On/Off switch
e Control lamp red/green
r Socket for mains adapter
t Mains adapter
GB
Figure B:
z Cleaning brush
u Storage bag
i Oil
Figure C:
o 5 × trimming templates
SBT 3.6 A1
35
Page 39
GB
Technical data
Power adapter
Type ZDJ045100EU
Input voltage 100 - 240 V ~, 50/60 Hz
Current consumption 0.2 A Max.
Output voltage 4.5V
Output current 1000mA
Protection class
Appliance
Input voltage 4.5V
Current consumption 1000mA
Protection type IPX4
Protection class
II /
III /
Safety guidelines
RISK OF ELECTRIC SHOCK!
► Connect the mains adapter for charging the built-in battery
only to a correctly installed mains power socket that supplies
a mains voltage of 100 - 240V ~/50/60Hz.
► The cable of the mains adapter cannot be replaced. If the
cable is damaged, the whole appliance must be scrapped.
► In the event of a malfunction and before cleaning disconnect
the plug from the mains power socket.
► Always pull on the mains adapter itself; never pull on the
power cable.
36
SBT 3.6 A1
Page 40
RISK OF ELECTRIC SHOCK!
► Do not kink or crush the power cable of the mains adapter,
and route the cable so that it cannot be stepped on or
tripped over.
► Ensure that neither the mains adapter nor its cable become
wet or damp during operation. Route the cable in such a
way that it cannot be crushed or damaged.
► If the appliance is damaged, discontinue using it immediately
to avoid personal risks.
► Do not use the appliance outdoors.
► Do not wrap the mains adapter cable around the appliance,
and protect it from being damaged.
► Never touch the appliance, mains adapter or its cable with
wet hands.
► WARNING! Keep the appliance dry.
The appliance is splash-proof in accordance with protection
class IPX4, the mains adapter is not. Never use the appliance
with its mains adapter connected near water, and keep it
away from sinks, baths and other similar containers. After
use, always remove the plug from the mains power socket.
As additional protection, the installation of a residual current circuit-breaker with an activation power rating of not
more than 30 mA is recommended for the power circuit in
the bathroom. Ask your electrician for advice.
GB
SBT 3.6 A1
37
Page 41
GB
WARNING! RISK OF INJURY!
► Do not operate the appliance if it has fallen down or is
damaged in any way. Have the appliance checked and/or
repaired by qualifi ed technicians if necessary.
► Do not open the housing or attempt to repair the appliance
yourself. Doing so can lead to risks and also invalidates
the warranty. Only allow authorised technicians to repair
a defective appliance if repairs become necessary.
► Use the appliance only with the supplied power adapter.
► Charge the appliance only with the supplied power adapter.
► This appliance may be used by children aged 8 years and
above and by persons with limited physical, sensory or mental
capabilities or lack of experience and knowledge, provided
that they are under supervision or have been told how to use
the appliance safely and are aware of the potential risks.
► Children must not use the appliance as a plaything.
► Cleaning and user maintenance tasks may not be carried out
by children unless they are supervised.
WARNING! RISK OF INJURY!
► To avoid personal injury, do not use the appliance with a
damaged or faulty attachment or comb.
► To avoid eye injuries, never use the appliance to trim eyelashes.
► To avoid injury and damage, keep the appliance away from
your scalp hair, eyelashes and eyebrows as well as clothing,
threads, cables and brushes, etc. when using the epilator head.
CAUTION – PROPERTY DAMAGE!
► Only use the appliance in an enclosed space.
38
SBT 3.6 A1
Page 42

Charging the appliance
1) Insert the connector plug of the mains adapter cable t into the connection socket r
on the hand element.
2) Connect the mains adapter t to a power socket. The control lamp e lights up red
to indicate that the appliance is charging.
As soon as the control lamp e lights up green the appliance is fully charged and you
can disconnect it from the mains power supply.
NOTE
► The appliance needs around 12 hours to fully charge the fi rst time. Always stop
ging as soon as the control lamp e lights up green.
char
► When the appliance is fully charged, you can shave and trim for about 60 minutes
or epilate for ar
► Do not recharge the appliance until the control lamp e starts alternately fl ashing
red and green (indicating low battery charge level).
ound 30 minutes.
Tips and tricks
NOTE
► Do not use the appliance if...
― You have sunburn on the specifi c part of the body.
― You have skin irritation or redness.
― You have a skin disease such as neurodermatitis.
― You have pimples, moles or warts on the aff ected parts of the body.
― You have wounds, open sores or raised scars on the aff ected parts of the
body
.
► First test the appliance on a small hidden location to establish the skin compatibility.
■ The hairs to be epilated should be between 0.3cm and 0.5cm long. Shorter hairs
ar
e not gripped by the tweezers and plucking out longer hairs is very painful.
Shorten longer hairs, if required.
■ The skin must be free of grease or cream residues. Otherwise, the tweezers will
stick/soil and the effi
■ The skin must be completely dry.
■ The best time for epilation is in the evening after a shower. Then the skin is somewhat
oftened, so that the hairs can be plucked out easily. In addition, the skin can recover
s
overnight, and any skin reddening will recede.
■ Before epilation, treat the skin with a peeling treatment or a massage glove. This
emove dead skin cells, ingrowing hairs are avoided, and fi ne hairs stand
helps r
proud. This enables the appliance to grip the hairs better.
■ After epilation/shaving, treat the skin with a moisturising lotion or cream. Ideally, use
eam containing aloe vera or camomile extracts to soothe and maintain the skin.
a cr
ciency of the appliance will be reduced.
GB
SBT 3.6 A1
39
Page 43
GB
Using the appliance
Fitting/removing the attachments
All of the supplied attachments (epilator head 1, precision trimmer 6, micro shaver 3
and micro trimmer 7) can be fi tted and removed in the same manner. Ensure the correct
orientation of the attachment to the hand element:
The curvature of the attachments must always be towards the side of the hand element q;
on which the on/off button w is located.
♦ To fi t an attachment, press it onto the appliance (see Fig. 1)
♦ To remove an attachment, pull it off the appliance (see Fig. 2)
(Fig. 1) (Fig. 2)
Epilation
When the appliance is charged and the body part to be epilated is prepared:
1) Rub your hand once more against the growth direction of the hairs to be removed.
This will raise the hairs so that they can be better captured by the tweezers.
2) Fit the epilator head 1 on the hand element q. The slight curvature of the epilator
head 1 must be facing towards the side of the hand element q on which the on/
off button w is located (see chapter "Fitting/removing the attachments").
3) Push the on/off switch w in the direction of the attachment.
4) Hold the skin tight with one hand.
5) Place the appliance perpendicular to the skin and, without exerting any pressure,
move it against the direction of the hair growth. Do not make back and forth or
circular movements. Move the appliance slowly with calm and gentle movements.
Always start anew and pass over the body part to be epilated several times, so that
all of the hair is removed.
40
SBT 3.6 A1
Page 44

NOTE
► It is possible that some hairs will grow back after a few days. The reason for this
is that these hair
6) When you are fi nished with the treatment, push the on/off switch w in the opposite
direction to switch off the appliance.
7) Clean the epilator head 1 as described in the section "Cleaning and Care".
NOTE
► If the epilator head 1 is damaged, do not use it an
head 1, please contact the service department (see chapter "Guarantee and
service"). Please have the IAM number ready (see operating manual cover).
s were too short to be removed during the last epilation session.
y more! To order a new epilator
Trimming the bikini line with the precision trimmer and
trimming comb
Use the precision trimmer 6 with the precision comb 8 to trim your bikini line.
1) Start by removing any other attachment from the hand element q, if required.
Fit the precision trimmer attachment 6 onto the hand element q so that the two
grooves in the attachment match up with those on the back of the hand element q.
2) Push the precision comb 8 with its side rails onto the two grooves on the appliance
until it clicks into place.
3) You can vary the cutting length to any one of the fi ve settings. To do this, press on
the grooved area 9 on the precision comb 8 so that the locking catch 0 is pushed
into the housing. Then push the precision comb 8 to the cutting length position that
corresponds to the desired length. Use the cutting settings on the precision comb 8
as an orientation aid as well as the following table:
GB
Setting Hair length after cutting
1 approx. 3 mm
2 approx. 5 mm
3 approx. 7 mm
4 approx. 9 mm
5 approx. 11 mm
4) Push the on/off switch w in the direction of the attachment.
5) Hold the skin tight with one hand.
6) Place the appliance perpendicular to the skin and, without exerting any pressure, move
it against the direction of the hair growth. The fl at side of the precision comb 8 must
always be set against the skin to achieve an even cut.
SBT 3.6 A1
41
Page 45

GB
7) If a lot of hair has accumulated in the precision comb 8, remove the comb and
blow or shake the hair out.
8) When you are fi nished with the treatment, push the on/off switch w in the opposite
direction to switch off the appliance.
Shaping with the precision trimmer
To give the bikini line its own form, use the precision trimmer 6 without the precision
comb 8.
1) Start by removing the precision comb 8 from the precision trimmer 6 or fi t the
precision trimmer 6 on the hand element q.
2) Push the on/off switch w in the direction of the attachment.
3) Use the appliance to contour your bikini line as required. Push the precision trimmer 6
gently against the hair. You can use the precision trimmer 6 directly on the skin or
stroke the outer part of the attachment housing across the skin. Let your creativity
run free or use one of the enclosed trimming templates o to create a contour.
4) When you are fi nished with the treatment, push the on/off switch w in the opposite
direction to switch off the appliance.
Trimming eyebrows with the precision trimmer and
eyebrow comb
You can use the precision trimmer 6 and the eyebrow comb 4 to trim your eyebrows
to the same length.
1) Start by removing any other attachment from the hand element q, if required.
Fit the precision trimmer attachment 6 onto the hand element q so that the two
grooves in the attachment match up with those on the back of the hand element q.
2) Push the eyebrow comb 4 with its side rails onto the two grooves on the appliance
until it clicks into place.
3) You can vary the cutting length to any one of the three settings. To do this, press
on the grooved area 5 on the eyebrow comb 4 so that the locking catch 0 is
pushed into the housing. Then push the eyebrow comb 4 to the cutting length
position which corresponds to the desired length. Use the cutting settings on the
eyebrow comb 4 as an orientation aid as well as the following table:
Setting Hair length after cutting
1 approx. 3 mm
2 approx. 6 mm
3 approx. 9 mm
4) Push the on/off switch w in the direction of the attachment.
42
SBT 3.6 A1
Page 46

5) Start by combing the eyebrows against the direction of hair growth.
6) Run the precision trimmer 6 with the eyebrow comb 4 from the outer end of the
eyebrow towards the bridge of the nose.
7) When you are fi nished with the treatment, push the on/off switch w in the opposite
direction to switch off the appliance.
Using the micro trimmer to form the eyebrows or remove
individual facial hairs
You can use the micro trimmer 7 to form the eyebrows or remove individual facial hairs.
1) Start by removing any other attachment from the hand element q, if required.
Fit the micro trimmer 7 on the hand element q. The slight curvature of the micro
trimmer 7 must be facing towards the side of the hand element q on which the
on/off button w is located (see chapter "Fitting/removing the attachments").
2) Push the on/off switch w in the direction of the attachment.
3) Move the micro trimmer 7 in a careful and controlled manner. Always move the micro
trimmer 7 against the direction of hair growth. Ensure that the micro trimmer 7 is
always fully in contact with your skin.
4) When you are fi nished with the treatment, push the on/off switch w in the opposite
direction to switch off the appliance.
Shaving with the micro shaver
Use the micro shaver 3 to remove short hairs along the contours of your bikini line.
This allows you to keep your bikini line well defi ned.
NOTE
► You should trim longer hairs fi rst with the precision trimmer 6 befor
micro shaver 3.
1) Start by removing any other attachment from the hand element q, if required.
Fit the micro shaver 3 on the hand element q. The slight curvature of the micro
shaver 3 must be facing towards the side of the hand element q on which the
on/off button w is located (see chapter "Fitting/removing the attachments").
2) Remove the protective cap 2.
3) Push the on/off switch w in the direction of the attachment.
4) Place the shaving foil gently on the skin and move the appliance against the direction
of hair growth.
5) When you are fi nished with the treatment, push the on/off switch w in the opposite
direction to switch off the appliance.
6) Replace the protective cap 2.
e you use the
GB
SBT 3.6 A1
43
Page 47

GB
NOTE ON THE SHAVING FOIL
► If the shaving foil is damaged, do not use it any more!
― To replace the shaving foil, remove the micro shaver 3 fr
element q. Pull the coloured part (shaving foil holder) off the base of
the micro shaver 3.
― Use a slender object to push the shaving foil downwards on the short side
so that it is pushed out of the catch.
― Remove the defective foil.
― Push the new shaving foil carefully from below into the shaving foil holder
so that it clicks into place on the catch.
► To order replacement parts, please contact the service department (see chapter
"Warranty and service"). Please have the IAM number ready (see operating
manual cover).
om the hand
Cleaning and care
RISK OF ELECTRIC SHOCK
► Before cleaning, disconnect the appliance from the mains adapter t and the
mains adapter t fr
CAUTION – PROPERTY DAMAGE!
► NEVER submerse the appliance in water or other liquids!
■ After every use, clean the attachment used with the supplied cleaning brush z to
emove loose hairs.
r
■ Disinfect the attachment used regularly by spraying and cleaning it with disinfectant
spr
ay.
■ To clean the epilator head 1 thor
Clean the epilator head 1 under running water and then allow it to dry.
■ To clean the micro shaver 3 thor
Pull the coloured part from the base of the attachment and then carefully clean the
cutting blades that have now been revealed using the supplied cleaning brush z.
Then put the two parts of the micro shaver 3 back together.
■ If used regularly, the precision trimmer 6 and the micr
occasionally. Use the supplied oil i.
■ Wipe the appliance, the trimming templates o and the po
a moist cloth. If required, use some mild detergent on the cloth. Ensure that the
appliance is completely dry before the next use.
om the power supply.
oughly, remove it from the hand element q.
oughly, remove it from the hand element q.
o trimmer 7 should be oiled
wer adapter t with
44
SBT 3.6 A1
Page 48
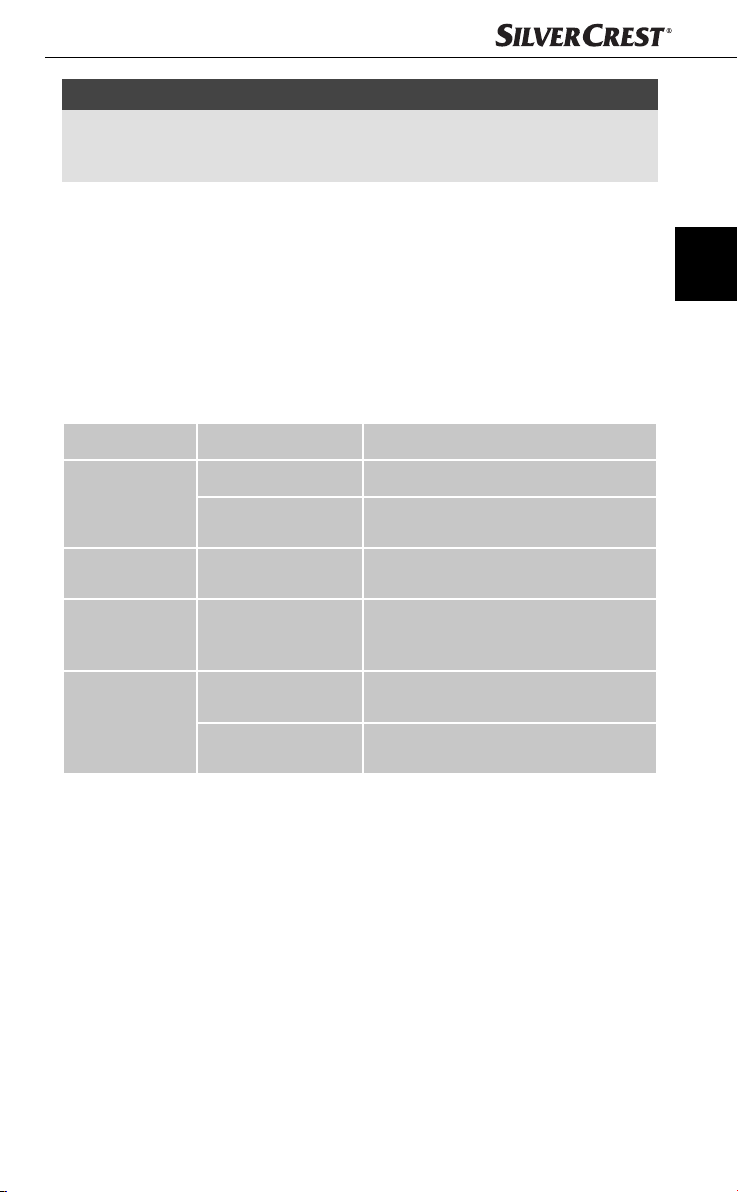
NOTE
► To order replacement parts, please contact the service department (see chapter
arranty and service"). Please have the IAM number ready (see operating
"W
manual cover).
Storage
■ Always protect the micro shaver 3 with the supplied protective cap 2.
■ Store the appliance, the trimming templates o, the cleaning brush z and the
mains adapter t in the stor
■ Store the appliance in a dry and dust-free location.
age bag u.
Troubleshooting
Problem Cause Solution
The appliance is
not working.
The appliance
only runs slowly.
The epilation of
the hairs is very
painful.
Not all hairs are
plucked.
The battery is empty. Charge the battery.
The appliance is
defective.
The battery is empty. Charge the battery.
The hairs may be too
long.
It is possible that the
hairs are too short.
You are working too
fast.
Contact the Customer Service
department.
Shorten the hairs to about 0.3 - 0.5 cm.
See also the section "Tips and Tricks".
The hairs should have a length
of 0.3 - 0.5 cm.
Move the appliance more slowly over
your skin.
GB
SBT 3.6 A1
45
Page 49
Disposal of the appliance
To dispose of the appliance in an environmentally friendly manner you must remove
the battery from the appliance.
RISK OF ELECTRIC SHOCK
► Disconnect the appliance from the mains power supply when you remove the battery!
GB
CAUTION – PROPERTY DAMAGE!
► Remove the battery from the appliance only if you want to scrap/dispose of the
appliance! The appliance is permanently defectiv
battery!
1) Remove any fi tted attachment (1, 3, 6, 7) from the appliance.
2) Lift the two internal restraints with a small screwdriver or similar to the top and press
them outwards, so that the side elements of the appliance can be released.
3) Loosen the two now visible screws. You can then take the housing apart.
4) Snip the red and black cables that connect the circuit board with the blue jacketed
battery. You can now remove the battery from the appliance.
Dispose of the battery in an environmentally friendly manner.
Please observe applicable regulations. Please contact your
waste disposal facility if you are in any doubt.
Never dispose of the appliance in the normal domestic waste.
This product is subject to the provisions of European Directive 2012/19/EU.
Dispose of the appliance via an approved waste disposal company or your
municipal waste disposal facility. Please observe applicable regulations.
Please contact your waste disposal facility if you are in any doubt.
e after you have removed the
46
SBT 3.6 A1
Page 50
Warranty and service
The warranty for this appliance is for 3 years from the date of purchase.
The appliance has been manufactured with care and meticulously examined before
delivery.
Please retain your receipt as proof of purchase. In the case of a warranty claim, please
make contact by telephone with our Customer Service Department.
Only in this way can a post-free despatch for your goods be assured.
NOTICE
► The warranty covers only claims for material and manufacturing defects,
but not for tr
components, e.g. buttons or batteries.
This product is for domestic use only and is not intended for commercial use.
The warranty is void in the case of abusive and improper handling, use of force and
internal tampering not carried out by our authorised service branch.
Your statutory rights are not restricted in any way by this warranty. The warranty period
is not extended by repairs made under the warranty. This applies also to replaced and
repaired parts.
Damages and defects extant at the time of purchase must be reported immediately
after unpacking, resp. no later than two days after the date of purchase.
Repairs made after the lapse of the warranty period are subject to charge.
Service Great Britain
Tel.: 0871 5000 720 (£ 0.10/Min.)
E-Mail: kompernass@lidl.co.uk
Hotline availability: Monday to Friday 08:00 - 20:00 (CET)
ansport damage, wearing parts or for damage to fragile
IAN 95827
GB
Importer
KOMPERNASS HANDELS GMBH
BURGSTRASSE 21
44867 BOCHUM
GERMANY
www.kompernass.com
SBT 3.6 A1
47
Page 51

KOMPERNASS HANDELS GMBH
BURGSTRASSE 21
44867 BOCHUM
DEUTSCHLAND / GERMANY
www.kompernass.com
Version des informations · Stand der Informationen
Last Information Update:
09 / 2014 · Ident.-No.: SBT3.6A1-012014-3
IAN 95827
2
 Loading...