

Page 1
s
Issued by
Gigaset Communications GmbH
Schlavenhorst 66, D-46395 Bocholt
Gigaset Communications GmbH is a trademark licensee of Siemens AG
© Gigaset Communications GmbH 2008
All rights reserved.
Subject to availability. Rights of modifications reserved.
www.gigaset.com
Gigaset SL37H
Gigaset
Page 2
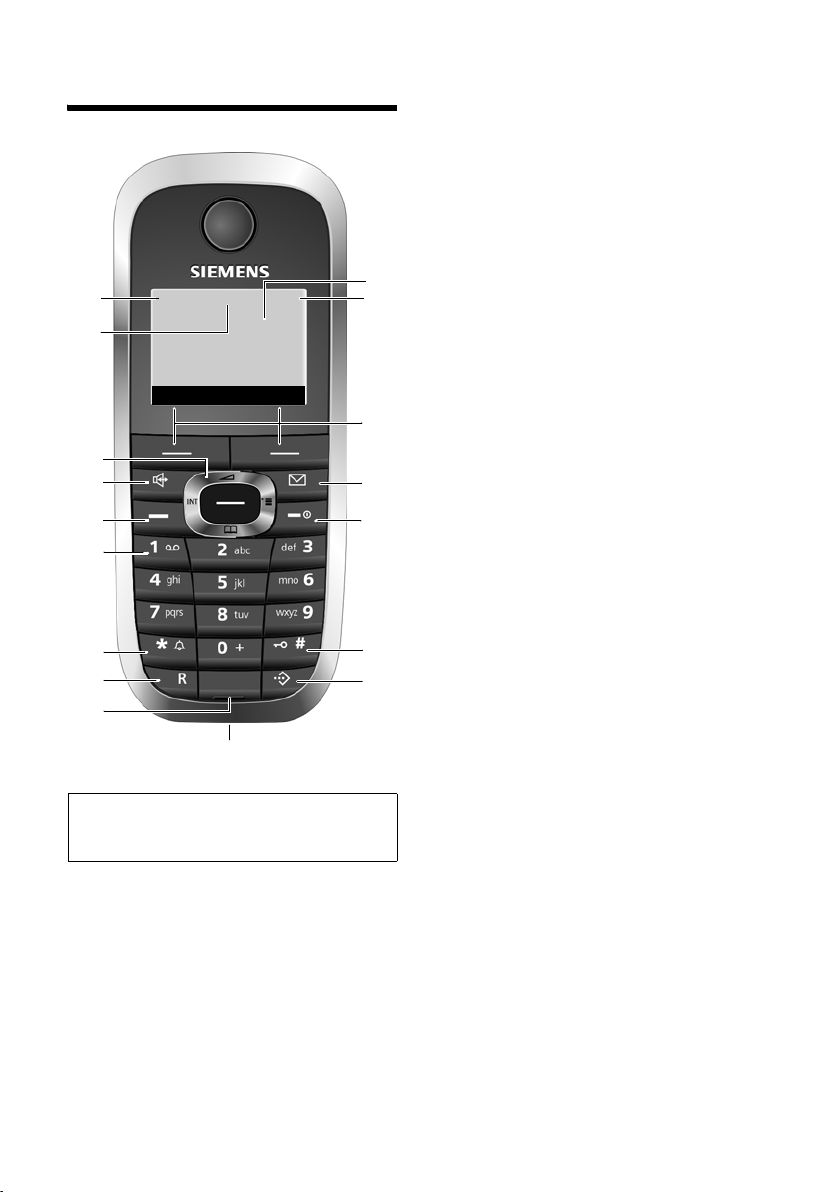
Handset at a glance
17
16
15
14
13
12
11
10
9
Please note:
Illustration of handset on a base station with
SMS functionality.
ÐòV
INT 1
15.11.07 09:45
?SMS
8
1 Display (screen) in idle status
2 Charge status of the battery pack
= e V U (flat to full)
= flashes: battery pack almost flat
e V U flashes: battery pack charging
3 Display keys (page 9)
4 Message key
Access to calls and message lists;
Flashes: new message or new call
5 End call key, On/Off key
End call, cancel function, go back one menu
1
2
3
4
5
6
7
level (press briefly), back to idle status (press
and hold), activate/deactivate handset
(press and hold in idle status)
6 Hash key
Keypad lock on/off (press and hold in
idle status),
Toggle between upper/lower case and digits
(press and hold)
7 Call-by-call list key
Open call-by-call list
8 Connection socket for headset
and PC interface
9 Microphone
10 Recall key
- Consult (flash)
- Insert a dialling pause (press and hold)
11 Star key
Ringer tones on/off (press and hold),
With an open connection: switch between
dial pulsing/touch tone dialling
(press briefly),
Open special characters table
12 Key 1
Select answer machine (depending on the
base station)/network mailbox (press and
hold)
13 Tal k key
Answer a call, open last number redial list
(press briefly), start dialling (press and hold)
When writing an SMS: send SMS
14 Handsfree key
Switch between earpiece and handsfree
mode;
Lights up: handsfree activated;
Flashes: incoming call
15 Control key (page 8)
16 Bluetooth activated (page 26)
17 Signal strength
Ð i Ñ Ò (high to low)
| flashes: no reception
1
Page 3

Contents
Contents
Handset at a glance . . . . . . . . . . . 1
Safety precautions . . . . . . . . . . . . 3
Gigaset SL37H –
More than just a telephone . . . . . 5
First steps . . . . . . . . . . . . . . . . . . . . 5
Pack contents . . . . . . . . . . . . . . . . . . . . 5
Installing the base station and
charging cradle . . . . . . . . . . . . . . . . . . . 5
Setting up the handset for use . . . . . . . 6
Registering handsets . . . . . . . . . . . . . . 7
Operating the handset . . . . . . . . . 8
Control key . . . . . . . . . . . . . . . . . . . . . . 8
Display keys . . . . . . . . . . . . . . . . . . . . . 9
Reverting to idle status . . . . . . . . . . . . . 9
Menu guidance . . . . . . . . . . . . . . . . . . 9
Correcting incorrect entries . . . . . . . . 10
ECO DECT . . . . . . . . . . . . . . . . . . . 10
Making calls . . . . . . . . . . . . . . . . . 10
Making external calls . . . . . . . . . . . . . 10
Ending a call . . . . . . . . . . . . . . . . . . . . 11
Accepting a call . . . . . . . . . . . . . . . . . 11
Handsfree talking . . . . . . . . . . . . . . . . 11
Muting . . . . . . . . . . . . . . . . . . . . . . . . 11
Making internal calls . . . . . . . . . . . . . 12
Using the directory and lists . . . 12
Directory/call-by-call list . . . . . . . . . . . 12
Last number redial list . . . . . . . . . . . . 16
Opening lists with the
message key . . . . . . . . . . . . . . . . . . . . 16
Using a handset as a
room monitor . . . . . . . . . . . . . . . 16
Walky-talky mode . . . . . . . . . . . . 17
Handset settings . . . . . . . . . . . . . 18
Shortcuts for functions and
numbers . . . . . . . . . . . . . . . . . . . . . . . 18
Changing the display language . . . . . 19
Setting the display . . . . . . . . . . . . . . . 19
Setting the screensaver . . . . . . . . . . . 20
Setting the display backlight . . . . . . . 20
Activating/deactivating
auto answer . . . . . . . . . . . . . . . . . . . . 20
Changing the handsfree/
earpiece volume . . . . . . . . . . . . . . . . . 21
Changing ringer tones . . . . . . . . . . . . 21
My stuff . . . . . . . . . . . . . . . . . . . . . . . . 22
Activating/deactivating
advisory tones . . . . . . . . . . . . . . . . . . . 23
Setting the alarm clock . . . . . . . . . . . . 24
Setting an appointment (calendar) . . 24
Displaying missed appointments and an-
niversaries . . . . . . . . . . . . . . . . . . . . . . 25
Using Bluetooth devices . . . . . . . . . . . 26
Setting your own area code . . . . . . . . 28
Restoring the handset to the
factory settings . . . . . . . . . . . . . . . . . . 28
Appendix . . . . . . . . . . . . . . . . . . 28
Care . . . . . . . . . . . . . . . . . . . . . . . . . . . 28
Contact with liquid . . . . . . . . . . . . . . . 28
Questions and answers . . . . . . . . . . . . 29
Service (Customer Care) . . . . . . . . . . . 29
Specifications . . . . . . . . . . . . . . . . . . . 30
Notes on the user guide . . . . . . 30
Example of a menu input . . . . . . . . . . 30
Example of multiple line input . . . . . . 30
Writing and editing text . . . . . . . . . . . 31
Additional functions via
the PC interface . . . . . . . . . . . . . 32
Accessories . . . . . . . . . . . . . . . . . 33
Index . . . . . . . . . . . . . . . . . . . . . . 34
2
Page 4
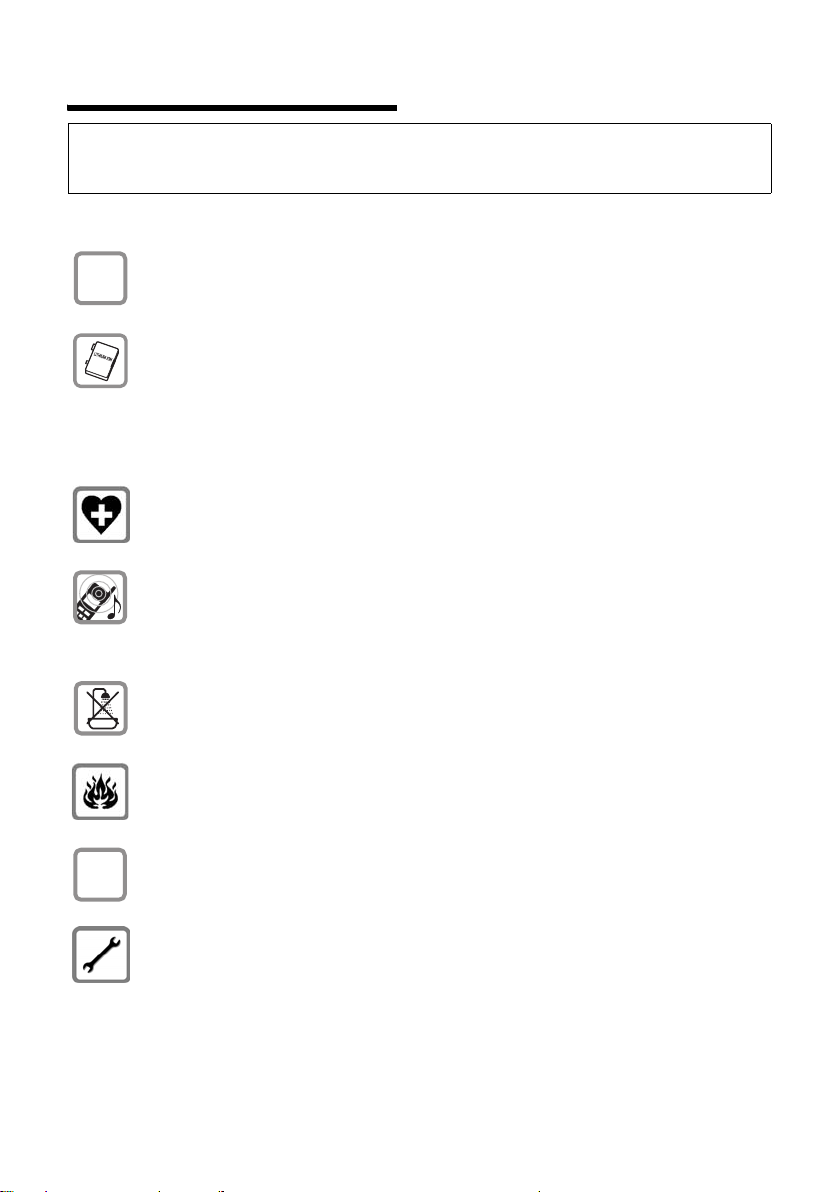
Safety precautions
Warning:
Read the safety precautions and the user guide before use.
Explain their contents and the potential hazards associated with using the telephone to your children.
Only use the mains adapter supplied, as indicated on the underside of the base
$
station or charging cradle.
Fit only the approved rechargeable battery pack (page 30)! That means never
use a conventional (non-rechargeable) battery pack as this could result in significant health risks and personal injury.
Battery packs should not be disposed of along with general household waste.
Observe the local waste disposal regulations, details of which can be obtained
from your local authority or the dealer you purchased the product from.
The operation of medical appliances may be affected. Be aware of the technical
conditions in your particular environment, e.g. doctor's surgery.
Do not hold the rear of the handset to your ear when it is ringing or when the
handsfree function is activated. Otherwise you risk serious and permanent damage to your hearing.
The handset may cause an unpleasant humming noise in hearing aids.
ƒ
Do not install the base station or charging cradle in bathrooms or shower rooms.
The base station and charging cradle are not splashproof (page 28).
Do not use your phone in environments with a potential explosion hazard,
e.g. paint shops.
If you give your Gigaset to someone else, make sure you al so give them the user
guide.
Please remove faulty base stations from use or have them repaired by our
Service, as they could interfere with other wireless services.
3
Page 5
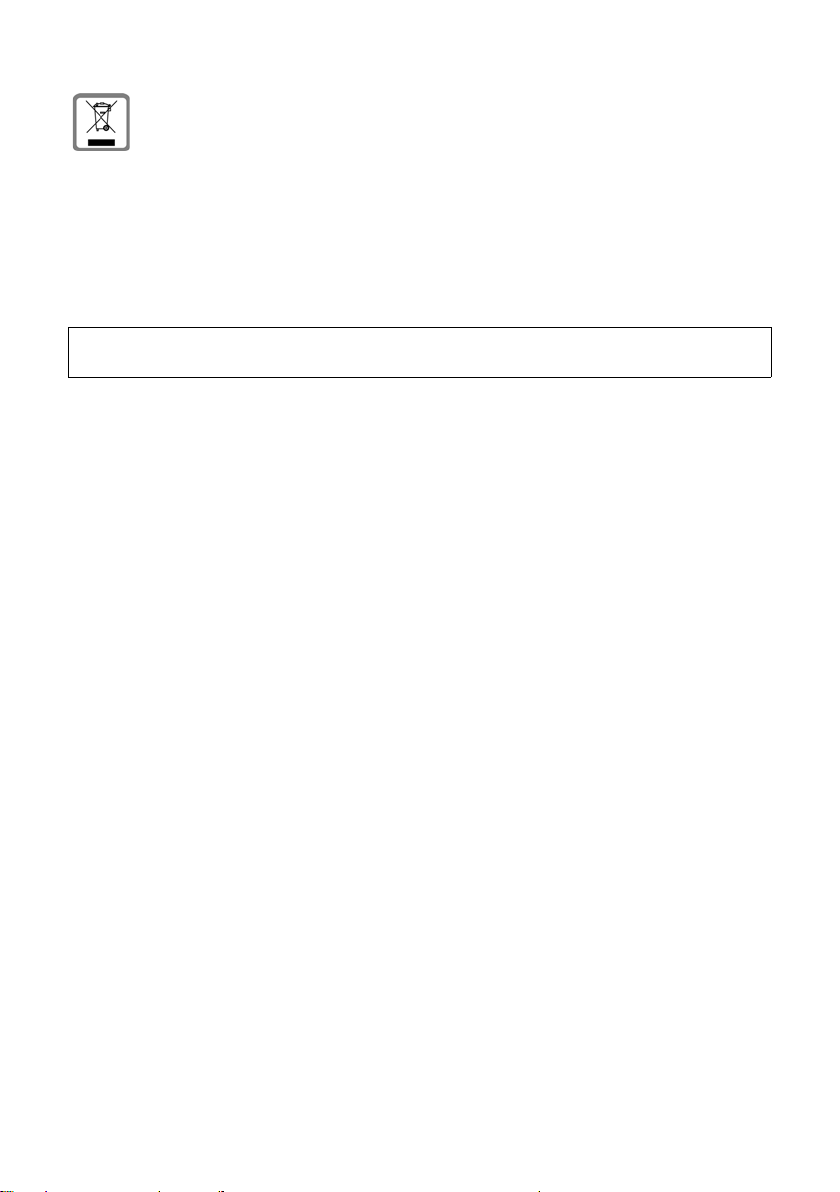
All electrical and electronic equipment must be disposed of separately from
general household waste using the sites designated by local authorities.
If a product displays this symbol of a crossed-out rubbish bin, the product is
subject to European Directive 2002/96/EC.
The appropriate disposal and separate collection of used equipment serve to
prevent potential harm to the environment and to health. They are a precondition for the re-use and recycling of used electrical and electronic equipment.
For further information on disposing of your used equipment, please contact
your local authority, your refuse collection service or the dealer you purchased
the product from.
Please note:
Not all of the functions described in this manual are available in all countries.
4
Page 6

Gigaset SL37H – More than just a telephone
Gigaset SL37H –
More than just a telephone
Your phone, which has a clearly laid out
colour display (65K colours), doesn't just
offer you the option of saving up to
250 phone numbers and e-mail addresses
(page 12) – it can do much more than
that:
u You can programme the keys of your
phone with important numbers or frequently used functions. The number is
then dialled or the function started by
simply pressing a key (page 18).
u You can designate important people as
VIPs so you can tell important calls from
the ringer tone (page 13).
u You can assign pictures to your con-
tacts. You can then tell who is calling
you from the picture on your handset's
display.
Precondition: Calling Line Identification
u You can store appointments (page 24)
and anniversaries (page 15) in your
phone and it will remind you of them in
advance.
u You can use Bluetooth™ for wireless
communication with other devices
(e.g. headsets) that also use this technology (see page 26).
Enjoy using your new telephone!
First steps
Pack contents
u one Gigaset SL37H handset,
u one charging cradle with mains
adapter,
u one battery pack,
u one battery cover,
u one belt clip,
u one user guide.
Installing the base station and charging cradle
The charging cradle is designed to be
operated in enclosed, dry areas at temperatures ranging from +5 °C to +45 °C.
Please note:
u Never expose the handset to the fol-
lowing influences: heat sources, direct
sunlight, other electrical appliances.
u Protect your Gigaset from moisture,
dust, corrosive liquids and vapours.
Range and reception strength
Range:
u Outdoors: up to 300 m
u Indoors: up to 50 m
Reception strength:
The display shows the quality of the radio
contact between the base station and
handset:
u Good to poor: ÐiÑÒ
u No reception: | flashes.
5
Page 7
First steps
Setting up the handset for use
The display is protected
by a plastic film.
Please remove the
protective film!
Fitting the battery pack
Warning:
Only use the rechargeable Gigaset Communications GmbH * original battery pack
(page 30)! Never use a conventional (nonrechargeable) battery or other battery types as
this could result in significant health risks and
personal injury. For example, the batteries
could explode. The phone could also malfunction or be damaged as a result of using batteries that are not of the recommended type.
* Gigaset Communications GmbH is a trademark
licensee of Siemens AG.
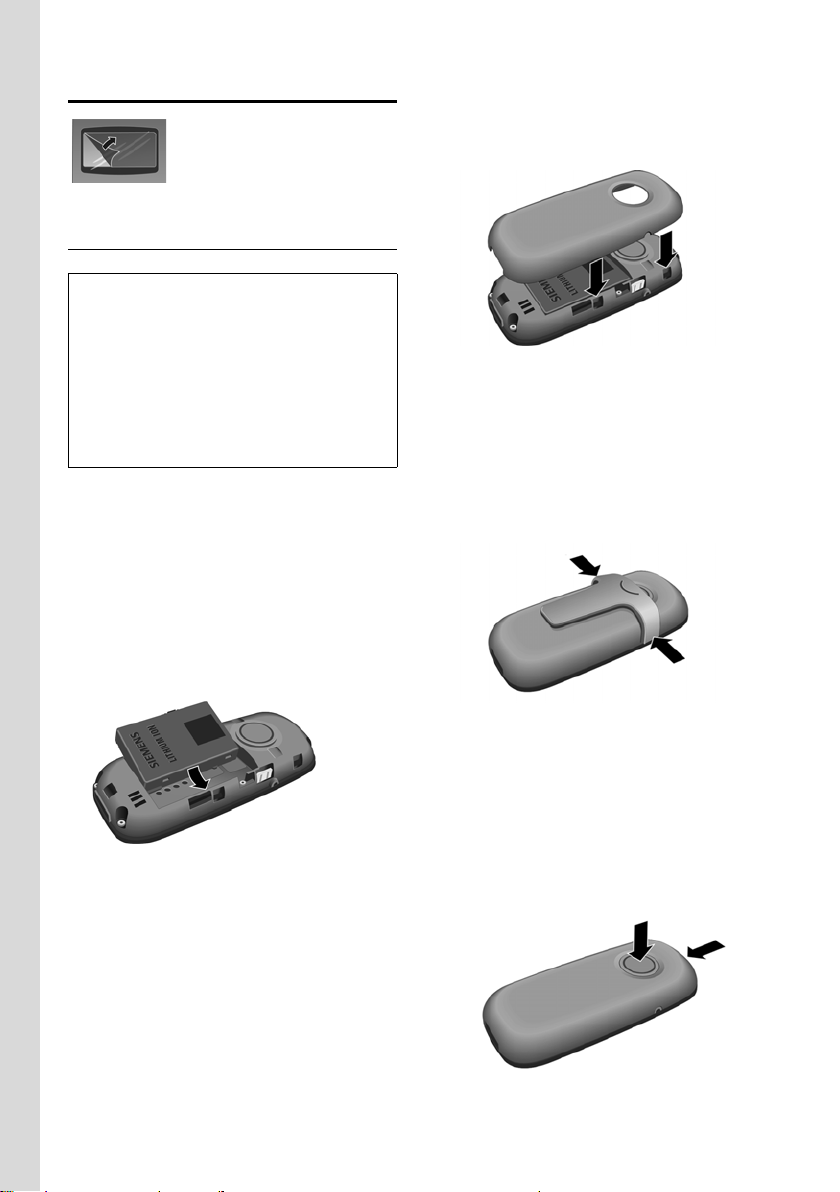
¤ With the pins to the front, insert the
battery pack into the cavity at an angle
from the left.
¤ Then press it into the housing from
above until the bracket on the side of
the battery back snaps securely into the
housing.
Closing the battery cover
¤ Align the battery cover parallel to the
casing and press down until it clicks
into place.
Attaching the belt clip
There are notches for attaching the belt
clip on the side of the handset at the same
height as the display.
¤ Press the belt clip onto the back of the
handset so that the protrusions on the
belt clip engage with the notches.
Please note:
To remove the battery pack, you must first
press the bracket on the side.
6
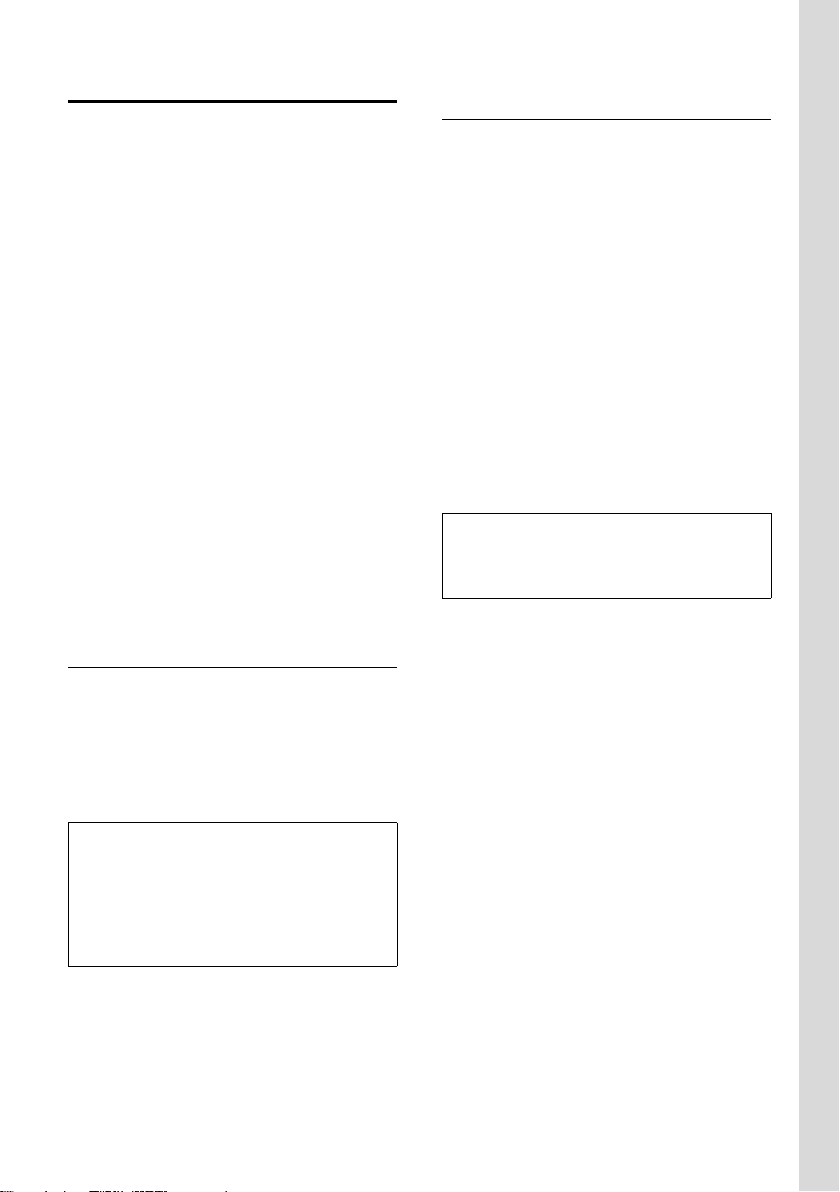
Opening the battery cover
¤ If fitted, remove the belt clip.
¤ Hold the device with the keypad facing
the palm of your hand.
¤ Place the thumb of your other hand on
the loudspeaker (a) and use the index
finger of the same hand to press the
groove at the top of the handset (b).
a
b
¤ Lift the cover.
Page 8
First steps
Registering handsets
A Gigaset SL37H handset can be registered to up to four base stations.
Once it has been registered, the handset
returns to idle status. The internal number
of the handset appears in the display,
e.g. INT 1. If it does not, repeat the procedure.
On the handset
w ¢ Ð ¢ Handset ¢ Register H/Set
s Select base station, e.g. Base 1
and press
~ Enter the system PIN of the
base station (the default is
0000) and press
lowing flashes in the display,
e.g. Base 1.
§OK§.
§OK§. The fol-
On the base station
To find out how to register the handset to
the base station, see the user guide for the
base station.
Placing the handset in the charging cradle
¤ Plug the charging cradle mains adapter
into a mains power socket.
¤ Place the handset in the charging cra-
dle with the display facing forward.
To charge the battery pack, leave the
handset in the charging cradle.
Please note:
– If the handset has switched itself off
because the battery pack is flat and is then
placed in the charging cradle, it will switch
itself on automatically.
– Only place the handset in the charging
cradle that is intended for it.
Initial charging and discharging of the battery pack
If the handset is activated, the flashing
battery icon e in the top right of the display indicates that the battery pack is
being charged.
During handset operation, the battery
icon indicates the charge status of the battery pack (page 1). The correct charge status can only be displayed if the battery
pack is first fully charged and discharged.
¤ To do this, leave the handset in the
charging cradle continuously for ten
hours. Your handset need not be
switched on for it to charge.
¤ Afterwards, remove the handset from
the charging cradle and do not put it
back again until the battery pack is fully
discharged.
Please note:
After the first battery charge and discharge,
you may place your handset in the charging
cradle after every call.
Please note:
u Always repeat the charging and dis-
charging procedure if you remove the
battery pack from the handset and
insert it again.
u The battery pack may warm up as it is
charging. This is not dangerous.
u After a time the charge capacity of the
battery pack will decrease for technical
reasons.
For questions and problems see page 29.
7
Page 9
First steps
Setting the date and time
Set the date and time so that the correct
date and time can be assigned to incoming calls, and so that the alarm and the calendar can be used.
¤ If you have not yet set the date and
time, press the display key
the input field.
To change the time, open the input field
with:
w ¢ Ð ¢ Date/Time
§Time§ to open
¤ Change multiple line input:
Date:
Enter the day, month and year in 8-digit
format.
Time:
Enter hours and minutes as 4 digits
(e.g. Q M 5 for 07:15 a.m.
§Save§ Press the display key
Display in idle status
Once the phone is registered and the time
set, the idle display looks as shown here
(example), depending on the base station:
ÐV
INT 1
15.11.07 07:15
?SMS
Your phone is now ready for use.
If you have any queries about using your
phone, please read the tips on troubleshooting ("Questions and Answers",
page 29) or contact our customer service
department (Customer Care, page 29).
Operating the handset
Activating/deactivating the handset
a In idle status, press and hold
the end call key (confirmation
tone).
Activating/deactivating the keypad lock
# Press and hold the hash key.
You will hear the confirmation tone. The
Ø icon appears in the display when the
keypad lock is activated.
The keypad lock is deactivated automatically if someone calls you. It is reactivated
when the call is finished.
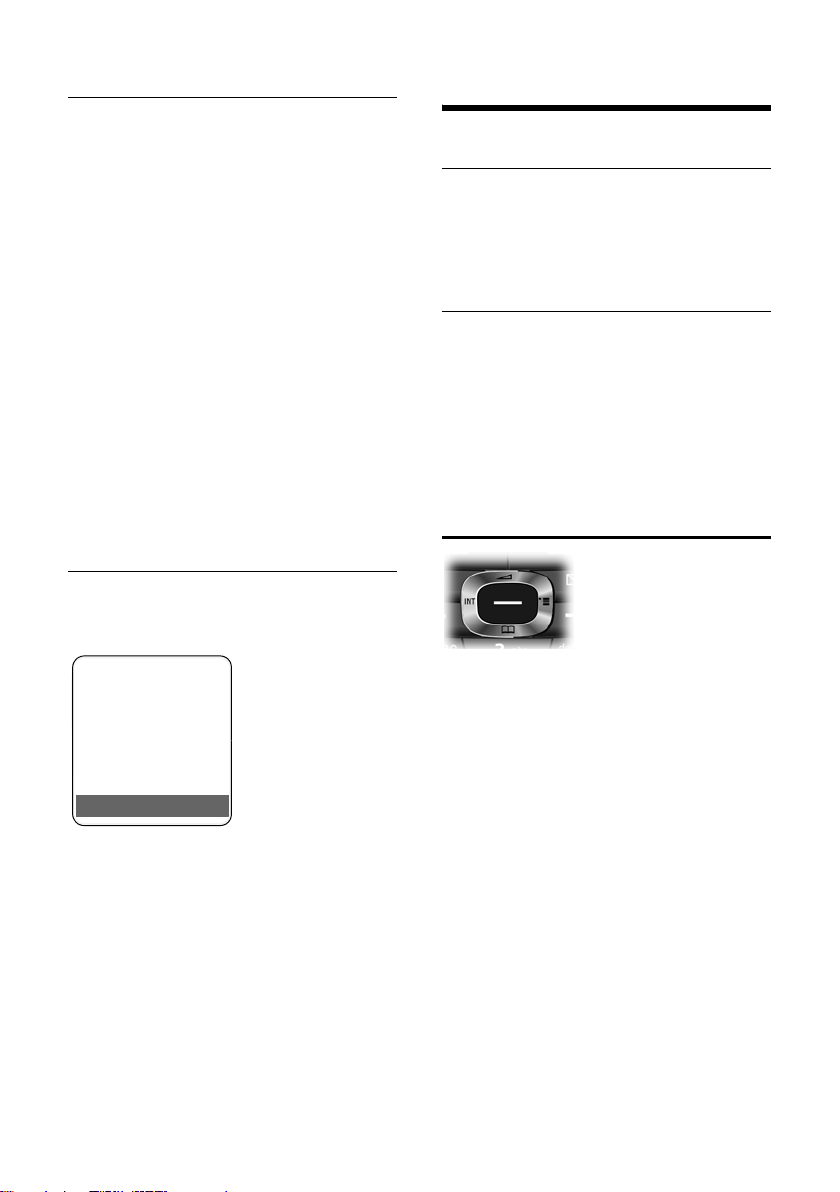
Control key
Below, the side of the control key that you
must press in the respective operating situation is marked in black (top, bottom,
right, left, centre), e.g. v for "press right
on the control key" or w for "press the
centre of the control key".
The control key has a number of different
functions:
When the handset is in idle status
s Open the directory.
w / v Open the main menu.
u Open list of handsets.
t Call up the menu to set the
call volume (page 21), ringer
tones (page 21), advisory
tones (page 23) and silent
alert (page 22) for the handset.
8
Page 10

First steps
In the main menu, submenus and lists
t / s Scroll up/down line by line.
w Open menu or confirm selec-
tion.
u Go back one menu level or
cancel.
In input fields
You can use the control key to move the
cursor up t, down s, right v or
left u.
During an external call
s Open the directory.
u Initiate internal consultation
call and mute.
t Change the earpiece volume
or handsfree volume.
Display keys
The function of the display keys changes
depending on the particular operating situation. Example:
? SMS
1 Current display key functions are shown in
the bottom display line.
2 Display keys
The most important display icons are:
} Left display key, as long as it
has not been assigned a function (page 18).
¨ Open the main menu.
§§Options§§§ Open a context-dependent
menu.
W Delete key: deletes one char-
acter at a time from right to
left.
Î Go back one menu level or
cancel operation.
1
2
ΠFetch e-mail address from the
directory.
Ó Copy number into the direc-
tory.
Ÿ On base stations with built-in
answer machines: forward
external call to answer
machine.
• Open the last number redial
list.
Reverting to idle status
You can revert to idle status from anywhere in the menu as follows:
¤ Press and hold the end call key a.
Or:
¤ Do not press any key: after 2 minutes
the display will automatically revert to
idle status.
Changes that you have not confirmed or
saved by pressing
Save Entry
An example of the display in idle status is
shown on page 1.
§OK§ will be lost.
§OK§, §Yes§, §Save§, §Send§ or
Menu guidance
Your telephone's functions are accessed
using a menu that has a number of levels.
Main menu (first menu level)
¤ When the handset is in idle status,
press w to open the main menu.
The main menu functions are shown in
the display as a list with colour icons and
names.
To access a function, i.e. to open the corresponding submenu (next menu level):
¤ Navigate to the function using the con-
trol key q. Press the display key
§OK§.
9
Page 11

First steps
Submenus
The functions in the submenus are displayed as lists.
To access a function:
¤ Scroll to the function with the control
key q and press
Briefly press the end call key a once to
return to the previous menu level / cancel
the operation.
Illustration in the user guide
The operating steps are shown in abbreviated form.
Example
The illustration:
w ¢ Ð ¢ Date/Time
means:
w Press the key to display the
main menu.
Ð Use the control key q to
scroll through submenu
Settings and press
Date/Time Scroll to the function with the
control key q and press
Other types of illustrations:
c / Q / * etc.
Press the matching key on the
handset.
~ Enter digits or letters.
You will find detailed examples of menu
entries and multiple line input in the
appendix to this user guide, page 30.
§OK§.
§OK§.
§OK§.
Correcting incorrect entries
You can correct incorrect characters in the
text by navigating to the incorrect entry
using the control key. You can then:
u press X to delete the character to the
left of the cursor
u insert characters to the left of the cur-
sor
u overwrite the character (flashing)
when entering the time and date etc.
ECO DECT
ECO DECT reduces power consumption by
using an energy efficient power supply.
Your handset also reduces the transmission power depending on the distance to
the base station.
Making calls
Making external calls
External calls are calls using the public telephone network.
~c Enter the number and press
the talk key.
Or:
c~ Press and hold the talk key
c and then enter the
number.
You can cancel the dialling operation with
the end call key a.
You are shown the duration of the call
while the call is in progress.
10
Please note:
Dialling using the directory, call-by-call list
(page 1, page 12) or last number redial list
(page 16) saves time re-entering numbers and
network provider access codes ("call-by-call
numbers").
Page 12

First steps
Continuing a call on a Bluetooth headset
Precondition: Bluetooth is activated; a
connection has been established between
the Bluetooth headset and the handset
(see page 26).
Press the talk key on the Bluetooth headset; it may take up to 5 seconds to establish a connection to the handset.
For further details on your headset, see
the user guide belonging to it.
Ending a call
a Press the end call key.
Accepting a call
The handset indicates an incoming call in
three ways: by ringing, by a display on the
screen and by the flashing handsfree key
d.
You can accept the call by:
¤ Pressing the talk key c.
¤ Pressing the handsfree key d.
If the handset is in the charging cradle and
the Auto Answer function is activated
(page 20), the handset will take a call
automatically when you lift it out of the
cradle.
If the ringer tone is intrusive, press the
§Silence§ display key. You can take the call as
long as it is displayed on the screen.
Accepting a call on a Bluetooth headset
Precondition: Bluetooth is activated; a
connection has been established between
the Bluetooth headset and the handset
(see page 26).
Only press the talk key on the headset
when the headset itself rings; it may take
up to 5 seconds to establish a connection
to the handset.
For further details on your headset, see
the user guide issued with it.
Handsfree talking
In handsfree mode, instead of holding the
handset to your ear you can put it down,
for example on the table in front of you, to
allow others to participate in the call.
Activating/deactivating handsfree mode
Activating while dialling
~d Enter the number and press
the handsfree key.
¤ You should inform your caller before
you use the handsfree function so that
they know someone else is listening.
Switching between earpiece and
handsfree mode
d Press the handsfree key.
Switch handsfree on or off during a call.
If you wish to place the handset in the
charging cradle during a call:
¤ Press and hold the handsfree key d
while placing the handset in the base
station. If the handsfree key d does
not light up, press the key again.
For how to adjust the handsfree volume
see page 21.
Muting
You can deactivate the microphone in
your handset during an external call.
The other party hears hold music.
u Press the control key on the
left to mute the handset.
” Press the display key to reacti-
vate the microphone.
11
Page 13

First steps
Making internal calls
Internal calls to other handsets registered
to the same base station are free.
Calling a specific handset
u Initiate internal call.
~ Enter the number of the hand-
set.
Or:
u Initiate internal call.
s Select handset.
c Press the talk key.
Calling all handsets ("group call")
u Initiate internal call.
* Press the star key. All handsets
are called.
Ending a call
a Press the end call key.
Using the directory and lists
You can store a total of 250 entries in the
directory and call-by-call list.
You create the directory and call-by-call
list for your own individual handset. You
can also send lists/entries to other handsets (page 14).
Directory/call-by-call list
Please note:
For quick access to a number from the directory or the call-by-call list (quick dial), you can
assign the number to a key.
Directory
In the directory you can store:
u up to three numbers and associated
first names and surnames,
u VIP designation and VIP ringer tone
(optional),
u e-mail address (optional),
u CLIP pictures (optional),
u anniversaries with reminder.
¤ With the handset in idle status, open
the directory by pressing the s key.
Length of the entries (directory)
3 numbers:
each max. 32 digits
First name and surname:
each max. 16 characters
E-mail address:
max. 60 characters
Call-by-call list
The call-by-call list is used to store the
access codes for network providers
("Call-by-call numbers").
¤ Open the call-by-call list in idle status
by pressing the C key.
Length of entries
Number: max. 32 digits
Name: max. 16 characters
Storing a number in the directory
s ¢ New Entry
¤ Change multiple line input:
First Name / Surname:
Enter a name in at least one of the
fields.
Phone (Home) / Phone (Office) / Phone (Mobile)
Enter a number in at least one of the
fields.
E-mail
Enter e-mail address.
Annivers.:
Select On or Off.
With setting On:
enter Anniversary (Date) and Annivers.
(Time) (page 15) and select reminder
type: Annivers. (Signal).
12
Page 14

First steps
Caller Picture
If required, select a picture to be displayed when the caller calls (page 22).
Precondition: Calling Line Identification
(CLIP).
Please note:
For further information on which base station your handset requires to support this
feature, please visit our website at
www.gigaset.com/customercare
.
¤ Save changes: (page 31).
Storing a number in the call-by-call list
C ¢ New Entry
¤ Change multiple line input:
Name:
Enter name.
Number:
Enter number.
Order of directory/call-by-call list entries
Directory entries are generally sorted
alphabetically by surname. Spaces and
digits take first priority. If only the first
name was entered in the directory, this is
incorporated into the sort order instead of
the surname.
The sort order is as follows:
1. Space
2. Digits (0–9)
3. Letters (alphabetical)
4. Other characters
To get round the alphabetical order of the
entries, insert a space or a digit in front of
the first letter of the surname. These
entries will then move to the beginning of
the directory.
Selecting entries in the directory and call-by-call list
s / C Open directory or call-by-call
list.
You have the following options:
u Use s to scroll through the entries
until the required name is selected.
u Enter the first character of the name (in
the directory: first character of the sur-
name or of the first name if only the
first name has been entered), or scroll
to the entry using s.
Dialling with the directory/call-by-call list
s / C ¢ s (select entry)
c Press the talk key. The number
is dialled.
Managing entries in the directory/callby-call lists
s / C ¢ s (select entry)
Viewing entries
§View§ Press the display key.
The entry is displayed.
Back with
§OK§.
Editing entries
§View§ §Edit§ Press display keys one after the
other.
¤ Carry out changes and save.
Using other functions
s / C ¢ s (select entry)
¢ §Options§ (open menu)
The following functions can be selected
with q:
Display Number
To edit or add to a saved number, or to
save it as a new entry, press Ó
after the number is displayed.
Edit Entry
Edit selected entry.
13
Page 15

First steps
Delete Entry
Delete selected entry.
VIP Entry (directory only)
Mark a directory entry as a VIP (Very
Important Person) and assign a specific
ringer tone to it. You can then recognise important calls from the ringer
tone.
Precondition: Calling Line Identification.
Copy Entry
Send a single entry to a handset
(page 14).
Delete List
Delete all entries in the directory/callby-call list.
Copy List
Send complete list to a handset
(page 14).
Available Memory
Display the available entries in the
directory and call-by-call list (page 12).
Using quick dial keys
¤ Press and hold the required quick dial
key (page 18).
Sending the directory/call-by-call list to another handset
Preconditions:
u The sending and receiving handsets
must both be registered on the same
base station.
u The other handset and the base station
can send and receive directory entries.
s / C
¢ s (select entry)
¢ §Options§ (open menu) ¢ Copy Entry /
Copy List
~ Select the internal number of
You can send several single entries one
after the other, by responding to the
prompt Copy next entry? with
¢ to Internal
the receiving handset and
§OK§.
press
§Yes§.
A successful transfer is confirmed by a
message and confirmation tone on the
receiving handset.
Please note:
You can also send the complete directory via
data transfer, without opening the directory:
w ¢ í ¢ Data Transfer ¢ Directory
Please note:
u Entries with identical numbers are not
overwritten on the receiving handset.
u The transfer is cancelled if the phone
rings or if the memory of the receiving
handset is full.
Transferring the directory as a vCard with Bluetooth
In Bluetooth mode (see page 26) you can
transfer directory entries in vCard format,
e.g. to exchange entries with your mobile
phone.
¢ s (select entry)
s
¢ §Options§ (open menu) ¢ Copy Entry /
Copy List
The list of "Known Devices" (see page 27)
is displayed.
s Select device and press
Receiving a vCard with Bluetooth
If a device from the "Known Devices" list
(see page 27) sends a vCard to your handset, this occurs automatically and you are
informed about it via the display.
If the sending device does not appear in
the list, you will be asked on the display to
enter the device PIN for the sending
device:
~ Enter the PIN for the sending
The transferred vCard is available as a
directory entry.
¢ vCard via Bluetooth
§OK§.
Bluetooth device and press
§OK§.
14
Page 16

First steps
Copying a displayed number to the directory
You can copy numbers to the directory
that are displayed in a list, e.g. the call history or the last number redial list, in an
SMS (depending on the base station) or
during a call to the directory.
If you have CNIP, the first 16 characters of
the transmitted name are copied to the
Name line.
A number is displayed:
§Options§ ¢ Copy to Directory
¤ Complete the entry, see page 12.
While the number is being transferred
from the answer machine list (depending
on the base station), the message playback is interrupted.
Copying a number or e-mail address from the directory
In many operating situations, you can
open the directory to copy a number or
e-mail address, for example. Your handset
need not be in idle status.
¤ Depending on the operating situation,
open the directory with s or Ò
¨ Directory.
or
q Select an entry (page 13).
Saving an anniversary in the directory
For each number in the directory, you can
save an anniversary and specify a time at
which a reminder call should be made on
the anniversary (delivery status: Annivers.:
Off).
Anniversaries are automatically recorded
in the calendar (page 24).
¢ s (select entry; page 13)
s
§View§ §Edit§ Press display keys one after the
other.
s Scroll to the Annivers.: line.
v Select On.
¤ Change multiple line input:
Anniversary (Date)
Enter day/month/year in 8-digit format.
Annivers. (Time)
Enter the hour/minute for the reminder
call in 4-digit format.
Annivers. (Signal)
Select the type of signal for the
reminder.
¤ Save changes: (page 31).
Deactivating anniversaries
s ¢ s (select entry; page 13)
§View§ §Edit§ Press display keys one after the
other.
s Scroll to the Annivers.: line.
v Select Off.
§Save Press the display key.
Reminder call on an anniversary
A reminder call is signalled on the handset
using the selected ringer tone.
You now have the following options:
§SMS§ Write an SMS.
§OFF§ Press the display key to
acknowledge and end the
reminder call.
Viewing missed anniversaries
In idle status, you are reminded of an
elapsed and unacknowledged anniversary
by the one-off display of
§Appoint.§.
¤ View appointment:
§Appoint.§ Press the display key.
You now have the following options:
§SMS§ Write an SMS (depending on
base station).
§Delete§ Delete reminder.
After deleting, press the or
§Go Back§ display key:
Back to idle status,
no longer displayed.
You can also view missed anniversaries
afterwards (see page 25).
§Appoint.§ is
15
Page 17

First steps
Last number redial list
The last number redial list contains the
20 numbers last dialled with the handset
(max. 32 digits). If a number is in the
phonebook or the call-by-call list, then
the appropriate name will be displayed.
Manual last number redial
c Press the key briefly.
s Select entry.
c Press the talk key again.
The number is dialled.
When a name is displayed, you can display
the corresponding phone number by
pressing the
Managing entries in the last number redial list
c Press the key briefly.
s Select entry.
§Options§ Open menu.
The following functions can be selected
with q:
Copy to Directory
Copy an entry to the directory
(page 12).
Automatic Redial
The selected number is automatically
dialled at fixed intervals (at least every
20 seconds). The handsfree key flashes
and "open listening" is activated.
– Party answers: press the talk
– Party does not answer: the call is ter-
Display Number (as in the directory,
page 13)
Delete Entry (as in the directory, page 14)
Delete List (as in the directory, page 14)
§View§ display key.
key c. The function is ended.
minated after approx. 30 seconds.
The function is ended after pressing
any key or after ten unsuccessful
attempts.
Opening lists with the message key
An advisory tone sounds as soon as a new
message arrives in a list. The message key
f flashes (it goes off when the key is
pressed). In idle status, the display shows
an icon for the new message.
If you press the message key f, you
access the lists that contain new messages.
Using a handset as a room monitor
If the room monitor is activated, a previously stored destination number is called
as soon as a set noise level is reached. You
can store an internal or external number
in your handset as the destination
number.
The room monitor call to an external
number stops after around 90 seconds.
The room monitor call to an internal
number (handset) stops after approx.
3 minutes (depending on the base station). While the room monitor is activated,
all keys are locked except the end call key.
The handset's speaker is muted.
When the room monitor is activated,
incoming calls to the handset are indicated without a ringer tone and are only
shown on the screen. The display and keypad are not illuminated and advisory
tones are also turned off.
If you accept an incoming call, the room
monitor mode is suspended for the duration of the call, but the function remains
activated.
The room monitor mode is retained if you
turn the handset off and on again.
16
Page 18

First steps
Caution!
– You should always check the operation
of the room monitor before use. For
example, test its sensitivity. Check the
connection if you are diverting the room
monitor to an outside number.
– When the function is switched on the hand-
set's operating time is severely reduced.
If necessary, place the handset in the
charging cradle. This ensures that the
batteries do not run down.
– Ideally the handset should be positioned 1
to 2 metres away from the baby. The microphone must be directed towards the baby.
– The connection to which the room monitor
is diverted must not be blocked by an activated answer machine.
Activating the room monitor and entering the destination number
v ¢ í ¢ Room Monitor
¤ Change multiple line input:
Room M.:
Select On to activate.
Call to:
External number: Select the number
from the directory (press display key
Ò) or enter it directly. Only the
last 4 digits are displayed.
Internal number:
§Options§ ¢ INT
¢ §OK§ ¢ s (select handset or Call
All if all registered handsets are to be
¢ §OK§.
called)
Level:
Set noise level sensitivity (Low or High).
¤ Press §Save§ to save the settings.
Changing set destination numbers
v ¢ í ¢ Room Monitor
s Scroll to the Call to: line.
X or §Delete§
Delete existing number.
¤ Enter and save number as described in
"Activating the room monitor and
entering the destination number"
(page 17).
Deactivating the room monitor remotely
Preconditions: The phone must support
touch tone dialling and the room monitor
should be set for an external destination
number.
¤ Accept the call from the room monitor
and press keys 9 ;.
The room monitor function will deactivate
after the call ends. There will be no further
room monitor calls. The other room monitor settings (e.g. no ringer tone) on the
handset will remain activated until you
press the display key
To reactivate the room function with the
same phone number:
§OFF§ on the handset.
¤ Turn on the activation again and save
§Save§.
with
Walky-talky mode
Walky-talky mode allows two handsets to
co mmuni cate wit h eac h ot her, bo th i nsid e
and outside the range of the base station
to which the handsets are registered.
Handsets that are to communicate with
each other using walky-talky mode must
meet one of the following conditions:
u The handsets are all registered to the
same base station.
u The handsets are set to Best Base or are
not yet registered.
In walky-talky mode, if you press the talk
c or the handsfree key d, the call
key
will go to all handsets that are in walkytalky mode. The connection is made with
the first handset to accept the walky-talky
call.
17
Page 19

First steps
Please note:
u The maximum range outdoors is
300 m.
u Handsets that are in walky-talky mode
are not available for phone calls.
u The handset operating times are
greatly curtailed.
Activating/deactivating walky-talky mode
v ¢ í ¢ Walky-Talky
Use §OK§ to activate walky-talky mode. You
can now:
§OFF§ Press the display key. Walky-
talky mode is switched off.
or
¨ Press the display key to open
the menu.
The following functions can be selected
with q:
Audio Settings
You can set Ringer Settings (see
page 21) and Advisory Tones(see
page 23) for walky-talky mode.
Room Monitor
You can use the handset in walky-talky
mode as a room monitor.
Using a handset in walky-talky mode as a room monitor
¨ ¢ Room Monitor
¤ Change multiple line input:
Room M.:
Select On to activate.
Level:
Set noise level sensitivity (Low or High).
¤ Save the changes.
The room monitor will use all the handsets
that are in walky-talky mode.
Switch the room monitor off by pressing
the display key
was used to activate the room monitor.
The handset reverts to normal walky-talky
mode.
§OFF§ on the handset that
Handset settings
Your handset is preconfigured, but you
can change the settings to suit your individual requirements.
Shortcuts for functions and numbers
You can assign the left display key and
each of the digit keys Q and 2 to
O a number or a function. The right display key has a preset function. You can
change the assignment.
The number is then dialled or the function
started by simply pressing a key.
Assigning a digit key/left display key
Precondition: The digit key or the left display key has not yet been assigned a
number or a function.
¤ Press the display key } or press
and hold the digit key.
The list of possible key assignments is
opened. The following can be selected:
Quick Dial / Call-by-Call
Assign a key to a number from the
directory or call-by-call list.
The directory or call-by-call list is
opened.
¤ Select an entry and press §OK§.
If you delete or edit an entry in the
directory or call-by-call list, this has no
effect on the assignment to the digit/
display key.
Room Monitor
Assign a key to the menu for setting
and activating the room monitor (see
page 16).
Alarm Clock
Assign a key to the menu for setting
and activating the alarm clock (see
page 24).
18
Page 20

First steps
Calendar
Open the calendar/enter a new
appointment.
Bluetooth
Assign the Bluetooth menu to a key.
More Features...
Depending on which base station you
have, further key assignments are also
possible.
If the left display key has been assigned a
shortcut, the selected function or name of
the phone number in the directory or callby-call list is displayed (abbreviated if necessary) in the bottom display line via the
display key.
Starting the function, dialling the number
If the handset is in idle status, press and
hold the numerical key or press the display key briefly.
Depending on the key assignment:
u Numbers are dialled directly.
u The function menu is opened.
Changing key assignments
Display key
¤ Press and hold the left or right display
key.
The list of possible key assignments is
opened.
¤ Proceed as is described when first
assigning the key with a shortcut
(page 18).
Changing the display language
You can view the display texts in different
languages.
¢ Ð ¢ Handset ¢ Language
w
The current language is indicated by .
s Select a language and press
§OK§.
a Press and hold (idle status).
If you accidentally choose a language you
do not understand:
w N 4
Press keys in sequence.
s Select the correct language
and press
§OK§.
‰
Setting the display
You have a choice of four colour schemes
and several different contrasts.
¢ Ð ¢ Display
w
Colour Scheme
Select and press
s Select a colour scheme and
§OK§ ( = current col-
press
our).
a Press briefly.
Contrast Select and press
r Select contrast.
§Save§ Press the display key.
a Press and hold (idle status).
§OK§.
‰
§OK§.
Digit key
¤ Press the digit key briefly.
§Change§ Press the display key. The list
of possible key assignments is
displayed.
¤ Proceed as is described when first
assigning the key with a shortcut
(page 18).
19
Page 21

First steps
Setting the screensaver
You can set a picture from the Resource
Dir. (page 22) to be displayed as a screensaver when the handset is in idle status.
This will replace the idle status display. It
may conceal the date, time and name.
The screensaver is not displayed in certain
situations, e.g. during a call or if the handset is de-registered.
If a screensaver is activated, the Screen
Saver menu option is marked with .
¢ Ð ¢ Display ¢ Screen Saver
w
The current setting is displayed.
‰
¤ Change multiple line input:
Activation:
Select On (screensaver is displayed) or
Off (no screensaver).
Selection:
If required, change the screensaver
(see below).
¤ Save changes: (page 31).
If the screensaver conceals the display,
briefly press a or w to show the idle
display with time and date.
Changing the screensaver
w ¢ Ð ¢ Display ¢ Screen Saver
s Scroll to the Selection line.
§View§ Press the display key.
The active screensaver is
displayed.
s Select screensaver and press
§Change§.
¤ Save changes: (page 31).
Setting the display backlight
Regardless of whether or not the handset
is in the charging cradle, you can activate
or deactivate the backlighting. If the handset is switched on, the display is permanently dimmed.
¢ Ð ¢ Display ¢ Backlight
w
The current setting is displayed.
¤ Change multiple line input:
In Charger
Select On or Off.
Without Charger
Select On or Off.
Please note:
With the On setting, the standby time of the
handset can be significantly reduced.
§Save§ Press the display key.
a Press and hold (idle status).
Activating/deactivating auto answer
If you activate this function, when you
receive a call you can simply lift the handset out of the charging cradle without having to press the talk key c.
¢ Ð ¢ Handset
w
Auto Answer
Select and press
a Press and hold (idle status).
‰
§OK§ (=on).
20
Page 22

First steps
Changing the handsfree/ earpiece volume
You can set the loudspeaker volume for
handsfree talking to five different levels
and the earpiece volume to three different
levels.
In idle status:
¢ Handset Volume
t
r Set the earpiece volume.
s Scroll to the Speaker: line.
r Set the handsfree volume.
§Save§ Press display key if necessary
to save the setting.
Setting the volume during a call:
t Press the control key.
r Set the volume.
The setting will automatically be saved
after approx. 3 seconds or press the display key
If t is assigned with another function,
e.g. when toggling:
§Options§ Open menu.
Vol ume Select and press §OK§.
Configure setting (see above).
§Save§.
Please note:
You can also set the call volume, the ringer
tones, the advisory tones and the silent alert
via the menu.
Changing ringer tones
u Volume:
You can choose between five volumes
(1–5; e.g. volume 2 = ˆ) and
the "Crescendo" ring (6; volume
increases with each ring =
‰).
u Ringer tones:
You can select various ringer tones,
melodies or any sound from My stuff
(page 22).
You can set different ringer tones for the
following functions:
u Ext. Calls: for external calls
u Internal Calls: for internal calls
u Appointments: for set appointments
(page 24)
u All: the same ringer tone for all func-
tions
Settings for individual functions
Set the volume and melody depending on
the type of signalling required. You can
activate the time control for external calls
to regulate the volume of a call (e.g. quieter at night-time than in daytime).
In idle status:
¢ Ringer Settings
t
q Select setting, e.g. Ext. Calls
and press
r Set volume (1–6).
s Scroll to the next line.
r Select melody.
§Save§ Press the display key to save
the setting.
§OK§.
Additionally for external calls:
§Time C.§ Press display key.
¤ Change multiple line input:
Time control:
Select On or Off.
From:
Enter the start of the period in 4-digit
format.
Until:
Enter the end of the period in 4-digit
format.
Vol ume :
Set the volume (1–6).
21
Page 23

First steps
Same settings for all functions
In idle status:
t ¢ Ringer Settings ¢ All
¤ Set volume and ringer tone (see "Set-
tings for individual functions").
§Save§ Press the display key to con-
firm the prompt.
a Press and hold (idle status).
Please note:
You can also set the call volume, the ringer
tones, the advisory tones and the silent alert
via the menu.
Activating/deactivating the ringer tone
You can deactivate the ringer tone on your
handset before you answer a call or when
the handset is in idle status; the ringer
tone can be deactivated permanently or
just for the current call. The ringer tone
cannot be reactivated while an external
call is in progress.
Deactivating the ringer tone permanently
* Press and hold the star key.
The Ú icon appears in the display.
Reactivating the ringer tone
* Press and hold the star key.
Deactivating the ringer tone for the current
call
§Silence§ Press the display key.
Activating/deactivating the alert tone
In place of the ringer tone you can activate
an alert tone. When you get a call, you will
hear a short tone ("Beep") instead of the
ringer tone.
* Press and hold the star key
and within 3 seconds:
§Beep§ Press the display key. A call will
now be signalled by one short
alert tone. You will now see
º
in the display.
Vibration alarm
Incoming calls and other messages are
indicated by vibration.
In idle status:
¢ Silent Alert
t
Press §OK§ to activate or deactivate
‰
(=on).
Please note:
You can also set the call volume, the ringer
tones, the advisory tones and the silent alert
via the menu.
My stuff
My stuff on the handset manages sounds,
which you can use as ringer tones, and
pictures (CLIP pictures and screensavers),
which you can use as caller pictures or as
screensavers. Precondition: Calling Line
Identification (CLIP). My stuff can manage
the following media types:
Icon Sound Format
Ù Ringer tones Standard
Ö Monophonic Standard
× Polyphonic .mid
Picture
(CLIP picture, screensaver)
The icon is displayed in front of the name
in My stuff. Various mono- and polyphonic
sounds and pictures are preconfigured on
your handset.
You can listen to the available sounds and
view the pictures.
You can download pictures from a PC
(page 32). If too little memory is available,
then you will have to delete one or more
pictures first. The pre-configured pictures
are labelled with è. You cannot rename or
delete them.
BMP
(128 x 128
or
128 x 64
pixels)
22
Page 24

First steps
Playing back sounds/viewing CLIP pictures
w ¢ Ï ¢ Screensavers / Caller
Pictures / Sounds (select entry)
§Play§ / §View§ Press the display key. Sounds
are played back or pictures are
displayed. Press the q key to
switch between entries.
§End§ / ” Press the display key. Playback
of the sound or the display of
the picture ends.
While you are playing back
sounds, you can also interrupt
playback with the u key.
a Press and hold (idle status).
If you have saved a picture in an invalid file
format, an error message will be displayed
after you make your selection. Cancel the
operation with Î. Delete the picture
§Delete§.
with
Sounds: setting the volume
During playback:
§Volume§ Press the display key.
r Set volume.
§Save§ Press the display key.
Renaming/deleting a picture
You have selected an entry.
§Options§ Open menu.
If a picture cannot be deleted (è), these
options are not available. Depending on
the situation, you can select the following
functions:
Delete Entry
The selected entry is deleted.
Delete List
All entries in the list that can be deleted
are deleted.
Rename
Change the name (max. 16 characters)
and press
the new name.
§Save§. The entry is stored with
Checking memory
You can check the available memory for
screensavers and CLIP pictures.
¢ Ï ¢ Capacity
w
” Back: press the display key.
Activating/deactivating advisory tones
Your handset uses "advisory tones" to tell
you about different activities and statuses.
The following advisory tones can be activated and deactivated independently of
each other:
u Key click: every key press is confirmed.
u Advisory tones:
– Confirmation tone (ascending tone
sequence): at the end of an entry/
setting and when an SMS (depending on the base station) or a new
entry arrives in the call history
– Error tone (descending tone
sequence): when you make an
incorrect entry
– Menu end tone: when scrolling at
the end of a menu
u Battery low tone: the battery pack
requires charging.
In idle status:
¢ Advisory Tones
t
¤ Change multiple line input:
Key Tones:
Select On or Off.
Confirm.:
Select On or Off.
Battery:
Select On, Off or In Call. The battery
warning tone is only activated/deacti-
vated and only sounds during a call.
¤ Save changes: (page 31).
23
Page 25

First steps
You cannot deactivate the confirmation
tone for placing the handset in the base
station.
Please note:
You can also set the call volume, the ringer
tones, the advisory tones and the silent alert
via the menu.
Setting the alarm clock
Precondition: The date and time have
already been set (page 8).
Activating/deactivating the alarm clock and setting the wake-up time
w ¢ ì
¤ Change multiple line input:
Activation:
Select On or Off.
Time:
Enter the wake-up time in 4-digit format.
Occurance:
Select Daily or Monday-Friday.
Vol ume :
Set the volume (1–6).
Melody:
Select melody.
¤ Save changes: (page 31).
The ì icon is displayed.
A wake-up call with selected ringer tone
(page 21) is signalled on the handset.
The wake-up call sounds for 60 seconds.
ì is shown in the display. If no key is
pressed, the wake-up call is repeated
twice at five minute intervals and then
switched off.
During a call, the wake-up call is signalled
by a short tone.
Deactivating the wake-up call/ repeating after a pause (snooze mode)
Precondition: A wake-up call is sounding.
§OFF§ Press the display key. The
wake-up call is deactivated.
or
§Snooze§ Press the display key or any
key. The wake-up call is deactivated and then repeated after
5 minutes. After the second
repetition the wake-up call is
deactivated completely.
Setting an appointment (calendar)
You can have your handset remind you of
up to 30 appointments (volume and melody, see page 21).
Saving an appointment
Precondition: The date and time have
already been set (page 8).
¢ ç
w
r/q Select the day in the graphical
calendar and press
(Days on which appointments
have already been saved are
highlighted in black.)
The list of saved appointments for the day
is displayed. If you have already saved
30 appointments, you must first delete an
existing appointment.
<New Entry>
Select and press
§OK§ or w.
§OK§.
¤ Change multiple line input:
Appoint.:
Select On or Off.
Date:
Enter day/month/year in 8-digit format.
Time:
Enter hours/minutes in 4-digit format.
24
Page 26

First steps
Notes:
Enter text (max. of 16 characters).
The text appears as the appointment
name in the list and will be displayed
on the screen during the appointment
reminder. If you do not enter any text,
only the date and time of the appointment are displayed.
§Save§ Press the display key.
a Press and hold (idle status).
The appointment is marked with in the
appointments list. The list of appointments is sorted by date.
An appointment reminder is signalled
with the selected ringer tone (page 21).
The appointment reminder sounds for
60 seconds. The entered text, date and
time are displayed.
During a call, the appointment reminder is
signalled by a short tone.
‰
Managing appointments
w ¢ ç
r/q Select the day in the graphical
calendar and press
(Days on which appointments
have already been saved are
highlighted in black in the calendar.)
q Select appointment for the
day.
§Options§ Open menu
Back with ”
§OK§ or w.
§.
You have the following options:
View Entry
View selected appointment,
open the menu
deleting and activating / deactivating.
Edit Entry
Edit selected appointment.
Delete Entry
Delete selected appointment.
Activate / Deactivate
Activate / deactivate the selected
appointment.
Delete List
Delete all appointments.
§Options§ for editing,
Switching off or accepting an appointment reminder
Precondition: An appointment reminder
is sounding.
§§OFF§§ Press the display key to switch
off the appointment reminder.
Or:
§SMS§ Press the display key to accept
the appointment reminder
with an SMS (depending on
base station).
Displaying missed appointments and anniversaries
Missed appointments/anniversaries
(page 15) are displayed in the Missed
Alarms list if:
u You do not accept an appointment/
anniversary.
u The appointment/anniversary was sig-
nalled during a phone call.
u The handset is deactivated at the time
of the appointment/anniversary.
u Automatic redial was activated at the
time of an appointment/anniversary
(page 16).
Th e mo st r ece nt e ntr y is a t th e he ad o f th e
list.
25
Page 27

First steps
If there is a new appointment/anniversary
in the list, the display shows
§Appoint.§.
Pressing the display key will also open the
Missed Alarms list.
To open the list from the menu:
¢ í ¢ Missed Alarms
w
Select appointment/
anniversary.
Information about the
appointment/anniversary is
displayed. A missed appointment is displayed with the
appointment name and a
missed anniversary is displayed with the last name and
first name. The date and time
will also be given.
§Delete§ Delete appointment
§SMS§ Write an SMS.
a Press and hold (idle status).
If 10 entries are already stored in the list,
the next appointment reminder will delete
the oldest entry.
Using Bluetooth devices
Your Gigaset SL37H handset can communicate wirelessly via Bluetooth™ with
other devices using this technology.
Before you can use your Bluetooth
devices, you must first activate Bluetooth
and then register the devices to the handset.
You can register 1 Bluetooth headset to
the handset. You can also register up to
5 data devices (PC, PDA) to send and
receive directory entries as vCards or to
exchange data with a computer
(page 32).
In order to transfer phone numbers via
Bluetooth connections, it is essential that
area codes (international and local area
codes) are stored on the phone (see
page 28).
You will find a description of how to operate your Bluetooth devices in the user
guides for these devices.
Please note:
– You can only operate headsets on your
handset that have the headset profile.
– It can take up to 5 seconds to create a con-
nection between your handset and a Bluetooth headset. This applies both when a call
is accepted using the headset and one is
transferred to the headset, and when a
number is dialled from the headset.
Activating/deactivating Bluetooth mode
w ¢ í ¢ Data Transfer ¢ Bluetooth
¢ Activation
Press §OK§ to activate or deactivate Bluetooth mode ( = activated).
In idle status, the ò icon on the handset
shows that Bluetooth mode is activated:
ÐòV
Please note:
– If Bluetooth is activated and accessories
(e.g. data cables page 32) are plugged into
the connection socket (page 1), Bluetooth
is automatically deactivated.
– If a Bluetooth voice connection has
– If a Bluetooth data connection has
– Bluetooth is automatically reactivated
when the accessories are removed.
– If Bluetooth is deactivated and accessories
are plugged in, then Bluetooth cannot be
activated.
Registering Bluetooth devices
The distance between the handset in Bluetooth mode and the activated Bluetooth
device (headset or data device) should be
no more than 10 m.
‰
INT 1
already been established, Bluetooth is
not deactivated until it is ended.
already been established, the response
depends on the receiving device.
26
Page 28

First steps
Please note:
– If you register a headset, any headset that is
already registered will be overwritten.
– If you would like to use a headset with your
handset that is already registered to
another device (e.g. to a mobile phone),
please deactivate this connection before
you start the registration process to the
Gigaset.
w ¢ í ¢ Data Transfer ¢ Bluetooth
¢ Search Headset / Search Data Device
The search can take up to 30 seconds.
Once the device has been found, its name
will be shown on the display.
§Options§ Press the display key.
Trust Device Select and press §OK§.
~ Enter the PIN for the Bluetooth
device you want to register
and press
§OK§.
The device is saved in the list of known
devices.
Cancelling/repeating current search
To cancel search:
§Cancel§ Press the display key.
Repeat search if necessary:
§Options§ Select and press §OK§.
Repeat Search
Select and press
§OK§.
Editing the list of known (trusted) devices
Open the list
w ¢ í ¢ Data Transfer ¢ Bluetooth
¢ Known Devices
A corresponding icon appears next to each
device name in the list displayed:
Icon Meaning
ô
õ
Bluetooth headset
Bluetooth data device
Viewing entries
Open list ¢ s (select entry)
§Options§ Press the display key.
View Entry Select and press §OK§.
Device name and address are
displayed.
Back with
§OK§.
De-registering a Bluetooth device
Open list ¢ s (select entry)
§Options§ Press the display key.
Delete Entry Select and press §OK§.
a Back: press and hold key.
Please note:
If you de-register an activated Bluetooth
device, it may try to reconnect as an "unregistered device".
Changing the name of a Bluetooth device
Open the list ¢ s (select entry)
§Options§ Press the display key.
Rename Select and press §OK§.
~ Change name.
§Save§ Press the display key.
a Back: Press and hold key.
Rejecting/accepting an unregistered Bluetooth device
If a Bluetooth device that is not registered
in the list of known devices tries to connect with the handset, you will be
prompted on the display to enter the PIN
for the Bluetooth device (bonding).
u Reject
§Go Back§ Press the display key.
u Accept
~ Enter the PIN for the Bluetooth
device you want to accept and
§OK§.
press
If you have accepted the device, you
can use it temporarily (i.e. as long as it
is within receiving range or until you
27
Page 29

First steps
deactivate the handset) or save it to the
list of known devices.
Once the PIN has been confirmed, save
to the list of known devices:
– Press the display key
– Press the display key
use temporarily.
§Yes§.
§No§:
Changing the Bluetooth name of the handset
You can change the handset name used
to identify it on the display of another
Bluetooth device.
¢ í ¢ Data Transfer ¢ Bluetooth
w
¢ Own Device Name
§Change§ Press the display key.
~ Change name.
§Save§ Press the display key.
a Back: Press and hold key.
Setting your own area code
In order to transfer phone numbers
between Bluetooth connections and
phone, it is essential that your area code
(international and local area code) is
stored on the phone.
Some of these numbers are already preset.
¢ Ð ¢ Handset ¢ Area Codes
w
Check that the (pre)set area code is correct.
¤ Change multiple line input:
q Select/change input field.
r Navigate in the input field.
X If necessary, delete number:
press the display key.
~ Enter number.
§Save§ Press the display key.
Example:
Area Codes
International code:
0000 - 49
Local area code:
0 - [ 89 ]
X
Save
Restoring the handset to the factory settings
You can reset any individual settings and
changes that you have made. Entries in
the directory, the call-by-call list, the call
history, the SMS lists (depending on the
base station) and the handset's registration to the base station as well as the content of My stuff are retained.
¢ Ð ¢ Handset ¢ Reset Handset
w
§Yes§ Press the display key.
a Press and hold (idle status).
Appendix
Care
¤ Wipe the charging cradle and the hand-
set with a damp cloth (do not use solvent) or an antistatic cloth.
Never use a dry cloth. This can cause a
build up of static.
Contact with liquid
If the handset has come into contact with
liquid:
1. Switch off the handset and remove
the battery pack immediately.
2. Allow the liquid to drain from the handset.
3. Pat all parts dry, then place the handset
with the battery compartment open
and the keypad facing down in a dry,
!
28
Page 30

First steps
warm place for at least 72 hours (not
in a microwave, oven etc.).
4. Do not switch on the handset again
until it is completely dry.
When it has fully dried out, you will normally be able to use it again.
Questions and answers
If you have any questions about using
your handset, visit us at any time at
www.gigaset.com/customercare
table below contains a list of common
problems and possible solutions.
Registration or connection problems with a
Bluetooth headset.
. The
¥ Reset the Bluetooth headset (see the user
guide for your headset).
¥ Delete registration data from the handset
when de-registering the device
(see page 27).
¥ Repeat the registration process
(see page 26).
The display is blank.
1. The handset is not switched on.
¥ Press and hold the end call key a.
2. The battery pack is flat.
¥ Charge/replace the battery pack
(page 6).
The keys of a handset do not respond when
pressed.
The keypad lock is activated.
¥ Press and hold the hash key
"Base station x" flashes on the display.
1. The handset is outside the range of the base
station.
#
(page 8).
¥ Move the handset closer to the base sta-
tion.
2. The handset has been de-registered.
¥ Register the handset (page 7).
3. The base station is not switched on.
¥ Check the base station mains adapter.
Base Search flashes in the display.
The handset is set to Best Base and no base station is switched on or within range.
¥ Move the handset closer to the base station.
¥ Check the base station mains adapter.
Handset does not ring.
The ringer tone is switched off.
¥ Activate the ringer tone (page 22).
The other party cannot hear you.
You have pressed the
set is "muted".
u (INT) key. The hand-
¥ Switch on the microphone again (page 11).
You hear an error tone when keying an input
(a descending tone sequence).
Action has failed/invalid input.
¥ Repeat the operation.
Watch the display and refer to the user
guide if necessary.
Service (Customer Care)
We offer you support that is fast and tailored to your specific needs!
Our Online Support on the Internet:
www.gigaset.com/customercare
For more information on aftersales service, please refer to your local warranty
card.
In some countries repair and replace services are impossible where the products are
not sold through our authorised dealers.
Bluetooth ò Qualified Design Identity
The Bluetooth QD ID for your
Gigaset SL37H is: B011264.
29
Page 31

First steps
Specifications
Recommended battery pack
(Valid at the time of going to press)
Technology: Lithium ion (Li-Ion):
Voltage: 3.7 V
Capacity: 700 mAh
Type: V30145-K1310-X250
V30145-K1310-X322
V30145-K1310-X401
The handset is supplied with the recommended battery pack. Only the original
battery pack may be used.
Handset operating times/charging times
The operating time of your Gigaset
depends on the capacity and the age of
the batteries and the way they are used.
(All times are maximum possible times
and apply when the display backlight is
switched off.)
Standby time approx. 350 hours (15 days)
Talktime approx. 14 hours
Charging time approx. 3.5 hours
Notes on the user guide
w ¢ Ð ¢ Display
¤ When the handset is in idle status,
press the control key in the centre
(w) to open the main menu.
¤ Use the q control key to select the
Ð Settings icon.
¤ Press w or press the display key §OK§
to confirm the Settings function.
The Settings submenu is displayed.
¤ Press on the bottom of control key q
until the Display menu function is
selected.
¤ Press w or press the display key §OK§
to confirm the selection.
Contrast Select and press
§OK§.
¤ Press on the bottom of control key q
until the Contrast menu function is
selected.
¤ Press w or press the display key §OK§
to confirm the selection.
r Select contrast and press w
or press the display key
§Save§.
¤ Press on the right or left of the control
key to set the contrast.
¤ Press w or press the display key §Save§
to confirm the selection.
This section explains the meaning of certain typographical conventions that are
used in this user guide.
Example of a menu input
The steps you need to perform are shown
in abbreviated form in the user guide. This
is illustrated below using the example of
"Setting the contrast for the display". The
things you have to do are explained in the
boxes.
30
a Press and hold (idle status).
¤ Press and hold the end call key until the
handset returns to idle status.
Example of multiple line input
In many situations you can change settings or enter data in several lines of a display.
In this user guide, the multi-level input is
illustrated in abbreviated form. This is
illustrated below using the example of
Page 32

First steps
"Setting the date and time". The things
you have to do are explained in the boxes.
You will see the following display (example):
Date/Time
Date:
[15.11.2007]
Time:
11: 11
Ý Save
Date:
Enter the day, month and year in
8-digit format.
The second line is marked with [ ] to
show it is active.
¤ Enter the date using the digit keys.
Time:
Enter hours/minutes in 4-digit format.
¤ Press the s key.
The four th line is marked wit h [ ] to show
it is active.
¤ Enter the date using the digit keys.
¤ Save the changes.
¤ Press the display key §Save§.
¤ Then press and hold the a key.
The handset switches to idle status.
Writing and editing text
The following rules apply when writing a
text:
u Control the cursor with u v t
s.
u Characters are inserted on the left of
the cursor.
u Press the star key
of special characters.
to show the table
*
u The first letter of the name of directory
entries is automatically capitalised, followed by lower case letters.
You can call up the table of special characters when writing an SMS using the
*
key. Select the required character and
insert it with
§Insert§.
Writing an SMS/name (without predictive text)
Press the relevant key several times to
enter letters/characters.
Standard characters
1x 2x 3x 4x 5x 6x 7x 8x 9x 10x
2)
1)
1
2 abc2дбавгз
3 def3ëéèê
4 gh i4ïíìî
5 jkl5
L mno6цсутфх
M pqr s7ß
N t uv8üúùû
O wx y z9ÿ ýæøå
Q .,?!0
1) Space
2) Line break
When you press and hold a key, the characters of that key appear in the display and
are highlighted one after the other. When
you release the key, the highlighted character is inserted into the input field.
Setting upper/lower case or digits
Press the hash key # briefly to switch
from "Abc" mode to "123" and from "123"
to "abc" and from "abc" to "Abc" (upper
case: 1st letter upper case, all others lower
case). Press the hash key # before
entering the letter.
You can see in the display whether upper
case, lower case or digits is selected.
31
Page 33

First steps
Writing SMS (with predictive text)
EATONI predictive text helps you when
you are writing text messages.
Each key between Q and O is
assigned several letters and characters.
These appear in a selection line immediately under the text panel (over the display keys) as soon as you press a key. The
letter you are most likely looking for is
shown in reversed highlights and is at the
beginning of the selection line. It is copied
into the text panel.
SMS 572(1)
Hello Peter, I cannot come
today. W
hgi
Ç
Abc
X Options
1 Remaining number of characters, in brack-
ets: SMS part 1-n
2SMS text
3Selection line
4 EATONI is activated
5 Upper/lower case or digits
If this letter is the one you want, confirm it
by pressing the next key. If it does not
match the one you want, repeatedly press
the hash key # briefly until the letter
you are looking for is reverse highlighted
in the display line and then transferred to
the text field.
If you press and hold the hash key #
you switch from "Abc" mode to "123" and
from "123" to "abc" and from "abc" to
"Abc".
Activating/deactivating predictive text
Precondition: you are writing a text message.
§Options§ Press the display key.
Predictive Text
Select and press
a Press the end call key briefly
to return to the text field.
Enter the text.
1
2
3
4
5
‰
§OK§ (=on).
Additional functions via the PC interface
You can connect the handset to your computer via Bluetooth (page 26) or a data
cable (page 33). If you want to use the
Bluetooth connection, your computer
must be equipped with a suitable dongle.
Your handset can communicate with a
computer using the "Gigaset QuickSync"
program (free download at
www.gigaset.com/gigasetSL370
You can
u access your handset's directory and
synchronise it with Outlook, or copy
contact details to the handset,
u download CLIP pictures (.bmp) from
the computer to the handset,
u download pictures (.bmp) for the
screensaver from the computer to the
handset.
During the transfer of data between handset and PC, you will see
ß on the dis-
play. During this time the keypad is disabled, and incoming calls will be ignored.
Please note:
– If Bluetooth is activated and accessories
(e.g. data cables page 32) are plugged into
the connection socket (page 1), Bluetooth
is automatically deactivated.
– If a Bluetooth voice connection has
already been established, Bluetooth is
not deactivated until it is ended.
– If a Bluetooth data connection has
already been established, the response
depends on the receiving device.
– Bluetooth is automatically reactivated
when the accessories are removed.
– If Bluetooth is deactivated and accessories
are plugged in, then Bluetooth cannot be
activated.
).
32
Page 34

Accessories
Mobile handsfree set with PTT key
With the mobile handsfree set you can make a call while
keeping your hands free.
In addition, conversations can be heard on the handset.
Data Cable USB DCA-510
For connecting your phone to the USB interface of your
computer.
All accessories and battery packs are available from your mobile phone retailer.
Only use original accessories. This will avoid possible health risks and damage
to property, and also ensure that all the relevant regulations are complied with.
First steps
33
Page 35

Index
A
Accessories . . . . . . . . . . . . . . . . . . . . 33
Activating
advisory tones
appointment
Bluetooth mode
call acceptance
handset
keypad lock
room monitor
Advisory tones
Alarm clock
Alert tone
Anniversary
deactivating
missed
saving in directory
Appointment/anniversary
display missed
Appointments
activating/deactivating
deleting
managing
Area code
setting own area code
Assigning a key
Assigning numerical keys
Automatic
call acceptance
last number redial
B
Base station
connecting and installing
. . . . . . . . . . . . . . . . . . . . . . . . 5
range
Battery pack
charging
display
. . . . . . . . . . . . . . . . . . . . . . . 1, 7
icon
inserting
recommended battery pack
. . . . . . . . . . . . . . . . . . . . . . . . 23
tone
Beep, see Advisory tones
Birthday, see Anniversary
Bluetooth
. . . . . . . . . . . . . . . . 23
. . . . . . . . . . . . . . . . . 24
. . . . . . . . . . . . . . . 26
. . . . . . . . . . . . . . . . 20
. . . . . . . . . . . . . . . . . . . . . . 8
. . . . . . . . . . . . . . . . . . . 8
. . . . . . . . . . . . . . 17, 18
. . . . . . . . . . . . . . . . . . 23
. . . . . . . . . . . . . . . . . . . . 24
. . . . . . . . . . . . . . . . . . . . . 22
. . . . . . . . . . . . . . . . . . . . 15
. . . . . . . . . . . . . . . . . . 15
. . . . . . . . . . . . . . . . . . . 15, 25
. . . . . . . . . . . . . 15
. . . . . . . . . . . . . . . . 25
. . . . . . . . . . . . . . . . . . 24
. . . . . . . . . . 25
. . . . . . . . . . . . . . . . . . . . . 25
. . . . . . . . . . . . . . . . . . . . 25
. . . . . . . . . . . 28
. . . . . . . . . . . . . . . . . 18
. . . . . . . . . . 18
. . . . . . . . . . . . . 11, 20
. . . . . . . . . . . . . . 16
. . . . . . . . . 5
. . . . . . . . . . . . . . . . . . . . 1, 7
. . . . . . . . . . . . . . . . . . . . . 1, 7
. . . . . . . . . . . . . . . . . . . . . 6
. . . . . . . 30
accepting a call
changing device name
de-registering devices
list of known devices
registering devices
transferring directory (vCard)
Bluetooth connection
setting own area code
. . . . . . . . . . . . . . . 11
. . . . . . . 27, 28
. . . . . . . . . . 27
. . . . . . . . . . . 27
. . . . . . . . . . . . . 26
. . . . . 14
. . . . . . . . . . 28
C
Calendar. . . . . . . . . . . . . . . . . . . . . . 24
Call
acceptance
accepting
accepting (Bluetooth)
duration
ending
external
internal
Call-by-call
numbers
Call-by-call list
. . . . . . . . . . . . . . . . . . . . . . . . . 1
key
Calling
external
Care of the telephone
Changing
destination number
device name (Bluetooth)
display language
earpiece volume
handsfree volume
ringer tone
Charge status display
CLIP picture
Confirmation tone
Control key
Correcting incorrect entries
Customer Care
. . . . . . . . . . . . . . . . . . 20
. . . . . . . . . . . . . . . . . . . 11
. . . . . . . . . . . 11
. . . . . . . . . . . . . . . . . . . . 10
. . . . . . . . . . . . . . . . . . . . . 11
. . . . . . . . . . . . . . . . . . . . . 10
. . . . . . . . . . . . . . . . . . . . . 12
. . . . . . . . . . . . . . . . . . . . 12
. . . . . . . . . . . . . . . . . . . . 12
. . . . . . . . . . . . . . . . . . . . . 10
. . . . . . . . . . . . 28
. . . . . . . . . . . . 17
. . . . . 27, 28
. . . . . . . . . . . . . . 19
. . . . . . . . . . . . . . 21
. . . . . . . . . . . . . 21
. . . . . . . . . . . . . . . . . . 21
. . . . . . . . . . . 1, 7
. . . . . . . . . . . . . . . . . 13, 22
. . . . . . . . . . . . . . . 23
. . . . . . . . . . . . . . . . . . . 1, 8
. . . . . . . . 10
. . . . . . . . . . . . . . . . . 29
D
Deactivating
advisory tones
appointment
appointment reminder
call acceptance
handset
keypad lock
room monitor
. . . . . . . . . . . . . . . . 23
. . . . . . . . . . . . . . . . . 24
. . . . . . . . . . 25
. . . . . . . . . . . . . . . 20
. . . . . . . . . . . . . . . . . . . . . . 8
. . . . . . . . . . . . . . . . . . . 8
. . . . . . . . . . . . . . . . 17
34
Page 36

Delete key . . . . . . . . . . . . . . . . . . . . . . 9
Deleting
characters
De-registering devices (Bluetooth)
Destination number
(room monitor)
Dialling
call-by-call list
directory
quick dial
with quick dial
Dialling pause
entering
Directory
copying number from text
managing entries
opening
order of entries
saving anniversary
saving entry
sending entry/list to handset
transferring a vCard (Bluetooth)
using to enter numbers
Display
backlight
changing display language
contrast
in idle status
memory (directory/call-by-call)
memory (My stuff)
missed appointments/
screensaver
setting
wrong language
Display keys
assigning
. . . . . . . . . . . . . . . . . . . 10
. . . . . . . . . . . 17, 18
. . . . . . . . . . . . . . . . . 13
. . . . . . . . . . . . . . . . . . . . 13
. . . . . . . . . . . . . . . . . . . . 18
. . . . . . . . . . . . . . . . 14
. . . . . . . . . . . . . . . . . . . . . . 1
. . . . . . . . . . . . . . . . . . . . . . 12
. . . . . . . . 15
. . . . . . . . . . . . . . 13
. . . . . . . . . . . . . . . . . . . . 8, 9
. . . . . . . . . . . . . . . . 13
. . . . . . . . . . . . . 15
. . . . . . . . . . . . . . . . . . 12
. . . . . . 14
. . . . . . . . . . 15
. . . . . . . . . . . . . . . . . . . . 20
. . . . . . . 19
. . . . . . . . . . . . . . . . . . . . . 19
. . . . . . . . . . . . . . . . . . . 9
. . . . . . . . . . . . . 23
anniversaries
. . . . . . . . . . . . . . 25
. . . . . . . . . . . . . . . . . . 20
. . . . . . . . . . . . . . . . . . . . . . 19
. . . . . . . . . . . . . . . 19
. . . . . . . . . . . . . . . . . . . 1, 9
. . . . . . . . . . . . . . . . . . . . 18
. . . 27
. . . 14
. . . . 14
E
Earpiece mode. . . . . . . . . . . . . . . . . . 11
Earpiece volume
EATONI (predictive text)
ECO DECT
Eco mode
E-mail address
copy from the directory
End call key
Ending, call
Ending, see deactivate
. . . . . . . . . . . . . . . . 21
. . . . . . . . . . . 32
. . . . . . . . . . . . . . . . . . . . . 10
. . . . . . . . . . . . . . . . . . . . . 10
. . . . . . . . . . 15
. . . . . . . . . . . . . . . 1, 10, 11
. . . . . . . . . . . . . . . . . . . . 11
Entry
selecting (menu)
selecting from directory
Error tone
Example
menu input
multiple line input
. . . . . . . . . . . . . . . . . . . . . 23
. . . . . . . . . . . . . . 30
. . . . . . . . . 13
. . . . . . . . . . . . . . . . . . 30
. . . . . . . . . . . . . 30
G
Group call. . . . . . . . . . . . . . . . . . . . . 12
H
Handset
activating/deactivating
advisory tones
contact with liquid
display backlight
display language
earpiece volume
handsfree volume
idle status
. . . . . . . . . . . . . . . . . . . . . . . 8, 9
list
. . . . . . . . . . . . . . . . . . . . . 11
muting
registering
restoring to factory settings
screensaver
. . . . . . . . . . . . . . . . . . . . . 18
setting
setting up
signal strength
using room monitor
Handset operating time
in room monitor mode
Handsfree key
Handsfree talking
Handsfree volume
Hash key
Hearing aids
Hold music
. . . . . . . . . . . . . . . . . . . . . 1, 8
. . . . . . . . . . . . . . . . 23
. . . . . . . . . . . . . . . . . . . . 9
. . . . . . . . . . . . . . . . . . . . 7
. . . . . . . . . . . . . . . . . . 20
. . . . . . . . . . . . . . . . . . . . 6
. . . . . . . . . . . . . . . . . 5
. . . . . . . . . . . . . . . . . . . 1
. . . . . . . . . . . . . . . . . . . . 3
. . . . . . . . . . . . . . . . . . . . 11
. . . . . . . . . . . 8
. . . . . . . . . . . . . 28
. . . . . . . . . . . . . . 20
. . . . . . . . . . . . . . 19
. . . . . . . . . . . . . . 21
. . . . . . . . . . . . . 21
. . . . . . 28
. . . . . . . . . . . . 16
. . . . . . . . . . 17
. . . . . . . . . . . . . . . 11
. . . . . . . . . . . . . . . 21
I
Icon
alarm clock
battery pack
display
for new messages
keypad lock
ringer tone
Idle status (display)
Idle status, returning to
. . . . . . . . . . . . . . . . . . 24
. . . . . . . . . . . . . . . . . . 7
. . . . . . . . . . . . . . . . . . . . . . 9
. . . . . . . . . . . . . 16
. . . . . . . . . . . . . . . . . . . 8
. . . . . . . . . . . . . . . . . . 22
. . . . . . . . . . . . . . . 9
. . . . . . . . . . . . 9
35
Page 37

Incorrect entry (correction). . . . . . . . .10
Installation, base station
Internal call
. . . . . . . . . . . . . . . . . . . . 12
. . . . . . . . . . . 5
K
Key 1 (fast access) . . . . . . . . . . . . . . . .1
Keypad lock
Keys
call-by-call list
control key
delete key
display keys
end call key
fast access
handsfree key
hash key
message key
on/off key
quick dial
recall key
star key
talk key
. . . . . . . . . . . . . . . . . . . . . 8
. . . . . . . . . . . . . . . . . . 1
. . . . . . . . . . . . . . . . . . 1, 8
. . . . . . . . . . . . . . . . . . . . . 9
. . . . . . . . . . . . . . . . . 1, 9
. . . . . . . . . . . . . 1, 10, 11
. . . . . . . . . . . . . . . . . . . . 1
. . . . . . . . . . . . . . . . . . 1
. . . . . . . . . . . . . . . . . . . . 1, 8
. . . . . . . . . . . . . . . . . . . 1
. . . . . . . . . . . . . . . . . . . . . 1
. . . . . . . . . . . . . . . . . . . . 14
. . . . . . . . . . . . . . . . . . . . . 1
. . . . . . . . . . . . . . . . . . . . . . 1
. . . . . . . . . . . . . . . . . . . 1, 10
L
Language, display . . . . . . . . . . . . . . . 19
Last number redial
. . . . . . . . . . . . . . . . . . . . . . . . 28
Liquid
. . . . . . . . . . . . . . . . . . . . . . . . . . 12
List
call-by-call list
handsets
known devices (Bluetooth)
Lock
activating/deactivating keypad
protection
. . . . . . . . . . . . . . . 16
. . . . . . . . . . . . . . . . . 12
. . . . . . . . . . . . . . . . . . . 8, 9
. . . . . . . 27
. . . . . . . . . . . . . . . . . 8
M
Mains adapter . . . . . . . . . . . . . . . . . . . 3
Making calls
accepting a call
external
internal
Manual last number redial
Medical appliances
Memory
directory/call-by-call
My stuff
Menu
end tone
. . . . . . . . . . . . . . . . 11
. . . . . . . . . . . . . . . . . . . . . 10
. . . . . . . . . . . . . . . . . . . . . 12
. . . . . . . . . 16
. . . . . . . . . . . . . . . . 3
. . . . . . . . . . . . 14
. . . . . . . . . . . . . . . . . . . . . 23
. . . . . . . . . . . . . . . . . . . . 23
menu guidance
menu input
opening
Message key
opening lists
Microphone
Missed
anniversary
appointment
Multiple line input
Muting the handset
My stuff
. . . . . . . . . . . . . . . . . . . . . . 22
. . . . . . . . . . . . . . . . 9
. . . . . . . . . . . . . . . . . . 30
. . . . . . . . . . . . . . . . . . . . . 8
. . . . . . . . . . . . . . . . . . . . 1
. . . . . . . . . . . . . . . . . 16
. . . . . . . . . . . . . . . . . . . . 1
. . . . . . . . . . . . . . . . . . 25
. . . . . . . . . . . . . . . . . 25
. . . . . . . . . . . . . . . 30
. . . . . . . . . . . . . . 11
N
Network provider (numbers list) . . . . 12
Number
as destination for room
monitor
copying from directory
copying to directory
entering with directory
saving in the directory
Numbers list
network provider
. . . . . . . . . . . . . . 17, 18
. . . . . . . . . . 15
. . . . . . . . . . . . 15
. . . . . . . . . . 15
. . . . . . . . . . 12
. . . . . . . . . . . . . . 12
O
On/Off key . . . . . . . . . . . . . . . . . . . . . 1
Order in directory
. . . . . . . . . . . . . . . 13
P
Pack contents . . . . . . . . . . . . . . . . . . . 5
PC Interface
Picture
deleting
renaming
Predictive text
. . . . . . . . . . . . . . . . . . . 32
. . . . . . . . . . . . . . . . . . . . . 23
. . . . . . . . . . . . . . . . . . . 23
. . . . . . . . . . . . . . . . . . 32
Q
Questions and answers . . . . . . . . . . . 29
Quick dial
. . . . . . . . . . . . . . . 12, 13, 18
R
Range. . . . . . . . . . . . . . . . . . . . . . . . . 5
Recall key
Registering (handset)
Registering devices (Bluetooth)
Reminder call
Ringer tone
. . . . . . . . . . . . . . . . . . . . . . 1
. . . . . . . . . . . . . 7
. . . . . 26
. . . . . . . . . . . . . . . . . . 15
36
Page 38

changing . . . . . . . . . . . . . . . . . . . . 21
setting melody
setting volume
Room monitor
. . . . . . . . . . . . . . . . 21
. . . . . . . . . . . . . . . . 21
. . . . . . . . . . . . . . . . . . 16
S
Screensaver. . . . . . . . . . . . . . . . . . . . 20
Searching in directory
Sending
directory entry to handset
Sensitivity (room monitor)
. . . . . . . . . . . . . . . . . . . . . . . 29
Service
Setting
. . . . . . . . . . . . . . . . . . . . . . . . . 8
date
. . . . . . . . . . . . . . . . . . . . . . 21
melody
screensaver
time
Setting up
handset
Signal strength
Snooze mode
Sound, see Ringer tone
Specifications
Star key
. . . . . . . . . . . . . . . . . . 20
. . . . . . . . . . . . . . . . . . . . . . . . . 8
. . . . . . . . . . . . . . . . . . . . . . 6
. . . . . . . . . . . . . . . . . . . 24
. . . . . . . . . . . . . . . . . . 30
. . . . . . . . . . . . . . . . . . . . . . . . 1
. . . . . . . . . . . . 13
. . . . . . . . 14
. . . . . . 17, 18
. . . . . . . . . . . . . . . . . . 5
T
Tal k key . . . . . . . . . . . . . . . . . . . . . 1, 10
Tro ubl eshootin g
. . . . . . . . . . . . . . . . . 29
V
Vibration alarm . . . . . . . . . . . . . . . . . 22
VIP (directory entry)
Volume
earpiece
earpiece volume
handset handsfree volume
loudspeaker
ringer tone
setting
. . . . . . . . . . . . . . . . . . . . . 21
. . . . . . . . . . . . . . . . . . . . . . 21
. . . . . . . . . . . . . . 14
. . . . . . . . . . . . . . . 21
. . . . . . . 21
. . . . . . . . . . . . . . . . . . 21
. . . . . . . . . . . . . . . . . . . 21
W
Warning tone, see Advisory tones
Writing, editing text
. . . . . . . . . . . . . . 31
37
Page 39

Page 40

Page 41

 Loading...