

Congratulations
By purchasing a Gigaset, you have chosen a brand that is fully committed
to sustainability. This product’s packaging is eco-friendly!
To learn more, visit www.gigaset.com.
.

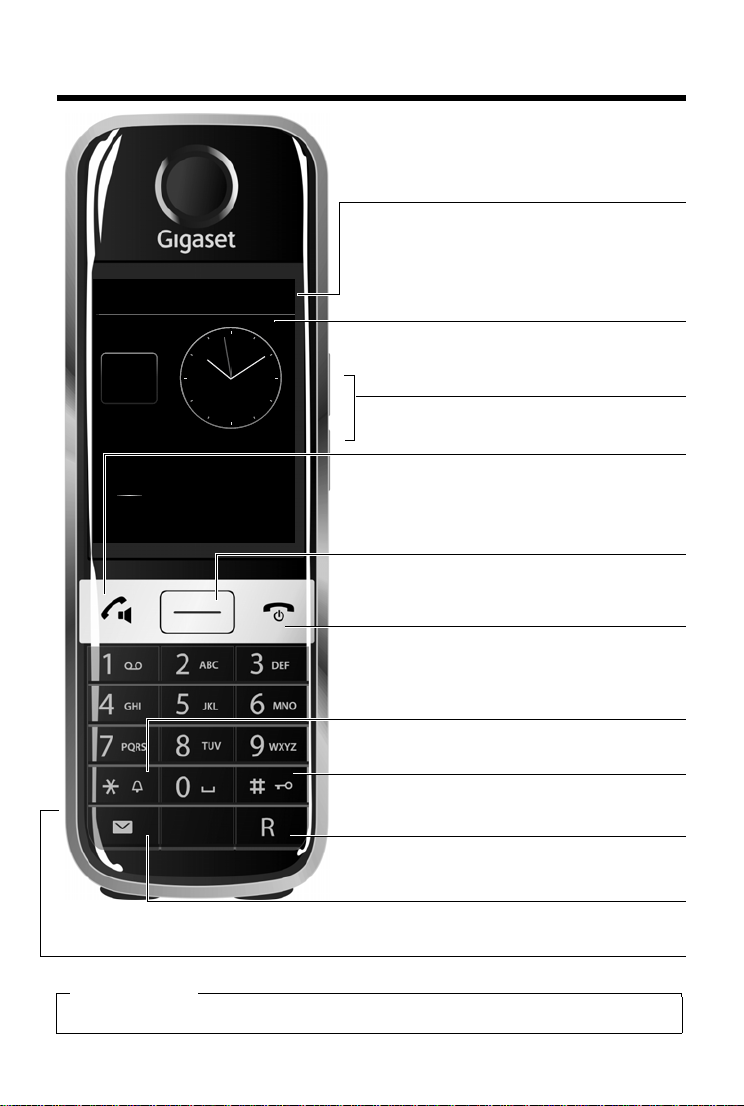
Gigaset S820H - Touch & Type
Ð
ò ôó
V
Â
˜
Apr
26
Thu
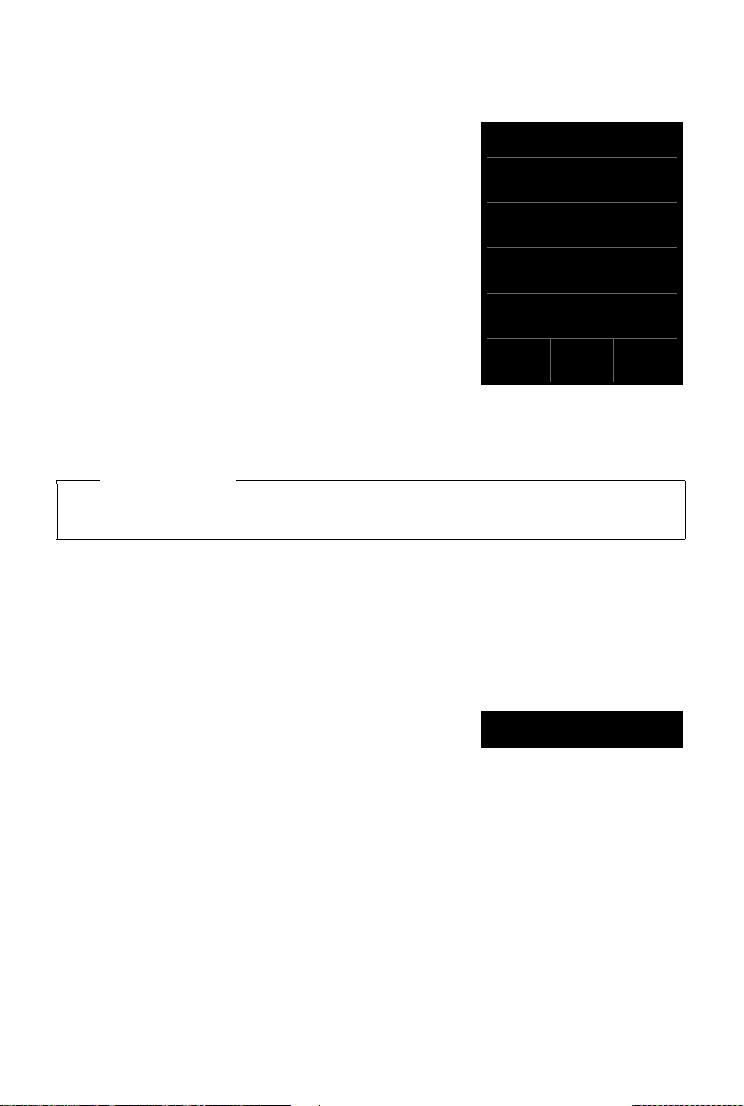
Status bar (¢ page 10)
Icons (¢ page 31) show the telephone's current settings and operating status. Touch the status bar to open
the status page (
¢ page 10).
v Menu key
Open the main menu/return to the idle display
(
¢ page 8)
a End call/end key
Press briefly: end call/paging call, reject internal call,
return to idle status
Press and hold: switch handset on/off
Touchscreen/display
Handset keys
Side keys
Set the volume during a call
Mini USB connection socket
Connect the handset to your PC (Gigaset QuickSync)
Idle display (¢ page 7) or menu page
(
¢ page 8)
Star key
Press and hold: activate/deactivate ring tones
(
¢ page 19)
Hash key
Press and hold: activate/deactivate (¢ page 11) keypad and display lock
Message key
Call up messages page (¢ page 9)
Recall key
Recall (flash)
Press and hold: enter dialling pause
c Talk key
Dial displayed number, accept call,
switch between earpiece and handsfree mode
Press briefly: open redial list
Press and hold: start dialling
Please note
To change the display language, proceed as described on page 17.
Gigaset S820H - Touch & Type
da en fi no sv 1

Contents
Contents
Gigaset S820H - Touch & Type . . . . . . . . . . . . . . . . . . . . . . . . . . . . . . . . . . . . . . . . . . . . . . . . . . . . . . . . . . . . . . 1
Safety precautions . . . . . . . . . . . . . . . . . . . . . . . . . . . . . . . . . . . . . . . . . . . . . . . . . . . . . . . . . . . . . . . . . . . . . . . . . 3
Getting started . . . . . . . . . . . . . . . . . . . . . . . . . . . . . . . . . . . . . . . . . . . . . . . . . . . . . . . . . . . . . . . . . . . . . . . . . . . . 4
Display pages . . . . . . . . . . . . . . . . . . . . . . . . . . . . . . . . . . . . . . . . . . . . . . . . . . . . . . . . . . . . . . . . . . . . . . . . . . . . . 7
Using the telephone . . . . . . . . . . . . . . . . . . . . . . . . . . . . . . . . . . . . . . . . . . . . . . . . . . . . . . . . . . . . . . . . . . . . . . 11
Making calls . . . . . . . . . . . . . . . . . . . . . . . . . . . . . . . . . . . . . . . . . . . . . . . . . . . . . . . . . . . . . . . . . . . . . . . . . . . . . . 14
Changing phone settings . . . . . . . . . . . . . . . . . . . . . . . . . . . . . . . . . . . . . . . . . . . . . . . . . . . . . . . . . . . . . . . . . 17
ECO DECT . . . . . . . . . . . . . . . . . . . . . . . . . . . . . . . . . . . . . . . . . . . . . . . . . . . . . . . . . . . . . . . . . . . . . . . . . . . . . . . 20
Network mailbox . . . . . . . . . . . . . . . . . . . . . . . . . . . . . . . . . . . . . . . . . . . . . . . . . . . . . . . . . . . . . . . . . . . . . . . . . 20
Bluetooth devices . . . . . . . . . . . . . . . . . . . . . . . . . . . . . . . . . . . . . . . . . . . . . . . . . . . . . . . . . . . . . . . . . . . . . . . . 21
Contacts (address book) . . . . . . . . . . . . . . . . . . . . . . . . . . . . . . . . . . . . . . . . . . . . . . . . . . . . . . . . . . . . . . . . . . 23
Call list . . . . . . . . . . . . . . . . . . . . . . . . . . . . . . . . . . . . . . . . . . . . . . . . . . . . . . . . . . . . . . . . . . . . . . . . . . . . . . . . . . . 26
Calendar . . . . . . . . . . . . . . . . . . . . . . . . . . . . . . . . . . . . . . . . . . . . . . . . . . . . . . . . . . . . . . . . . . . . . . . . . . . . . . . . . 26
Alarm . . . . . . . . . . . . . . . . . . . . . . . . . . . . . . . . . . . . . . . . . . . . . . . . . . . . . . . . . . . . . . . . . . . . . . . . . . . . . . . . . . . . 28
Baby phone . . . . . . . . . . . . . . . . . . . . . . . . . . . . . . . . . . . . . . . . . . . . . . . . . . . . . . . . . . . . . . . . . . . . . . . . . . . . . . 28
Synchronising with your PC (Gigaset QuickSync) . . . . . . . . . . . . . . . . . . . . . . . . . . . . . . . . . . . . . . . . . . . 30
Display icons . . . . . . . . . . . . . . . . . . . . . . . . . . . . . . . . . . . . . . . . . . . . . . . . . . . . . . . . . . . . . . . . . . . . . . . . . . . . . 31
Setting options . . . . . . . . . . . . . . . . . . . . . . . . . . . . . . . . . . . . . . . . . . . . . . . . . . . . . . . . . . . . . . . . . . . . . . . . . . . 33
Customer Service & Assistance . . . . . . . . . . . . . . . . . . . . . . . . . . . . . . . . . . . . . . . . . . . . . . . . . . . . . . . . . . . . 35
Environment . . . . . . . . . . . . . . . . . . . . . . . . . . . . . . . . . . . . . . . . . . . . . . . . . . . . . . . . . . . . . . . . . . . . . . . . . . . . . 38
Appendix . . . . . . . . . . . . . . . . . . . . . . . . . . . . . . . . . . . . . . . . . . . . . . . . . . . . . . . . . . . . . . . . . . . . . . . . . . . . . . . . 39
Index . . . . . . . . . . . . . . . . . . . . . . . . . . . . . . . . . . . . . . . . . . . . . . . . . . . . . . . . . . . . . . . . . . . . . . . . . . . . . . . . . . . . . 41
2 da en fi no sv
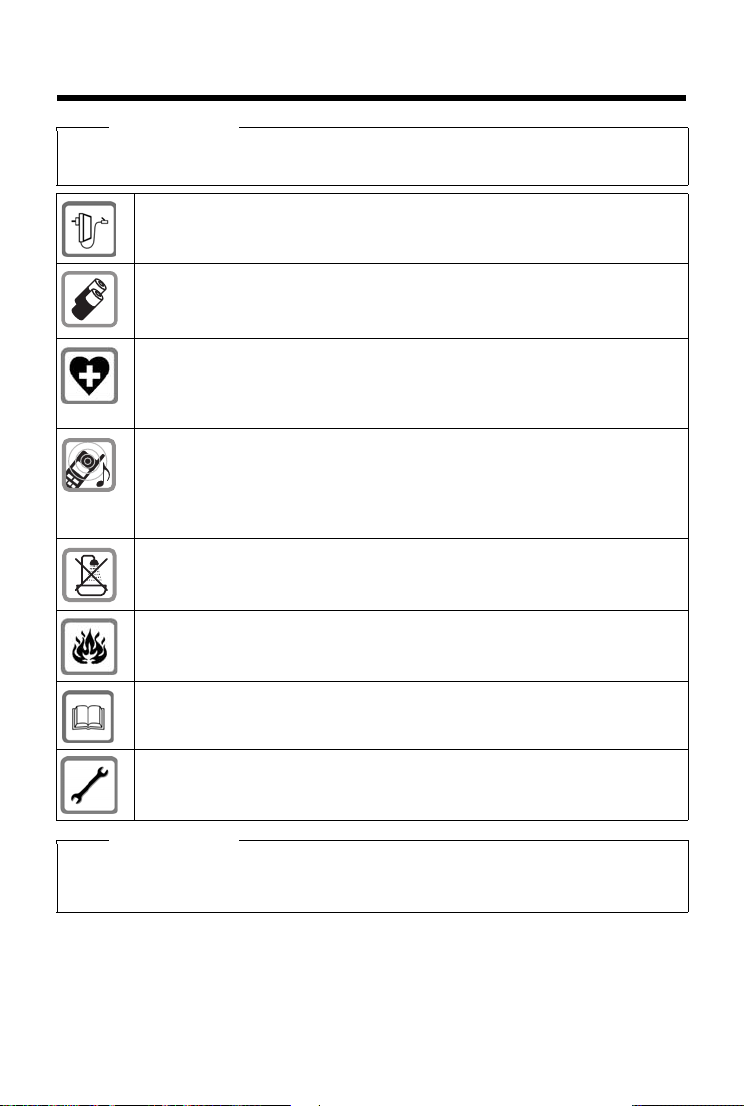
Safety precautions
Safety precautions
Warning
Read the safety precautions and the user guide before use.
Explain their content and the potential hazards associated with using the device to your children.
Use only the power adapter indicated on the device.
Use only rechargeable batteries that correspond to the specification (see "Technical Data").
Never use a conventional (non-rechargeable) battery or other battery types as this could result
in significant health risks and personal injury. Rechargeable batteries, which are noticeably
damaged, must be replaced.
Using your telephone may affect nearby medical equipment. Be aware of the technical conditions in your par ticular environment, e.g. doctor's surgery.
If you use a medical device (e.g. a pacemaker), please contact the device manufac turer. They will
be able to advise you regarding the susceptibility of the device to external sources of high frequency energy (for the specifications of your Gigaset product see "Technical Data").
Do not hold the rear of the handset to your ear when it is ringing or when speaker mode is activated. Otherwise you risk serious and permanent damage to your hearing.
Your Gigaset is compatible with the majority of digital hearing aids on the market. However, perfect function with all hearing aids cannot be guaranteed.
The phone may cause interference in analogue hearing aids (humming or whistling) or cause
them to overload. If you require assistance, please contact the hearing aid supplier.
The devices are not splashproof. For this reason do not install them in a damp environment such
as bathrooms or shower rooms.
Do not use the devices in environments with a potential explosion hazard (e.g. paint shops).
If you give your Gigaset to a third party, make sure you also give them the user guide.
Rem ove f ault y dev ices f rom u se or have t hem r epai red by our S ervi ce te am, a s the se cou ld in terfere with other wireless services.
Please note
u Th e de vi ce c ann ot b e u sed in t he eve nt o f a p ow er f ail ure . I t is als o not possible to transmit emergency
calls.
u Emergency numbers cannot be dialled if the keypad lock is activated!
da en fi no sv 3
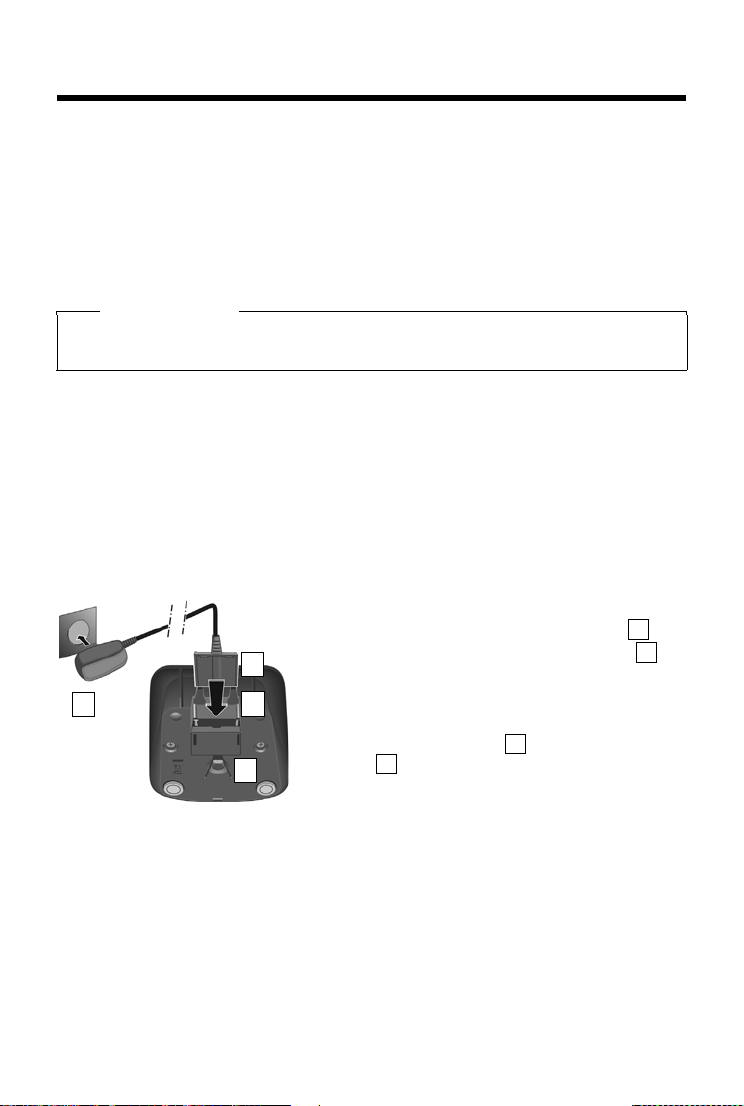
Getting started
¤ Connect the flat plug to the charger cradle .
¤ Plug the charger cradle into the plug socket .
If you have to remove the plug from the charger again:
¤ Disconnect the charger cradle from the mains
power supply.
¤ Press the release button and disconnect the
plug .
1
2
3
4
2
1
3
4
Getting started
Checking the package contents
One Gigaset handset, one battery cover (rear cover of the handset), two batteries, one charger
with charger cradle, one belt clip, one rubber seal for the USB connection, one user guide.
Setting up the charger
The charger is designed for use in dry rooms in a temperature range of +5°C to +45°C.
¤ Set up the charger on a level, non-slip surface, or mount the charger on the wall.
Please note
Pay attention to the range of the base. In buildings this is up to 50 m, outdoors up to 300 m.
The range is reduced when ECO DECT (
The phone’s feet do not usually leave any marks on surfaces. However, due to the multitude of
different varnishes and polishes used on today's furnishings, the occurrence of marks on the surfaces cannot be completely ruled out.
Please note:
u Never expose the telephone to the effects of heat sources, direct sunlight or other electrical
devices.
u Protect your Gigaset from moisture, dust, corrosive liquids and fumes.
Connecting the charger
¢ page 20) is activated.
4 da en fi no sv
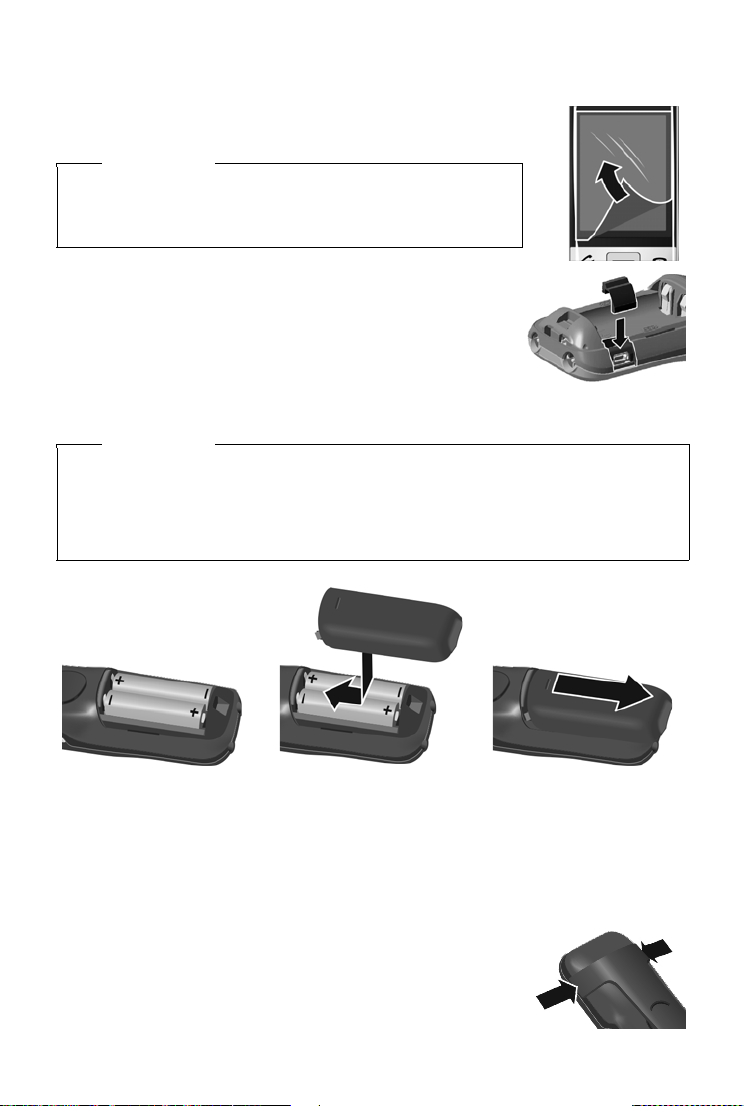
Getting started
¤ Insert the batteries with
the polarity in the correct
direction.
The polarity is indicated in the
battery compartment.
¤ Insert the battery cover
from above.
¤ Then press the cover until
it clicks into place.
To reopen the battery cover
to replace the battery:
¤ Insert your fingernail into
the notch on the top of the
cover and push downwards.
Setting up the handset for use
The handset’s display and keys are covered with a protective film.
Please remove the protective film.
Caution
Please do not use any touchscreen styli to operate the handset.
Do not use any protective sleeves/films from other manufacturers,
as they may restrict the operation of your handset.
Inserting the rubber seal for the USB plug socket
Open the battery cover and insert the rubber seal into the
groove.
Inserting the battery and closing the battery cover
Caution
Use only rechargeable batteries (¢ page 39) recommended by Gigaset Communications
GmbH, as this could otherwise result in significant health risks and personal injury. For
example, the outer casing of the batteries could be destroyed or the batteries could explode.
The phone could also malfunction or be damaged as a result of using batteries that are not
of the recommended type.
Attaching the belt clip
The handset has notches on each side to attach the belt clip. Press the
belt clip onto the back of the handset so that the protrusions on the
belt clip engage with the notches.
da en fi no sv 5
Getting started
14.5hr
Handset not
registered to
any base
Register
+
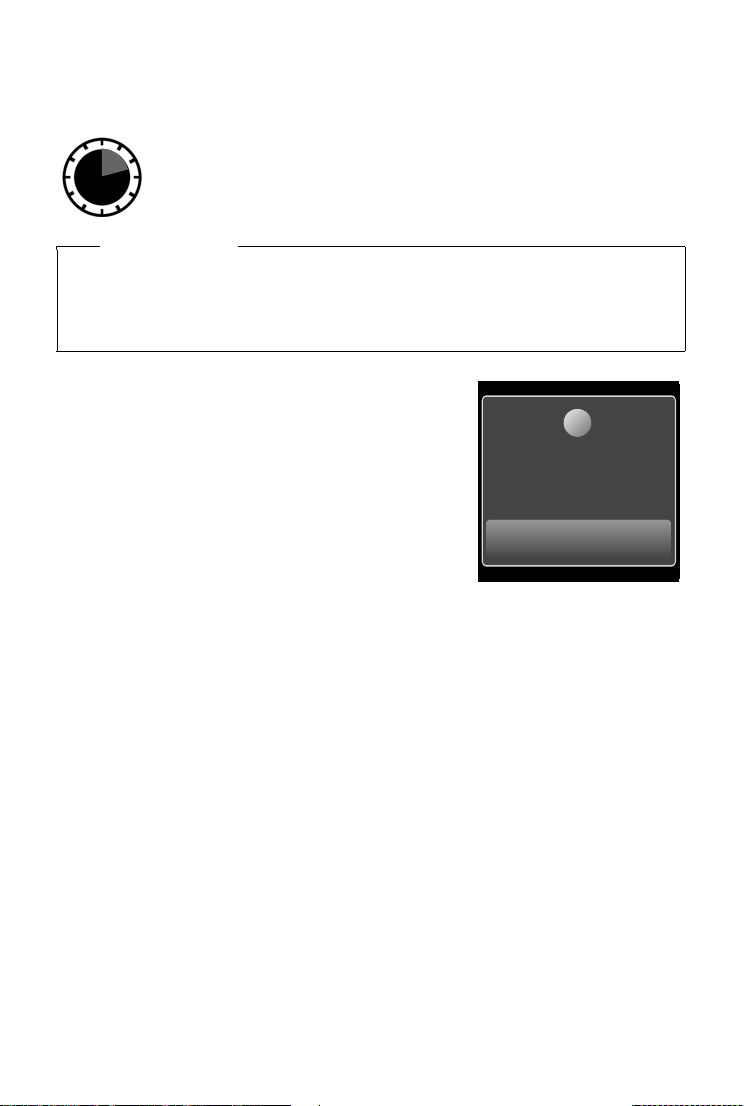
Charging the battery
The battery is supplied with a partial charge. The batteries are fully charged when the lightning
icon
on the display goes out.
¤Place the handset in the charger for 14.5hours.
Please note
u The handset may only be placed in the designated Gigaset S820/S820A base or the
charger.
u The battery may heat up during charging. This is not dangerous.
u After a time, the charge capacity of the battery will decrease for technical reasons.
Registering the handset
When your handset has sufficient charge the registration
process starts. The registration screen is displayed.
Changing the display language:
Menu key v
¤Menu page Settings
¤° Language and Location ¤Display Language
¤Select language (
=selected) ¤è
´
¤Return to the registration screen: press the a key
briefly.
The registration process depends on the base:
u Automatically registering a handset on the Gigaset S820/S820A base:
¤ Place the handset in the base.
If automatic registration does not work, the handset will have to be registered manually
u Manually registering the handset:
¤ On the base: press and hold (at least 3 seconds) the registration/paging key.
¤ Press Register on the S820H handset
Or
Menu key v
Searching for a base which is in registration mode will appear on the display. This
creates a connection to the base, but it may take some time.
¤Menu page Settings ¤É HS + Base ¤Register
¤If necessary, enter the system PIN (default: 0000) ¤Confirm PIN withè.
Display during registration: Handset is registering
Display after successful registration: Handset registered
The installation wizard will start after successful registration. It helps you to perform important
basic settings.
Your handset can be registered on up to four bases. For how to use your handset on multiple
bases and de-register your handset, see your base user guide.
6 da en fi no sv
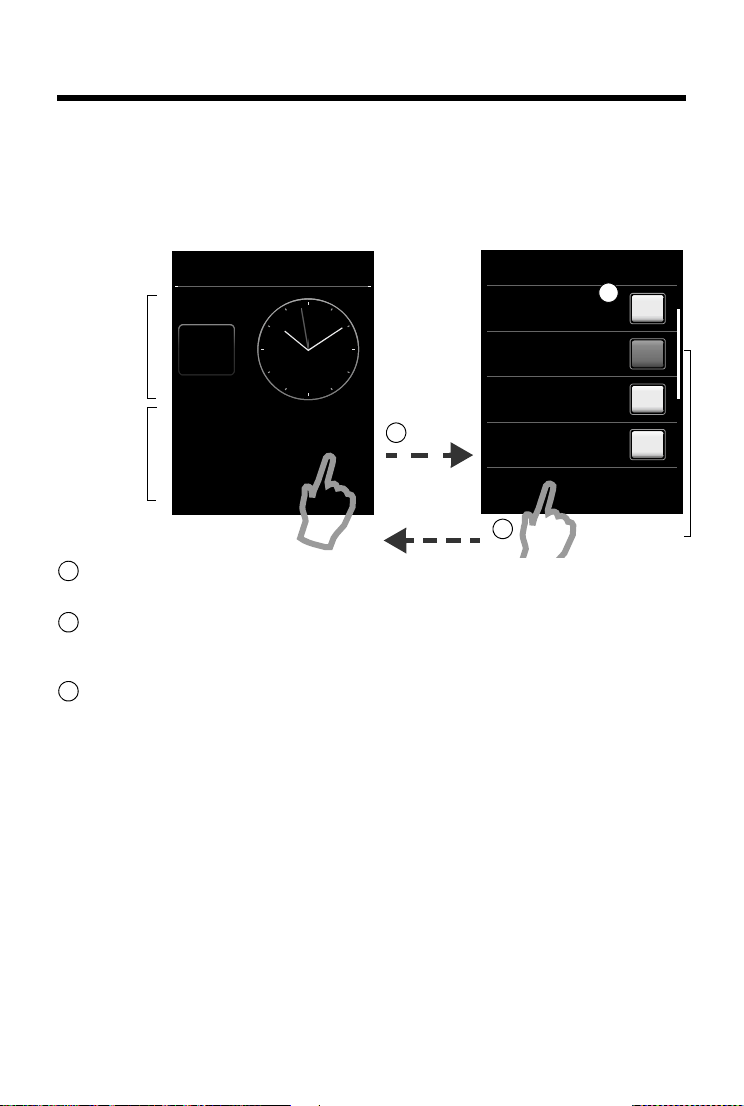
Display pages
information
area
(configurable
with a maximum of 3 elements)
Idle status Configuration mode
Show Applications
l
Time
Ù
Alarm
Calendar
Â
Contacts
L
‰‰‰
Ð
ò ôó
V
Â
˜
Application
area
(configurable
with a maximum of 6 elements)
3
1
Apr
26
Thu
Press and hold
Scroll bar
2
1
2
3
Idle display (individually customisable)
You can customise the idle display to suit your needs. Bring together the key applications you
want to start up directly from idle status with a single "touch".
Changing the idle display
Switch to configuration mode:
Press and hold (approx. 2 seconds) any free position on the configurable area on the display.
Select the desired applications/functions:
A selection bar with the available functions/applications is displayed. You can scroll through the
list to display further entries. Mark the functions/applications you want to see on the idle display.
Return to the idle display:
Tou c h
‘ or briefly touch the end call key a. Your selection is saved.
Selectable applications and functions
for the information area for the application area
m Time œ Contacts (
Ü Alarm (
} Calendar (
da en fi no sv 7
¢ page 28) — Call List (¢ page 26)
¢ page 26) ‡ Internal Call (¢ page 16)
· Write SMS (Dependent on base)
Ç Baby Phone (
T One Touch Call (
3 Call Divert and Notifications
¢ page 23)
¢ page 28)
¢ page 15)
Display pages
Display pages
Start telephone applications Edit telephone settings to suit your
requirements
"Settings"
"Applications"
Applications Settings Applications Settings
˜
Call List Contacts
Â
Write
SMS
¾
Baby
Phone
Á
CalendarAlarm
Ù
Divert
Š
1 Touch
Call
ž
Internal
Call
å
ã
Select
Services
Call Pro-
tection
System
Ï
Date +
Time
á
Language
+Location
Æ
HS +
Base
Î
Display
i
Audio
Settings
ï
Quick
Dial
í
Applications Settings
Network
Mailbox
n
Bluetooth
»
Select
Services
ã
Tele -
phony
ª
SMS
Ë
Quick
Dial
í
Call Protection
Menu pages (dependent on base)
*
Please note
The applications/settings shown here apply to operation with a GigasetS820/S820A base.
When operating with another base, not all applications/settings may be available.
Switching from the idle display to the menu page Applications and back:
¤ Briefly press the v menu key.
Switching between menu pages:
¤ Touch the desired page in the header.
Returning to the idle display from anywhere in the menu:
¤ Press the a key briefly.
If there are more elements than can be displayed at once:
A scroll bar will appear on the right of the display.
¤ Slide vertically over the display while pressing down to scroll through the display.
*Please note: applications/settings that are currently unavailable (e.g., because the handset is outside the
range of the base) are greyed out.
8 da en fi no sv

Display pages
Message Centre
Number of new messages in the list
List type (see above)
Number of old messages in the list
No new messages
Number of old messages in the list
31
119
2
[
¾
™
You rece ive d:
À
1
3
¾
™
1
Ã
2
Network mailbox
Message pop-up (example)
Messages page
The contents of the messages page and lists are dependent on the base. The image on your display may therefore differ from the user guide.
You can call up the messages page by pressing the messages key d on the keypad. You can
access the following message lists:
u 5 Network mailbox, if your network provider supports this function and the number of
the network mailbox is stored in your telephone
· SMS incoming message list
u
u Õ Missed calls list (see "Call list"
u \ Missed appointments list (
Messages page (example)
The list of missed calls is always displayed. The icon for the network mailbox is always displayed,
provided the number is stored in the telephone. The other lists are only displayed if they contain
messages.
¢ page 26)
¢ page 27)
¤ Touch an icon to open the corresponding list.
Exception: if you touch the icon for the network mailbox, your telephone will dial the number for the network mailbox (
¢ page 20). No list will open on the display.
Message pop-up
An advisory tone sounds as soon as a new entry arrives in
a list. The message key also flashes (if activated, see the
base user guide). The message pop-up is displayed and
partially covers the idle display.
The number of new messages in each list is displayed
beneath the icons.
¤ Close the pop-up: touch
¤ Open the list: touch the relevant list icon.
The messages LED flashes (if activated, see the base user
guide) until you have opened a list or the messages page.
da en fi no sv 9
(top right).
é
Display pages
Missed Calls
ý
James Foster
™ 18:30, Home
01712233445566
™ 11.06, 18:30
L
Show
all
Show
by type
Call list (example)
Ð
ò ôó
V
List entry
The following information is displayed in the list entries:
u The list type (in the header)
u Icon for the type of entry:
- Call list: ™ (Missed), › (Accepted),
š (Outgoing)
- SMS list: Œ (unread), † (read)
The icon is red for new (unread) entries.
u Caller’s number. If the caller's number is stored in the
contacts, the caller’s name and number type (Home,
Office, Mobile) is displayed instead. For missed calls,
the number of calls from this number is also shown in
square brackets.
u Date and time of call (if set).
Open the detail view: touch an entry. The display shows
all the available information. The SMS text is displayed in
the SMS incoming message list. You can delete the entry
or copy the number for the entry to the contacts (
Call back a caller from the calls list: in the detail view, briefly touch the name or number.
¢ page 25).
Please note
If you press the c key after you have opened a list, the number for the entry marked by a
green dot is dialled.
Deleting lists
You can delete the entire contents of the individual lists:
Menu key v
¤Menu page Settings ¤ÊSystem ¤Clean-up List ¤Touch the desired list
¤Touch the desired list type ¤Tou ch Ye s to confirm.
Status bar and status page
The top line in the idle display is called the status bar. It
shows the phone's current settings and operating state
(meaning of the icons,
10 da en fi no sv
¢ page 31).

Using the telephone
W
Max. Range
No Radiation
ò
Bluetooth
¹
on
off
on
W
Status page:
You can change the settings for ECO DECT (¹), and the
Bluetooth interface from the status page, depending on
the base.
¤ Touch the status bar to open the status page.
¤ Tou ch the keys to activate or deactivate components.
¤ If you touch Bluetooth, a page will open where you
can adjust the settings for that component.
¤ Touch the icon in the header or the end call/end
key a to return to the idle display.
Using the telephone
The Gigaset S820H handset has a unique operating concept. It combines the benefits of the touchscreen with those of a conventional keypad. You navigate around the menu settings and applications and activate/deactivate functions via the
touchscreen and can enter numbers and letters via the keypad.
Switching the handset on/off
¤ Press and hold the end call key a. You will hear a melody.
The handset can only be switched off when in the idle status.
Returning to idle status
¤ Briefly press the end call key a.
¤ If you do not press any key and do not touch the display, the display automatically reverts to
idle status after approximately threeminutes.
Keypad and display lock
The keypad and display lock prevents the phone being operated unintentionally. If you touch
the display when the lock is activated, nothing happens. A corresponding message will appear
if you press a key.
Activating/deactivating the keypad and display lock
¤ Press and hold key #.
If a call is signalled on the handset, the keypad/display lock automatically deactivates and you
can accept the call. The lock reactivates once the call has finished.
Activating/deactivating the automatic display lock
The display is automatically locked during a call or when listening to the answer machine to prevent inadvertent operation. You can deactivate the lock for 5 seconds to operate the telephone
via the display. The lock then reactivates.
da en fi no sv 11
Using the telephone
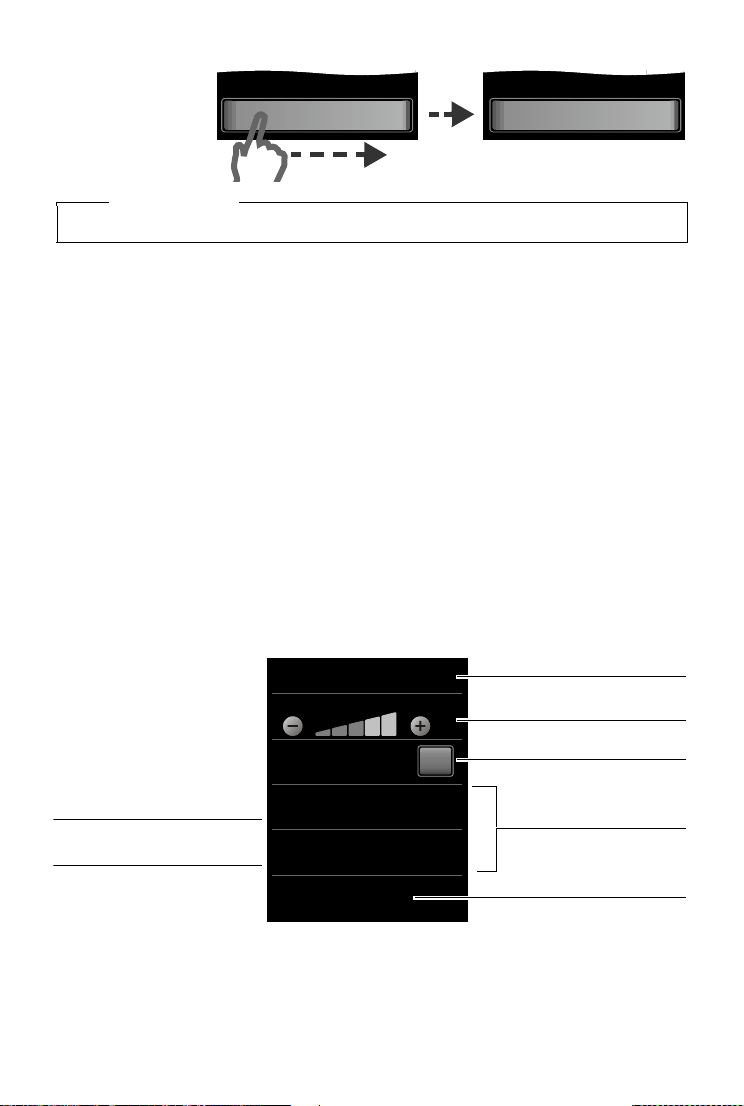
] ^
Slide to unlock
^
Unlocked
Ringtones (Handset)
Volu me
Crescendo
Internal Calls
16 Mellow
External Calls
06 Gigaset
L
off
Return to previous display
view; settings are saved
Switch:
Activate/deactivate the function
Call up submenus to adjust
settings
Func tion
Adjust setting
(touch Ó / Ô)
Current setting for
External Calls
Current setting for
Internal Calls
Examples:
To unl oc k, swipe
across the display
from left to right,
pressing down on
the bottom line.
Please note
When the keypad lock is active, you cannot call emergency numbers.
Operating the touchscreen
Icons, list entries, switches and selection areas shown on the display are touch sensitive areas.
Touching these areas allows you to set and start functions and navigate between the various display screens (pages).
Selecting functions/list entries
Touch a list entry or the corresponding icon to select the list item (contacts, submenu, call lists)
or to activate/deactivate a function.
Scrolling in lists and menus (scrolling vertically)
If there are more elements than those shown, a scroll bar appears on the right of the display. This
shows the size and position of the visible section. Slide your finger vertically over the display
while pressing down to scroll through the display.
Changing settings (UI elements)
Touch an icon on one of the menu pages to open the corresponding application/function. The
display shows the adjustable parameters and their current settings (marked orange), selection
options or switches for activating/deactivating an application/function.
12 da en fi no sv

Using the telephone
Activated/
selected
Or
Deactivated/
deselected
on
‰
off
Call
Divert
SMS
Notification
Call Divert selection field
(example)
h
Conf-
erence
Options
Options bar (example)
Edit
First N ame
Surname
L ‰
ç
James
Abc
123
;-@
Switch: switching functions on/off (activating/deactivating) or selecting functions
Touch the switch briefly to activate/deactivate or select/
deselect functions.
The function is activated or selected if the switch is orange
(text on) or light grey (
‰ icon).
Selection fields
If two or three alternative settings are available for one
parameter, these alternatives are displayed in the form of
selection fields. The current setting appears in orange.
¤ To change it, briefly touch the selection field you
require.
Opening the sub-menu to set a parameter
¤ Briefly touch the parameter field to open the submenu.
Options and options bar
Many displays have an options bar at the bottom. This displays all the actions that you can apply in the current context.
¤ Touch an option to perform the corresponding action
or touch Options to display a list of further options.
Returning to the previous display
You will see the ‘icon on many pages.
¤ Touch the icon to return to the previous display page.
Entering numbers and text
Use the keypad to enter characters.
Correcting incorrect entries
Tou c h $ briefly to delete the character, or touch and hold
$ to delete the words in front of the cursor.
Entering text
u Each key between 0 and O is assigne d several letters
and characters. The characters are displayed in a selection
line at the bottom of the screen when you press a key. The
selected character is highlighted. Briefly press the key
several times in succession to select the required letter/
character.
u The letter/characters are inserted at the cursor position. You can move the cursor by touch-
ing the desired position in the input field.
u
Abc§: switches between lower and upper case for the subsequent letters.
da en fi no sv 13

Making calls
u When editing a contacts entry, the first letter and each letter following a space is automati-
cally in upper case.
§123§: enters digits. Touch §Abc§ to return to the letter keypad (upper/lower case).
u
§;-@§ : opens table with special characters; press to insert special characters. You can enter spe-
u
cial characters (marked/diacritical characters, e.g., umlauts) by pressing the corresponding
key repeatedly; see character set tables
¢ page 40.
Making calls
Making an external call
¤ Enter the number and briefly press c.
You can cancel dialling by pressing a.
Dialling with Contacts
Menu key v ¤œContacts
¤ Scroll through the contacts until the desired entry appears.
¤ Touch the name of an entry to open the detail view
¤ Press c. The number of the entry marked with the green dot is dialled.
Or:
¤ Touch the desired number.
Dialling with the redial list
¤ Briefly press c to open the redial list.
¤ Press c. The phone dials the last dialled number (marked with a green dot).
Or:
¤ Touch an entry to open the detail view.
¤ Press c. The number of the entry marked with the green dot is dialled.
Or:
¤ Touch the desired number.
Please note
The redial list contains the last twenty numbers dialled with this handset. You can manage
them in the same way as the message lists on your telephone:
¤ Open the detail view: touch the entry. The display shows all the available information. In
the detail view, you can delete the entry or add the number to the contacts (
14 da en fi no sv
¢ page 25).

Making calls
All Calls
ý
James Foster
™ 18:30, Home
01712233445566
™ 11.06, 18:30
0168123477945
š 10.06, 17:13
L
Show
all
Show
by type
Call list (example)
Dialling from the call list
Menu key v ¤—Call List
¤ Press c. The number of the entry marked with the
green dot is dialled.
Or:
¤ Touch an entry to open the detail view.
¤ Press c. The phone dials the last dialled number
(marked with a green dot).
Or:
¤ Touch the field with the green dot.
- No entry in contacts: the number is dialled.
- Entry in contacts: detail view opens.
¤Press c. The phone dials the last dialled number
(marked with a green dot).
Or:
¤Touch the desired number.
Please note
If you have new messages you can also open the call list via the message pop-up or the
message page.
One touch call
You can set your phone to dial a previously stored number when you touch any key.
Menu key v
¤TOne Touch Call
¤ Tou c h f. Enter the number you wish to call or edit a stored number.
¤ Activate one touch call with on. If no number has been saved yet, the menu for entering a
number is opened. The one touch call function appears on the display when it is activated.
Exit one touch call mode: press and hold # key.
Configuring/selecting QuickDial
Prerequisite: the contacts must contain at least one number.
Menu key v
If no numbers have been saved:
¤ Contacts opens ¤ select a number
If a number has already been saved:
¤Delete the number:
Or:
¤ Change the number: Edit ¤ contacts opens ¤ select a number
Select number: press and hold the corresponding key in idle status.
If you change/delete a number from the contacts, the same number is automatically deleted
from the QuickDial list.
da en fi no sv 15
¤Menu page Settings ¤¥QuickDial ¤Touch the desired QuickDial key.
Please note
þ
.

Making calls
Accepting a call
You have the following options:
¤ Press c.
¤ If Auto Answer is activated (¢ page 18), remove the handset from the charger.
Accepting/rejecting call waiting
If you receive a call during a conversation, you will hear a call waiting signal and see a corresponding message on the display. For further information, please refer to your base user guide.
Call display
The default setting on your phone is set to display the caller's number. If the caller's number is
saved in your contacts, the number ty pe and nam e will also be displaye d. If you have assigned a
picture to the caller's number (
requested or withheld Calling Line Identification you will see External, Withheld or Unavailable
in the display.
Information on CLIP
¤ www.gigaset.com/service
¢ page 23), it also appears on the display. If the caller has not
Making internal calls
Internal calls to other handsets registered to the same base are free of charge.
Menu key v
Handsets (group call).
After opening the list, press c to initiate a group call to all handsets.
¤‡ Internal Call ¤if necessary, select a handset from the list or touch All
Internal consultation/internal transfer
You are speakin g with an external participant and want to consult an internal participant or
transfer the call to him.
¤ Consultation ¤Internal ¤If more than two handsets are registered to the base, select one
handset or All.
Consulting: you consult the internal participant and return to the external call:
Transferring the external call: you have two options to transfer the external call:
¤press End.
¤ You wait until the participant answers your call ¤press a.
Or:
¤ Press a before the participant answers.
If the other participant does not answer your call, press End to cancel the consultation call.
Call swapping/establishing a conference call
You are engaged in one conversation whilst another one is on hold. Both participants appear in
the display.
¤ Call swapping: on the display, touch the participant with whom you wish to speak.
Or:
¤ Establishing a three-way conference: touch Conference.
Ending the conference: touch End Conf.. You return to "call swapping" and are again connected to the participant with whom you initiated the conference.
16 da en fi no sv

Changing phone settings
Each of the callers can end their participation in the conference call by pressing the end call key
and terminating the call.
Speaker
If you are going to let someone listen in, you should tell the other party that this is happening.
Activating handsfree mode while dialling
¤ Enter the number, press c twice.
Switching between earpiece and handsfree mode
During a call, when establishing a connection and when listening to the answer machine
(depending on the base):
¤ Press c.
Place the handset in the charger during a call:
¤ Press and hold the c key while placing the handset in the charger and hold for a further
2seconds.
Changing the earpiece, handsfree and headset volume
Use the side keys
piece, headset) during a call. The current setting appears on the display
saved automatically after approximately 2 seconds and the display returns to the previous
screen.
Ó (¢ page 1) to adjust the volume for the current mode (handsfree, ear-
Ô /
e. The setting is
Activating/deactivating the microphone (muting)
If you turn the microphone off during a call, your caller can no longer hear you.
¤ Tou c h– to switch the microphone on and off.
Changing phone settings
Your handset comes with default settings. You can change settings individually during a call or
in idle status via the menu page Settings.
Changing the display language
Menu key v ¤Menu page Settings ¤° Language and Location ¤Display Language
¤Select language (
Setting the country and your own area code
Menu key v ¤Menu page Settings ¤° Language and Location.
da en fi no sv 17
=selected) ¤è
´

Changing phone settings
Screensaver
Activation
Selection
Analogue Clock
L
on
Changing the handset name
When you register multiple handsets the names "INT 1",
""INT 2" etc. are assigned automatically. To change the name:
Menu key v
¤Menu page Settings ¤É HS + Base
¤ Changing the name of the handset in use: touch This Handset or
Changing the name of a different handset: Tou ch Registered Handsets
¤Select handset
¤Touch the name you want to change.
¤ Delete the old name with $ and enter the new name (max. 10 alphanumerical characters)
¤Confirm with è.
Setting the screensaver/Slideshow
Choose between an analogue clock/digital clock/picture/
slideshow. You can load pictures onto your handset using
the Gigaset QuickSync (
To show the idle display again, briefly press a or the dis-
play.
Menu key v
¤Menu page Settings
¢ page 30) software.
¤gDisplay ¤Screensaver
- Use the switch to activate/deactivate the screensaver.
- Select the screensaver:
¤Selection ¤Use ê or ë in the header to browse
through the selection
back without saving.
¤Select or touch ‘ to go
Setting the display backlight
The display backlight lights up as soon as you press a key, touch the display or remove the handset from the base/charger. You can specify the period of time in idle status after which the display backlight is switched off. If no period is set, the display is permanently dimmed.
Menu key v
The handset’s standby time can be significantly reduced if the display backlight is activated.
¤Menu page Settings ¤gDisplay ¤Backlight
Please note
Activating/deactivating auto answer
With auto answer, the handset accepts an incoming call as soon as you take it from the charger.
Menu key v
The connection is terminated as soon as you return the handset to the charger, regardless of the
Auto Answer setting. Exception: you press c when returning the handset to the charger and
hold it for two more seconds when it is in place.
18 da en fi no sv
¤Menu page Settings ¤«Telephony ¤Auto Answer on/off

Changing phone settings
Ringtones (Handset)
Volu me
Crescendo
Internal Calls
16 Mellow
External Calls
06 Gigaset
L
off
Setting ring tones
Setting volume, melody
Menu key v ¤Menu page Settings ¤ìAudio Settings ¤Ringtones (Handset)
Ring tone volume for all calls
¤ Tou c h Ô / Ó, several times if necessary, to adjust the
volume.
Or
¤ Activate/deactivate the crescendo ring tone (increas-
ing volume) with the Crescendo switch.
The activated crescendo only applies to ring tones. It does
not affect how a melody is played back.
Setting the ring tone for external/internal calls
¤ Internal Calls/External Calls ¤Select the ring tone
¤Go back with ‘.
You can load additional ring tones onto your handset
using the Gigaset QuickSync (
¢ page 30) software.
Activating/deactivating the ring tone
¤ Perma nently activate/deactivate the ring tone: press and hold the star key *.
When the ring tone is deactivated, ”appears in the status bar.
¤ Deactivate for the current call: Silence
Activating/deactivating the alert tone
You can activate an alert tone instead of the ring tone.
¤ Press and hold the star key * and within 3 seconds ¤Beep.
When the alert tone is activated, ¯appears in the status bar.
¤ Press and hold the star key * to deactivate the alert tone.
Activating/deactivating advisory tones
Your handset uses advisory tones to tell you about different activities and statuses. These advisory tones can be activated/deactivated independently of each other.
Menu key v
Restoring handset to default settings
You can reset individual settings.
Menu key v
The following are not affected by the reset:
u Date and time
u Registrations of handsets to the base and the current base selection
u System PIN
u Entries in the calendar and contacts
da en fi no sv 19
¤Menu page Settings ¤
¤Menu page Settings ¤ÊSystem ¤Resets ¤Handset Reset
Audio Settings ¤Advisory Tones
ì

ECO DECT
New messages
(if your network provider supports this
function)
1
1
4
u Redial list
u Stored external and internal destination numbers for the baby phone (Forward alarm to is
reset to External)
u Destination number for call divert.
Resetting the handset (Handset Reset) deletes your settings for the configurable page
¢ page 7) and your audio and display settings.
(
ECO DECT
ECO DECT indicates low energy consumption and reduced transmission power.
Reducing energy consumption
Your telephone has a power-saving adapter plug and uses less power.
Reducing radiation (dependent on base)
The radiation can only be reduced if your base supports this function.
The telephone's transmission power is automatically reduced depending on the distance to the
base.
You can reduce the radiation from the handset and the base even more by doing the following:
u Deactivate Max. Range
u Activate No Radiation.
For further details, please refer to your base user guide.
Network mailbox
You can only use the network mailbox if you have requested it from your provider and saved the
network mailbox number in your phone.
Menu key v
¤Menu page Settings ¤
Network Mailbox
¶
¤ Enter the number of the network mailbox: Access Number ¤Enter the number for the net-
work mailbox
¤ Tou ch è to confirm.
¤ Activate/deactivate the network mailbox using the switch (if your network p rovider supports
this function).
After saving the phone number, the following
icon is displayed on the message page:
Playing back network mailbox messages
¤ Message key d ¤
Or:
5
.
¤ Press and hold key .
Your network mailbox is called directly. You can listen to the messages.
20 da en fi no sv

Bluetooth devices
Bluetooth
Activation
Search for Devices
Known Devices
Name
James’ Borneo
L
on
Bluetooth devices
You can register up to five data devices (PC, PDA, mobile phones) and one Bluetooth headset.
You must activate Bluetooth on the handset, ensure the devices are visible if necessary and then
register the handset.
You can exchange contacts entries using the data devices and load ring tones and pictures to
the handset using the Gigaset QuickSync software (
Please note
u A headset must have the headset or handsfree profile. The handsfree profile is pre-
ferred.
u Establishing a connection to a headset can take up to 5seconds.
Activating/deactivating Bluetooth mode
You can activate/deactivate Bluetooth mode using the status page (
Menu key v
¢ page 10) or via
¤Menu page Settings ¤³Bluetooth
¤Activation on/off
If Bluetooth is activated:
u ³ is displayed in the status bar (
u The handset can communicate with all devices in the
Known Devices list.
u The handset is visible to Bluetooth devices within its
range.
u If the known devices include a headset, the handset
establishes a connection to this headset.
¢ page 31)
¢ page 30).
Finding and registering (trusting) Bluetooth devices
The distance between the handset and the activated Bluetooth device should be a maximum
of 10m.
Please note
u If you register a headset, any previously registered headset is overwritten.
u If a headset is already registered to another device, please deactivate this connection
before starting the registration process.
Starting the search
¤ Start the search via Search for Devices in the Bluetooth sub-menu
The handset searches for Bluetooth devices within its range. Located devices are added to the
Devices Found list.
Trusting the device - adding the device to the known devices list
¤ Select the device in the Devices Found list ¤Trust Device ¤I f necessary, enter the PIN of the
device you want to pair and touch è to confirm
da en fi no sv 21

Bluetooth devices
u PIN for a data device: enter any PIN on the handset and then also on the data device.
PIN for a headset: 0000 is generally preset. Therefore, you only need to enter the PIN in
exceptional cases.
u If Known Devices already contains six entries, the last entry is overwritten. Exception: a
headset only overwrites a headset.
Ending the search
¤ Use ‘ to exit the Devices Found list or touch Stop Search.
Editing the list of paired (trusted) devices
A ô next to the device name in the list indicates a headset and = indicates a data device.
¤ Open the Known Devices list ¤Select device ¤View device information
¤Touch ü to delete the device ¤Touc h Ye s to confirm
Or:
¤ Tou ch the Name field ¤Change the name and touch è to confirm.
Rejecting/accepting an unregistered Bluetooth device
If an unknown Bluetooth device tries to establish a connection, you will be asked to enter the
device's PIN (bonding).
¤ Reject: touch ‘ or a.
Or:
¤ Accept: enter device PIN ¤Press è to confirm.
¤Yes : add to the Known Devices list or
¤No: use the device temporarily
Changing the handset's Bluetooth name
Menu key v ¤Menu page Settings ¤³Bluetooth ¤Own Device (If Bluetooth is
deactivated, it will be activated.)
previous name
¤Enter new name ¤Tou ch è to confirm.
¤Touch the name ¤If necessary, use ç to delete the
Continuing a handset call on the Bluetooth headset
Prerequisite: Bluetooth is activated; the Bluetooth headset and the handset are connected.
¤ Press the talk key on the headset.
It may take up to 5 seconds to establish a connection to the handset.
Use the side keys (
For further details about your headset, see the accompanying user guide.
Accepting a call on a Bluetooth headset
Prerequisite: Bluetooth is activated; the Bluetooth headset and the handset are connected.
Only press the talk key on the headset once the headset rings.
For further details about your headset, see the accompanying user guide.
22 da en fi no sv
¢ page 1) to adjust the volume.

Contacts (address book)
New Entry
Add Name
Add Number
Add eMail
Add Ringtone
L
Save
Contacts (address book)
You can save up to four numbers, together with first names and surnames, eMail addresses,
birthdays/anniversaries with signalling, VIP ring tone and caller picture in one contacts entry.
You can synchronise the contacts with the Outlook contacts in your PC address book and upload
ring tones and pictures to your handset (
You can create the contacts (with up to 500 entries) individually for each of your handsets. You
can also send lists/entries to other handsets (
Opening the contacts
Menu key v ¤œContacts or during a call, depending on the situation,
œ or Options ¤Contacts
Creating a new entry
¤ Open the contacts.
If no entries have been created yet
¤New Entry, otherwise
¤Options ¤New Entry
¤ Enter the components of each entry via the input fields.
Where necessary, scroll down to see additional components.
To create an entry, you must enter at least one number.
Input in the eMail field: pressing the 0 key multiple times
allows you to enter frequently used characters: @. - 0 _
If available, confirm each entry with è. Touch
menu without saving (exceptions: ring tone and caller picture).
The first number in each entry is automatically highlighted
in green (
ý). This number is used when you open the contacts entry and press the talk key.
¤ Tou c h Save
¢ page 30).
¢ page 24).
‘ to exit the
Viewing an entry (detail view)
¤ Open contacts ¤Touch the desired entry.
Editing entries
¤ Tou c hN.
u Change/delete first name, surname, number or eMail address: Touch the entry
essary, touch the relevant field
data
¤Confirm withè. Touch ‘ to exit the menu without saving.
u Delete a caller picture or ring tone assignment: touch the relevant entry
Ringtone
u Delete a birthday: touch the Birthday field
da en fi no sv 23
¤Delete data by touching ç ¤Where necessary, enter new
¤
þ
¤Where nec-
¤No Picture/No

Contacts (address book)
Deleting an entry
¤ In the detail view: Options ¤Delete ¤Touch Yes to confirm
Delete all contacts entries:
Menu key v
¤Menu page Settings ¤ÊSystem ¤Clean-up List¤Contacts
¤Delete all contact entries ¤Tou ch Ye s to confirm.
Displaying the number of entries that are still available in the contacts
¤ Open the contacts ¤Options ¤Memory
Defining the order of the contacts entries
You can define whether the entries are to be sorted by first name or surname.
Menu key v
If no name was entered, the number with the green dot is copied to the surname field. These
entries appear at the beginning of the list, regardless of how the entries are sorted.
The sort order is as follows:
Space | Digits (0-9) | Letters (alphabetical) | Other characters.
Selecting a contacts entry, navigating in the contacts
If there are more than four entries in your contacts, a scroll bar appears on the right-hand side.
You have the following options:
u Scroll to the name you are searching for.
u Enter the first letter of the name via the keypad.
Transferring an entry/contacts to another handset
¤œContacts ¤Press First Name or Sort by Surname.
Prerequisites:
u The sending and receiving handsets must both be registered to the same base.
u The other handset and the base can send and receive contacts entries.
Please note
u An external call will interrupt the transfer.
u Caller pictures and sounds are not transferred. For a birthday, only the date is transferred.
u When transferring an entry between two vCard handsets:
If the recipient does not yet have an entry with that name, a new entry is created.
If there is already an entry with that name, this entry is expanded with the new numbers.
Where there are more than eight numbers in total, a second entry is created with the
same name.
u If the recipient is not a vCard handset: an entry is created and sent for each number.
u Your handset receives entries from a non-vCard handset: entries with numbers already
saved are rejected; otherwise a new entry is created.
24 da en fi no sv

Contacts (address book)
Transferring individual entries
¤ Open the detail view for the entry (¢ page 23) ¤Options ¤Copy ¤Internal Handset
¤Select the recipient handset.
After a successful transfer:
¤ Tou c h Yes if another entry is to be sent. Otherwise, touch No.
Transferring the entire contacts
¤ Open the contacts (¢ page 23) ¤Options ¤Copy List ¤Internal Handset
¤Select the recipient handset.
Transferring the contacts as a vCard with Bluetooth
Entire contacts:
Menu key v
Or:
Single entry:
Menu key v
¤œContacts ¤Options ¤Copy List
¤œContacts ¤Open the detail view for the entry ¤Options ¤Copy
¤ Answer the prompt with Bluetooth Device. Bluetooth is activated, if necessary.
¤ Select the recipient from the Known Devices (¢ page 22) list or touch Search and select the
recipient from the Devices Found list. Enter the recipient’s PIN and touch è.
Receiving a vCard with Bluetooth
Prerequisite: the handset is in idle status. Bluetooth is activated.
¤ If the sender is in the Known Devices list (¢ page 22), receipt occurs automatically.
¤ If the sender is not in the Known Devices list, enter the sender’s device PIN and touch è.
Following the vCard transfer, state whether the device should be added (Ye s ) to the Known
Devices list or not (No).
Adding a displayed number to the contacts
You can copy numbers that are displayed in a list, e.g., the call list, the redial list or in an SMS, as
well as numbers that you have just dialled or entered for dialling, to the contacts.
¤ Touch the desired number ¤Press ¬.
¤New Entry: the number is copied as the first number of the entry with number type Home
Or:
¤Select entry and
- Add number:
Or:
- Overwrite number:
Copying a number from the contacts
In certain operating situations you can open the contacts to copy a number, e.g., to send an SMS
or when you are dialling (even after you have entered a suffix).
¤touch Add
¤Select required number ¤Press Yes .
¤ Depending on the operating situation, open the contacts with œContacts or œ.
¤ Touch a contacts entry ¤ Touch the number you want to copy.
da en fi no sv 25

Call list
Missed Calls
ý
James Foster
™ 18:30, Home
01712233445566
™ 11.06, 18:30
L
Show
all
Show
by type
Call list (example)
f
August 2012
g
M T W T F S S
1 2 3 4 5
6 7 8 9 10 11 12
13 14 15 16 17 18 19
20 21 22 23 24 25 26
6
06. August 2012
Tex t
Meeting
Time
16:00
Reminder
0 min.
Sound Signal
L
Save
on
f
g
Call list
Your telephone stores various types of calls.
¤ Open the call list via the messages page (¢ page 9)
or message pop-up (
Calls list.
¢ page 9); open the Missed
¤ Open the call list via the Applications menu page;
open the full list of all calls.
You can display a different call list. Select Show all or
Show by type.
Calendar
You can remind yourself of up to 30 appointments. Birthdays in the contacts are transferred to the calendar.
The current date is highlighted in white in the calendar.
Days with appointments are marked with a coloured bar.
When you select a day, it is briefly highlighted in colour.
Saving appointments to the calendar
Prerequisite: the date and time have already been set.
Menu key v
¤ Set the month using / ¤Touch the desired day
¤New Entry
The following information can be added:
- Tex t : Name for the appointment (e.g., dinner, meet-
- Time: Time (hour and minutes) for the appoint-
- Reminder: You can set a reminder for up to one
- Sound Signal: Use the key to activate/deactivate
¤ Tou c h Save
26 da en fi no sv
¤}Calendar
ing).
ment.
week in advance of the appointment.
the sound signal.

Calendar
Number of new messages
2
1
[
Number of old
entries
Setting the tones and volumes of the reminder signal
Menu key v ¤Menu page Settings ¤ìAudio Settings ¤Reminder Signal
¤ Set the volume using Ô / Ó or set increasing volume using the switch next to Crescendo.
¤ Sound ¤Select the ring tone ¤Go back with ‘.
Signalling appointments and birthdays
An appointment/birthday is displayed in idle status and signalled for 60 seconds with the
selected ring tone and volume.
You can deactivate the reminder call and respond with an SMS:
¤ Tou c h Off to acknowledge and end the reminder call.
Or:
¤ Tou c h Write SMS. The SMS editor is opened.
When you are on the phone, a reminder call is indicated on the handset with a single advisory
tone.
Displaying unacknowledged appointments/birthdays
The following appointments and birthdays are saved in the Reminders / Events list:
u The appointment/birthday reminder was not acknowledged.
u The appointment/birthday was signalled during a phone call.
u The handset was deactivated at the time of the appointment/birthday.
The last 20 entries are displayed.
The Reminders / Events list is displayed on the
messages page (
¢ page 9) with an icon.
¤ Open list: touch message key d to open
the messages page, then touch \.
Showing/deleting stored appointments
Menu key v ¤}Calendar ¤Touch the desired day to display the appointments list
¤Touch the desired appointment ¤Delete appointment
Delete all missed appointments:
Menu key v
¤Menu page Settings ¤ÊSystem ¤Clean-up List¤Appointments
or select, edit and save the entry.
þ
¤Delete all past appointments ¤Touc h Yes to confirm.
da en fi no sv 27

Alarm
Alarm
Time
07:10
Active Days
Mon Tue Wed Thu Fri
Sound
03
L
Save
Alarm
Prerequisite: the date and time have already been set.
You can activate/deactivate and set the alarm as follows:
Menu key v
¤ Tou c hN to change the settings for the alarm:
- Time
- Active Days
- Sound
¤ Tou c h Save and confirm the security prompt.
A wake-up call is signalled in the display and with the
selected ring tone for a maximum of 60seconds. During a
call, the wake-up call is only signalled by a short tone.
Please note
The wake-up call volume increases over time (fixed setting).
Deactivating the wake-up call/repeating after a pause (snooze mode)
¤ Deactivate the wake-up call: touch Off.
¤ Snooze mode: touch Snooze. The wake-up call is deactivated and then repeated after 5 min-
utes. After the second repetition the wake-up call is deactivated for 24 hours.
¤Ü Alarm ¤on/off
¤Set the hour and minute for the wake-up
time
¤Set the days when you want the
alarm to ring
¤Select a ring tone for the wake-up call
Baby phone
When the baby phone is switched on, the stored (internal or external) destination number is
called as soon as a defined noise level is exceeded in the vicinity of the handset.
The baby a larm call to an ex ternal number is cancelled after approximately 90 seconds. The talk
and menu keys are locked when the baby monitor is activated. The handset's speaker can be
switched on or off using the Two Way Tal k function. If two way talk is activated, you can respond
to the baby alarm.
When baby phone mode is activated, incoming calls are only indicated on the display (without
a ring tone). The display backlight is reduced to 50%. Advisory tones are deactivated.
If you accept an incoming call, the baby phone mode is suspended for the duration of the call,
but the function remains activated. The baby phone is not deactivated by switching the handset
off and on again.
28 da en fi no sv

Baby phone
Caution
u Please check the functionality when you switch on. For example, test its sensitivity.
Check the connection if you are diverting the baby phone to an external number.
Please note that the baby monitor is only activated 20 seconds after being switched
on.
u Activating the function reduces the operating time of your handset. If necessary, place
the handset in the charger.
u The handset should be positioned 1 to 2 metres away from the baby. The microphone
must be pointed towards the baby.
u No answer machine may be activated at the destination number.
Changing the settings
Menu key v ¤ÇBaby Phone ¤ Set f ¤Forward alarm to (Internal or External), Two
Way Talk on/off, Sensitivity (High or Low)
u Internal: select the internal handset from the list.
u External: enter the destination number
¤Save
¤ Confirm with è.
Activating/deactivating the baby phone
¤ Activate: menu key v ¤
Baby Phone ¤on
Ç
¤ Deactivate: deactivate the switch on the idle display.
Cancelling/deactivating the baby phone call
To cancel a baby phone call: touch a.
Deactivating the baby monitor remotely
Prerequisite: the baby alarm is diverted to an external destination number. The recipient’s
phone supports tone dialling.
¤ Accept the baby alarm call and touch the 9 ; keys.
The call is ended. The baby phone is deactivated and the handset is in idle status.
da en fi no sv 29

Synchronising with your PC (Gigaset QuickSync)
Synchronising with your PC (Gigaset QuickSync)
You can:
u Synchronise your handset's directory with your Google contacts online via the cloud.
u Synchronise the contacts on your handset with your PC’s Outlook contacts.
u Load caller pictures to the handset from the PC.
u Download pictures as a screensaver from the PC to the handset.
u Download sounds (ring tones) from the PC to the handset.
u Make outgoing calls and accept incoming calls. The display on the handset behaves in the
same way as if the call were being handled directly on the handset.
u Update the firmware of your Gigaset S820 handset (via USB only).
To enable your handset to communicate with a PC, the "Gigaset QuickSync" program (Version
7 or higher) must be installed on your PC (free download and more information at
www.gigaset.com/gigasets820
and handset (
¢ page 1) via Bluetooth (¢ page 21) or USB.
Please note
u Firmware can only be updated via a USB connection.
u If the USB data cable is plugged in, a Bluetooth connection cannot be established. If it is
plugged in during an existing Bluetooth connection, this is cancelled.
A detailed description can be found in the Gigaset QuickSync help file.
). You can use this program to create a connection between PC
30 da en fi no sv

Display icons
Ð
White if
Maximum Range
is on;
green if
Maximum Range
is off
}
iÑÒ¹¹
ò
ò ô
ó
€
Þ
Display icons
Options bar icons
The following functions are available in the options bar depending on the operating situation:
Icon Action
‘
–
– (orange) Unmute handset microphone
—
œ
¬
Return to the previous display
Mute handset microphone
Open call list
Open the contacts
Save number to contacts
Icon Action
þ
è
f
Delete
Save/select
Edit entry, enter new appointment
Please note
The menu icons can be found in the
menu overview on page 33.
Icons in the status bar
The following icons are displayed in the status bar depending on the settings and the operating
status of your telephone:
Icon Meaning
Signal strength (No Radiation off)
76%–100%
51%–75%
26%–50%
1%–25%
Red: no connection to the base
No Radiation activated:
white if Maximum Range is on;
green if Maximum Range is off;
Bluetooth activated or
Bluetooth headset/data device
connected
Ring tone deactivated
"Beep" ring tone activated
USB connection active
Icon Meaning
Battery charge status:
{
{
y
y
y
xy 0%–10%
xy 11%–33%
x{ 34%–66%
x{ 67%–100%
White: charged over 66%
White: charged between 34% and
66%
White: charged between 11% and
33%
Red: charged below 11%
Flashing red: battery almost empty
(less than 10 minutes talk time)
Battery charging
(current charge status):
da en fi no sv 31

Display icons
š
<
b
Ø
w
Ú
Ø
Ù
Ú
Ø
ð
Ú
Ø
á
Ú
+
-
Ž
‰
,
À
Signalling display icons
Establishing a connection (outgoing call)
Connection
established
Connection cannot be
established/connection terminated
Internal/external
call
Other display icons
Information
Action complete
(green)
Alarm call Birthday reminder call
Reminder call for appointment
(Security)
prompt
Warning Action failed
Please wait...
(red)
32 da en fi no sv

Setting options
Date +
Time
á
Audio
Settings
ï
Display
i
Language
+Location
Æ
HS +
Base
Î
System
Ï
Open the Settings menu page:
¤ Briefly press menu key v when the handset is in idle mode.
¤ Press Settings in the header.
Please note
Not all of the functions described in this user guide are available in all countries.
Time
Time Format 12 hrs/24 hrs
Date
Date Order Day Month Year/Month Day Year
Ringtones (Handset) Volume page 19
Crescendo page 19
Internal Calls page 19
External Calls page 19
Reminder Signal Volume page 27
Crescendo page 27
Sound page 27
Advisory Tones Confirmation page 19
Key Click page 19
Battery Warning page 19
Music on Hold (Dependent on base)
Screensaver Activation page 18
Selection page 18
Backlight In Charger page 18
Out of Charger page 18
Timeout page 1 8
Display Language page 17
Country page 17
Area (Dial Code) page 17
This Handset
Register/De -register page 6
Registered Handsets
Connect to Base Base 1
:
Base 4
Best Base
(Dependent on base)
Setting options
da en fi no sv 33

Setting options
ã
Select
Services
Call Pro-
tection
Quick
Dial
í
Tele -
phony
ª
SMSËBlue-
tooth
»
Network
Mailbox
n
(Dependent on base)
(Dependent on base)
Key 2 page 15
:
Key 9
Auto Answer page 18
(Further menus dependent on base)
(Dependent on base)
Activation page 21
Search for Devices page 21
Known Devices page 22
Own Device page 22
Access Number page 20
Activate/Deactivate (Dependent on your network provider) page 20
34 da en fi no sv

Customer Service & Assistance
Australia - - - - - - - - - - - - - - - - - - +61 1300 780 878
Austria - - - - - - - - - - - - - - - - - - - - -0043 1 311 3046
Bahrain - - - - - - - - - - - - - - - - - - - - - - - - 31 73 11 173
Belgium - - - - - - - - - - - - - - - - - - - - - - - -07815 6679
Bosnia Herzegovina - - - - - - - - - - - - - - 033 276 649
Brazil
Grandes Capitais e Regiões Metropolitanas:
- - - - - - - - - - - - - - - - - - - - - - - - - - - - - - - -4003 3020
(Preço de uma ligação local)
- - - - - - - - - - - - - - - - - - - - - - - - - Demais localidades:
- - - - - - - - - - - - - - - - - - - - - - - - - - - - 0800 888 3020
(Gratui to)
Bulgaria - - - - - - - - - - - - - - - - - - - - +359 2 9710666
Canada - - - - - - - - - - - - - - - - - - - - - 1-866 247-8758
China - - - - - - - - - - - 0 21 400 670 6007 (RMB 0.11)
Croatia - - - - - - - - - - - - - - - - - - - - - - - 01 / 2456 555
Czech Republic - - - - - - - - - - - - - - - - - - 233 032 727
Denmark- - - - - - - - - - - - - - - - - - - - - +45 43682003
Finl and - - - - - - - - - - - - - - - - - -+358 (0)9725 19734
Fran ce- - - - - - - - - - - - - - - - - - - +33 (0)157 324 522
Germany- - - - - - - - - - - - - - - - - - - - - 01805 333 222
Greece - - - - - - - - - - - - - - - - - - - +30 2111 98 1778
Hong Kong - - - - - - - - - - - - - - - - - - - - - - -2763 0203
- - - - - - - - - - - - - - - - - - - - - - - - - - - - - - - - -2389 7285
Hungary - - - - - - - - - - - - - - - (06-1) 267 2109 (27 Ft)
India - - - - - - - - - - - - - - - - - - - - - -Please refer to your
- - - - - - - - - - - - - - - - - - - - - - - - - -local warranty card
Indonesia - - - - - - - - - - - - - - - - - - - (62-21) 5673813
- - - - - - - - - - - - - - - - - - - - - - - - (62-21) 888856000
Ireland - - - - - - - - - - - - - - - - - - - +353 818 200 033
Italy- - - - - - - - - - - - - - - - - - - - - - - - - - 199.15.11.15
(€ cent 8,36 + IVA al minuto da telefono fisso della rete
Telecom Italia senza scatto alla risposta mentre per le
chiamate effettuate attraverso la rete di altri operatori
fissi o mobili consultate le tariffe del vostro operatore)
Jordan- - - - - - - - - - - - - - - - - -00962 6 5625460/1/2
Kuwait - - - - - - - - - - - - +965 -22458737/22458738
Lebanon - - - - - - - - - - - - - - - - - - - - - +9611240259/
- - - - - - - - - - - - - - - - - - - - - - - - - - - - -+9611236110
Luxembourg- - - - - - - - - - - - - - - - (+352) 8002 3811
Malaysia - - - - - - - - - - - - - - - - - - - -+603-8076 9696
Malta - - - - - - - - - - - - - - -+39 02360 46111 (0,10 €)
Mexico
- - - - - 01800 999 4442738 (01800 999 GIGASET)
Netherlands - - - - - - - - - - - - - - - - - - 0900-3333102
New Zealand - - - - - - - - - - - - - - - - - - 0800 780 878
Norway- - - - - - - - - - - - - - - - - - - - - - +47 2231 0845
Oman - - - - - - - - - - - - - - +968 70928 Ext. 49/21/75
Polan d - - - - - - - - - - - - - - - - - - - - - - - - 801 140 160
Port ugal+351 808 788 877 (custo de uma chamada
local)
Romania- - - - - - - - - - - - - - - - - - - +40 021 204 9130
Russia - - - - - - - - - - - - - - - - - - - 810-800 2582 1044
Serbia- - - - - - - - - - - - - - - - - - - - - - - - 0800 222 111
Singapore- - - - - - - - - - - - - - - - - - - - - - - - 6735 9100
Slovak Republic - - - - - - - - - - - 044 5567 988 alebo
- - - - - - - - - - - - - - - - - - - - - - - - - - - - - -02 59682266
Slovenija- - - - - - - - - - - - - - - - - - - - - - - 01 5466 511
South Africa - - - - - - - - - - - - - - - - - - - 0800 98 08 42
Spain -
- - - - - - - - - - - - - - - - - - - - - - - - - 902 103935
Sweden - - - - - - - - - - - - - - - - - - +46 (0)8502 52347
Switzerland - - - - - - - - - - - - - - - - - - - 0848 212 000
Tai wa n - - - - - - - - - - - - - - - - - - - - - - - 02 266 24343
Tur key - - - - - - - - - - - - - - - - - - - - +90 2121 3103 17
Ukraine- - - - - - - - - - - - - - - - - - +380-44-451-71-72
United Arab Emirates - - - - - - - - - - - +97144458255
- - - - - - - - - - - - - - - - - - - - - - - - - - - - +97144458254
United Kingdom- - - - - - - - - - - - - +44 84503 18190
USA - - - - - - - - - - - - - - - - - - - - - - - 1-866 247-8758
- - - - - - - - - - - - - - - - - - - - - - - - - - - - - - - - - - - tollfree
Customer Service & Assistance
Do you have any questions? As a Gigaset customer, you can find help quickly in this User Manual and in the
service section of our Gigaset online portal www.gigaset.com/service
Please register your phone online right after purchase.
This enables us to provide you with even better service regarding questions or a warranty claim. In order to
contact our customer service via email, please use the email contact form from our Gigaset online por tal after
selecting your home country.
Our representatives are also available on the telephone hotlines for consultation.
Please have your record of purchase ready when calling.
Replacement or repair services are not offered in countries where our product is not sold by
authorised dealers.
da en fi no sv 35
.

Customer Service & Assistance
Questions and answers
If you have any queries about the use of your telephone, suggested solutions are available on
the Internet at www.gigaset.com/service
The table below also lists steps for troubleshooting.
Registration or connection problems with a Bluetooth headset.
¤FAQ ¤First steps for troubleshooting.
¥ Reset the Bluetooth headset (see the user guide for your headset).
¥ Delete registration data from the handset when de-registering the device (¢page 22).
¥ Repeat the registration process (¢ page 21).
There is nothing on the display and the display does not react when you touch it.
1. The handset is not activated.
¥ Press and hold a.
2. The battery is flat.
¥ Charge or replace the battery (¢ page 5).
3. The keypad and display lock is activated.
¥ Press the hash key # and hold.
The display flashes
1. The handset is outside the range of the base.
"Base connection lost - Searching for base ...".
¥ Move the handset closer to the base.
2. The base is not activated.
¥ Check the base charger cradle.
3. The base’s range is reduced because Eco Mode is activated.
¥ Deactivate Eco Mode (¢ page 20) or reduce the distance between the handset and the base.
The display flashes
The handset has not yet been registered or was de-registered because an additional handset was registered
(more than six DECT registrations).
"Handset not registered to any base".
¥ Register the handset again (¢ page 6).
The handset does not ring.
1. The ring tone is deactivated.
¥ Activate the ring tone (¢ page 19).
2. Call divert is set.
¥ Disable call divert.
You cannot hear a ring/dialling tone from the fixed line.
The phone cord supplied has not been used or has been replaced by a new cord with the wrong pin connec-
tions.
¥ Please always use the phone cord supplied or ensure that the pin connections are correct when purchas-
ing from a retailer.
The connection always terminates after approx.30seconds.
Repeater activated/deactivated.
¥ Switch the handset off and back on again (¢ page 11).
Error tone sounds after system PIN prompt.
You have entered the wrong system PIN.
¥ Repeat the process; if necessary reset the system PIN to 0000.
Forgotten system PIN.
¥ Reset the system PIN to 0000.
36 da en fi no sv

Customer Service & Assistance
The other party cannot hear you.
The handset is "muted".
¥ Unmute the microphone (¢ page 17).
The caller's number is not displayed.
1. Calling Line Identification (CLI) is not enabled for the caller.
¥ The caller should ask his network provider to enable Calling Line Identification (CLI).
2. Calling line display (CLIP) is not supported by the network provider or has not been enabled for you.
¥ Have calling line display (CLIP) enabled by your network provider.
3. Yo ur t elep hon e is conn ect ed v ia a PA BX or a ro uter wit h an inte gra ted PA BX (g ateway) that does not transmit all information.
¥ Reset the system: briefly pull out the power plug. Reinser t the plug and wait until the device restarts.
¥ Check the settings on the PABX and activate phone number display, if necessary. To do this, search for
terms such as CLIP, calling line identification, phone number identification, caller ID etc. in the sys-
tem’s user guide or ask the system manufacturer.
You hear an error tone when keying an input.
Action has failed/invalid input.
¥ Repeat the process.
Read the display and refer to the user guide if necessary.
You cannot listen to messages on the network mailbox.
Your PABX is set to pulse dialling.
¥ Set your PABX to tone dialling.
Authorisation
This device is intended for use within the European Economic Area and Switzerland. If used in
other countries, it must first be approved nationally in the country in question.
Country-specific requirements have been taken into consideration.
We, Gigaset Communications GmbH, declare that this device meets the essential requirements
and other relevant regulations laid down in Directive 1999/5/EC.
A copy of the Declaration of Conformity is available at this Internet address:
www.gigaset.com/docs
Exclusion of liability
Your handset's display has a resolution of 240x320 pixels. Each pixel consists of three subpixels
(red, green, blue).
It may be the case that a pixel is incorrectly controlled or has a colour deviation. This is normal
and no reason for a warranty claim.
da en fi no sv 37

Environment
The following table shows the number of pixel errors that may occur without leading to a warranty claim.
Description Maximum number of permitted pixel errors
Colour illuminated subpixels 1
Dark subpixels 1
Tot al n umb er o f co lou red and dark subpixels 1
Please note
Signs of wear on the display and housing are excluded from the warranty.
Environment
Our environmental mission statement
We, Gigaset Communications GmbH, bear social responsibility and are actively committed to a
better world. Our ideas, technologies and actions serve people, society and the environment.
The aim of our global activity is to secure sustainable life resources for humanity. We are committed to a responsibility for our products that comprises their entire life cycle. The environmental impact of products, including their manufacture, procurement, distribution, utilisation, service and disposal, are already evaluated during product and process design.
Further information on environmentally friendly products and processes is available on the
Internet at www.gigaset.com
Environmental management system
Gigaset Communications GmbH is certified pursuant to the international
standards ISO 14001 and ISO 9001.
ISO 14001 (Environment): Certified since September 2007 by TÜV SÜD Management Service GmbH.
ISO 9001 (Quality): Certified since 17/02/1994 by TÜV SÜD Management Service GmbH.
.
Disposal
Batteries should not be disposed of in general household waste. Observe the local waste disposal regulations, details of which can be obtained from your local authority.
All electrical and electronic equipment must be disposed of separately from general household
waste using the sites designated by local authorities.
If a product displays this symbol of a crossed-out rubbish bin, the product is
subject to European Directive 2002/96/EC.
The appropriate disposal and separate collection of used equipment serve to
prevent potential harm to the environment and to health. They are a precondition for the re-use and recycling of used electrical and electronic equipment.
For further information on disposing of your used equipment, please contact your local authority or your refuse collection service.
38 da en fi no sv

Appendix
!
Appendix
Care
Wipe the device with a damp cloth or an antistatic cloth. Do not use solvents or microfibre
cloths.
Never use a dry cloth; this can cause static.
In rare cases, contact with chemical substances can cause changes to the device’s exterior. Due
to the wide variety of chemical products available on the market, it was not possible to test all
substances.
Impairments in high-gloss finishes can be carefully removed using display polishes for mobile
phones.
Contact with liquid
If the device comes into contact with liquid:
1 Disconnect the power supply.
2 Remove the batteries and leave the battery compartment open.
3 Allow the liquid to drain from the device.
4 Pat all parts dry.
5 Place the device in a dry, warm place for at least 72 hours ( not in a microwave, oven etc.) with
the battery compartment open and the keypad facing down (if applicable).
6 Do not switch on the device again until it is completely dry.
When it has fully dried out, you will normally be able to use it again.
Specifications
Battery
Technology: 2 x AA NiMH
Voltage: 1.2 V
Capacity: 1300 mAh
Handset operating times/charging times
The operating time of your Gigaset depends on the capacity and age of the battery and the way
it is used. (All times are maximum possible times.)
Standby time (hours) * 250
Standby time in
Talk time (hours) 20
Operating time for 1.5hours of calls per day (hours) * 165
Operating time in Eco mode+ for 1.5hours of calls perday (hours) * 105
Charging time in charger (hours) 14,5
* Wit hout display backlight
da en fi no sv 39
Eco mode+ (hours) * 180

Appendix
1) Space
1x 2x 3x 4x 5x 6x 7x 8x 9x 10x
1
2 abc2дбавгз
3 def 3ëéèê
4 gh i4ïíìî
5 jkl5
6 mno6цсутфх
7 pq r s 7ß
8 tuv8üúùû
O wx y z 9ÿ ýæøå
0 -.0
1)
Information about the USB port
u The handset’s battery is charged using a USB connection with a power supply of 500 mA.
u On USB connections with lower charging currents, the consumption of the handset itself
may be greater than the recharging. In this case, the battery charge decreases.
General specifications
DECT
DECT standard Supported
GAP standard Supported
No. of channels 60 duplex channels
Radio frequency range 1880-1900 MHz
Duplex method Time division multiplexing, 10msframe length
Repeat frequency of the transmission pulse 100 Hz
Length of the transmission pulse 370 μs
Channel grid 1728 kHz
Bit rate 1152 kbit/s
Modulation GFSK
Language code 32 kbit/s
Transmission power 10 mW average powerper channel, 250 mW pulse power
Range Upto50 m in buildings, up to 300m outdoors
Ambient conditions for operation +5°C to +45°C, 20% to 75% relative humidity
Bluetooth
Radio frequency range 2402-2480 MHz
Transmission power 4 mW pulse power
Character set tables
Standard characters
Press the relevant key the
number of times indicated.
40 da en fi no sv

Index
. . . . . . . . . . . . . . . . . . . . . . . . . . . . 26
Index
A
Activating the handset . . . . . . . . . . . . . . . . 11
Activating/deactivating function
Activating/deactivating microphone
(handset)
Advisory tones
Alarm
Alert tone
Anniversary, see Birthday
Applications menu
Appointment
deleting the list
missed
setting
Area code number (own area code)
Authorisation
Auto answer
. . . . . . . . . . . . . . . . . . . . . . . 17
. . . . . . . . . . . . . . . . . . . . . . . 19
. . . . . . . . . . . . . . . . . . . . . . . . . . . . . . 28
. . . . . . . . . . . . . . . . . . . . . . . . . . . 19
. . . . . . . . . . . . . . . . . . . . 8
. . . . . . . . . . . . . . . . . . . . 10
. . . . . . . . . . . . . . . . . . . . . . . . . . . 27
. . . . . . . . . . . . . . . . . . . . . . . . . . . 26
. . . . . . . . . . . . . . . . . . . . . . . . 37
. . . . . . . . . . . . . . . . . . . . . . . . . 18
B
Baby monitor, baby alarm . . . . . . . . . . . . . . 28
Back function
Backlight display
Battery
charging
charging status
inserting
Battery charging status
Birthday
deleting the list
missed
Bluetooth
accepting call
activating/deactivating
changing device name
list of known devices
registering devices
searching for devices
transferring contacts (vCard)
. . . . . . . . . . . . . . . . . . . . . . . . 13
. . . . . . . . . . . . . . . . . . . . . 18
. . . . . . . . . . . . . . . . . . . . . . . . . . . 6
. . . . . . . . . . . . . . . . . . . . 31
. . . . . . . . . . . . . . . . . . . . . . . . . . . 5
. . . . . . . . . . . . . . . . 31
. . . . . . . . . . . . . . . . . . . . . . . . . . . . 23
. . . . . . . . . . . . . . . . . . . . 10
. . . . . . . . . . . . . . . . . . . . . . . . . . . 27
. . . . . . . . . . . . . . . . . . . . . . 22
. . . . . . . . . . . . . . . . 22
. . . . . . . . . . . . . . . . .21
. . . . . . . . . . . . . . . . 21
C
Calendar . . . . . . . . . . . . . . . . . . . . . . . . . . . . 26
Call
accepting
answer automatically
external
internal
missed
transferring (connecting)
transferring internally (connecting)
da en fi no sv 41
. . . . . . . . . . . . . . . . . . . . . . . . . 16
. . . . . . . . . . . . . . . . . . . . . . . . . . 14
. . . . . . . . . . . . . . . . . . . . . . . . . . . 16
. . . . . . . . . . . . . . . . . . . . . . . . . . . 26
. . . . . . . . 13
. . . . . . 17
. . . . . . . . . . . 11, 21
. . . . . . . . . . . . . . 22
. . . . . . . . . 25
. . . . . . . . . . . . . . . 18
. . . . . . . . . . . . 16
. . . . 16
Call lists
deleting an entry
deleting entire lists
deleting the entire list
Call swapping
internal/external call
Call waiting
Caller picture
Calling
external
. . . . . . . . . . . . . . . . . . . . . . . . . . 14
. . . . . . . . . . . . . . . . . . . . . . . . . . 16
internal
Calling Line Identification
Care of the device
Changing display page
Changing handset name
Character set tables
Charger
connecting
setting up
Charging time of handset
Cloud synchronisation
Conference
Configuring the idle display
Contact with liquid
Contacts
Correcting incorrect entries
Crescendo tone (ring tone)
. . . . . . . . . . . . . . . . . . . . . . . . . . . 16
ending
internal/external call
. . . . . . . . . . . . . . . . . . . . . . . . . . . . 23
copying number from text
deleting all entries
deleting entry
managing entries
. . . . . . . . . . . . . . . . . . . . . . . . . . 24
memory
order of entries
saving entry
selecting entry
sending entry/list to handset
sending to handset
synchronising with PC or Mac.
transferring a vCard (Bluetooth)
using to enter numbers
. . . . . . . . . . . . . . . . . . 10
. . . . . . . . . . . . . . . . . 10
. . . . . . . . . . . . . . 10
. . . . . . . . . . . . . . . . 16
. . . . . . . . . . . . . . . . . . . . . . . . . 16
. . . . . . . . . . . . . . . . . . . . . . . . 23
. . . . . . . . . . . . . . 16
. . . . . . . . . . . . . . . . . . . . 39
. . . . . . . . . . . . . . . . . 8
. . . . . . . . . . . . . . 18
. . . . . . . . . . . . . . . . . . 40
. . . . . . . . . . . . . . . . . . . . . . . . 4
. . . . . . . . . . . . . . . . . . . . . . . . . 4
. . . . . . . . . . . . . . 39
. . . . . . . . . . . . . . . . 30
. . . . . . . . . . . . . . . . 16
. . . . . . . . . . . . . 7
. . . . . . . . . . . . . . . . . . . 39
. . . . . . . . . . . 25
. . . . . . . . . . . . . . . . . 10
. . . . . . . . . . . . . . . . . . . . . 24
. . . . . . . . . . . . . . . . . . 23
. . . . . . . . . . . . . . . . . . . . 24
. . . . . . . . . . . . . . . . . . . . . . 23
. . . . . . . . . . . . . . . . . . . . 24
. . . . . . . . . 24
. . . . . . . . . . . . . . . . . 24
. . . . . . . . 30
. . . . . . 25
. . . . . . . . . . . . . 25
. . . . . . . . . . . . 13
. . . . . . . . . . . . 19
D
Date . . . . . . . . . . . . . . . . . . . . . . . . . . . . . . . 33
Deactivating
baby alarm
handset
Delete
contacts entry
Deleting
. . . . . . . . . . . . . . . . . . . . . . . 29
. . . . . . . . . . . . . . . . . . . . . . . . . . 11
. . . . . . . . . . . . . . . . . . . . . 24

Index
. . . . . . . . . . . . . . . . . . . . . . . . . . . . . . 10
lists
messages
Dialling
using the call list
using the redial list
with contacts
Display
backlight
calling line display (CLI/CLIP)
configuring the idle display
screensaver
Display icons
Display lock
Disposal
Dot, green
. . . . . . . . . . . . . . . . . . . . . . . . . 10
. . . . . . . . . . . . . . . . . . . 15
. . . . . . . . . . . . . . . . .14
. . . . . . . . . . . . . . . . . . . . . . 14
. . . . . . . . . . . . . . . . . . . . . . . . . 18
. . . . . . . . . 16
. . . . . . . . . . . 7
. . . . . . . . . . . . . . . . . . . . . . . 18
. . . . . . . . . . . . . . . . . . . . . . . . 31
. . . . . . . . . . . . . . . . . . . . . . . . . 11
. . . . . . . . . . . . . . . . . . . . . . . . . . . . 38
. . . . . . . . . . . . . . . . . . . . . . . 10, 14
E
Earpiece mode . . . . . . . . . . . . . . . . . . . . . . .17
Earpiece volume
ECO DECT
Entering special characters
Entering text
Entering umlauts
Exclusion of liability
. . . . . . . . . . . . . . . . . . . . . 17
. . . . . . . . . . . . . . . . . . . . . . . . . . . 20
. . . . . . . . . . . . . 14
. . . . . . . . . . . . . . . . . . . . . . . . 13
. . . . . . . . . . . . . . . . . . . . . 14
. . . . . . . . . . . . . . . . . . . 37
G
Getting started. . . . . . . . . . . . . . . . . . . . . . . . 4
Gigaset QuickSync
Green dot
Group call
. . . . . . . . . . . . . . . . . . . . 30
. . . . . . . . . . . . . . . . . . . . .10, 14, 15
. . . . . . . . . . . . . . . . . . . . . . . . . . . 16
H
Handset
activating/deactivating
advisory tones
changing name
display backlight
display language
earpiece volume
idle status
muting
reset
restoring to factory settings
screensaver
setting
setting up
speaker volume
transferring a call
using it as a baby monitor
Handset + base
Handsfree volume
42 da en fi no sv
. . . . . . . . . . . . . . . . . . . . . . . . . 11
. . . . . . . . . . . . . . . . . . . . . . . . . . . 17
. . . . . . . . . . . . . . . . . . . . . . . . . . . . . 19
. . . . . . . . . . . . . . . . . . . . . . . 18
. . . . . . . . . . . . . . . . . . . . . . . . . . . 17
. . . . . . . . . . . . . . . . . . . . . . . . . . 5
. . . . . . . . . . . . . . . . . . . . . . . 6
. . . . . . . . . . . . . . 11
. . . . . . . . . . . . . . . . . . . . . 19
. . . . . . . . . . . . . . . . . . . . 18
. . . . . . . . . . . . . . . . . . . 18
. . . . . . . . . . . . . . . . . . . 17
. . . . . . . . . . . . . . . . . . . 17
. . . . . . . . . . 19
. . . . . . . . . . . . . . . . . . . . 17
. . . . . . . . . . . . . . . . . . . 16
. . . . . . . . . . . . 28
. . . . . . . . . . . . . . . . . . . . 17
Headset (Bluetooth)
Hearing aids
Help
. . . . . . . . . . . . . . . . . . . . . . . . . . . . . . . 36
I
Icons
displaying new messages
options bar
status bar
Idle display
Idle status
returning to
Incorrect entry correction
Installation wizard
Internal call
Internal consultation call
K
Keypad lock . . . . . . . . . . . . . . . . . . . . . . . . . 11
Keys
end call/end key
. . . . . . . . . . . . . . . . . . . . . . . . . . . 1
handset
menu key
. . . . . . . . . . . . . . . . . . . . . . . . . . . 1
talk key
L
Language + region . . . . . . . . . . . . . . . . . . . 17
. . . . . . . . . . . . . . . . . . . . . . . . . . . . . . 39
Liquid
List
accepted calls
. . . . . . . . . . . . . . . . . . . . . . . . . . 26
call lists
cleaning up
deleting
. . . . . . . . . . . . . . . . . . . . . . . . . . 10
known devices (Bluetooth)
missed calls
outgoing calls
List entry
Lower/upper case
. . . . . . . . . . . . . . . . . . . . . . . . . . . 10
M
Main menu
applications
settings
Making calls
Making internal calls
Medical equipment
Melody
Memory space in contacts
. . . . . . . . . . . . . . . . . . . . . . . . 8, 33
accepting a call
external
. . . . . . . . . . . . . . . . . . . . . . . . . . 14
. . . . . . . . . . . . . . . . . . . . . . . . . . 16
internal
ring tone for internal/external calls
. . . . . . . . . . . . . . . . . . 22
. . . . . . . . . . . . . . . . . . . . . . . . . 3
. . . . . . . . . . . . . 9
. . . . . . . . . . . . . . . . . . . . . . . 31
. . . . . . . . . . . . . . . . . . . . . . . . . 31
. . . . . . . . . . . . . . . . . . . . . . . . . . 7
. . . . . . . . . . . . . . . . . . . . . . . 11
. . . . . . . . . . . . . . 13
. . . . . . . . . . . . . . . . . . . . . 6
. . . . . . . . . . . . . . . . . . . . . . . . . 16
. . . . . . . . . . . . . . 16
. . . . . . . . . . . . . . . . . 1, 14
. . . . . . . . . . . . . . . . . . . . . . . . . . 1
. . . . . . . . . . . . . . . . . . . . . 26
. . . . . . . . . . . . . . . . . 10, 24, 27
. . . . . . . . . . 22
. . . . . . . . . . . . . . . . . . . . . . . 26
. . . . . . . . . . . . . . . . . . . . . 26
. . . . . . . . . . . . . . . . . . . . 13
. . . . . . . . . . . . . . . . . . . . . . . . 8
. . . . . . . . . . . . . . . . . . . . 16
. . . . . . . . . . . . . . . . . . 16
. . . . . . . . . . . . . . . . . . . . 3
. . . . 19
. . . . . . . . . . . . . 24

Index
Menu
applications
opening
returning to idle status
settings
Menu key
Menu tree
Message pop-up
Messages page
Muting the handset
. . . . . . . . . . . . . . . . . . . . . . . . 8
. . . . . . . . . . . . . . . . . . . . . . . . . . . 8
. . . . . . . . . . . . . . . 8
. . . . . . . . . . . . . . . . . . . . . . . . 8, 33
. . . . . . . . . . . . . . . . . . . . . . . . . . . . 1
. . . . . . . . . . . . . . . . . . . . . . . . . . . 33
. . . . . . . . . . . . . . . . . . . . . . 9
. . . . . . . . . . . . . . . . . . . . . . . 9
. . . . . . . . . . . . . . . . . . . 17
N
Navigation area . . . . . . . . . . . . . . . . . . . . . . . 8
Network mailbox
Number
as destination for baby alarm
copying to contacts
displaying caller's number (CLIP)
entering with contacts
saving in contacts
. . . . . . . . . . . . . . . . . . . . . 20
. . . . . . . . . 29
. . . . . . . . . . . . . . . . .25
. . . . . . 16
. . . . . . . . . . . . . . 25
. . . . . . . . . . . . . . . . . . 23
O
One touch call . . . . . . . . . . . . . . . . . . . . . . . 15
Opening message lists
Opening the submenu
Operating the touchscreen
Operating time of handset
. . . . . . . . . . . . . . . . . . . . . . . . . . . . . 13
Options
Options bar
icons
. . . . . . . . . . . . . . . . . . . . . . . . . 13
. . . . . . . . . . . . . . . . . . . . . . . . . . . . . 31
. . . . . . . . . . . . . . . . . 9
. . . . . . . . . . . . . . . .13
. . . . . . . . . . . . . 12
. . . . . . . . . . . . . 39
P
Package contents. . . . . . . . . . . . . . . . . . . . . . 4
PC interface
Phone
operating
restoring to factory settings
setting
Power adapter
. . . . . . . . . . . . . . . . . . . . . . . . . 30
. . . . . . . . . . . . . . . . . . . . . . . . . 11
. . . . . . . . . . 19
. . . . . . . . . . . . . . . . . . . . . . . . . . . 17
. . . . . . . . . . . . . . . . . . . . . . . . 3
Q
Questions and answers . . . . . . . . . . . . . . . . 36
QuickDial
QuickSync
. . . . . . . . . . . . . . . . . . . . . . . . . . . 15
(software for Windows and Mac)
. . . . 30
R
Range . . . . . . . . . . . . . . . . . . . . . . . . . . . . . . . 4
Reducing radiation
Reducing transmission power
Reset handset
Ring tone
. . . . . . . . . . . . . . . . . . . 20
. . . . . . . . . . 20
. . . . . . . . . . . . . . . . . . . . . . . 19
changing
crescendo tone
melody for internal/external calls
Rubber seal
. . . . . . . . . . . . . . . . . . . . . . . . . 19
. . . . . . . . . . . . . . . . . . . . 19
. . . . . 19
. . . . . . . . . . . . . . . . . . . . . . . . . . 5
S
Safety precautions . . . . . . . . . . . . . . . . . . . . 3
Screensaver
Searching in contacts
Selection fields
Sending
complete contacts to handset
contacts entry to handset
Setting options
Setting the display language
Settings menu
Signal strength
Signal tone, see Advisory tones
Snooze mode (alarm)
Speaker
Specifications
Status bar
Status page
Switching off wireless module
Synchronising directory
Synchronising Google contacts
. . . . . . . . . . . . . . . . . . . . . . . . . 18
. . . . . . . . . . . . . . . . . 24
. . . . . . . . . . . . . . . . . . . . . . 13
. . . . . . . . 24
. . . . . . . . . . . 24
. . . . . . . . . . . . . . . . . . . . . . 17
. . . . . . . . . . . 17
. . . . . . . . . . . . . . . . . . . . . 8, 33
. . . . . . . . . . . . . . . . . . . . . . 31
. . . . . . . . . . . . . . . . . 28
. . . . . . . . . . . . . . . . . . . . . . . . . . . . 17
. . . . . . . . . . . . . . . . . . . . . . . 39
. . . . . . . . . . . . . . . . . . . . . . 1, 10, 31
. . . . . . . . . . . . . . . . . . . . . . 10, 11
. . . . . . . . . . 11
. . . . . . . . . . . . . . . 30
. . . . . . . . . 30
T
3-way conference . . . . . . . . . . . . . . . . . . . . 16
. . . . . . . . . . . . . . . . . . . . . . . . . . . . . . . 33
Time
Ton es + sig nal s
Troubleshooting
. . . . . . . . . . . . . . . . . . . . . . 19
. . . . . . . . . . . . . . . . . . . . . 36
U
UI elements . . . . . . . . . . . . . . . . . . . . . . . . . 12
Updating firmware
Upper/lower case
USB connection socket
USB connection, rubber seal
Using the redial list
. . . . . . . . . . . . . . . . . . . 30
. . . . . . . . . . . . . . . . . . . . 13
. . . . . . . . . . . . . . . . . 1
. . . . . . . . . . . . 5
. . . . . . . . . . . . . . . . . . . 14
V
vCard . . . . . . . . . . . . . . . . . . . . . . . . . . . . . . 25
VIP ring tone
Volu me
handsfree/earpiece volume of
. . . . . . . . . . . . . . . . . . . . . . . . 23
handset
. . . . . . . . . . . . . . . . . . . . . . 17
W
Warning tone, see Advisory tones
da en fi no sv 43
All rights reserved. Rights of modification reserved.

 Loading...