

Ricoh SP C240 Series, SP C240SF, SP C240DN, SP C242 Series, SP C242SF Firmware Update Manual
...
1
Model No.
SP C240/C242 Series
Firmware Update Guide
This manual explains how to update the firmware of the following machine:
• Multifunctional Printer: SP C240SF/SP C242SF
• Printer: SP C240DN/SP C242DN
You can download the firmware update package from our Web site.
About the firmware package ❖
The firmware packages on our Web site are each designed to be used for a
specific model, and cannot be used for any other model.
Confirm the model of your machine, and download the appropriate firmware package for your model.
Disclaimer ❖
The supplier shall not be liable to the customer for any consequential,
incidental or indirect damages (including, but not limited to, damages for
loss of profits, business interruption or loss of business information, and
the like) caused by failure of this software or loss of documents or data, nor
for any other damages arising out of the use of this software, even if the
customer has been advised of the possibility of such damages.
Before Updating the Firmware
Check your operating environment before beginning the update.
Compatible Operating Systems ❖
Your computer must be running one of the following operating systems:
Windows XP (32/64 bit)/Vista (32/64 bit)/7 (32/64 bit), or Mac OS X 10.3.9
or later.
Backing up the machine’s settings ❖
After the firmware update, the machine’s settings may return to their factory defaults.
Before you reconnect the machine for the update, we recommend that
you back up the machine’s settings by accessing the machine using a Web
browser from a computer connected via a network.
Also, you can print out lists of scan and fax destinations or a configuration
page using a Web browser or the machine’s control panel. For details, see
the manuals provided with the machine.
Connection ❖
Connect your computer and the machine through a network or directly by
USB.

2
CAUTION:
We recommend that you update the firmware via USB. If you update the firmware over the •
network, the machine may receive data over the network such as a print job during the
updates, which can interfere with the update process.
If you are updating the firmware via USB, the printer driver for USB connection must be •
installed on your computer beforehand. However, if you are updating via a network, no
printer driver is necessary.
Make sure your computer is securely connected to the machine with the USB or network •
cable that you will be using for the firmware update.
Disconnect any other cables that are not necessary for the firmware update, such as a •
telephone cable, from the machine.
Make sure that your computer does not enter standby or hibernation mode during the •
update process. Following is a procedure for configuring this setting based on Windows
XP as an example:
On the 1. [Start] menu, click [Control Panel].
Click 2. [Performance and Maintenance].
Click 3. [Power Options].
On the 4. [Power Schemes] tab, select [Never] for [System standby:] and [System
hibernates:].
Updating the Firmware
Use the following procedure to update the firmware. Be sure to print the
configuration page both before and after the update. Comparing pre- and
post-update configuration pages allows you to check whether or not the
update was successful.
Follow the procedure carefully.
CAUTION:
Do not operate the machine using the control panel, access the machine using Web •
Image Monitor, perform fax transmissions, printing, or TWAIN scanning during the update
process.
The update may take a while to complete. Do not turn off the power during the update. Turn •
off the power only when an update completion message appears on the machine’s control
panel.
Never disconnect the cable you are using for the updates during the update process. •
• When using a computer running on a Windows operating system, you must
have an account that has Manage Printers permission. Log on as an Administrators group member to acquire this permission.
• The screens shown in the following procedure are examples based on Windows XP, unless otherwise stated.

3
Connect your computer securely to the machine with the USB or network
cable that you will be using for the firmware update. Disconnect any
other non-essential cables.
Print the configuration page.
Use the following procedure to print the configuration page. Take note of
the current firmware version (shown under ”Firmware Version” on the
configuration page).
SP C240SF/C242SF ❖
A. Turn on the machine.
B. Press the [User Tools] key on the machine’s control panel.
C. Press the [
][ ] keys to select [Print List/Report], and then press the [OK]
key.
D. Press the [
][ ] keys to select [Configuration Page], and then press the [OK]
key.
E. Press [Yes].
SP C240DN/C242DN ❖
A. Turn on the printer.
B. Press the [Menu] key.
C. Press the [
][ ] keys to select [List/Test Print], and then press the [OK] key.
D. Press the [
][ ] keys to select [Config. Page], and then press the [OK] key.
Double-click the
[UpdateTool.exe]
(Windows) or
[Firmware Update Tool]
(Mac
OS X) icon to launch the firmware update tool.
A dialog box with cautionary statements appears.
4
Read the cautionary statements carefully, and then click
[OK]
.
The firmware update tool opens.
Do not close the update tool unless you are instructed to do so.
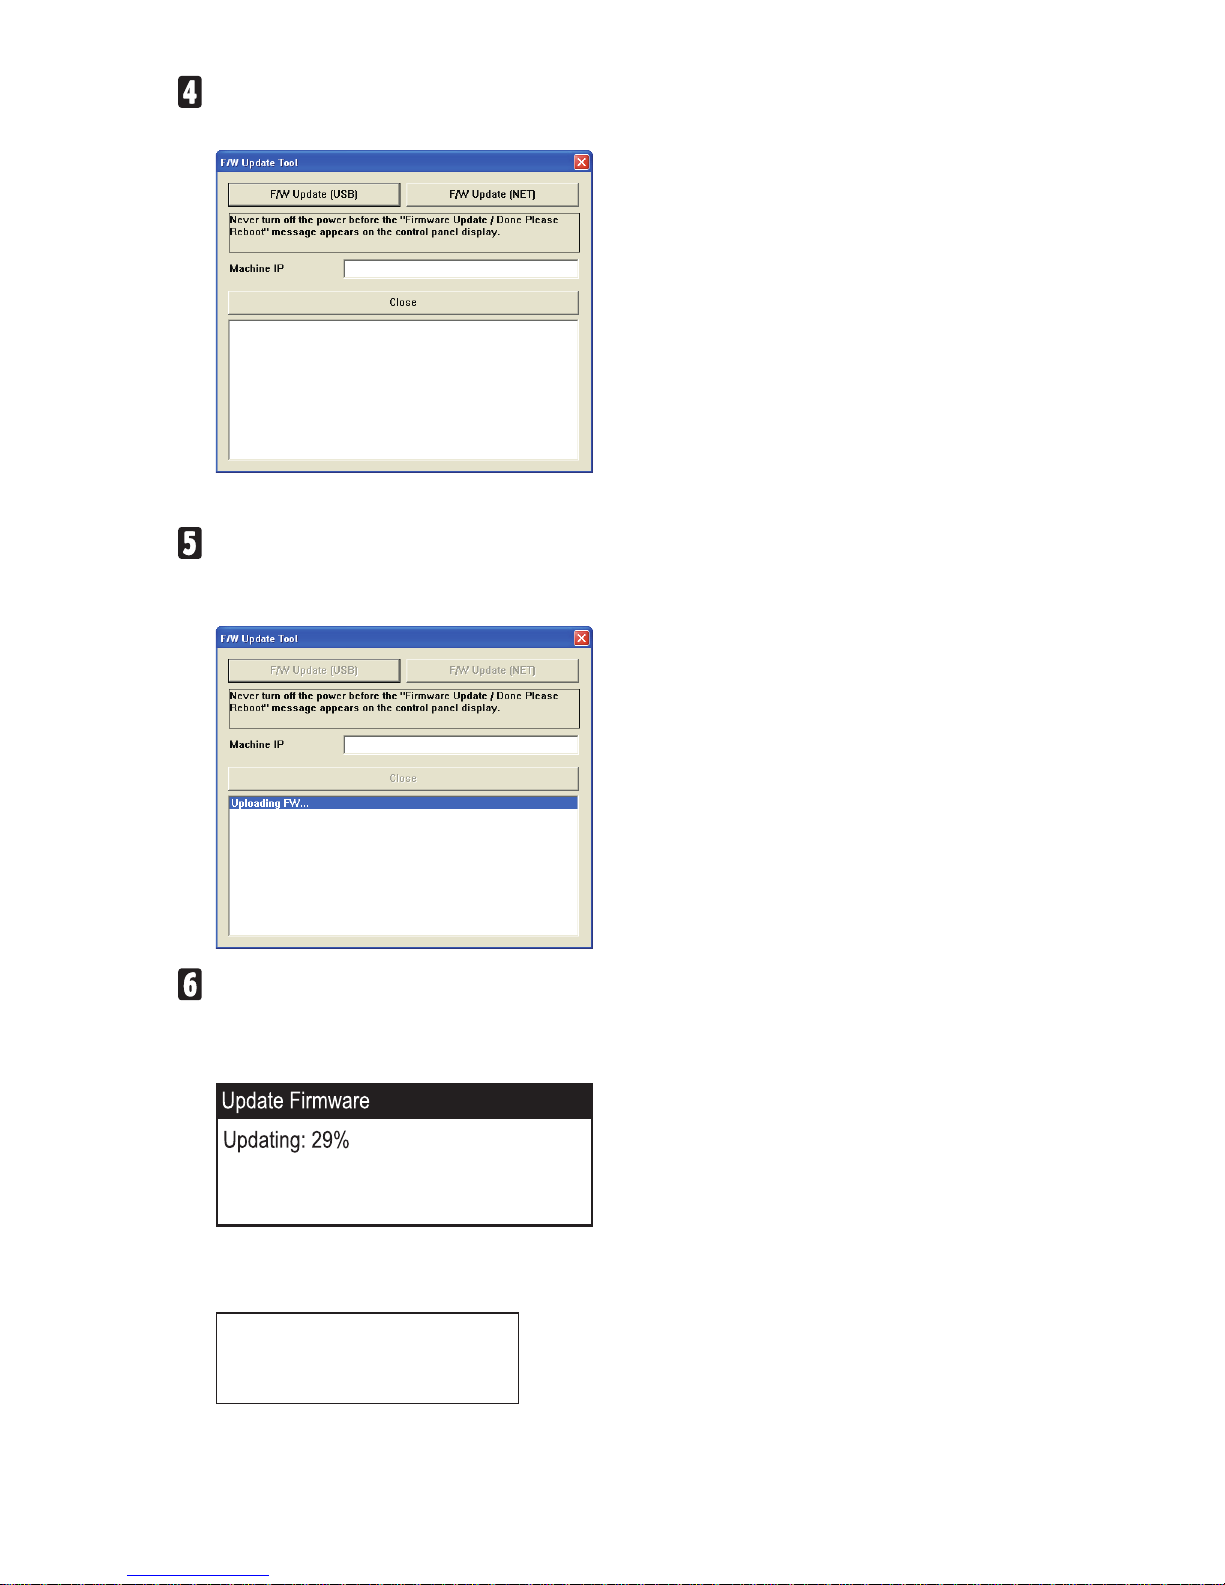
For a USB connection, click
[F/W Update (USB)]
. For a network connection,
enter the machine’s IP address in
[Machine IP]
, and then click
[F/W Update
(NET)]
.
Check the machine’s control panel for messages and the update’s current
percentage of completion.
SP C240SF/C242SF ❖
SP C240DN/C242DN ❖
The Alert indicator lights up.
Update Firmware:
Updating...: 029
5
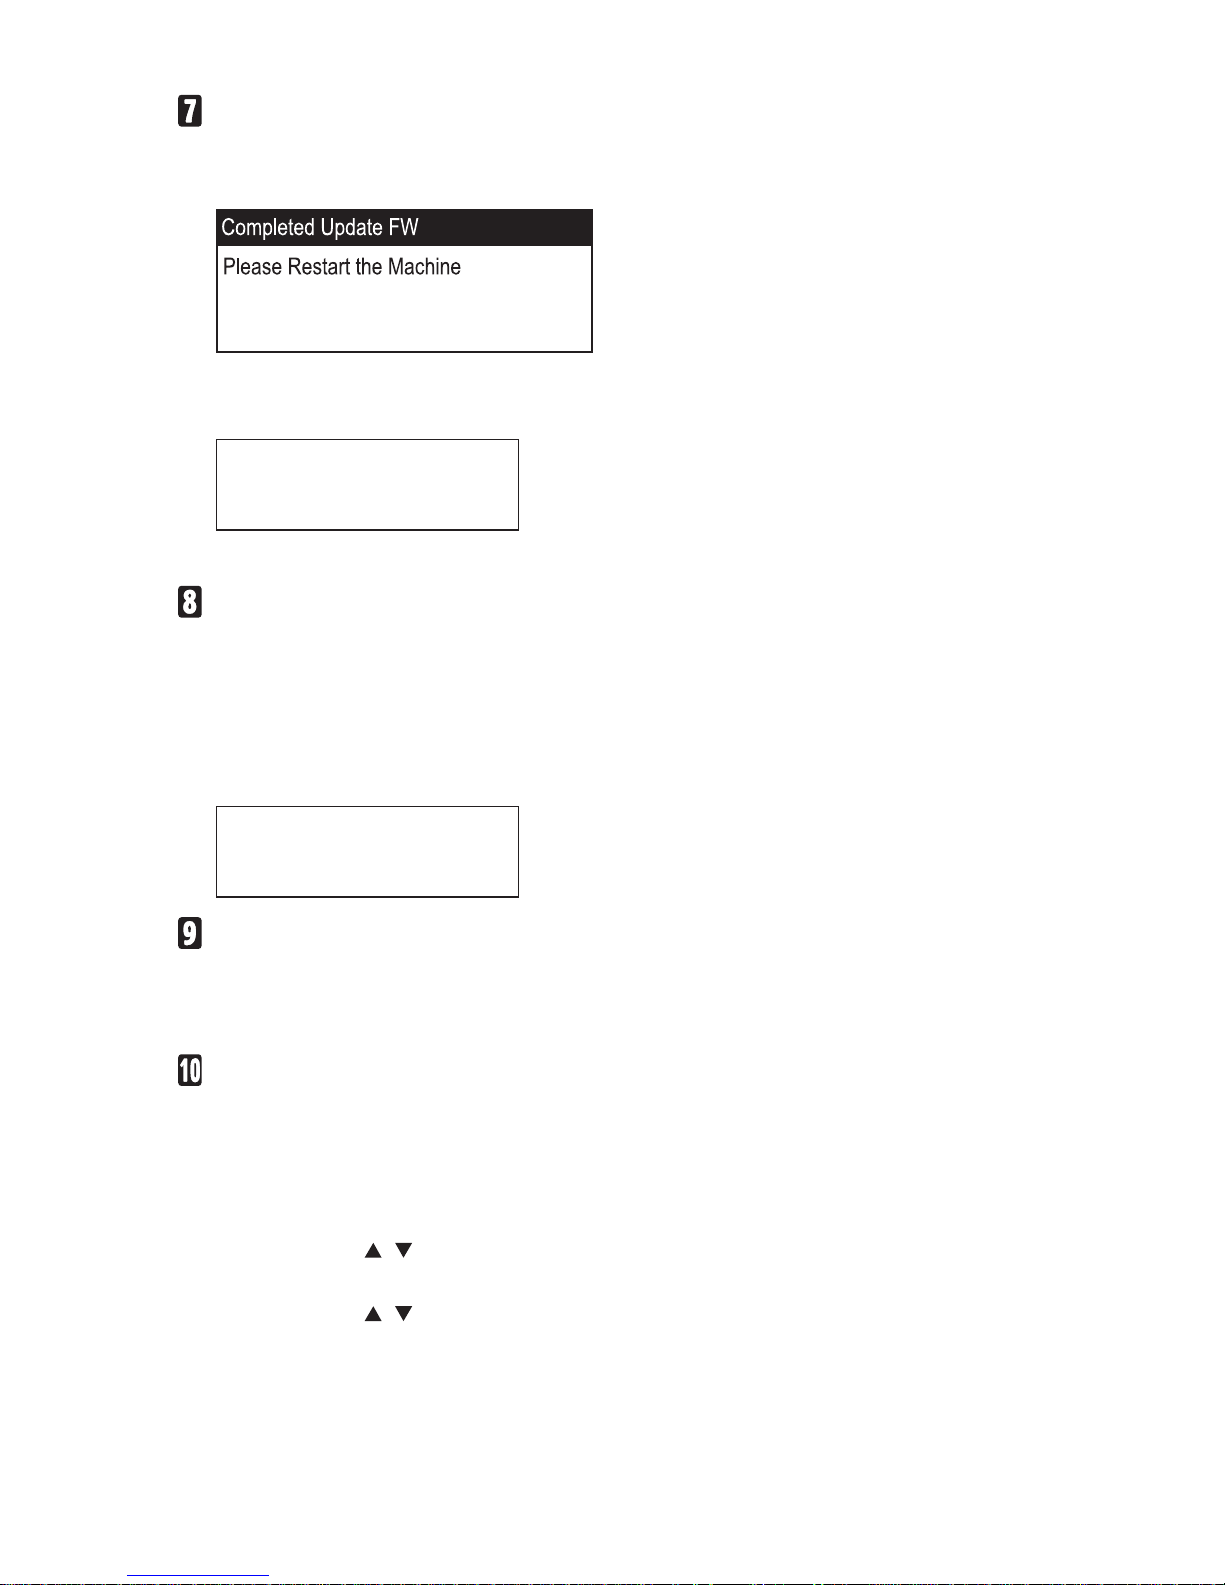
Wait until the update completion message appears on the machine’s
control panel.
SP C240SF/C242SF ❖
SP C240DN/C242DN ❖
The Alert indicator starts flashing.
Controller FW
Dwnload complete
Click [Close] to close the update tool.
Turn off the power of the machine, and then turn it back on.
After you turn the power back on, the machine performs initialization.
SP C240SF/C242SF ❖
“Please wait...” appears on the machine’s control panel.
SP C240DN/C242DN ❖
The Alert and Data in indicators flash twice.
Warming up...
Wait until “Ready” appears on the machine’s control panel.
If “Ready” does not appear on the machine’s control panel after one minute, the update is not complete. In this case, see p.7 “If initialization does
not end following a firmware update”.
Print the configuration page again.
Confirm that the firmware has been updated by checking its version
(shown under “Firmware Version” on the configuration page).
SP C240SF/C242SF ❖
A. Press the [User Tools] key on the machine’s control panel.
B. Press the [
][ ] keys to select [Print List/Report], and then press the [OK]
key.
C. Press the [
][ ] keys to select [Configuration Page], and then press the [OK]
key.
D. Press [Yes].
 Loading...