

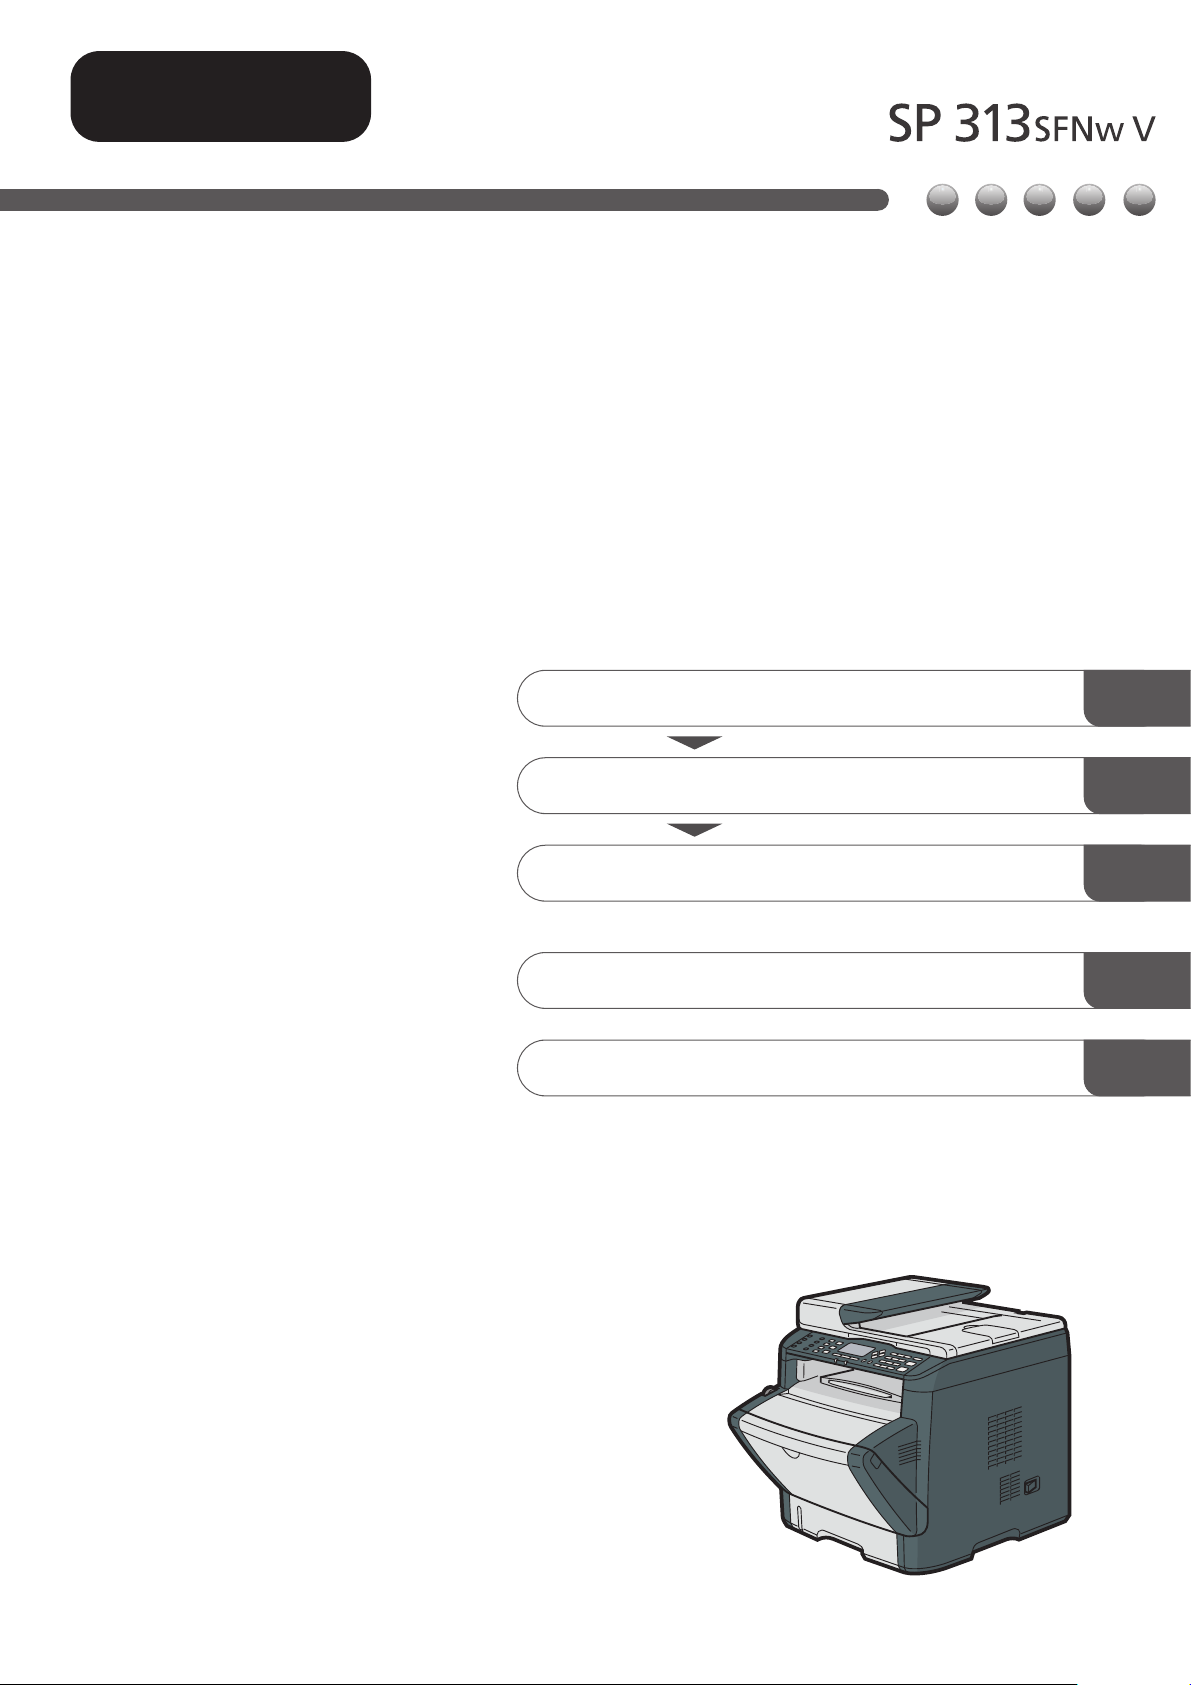
Ricoh SP 313SFNW V Setup Manual
Read This First
Setup Guide
You cannot use the machine unless you perform
the following:
Setting Up the Machine1
23Installing the Software
PaaS (Printer as a Service) Settings
Troubleshooting
Terminology
P.2
P.9
P.33
P.37
P.38


How to Read This Manual
For safe and correct use, be sure to read the Safety Information in "Safety Information" before using the machine.
•
Introduction
This product requires special network settings.
What Can be Done with this Machine
The rental model is a printing equipment management system using a cloud service. Using the rental model, you can receive the following ser vice:
Preventing Equipment Failure
•
By periodic inspection according to the machine’s condition, you can prevent equipment failure.
Minimizing downtime by prompt action
•
You can minimize the device downtime at the time of failure by such means as automatic notification, checking the status, promptly
calling the customer engineer, and simplifying the procedure for requesting repair.
Maintaining print quality
•
You can secure an environment in which genuine toner is always available according to use. Thus, you can prevent consumable
shortage and specify where to buy consumables.
Supporting device management
•
Using the web browser, you can check the use counter and operational status of the device.
1
70 cm
(27.6")
20 cm
(7.9")
40 cm
(15.8")
20 cm
(7.9")
10 cm
(4")
DPH057
CER119
DPH027
1
2
DPH028
1
2
DPH007
DPH008
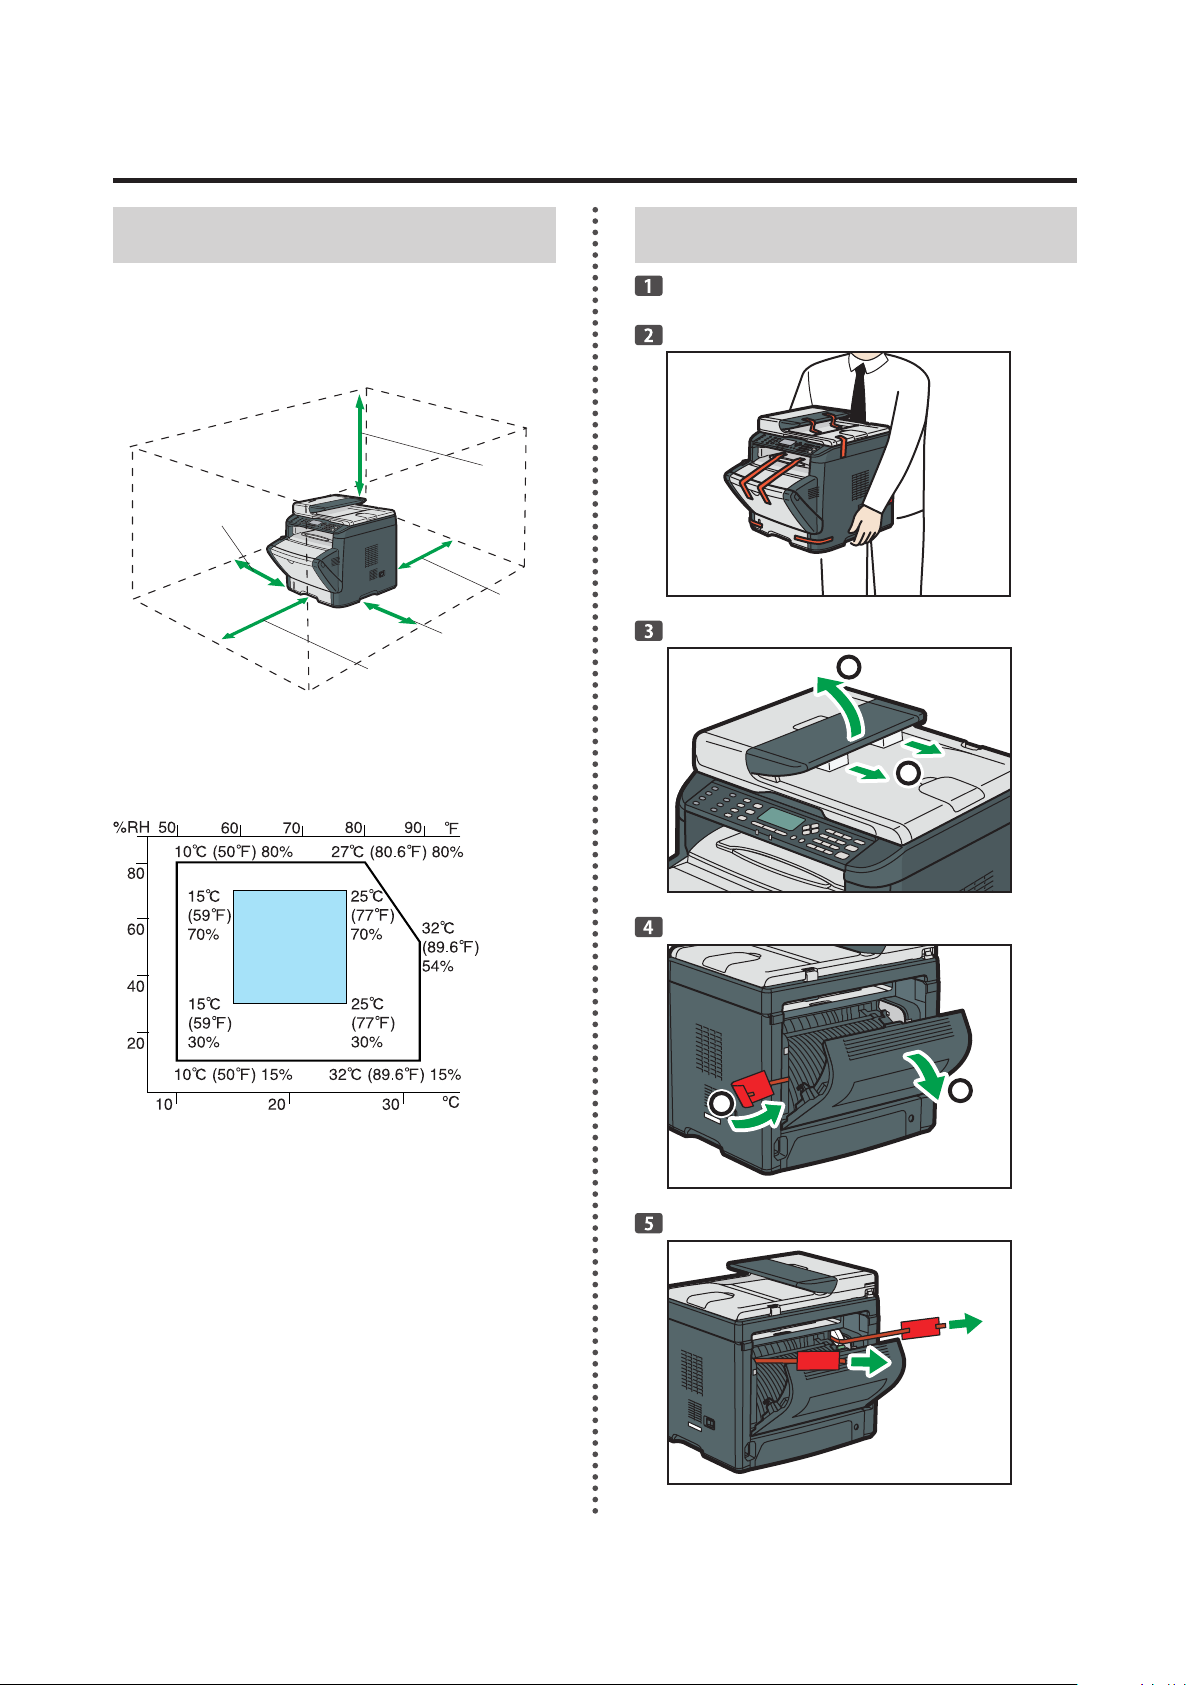
1. Setting Up the Machine
Place to Install
Space Required for Installation
The recommended (or minimum) space requirements are as
follows:
Optimum Environmental Conditions
Permissible and recommended temperature and humidity
ranges are as follows:
Unpacking
Take the machine out of the box and then out of the
plastic bag.
White area: Permissible Range
•
Blue area: Recommended Range
•
To avoid possible build-up of ozone, locate this machine in
large well ventilated room that has an air turnover of more
than 30m3/hr/person.
2
DPH009
DPH035
DPH068
CMC014
DPH045
DPH052
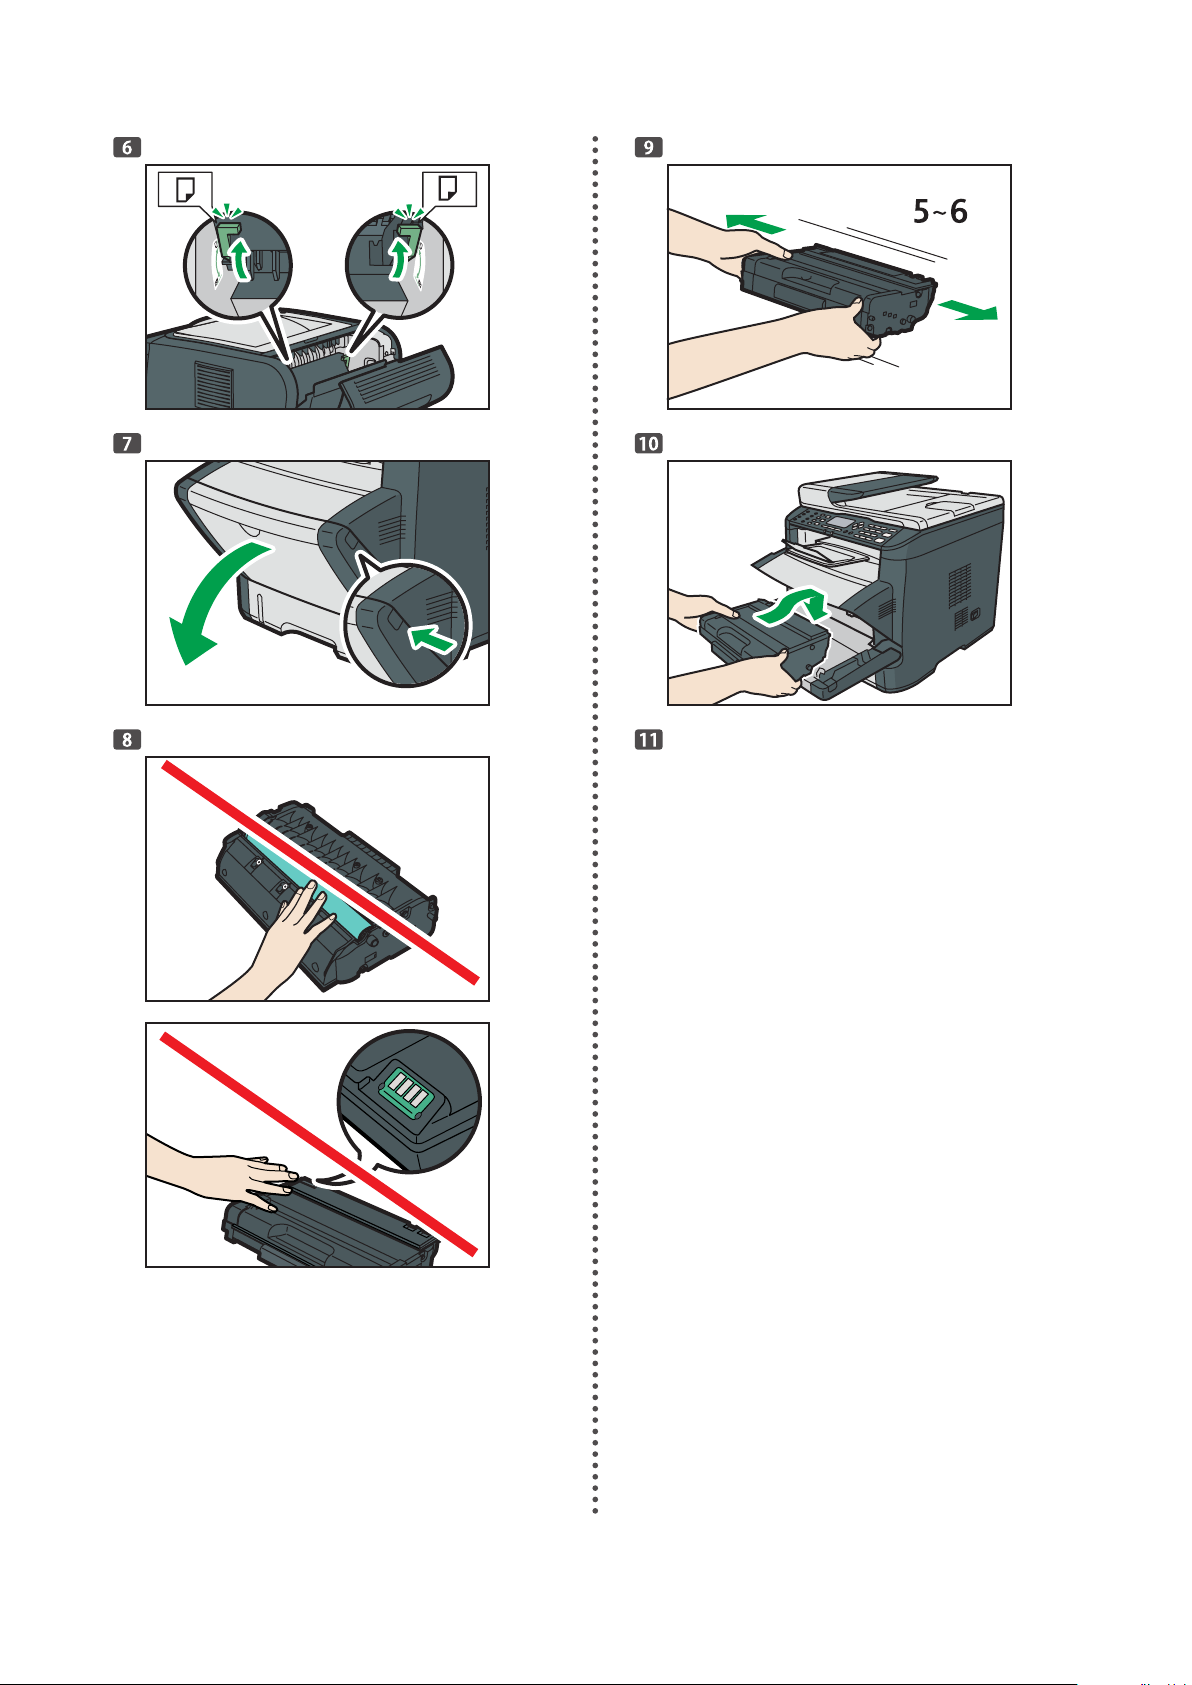
Take the toner out of the box.
Close the cover.
3
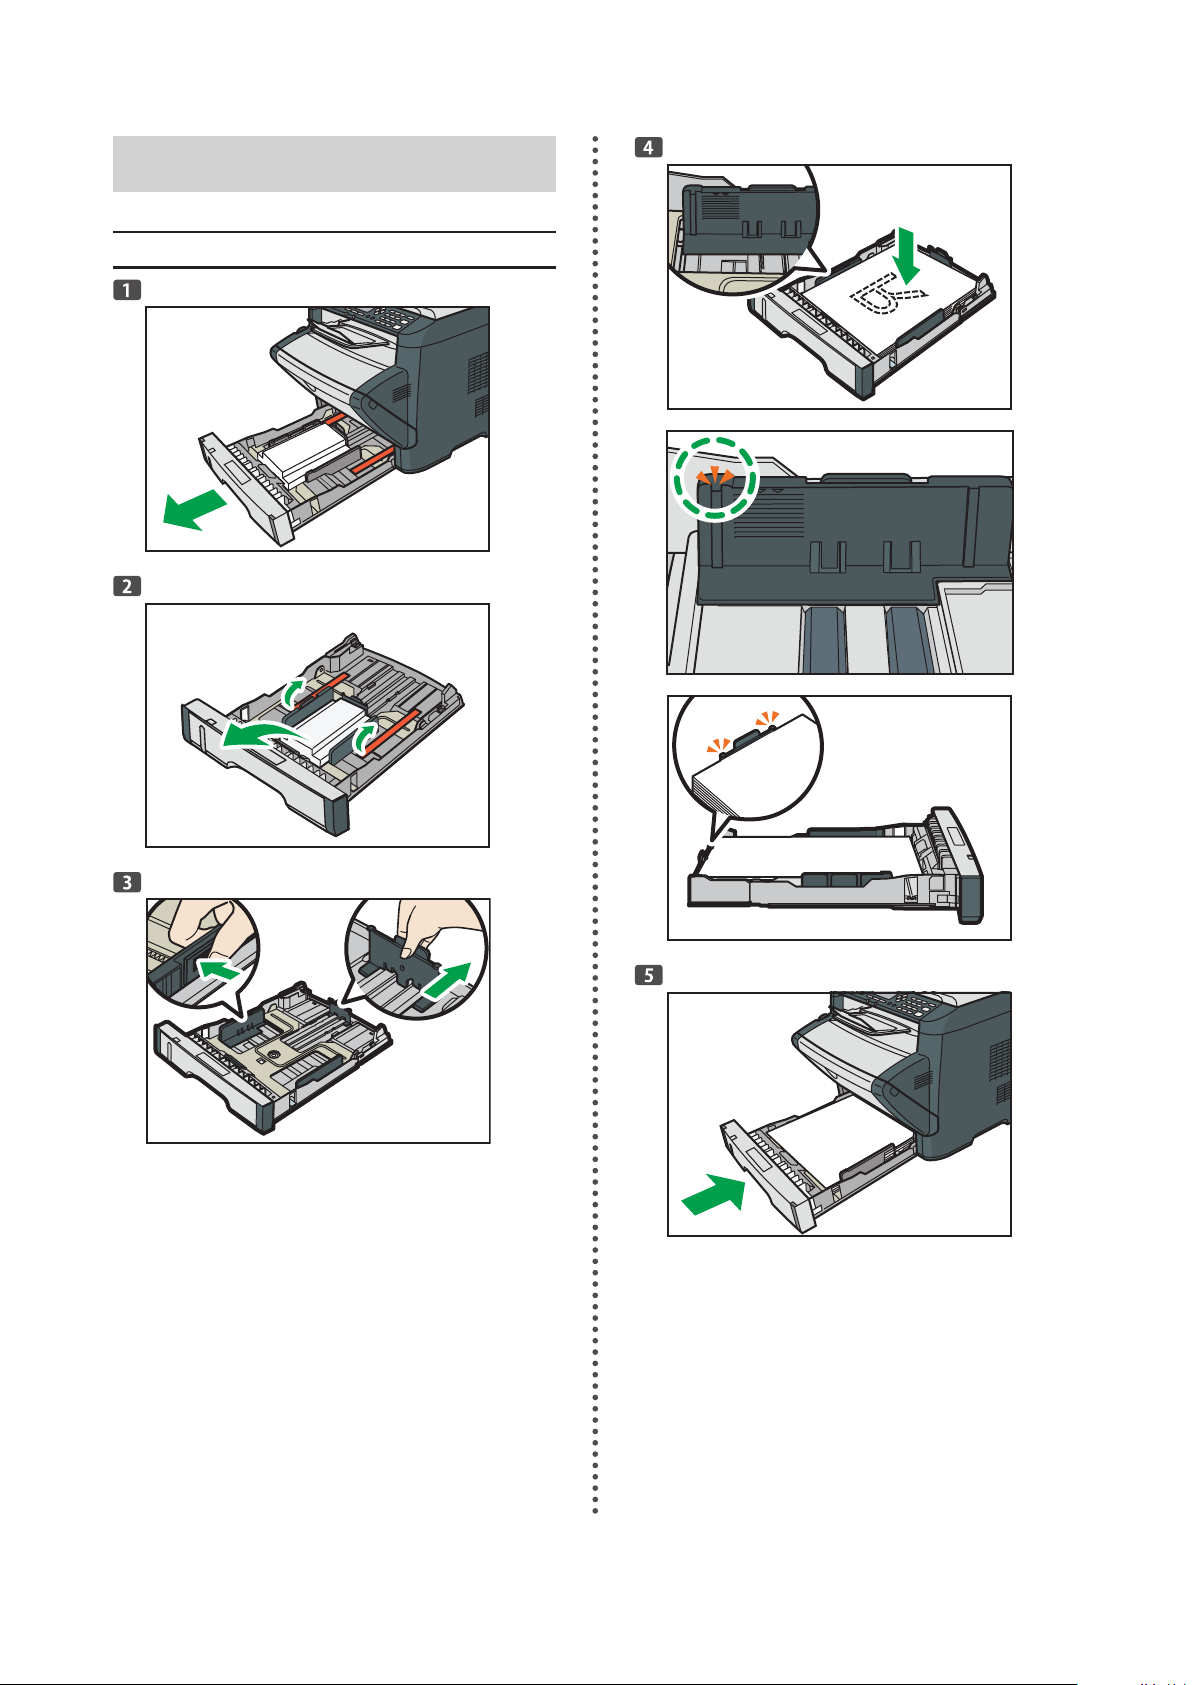
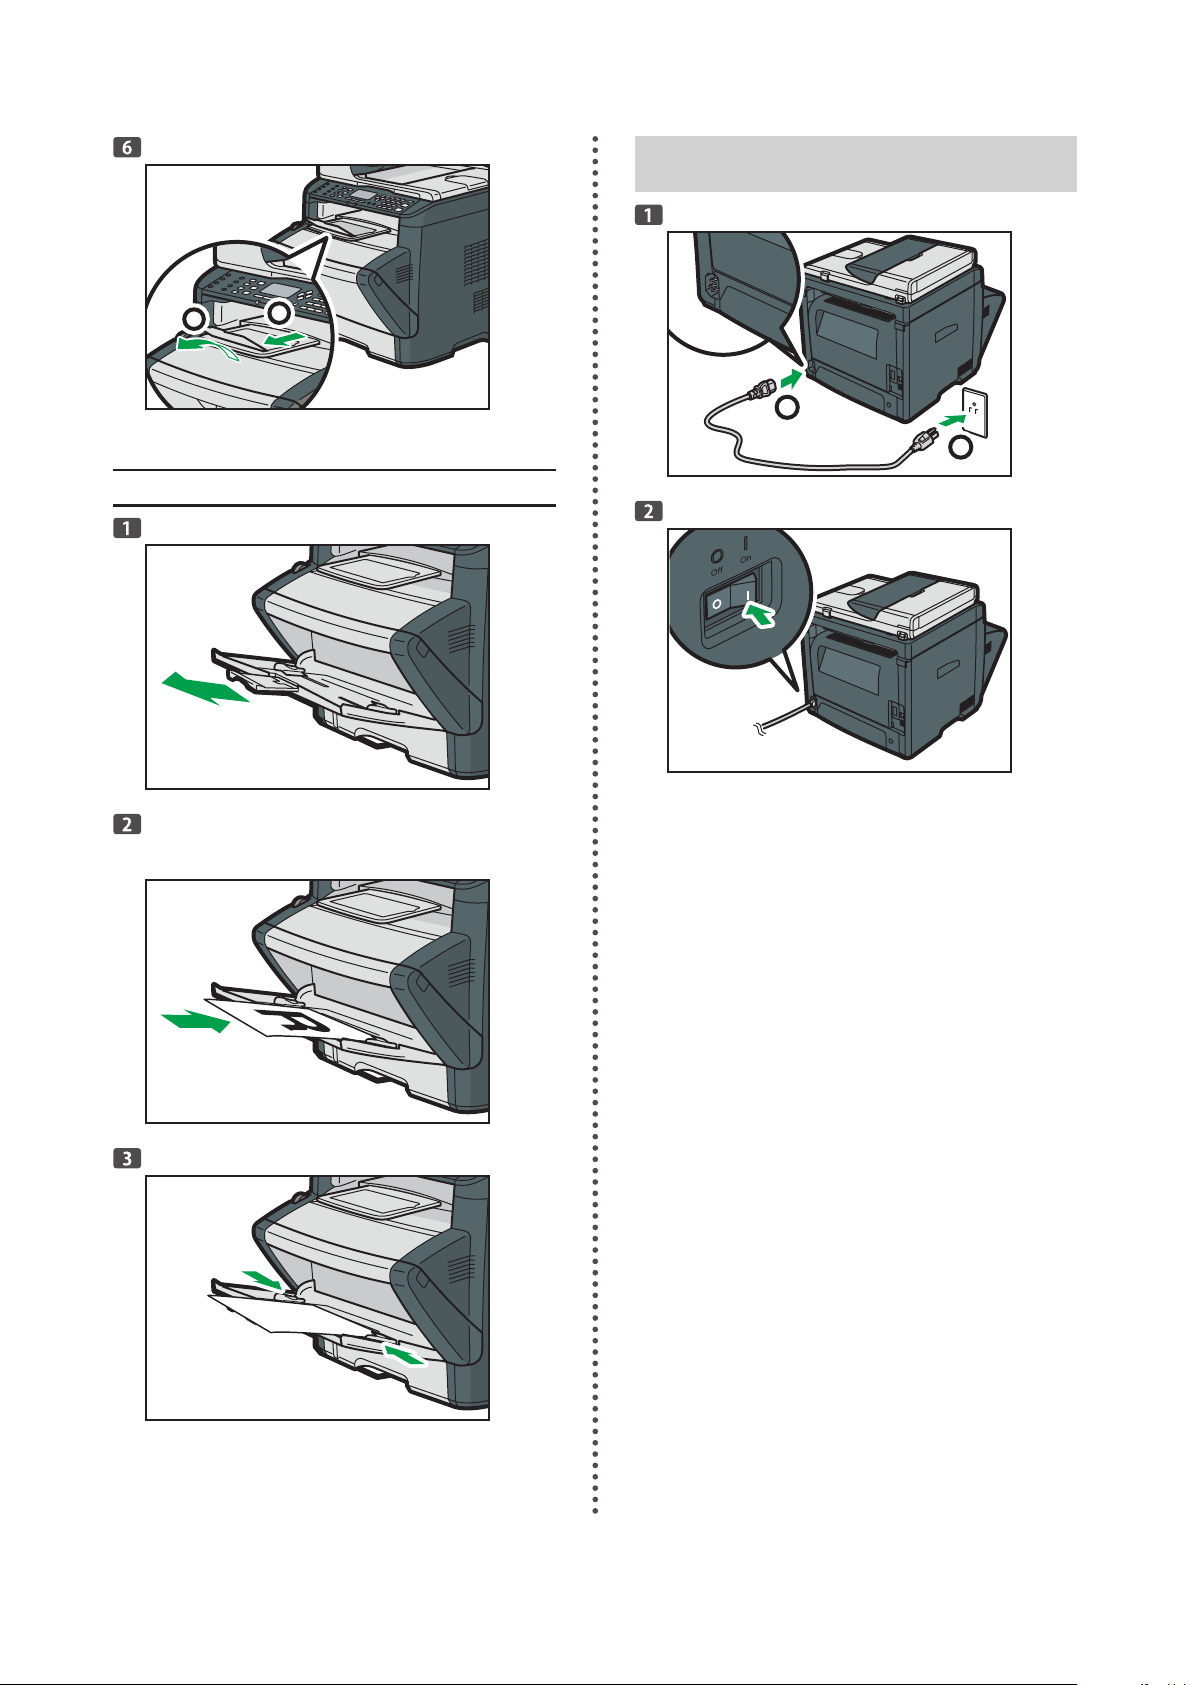
Loading Paper
DPH059
CVW519
CVW522
CVW047
CVW032
CVW033
DPH039
Loading Paper into Tray 1
4
2
1
DPH040
DPH041
DPH042
DPH043
1
2
DPH015
DPH016
Loading Paper into Bypass Tray
Open the bypass tray.
Connection
Slide the side guides outward, then load paper with
the print side up, and push in until it stops against
the machine.
Adjust the side guides to the paper width.
5
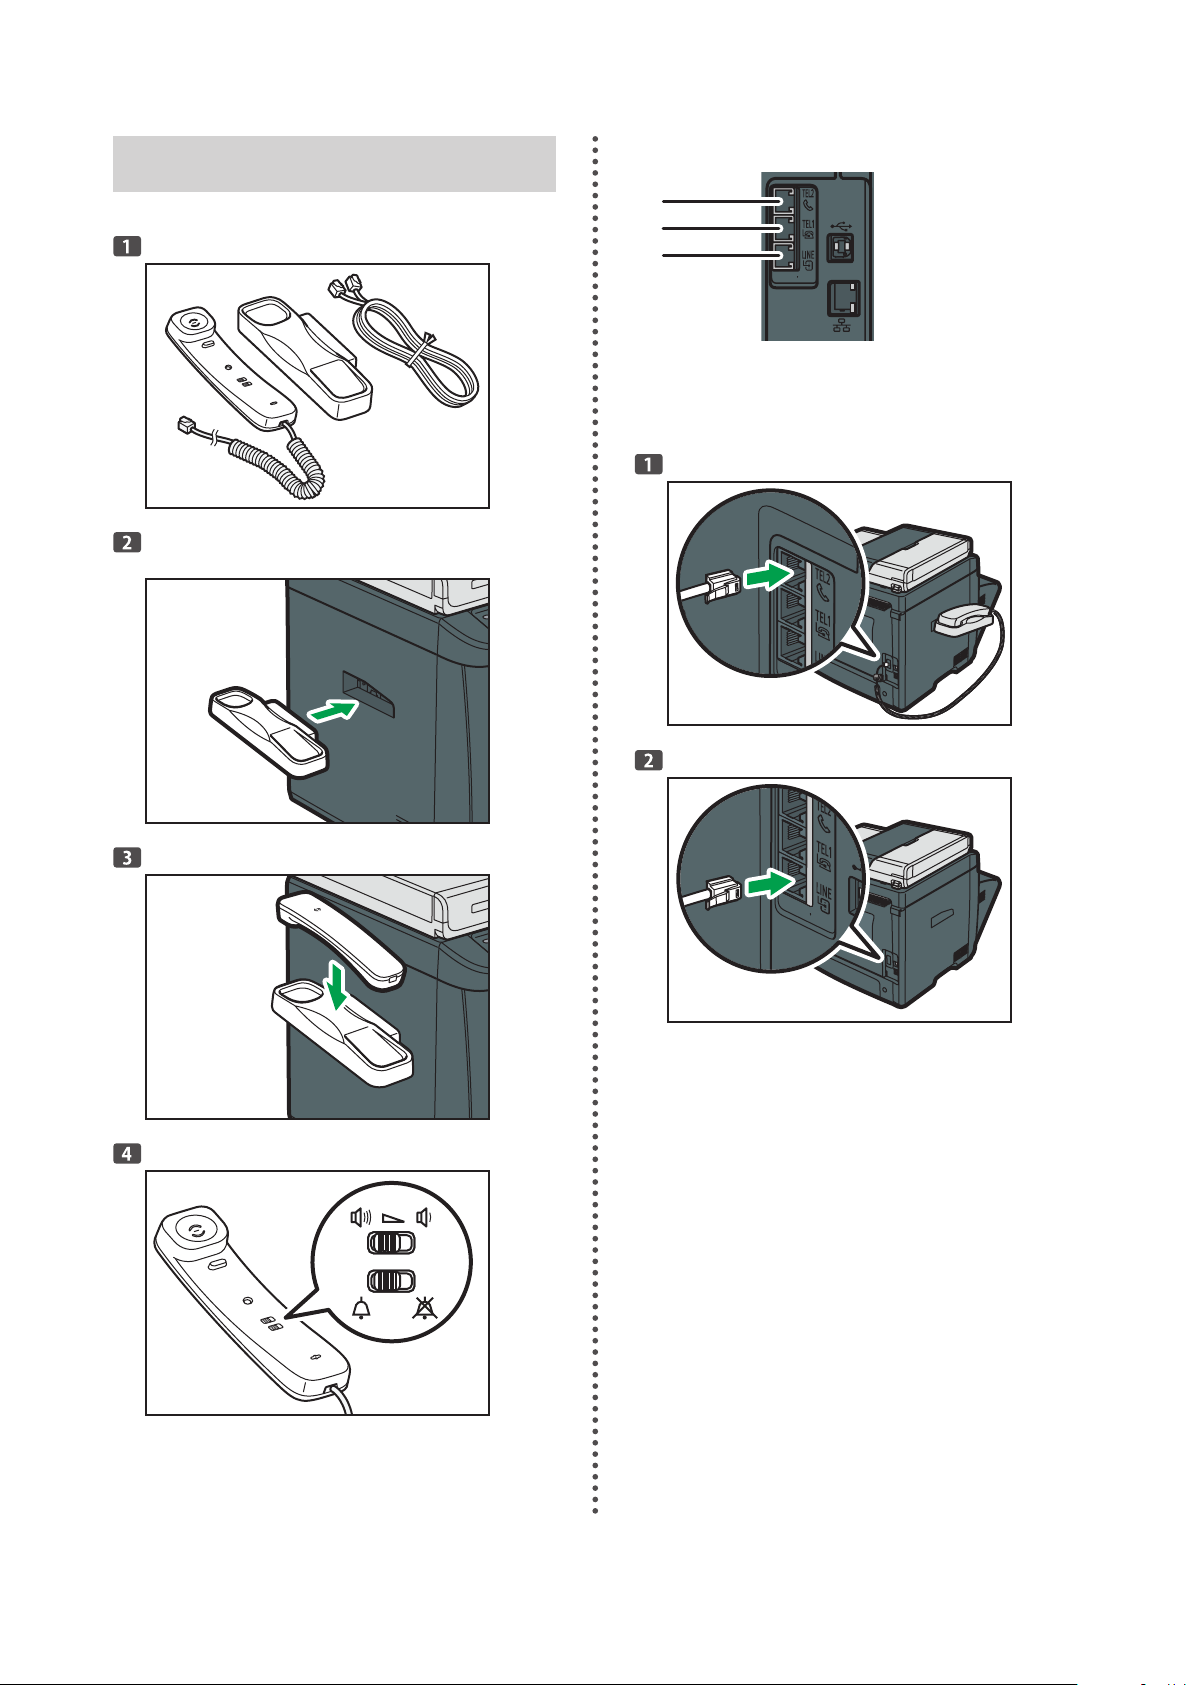
Using the Fax Function
CVW512
DPH005 DPH006
CVW515
CVW516
2
3
1
DPH011
DPH012
1. Connecting the Handset
Attach the telephone receiver cradle to the left side
of the machine.
2.Connection
1. Handset Connector
2. External Telephone Connector
3. G3 (analog) Line Interface Connector
6
3. Selecting the Telephone Line Type
cvw104
CVW102
There are two types of telephone lines: those for touch-tone
and those for pulse-dialing.
•
Check which dialing system is being used in advance.
Press the [ ] key.
Press the [ ] or [ ] key to select [Admin. Tools], and
then press the [OK] key.
Press the [ ] or [ ] key to select [Dial/Push Phone],
and then press the [OK] key.
Press the [ ] or [ ] key to select the telephone line
type appropriate for your telephone service, and
then press the [OK] key.
Press the [ ] key to return to the initial screen.
4. Selecting the Telephone Network Connection
Type
There are two types of telephone line connections: public
switched telephone network (PSTN) and private branch
exchange (PBX).
When using the machine in a domestic environment, set it
•
to [PSTN].
Press the [ ] key.
Press the [ ] or [ ] key to select [Admin. Tools], and
then press the [OK] key.
Press the [ ] or [ ] key to select [PSTN / PBX], and
then press the [OK] key.
Press the [ ] or [ ] key to select [PSTN] or [PBX],
and then press the [OK] key.
Press the [ ] key to return to the initial screen.
5. Setting the Outside Line Access Number
If you have selected PBX, use the following procedure.
Press the [ ] key.
Press the [ ] or [ ] key to select [Admin. Tools], and
then press the [OK] key.
Press the [ ] or [ ] key to select [PBX Access
Number], and then press the [OK] key.
Enter the outside line access number using the
number keys, and then press the [OK] key.
Press the [ ] key to return to the initial screen.
6. Basic Operation for Sending a Fax
Press the [ ] key.
Place the original on the exposure glass or in the
ADF.
Press the [ ] key.
Depending on the machine's settings, you may be
prompted to enter the fax number again if you manually
entered the destination fax number. Enter the fax number
within 60 seconds. If the fax numbers do not match, go
back to Step 3.
If you have more originals to scan, press [ Yes]
within 60 seconds, place the next original on the exposure glass, and then press [OK]. Repeat this step
until all originals are scanned.
When all originals have been scanned, press the [#]
key to star t sending the fax.
7

Using the Scan Function
When using the scan function, configure the following settings:
When using the machine in a network environ-
ment
When using the machine in a network, specify the machine's IP address.
For details about specifying the IP address, see page 22
"Wire LAN Settings".
When using the machine as a scanner
Install the TWAIN driver.
Installation procedure:
•
See page 10 "Connecting the Machine via USB".
See page 13 "Quick Install for Network".
Operation procedure:
•
"Scanning from a Computer", User Guide
8
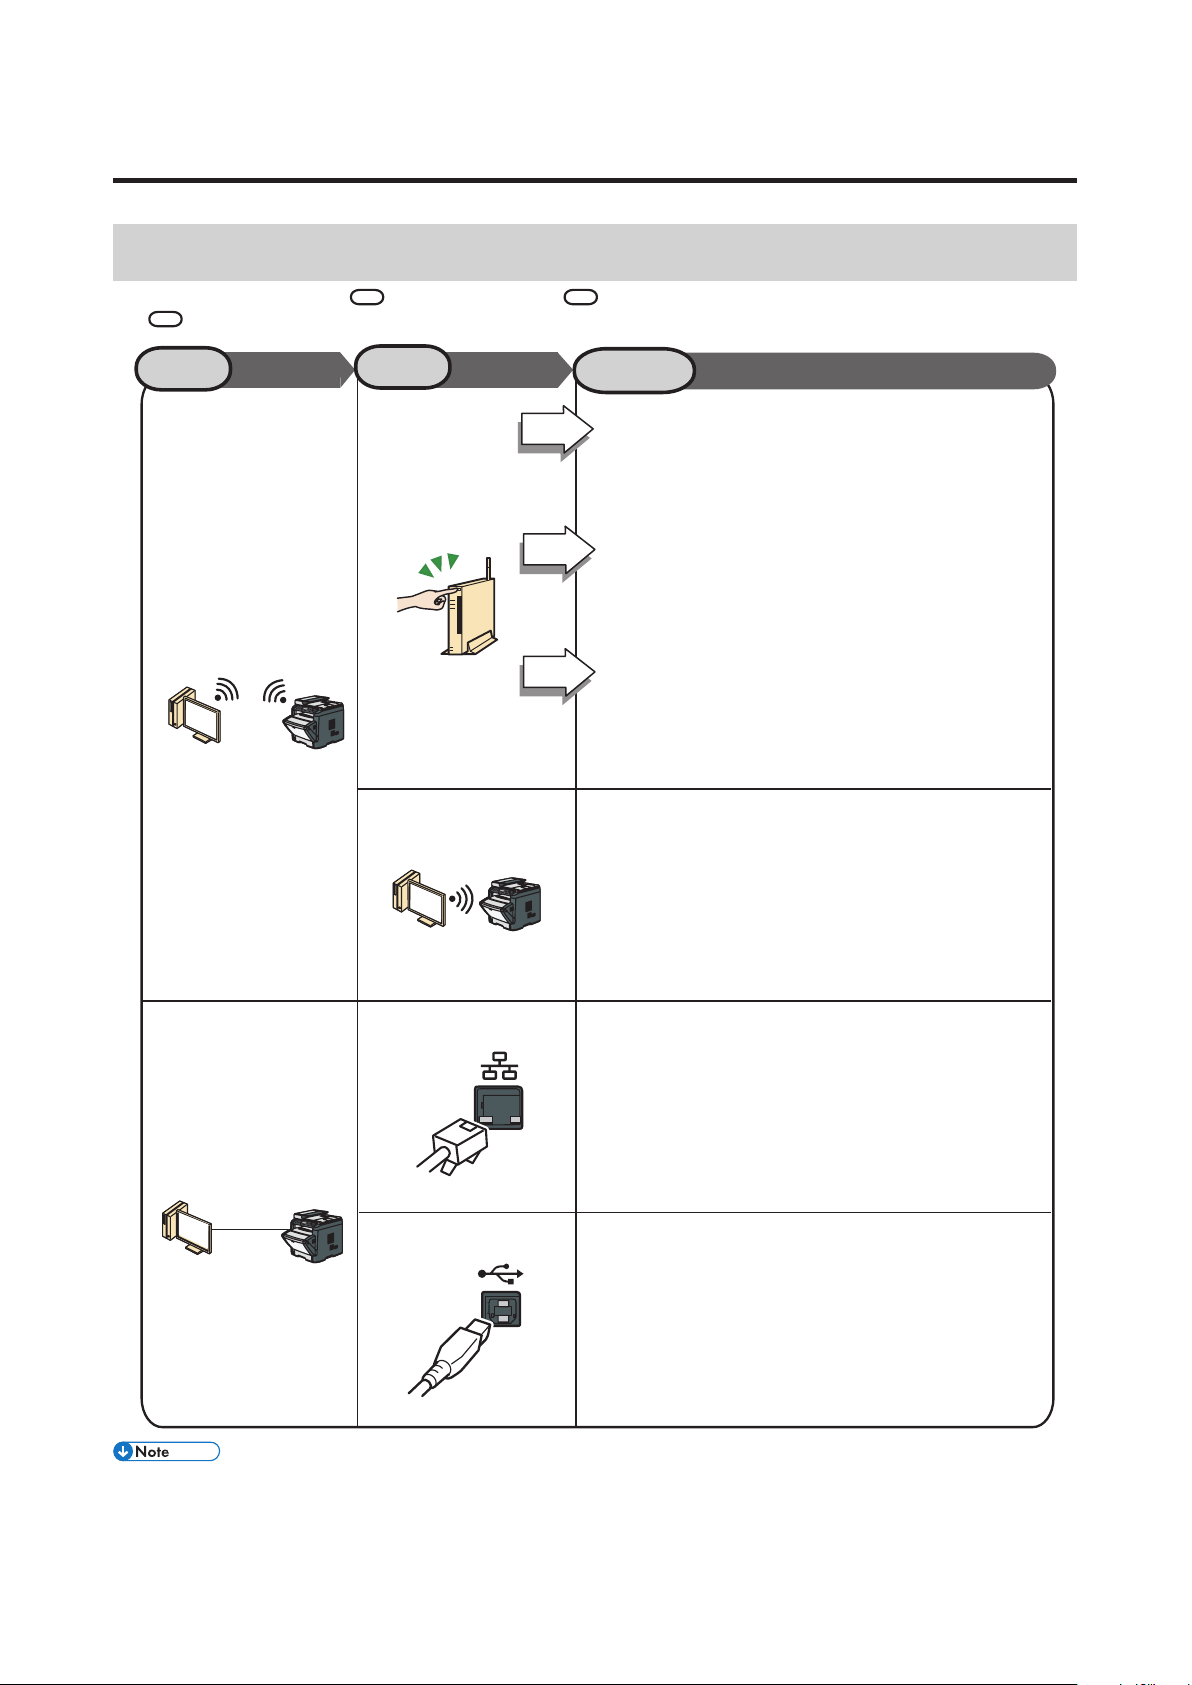
2. Installing the Software
2
3
Yes
No
No
1
Want to use it
wireless
Want to use it
wired
Can you press
the router button?
Ethernet
USB
“Connecting the Machine via USB”
“Connecting the Machine via Network”
“Wire LAN Settings”
“Connecting the Machine via Network” ,
User Guide
“Quick and Easy Setup Using the WPS Button”
“Quick and Easy Setup Using the PIN Code”
“Manual Settings (Confirm the SSID and
Encryption key)”
“Connecting the Machine via Network”
“Connecting the Machine via Network”
“Connecting the Machine via Network”
Want to use the PIN code
Want to set manually
See page 10
See page 12
See page 22
See page 12, 15
See page 12, 17
See page 12, 19
Ad-hoc Mode
Select the available connection
Select the connection method in 1, Internet environment in 2, and then follow the procedure described in the sections referred
to in 3.
This machine must be connected to the Internet. Even when printing via a USB connection, use the network cable for connection.
•
For details, see page 33 "3. PaaS (Printer as a Service) Settings".
9
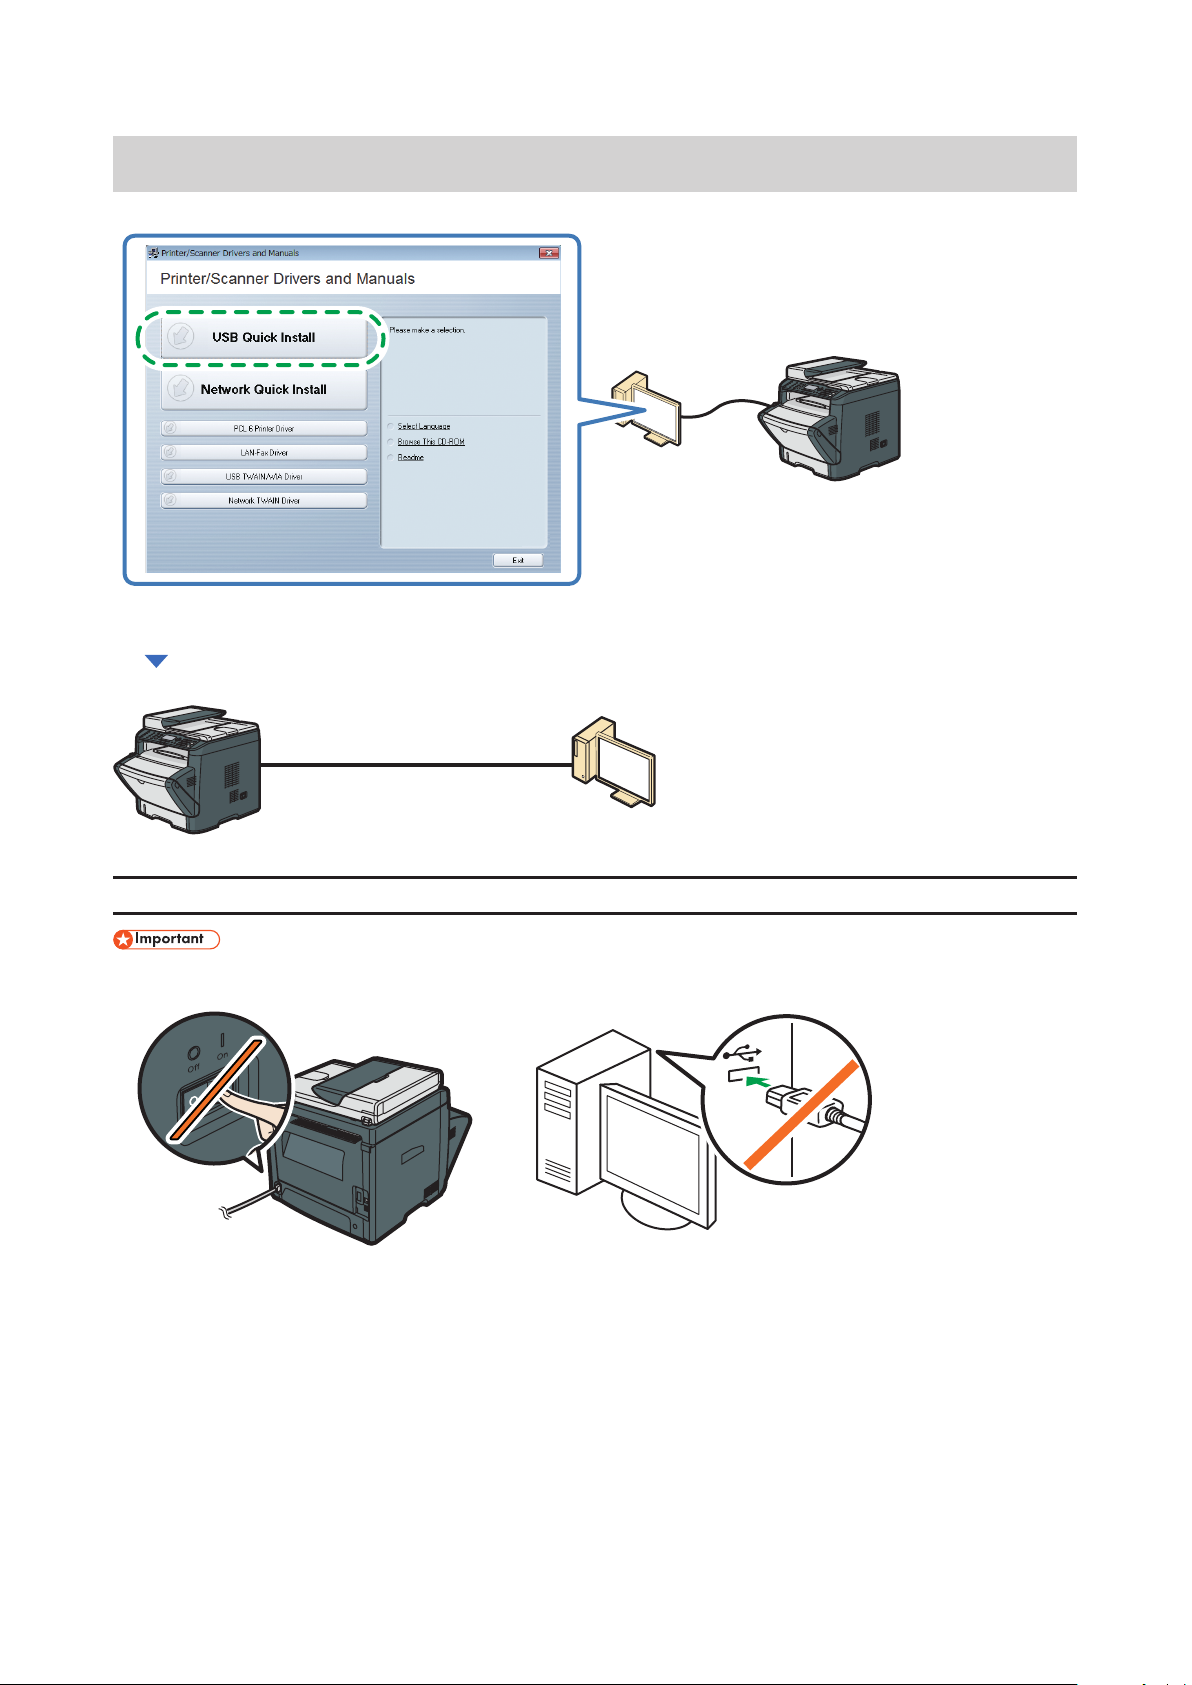
Connecting the Machine via USB
DPH029
DPH030
DPH013
CXP122
This section explains how to connect the machine to a computer using a USB cable.
Perform the setup according to the following procedures.
1. Quick Install for USB (See page 10)
2. Connecting the Computer and Machine (See page 11)
1. Quick Install for USB
Do not turn the machine on until prompted to do so in the installer window.
•
Do not connect the USB cable to the machine until prompted to do so in the installer window.
•
10

Make sure the machine is off.
CXP066
DPH036
DPH014
Turn on the power of the computer.
Insert the CD-ROM into the CD- ROM drive.
If the CD-ROM cannot be used, see page 29 "Installing the Software without Using the CD-ROM".
Select a language and product for the interface, and then click [OK].
Click [USB Quick Install].
Follow the instructions in the installation wizard.
If a message to turn on the power and connect the USB cable appears, do the following.
2. Connecting the Computer and Machine
Connect the machine and computer with a USB cable.
Plug the other end of the cable into a network device, such as a hub.
If it is necessary to specify the subnet mask, gateway, DNS server, or proxy server, see page 31 "How to Specify the Subnet, Gate-
•
way, DNS Server, and Proxy Server".
11
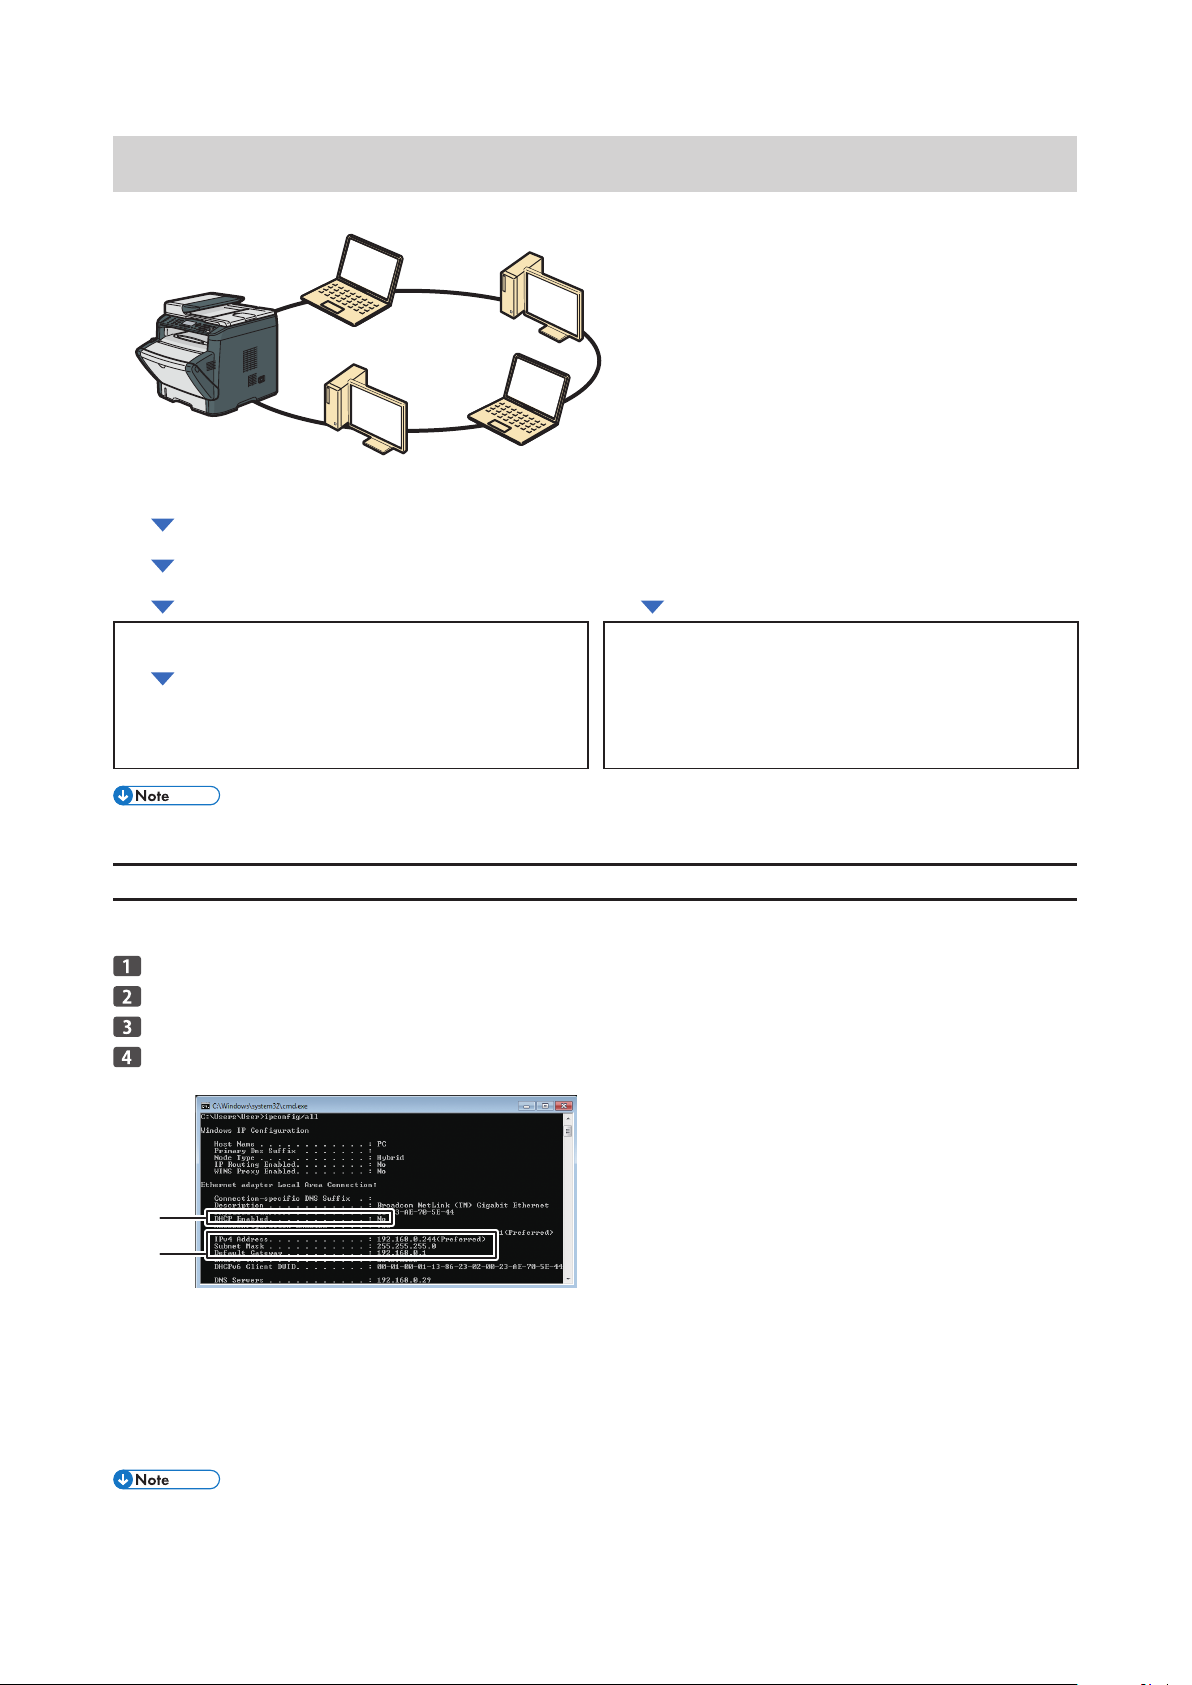
Connecting the Machine via Network
DPH031
1
2
CVW601
This section explains how to connect the machine to a computer using a network cable or wireless L AN.
Perform the setup according to the following procedures.
1. Checking the IP Address Settings(See page 12)
2. Printing the Configuration Page (See page 13)
3. Quick Install for Network (See page 13)
4. Wire L AN Settings (See page 22)
Connecting the Computer and Machine (See page 23)
Configuring network settings (See page 23)
IPv4
•
IPv6
•
If using the Ethernet cable, proceed to step 4. If using Wi-Fi connection, proceed to step 5.
•
5. Wi- Fi Settings (See page 15)
•
Quick and Easy Setup Using the WPS Button (See page 15)
Quick and Easy Setup Using the PIN Code (See page 17)
•
Manual Settings (Confirm the SSID and Encryption key) (See
•
page 19)
1. Checking the IP Address Settings
Confirm the network environment you want to use. Per form the following procedure using a computer on the network to which the
printer will be connected. The following procedure uses Windows 7 as an example.
Click the [Start] menu.
Enter "cmd" in the [Search programs and files] field, and then press the [Enter] key.
The command prompt appears.
Enter "ipconfig /all", and then press the [Enter] key.
The details about the network environment appear.
1. DHCP Enabled
"Yes" is displayed if the addresses on the screen were assigned by DHCP. The network settings can be automatically configured.
"No" is displayed if the addresses on the screen were not assigned by DHCP.
2. IP address, subnet mask, and default gateway
The IP address, subnet mask, and default gateway that have been assigned to the computer are displayed.
For manual configuration, use the same values as displayed here.
To manually specify the setting using Ethernet connection, make a note of the checked IP address.
•
12
 Loading...