

Page 1

MOISTURE METER
IAN 306954
PRÍSTROJ NA MERANIE VLHKOSTI
V STAVBÁCH A DREVE
Pokyny pre obsluhu a bezpečnostné pokyny
BAU- UND HOLZFEUCHTEMESSGERÄT
Bedienungs- und Sicherheitshinweise
MERILNIK VLAGE V LESU IN ZGRADBAH
Navodila za upravljanje in varnostna opozorila
MĚŘIČ VLHKOSTI DŘEVA A
STAVEBNÍCH MATERIÁLŮ
Pokyny pro obsluhu a bezpečnostní pokyny
MOISTURE METER
Operation and Safety notes
ANY A GNEDVESSÉGMÉRŐ
Kezelési és biztonsági utalások
Page 2
GB Operation and Safety notes Page 5
HU Kezelési és biztonsági utalások Oldal 20
SI Navodila za upravljanje in
varnostna opozorila Stran 35
CZ Pokyny pro obsluhu a
bezpečnostní pokyny Strana 51
SK Pokyny pre obsluhu a
bezpečnostné pokyny Strana 66
DE / AT / CH Bedienungs- und Sicherheitshinweise Seite 81
Page 3

8
2
1
4
3
6 5
7
Page 4

A
9
13 12 11
10
Page 5

5 GB
Introduction .....................................Page 6
Intended use ..........................................Page 6
Parts description ....................................Page 6
Technical data .......................................Page 7
Scope of delivery ..................................Page 7
General safety
instructions .......................................Page 8
Safety instructions for batteries /
rechargeable batteries..........................Page 8
Before using ....................................Page 10
Inserting / changing the
batteries .............................................Page 10
Start-up ...............................................Page 11
Before you take a measurement ..........Page 11
Taking a measurement ..........................Page 11
Battery display.......................................Page 14
Temperature display .............................Page 14
Reset function ........................................Page 14
Troubleshooting ..........................Page 15
Cleaning and care ......................Page 16
Storage ...............................................Page 16
Disposal ..............................................Page 16
Warranty ...........................................Page 18
Warranty claim procedure ...................Page 18
Service ...................................................Page 19
Page 6

6 GB
Moisture Meter
Introduction
We congratulate you on the purchase of your new
product. You have chosen a high quality product.
The instructions for use are part of the product. They
contain important information concerning safety, use
and disposal. Before using the product, please familiarise yourself with all of the safety information and
instructions for use. Only use the unit as described
and for the specified applications. If you pass the
product on to anyone else, please ensure that you
also pass on all the documentation with it.
Intended use
This product is suitable for measuring wood and
building moisture, for example in firewood, paper,
cardboard, mortar, concrete or plaster. The product
is only intended for use in private households, and
not intended for commercial use.
Parts description
1
Protective cap
2
Measuring pins
3
M / °C / °F button (Material selection,
°C or °F selection)
4
button (ON/OFF, displays
measurement on screen)
5
RESET button
6
Battery compartment cover
7
Battery compartment
Page 7

7 GB
8
Display
Moisture indicator in %
10
Material number
11
Low battery indicator
12
Lock symbol (Measured value frozen)
13
Temperature display (°C or °F)
Technical data
Operating voltage: 3 V (Direct Current)
Battery type: 2 x LR03/AAA
Temperature accuracy: + / - 1°C
Humidity accuracy: A: building material
below 1.4%: +/- 0.3%
over 1.4%: +/- 0.5%
B: wood material
below 30%: +/-2%
over 30%: +/-4%
Precision: see chapter “Making
measurements”
Operating temperature: 0 °C to 40 °C
Protection class: IP 20
Resolution: 0.1%
Air humidity: up to a maximum of
80% (relative)
Scope of delivery
Immediately after unpacking please check the
package contents for completeness and if all parts
and the product are in good condition.
1 Moisture Meter
2 LR03/AAA batteries
1 Instructions for use
Page 8
8 GB
General safety instructions
Before using the product, please familiarise yourself with all the operating and safety instructions.
Please include all documentation when passing
this product on to others.
Check the product for damage before use. If
the product is damaged do not use it.
Do not expose the product to moisture. Oth-
erwise the product could be damaged.
T
his product may be used by children age 8
ye
ars and up, as well as by persons with reduced physical, sensory or mental capacities,
or lacking experience and / or knowledge, so
long as they are supervised or instructed in
the safe use of the product and understand
the associated risks. Children should not be
allowed to play with the product. Cleaning
and user maintenance should not be performed by children without supervision.
The measuring pins are very
sharp. Always be careful when using this
product. Always attach the protective cap to
the product when not in use. Otherwise there
is a risk of injury!
Safety instructions for
batteries / rechargeable
batteries
DANGER TO LIFE! Keep batteries / re-
chargeable batteries out of reach of children.
If accidentally swallowed seek immediate
medical attention.
Page 9
9 GB
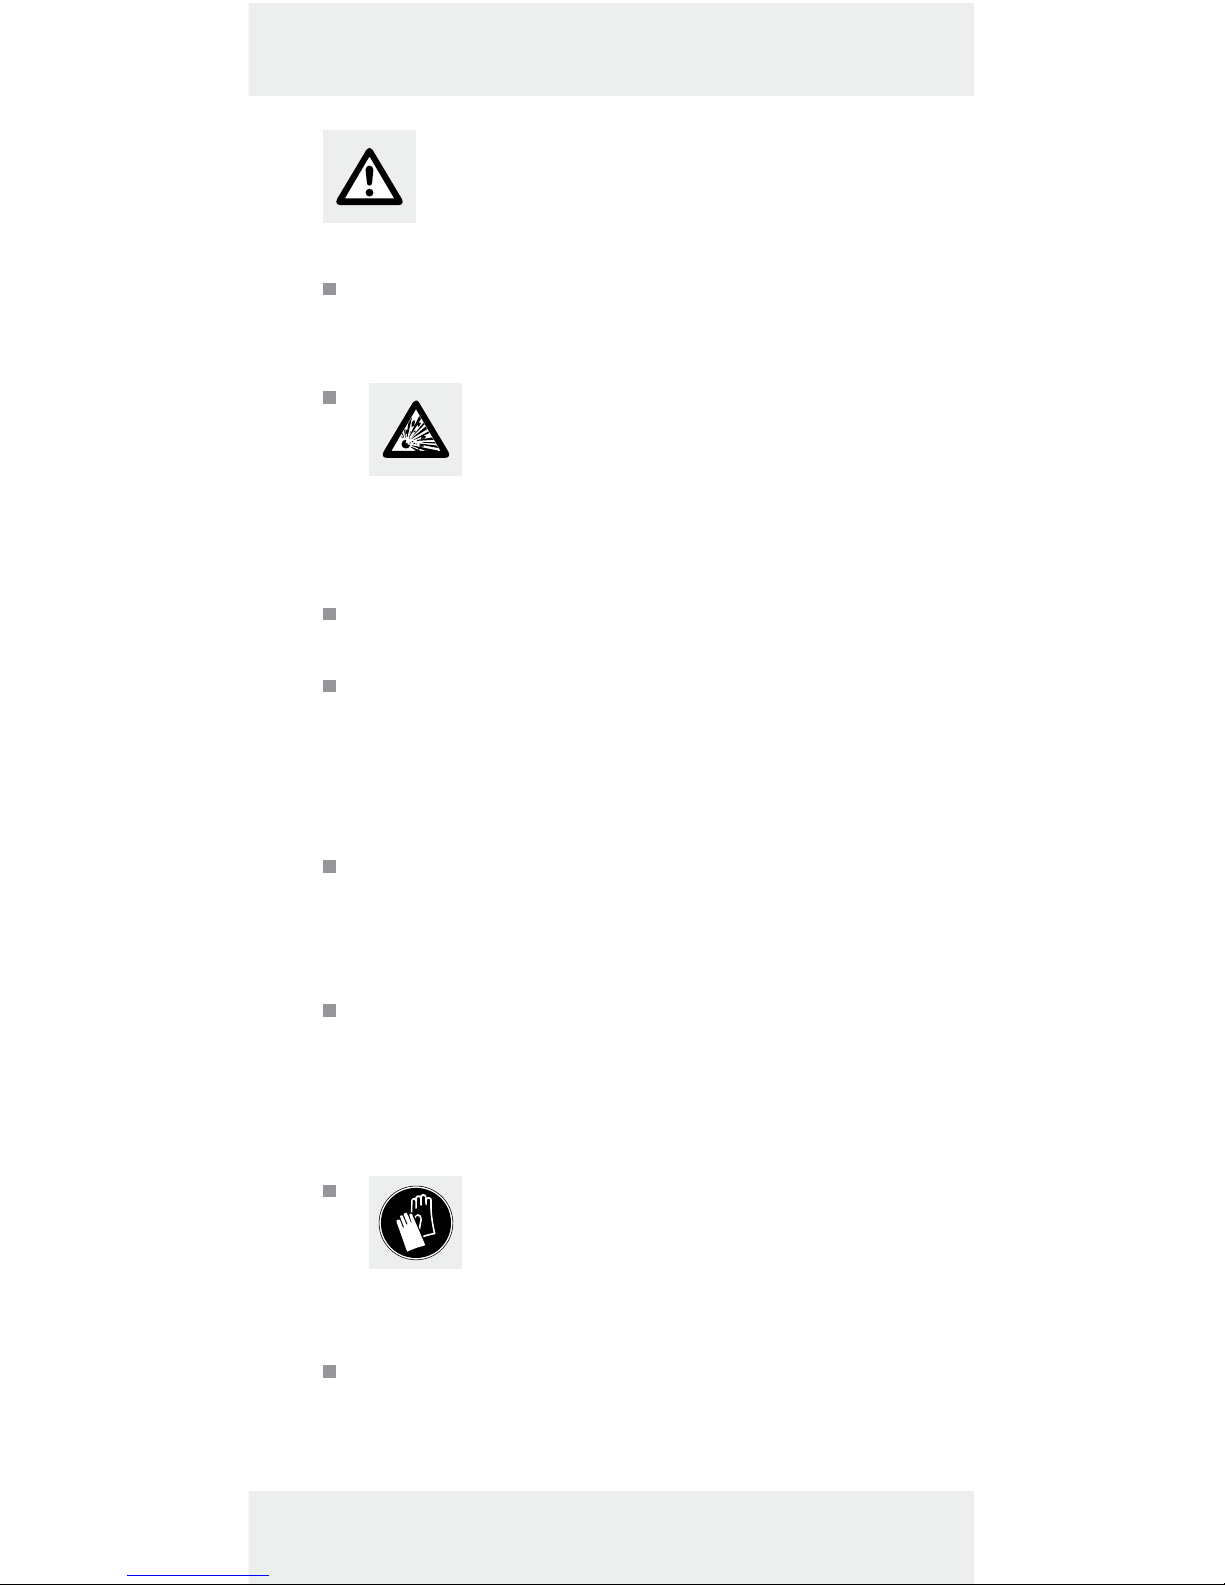
DANGER OF EXPLOSION!
Never recharge non-rechargeable
batteries. Do not short-circuit batteries / rechargeable batteries and / or open
them. Overheating, fire or bursting can be the
result.
Never throw batteries / rechargeable batter-
ies into fire or water.
Do not exert mechanical loads to batteries /
rechargeable batteries.
Risk of leakage of batteries / rechargeable batteries
Avoid extreme environmental conditions and
temperatures, which could affect batteries /
rechargeable batteries, e.g. radiators / direct
sunlight.
Avoid contact with the skin, eyes and mucous
membranes. In the event of contact with battery acid, thoroughly flush the affected area
with plenty of clean water and seek immediate medical attention.
WEAR PROTECTIVE GLOVES!
Leaked or damaged batteries /
rechargeable batteries can cause
burns on contact with the skin. Wear suitable
protective gloves at all times if such an event
occurs.
In the event of a leakage of batteries /
rechargeable batteries, immediately remove
them from the product to prevent damage.
Only use the same type of batteries /
rechargeable batteries. Do not mix used and
new batteries / rechargeable batteries.
Remove batteries / rechargeable batteries if
the product will not be used for a longer
period.
Page 10
10 GB
Risk of damage of the product
Only use the specified type of battery /
rechargeable battery!
Insert batteries / rechargeable batteries ac-
cording to polarity marks (+) and (-) on the
battery / rechargeable battery and the
product.
Clean the contacts on the battery / recharge-
able battery and in the battery compartment
before inserting!
Remove exhausted batteries / rechargeable
batteries from the product immediately.
Before using
Before initial use, remove the protective film
from the product display
8 and insert the
enclosed batteries.
Inserting / changing
the batteries
If the low battery indicator 11 appears in the display
8
,
the inserted batteries are almost drained and
must be replaced. Empty batteries can falsify the
measured result.
To insert the batteries proceed as follows:
Open the battery compartment cover on the
back of the product.
Remove the used batteries.
Insert 2 pcs of LR03 / AAA batteries with
observe the correct polarity.
Page 11

11 GB
Insert the batteries in the battery compart-
ment and close the cover again, so that it
audibly latches into place.
Note: No button should be pressed while
inserting the batteries.
Start-up
Before you take a
measurement
Ensure that both measuring pins 2 touch the
surface of the material at the same time.
Increase the pressure on the measuring pins
for rough surfaces if necessary.
For delicate surfaces complete the measure-
ment on a section that is not in the visible
area.
Note: The measuring pins are sharp and
may dent or damage the surface.
Rub the damp residue on the surface before
taking the measurement.
Measure several places and take an average
value.
Be aware that salts can increase the conduc-
tivity of water. This can lead to incorrect
readings and results that are too high.
Remove the bark from firewood if needed.
Press the measuring pins against the grain in
various places on the wood.
Taking a measurement
Press the button 4 to turn on the
product.
On the display 8 ‚0.0%‘
, the
Page 12
12 GB
surrounding temperature in °C and the previ-
ously selected material (1–6) appears.
Press the M / °C / °F button 3 and hold it
down for approximately 5 seconds to switch
the temperature display between °C and °F.
Press the M / °C / °F button 3 to select the
material number of which you wish to meas-
ure the moisture level.
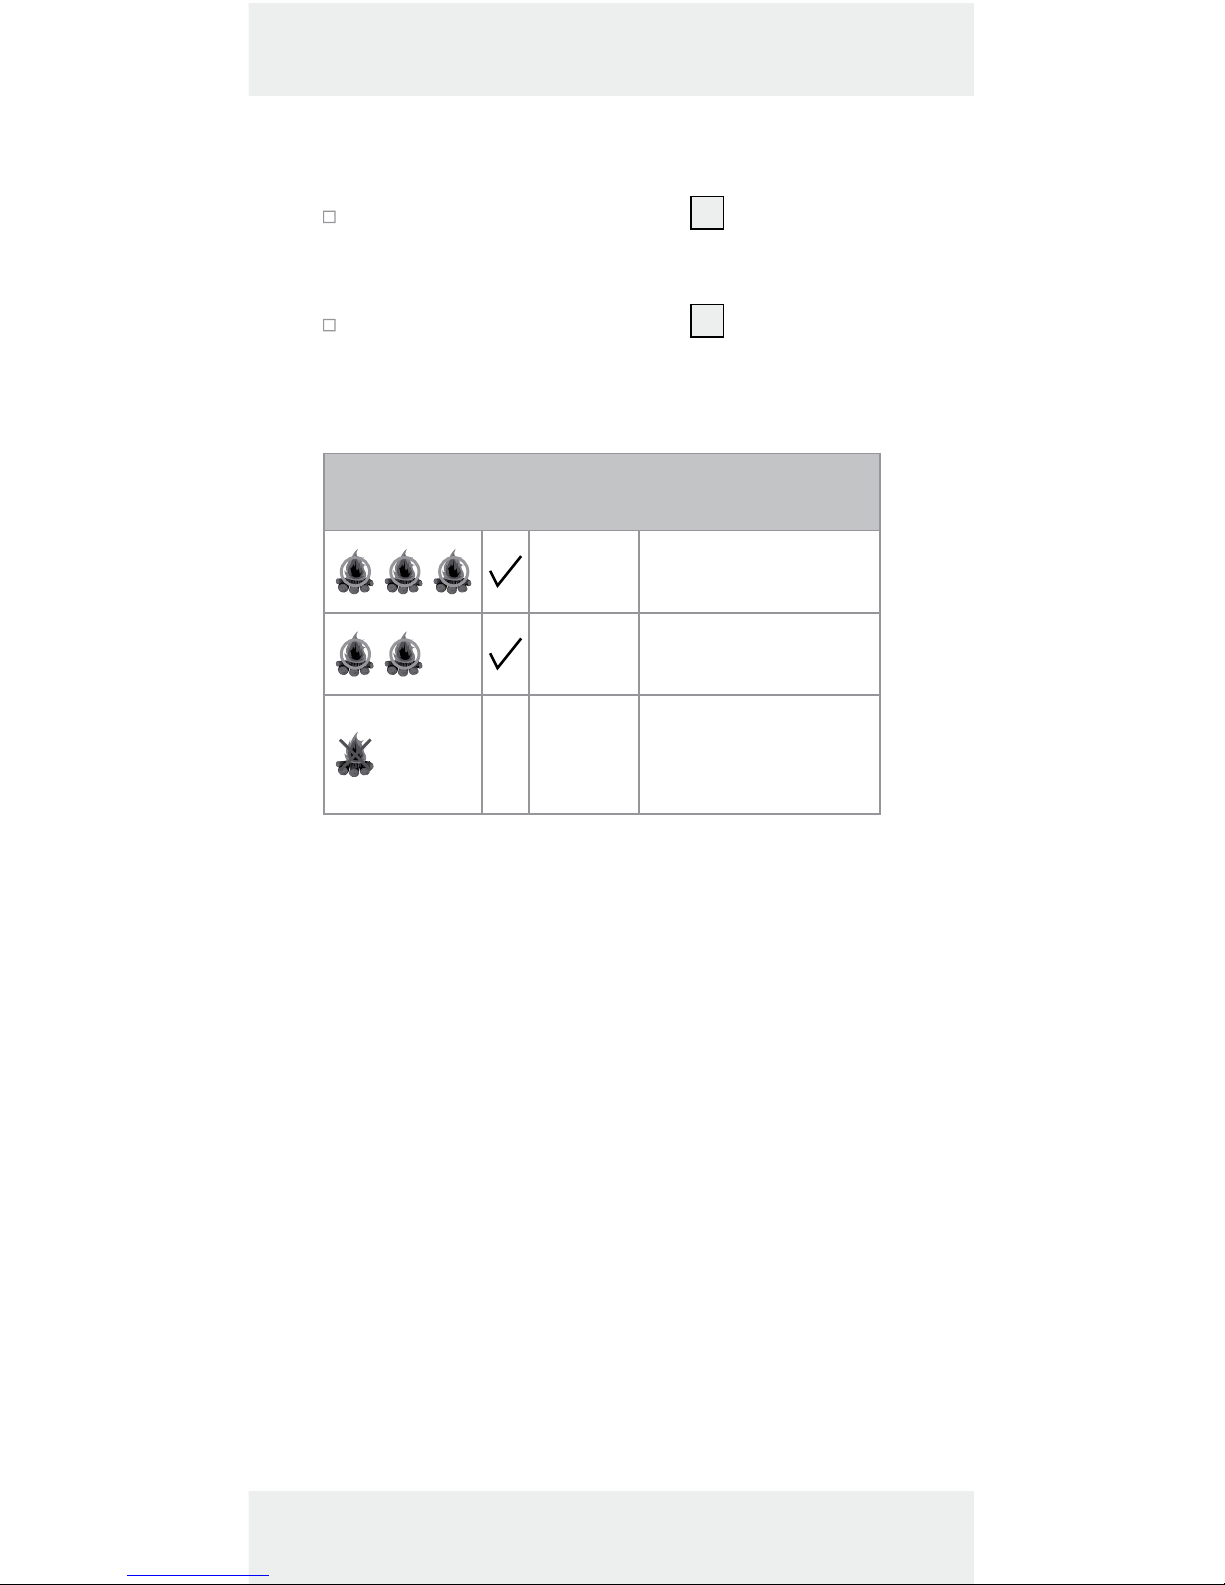
Wood moisture approximate value
for firewood
6–
15 %
ideal for heating –
high heating value
16–
20 %
restricted heating –
low heating value
X
21–
44 %
not suitable for hea-
ting – further drying
necessary
Note: Above table is reference for checking the
status of firewood. If the measured wood moisture
level is 15% or below, the firewood is ideal for
heating. If the measured wood moisture level is
from 16 to 20%, the firewood is medium dry. If
the measured wood moisture level is 21% or
above, the firewood is not suitable for heating
and further drying is necessary.
Page 13

13 GB
Reference values for humidity
expressed in per cent by weight
Num-
ber
Material
Measuring
range
dry borderline too humid
1
birch, beech, cherry,
larch, spruce
6–44 % < 12 % 12–15 % > 15 %
1
oak, pine, maple,
ash, Douglas fir
6–44 % < 15 % 15–20 % > 20 %
2
Cement screed,
concrete
1.4–7.4 % < 2 % 2–4 % > 4 %
3
Anhydride screed,
plaster
0.0–4.1 % < 0.5 % 0.5–1 % > 1 %
4
Cement mortar
0.8–5.1 % < 2 % 2–5 % > 5 %
5
Lime mortar
0.4–3.7 % < 2 % 2–3.5 % > 3.5 %
6
Brick
0.0–8.5 % < 1 % 1–3 % > 3 %
Note: When measuring under the measure-
ment range, the display shows ‚0.0%‘ or
‚Lo‘. For measurements above the measurement range, the display shows ‚Hi‘.
Remove the protective cap 1.
Press both measuring pins 2 against the
surface at the same time. After 1–2 seconds
you can read the percentage value.
If you are taking a measurement in an area in
which you cannot read the display, press
Page 14

14 GB
the button 4 to freeze the result on the
display. The display will then also show the
lock symbol.
Press the button 4 again to take an-
other measurement.
If you have completed your measurement,
switch the moisture measuring product off by
pressing holding the
button 4 for more
than 5 seconds.
Note: The moisture measuring product
switches itself off automatically if the product
is not used for 60 seconds approximately.
Battery display
If the battery charge status is low, the low battery
indicator
11
appears on the display 8. Please
note that while the batteries are low, the measured values will be false or inaccurate. Replace
the batteries as quickly as possible if this display
appears. The battery change is described in the
section “Inserting / changing the batteries“.
Temperature display
You can change the temperature display between
°C and °F by holding down M / °C / °F button
3
for approximately 5 seconds.
Reset function
A calibration can be performed if 0.0 % is not
shown on the display right after turn ON the
product. For this, open the battery compartment
Page 15

15 GB
and press the reset button situated on the backside of the product using a sharp object. If the displayed reading is still not right, press the reset
button again to calibrate again.
Note: Do not remove the batteries while using
RESET function.
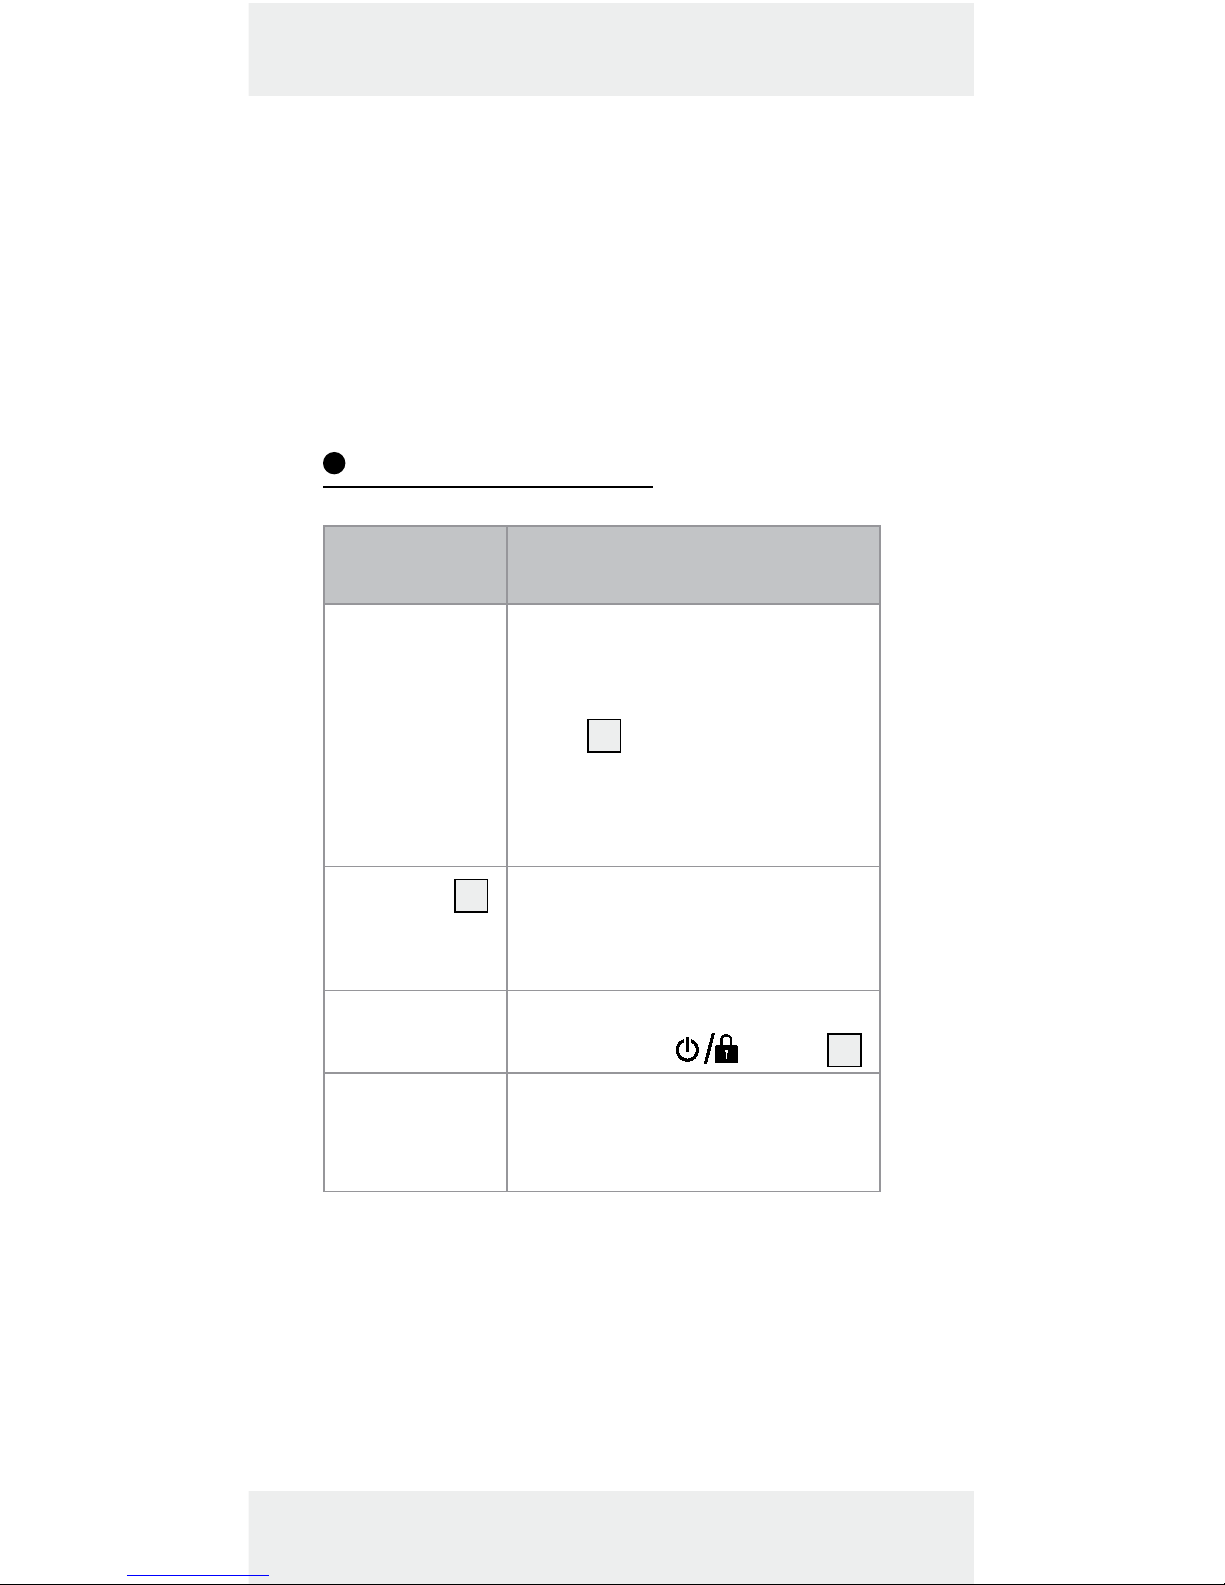
Troubleshooting
Error Possible causes and
solutions
The measurement is obviously too high
or low.
Check whether the product is
set to the correct material.
Check if the measuring pins
2
are correctly pressed against
the material.
Repeat the measurement process.
The display
8
is reading
'Lo' or 'Hi'.
The measurement range has
been exceeded or you have
not reached the measuring
range.
The number
on the display
is not reacting.
Is the lock key on the display?
Press the
button 4.
You can
barely see the
number on the
display.
The batteries are low.
See the chapter 'Inserting/
changing the batteries'.
Electrostatic discharges can lead to malfunctions.
In the event of such malfunctions, remove the
batteries briefly and reinsert them.
Page 16

16 GB
Cleaning and care
Do not allow liquids to enter the product.
Otherwise the product may be damaged.
Only clean the product with a slightly damp-
ened cloth and mild washing-up liquid.
Clean the measuring pins with a slightly
dampened cloth and dry it afterwards.
Check the product for visible external dam-
age before every use.
Check the measuring pins for damage before
every use.
Storage
Always attach the protective cap 1 to the
product when not in use.
Always remove the batteries if the product
will not be used for extended periods.
Store the product in a dry location.
Disposal
The packaging is made entirely of recyclable
materials, which you may dispose of at local
recycling facilities.
b
a
Observe the marking of the packaging
materials for waste separation, which
are marked with abbreviations (a) and
numbers (b) with following meaning:
1–7: plastics / 20–22: paper and fibreboard / 80–98: composite materials.
Page 17

17 GB
The product and packaging materials
are recyclable, dispose of it separately
for better waste treatment. The Triman
logo is valid in France only.
Contact your local refuse disposal
authority for more details of how to
dispose of your worn-out product.
To help protect the environment,
please dispose of the product properly
when it has reached the end of its useful life and not in the household waste.
Information on collection points and
their opening hours can be obtained
from your local authority.
Faulty or used batteries / rechargeable batteries
must be recycled in accordance with Directive
2006/66/EC and its amendments. Please return
the batteries / rechargeable batteries and / or the
product to the available collection points.
Environmental damage through
incorrect disposal of the batteries / rechargeable batteries!
Batteries / rechargeable batteries may not be disposed of with the usual domestic waste. They may
contain toxic heavy metals and are subject to
hazardous waste treatment rules and regulations.
The chemical symbols for heavy metals are as follows: Cd = cadmium, Hg = mercury, Pb = lead.
That is why you should dispose of used batteries /
rechargeable batteries at a local collection point.
Page 18

18 GB
Warranty
The product has been manufactured to strict quality guidelines and meticulously examined before
delivery. In the event of product defects you have
legal rights against the retailer of this product.
Your legal rights are not limited in any way by our
warranty detailed below.
The warranty for this product is 3 years from the
date of purchase. Should this product show any
fault in materials or manufacture within 3 years
from the date of purchase, we will repair or replace it – at our choice – free of charge to you.
The warranty period begins on the date of purchase.
Please keep the original sales receipt in a safe location. This document is required as your proof of
purchase. This warranty becomes void if the product has been damaged, or used or maintained
improperly.
The warranty applies to defects in material or manufacture. This warranty does not cover product
parts subject to normal wear, thus possibly considered consumables (e.g. batteries) or for damage
to fragile parts, e.g. switches, rechargeable batteries
or glass parts.
Warranty claim procedure
To ensure quick processing of your case, please
observe the following instructions:
Page 19

19 GB
Please have the till receipt and the item number
(e.g. IAN 123456) available as proof of purchase.
You will find the item number on the type plate,
an engraving on the front page of the instructions
(bottom left), or as a sticker on the rear or bottom
of the appliance.
If functional or other defects occur, please contact
the service department listed either by telephone
or by e-mail.
You can return a defective product to us free of
charge to the service address that will be provided
to you. Ensure that you enclose the proof of purchase
(till receipt) and information about what the defect
is and when it occurred.
Service
Service Great Britain
Tel.: 0800 404 7657
E-Mail: owim@lidl.co.uk
Page 20

20 HU
Bevezető .......................................... Oldal 21
Rendeltetésszerű használat ................ Oldal 21
Alkatrészleírás ..................................... Oldal 21
Műszaki adatok .................................. Oldal 22
A csomag tartalma ..............................Oldal 22
Általános biztonsági
utasítások ....................................... Oldal 23
Az elemekre / akkukra vonatkozó
biztonsági tudnivalók ..........................Oldal 24
Az üzembe helyezés előtt .. Oldal 25
Elemek behelyezése /
cserélése ..........................................Oldal 25
Üzembe helyezés .....................Oldal 26
Mérés végzése előtt ............................Oldal 26
A mérés elvégzése ..............................Oldal 27
Az elemekre vonatkozó kijelzések .....Oldal 29
Hőmérséklet kijelzés ...........................Oldal 29
Reset-funkció ........................................Oldal 29
Hibák elhárítása ....................... Oldal 30
Tisztítás és ápolás .................... Oldal 31
Tárolás ...............................................Oldal 31
Mentesítés ......................................Oldal 31
Garancia .......................................... Oldal 33
Garanciális ügyek lebonyolítása ....... Oldal 34
Szerviz ................................................. Oldal 34
Page 21

21 HU
Anyagnedvességmérő
Bevezető
Gratulálunk új termékének vásárlása alkalmából.
Ezzel a döntésével vállalatunk értékes terméke
mellett döntött. A használati utasítás ezen termék
része. A biztonságra, a használatára és a megsemmisítésre vonatkozó fontos tudnivalókat tartalmazza. A termék használata előtt ismerje meg az
összes használati és biztonsági tudnivalót. A terméket csak a leírtak szerint és a megadott felhasználási területeken alkalmazza. A termék harmadik
személy számára való továbbadása esetén kézbesítse vele annak a teljes dokumentációját is.
Rendeltetésszerű használat
A termék fa és építőanyagok, pl. tűzifa, papír,
karton, szerkezetfa, habarcs, beton és vakolat,
nedvességének mérésére alkalmas. A termék
magánháztartásokban történő alkalmazásra és
nem közületi felhasználásra készült.
Alkatrészleírás
1
Védősapka
2
Mérőrudak
3
M-/°C-/°F-Taste (anyagkiválasztás), °C-
vagy °F-kiválasztás)
4
-gomb (BE/KI), mért eredmény a
kijelzőn)
5
RESET -gomb
6
Elemrekesz-fedél
Page 22

22 HU
7
Elemrekesz
8
Kijelző
9
Nedvességtartalom kijelzése %-ban
10
Anyagszám
11
Az elem alacsony töltösségének kijelzése
12
Zár-jel (mérési egység befagyva)
13
Hőmérséklet-kijelző (°C, vagy °F)
Műszaki adatok
Üzemi feszültség: 3 V (egyenáram)
Elemtípus: 2 x LR03/AAA
Hőmérséklet pontossága: + / - 1 °C
Nedvesség pontossága: A: építőanyag
1,4% alatt: +/- 0,3%
1,4% felett: +/- 0,5%
B: faanyag 30 % alatt:
+/-2 %
30 % felett: +/-4 %
Mérési pontosság: lásd a „Mérés
kiviteezése“ fejezetet
Üzemi hőmérséklet: 0 °C-tól 40 °C-ig
Védelmi osztály: IP 20
Febontás: 0,1 %
Levegő páratartalma: maximum 80 %-ig
(relatív)
A csomag tartalma
A kicsomagolás után azonnal ellenőrizze a csomagolás tartalmát, annak teljességét, valamint a
termék és az elemek kifogástalan állapotát.
Page 23

23 HU
1 Építőanyag- és fanedvesség-mérőkészülék
2 LR03/AAA elem
1 Kezelési utasítás
Általános biztonsági
utasítások
A termék első használata előtt ismerje meg
valamennyi használati és biztonsági utasítást!
A termék harmadik félnek történő továbbadása
esetén adja át a teljes dokumentációt is!
Használatbavétel előtt ellenőrizze, hogy nem
sérült-e a termék. Ne üzemeljen be sérült
készüléket.
Ne tegye ki a terméket nedvességnek! Ellen-
kező esetben a termék károsodhat.
A terméket 8 éves kor feletti gyermekek,
valamint korlátozott fizikai, érzékszervi vagy
szellemi képességgel élő vagy nem megfelelő
tapasztalattal és tudással rendelkező személyek
csak felügyelet mellett, illetve a termék biztonságos használatára vonatkozó felvilágosítás
és a lehetséges veszélyek megértése után
használhatják. Gyermekek nem játszhatnak a
termékkel. A tisztítást és az ápolást gyermekek
felügyelet nélkül nem végezhetik.
A mérőrudak nagyon
hegyesek. Legyen mindig óvatos, amikor a
termékkel dolgozik. Mindig tegye fel a védőkupakot a termékre, ha nem használja azt.
Ellenkező esetben sérülésveszély áll fenn.
Page 24
24 HU
Az elemekre / akkukra
vonatkozó biztonsági
tudnivalók
ÉLETVESZÉLY! Tartsa távol az elemeket /
akkumulátorokat a gyermekektől. Lenyelés
esetén azonnal forduljon orvoshoz!
ROBBANÁSVESZÉLY! Soha ne
töltse a nem feltölthető elemeket.
Az elemeket / akkukat tilos rövidre
zárni és / vagy felnyitni. Annak következménye
túlhevülés, tűzveszély vagy a kihasadásuk
lehet.
Soha ne dobja az elemeket / akkukat tűzbe
vagy vízbe.
Ne tegye ki az elemeket / akkukat mechanikai
terhelésnek!
Az elemek / akkuk kifolyásának
kockázata
Kerülje a szélsőséges körülményeket és hő-
mérsékleteket, mint pl. fűtőtestek / közvetlen
napsugárzás, amelyek hatással lehetnek az
elemekre / akkukra.
Kerülje el a bőrrel, a szemmel és a nyálkahár-
tyákkal való érintkezését! Elemsavval való
érintkezés esetén azonnal mossa le az érintett helyet bő tiszta vízzel és haladéktalanul
forduljon orvoshoz!
VISELJEN VÉDŐKESZTYŰT! A
kifutott, vagy sérült elemek / akkuk
a bőrrel érintkezve felmarhatják
azt. Ezért ilyen esetben mindenképpen húzzon megfelelő védőkesztyűt!
Az elem / akku kifolyása esetén távolítsa el
azt azonnal a termékből a sérülések elkerülése érdekében.
Page 25

25 HU
Csak azonos típusú elemeket / akkukat
használjon! Ne használjon együtt régi és új
elemeket / akkukat!
Távolítsa el az elemeket / akkukat, ha hosz-
szabb ideig nem használja a terméket.
A termék sérülésének veszélye
Kizárólag a megadott típusú elemeket /
akkukat használja.
Az elemeket / akkut a termék és az elem /
akku (+) és (-) polaritás-jelzésének megfelelően helyezze be.
Tisztítsa meg az elem / akku és az elemrekesz
érintkezőit a behelyezés előtt!
A lemerült elemeket / akkukat haladéktalanul
távolítsa el a készülékből.
Az üzembe helyezés előtt
Üzembehelyezés előtt távolítsa el a védőfó-
liát a termék kijelzőjéről
8
és helyezze be a
mellékelt elemeket.
Elemek behelyezése /
cserélése
Ha megjelenik a kijeltőn 8 az alacsony elemtöltöttség
11
akkor az elemek lassan lemerülnek és
ki kell azokat cserélni. A lemerült elemek meghamisíthatják a mérés eredményét.
Az elem behelyezésekor a következőképpen járjon el:
Nyissa ki a készülék hátoldalán található
elemrekesz fedelet.
Page 26

26 HU
Adott esetben vegye ki belőle az régi elemeket.
Helyezzen be 2db LR03 / AAA típusú elemet.
Ügyeljen a helyes polaritásra.
Helyezze be az elemet az elemrekeszbe és
zárja le a fedelet ismét úgy, hogy az hallhatóan bepattanjon.
Tudnivaló: Miközben behelyezi az eleme-
ket, ne nyomjon meg semmilyen gombot.
Üzembe helyezés
Mérés végzése előtt
Ügyeljen arra, hogy mindkét mérőpálca 2
egyidőben érintse az anyagfelületet.
Érdes felület esetén növelje a mérőpálcákra
gyakorolt nyomást.
Kényes felületek esetén egy nem látható
helyen végezze el a mérést.
Útmutatás: A mérőpálcák hegyesek és
benyomhatják, ill. károsíthatják a felületeket.
A nedves felületeket a mérés előtt dörzsölje
szárazra.
Több helyen végezzen mérést és számítson
átlagértéket.
Ügyeljen arra, hogy a sók növelik a víz veze-
tőképességét. Ezek torzíthatják és megnövelhetik a mérési eredményeket.
Amennyiben szükséges, a tűzifa kérgét
távolítsa el. Nyomja a mérőpálcákat a száliránynak keresztbe a fába több helyen is.
Page 27

27 HU
A mérés elvégzése
Nyomja meg a gombot 4 a termék
bekapcsolásához. A kijelzőn
8
megjelenik
a „0,0 %“, a környezeti hőmérséklet °C-ban
és az utoljára választott anyag (1–6).
Tartsa az M-/ °C-/ °F -gombot 3 lenyomva
kb. 5 másodpercre, hogy a hőmérséklet kijelzést megváltoztassa °C és °F között.
Nyomja meg újra a M-/ °C-/ °F -gombot 3,
hogy a nedvességmérőt a mérendő anyagra
beállítsa:
Fanedvesség-irányértékek tüzifához:
6–
15 %
Optimális tüzelés-
hez - magas
fűtőérték
16–
20 %
Korlátozottan fűtőalacsony fűtőérték
X
21–
44 %
Fűtésre nem
alkalmas - további
szárítás szükséges
Tudnivaló: Az előző táblázat a tűzifa mérésére
szolgál. Ha a mért nedvesség 15 % vagy kevesebb,
akkor a fa jó tűzifa. Ha a nedvesség 16 és 20 %
között van, akkor a megfelelőség határán van. A
20 % nedvesség feletti fa nem alkalmas tűzifának
és tovább kell szárítani.
Page 28

28 HU
Referenciaértékek nedvességre,
százalékban ábrázolva,
súlyra vonatkoztatva
Számj-
egy
Anyag
Mérési tar-
tomány
száraz határérték túl nedves
1
Nyírfa, bükkfa,
cseresznyefa, vöröfenyő,
lucfenyő
6–44 % < 12 % 12–15 % > 15 %
1
Tölgy, erdeifenyő, juhar,
kőris, douglaszfenyő
6–44 % < 15 % 15–20 % > 20 %
2
cementvakolat, beton
1,4–7,4 % < 2 % 2–4 % > 4 %
3
anhidrit-vakolat, vakolat
0,0–4,1 % < 0,5 % 0,5–1 % > 1 %
4
Cementhabarcs
0,8–5,1 % < 2 % 2–5 % > 5 %
5
Mészhabarcs
0,4–3,7 % < 2 % 2–3,5 % > 3,5 %
6
Tégla
0,0–8,5 % < 1 % 1–3 % > 3 %
Útmutatás: A mérési tartomány alatti mérés
esetén a kijelzőn „0,0 %“, vagy „Lo“ látszik.
A mérési tartomány feletti mérés esetén a kijelzőn „Hi“ látszik.
Távolítsa el a védőkupakot 1.
Nyomja mindkét mérőpálcát 2 egyszerre a
felületre. Kb. 1-2 másodpercig leolvashatja a
százalékos értéket.
Ha olyan tartományban mér, amit a kijelzőn
nem tud leolvasni, nyomja meg a
-
Page 29

29 HU
gombot 4 a kijelző újraindításához. A kijelzőn ekkor a zár-jel is látható.
Nyomja meg még egyszer a -gombot
4
egy új mérés elvégzéséhez.
Ha a mérés lezajlott, kapcsolja ki a nedves-
ségmérőt úgy, hogy tartsa lenyomva a
-
gombot,
4
több mint 5 másodpercre. Végül
tegye vissza a védősapkát.
Tudnivaló: A nedvességmérő automatikusan
kikapcsol, ha a terméket körülbelül 60 másodpercig nem használja.
Az elemekre vonatkozó
kijelzések
Alacsony elemtöltöttség esetén a kijelzőn 8 az
alacsony elemtöltöttség
11
állapotjelző jelenik meg.
Kérem, vegye figyelembe, hogy alacsony elemtöltöttségnél a mért értékek helytelenek és pontatlanok.
Ennek a jelnek a megjelenésekor a lehető legygyorsabban cserélje ki az elemet. Az elemcsere
folyamatát az „Elem behelyezése /cseréje“ fejezet írja le.
Hőmérséklet kijelzés
A hőmérsékletkijelzőn °C és °F között válthat,
úgy hogy kb. 5 másodpercig lenyomva tartja az
M / C / F -gombot
3
.
Reset-funkció
Akkor lehet kalibrálni, ha a termék közvetlen bekapcsolása után a kijelző nem 0,0 % -ot mutat.
Page 30
30 HU
Nyissa ki az elemrekeszt és egy hegyes tárgy segítségével nyomja meg a Reset-gombot a termék
hátoldalán. Ha a kijelzett, mért érték nem stimmel,
nyomja meg újból a Reset-gombot, hogy újra kalibrálja a terméket.
Tudnivaló: Ne távolítsa el az elemeket, amíg a
RESET-funkciót használja.
Hibák elhárítása
Hiba Lehetséges ok és
megoldás
A mérési
eredmény
láthatóan túl
magas, vagy
túl alacsony.
Ellenőrizze, hogy a termék a
helyes anyagra van-e beállítva.
Ellenőrizze, hogy a mérőpálcákat
2
helyesen nyomja-e
az anyagra.
Ismételje meg a mérési
folyamatot.
A kijelzőn
8
„Lo“, vagy
„Hi“ látható.
Átlpte a mérési tartományt.
A kijelző nem
reagál.
Látszik-e a kijelzőn a zár-jel?
Nyomja meg a -gombot 4.
A kijelzőn alig
látszik valami.
Az elemek lemerültek.
Ehhez lásd „Az elemek behelyezése/cseréje” fejezetet.
Az elektrosztatikus kisülések működési zavarokhoz vezethetnek. Ilyen működési zavarok előállása esetén távolítsa el a készülékből rövid időre
az elemet és utána helyezze azt újra vissza.
Page 31

31 HU
Tisztítás és ápolás
Ügyeljen arra, hogy ne szivárogjon folyadék
a termékbe. Ellenkező esetben anyagi károsodás veszélye áll fenn.
A terméket mindössze egy enyhén megnedve-
sített kendővel és kíméletes mosogatószerrel
tisztítsa.
A mérőhegyeket egy enyhén megnedvesített
kendővel tisztítsa és végül szárítsa meg.
Minden használat előtt ellenőrizze a termék
külső, látható sérüléseit.
Minden használat előtt ellenőrizze a mérőhe-
gyeket, hogy nem sérültek-e.
Tárolás
Mindig tegye fel a védőkupakot 1 a termékre,
ha nem használja azt.
Mindig távolítsa el az elemet, ha hosszabb
ideig nem használja a terméket.
A terméket hűvös és száraz környezetben
tárolja.
Mentesítés
A csomagolás környezetbarát anyagokból készült,
amelyeket a helyi újrahasznosító helyeken adhat
le ártalmatlanítás céljából.
b
a
A hulladék elkülönítéséhez vegye
figyelembe a csomagolóanyagon
található jelzéseket. Ezek rövidítéseket
(a) és számokat (b) tartalmaznak a
következő jelentéssel: 1–7: műanyagok /
Page 32

32 HU
20–22: papír és karton / 80–98:
kötőanyagok.
A termék és a csomagolóanyagok
újrahasznosíthatóak, semmisítse meg
ezeket elkülönítve a jobb hulladékkezelés érdekében. A Triman-logó csak
Franciaországra vonatkozik.
A kiszolgált termék megsemmisítési
lehetőségeiről lakóhelye illetékes
önkormányzatánál tájékozódhat.
A környezete érdekében, ne dobja a
kiszolgált terméket a háztartási szemétbe, hanem adja le szakszerű ártalmatlanításra. A gyűjtőhelyekről és
azok nyitvatartási idejéről az illetékes
önkormányzatnál tájékozódhat.
A hibás vagy elhasznált elemeket / akkukat a
2006/66/EK irányelv és módosításai értelmében
újra kell hasznosítani. Szolgáltassa vissza az elemeket / akkukat és / vagy a terméket az ajánlott
gyűjtőállomásokon keresztül.
Környezeti károk az elemek /
akkuk hibás megsemmisítése
következtében!
Az elemeket / akkukat nem szabad a háziszemétbe
dobni. Mérgező hatású nehézfémeket tartalmazhatnak és ezért különleges kezelést igénylő hulladéknak számítanak. A nehézfémek vegyjelei a
következők: Cd = kadmium, Hg = higany, Pb =
ólom. Ezért az elhasznált elemeket / akkukat egy
közösségi gyűjtőhelyen adja le.
Page 33

33 HU
Garancia
A terméket szigorú minőségi előírások betartásával
gondosan gyártottuk, és szállítás előtt lelkiismeretesen ellenőriztük. Ha a terméken hiányosságot
tapasztal, akkor a termék eladójával szemben törvényes jogok illetik meg Önt. Ezeket a törvényes
jogokat a következőkben ismertetett garancia
vállalásunk nem korlátozza.
A termékre 3 év garanciát adunk a vásárlás dátumától számítva. A garanciális idő a vásárlás dátumával kezdődik. Kérjük, jól őrizze meg a pénztári
blokkot. Ez a bizonylat szükséges a vásárlás tényének az igazolásához.
Ha a termék vásárlásától számított 3 éven belül
anyag- vagy gyártási hiba merül fel, akkor a választásunk szerint a terméket ingyen megjavítjuk
vagy kicseréljük. A garancia megszűnik, ha a terméket megrongálták, nem szakszerűen kezelték
vagy tartották karban.
A garancia az anyag- vagy gyártáshibákra vonatkozik. A garancia nem terjed ki azokra a termékrészekre, melyek normál kopásnak vannak kitéve
és ezért fogyóeszköznek tekinthetők (pl. elemek),
vagy a törékeny részekre sérülésére, pl. kapcsolók,
akkuk, vagy üvegből készült részek.
Page 34

34 HU
Garanciális ügyek
lebonyolítása
Ügyének gyors elintézhetősége céljából, kérjük
kövesse az alábbi útmutatást:
Kérjük, kérdések esetére készítse elő a pénztárblokkot és a cikkszámot (pl. IAN 123456) a vásárlás
tényének az igazolására.
Kéjük, hogy a cikkszámot olvassa le a típustábláról,
a gravírozásból, az Útmutató címoldaláról (balra
lent), illetve a hátoldalon, vagy a termék alján
található matricáról.
Amennyiben működési hibák, vagy egyéb hiányosság lépne fel, előszöris vegye fel a kapcsolatot a
következőkben megnevezett szervizek egyikével
telefonon, vagy e-mailen.
A hibásnak ítélt terméket ezután a vásárlást igazoló
blokk, valamint a hiba leírásának és keletkezési
idejének mellékelésével díjmentesen postázhatja
az Önnel közölt szervizcímre.
Szerviz
Szerviz Magyarország
Tel.: 06 800 21225
E-mail: owim@lidl.hu
Page 35

35 SI
Uvod .....................................................Stran 36
Predvidena uporaba ............................Stran 36
Opis delov ............................................ Stran 36
Tehnični podatki ................................... Stran 37
Obseg dobave .....................................Stran 37
Splošni varnostni napotki .. Stran 38
Varnostni napotki za baterije /
akumulatorje .........................................Stran 39
Pred začetkom uporabe .....Stran 40
Vstavljanje / menjavanje
baterij ..................................................Stran 40
Začetek uporabe ....................... Stran 41
Preden začnete z merjenjem ............... Stran 41
Izvedba meritve ....................................Stran 42
Prikaz baterije.......................................Stran 44
Prikaz temperature ............................... Stran 44
Funkcija ponastavitve ...........................Stran 44
Odprava napak ..........................Stran 45
Čiščenje in nega .......................... Stran 46
Skladiščenje ................................... Stran 46
Odstranjevanje ........................... Stran 46
Garancijski list .............................Stran 48
Postopek pri uveljavljanju garancije ... Stran 50
Servis .....................................................Stran 50
Page 36

36 SI
Merilnik vlage v lesu in zgradbah
Uvod
Iskrene čestitke ob nakupu vašega novega izdelka. Odločili ste se za zelo kakovosten izdelek.
To navodilo za uporabo je sestavni del tega izdelka. Vsebuje pomembna navodila za varnost,
uporabo in odstranitev. Preden začnete izdelek
uporabljati, se seznanite z vsemi navodili za uporabo in varnostnimi napotki. Izdelek uporabljajte
samo tako, kot je opisano, in samo za navedena
področja uporabe. Če izdelek odstopite novemu
lastniku, mu zraven izročite tudi vse dokumente.
Predvidena uporaba
Izdelek je namenjen za merjenje vlage v lesu in
gradbenem materialu, npr. v lesu za ogrevanje,
papirju, kartonu, konstrukcijskem lesu, malti, betonu
ali ometu. Izdelek je predviden samo za uporabo
v zasebnih gospodinjstvih in ne za poslovno uporabo.
Opis delov
1
Zaščitni pokrov
2
Merilni žebljička
3
Tipka M / °C / °F (izbira materiala, °C ali °F)
4
-Tipka (VKLOP / IZKLOP, rezultat merjenja na zaslonu)
5
Tipka RESET
6
Pokrov predalčka za baterije
7
Predalček za baterije
Page 37

37 SI
8
Zaslon
9
Prikaz vlažnosti v %
10
Številka materiala
11
Prikaz nizkega stanja baterij
12
Simbol ključavnice (merilna vrednost je
zamrznjena)
13
Prikaz temperature (°C ali °F)
Tehnični podatki
Obratovalna napetost: 3 V (enosmerni
tok)
Vrsta baterije: 2 x LR03/AAA
Natančnost temperature: + / - 1 °C
Natančnost vlage: A: gradbeni material
pod 1,4%: +/- 0,3%
nad 1,4%: +/- 0,5%
B: lesni material pod
30 %: +/-2 %
nad 30 %: +/-4 %
Natančnost merjenja: glej poglavje
„Izvedba meritve“
Obratovalna temperatura: 0 °C do 40 °C
Razred zaščite: IP 20
Ločljivost: 0,1 %
Vlažnost zraka: do največ 80 %
(relativne vlage)
Obseg dobave
Takoj ko odvijete embalažo, preverite popolnost
in nepoškodovanost izdelka ter vseh delov.
Page 38

38 SI
1 Merilnik vlage v gradbenem materialu in lesu
2 Bateriji LR03/AAA
1 Navodilo za uporabo
Splošni varnostni
napotki
Pred prvo uporabo izdelka preberite vsa navodila
za uporabo in varnostne napotke! Če izdelek
odstopite novemu lastniku, mu zraven izročite tudi
vse dokumente!
Pred prvo uporabo preverite, ali so na izdelku
morebitne poškodbe. Nikoli ne uporabljajte
izdelka, če ugotovite kakršne koli poškodbe.
Izdelka ne izpostavljajte vlagi. V nasprotnem
primeru se lahko izdelek poškoduje.
Izdelek lahko uporabljajo otroci od 8. leta
naprej ter osebe z zmanjšanimi fizičnimi, čutilnimi ali duševnimi sposobnostmi ali osebe s
pomanjkanjem izkušenj in / ali znanja, če so
pod nadzorom ali če so bili poučeni o varni
uporabi izdelka in razumejo nevarnosti, do
katerih lahko pride med uporabo. Otroci se
ne smejo igrati z izdelkom. Otroci ne smejo
brez nadzora izvajati čiščenja in vzdrževanja.
Merilna zatiča sta zelo
koničasta. Med delom z izdelkom bodite
vedno previdni. Na izdelek vedno namestite
zaščitno kapico, če ga ne uporabljate. V nasprotnem primeru obstaja nevarnost poškodb!
Page 39

39 SI
Varnostni napotki za
baterije / akumulatorje
SMRTNA NEVARNOST! Baterije / akumu-
latorje shranjujte zunaj dosega otrok. V primeru
zaužitja nemudoma poiščite zdravniško
pomoč!
NEVARNOST EKSPLOZIJE!
Baterij, ki niso predvidene za pol-
njenje, nikoli znova ne polnite. Ne
povzročite kratkega stika baterij / akumulatorjev in / ali jih odpirajte. Posledice so lahko
pregretje in nevarnost požara, lahko jih tudi
raznese.
Baterij / akumulatorjev nikoli ne mečite v
ogenj ali vodo.
Baterij / akumulatorjev ne izpostavljajte
mehanskim obremenitvam.
Tveganje iztekanja baterij /
akumulatorjev
Izogibajte se izrednim pogojem in temperatu-
ram, ki bi lahko vplivale na baterije / akumulatorje, npr. na radiatorju / neposredni sončni
svetlobi.
Izogibajte se stiku s kožo, z očmi in s sluzni-
cami! Če pridete v stik s kislino iz baterije,
prizadeta mesta takoj izperite z veliko čiste
vode in nemudoma poiščite zdravniško pomoč!
NOSITE ZAŠČITNE ROKA-
VICE! Iztekle ali poškodovane
baterije / akumulatorji lahko ob
stiku s kožo povzročijo razjede. V takšnem
primeru nosite primerne zaščitne rokavice.
V primeru iztekanja baterij / akumulatorjev
le-te takoj odstranite iz izdelka, da preprečite
poškodbe.
Page 40

40 SI
Uporabljajte samo baterije / akumulatorje
enakega tipa. Ne mešajte starih baterij /
akumulatorjev z novimi!
Baterije / akumulatorje odstranite, kadar iz-
delka dlje časa ne uporabljate.
Tveganje poškodb izdelka
Uporabljajte izključno navedeni tip baterije /
akumulatorja!
Baterije / akumulatorje vstavite v izdelek
skladno z oznakama polarnosti (+) in (-) na
bateriji / akumulatorju in izdelku.
Pred vstavljanjem očistite kontakte na bateri-
jah / akumulatorjih in v predalčku za baterije!
Iztrošene baterije / akumulatorje nemudoma
odstranite iz izdelka.
Pred začetkom uporabe
Pred začetkom uporabe odstranite zaščitno
folijo z zaslona
8
izdelka in vstavite prilo-
ženi bateriji.
Vstavljanje / menjavanje
baterij
Če se na zaslonu 8 prikaže prikaz nizkega stanja
baterij
11
, sta vstavljeni bateriji skoraj izpraznjeni
in ju je treba zamenjati. Prazne baterije lahko
povzročijo napačne rezultate merjenja.
Pri vstavljanju novih baterij ravnajte
kot sledi:
Odprite pokrov predalčka za baterije na
hrbtni strani izdelka.
Page 41

41 SI
Po potrebi odstranite stari bateriji.
Vstavite 2 bateriji LR03 / AAA. Upoštevajte
pravilno polarnost.
Bateriji vstavite v predalček za baterije in po-
krov znova zaprite, tako da se slišno zaskoči.
Napotek: Med vstavljanjem baterij ne
smete pritisniti nobene tipke.
Začetek uporabe
Preden začnete z merjenjem
Pazite na to, da se bosta oba merilna
zatiča
2
hkrati dotaknila površine materiala.
V primeru hrapave površine eventualno
povečajte pritisk na merilna zatiča.
Na občutljivih površinah meritev izvedite na
skritem mestu.
Napotek: Merilna zatiča sta špičasta, s
katerima lahko vdrete površino oz. jo poškodujete.
Mokre dele na površini obrišite pred začet-
kom merjenja.
Meritev izvedite na različnih mestih in nato
izračunajte povprečno vrednost.
Pazite na to, da soli zvišajo prevodnost vode.
Zaradi tega lahko pride do napačnega oz.
previsokega merilnega rezultata.
Če je treba pri lesu za kurjenje v kaminu, po
potrebi odstranite kamin. Merilna zatiča na
različnih mestih zarinite v les prečno glede na
smer vlaken.
Page 42

42 SI
Izvedba meritve
Za vklop izdelka pritisnite tipko 4. Na
zaslonu
8
se pojavi »0,0 %«, temperatura v
okolici v °C in prej izbrani material (1–6).
Držite tipko M/ °C/ °F 3 pritisnjeno pribl.
5 sekund, da boste preklopili prikaz temperature med °C in °F.
Ponovno pritisnite tipko M/ °C/ °F 3, če že-
lite nastaviti merilnik vlage na material, ki ga
želite izmeriti:
Vlažnost lesa - orientacijske vrednosti
za drva
6–
15 %
Optimalno za ogre-
vanje – visoka
kalorična vrednost
16–
20 %
Omejeno ogre-
vanje – nizka
kalorična vrednost
X
21–
44 %
Ni primerno za
ogrevanje – pot-
rebno je dodatno
sušenje
Napotek: Predhodno prikazana tabela je namenjena za merjenje drv. Če je izmerjena vlaga
15 % ali manj, je les idealen za kurjenje. Če je
vlaga med 16 in 20 %, je primernost na meji. Če
je vlaga nad 20 %, les ni primeren za kurjenje in
ga je treba predhodno posušiti.
Page 43

43 SI
Referenčne vrednosti za
vlažnost, prikazane v odstotkih,
povezane s težo
Številka Material
Merilno
območje
suho
Mejna
vrednost
prevlažno
1
breza, bukev, češnja,
macesen, smreka
6–44 % < 12 % 12–15 % > 15 %
1
Hrast, bor, javor,
jesen, duglazija
6–44 % < 15 % 15–20 % > 20 %
2
cementni estrih, beton
1,4–7,4 % < 2 % 2–4 % > 4 %
3
anhidridni estrih,
omet
0,0–4,1 % < 0,5 % 0,5–1 % > 1 %
4
cementna malta
0,8–5,1 % < 2 % 2–5 % > 5 %
5
apnena malta
0,4–3,7 % < 2 % 2–3,5 % > 3,5 %
6
opeka
0,0–8,5 % < 1 % 1–3 % > 3 %
Napotek: Pri meritvah, ki so manjša od
merilnega področja, se na zaslonu prikaže
„0,0 %“ ali „Lo“. Pri meritvah, ki so višja od
merilnega področja, se na zaslonu prikaže „Hi“.
Odstranite zaščitno kapo 1.
Istočasno pritisnite merilna zatiča 2 na povr-
šino. Po pribl. 1–2 sekundah lahko odčitate
vrednost v odstotkih.
Če merite na takšnem mestu, da ne morete
prebrati vrednosti na zaslonu, pritisnite tipko
Page 44

44 SI
4, da boste zamrznili prikaz na zaslonu. Na zaslonu se dodatno prikaže simbol
s ključavnico.
Znova pritisnite tipko 4, če želite
izvesti novo meritev.
Če je meritev uspešna, izklopite merilnik vlage,
tako da pritisnete in zadržite tipko
4
za več kot 5 sekund. Nato ponovno namestite
zaščitni pokrov.
Napotek: Merilnik vlage se bo samodejno
izključil, če izdelka ne boste uporabljali približno 60 sekund.
Prikaz baterije
Pri nizkem stanju baterij se na zaslonu 8 prikaže
prikaz nizkega stanja baterij
11
. Upoštevajte, da
so lahko pri nizkem stanju baterij izmerjene vrednosti napačne ali nenatančne. Ko se pojavi ta
prikaz, čim prej zamenjajte bateriji. Zamenjava
baterij je opisana v poglavju »Vstavljanje / menjava
baterij«.
Prikaz temperature
Pritisnite tipko M/°C/°F 3 in jo držite pribl.
5 sekund za prestavitev prikaza temperature med
°C in °F.
Funkcija ponastavitve
Umerjanje je mogoče izvesti, če neposredno po
vklopu izdelka na zaslonu ni prikazano 0,0 %. Za
to odprite predalček za baterije in s pomočjo
Page 45

45 SI
koničastega predmeta pritisnite tipko Reset na
hrbtni strani izdelka. Če prikazana izmerjena vrednost še ni pravilna, znova pritisnite tipko Reset
za novo umerjanje.
Napotek: Med uporabo funkcije ponastavitve
ne odstranite baterij.
Odprava napak
Napaka Morebiten vzrok in
rešitev
Rezultat merjenja je očitno
previsok ali
prenizek.
Preverite, ali je izdelek nastavljen na pravi material. Preverite, če ste merilna zatiča
2
pravilno pritisnjena k materialu.
Ponovite postopek merjenja.
Na zaslonu
8
se prikaže
„Lo“ ali „Hi“.
Vrednost meritve je nižje ali
višje od merilnega področja.
Prikaz na
zaslonu ne
reagira.
Ali je na zaslonu prikazan simbol ključavnice?
Pritisnite tipko
4.
Prikaz na zaslonu je komaj
berljiv.
Bateriji sta izpraznjeni.
Oglejte si poglavje »Vstavljanje/menjava baterij«.
Elektrostatične razelektritve lahko privedejo do
motenj v delovanju. V primeru tovrstnih motenj
za kratek čas odstranite baterije in jih ponovno
vstavite.
Page 46

46 SI
Čiščenje in nega
Poskrbite, da tekočina ne bo prodrla v izdelek.
Drugače obstaja nevarnost povzročitve materialne škode.
Izdelek čistite z rahlo navlaženo krpo in
blagim sredstvom za pomivanje.
Očistite merilne konice z rahlo navlaženo
krpo in jih nato posušite.
Izdelek pred vsako uporabo preglejte glede
zunanjih, vidnih poškodb.
Merilni konici preglejte pred vsako uporabo,
ali sta poškodovani.
Skladiščenje
Če izdelka ne uporabljate, vedno namestite
zaščitno kapico
1
.
Bateriji vedno odstranite, če izdelka dlje časa
ne uporabljate.
Izdelek shranite na suhem mestu.
Odstranjevanje
Embalaža je narejena iz okolju primernih materialov, ki jih lahko oddate za recikliranje na lokalnih
zbirališčih odpadkov.
b
a
Upoštevajte oznake embalažnih
materialov za ločevanje odpadkov,
ki so označene s kraticami (a) in številkami (b) z naslednjim pomenom: 1–7:
umetne mase / 20–22: papir in karton /
80–98: vezni materiali.
Page 47

47 SI
Izdelek in materiale embalaže je mogoče reciklirati; za lažjo obdelavo odpadkov jih odstranite ločeno. Logotip
Triman velja samo za Francijo.
O možnostih odstranjevanja odsluženega izdelka se lahko pozanimate pri
svoji občinski ali mestni upravi.
Ko je vaš izdelek dotrajan, ga zaradi
varovanja okolja ne odvrzite med gospodinjske odpadke, temveč ga oddajte
na ustreznem zbirališču tovrstnih odpadkov. O zbirnih mestih in njihovih
delovnih časih se lahko pozanimate pri
svoji pristojni občinski upravi.
Pokvarjene ali iztrošene baterije / akumulatorje je
treba reciklirati v skladu z Direktivo 2006/66/ES
in njenimi spremembami. Baterije / akumulatorje
in / ali izdelek vrnite na ponujenih zbirnih mestih.
Škoda na okolju zaradi
napačnega odstranjevanja
baterij / akumulatorjev!
Baterij / akumulatorjev ni dovoljeno odstraniti skupaj z gospodinjskimi odpadki. Vsebujejo lahko
strupene težke kovine in so podvržene določbam
za ravnanje z nevarnimi odpadki. Kemični simboli
težkih kovin so naslednji: Cd = kadmij, Hg = živo
srebro, Pb = svinec. Zato iztrošene baterije / akumulatorje oddajte na komunalnem zbirnem mestu.
Page 48

48 SI
Pooblaščeni serviser:
OWIM GmbH & Co. KG
Stiftsbergstraβe 1
DE-74167 Neckarsulm
NEMČIJA
Servisna telefonska številka: 00386 (0) 80 28 60
Garancijski list
1. S tem garancijskim listom OWIM GmbH & Co.
KG, Stiftsbergstraβe 1, DE-74167 Neckarsulm,
Nemčija jamčimo, da bo izdelek v garancijskem
roku ob normalni in pravilni uporabi brezhibno
deloval in se zavezujemo, da bomo ob izpolnjenih spodaj navedenih pogojih odpravili
morebitne pomanjkljivosti in okvare zaradi
napak v materialu ali izdelavi oziroma po
svoji presoji izdelek zamenjali ali vrnili kupnino.
2. Garancija je veljavna na ozemlju Republike
Slovenije.
3. Garancijski rok za proizvod je 3 leta od da-
tuma izročitve blaga. Datum izročitve blaga
je razviden iz računa.
4. Kupec je dolžan okvaro javiti pooblaščenemu
servisu oziroma se informirati o nadaljnjih
postopkih na zgoraj navedeni telefonski številki. Svetujemo vam, da pred tem natančno
preberete navodila o sestavi in uporabi izdelka.
5. Kupec je dolžan pooblaščenemu servisu pre-
dložiti garancijski list in račun, kot potrdilo in
dokazilo o nakupu ter dnevu izročitve blaga.
Page 49

49 SI
6.
V primeru, da proizvod popravlja nepooblaščen
i servis ali oseba, kupec ne more uvelja-
vljati zahtevkov iz te garancije.
7. Vzroki za okvaro oziroma nedelovanje izdelka morajo biti lastnosti stvari same in ne
vzroki, ki so zunaj proizvajalčeve oziroma
prodajalčeve sfere. Kupec ne more uveljavljati
zahtevkov iz te garancije, če se ni držal priloženih navodil za sestavo in uporabo izdelka
ali če je izdelek kakorkoli spremenjen ali nepravilno vzdrževan.
8. Jamčimo servis in rezervne dele še 3 leta po
preteku garancijskega roka.
9. Obrabni deli oz. potrošni material so izvzeti
iz garancije.
10. Vsi potrebni podatki za uveljavljanje garancije se nahajajo na dveh ločenih dokumentih
(garancijski list, račun).
11. Ta garancija proizvajalca ne izključuje pravic
potrošnika, ki izhajajo iz odgovornosti prodajalca za napake na blagu.
Prodajalec:
Lidl Slovenija d.o.o. k.d., Pod lipami 1, SI-1218
Komenda
Page 50

50 SI
Postopek pri uveljavljanju
garancije
Za zagotovitev hitre obdelave vašega primera
vas prosimo, da sledite naslednjim napotkom:
Prosimo, da za vsa vprašanja pripravite račun in
številko izdelka (npr. IAN 123456) kot dokazilo
o nakupu.
Številko izdelka najdete na identifikacijski ploščici,
gravuri, naslovni strani v navodilih (spodaj levo)
ali na nalepki na hrbtni ali spodnji strani.
Če pride do napačnega delovanja ali drugih pomanjkljivosti, se obrnite najprej na v nadaljevanju
navedeni servisni oddelek po telefonu ali prek e-
-pošte.
Izdelek, označen kot okvarjen, lahko nato brez
poštnine pošljete na navedeni naslov servisa, zraven pa priložite potrdilo o nakupu (blagajniški račun) in navedite, za kakšno pomanjkljivost gre in
kdaj je nastala.
Servis
Servis Slovenija
Tel.: 080 080 917
E-Mail: owim@lidl.si
Page 51

51 CZ
Úvod ................................................... Strana 52
Použití ke stanovenému účelu............Strana 52
Popis dílů ............................................Strana 52
Technické údaje .................................Strana 53
Obsah dodávky .................................Strana 53
Všeobecná bezpečnostní
upozornění ...................................Strana 54
Bezpečnostní pokyny pro baterie a
akumulátory ........................................ Strana 54
Před uvedením do
provozu ...........................................Strana 56
Vložení a výměna baterií ..Strana 56
Uvedení do provozu ............. Strana 57
Před měřením ......................................Strana 57
Měření ................................................Strana 57
Zobrazení stavu baterie ..................... Strana 60
Zobrazení teploty ............................... Strana 60
Funkce RESET .....................................Strana 60
Odstranění poruch .................Strana 61
Čistění a ošetřování ............... Strana 62
Skladování .................................... Strana 62
Zlikvidování ................................. Strana 62
Záruka .............................................. Strana 64
Postup v případě uplatňování
záruky .................................................Strana 64
Servis ................................................... Strana 65
Page 52

52 CZ
Měřič vlhkosti dřeva a
stavebních materiálů
Úvod
Blahopřejeme Vám ke koupi nového výrobku.
Rozhodli jste se pro kvalitní produkt. Návod
kobsluze je součástí tohoto výrobku. Obsahuje
důležité pokyny pro bezpečnost, použití a likvidaci. Před použitím výrobku se seznamte se všemi
pokyny k obsluze a bezpečnostními pokyny.
Používejte výrobek jen popsa ným způsobem a
na uvedených místech. Při předání výrobku třetí
osobě předejte i všechny podklady.
Použití ke stanovenému účelu
Výrobek je vhodný na měření vlhkosti dřeva a stavebnin, jako například dřeva na topení, papíru,
lepenky, dřevěných konstrukcí, malty, betonu
nebo omítky. Výrobek je určený jen kpoužívání
vdomácnostech, není vhodný pro živnostenskou
činnost.
Popis dílů
1
Krytka
2
Měřící hroty
3
Tlačítko M-/°C-/°F (volba materiálu, volba
°C- nebo °F)
4
Tlačítko (ZAP / VYP, výsledek měření na
displeji)
5
Tlačítko RESET
6
Víčko přihrádky na baterie
Page 53

53 CZ
7
Přihrádka na baterie
8
Displej
9
Zobrazení vlhkosti v %
10
Číslo materiálu
11
Ukazatel nízké kapacity baterie
12
Symbol zámku (měřená hodnota zafixována)
13
Zobrazení teploty (°C nebo °F)
Technické údaje
Provozní napětí: 3 V (stejnosměrný proud)
Typ baterie: 2 x LR03/AAA
Přesnost teploty: + / - 1 °C
Přesnost vlhkosti: A: stavební materiál
pod 1,4%: +/- 0,3%
přes 1,4%: +/- 0,5%
B: dřevěný materiál pod
30 %: +/-2 %
přes 30 %: +/-4 %
Přesnost měření: viz kapitola „Měření“
Provozní teplota: 0 °C až 40 °C
Druh krytí: IP 20
Rozlišení: 0,1 %
Vlhkost: až maximálně 80 %
(relativní)
Obsah dodávky
Bezprostředně po rozbalení zkontrolujte úplnost
dodávky a bezvadný stav výrobku a všech jeho
částí.
1 přístroj na měření vlhkosti stavebních
materiálů a dřeva
Page 54

54 CZ
2 baterie LR03/AAA
1 návod kobsluze
Všeobecná bezpečnostní
upozornění
Před prvním použitím výrobku se seznamte se
všemi pokyny k obsluze a bezpečnostními
upozorněními! Při předávání výrobku třetí osobě
předávejte současně i všechny jeho podklady!
Před uvedením do provozu zkontrolujte výrobek,
jestli není poškozený. Vadný výrobek neuvádějte do provozu.
Nevystavujte výrobek vlhkosti. Jinak může
dojít k poškození výrobku.
Tento výrobek mohou používat děti od 8 let,
osoby se sníženými fyzickými, smyslovými nebo
duševními schopnosti nebo snedostatečnými
zkušenostmi a znalostmi, jestliže budou pod
dohledem nebo byly poučeny obezpečném
používání výrobku a chápou nebezpečí, která
zjeho používání vyplývají. Svýrobkem si děti
nesmí hrát. Děti nesmí bez dohledu provádět
čištění ani uživatelskou údržbu výrobku.
Měřící hroty jsou velmi špičaté.
Při práci s výrobkem buďte stále velmi opa-
trní. Při nepoužívání výrobku vždy nasaďte
jeho krytku. Jinak hrozí nebezpečí zranění!
Bezpečnostní pokyny pro
baterie a akumulátory
NEBEZPEČÍ OHROŽENÍ ŽIVOTA! Ucho-
vávejte baterie a akumulátory mimo dosah
Page 55

55 CZ
dětí. V případě spolknutí okamžitě vyhledejte
lékařskou pomoc!
NEBEZPEČÍ VÝBUCHU! Nena-
bíjecí baterie nikdy znovu nenabí-
jejte. Baterie nebo akumulátory
nezkratujte ani je neotevírejte. Hrozí přehřátí,
nebezpečí požáru nebo jejich prasknutí.
Nikdy neházejte baterie nebo akumulátory
do ohně ani do vody.
Nevystavujte baterie nebo akumulátory
mechanickému zatížení.
Nebezpečí vytečení baterií / akumulátorů
Zabraňte extrémním podmínkám a teplotám,
např. na topení anebo na slunci, které mohou
negativně ovlivnit funkci baterií nebo akumulátorů.
Vyhýbejte se kontaktu s pokožkou, očima a
sliznicemi! Po kontaktu s kyselinou baterií
ihned omyjte postižená místa dostatečným
množstvím čisté vody a okamžitě vyhledejte
lékařskou pomoc!
NOSTE OCHRANNÉ RUKA-
VICE! Vyteklé i poškozené baterie
nebo akumulátory mohou při
kontaktu s pokožkou způsobit její poleptání.
Noste proto vhodné rukavice.
V případě vytečení ihned odstraňte baterie
nebo akumulátory z výrobku, abyste zabránili
jeho poškození!
Používejte jen baterie nebo akumulátory stej-
ného typu. Nekombinujte staré baterie nebo
akumulátory s novými!
Odstraňte baterie nebo akumulátory při
delším nepoužívání z výrobku.
Page 56

56 CZ
Nebezpečí poškození výrobku
Používejte jen udaný typ baterie nebo
akumulátoru!
Nasazujte baterie nebo akumulátory podle
označení polarity (+) a (-) na bateriích nebo
akumulátorech a na výrobku.
Vyčistěte před vložením kontakty baterie
nebo akumulátoru a kontakty v přihrádce na
baterie!
Vybité baterie nebo akumulátory ihned
vyjměte z výrobku.
Před uvedením do provozu
Před uvedením do provozu odstraňte ochran-
nou fólii zdispleje
8
výrobku a vložte přilo-
žené baterie.
Vložení a výměna baterií
Jestliže ukáže displej 8 nízkou kapacitu baterií
11
, pak jsou baterie skoro vybité a musí se vymě-
nit. Vybité baterie mohou zkreslit výsledek měření.
Při vkládání baterie postupujte následovně:
Otevřete víčko přihrádky na baterie na zadní
straně výrobku.
Vyjměte staré baterie.
Vložte do výrobku 2 baterie LR03 / AAA.
Dbejte na správnou polaritu.
Vložte baterie do přihrádky na baterie a zase
zavřete víčko tak, aby slyšitelně zaskočilo.
Upozornění: Během vkládání baterií se
nesmí stisknout žádné tlačítko.
Page 57

57 CZ
Uvedení do provozu
Před měřením
Dávejte pozor, aby se vždy oba měřící hroty
2
dotýkaly povrchu materiálu.
U hrubých povrchů popřípadě více přitlačte
na měřící hroty.
Na choulostivém povrchu měřte na skrytém
místě.
Upozornění: Měřící hroty jsou ostré,
mohou proniknout do materiálu resp. ho
poškodit.
Před měřením vysušte povrch materiálu.
Měřte na různých místech a určete průměr-
nou hodnotu.
Dbejte na to, že soli vodivost vody zvyšují.
Tím se naměřené hodnoty mohou zkreslit a
být vyšší.
Pokud je to zapotřebí odstraňte u krbového
dřeva kůru. Zatlačte měřící hroty na různých
místech do dřeva příčně k jeho létům.
Měření
Pro zapnutí výrobku stiskněte tlačítko
4
. Na displeji 8 se objeví „0,0 %“, tep-
lota okolního prostředí v °C a předtím zvolený materiál (1–6).
Pro přepínání mezi jednotkami teploty °C a
°F přidržte tlačítko M / °C / °F
3
na cca
5 vteřin.
Stiskněte opakovaně tlačítko M / °C / °F 3,
pro nastavení vlhkoměru na druh materiálu,
jehož vlhkost chcete měřit:
Page 58

58 CZ
Orientační hodnoty vlhkosti
palivového dřeva
6–
15 %
Optimální na
topení - vysoké
spalné teplo
16–
20 %
Omezeně vhodné
na topení – nízké
spalné teplo
X
21–
44 %
Nevhodné na
topení – další
sušení zapotřebí
Poznámka: Předtím zobrazená tabulka slouží k
měření palivového dřeva. Dřevo má optimální
vlhkost k topení při naměřené vlhkosti 15 % nebo
méně. Jestliže se vlhkost dřeva pohybuje mezi
16 a 20 % je jeho způsobilost ke spalování na
hranici. Při vlhkosti přes 20 % není dřevo vhodné
ke spalování a musí se nechat vyschnout.
Page 59

59 CZ
Referenční hodnota pro vlhkost,
zobrazená v procentech,
vztažená na váhu
Číslo Materiál
Rozsah
měření
suché
Mezní
hodnota
příliš vlhké
1
Bříza, buk, třešeň,
modřín, smrk
6–44 % < 12 % 12–15 % > 15 %
1
Dub, borovice, javor,
jasan, douglaska tisolistá
6–44 % < 15 % 15–20 % > 20 %
2
Cementový potěr, beton
1,4–7,4 % < 2 % 2–4 % > 4 %
3
Anhydritový potěr,
omítka
0,0–4,1 % < 0,5 % 0,5–1 % > 1 %
4
Cementová malta
0,8–5,1 % < 2 % 2–5 % > 5 %
5
Vápenná malta
0,4–3,7 % < 2 % 2–3,5 % > 3,5 %
6
Cihla
0,0–8,5 % < 1 % 1–3 % > 3 %
Poznámka: při naměřených hodnotách,
které leží pod dolní hranicí rozsahu měření
ukazuje displej „0,0 %“ nebo „Lo“. Při na-
měřených hodnotách, které leží nad horní
hranicí rozsahu měření ukazuje displej „Hi“.
Odstraňte krytku 1.
Přitlačte oba měřící hroty 2 současně na po-
vrch. Po cca 1 až 2 vteřinách můžete odečíst
hodnotu v procentech.
Page 60

60 CZ
Jestliže měříte v prostředí, kde nemůžete dis-
plej odečíst, stiskněte tlačítko
4 pro
záznam zobrazení displeje. Displej ukazuje
přídavně symbol zámku.
Pro nové měření stiskněte ještě jednou tlačítko
4.
Po měření vypněte vlhkoměr stisknutím tlačítka
4 na déle než 5 vteřin. Nasaďte zase
krytku.
Upozornění: Nepoužívaný vlhkoměr se
automaticky za 60 vteřin vypíná.
Zobrazení stavu baterie
Vpřípadě nízké kapacity baterie se na displeji
8
nízký stav baterie 11. Prosíme, vezměte na
vědomí, že jsou při nízké kapacitě baterií naměřené hodnoty chybné nebo nepřesné. Pokud se
ukazatel zobrazí, vyměňte co nejrychleji baterie.
Výměna baterií je popsána vkapitole „Vložení /
výměna baterie“.
Zobrazení teploty
Pro přepínání mezi jednotkami teploty °C a °F
přidržte tlačítko M / °C / °F
3
na cca 5 vteřin.
Funkce RESET
Kalibrace se musí provést, jestliže se po zapnutí
výrobku neobjeví na displeji 0,0 %. K tomu otevřete přihrádku na baterie a stiskněte špičatým
předmětem tlačítko Reset na zadní straně
Page 61

61 CZ
výrobku. Jestliže není zobrazení ještě správné,
stiskněte znovu tlačítko Reset pro novou kalibraci.
Upozornění: Během používání funkce RESET
nevyjímejte baterie.
Odstranění poruch
Chyba Možná příčina a řešení
Naměřená
hodnota je
zřejmě příliš
vysoká nebo
příliš nízká.
Zkontrolujte jestli je výrobek
nastavený na správný materiál.
Kontrolujte, jestli jsou měřící
hroty
2
správně přitlačené na
materiál. Opakujte měření.
Displej
8
ukazuje „Lo“
nebo „Hi“.
Naměřená hodnota překračuje
nebo podkročuje měřící
rozsah.
Zobrazení na
displeji
nereaguje.
Je na displeji zobrazen symbol
zámku?
Stiskněte tlačítko
4.
Zobrazení na
displeji je
těžko
rozeznatelné.
Baterie jsou vybité.
Postupujte přitom podle kapitoly
„Výměna baterií”.
Elektrostatické výboje mohou vést k poruchám
funkcí. Při poruchách funkcí odstraňte krátce
baterie a znovu je vložte do váhy.
Page 62

62 CZ
Čistění a ošetřování
Dbejte na to, aby do výrobku nevnikla žádná
tekutina. Vopačném případě hrozí nebezpečí
poškození věcí.
Výrobek čistěte mírně navlhčeným hadrem a
slabým mycím prostředkem!
Měřící hroty čistěte mírně navlhčeným had-
rem a nakonec je vysušte.
Před každým použitím výrobek kontrolujte,
jestli nemá vnější, viditelná poškození.
Před každým použitím kontrolujte i měřící
hroty, jestli nejsou poškozené.
Skladování
Při nepoužívání výrobku vždy nasaďte jeho
krytku
1
.
V případě delšího nepoužívání výrobku z
něho vyjměte baterie.
Výrobek uchovávejte v suchém prostředí.
Zlikvidování
Obal se skládá zekologických materiálů, které
můžete zlikvidovat prostřednictvím místních sběren recyklovatelných materiálů.
b
a
Při třídění odpadu se řiďte podle označení obalových materiálů zkratkami (a)
a čísly (b), s následujícím významem:
1–7: umělé hmoty / 20–22: papír a
lepenka / 80–98: složené látky.
Page 63

63 CZ
Výrobek a obalové materiály jsou
recyklovatelné, zlikvidujte je odděleně
pro lepší odstranění odpadu. Logo
Triman platí jen pro Francii.
O možnostech likvidace vysloužilých
zařízení se informujte u správy vaší
obce nebo města.
Vzájmu ochrany životního prostředí
vysloužilý výrobek nevyhazujte do
domovního odpadu, ale předejte k
odborné likvidaci. O sběrnách a jejich
otevíracích hodinách se můžete informovat u příslušné správy města nebo
obce.
Vadné nebo vybité baterie resp. akumulátory
se musí, podle směrnice 2006/66/ES a jejích
příslušných změn, recyklovat. Baterie, akumulátory
i výrobek odevzdejte zpět do nabízených sběren.
Ekologické škody v důsledku
chybné likvidace baterií /
akumulátorů!
Baterie / akumulátory se nesmí zlikvidovat v
domácím odpadu. Mohou obsahovat jedovaté
těžké kovy a musí se zpracovávat jako zvláštní
odpad. Chemické symboly těžkých kovů: Cd =
kadmium, Hg = rtuť, Pb = olovo. Proto odevzdejte
opotřebované baterie / akumulátory u komunální
sběrny.
Page 64

64 CZ
Záruka
Výrobek byl vyroben s nejvyšší pečlivostí podle
přísných kvalitativních směrnic a před odesláním
prošel výstupní kontrolou. V případě závad máte
možnost uplatnění zákonných práv vůči prodejci.
Vaše práva ze zákona nejsou omezena naší níže
uvedenou zárukou.
Na tento artikl platí 3 záruka od data zakoupení.
Záruční lhůta začíná od data zakoupení. Uschovejte
si dobře originál pokladní stvrzenky. Tuto stvrzenku
budete potřebovat jako doklad o zakoupení.
Pokud se do 3 let od data zakoupení tohoto výrobku
vyskytne vada materiálu nebo výrobní vada, výrobek Vám – dle našeho rozhodnutí – bezplatně
opravíme nebo vyměníme. Tato záruka zaniká,
jestliže se výrobek poškodí, neodborně použil
nebo neobdržel pravidelnou údržbu.
Záruka platí na vady materiálu a výrobní vady.
Tato záruka se nevztahuje na díly výrobku podléhající opotřebení (např. na baterie), dále na poškození křehkých, choulostivých dílů, např. vypínačů,
akumulátorů nebo dílů zhotovených ze skla.
Postup v případě uplatňování
záruky
Pro zajištění rychlého zpracování Vašeho případu
se řiďte následujícími pokyny:
Page 65

65 CZ
Pro všechny požadavky si připravte pokladní stvrzenku a číslo artiklu (např. IAN 123456) jako
doklad o zakoupení.
Číslo artiklu najdete na typovém štítku, gravuře, titulní stránce návodu (vlevo dole) nebo na nálepce
na zadní nebo spodní straně.
V případě poruch funkce nebo jiných závad nejdříve
kontaktujte, telefonicky nebo e-mailem, v následujícím textu uvedené servisní oddělení.
Výrobek registrovaný jako vadný potom můžete
s přiloženým dokladem o zakoupení (pokladní
stvrzenkou) a údaji k závadě a kdy k ní došlo,
bezplatně zaslat na adresu servisu, která Vám
byla sdělena.
Servis
Servis Česká republika
Tel.: 800 143 873
E-Mail: owim@lidl.cz
Page 66

66 SK
Úvod ................................................... Strana 67
Používanie v súlade s určeným
účelom ................................................Strana 67
Popis častí ........................................... Strana 67
Technické údaje .................................Strana 68
Obsah dodávky .................................Strana 68
Všeobecné bezpečnostné
upozornenia ................................Strana 69
Bezpečnostné upozornenia týkajúce
sa batérií / akumulátorových batérií ...Strana 70
Pred uvedením do
prevádzky ..................................... Strana 71
Vkladanie / výmena
batérií ................................................ Strana 71
Uvedenie do prevádzky ...Strana 72
Pred meraním .....................................Strana 72
Meranie ..............................................Strana 73
Ukazovateľ batérií .............................Strana 75
Zobrazenie teploty ............................. Strana 75
Funkcia RESET ....................................Strana 75
Odstraňovanie porúch........Strana 76
Čistenie a údržba ..................... Strana 77
Skladovanie ................................. Strana 77
Likvidácia ....................................... Strana 77
Záruka .............................................. Strana 79
Postup v prípade poškodenia v
záruke .................................................Strana 80
Servis ................................................... Strana 80
Page 67

67 SK
Prístroj na meranie vlhkosti v
stavbách a dreve
Úvod
Blahoželáme Vám ku kúpe Vášho nového výrobku.
Rozhodli ste sa pre veľmi kvalitný výrobok. Návod
na obsluhu je súčasťou tohto výrobku. Obsahuje
dôležité upozornenia týkajúce sa bezpečnosti,
používania a likvidácie. Skôr ako začnete výrobok používať, oboznámte sa so všetkými pokynmi
k obsluhe a bezpečnosti. Výrobok používajte iba
v súlade s popisom a v uvedených oblastiach používania. V prípade postúpenia výrobku ďalším
osobám odovzdajte aj všetky dokumenty patriace
k výrobku.
Používanie v súlade s
určeným účelom
Výrobok je vhodný na meranie vlhkosti dreva a
stavebných materiálov, napríklad na meranie
vlhkosti v palivových drevách, papieri, kartóne,
konštrukčných drevách, malte, betóne alebo v
omietke. Výrobok je určený iba na používanie v
súkromných domácnostiach, nie na komerčné
účely.
Popis častí
1
Ochranný kryt
2
Meracie tyčinky
3
Tlačidlo M/°C/°F (výber materiálu, výber
°C alebo °F)
Page 68

68 SK
4
Tlačidlo (ZA- / VYPÍNAČ, výsledok
merania na displeji)
5
Tlačidlo-RESET
6
Kryt priečinka pre batérie
7
Priečinok pre batérie
8
Displej
9
Ukazovateľ vlhkosti v %
10
Číslo materiálu
11
Zobrazenie pre nízky stav batérií
12
Symbol kľúča (nameraná hodnota zamrznutá)
13
Ukazovateľ teploty (°C alebo °F)
Technické údaje
Prevádzkové napätie: 3 V (jednosmerný
prúd)
Typ batérií: 2 x LR03/AAA
Presnosť teploty: + / - 1 °C
Presnosť vlhkosti: A: stavebný materiál
pod 1,4%: +/- 0,3%
nad 1,4%: +/- 0,5%
B: stavebný materiál pod
30 %: +/-2 %
nad 30 %: +/-4 %
Presnosť merania: pozri kapitolu „Meranie“
Prevádzková teplota: 0 °C až 40 °C
Trieda ochrany: IP 20
Rozlíšenie: 0,1 %
Vlhkosť vzduchu: do max. 80 % (relatívne)
Obsah dodávky
Bezprostredne po rozbalení skontrolujte obsah
dodávky čo sa týka kompletnosti i bezchybnosti
výrobku a všetkých jeho častí.
Page 69

69 SK
1 merač vlhkosti dreva a stavebných materiálov
2 LR03/AAA batérie
1 návod na používanie
Všeobecné bezpečnostné
upozornenia
Skôr, ako začnete výrobok používať, oboznámte
sa so všetkými pokynmi týkajúcimi sa ovládania a
bezpečnosti! Ak výrobok odovzdáte tretím osobám, priložte k nemu aj všetky podklady!
Pred uvedením do prevádzky skontrolujte, či
výrobok nie je poškodený. Poškodený výrobok
neuvádzajte do prevádzky.
Výrobok nikdy nevystavujte vlhkosti. V opačnom
prípade sa môže výrobok poškodiť.
Tento výrobok môžu používať deti od 8 rokov,
ako aj osoby so zníženými psychickými, senzorickými alebo duševnými schopnosťami
alebo s nedostatkom skúseností a vedomostí,
ak sú pod dozorom, alebo ak boli poučené
ohľadom bezpečného používania výrobku, a
ak porozumeli nebezpečenstvám spojeným s
jeho používaním. Deti sa s výrobkom nesmú
hrať. Čistenie a údržbu nesmú vykonávať deti
bez dozoru.
Meracie tyčinky sú veľmi
ostré. Pri práci s výrobkom buďte vždy opa-
trný. Ak výrobok nepoužívate, nasaďte naň
vždy ochranný kryt. V opačnom prípade
vzniká nebezpečenstvo poranenia!
Page 70

70 SK
Bezpečnostné
upozornenia týkajúce sa
batérií / akumulátorových
batérií
NEBEZPEČENSTVO OHROZENIA
ŽIVOTA! Batérie / akumulátorové batérie
držte mimo dosahu detí. V prípade prehltnutia
okamžite vyhľadajte lekára!
NEBEZPEČENSTVO EXPLÓ-
ZIE! Nenabíjateľné batérie nikdy
znova nenabíjajte. Batérie / akumulátorové batérie neskratujte a / alebo neotvárajte. Následkom môže byť prehriatie,
požiar alebo explózia.
Batérie / akumulátorové batérie nikdy nehá-
džte do ohňa alebo vody.
Nevystavujte batérie / akumulátorové batérie
mechanickej záťaži.
Riziko vytečenia batérií / akumulátorových batérií
Batérie / akumulátorové batérie nikdy nevy-
stavujte extrémnym podmienkam a teplotám,
ktoré by na ne mohli pôsobiť, napr. na vykurovacích telesách / priamom slnečnom žiarení.
Vyhýbajte sa styku s pokožkou, očami a sliz-
nicami! Pri kontakte s kyselinou batérie ihneď
vypláchnite postihnuté miesta väčším množstvom čistej vody a okamžite vyhľadajte lekára!
NOSTE OCHRANNÉ RUKA-
VICE! Vytečené alebo poškodené
batérie / akumulátorové batérie
môžu pri kontakte s pokožkou spôsobiť
poleptanie. V takom prípade preto noste
vhodné ochranné rukavice.
Page 71

71 SK
V prípade vytečenia batérií / akumulátorových
batérií ich ihneď vyberte z výrobku, aby ste
predišli vzniku škôd.
Používajte iba batérie / akumulátorové batérie
rovnakého typu. Nekombinujte staré batérie /
akumulátorové batérie s novými!
Ak produkt dlhší čas nepoužívate, vyberte z
neho batérie / akumulátorové batérie.
Riziko poškodenia produktu
Používajte výhradne uvedený typ batérií /
akumulátorových batérií!
Vložte batérie / akumulátorové batérie podľa
označenia polarity (+) a (-) na batérii / akumulátorovej batérii a výrobku.
Pred vložením vyčistite kontakty na batérii /
akumulátorovej batérii a v priečinku pre
batérie!
Vybité batérie / akumulátorové batérie ihneď
vyberte z produktu.
Pred uvedením do prevádzky
Pred uvedením do prevádzky odstráňte
ochrannú fóliu z displeja
8
produktu a
vložte priložené batérie.
Vkladanie / výmena batérií
Ak sa na displeji 8 objaví zobrazenie pre nízky
stav batérií
11
, sú vložené batérie takmer vybité
a musia byť vymenené. Vybité batérie môžu spôsobovať skreslenie výsledku merania.
Page 72

72 SK
Pre vloženie nových batérií postupujte
nasledujúco:
Otvorte kryt priečinka pre batérie na zadnej
strane výrobku.
Vyberte príp. vybité batérie.
Vložte dve 2 batérie LR03 / AAA. Dbajte na
správnu polaritu.
Batérie vložte do priečinka pre batérie a opäť
zatvorte kryt tak, aby počuteľne zapadol.
Poznámka: Keď vkladáte batérie, nesmie
byť stlačené žiadne iné tlačidlo.
Uvedenie do prevádzky
Pred meraním
Dbajte na to, aby sa obe meracie tyčinky 2
súčasne dotýkali povrchu materiálu.
Pri drsných povrchoch príp. zvýšte tlak na me-
racie tyčinky.
Pri citlivých povrchoch uskutočnite meranie na
mieste, ktoré nie je vidieť.
Poznámka: Meracie kolíky sú ostré a mohli
by stlačiť príp. poškodiť povrchy.
Vlhké zvyšky na povrchu pred meraním vytrite
dosucha.
Merajte na rôznych miestach a vypočítajte
priemernú hodnotu.
Myslite na to, že soli zvyšujú vodivosť vody.
Tým by mohlo byť meranie sfalšované alebo
výjsť príliš vysoké.
Z dreva do krbu odstráňte kôru, ak je to po-
trebné. Meracie tyčinky zatlačte na rôznych
miestach priečne k smeru vlákien do dreva.
Page 73

73 SK
Meranie
Stlačte tlačidlo 4, aby ste výrobok
zapli. Na displeji
8
sa objaví „0,0 %“, tep-
lota okolia v °C a predtým zvolený materiál
(1–6).
Podržte tlačidlo M/ °C/ °F 3 cca. 5 sekúnd
stlačené, aby ste vybrali ukazovateľ teploty
°C alebo °F.
Opakovane stlačte tlačidlo M/ °C/ °F 3,
aby ste merač vlhkosti nastavili na meraný
materiál:
Vlhkosť dreva - smerové hodnoty pre
palivové drevo
6–
15 %
Optimálne na vyku-
rovanie - Vysoká
výhrevnosť
16–
20 %
Obmedzené vyku-
rovanie - Nízka
výhrevnosť
X
21–
44 %
Nevhodné na vyku-
rovanie - Nutné
ďalšie sušenie
Poznámka: Vyššie uvedená tabuľka slúži na
meranie palivového dreva. Ak je nameraná vlhkosť
15 % alebo menej, je drevo ideálne na spálenie.
Ak vlhkosť leží medzi 16 a 20 %, je vhodnosť hraničná. Pri vlhkosti nad 20 % drevo nie je vhodné
na spálenie a musí najskôr ďalej schnúť.
Page 74

74 SK
Referenčné hodnoty pre vlhkosť,
zobrazené v percentách, týka-
júce sa hmotnosti
Číslica Materiál
Rozsah
merania
suché
Hraničná
hodnota
príliš vlhké
1
Breza, buk, čerešňa,
smrekovec, smrek
6–44 % < 12 % 12–15 % > 15 %
1
Dub, borovica, javor,
jaseň, douglaska
6–44 % < 15 % 15–20 % > 20 %
2
Cementový poter,
betón
1,4–7,4 % < 2 % 2–4 % > 4 %
3
Anhydritový poter,
omietka
0,0–4,1 % < 0,5 % 0,5–1 % > 1 %
4
Cementová malta
0,8–5,1 % < 2 % 2–5 % > 5 %
5
Vápenná malta
0,4–3,7 % < 2 % 2–3,5 % > 3,5 %
6
Tehla
0,0–8,5 % < 1 % 1–3 % > 3 %
Poznámka: Pri meraniach, ktoré ležia pod
oblasťou merania, zobrazí displej „0,0 %“
alebo „Lo“. Pri meraniach, ktoré ležia nad
oblasťou merania, zobrazí displej „Hi“.
Odstráňte ochranný kryt 1.
Zatlačte súčasne obe meracie tyčinky 2
proti povrchu. Po cca. 1–2 sekundách uvidíte
percentuálnu hodnotu.
Keď meriate v oblasti, v ktorej nie je možné
prečítať displej, stlačte tlačidlo
4, aby
Page 75

75 SK
zobrazenie na displeji zamrzlo. Displej potom
dodatočne ukazuje symbol kľúča.
Znova stlačte tlačidlo 4, aby ste vyko-
nali nové meranie.
Ak je meranie uskutočnené, vypnite merač
vlhkosti tak, že tlačidlo
4 stlačíte na
dlhšie ako 5 sekúnd. Následne opäť nasaďte
ochranný kryt.
Poznámka: Merač vlhkosti sa automaticky
vypne, keď výrobok približne 60 sekúnd nie
je použitý.
Ukazovateľ batérií
Pri nízkom stave nabitia batérií sa na displeji 8
objaví symbol nízkeho stavu batérií
11
. Myslite
prosím na to, že pri nízkom stave batérií sú výsledky
merania nesprávne alebo nepresné. Pri objavení
tohto zobrazenia čo najskôr vymeňte batérie. Výmena batérií je popísaná v kapitole „Vkladanie /
výmena batérií“.
Zobrazenie teploty
Podržte tlačidlo M / °C / °F 3 cca. 5 sekúnd
stlačené, aby ste striedali zobrazenie teploty
medzi °C a °F.
Funkcia RESET
Kalibráciu možno vykonať, keď sa priamo po zapnutí výrobku na displeji neobjaví 0,0 %. Otvorte
preto priečinok pre batérie a pomocou ostrého
predmetu stlačte tlačidlo Reset na zadnej strane
Page 76

76 SK
výrobku. Ak zobrazená hodnota nesúhlasí, znova
stlačte tlačidlo Reset pre novú kalibráciu.
Poznámka: Nevyberajte batérie, pokiaľ použí-
vate funkciu RESET.
Odstraňovanie porúch
Porucha Možná príčina a
odstránenie
Výsledok
merania je
zjavne príliš
vysoký alebo
príliš nízky.
Skontrolujte, či je na výrobku
nastavený správny materiál.
Skontrolujte, či sú meracie tyčinky
2
správne zatlačené
proti materiálu.
Zopakujte meranie.
Displej
8
zo-
brazuje „Lo“
alebo „Hi“.
Oblasť merania nie je dosiahnutá príp. je prekročená.
Zobrazenie
displeja
nereaguje.
Je na displeji zobrazený
symbol kľúča?
Stlačte tlačidlo
4.
Zobrazenie
displeja nie je
čitateľné.
Batérie sú vybité.
Pozrite si kapitolu
„Vkladanie/ výmena batérií“.
Elektrostatické výboje môžu viesť k funkčným
poruchám. Pri takýchto funkčných poruchách
vyberte na krátky čas batériu a znova ju vložte.
Page 77

77 SK
Čistenie a údržba
Dbajte na to, aby do výrobku neprenikla
žiadna kvapalina. V opačnom prípade hrozí
nebezpečenstvo vecných škôd.
Výrobok čistite iba jemne navlhčenou han-
dričkou a jemným čistiacim prostriedkom.
Meracie špičky čistite jemne navlhčenou han-
dričkou a následne ich osušte.
Pred každým použitím skontrolujte výrobok
ohľadom vonkajších viditeľných poškodení.
Pred každým použitím skontrolujte meracie
špičky ohľadom prípadných poškodení.
Skladovanie
Ak výrobok nepoužívate, nasaďte naň vždy
ochranný kryt
1
.
Ak výrobok dlhší čas nepoužívate, vyberte z
neho batérie.
Výrobok skladujte v suchom prostredí.
Likvidácia
Obal pozostáva z ekologických materiálov, ktoré
môžete odovzdať na miestnych recyklačných
zberných miestach.
b
a
Všímajte si prosím označenie obalových materiálov pre triedenie odpadu,
sú označené skratkami (a) a číslami
(b) s nasledujúcim významom: 1–7:
Plasty / 20–22: Papier a kartón /
80–98: Spojené látky.
Page 78

78 SK
Výrobok a obalové materiály sú recyklovateľné, zlikvidujte ich oddelene pre
lepšie spracovanie odpadu. TrimanLogo platí iba pre Francúzsko.
O možnostiach likvidácie opotrebovaného výrobku sa môžete informovať
na Vašej obecnej alebo mestskej
správe.
Ak výrobok doslúžil, v záujme ochrany
životného prostredia ho neodhoďte do
domového odpadu, ale odovzdajte na
odbornú likvidáciu. Informácie o zberných miestach a ich otváracích hodinách získate na Vašej príslušnej
správe.
Defektné alebo použité batérie / akumulátorové
batérie musia byť odovzdané na recykláciu podľa
smernice 2006/66/ES a jej zmien. Batérie / akumulátorové batérie a / alebo výrobok odovzdajte
prostredníctvom dostupných zberných stredísk.
Nesprávna likvidácia batérií /
akumulátorových batérií ničí
životné prostredie!
Batérie / akumulátorové batérie sa nesmú
likvidovať spolu s domovým odpadom. Môžu
obsahovať jedovaté ťažké kovy a je potrebné
zaobchádzať s nimi ako s nebezpečným odpadom. Chemické značky ťažkých kovov sú nasledovné: Cd = kadmium, Hg = ortuť, Pb = olovo.
Opotrebované batérie / akumulátorové batérie
preto odovzdajte v komunálnej zberni.
Page 79

79 SK
Záruka
Tento výrobok bol dôkladne vyrobený podľa prísnych akostných smerníc a pred dodaním svedomito
testovaný. V prípade nedostatkov tohto výrobku
Vám prináležia zákonné práva voči predajcovi
produktu. Tieto zákonné práva nie sú našou nižšie
uvedenou zárukou obmedzené.
Na tento produkt poskytujeme 3-ročnú záruku od
dátumu nákupu. Záručná doba začína plynúť dátumom kúpy. Starostlivo si prosím uschovajte originálny pokladničný lístok. Tento doklad je potrebný
ako dôkaz o kúpe.
Ak sa v rámci 3 rokov od dátumu nákupu tohto
výrobku vyskytne chyba materiálu alebo výrobná
chyba, výrobok Vám bezplatne opravíme alebo
vymeníme – podľa nášho výberu. Táto záruka zaniká, ak bol produkt poškodený, neodborne používaný alebo neodborne udržiavaný.
Poskytnutie záruky sa vzťahuje na chyby materiálu
a výrobné chyby. Táto záruka sa nevzťahuje na
časti produktu, ktoré sú vystavené normálnemu
opotrebovaniu, a preto ich je možné považovať
za opotrebovateľné diely (napr. batérie) alebo
na poškodenia na rozbitných dieloch, napr. na
spínači, akumulátorových batériach alebo častiach,
ktoré sú zhotovené zo skla.
Page 80

80 SK
Postup v prípade
poškodenia v záruke
Pre zaručenie rýchleho spracovania Vašej požiadavky dodržte prosím nasledujúce pokyny:
Pre všetky otázky majte pripravený pokladničný
doklad a číslo výrobku (napr. IAN 123456) ako
dôkaz o kúpe.
Číslo výrobku nájdete na typovom štítku, gravúre,
na prednej strane Vášho návodu (dole vľavo) alebo
ako nálepku na zadnej alebo spodnej strane.
Ak sa vyskytnú funkčné poruchy alebo iné nedostatky, najskôr telefonicky alebo e-mailom kontaktujte následne uvedené servisné oddelenie.
Produkt označený ako defektný potom môžete s
priloženým dokladom o kúpe (pokladničný lístok)
a uvedením, v čom spočíva nedostatok a kedy sa
vyskytol, bezplatne odoslať na Vám oznámenú
adresu servisného pracoviska.
Servis
Servis Slovensko
Tel.: 0850 232001
E-pošta: owim@lidl.sk
Page 81

81 DE/AT/CH
Einleitung ...........................................Seite 82
Bestimmungsgemäße Verwendung ......Seite 82
Teilebeschreibung .................................Seite 82
Technische Daten ..................................Seite 83
Lieferumfang ..........................................Seite 83
Allgemeine
Sicherheitshinweise ..................Seite 84
Sicherheitshinweise für Batterien /
Akkus......................................................Seite 85
Vor der Inbetriebnahme ......Seite 86
Batterien einlegen /
wechseln ............................................Seite 86
Inbetriebnahme ...........................Seite 87
Bevor Sie eine Messung durchführen ..Seite 87
Messung durchführen ...........................Seite 88
Batterieanzeige .....................................Seite 90
Temperaturanzeige ...............................Seite 90
RESET-Funktion ......................................Seite 91
Fehlerbehebung ..........................Seite 91
Reinigung und Pflege ..............Seite 92
Lagerung ...........................................Seite 92
Entsorgung .......................................Seite 93
Garantie .............................................Seite 94
Abwicklung im Garantiefall ..................Seite 95
Service ...................................................Seite 96
Page 82

82 DE/AT/CH
Bau- und Holzfeuchtemessgerät
Einleitung
Wir beglückwünschen Sie zum Kauf Ihres neuen
Produkts. Sie haben sich damit für ein hochwertiges
Produkt entschieden. Die Bedienungsanleitung ist
Teil dieses Produkts. Sie enthält wichtige Hinweise
für Sicherheit, Gebrauch und Entsorgung. Machen
Sie sich vor der Benutzung des Produkts mit allen
Bedien- und Sicherheitshinweisen vertraut. Benutzen
Sie das Produkt nur wie beschrieben und für die
angegebenen Einsatzbereiche. Händigen Sie alle
Unterlagen bei Weitergabe des Produkts an
Dritte mit aus.
Bestimmungsgemäße
Verwendung
Das Produkt ist zum Messen von Holz- und Baufeuchte geeignet, zum Beispiel in Brennhölzern,
Papier, Pappe, Konstruktionshölzern, Mörtel, Beton oder Putz. Das Produkt ist nur für den Einsatz
in privaten Haushalten und nicht für den gewerblichen Gebrauch vorgesehen.
Teilebeschreibung
1
Schutzkappe
2
Messstifte
3
M-/°C-/°F-Taste (Materialauswahl,
°C- oder °F-Auswahl)
4
-Taste (EIN / AUS, Messergebnis im
Display)
Page 83

83 DE/AT/CH
5
RESET -Taste
6
Batteriefachdeckel
7
Batteriefach
8
Display
9
Feuchtigkeitsanzeige in %
10
Materialnummer
11
Anzeige für niedrigen Batteriezustand
12
Schlosssymbol (Messwert eingefroren)
13
Temperaturanzeige (°C oder °F)
Technische Daten
Betriebsspannung: 3 V (Gleichstrom)
Batterietyp: 2 x LR03/AAA
Temperaturgenauigkeit: + / - 1 °C
Feuchtigkeitsgenauigkeit: A: Baumaterial
unter 1,4%: +/- 0,3%
über 1,4%: +/- 0,5%
B: Holzmaterial
unter 30 %: +/-2 %
über 30 %: +/-4 %
Messgenauigkeit: siehe Kapitel „Messung
durchführen“
Betriebstemperatur: 0 °C bis 40 °C
Schutzklasse: IP 20
Auflösung: 0,1 %
Luftfeuchtigkeit: bis maximal 80 %
(relativ)
Lieferumfang
Kontrollieren Sie unmittelbar nach dem Auspacken
den Lieferumfang auf Vollständigkeit sowie den einwandfreien Zustand des Produktes und aller Teile.
Page 84

84 DE/AT/CH
1 Bau- und Holzfeuchtemessgerät
2 LR03/AAA Batterien
1 Bedienungsanleitung
Allgemeine
Sicherheitshinweise
Machen Sie sich vor der Benutzung des Produkts
mit allen Bedien- und Sicherheitshinweisen vertraut.
Händigen Sie alle Unterlagen bei Weitergabe des
Produkts mit aus.
Kontrollieren Sie das Produkt vor der Inbe-
triebnahme auf Beschädigungen. Nehmen
Sie ein beschädigtes Produkt nicht in Betrieb.
Setzen Sie das Produkt keiner Feuchtigkeit
aus. Andernfalls könnte das Produkt beschädigt werden.
Dieses Produkt kann von Kindern ab 8 Jahren
und darüber sowie von Personen mit verringerten physischen, sensorischen oder mentalen
Fähigkeiten oder Mangel an Erfahrung und
Wissen benutzt werden, wenn sie beaufsichtigt oder bezüglich des sicheren Gebrauchs
des Produkts unterwiesen wurden und die daraus resultierenden Gefahren verstehen. Kinder
dürfen nicht mit dem Produkt spielen. Reinigung und Benutzerwartung dürfen nicht von
Kindern ohne Beaufsichtigung durchgeführt
werden.
Die Messstifte sind sehr spitz.
Seien Sie stets vorsichtig, wenn Sie mit dem
Produkt arbeiten. Setzen Sie immer die
Schutzkappe auf das Produkt, wenn Sie es
nicht benutzen. Andernfalls besteht Verletzungsgefahr!
Page 85

85 DE/AT/CH
Sicherheitshinweise für
Batterien / Akkus
LEBENSGEFAHR! Halten Sie Batterien / Ak-
kus außer Reichweite von Kindern. Suchen
Sie im Falle eines Verschluckens sofort einen
Arzt auf!
EXPLOSIONSGEFAHR! Laden
Sie nicht aufladbare Batterien nie-
mals wieder auf. Schließen Sie
Batterien / Akkus nicht kurz und / oder öffnen
Sie diese nicht. Überhitzung, Brandgefahr
oder Platzen können die Folge sein.
Werfen Sie Batterien / Akkus niemals in Feuer
oder Wasser.
Setzen Sie Batterien / Akkus keiner mecha-
nischen Belastung aus.
Risiko des Auslaufens von Batterien /
Akkus
Vermeiden Sie extreme Bedingungen und
Temperaturen, die auf Batterien / Akkus einwirken können z. B. auf Heizkörpern / direkte
Sonneneinstrahlung.
Vermeiden Sie den Kontakt mit Haut, Augen
und Schleimhäuten! Spülen Sie bei Kontakt
mit Batteriesäure die betroffenen Stellen
sofort mit klarem Wasser und suchen Sie
umgehend einen Arzt auf!
SCHUTZHANDSCHUHE TRA-
GEN! Ausgelaufene oder beschä-
digte Batterien / Akkus können bei
Berührung mit der Haut Verätzungen verursachen. Tragen Sie deshalb in diesem Fall
geeignete Schutzhandschuhe.
Page 86

86 DE/AT/CH
Im Falle eines Auslaufens der Batterien /
Akkus entfernen Sie diese sofort aus dem
Produkt, um Beschädigungen zu vermeiden.
Verwenden Sie nur Batterien / Akkus des
gleichen Typs. Mischen Sie nicht alte Batterien / Akkus mit neuen!
Entfernen Sie die Batterien / Akkus, wenn das
Produkt längere Zeit nicht verwendet wird.
Risiko der Beschädigung des Produkts
Verwenden Sie ausschließlich den angege-
benen Batterietyp / Akkutyp!
Setzen Sie Batterien / Akkus gemäß der
Polaritätskennzeichnung (+) und (-) an
Batterie / Akku und des Produkts ein.
Reinigen Sie Kontakte an Batterie / Akku und
im Batteriefach vor dem Einlegen!
Entfernen Sie erschöpfte Batterien / Akkus
umgehend aus dem Produkt.
Vor der Inbetriebnahme
Entfernen Sie vor der Inbetriebnahme die
Schutzfolie vom Display
8
des Produkts und
legen Sie die beiliegenden Batterien ein.
Batterien einlegen / wechseln
Wenn im Display 8 die Anzeige für niedrigen
Batteriezustand
11
erscheint, sind die eingelegten Batterien nahezu erschöpft und müssen ausgetauscht werden. Leere Batterien können das
Messergebnis verfälschen.
Page 87

87 DE/AT/CH
Gehen Sie zum Einlegen der Batterien
wie folgt vor:
Öffnen Sie den Batteriefachdeckel auf der
Rückseite des Produkts.
Entnehmen Sie ggf. die alten Batterien.
Setzen Sie 2 Batterien LR03 / AAA ein. Beach-
ten Sie die richtige Polarität.
Legen Sie die Batterien in das Batteriefach
und schließen Sie den Deckel wieder, so dass
er hörbar einrastet.
Hinweis:
Während Sie die Batterien einlegen,
darf keine andere Taste gedrückt werden.
Inbetriebnahme
Bevor Sie eine Messung
durchführen
Achten Sie darauf, dass beide Messstifte 2
gleichzeitig die Materialoberfläche berühren.
Erhöhen Sie bei rauen Oberflächen ggf. den
Druck auf die Messstifte.
Führen Sie bei empfindlichen Oberflächen die
Messung an einer Stelle durch, die nicht im
Sichtbereich liegt.
Hinweis: Die Messstifte sind spitz und könnte
n
die Oberflächen eindrücken bzw. beschädigen.
Reiben Sie feuchte Rückstände auf der Ober-
fläche vor der Messung trocken.
Messen Sie an verschiedenen Stellen und er-
mitteln Sie einen Durchschnittswert.
Achten Sie darauf, dass Salze die Leitfähigkeit
von Wasser erhöhen. Dadurch kann die Mes-
sung verfälscht werden und zu hoch ausfallen.
Entfernen Sie bei Kaminholz, falls notwendig,
die Rinde. Drücken Sie die Messstifte quer zur
Page 88

88 DE/AT/CH
Faserrichtung an verschiedenen Stellen in das
Holz ein.
Messung durchführen
Drücken Sie die -Taste 4, um das Pro-
dukt einzuschalten. Im Display
8
erscheint
„0,0 %“, die Umgebungstemperatur in °C
und das zuvor gewählte Material (1–6).
Halten Sie die M-/ °C-/ °F -Taste 3 ca. 5
Sekunden gedrückt, um in der Temperaturanzeige zwischen °C und °F zu wechseln.
Drücken Sie wiederholt die M-/ °C-/ °F -Taste
3
, um den Feuchtigkeitsmesser auf das zu
messende Material einzustellen:
Holzfeuchte-Richtwerte für Brennholz
6–
15 %
Optimal zum
Heizen – Hoher
Brennwert
16–
20 %
Eingeschränkt
Heizen – Niedriger
Brennwert
X
21–
44 %
Keine Eignung zum
Heizen – Weitere
Trocknung nötig
Hinweis: Die zuvor dargestellte Tabelle dient
zur Messung von Brennholz. Wenn die gemessene
Feuchtigkeit 15 % oder weniger beträgt, ist das
Holz ideal zum Verfeuern. Beträgt die Feuchtigkeit
zwischen 16 und 20 % ist die Eignung grenzwertig.
Bei über 20 % Feuchtigkeit eignet sich das Holz
nicht zum Verfeuern und muss erst weiter getrocknet werden.
Page 89

89 DE/AT/CH
Referenzwerte für Feuchtigkeit,
dargestellt in Prozent, bezogen
auf das Gewicht
Ziffer Material
Messbereich
trocken Grenzwert zu feucht
1
Birke, Buche, Kirsche,
Lärche, Fichte
6–44 % < 12 % 12–15 % > 15 %
1
Eiche, Kiefer, Ahorn,
Esche, Douglasie
6–44 % < 15 % 15–20 % > 20 %
2
Zementestrich, Beton
1,4–7,4 % < 2 % 2–4 % > 4 %
3
Anhydritestrich, Putz
0,0–4,1 % < 0,5 % 0,5–1 % > 1 %
4
Zementmörtel
0,8–5,1 % < 2 % 2–5 % > 5 %
5
Kalkmörtel
0,4–3,7 % < 2 % 2–3,5 % > 3,5 %
6
Ziegelstein
0,0–8,5 % < 1 % 1–3 % > 3 %
Hinweis: Bei Messungen, die unterhalb des
Messbereichs liegen, zeigt das Display „0,0 %“
oder „Lo“ an. Bei Messungen, die oberhalb
des Messbereichs liegen, zeigt das Display
„Hi“ an.
Entfernen Sie die Schutzkappe 1.
Drücken Sie beide Messstifte 2 gleichzeitig
gegen die Oberfläche. Nach ca. 1–2 Sekun-
den können Sie den Prozentwert ablesen.
Page 90

90 DE/AT/CH
Wenn Sie in einem Bereich messen, in dem Sie
das Display nicht ablesen können, drücken Sie
die
-Taste 4, um die Anzeige im Display
einzufrieren. Das Display zeigt dann zusätzlich das Schloss-Symbol an.
Drücken Sie die -Taste 4 noch einmal,
um eine erneute Messung durchzuführen.
Ist die Messung erfolgt, schalten Sie den Feuch-
tigkeitsmesser aus, indem Sie die
-Taste 4
für mehr als 5 Sekunden gedrückt halten. Setzen
Sie anschließend die Schutzkappe wieder auf.
Hinweis: Der Feuchtigkeitsmesser schaltet sich
automatisch aus, wenn das Produkt innerhalb
von ungefähr 60 Sekunden nicht bedient wird.
Batterieanzeige
Bei niedrigem Batterieladezustand erscheint im
Display
8
die Anzeige für niedrigen Batteriezu-
stand
11
. Bitte beachten Sie, dass bei niedrigem
Batterieladezustand die Messwerte falsch oder
ungenau sind. Tauschen Sie bei Erscheinen dieser
Anzeige schnellstmöglich die Batterien aus. Der
Batteriewechsel wird im Kapitel „Batterien einlegen / wechseln“ beschrieben.
Temperaturanzeige
Sie können in der Temperaturanzeige zwischen
°C und °F wechseln, indem Sie die M / °C / °F Taste
3
ca. 5 Sekunden gedrückt halten.
Page 91

91 DE/AT/CH
RESET-Funktion
Eine Kalibrierung kann durchgeführt werden, wenn
direkt nach dem Einschalten des Produkts nicht
0,0 % auf dem Display angezeigt wird. Öffnen
Sie hierzu das Batteriefach und drücken Sie mittels eines spitzen Gegenstandes die Reset-Taste
auf der Rückseite des Produkts. Wenn der angezeigte Messwert noch nicht stimmt, drücken Sie
erneut die Reset-Taste, um erneut zu kalibrieren.
Hinweis: Entfernen Sie die Batterien nicht,
während Sie die RESET-Funktion verwenden.
Fehlerbehebung
Fehler Mögliche Ursache
und Lösung
Das Messergebnis ist
offensichtlich
zu hoch oder
zu niedrig.
Prüfen Sie, ob das Produkt auf
das korrekte Material eingestellt ist. Prüfen Sie, ob die
Messstifte
2
korrekt gegen
das Material gedrückt sind.
Wiederholen Sie den Messvorgang.
Das Display
8
zeigt „Lo“
oder „Hi“ an.
Der Messbereich ist unterbzw. überschritten.
Die Anzeige
im Display reagiert nicht.
Wird das Schloss-Symbol im
Display angezeigt?
Drücken Sie die
-Taste 4.
Die Anzeige
im Display ist
kaum zu erkennen.
Die Batterien sind erschöpft.
Sehen Sie hierzu das Kapitel
„Batterien einlegen / wechseln“.
Page 92

92 DE/AT/CH
Elektrostatische Entladungen können zu Funktionsstörungen führen. Entfernen Sie bei solchen Funktionsstörungen kurzzeitig die Batterien und setzen
Sie sie erneut ein.
Reinigung und Pflege
Achten Sie darauf, dass keine Flüssigkeit in
das Produkt eindringt. Andernfalls besteht
Gefahr der Sachbeschädigung.
Reinigen Sie das Produkt nur mit einem leicht
angefeuchteten Tuch und einem milden Spülmittel.
Reinigen Sie die Messspitzen mit einem leicht
angefeuchteten Tuch und trocknen Sie sie
anschließend ab.
Kontrollieren Sie das Produkt vor jeder An-
wendung auf äußere, sichtbare Schäden.
Kontrollieren Sie die Messspitzen vor jeder
Anwendung auf Beschädigungen.
Lagerung
Setzen Sie immer die Schutzkappe 1 auf
das Produkt, wenn Sie es nicht benutzen.
Entnehmen Sie die Batterien immer, wenn das
Produkt für längere Zeit nicht benötigt wird.
Bewahren Sie das Produkt in einer trockenen
Umgebung auf.
Page 93

93 DE/AT/CH
Entsorgung
Die Verpackung besteht aus umweltfreundlichen
Materialien, die Sie über die örtlichen Recyclingstellen entsorgen können.
b
a
Beachten Sie die Kennzeichnung der
Verpackungsmaterialien bei der Abfalltrennung, diese sind gekennzeichnet
mit Abkürzungen (a) und Nummern
(b) mit folgender Bedeutung: 1–7:
Kunststoffe / 20–22: Papier und
Pappe / 80–98: Verbundstoffe.
Das Produkt und die Verpackungsmaterialien sind recycelbar, entsorgen Sie
diese getrennt für eine bessere Abfallbehandlung. Das Triman-Logo gilt nur
für Frankreich.
Möglichkeiten zur Entsorgung des ausgedienten Produkts erfahren Sie bei Ihrer Gemeinde- oder Stadtverwaltung.
Werfen Sie Ihr Produkt, wenn es ausgedient hat, im Interesse des Umweltschutzes nicht in den Hausmüll,
sondern führen Sie es einer fachgerechten Entsorgung zu. Über Sammelstellen und deren Öffnungszeiten
können Sie sich bei Ihrer zuständigen
Verwaltung informieren.
Defekte oder verbrauchte Batterien / Akkus müssen
gemäß Richtlinie 2006/66/EG und deren
Änderungen recycelt werden. Geben Sie Batterien /
Page 94

94 DE/AT/CH
Akkus und / oder das Produkt über die angebotenen
Sammeleinrichtungen zurück.
Umweltschäden durch falsche
Entsorgung der Batterien /
Akkus!
Batterien / Akkus dürfen nicht über den Hausmüll
entsorgt werden. Sie können giftige Schwermetalle
enthalten und unterliegen der Sondermüllbehandlung. Die chemischen Symbole der Schwermetalle
sind wie folgt: Cd = Cadmium, Hg = Quecksilber,
Pb = Blei. Geben Sie deshalb verbrauchte Batterien / Akkus bei einer kommunalen Sammelstelle ab.
Garantie
Das Produkt wurde nach strengen Qualitätsrichtlinien
sorgfältig produziert und vor Anlieferung gewissenhaft geprüft. Im Falle von Mängeln dieses Produkts
stehen Ihnen gegen den Verkäufer des Produkts
gesetzliche Rechte zu. Diese gesetzlichen Rechte
werden durch unsere im Folgenden dargestellte
Garantie nicht eingeschränkt.
Sie erhalten auf dieses Produkt 3 Jahre Garantie ab
Kaufdatum. Die Garantiefrist beginnt mit dem Kaufdatum. Bitte bewahren Sie den Original-Kassenbon gut auf. Diese Unterlage wird als Nachweis
für den Kauf benötigt.
Tritt innerhalb von 3 Jahren ab dem Kaufdatum
dieses Produkts ein Material- oder Fabrikationsfehler
auf, wird das Produkt von uns – nach unserer
Wahl – für Sie kostenlos repariert oder ersetzt.
Diese Garantie verfällt, wenn das Produkt
Page 95

95 DE/AT/CH
beschädigt, nicht sachgemäß benutzt oder gewartet wurde.
Die Garantieleistung gilt für Material- oder Fabrikationsfehler
. Diese Garantie erstreckt sich nicht auf Produktteile, die normaler Abnutzung ausgesetzt sind
(z. B. Batterien) und daher als Verschleißteile angesehen werden können oder Beschädigungen
an zerbrechlichen Teilen, z. B. Schalter, Akkus
oder die aus Glas gefertigt sind.
Abwicklung im Garantiefall
Um eine schnelle Bearbeitung ihres Anliegens zu
gewährleisten, folgen Sie bitte den folgenden
Hinweisen:
Bitte halten Sie für alle Anfragen den Kassenbon
und die Artikelnummer (z. B. IAN 123456) als
Nachweis für den Kauf bereit.
Die Artikelnummer entnehmen Sie bitte dem
Typenschild, einer Gravur, auf dem Titelblatt ihrer
Anleitung (unten links) oder als Aufkleber auf der
Ruck- oder Unterseite.
Sollten Funktionsfehler oder sonstige Mangel
auftreten kontaktieren Sie zunächst die nachfolgend
benannte Serviceabteilung telefonisch oder per
E-Mail.
Ein als defekt erfasstes Produkt können Sie dann
unter Beifügung des Kaufbelegs (Kassenbon) und
der Angabe, worin der Mangel besteht und wann
er aufgetreten ist, für Sie portofrei an die Ihnen
mitgeteilte Service-Anschrift übersenden.
Page 96

96 DE/AT/CH
Service
Service Deutschland
Tel.: 0800 5435 111
(kostenfrei aus dem dt.
Festnetz / Mobilfunknetz)
E-Mail: owim@lidl.de
Service Österreich
Tel.: 0820 201 222
(0,15 EUR/Min.)
E-Mail: owim@lidl.at
Service Schweiz
Tel.: 0842 665566
(0,08 CHF/Min.,
Mobilfunk max. 0,40 CHF/Min.)
E-Mail: owim@lidl.ch
Page 97

OWIM GmbH & Co. KG
Stiftsbergstraße 1
DE-74167 Neckarsulm
GERMANY
Model-No.: HG04213B
Version: 09 / 2018
Last Information Update · Információk
állása · Stanje informacij · Stav
informací · Stav informácií · Stand
der Informationen: 07 / 2018
Ident.-No.: HG04213B072018-4
IAN 306954
 Loading...