

Pioneer X-SMC4-K Owner's Manual
X-SMC4-K
MUSIC TAP
Register your product at:
http://www.pioneerelectronics.com (US)
http://www.pioneerelectronics.ca (Canada)
• Protect your new investment
The details of your purchase will be on file for reference in the event of an insurance claim such as loss or theft.
• Receive free tips, updates and service bulletins on your new product
• Improve product development
Your input helps us continue to design products that meet your needs.
• Receive a free Pioneer newsletter
Registered customers can opt in to receive a monthly newsletter.
http://www.pioneerelectronics.com (États-Unis)
http://www.pioneerelectronics.ca (Canada)
“MUSIC TAP” is a registered trademark of PIONEER CORPORATION.
"MUSIC TAP" est une marque deposee de PIONEER CORPORATION.
Operating Instructions
Mode d’emploi
NOTE:
This equipment has been tested and found to comply with the limits for a Class B digital device, pursuant to Part 15
of the FCC Rules. These limits are designed to provide reasonable protection against harmful interference in a
residential installation. This equipment generates, uses, and can radiate radio frequency energy and, if not installed
and used in accordance with the instructions, may cause harmful interference to radio communications. However,
there is no guarantee that interference will not occur in a particular installation. If this equipment does cause
harmful interference to radio or television reception, which can be determined by turning the equipment off and on,
the user is encouraged to try to correct the interference by one or more of the following measures:
— Reorient or relocate the receiving antenna.
— Increase the separation between the equipment and receiver.
— Connect the equipment into an outlet on a circuit different from that to which the receiver is connected.
— Consult the dealer or an experienced radio/TV technician for help.
D8-10-1-2_A1_En
This Class B digital apparatus complies with
Canadian ICES-003.
D8-10-1-3_A1_En
Information to User
Alterations or modifications carried out without
appropriate authorization may invalidate the user’s
right to operate the equipment.
D8-10-2_A1_En
WARNING:Handling the cord on this product or
cords associated with accessories sold with the
product may expose you to chemicals listed on
proposition 65 known to the State of California and
other governmental entities to cause cancer and
birth defect or other reproductive harm.
Wash hands after handling.
D36-P5_B1_En
WARNING
This equipment is not waterproof. To prevent a fire or
shock hazard, do not place any container filled with
liquid near this equipment (such as a vase or flower
pot) or expose it to dripping, splashing, rain or
moisture.
D3-4-2-1-3_A1_En
WARNING
To prevent a fire hazard, do not place any naked flame
sources (such as a lighted candle) on the equipment.
D3-4-2-1-7a_A1_En
WARNING
Before plugging in for the first time, read the following
section carefully.
The voltage of the available power supply diers
according to country or region. Be sure that the power
supply voltage of the area where this unit will be used
meets the required voltage (e.g., 230 V or 120 V) written
on the AC adapter label.
D3-4-2-1-4*_A1_En
VENTILATION CAUTION
When installing this unit, make sure to leave space
around the unit for ventilation to improve heat radiation
(at least 10 cm at top, 10 cm at rear, and 10 cm at each
side).
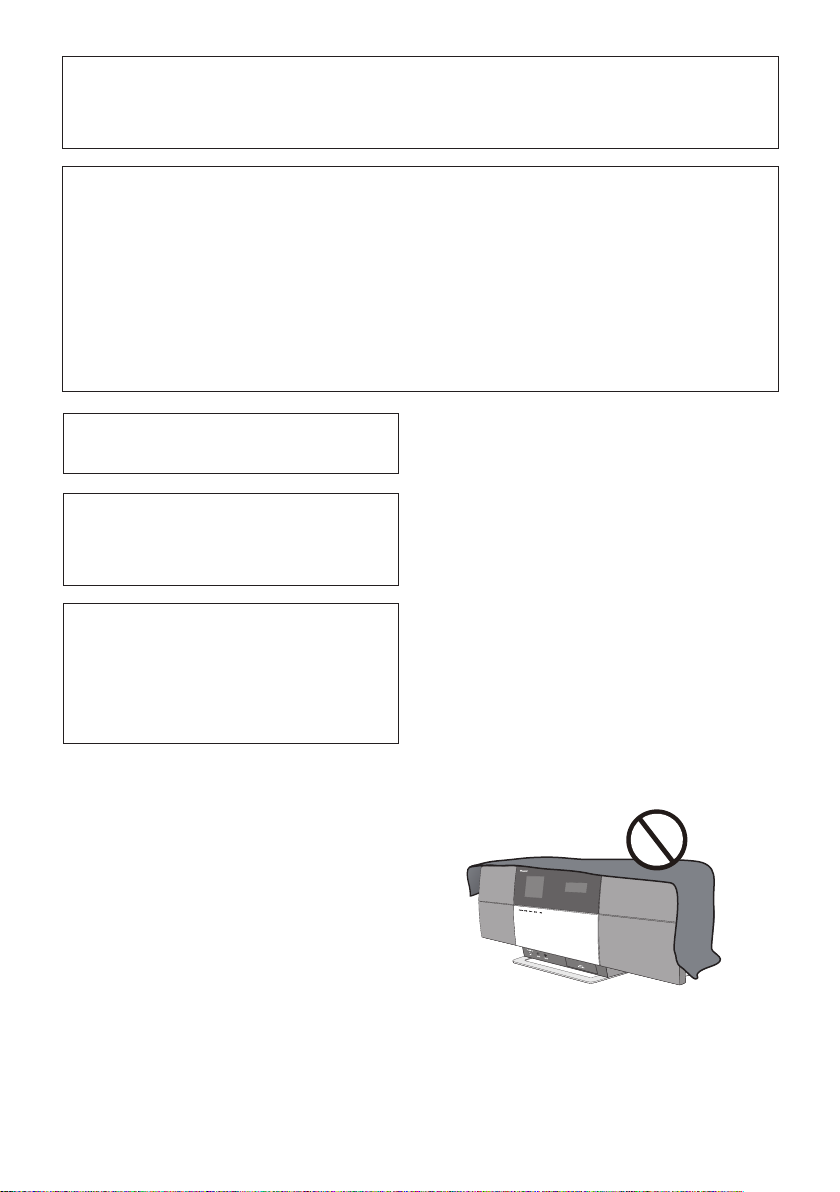
WARNING
Slots and openings in the cabinet are provided for
ventilation to ensure reliable operation of the product,
and to protect it from overheating. To prevent fire
hazard, the openings should never be blocked or
covered with items (such as newspapers, table-cloths,
curtains) or by operating the equipment on thick carpet
or a bed.
D3-4-2-1-7b*_A1_En
Operating Environment
Operating environment temperature and humidity:
+5 °C to +35 °C (+41 °F to +95 °F); less than 85 %RH
(cooling vents not blocked)
Do not install this unit in a poorly ventilated area, or in
locations exposed to high humidity or direct sunlight (or
strong artificial light)
D3-4-2-1-7c*_A1_En
IMPORTANT NOTICE
THE MODEL NUMBER AND SERIAL NUMBER OF THIS EQUIPMENT ARE ON THE REAR OR BOTTOM.
RECORD THESE NUMBERS ON YOUR ENCLOSED WARRANTY CARD AND KEEP IN A SAFE PLACE FOR FUTURE
REFERENCE.
D36-AP9-1_A1_En
IMPORTANT
The lightning flash with arrowhead symbol,
within an equilateral triangle, is intended to
alert the user to the presence of uninsulated
“dangerous voltage” within the product’s
enclosure that may be of sufficient
magnitude to constitute a risk of electric
shock to persons.
Read these instructions.
1)
Keep these instructions.
2)
Heed all warnings.
3)
Follow all instructions.
4)
Do not use this apparatus near water.
5)
Clean only with dry cloth.
6)
Do not block any ventilation openings. Install in
7)
accordance with the manufacturer’s
instructions.
Do not install near any heat sources such as
8)
radiators, heat registers, stoves, or other
apparatus (including amplifiers) that produce
heat.
Do not defeat the safety purpose of the polarized
9)
or grounding-type plug. A polarized plug has two
blades with one wider than the other. A
grounding type plug has two blades and a third
grounding prong. The wide blade or the third
prong are provided for your safety. If the provided
plug does not fit into your outlet, consult an
electrician for replacement of the obsolete outlet.
Protect the power cord from being walked on or
10)
pinched particularly at plugs, convenience
receptacles, and the point where they exit from
the apparatus.
CAUTION:
TO PREVENT THE RISK OF ELECTRIC
SHOCK, DO NOT REMOVE COVER (OR
BACK). NO USER-SERVICEABLE PARTS
INSIDE. REFER SERVICING TO QUALIFIED
SERVICE PERSONNEL.
%#76+10
4+5-1('.'%64+%5*1%-
&101612'0
Only use attachments/accessories specified by
11)
the manufacturer.
Use only with the cart, stand, tripod, bracket, or
12)
table specified by the manufacturer, or sold with
the apparatus. When a cart is used, use caution
when moving the cart/apparatus combination to
avoid injury from tip-over.
Unplug this apparatus during lightning storms
13)
or when unused for long periods of time.
Refer all servicing to qualified service personnel.
14)
Servicing is required when the apparatus has
been damaged in any way, such as power-supply
cord or plug is damaged, liquid has been spilled
or objects have fallen into the apparatus, the
apparatus has been exposed to rain or moisture,
does not operate normally, or has been dropped.
The exclamation point within an equilateral
triangle is intended to alert the user to the
presence of important operating and
maintenance (servicing) instructions in the
literature accompanying the appliance.
D3-4-2-1-1_A1_En
D3-7-13-69_En
CAUTION
STANDBY/ON switch on this unit will not
The
completely shut off all power from the AC outlet.
Since the power cord serves as the main disconnect
device for the unit, you will need to unplug it from the
AC outlet to shut down all power. Therefore, make
sure the unit has been installed so that the power
cord can be easily unplugged from the AC outlet in
case of an accident. To avoid fire hazard, the power
cord should also be unplugged from the AC outlet
when left unused for a long period of time (for
example, when on vacation).
D3-4-2-2-2a*_A1_En
FCC Radiation Exposure Statement:
This equipment complies with FCC radiation exposure
limits set forth for an uncontrolled environment. This
equipment should be installed and operated with a
minimum distance of 20 cm between the radiator and
your body.
If the AC plug of this unit does not match the AC
outlet you want to use, the plug must be removed
and appropriate one fitted. Replacement and
mounting of an AC plug on the power supply cord of
this unit should be performed only by qualified
service personnel. If connected to an AC outlet, the
cut-off plug can cause severe electrical shock. Make
sure it is properly disposed of after removal.
The equipment should be disconnected by removing
the mains plug from the wall socket when left unused
for a long period of time (for example, when on
vacation).
D3-4-2-2-1a_A1_En
IC Radiation Exposure Statement:
This equipment complies with IC RSS-102 radiation
exposure limits set forth for an uncontrolled
environment. This equipment should be installed and
operated with a minimum distance of 20 cm between the
radiator and your body.

POWER-CORD CAUTION
Handle the power cord by the plug. Do not pull out the
plug by tugging the cord and never touch the power
cord when your hands are wet as this could cause a
short circuit or electric shock. Do not place the unit, a
piece of furniture, etc., on the power cord, or pinch the
cord. Never make a knot in the cord or tie it with other
cords. The power cords should be routed such that they
are not likely to be stepped on. A damaged power cord
can cause a fire or give you an electrical shock. Check
the power cord once in a while. When you find it
damaged, ask your nearest PIONEER authorized
service center or your dealer for a replacement.
S002*_A1_En
Radio wave caution
This unit uses a 2.4 GHz radio wave frequency, which is
a band used by other wireless systems (Microwave
ovens and Cordless phones, etc.). In this event noise
appears in your television image, there is the possibility
this unit (including products supported by this unit) is
causing signal interference with the antenna input
connector of your television, video, satellite tuner, etc.
In this event, increase the distance between the
antenna input connector and this unit (including
products supported by this unit).
• Pioneer is not responsible for any malfunction of the
compatible Pioneer product due to communication
error/malfunctions associated with your network
connection and/or your connected equipment.
Please contact your Internet service provider or
network device manufacturer.
• A separate contract with/payment to an Internet
service provider is required to use the Internet.
AC adapter CAUTION
• Make sure to grasp the body of the AC adapter when
removing it from the power outlet. If you pull the
power cord, it may become damaged which could
lead to fire and/or electrocution.
• Do not attempt to plug in or remove the AC adapter
with wet hands. This may result in electrocution.
• Do not insert the power cord of AC adapter into a
power outlet where the connection remains loose
despite inserting the prongs all the way into the
outlet. Heat may be generated which could lead to
fire. Consult with the retailer or an electrician
regarding replacement of the power outlet.
When using this product, confirm the safety
information shown on the bottom of the unit and the
AC adapter label.
D3-4-2-2-4_B1_En
This transmitter must not be co-located or operated
in conjunction with any other antenna or transmitter.
This device complies with Industry Canada
licence-exempt RSS standard(s). Operation is subject
to the following two conditions: (1) this device may
not cause interference, and (2) this device must
accept any interference, including interference that
may cause undesired operation of the device.
WARNING
Store small parts out of the reach of children and
infants. If accidentally swallowed, contact a doctor
immediately.
This product is for general household purposes. Any
failure due to use for other than household purposes
(such as long-term use for business purposes in a
restaurant or use in a car or ship) and which requires
repair will be charged for even during the warranty
period.
K041_A1_En
The Safety of Your Ears is in Your Hands
Get the most out of your equipment by playing it at a
safe level – a level that lets the sound come through
clearly without annoying blaring or distortion and, most
importantly, without affecting your sensitive hearing.
Sound can be deceiving. Over time, your hearing
“comfort level” adapts to higher volumes of sound, so
what sounds “normal” can actually be loud and
harmful to your hearing. Guard against this by setting
your equipment at a safe level BEFORE your hearing
adapts.
ESTABLISH A SAFE LEVEL:
• Set your volume control at a low setting.
• Slowly increase the sound until you can hear it
comfortably and clearly, without distortion.
• Once you have established a comfortable sound
level, set the dial and leave it there.
BE SURE TO OBSERVE THE FOLLOWING
GUIDELINES:
• Do not turn up the volume so high that you can’t
hear what’s around you.
• Use caution or temporarily discontinue use in
potentially hazardous situations.
• Do not use headphones while operating a motorized
vehicle; the use of headphones may create a traffic
hazard and is illegal in many areas.
S001a_A1_En
Store the AC adapter out of the reach of
children and infants.
The AC adapter cord may accidentally wind around the
neck and it may cause suffocation.

Thank you for buying this Pioneer product.
Please read through these operating instructions so that you will know how to operate your model properly. After you have
finished reading the instructions, put them in a safe place for future reference.
Contents
01 Before you start
What’s in the box. . . . . . . . . . . . . . . . . . . . . . . . . . . . . . . .6
Loading the batteries in the remote control . . . . . . . . . .6
Using the remote control . . . . . . . . . . . . . . . . . . . . . . . . . . 6
02 Connections
Connecting the FM antenna. . . . . . . . . . . . . . . . . . . . . . .7
Connecting USB storage devices . . . . . . . . . . . . . . . . . .7
Connecting your TV . . . . . . . . . . . . . . . . . . . . . . . . . . . . . .7
Connecting to the network through the LAN
interface . . . . . . . . . . . . . . . . . . . . . . . . . . . . . . . . . . . . . . .8
Connecting using LAN cable. . . . . . . . . . . . . . . . . . . . . . . 8
Connecting using wireless LAN. . . . . . . . . . . . . . . . . . . . . 8
Plugging in. . . . . . . . . . . . . . . . . . . . . . . . . . . . . . . . . . . . .9
03 Part names and functions
Remote control . . . . . . . . . . . . . . . . . . . . . . . . . . . . . . . .10
Top panel . . . . . . . . . . . . . . . . . . . . . . . . . . . . . . . . . . . . .11
Front panel . . . . . . . . . . . . . . . . . . . . . . . . . . . . . . . . . . . .12
Main display . . . . . . . . . . . . . . . . . . . . . . . . . . . . . . . . . . .13
04 Getting started
05 iPod/iPhone playback
Confirming what iPod/iPhone models are
supported . . . . . . . . . . . . . . . . . . . . . . . . . . . . . . . . . . . . .15
Connecting your iPod/iPhone . . . . . . . . . . . . . . . . . . . .15
Connecting your TV. . . . . . . . . . . . . . . . . . . . . . . . . . . . . . 16
Playing your iPod/iPhone . . . . . . . . . . . . . . . . . . . . . . . .16
06
Bluetooth
Music playback using Bluetooth wireless
technology . . . . . . . . . . . . . . . . . . . . . . . . . . . . . . . . . . . .18
Remote control operation. . . . . . . . . . . . . . . . . . . . . . . . . 18
About Bluetooth® adapter . . . . . . . . . . . . . . . . . . . . . . .18
Setting the PIN code . . . . . . . . . . . . . . . . . . . . . . . . . . . .19
Pairing Bluetooth® adapter and Bluetooth wireless
technology device . . . . . . . . . . . . . . . . . . . . . . . . . . . . . .19
Listening to music contents of Bluetooth wireless
technology device . . . . . . . . . . . . . . . . . . . . . . . . . . . . . .19
AIR JAM . . . . . . . . . . . . . . . . . . . . . . . . . . . . . . . . . . . . . .20
Radio wave caution . . . . . . . . . . . . . . . . . . . . . . . . . . . . .20
Scope of operation . . . . . . . . . . . . . . . . . . . . . . . . . . . . . . 21
Radio wave reflections . . . . . . . . . . . . . . . . . . . . . . . . . . . 21
Precautions regarding connections to products
supported by this unit. . . . . . . . . . . . . . . . . . . . . . . . . . . . 21
® Audio playback
07 USB playback
Playing files stored on USB storage devices. . . . . . . . .22
08 Internet radio
Listening to the Internet radio . . . . . . . . . . . . . . . . . . . .23
Connecting to a LAN network . . . . . . . . . . . . . . . . . . . . . 23
Listening to the Internet radio for the first time . . . . . . . 23
Tune into a station. . . . . . . . . . . . . . . . . . . . . . . . . . . . . . . 23
Adding the stations to the Favorites . . . . . . . . . . . . . . .24
To delete the stations from the list . . . . . . . . . . . . . . . . . 24
Advanced operations for the Internet radio . . . . . . . . .24
Registering broadcast stations not on the vTuner list
from the special Pioneer site . . . . . . . . . . . . . . . . . . . . . . 24
09 Music server
Introduction . . . . . . . . . . . . . . . . . . . . . . . . . . . . . . . . . . .25
About playable DLNA network devices. . . . . . . . . . . . . . 25
Using AirPlay on iPod touch, iPhone, iPad and
iTunes. . . . . . . . . . . . . . . . . . . . . . . . . . . . . . . . . . . . . . . . . 25
About the DHCP server function. . . . . . . . . . . . . . . . . . . 25
Authorizing this unit. . . . . . . . . . . . . . . . . . . . . . . . . . . . . 26
Playing audio files stored on PCs or other
components. . . . . . . . . . . . . . . . . . . . . . . . . . . . . . . . . . .26
Connecting to the LAN network . . . . . . . . . . . . . . . . . . . 26
Playback with Music Server. . . . . . . . . . . . . . . . . . . . . . . 26
10 Using the tuner
Listening to the FM radio broadcasts . . . . . . . . . . . . . .27
Saving stations . . . . . . . . . . . . . . . . . . . . . . . . . . . . . . . . . 27
Listening to station presets . . . . . . . . . . . . . . . . . . . . . .27
11 Other connections
Connecting auxiliary components . . . . . . . . . . . . . . . . . 28
Listening to auxiliary components . . . . . . . . . . . . . . . . . 28
12 Changing the settings
Using the timer . . . . . . . . . . . . . . . . . . . . . . . . . . . . . . . .30
Setting the clock . . . . . . . . . . . . . . . . . . . . . . . . . . . . . . . . 30
Setting the wake-up timer . . . . . . . . . . . . . . . . . . . . . . . . 30
Turning on/off the wake-up timer . . . . . . . . . . . . . . . . . . 31
Using the wake-up timer . . . . . . . . . . . . . . . . . . . . . . . . . 31
Using the sleep timer . . . . . . . . . . . . . . . . . . . . . . . . . . . . 31
Network setting . . . . . . . . . . . . . . . . . . . . . . . . . . . . . . . .31
Wired Setting. . . . . . . . . . . . . . . . . . . . . . . . . . . . . . . . . . . 32
Wireless Setting . . . . . . . . . . . . . . . . . . . . . . . . . . . . . . . . 32
WPS connection setting. . . . . . . . . . . . . . . . . . . . . . . . . 33
Connecting using PIN Input . . . . . . . . . . . . . . . . . . . . . . 34
Friendly Name . . . . . . . . . . . . . . . . . . . . . . . . . . . . . . . . . 34
Parental lock setup . . . . . . . . . . . . . . . . . . . . . . . . . . . . .34
Turn on/off the parental lock . . . . . . . . . . . . . . . . . . . . . . 34
Changing the password . . . . . . . . . . . . . . . . . . . . . . . . . . 34
Software Update . . . . . . . . . . . . . . . . . . . . . . . . . . . . . . . 35
Software Update messages. . . . . . . . . . . . . . . . . . . . . . . 35
Sound settings. . . . . . . . . . . . . . . . . . . . . . . . . . . . . . . . . 35
Using the Virtual Surround/Sound Retriever . . . . . . . . . 35
Adjusting the bass and treble . . . . . . . . . . . . . . . . . . . . . 35
Resetting the system. . . . . . . . . . . . . . . . . . . . . . . . . . . . 35
13 Additional information
Troubleshooting. . . . . . . . . . . . . . . . . . . . . . . . . . . . . . . . 36
Playable file formats . . . . . . . . . . . . . . . . . . . . . . . . . . . .41
Cautions on use. . . . . . . . . . . . . . . . . . . . . . . . . . . . . . . . 42
About network playback . . . . . . . . . . . . . . . . . . . . . . . . . 42
About iPod/iPhone . . . . . . . . . . . . . . . . . . . . . . . . . . . . . 44
About Wi-Fi® . . . . . . . . . . . . . . . . . . . . . . . . . . . . . . . . . . 44
Specifications . . . . . . . . . . . . . . . . . . . . . . . . . . . . . . . . .45
•Illustrations featured in the Operating Instructions may
have been modi fied or simplified for ea se of explanation,
and may therefore differ from the actual product
appearance.
English
Français Español
5
En
Before you start01
30°
7 m (23 ft.)
30°
Chapter 1:
Before you start
What’s in the box
Please confirm that the following accessories are in the box
when you open it.
• Remote control
•Power cord
• AC adapter
• FM wire antenna
• AAA batteries (R03) x 2
• Warranty card
• Operating instructions (this document)
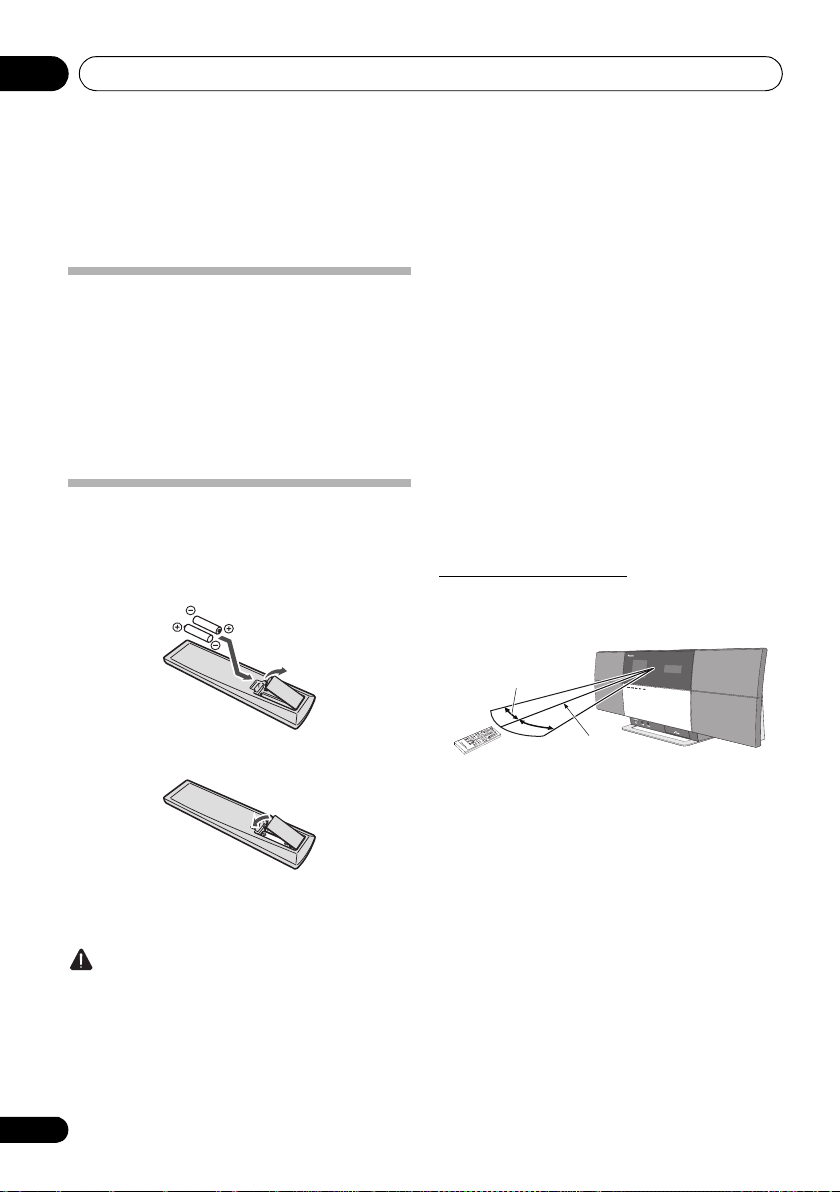
Loading the batteries in the remote
control
1 Open the rear lid and load the batteries as
illustrated below.
• Do not heat batteries, disassemble them, or throw them
into flames or water.
• Batteries may have different voltages, even if they are the
same size and shape. Do not use different types of
batteries together.
• To prevent leakage of battery fluid, remove the batteries
if you do not plan to use the remote control for a long
period of time (1 month or more). If the fluid should leak,
wipe it car efully off the in side of the case, then insert new
batteries. If a battery should leak and the fluid should get
on your skin, flush it off with large quantities of water.
• When disposing of used batteries, please comply with
governmental regulations or environmental public
institution’s rules that apply in your country/area.
• WARNING
Do not use or store batteries in direct sunlight or other
excessively hot place, such as inside a car or near a
heater. This can cause batteries to leak, overheat,
explode or catch fire. It can also reduce the life or
performance of batteries.
Using the remote control
The remote has a range of about 7 m (23 ft.) at an angle of
about 30º from the remote sensor.
2 Close the rear lid.
The batteries included with the unit are to check initial
operations; they may not last over a long period. We
recommend using alkaline batteries that have a longer life.
Caution
• When inserting the batteries, make sure not to damage
the springs on the battery’s terminals.
• Do not use any batteries other than the ones specified.
Also, do not use a new battery together with an old one.
• When loading the batteries into the remote control, set
them in the proper direction, as indicated by the polarity
marks ( and ).
6
En
Keep in mind the following when using the remote control:
• Make sure that there are no obstacles between the
remote and the remote sensor on the unit.
• Remote operation may become unreliable if strong
sunlight or fluorescent light is shining on the unit’s
remote sensor.
• Remote controllers for different devices can interfere
with each other. Avoid using remotes for other
equipment located close to this unit.
• Replace the batteries when you notice a fall off in the
operating range of the remote.
Connections 02
Note
ANTENNA
LAN
(10/100)
VIDEO
OUT
DC IN
19 V
FM75
FM wire antenna (supplied)
This unit’s rear panel
USB storage device
(commercially available)
This unit’s front panel
Yellow
TV
Video cable
(commercially available)
To video input
terminals
This unit’s rear panel
Chapter 2:
Connections
•Be sure to turn off the power and unplug t he power cord
from the power outlet whenever making or changing
connections.
• Connect the power cord after all the connections
between devices have been completed.
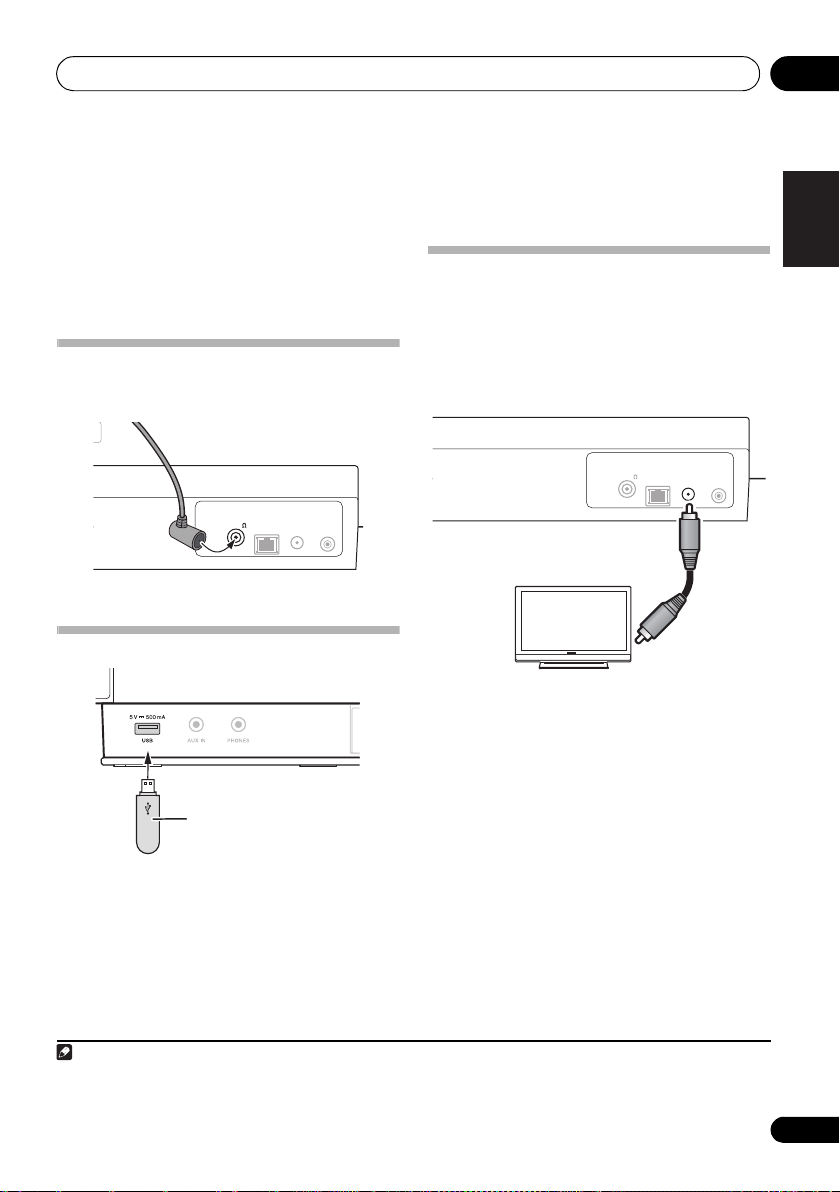
Connecting the FM antenna
Connect the FM antenna plug onto the center pin of the FM
antenna socket.
Connecting USB storage devices
1
Connecting your TV
To watch iPod/iPhone images on a television, connect it
using a composite video cable.
• When an iPod/iPhone is connected to this unit, the TV
output setting of the iPod/iPhone is automatically set to
2
‘ON’.
ANTENNA
LAN
VIDEO
FM75
(10/100)
DC IN
OUT
19 V
English
Français Español
1To ensure optimum reception, make sure the FM antenna is fully extended and not coiled or hanging at the rear of the unit.
2 • Some iPod allow the TV output setting to be changed while connected.
• When the iPod/iPhone is disconnected from this unit, the iPod/iPhone’s TV output setting returns to its original state.
7
En
Connections02
Note
Internet
Modem
Router
PC2
PC1
This unit’s rear panel
LAN cable
(commercially
available)
Internet
This unit
Router
PC
Modem
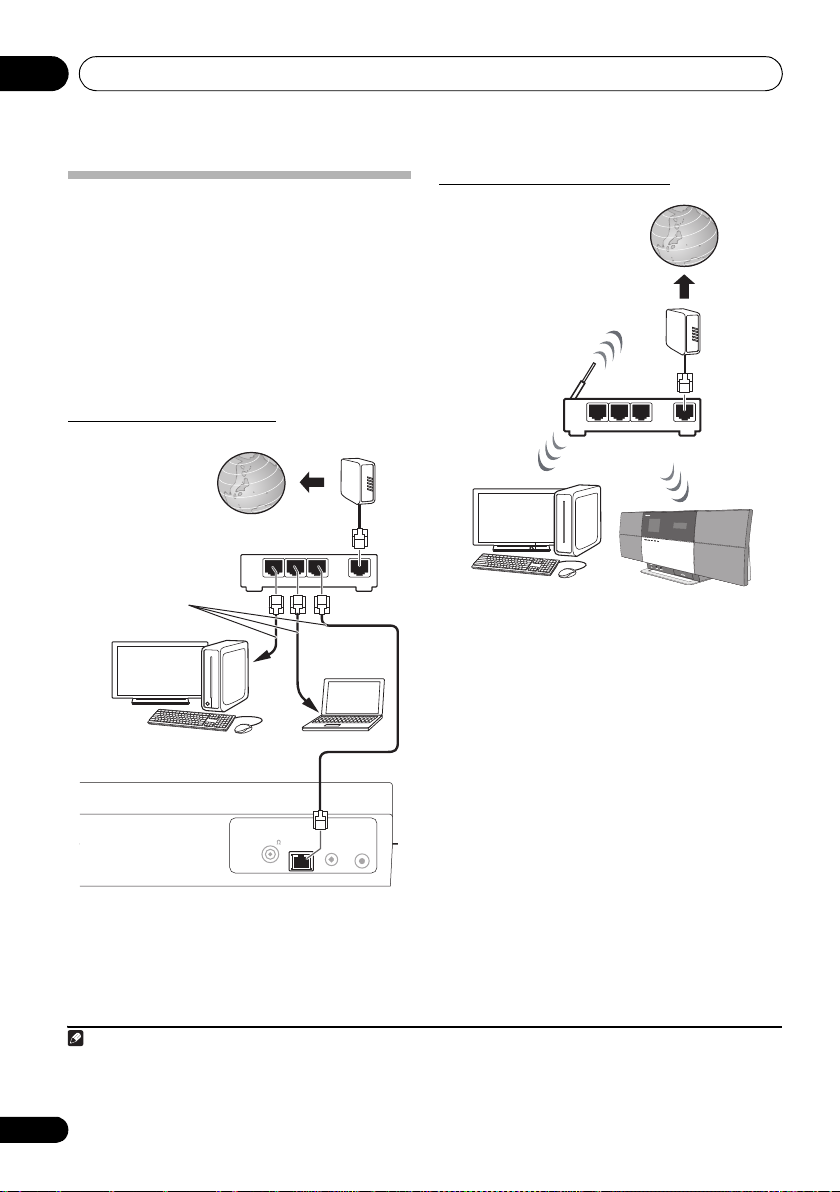
Connecting to the network through the
LAN interface
By connecting this unit to the network via the LAN interface,
you can play back audio files stored on components on the
network, including your PC, and listen to Internet radio
1
stations.
Connect the LAN terminal on this unit to the LAN terminal on
your router (with or witho ut the built-in D HCP server function)
with a straight LAN cable (CAT 5 or higher). Also wireless
connection to the network is possible.
Turn on the DHCP server function of your router. If your router
does not have a built-in DHCP server function, you have to set
up the network manually. For details, see page 31.
Connecting using LAN cable
LAN
321
ANTENNA
LAN
FM75
(10/100)
VIDEO
Connecting using wireless LAN
LAN
321
WAN
DC IN
OUT
19 V
WAN
1• To use services such as Internet radio or automatic clock sync functions, you must conclude a contract with an Internet service
provider.
• Photo or video files cannot be played back.
• With Windows Media Player 11or 12, you can even play back copyrighted audio files on this unit.
8
En
Connections 02
To AC outlet
AC adapter
(supplied)
This unit’s rear panel
Power cord (supplied)
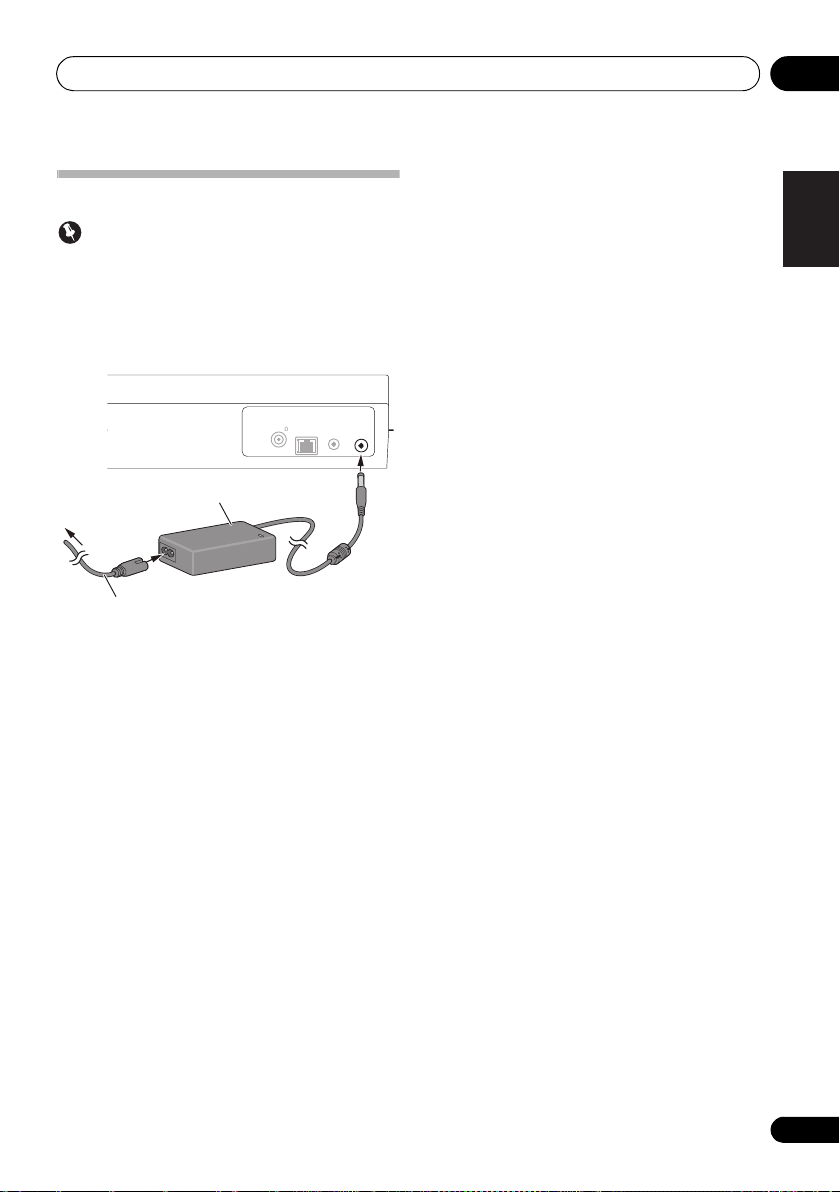
Plugging in
Important
•Before making or changing the connections, switch off
the power and disconnect the power cord from the AC
outlet.
After you’ve finished making all connections, plug the unit
into an AC outlet.
ANTENNA
LAN
VIDEO
(10/100)
DC IN
OUT
19 V
DC IN
FM75
1 Plug the supplied AC adapter into the
socket on the back of the unit.
2 Plug the supplied power cord into the AC
adapter then plug the other end into an AC
outlet.
English
Français Español
9
En
Part names and functions03
STANDBY/ON
5
6
12
1
3
7
15
2
4
8
Chapter 3:
Part names and functions
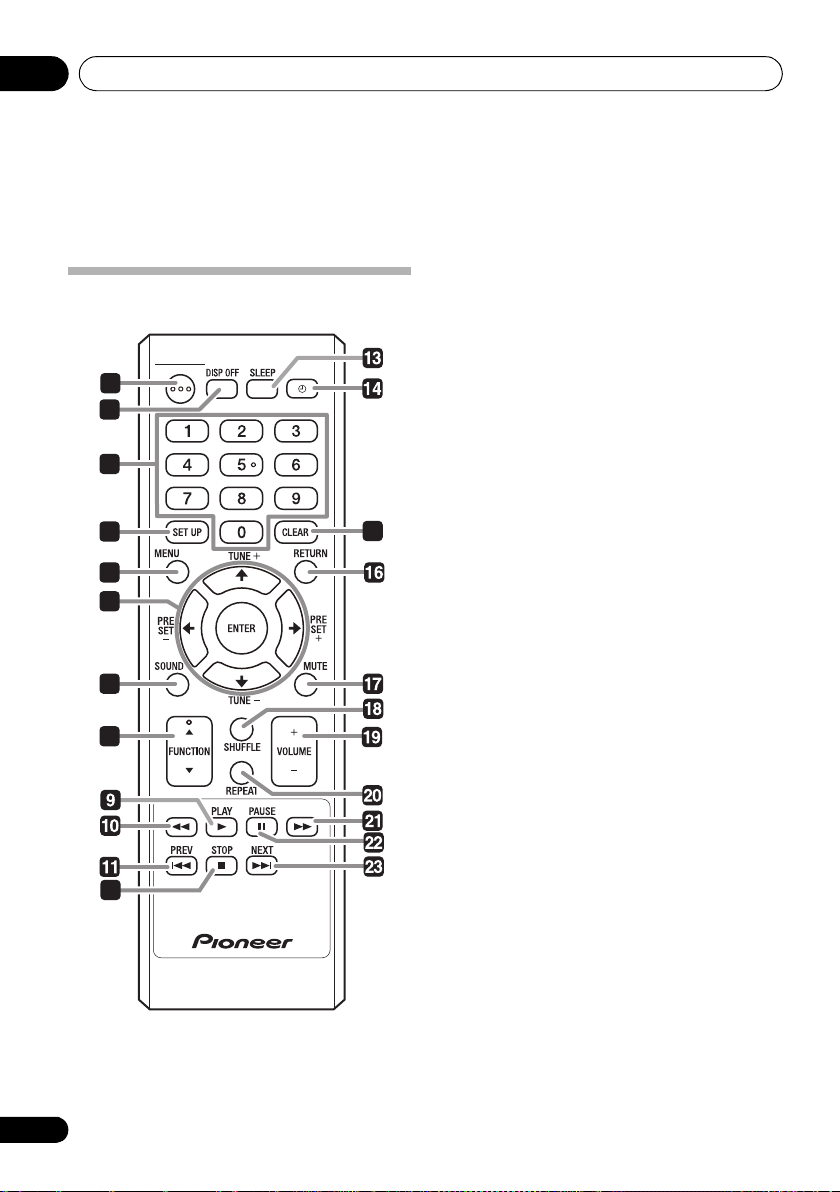
1
STANDBY/ON
Remote control
Press to turn the power on and off.
2 DISP OFF
Press to turn the main display off when you do not need it.
3 Number buttons (0 to 9)
Use them to select the station preset when using the tuner,
etc.
4 SET UP
Use this to change the settings such as Timer Setting
(page 29), Clock Setting (p age 29), Display Setting
(page 29), Network Setting (p age 29), Option Setting
(page 30) and see System Info (page 30).
5MENU
Select and play the track or file from the menu screen.
6 ///
Use these to select items, change settings and move the
cursor.
ENTER
Use this to implement the selected item or enter a
setting that you have changed.
PRESET +/–
Use these to select station presets.
TUNE +/–
Change the frequency one step at a time. To search for
stations automatically, press and hold for about a few
second.
7
SOUND
Turns Virtual Surround and Sound Retriever on and off
(page 35). Also use to adjust the Bass and Treble.
8
FUNCTION /
Use to change the input source. The source changes as
below.
iPod BT Audio Air Jam USB FM Internet
Radio Music Server AUX Return to the
beginning (Undisplayed)
9
PLAY
Press to start playback.
10
Press during playback to fast-reverse.
10
En
Part names and functions 03
11
PREV
Press to return to the beginning of the currently playing track
or file. Press twice to move back to the beginning of the
previous track or file.
12
STOP
Press to stop playback.
13
SLEEP
Use to put the unit in the sleep mode and select the amount
of time before sleep (page 31).
14
Use to turn on and off the timer (page 30).
15
CLEAR
Press to clear the selected item.
Use this for example if you input the wrong number.
16
RETURN
Press to return to the previous screen. Also, use to cancel the
clock setting or the sound setting.
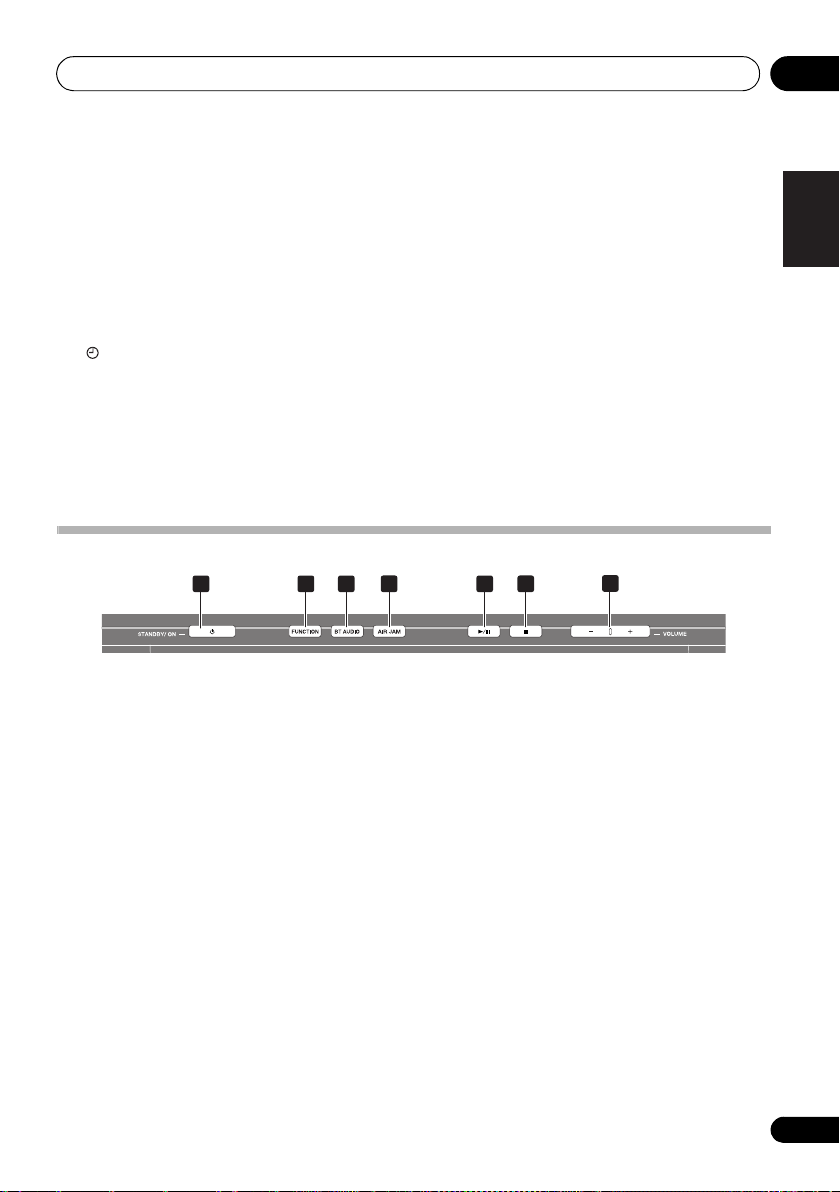
Top panel
1 4
2 3
17
MUTE
Press to temporarily silence the sound.
18
SHUFFLE
Perform shuffle play of tracks on the selected iPod/iPhone,
USB storage device or Music Server (page 16, 22, 26).
19
VOLUME +/–
Use to set the listening volume. (Default setting: 10)
20
REPEAT
Perform repeat play of tracks on the selected iPod/iPhone,
USB storage device or Music Server (page 16, 22, 26).
21
Press during playback to fast-forward.
22
PAUSE
Press to stop playback temporarily. Press again to resume.
23
NEXT
Press during playback to skip ahead to the beginning of the
next track or file.
7
5
6
7
English
Français Español
1
STANDBY/ON
Press to turn the power on and off.
2FUNCTION
Use to change the input source. The source changes as
below.
iPod BT Audio Air Jam USB FM Internet
Radio Music Server AUX Return to the beginning
(Undisplayed)
3
BT AUDIO
Switches the input source to BT Audio.
4
AIR JAM
Switches the input source to Air Jam.
5
Press to start playback. During playback, pause/unpause
playback.
6
Press to stop playback.
7
VOLUME –/+
Use to set the listening volume. (Default setting: 10)
11
En
Part names and functions03
44
3
5
6
7
7
8
21
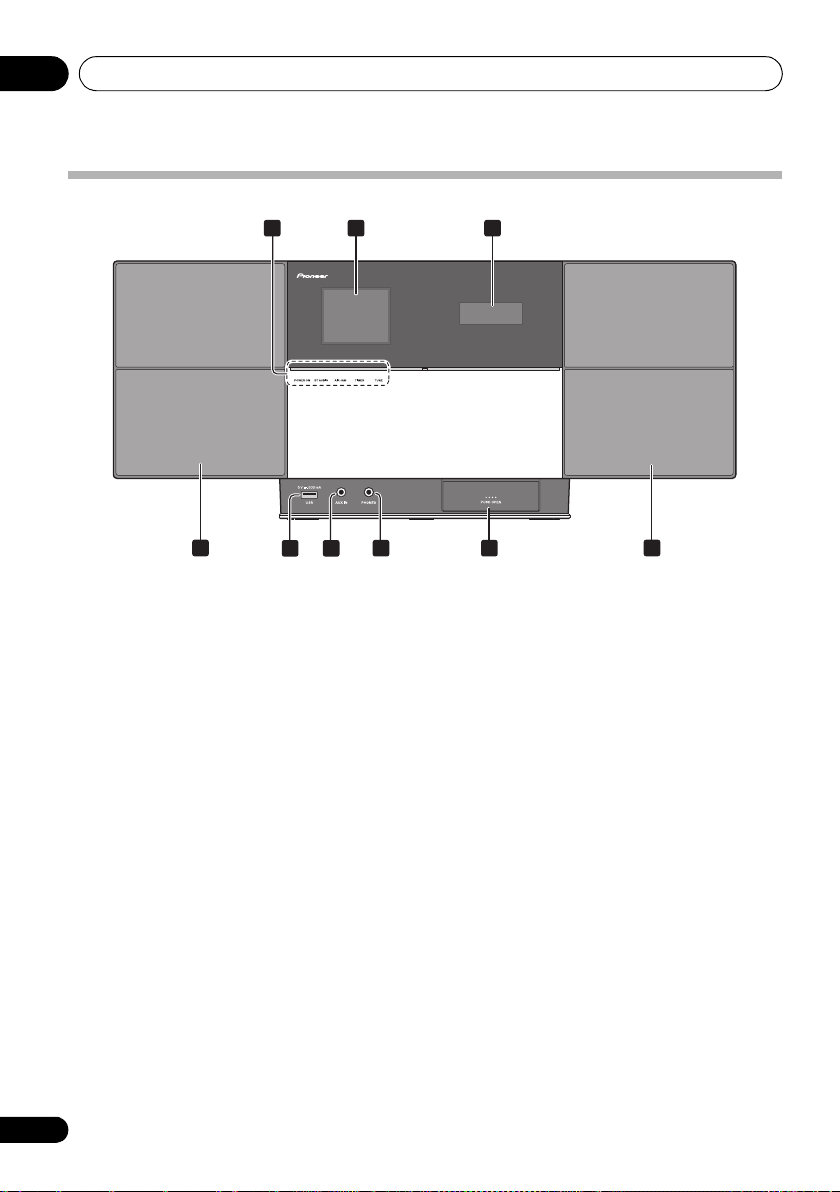
Front panel
1
POWER ON
When the power is on, this indicator lights.
BT AUDIO
When BT Audio is selected as the input source, this
indicator lights.
AIR JAM
When Air Jam is selected as the input source, this
indicator lights.
TIMER
When the wake-up timer is set to On, this indicator
lights.
TUNE
When the tuner receives FM broadcasts, the TUNE
indicator lights.
2
Main Display
3
Sub Display
4
Speaker units
5
USB port
6
AUX IN
Use to connect auxiliary components.
7 PHONES
Use to connect headphones.
8
iPod/iPhone connector port
12
En
Part names and functions 03
Song
Artist
Album
1 4
5
7
8
7
9
6
7
2 3
10 11 12
Note
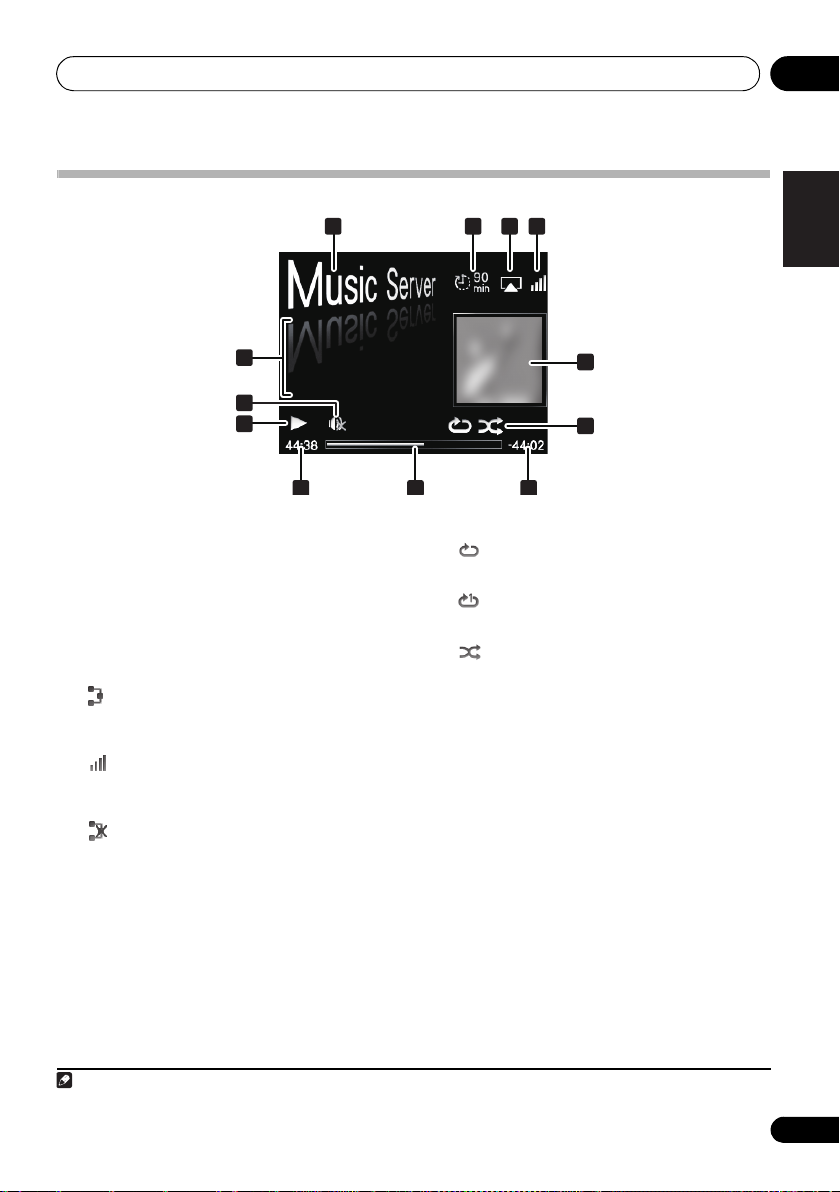
Main display
1 Input source
2 Sleep timer
When the sleep timer is set, the remaining time until power
off is displayed.
3 AirPlay
This appears in blue during AirPlay operation, and in white
during stop mode.
4 Network connection status
When the unit is connected to the wired network, this
indicator lights.
When the unit is connected to the wireless network, this
indicator lights.
1
9 Repeat and Shuffle
Repeat all files.
Repeat a file.
Shuffle
10 Elapsed playing time
11 Play bar
The bar becomes longer together with the elapsed playback
time.
12 Remaining playing time
English
Français Español
When the unit is not connected to the network, this
indicator lights.
5 Name of file/track/artist/album/station,
etc.
6Mute
Displayed during Mute operation.
7 Play status
8 Artwork
Displayed when the currently playing file includes an album
jacket image, etc.
1 This does not indicate the strength of the received signal; the number of bars does not change.
13
En
Getting started04
Select "Start" to start
Demo mode; otherwise
"Cancel".
[PLAY] Start
[STOP] Cancel
Language
Français
Deutsch
Nederlands
English
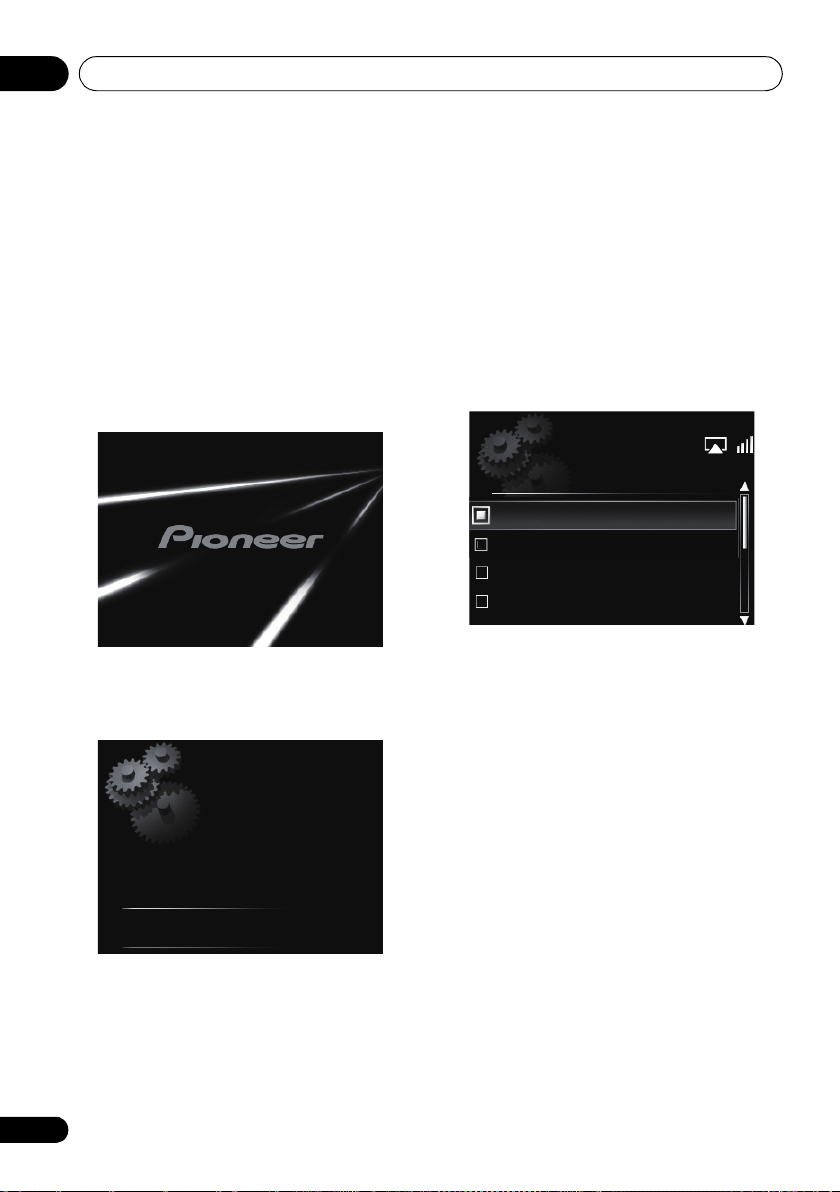
Chapter 4:
Getting started
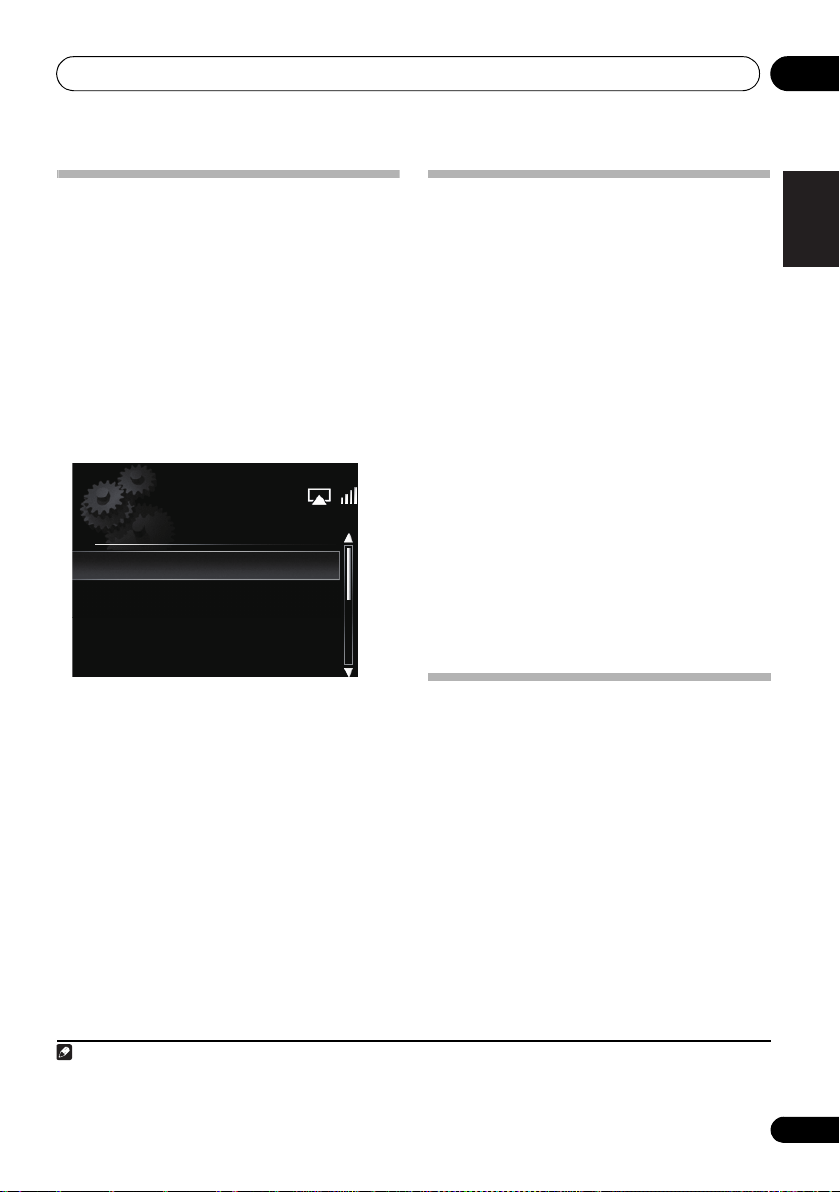
When you use the unit for the first time, the following screens
will be displayed.
Set up the following items to customize the unit.
1 Press
About twenty seconds after turning on the power, the
following splash screen appears. About one minute is
required between turning the power on and completion of
startup.
Setting Quick Start Mode to On will allow faster startup
(page 30).
2 Cancel Demo Mode (Set to normal mode).
The screen be low will automaticall y appear after the scree n in
step 1. If the STOP is pressed, the operation will proceed to
step 3.
STANDBY/ON
.
•The Demo Mode and Quick Start Mode settings can
also be changed manually in the Option Settings (see
page 30). When Demo Mode is set in step 2, if the
Option Settings menu is subsequently used to cancel
the Demo Mode, the Quick Start Mode will not be
cancelled simultaneously. The two settings must be
changed independently.
3Use
/
unit, then press
The setting is done.
to select the menu language of this
ENTER
.
• Press PLAY button to start the Demo Mode. When
starting up the next time, it will be necessary to set step
3.
• When Demo Mode is selected, the Quick Start Mode
is simultaneously set to On.
14
En
iPod/iPhone playback 05
Note
Push
Chapter 5:
iPod/iPhone playback
Merely by connecting your iPod/iPhone to this unit, you can
enjoy high-quality sound from your iPod/iPhone. This unit can
also be connected to a television set, letting you view images
from your iPod/iPhone.
Playback and volume level setting for iPod/ iPhone music and
images can be performed from this unit or the iPod/iPhone
itself.
Confirming what iPod/iPhone models are
supported
The iPod/iPhone playable on this unit are shown below.1
iPod/iPhone Audio Cont rol Video
iPod nano 2G —
iPod nano 3/4/5/6G *
iPod classic
iPod touch 1/2/3/4G
iPhone
iPhone 3G/3GS
iPhone 4
* The iPod nano 6G cannot play back video, but can play slide
shows only.
• This system has been developed and tested for the
software version of iPod/iPhone indicated on the website
of Pioneer (http://pioneer.jp/homeav/support/ios/
na/).
• Installing software versions other than indicated on the
website of Pioneer to your iPod/iPhone may result in
incompatibility with this system.
1 Select “
When using iPod touch or iPhone, select “General” after
selecting “Settings”.
2 Select “
The software version will be displayed.
Settings
About
” from the top menu.
”.
Tip
• When using an iPod/iPhone not supported by this unit,
use a commercially available cable to connect the iPod/
iPhone to the AUX IN connector of this unit.
Connecting your iPod/iPhone
Caution
• When connecting iPod/iPhone units, always use the
dock adapter provided with iPod/iPhone units, or a
commercially available adapter designed to support
iPod/iPhone. The iPod/iPhone cannot be connected
without a dock adapter; attempting to connect an iPod/
iPhone without it will cause damage or malfunction.
• An iPod/iPhone universal dock adapter is not supplied
with this unit.
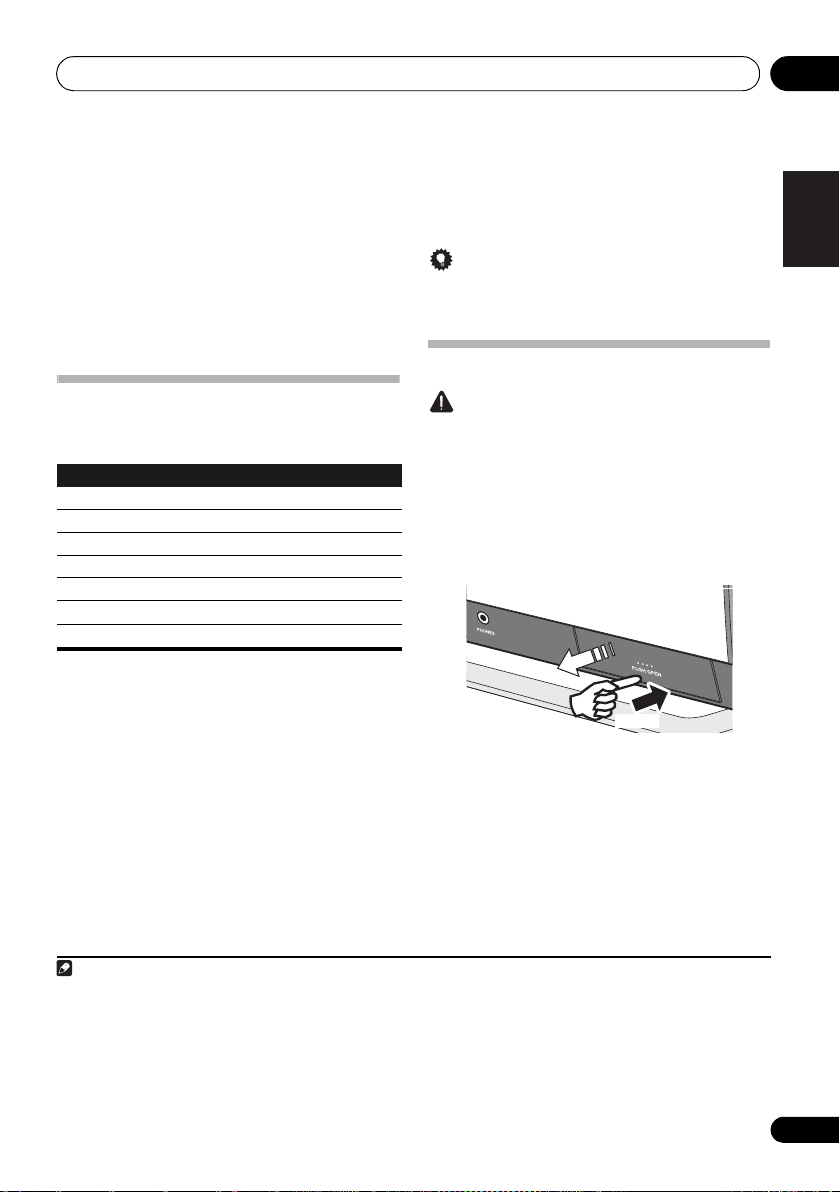
1 Open the iPod/iPhone connector port.
2 Attach the dock adapter to iPod/iPhone
connector port.
When attaching the dock adapter, be sure to orient the front-
back directions of the dock adapter correctly. To attach, first
place the protruding tabs on the front side of the adapter into
the depressions on the iPod/iPhone connector port and press
into position. When attaching the adapter, be careful not to
strike the connectors.
English
Français Español
2
1• Pioneer does not guarantee that this unit plays iPod/iPhone models other than the ones specified.
• Some functions may be restricted depending on the model or software version.
• iPod/iPhone is licensed for reproduction of non-copyrighted materials or materials the user is legally permitted to reproduce.
• Features such as the equalizer cannot be controlled using this system, and we recommend switching the equalizer off before
connecting.
• Pioneer cannot under any circumstances accept responsibility for any direct or indirect loss arising from any inconvenience or loss of
recorded material resulting from iPod/iPhone failure.
• For detailed instructions on using the iPod/iPhone, please refer to the manual supplied with the iPod/iPhone.
2 When opening or closing the iPod/iPhone connector port, support the top of the unit with your hand to prevent it from moving.
15
En
iPod/iPhone playback05
Note
3
2
Push
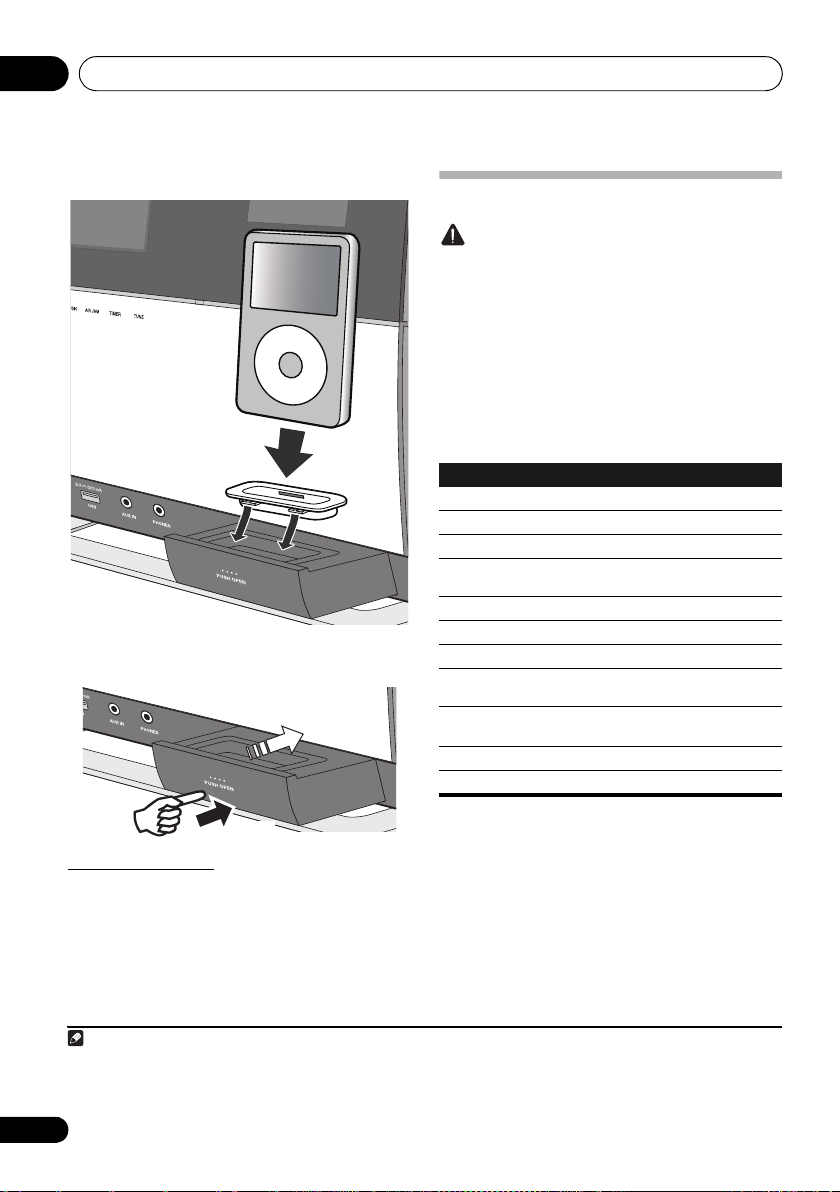
3 Connect your iPod/iPhone.
MENU
• When your iPod/iPhone is not connected to the unit,
close the iPod/iPhone connector port firmly.
Connecting your TV
To watch iPod/iPhone images on a television, connect it using
a composite video cable.
• When an iPod/iPhone is connected to this unit, the TV
output setting of the iPod/iPhone is automatically set to
1
‘ON’.
Playing your iPod/iPhone
Caution
• When your iPod/iPhone is connected to this unit and you
wish to operate the iPod/iPhone directly, be sure to hold
the iPod/iPhone steady with the other hand to prevent
malfunctions due to faulty contacts.
1 Connect your iPod/iPhone.
• To connect your iPod/iPhone, see Connecting your iPod/
iPhone on page 15.
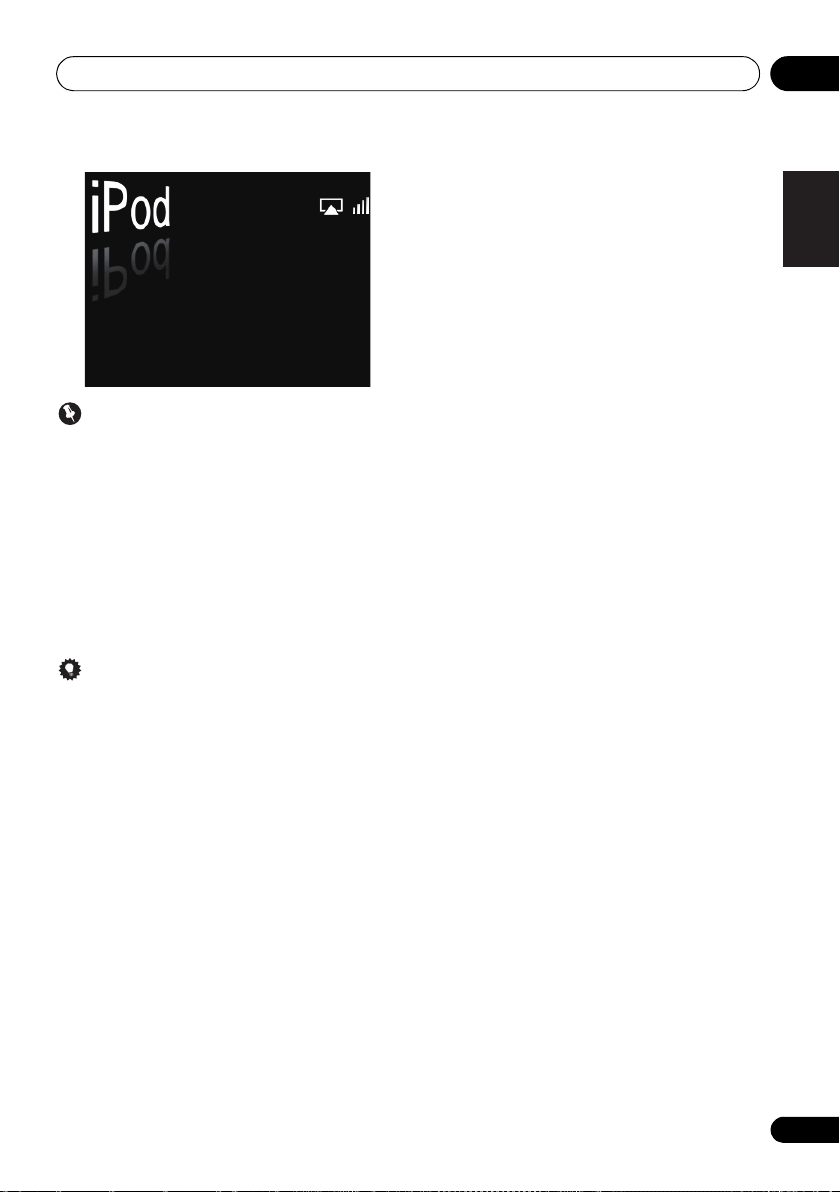
2 Press
input source.
iPod is shown on the main display and starts playback.
The following operations are possible for iPod/iPhone.
Button What it does
PLAY
PAUSE
STOP
PREV
NEXT
SHUFFLE
REPEAT
MENU
//ENTER
When no device is connected to the iPod/iPhone connector
port and this unit is not operated for 30 minutes or more,
power will automatically turn off.
FUNCTION /
Starts normal playback.
Pauses playback.
Pauses playback.
Press to skip to the start of the current file, then
previous files.
Press to skip to the next file.
Press and hold to start fast reverse scanning.
Press and hold to start fast forward scanning.
The currently selected iPod/iPhone tracks are
played back in random order (shuffle play).
The currently selected iPod/iPhone tracks are
played back repeatedly.
Use to access the iPod/iPhone menu.
Use to control the iPod/iPhone menu.
*
Each time you press REPEAT the repeat modes changes as
2
below.
Repeat 1 Repeat all Normal playback
Repeat 1: Repeats a file currently played back.
Repeat all: Repeats all files.
to select
*
3
iPod
as the
1 • Some iPod allow the TV output setting to be changed while connected.
• When the iPod/iPhone is disconnected from this unit, the iPod/iPhone’s TV output setting returns to its original state.
2 No icon will be displayed on the main display when the iPod/iPhone is in the repeat mode or shuffle mode.
3Only when Power Save mode is selected in Auto mode select (page 30).
16
En
iPod/iPhone playback 05
Important
If this unit cannot play your iPod/iPhone, perform the
following troubleshooting checks:
• Check whether the iPod/iPhone is supported by this unit.
• Reconnect the iPod/iPhone to the unit. If this doesn’t
seem to work, try resetting your iPod/iPhone.
• Check the iPod/iPhone software is supported by this
unit.
If the iPod/iPhone cannot be operated, check the following
items:
• Is the iPod/iPhone connected correctly? Reconnect the
iPod/iPhone to the unit.
• Is the iPod/iPhone experiencing a hangup? Try resetting
the iPod/iPhone, and reconnect it to the unit.
English
Français Español
Tip
• iPod/iPhone recharging occurs whenever an iPod/
iPhone is connected to this unit. (This function is
supported in standby mode as well.)
• When input is switched from iPod to another function,
iPod/iPhone playback is temporarily stopped.
17
En
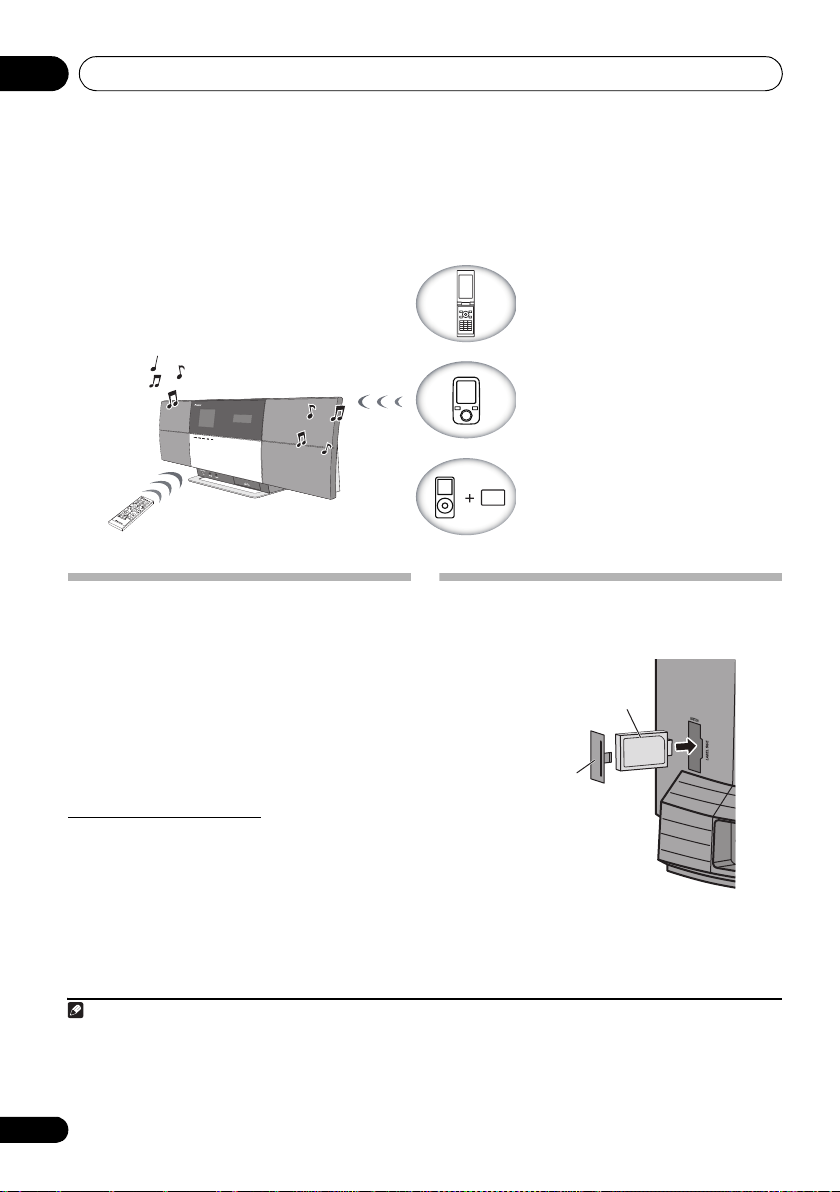
06
Remote control operation
This unit
Device not equipped with Bluetooth
wireless technology:
Digital music player
+
Bluetooth® audio transmitter
(commercially available)
Bluetooth wireless technology
enabled device:
Digital music player
Bluetooth wireless technology
enabled device:
Cell phone
Note
Bluetooth
®
adapter
This unit’s
rear panel
Cover
Chapter 6:
Bluetooth
®
Audio playback
Bluetooth
Music playback using
®
Audio playback
Bluetooth
wireless
technology
When the Bluetooth® adapter (Pioneer Model No. AS-BT200)
is connected to this unit, a product equipped with Bluetooth
wireless technology (portable cell phone, digital music player,
etc.) can be used to listen to music wirelessly.
a commercially available transmitter supporting Bluetooth
wireless technology, you can listen to music on a device not
equipped with Bluetooth wireless technology. The AS-BT200
model supports SCMS-T contents protection, so music can
also be enjoyed on devices equipped with SCMS-T type
Bluetooth wireless technology.
1
Also, by using
About
Bluetooth
Located in the position shown in the accompanying
illustration. Do not remove.
®
adapter
Remote control operation
The remote control supplied with this unit allows you to play
and stop media, and perform other operations.
1• The Bluetooth wireless technology enabled device must support A2DP profiles.
2• The Bluetooth wireless technology enabled device must support AVRCP profiles.
• Pioneer does not guarantee proper connection and operation of this unit with all
• The
Bluetooth® word mark and logos are registered trademarks owned by
CORPORATION is under license. Other trademarks and trade names are those of their respective owners.
• Remote control operations cannot be guaranteed for all Bluetooth wireless technology enabled devices.
18
En
2
Bluetooth
Bluetooth
wireless technology enabled devices.
SIG, Inc. and any use of such marks by PIONEER
Bluetooth
Option Setting
Volume Limit Setting
Internet Parental Lock
AutoMode Change
BT PIN Select
Note
®
Audio playback 06
Setting the PIN code
Set this unit’s PIN code to the same setting as that for the
Bluetooth wireless technology device used. Supported PIN
code setting values include 0000, 1234 or 8888.
• Default setting: 0000
1 Press
top panel of the unit to select
input source.
The BT AUDIO indicator lights and BT Audio is shown on the
main display.
2 Press
3Use
Select, then press
4Use
ENTER
The PIN code is stored.
FUNCTION /
or
BT AUDIO
BT Audio
SET UP
.
/
to select Option Settings BT PIN
ENTER
.
/
to select the PIN code, then press
.
on the
as the
Pairing
Bluetooth
“Pairing” must be done before you start playback of Bluetooth
wireless technology content using Bluetooth
sure to pair devices the first time you operate the system or
any time pairing data is cleared. “Pairing” is the step
necessary to register Bluetooth wireless technology device to
enable Bluetooth communications.
also the operating instructions of your Bluetooth wireless
technology device.
1 Press
Bluetooth
wireless technology device
FUNCTION /
top panel of the unit to select
®
adapter and
1
For more details, see
or
BT AUDIO
BT Audio
®
adapter. Make
on the
as the
input source.
The BT AUDIO indicator lights and BT Audio is shown on the
main display.
2 Turn on the
Bluetooth
wireless technology
device that you want to pair, place it near the
system and set it into pairing mode.
Pairing starts.
3 Check to see that the
detected by the
device.
•If the Bluetooth wireless technology device cannot be
connected to the unit, perform the connection operation
from the Bluetooth wireless technology device.
Bluetooth
Listening to music contents of
Bluetooth® adapter is
wireless technology
Bluetooth
wireless technology device
1 Press
top panel of the unit to select
input source.
The BT AUDIO indicator lights and BT Audio is sh own on the
main display.
2 Make connection between the
wireless technology device and the unit.
FUNCTION /
or
BT AUDIO
BT Audio
on the
as the
Bluetooth
•See Pairing Bluetooth® adapter and Bluetooth wireless
technology device above.
English
Français Español
1• Pairing is required when you first use Bluetooth wireless technology device and Bluetooth® adapter.
• To enable Bluetooth communication, pairing should be done with both of your system and Bluetooth wireless technology device.
• During pairing, the name of this unit appears as AS-BT200.
19
En
06
Note
Bluetooth
®
Audio playback
3 Press
The following operations are now possible for Bluetooth
wireless technology devices, using the remote control.
Button What it does
PLAY
PAUSE
STOP
PREV
NEXT
* This function may work differently depending on the connected
device.
PLAY
to start playback.
Starts normal playback.
Pauses playback.
Stops playback.
Press to skip to the sta rt of the current file, then
previous files.
Press to skip to the next file.
Press and hold to start fast reverse scanning.
Press and hold to start fast forward scanning.
• When no Bluetooth wireless technology device is
connected and no operation has been done for 30
minutes or more, the power will automatically turn off.
1
*
AIR JAM
Air Jam – a Pioneer-exclusive application and available for
free.
Air Jam lets you connect multi compatible device s to this unit
using Bluetooth wireless technology. With it, you can make a
group playlist directly on a supported device to play in your
home theater through the unit. You and your friends can add
songs from your devices to the playlist. Also Air Jam lets you
delete the song before anyone has to hear it.
1 Press
panel of the unit to select
source.
The AIR JAM indicator lights and Air Jam is shown on the
main display.
For more details on using Air Jam, access our website.
http://pioneer.jp/product/soft/iapp_airjam/en.html
FUNCTION /
or
AIR JAM
Air Jam
on the top
as the input
Radio wave caution
This unit uses a 2.4 GHz radio wave frequency, which is a
band used by other wireless systems (see list below). To
prevent noise or interrupted communication, do not use this
unit nearby such devices, or make sure these devices are
switched off during use.
•Cordless phones
•Cordless facsimiles
•Microwave ovens
•Wireless LAN devices (IEEE802.11b/g)
•Wireless AV equipment
•Wireless controllers for game systems
•Microwave-based health aids
• Some baby monitors
*
Other, less common, equipment that may operate on the
same frequency:
• Anti-theft systems
•Amateur radio stations (HAM)
•Warehouse logistic management systems
2
•Discrimination systems for train or emergency vehicles
Note
• In the event no ise appears in your te
the possibility that a Bluetooth wireless technology
is
enabled device or this unit (including products
supported by this unit) are causing signal interference
with the antenna input connector of your television,
video, satellite tuner, etc. In this event, increase the
distance between the antenna input connector and the
Bluetooth wireless technology enabled device or this
unit (including products supported by this unit).
•If there is something obstructing the path between this
unit (including devices supported by this unit) and the
device equipped with Bluetooth
(such as a metal door, concrete wall, or insulation
containing tinfoil), you may need to change the location
of your system to prevent signal noise and interruptions.
levision image, there
wireless technology
1• The Bluetooth wireless technology enabled device must support AVRCP profiles.
• The operation of some Bluetooth wireless technology devices may differ from what is shown in the above table.
2Only when Power Save mode is selected in Auto mode select (page 30).
20
En

Bluetooth
®
Audio playback 06
Scope of operation
Use of this unit is limited to home use. (Transmission
distances may be reduced depending on communication
environment).
In the follow ing locations, poor cond ition or inability to receive
radio waves may cause the audio to be interrupted or stopped:
•In reinforced concrete buildings or steel framed or iron-
framed buildings.
•Near large metallic furniture.
•In a crowd of people or near a building or obstacle.
•In a location exposed to the magnetic field, static
electricity or radio wave interference from radio
communication equipment using the same frequency
band (2.4 GHz) as this unit, such as a 2.4 GHz wireless
LAN device (IEEE802.11b/g) or microwave oven.
• If you live in a heavily popul
(apartment, townhouse, etc.) and if your neighbor’s
microwave is placed near your system, you may
experience radio wave interference. If this occurs, move
your unit to a different place. When the mi crowave is not
in use, there will be no radio wave interference.
ted residential area
a
Radio wave reflections
The radio waves received by this unit include the radio wave
coming directly from the device equipped with Bluetooth
wireless technology (direct wave) and waves coming from
various directions due to reflections by walls, furniture and
building (reflected waves). The reflected waves (due to
obstacles and reflecting objects) further produce a variety of
reflected waves as well as variation in reception condition
depending on locations. If the audio cannot be received
properly due to this phenomenon, try moving the location of
the device equipped with Bluetooth
little. Also note that audio may be interrupted due to the
reflected waves when a person crosses or approaches the
space between this unit and the device equipped with
wireless technology.
Bluetooth
wireless technology a
Precautions regarding connections to
products supported by this unit
•Complete connections for all devices supported by this
unit, including all audio cords and power cables before
connecting them to this unit.
•After completing connections to this unit, check the
audio and power cables to confirm that they not twisted
together.
• When disconnecting this unit, confirm that you have
sufficient working space in the surrounding area.
• When changing connections of audio or other cables for
products supported by this unit, confirm that you have
sufficient working space in the surrounding area.
English
Français Español
21
En
USB playback07
Note
Song
Artist
Album
Chapter 7:
USB playback
Playing files stored on USB storage
devices
• This unit may not recognize a USB storage device, play
files or supply power to a USB storage device. For
details, see When a USB storage device is connected on
page 37.
• Pioneer does not guarantee that any file recorded on a
USB storage device will play or that power will be
supplied to a USB storage device. Also note that Pioneer
will accept no responsibility whatsoever for loss of files
on USB storage devices caused by connection to this
unit.
1 Press
input source.
USB is shown on the main display.
2 Connect the USB storage device.
The folders/files stored on the connected USB storage device
appear on the main display automatically.
3Use / to select the file, then press
ENTER
Playback starts.
You can perform the following operations. Note that some
buttons are not available for operation depending on the
category currently being played back.
Button What it does
PLAY
PAUSE
STOP
PREV
NEXT
SHUFFLE
REPEAT
1Only when Power Save mode is selected in Auto mode select (page 30).
22
En
FUNCTION /
to select USB as the
.
• To return to the previous screen, press RETURN.
• When changing to a different input source, stop the USB
memory playback first, before changing.
• Turn the power off before removing the USB storage
device.
Unpauses playback. When this is pressed from
the file select menu, the screen for the currently
playing file is displayed.
Pauses playback.
Stops playback.
Press to skip to the previous files.
Press to skip to the next file.
The currently selected tracks are played back in
random order (shuffle play).
The currently selected tracks are played back
repeatedly.
*
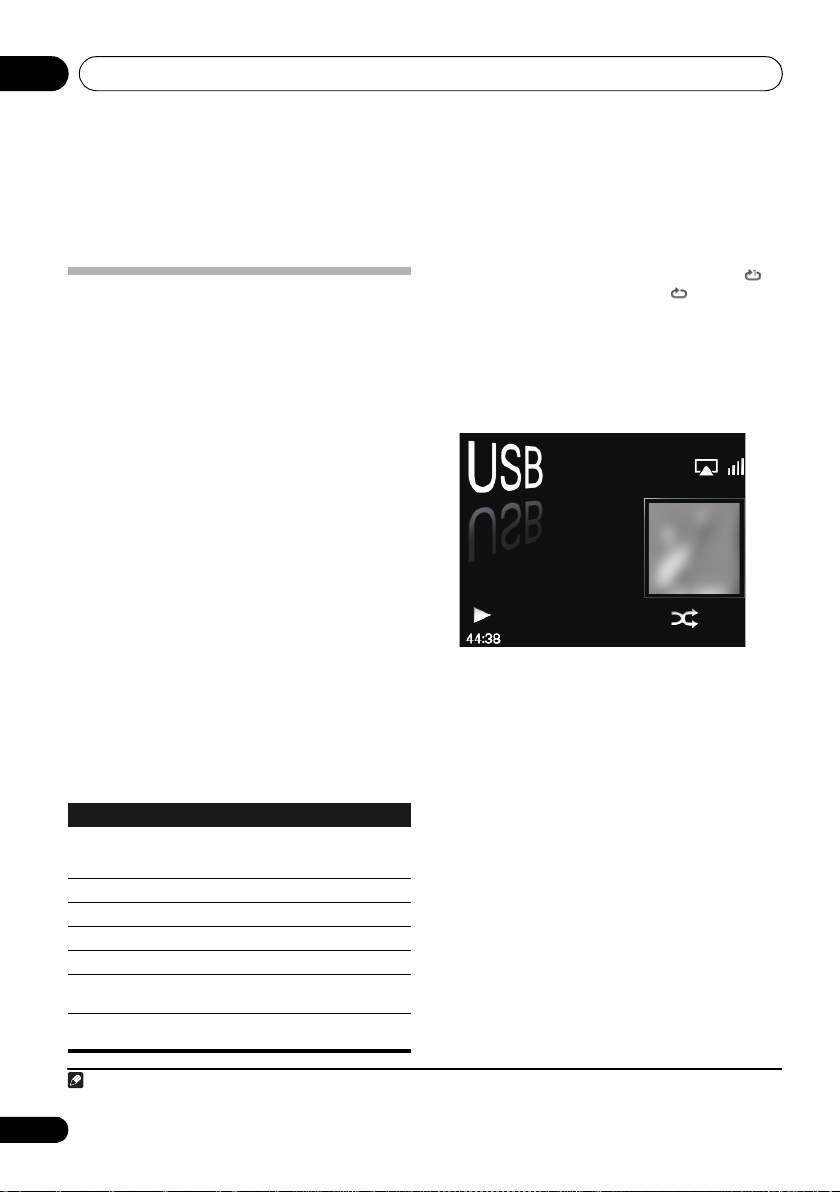
* Press repeatedly to switch between repeat play options. ‘ ’
plays the currently playing file repeatedly. ‘ ’ plays all the files
repeatedly.
When a USB storage device is not playing and the unit has
not been operated for 30 minutes or more, the power will
automatically turn off.
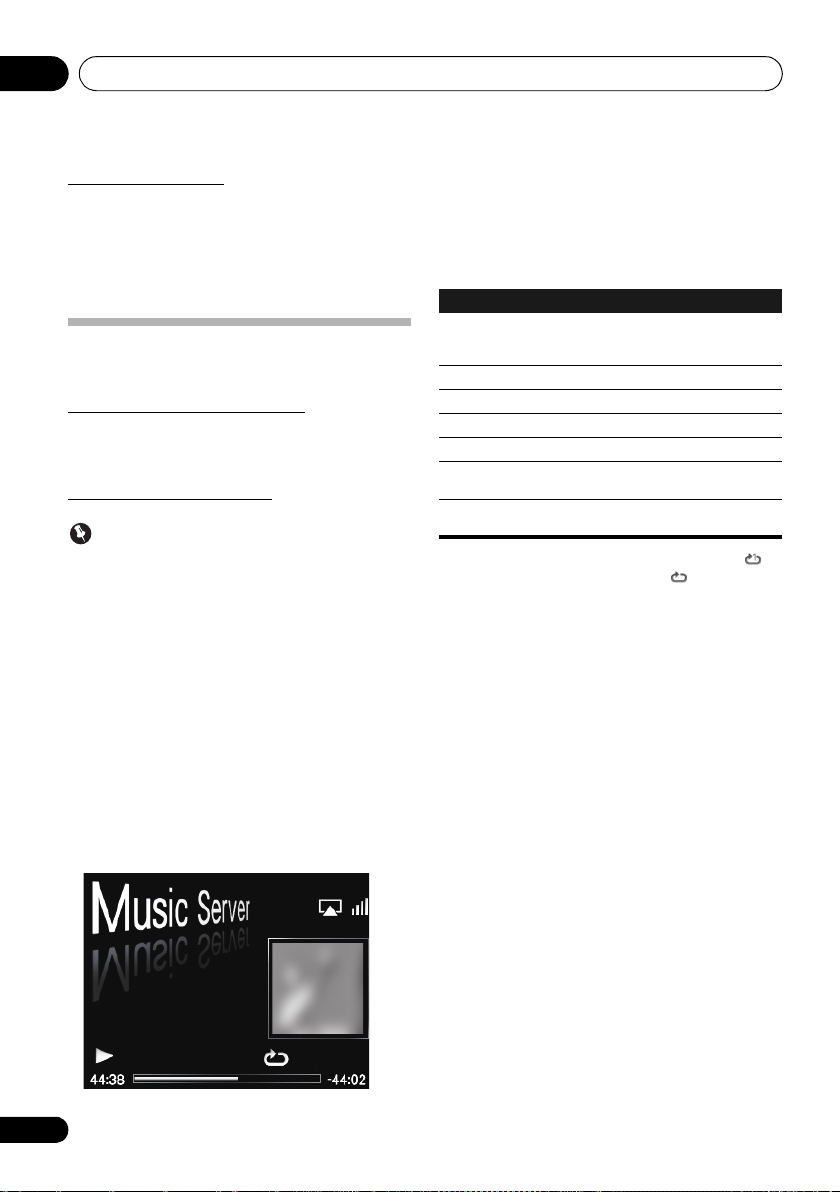
The following screen appears on the main display when you
play back audio files. Note that some file types may not be
displayed.
1
Internet radio 08
Internet Radio
Find Net Radio
Favorites
Genres
Countries
Podcasts By Genre
Podcasts By Location
Chapter 8:
Internet radio
Listening to the Internet radio
Connecting to a LAN network
Connect to the network using the LAN interface.
For details on the connections, see Connecti ng to the network
through the LAN interface on page 8.
Listening to the Internet radio for the first
time
When you listen to the Internet radio first time, follow the
instructions below to tune into your desired station.
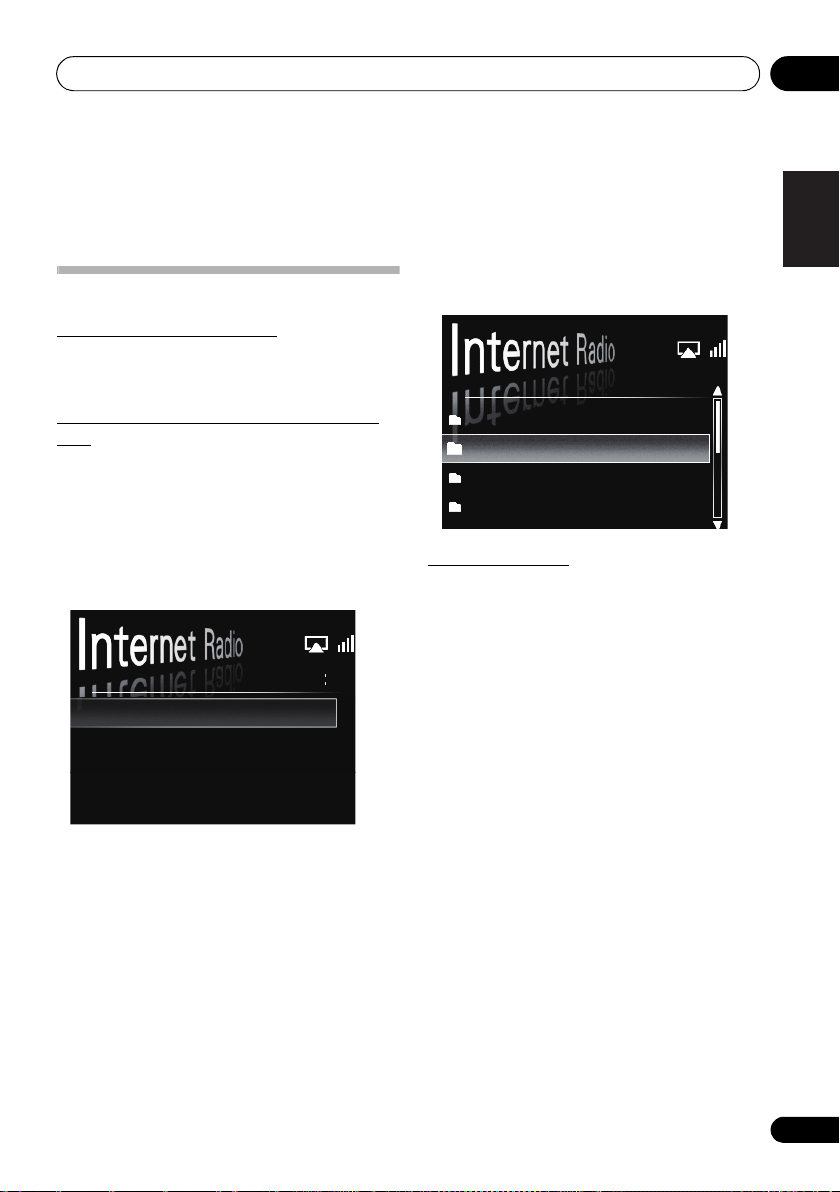
1 Press
Radio as the input source.
Internet Radio is shown on the main display.
2Use
ENTER
FUNCTION /
/
to select Find Net Radio, then press
.
to select Internet
/
3Use
ENTER
to select the station, then press
.
Tune into a station
1 Press
Radio as the input source.
2 Press
menu screen.
3Use
Favorites
4Use
ENTER
FUNCTION /
•The information of the station you last selected is
displayed on the main display.
MENU
to display the internet radio
/
to select
, then press
• Select Find Net Radio when you want to tune into a
station which has not been added to Favorites.
• Select Favorites when you want to tune into a station
which has been added to Favorites already.
• To add stations to the Favorites, see Adding the stations
to the Favorites below.
/
to select the station, then press
.
• When you select Find Net Radio, you can also select the
available stations from the Internet radio menu.
to select Internet
Find Net Radio
ENTER
.
or
English
Français Español
23
En
Internet radio08
Adding the stations to the Favorites
1 Tune into the station from Find Net Radio.
•Follow the instructions Tune into a station on page 23.
•The information of the station is displayed on the main
display.
2 Press and hold
• A maximum of 20 stations can be stored in Favorites.
1. FM AAAAA
[ENTER] (Press and hold):
Add to Favorites
To delete the stations from the list
1 Press
menu screen.
2Use
ENTER
3Use
delete, then press
4Use
Select OK to confirm.
MENU
/
.
/
/
• To cancel deleting the station, press RETURN.
ENTER
for a few seconds.
to display the Internet radio
to select
Favorites
, then press
to select the station you want to
ENTER
.
to select Delete, then press
ENTER
Advanced operations for the Internet
radio
Registering broadcast stations not on the
vTuner list from the special Pioneer site
With this unit, broadcast stations not included on the list of
stations distributed by vTuner can be registered and played.
Check the access code required for registration on this unit,
use this access code to access the special Pioneer Internet
radio site and register the desired broadcast stations in your
favorites. The address of the special Pioneer Internet radio
site is:
http://www.radio-pioneer.com
1 Display
To display the Internet radio list screen, perform steps 1 to 3
at Listening to the Internet radio for the first time on page 23.
2Use
3Use
press
The access code required for registration on the special
Pioneer Internet radio site is displayed. Make a memo of this
address.
The following can be checked on the Help screen:
• Get Access Code
• Show Your WebID/PW
• Reset Your WebID/PW
.
4 Access the special Pioneer Internet radio site
from your computer and perform the
registration process.
Access the above site and use the access code in step 3 to
perform user registration, following the instructions on the
screen.
5 Register the desired broadcast stations as
your favorites, following the instructions on the
computer’s screen.
Both broadcast stations not on the vTuner li st an d sta tion s on
the vTuner list can be registered. In this case they are
registered on the unit as favorite broadcast stations and can
be played.
Find Net Radio
/
to select
/
to select
ENTER
.
registration on the special Pioneer Internet radio site is
displayed.
special Pioneer Internet radio site, the registered ID and
password are displayed.
registered on the special Pioneer Internet radio site.
When reset, all the registered broadcast stations are
also cleared. If you want to listen to the same stations, re-
register after resetting.
-
screen.
Help
, then press
Get Access Code
The access code required for
-
After registering on the
-
Resets all the information
ENTER
, then
.
24
En

Music server 09
Note
Chapter 9:
Music server
This unit can play audio files stored on PCs or other
components on a Local Area Network (LAN).
Introduction
This unit allows you to listen to audio files on a computer or
other component connected to the unit via LAN interface.
This chapter describes the setup and playback procedures
required to enjoy these features. It is advisory that you also
refer to the operation manual supplied with your network
component.
• Photo or video files cannot be played back.
• With Windows Media Player 11 or Windows Media
Player 12, you can even play back copyrighted audio files
on this unit.
About playable DLNA network devices
This unit allows you to play music on media servers
connected on an identical Local Area Network (LAN) as the
unit. This unit allows you to play files stored on the following
devices:
• PCs running Microsoft Windows Vista or XP with
Windows Media Player 11 installed
• PCs running Microsoft Windows 7 with Windows Media
Player 12 installed
• DLNA-compatible digital media servers (on PCs or other
components)
Files stored in a PC or DMS (Digital Media Server) as
described above can be played via command from an external
Digital Media Controller (DMC). Devices controlled by this
DMC to play files are called DMRs (Digital Media Renderers).
This unit supports this DMR function.
When this unit is selected as a DMR and DMS playback is
begun, the unit’s input automatically switches to DMR.
During DMR input, the currently playing track name, artist
name, album name, and album art will appear on the unit’s
main display (some information may not be displayed,
depending on the file being played).
When in the DMR mode, such operations as playing and
stopping files can be performed from the external controller.
Volume adjustment and the muting control are also possible.
If the FUNCTION / buttons are pressed during DMR
playback, the DMR playback will stop and the unit will revert
to the input function selected prior to DMR playback.
• Depending on the external controller being used,
playback may be interrupted when the volume is
adjusted from the controller. In this case, adjust the
volume from the unit or remote control.
Using AirPlay on iPod touch, iPhone, iPad and
iTunes
This unit supports AirPlay audio streaming from iPod touch
(2nd, 3rd and 4th generations), iPhone 4, iPhone 3GS, iPad
with iOS 4.2 or later, and iTunes 10.1 (Mac and PC) or later.
To use AirPlay, select your unit on your iPod touch, iPhone,
iPad or in iTunes and start playback.
Input to the unit will switch automatically when AirPlay is in
use.
The following operations can be performed when in AirPlay
mode:
• Adjustment of the unit’s volume from iPod touch,
iPhone, iPad or iTunes.
• Pause/resume, next/previous track, and shuffle/repeat
from the remote control of the unit.
• Display of the currently playing track information on the
unit’s main display, including artist, song/album name
and album artwork.
•If the FUNCTION / buttons are pressed during
AirPlay playback, the AirPlay playback will stop and the
unit will revert to the input function selected prior to
AirPlay.
Tip
• A network environment is required to use AirPlay.
• The unit’s name that shows up in the AirPlay UI on iPod
touch, iPhone, iPad and iTunes can be changed by
Friendly Name from Network Setting.
• AirPlay provided on this unit has been developed and
tested based on the software versio ns for the iPod touch,
iPhone, iPad and the software versions for iTunes that
are indicated on the Pioneer website. AirPlay may not be
compatible with iPod touch, iPhone, iPad or iTunes
software versions other than those indicated on the
Pioneer website.
3
1
2
About the DHCP server function
To play back audio files stored on components on the
network, you must turn on the DHCP server function of your
router.
In case your router does not have the built-in DHCP server
function, it is necessary to set up the network manually.
Otherwise, you cannot play back audio files stored on
components on the network or listen to Internet radio
stations. See Network setting on page 31 for more on this.
English
Français Español
1 For more information, see the Apple website (http://www.apple.com).
2 The main display will not show the Play Status, Repeat, or Shuffle icons.
3 It may not be displayed other than song name.
25
En
Music server09
Authorizing this unit
This unit must be authorized to enable playback. The unit is
automatically authorized when it is connected to a PC over a
network. If not, please authorize t his unit manually on the P C.
The authorization (or permission) method for access varies
depending on the type of server currently being connected.
For more information on authorizing this unit, refer to the
instruction manual of your server.
Playing audio files stored on PCs or other
components
Connecting to the LAN network
Be sure to connect PC or other components to the network
using the LAN interface before you use this function.
For details on the connections, see page 8.
Playback with Music Server
Important
• You cannot access a PC on a network while you are
logged onto a domain that is configured in a Windows
network environment. Instead of logging onto the
domain, log onto the local machine.
• There are cases where the time elapsed may not be
correctly displayed.
1 Press
All available servers are shown on the main display.
2Use
you want to play is stored on, then press
The folders/files stored on the server are shown on the main
display.
3Use
then press ENTER.
Playback starts.
FUNCTION /
• When no sever is available to play, “Empty” will be
displayed.
/
to select the server that the file
to select Music Server.
ENTER
/
to select the file you want to play,
• When the file you want to play is in the folder, select the
folder first.
• If you press RETURN during playback, the previous
(folders/files) screen will be displayed.
You can perform the following operations. Note that some
buttons are not available for operation depending on the
category currently being played back.
Button What it does
PLAY
PAUSE
STOP
PREV
NEXT
SHUFFLE
REPEAT
* Press repeatedly to switch between repeat play options. ‘ ’
plays the currently playing file repeatedly. ‘ ’ plays all the files
repeatedly.
Unpauses playback. When this is pressed from
the file select menu, the screen for the currently
playing file is displayed.
Pauses playback.
Stops playback.
Press to skip to the previous file.
Press to skip to the next file.
The currently selected tracks are played back in
random order (shuffle play).
The currently selected tracks are played back
*
repeatedly.
.
26
En
Song
Artist
Album
Using the tuner 10
Note
Chapter 10:
Using the tuner
Listening to the FM radio broadcasts
The tuner can receive FM broadcasts, and can save your
favorite stations.
1 Press
The tuned frequency will be displayed on the main display.
2 Tune into a station.
When the tuner receives FM broadcasts, the TUNE indicator
lights.
There are two ways to do this:
FUNCTION /
Automatic tuning - To search for stations, press and
TUNE +/– for about a few seconds. This unit will
hold
start searching for the next station, stopping when it h as
found one. Repeat to search for other stations.
Manual tuning - To change the frequency one step at
a time, press TUNE +/–.
to select FM.
• Automatically saving station presets
1 Press and hold
Auto tuning starts.
• The tuned frequencies will be preset to the buttons in
numerical order.
• Auto tuning stops after the FM band has finished, or the
limit of 9 presets has been reached.
PRESET +
for a few seconds.
Listening to station presets
1 Press
The tuned frequency will be shown on the main display.
2 Press the number button (1 to 9) that stores
the FM radio station.
FUNCTION /
Tip
•Press PRESET +/– repeatedly to selected the station
preset in numerical order.
to select FM.
English
Français Español
Saving stations
You can save up to 9 station presets so that you always have
easy access to your favorite stations without having to tune in
manually each time.
• Manually saving station presets
1 Press
The tuned frequency will be shown on the main display.
2 Tune into a station.
3 Press and hold a number button (1 to 9) for
a few seconds.
The tuned frequency is preset to the selected number button.
The previous station preset is overwritten.
1 When a new b roadcast frequency is stored in a station containing a previously stored frequency, the previous frequency will be overwrit-
ten with the new one.
1
FUNCTION /
to select FM.
27
En
Other connections11
Digital audio
player, etc.
Stereo mini-plug cable
(commercially available)
This unit’s front panel
Chapter 11:
Other connections
• Before making or changing the connections, switch off
the power and disconnect the power cord from the
power outlet.
•If the AUX IN mini-plug jack is connected to auxiliary
phones jack, the volume of the unit will be adjusted by
the volume on the playback component. If the sound is
distorted after you lower the volume of the unit, try
lowering the volume on the auxiliary playback
component.
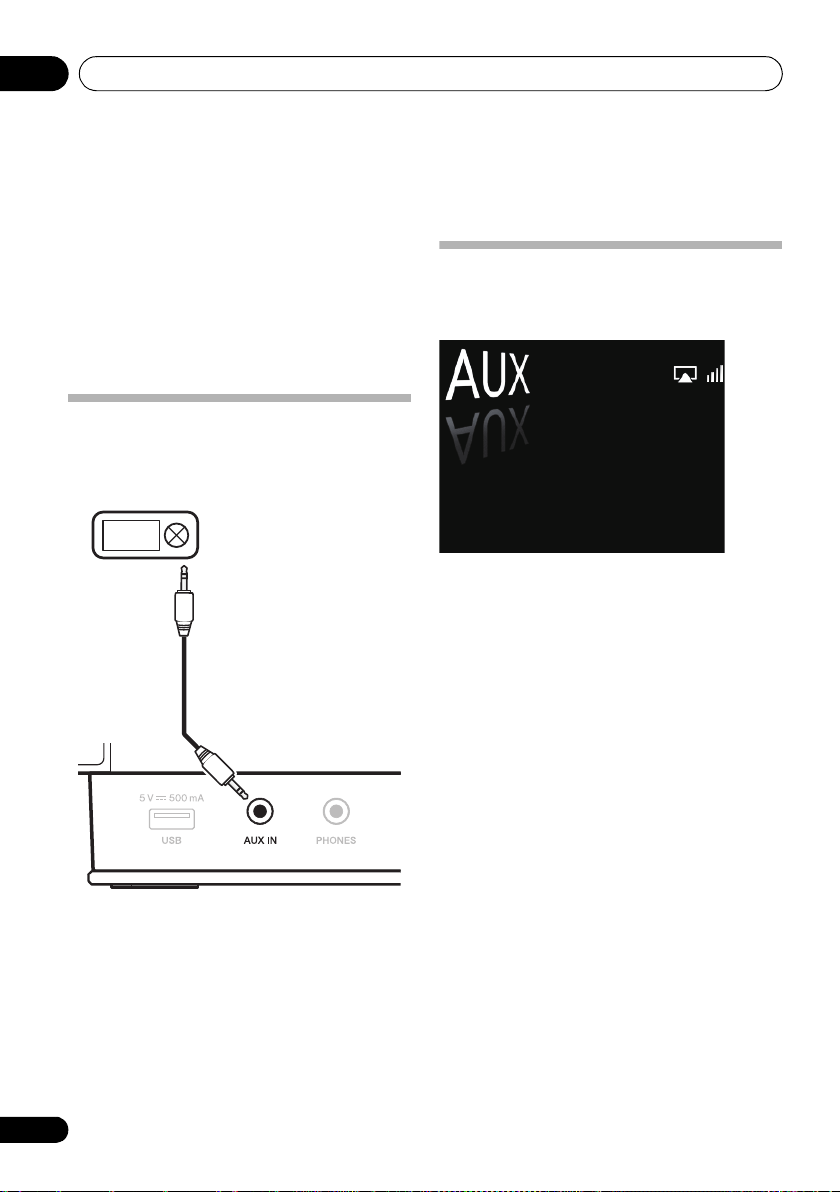
Connecting auxiliary components
Connect the front panel AUX IN mini-plug jack to your
auxiliary playback component.
• This method can be used to play music on this unit from
iPods/iPhones that do not support use of an iPod Dock.
Listening to auxiliary components
1 Press
2 Start playback of the auxiliary component.
FUNCTION /
• AUX is shown on the main display.
• When Auto mode select is set to Power Save mode, if
the function is set to AUX but no input is connected to
the AUX IN connector and no other control operation is
performed for 30 minutes, the unit will automatically
turn off.
to select AUX.
28
En
 Loading...