


Studio 9
Professional Quality Movie-Making
Special thanks to Mike Iampietro, William Chien, Richard Edgley, Ivan Maltz, Jon McGowan, Keith Thomson, Jörg Weselmann, and Chris Zamara.
Documentation: Nick Sullivan
Copyright © 2003 Pinnacle Systems, Inc. All Rights Reserved. Pinnacle Systems is a registered trademark, and Pinnacle Studio, SmartCapture, SmartMovie, Hollywood FX, RTFx and VST are trademarks, of Pinnacle Systems, Inc.
QDesign MPEG-1 Layer 2 Fast Encoder/Decoder copyright © 19962002 by QDesign Corporation. The RealProducer is included under license from RealNetworks, Inc. RealProducer version 8.0. copyright 1995-2002, RealNetworks Inc. “RealProducer”, “RealVideo”, “RealServer”, and “Real” logo are trademarks or registered trademarks of RealNetworks, Inc. All rights reserved. SmartSound is a registered trademark of SmartSound Inc. Pro Logic is a registered trademark of Dolby Laboratories Inc. Windows Media is a trademark of Microsoft Corporation. All other trademarks are the property of their respective owners. You agree not to remove any product identification or notices of the property restrictions from Pinnacle Systems' products or manuals.
No part of this manual may be copied or distributed, transmitted, transcribed, stored in a retrieval system, or translated into any human or computer language, in any form by any means, electronic, mechanical, magnetic, manual, or otherwise, without the express written permission of Pinnacle Systems, Inc.
Pinnacle Systems, Inc.
280 North Bernardo Avenue
Mountain View, CA 94943
Printed in the USA.
ii |
Studio 9 |
Table of contents
BEFORE YOU START.................................................. |
XI |
Equipment requirements......................................................................... |
xi |
Abbreviations and conventions............................................................. |
xiii |
On-line help........................................................................................... |
xv |
CHAPTER 1: USING STUDIO ....................................... |
1 |
Undo, Redo and Help .............................................................................. |
2 |
Setting options ......................................................................................... |
4 |
Edit mode .................................................................................................... |
5 |
The Player................................................................................................ |
6 |
Playback controls..................................................................................... |
8 |
Further editing topics............................................................................. |
11 |
CHAPTER 2: CAPTURING VIDEO.............................. |
13 |
The Capture mode interface.................................................................... |
14 |
The Diskometer ..................................................................................... |
16 |
The Camcorder Controller..................................................................... |
18 |
The capture process.................................................................................. |
19 |
Capture hardware................................................................................... |
19 |
Capture step-by-step.............................................................................. |
21 |
Scene detection...................................................................................... |
23 |
Table of contents |
iii |
Digital capture .......................................................................................... |
25 |
SmartCapture: Preview-quality capture................................................. |
26 |
Full-quality capture................................................................................ |
28 |
Audio and video levels – digital ............................................................ |
29 |
Analog capture.......................................................................................... |
30 |
Capture quality options.......................................................................... |
31 |
Audio and video levels – analog............................................................ |
31 |
CHAPTER 3: THE ALBUM.......................................... |
33 |
The Video Scenes section ......................................................................... |
36 |
Opening a captured video file................................................................ |
38 |
Viewing captured video......................................................................... |
42 |
Selecting scenes and files ...................................................................... |
43 |
Displaying scene and file information................................................... |
44 |
Comment view....................................................................................... |
45 |
Combining and subdividing scenes ....................................................... |
46 |
Redetecting scenes................................................................................. |
49 |
The Transitions section............................................................................ |
50 |
The Titles section...................................................................................... |
51 |
The Still Images section ........................................................................... |
52 |
The Sound Effects section........................................................................ |
53 |
The Disc Menus section............................................................................ |
54 |
CHAPTER 4: THE MOVIE WINDOW........................... |
55 |
Movie Window views................................................................................ |
57 |
Storyboard view..................................................................................... |
58 |
Timeline view........................................................................................ |
58 |
Text view............................................................................................... |
62 |
The toolboxes ............................................................................................ |
62 |
The Video toolbox................................................................................. |
64 |
The Audio toolbox................................................................................. |
66 |
iv |
Studio 9 |
CHAPTER 5: VIDEO CLIPS ........................................ |
69 |
Video clip basics ....................................................................................... |
70 |
Adding video clips to your movie ......................................................... |
70 |
Working with multiple capture files ...................................................... |
71 |
Interface features ................................................................................... |
72 |
Trimming video clips................................................................................ |
73 |
Trimming on the Timeline using handles.............................................. |
74 |
Clip-trimming tips ................................................................................. |
77 |
Trimming with the Clip properties tool................................................. |
78 |
Resetting trimmed clips ......................................................................... |
80 |
Splitting and combining clips .................................................................. |
81 |
Advanced Timeline editing ...................................................................... |
82 |
Insert editing.......................................................................................... |
83 |
Split editing ........................................................................................... |
86 |
Using video effects .................................................................................... |
90 |
Working with the effects list.................................................................. |
91 |
Changing effect parameters ................................................................... |
92 |
Fading effects in and out ....................................................................... |
94 |
Previewing and rendering...................................................................... |
94 |
Video effects – the basic set...................................................................... |
95 |
Cleaning effects......................................................................................... |
96 |
Auto color correct.................................................................................. |
97 |
Noise reduction...................................................................................... |
97 |
Stabilize ................................................................................................. |
98 |
Time effects ............................................................................................... |
99 |
Strobe..................................................................................................... |
99 |
Speed ................................................................................................... |
100 |
Color effects ............................................................................................ |
101 |
Black and white ................................................................................... |
101 |
Color correction................................................................................... |
101 |
Posterize .............................................................................................. |
102 |
Sepia .................................................................................................... |
102 |
Table of contents |
v |
Fun effects ............................................................................................... |
103 |
Lens flare............................................................................................. |
103 |
Noise.................................................................................................... |
104 |
Water drop........................................................................................... |
104 |
Style effects.............................................................................................. |
105 |
Blur...................................................................................................... |
105 |
Emboss ................................................................................................ |
106 |
Mosaic ................................................................................................. |
107 |
Old film ............................................................................................... |
107 |
The SmartMovie music video tool......................................................... |
108 |
CHAPTER 6: TRANSITIONS..................................... |
111 |
Transition types and their uses ............................................................ |
112 |
Previewing transitions in your movie .................................................. |
115 |
Audio transitions ................................................................................. |
116 |
The Ripple Transition command ......................................................... |
117 |
Trimming transitions ............................................................................. |
118 |
Trimming with the Clip properties tool............................................... |
118 |
CHAPTER 7: STILL IMAGES .................................... |
121 |
Editing still images ................................................................................. |
124 |
Trimming with the Clip properties tool............................................... |
125 |
The Frame Grabber ............................................................................... |
125 |
The Frame grabber tool ....................................................................... |
126 |
CHAPTER 8: DISC MENUS....................................... |
129 |
Disc authoring in Studio ...................................................................... |
131 |
Using menus from the Album.............................................................. |
133 |
The DVD Player Control..................................................................... |
135 |
Editing menus on the Timeline............................................................ |
136 |
Editing with the Clip properties tool ................................................... |
138 |
The Disc menu tool.............................................................................. |
144 |
vi |
Studio 9 |
CHAPTER 9: THE TITLE EDITOR ............................ |
145 |
Launching the Title Editor................................................................... |
146 |
The Title Editor controls ....................................................................... |
147 |
Title-type buttons................................................................................. |
147 |
Object toolbox ..................................................................................... |
148 |
Editing-mode selection buttons ........................................................... |
151 |
Object layout buttons........................................................................... |
153 |
Clipboard and delete buttons ............................................................... |
155 |
Text-styling controls............................................................................ |
155 |
The Title Editor Album ......................................................................... |
157 |
The Looks Browser ............................................................................. |
157 |
The Backgrounds section..................................................................... |
160 |
The Pictures section............................................................................. |
161 |
The Buttons section ............................................................................. |
161 |
CHAPTER 10: SOUND EFFECTS AND MUSIC........ |
165 |
The Timeline audio tracks ................................................................... |
167 |
The CD audio tool ............................................................................... |
168 |
The SmartSound tool ........................................................................... |
170 |
The Voice-over tool ............................................................................. |
172 |
Trimming audio clips ............................................................................. |
175 |
Trimming with the Clip properties tool............................................... |
175 |
Audio volume and mixing...................................................................... |
177 |
Anatomy of an audio clip .................................................................... |
178 |
Adjusting audio on the Timeline ......................................................... |
180 |
The Volume and balance tool.............................................................. |
182 |
Audio effects............................................................................................ |
187 |
Noise reduction.................................................................................... |
188 |
Equalizer.............................................................................................. |
190 |
Leveler................................................................................................. |
191 |
Reverb ................................................................................................. |
191 |
CHAPTER 11: MAKING YOUR MOVIE..................... |
193 |
Outputting to a camera or video recorder... ......................................... |
195 |
Output your movie to videotape .......................................................... |
197 |
Save your movie as an AVI file........................................................... |
199 |
Table of contents |
vii |
Save your movie as an MPEG file....................................................... |
202 |
Save as RealVideo or Windows Media ............................................... |
203 |
Share your movie via the Internet........................................................ |
205 |
Output your movie to DVD, VCD or S-VCD...................................... |
207 |
Copying an AVI file to tape................................................................. |
210 |
APPENDIX A: SETUP OPTIONS .............................. |
211 |
Capture source settings........................................................................ |
212 |
Capture format settings........................................................................ |
216 |
Edit settings ......................................................................................... |
221 |
CD and voice-over settings.................................................................. |
225 |
Make tape settings ............................................................................... |
226 |
Make AVI file settings ........................................................................ |
228 |
Make MPEG file settings .................................................................... |
230 |
Make RealVideo file settings............................................................... |
232 |
Make Windows Media file settings ..................................................... |
235 |
Make disc settings ............................................................................... |
236 |
APPENDIX B: TIPS AND TRICKS ............................ |
239 |
Hardware ............................................................................................. |
239 |
Software............................................................................................... |
242 |
Increasing the frame rate ..................................................................... |
244 |
Studio and computer animation........................................................... |
245 |
Smart Capture Tips (DV only) ............................................................ |
245 |
APPENDIX C: TROUBLESHOOTING ....................... |
247 |
Technical help on-line ............................................................................ |
248 |
Studio crashes in Edit mode ................................................................ |
251 |
Capture error occurs on starting capture.............................................. |
256 |
Studio hangs when rendering............................................................... |
259 |
CD or DVD burner is not detected ...................................................... |
262 |
Studio hangs on launch or does not launch.......................................... |
263 |
HollywoodFX transitions are still watermarked after upgrading......... |
264 |
“Cannot initialize the DV capture device” error appears in Capture mode |
|
............................................................................................................. |
265 |
Installation problems ............................................................................. |
269 |
Operation problems ............................................................................... |
270 |
viii |
Studio 9 |
APPENDIX D: VIDEOGRAPHY TIPS ........................ |
277 |
Creating a shooting plan ...................................................................... |
278 |
Editing ................................................................................................. |
279 |
Rules of thumb for video editing ......................................................... |
282 |
Soundtrack production......................................................................... |
284 |
Title ..................................................................................................... |
286 |
APPENDIX E: GLOSSARY........................................ |
287 |
APPENDIX F: LICENSE AGREEMENT .................... |
303 |
APPENDIX G: KEYBOARD SHORTCUTS................ |
307 |
INDEX ........................................................................ |
311 |
Table of contents |
ix |
Before you start
Thank you for purchasing Pinnacle Studio. We hope you enjoy using the software.
If you have not used Studio before, we recommend that you keep the manual handy for reference even if you don’t actually read it all the way through.
In order to ensure that your Studio experience gets off on the right foot, please review the three topics below before continuing to Chapter 1: Using Studio.
Equipment requirements
In addition to your Studio software, here is what you need to make a Studio editing system.
Computer
•Intel Pentium or AMD Athlon 800 MHz or higher (1.5 GHz or higher recommended)
•Microsoft Windows 98 SE, Windows “Millennium”, Windows 2000 or Windows XP (recommended)
•DirectX-compatible graphics card (ATI Radeon or NVIDIA GeForce 2 or higher recommended)
Before you start |
xi |

•DirectX-compatible sound card
•256 MB of RAM (512 MB recommended)
•CD-ROM drive
•Speakers
•Mouse
•A microphone, if you want to record voice-overs
•300 MB of free hard drive space to install software
•Optional CD burner for creating VideoCDs (VCDs) or Super-VideoCDs (S-VCDs)
•Optional DVD burner for creating DVDs
The hard drive
Your hard drive must be capable of sustained reading and writing at 4 MB/sec. All SCSI and most UDMA drives are capable of this. The first time you capture at full quality, Studio will test your drive to make sure it is fast enough. Video in the DV format occupies 3.6 MB of hard drive space for every second of video, so four and a half minutes of DV video consume a full gigabyte of hard drive space.
If disk space is a concern with your DV captures, use SmartCapture to capture your video at preview quality (see “SmartCapture: Preview-quality capture” on page 26). This feature uses much less disk space. An entire tape can fit in as little as 360 MB.
Tip: We recommend using a separate hard drive dedicated to video capture. This avoids competition between Studio and other software, including Windows, for use of the drive during capture.
xii |
Studio 9 |

Video capture hardware
Studio can capture video from a variety of digital and analog sources. Please see “Capture hardware” on page 19.
Video equipment
Studio can output video to:
•Any DV or Digital8 camcorder or VCR. This requires an OHCI-compliant IEEE-1394 (FireWire) port (as provided by Pinnacle Studio DV). The camcorder must be set up to record from DV Input.
•Any analog (8mm, Hi8, VHS, SVHS, VHS-C or SVHS-C) camcorder or VCR. This requires Pinnacle Studio DC10plus, Studio AV, or another Pinnacle card with analog outputs. Output to analog camcorders or VCRs is also possible using a Pinnacle Studio DV or other OHCI-compliant 1394 port if your DV or Digital8 camcorder or VCR can pass a DV signal through to its analog outputs (see your camcorder manual and Chapter 11: Making your movie, for more information).
Abbreviations and conventions
This guide uses the following conventions to help organize the material.
Terminology
Studio: “Studio” refers to the editing software.
DV: The term “DV” refers to DV and Digital8 camcorders, VCRs, and tapes.
Before you start |
xiii |
1394: The term “1394” refers to OHCI-compliant IEEE-1394, FireWire, DV or i.LINK interfaces, ports and cables.
Analog: The term “analog” refers to 8mm, Hi8, VHS, SVHS, VHS-C or SVHS-C camcorders, VCRs and tapes, and to Composite/RCA and S-Video cables and connectors.
Buttons, menus, dialog boxes and windows
Names of buttons, menus and related items are written in italics to distinguish them from the surrounding text, whereas window and dialog names are written with initial capital letters. For example:
Click the Edit menu button to open your menu in the Title Editor.
Choosing menu commands
The right arrowhead symbol (¾) denotes the path for hierarchical menu items. For example:
Select Toolbox ¾ Generate Background Music.
Keyboard conventions
Key names are spelled with an initial capital and are underlined. A plus sign denotes a key combination. For example:
Press Ctrl+A to select all the clips on the Timeline.
Mouse clicks
When a mouse click is required, the default is always a left-click unless otherwise specified:
Right-click and select Go to Title/Menu Editor.
xiv |
Studio 9 |

On-line help
Two kinds of immediate help are always available while you are working in Studio:
•On-line help: Click the help button  in the Studio main menu bar, or select the Help ¾ Help topics menu, or press F1 to open Studio’s on-line help file.
•Tool tips: To find out what a button or other Studio control does, pause your mouse pointer over it. A “tool tip” appears explaining its function.
Before you start |
xv |

CHAPTER 1:
Using Studio
Creating movies with Studio is a three-step process:
1. Capture: Import source video material to your PC hard drive. Possible sources include analog videotape (8mm, VHS etc.), digital videotape (DV, Digital8), and live video from a video camera, camcorder or webcam.
Capture mode is covered in Chapter 2: Capturing video.
2. Edit: Arrange your video material as desired by reordering scenes and discarding unwanted footage. Add visuals, such as transitions, titles and graphics, and supplementary audio, such as sound effects and background music. For DVD and VCD authoring, create interactive menus that give your audience a customized viewing experience.
Edit mode is the arena for most of your work in Studio. See “Edit mode” later in this chapter (page 5) for a fuller introduction.
3. Make movie: When your project is complete, generate a finished movie in your choice of format and storage medium: tape, VCD, S-VCD, DVD, AVI, MPEG, RealVideo or Windows Media.
Make Movie mode is covered in Chapter 11: Making your movie.
Chapter 1: Using Studio |
1 |
Setting the mode
Select which step of the movie-making process you want to work on by clicking one of the three mode buttons at the top left of the Studio window:
When you switch modes, the Studio screen changes to display the controls needed for the new mode.
Undo, Redo and Help
The Undo, Redo and Help buttons are always to be found in the top right
corner of the Studio window, no matter which of the three modes you are currently working in.
•Undo allows you to back out of any changes you have made to your project during the current session, one step at a time.
•Redo reinstates the changes one by one if you undo too far.
•The Help button launches Studio’s on-line help system.
All other controls on the Studio screen are dedicated to tasks within the current mode.
2 |
Studio 9 |

Chapter 1: Using Studio |
3 |
Setting options
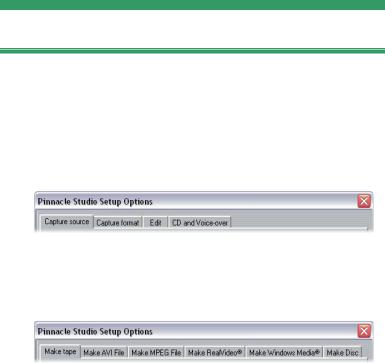
Most options in Studio are set using two tabbed dialog boxes.
The first lets you control options related to Capture mode and Edit mode. It has four tabs:
The other dialog box is concerned with options relating to Make Movie mode. It has six tabs, one for each of the six movie output types:
Each panel of both dialog boxes can be opened individually with a corresponding command on the
Setup menu (e.g. Setup ¾ Capture Source). Once either dialog box is open, however, all of its panels are available through the tabs.
For simplicity, we generally refer to the different options panels independently, as in “the Capture source options panel”.
Detailed explanations of the options in both dialog boxes are contained in Appendix A: Setup Options.
4 |
Studio 9 |
EDIT MODE
Studio opens in Edit mode each time it is launched, because that is the mode you use most often. The Edit mode display includes three main areas.
The Album stores resources you will use in your movies, including your captured video scenes.
The Movie Window is where you create your edited movie by arranging video and sound clips, and by applying transitions and effects.
The Player provides playback and previewing for whichever item is currently selected in Studio. That may be an Album resource – such as a video scene, title or sound effect – or your edited movie, complete with transitions, titles, effects and three audio tracks. The Player is covered below.
See Chapter 3: The Album and Chapter 4: The Movie Window for detailed information on those topics.
Chapter 1: Using Studio |
5 |

The Player
The Player displays a preview of your edited movie, or of the item currently selected in the Album.
It consists of two main areas: a preview window and playback controls. The preview window displays video images. The playback controls allow you to play the video, or go to an exact position within it. These controls come in two formats: standard and DVD.
Standard mode
The standard playback controls are similar to those on a camcorder or VCR. They are used for viewing ordinary video.
DVD mode
The DVD playback controls emulate the navigation controls on a DVD player or remote control. Use them for previewing your DVD, VCD or S-VCD disc productions, including menu interaction.
6 |
Studio 9 |

The preview window
This is a point of focus in Studio because you use it so often, especially for previewing your movie. It can also be used to display:
•Any type of Album content.
•Still images or titles from your movie.
•Changes to video effects in real time while you adjust the parameter controls for the effects.
•Still frames from your video.
When viewing a still frame, you can advance by a single frame in either direction with the “jog” controls.
Note: When 16:9 (widescreen) video is previewed, the Player is proportioned somewhat differently than in our illustrations, but its general appearance is the same.
The DVD toggle button
Switch between the two playback modes with the DVD toggle button at the bottom right-hand corner of the Player. This button is only available when
your edited movie contains at least one menu.
Chapter 1: Using Studio |
7 |

Playback controls
The Player presents either of two sets of playback controls depending on the playback mode you choose.
When you play your movie back as ordinary video, you will be using the standard playback controls. If your movie uses disc menu navigation, you can play it back as an optical disc with interactive on-screen menus by using the DVD playback controls. Both groups of controls are covered below.
The full-screen preview button: This button, just below the bottom right-hand corner of the preview window, switches to a full-screen preview. It is available in both playback modes. The full-screen display ends when your movie ends, or you doubleclick the screen or press the Esc key.
Standard playback controls
These buttons control playback in the Player.
Play / Pause: The Play button previews the movie from the current position. Once preview begins, Play becomes Pause. When playback is paused, the Album scene or Movie Window clip at which previewing stopped remains selected.
The [Space] key can also be used to start and stop playback.
Fast reverse, Fast forward: These buttons let you preview your movie at two, four or ten times the normal speed, in either direction. Use them to scan for a particular piece of video you want to
work with. Click the buttons repeatedly to loop through the speed factors.
8 |
Studio 9 |

Go to beginning: This button halts playback and skips back to the first frame of the material being previewed.
Jog buttons: This pair of controls lets you step your movie forward and backward by one frame at a time.
The Player scrubber
Use the Player scrubber to quickly traverse your captured video or edited movie in either direction. The scrubber position corresponds to the position of the current frame in the captured video file (not just the current scene) or in the edited movie (not just the current clip). Thus the scrubber bar always represents the entire length of the content being viewed.
As you move the scrubber, the preview window shows the current frame.
The ability of the preview to keep up with the scrubber depends on the speed of your computer. If you move the Player scrubber slowly, the preview display responds smoothly. As you increase the rate at which you move the scrubber, the preview will jump frames. The point at which it does so depends on your hardware. The smoothness of the preview also diminishes as the overall length of the material being scrubbed increases.
The counter
The counter displays the current playback position in hours, minutes, seconds and frames. You can directly modify the counter fields to select an
Chapter 1: Using Studio |
9 |

exact frame to view or at which to start playback. Simply click on the number you wish to change and type a new value. After you click within the counter, you can also control it from the keyboard:
•Step through the fields: Tab, Shift+Tab, Left, Right
•Raise and lower field values: Up and Down. Hold the key down to continuously change the value.
The master volume slider
This control sets the overall audio volume during preview playback. It is equivalent to turning up the master volume on your sound card using the system volume tool. It does not affect the volume of the final movie Studio creates in Make Movie mode.
The small loudspeaker icon at the right of the control serves as a master mute button during playback.
DVD playback controls
These controls include the four standard transport buttons detailed above (Play/Pause, Fast reverse, Fast forward, Go to beginning) plus the DVD Player
Control, which is described under “The DVD Player Control” on page 135.
10 |
Studio 9 |

Further editing topics
Please see the following for details on specific editing topics:
•Chapter 5: Video clips
•Chapter 6: Transitions
•Chapter 7: Still images
•Chapter 8: Disc menus
•Chapter 9: The Title Editor
•Chapter 10: Sound effects and music
Chapter 1: Using Studio |
11 |
CHAPTER 2:
Capturing video
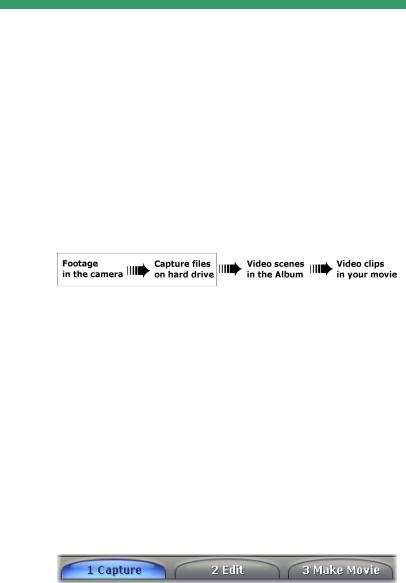
Capture is the process of importing video from a video source such as a camcorder to a file on your PC’s hard drive. Clips from this “capture file” can then be used in Studio as ingredients of your edited movies. You can open capture files into the Album in Studio’s Edit mode (see Chapter 3: The Album).
Capture is the first step in using your video footage.
Studio is able to capture from both digital (DV, MicroMV) and analog video sources. See “Capture hardware” on page 19 for details on configuring Studio to capture from your equipment.
Switching to Capture mode
The very first step in capturing is to switch into Studio’s Capture mode by clicking the Capture button at the top of the screen.
Chapter 2: Capturing video |
13 |
This opens the Capture mode interface, enabling you to set up and carry out video capture. The details of the interface are somewhat different for analog than for digital video sources.
Topics in this chapter
•“The Capture mode interface” (below) introduces the controls and displays for both analog and digital captures.
•“The Capture Process” (page 19) covers setting up for your hardware, gives step-by-step capturing instructions, and describes the automatic scene detection feature.
•“Digital capture” (page 25) and “Analog capture” (page 30) cover topics specific to each type of source.
THE CAPTURE MODE INTERFACE
The tools and controls you see in Capture mode are different depending on whether your capture hardware is digital or analog.
Digital capture
If your video source is digital, your Capture mode screen will look like the illustration on the opposite page.
The Album, at the top left of the screen, displays icons representing the video scenes as they are captured. The Player, at top right, lets you view the incoming video
14 |
Studio 9 |
 Loading...