

Philips FWD20 User Manual
DVD Mini Hi-Fi System
FWD20

CAUTION
Use of controls or
adjustments or performance
of procedures other than
herein may result in
hazardous radiation
exposure or other unsafe
operation.
2
^
3!09876
ON/OFF
4 5%$#12 @
3
•
∞
1
4
≥
2
6
!
0
%
£
@
9
#
)
/ANGLE
ª
3
5
8
7
6
™
&
*
⁄
$
≤
§
¡
(
º
^
4

This product incorporates copyright protection technology
that is protected by method claims of certain U.S. patents
and other intellectual property rights owned by Macrovision
Corporation and other rights owners. Use of this copyright
protection technology must be authorized by Macrovision
Corporation, and is intended for home and other limited
viewing uses only unless otherwise authorized by
Macrovision Corporation. Reserve engineering or disassem-
bly is prohibited.
5

Contents
English
General Information
Features .................................................................. 7
Discs for playback ................................................ 7
Supplied accessories ............................................ 7
Environmental information ................................ 8
Care and safety information .............................. 8
Connections
Step 1: Placing the speakers and subwoofer .....
........................................................................... 9~10
Step 2: Connecting speakers ............................ 10
Step 3: Connecting TV set .......................... 11-12
Step 4: Antenna Connection ............................ 13
Step 5: Connecting the power cord ............... 13
Additional: Connecting additional equipment .
................................................................................ 14
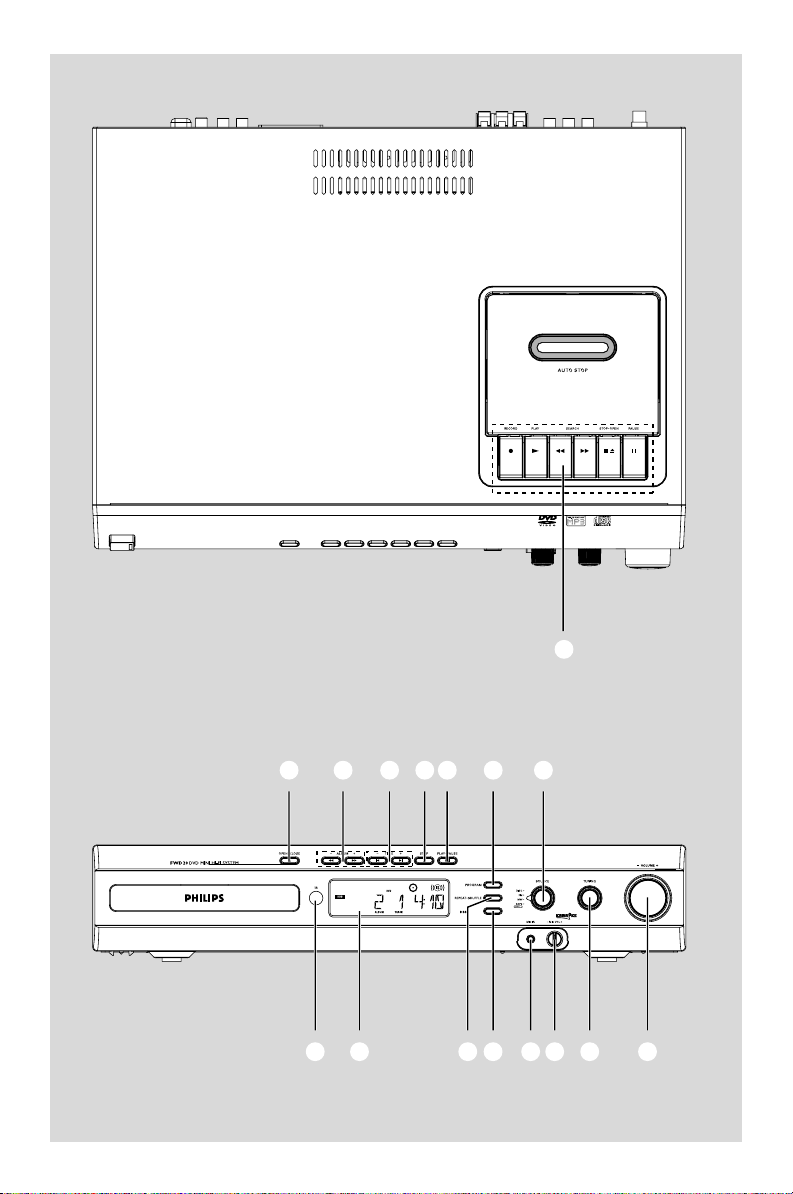
Controls
Controls on the system .................................... 15
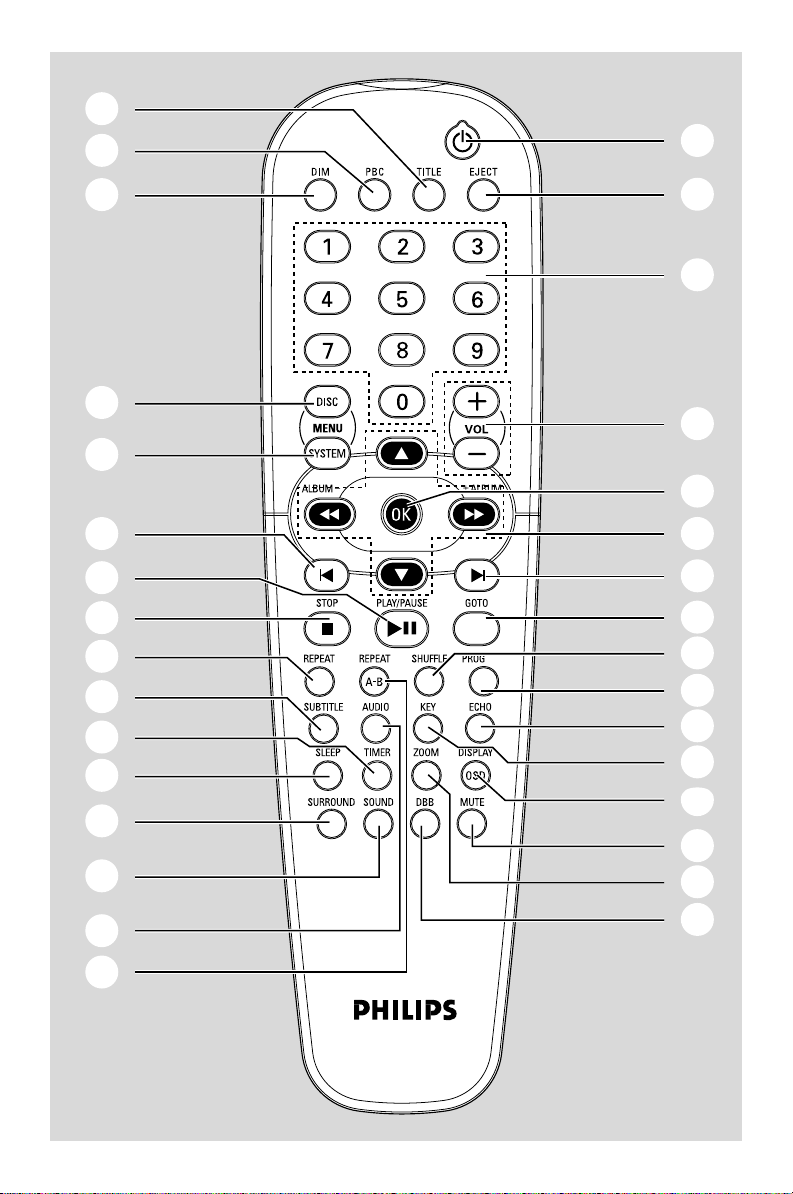
Controls on the remote control .............. 15-16
DVD Menu Operations
Using the system menu ..................................... 24
Setting language preference .......................... 24
Setting video preference ............................... 24
Setting audio ..................................................... 25
Night mode ...................................................... 25
Setting rating .............................................. 25-26
MP3 / Picture Disc Operations
Playing MP3 / picture disc................................. 27
MP3 / picture disc ........................................... 27
Mixed-mode disc................................... 27
Other Functions
Radio reception .................................................. 28
Ta pe playback ...................................................... 28
Rewinding/Fast forwarding ............................... 28
General information on recording ................. 28
Start recording .................................................... 28
Preparations
Step 1: Inserting batteries into the remote
control .................................................................. 17
Step 2: Setting language preference ................ 17
Step 3: Setting video preference ............... 18-19
Disc Operations
Playing discs ......................................................... 20
Using the disc menu .......................................... 20
Skipping to another title (track) / chapter 20
Shuffle play mode ............................................ 20
Repeat play mode ........................................... 21
Repeating a section within a chapter/track ....
............................................................................ 21
Programing favorite tracks ............................ 21
Playing in slow motion mode ....................... 21
Fast search ........................................................ 22
Moving to another title (track) / chapter .. 22
GOTO ............................................................... 22
Zooming in ....................................................... 23
Camera angle ................................................... 23
Special VCD/SVCD features ............................ 23
Playback control (PBC) ................................ 23
Viewing from another angle ......................... 23
Sound and Volume Controls
Sound control ..................................................... 29
Adjusting volume and sound ........................ 29
Switching off the volume temporarily ........ 29
Selecting surround sound .............................. 29
Microphone Mixing ............................................ 29
Key Control ......................................................... 29
Specifications ........................................... 30
Tr oubleshooting .............................. 31-32
Glossary ......................................................... 33
6
General Information
Features
Your DVD Mini System with 5.1-channel full
digital amplifier creates the same dynamic sound
qualities that you find in full-fledged cinemas and
incorporates some of the best features in home
theater technology.
Other features include:
Built-in Dolby Digital decoder and
stereo.
Additional Component Connections
Lets you connect other audio and audio/visual
components to the system so you can use the
system’s surround sound speakers.
Night Mode
Lets you compress the dynamic range, reducing
the difference in loudness between sounds in
Dolby Digital mode.
Parental Control (rating level)
Lets you set a rating level so that your children
cannot watch a DVD that has a rating higher
than you set.
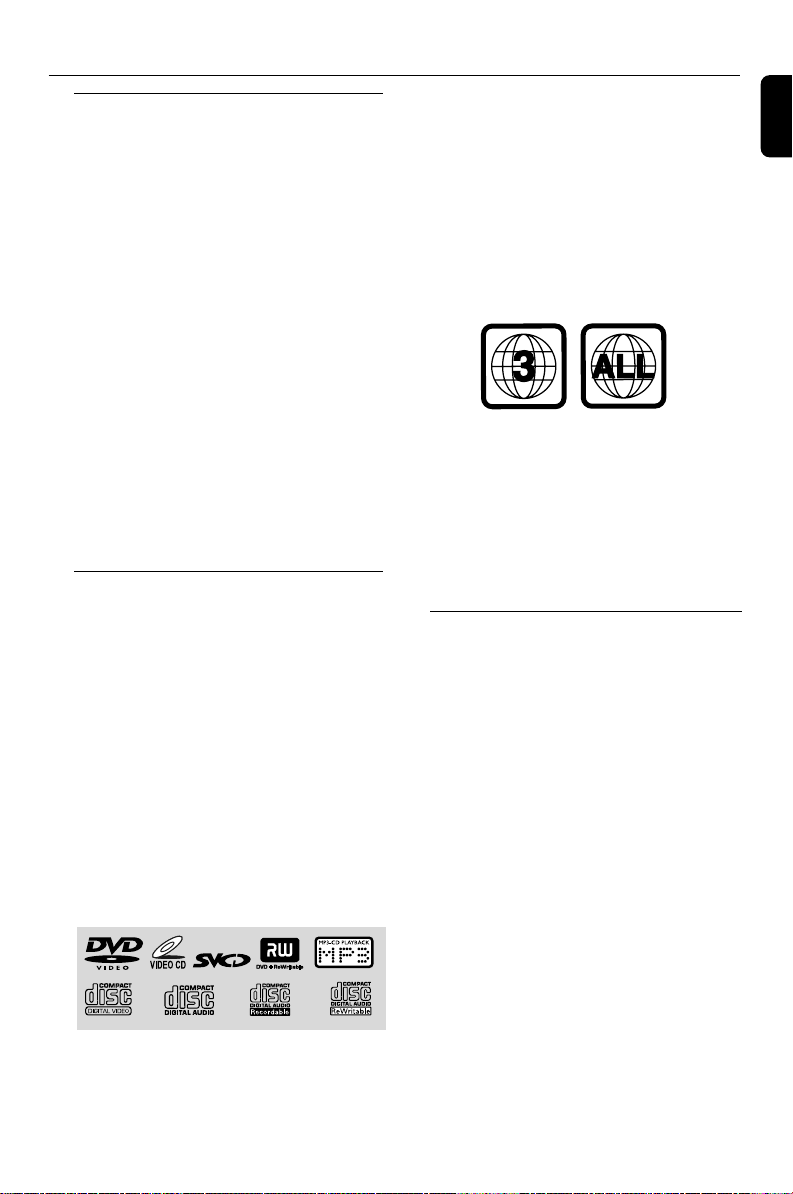
Discs for playback
Your DVD System will play:
– Digital Video Discs (DVDs)
– Video CDs (VCDs)
– Super Video CDs (SVCDs)
– Digital Video Discs + Rewritable (DVD+RW)
– Compact Discs (CDs)
– Picture (Kodak, JPEG) files on CDR(W)
– Supported MP3-CD format.
• Max. title/album name –12 characters
• Max. title number plus album is 255.
• Max. nested directory is 8 levels.
• The max. album number is 32.
• The max. MP3 track number is 999.
• Supported sampling frequencies for MP3
disc: 32 kHz, 44.1 kHz, 48 kHz.
• Supported Bit-rates of MP3 disc are: 32, 64,
96, 128, 192, 256 (kbps).
The following formats can’t be supported
• The files like *.VMA, *.AAC, *.DLF, *.M3U,
*.PLS, *.WAV,
• Non-English Album/Title name
• The discs recorded under Joliet format
Region Codes
DVDs must be labeled for ALL region or for
Region 3 in order to play on this DVD system.
You cannot play discs that are labeled for other
regions.
Notes:
–For mixed mode discs, only one mode will be
selected for playback according to the recording
format.
– If you are having trouble playing a certain disc,
remove the disc and try a different one. Improperly
formatted discs will not play on this system.
Supplied accessories
– Composite video cable (yellow)
– Component video cables (red/blue/green)
– Audio cables (white, red)
– MW loop antenna
– Remote Control with two AA batteries
– This instruction booklet and a Quick Star t
Guide.
English
7
General Information
English
Environmental information
Any unnecessary packaging has been omitted.
We have tried to make the packaging easy to
separate into three materials: cardboard (box),
polystyrene foam (buffer) and polyethylene (bags,
protective foam sheet).
Your system consists of materials which can be
recycled and reused if disassembled by a
specialised company. Please observe the local
regulations regarding the disposal of packaging
materials, exhausted batteries and old
equipment.
Care and safety information
Avoid high temperatures, moisture,
water and dust
● Do not expose the system, batteries or discs to
humidity, rain, sand or excessive heat (caused by
heating equipment or direct sunlight). Always
keep disc trays closed to avoid dust buildup on
the lens.
● No objects filled with liquids, such as vases, shall
be placed on the apparatus.
● No naked flame sources, such as lighted candles,
should be placed on the apparatus.
● The apparatus shall not be exposed to dripping
or splashing.
Avoid condensation problem
● The lens may cloud over when the player is
suddenly moved from cold to warm
surroundings, making it impossible to play a disc.
Leave the player in the warm environment until
the moisture evaporates.
Do not block the vents
● Do not operate the system in an enclosed
cabinet and allow about 10 cm (4 inches) of free
space all around the player for adequate
ventilation.
● The ventilation should not be impeded by
covering the ventilation openings with items,
such as newspapers table-cloths, curtains, etc.
Cleaning the cabinet
● Use soft cloth slightly moistened with a mild
detergent solution. Do not use a solution
containing alcohol, spirits, ammonia or abrasives.
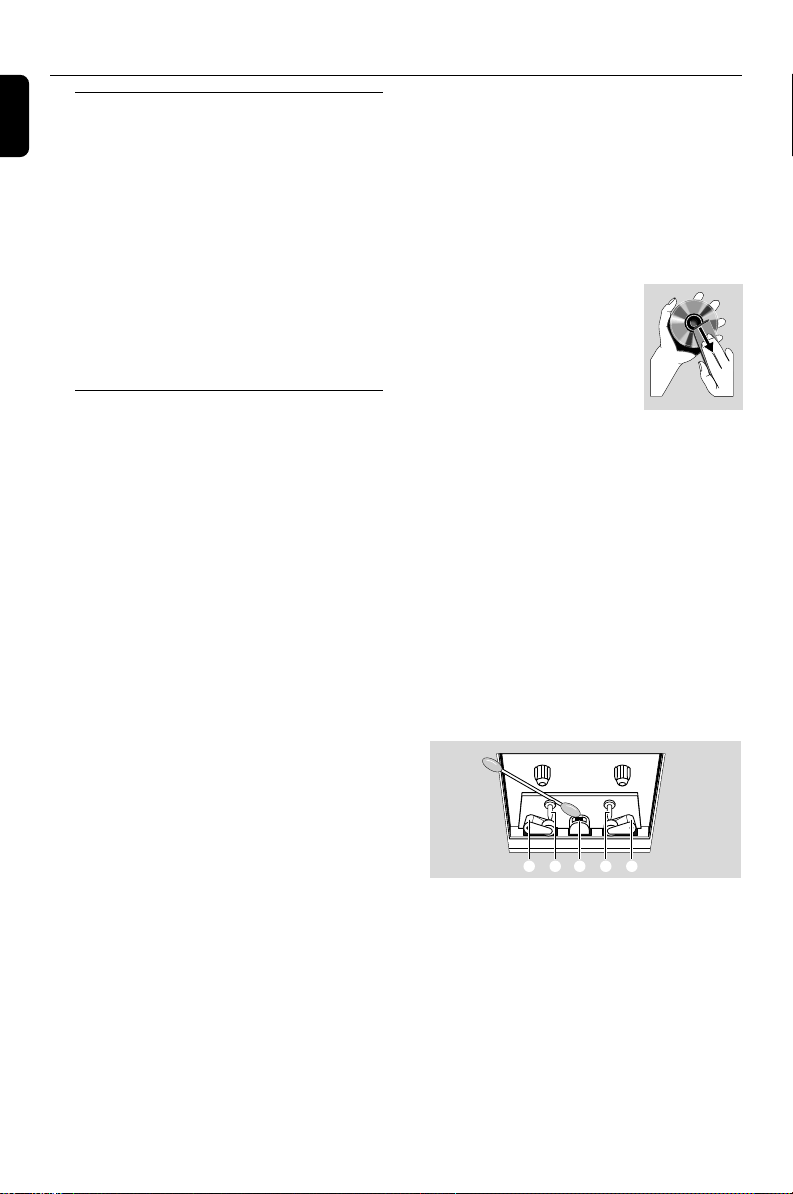
Cleaning discs
● To clean a CD, wipe it in a straight line from the
center towards the edge using soft and lint-free
cloth. A cleaning agent may damage the disc.
● Write only on the printed side of a CDR(W)
and only with a soft felt-tipped pen.
● Handle the disc by its edge. Do not touch the
surface.
Cleaning the disc lens
● After prolonged use, dirt or dust
may accumulate at the disc lens.
To ensure good playback quality,
clean the disc lens with Philips
CD Lens Cleaner or any
commercially available cleaner.
Follow the instructions supplied
with cleaner.
Finding a suitable location
● Place the player on a flat, hard, stable surface.
● Install this unit near the AC outlet and where the
AC power plug can be reached easily.
Cleaning the head and the tape paths
● To ensure good recording and playback quality,
clean the head A, the capstan(s) B, and
pressure roller(s) C after every 50 hours of tape
operation.
● Use a cotton swab slightly moistened with
cleaning fluid or alcohol.
● You also can clean the head by playing a cleaning
tape once.
CBABC
Demagnetising the head
● Use a demagnetising tape available at your dealer.
8
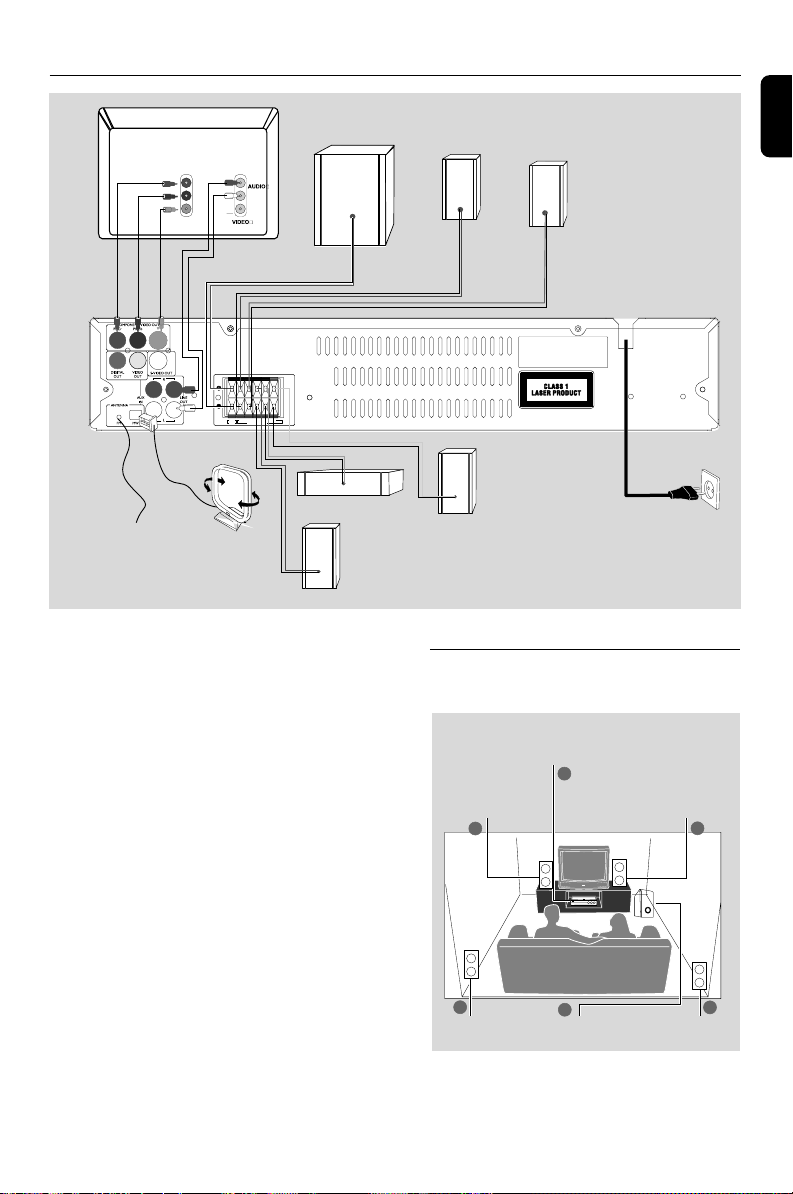
Connections
FM wire
antenna
Television
Cr
Cb
Y
MW loop
antenna
IN
SUB
SR SL FR C FL
(6 )
R
L
SPEAKER (4 )
IN
Subwoofer
Center speaker
Front speaker (right)
IMPORTANT!
– The type plate is located at the rear of
the system.
– Before connecting the AC power cord
to the wall outlet, ensure that all
other connections have been made.
–Never make or change any
connections with the power switched on.
To avoid overheating of the system, a safety
circuit has been built in. Therefore, your
system may switch to Standby mode
automatically under extreme conditions. If
this happens, let the system cool down
before reusing it (not available for all versions).
Surround
speaker (right)
Front speaker (left)
Surround
speaker (left)
AC power cord
Step 1: Placing the speakers and
subwoofer
Center speaker and
DVD system
Front speaker with
stand (Left)
1
2
Front speaker with
stand (Right)
1
English
3
Surround
Speaker (Left)
4
Subwoofer
Surround
Speaker (Right)
3
9
Connections
1
2
English
For best possible surround sound, all the
speakers (except subwoofer) should be placed
at the same distance from the listening position.
1 Place the front left and right speakers at equal
distances from the TV and at an angle of
approximately 45 degrees from the listening
position.
2 Place the center speaker above the TV or the
DVD system so that the center channel's sound
is localized.
3 Place the rear speakers at normal listening ear
level facing each other or hang on the wall.
4 Place the subwoofer on the floor near the TV.
Notes:
–To avoid magnetic interference, do not position
the front speakers too close to your TV.
– Allow adequate ventilation around the DVD
system.
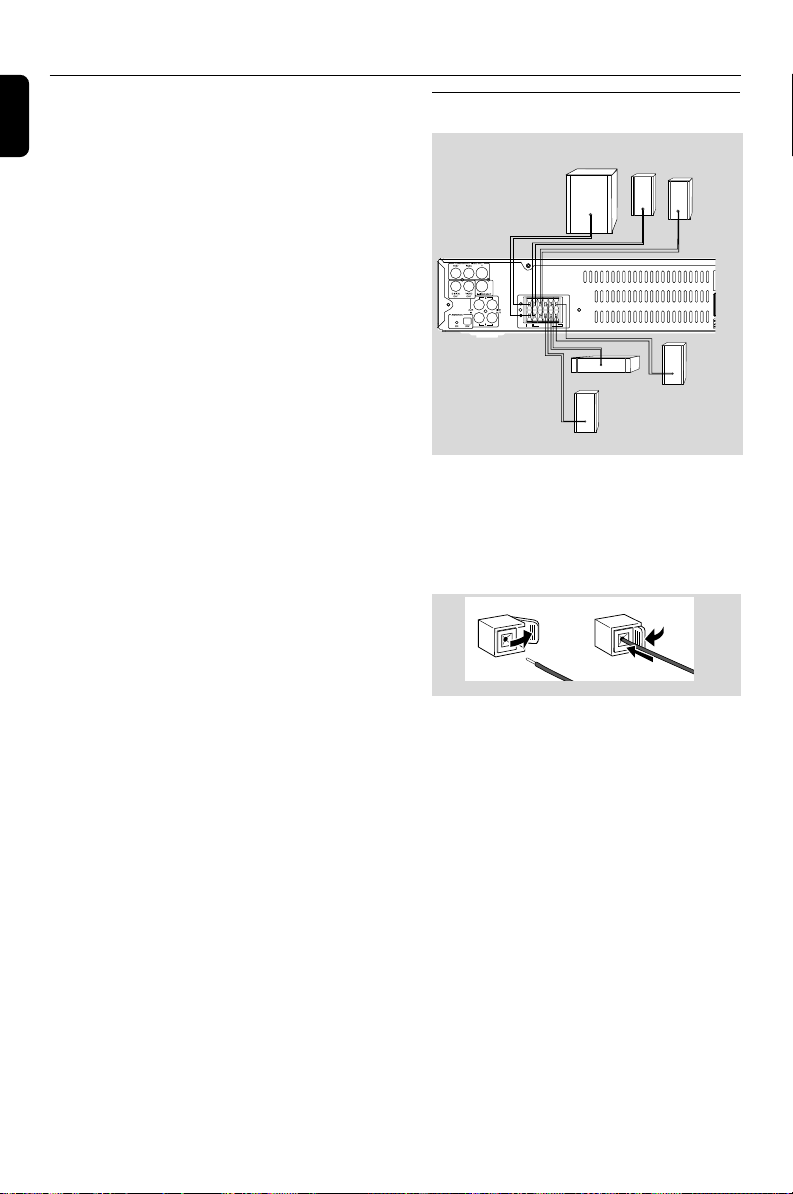
Step 2: Connecting speakers
Surround
Subwoofer
speaker (right)
Surround
speaker (left)
SUB
SR SL FR C FL
SPEAKER (4Ω)
(6Ω)
Center speaker
Connect the speaker wires to the SPEAKER
terminals by matching the color and silkscreen,
coloured (marked) wire to “+” and black
(unmarked) wire to “–”. Fully insert the stripped
portion of the speaker wire into the terminal as
shown.
Front speaker (left)
Front speaker (right)
Notes:
–For optimal sound performance, use the
supplied speakers.
– Do not connect more than one speaker to any
one pair of +/- speaker terminals.
– Do not connect speakers with an impedance
lower than the speakers supplied. Please refer to
the SPECIFICATIONS section of this manual.
10
 Loading...