


Fully automatic
espresso machine
1200 series
EN USER MANUAL
한국어 사용 설명서
OMNIA #0 COVER_FRONT_A5_WE/EE/RCA/KO.indd 4
www.philips.com/coee-care
31-10-19 11:20


My Coffee Choice
A2A1 A3 A4
A13
A6
A8A7
A9
A12
A10
A11
A5
A16
A14
A
B1 B2 B3 B4 B5
B9B8
B7B6
B
A18
A17
A15
A19 A20

1200 series
EP1200
A18 A19 A20
A16A17 A15 A13 A19
A14 A9 A4 A12
C
D

English
Contents
Machine overview (Fig. A) ____________________________________________________________________________ 7
Control panel (Fig. B) _________________________________________________________________________________ 7
Introduction __________________________________________________________________________________________ 8
Before first use _______________________________________________________________________________________ 8
Brewing drinks ________________________________________________________________________________________ 9
Adjusting machine settings __________________________________________________________________________ 11
Removing and inserting the brew group ____________________________________________________________ 12
Cleaning and maintenance __________________________________________________________________________ 13
AquaClean water filter _______________________________________________________________________________ 14
Setting the water hardness __________________________________________________________________________ 16
Descaling procedure (30 min.) _______________________________________________________________________ 17
Ordering accessories _________________________________________________________________________________ 18
Troubleshooting ______________________________________________________________________________________ 18
Technical specifications ______________________________________________________________________________ 23
Machine overview (Fig. A)
A1 Control panel A10 Service door
A2 Cup holder A11 Data label with type number
A3 Pre-ground coffee compartment A12 Water tank
7
English
A4 Lid of bean hopper A13 Coffee grounds container
A5 Adjustable coffee spout A14 Front panel of coffee grounds
A6 Mains plug A15 Drip tray cover
A7 Grind setting knob A16 Drip tray
A8 Coffee bean hopper A17 'Drip tray full' indicator
A9 Brew group
container
Accessories
A18 Grease tube A20 Water hardness test strip
A19 Measuring scoop
Control panel (Fig. B)
Refer to figure B for an overview of all buttons and icons. Below you find the description.
B1 On/off button B6 Start light
B2 Drink icons* B7 Start/stop button
B3 Aroma strength/pre-ground coffee icon B8 AquaClean icon
English

ON
8
English
B4 Drink quantity icon B9 Calc / Clean icon
B5 Warning icons
* Drink icons: espresso (1 cup), coffee (1 cup), espresso (2 cups), coffee (2 cups)
Introduction
Congratulations on your purchase of a Philips fully automatic coffee machine! To fully benefit from the
support that Philips offers, please register your product at www.philips.com/welcome.
Read the separate safety booklet carefully before you use the machine for the first time and save it for
future reference.
To help you get started and to get the best out of your machine, Philips offers support in multiple
ways. In the box you find:
1 This user manual with picture-based usage instructions and more detailed information on cleaning
and maintenance.
There are two versions of this espresso machine. Each version has its own type number. You can
find the type number on the data label on the inside of the service door (see fig A11).
2 The separate safety booklet with instructions on how to use the machine in a safe way.
3 For online support (frequently asked questions, movies etc.), scan the QR code on the cover of this
booklet or visit www.philips.com/coffee-care
This machine has been tested with coffee. Although it has been carefully cleaned, there may be
some coffee residues left. We guarantee, however, that the machine is absolutely new.
The machine automatically adjusts the amount of ground coffee that is used to make the best-tasting
coffee. You should brew 5 coffees initially to allow the machine to complete its self-adjustment.
Before first use
1. Rinsing the machine

5 sec.
30 sec.
3 sec.
1 sec.
OFF
1 min.
3 sec.
=
3x
ON
English
2. Activating the AquaClean water filter (5 min.)
Your machine is AquaClean enabled. Since your machine has to be completely limescale-free before
you start to use the AquaClean water filter, we advise you to start using the AquaClean filter from the
first day. You can purchase it from your local retailer, from authorized service centers or online at
www.philips.com/parts-and-accessories.
See chapter 'AquaClean water filter' for step-by-step instructions.
3. Setting the water hardness
See chapter 'Setting the water hardness' for step-by-step instructions. The default water hardness
setting is 4: hard water.
9
English
Brewing drinks
General steps
1 Fill the water tank with tap water and fill the bean hopper with beans.
2 Press the on/off button to switch on the machine.
-
The machine starts heating up and performs the automatic rinsing cycle. During heating up, the
lights in the drinks icons light up and go out slowly one by one.
-
When all lights in the drink icons light up continuously, the machine is ready for use.
3 Place a cup under the coffee dispensing spout. Slide the coffee dispensing spout up or down to
adjust its height to the size of the cup or glass you are using (Fig. 1).

10
English
Personalizing drinks
This machine allows you to adjust the settings of a drink to your own preference. After selecting a
drink you can:
1 Adjust the aroma strength by tapping the aroma strength icon (Fig. 2). There are 3 strengths, the
lowest is the mildest and the highest is the strongest.
2 Adjust the drink quantity by tapping the drink quantity icon (Fig. 3). There are 3 quantities: low,
medium and high.
You can also adjust the coffee temperature to your own preference (see 'Adjusting the coffee
temperature').
Brewing coffee with beans
1 To brew a coffee, tap the drink icon of your choice.
-
The aroma strength and quantity lights go on and show the previously selected setting.
-
You can now adjust the drink to your preferred taste.
2 Press the start/stop
-
The light in the drink icon flashes while the drink is being dispensed.
3 To stop dispensing coffee before the machine is finished, press the start/stop
To brew 2 coffees at the same time, tap the 2-cup icon and then press the start/stop button.
button.
button again.
Brewing coffee with pre-ground coffee
You can choose to use pre-ground coffee instead of beans, for example if you prefer a different coffee
variety or decaffeinated coffee.
1 Press the on/off button to switch on the machine and wait until it is ready for use.
2 Open the lid of the pre-ground coffee compartment and pour one leveled measuring scoop of pre-
ground coffee into it (Fig. 4). Then close the lid.
3 Place a cup under the coffee dispensing spout.
4 Select a single drink.
5 Press the aroma strength icon for 3 seconds (Fig. 5).
-
The pre-ground coffee light goes on and the start light starts pulsing.
6 Press the start/stop
7 To stop dispensing coffee before the machine is finished, press the start/stop button again.
button.
With pre-ground coffee you can only brew one coffee at a time.
Pre-ground coffee is not a setting that is saved as a previous selected strength setting. Each time
you want to use pre-ground coffee, you need to press the aroma strength icon for 3 seconds.
When you select pre-ground coffee, you cannot select a different aroma strength.

Adjusting machine settings
English
11
Programming the highest default setting of your drinks
The machine has 3 default settings for each drink: low, medium, high. You can only adjust the quantity
of the highest setting. The new quantity can be stored as soon as the start light starts to pulse.
1 To adjust the highest quantity setting, press and hold the 1-cup icon of the drink you want to adjust
for 3 seconds.
-
The drink light and the light in the 2-cup icon light up. The upper light of the drinks quantity icon
and the start light start to pulse, indicating that you are in programming mode.
2 Press the start/stop
-
The start light lights up continuously at first. When the machine is ready to store the adjusted
volume, the start light starts to pulse.
3 Press the start/stop
-
The upper light of the drinks quantity icon and the start light go off, indicating that the new
quantity has been stored.
After you have programmed the new highest default quantity for a drink, the machine will dispense
this new amount each time you select the highest quantity of both the 1-cup and 2-cup variant of this
drink.
You can only adjust the highest default quantity level.
When you adjust the volume of a drink, both the volume of the 1-cup and 2-cup variants of this
drink are adjusted.
If you want to go back to the default quantity settings, see ' Restoring factory settings'.
button. The machine starts to brew the selected beverage.
button again when the cup contains the desired quantity of coffee.
Adjusting the coffee temperature
1 Press the on/off button to switch off the machine.
2 When the machine is switched off: press and hold the coffee quantity icon until the lights in this
icon go on (Fig. 6).
3 Tap the quantity icon to select the required temperature: normal, high or max.
-
Respectively 1, 2 or 3 lights are on.
4 When you have finished setting the coffee temperature, press the start/stop
5 Press the on/off button to switch on the machine again.
button.
English
If you do not switch off the machine yourself, it will switch off automatically after some time.
Restoring factory settings
The machine offers you the possibility to restore the drinks default settings at any moment.
You can only restore the default settings when the machine is switched off.
1 Press the on/off button to switch the machine off.
2 Press and hold the espresso icon for 3 seconds.
-
The middle lights in the drink setting icons light up. The start/stop light starts to pulse, indicating
that the settings are ready to be restored.
3 Press the start/stop
button to confirm you want to restore the settings.
12
English
4 Press the on/off button to switch on the machine again.
Adjusting grinder settings
You can change the coffee strength with the grind setting knob inside the bean container. The lower
the grind setting, the finer the coffee beans are ground and the stronger the coffee. There are 12
different grind settings you can choose from.
The machine has been set up to get the best taste out of your coffee beans. Therefore we advise you
not to adjust the grinder settings until you have brewed 100-150 cups (approx. 1 month of usage).
You can only adjust the grind settings when the machine is grinding coffee beans. You need to
brew 2 to 3 drinks before you can taste the full difference.
Do not turn the grind setting knob more than one notch at a time to prevent damage to the grinder.
1 Place a cup under the coffee dispensing spout.
2 Open the lid of the coffee bean hopper.
3 Tap the espresso icon and then press the start/stop button.
4 When the grinder starts grinding, press down the grind setting knob and turn it to the left or right.
(Fig. 7)
Deactivate the beeps of the control panel
1 Press the on/off button to switch off the machine.
2 When the machine is switched off, tap and hold the coffee icon until the light in the icon goes on.
The start light starts flashing.
3 Tap the coffee icon again to deactivate the beeps of the control panel. The light in the coffee icon
goes out.
4 Press the start/stop button to confirm your choice.
5 Press the on/off button to switch on the machine again. The beeps of the control panel have now
been deactivated.
Note: If the light in the coffee icon does not go on after tapping and holding the icon, this means that
the beeps of the control panel already have been deactivated. To activate them again, tap the icon
again and confirm by pressing the start/stop button.
The beeps in the on/off button and in the start/stop button cannot be deactivated.
Removing and inserting the brew group
Go to www.philips.com/coffee-care for detailed video instructions on how to remove, insert and
clean the brew group.
Removing the brew group from the machine
1 Switch off the machine.
2 Remove the water tank and open the service door (Fig. 8).
3 Press the PUSH handle (Fig. 9) and pull at the grip of the brew group to remove it from the machine
(Fig. 10).

English
13
Reinserting the brew group
Before you slide the brew group back into the machine, make sure it is in the correct position.
1 Check if the brew group is in the correct position. The arrow on the yellow cylinder on the side of
the brew group has to be aligned with the black arrow and N (Fig. 11).
-
If they are not aligned, push down the lever until it is in contact with the base of the brew group
(Fig. 12).
2 Slide the brew group back into the machine along the guiding rails on the sides (Fig. 13) until it locks
into position with a click (Fig. 14). Do not press the PUSH button.
3 Close the service door and place back the water tank.
Cleaning and maintenance
Regular cleaning and maintenance keeps your machine in top condition and ensures good-tasting
coffee for a long time with a steady coffee flow.
Consult the table below for a detailed description on when and how to clean all detachable parts of
the machine. You can find more detailed information and video instructions on
www.philips.com/coffee-care. See figure D for an overview of which parts can be cleaned in the
dishwasher.
Detachable
parts
Brew group Weekly Remove the brew group from the machine (see
When to clean How to clean
'Removing and inserting the brew group'). Rinse it
under the tap (see 'Cleaning the brew group
under the tap').
English
Monthly Clean the brew group with the Philips coffee oil
Pre-ground coffee
compartment
Coffee grounds
container
Drip tray Empty the drip tray daily or
Check the pre-ground coffee
compartment weekly to see
if it is clogged.
Empty the coffee grounds
container when prompted by
the machine. Clean it weekly.
as soon as the red 'drip tray
full' indicator pops up
through the drip tray (Fig. 16).
Clean the drip tray weekly.
remover tablet (see 'Cleaning the brew group
with the coffee oil remover tablets').
Unplug the machine and remove the brew group.
Open the lid of the pre-ground coffee
compartment and insert the spoon handle into it.
Move the handle up and down until the clogged
ground coffee falls down (Fig. 15). Go to
www.philips.com/coffee-care for detailed video
instructions.
Remove the coffee grounds container while the
machine is switched on. Rinse it under the tap
with some washing-up liquid or clean it in the
dishwasher. The front panel of the coffee
grounds container is not dishwasher-safe.
Remove the drip tray (Fig. 17) and rinse it under
the tap with some washing-up liquid. You can
also clean the drip tray in the dishwasher. The
front panel of the coffee grounds container (fig.
A14) is not dishwasher-safe.

14
English
Detachable
When to clean How to clean
parts
Lubrication of the
brew group
Water tank Weekly Rinse the water tank under the tap
Every 2 months Consult the lubrication table and lubricate the
brew group with the Philips grease (see
'Lubricating the brew group').
Cleaning the brew group
Regular cleaning of the brew group prevents coffee residues from clogging up the internal circuits.
Visit www.philips.com/coffee-care for support videos on how to remove, insert and clean the brew
group.
Cleaning the brew group under the tap
1 Remove the brew group (see 'Removing and inserting the brew group').
2 Rinse the brew group thoroughly with water. Carefully clean the upper filter (Fig. 18) of the brew
group.
3 Let the brew group air-dry before you place it back. Do not dry the brew group with a cloth to
prevent fibers from collecting inside the brew group.
Cleaning the brew group with the coffee oil remover tablets
Only use Philips coffee oil remover tablets.
1 Put a cup under the coffee spout. Fill the water tank with fresh water.
2 Put a coffee oil remover tablet in the pre-ground coffee compartment.
3 Tap the coffee icon and then press the aroma strength icon for 3 seconds to select the pre-ground
coffee function (Fig. 5).
4 Do not add pre-ground coffee. Press the the start/stop button to start the brewing cycle. When
half a cup of water has been brewed, unplug the machine.
5 Let the coffee oil remover solution act for at least 15 minutes.
6 Insert the mains plug back into a wall socket and switch on the machine. The machine will heat up
again and performs the automatic rinsing cycle. Empty the cup.
7 Remove the water tank and open the service door. Remove the brew group (see 'Removing the
brew group from the machine') and rinse it thoroughly under the tap.
8 Reinsert the brew group and water tank and place a cup under the coffee spout.
9 Tap the coffee icon and then press the aroma strength icon for 3 seconds to select the pre-ground
coffee function (Fig. 5). Do not add pre-ground coffee. Press the start/stop button to start the
brewing cycle. Repeat this twice. Empty the cup.
Lubricating the brew group
Lubricate the brew group every 2 months, to ensure that the moving parts continue to move smoothly.
1 Apply a thin layer of grease on the piston (grey part) of the brew group (Fig. 19).
2 Apply a thin layer of grease around the shaft (grey part) in the bottom of the brew group (Fig. 20).
3 Apply a thin layer of grease to the rails on both sides (Fig. 21).
AquaClean water filter
Your machine is AquaClean enabled. You can place the AquaClean water filter in the water tank to
preserve the taste of your coffee. It also diminishes the need for descaling by reducing limescale
English
build-up in your machine. You can purchase an AquaClean water filter from your local retailer, from
authorized service centers or online at www.philips.com/parts-and-accessories.
15
AquaClean icon and light
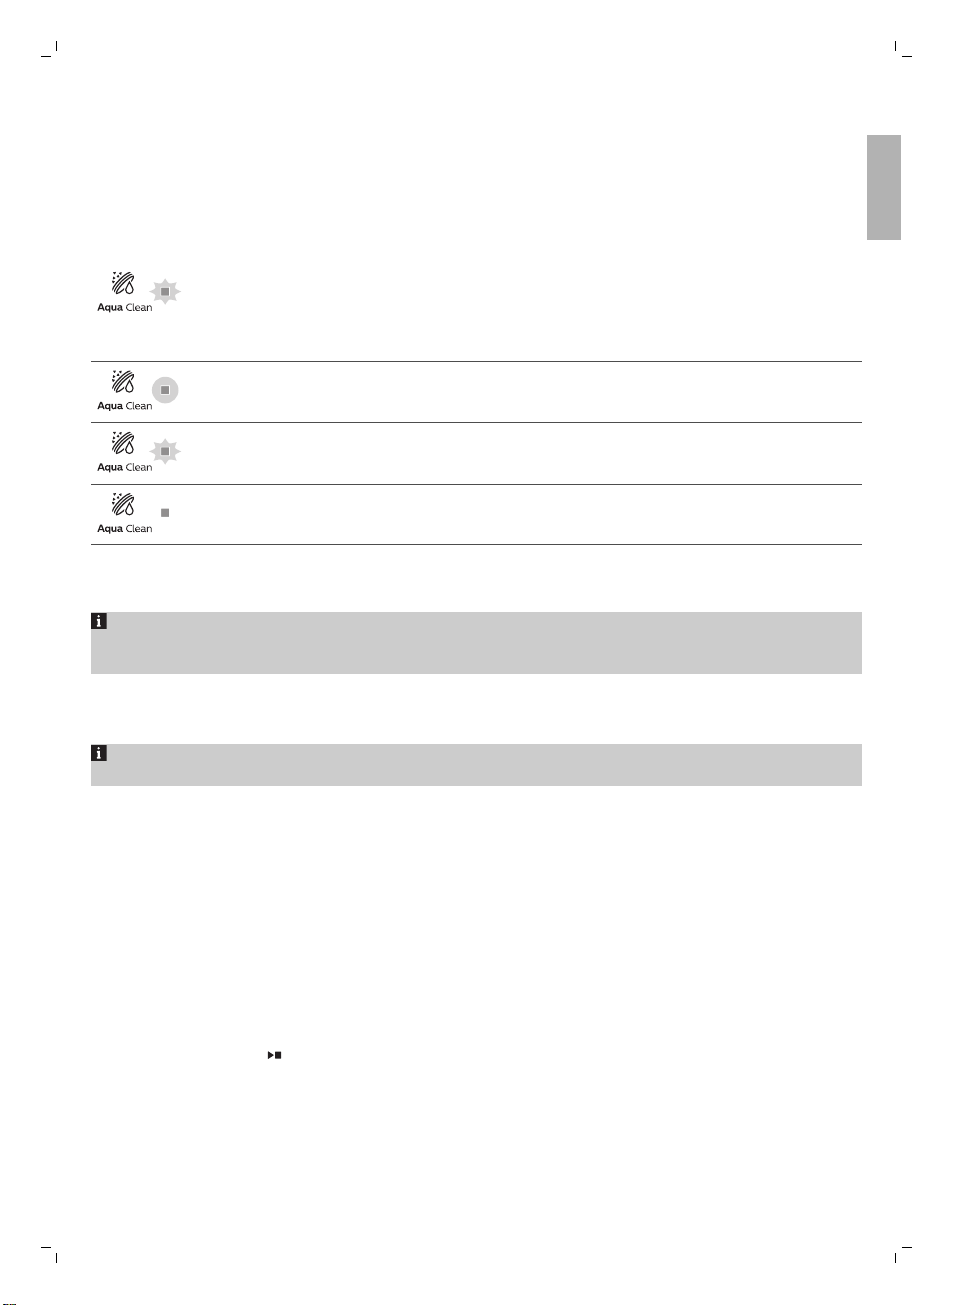
Your machine is equipped with an AquaClean water filter light (Fig. 22) to indicate the status of the
filter. Use the table below to see what actions are required when the light is on or when it is flashing.
When you use the machine for the first time, the AquaClean light starts flashing
orange. This indicates that you can start using the AquaClean water filter. If you do
not activate an AquaClean water filter, the light will switch off automatically after a
while.
Once you have installed the filter and activated it with the AquaClean icon, the
AquaClean light turns blue to confirm that the AquaClean water filter is active.
When the filter is exhausted, the AquaClean light starts flashing orange again to
remind you to replace the filter with a new one.
When the orange AquaClean light is off, you can still activate an AquaClean filter,
you will need to descale the machine first.
Activating the AquaClean water filter (5 min.)
The machine does not automatically detect that a filter has been placed in the water tank.
Therefore you need to activate each new AquaClean water filter that you install with the AquaClean
icon.
When the orange AquaClean light is off, you can still activate an AquaClean water filter, but you will
need to descale the machine first.
Your machine has to be completely limescale-free before you start to use the AquaClean water
filter.
English
Before activating the AquaClean water filter, it has to be prepared by soaking it in water as described
below. If you don't do this, air might be drawn into the machine instead of water, which makes a lot of
noise and prevents the machine from being able to brew coffee.
1 Shake the filter for about 5 seconds (Fig. 23).
2 Immerse the filter upside down in a jug with cold water, shake/press it a bit and wait until no more
air bubbles come out (Fig. 24).
3 The filter is now prepared for use and can be inserted into the water tank.
4 Insert the filter vertically onto the filter connection in the water tank. Press it down to the lowest
possible point (Fig. 25).
5 Fill the water tank with fresh water and place it back into the machine.
6 Press the AquaClean icon for 3 seconds (Fig. 26). The start light starts to pulse.
7 Press the start/stop button to start the activation process.
8 Hot water will be dispensed from the coffee spout and some water will flow from the internal
system directly into the drip tray (1 min.)
9 When the activation process is finished, the blue AquaClean light goes on to confirm that the
AquaClean water filter has been activated correctly.
 Loading...