

Philips 21PV358 User Manual
14PV374/58
21PV375/58
TVCR
T6400EZ-BG/DK(EN).qx3 03.4.21 15:50 Page 1
EN
Thank you for buying a Philips TV-Video combi.
This TV-Video combi is one of the most sophisticated and easy-to-use TV-Video combi on the
market. Please take the time to read this operating manual before using your TV-Video combi. It
contains important information and notes regarding operation.The TV-Video combi should not
be turned on immediately after transportation
from a cold to a hot area or vice versa, or in conditions of extreme humidity.Wait at least three
hours after transporting the device.The TVVideo combi needs this time in order to become
acclimatised to its new environment (temperature, air humidity, etc.).
This TV-Video combi is used for the recording
and playback of VHS videocassettes. Cassettes
with the VHS-C label (VHS cassettes for camcorders) may only be used with a suitable
adapter.
We hope you enjoy your new TV-Video combi.
Important notes regarding operation
Danger: High voltage!
There is a risk of an electrical shock!
The TV-Video combi does not contain any
components that can be repaired by the
customer.Please leave all maintenance
work for qualified personnel.
As soon as the TV-Video combi is connected to the power supply, some components
are in constant operation.To-switch off the
TV-Video combi completely you must disconnect it from the mains or switch it off
with the main switch.
Make sure that air can circulate freely
through the ventilation slots on the TV-Video
combi. Do not place the device on an
unsteady base.
Make sure that no objects or liquids enter
the TV-Video combi. Do not place vases or
the like on the TV-Video combi.If liquid is
spilt into it, immediately disconnect the TVVideo combi from the power supply and call
After-sales Service for advice.
Do not place any combustible objects on
the device (candles, etc.).
Make sure that children do not place any
foreign objects within the openings or ventilation slots.
These operating instructions have been
printed on non-polluting paper.
Deposit old batteries at the appropriate collection points.
Please make use of the facilities available in
your country for disposing of the packaging
of the TV-Video combi in a way that helps to
protect the environment.
This electronic device contains many materials that can be recycled. Please enquire
about the possibilities for recycling your old
device.
ShowView is a registered trademark of
Gemstar Development Corporation.The
ShowView system is manufactured under
licence from Gemstar Development
Corporation.
So that you can identify your machine for service
questions or in the event of theft, enter the serial
number here.The serial number (PROD.NO.) is
printed on the type plate fixed at the back of the
device.
This product complies with the requirements of
Directive 73/23/EEC +89/336/EEC +93/68 EEC.
Specifications
Voltage: 220-240V/50Hz
Power consumption (Standby): less than 5W
Rewind time: less than 70 seconds (cassette E-180)
Number of video heads : 2
Recording/playback time: 3 hours (SP)
(cassette E-180), 6 hours (LP) (cassette E-180)
Weight without packing in kg: 11.5
Dimensions in cm (HxWxD):40.0x37.3x38.0
Power consumption : 52W
Weight without packing in kg: 20.6
Dimensions in cm (HxWxD):51.1.x50.0x49.5
Power consumption : 65W
Supplied accessories
• Operating instructions
• Remote control and batteries
21PV375
14PV374
OPERATING INSTRUCTIONS
MODEL NO. : 14PV374/58, 21PV375/58
PROD. NO. ...........................
!
"
"
"
!
!
!
PAL
2
T6400EZ-BG/DK(EN).qx3 03.4.21 15:51 Page 2
EN
✄
IN BRIEF
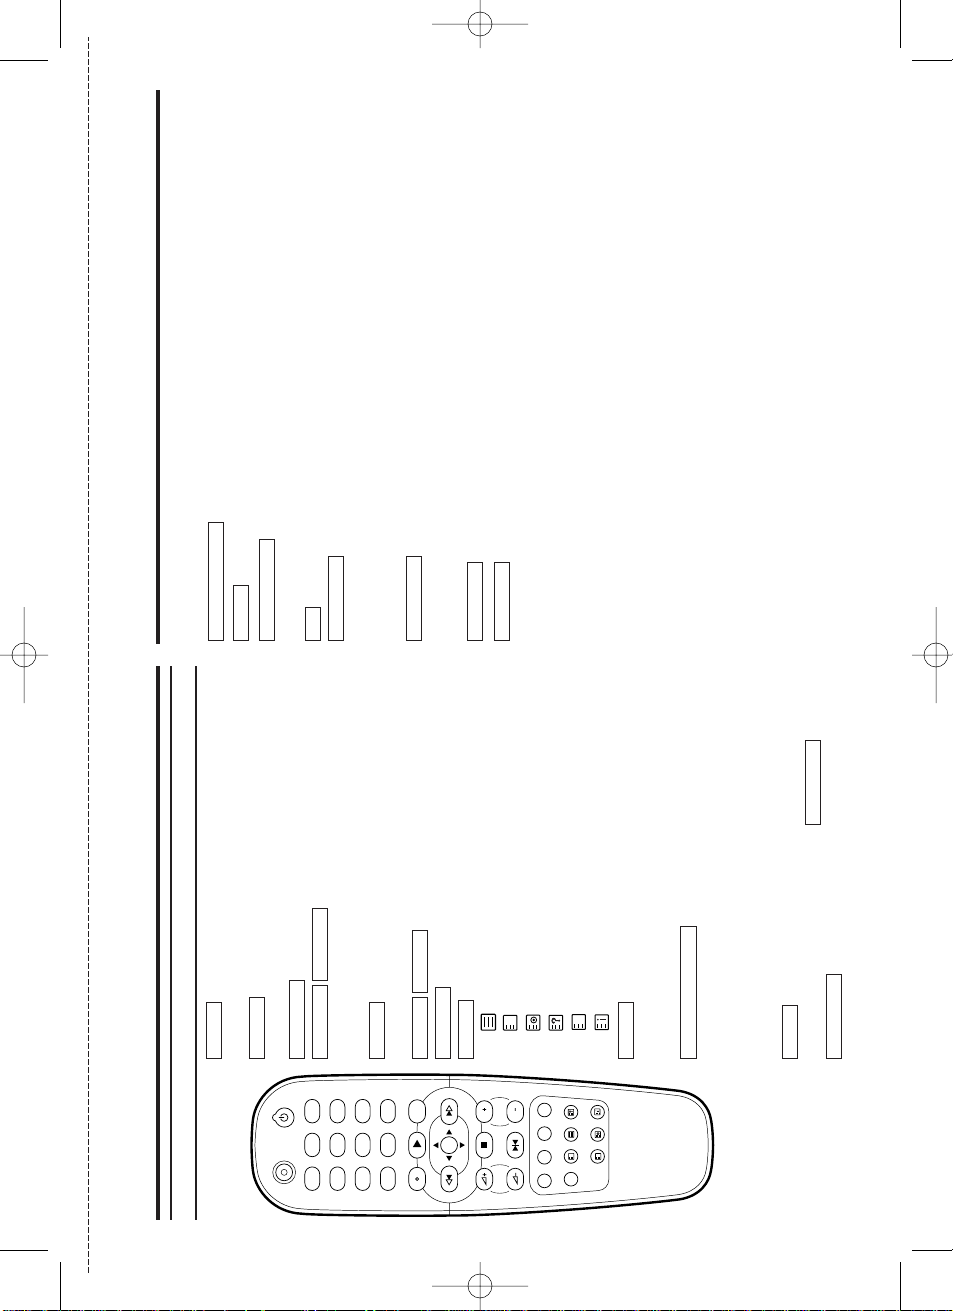
The remote control
1 2 3
4 5 6
7 8 9
P0P
P
STILL
STOP
MENU
REW FWD
PLAYSTATUS/EXIT CLEAR
SLEEP SYSTEM
REC STANDBY/ON
PROGVOL
SMART PICTURESV/V+
MUTE
INDEX
o
l
p
o
l
p
To delete last entry/Clear programmed recording
(TIMER).
To record the TV channel selected at this moment
or press repeatedly to start a One-Touch Recording.
To stop the tape and show a still picture.
To select the programme number.
During normal or slow motion playback, press to adjust the
tracking or vertical jitter.
To eliminate the sound. Press again to restore the
volume.
To adjust the volume.
To change the video (colour) system.
To select the switch-off time in 30 minutes intervals.
: To switch TELETEXT on or off, or transparent mode.
: enlarge font
: select TELETEXT sub-page
: recall hidden information
: stop page changes
: go back to start page.
Red button / To programme recordings with Show
View or to alter / clear programmed TIMER recordings. Select
TELETEXT function when you are in TELETEXT mode.
Green button / To call up preset picture
settings.Select TELETEXT function when you are in
TELETEXT mode.
Yellow button/ Select TELETEXT function when you are in
TELETEXT mode.
Blue button / Search for the previous/next recording
code on the tape in combination with /
.
Select TELETEXT function when you are in
TELETEXT mode.
FWD
1- B
REW
0- s
INDEX
SMART PICTURE
SV/V+
SLEEP
SYSTEM
VOL5
–
VOL5
+
MUTE
PROG P–PROG P
+
STILL
22
REC I
CLEAR
To switch TVCR on or off, interrupt menu function.
To call up main menu of TVCR.
To access or remove the TVCR’s on-screen status display.To exit on-
screen menus.
Press to select channels.
When tape playback is stopped, press to fast forward the tape at high
speed. During playback, press to fast forward the tape while the picture stay on the
screen.To store or confirm entry in the menu. Press to adjust the controls of TVCR
menu.
When tape playback is stopped, press to rewind the tape at high speed.
During playback, press to rewind the tape while the picture stay on the screen.To return
the cursor in the menu. Press to adjust the controls of TVCR menu.
To play a tape, select an item in the menu of TVCR.
To stop the tape, select an item in the menu of TVCR.
STOP
C
-
L
PLAY
B- K
REW
0- s
FWD
1- B
0..9
STATUS/EXIT
MENU
STANDBY/ON
yy
T6400EZ-BG/DK_BRF(EN).qx3 03.4.21 16:53 Page 1
p
o
l
p
o
l
EN
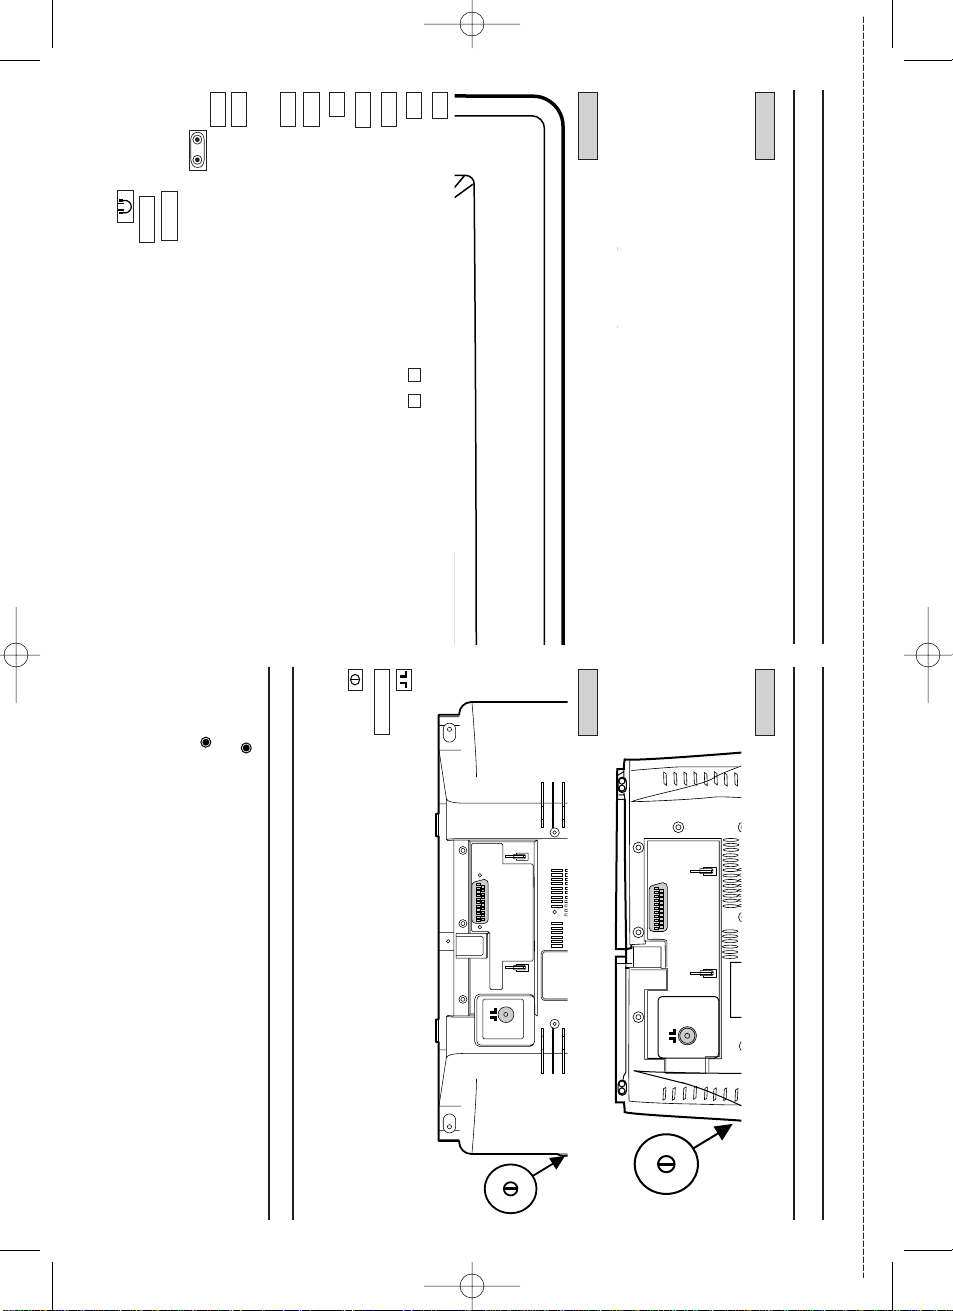
Front of the device
Standby/on: To switch TVCR on or off, interrupt menu function.
Volume:In connection with the button , to adjust the volume.
Programme number minus: previous programme number
Programme number plus: next programme number
Record: To record the programme currently selected.
Playback: To play a recorded cassette.
Pause/Stop, eject cassette: To stop the tape; If this key is depressed while in
STOP, the cassette is then ejected from the machine.
When tape playback is stopped, press to fast forward the tape at high speed.
When tape playback is stopped, press to rewind the tape at high speed.
Sockets on the front:
White socket / input socket: To connect a camcorder or video games (audio).
Yellow socket / input socket: To connect a camcorder or video games (video).
Small socket / socket for headphones: To connect headphones.
Back of the set
Aerial input socket: To connect the aerial cable
Scart socket :To connect a satellite receiver, decoder, video recorder, etc
Power switch: To switch the TV-Video Combi off.
Caution: If you switch off using the power switch, TIMER-recordings are impossible!
The control lights at the front of machine
STANDBY Standby light:lights up when the TV-Video Combi has been switched on
by means of the main switch.
RECORD Recording light:lights up during recording.
FAST blink: RECORDING PAUSE;TIMER RECORDING NOT STAND-BY.
SLOW blink;TIMER RECORDING is stored in a timer block.
EXT1/AV1
21PV375
14PV374
VIDEO
AUDIO
0
1
C
/
AA
B
I
P+
P-
–+
55
yy
21PV375
14PV374
EXT/AV1
EXT/AV1
✄
T6400EZ-BG/DK_BRF(EN).qx3 03.4.21 16:53 Page 2
3
EN
1. Connecting the TV-Video Combi . . . .4
Preparing the remote control
for operation . . . . . . . . . . . . . . . . . . . .4
Connecting the cable . . . . . . . . . . . . . .4
Connecting additional devices . . . . . . .4
2. Important notes for operation . . . . . .4
Navigation in the screen menu . . . . . . .4
3. Installing your TV-Video Combi . . . . .5
Preparation for use . . . . . . . . . . . . . . .5
Decoder allocation . . . . . . . . . . . . . . . .5
Manual TV channel search . . . . . . . . . .6
Using the satellite receiver . . . . . . . . . .6
Automatic Tuning . . . . . . . . . . . . . . . . .6
Sorting and clearing TV channels
manually . . . . . . . . . . . . . . . . . . . . . . .7
Setting the language . . . . . . . . . . . . . .7
Setting the clock . . . . . . . . . . . . . . . . .7
4.TV set functions . . . . . . . . . . . . . . . . .8
Selecting a TV channel . . . . . . . . . . . .8
Selection of the scart socket . . . . . . . .8
Selection of the front A/V sockets . . . . .8
Volume control . . . . . . . . . . . . . . . . . . .8
Picture settings . . . . . . . . . . . . . . . . . .8
How do I read TELETEXT? . . . . . . . . .8
Special TELETEXT functions . . . . . . . .8
SMART Picture . . . . . . . . . . . . . . . . . .9
Switch-off function (SLEEP TIMER) . . .9
5. Playback . . . . . . . . . . . . . . . . . . . . . . .9
Playing cassettes . . . . . . . . . . . . . . . . .9
Playing back NTSC cassettes . . . . . . .9
Displaying current tape position . . . . . .9
Searching for a tape position
with picture(scanning) . . . . . . . . . . . .10
Still picture . . . . . . . . . . . . . . . . . . . . .10
Searching for tape position without
picture(forward wind and rewind) . . . .10
Index search . . . . . . . . . . . . . . . . . . .10
Manual Tracking . . . . . . . . . . . . . . . . .10
6. Manual recording . . . . . . . . . . . . .11
General information . . . . . . . . . . . .11
Recording without automatic
switch-off . . . . . . . . . . . . . . . . . . . .11
Recording with automatic switch-off
(OTR One-Touch-Recording) . . . . .11
Preventing accidental erasing . . . . .11
Lining up recordings (assemble cut)
. .11
Selecting the recording speed
(SP or LP) . . . . . . . . . . . . . . . . . . .12
Automatic controlled recording from
a satellite receiver (RECORD LINK) . .
12
7.
Programming a recording (TIMER) . .
13
General information . . . . . . . . . . . .13
Programming a recording with the
'SHOWVIEW®' system . . . . . . . . . . . .13
Helpful Hints . . . . . . . . . . . . . . . . . .14
Programming a recording (without
the SHOWVIEW system) . . . . . . . . . .14
How to check, change or delete a
programmed recording (TIMER) . . .14
How to change a programmed
recording (TIMER) . . . . . . . . . . . . .14
8. Other functions . . . . . . . . . . . . . . .15
Changing the video (colour) system . . .15
Switching the status display off or on . .
15
Continuous playback . . . . . . . . . . .16
Blue Background on or off . . . . . . .16
Palental control(Child lock) . . . . . . .16
9.Before you call an engineer . . . . . .17
Table of contents
T6400EZ-BG/DK(EN).qx3 03.4.21 15:51 Page 3
EN
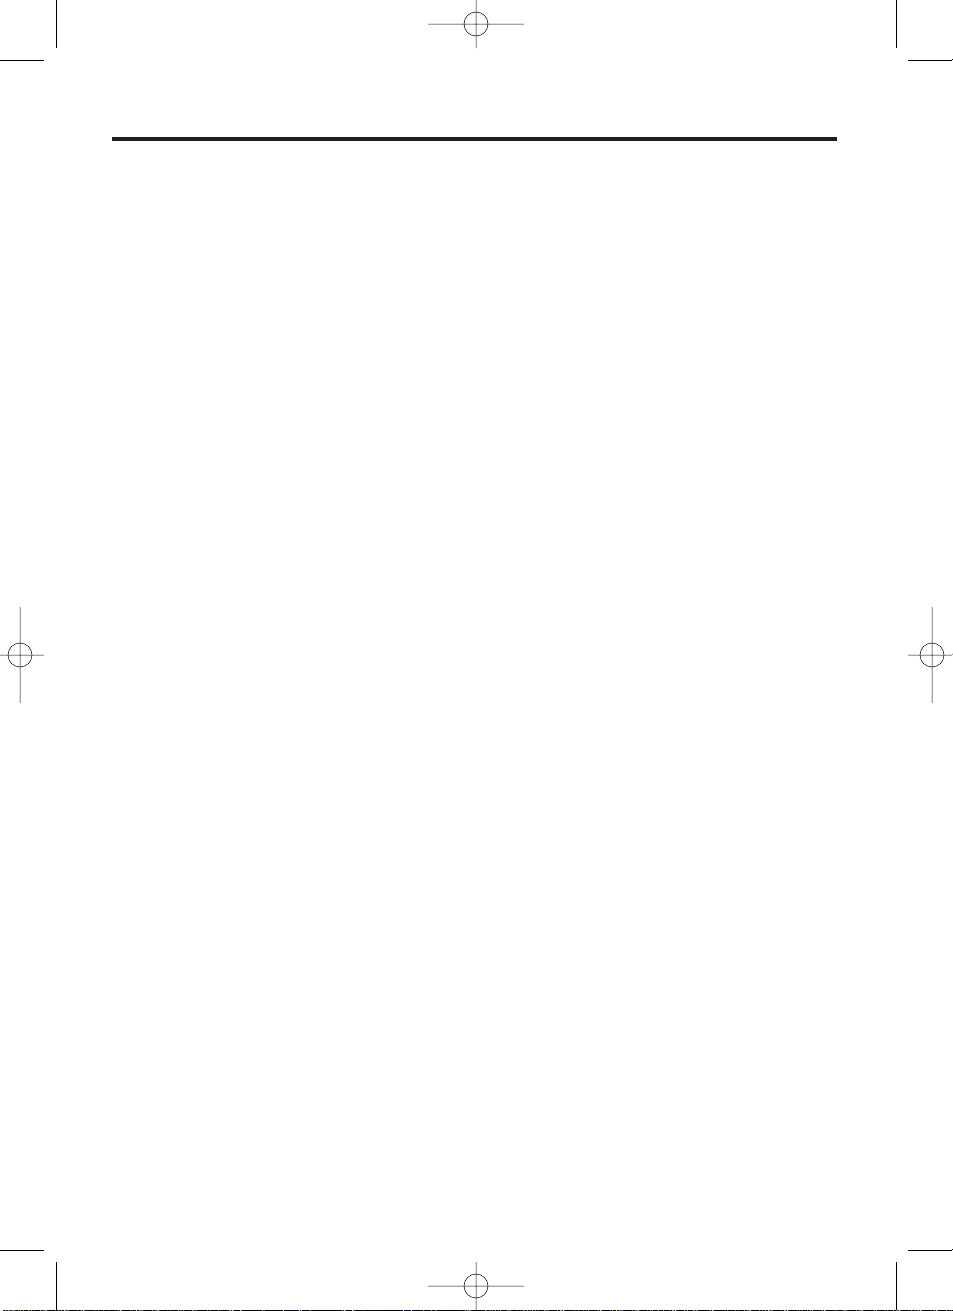
Preparing the remote control for
operation
The remote control and its batteries are packed
separately in the original TV-Video Combi packaging.You must install the batteries in the
remote control before use.
1.
1.Take the remote control and the enclosed
batteries (2 batteries).
2.
2.
Open the remote control's battery compartment
and place the batteries in it as shown in the pic-
ture and close the battery compartment.
The remote control is now ready to use.
Its range is approximately 7 metres.
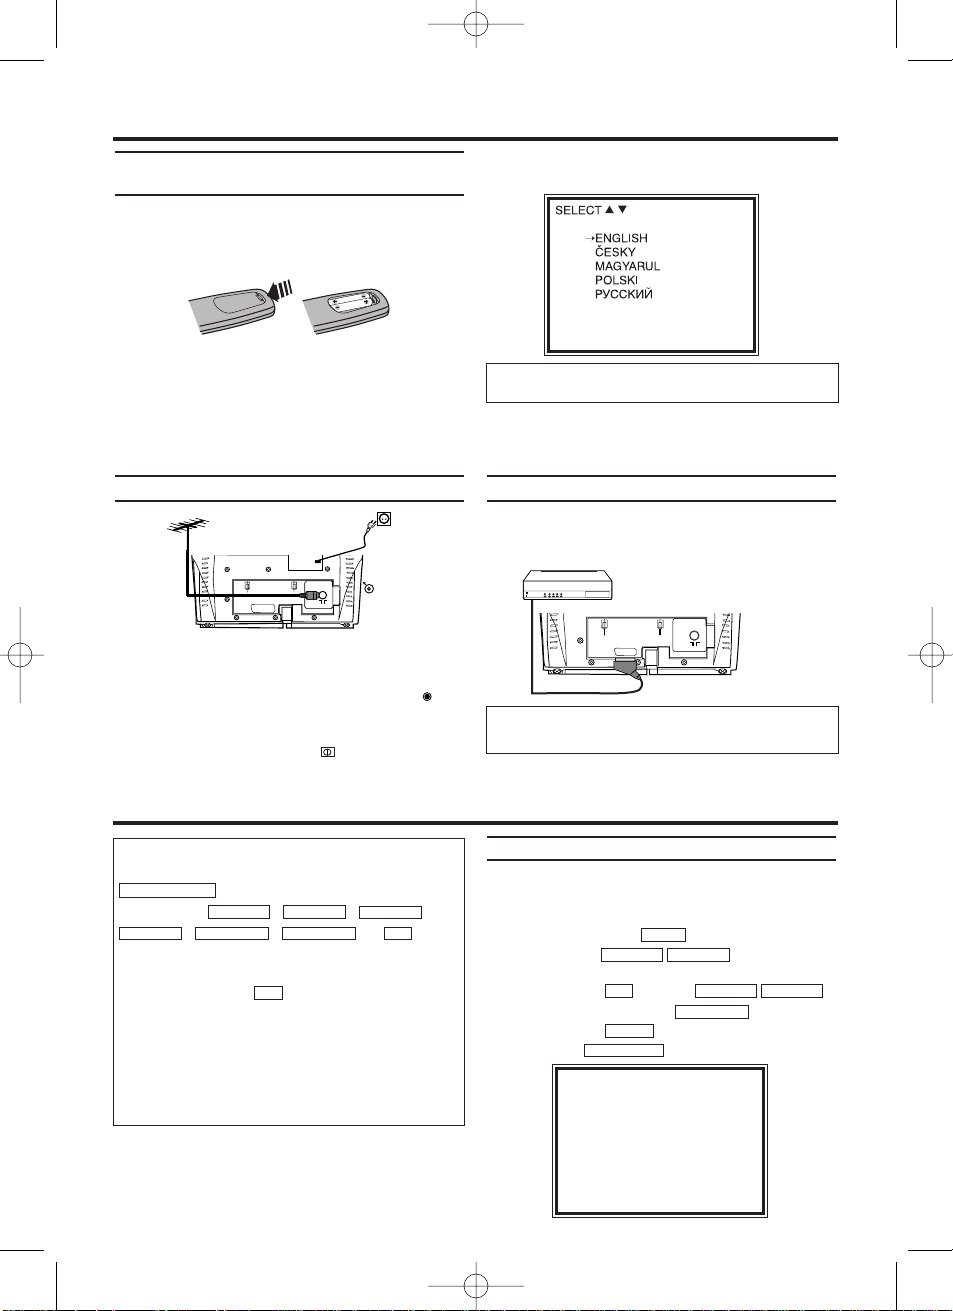
Connecting the cable
1.
1.Insert the aerial cable plug into the AERIAL
at the back of the TV-Video Combi.
2.
2.Connect the mains cable to the wall socket.
3.
3.If the little red standby light (STANDBY ) at
the front panel of the set is not lit, please
switch on the set using the main power
switch.The power switch is located on the
left side panel of the set.
4.
4.Language setting picture will appear on the
screen.
You can find more details in chapter 'Preparation
for use'.
Connecting additional devices
You can connect additional devices such as
decoders, satellite receivers, camcorders, etc.to
the EXT1 socket.
Navigation in the screen menu
You can check/change many functions and settings of your TV-Video Combi via on-screen
menu.The individual functions are selected, via
the remote control as follows:
Call up the menu: with .
To select: with .
To enter or change your selection: with the
number buttons or with
To save or confirm: with .
To cancel: with .
To end: with .
STATUS/EXIT
CLEAR
FWD 1- B
STOP C-LPLAYB-K
0..9
STOP C-LPLAYB-K
MENU
1. Connecting the TV-Video Combi
I do not see a Language setting picture
* Check the cable connections.
The respective scart socket is usually marked
'AV'
or 'TV'on the decoder or satellite receiver.
2. Impor tant notes for operation
Switching on
You can switch on the TV-Video Combi with
.
If you press , ,
,
,
, or while
the set is in Stand-by, the power will be automatically turned on.
Note that the keys will be inactive for
about 5 seconds just after having switched the
TV-Video combi off.
Power outage/no power
Channel information remains saved for up to 10
year, the time and timer information is saved for
up to 1 minute.
0..9
0..9
REW0- sFWD 1- B
PROG P–
PROG P+
STOP C-LPLAYB-K
STANDBY/ON
yy
SELECT KL CHOOSE B
→TIMER
PICTURE CONTROL
RECORD SET UP
VCR SET UP
TUNER SET UP
GENERAL SET UP
END=EXIT
[14 inch]
[14 inch]
4
T6400EZ-BG/DK(EN).qx3 03.4.21 15:51 Page 4
PUSH MENU TO CONTINUE
 Loading...